You must be logged in to rate content!
71 minute(s) of a 173 minute read
1-12-2021
OK. So my entire ATP turbo kit is here: logical first steps??? TIPS??
Compliments of nater @ www.VWVortex.com
May 05, 2004
Let me start off by saying this post has become an incredible source of all sorts of good turbo install info (and it's subsequent "issues" that you encounter during the install). I'll keep these pics as long as I can (in their same address on my website) so that they never become bright red X's (that's the goal). If they do, contact me at ' [email protected] '.
Guys,
I just want to make sure I don't do something (ie. bolt something up) in the "wrong" order.
IE. My first guess would be to mount the exh manny to the head first then put the turbo on???
What I'd like to get from you guys is any TIPS that you've found that make the process a bit easier...
Basically it's an ATP stage 2 (i/c) with a "killa" TO4E Turbo on my GTi VR6 MK3.
TIA, guys...
Later,
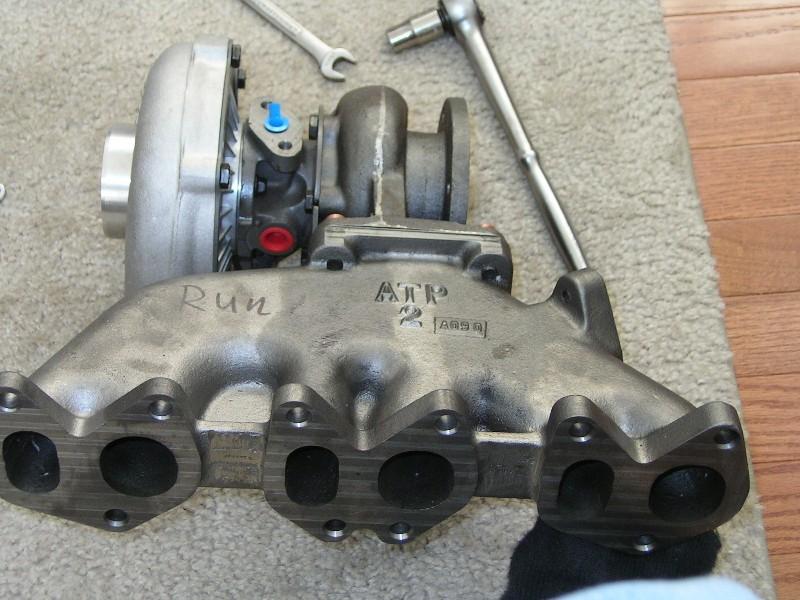
A "normal" sized picture of what I've got so far (I've already got the turbo - see my other thread with the super large pic!).


Ok, so I guess it's obvious that I've got to clock this turbo so the it's pointing exactly 180deg from where it is, correct?
And the blue cap on the top is actually the oil feed?
I want to make sure I've got the oil feed and the oil return correct...
My guess is that the oil return is indeed (in these pics) on the bottom (just beyond where you can see)?
And, both flanges look identical to me so how can I tell for sure?
And, the red circular caps are for what purpose??? There are two of them (one is pictured and the other is on the other side).
Oil feed is indeed up. Oil return has a larger, rectangular hole, oil feed is smaller, round, and probably threaded.
clock the turbo 180*
top of the Turbo is for oil inlet
bottom is for outlet (don't forget the teflon tape)
red caps are for water cooling (optional), with very little work you can use your stock TB coolant lines.
I have clocked the turbo:
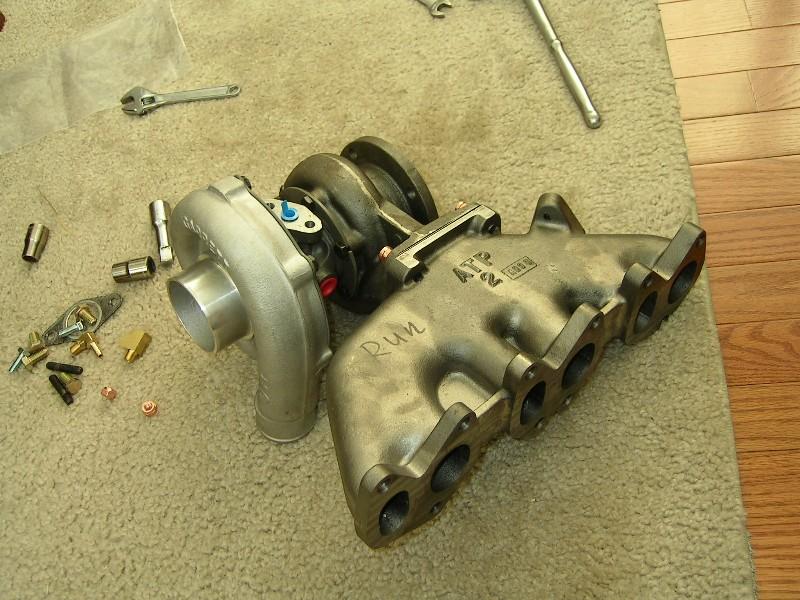
Ok, so I can keep the water cooling plugged up for now? Or should I not run it unless it's water cooled?
As for the Tephlon tape...I've got ATP's hardware kit which has a lot of gaskets and stuff...one of them matches up the oil return on the bottom...my guess is that's what I need for it.
So far (with these pics), so good????
Will update with pics as I progress tonight...

bolted up oil return. Figure if there's anything 'wrong' here let me know...
Thanks for the ongoing help, guys....

I just screwed in the brass oil feed line as the hardware kit had no "flange" as the oil return DID. I figure this is ok and doesn't need any particular "seal".
My supercharger oil feed/return was just threaded like this too...and had no particular seal on it either...
I assume it all looks good, eh?
Keep the help coming guys...I'm fairly mechanically inclined (installed cams, supercharger, etc...) but this is an entirely different ballgame.
Much appreciated!
Please don't think I'm a retard but this pic shows how I *thought* the WG is supposed to be attached to the manifold. Please, if I did it backwards or something don't call me a wee-tod...


wg fixed and rotated 180degrees. There's no 'easy' way to re-route that wg back into the exhaust or does it just go into the atmosphere? And, if so...does it make the car much louder???
Here's the updated pics:
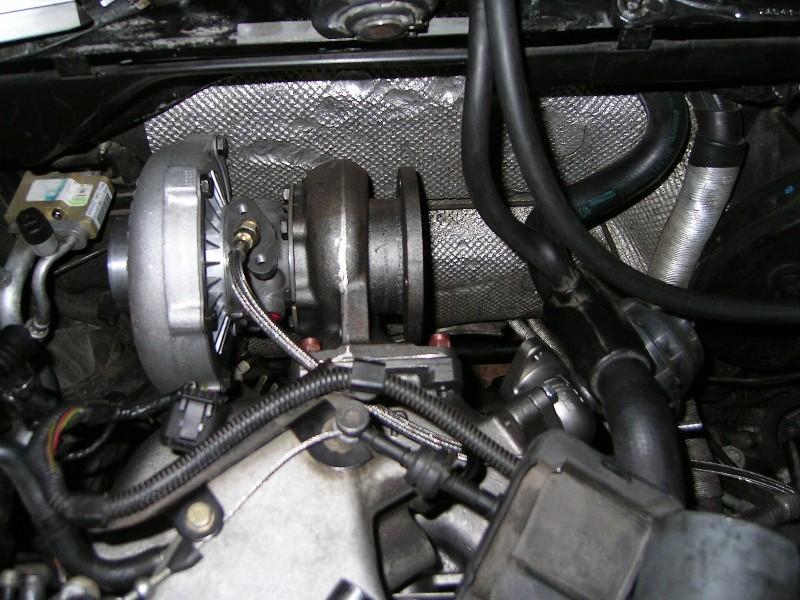


I did.
I'll use the lines going in and out of my TB, right?
Do you know where I can get the fittings which will allow me to hook these lines up?
And what really happens if I don't run it watercooled when it has that option? Is it really bad for the turbo???
And if I have the water hooked up does it mean I still need a turbo timer b/c doesn't the aux water pump just keep pumping to keep things cool anyway?
Or is it a matter of the oil just caking up inside the turbo???
Oh, by the way...I could really use a diagram of exactly how to plumb this setup (i/c) b/c I'm totally clueless. I've got the atp stage 2 plumbing and intercooler but it's all a big pile if isht right now .
Would an exh shop have those flanges you used on each end of the pipe on either side of that "flex section-looking part"?
That leads me to my next Q...
Is that indeed some type of flex section or is it just the picture playing games with me?
Is that just a straight 1.5" pipe in b/w the curved parts that the shop supplied?
So, if I've got this correct...
You went to HD and bought one of their SS mandrel 1.5" bathroom handle, gave it to the shop and told them what you wanted to do...and they supplied the short straight tube and the flanges and welded it all together, correct?
I'll do this over the weekend then...
Just let me know I've got this correct so I don't walk into this muffler shop and them stare at me like I'm an idiot!
exhaust shop isn't going to have tial 38mm flanges. You'll need to get some from ATP. The stainless bath handle rocks. Flex section is a good idea since stainless expands and contracts quite a bit. I'm not sure where to get one that small. The one Marty has looks like a hydraulics part.
Definitely do a re-route. Open dumps sound ugly (IMO)
May 06, 2004
So, tell me this...
Is this the part I need then???
http://www.atpturbo.com/mm5/merchant...egory_Code=FLS
This is explained on atp's website as:
"Steel - External Wastegate Drilled Flange" and they go on to explain it like this:
"CNC'd steel external wastegate weld flange. Designed for Turbonetics Deltagate or Tial 38mm external wastegate. Perfect for dump tubes. Mounting holes are drilled through. Flange is 3/8" thick to prevent warping in high temperature applications."
So, how many of these flanges do I need for this application? My guess is two is fine? drilled, not tapped?
Here's what I picked up today from The Home Depot:

Am I in the right direction????
Guys,
What fitting(s) do I need to run my TB coolant/water lines in and out of the turbo????
It seems so easy but I need some special fittings for this, correct?
It's really amazing how everybody is actually putting their $.02 in and making this the awesome thread that it is.
I'll keep posting pics as I go AND will try and keep them active for as long as I can on my website. The goal is that these pics don't become X's and others can learn before they get started. Wouldn't that be awesome?!
Now, back to my question I posted two posts up...about fittings for coolant lines...where can I get these and what are they called exactly???
Ok,
So let me understand this right...
The coolant "holes" on the turbo housing are just holes - ie. not threaded?
So, you used a 3/8"-11NPT tap and actually created the thread for the inside of those holes, correct?
Then just screwed in the 5/18"-11 threads?
And you meant, 5/18"-11 not 5/8"-11...
Please correct me if I'm wrong here...just want to make sure I do this correctly.
Nice,
So it's easlier than I thought!!!!
Thanks bro!
Now,
anybody know where I can source these fittings? As simple as hitting The Home Depot or any local hardware store? Or is this more of a specialty item?
Oh, And does it matter which side is intake and exhaust (regarding the coolant)???
Or will it go through either way?
May 07, 2004
OK...
So, here's the update with lots and lots of pictures....
My water pipe (aka "crack pipe") broke so I had to install a new one.
Here's a pic of me cleaning off the thermostat housing:

I installed my waterpipe (shown here attached to the thermostat housing with some grease sprayed around the outside by the seals...

before I re-installed the thermo housing:
http://www.nateronline.com/turbo_project/t2.jpg
I actually had to pull the waterpipe back out again b/c it was easier to do what I did in the picture above this one and hook them together then push the assembly in as one. This way I was able to line up the "nipples" and stuff with the thermo housing...
Oh yea, had my oil pan welded today from my buddy. It looked like it would never leak any oil but I am a freakin pessimist so I threw some atv sealant around the outside just to be sure.

I installed my nice and clean (but old) thermostat housing:

Just snapping the thermo housing back into place along with the waterpipe in one motion:

This shot shows everything back together AND also gives you an idea of how I routed the oil feed line...You could probably do it a million different ways but since I had a long line I figured this would be the best way...

Just another shot:

Ok,
So, I'm ready to start my i/c install...
I put my bumper/rebar back on (by accident). I realized after the fact that I should probably have left it off...But it was nice starting to see the car look like a car again ...

I started to cut but using my recip saw I effin cut into my a/c condensor...
Here's what happens when you aren't careful with your sawzall:


No a/c now...was thinking of just pulling it all out but I'll just replace my condensor at a later point...
Did a crapload of cutting and here's what I ended up with:
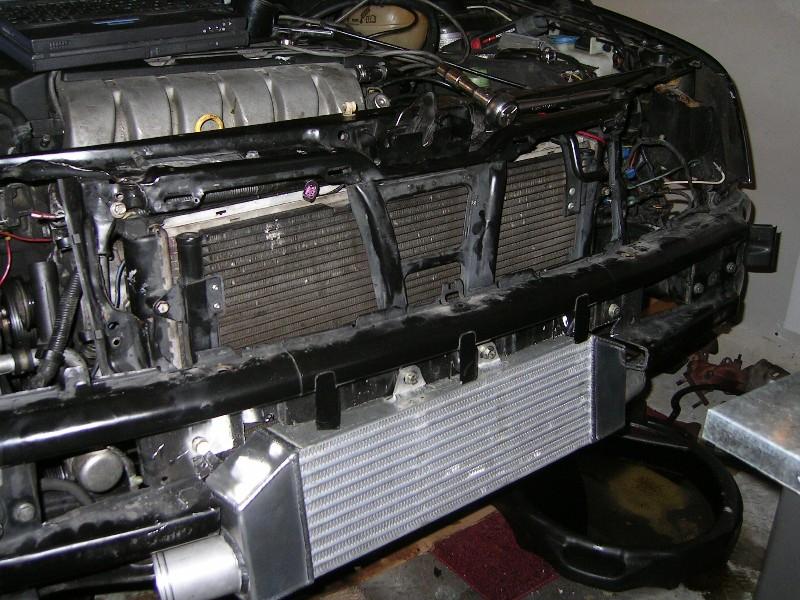
Now it's starting to take shape!!!
I actually almost have the bumper back on but forgot to take pics (was in a serious groove with the dremel tool).
This part is a PITA and I think I've cut too much in a couple spots. To me, it looks pretty bad...but we'll see. I'll post up pics of the bumper once I get the entire thing put together...
Thanks for looking guys...
Will continue to post up on this thread as my project progresses!!!!
May 08, 2004
OK,
So I've starting routing my plumbing...I don't have pics yet (give me til tomorrow)...
Basically, what do I have to do to get my turbo inlet and the large elbow to clear my a/c (whatever those two lines are going into the firewall)...
I've pulled the little box off that seems to protect them a bit and started yanking at them and bending them away...
But it's still a tight fit. Is this the way it's supposed to be? Any tips?
And another thing, there is a canister of sorts which is associated with the a/c compressor via a/c lines (with the two bolts that are attached to the frame behind the passenger side headlight area)...I disconnected the lines going in and out (if you see above I already accidentally drained my freon with the sawzall)...where can I move that silver canister to????
I'll post pics later but I know you all knwo what I'm talking about w/o pics...
Help!!!
Is it just as simple as bending these lines until they are sufficiently out of the way?
I mean, short of pulling out the a/c alltogether.
Ok guys,
So I lied...here's more pics from what I did this morning (not much but good to document, I suppose):
Self-expressive...i guess. TB plumbing...
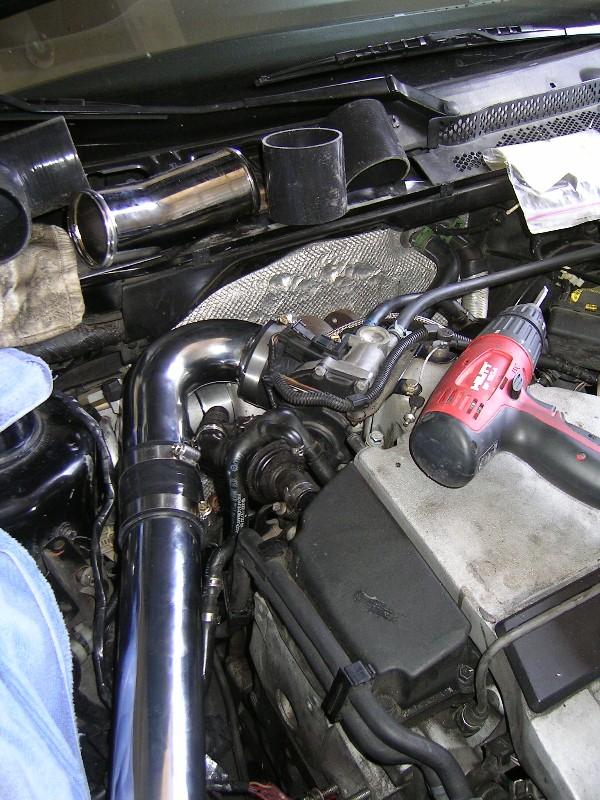
Close-up of the a/c lines that I had to bend (notice the one on the right that I bent into the one on the left - but the left one doesn't budge. I still need to complete this as there still is not enough space for the elbow to attach to the turbo: help

This is a nice shot that shows how I (now, I was guessing what I needed to do as I've got no direction) ran the plumbing from the i/c to the throttle body. Anybody that sees anything wrong or that is important to point out PLEASE SPEAK UP AS THIS THREAD IS FOR OTHERS TO SEE LATER...
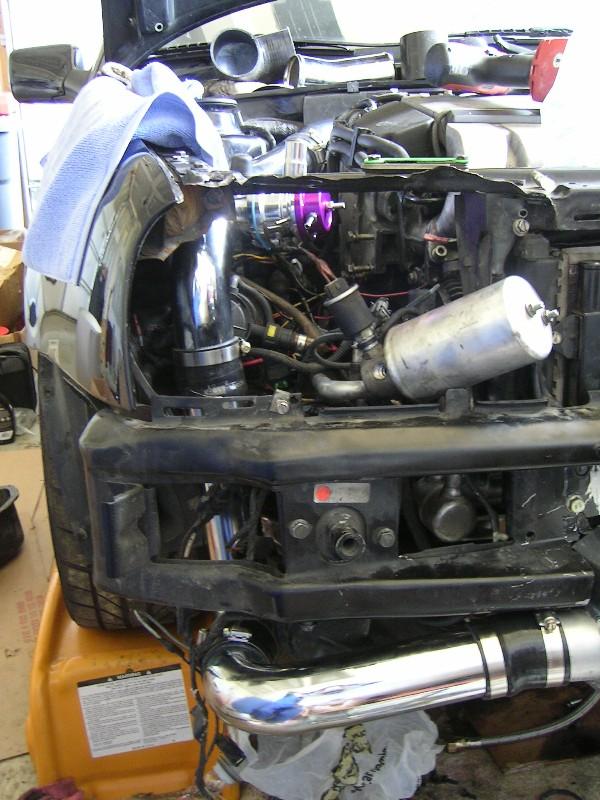
Another shot, but here's my question: where the heck do I put that a/c canister that is out of the way (now) on the bumper (the silver thing)?
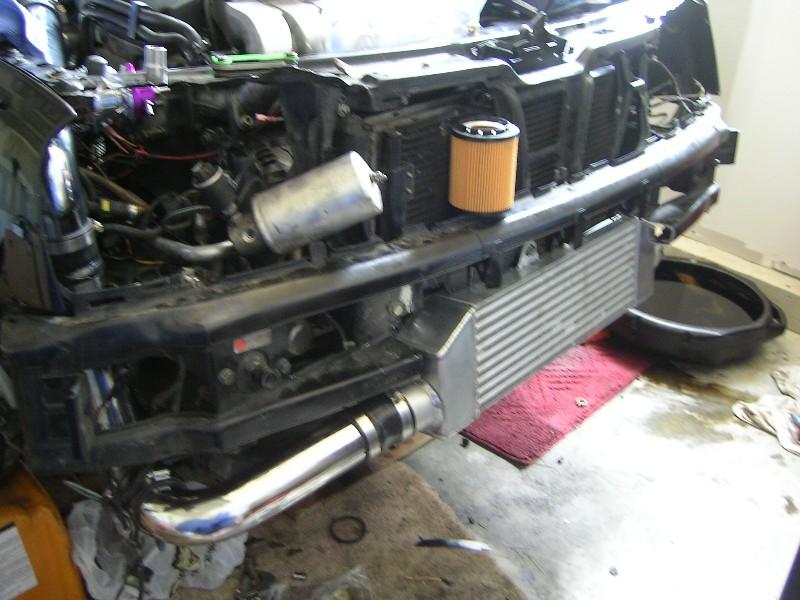
A cool shot from above the car...
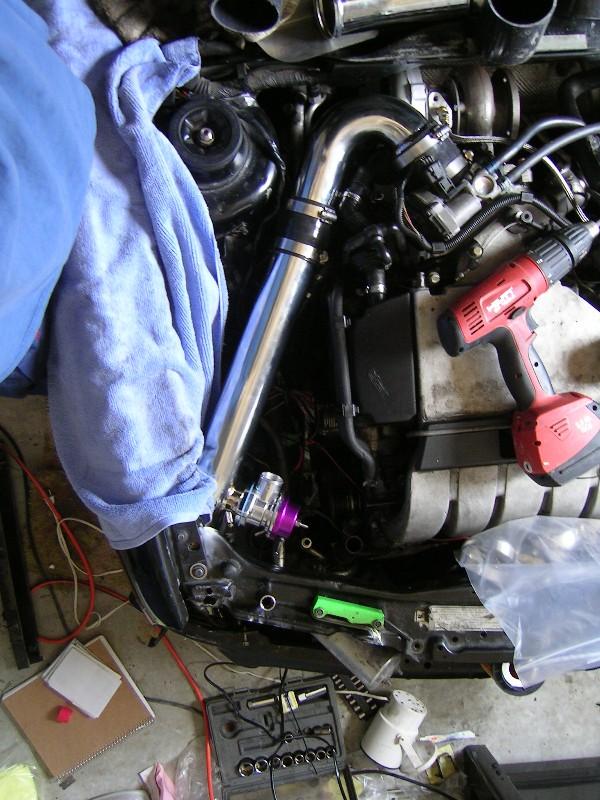
The pics are here so you can help me but also others as well when they do their turbo...so please chime in with any and all relevant info!!!!!
Thanks guys!
May 09, 2004
The main reason for this thread and all the pics is b/c I know this is such an unknown territory for me, and I just dove right in and did it. While I'm not done - and it hasn't been easy...the point is, that if I can do it than many others can...
So, I'll try and take pics on every step I take and try to keep them from going to red X's so that others can learn before they get started on their turbo vr6 project
May 12, 2004
Guys,
What's this "nipple" sticking out of the last pipe that goes up and into the turbo (the first pipe out of the turbo going towards the inlet of the i/c???
My guess is you just need to cap it off, right?
So, WHAT DO I USE TO CAP IT OFF AND WHERE CAN I GET IT???
Here's the pic (it's the only 'nipple' you can see sticking out):
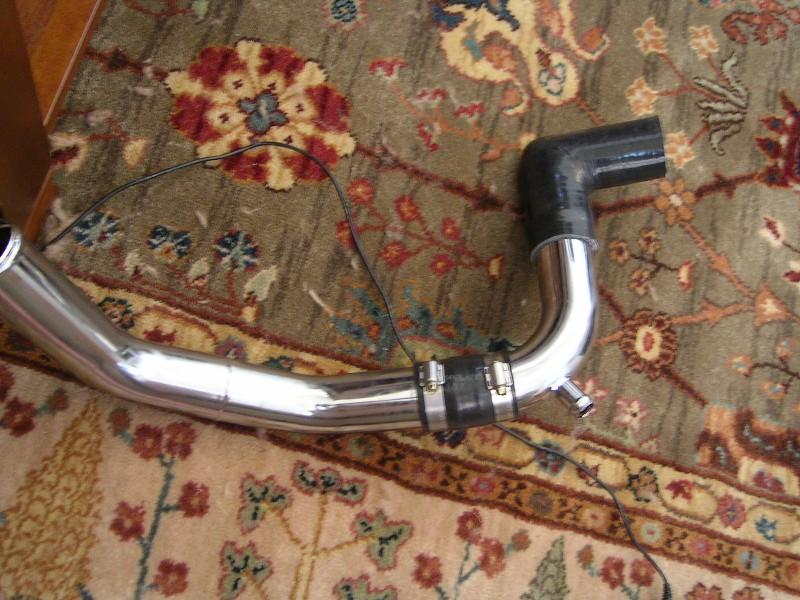
Thanks for all the good info on these nipple plugs.
VR6 Mole,
I'll let you know...as I def want to keep my a/c and I'll be NEEDING an a/c condensor.
And you are close.
I'm just west of Eagle, PA - straight shot down from you on Rt100.
I'll take a pic of what I get and post it up here so that others will get this stuff the first time around w/o having to post up like I did...Through all the searching and reading that is one thing that I never saw a post on.
May 14, 2004
All of my plumbing is now done (basically)...
The only thing(s) really left to do is put back on the stock bumper (all cut up ), have the muffler shop do my dump tube for me (will take pics) and also have them do my exhaust...
But I'll have the oil pan back on tonight and new fluids (oil and coolant) in and will start her up.
Oh, one last thing...
Anybody have a diagram of ALL of the VACUUM lines I need to hook up here???
I'm confused...I see two nipples sticking out of my BOV and one or two coming out of my WG (I think...although I haven't looked at my WG for a while)...
Do I just route all of these back into my "vacuum system" in any way I can (ie. using brass Y connectors and just plugging them all in)?
You cap off the other?
May 15, 2004
So my next step is to get the downpipe connected to either the flange on my stock CAT or to get it connected to a test pipe...
Problem is, the flange on my 3" DP is huge and my exhaust (w/o cat) is a TT 2.5"...
So, how long of a test pipe do I need (to go from downpipe to AFTER the cat) and where can I get that large flange so that I can just have the muffler shop weld it in place for me...?????
I heard Pep Boys (much like autozone) has some misc exhaust parts...do you think I can find what I need there?
Thanks buddy.
Found a local muffler shop that did the welding for me today. Car is about done.
I'll be firing her up tomorrow or during the week.
May 16, 2004
I fired up the car yesterday. I need to get the car to the muffler shop again b/c the guy didn't weld something perfectly. So, I'll be putting the front end back on today and get it "roadworthy" so nobodys' looking at me crazy....
I'll hit pep boys up for some exhaust parts to get me a bit quieter for the trip.
Car should be done this week. I've got a CLEARANCE issue with where the short U bend pipe goes into the TB. It is hitting the turbo really badly!!!! Any tips guys? I'm just going to hammer the hell out of it today until it fits?????
Matt,
There has to be an easier way of doing this??? I've seen these ATP stage 2 kits installed w/o the short runners w/o any "visable" issues so someone has to know how to do it.
I'm getting 'interference' w/ my intake pipe that goes into the TB with the Turbo...
I guess I could get a longer silicone connector and just use that as a flexible connector...my only fear is that under hard engine movement it may pop off...
Any more suggestions???
I'll post up pics this afternoon of what I'm upagainst...
Well,
She's running!
I've got some running issues right now but that's a tuning problem. Jeff and I will be working that out shortly.
I've also got exhaust issues but I'm going to have the muffler shop fix all that this week.
One BIG problem is a large oil leak in the worst of all spots - on my oil filter housing. Seems I didn't torque down my oil feed connector tight enough...at least that's where the oil appears to be coming from.
And I just got the front end back on!!!!
I'll try and fix it w/o having to pull the front end off again...
And, I actually did have to hammer away at that pipe just a tad bit on the underside of it so you can't see it at all. Still is a tough fit though.
Ok,
So here's the pics:
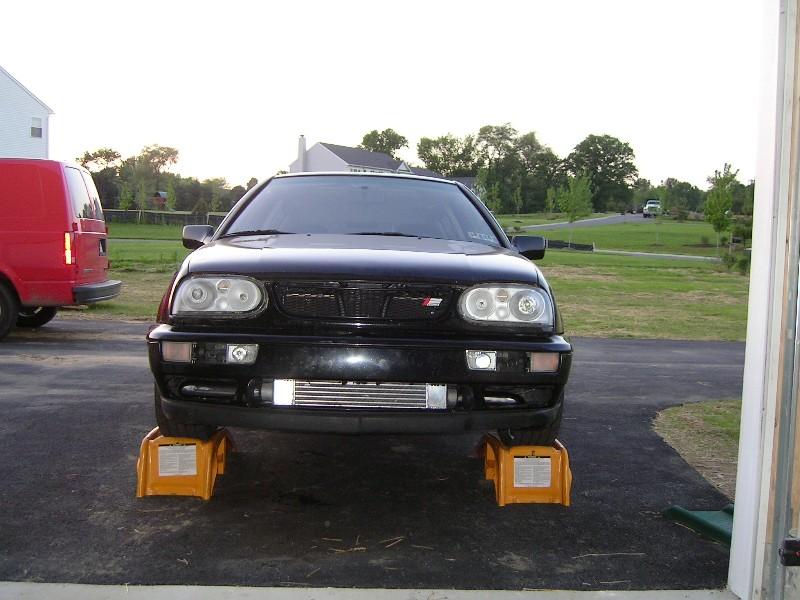
Of the front end. I butchered the bumper cover - if you can't tell that's great. But I can. I butchered the opening where there used to be the black plastic supports in the large opening. It needs to be sanded down flat and painted. Oh well!
So here's where I've still got some issues that I need you turbo experts to help with...Vacuum lines on the WG and on the BOV. I know I asked this already but ppl were talking "upper nipple" and "lower nipple" but I don't know what you guys mean when you say upper or lower...as I can't tell what's the top or the bottom anyway .
This pic shows my WG and the Vac line I've got attached and which one it's attached to.
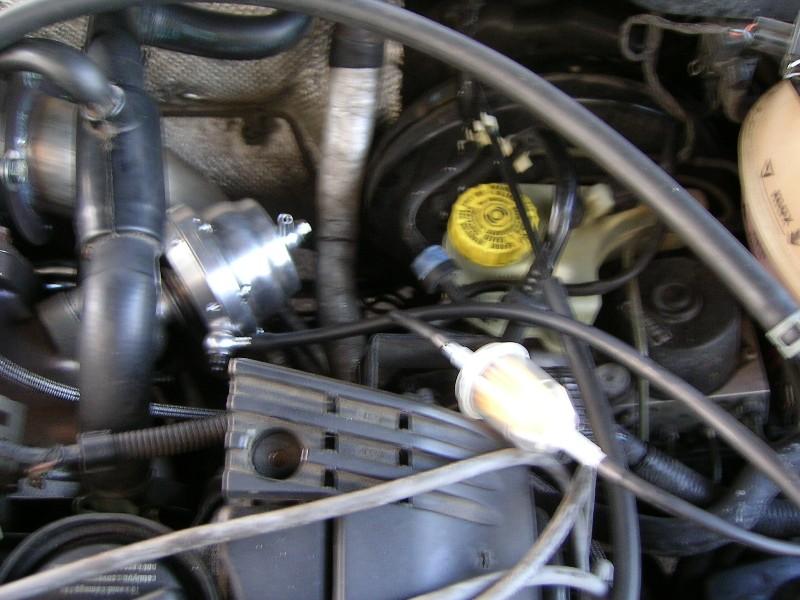
That vac line then goes into the area where the fpr is...I just added a Y connector and that's where it is hooked up to now. The left part of that Y connector is going to my BOV...
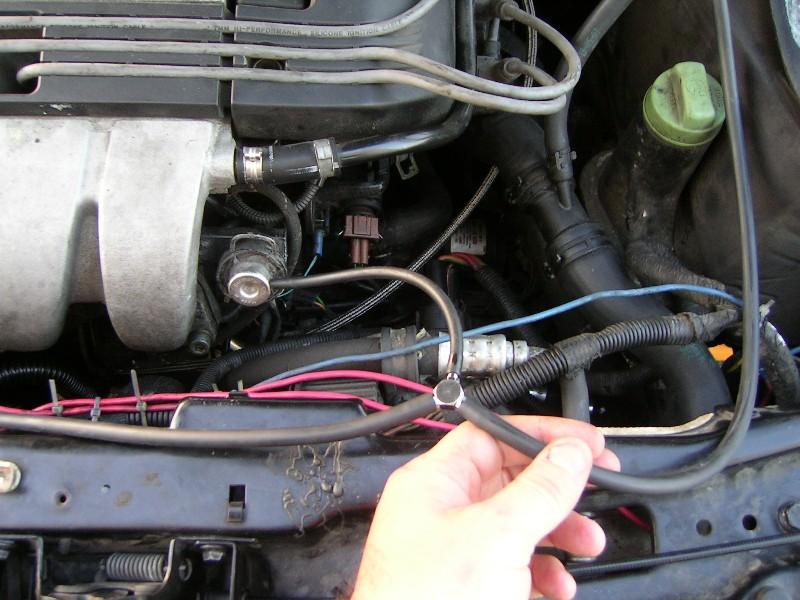
This is a great picture showing where I hooked up my vac line from the Y connector at the FPR to the BOV. Is this correct? Please help here...plus, for others viewing this thread in the future I'd like them to know what the EFF they are doing too
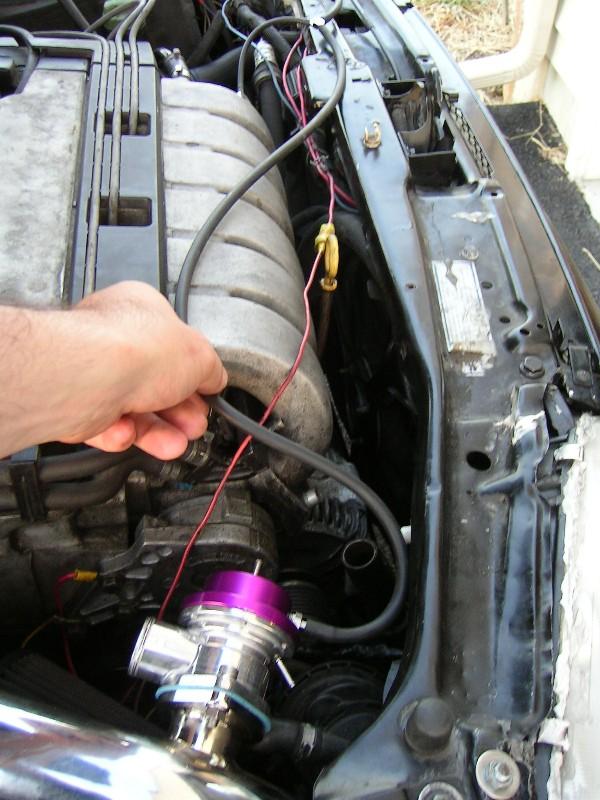
This is just a pic of the engine bay near the back where all the turbo stuff is...please take a good look and let me know if I'm missing something (besides the engine cover ).
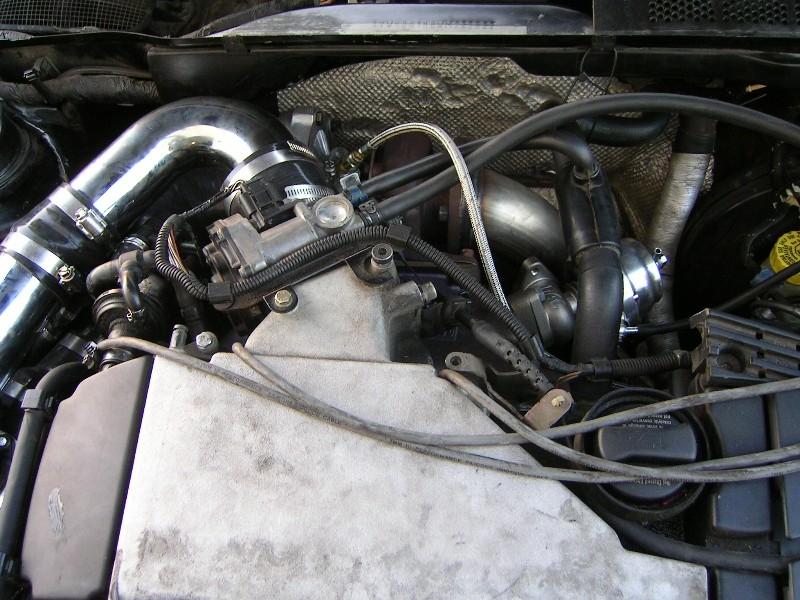
Guys,
Please help here as I'd like to make sure this is 100% correct. My guess is I've got some vac lines mixed up...please get me straight so I know I'm not effing something up here.
Thanks guys!!!!
May 17, 2004
So now for the really stupic question (feeling stupid right now...)...
I see plenty of (what I call) vac lines but where are my boost lines?
I thought it was one and the same?
so, according to my pic I've got a vac line that should be attached to the bottom of my WG (or closest to the exh manifold)...
And,
Looking at the BOV, I should have my vac line connected on the top...or farthest from the intake pipe, correct?
And yes, Marty...once I understand how a diaphram works I'll know exactly what the hell to do...But until then I gotta sound like a wee-tard first!
Am I understanding correctly that I need to get my boost line by hooking it up to the compressor housing somehow???
If so, that may be why my car is running a bit odd right now b/c I had no idea that there was a connection there to be had...
Correct me if I'm wrong here guys...
May 18, 2004
Update:
I don't know what the problem is...
The car ran yesterday, it ran pretty bad (as if it were missing a cylinder) but it ran. Today I couldnt' even start it...wouldnt' hold idle. I'm going to check to see if I soldered the MAF sensor wires wrong today.
But that's wierd, if I had...then it wouldn't have run yesterday.
So, my only bet here is to get with someone that has a turbo and compare everything...at this point I'm a bit at a loss...
I'll keep this thread posted on what I find out and how things progress...
Any tips here I'd appreciate it!
Thanks.
I'm not a total idiot when it comes to mechanical aptitude but when talking about vacuum lines and the like I am a self-proclaimed idiot.
I was just thinking that as long as I had them all connected together with one "source" of vacuum I'd be ok...but I totally forgot about the FPR...
Tim and Jason will stop by later today (hopefully) and we'll square this away.
Thanks guys!!! I"ll report back with pics what we do.
Goddam, is that WG LOUD!!! I'm def having it re-routed back into the exhaust later this week.
But it's amazing how quiet the exhaust is. I mean, it's quieter than stock but an amazing tone that the turbo adds...a nice rumble.
Yea, fpr wasn't connected to any line. We connected then it started up!
Now that I know it's all working correctly I'll take a couple pics of the engine bay which shows everything....
That way we can keep these pics on this thread for others to see.
But to be honest, my problems were quite simple and almost idiotic so I doubt anyone else will have major problems like I had. I mean, even though my car was freaking out it was a matter of just connecting one or two lines and all was well. No biggie.
May 19, 2004
To be honest, I thought it was the best way to go...if I bought their i/c with piping I knew that it would be 'close'....
It wasn't too bad I suppose.
I had a very large oil leak coming out of my oil filter housing that I had to tear the entire front end of the car off to get to today...
But it's fixed. Seems I didn't torque down my oil feed brass fitting quite enough.
While I was in there I used teflon tape (making very sure not to interfere with any oil passages) on every single fitting and torqued them down very well.
Not a drop of oil came out while it idled for over 30 mins tonight .
On sat I get the exhaust done and AM DEF GETTING THE DUMP TUBE REROUTED b/c the damn thing is LOUD AS BALLS .
Not my cup o tea.
But shes up and running.
May 23, 2004
Some *final* pics of the car "up and running" in my driveway...
Looks a bit cleaner than those 'other' pics I was posting up here in the last couple weeks .
Jeff and I will be tuning first weekend of June so she'll be running smooth as a baby's behind then !
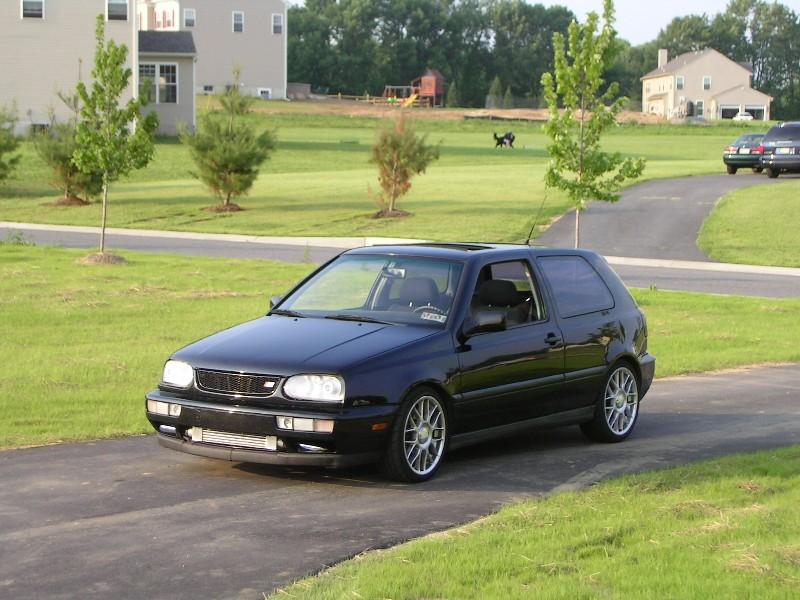
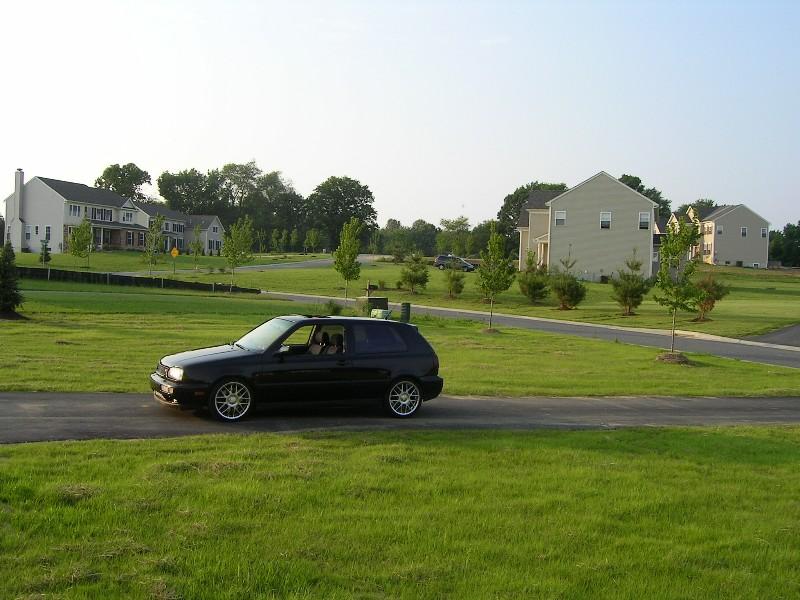
And a pic of the car...looking good today!!!
June 02, 2004
But it's a long story. I had it in this muffler shop where this guy really knows what he's doing (was there in and out for a solid week since my last post) and I kept getting the runaround and dealt with it (b/c they were going to give me a cash deal a serious break on the price if I paid the guy personally instead of paying midas)...
Turns out the guy was ready to quit and ended up calling in sick like 4 days in a row. I couldn't get a ride there to pick up the car until just this weekend....
Damn...
So, I've still got my open WG with no dump tube (loud as hell ) and a ****load of ugly crappy black soot in my engine compartment.
So,
I'm happy to take pics but know I'll be flamed for having an ugly engine bay....
Which is the only reason why I was holding off.
Ppl wanted "money shots" and this is NOT money.
Plus,
I'm writing from my wifes computer. Mine is out for service as I blew my hard drive and lost EVERYTHING.
Including the software to load in my camera's pics...and don't want to load it into my wifes computer right now.
I'll have the computer back by the beginning of next week.
If any of you guys need a pic of the vac lines immedietly (ie. in the middle of your project) I'd be happy to find a way to get a pic to you - just let me know.
Otherwise, I'm gonna wait until I get all my isht in order, k?
Car is still fast as uckF!!!!!! I love it!
Full boost at 1/4 throttle and at 3200rpms!!!! Holy isht! I had to put my foot all the way down to get ANY boost with the s/c!
And by the way guys...
Thanks for your interest. I haven't forgotten about this post and making it "complete" it's just that I've hit some 'snags' and it's not like they are keeping me from driving the car so I'm working on fixing them slowly but surely.
Trust me, this post will be updated for SURE!!!
Thanks for reminding me guys.
June 16, 2004
I had an appointment for tuning that I had to cancel due to rain during the first weekend of June (can't tune in the rain for a couple reasons)...
We've got a def appointment to tune my car (jeff and I) on our trip out to Midwest Massiv in Columbus, OH June 25th.
right now, the car is running real rich (by design from Jeff) just to get me up to him so we can tune...but she's still fast!!!! Real fast.
I can't wait until we tune it and get the real power .
Trust me, when things change I'll post up.
That includes finally getting my dump tube welded back into the dp (next week). I'm pulling my turbo/dp/wg out tonight so I can get it welded....
June 24, 2004
UPDATE:
Had my WG re-routed back into the DP. After a few ppl told me that it really didn't matter much that the WG be close to the Turbo outlet I figured it would be easiest to just have a straight pipe welded from the WG to the DP. Yes, it's close to the turbo but I doubt with all the exhaust coming out that the "puny" WG is gonna mess anything up.
Can I say QUIET???? Holy Schnikies...
I love it. She rips and barely makes any noise except for the turbo whistle and the BOV!
I was a bit disappointed in the welding job as the guy was a bit anxious (it seems) and may have gotten the parts too hot and seemed to have warped it a bit, I had to gingerly put things back together slowly tightening down everything in sequence...what a PITA.
But I'm done now, and I'll be meeting up with Jeff Atwood in a few hours on our way to the Midwest Massiv show to tune the car. She'll be totally done this weekend.
Those engine bay pics that someone asked for? I'll get them up here soon once I get the engine clean. now there is no WG black smoke being blown in. You should see my engine compartment...holy smokes!
Here ya go:
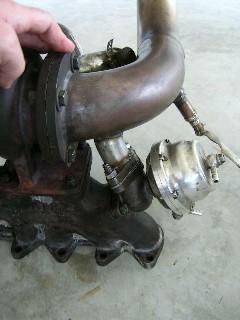
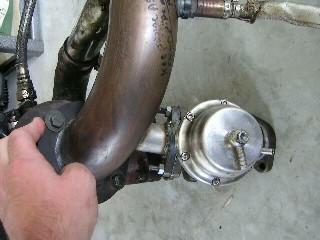
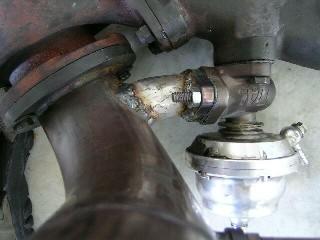
June 26, 2004
As promised I told you I'd give you an update on this question you have. I also promised pics but I don't have them up yet (will do soon).
I'm here at Midwest Massiv right now and I've finally gotten my WG plumbed back into the DP AND threw in Jeff's 30# software.
The car is a freakin' rocket! Smooth as silk part throttle, smooth as silk WOT...
Car drives itself in 3rd gear through the parking lot at idle (no foot on gas) with not a buck to be had.
No misfires AT ALL (no misfire codes and no blinking light).
Rock solid idle. Quiet motor with an incredible roar at WOT and a nice burble around town at part throttle.
And as for your Q about the difference b/w turbo and s/c...
The power is much different. It's all in what you want, but I wanted that turbo VR6 and my VF blower just wasn't up to it (no dual idler pulley available for that blower like there is for the v1/v2's).
Amazing.
Jeff's tuning is incredible on this car...
For those running a vr6 turbo, if you haven't contacted c2/jeff atwood about their tuning then you gotta do it now (from what I hear there aren't a bunch of Turbo VR6's out there anymore that don't have it - unless they've got stand-alone)...
Anyway, I'll post pics and a dyno plot (pics first, dyno is soon).
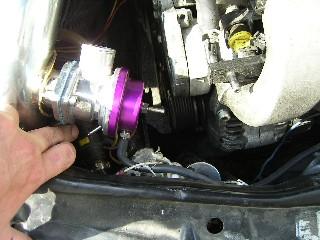
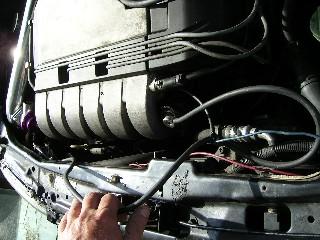
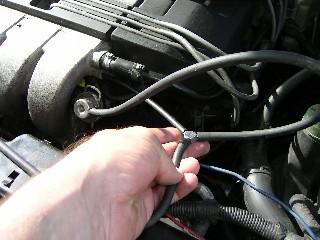
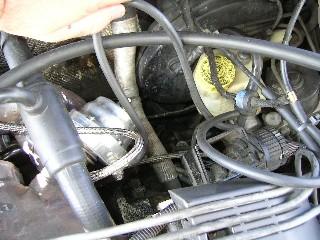
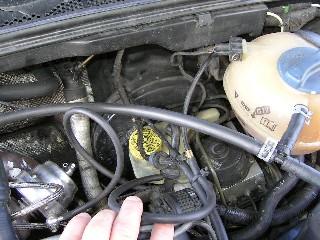
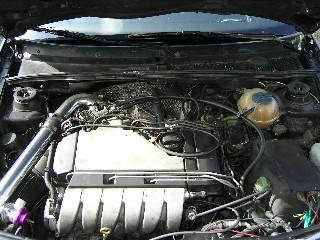
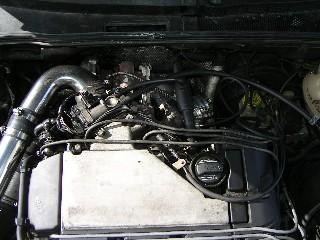
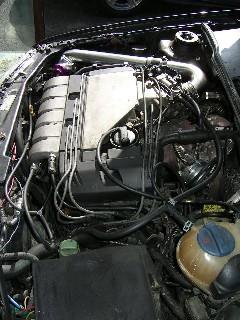

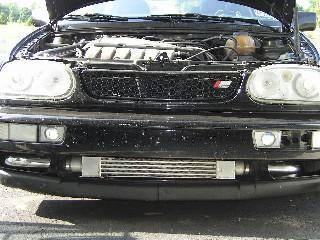
And for good measure, a pic of Jeff Atwood and my car just after we cleaned 'em at midwest massiv (thanks Jeff for the awesome tuning, man )...
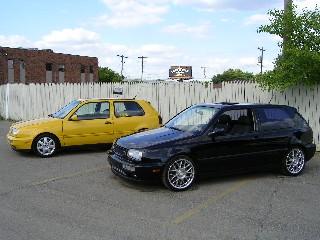
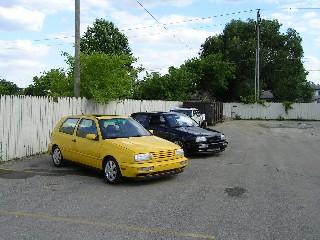
Does this conclude the "how-to"???
Oh, I'll post up my complete parts list on what I used for this turbo when I get a chance.
October 30, 2004
So, I've received my 8.5:1 head spacer from c2. Thanks chris.
Here it is and ready to go in!!!
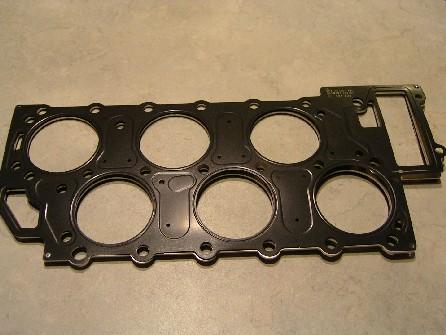
I'll update as I progress with the project.
November 10, 2004
Motor pulled:
Here's some pics for those that care (but I guess it's all part of the process of building a Turbo vr6 ):
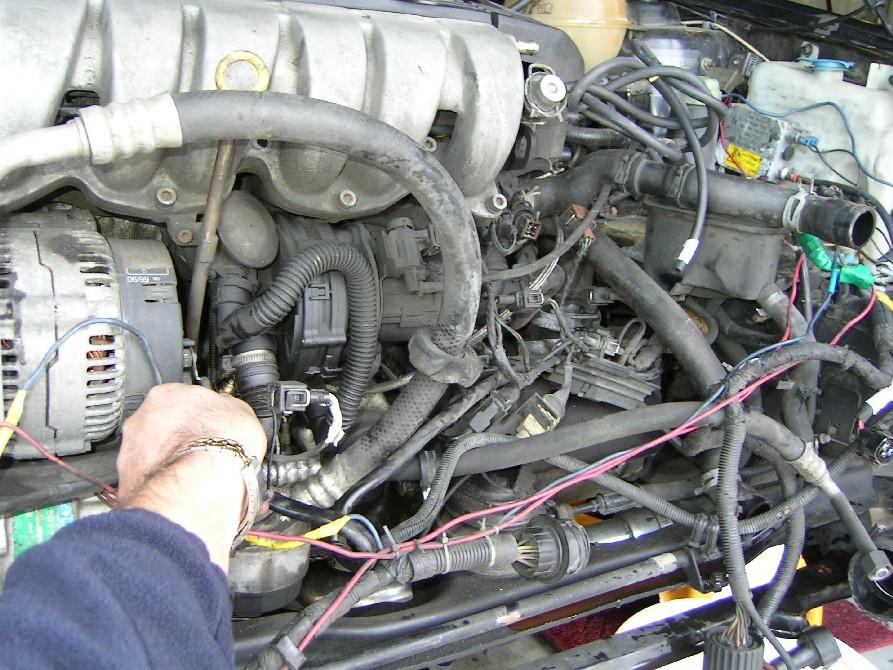
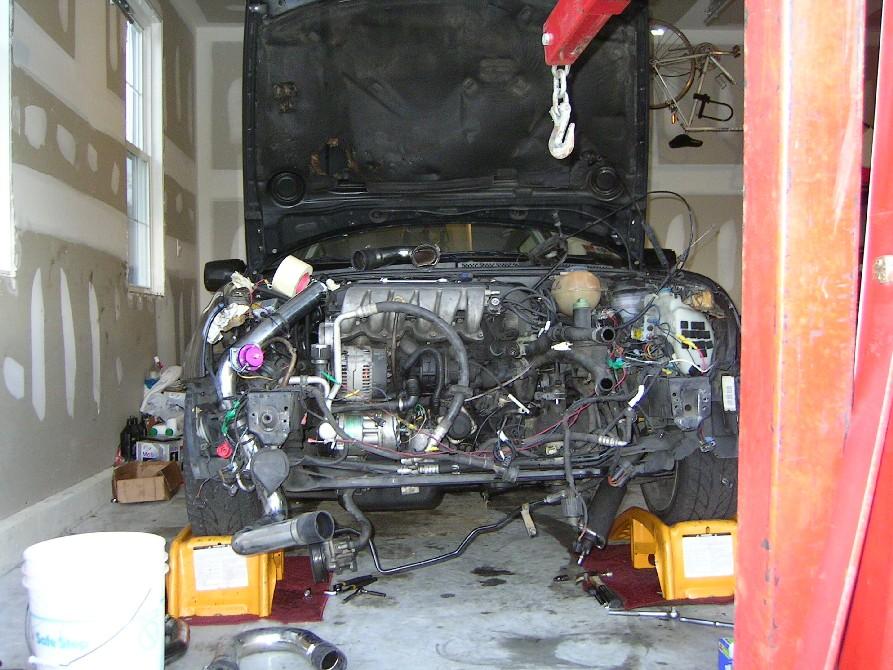
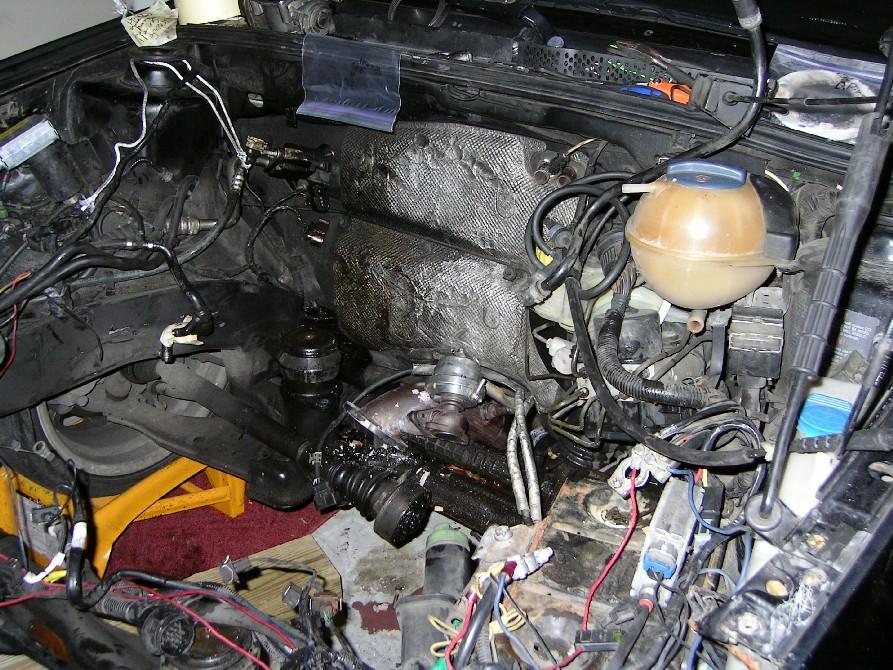

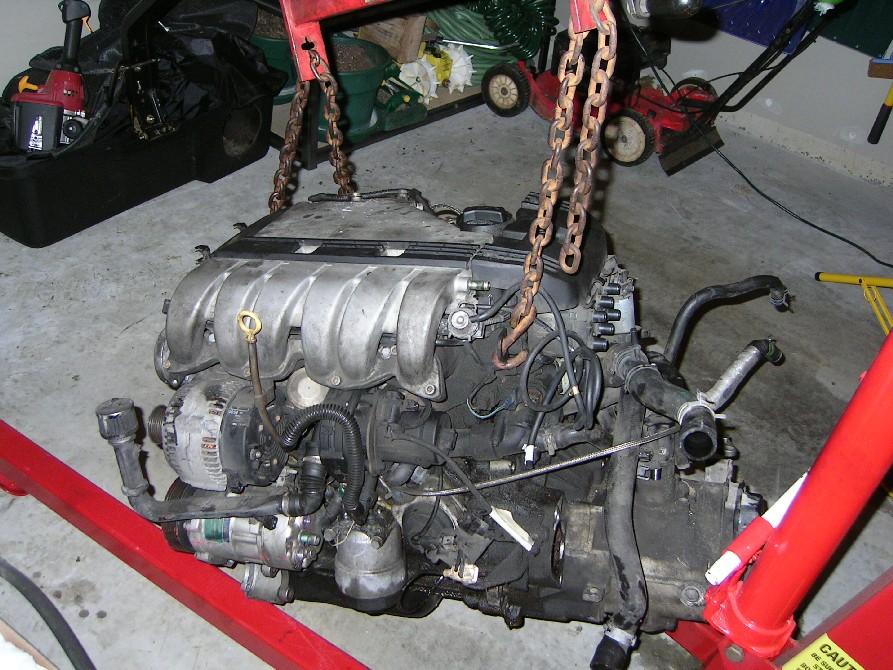
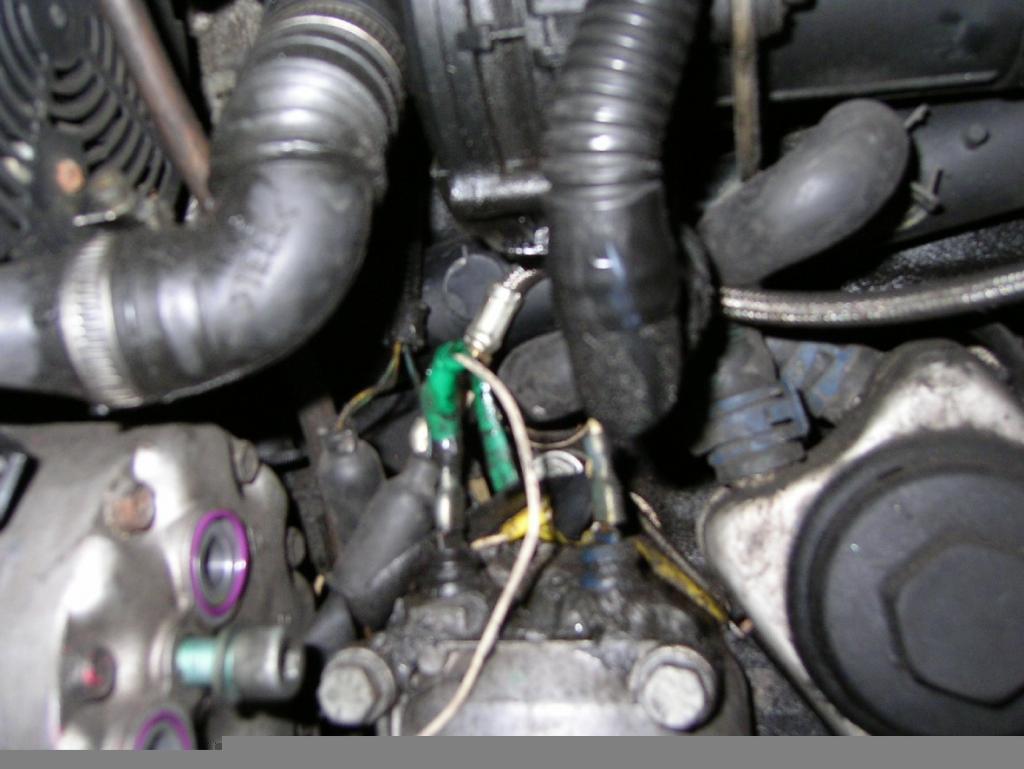
I marked EVERYTHING with masking tape and put EVERY SINGLE BOLT/NUT/WASHER into a ziplock bag and marked it with permenant ink for easy installation (I hope ).
I took plenty more pics for my own reference but mostly of various connections, vacuum lines, etc...but I won't bore you with them.
November 18, 2004
Ok,
Valve cover is off...head comes off on Sunday (damn, I forgot those large head bolts are the 12point snap-on's)...
She looks nice and clean inside, eh?
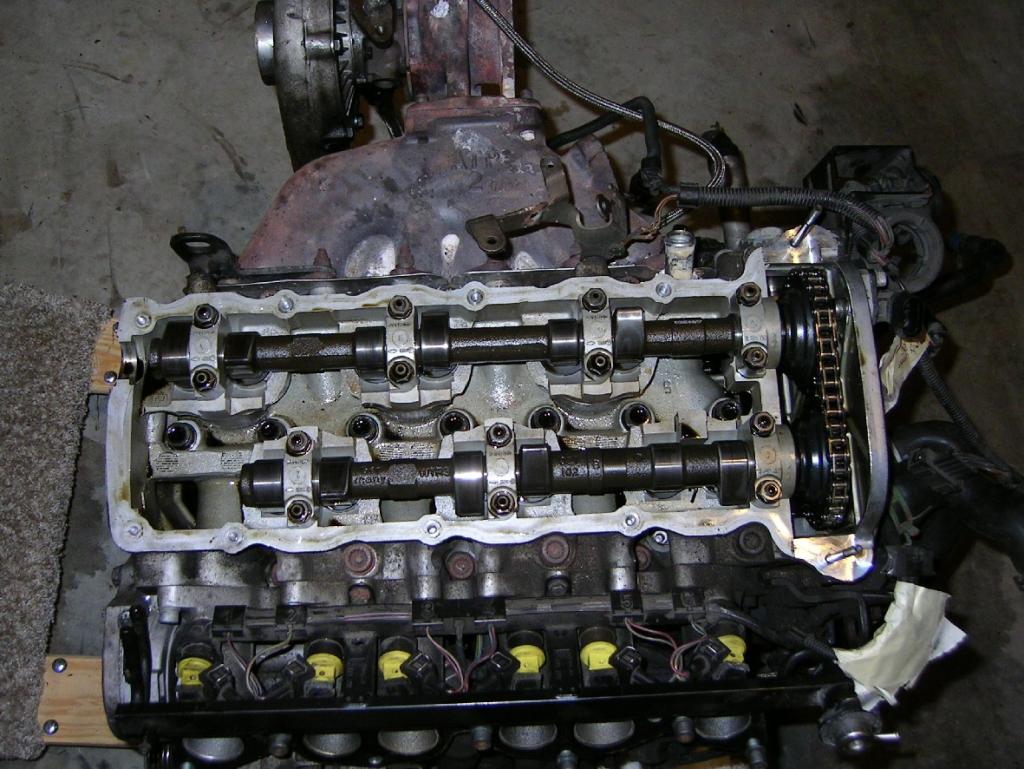
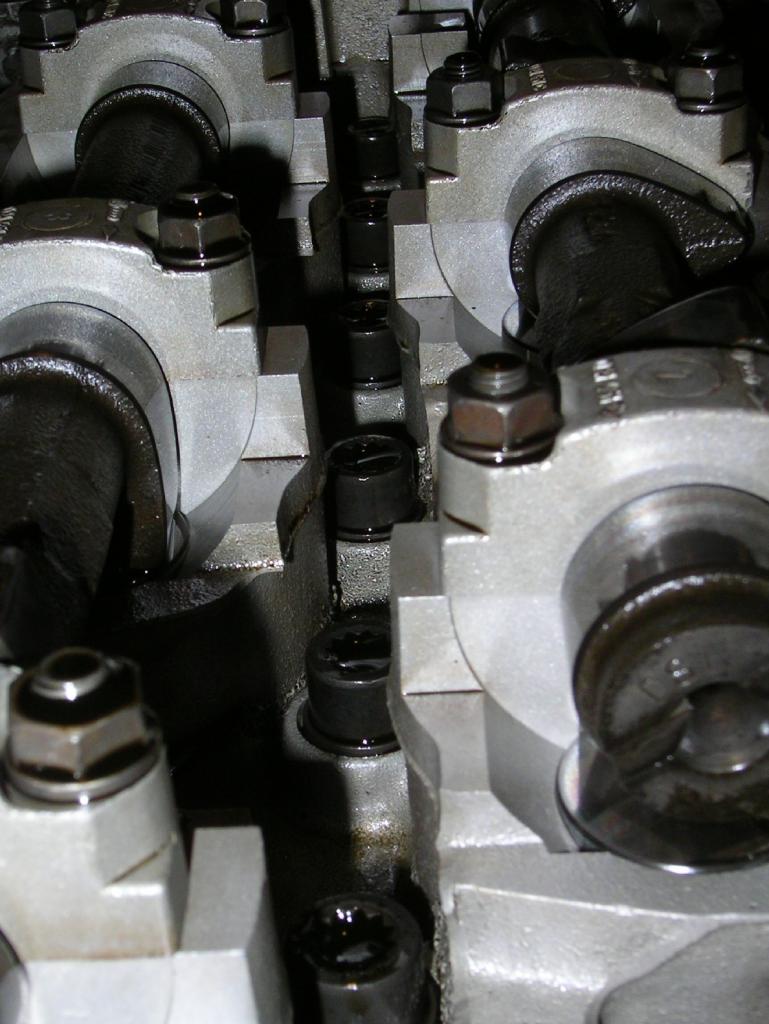

November 27, 2004
Not on hold anymore...
Going 3L (hopefull) courtesy of schimmel performance.
Here's where I'm at now (pistons out of block):
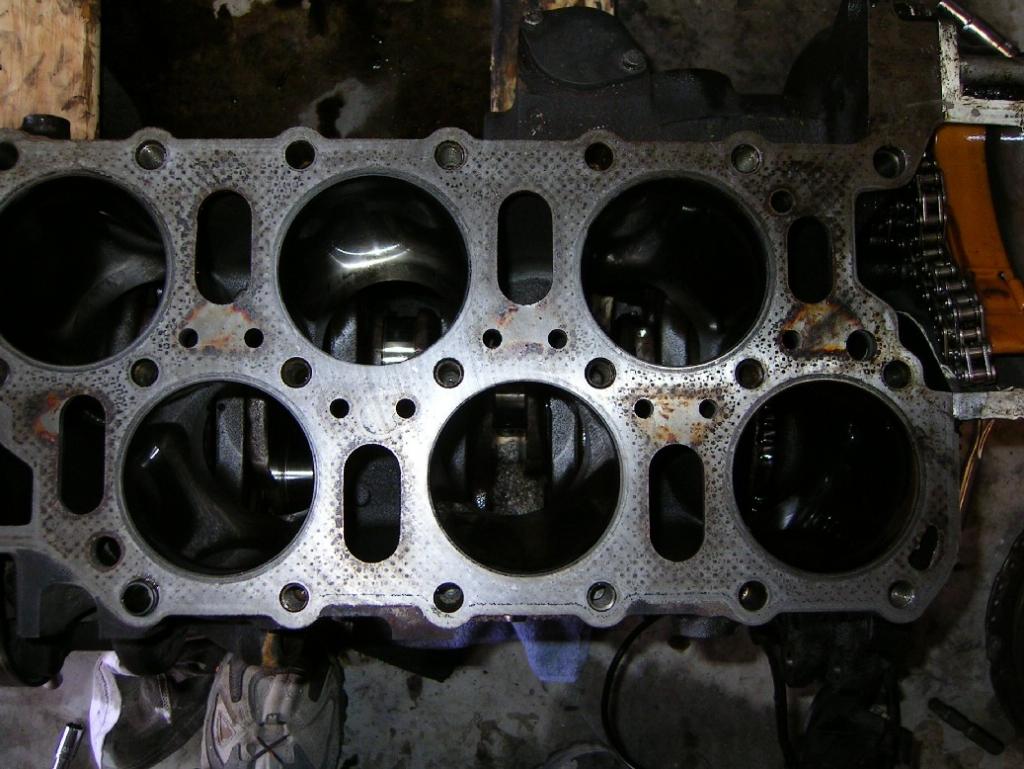

November 29, 2004
Ok,
It's a good day today. Talked to Schimmel (schimmelperformance.com I think) and he'll be doing my motor up for me (3L full bottom end rebuild). It should be done w/in the week b/c he's got a block ready to go.
One HORRIBLE pic of the head in my work truck (still has lower intake manny on) and a good pic of the block...
I'll keep you posted .
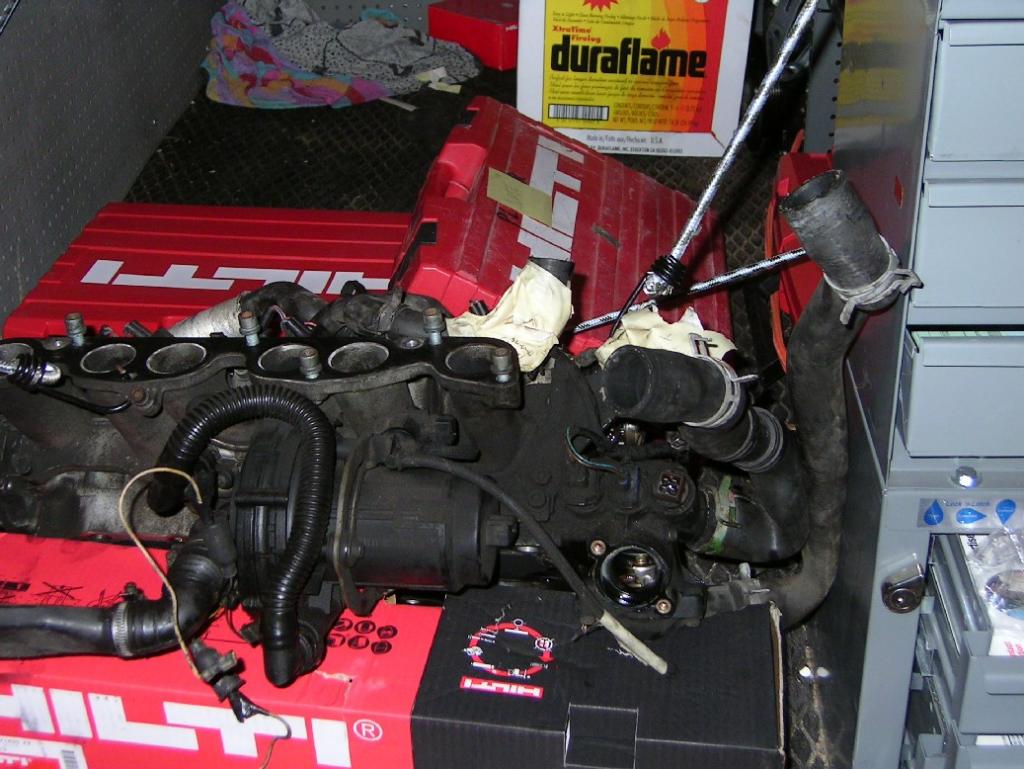
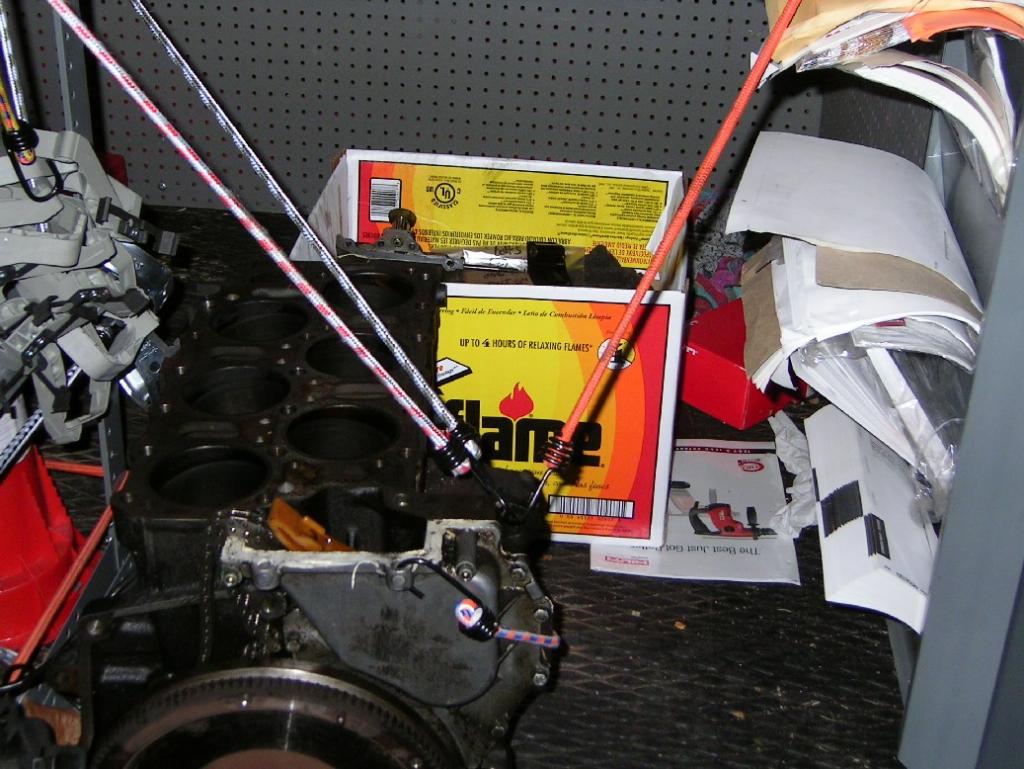
Well,
Add a full head rebuild to my project.
Just so some of you guys that are reading this know...
It's not just buying the turbo/kit...sometimes it's about everything else you end up doing afterwards.
December 12, 2004
Got the motor back.
Here's what I got done:
Schimmel Performance 3L long block complete rebuild with 10.0:1 Forged JE Pistons, 8.5:1 C2 head spacer (so I'm around 8.3:1 CR), 3angle valve job, new valves, seals, guides...
Timing chains redone (refreshed as they were in good shape, new guides and seals).
Transmission:
Total rebuild including a new gear selector (I literally BROKE it in pieces but it stayed together in the trans!!!!) and a new second gear...and new seals, etc...
Added a Peloquin differential in there too!!!
While I was in there I bought a Schimmel Performance HD clutch (6 puck, modified pressure plate for 25% more clamping force...good to 400whp).
I think that's it...
Here's a couple pics of the motor when I got it home yesterday. I've already got most of the accessories on and she's about ready to go in the car.
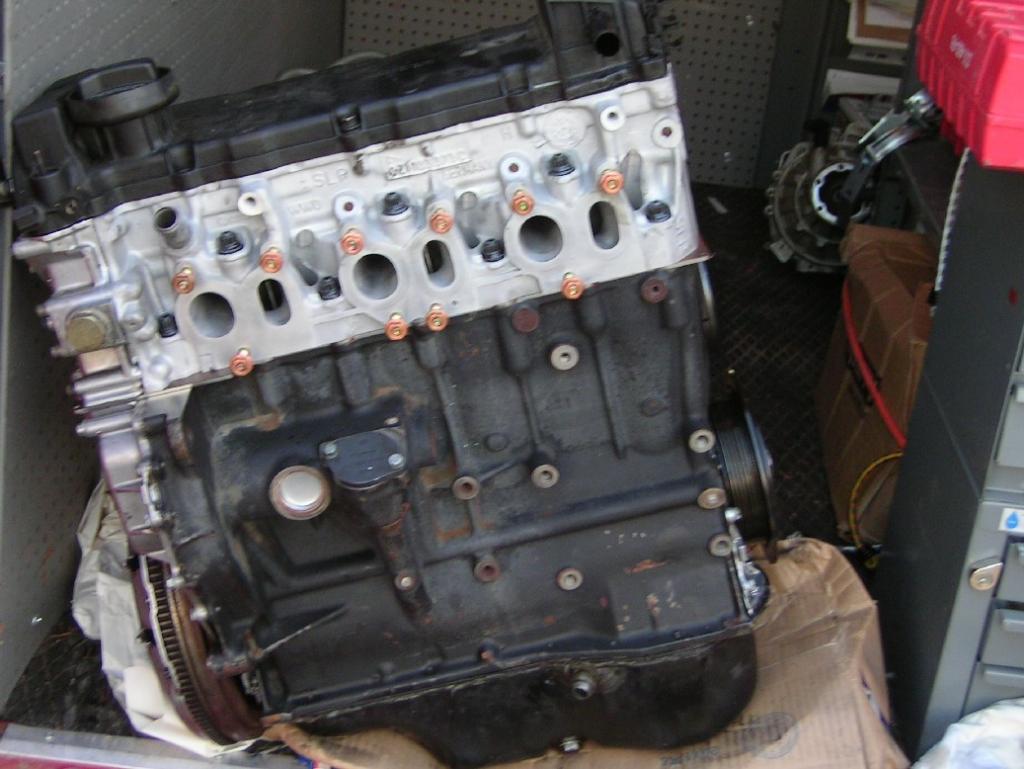

December 14, 2004
Update:
Got the motor in tonight. Should be finishing up tomorrow or Thursday for sure.
December 15, 2004
The motor is in and most of the wiring/plumbing is back in and she will be running tomorrow (thursday).
My digi cam ran out of "juice" and I've got no replacement batteries but I'll take a pic tomrrow and add it here...
December 17, 2004
Update: It is Friday and she's closer to being started up. All electrical connections are done and just have to do turbo plumbing, Downpipe to turbo connection, 'test pipe', front end back on, and connect all coolant hoses.
*should* have it up this weekend. My initial estimate of Thursday was too optimistic b/c I've lost a couple bolts and am having a hard time matching up bolt holes on trans to driveshafts (I'm up on ramps, not on a lift).
Ok,
So car is about done but I'm going out tonight so it's gonna have to wait until tomorrow.
One last question:
How can I jack my car up when it's up on ramps already?
I mean, the 4 jack points are right where the ramp is and I can't get my jack in there.
Is there another safe spot that I can use on the front part of the car?
I have one side of the trans bolted up but need to twist the pass side wheel to get the holes to line up there (I think).
Could I just get my engine hoist and pull the front end of the car up by the two "beams" that come out on either side (by each fender)???
Or would they buckle?
Bentley says, "severe damage may occur if you use other than these 4 points".
So, I don't want to damage my car that bad.
December 18, 2004
Car is back together with fluids. Front end is back on...
Intercooler piping and downpipe need to be installed tomorrow...And that depends on how late I sleep then the eagles are on at 1pm.
Then after the game I'll be too drunk to work on it - so Sunday may be a wash.
For some reason I'm still nervous about cranking this biatch over for the first time in so long. I know schimmel knows what he's doing....but I'm still nervous.
December 27, 2004
Need some more tech help guys... but I got it started and running.
Just a little concerned about my oil light that came on...and need a way to check oil pressure. Check that other thread for my specific question.
December 28, 2004
Ok,
An update (and to get this thread a bit more back on-topic for what it was meant to be)...
I did two things worth noting:
1) Re-routed my BOV back into my intake to eliminate compressor surge.
2) Had an o2 bung welded into my "test pipe".
Here are the pics:
3L Schimmel rebuild with 10.0:1 Forged Pistons, C2 8.5:1 Gasket, Head rebuild with HD valve springs, Peloquin with Trans rebuild:

Intake tube (that 90deg elbow goes right into the turbo inlet):
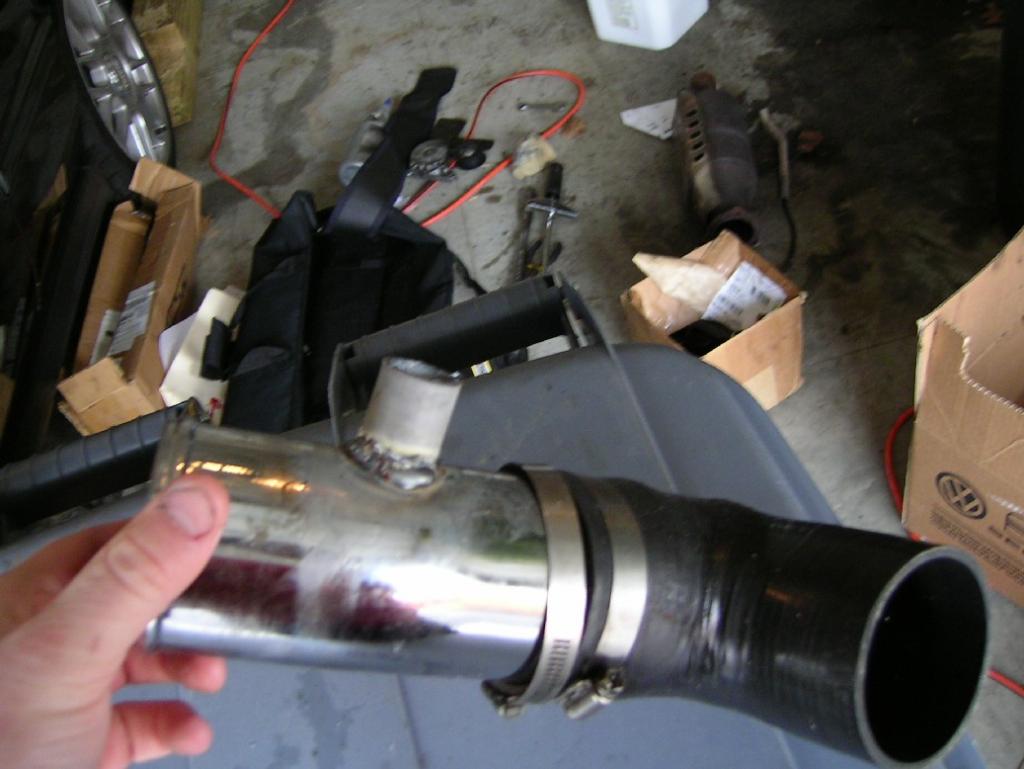
I just got that pipe cut at Home Depot. I think it's 1" OD or close to it.
Nothing fancy, but this pic shows the bung I had welded into my 'test pipe'.
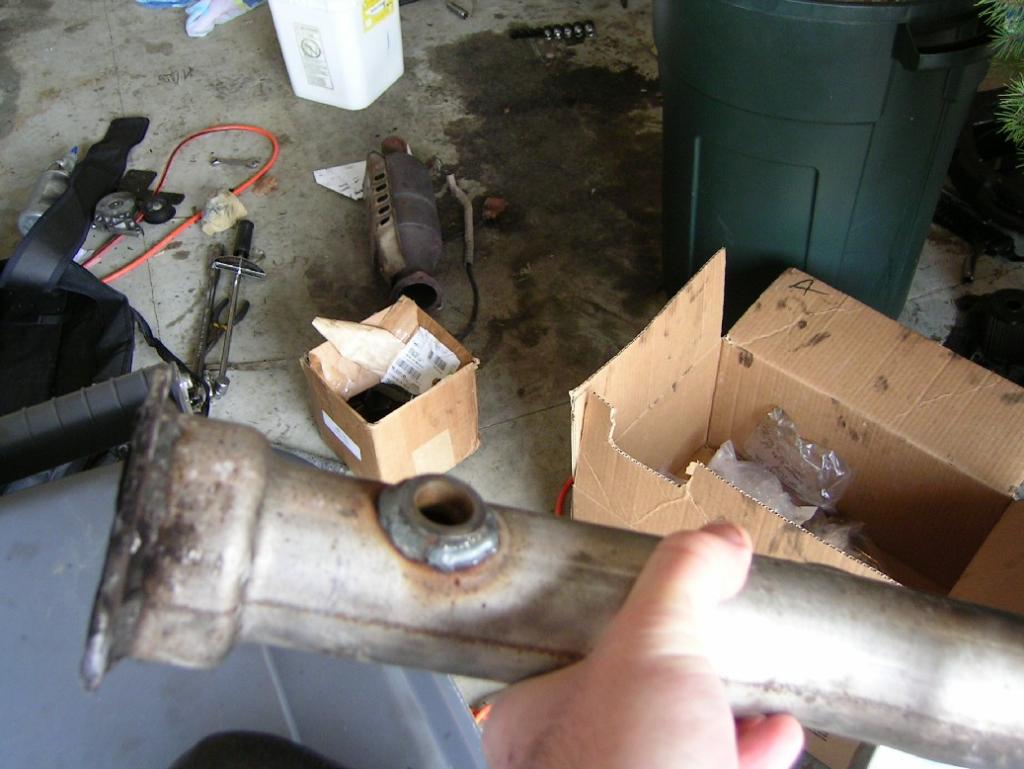
And from the thread show above, here is my last post which should have fixed a couple electrical problems I have had recently. To summarize, the first problem was electrical shorts on the wiring harness connected to the injectors, oil pressure switches, and TPS. Second problem occured b/c I messed something while fixing the first, and it caused my high pressure (20psi) switch to malfunction (showing no oil pressure at high rpms)... Here's my entire last post on that thread:
Ok,
So this post is two fold in nature. Just throwing in some pics of the previous "problem" I had and the fix (which I'll put below) and to update you on my current "problem" (oil pressure 'issue').
While I've still got the car apart (well, front end off) I noticed that the left pressure switch (I think it's called the 20psi "dynamic Oil Pressure Switch") with the yellow wire was totally disconnected.
And I guess it's somewhat related to my earlier fix so I'll post those pics right now and show you guys what I did (to fix the last electrical problem, and to cause this low oil pressure malfunction problem )...
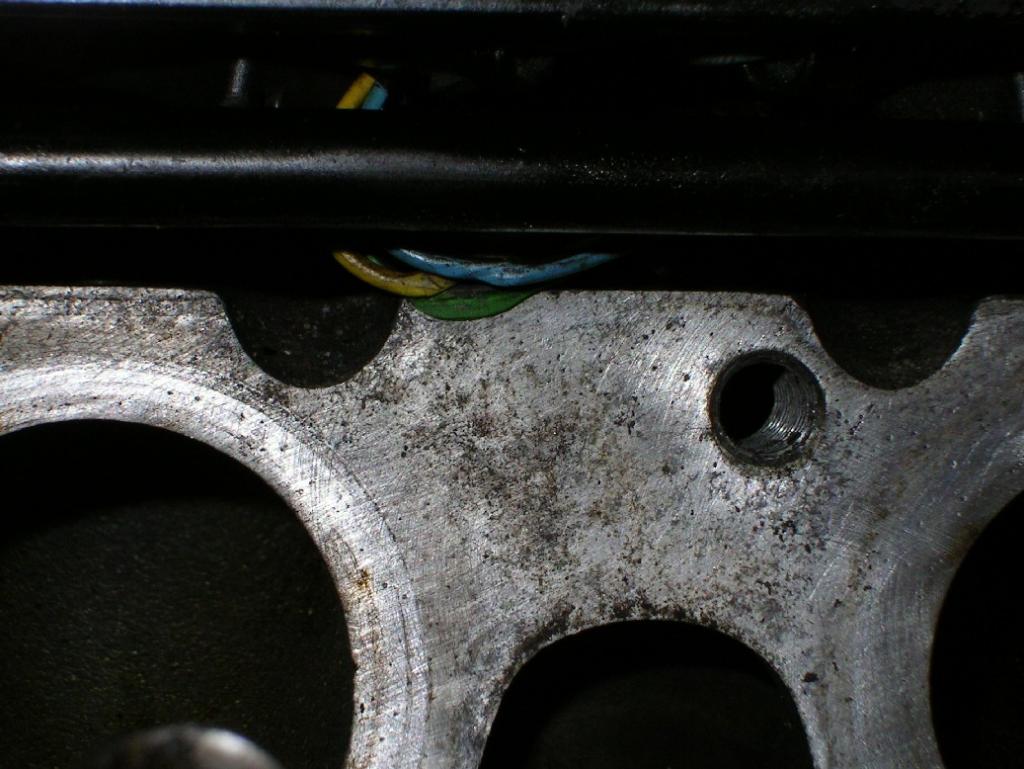
This picture just above shows these three wires that come up between the fuel rail and the lower intake manifold that are actually the wires that go to the oil filter housing switches. As you can see, somehow they got pulled out and I layed the upper intake manifold on top of them and torqued it down, crushing all three of them to the point where I had all sorts of electrical gremlins with that short.

Above pic just shows another pic.
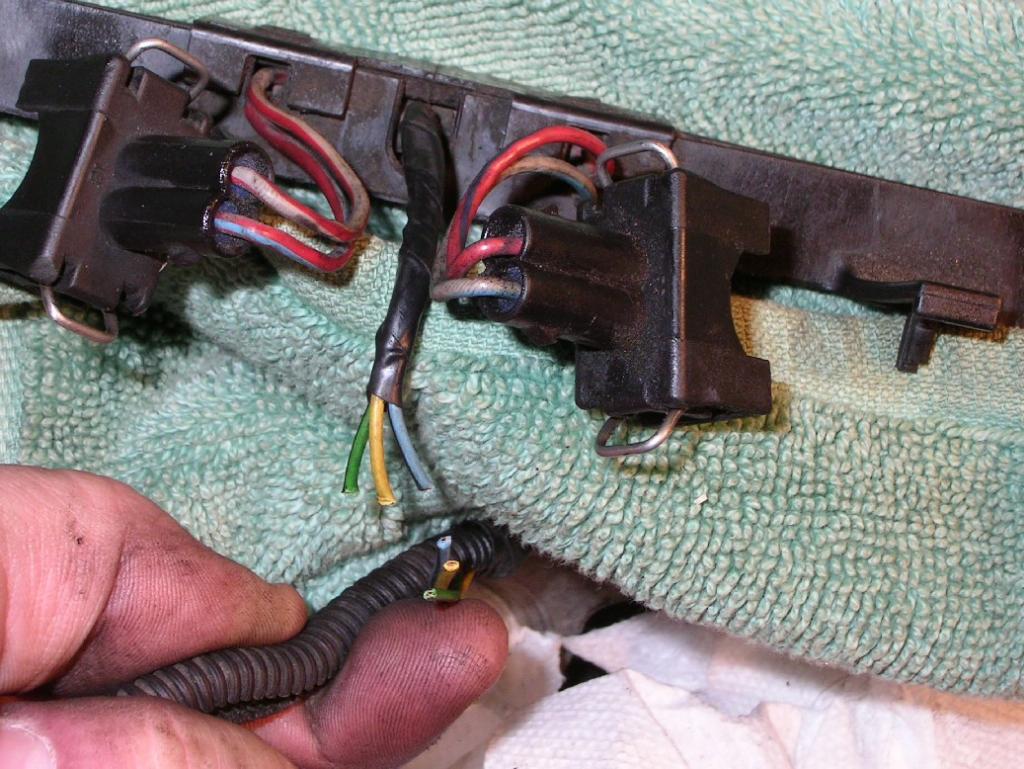
Above pic shows I just cut the "bad part" out and since there was more wire left (slack) I just soldered them back together (I cut out about a 1/2").

Above pic shows the tubing I found at Sears Hardware that I used to make it nice and oem-looking.
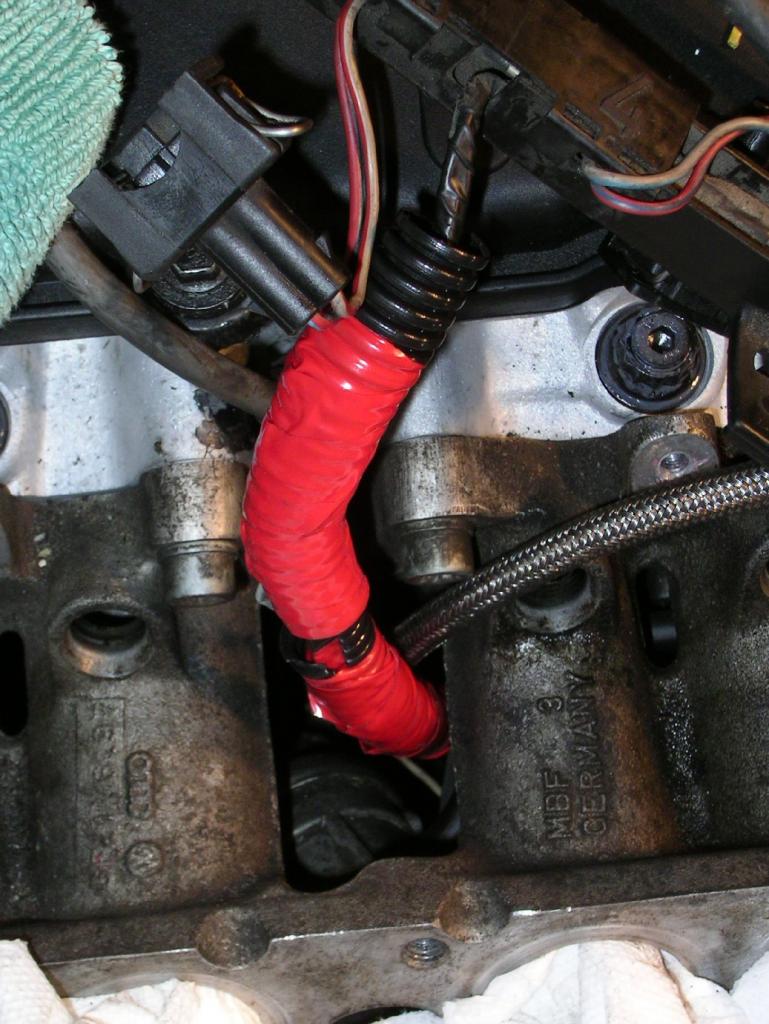
Above pic shows final result. Just wrapped the wire with the tubing and then threw some red electrical tape on top of it.
So, as you all know when I did that work I must have pulled those wires too hard...so hard that I pulled the connector off of the high pressure dynamic oil switch (yellow wire, black sensor on the left on the oil filter housing)...
I decided the quickest way to get down there with my big hands was actually to pull the front end off. I'm getting to be very good at it. It took about 15 mins incl pulling i/c piping off w/o the car being up on stands...not bad (at least IMO)...

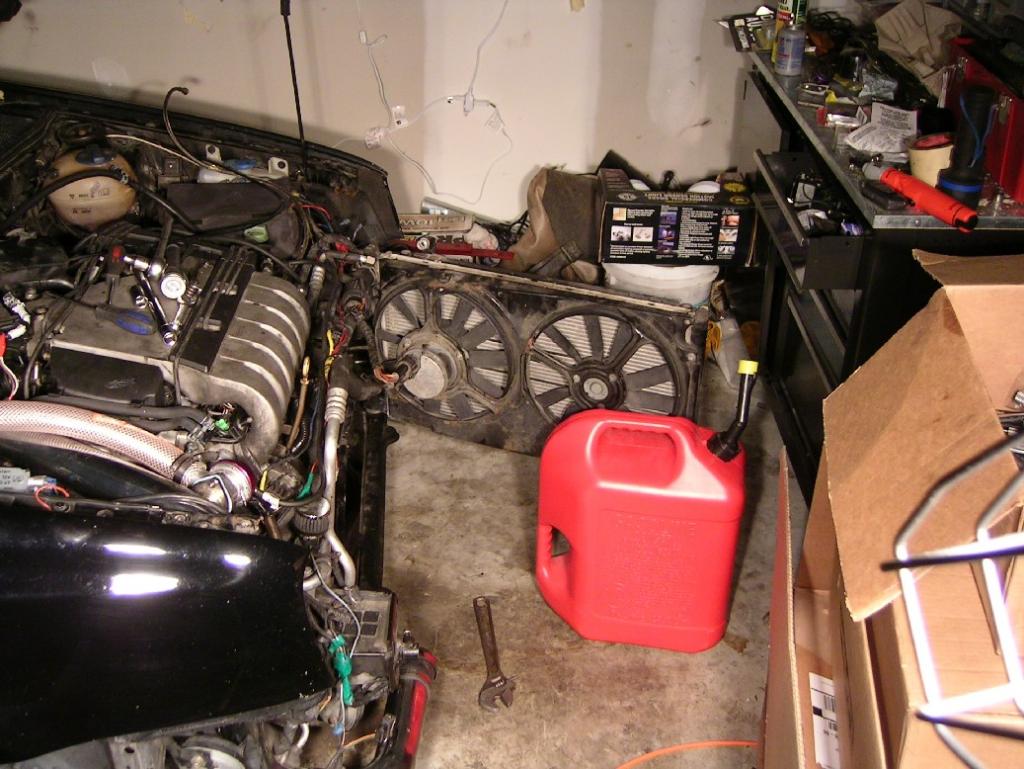
Above pics show how I just pulled the front end off and the lower radiator (left side) bolt out - plus the a/c condensor line (left and upper right). This allowed me to just open it up like a door...easy access to the oil filter housing and w/in two mins I was able to see this(below):
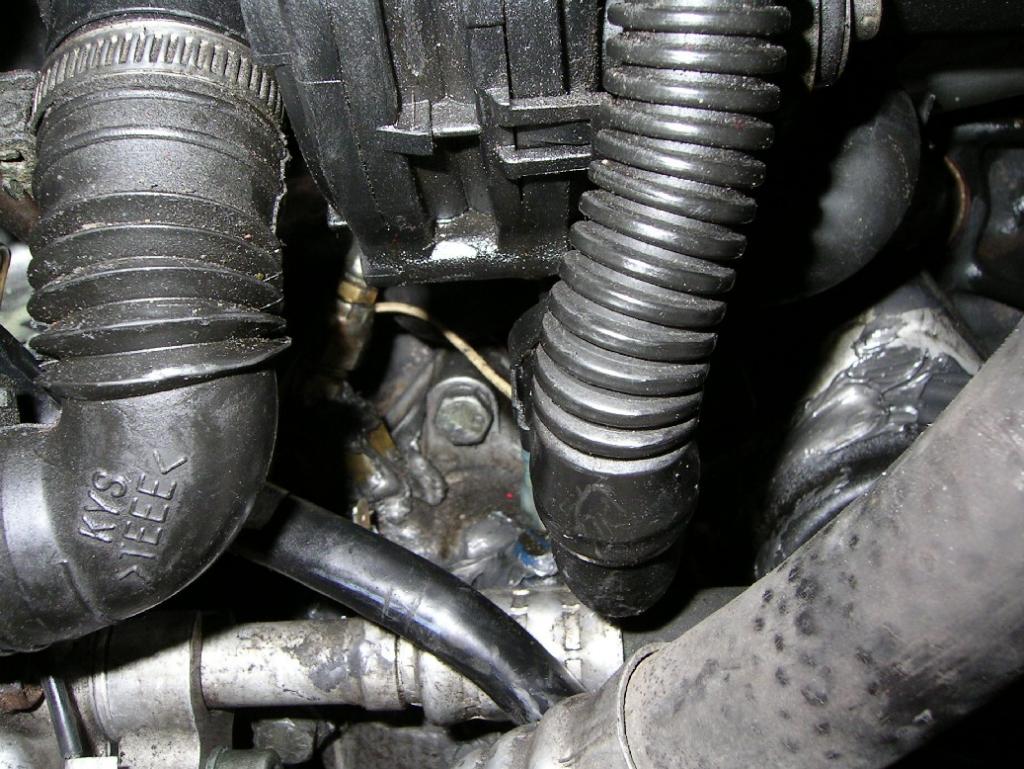
Not a bad pic but you have to really look for it.
You can easily see the top/rear sender where I tapped my oil for the turbo (in the back)...
You will also see (peeking up over the black tube) is a brass connector all by itself with no wire connected.
That is the dynamic (20psi) switch that is SUPPOSED to have the yellow wire connected to it.
Obviously, that is my problem.
Thought you guys would like to see what I've been up to.
Well,
I put the front end back on and she fired up. Once it warmed up a tad I revved it to above 2k rpms which is when the bentley says that high pressure switch turns on...
Looks like everything is fine and it actually just was that wire that was disconnected.
Whew.
Now to wait for my atp gaskets (thursday) to fix my exhaust leak and I"ll be breaking in the car on friday.
Will post up finished pics then with impressions of the 3L motor, new clutchnet (I think) clutch, and peloquin with rebuilt trans....
December 29, 2004
I put about 75 miles on it this morn/afternoon and the car runs great. I didn't get into boost (except for a couple "mistakes" but only maybe 2psi).
Car runs very strong. When decellerating in gear I get In Hg vacuum of like 28.
Idles close to 20. Feels real tight...
And the motor when revved to about 2k rpms has a sweet tone to it.
It's awesome. Oh, re-routed (as you can see from pics above) the BOV back into the intake and the car has NEVER shifted (motor-wise) smoother.
And of course, the schimmel rebuilt trans feels smooth as silk.
Clutch is super stock feeling but grabs like hell.
Peloquin,
Well, I haven't got into it enough to feel it. But I don't even know it's there (for now).
Just thought I'd share.
I put 110 miles on her today...back roads and highway runs at 0 boost and below. RPM's varying but topping out occasionally at 5k.
No long road trip planned but she'll be broken in (basically) tomorrow.
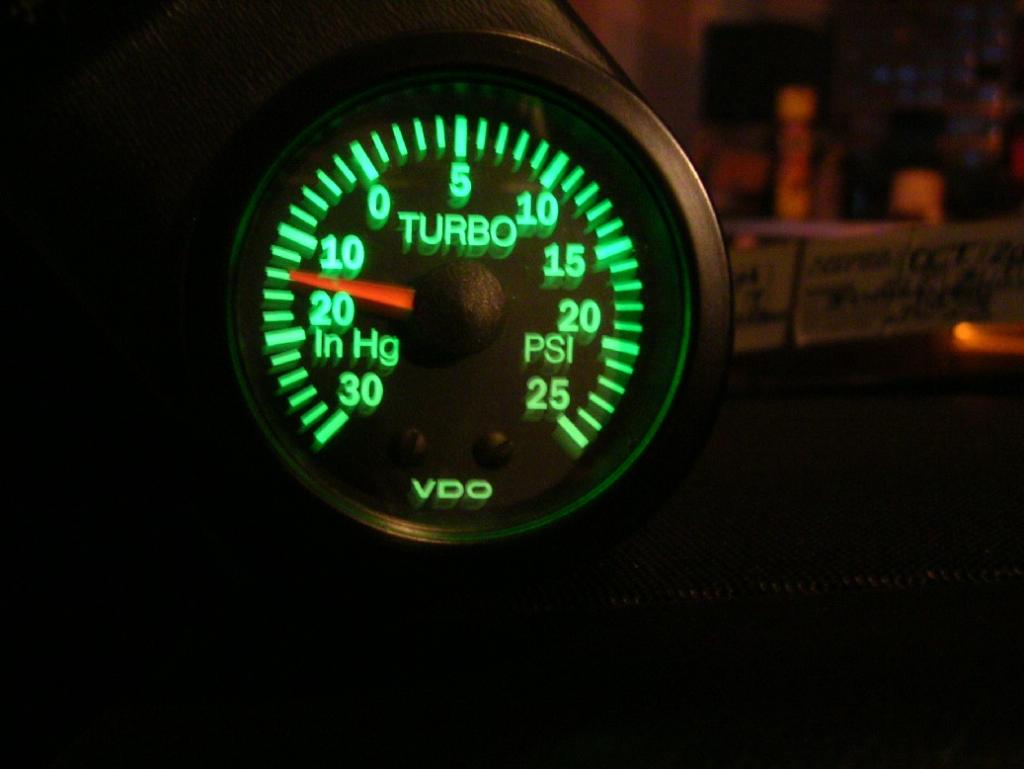
I'm gonna post a pic of what my boost guage reads at idle so you guys can see (on my next post - gotta upload it to my website)...
And tell me what you think it means. It's reading 12-14vacuum at idle.
That may just be due to the fact that she's not broken in or being that I lowered compression, or even that it's a 3L...or some combo of all three.
My best guess would be that it's just not even close to broken in.
I actually thought tho that the rings would have seated to a degree where that number didn't look too far off...
Any input on this is greatly appreciated.
Pic post to follow...
Boost guage at idle after 110 miles of driving new motor...

December 31, 2004
I put another 150 miles on it yesterday staying out of boost...A total of about 300 miles on the fresh motor.
Towards the end of the day I planned on "short shifting" at say, 4800rpms and not worrying about "modulating the throttle".
So, I kept the rev's down (as I promised myself) but layed into it down low and can I just say HOLY FOCKERS!!!
Keep in mind, nothing (as far as boost) has changed with this motor and I can say right off the bat that the car is waaaaay faster/more powerful than it was before at the same boost. You should feel it at boost in 4th gear on the hwy. It's scary fast.
I knew that boring it out would make a difference but with the turbo it must have made a bigger difference. My butt dyno says I should have gained maybe 30+ WHP by getting it bored out (not a bad deal considering it would have cost me the same to rebuild it to stock).
Plus, my head turned out to be in pretty bad shape so maybe it was never that fast to begin with (it sure felt fast before tho ).
I've been taking care of the clutch tho so I'm fully engaging the clutch before getting into any boost (I never really get into it anyway until it's fully engaged since I don't race much)...
But I can also tell you that I AM starting to "feel" the peloquin and man is it nice.
Clutch is a no ishter, stock-feeling clutch yet it grabs awesome! I had to get my car up on my oil change ramps and I used to have to ride it a bit to get it up but I just engaged this clutch and it went right up the ramps...grabs like a biatch.
Guys, I'm actually a bit concerned about turning up the boost. I'm not really getting traction in 2nd gear (at part throttle-foot about 1/4 to 1/2 the way down) so I know that when I turn it up to 15 it'll be insane.
Like there aren't many spots where I would feel comfortable using that 15 psi except on the hwy.
Scary fast is good. I guess that was the point.
I'm just amazed at how much faster this car is with the rebuilt motor.
Even with my cheesy spacer . lol
Anyway, as I turn up boost I'll be updating the thread...
For those of you that have followed this thread from post one (that were clueless like me) it is a known fact that turbo's don't just cost what the "kits" cost. They end up costing much much more.
I had heard it before, and now I'm preaching it.
Even w/o the crazy engine rebuild (which technically I didn't need) I'm still in the range of $7k since this turbo was bought.
Rebuilt trans with peloquin and HD clutch cost some coin..add in the motor and I think I'm around $9k now (just adding in tires too)...
So, you guys were right.
I'll be adding my Walbro (just picked up yesterday from Scott Williams) and will be installing soon and when I do I'll do a picture write up on that and add it to this post.
I'll also be going up to see Jeff Atwood and we'll be doing some fine tuning for the 42# chip (specific for my car) and I'll get it dyno'd then and will post that up here as well. Then hopefully this thread will be "complete" (finally).
January 05, 2005
Well,
I've been having a problem with the car stalling A LOT. And it's running extremely rich at idle (when it stays idling).
It's almost like a vacuum tube is disconnected (but it's not) or a boost tube is leaking (which I dont' think it is).
I idled the car last night and did the following test on the MAF and TPS:
Disconnected the MAF with TPS still connected: No reaction.
Plugged MAF back in, then out, then back in again while engine running: Nothing. Like it didn't exist.
Disconnected the TPS with MAF plugged in/out: Car stalled out.
Drove car with MAF disconnected and it drove identical to the way it was driving before.
Only MAF-related code is "maf signal too high" not the too low code.
My initial thought is that it's a problem with my MAF wiring which I'll check later today or tomorrow...then clean the MAF. In the event that it's still acting up I'll find a new maf.
I'll keep you all in the loop.
January 08, 2005
Update:
So I tested my MAF sensor wiring and found a couple things...
Check it out and add your thoughts if you can (theres pics there )...
January 20, 2005
I fixed it just be replacing the 111 relay (relay for secondary air injection pump) which is right behind the battery on the drivers' side (mk3) and is attached close to the strut tower.
So, I'm not sure if it was the maf sensor itself that was bad or the wiring or a combination of the two as I "fixed" it all at the same time.
Car is smooooooooth as silk now and running fast as balls. And only on 9lbs of boost. That 3L motor really made a difference!!!!
June 03, 2005
I'm fighting a boost leak somewhere which is pissing me off....And I'm too tired to work on my car for the last few days. But besides that it's great!!!
My clutch SUCKS!!! But besides that it's great!!!!!!
My trans is acting up...but besides that it's great!!!!!
Typical Turbo problems. Runs smooth as silk though (except for the boost tube that I must have blown loose the other day).
Oh, TIP for ppl....that don't knwo any better like me!!! :
USE THE HEAT SHIELD FOR THE TURBO...
I didn't.
Now, I am melting my throttle body! May have to do with my slight bucking problems I've been encountering...I looked under the hood and see the black plastic melting onto the Exh manny!
June 05, 2005
Here's an update on how the car is 'doing'.
Since this is a comprehensive thread on turbo'ing the vr6 I thought I'd keep readers in the loop on everything that has/is happening to my car after I decided to turbo it.
July 10, 2005
UPdate:
There are so many "offshoot threads" in regards to this topic and I think I've been good in linking those threads in this one. So, if I've missed anything let me know.
The latest thread on me trying to figure out why I had oil sitting in my cylinders (on the piston tops) and on the plugs in all cylinders is HERE:
Basically, I had some whining of my synchro in 1st going to 2nd gear. Schimmel took it apart and found nothing at all and said they do that every once in a while.
I also had grinding in 3rd which I just thought was as a result of my other trans problem. They found that it was a bad synchro and selector. I'm having it replaced.
The head is still in the air, schimmel is dissassembling as we speak.
But the above thread shows pics of my pistons when I pulled 'em and pics of them before I re-installed.
Thanks everybody! I'll post all related updates in this thread for sure.
September 02, 2005
Update to my last post....
A lot has happened since then.
The head was 'fine'. The trans was fixed. I re-installed my pistons after cleaning them thoroughly (see thread link in last post for pics).
The car is all back together and running PERFECTLY. Only this time I decided to use C2's 30# software/injectors.
After speaking with a few people about the subject what I've been told could possibly been the cause:
An extremely rich condition causing excessive fuel in the cylinders when I was initially breaking in the motor...which coated the cylinder with unburnt fuel and took away the lubricating properties of the oil. This caused some excessive wear of the cylinder and also did not allow for the rings to seat properly.
Now, if this is really the cause I don't know. But since I put the motor back together it's just fine...and vacuum is reading even closer to 20 then it was before. So, I guess it's "tighter".
And just so you guys know, I was looking through some of my old posts about when I had this motor built and when I installed it...and I had some posts of some very rich conditions and a bad maf sensor AND the wiring too...and this happened as I was just starting my car up for the first time after getting the motor rebuilt.
So, I'm going with that as my cause...
And as long as it doesn't come back i'm fine.
So for any of you guys that are going through a motor rebuild (and turbo) PLEASE make sure all of your tuning is worked out BEFORE you go starting your motor for the first time.
Don't eff around with it. Or you'll end up like me.
On page 12 still bitching about problems with my vr6T.
But now, I have to say that all is well!!!
September 04, 2005
Well,
The motor does have only 750 miles on it and it has been getting progressivly better over the last 300 or so miles.
So maybe it's slowly going away. Who knows. I'll get back to you on it after a few hundred more miles.
September 26, 2005
Since I'm trying to make this a true and complete start to finish Turbo thread I am posting a link to my other thread that has the good news of me passing PA inspection.
This is with C2's 30# setup.
Yay.
December 04, 2005
Just an update for those that wanna keep track of everything that happens with a turbo car:
I think I broke my speedo gear in my trans.
The other day my speedo quit working but at the same time started making noises inside the trans.
Replaced my speed sensor but to no avail.
Will be pulling trans to have it looked at.
Gears shift fine, synchros working perfectly...just no speedo and a rattle inside there that scares me .
Just another thing that can go wrong with just "modest" boost.
So, if you think you won't be putting any "extra" $$$ into your turbo VR6, you're wrong
Another winter project begins...
December 04, 2006
I don't even know where to start with that...
Maybe I'll start another thread for that topic???
EDIT: Here it is
I've already replaced my 2nd, 3rd, and 4th gears...with OEM's.
So, I'm not sure.
February 09, 2006
Update (for those that care):
Car still in the garage. Hoping to fix the trans in the next couple weeks.
I'm actually getting used to not driving it (which is scaring me) . I hope I don't get too used to not driving....
Although I'd love to get my hands on some traction (errr...AWD).
March 11, 2006
Well,
I knew I had something 'not right' with the trans...And I still don't know what it is.
So, I go to back my car into the garage today (it was facing the wrong direction for me to work on it) and then just a very slight noise. Then:
Oil on the driveway,
and this:
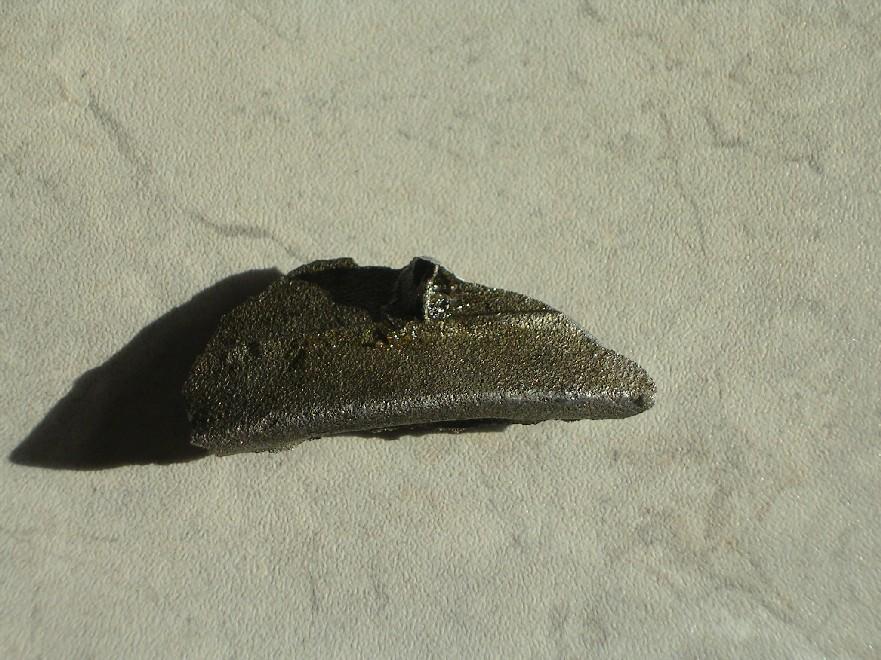
OUCH!
So, no more trans.
What sucks is I haven't even driven this car since it started to make a very slight noise.
Funny thing, is after the trans totally broke and spit that piece out, I was still able to drive the car back into my garage!
The fluid was almost like somebody mixed it with Silver paint.
Back to the drawing board! I barely drove this car after Schimmel rebuilt it.
I'm not sure if I should even try to bring it back to him...it may not even be worth the fight. He will probably think I've been putting insane boost through it.
So, I'm in need of a local (se pennsylvania) guy to take a look at the trans.
March 30, 2006
many of you know my other threads but I have always promised updates so that those that read this thread from front to back will know EVERYTHING that has gone wrong (and right)...
My decision to go O2M swap and asking for help on list
Hope this keeps those of you that care in the loop.
My goal is just so those that think it's cheap to just slap a Turbo on (no matter what you think) know what they are getting into.
But I can also say I think I've had some bad luck too.
April 15, 2006
So, I ordered my O2M Swap...
It should be here in the next few days.
Hopefully this holds up better than the O2A trans does. I'm debating on whether to get a bolt kit (if one is available) for it.
I'm holding off on the LSD for now. I'm going to sell my O2A Peloquin and use that cash to get my new turbine housing (.69 or close) and a 3" exhaust.
I've pulled my tranny but it was very hard doing it all on my own - not lots of space in there.
But I was wondering how I'd get the O2M back in by myself.
I had to loosen all three mounts to move the motor a tad to get the tranny out...
So today I just figured it would be just as easy (and would make the swap easier) if I just pulled the motor.
So, now my motor is out again ... And I'm awaiting my o2m.
This will make it easier to swap flywheels/clutch and install the O2M.
I'll keep this thread updated on the progress (for those that care).
This thread has turned into more of a "cradle to grave" type DIY turbo project thread (hopefully the "grave" part happens a ways from now).
April 25, 2006
Update:
So, my O2M gearbox arrived today and my conversion has officially began!
Here's some more pics for those that care:
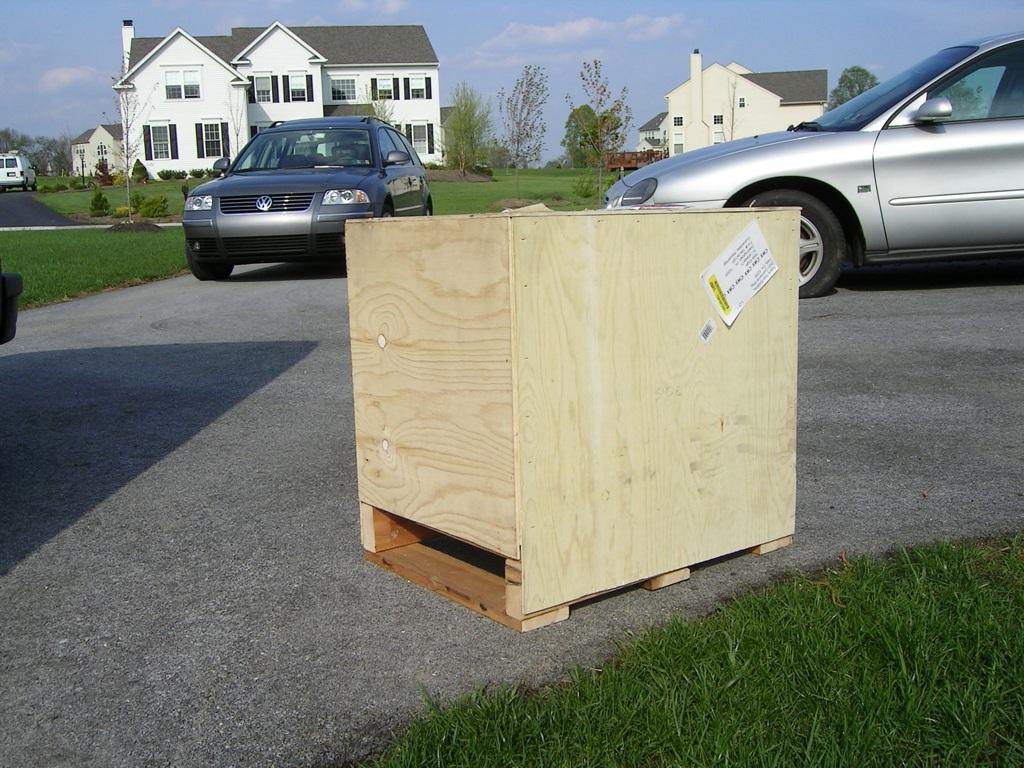
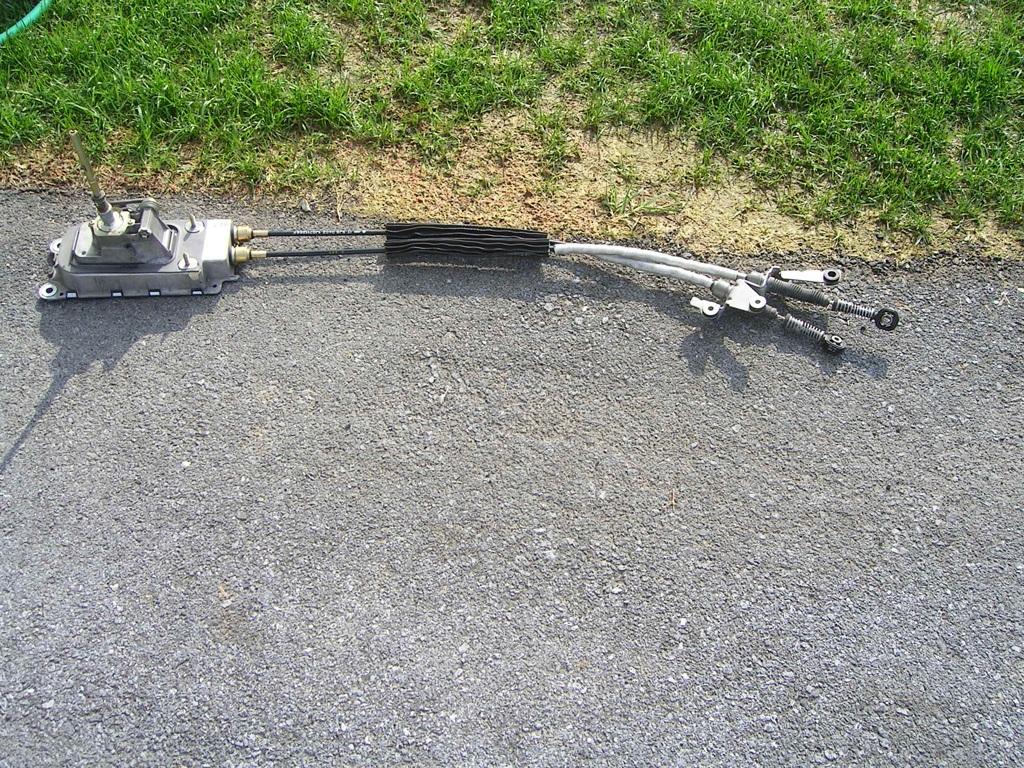

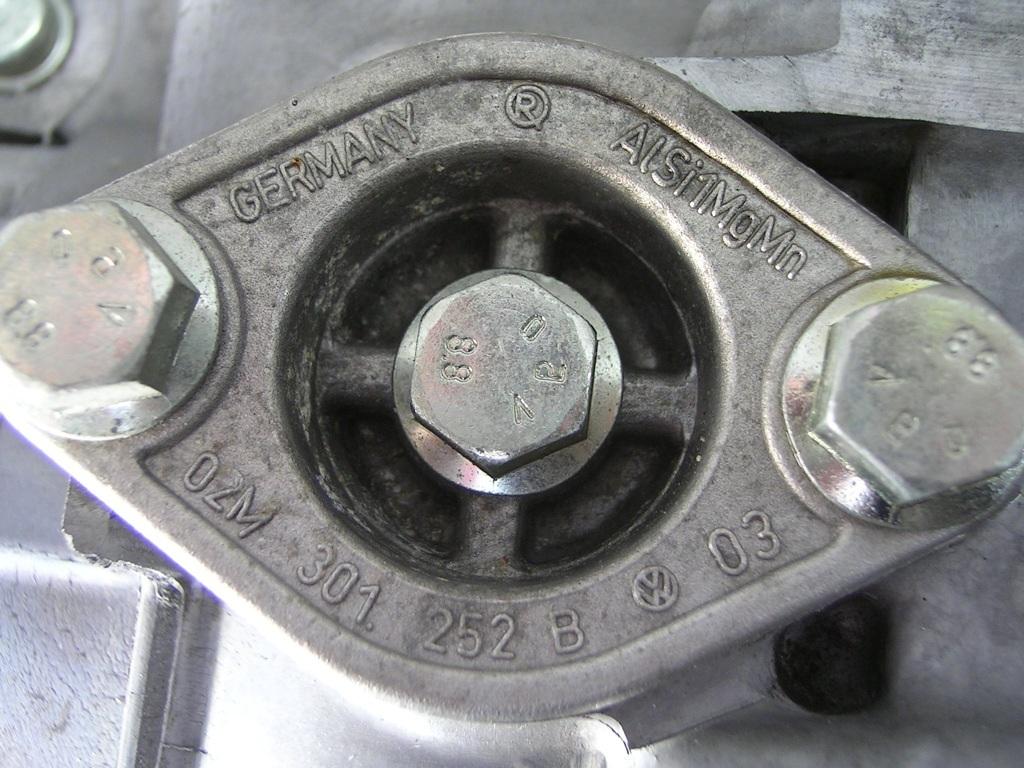
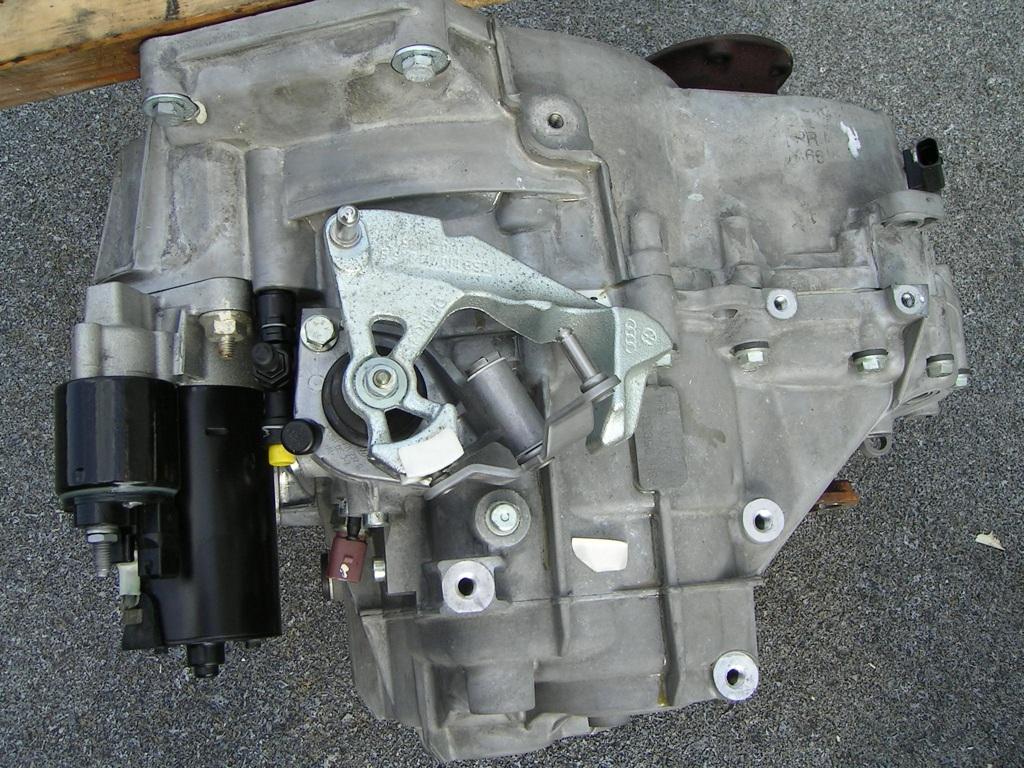
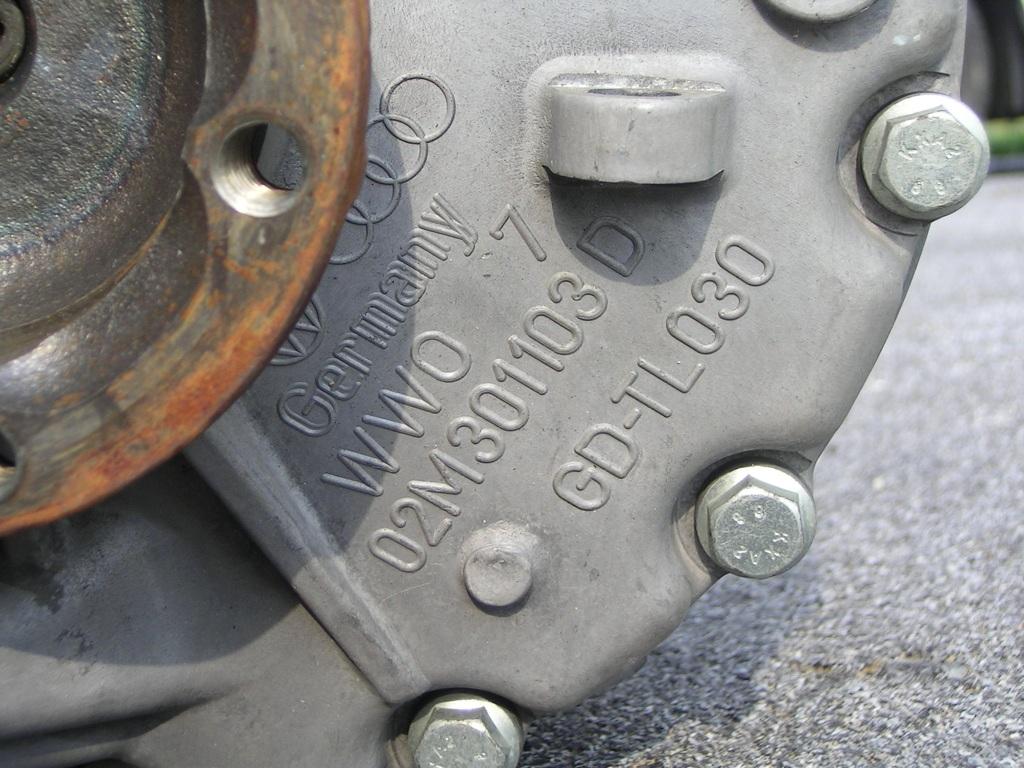
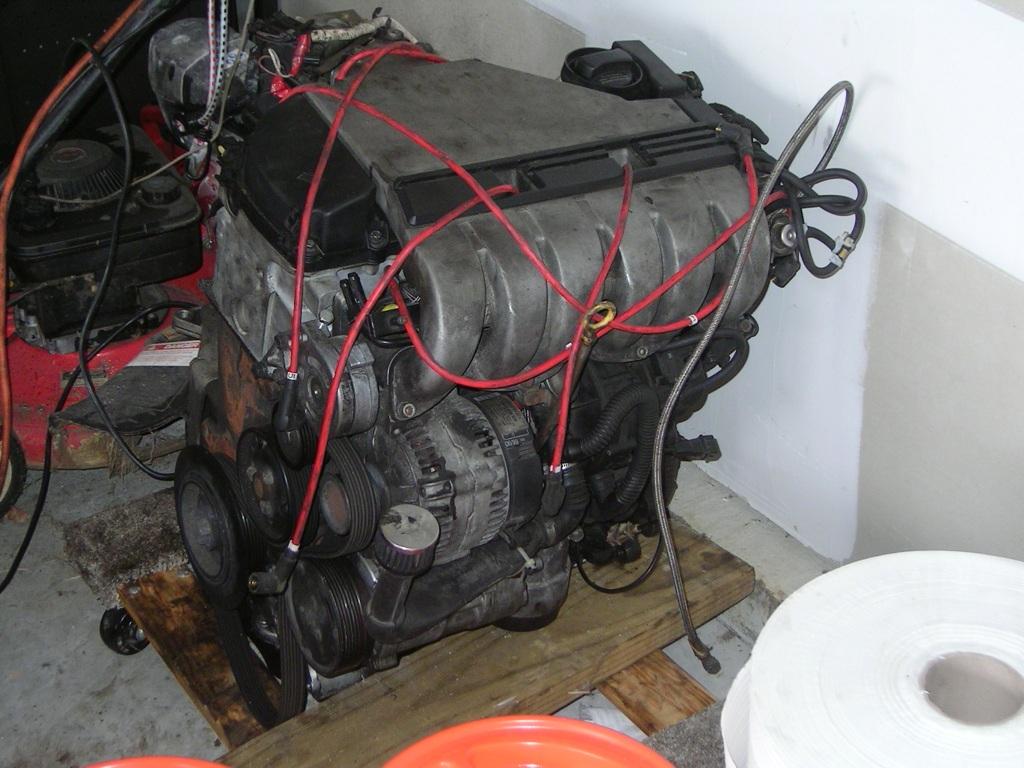
And yep...I pulled the motor again b/c it almost makes it easier to complete:
And the motor anxiously awaiting another trip into the bay (only this time mated to a 6speed )
To Dean at BVAmotorsports for getting me this tranny setup only 10 days after I put down a deposit!!!!
Just look at how well crated it was!
This is how you do business!
May 17, 2006
UPDATE:
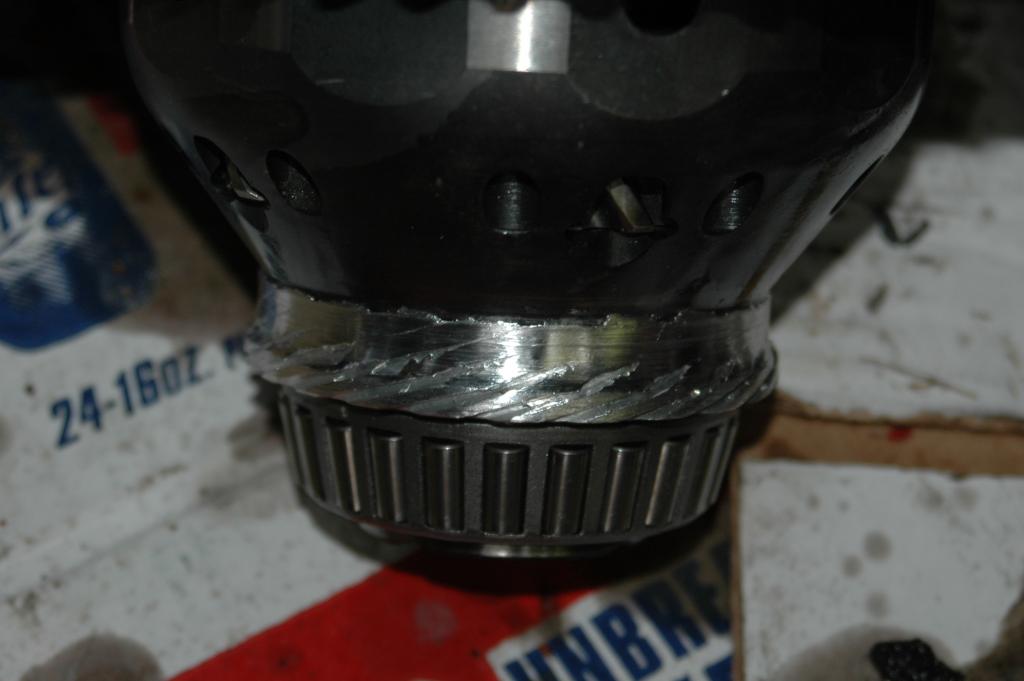
Sold my O2A trans to Paul ("10sec-rabbit") and he pulled everything apart.
Looks like (for the most part) the trans is in pretty good shape except for the actual bolt kit sheared off of the diff. Not good. Still wondering how that happened.
Some pics:


Here's a good pic of all of the bolts that just sheared off:

And why my speedo quit working
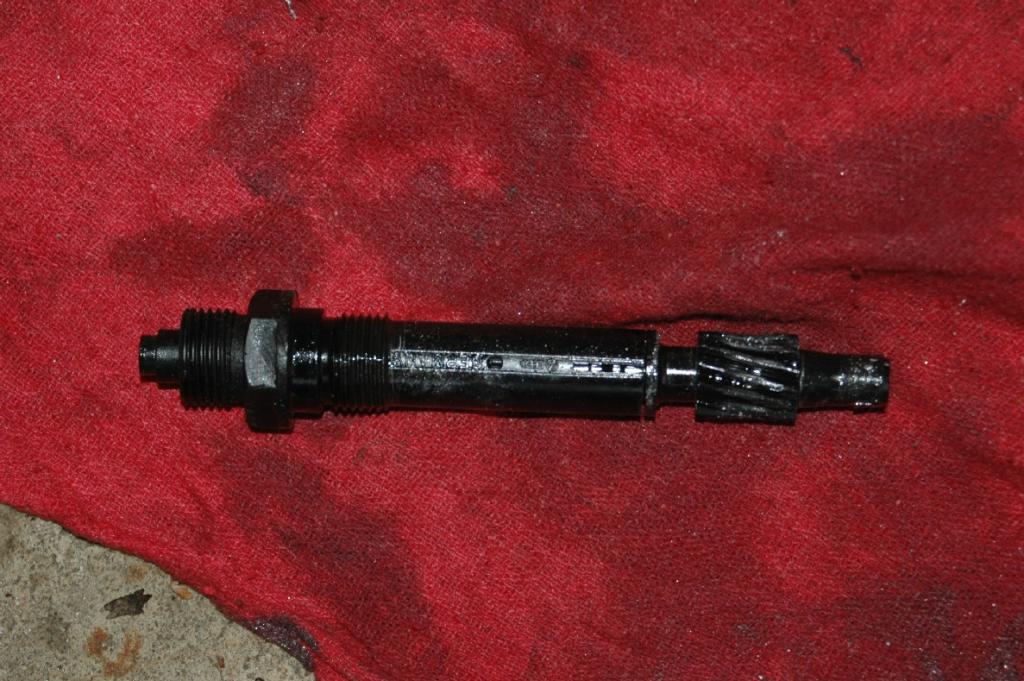
May 28, 2006
A couple updates:
Since I've decided to go with an O2M I also put together a thread outlining what I've done...
http://forums.vwvortex.com/showthread.php?2633108
Also,
Finally, after all of this time I put my water lines on the turbo...
For anybody looking for the size/type thread...the female thread on the turbo itself is gas line thread (whatever the official term for that is I don't know) in 3/8" variety.
Since I couldn't find any gas line fittings that had a barbed end, I then had to get a 3/8" pipe thread fitting to go into that with a 3/8" barb on the other side.
Now, the 3/8" may be a bit too big (I haven't tried getting the coolant line on it yet)...if it is, I'll just throw on a 3/8" to 1/4" barb.
EDIT: I did test fit the coolant lines and they fit perfectly on the 3/8" barbed fittings.
Pic:
This is a pic of the "Danco" brand elbow item I bought:

And the 3/8" thread to hose barb:

Installed:
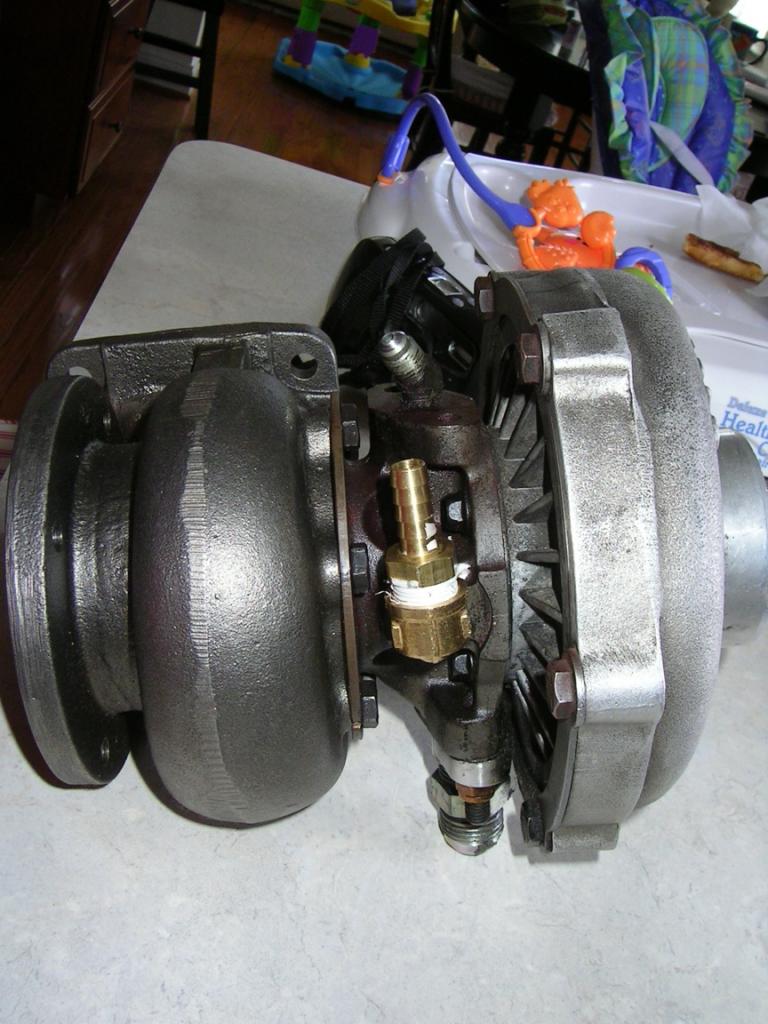
Oh, and if I haven't mentioned it yet...you might notice a .69 turbine housing.
I'll update the thread on that after I drive it.
June 11, 2006
Update:
Car is complete (o2m swap)...
Here is the progress...
But now my clutch is slipping. Dammit.
July 06, 2006
Clutch is only slipping in 5th & 6th gears when it gets hot.
Besides that, it hooks up nicely!!!!
I'll be getting an upgraded clutch soon..and dammit I'll be pulling that ***** again.
July 13, 2006
I had schimmel install the diff when he rebuilt the tranny so I'm still not sure what happened.
On the bigger turbine housing...yea, I've already gone to a .69 from a .58 - but my boost is still moderate (at only 8.5psi).
When I turn up the boost I'll be going up to something like a .89 (if one exists) or .91...whatever the closest "existing" housing is.
B/c I definitely don't want to break the new trans .
September 17, 2006
Update:
Moral of the story (to save the read) is get the turbine/DP wraps and protect the car from heat!
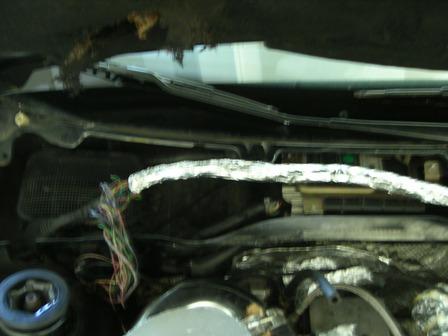
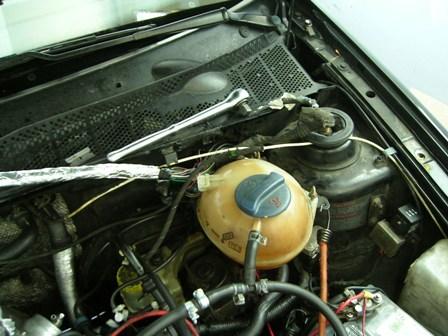
Yea, bad pics...I actually repaired much of the harness in the center...re-wrapped it with high heat electrical tape then used some foil tape...Ghetto but very useful. Has saved my coolant hoses as well.
But those two pics show the actual harness. This doesn't go into the windage tray until it is at the pass side. Then it goes into the ECU.
What happened is this:
Turbo heat finally broke down the wiring harness (my bone-head didn't even think that would be a problem). It literally passes right over the turbo.
I had the onset of a small electrical fire after seeing some weird electrical problems (mostly related to my abs).
When I pulled over I saw melting wires and smoke coming from the pass side wire harness there just before it goes into the compartment where the ECU is.
Apparently, some wires melted into each other under the extreme heat over time, then the coating melted off....causing some wires to make contact with each other...which caused this to occur.
It's a real mess, my abs still isn't working b/c as I'm tracing back how far in the harness the burnt wires went, I can't get that far. Looks like I may have to pull the dash and most of the harness. I can't even see the bad wire b/c the coating melted completely off so I don't even know what wire it is (using color-coding from the wiring schematics).
So, as I said at the beginning. Don't go cheap when turbo'ing your car. Make sure you get those heat wrap thingamajiggies.
December 03, 2006
Update...
New wiring harness is installed and car is running perfectly.
Now I'm just going to finish up some little things that I've been needing to do over the past few months anyway.
Car is up on 4 jackstands in my garage for the winter....
Going to install my 13lb wastegate spring, in-line Walbro, and fix some other misc cosmetic things and get her ready for spring .
See you guys out there in the next few months!
December 04, 2006
Oh, I forgot to add that I have installed my turbo wrap, downpipe wrap (inferno wrap good to 2000degrees constant and 3000 deg spikes) and am still awaiting my other DEI turbo insulation kit that I will use to wrap my Exh Manny.
I'll snap pictures to add to this thead later. I'm thinking of relocating my ambient air temp guage (in MFA) to read under-hood temps...
I think that would be cool since I never care how hot/cold it is outside.
February 20, 2007
Here's my update:
Walbro was installed Jan '07...Ran a little light into the dash that tells me that the pump is running. Not loud at all.
Installed all of my heat shielding material (turbo wrap, downpipe wrap, exhaust manifold wrap) and man does this turbo spool!!!!
I upgraded from .58 to .69 and now I feel like I'm back at .58 with the top-end of the .69....
It's always in boost now. I start building boost at just over 2k (ie. 6th gear at 2k rpms if I mash it I start building boost). It's mad.
Trust me, if anybody is on the fence about this you're making a mistake.
I'm not sure exactly what the temp difference is under the hood but it's very noticeable.
New engine wiring harness was installed and everything checked out. Been driving the car for a good month so far with no problems.
Here's me talking about how well the thing drives with Jeff's updated chip.
February 23, 2007
Did I forget to add in this thread that I removed my AC? If I did, I'm sorry...
So, the connection at the firewall is now gone. I had to hammer it to the side when I installed the turbo but when I went to charge it I had a very small leak there and couldn't hold pressure.
At that point I just yanked everything out - and I guess I may have forgotten to update this thread on that 'small' detail .
Yes, long thread with lots of frustrations...but I'd do it again! I love this car.
December 31, 2007
Just a little update:
So I guess I blew out a seal (or seals) in the turbo. Since I got my Passat I've been beating on the VR a lot lately. I'm not sure why, but I think it's b/c the Passat gives me my "dub-fix" - so before I had it I would baby it a bit for fear of breaking it. Just a guess.
Either way,
I've been having fun with it and this afternoon I started it up and warmed it a bit to take her out and sure enough I'm burning oil. I can actually see the oil trying to come out of the housing somewhere. No, not a leak anywhere around the turbo...it's blowing out the exhaust as well as smoking at the turbine housing.
So, I guess a new T04e w/o water cooling will only last so long.
Time for an upgrade.
PM me Paul.
Let's talk.
EDIT:
I'm also thinking that I might have just made a mess in my turbo since I was idling the car for about 45 mins (don't ask....if you have kids you know how time can get the best of you ).
So, now I'm thinking it might just be a case of soaked seals (happened once before, smoked like a chimney).
I knew I should have put a restrictor in for times like this.
So, only time will tell. The car is going under the knife again soon anyway (new clutch, LSD for 02m, etc).
EDIT:
Not blown seals. Everything is fine. I just need a restrictor on the turbo oil feed.
When idling it likes to back up.
December 30, 2009
Sorry....
Update is that there is no update. Haven't driven the car in over a year.
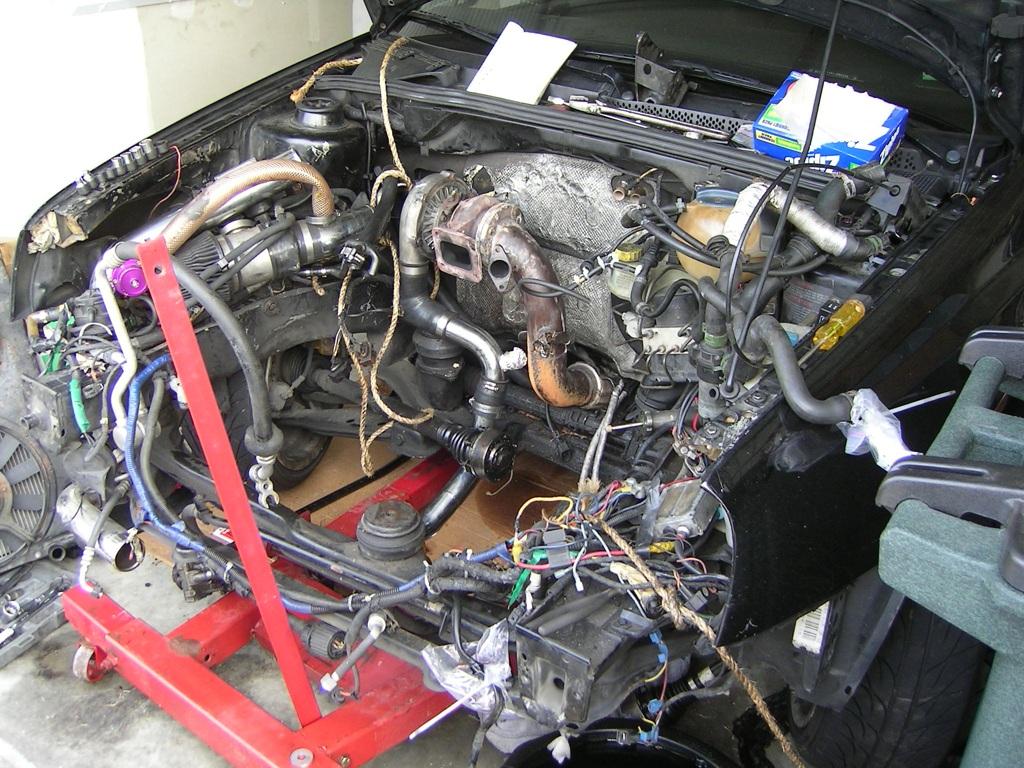
Lost the time to get some "maintenance" done. I pulled the front end off last year to re-do the intercooler piping then ran into a brick wall (figuratively of course).
July 05, 2010
Bump (for a couple reasons):
1) Got the pics working again
2) Getting the car back together after 2 years of sitting in the garage!
C2 Drivers side (TB) short runner, re-vamped (obviously) Turbo piping, Euro Rad Support.
So, on the Euro Rad Support with C2motorsports DRIVERS SIDE short-runner....seems it's VERY close to the euro rad support.
Anybody use this (drivers side short runner) with the euro rad support?
October 31, 2011
Well,
I've installed the rad support, re-routed my coolant lines, did some very small cleaning up under the hood, etc...
Car runs bug having some issues with a couple wires broken somewhere. Still not driving daily yet. Getting there. No recent dyno runs. 6speed still excellent.
December 28, 2011
So...
Tidying some things up under the hood (more than posted about earlier). I had an exhaust leak so I removed my turbo to put a new mounting gasket in. Turns out the turbo has the *slightest* amount of shaft play. This put my "project" (if you can call it that) into a different direction.
My re-route has never been ideal..when the re-route was welded it warped the metal a bit. It was doable but never an easy task to put new gaskets in (wastegate and wastegate flange to reroute) so I've decided to go with ATP's "new" (been out a couple years) downpipe v.2 which has the re-route already built in. You need the 44mm wastegate (ka-ching $) but it's got the v-band setup. So, saying bye bye to the lame old-school bolts and BS and finally upgrading. So, why get the turbo rebuilt when I'll have to get a v-band/tangential exhaust setup (needed for new downpipe)?
What's on order:


and:
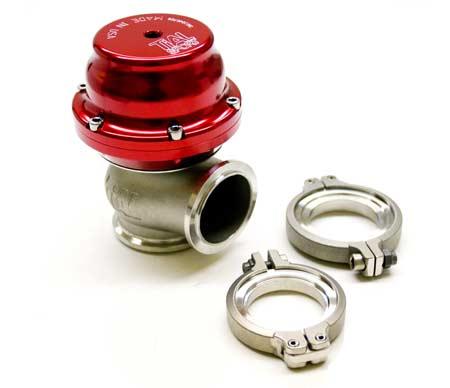
And from Killa (again!):
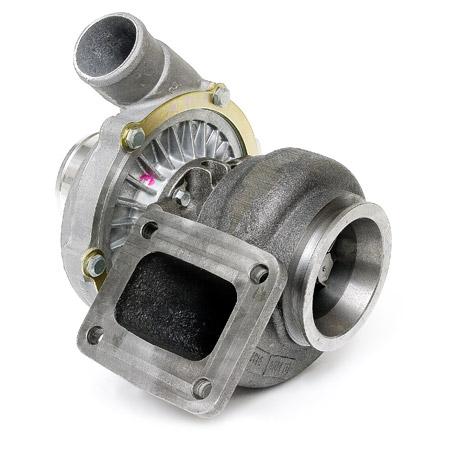
And then (finally) time to turn up boost to about 15.
Since this thread has gone on for years I felt the need to update you guys on everything. I'll probably rebuild the turbo and sell it (unless somebody wants it for cheap to rebuild yourself).
December 30, 2011
Well, as you know those aren't my actual pics but the ATP stuff showed up yesterday and just ordered the turbo from Killa today.
January 10, 2012
It's here.
Doing work tomorrow.
44mm tial WG and new vband turbo downpipe going on soon. Old stuff coming out.
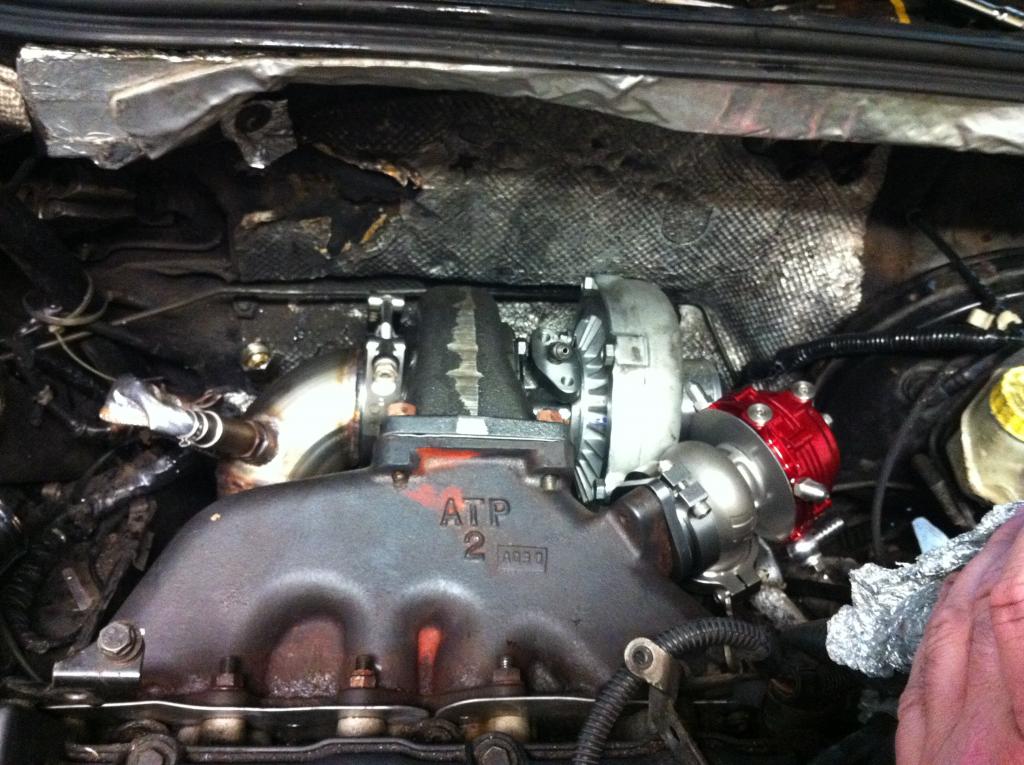
June 07, 2012

The new v-band setup is all installed. New vband t04e turbo, 44mm Tial Wastegate, new atp 3" vband downpipe. This is an ATP downpipe with Tial WG with built in re-route. Hell Yea!
Turned boost up to 15psi.
November 17, 2012
On to a fab shop locally for custom intercooler piping on Tuesday.
It's getting close to getting back on the road.
November 20, 2012
On her way!
February 11, 2013
Custom intercooler piping almost done. Ill let the pics speak for themselves. Sorry, iPhone pics only at this time...
Moved power steering reservoir:
Blow off valve re-route:
February 13, 2013
Ok,
So hoping to get this thread/discussion going again like it was back when I started it years ago...
Couple questions for you guys...
My next purchase is going to be a boost controller and wideband.
After all of these years I only have a boost gauge. No controller or wideband. But I'm looking to turn things up this time, my wastegate springs are set to 16psi right now. The car isn't running again yet but will be soon.
Obviously I'm looking to get a controller that has no spikes at all and is easy to use.
In a wideband I'm looking for something rather simple yet accurate. With a pod-style display. No boxes or anything big like that. I'm not tuning or racing with it...
Anybody have any ideas? I've got my eyes on the aem wideband and profecB boost controllers (thanks Jeff Atwood) .
And a pic as it sits now:
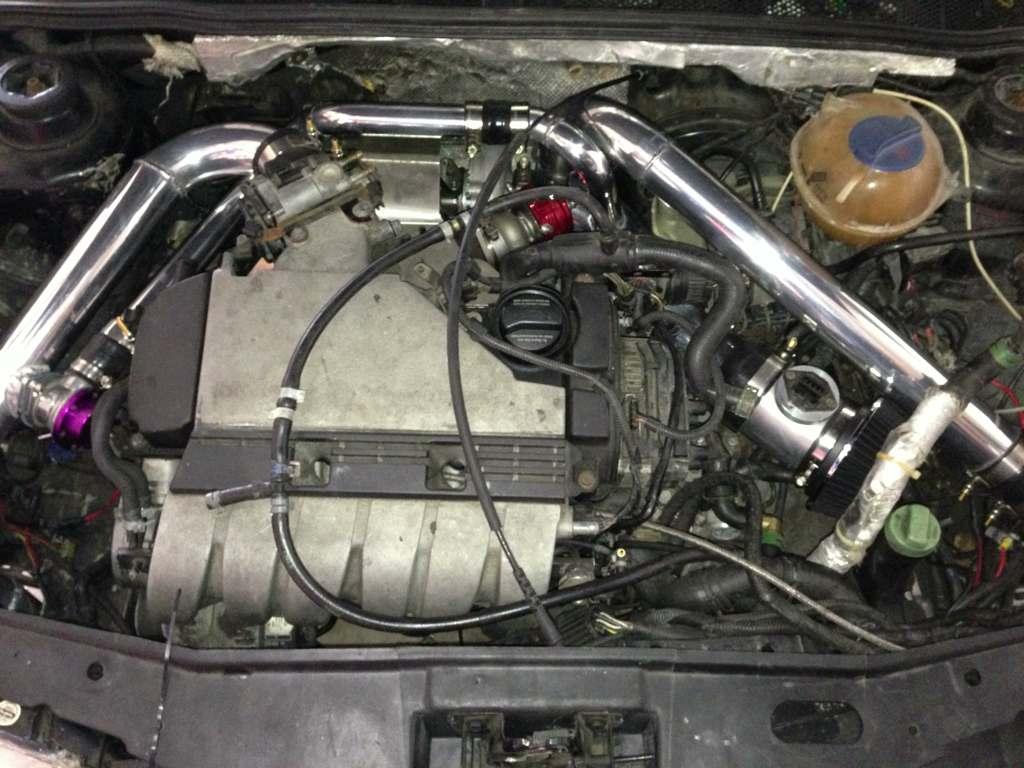
March 07, 2013
Guys,
Help requested with some heat protection. Seems my turbo oil outlet (that goes to oil pan) braided line now interferes slightly with my new ATP downpipe. It touches the flex section but only slightly.
I see a lot of heat protection sleeves at summit racing but unsure what is the right stuff to get. With exhaust temps getting extremely hot I'm unsure what will be a good form of protection. Most of them protect against radiant heat but I'm more worried about conductive heat.
Since this is a braided line I'm worried it'll get extremely hot under certain conditions.
Any ideas guys?
You need to reroute that line pronto. A heat sleeve is not meant to contain contact heat, only radiated. Build a new line, and if it's sufficiently far enough (i'd say about 6-8" sideways) no sleeve necessary, if it is braided, most is good for 300-500f radiant heat.
March 20, 2013
Well, what I have is the atp straight 18" oil return "kit". 10 AN straight fittings and 18" braided line.
What I just ordered was:
Custom ATP drain line (-10 braided line 20" long with 2 90 degree bends at each end)
1/2" NPT (45 degree) to -10 AN (2 in case I need them)
I'm not sure exactly what ill need until I get them. I will keep you guys posted.
45 degree fittings.
September 09, 2013
No big updates here...Been busy trying to get my B6 running (which I did, Thank God). Anyway, the biggest problem (besides motivation) has been this damned oil drain line. With the new setup it was contacting the downpipe, and as we discussed that's a big problem.
So, as stated in my last post I ordered a new custom line from ATP (they never fail for me, always have what I need and ship it quick). When I tried running the line it just didn't work correctly. This line is still quite rigid and just didn't fit correctly with the existing fitting in the oil pan.
You'll see in this picture that I need to move the fitting from where it's at to where my index finger is.
Re-install oil pan, put car back together and I should have a running car (I hope). Oh man, it's been years. Crazy.