You must be logged in to rate content!
16 minute(s) of a 297 minute read
6-9-2014
Thanks!
Here's another update from Saturday night:
- Installed Turbo Studs
- Installed Coolant Hoses onto Turbo
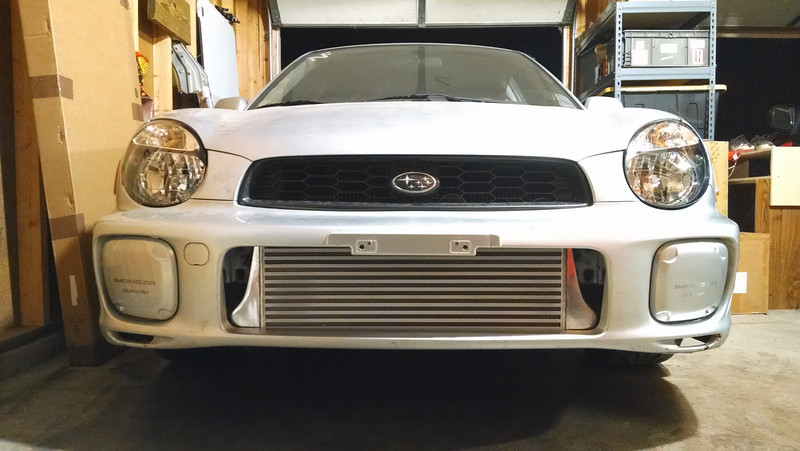
- Installed FMIC Core
- Instaleld FMIC Piping
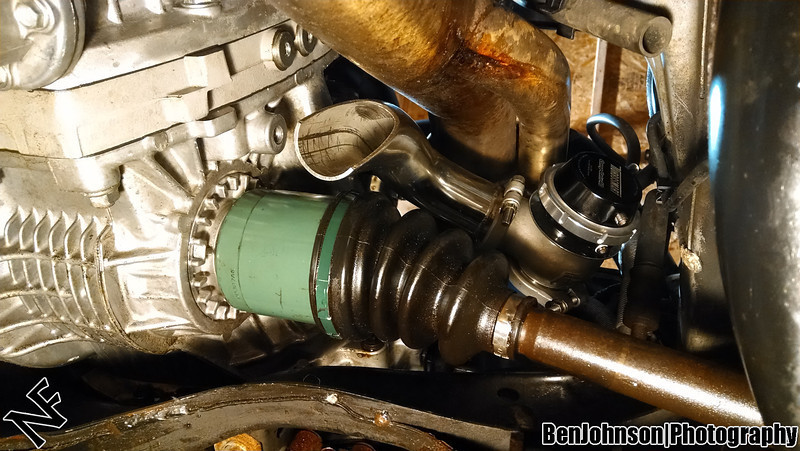
- Installed BOV
Things that still need to be done:
- Cut Bumper for FMIC
- Install Bumper
- Install Foglight Covers
- Install Front Lip
- Install Grill
- Install Headlights
- Install Downpipe
- Install Catback Exhaust
- Swap Hood
- Remove Charcoal Canister
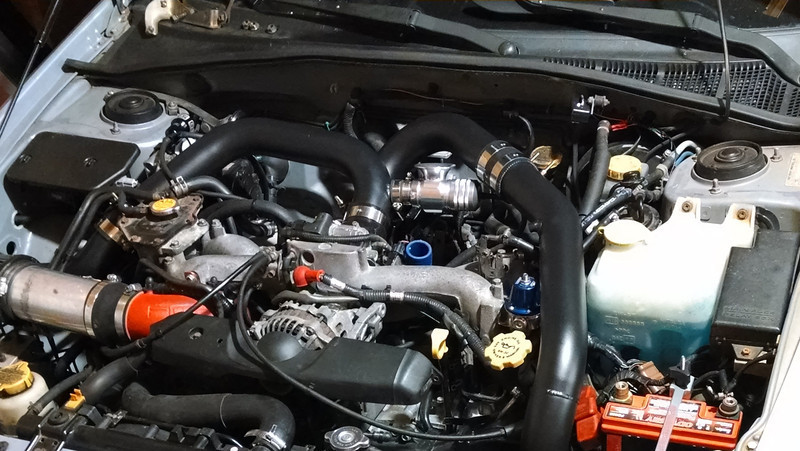
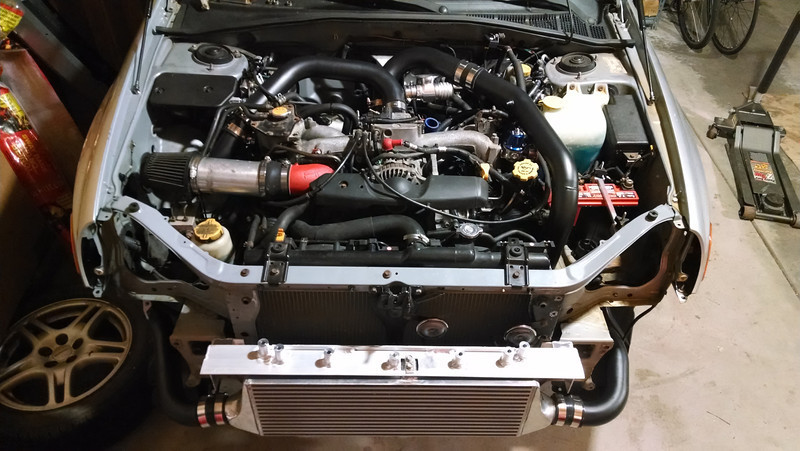
The knock off TurboXS FMIC went on pretty well. No major issues, but a few small things that had to be resolved.
I already had the bumper and bumper beam off. The bumper beam bolts tend to be quite rusty so use PBlaster and try not to snap anything off. Mine all came off fine despite the corrosion. The new bumper beam bolts in easily. I mocked up my grill to try and get the beam mounted at the right height. The grill and core basically locate the beam where it needs to go. Hopefully that all works out once the bumper is on.
The core mounts to the bottom of the frame with two brackets that go into bolt holes that are normally used for the front u-brace and maybe the splash guard. I have both of these removed so I don't quite remember. The threaded holes are really just nuts welded inside the frame rail. When taking off the u-brace I broke one of these nuts. I had to cut the bolt off and then drill a hole in through the top of the beam and drop a long both through to mount the core. It worked great and is very secure.
With the core secured on the bottom, and the beam mounted on top, I then bolted the beam to the core. I didn't realize there was a rectangular bracket in the kit so I tried to use a bunch or washers all while being very confused why they cut a square hole. Later on I found the rectangle bracket and it all bolted together very easily once that was in place. Here is a photo.
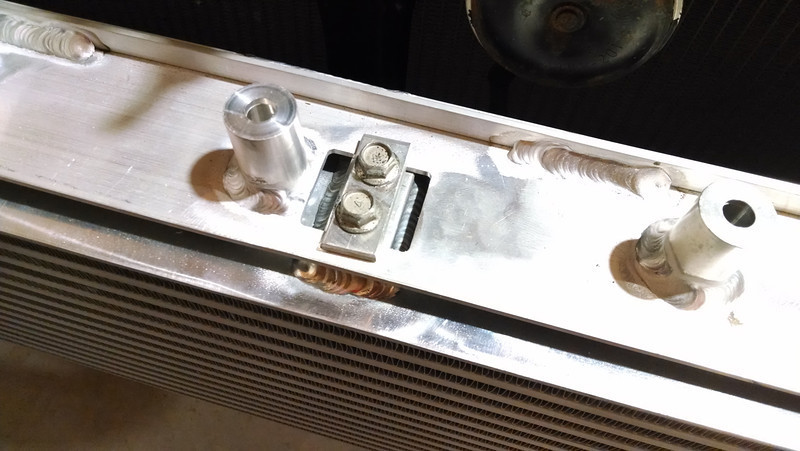
After that I pulled the OEM coolant overflow and replaced it with the small one they provide. The mounting bracket works well. Next I laid out all piping, couplers, and clamps based on photos from online. The pipes were much less ambiguous than on the 08+ kits, so it was pretty easy to figure out where everything went. I then bolted up the driver's side pipes. First loosely fitting all the pipes and couplers and once it was all lined up, then tightening it down. No issues. Perfect fitment.
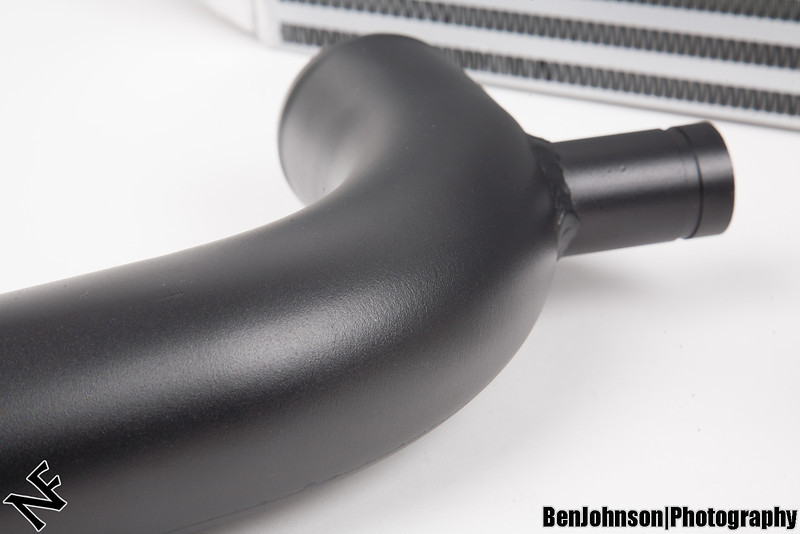
Onto the passenger's side. The first thing I did was put the edging in to the hole the FMIC piping passes through. Edging fit perfect and looks like it will work great. Then I mocked up the lower two pipes. The top pipe has the BOV mounting flange. I bought a TurboXS BOV due to the (assumed) bolt on fit. Unfortunately the mounting flange OD was too large and the BOV wouldn't fit on. This was an issue that I had noted previously and knew I needed to resolve.
I had purchased some coarse grit sandpaper and went to work sanding it down. After I while it still didn't seem like I was getting much closer and I noted that the BOV comes with a mounting flange (for welding onto a custom setup). But I realized I could just use a small house and use the adapter onto the other flange. Here are a couple photos to make things more clear.
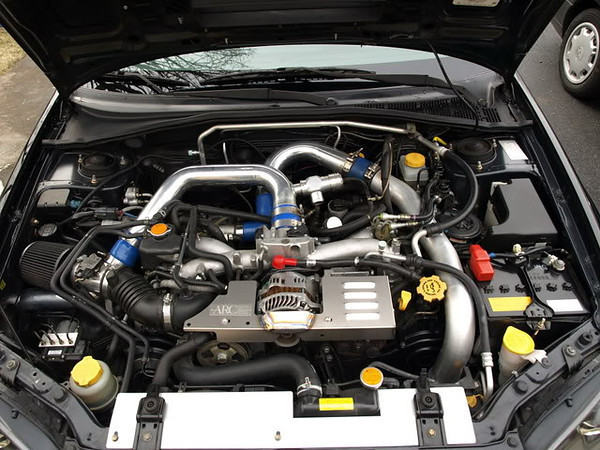
Supposed mounting point on my piping kit:
TurboXS BOV is supposed to be able to slide on and be secured with set screws (not my photo):
TurboXS BOV comes with weld on flanges (one aluminum and one steel):
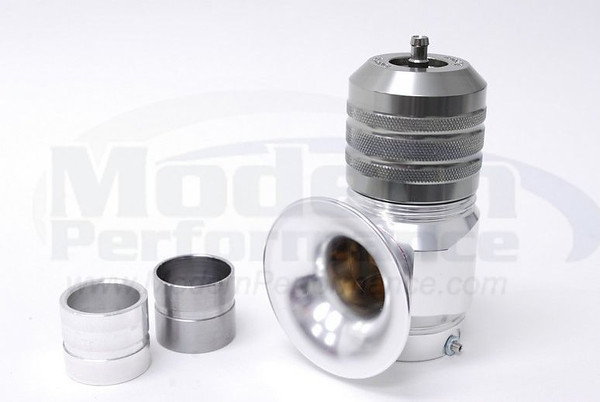
So I got out the pipe cutter and chopped down the flange on the pipe to only be ~1/2" long and then cut off a short piece of hose and clamped it on. Then I stuck the BOV adapter into the other end of the hose and clamped it down. Finally the BOV goes onto the adapter flange and the set screws hold it on. Not quite as elegant or pretty as the normal setup, but it is secure and shouldn't give me any issues.
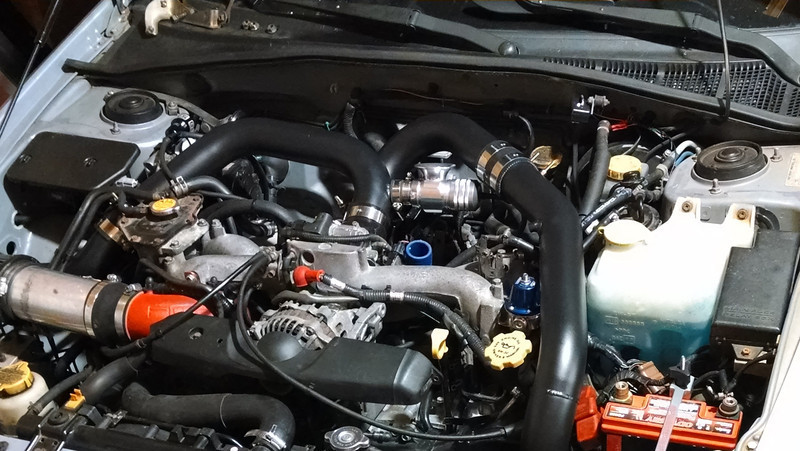
Once that was on I bolted that pipe onto the throttle body and the rest of the passenger side piping. I had purchased the correct throttle body reducer coupler (since it is not included) and used one of the clamps I had used with the throttle body previously. The fitment on this pipe was a little tight but not too bad. Everything is clamped down securely.
I did not use the drivers side mounting bracket. I seem uncessary and will likely break. The 08+ kits don't have any hard mounting points for the piping and it was never an issue, so I think I'll be fine. The hot and cold side pipes do touch near the throttle body so I'll have to keep and eye on them for wear.
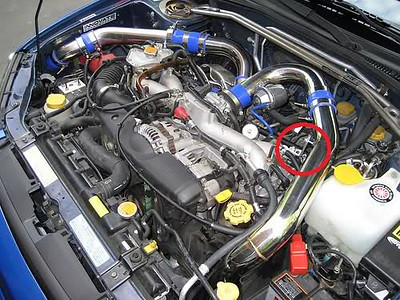
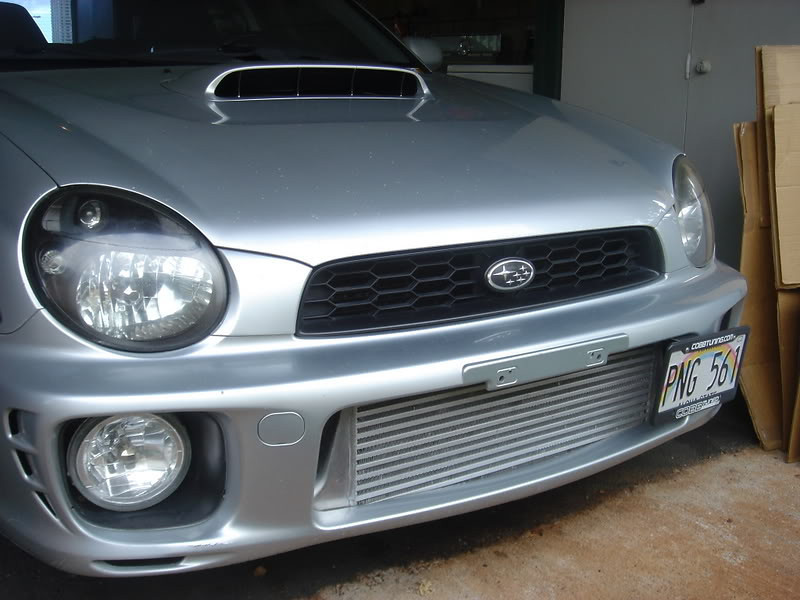
So, the FMIC is all on. Just need to hack up the bumper to get it to fit. Any suggestions on the best cutting tool? I think I might just go with a Dremel with cutoff wheel, unless something else will work better. Will a jigsaw or some other reciprocating saw work? I'm worried it's too tight of a space to work. Anyone know how much of the lower section of the bumper needs to be cut out? From what I can tell it looks like about ~1" from the front?
Picked up a new Dremel and a mini hacksaw. Hopefully one of these will work.
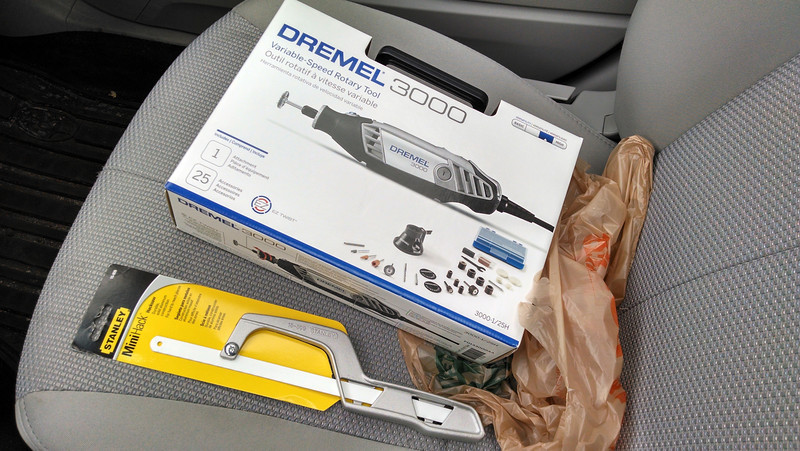
My battery powered Dremel seemed like a good idea when I bought it years ago, but in the end the battery just doesn't have a lot of power and runs out fairly quickly. So this plug in Dremel should be a nice upgrade.
I did cut some of my 2011 bumper with the Dremel and high speed cut off wheel last time, so I know it will at least work, but it's not a real clean cut and kind of melts the plastic. It cuts quick though, haha. I did notice that Dremel makes a saw attachment now. Anyone have experience with this?
http://www.amazon.com/Dremel-546-01-4-Inch-Diameter-Crosscut/dp/B00008Z9ZQ/http://www.amazon.com/Dremel-670-Mini-Saw-Attachment/dp/B00008Z9ZP/
6-10-2014
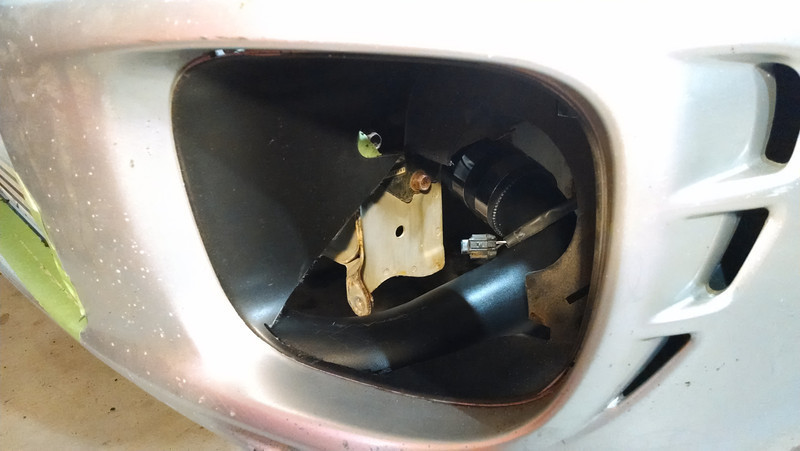
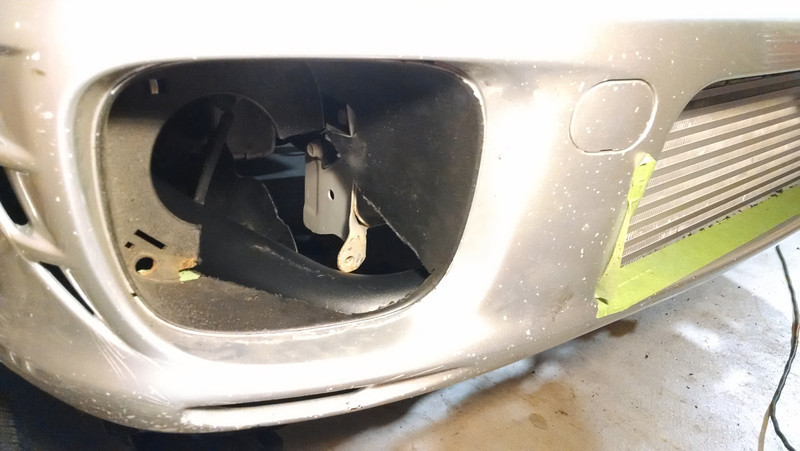
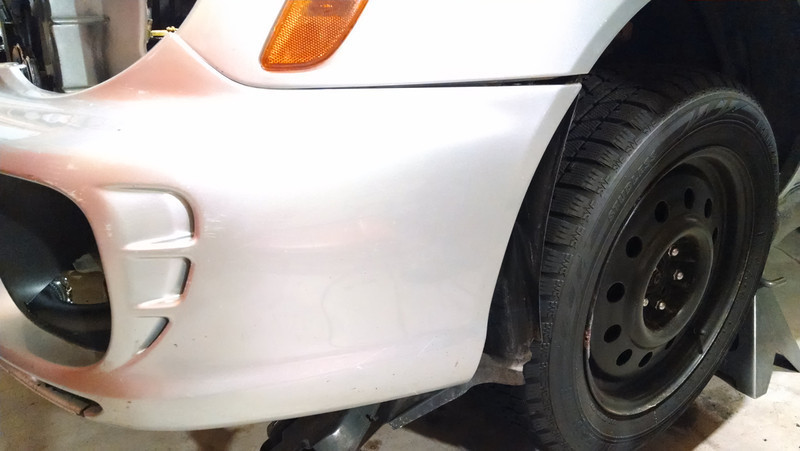
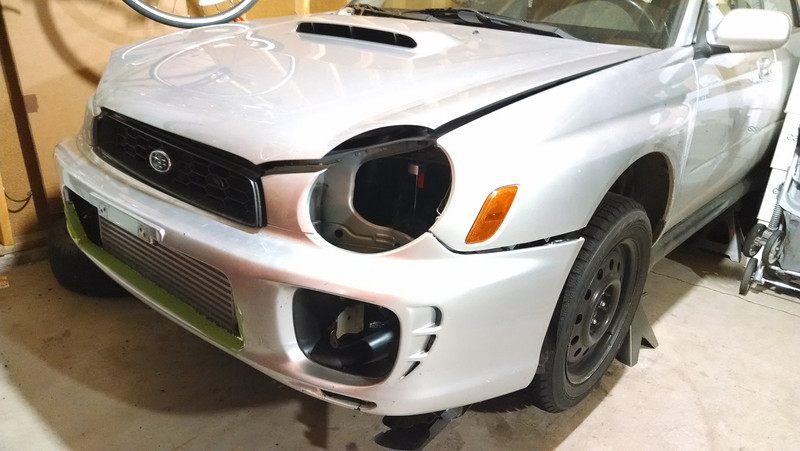
Here are some photos of the FMIC/bumper fitment issues. I've basically cut as much as possible that will still be hidden by the fog light covers. From what I can tell the core probably needs to be lower? I'll try shimming the mounts with washers and see if that helps any.
Driver Side:
Passenger Side:
Front (No Issues):
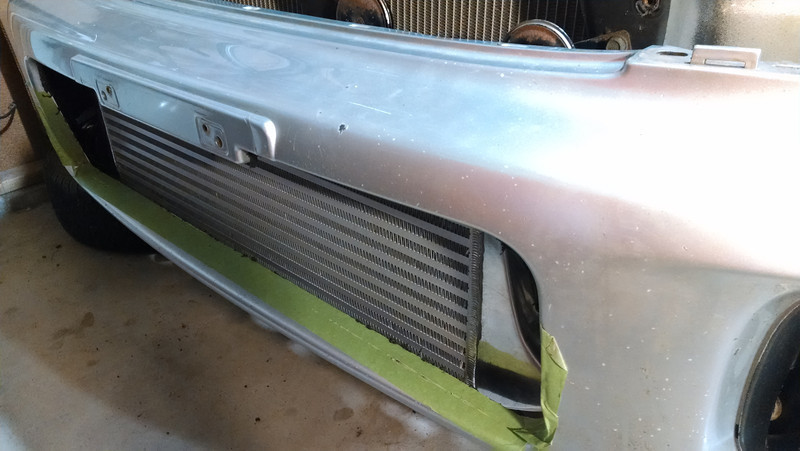
It is somewhat close to fitting, but the piping makes the front of the bumper sit a little to high, and that pull the alignment of the sides of the bumper so it won't fit.
Mock Up:
6-11-2014
My brother and I did a couple more hours of work last night. First we swapped the hood. Getting the GS dampers onto the new hood was a bit of a challenge since they were already bolted to the car. One I ended up popping the clip off to get it on, the other I just muscled the damper into the right spot and got the bolt in.
Next I went to install the downpipe only to find that it wouldn't fit on with the EWG dump tube in place. I am pretty sure I could do it on my 2011 WRX, but it just wasn't happening, so I took the EWG dump tube off. Then put the DP on, and then up the EWG dump tube back on. Getting that EWG dump was quite a pain to do with the DP on. Very little room to work.
That's all the further we got over a couple hours. Still need to bolt on the
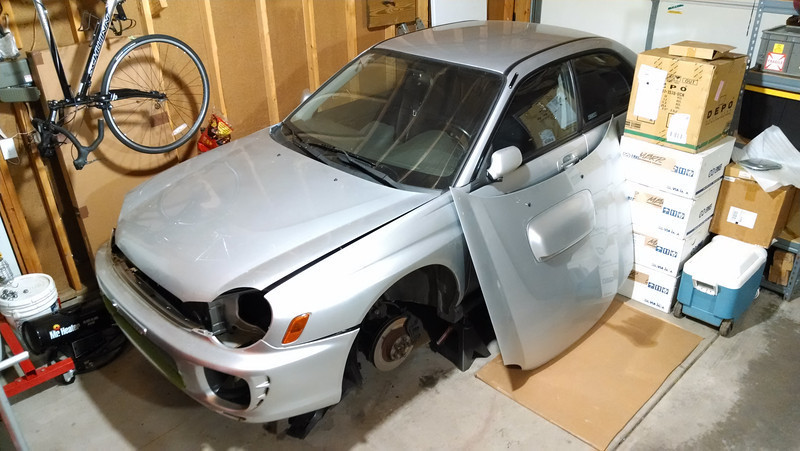
6/10/14 Update
- Install Downpipe
- Swap Hood
Things that still need to be done:
- Install Catback Exhaust
- Remove Charcoal Canister
- Plug BPV Recirc Hose
- Cut Bumper for FMIC
- Install Bumper/Fog Covers/Lip/Grill/Headlights
- Install Wheels/Tires
6-13-2014
Last night I installed the catback and removed the charcoal canister. The gasket between the midpipe and axleback was fused to the flanges. I chipped off as much as possible and then put the sanding barrel on the Dremel and ground off the rest. Flanges ended up fairly smooth and clean and should make a good seal. Used GrimmSpeed 3" exhaust gaskets on the midpipe to axleback and midpipe to downpipe. Everything bolted up great. Looking forward to hearing how it sounds.
I also removed the charcoal canister. The mounting bolts were really rusty. I sprayed them with PBlaster, but they weren't moving with the impact gun or with a ratchet. I eventually just muscled them and broke two of the bolts clean off, but the third on stripped the nut so I had to cut the bracket off with a cutoff wheel. The clamps on the hoses also were rusted frozen so I just cut the hoses off. Now basically all of the evap system has been deleted.
I almost forgot, but I also plugged the BPV recirc hose. The hose is 1.25" ID and a PVC pipe cap for a 3/4" pipe fits perfectly. The walls on the cap are 1/4" so the OD ends up being 1.25". It slips right in and I clamped it down just to be save. I zip tied the hose to the intake manifold so it wouldn't just be flopping around.
Now all that's left is getting that bumper to fit on, and then getting the tires mounted and put on the wheels.
6-16-2014
6/13/14 (Friday):
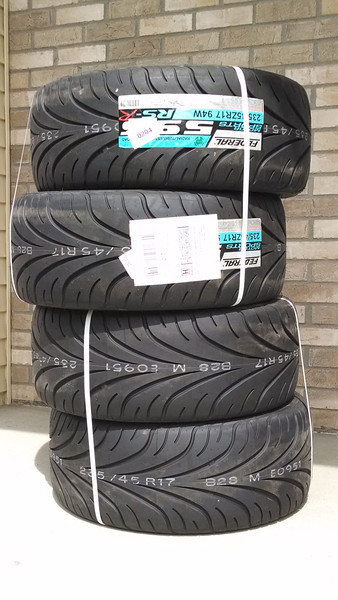
- Federal 595 RS-R Arrived
- Dropped Off Tires To Be Mounted
- Bought A Set of Stock Rear Axles (Just In Case)
- Adjusted FMIC Piping
To get the bumper to fit on, all I had to do was loosen the clamps on the couplers going to the core. Then angle the couplers down and back as much as possible and then tighten the clamps back down. The pipes angle off the core at a little bit of a downward angle, and the bumper fits pretty well.
The cuts turned out pretty good. Did the Dremel with high speed cutoff wheel for the cutting and then the Dremel with a sanding drum to clean things up. I didn't need to cut nearly that much off for the foglights, but it's all hidden behind the covers so it doesn't matter.
6/14/14 (Saturday):
- Installed Hood
- Installed Bumper/Grill/Lights
- Removed Fender Liners
- Installed Fog Light Covers
- Started Car - Oil Leak
Saturday evening the wheels/tires got dropped off. Saturday night my brother and I installed the flat hood, finished installing the bumper/grill/headlights, and put on the fog light covers. I didn't have brackets for the fog light covers, but some 4" long 1/4" bolts worked fine. They aren't quite the right angle, but they'll hold things on. Realized I didn't have headlights bulbs. Still need to buy those.
After he went home I got everything ready to start up the car for the first time. Dead battery. Jumped it (after priming the turbo). Started it up and heard a leak. Look under the car and oil is dripping out at an alarming rate. Turn off the car. Made a big mess in just a few seconds.
After somewhat cleaning up the mess I checked around and figured out the leak was coming from the oil feed line (FP oil feed) on the back of the head. I tried tightening it down and got the banjo bolt to turn a bit more. I thought I had it solved so I redid the whole process and it still leaked. It was getting really late so I cleaned up a little more and then called it quits for the night.
6/15/14 (Sunday):
- Fixed Turbo Oil Feed Leak
- Started Car
- Put On Wheels
- Drove 20 ft In/Out of Garage
Sunday night I pulled the oil feed line off the head and checked it out. Everything looked fine. I was a little suspect of the washers. The ones FP includes don't appear to be copper. They just look like a regular washer. I decided to try reusing the OEM washers and banjo bolt. I dug that out and started putting things back together.
At some point I realized that when the oil line points straight up (like I had it before), the wrench flats on the FP line hit the head casting and prevent the banjo fitting from sitting flat against the head! Over-tightening it would have just bent/broken something. I found that if point the hose straight down there is plenty of clearance.
The OEM line doesn't have this issue since it is a solid hardline with nut with wrench flats. Just a hardline soldered onto a banjofitting. It can sit flush without any issue. Once I had the FP oil line oriented properly and tightened down I started up the car and no leak! I did use the OEM bolt and washers, but I don't think that was the issue. Just the alignment and interference.
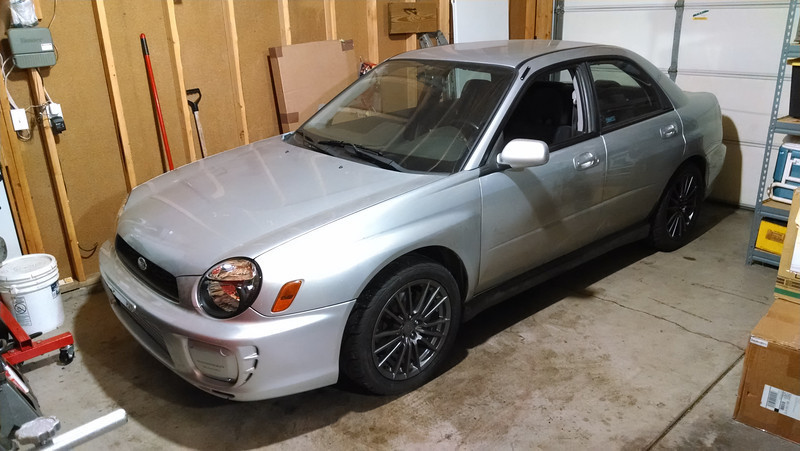
I threw the wheels on and took the car off the stands. Still no headlight bulbs and it was late so all I did was back it in and out of the garage. Hopefully will get it tuned soon, and then take it to BIR this weekend for Proving Grounds 2014.
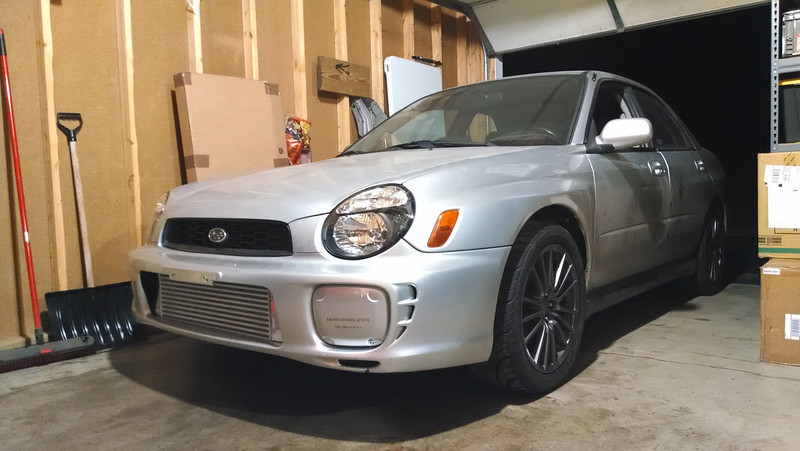
Thanks! Can't wait to get it tuned!
Here's a little more info on the turbo oil feed line issue.
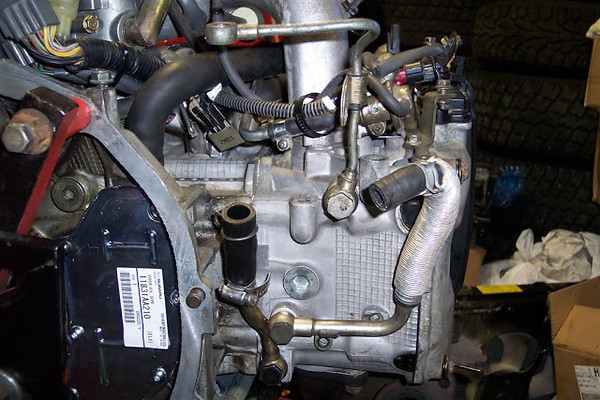
The 02 WRX is non-AVCS and therefore the OEM oil feed line goes of the back of the head and straight to the turbo. It does not go both directions as some of the AVCS setups do. It just uses a normal banjo bolt instead of the dual exit one. Here's an example of what it looks like stock:
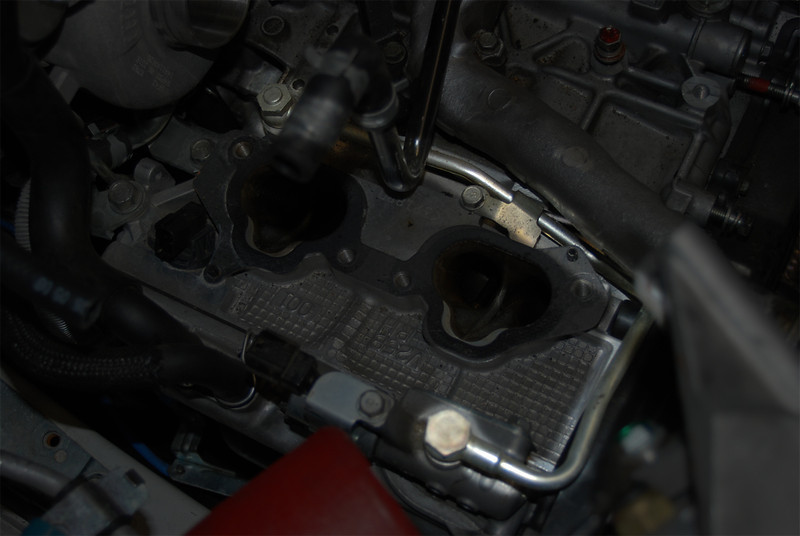
My motor does have AVCS (I am not using it, but it's hooked up), but the newer motors pull the AVCS feed from a different banjoon the top of the motor. So it can still use the simple turbo oil feed line on the back of the head. Here's a photo showing how the oil feed for the AVCS is setup.
I bought the Forced Perfomance "NON-AVCS" oil line kit. It's meant to connect to the back of the head and go directly to the turbo. Very simple design. Just a banjo on each end and a hose between. The end of the hose has a nut for using a wrench to tighten down the banjo bolt.
http://store.forcedperformance.net/P...LSSSubaru.html
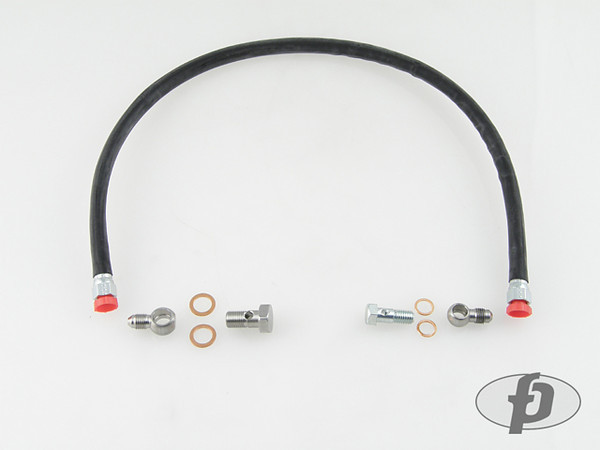
The issue is with the nut on the end of the hose, before the banjo. Unless the nut just happens to align so that there is a flat side on the same flat as the banjo, it will interfere when mounted to a flat surface. This is what happened to me.
I pointed the hose up, and the nut hit part of the casting on the head, so the banjo wouldn't sit flat. I had to point the hose down and there is a carved out portion that it sits into perfectly. The bolt tightens down fully and no leaks! Simple solution, but quite a headache.