You must be logged in to rate content!
260 minute(s) of a 536 minute read
1-10-2021
2001 Porsche 996 LS1 Conversion Thread
Compliments of 1dirtyZ @ www.ls1tech.com
02.14.10
I know this might **** off a lot of other car enthusiasts , but heck thats a huge part of the appeal of such a conversion !
So after searching for a long time and doing all my homework and research I decided to go ahead with this project
Ill be putting an ls1 based engine in a 996 porsche ( 1999 to 2007 body style), this wont be a race car kind of conversion , but a proper daily driver with most amenities and systems working .
The plan is to have a dependable daily driver that I can take out on long cross country trips without worrying about breakdowns, initially planning on matching the original hp output, but instead of 420 to the crank , I plan on getting 420 to the wheels .
It will have air, heat , all power stuff , a proper stereo system with navigation , good gas mileage, and a comfortable ride and all the instrument cluster working . basically have it where if a person drives it they would never know it was a hybrid ( until you stomp on the loud pedal).
Ill be documenting every step of the process as best I can throughout the build process in this thread. This wont be one of my good enough engineering kind of builds where a week later the car is somehow blasting down the highway, instead it will be a long term project where I take my time and do it real right
This build will comprise of several steps , first of is getting the car into my garage and making it into a roller .
Next is getting the engine/ trans in and getting all the essentials working so that the car can drive under its own power.
Then comes the long task of fixing all the little odds and ends to get the final product.
After the car is done and running, i plan on getting a new shortblock in along with a set of turbos ( gotta use the intercoolers and ducts for something ) , but thats thinking waaaay ahead .
Any how , on with the build ; originally I was looking for a regular rear wheel drive 911- 996 for the project, but as luck has it I found a turbo awd one without the engine and trans. After doing some research, I found out that retaining the AWD is not a problem so I decided to go with this car:
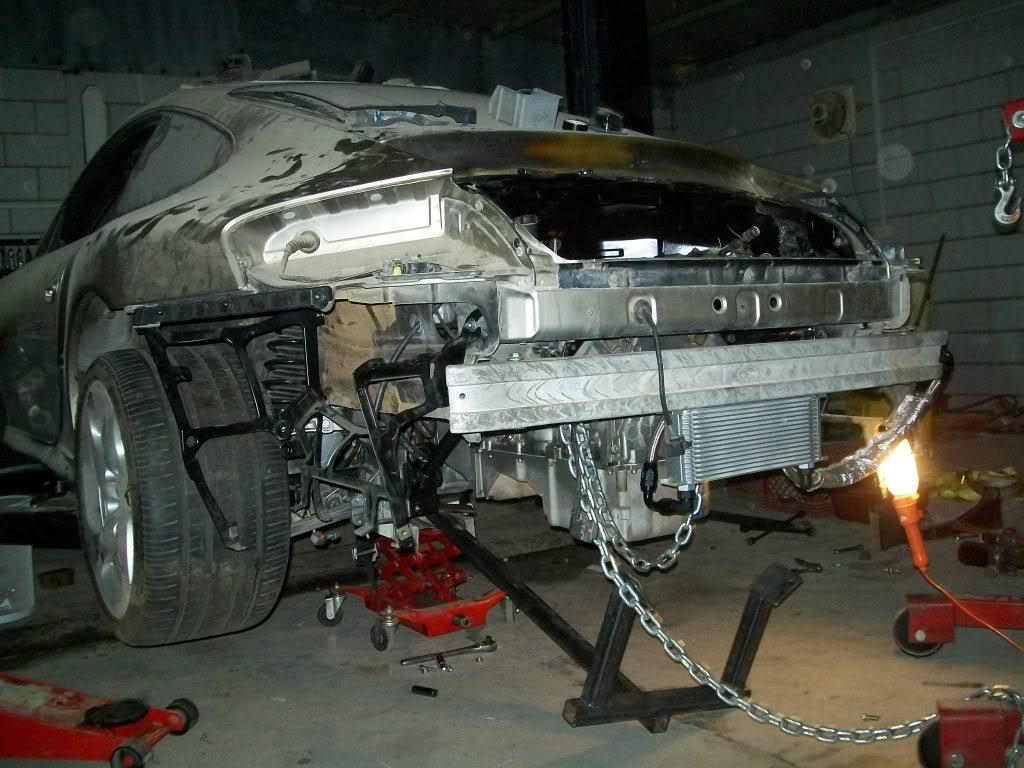
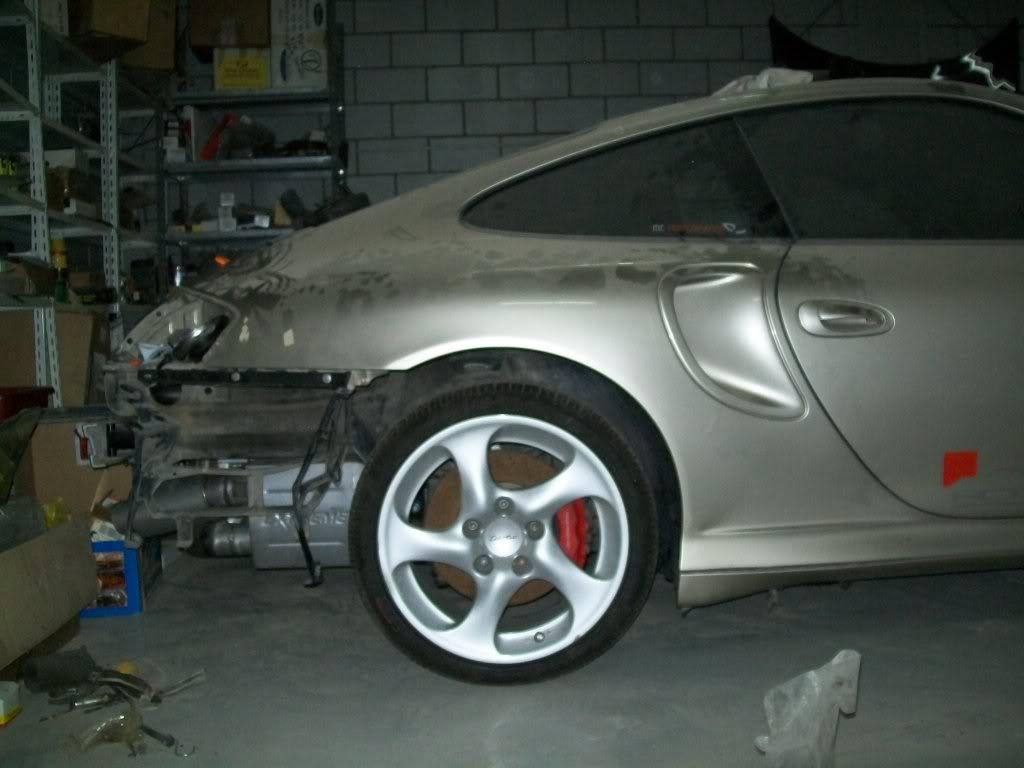
The car had an engine compartment fire before, and now is missing a bunch of stuff from the driver rear side rear. I need to get control arms, knuckle, caliper and rotor. but first is getting the thing cleaned up to assess what I need to do. I already have the longblock sitting in the garage ready to be installed. But that will have to wait until I fab up some engine mounts and other stuff.
So to sum it up, I have to :
- Clean engine compartment
- Clean rest of the car
- Get a to order list going with priorities
- Start ordering suspension stuff and tranny
- Start mocking up the engine in the compartment
- Start building an engine cradle so I can jack the thing into place
here are pics of her first moments in the garage
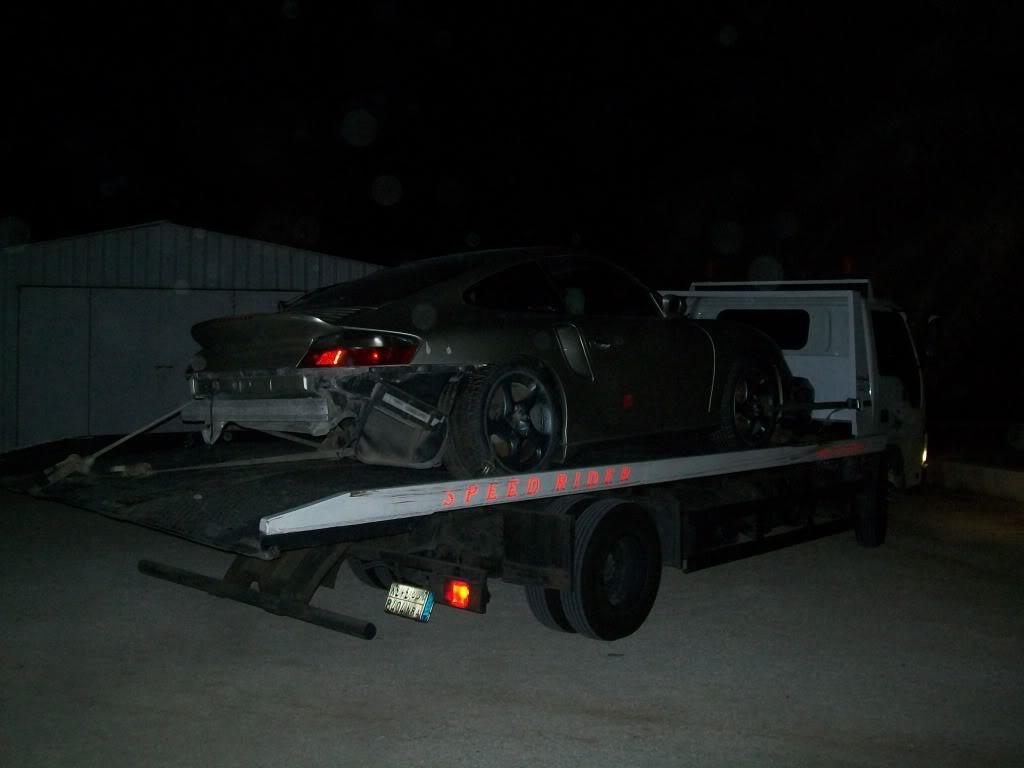
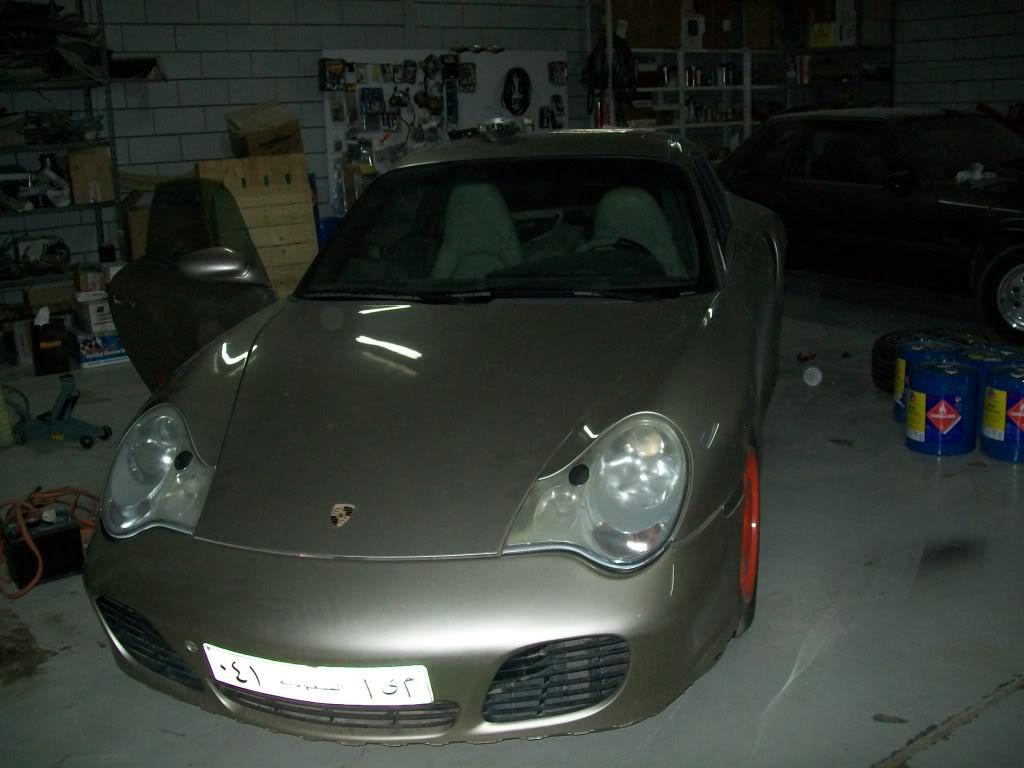
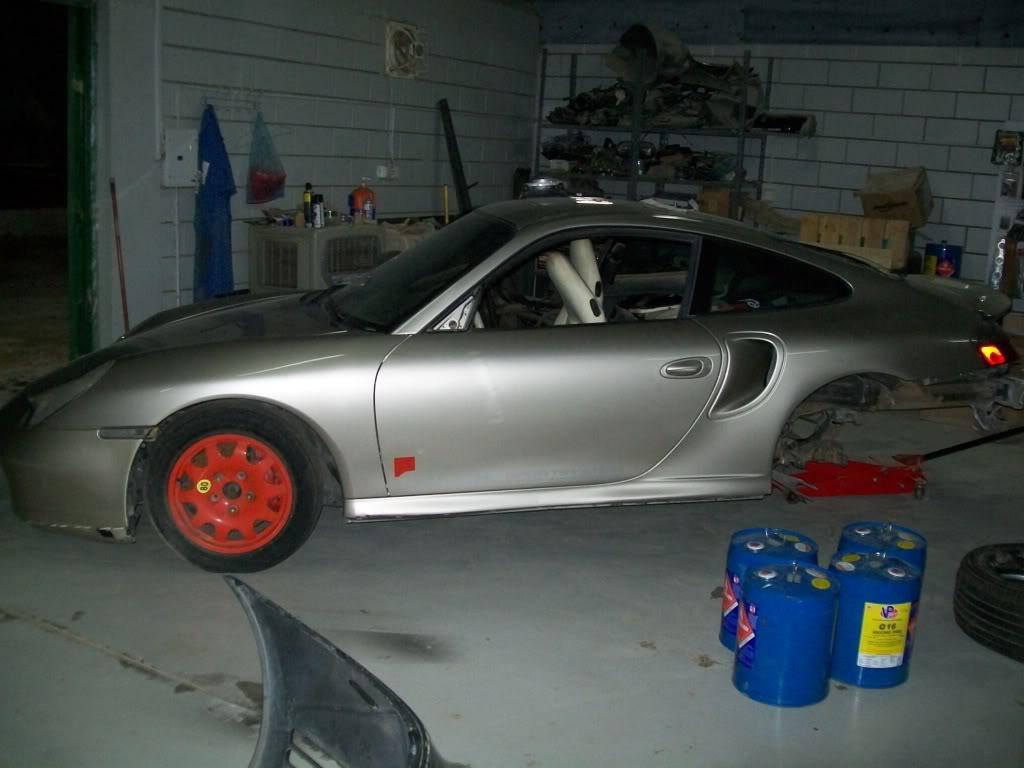
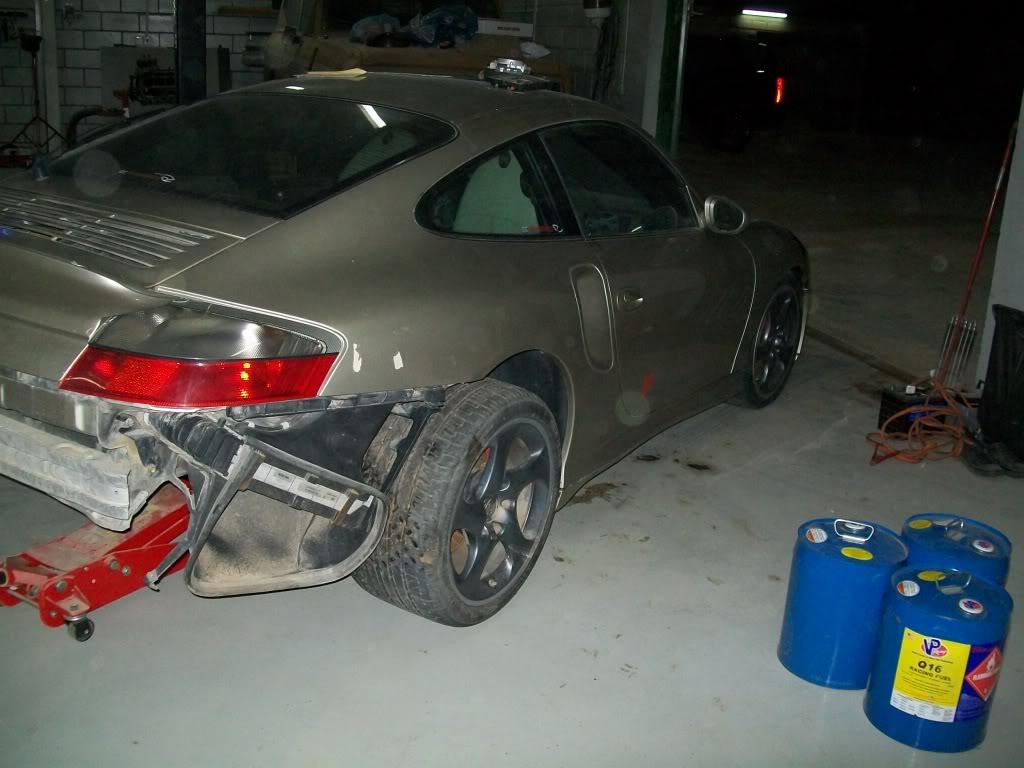
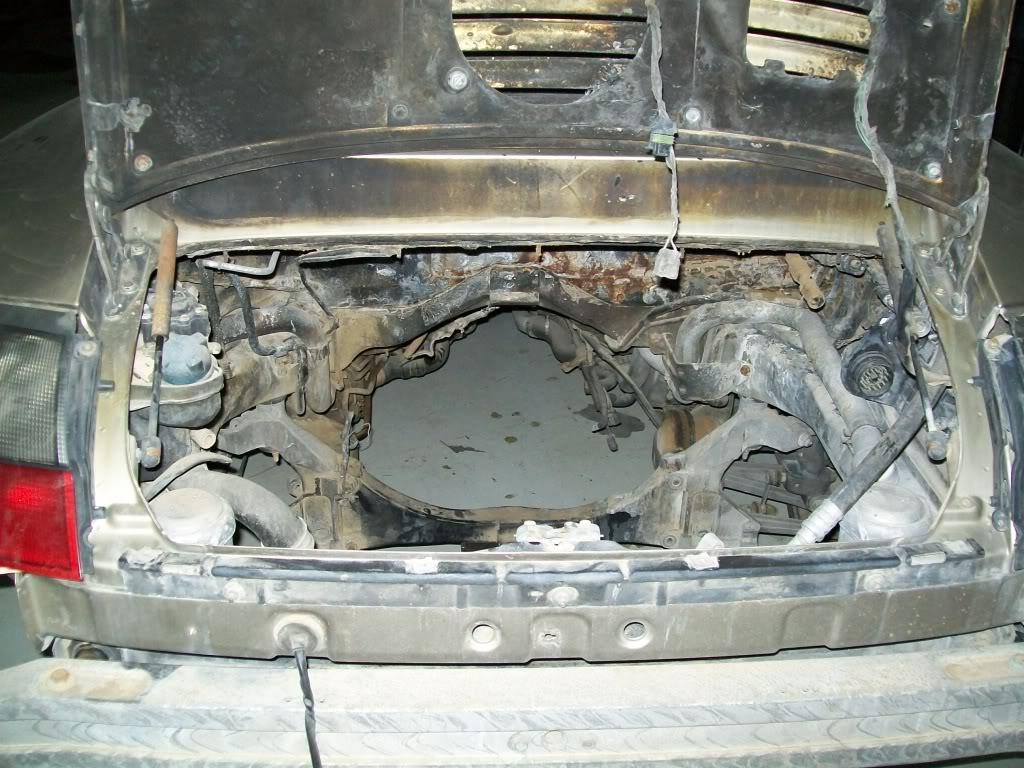
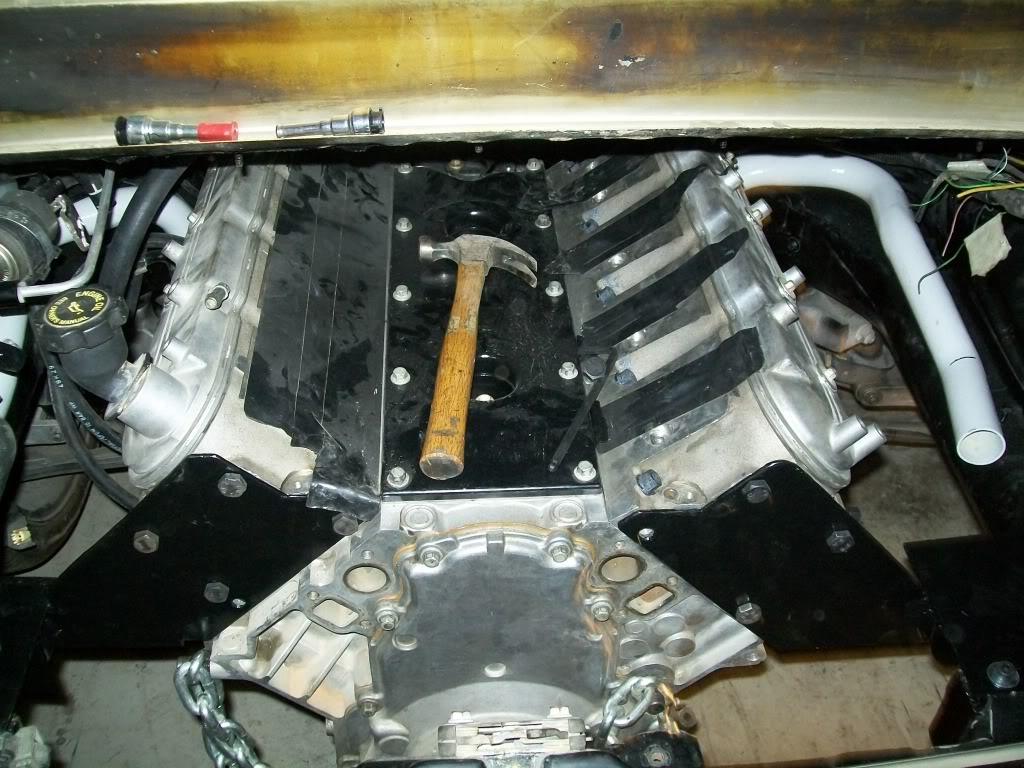
and given how excited i am about this project , i immediatly threw in the mockup engine
engine compartment with a mockup ls longblock :
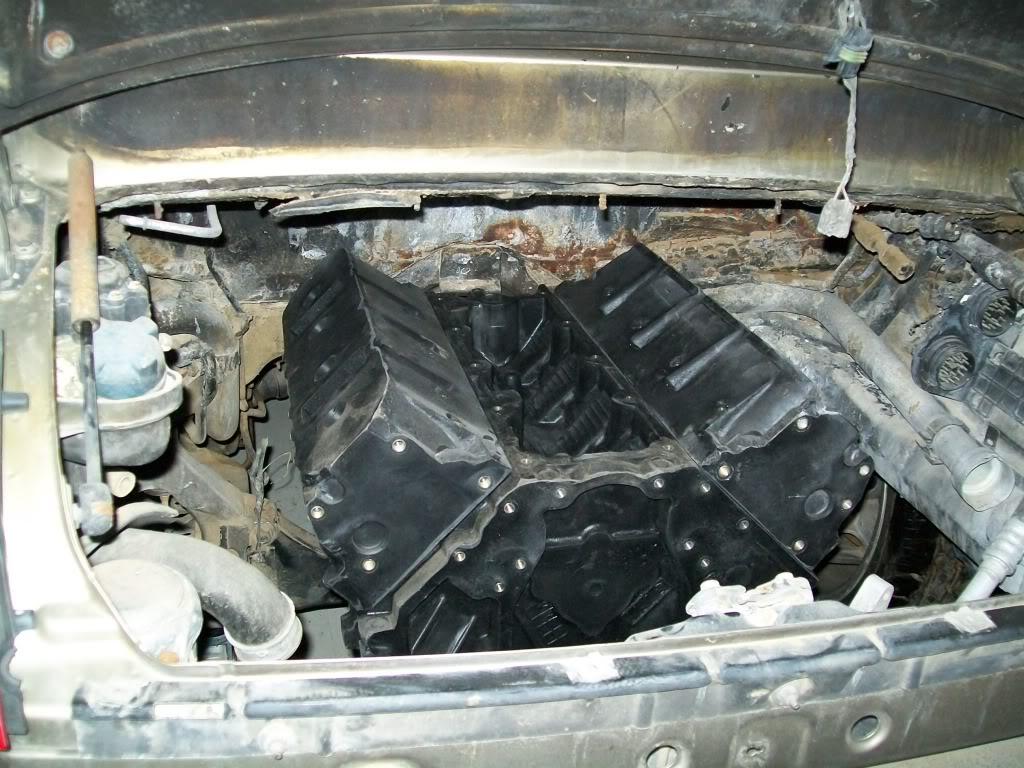
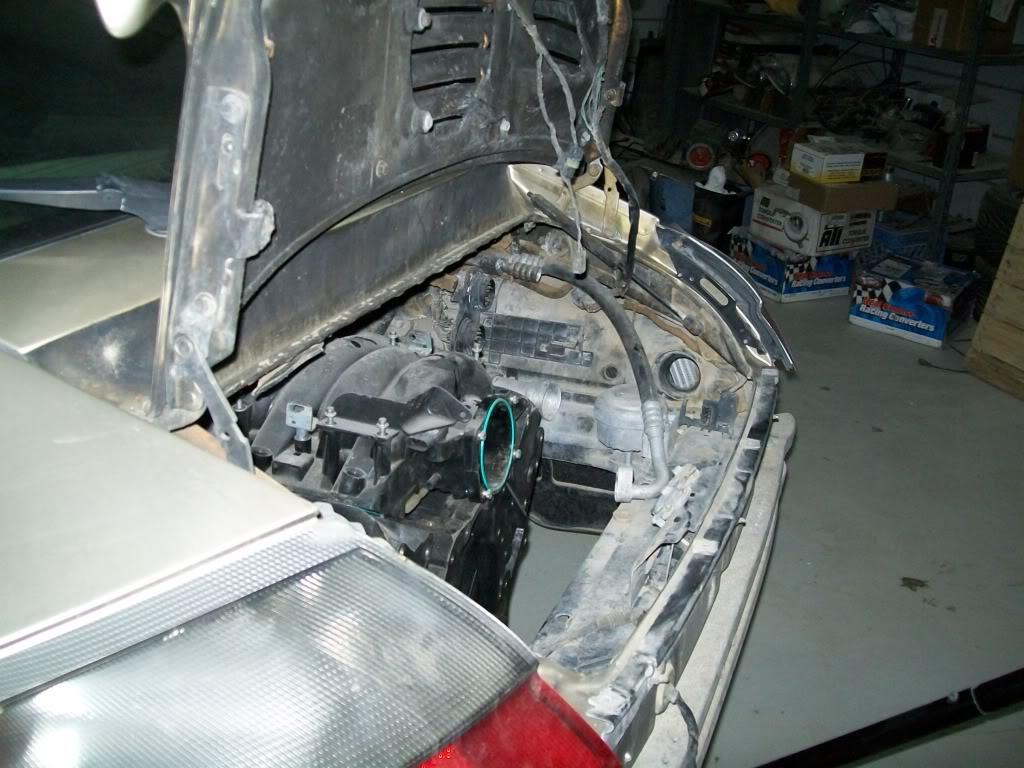
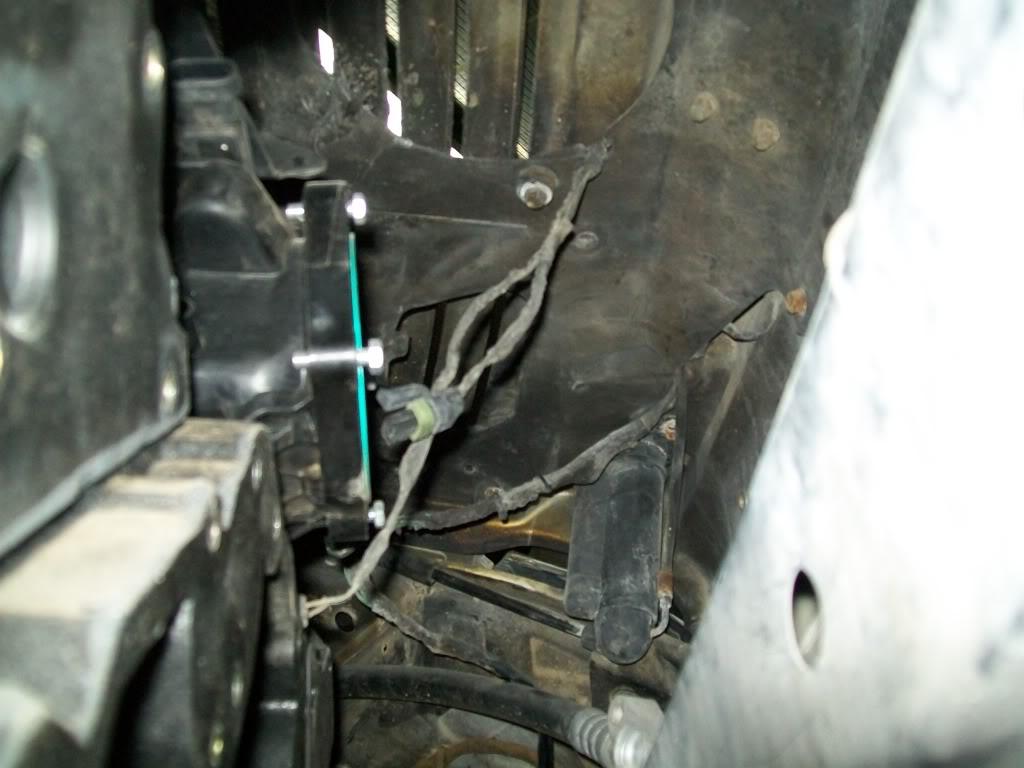
interior shots ( you can see the evidence of the engine fire inside the car) , and please forgive the dust and mess, the car has been sitting in the open with the window down for 2 years :

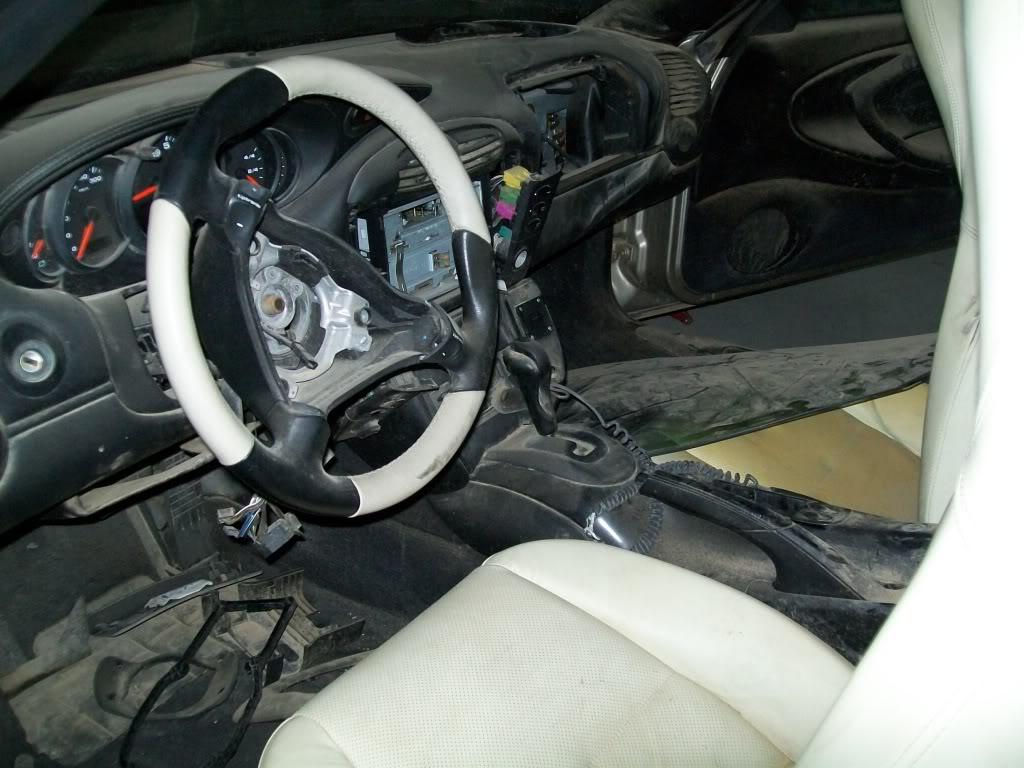
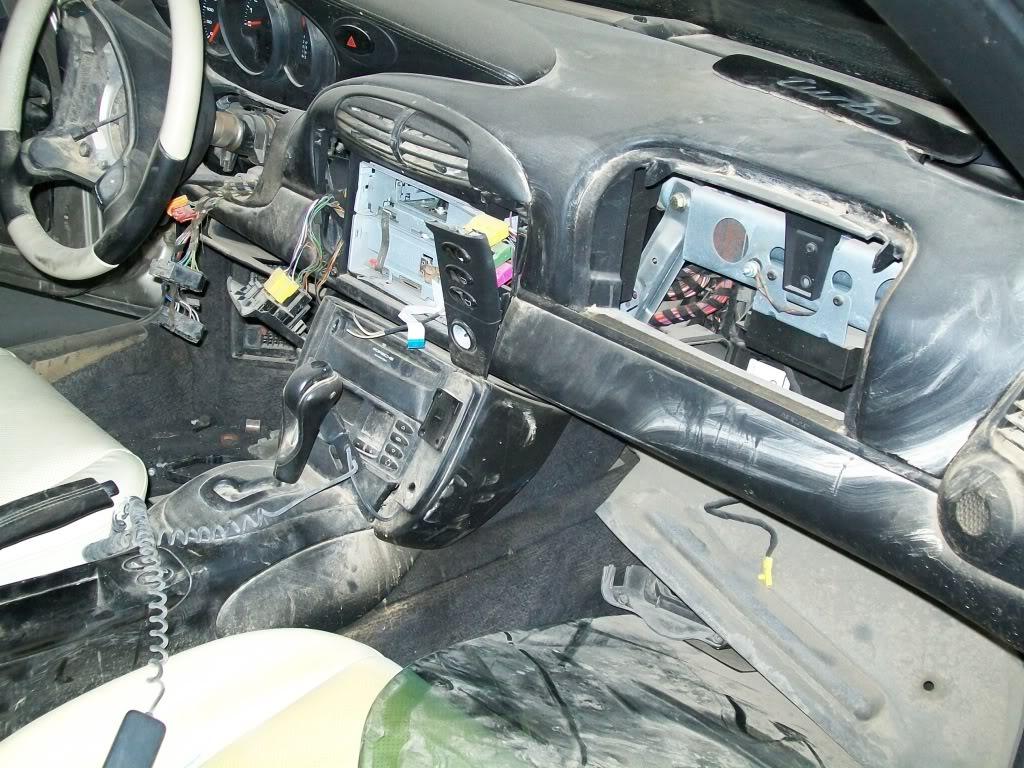
as you can see it has a loooong way to go , so wish me luck . i'll update this thread as i go .
02.15.10
well i intend to start tomorow , i guess i'll start with vaccuming and cleaning it out from the inside, then try positioning it properly in the garage and put it up on jackstands.
i guess tomorrow will be my tear down and measurement session
da plan :
- mock up engine insde the engine bay and see what accessory drive to use ( vette or f-body)
- put the car on jackstands
- figure out engine cradle design
- clean interior
- clean out engine compartment
i guess that's it for tommorow , unless i get carried away and stard welding stuff up
02.17.10
i got some stuff done last night
i managed to pop the trunk,,,errr hood ,,, the lid in front of the car to gain access to the battery compartment , took the steering wheel and seats out , vaccumed the interior ( still need to wipe down everything ) .
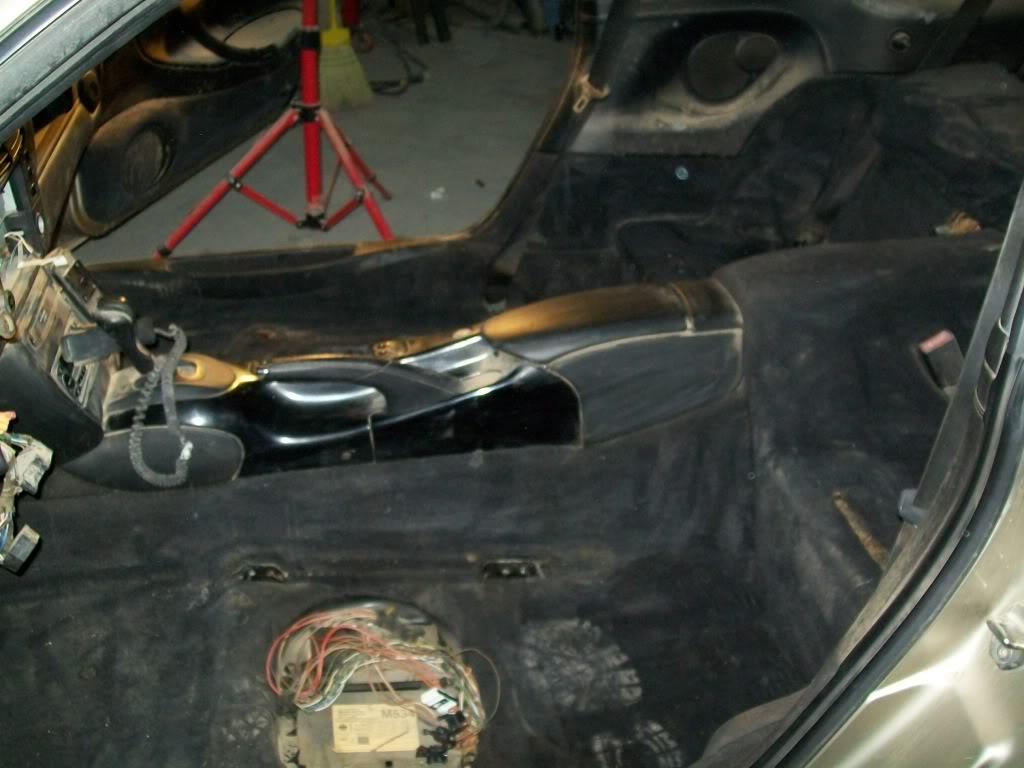
i then started cleaning up the engine compartment ,,,, lets just say cleanning after a fire is not cool
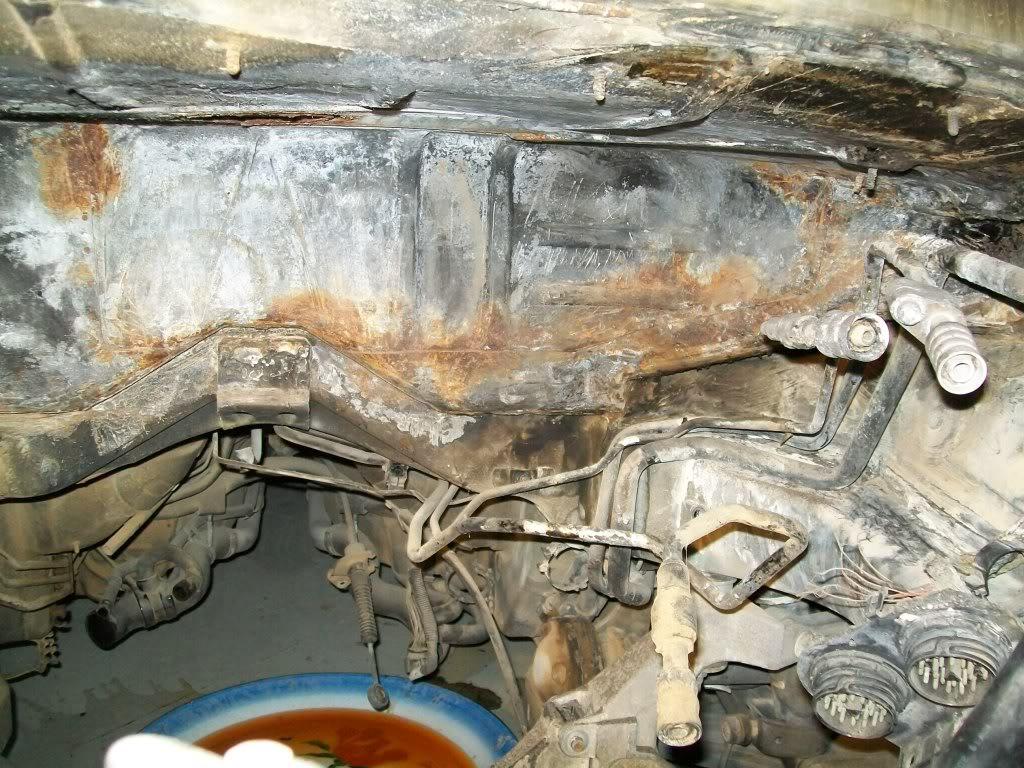
i took out what was left of the coolant expansion tank and radiator hoses ( check out the funky hose!)
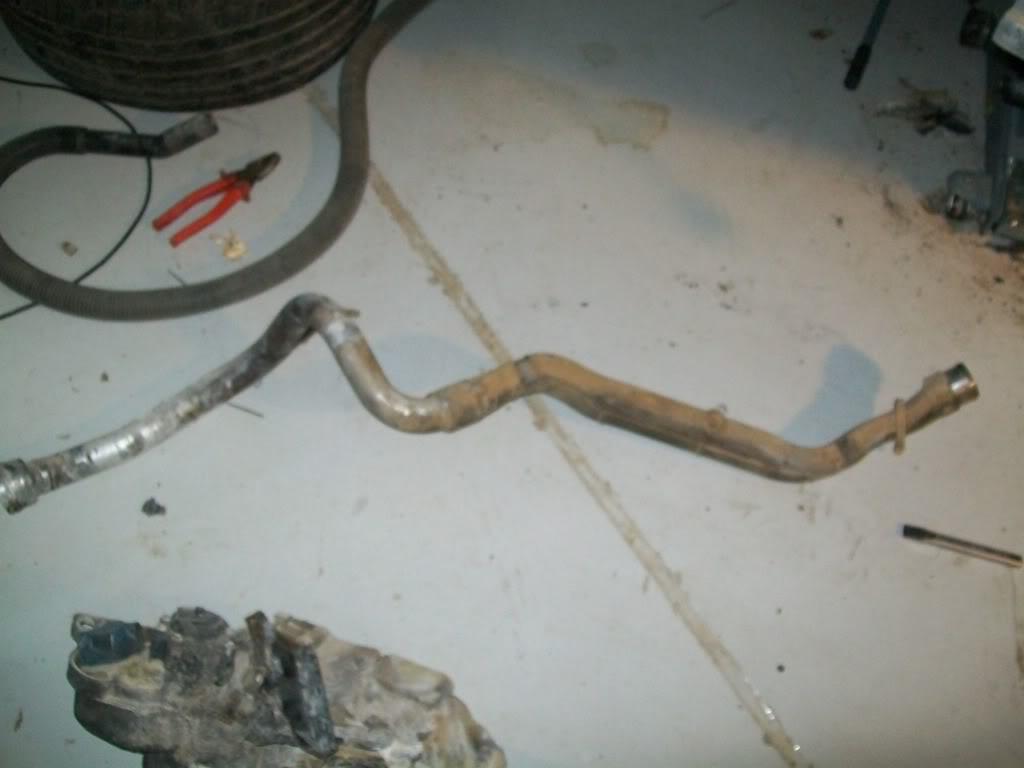
and started cleaning and scraping the whole place ( not done but getting there). this is a bit hard since i can't remove all the fluid lines ( a/c , coolant, fuel , vapor) cause its a pain in the @$# to do so , so i just moved them a bit just enough to gain access to whats behind them so i can clean and then paint the whole area. this is an ants-eye view of the engine compartment
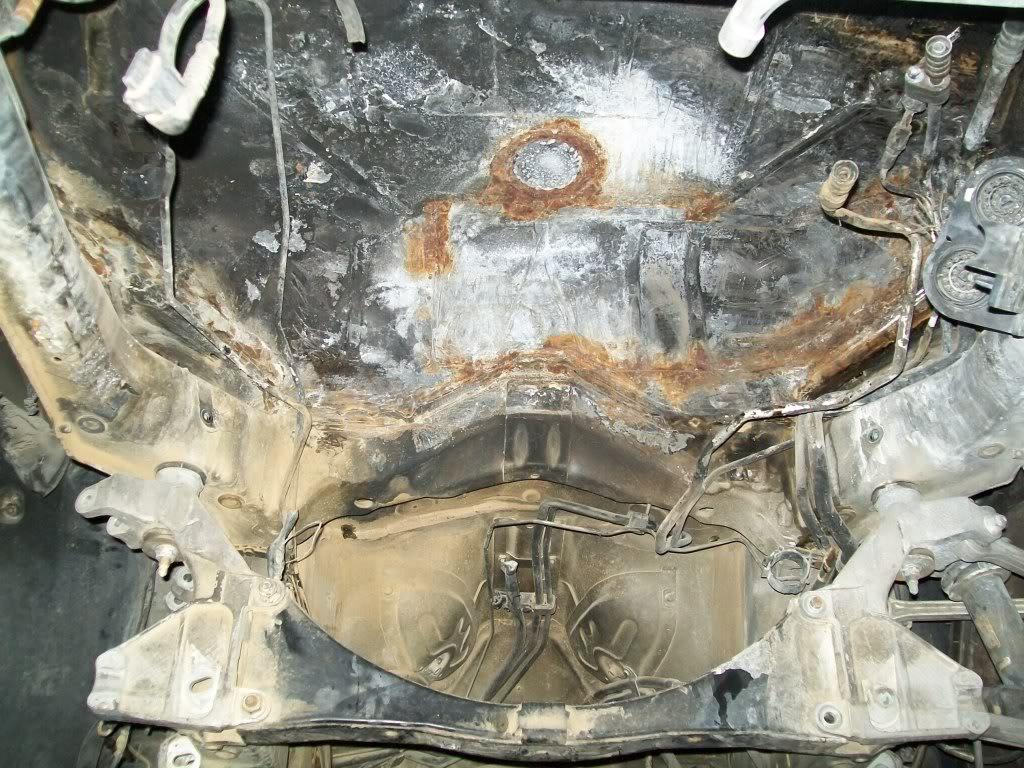
the plan is to have it painted and then put some reflective sheilding/insulation in certain areas to keep the cabin cool. i also thre the mockup engine in again to see how its going to sit ( the car was now on the lift , aso i can better judge ), i seems its going to be fine ( but tight ) as long as i use a shallow accessory drive ( vette ) , problem is i can't judge exactly till i get a tranny in there. while i was cleaning the interior i found this :
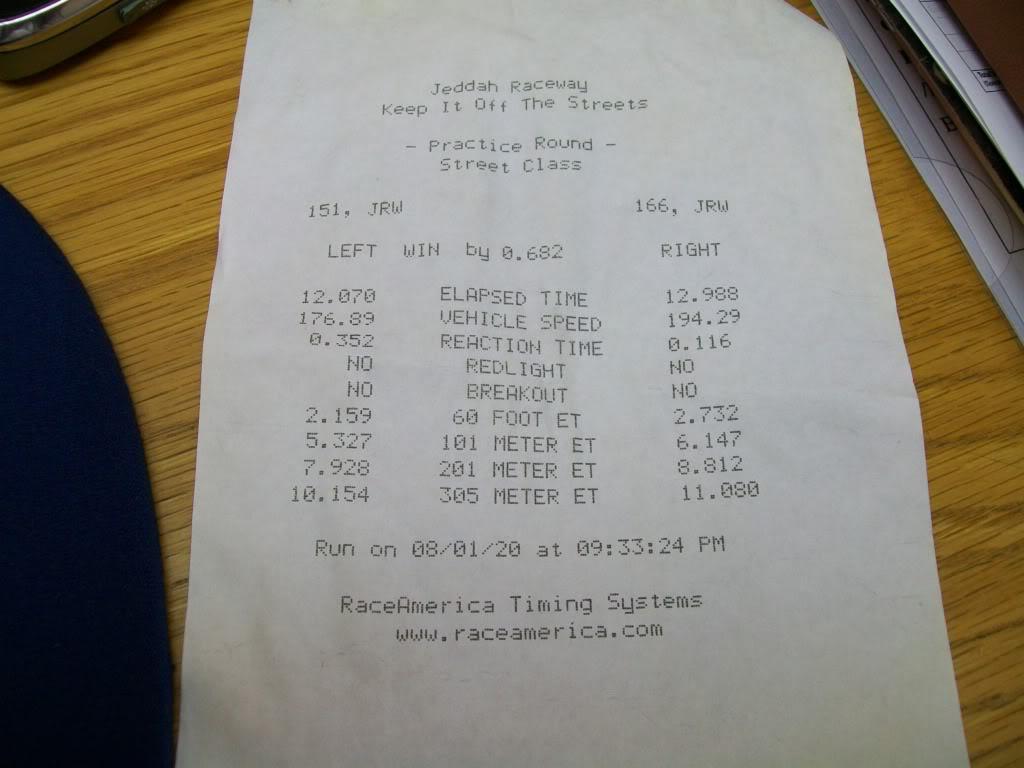
i'm not sure which lane the car was in , but i pan on beating either time by a full second (speeds are in kph and are109mph and 120 mph respectively)
so next on the seemingly never ending to do list :
- clean the engine compartment some more , probably with a sander
- paint it hi-temp black
- order the suspension parts
- take the wheels off
- remove the engine compartment cover
- remove the rear carpet inside
- start rough sketching an engine cradle
that should keep me occupied for a few days
02.18.10
well i managed to clean the engine compartment yesterday, its amazing what a wire brush can do
i still have a few spots left that have some gooey gunk i have to scrape off but its pretty much ready to be painted .
i also took the rear inside carpet that was melted from the fire and found a little nasty surprise ,,, lets say i have to scrape and clean some more in there ( sorry no pics , forgot the camera )
i also ordered the missing suspension stuff , should see it in a week or so .
i have to get some kind of adhesive insulation to stick in the engine compartment , and i guess i could start the mockup process now
made some progress today , i took out the rear carpet ( fire damaged ) and found a little nasty surprise underneath it; i found a puddle ( still wet) of melted foam insulation - it had the consistancy of tar.
needless to say it was fun removing that stuff with napkins
here is a before pic :
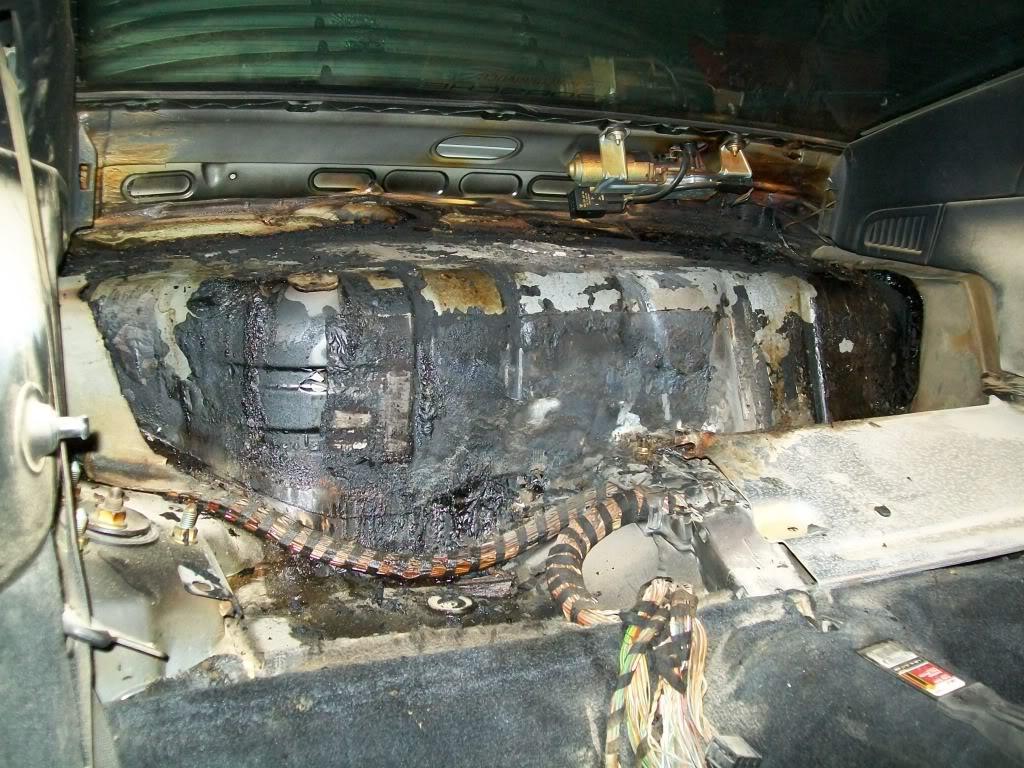
and after it was done ( still needs another coat and then some insulation ):
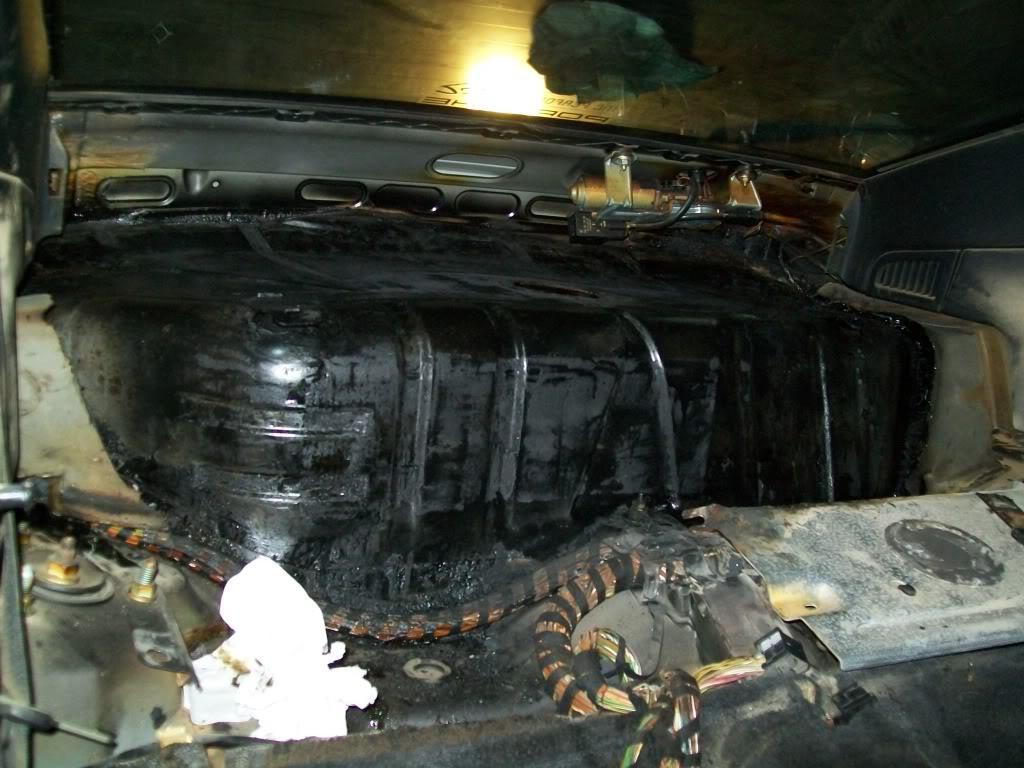
i also finished cleaning and prepping the engine compartment , should be ready to paint next time

i also have a pretty good idea how the engine cradle will be , it will utelize the stock engine mount location and wrap under the engine and attatch to the existing removable crossmember. the engine will use vette style engine mounts that will attatch to the cradle. that way all i have to do to remove the engine is unbolt the cradle and the xmember (6 bolts ) and the engine drops down just like the original did .
i should have the tubes bent and ready to be welded and installed by saturday i hope
02.20.10
to tell you the truth i'm not that worried about the rear end partying all over the place , porsche engineers have been slowly but surely eliminating the wild oversteer that these cars were known for since they first came out ; on the current 997 models the handling is nutural and not "oversteerish" ( i know cause i drove one around a race track ). so i have faith that this car will handle properly ( not that the new engine combo will not change some of the cars handeling charachterstics )
any how , back to the updates
i think i scored a stock muffler for the car , and i also got a set of sway bars for it too ( i'm missing the rear one ) , and man are they dinky !

i also finally decided on going with an ls3 accessory drive system ( G8 or holden style ) for ease of replacement and "shalowness"
i'm also contemplating on going with an Fbody oil pan instead of the GTO one i have now , cause the use of the fbody pan allows me to lower the engine a bit more . only problem is that it will have the sump in the back of the engine ( towards the front of the car ), which might cause oil starvation issues during hard launches. i'll be researching it some more.
anyhow , i started the mocking up process by first hanging the plastic engine with bungee cords in roughly the location i think the engine will be ( need to get proper tranny measurement or get the real thing in there)
i started with the idea of running two "L" bars that would attatch the short leg of the L to the original porsche engine mounts ( or to their location) in the rear corners of the engine compartment , and the long leg of the L would be welded to the cross member (located between engine and trans ). the idea was to have it angled so that it clears the alternator and A/C compressor .
i was planning on using holden style pedestals and mounts ( just like on vette's) and have them sit on the long leg of the "L" :
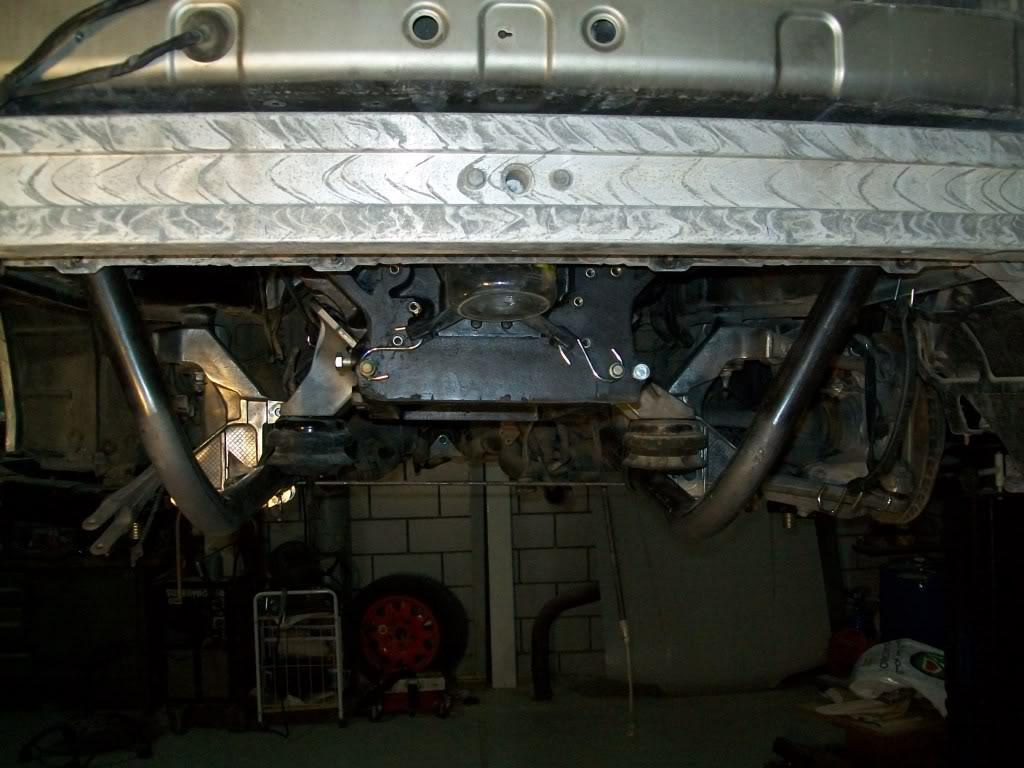
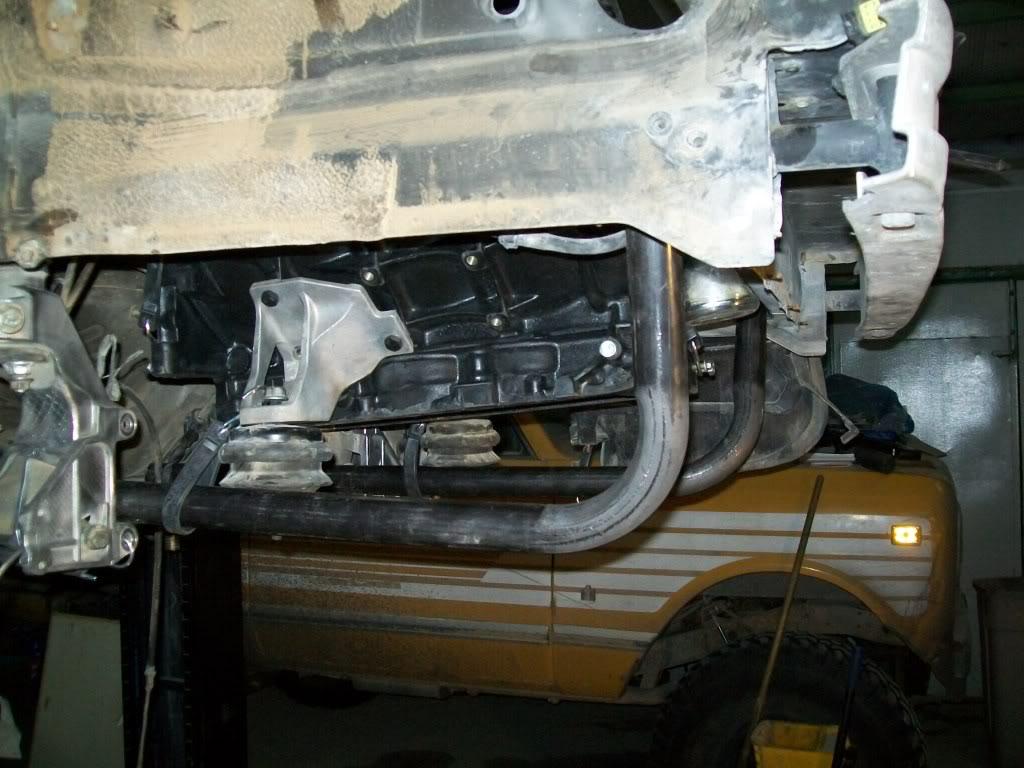
but after messing with it for some time i decided to it was not going to work , first off the pedestals are not the same ( one is longer than the other ) from side to side:
(check out how the mounts are offset in the pics above , and the comparison below
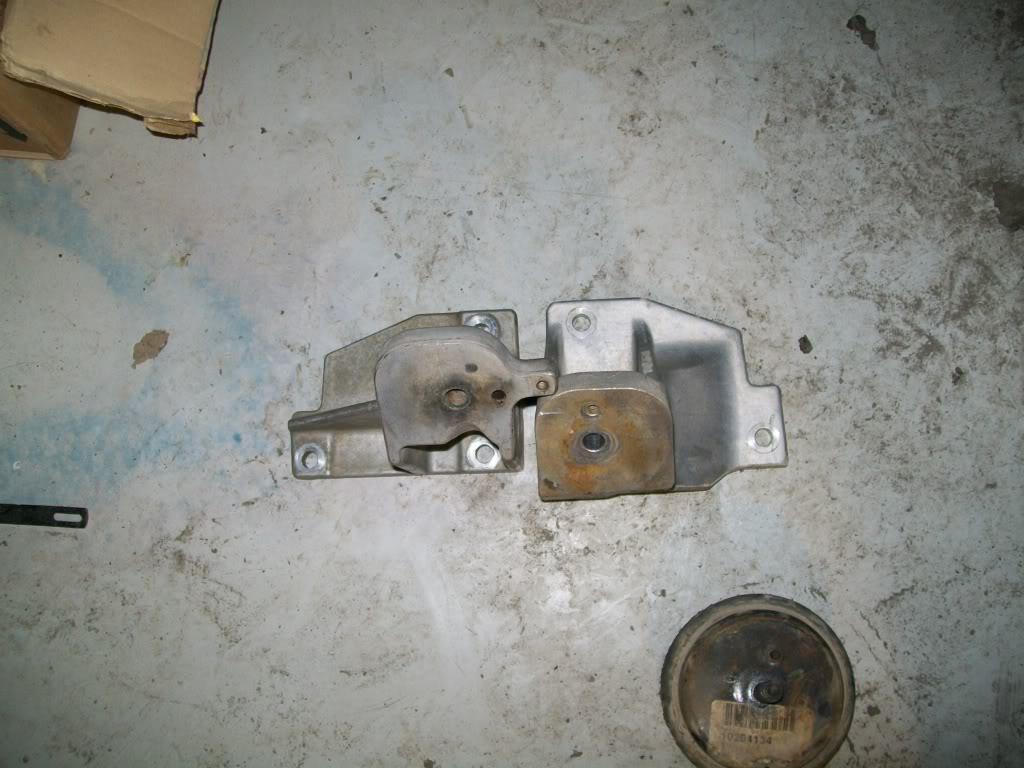
second , they took too much space. when you compare them to ford or F-body mounts these stick too far out . here is how a ford mount looks :
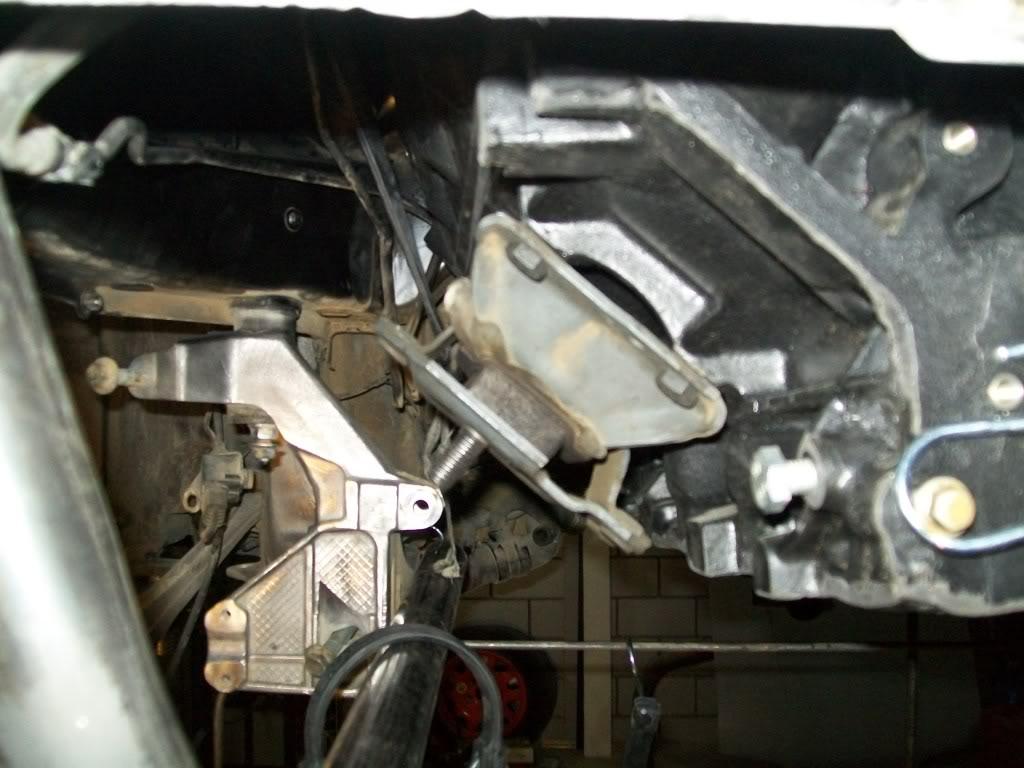
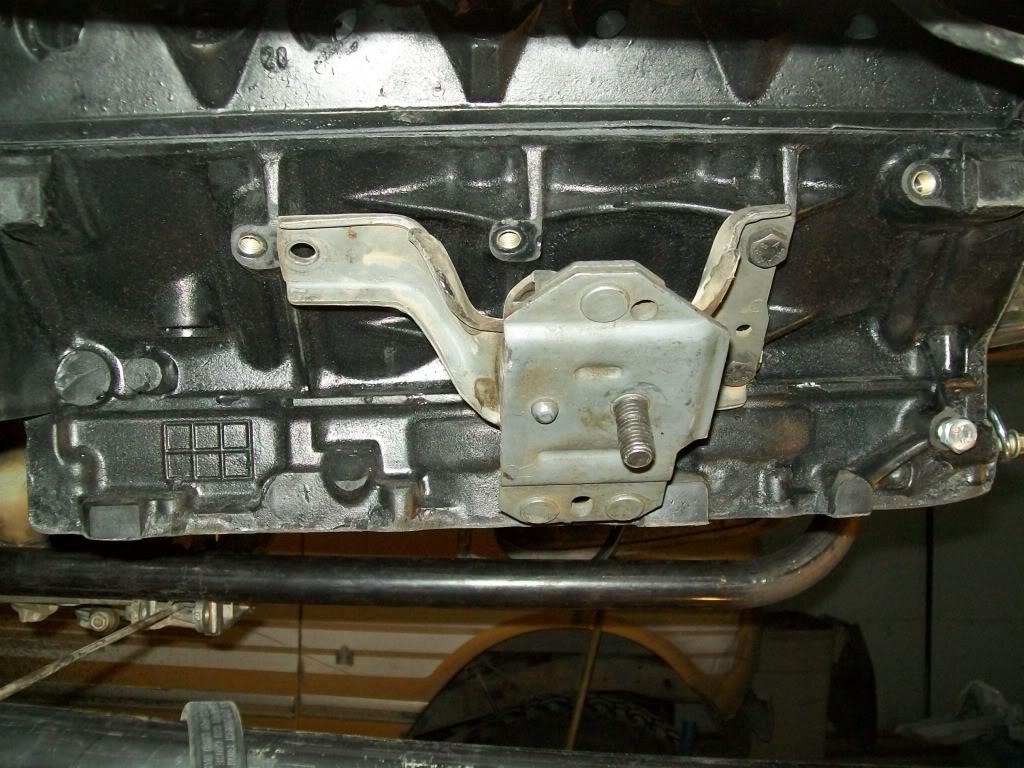
another thing i noticed after placing the l bar on the real engine is that it would not work cause the pipe would hit the compressor ( you have to see it to understand how it happenes) so to make it work i now have to make new pipe that has two bends in it , kinda like this : (imagine another bend where my hand is )
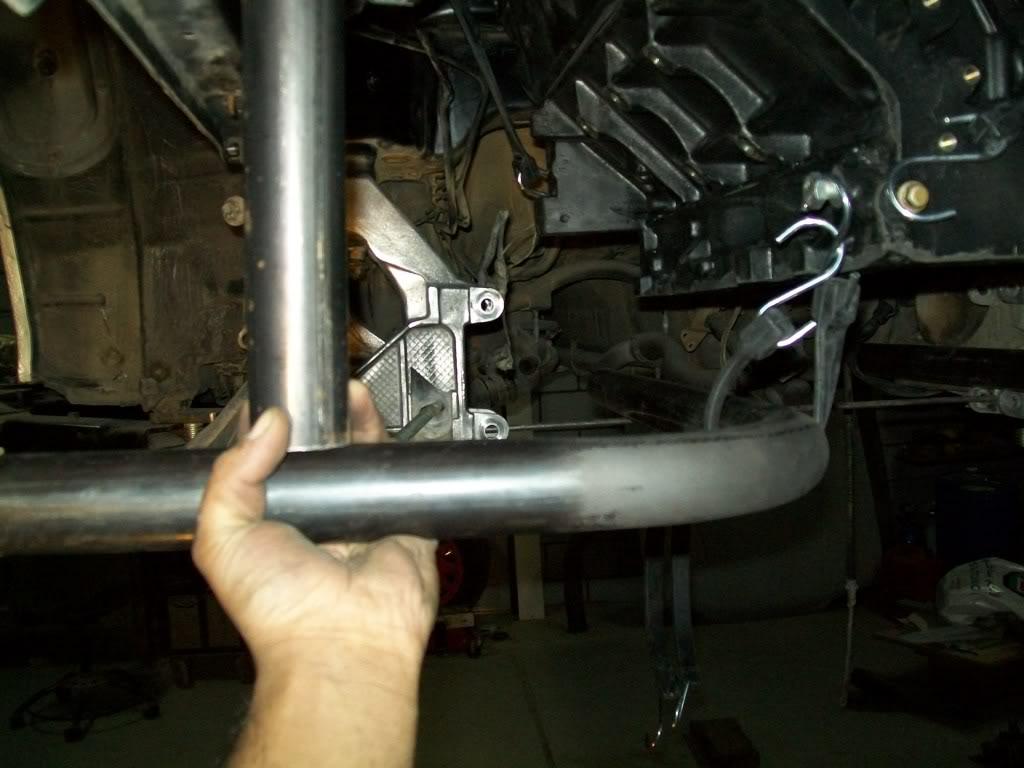
and use f-body mounts so all i have to do is weld two tabs on the cradle and drill them , then attatch the mount to them . furthermore, i have the option of going poly later on if i need to .
so all in all , i think today was somewhat productive
next on the to do list :
- get fbody mounts
- bend new pipes for cradle
- get accessories
- find transmission measurements ( from mount holes to bellhousing edge )
- start figuring out which porsche wires i need to use
- install suspension parts as soon as they get here
02.22.10
i'm trying to keep everything in the same location when it comes to the accessory drive, so the cradle has to make its way around them . ( see below). i do have a remote water pump and all the fittings, but like i said , i'm trying to stick to stock .
i'm waiting to get some critical measurements from under a car with the trans intact so i know exactly where the engine will sit and wether to go with a remote pump or not. as for the trans it most likely will be a the stock six speed G96/50 that originally comes on these cars ( from the picture you posted they seem to hold up well )
by the way , what trans and clutch is that porsche using ( and what engine if it is different from stock) ??
otto , thank you so much for the offer , but i'll have to pass ( 1- i have them , 2- shipping will cost an arm and a leg ; i like in middle east )
irish , i plan on using both ls1 and porsche pcm's ; ls1 pcm to contol the engine, and the porsche one to do everything else, the plan is to connect vital signals from the ls1 ( like temp , map, oil pressure , etc ) using porsche sensors . that way all the pcm knows is that the original engine is still there
any ways , on with the updates
i decided to ditch the original design i had for the cradle in favor of a much simpler and more convenient one . simply put its a giant "u" from one porsche engine mount location to the other with two parallel bar running fron to back underneath
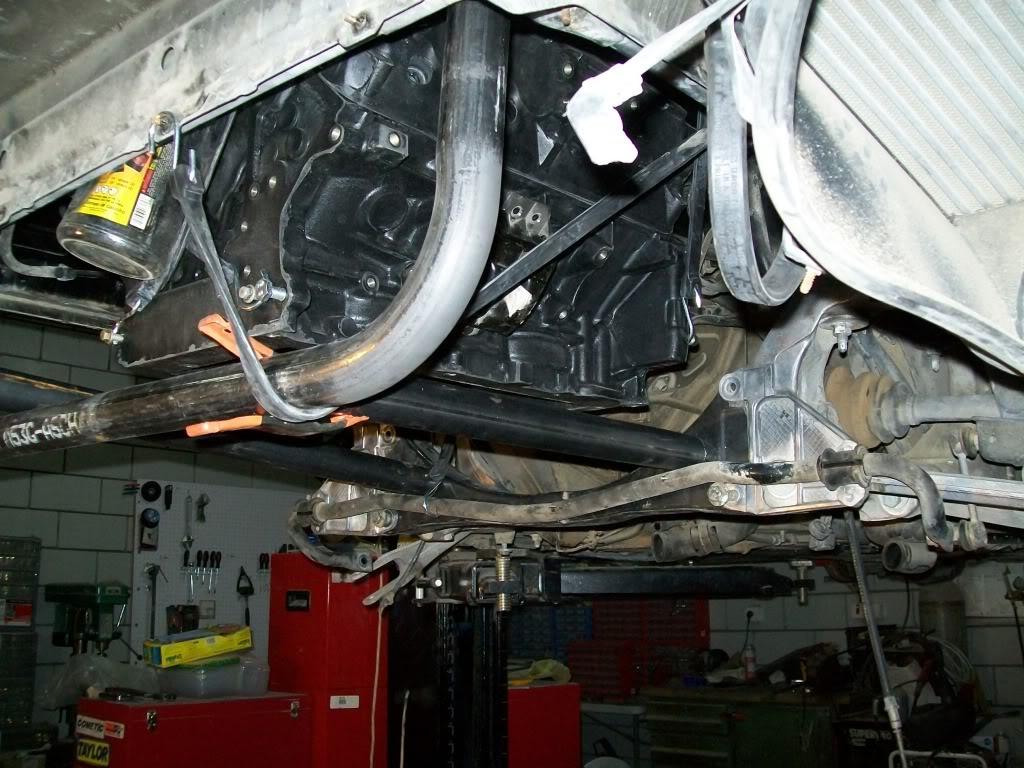
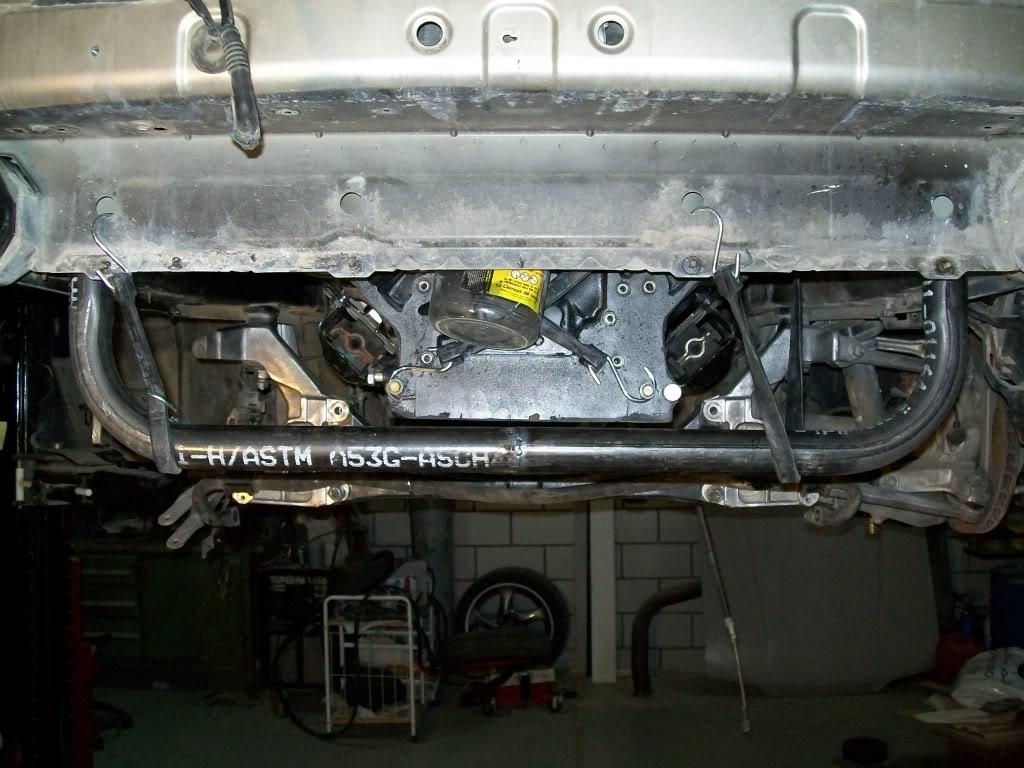
and from this picture you can see it does not show when the bumper is on :

the only thing i have to decide on now is wether to make it a completely bolt in cradle or weld it to the leading edge to the crossmember ( which is removable )
another concideration is a slightly different design which does not attatch to the crossmember and terminates just under the ls1 engine mount , this way i can use the porsche engine mount and solid mount the engine to the cradle ( i think this is how renegade does their cradles ).
i might sound like i'm complicating things right now , but remeber , i have to have space for the turbo's later down the road
either design i go with will have to wait a bit , since i did manage to score a stock exhaust , which i might use ( just have to go and pick it up tonight )
i'd like to place it on the car and see if it is possible at all to run it with the cradle design i have right now or not .
(why does it seem like i want this whole thing to be a bolt on process )
02.26.10
i do beleive i will need an extra pump to help with circulation some time later down the road. and i will be running an oil cooler from the begining, i just havn't figured out where to place the cooler .
any how , here are the pics of yesterday's progress:
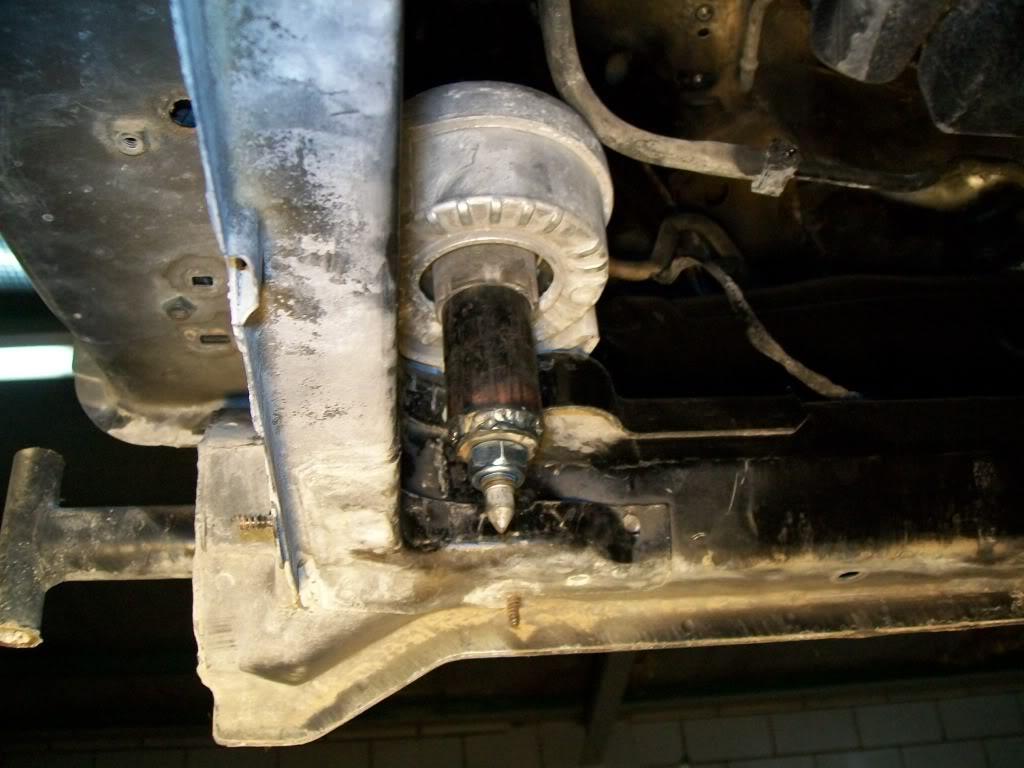
motor mount :
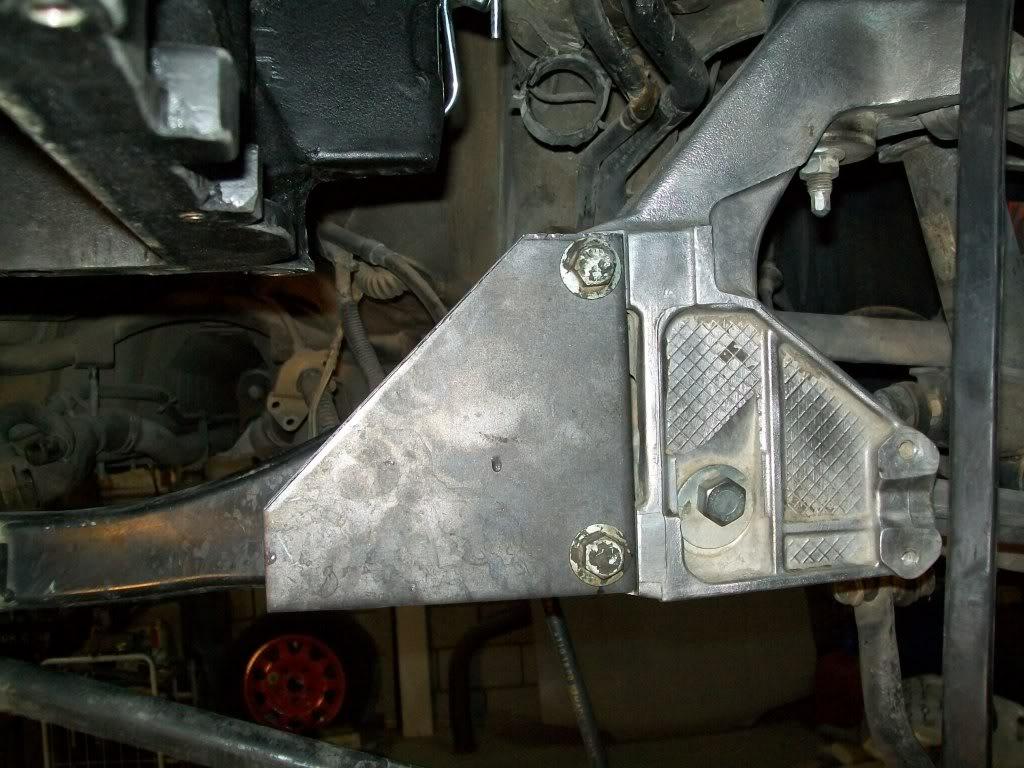
crossmember plate :
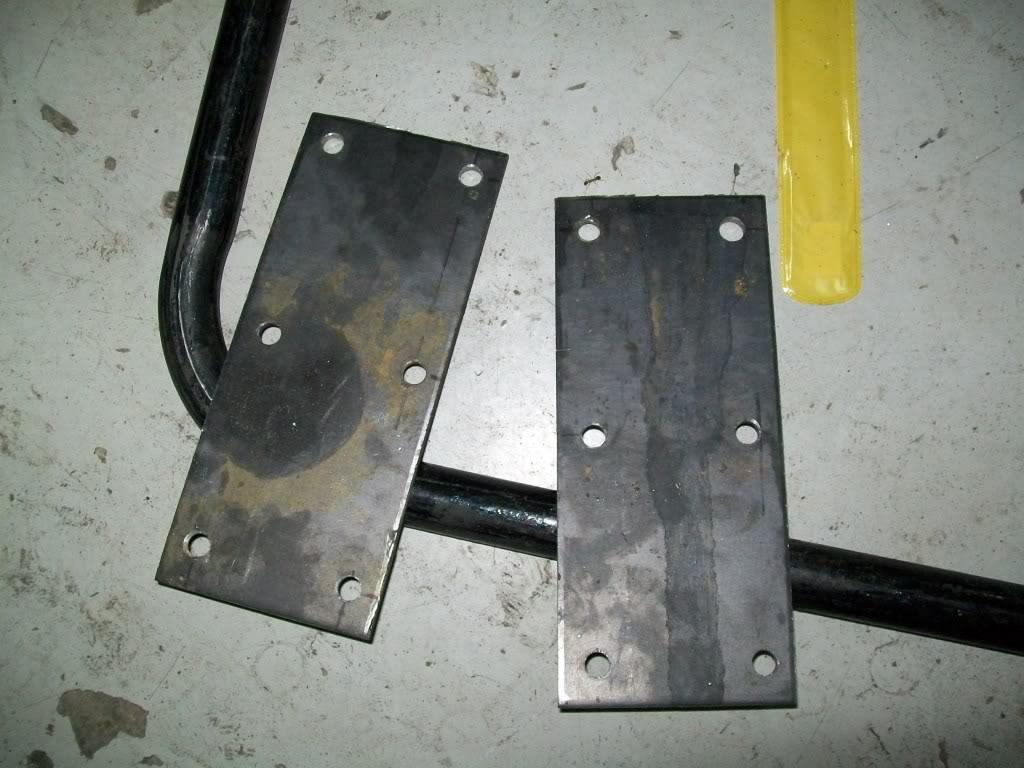
engine block plate :
how it all looks :
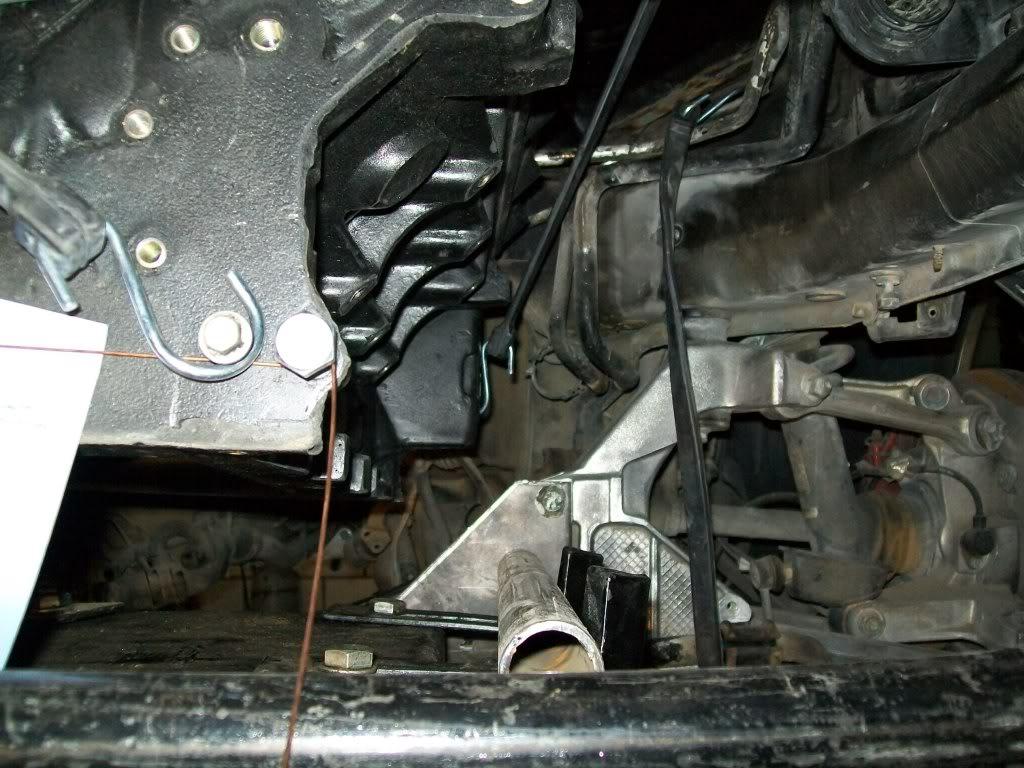
03.01.10
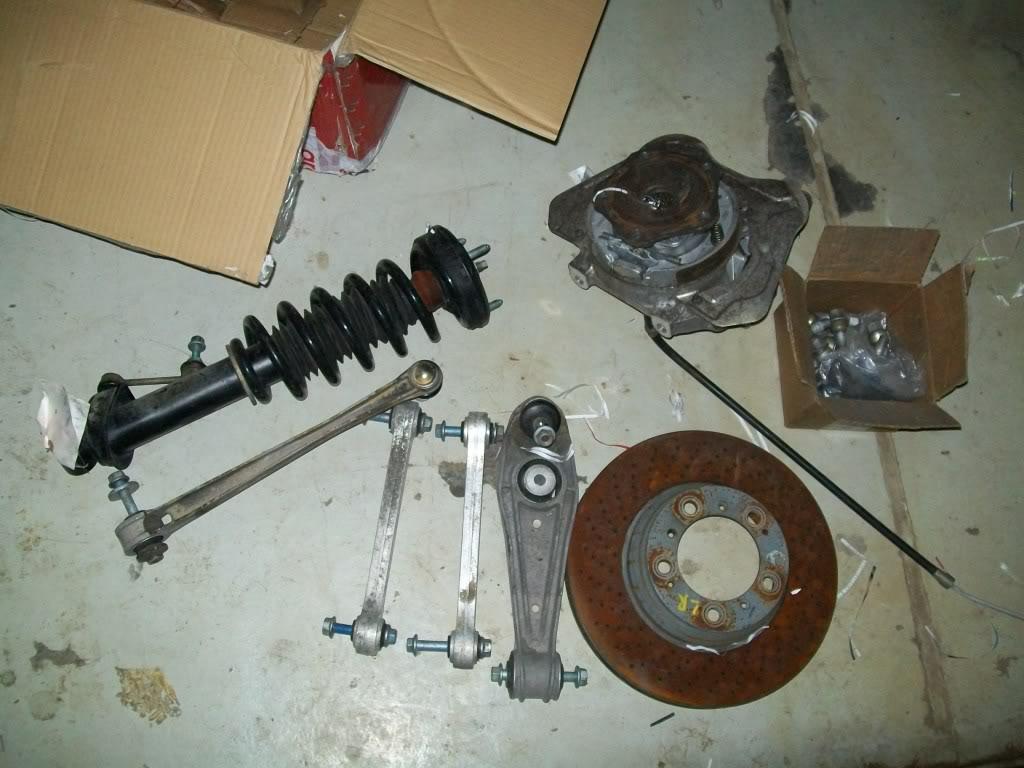
got the suspension parts in today , but upon installing them found out i was missing a few important bolts ( alignment excentric and a few others) but no biggie , will order them soon :
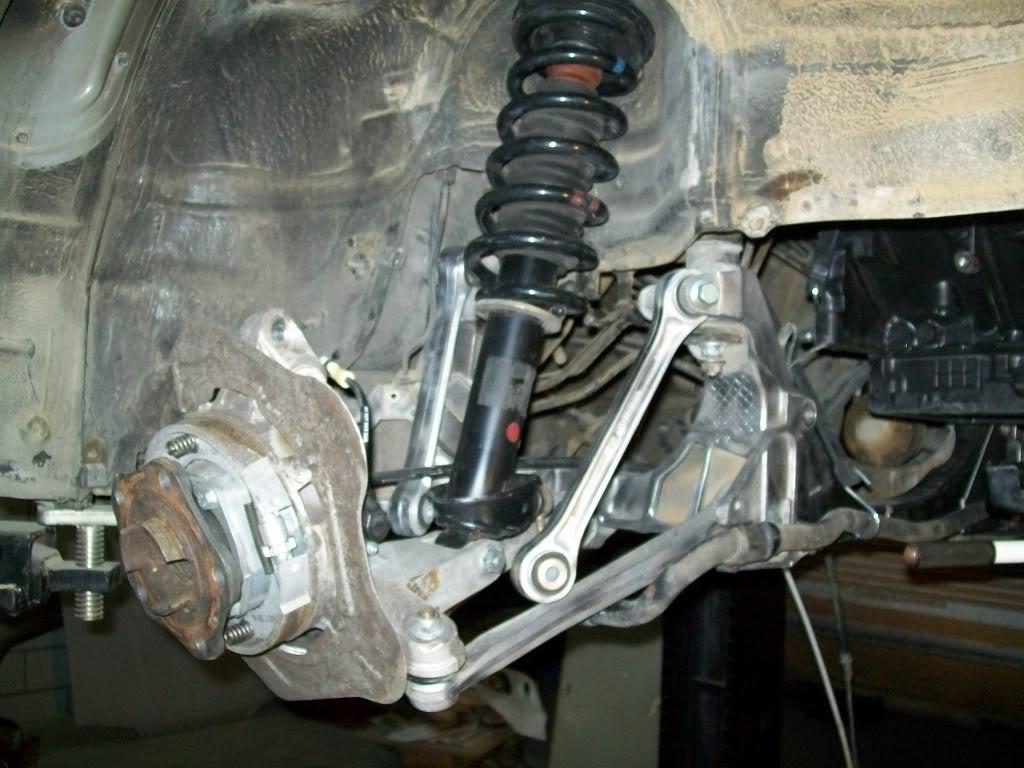
here is how the stuff looks on the car ( going to be a roller soon ! ):
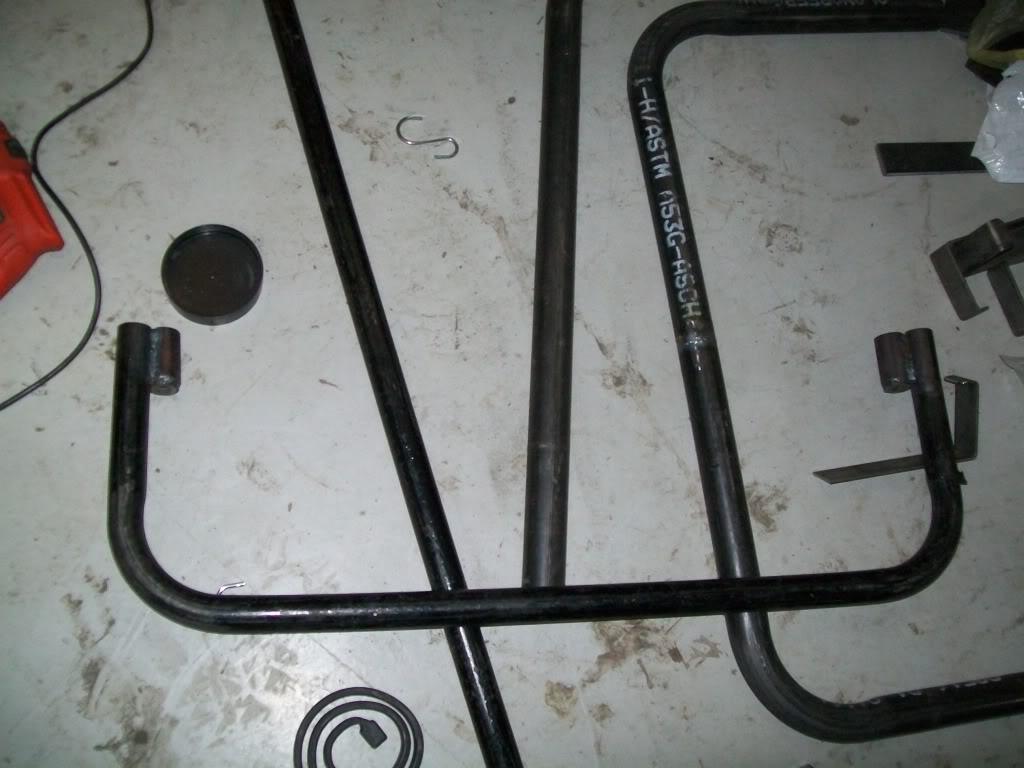
i also messed around with the cradle some more , now the "U" part is finally done :
and this is where the original porsche mount will bolt up to the new cradle :

next up will probably be the parallel tubes that the engine will sit on , i have to cut and weld these on next . those should go from the "U" part to the plate i have on the crossmember , i won't make any "pedestals" yet untill i get the headers and trans in.
another option that i'm really contemplating ( well thinking of as a backup plan) if the trans measurements i got were not correct and the trans ended up pushing the engine further towards the back of the car ( from pics i saw the tranny sits on to and past the cross member towards the back of the car- but the measurements i got place it just ahead of the crossmemebr) is a new cradle like andy has.
the parallel tubes under the engine would just extend past the crossmember ( either above it or through it) all the way to where the original trans mount bolts and attatch there . then the tranny can be slid forward a few inches ( can do that cause there is a drive shaft i can shorten infont of the trans) and mount it to the cradle. that way i have a complete suubframe for the engine and trans ,,,, but that's just me thinking way to far ahead
i also did not get the exhaust yet , waiting on the owner to call me to get it
any how , next up on the list :
- use regular bolts for now to finish bolting up the suspension
- slap the wheels on there to make it a roller ! ( end of stage 1 )
- weld up the two bars underneath to finish the cradle
- fab up a bar that holds the mock engine inplace teporarily so i can get rid of the bungee cords
- install the stock exhaust ( if i get it today )
03.02.10
i just had a "DOH!" moment last night ,,,, i just figured out i can't run the cradle like i intended ( to the crossmemebr ); if i do weld it to the plate i made on the crossmember it will be rigid on that end and flexible on the porsche motor mount end !
so there are two options: first, run it from the original mounts to under the engine and stop just before the crossmember ( then maybe attatch it to the block on the bellhousing surface with a plate ).
second option is redo the "u" part where is it soilidly mounted to where the original porsche mounts are ( remove those and replace with a plate ) and then attach the other end to the crossmember plate , and use original F-body motor mounts.
either way is easy , and i might just end up doing them both and choosing later down the road which one to pick
aside form that , i'm done with stage 1 ! the car is a roller now !
i just need to get the correct bolts for the control arms ( just put temporary ones now ) later .
after i put the thing on the ground i couldn't help but check how the crossmember i made would look from behind the car , so i slapped on the bumper ad what do you know ! it doesn't even show when looking at it from about 1 foot above ground! ( you could see it through the exhaust cutout in the bumper)
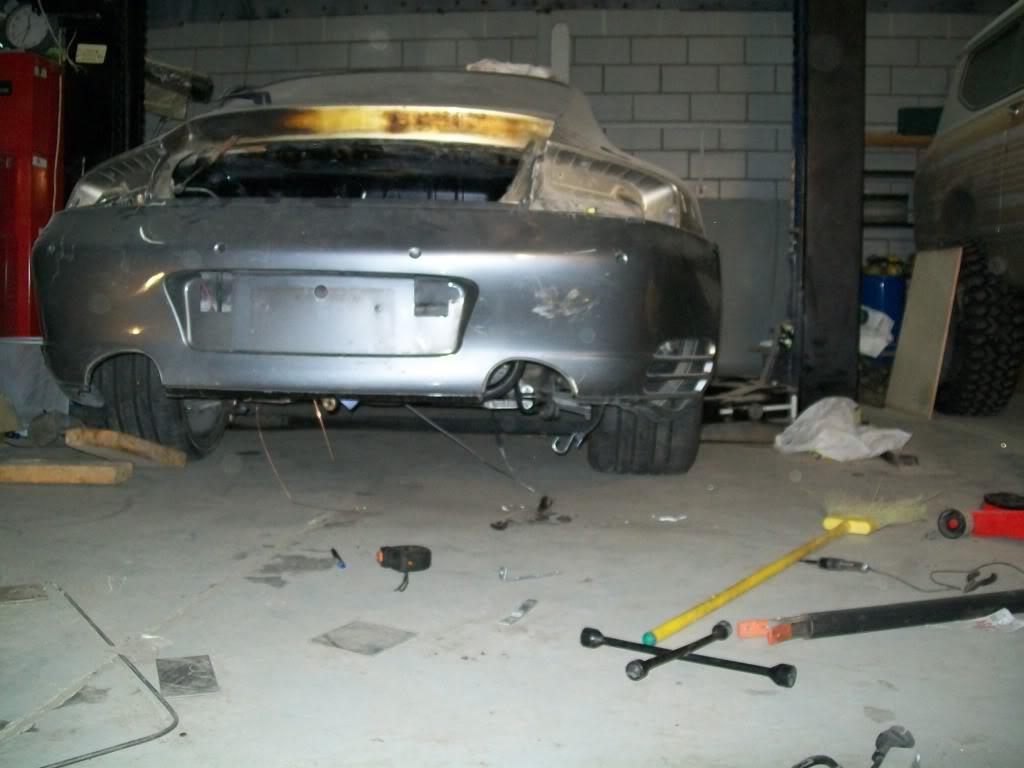
and incase you are wondering how much space is there to run the stock exhaust , well here it is :
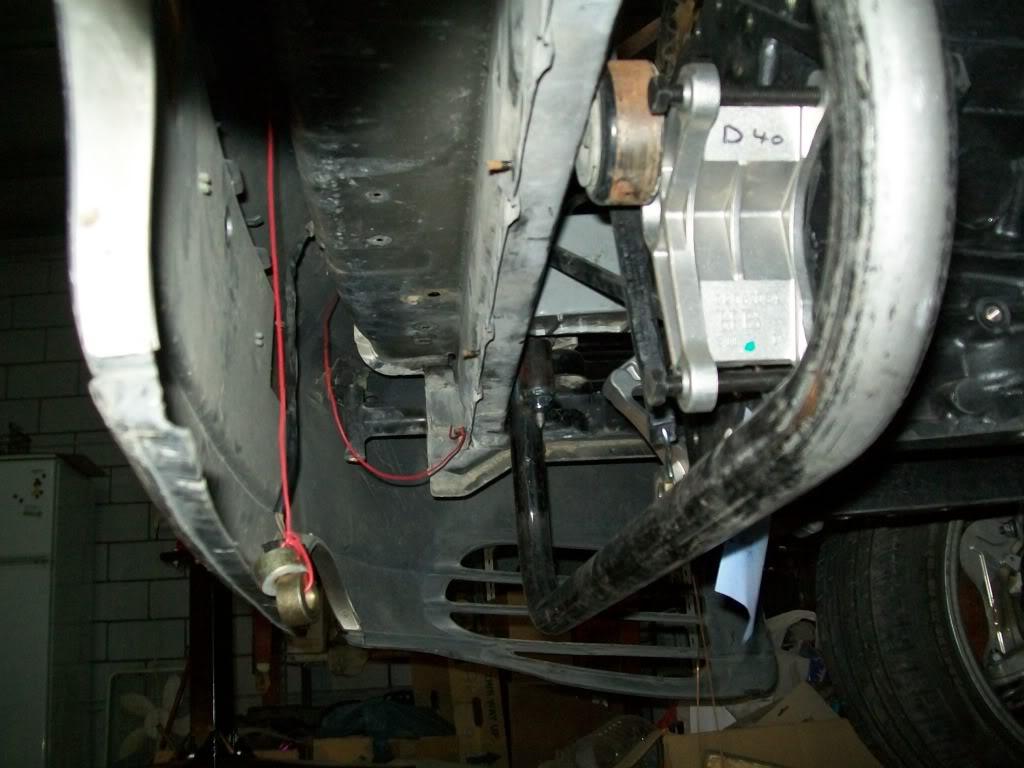
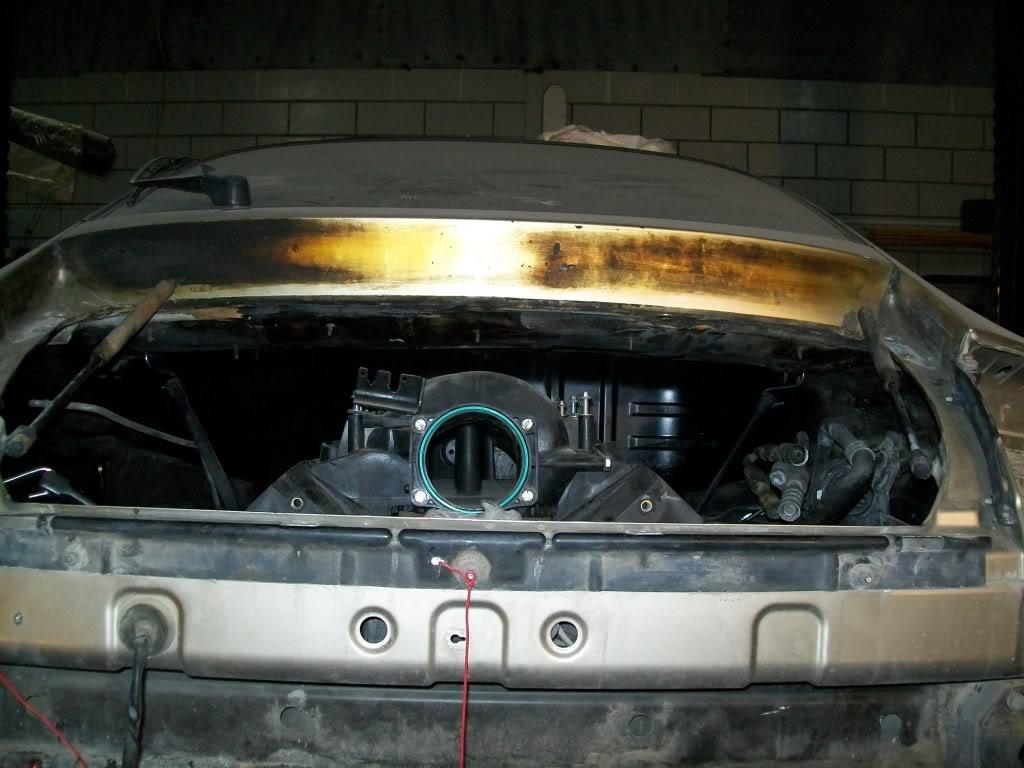
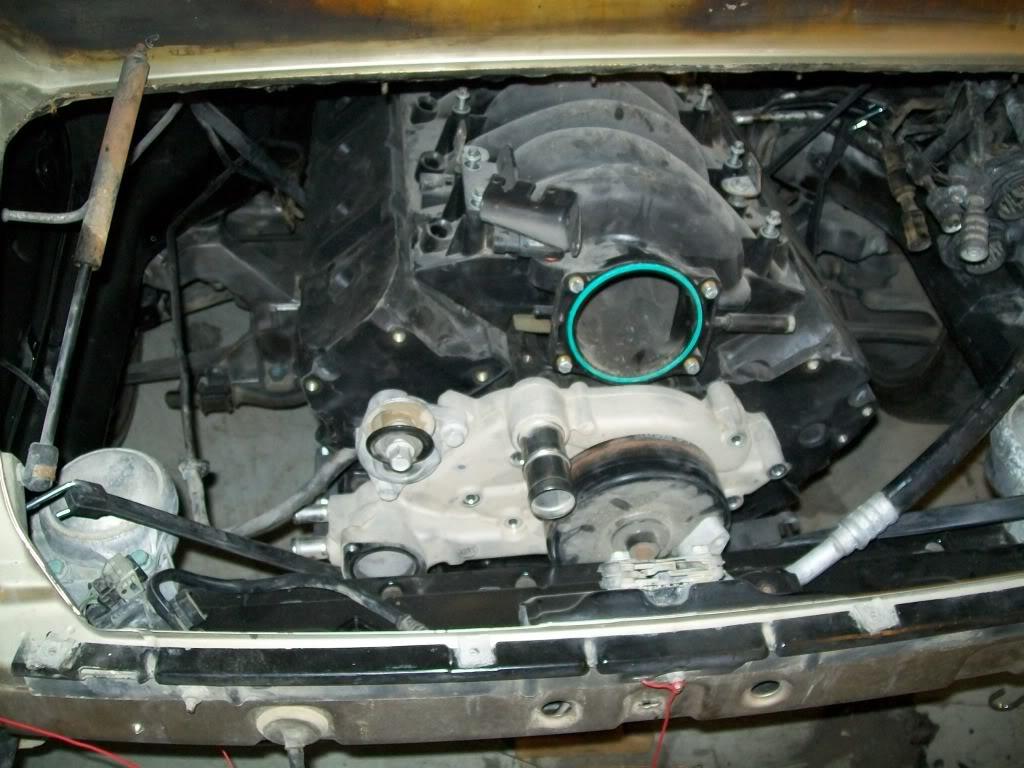
this is how much space i have with the intake on , notice how unlike on 993 models ( the older body style ) i don't have to flip the intake and use the funky looking elbow on the throttle body . but due to how slanted the engine cover is , i can't run a carb style intake and elbow cause it sticks up too high ( unless i use a sheetmetal elbow that is super low- and before you say edelbrock,,,, i checked - the stang has a GMPP carb intake and edelbrock ultra low elbow- sits about 2 inches too high ) :
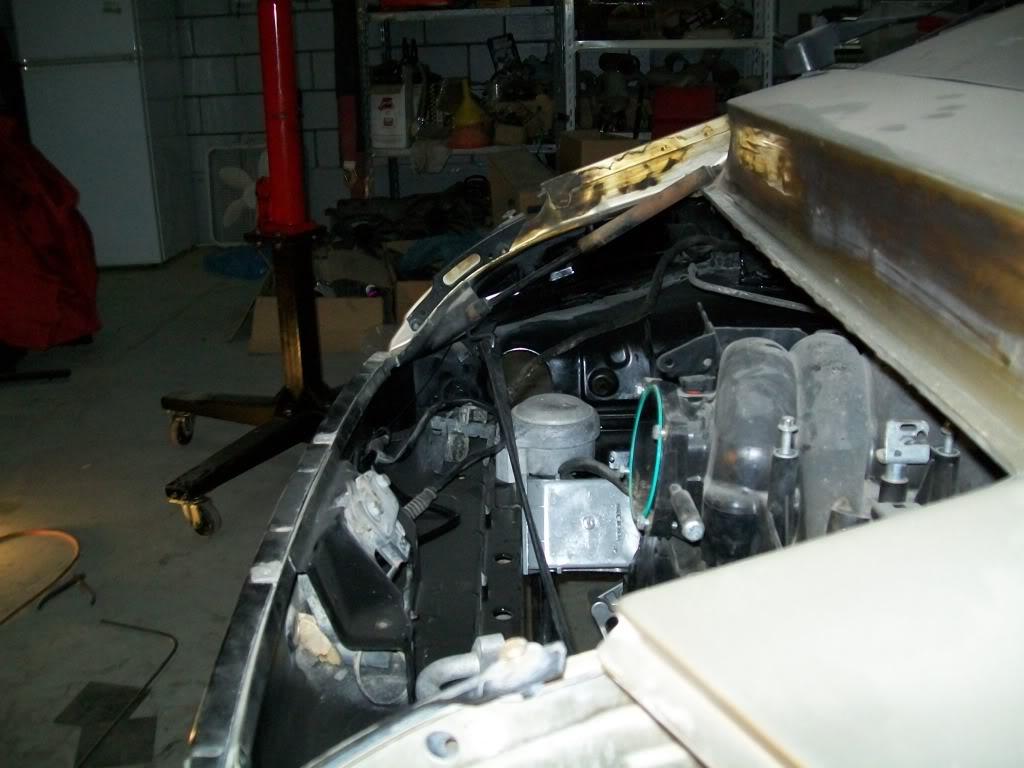
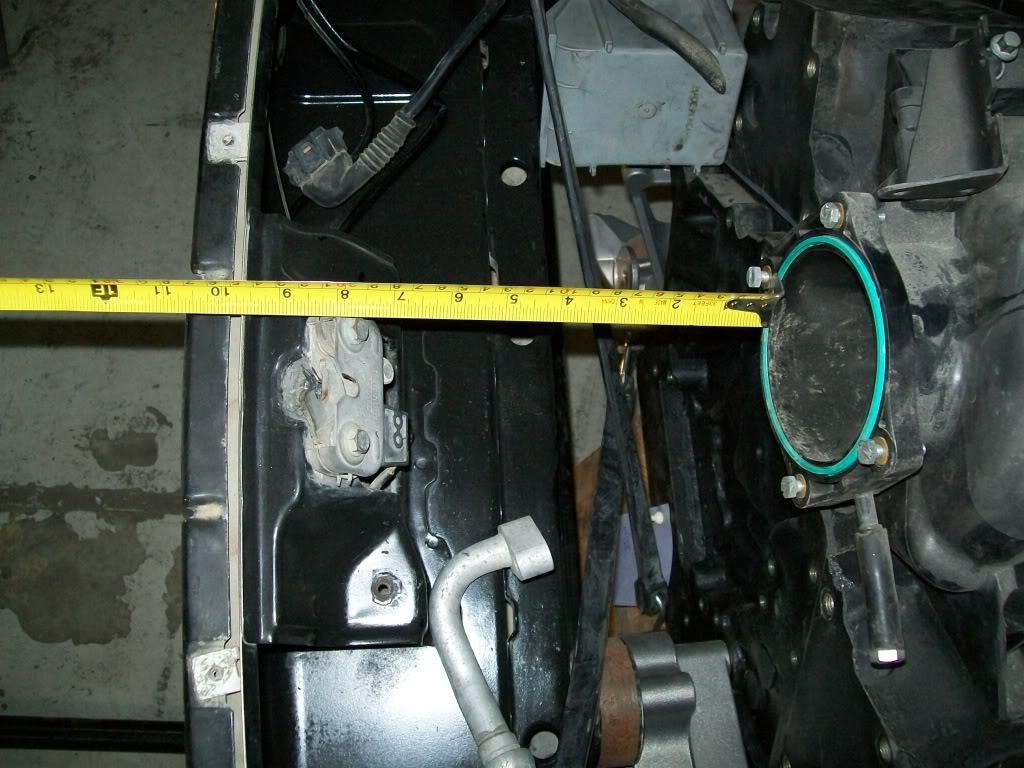
as you can see , its pretty tight when it comes to belt clearance , but i can't make a %100 judgement untill i have a tranny in there , but worst case scenario is i have to notch the brace and reinforce it ( which i really don't want to do ).
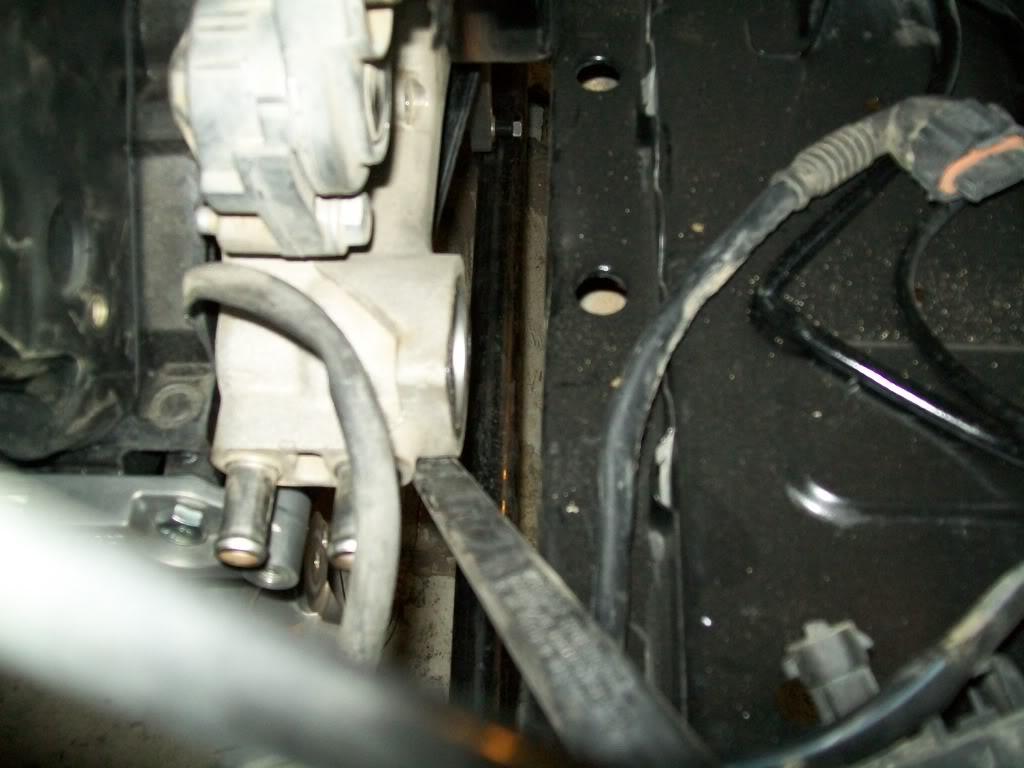
and why is it every time i look at this picture:
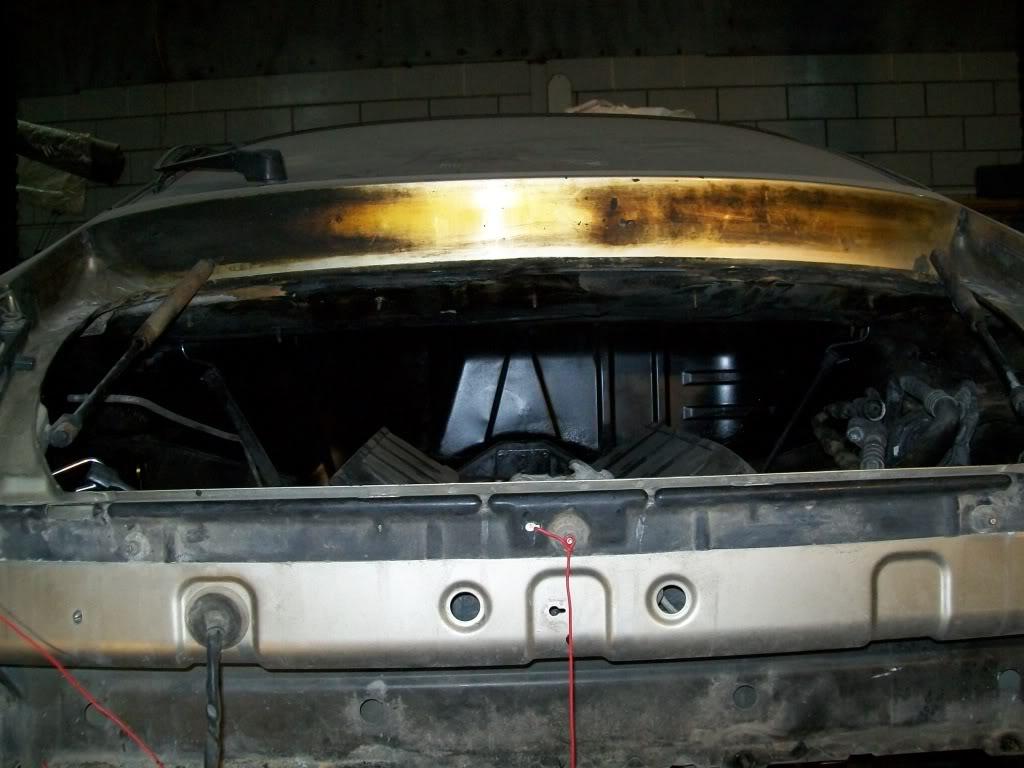
i can't help but see this in my head :
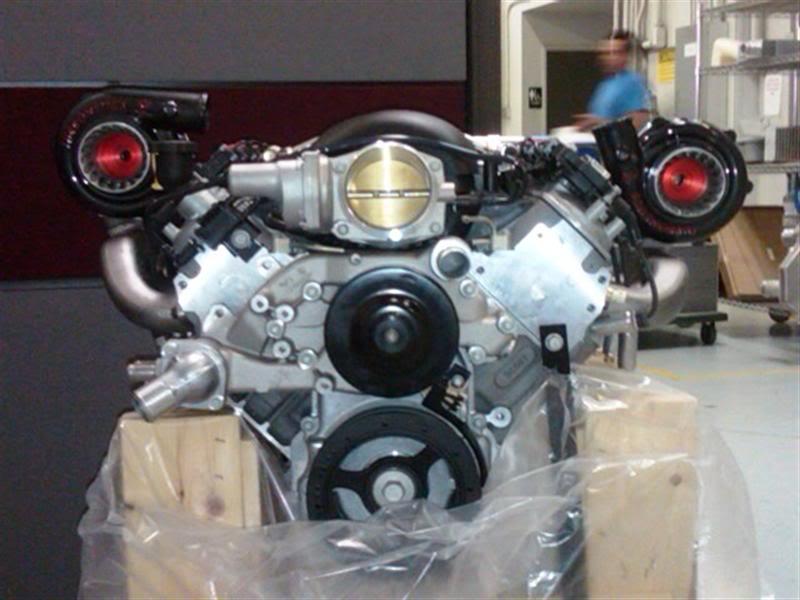
so i guess from the looks of it i can't make any real progress in the engine compartment side untill i get a trans in there ( or do some measuring myself on another car ), other than that , i can just build the other cradle and tack weld suff .
so , next up :
- finish the cradle
- build the damn brace i've been talking about forever to hold the engine
- strat looking into the fuel and return lines.
- take the center console out as well as the pedal assembly
- order more stuff
03.06.10
any how , got some work done last time :
took the bar that was attatched to the stock porsche mounts off as well as the mounts . i then started the other cradel by bolting in these plates inplace of the original mounts :
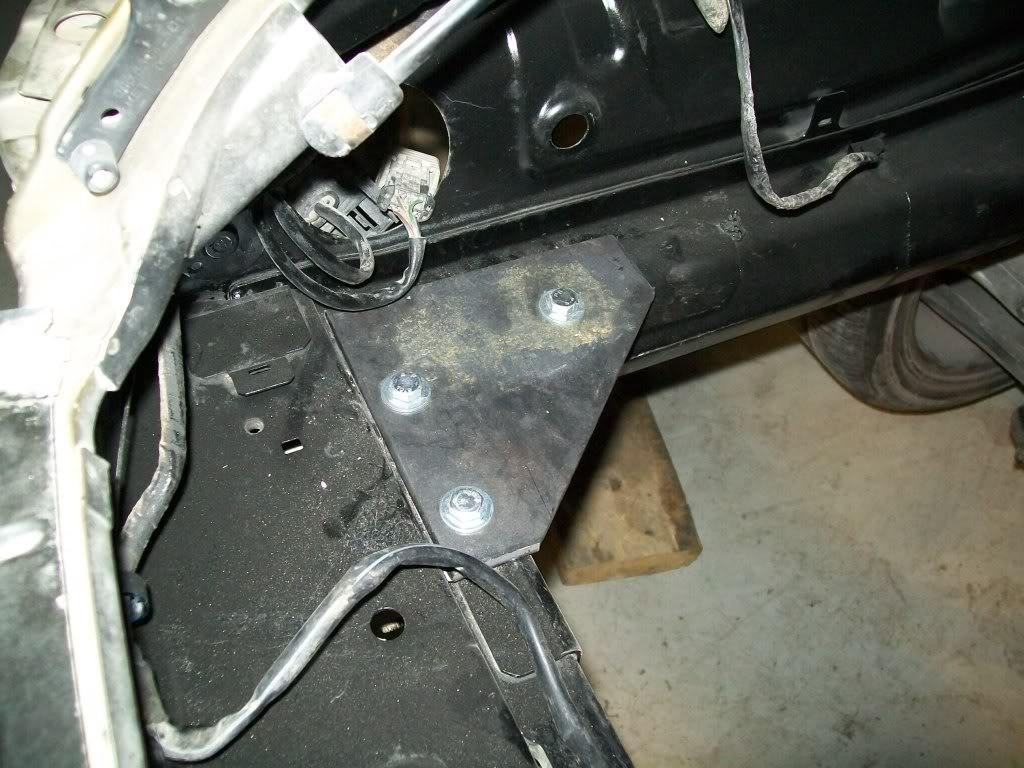
i then welded a nut to each end of the "u" :
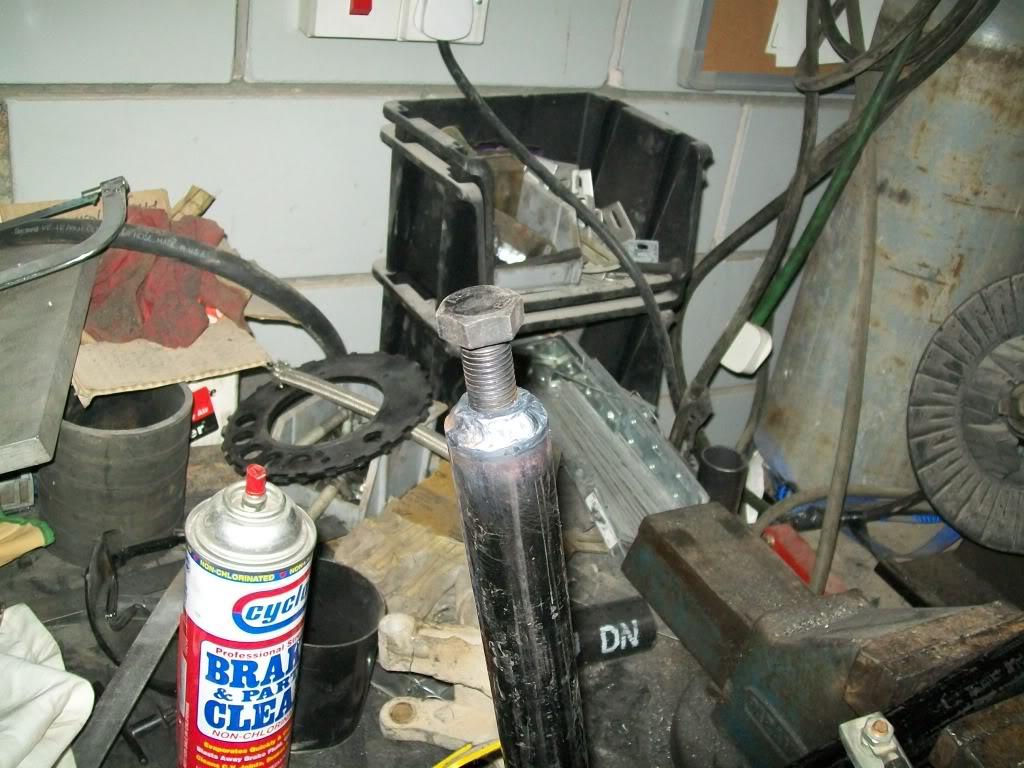
and drilled the plates so i can attatch the two peices like this :
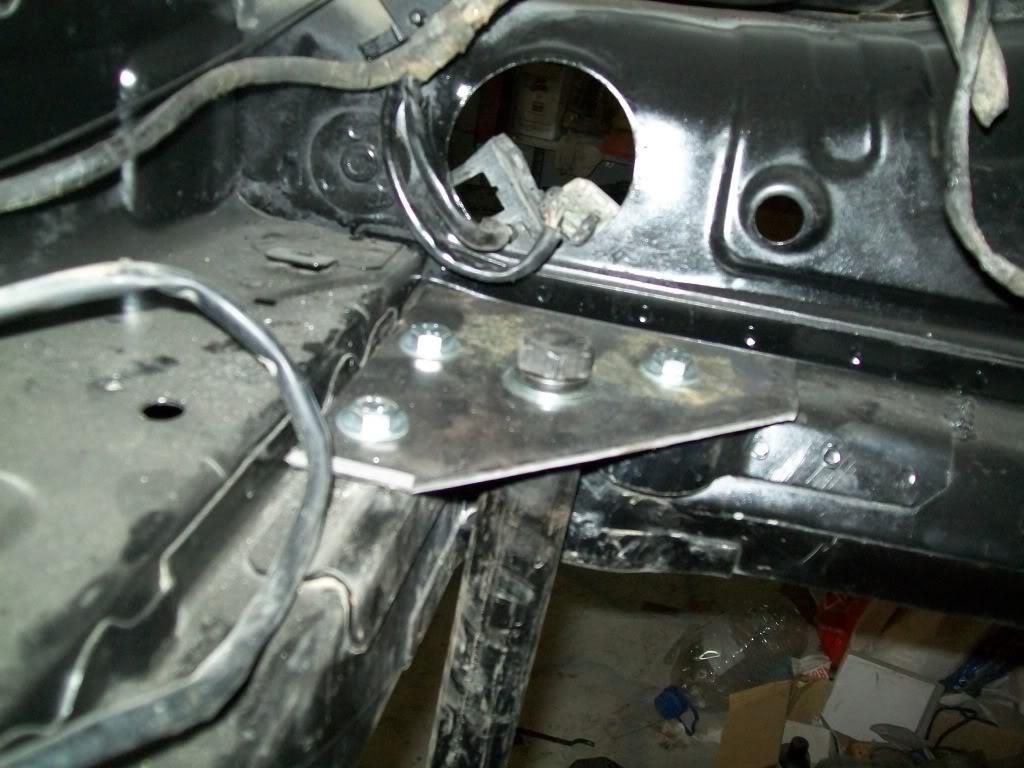
i also notched the two tubes going front to back , i just need to weld them on .
the block hugger headers came in too, and i'm not diggin'em
they exit right at where i want to run the bars holding the pedestals :
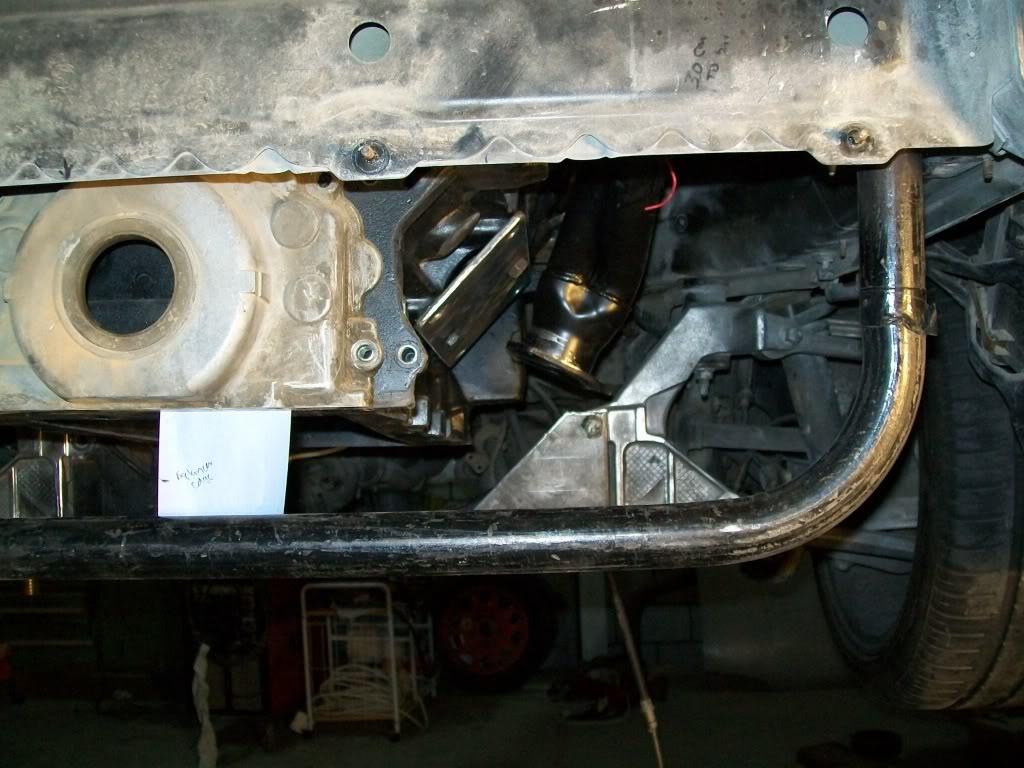
so i guess i'll just have to wait till i get the vette shorty headers in . they angle rearwards ( or forwards ) and away from the bars .
and on a side note , i found out that i can run two bullets horizontally on top of each other in the space where the original muffler sits all while maintaining the proper exit location for the tips , which gives more room inside the engine compartment or atleast a better chance to quite down the engine .
03.13.10
a little progress to report
got the other cradle (v1.1) kinda done
i first had to get two "L" bends to form the pedestals, then instead of notching them i drilled a hole on the ends and cut through the hole : (looks like the professor charachter on the muppet show )
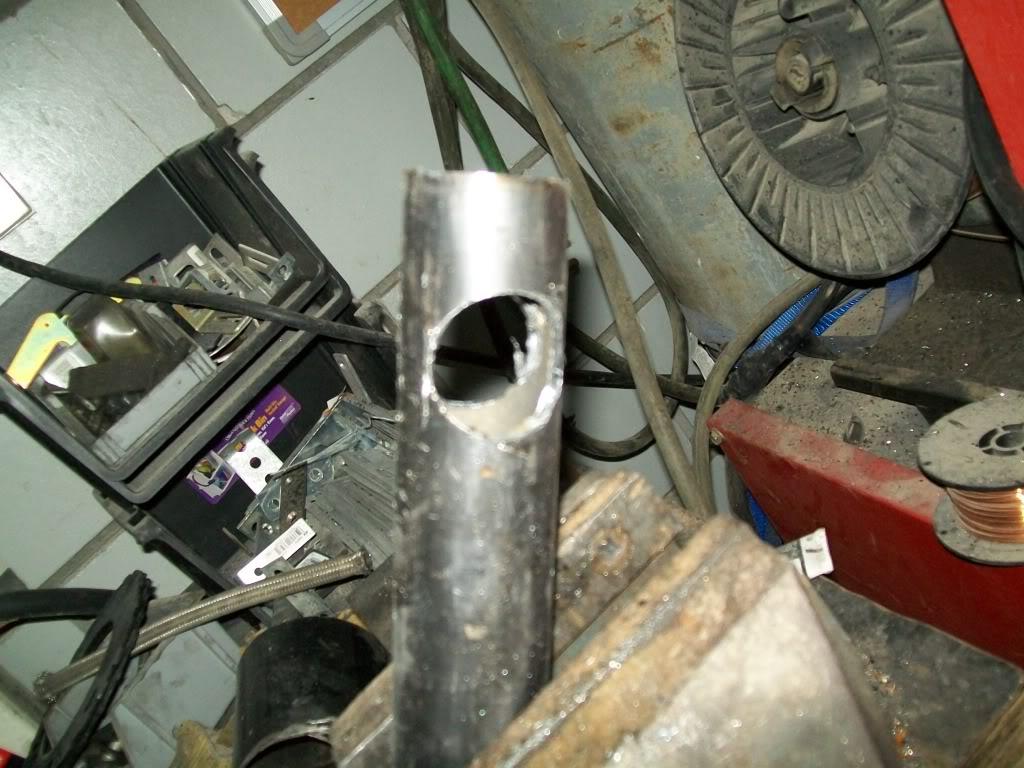
then i placed the L on to the main hoop and tacked it on :
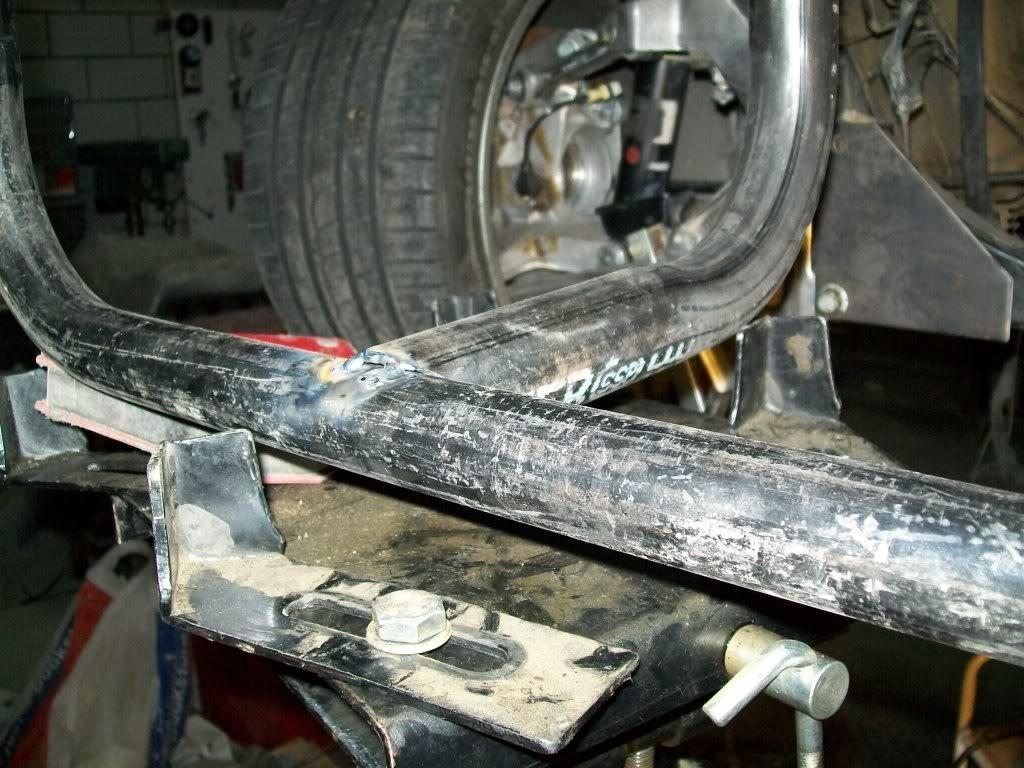
i plan on welding the other bit that had cut off so it looks like the pipes go through each other , this way a have a mounting point for a two hook or the exhaust .
anyhow, here is how it looks when both sides are on there:
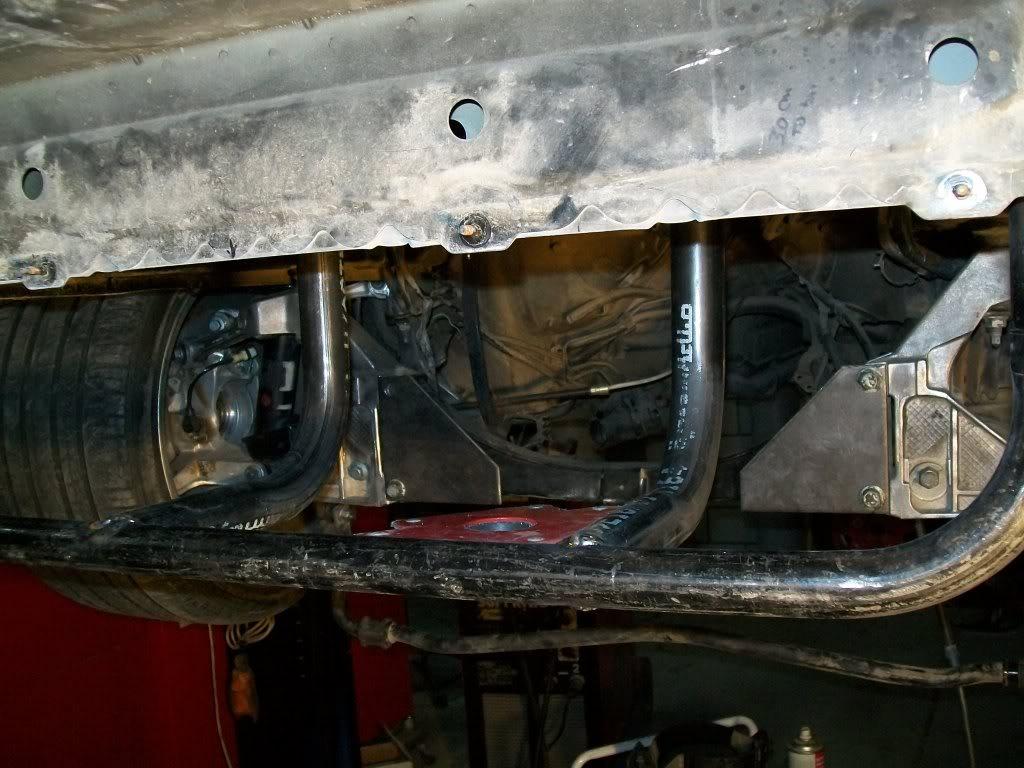
i then sliced the other ends of the pedestals at an angle so they sit flush on the motor plate:
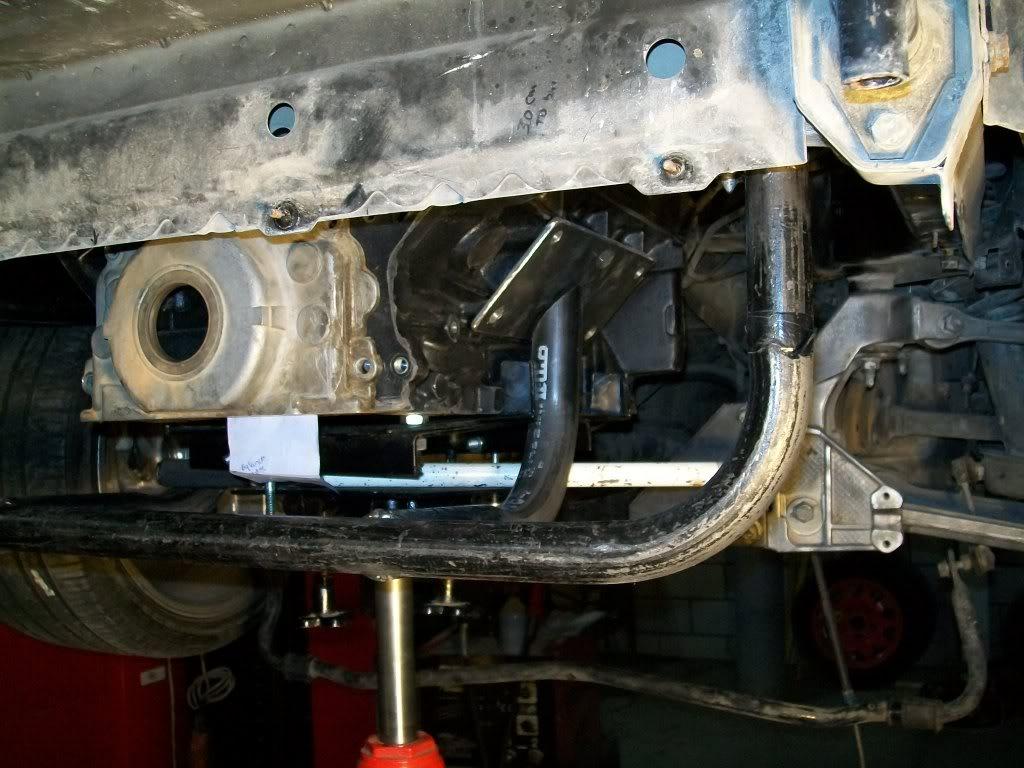
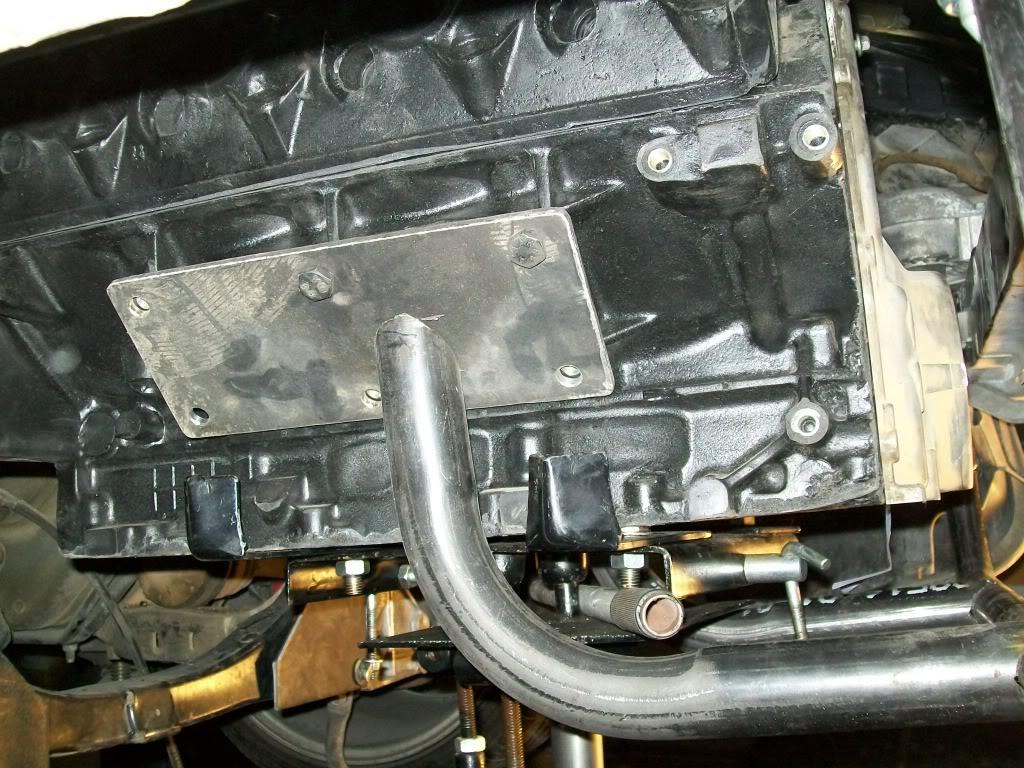
everything is tacked on there , i need to fully weld those bars ( except the motor plate connection - that waits till i get a tranny) but i have to wait till i get the TIG welder back from a buddies shop .
after welding that , this version of the cradle will be almost done
i guess next up will be the V2.0 of the cradle, got everything cut and notched to fit , just need to weld it up when i get the time.
other than that , i started messing around with some wiring diagrams,,,, not fun
so as soon as i'm done with the camaro and the race in a week , and the vette headers come in , i should be back on track
i'm also thinking of using an MR2 electric powersteering pump ( just like in the Audi build thread here), this way i can run the ac compressor and alternator (using a BMR mount ) using belts , and keep the belts on a level below the rearmost crossmember or brace and run a remote EWP and the electric PS pump , this way i can pull the engine towards the rear a bit more ,,,, of course this all depends on the transmission ,,, which is not here
but its nice to have more options.
03.23.10
jmarsa, i thought about that but moving it forward a few inches only alters the angle slightly and shouldn't affect length much .
marky, i would really appreciate it ! thanks!
ls1450 , the engine is an LS1 but it will run the LS3 stuff like the balancer and water pump and other stuff.
on a side note , i just got off the phone with efren from LA dismantlers and they hooked me up with the transmission as well as EVERYTHING i needed for the conversion from automatic to manual . they should have everything ready to ship in a couple of days
that should keep me busy for a while
i'm also doing some research on the electronics i'll be using from the porsche , so i've started with the equivelant of the crank position sensor. on the porsche the sensor is mounted on the bellhousing and the trigger wheel is on the back side of the flywheel ( unlike the ls1 where the reluctor wheel is on the crank in the engine) .
from what i gathered i don't think i can use the porsche setup , since most of the adapter kits make their own flywheel which does not incorperate the trigger wheel ( wich is a 58toothwheel (with 2 missing teeth for a total of 60).
so i found some sites that sell a 58 tooth wheel which i can bolt on the front of the balancer, or press fit them on the back of the balancer like this :
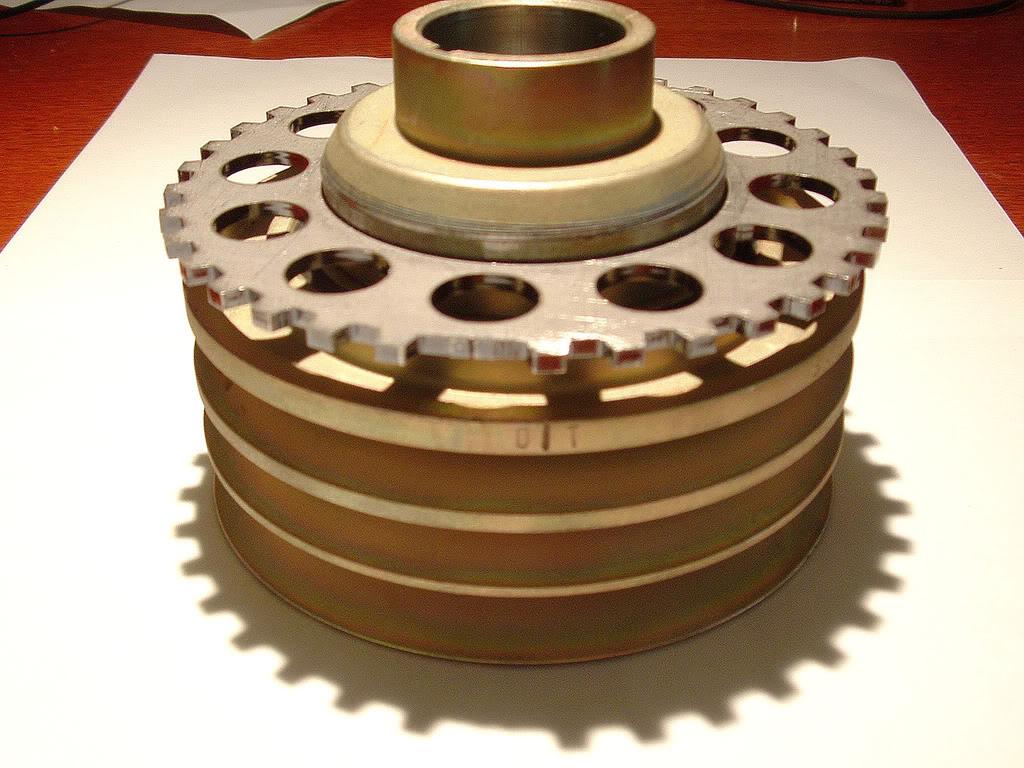
or machine the teeth on the balancer itself like this :
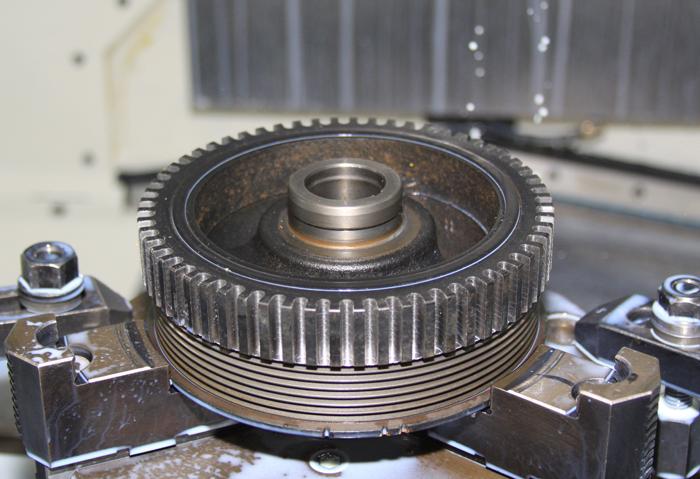
if i was going to use this method i most likely have to use an SLP pulley cause of the deeper or taller walls they have which should make it much easier to machine
or machine the flywheel back side like this :
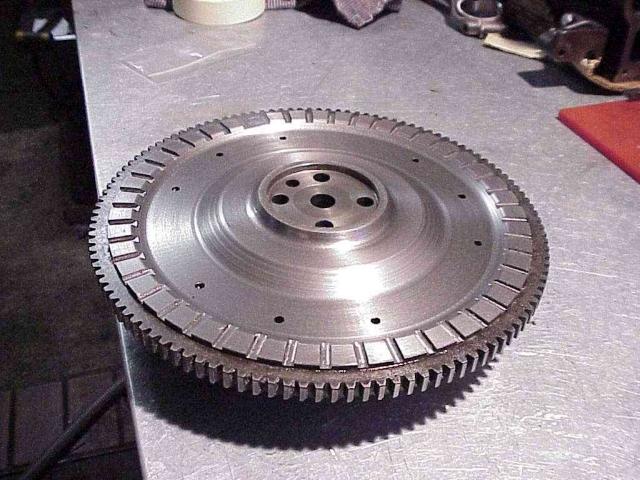
but i'm not favoring this cause it might throwoff the flywheel's balance .
off course with all these methods i have to fabricate a bracket to hold the stock porsche crank sensor.
04.03.10
not much going on right now , i took the center console , shifter mechanisim , and E-brake cable all out , i also took out the stero and cd changer , and the climate control unit , and i'm in the process of removing the dash in anticipation for the new pedal assembly ( it comes as a whole peice connected to the bracing behind the dash .
the headers also should be here today and that (along with getting the stock exhaust ,,,, which i did not )should get me rolling again on mounting the engine.
i was also contacted by LAdismantlers sayign all my parts are ready
http://www.ladismantler.com/index.ph...em&inv_id=2263
they should ship out monday or tuesday !
so , next up on the list
- remove dash (tons of fun right there )
- mount headers and mock engine in and finalize both engine cradle designs
- seperate the wires i need from the porsche wiring harness.
- figure out what else i need to do
04.07.10
well finally some progress to report
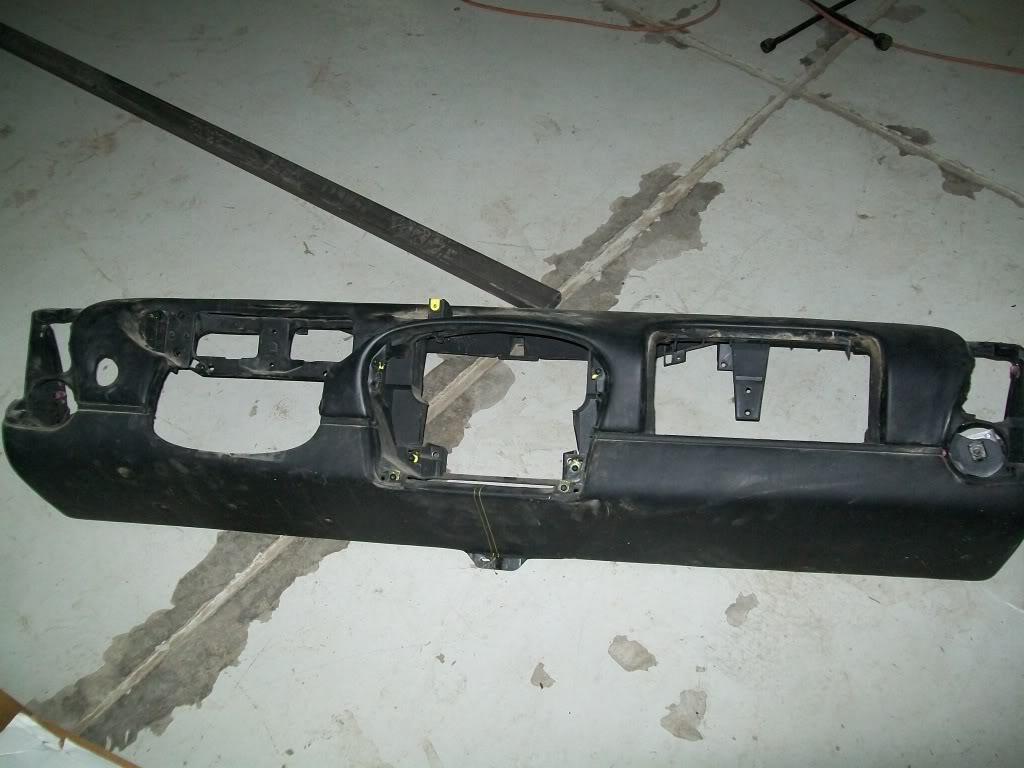
i finally got the damn dash out ! man is that thing a pin in the rear ! 10 gazzilion screws and then some !

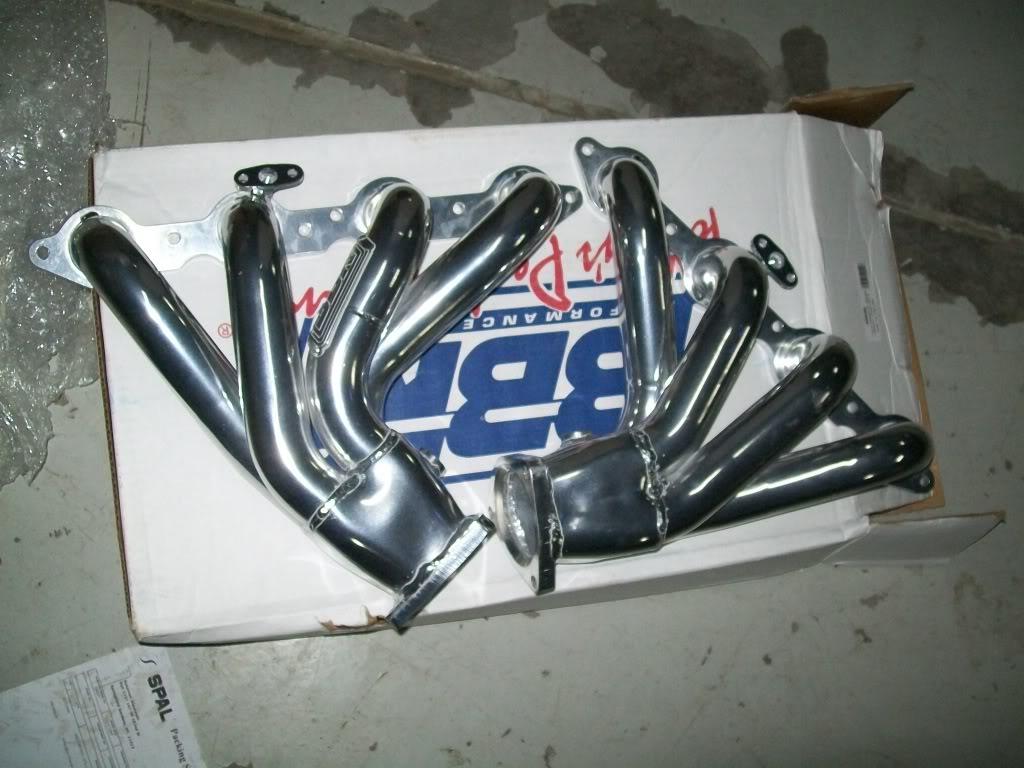
also vette shorty headers cam in today ! and might i add they are blingy :
i put them on the mockup engine and started thinking about crossmember placement and exhaust routing . the headers fit nicly and clear everthing around them using this cradle .
the plan is to run them so they face towards the back of the car like so :
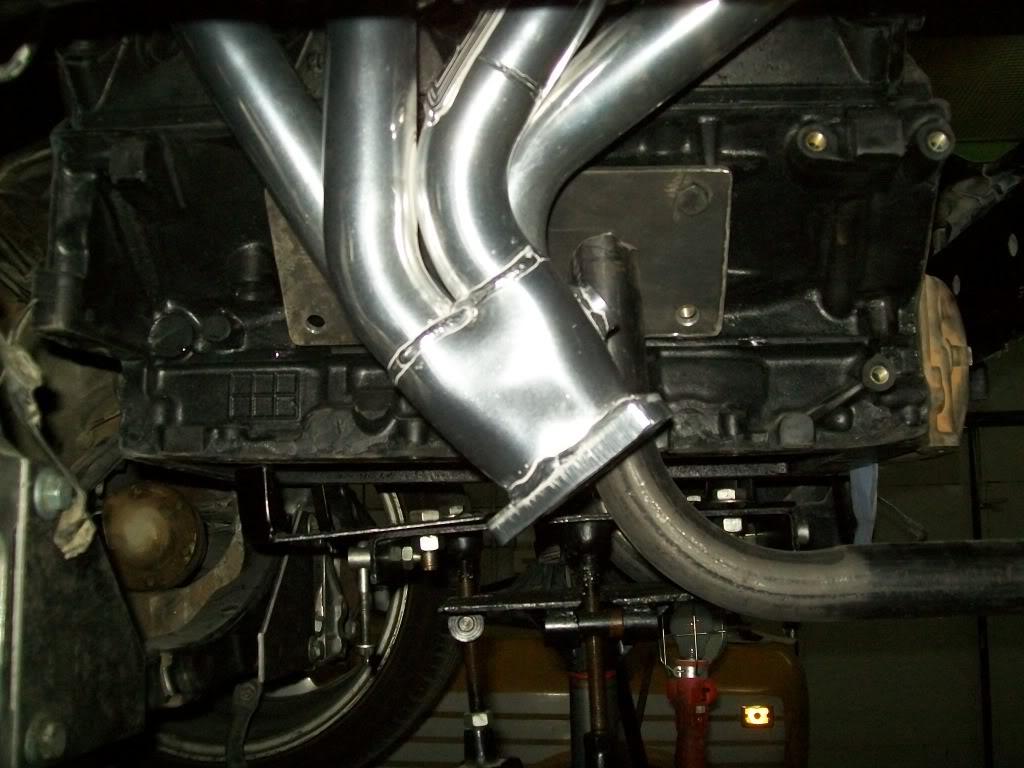
and have a 45deg. elbow right after the flange so the exhaust becomes horizontal , then it makes a 180 deg. u turn towards the front of the car into a 10" muffler or bullet (wich will be horizontal too), after that the exhaust exits the muffler and makes an upwards sweeping uturn into another bullet or muffler that will be 17" long and sits right above the other muffler/bullet. after that the exhaust can either go straight out to the tips or i can run it into the stock muffler for more noise reduction .
another thing i noticed is that with this cradle i have no clearance issues between the motor mounting plate and the header, but if i go with the other design cradle (using the F-body motor mount ) it might touch or be too close to the header. so the solution would be to use the vette style aluminum pedestal and doughnut mount for a clean and nice fit.
i should have the welder back in a few days , so i can finish up this cradle and start mocking the engine and exhaust on the other cradle too ( don't ask me why i'm doing things twice , i don't know )
on a side note, all the trans stuff should be shipping out tomorow !
so , next up is :
- order mufflers and u bends for exhaust system
- weld up first virsion of cradle to make it officially finished
- strart tacking together the second cradle and see how everything fits
- remove pedal assembly
- figure something else to do while i'm there
04.12.10
well a minor setback but not major i guess;
in my infinite wisdom i welded the engine pedestals to the hoop i made without double cheking pan clearance ( i went off the side of the block ) . i later noticed that the oil filter kicks out a bit and it would not clear the pass. side engine mount .
so to cure this i had to cut and grind the welds i made the engine mount plates ( the "L" ) and reweld them at an angle - basically a few inches away from where they were before . this was the best way to do it since it still gives me the room i want to run the exhaust .
and to further clear things up , i can not use the F-body mounts with the vette headers ( they touch ) , so if i am to go with the other design , i have to get some vette mounts and pedestals .
so i guess now i just have to wait for the trans and exhaust bends and stuff to show up so i can finish the bottom part of the car ( i know i 've been saying that for a month now )
04.21.10
well i have some good news and some bad news,,,,
the good news is that the transmission and other things needed for converting the car from an auto to a manual showed up ! :
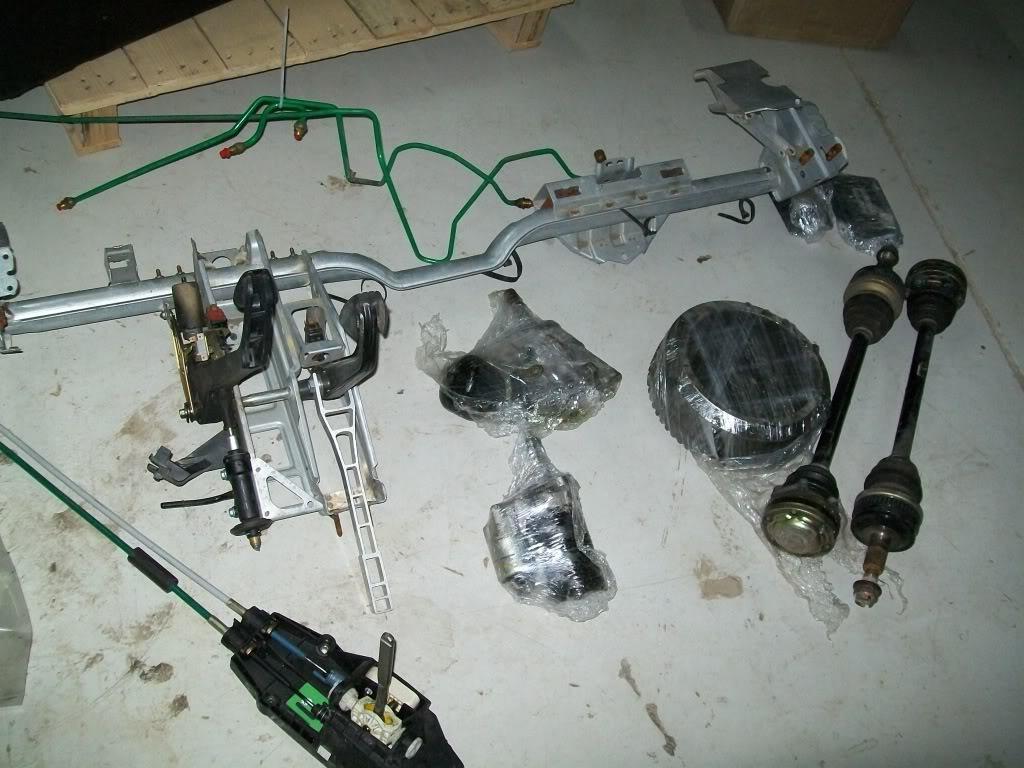
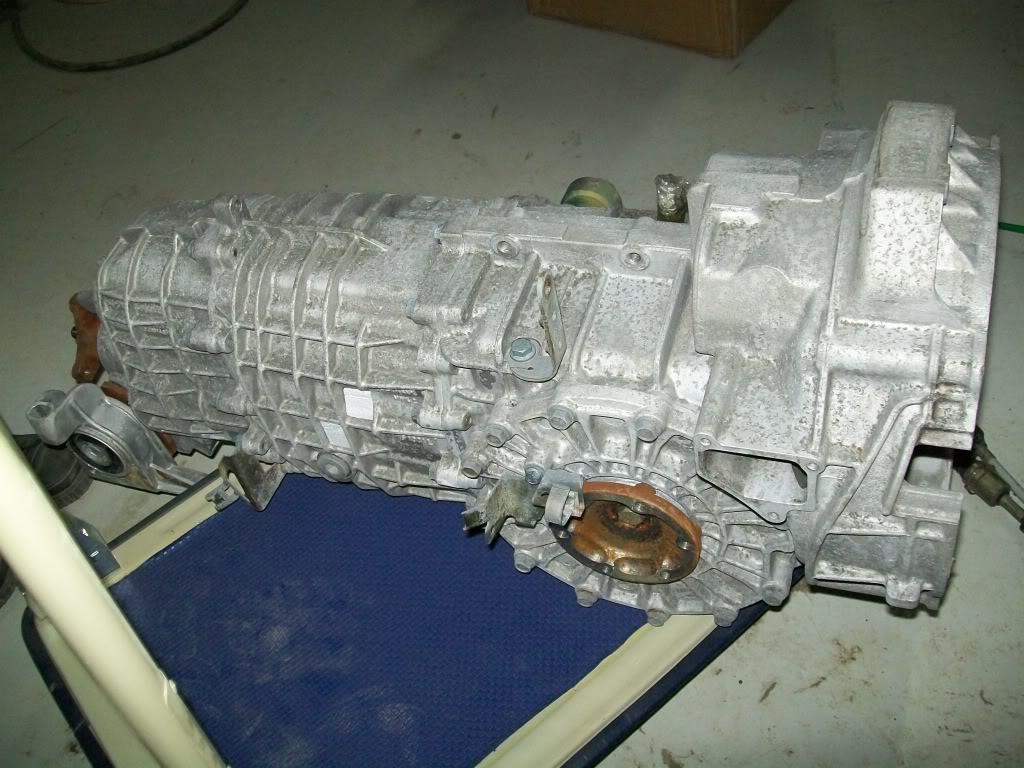
,,,, the bad news is that my worries about not being able to push the transmission further towards the front of the car became true.
it is so cramped where the transmission mount is that is almost impossible to push the tranny forward more than where it is stockbecause of how the coolant pipes are routed.
now i didn't think of this option last night when i was under the car , but i might be able to relocate the transmission mount further if i notch the floor pan and push the hoses into the recess therby clearing some room to relocate the trans mount . but that has to wait till i go back there.
any how , its a good thing i didn't weld up the mounts according to the measurments i had before . and guess what !!!??? i have to redo the cradle again !!
the reason for redoing it is that the oil pan will hit the bar if i use the stock trans location. here's what i mean :

so ,,, the new mounts will be much simpler , i just have to get some 90 deg. bent tubes today and start chopping away .
after that is done and i'm happy with where the engine sits i will have to start looking into where i have to notch the rear brace ; the engine will be moved so far back that in order to run a water pump and power steering i have to clerace the brace a bit to make them fit . here is how the engine should sit compared to the brace when done :
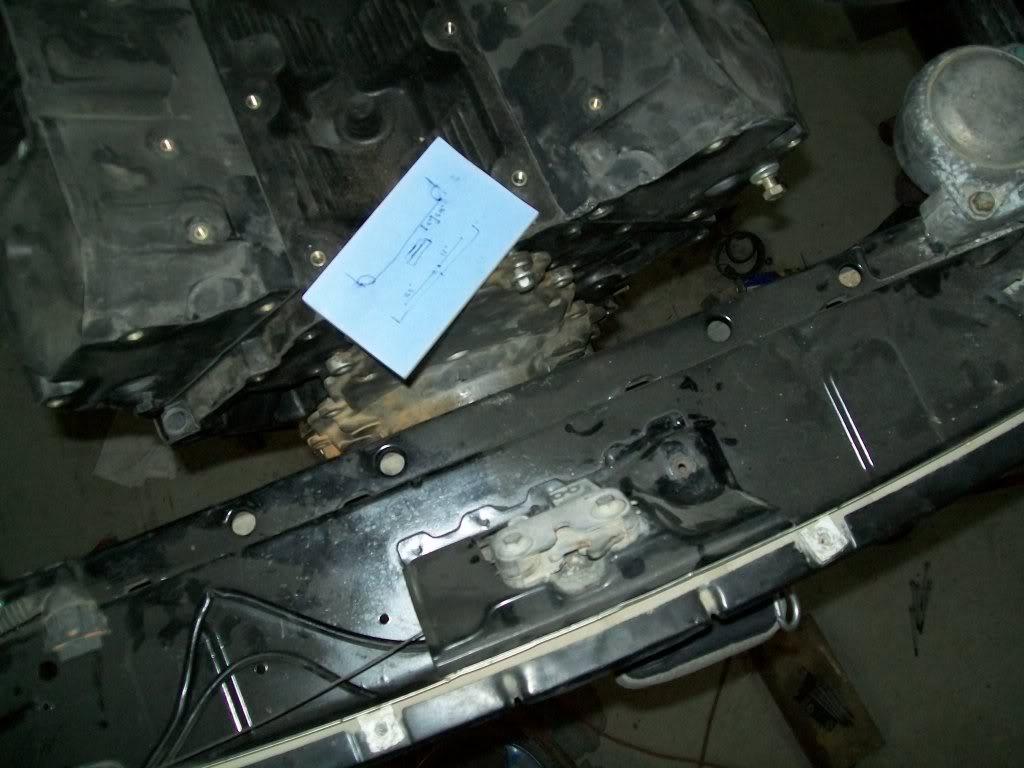

(don't mind my "air gap" oil pan )
the brace should be notched to about where the spot welds are in the bottom pic or where the latch starts in the top pic. , offcourse after notching it i have to run a brace ( most likely a tubelar one ) from one side to the other to maintain the integrity of the body.
and in another moment of "DOH!" i noticed that the AC compressor and mount i had on the real engine ( which i was using for measurements for accessory drives) was of an F-body ,,,, and the bracket and AC i am intending to use are off an LS3 ,,,,, which means the engine is going to be overall narrower than what i had annticipated,,, which means i can't cut the brace till i get an accurate measurement .... (man this measure twice, cut once stuff is killing me ! )
i should have the tranny in the car by tonight , and i will know then if i can relocate the coolant hoses or not. i decided to try and focus on the bottom side of the car first and leave the top part ( interior, dash ,wiring , etc.) for later till i can get the car off the lift . that way i can roll it out somewhere whare i can have more working room next to the car.
04.25.10
One small step for man , one giant leap for sam-kind
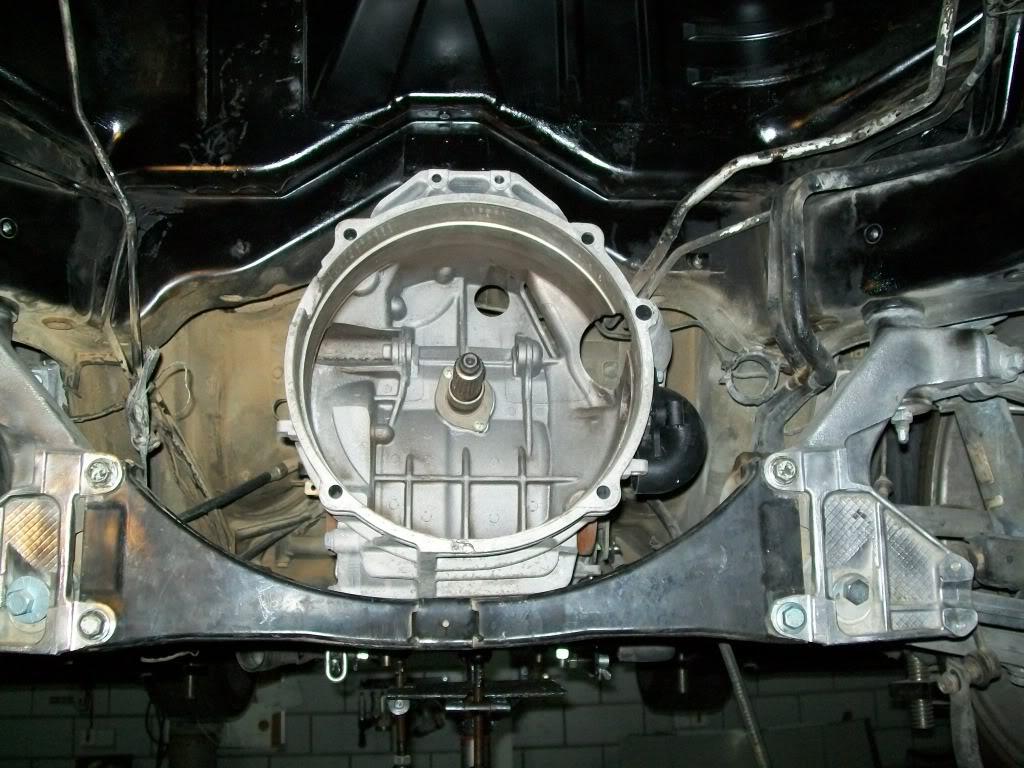
Trans finally in the car, and like I said before moving it forward is almost impossible ,,,, if i use the stock transmission mount
I’ve been messing with an idea of another trans mount (fabricated) that would get me those precious inches of clearance, but more on that later ( I just started thinking about it and I have no idea if it would work or not , I have to go back to the garage and physically check it). here is how the original trans mount looks like :
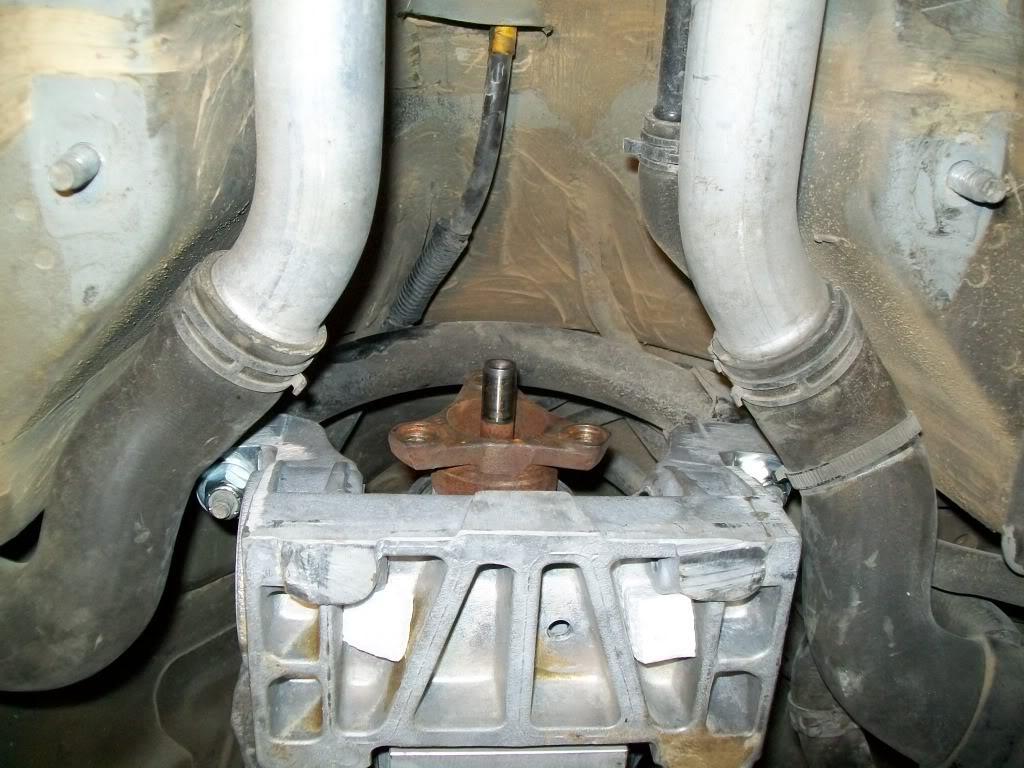
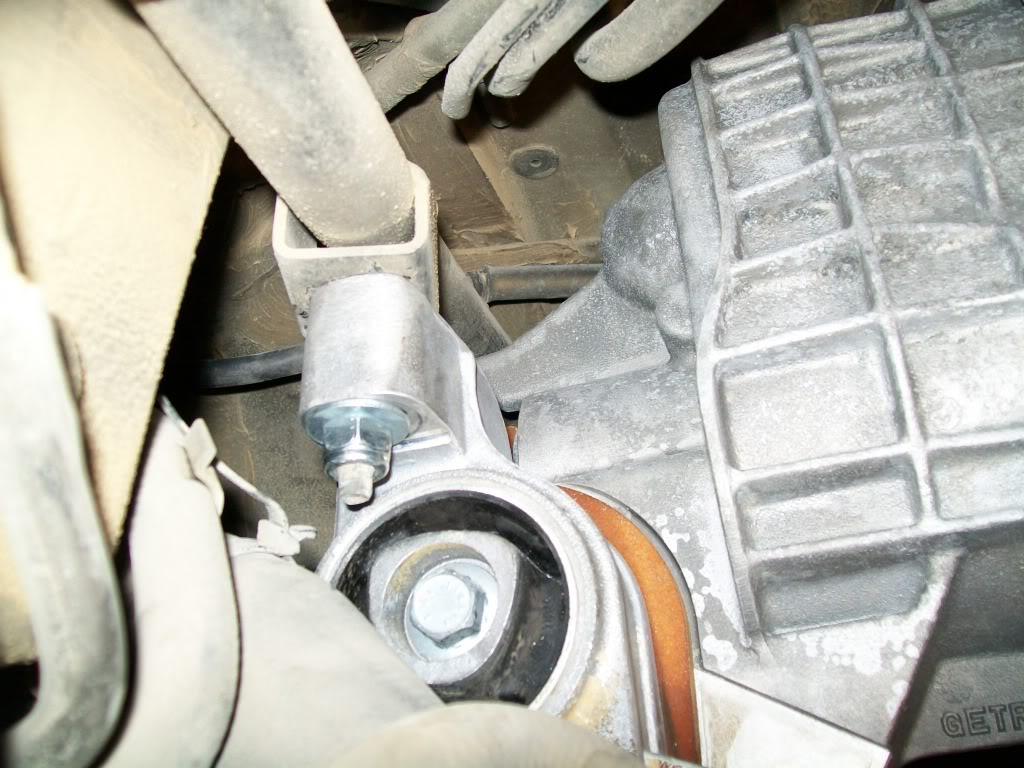
now,, i said before that i might have to redo the cradle because of interfernce between the cradle and oil pan , but now that i'm thinking about it , why not just notch the pan abit ( all i need is about 1"-1.5" of clearance) , or get a custom pan made that would be a bit shallower than this one (all this assuming the trans stays in place).
i guess now i have to start messing with the trans mount and see what i can do there. after that is done i can focus on the engine compartment again and locating the engine in there. ( guess no new cradle for now )
04.26.10
more progress !
i got the original trans mount and xmember off and saw how much i can slide the tansmission ; i think i got about 5 inches of clearance ! enough to install the engine without needing to cut the brace.
here it is before :
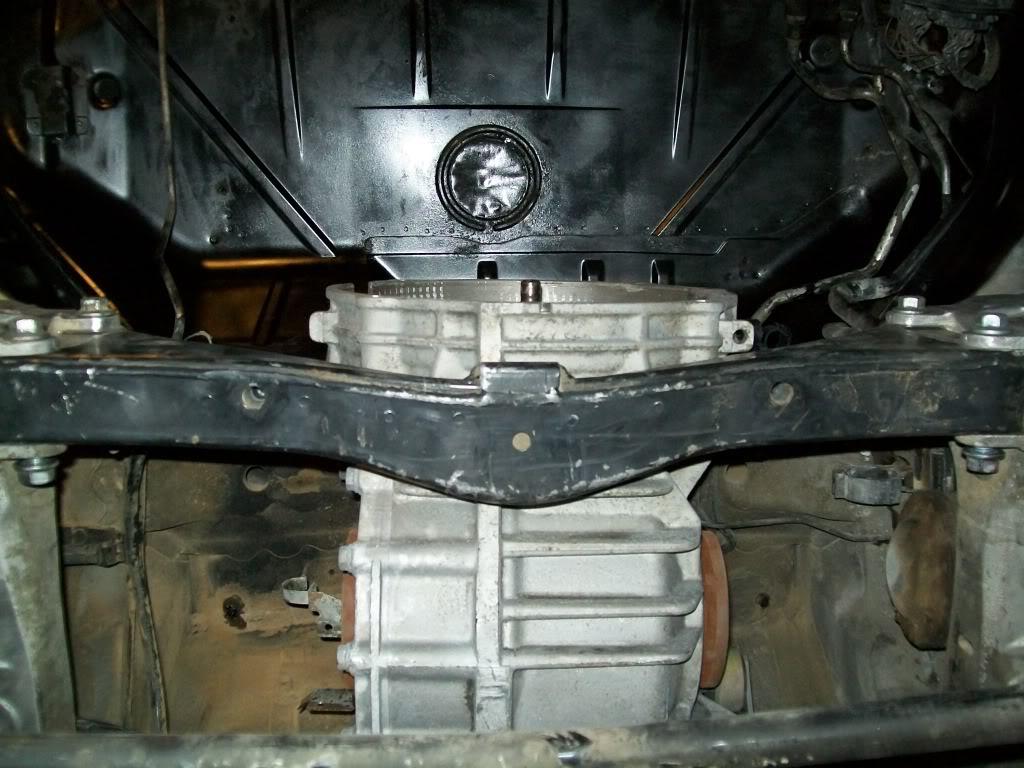
and after :
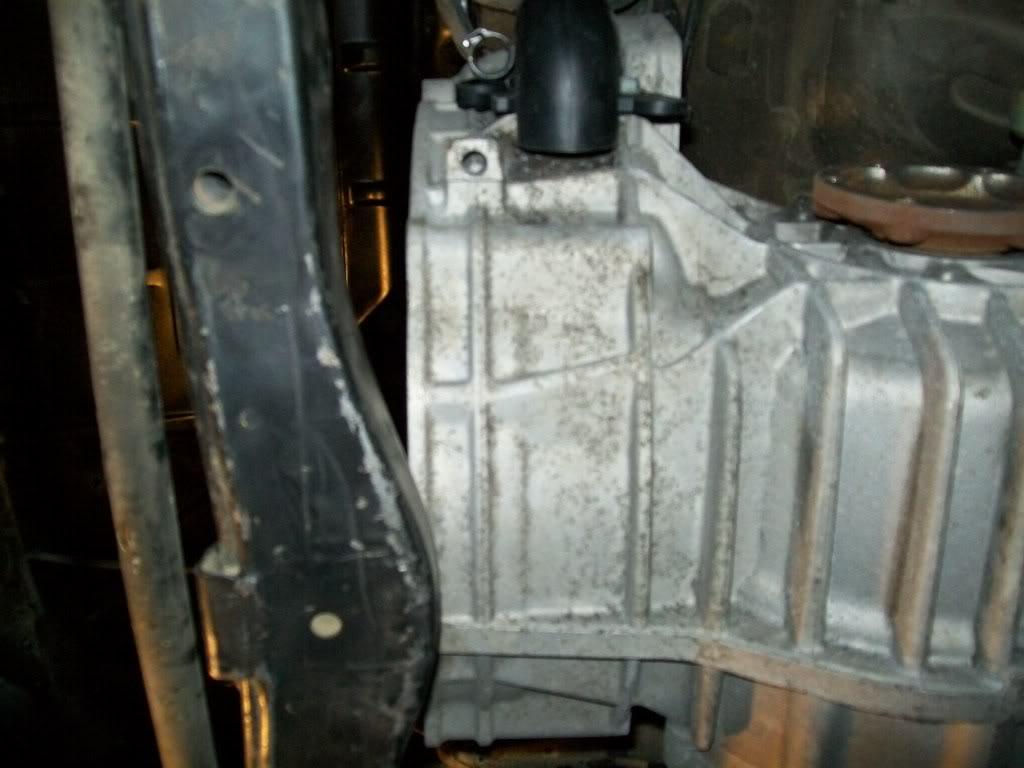
removing the original mount will get you this nice little pad that porsche so kindly made removable ( 4 allen key bolts hold it on to a flat part of the trans):
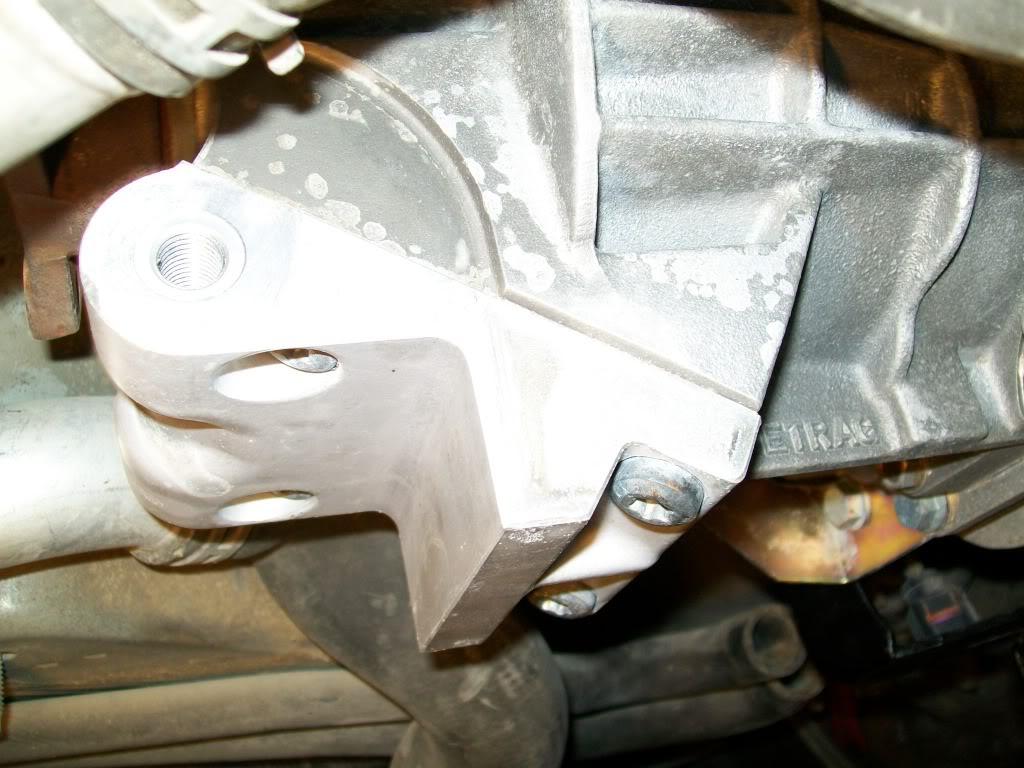
i'm not going to take it off since it will be part of my new trans mount, it will have two tabs bolted to the sides and going down to a regular gm trans mount (poly) like so :
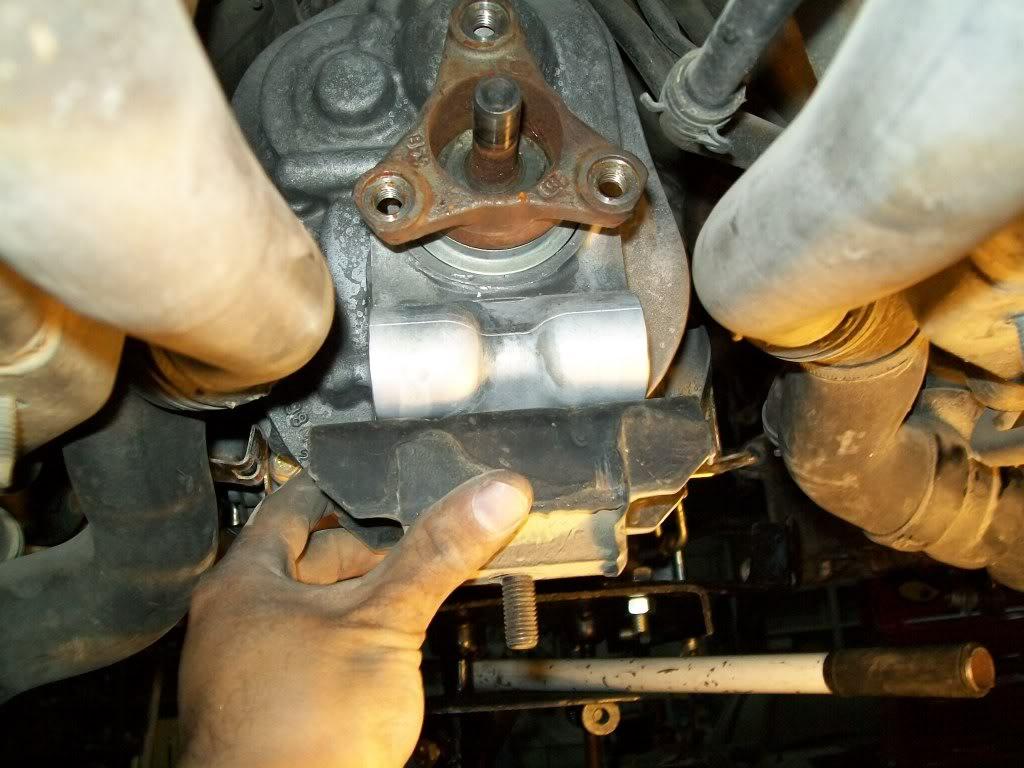
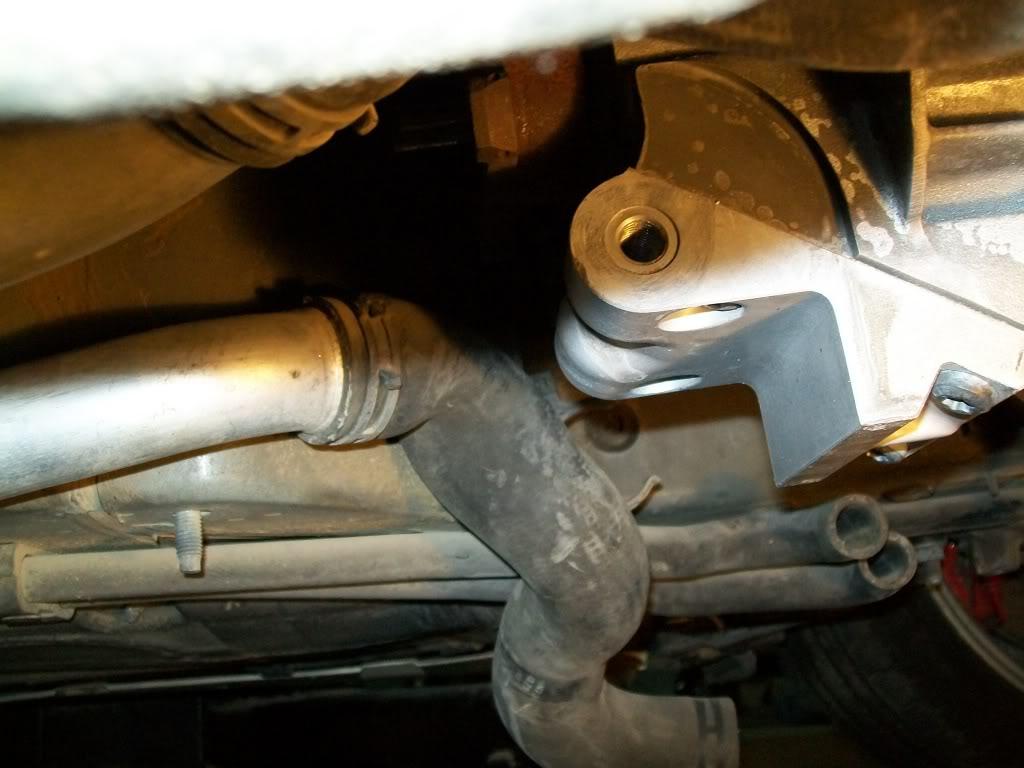
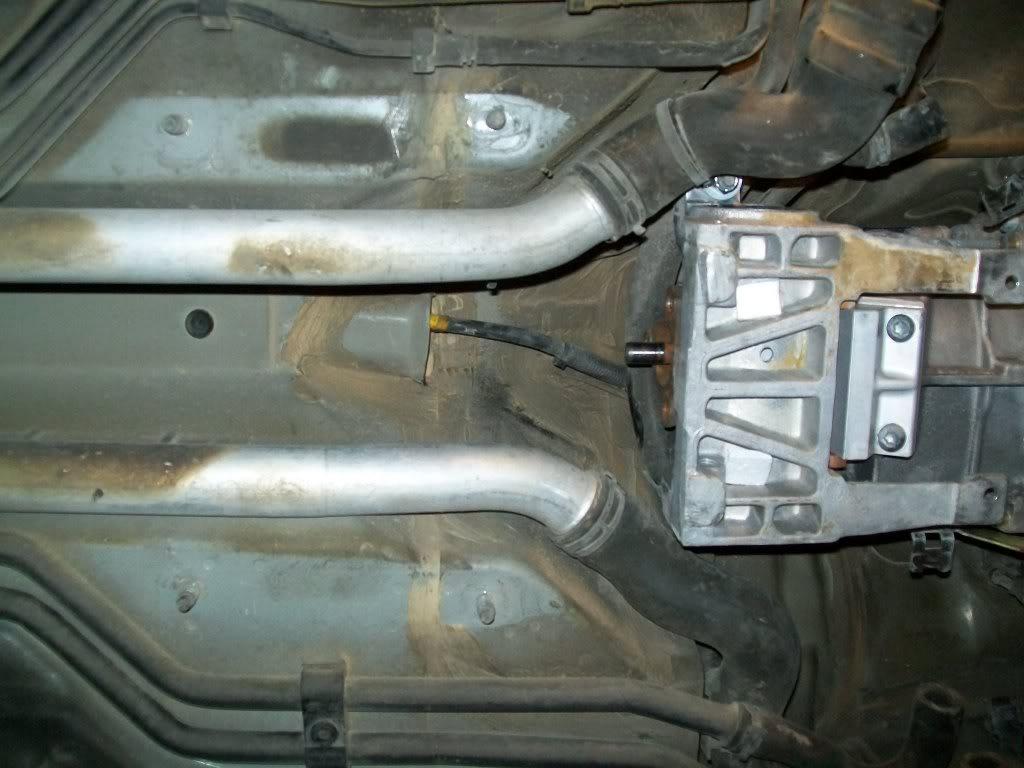
and the nice people at porsche also added four beefy studs under the car ( just like they knew someone would need them someday ) right infront of the transmission to use as a mounting point for the new trans xmember ( here is one on the left side of the picture ) :
and here are all 4 :
now it isn't all smooth sailing , there are a few issues to deal with :
first off is the shifter mechanisim on the transmission hits the E-brake and strater + cable , it's not the shifter lever itself but a counter weight it has on it (see pic ) that is hitting , the solution would be to cut it but i don't know how that would affect shiter "feel"?
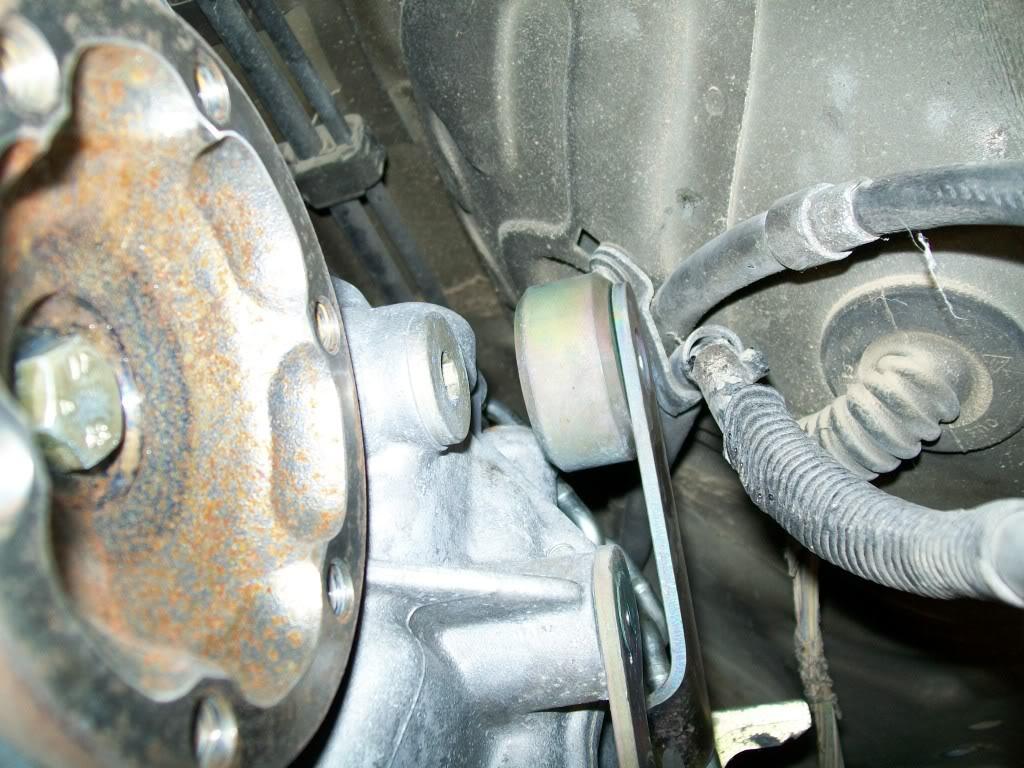
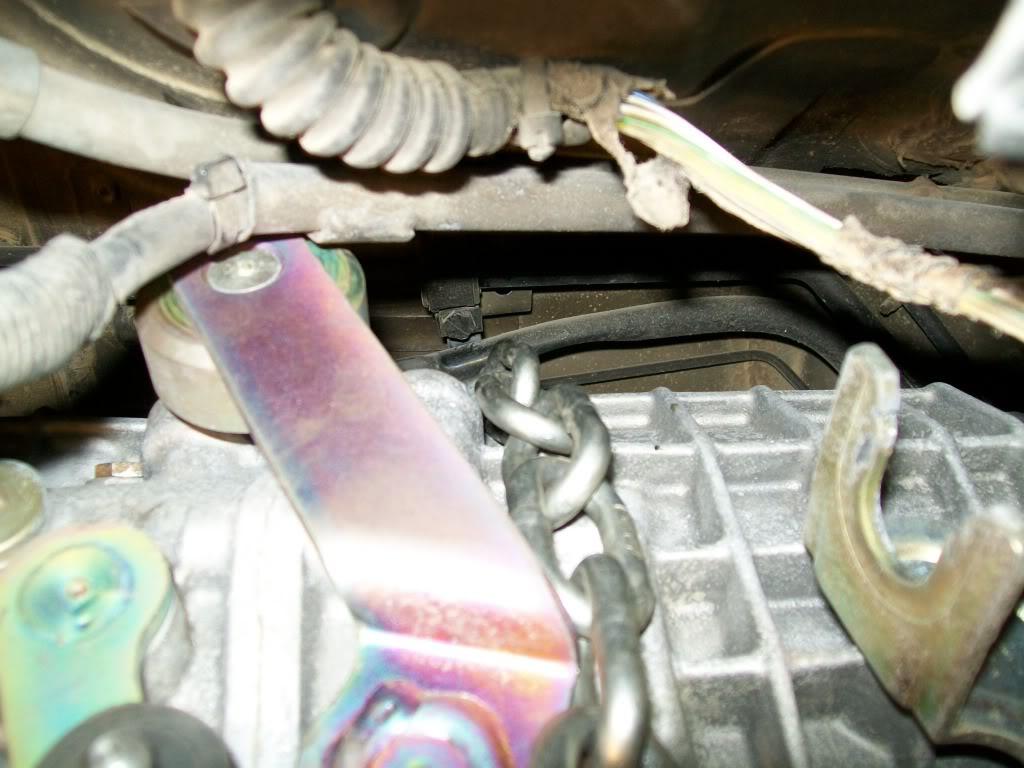
here is a better pic of the part :
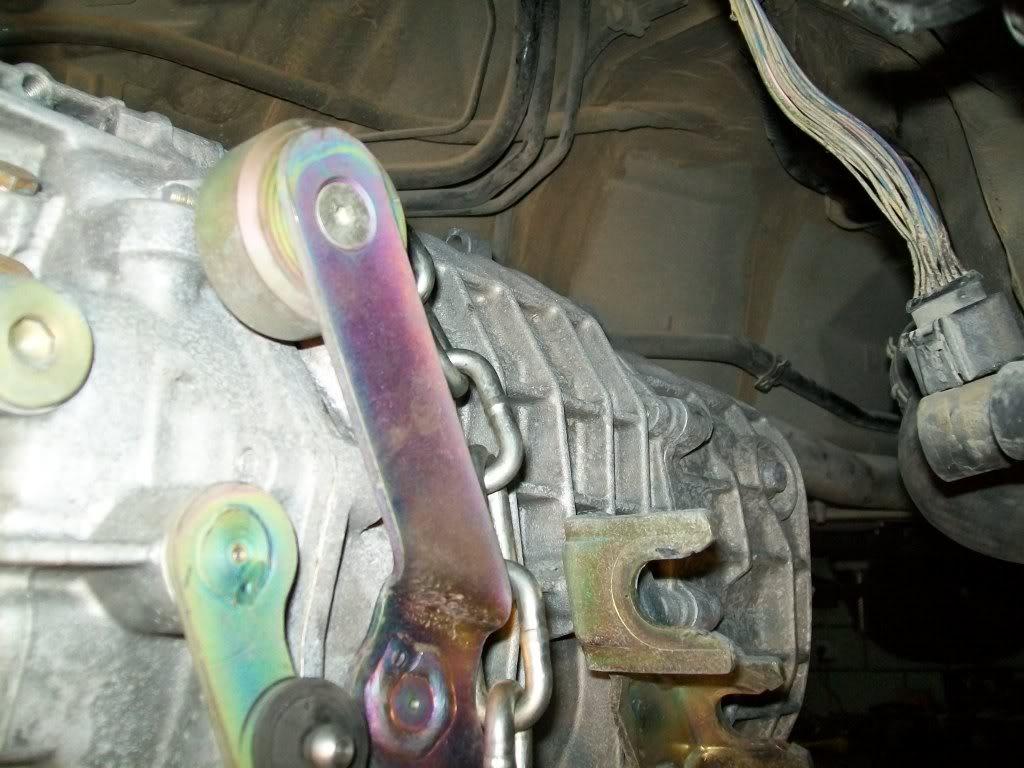
the other issue is the driveshaft length , but that is not a huge problem since i can have it shortened ( it already has a loooong splined end)
last issue is the cv joint angle , i'm doing some reading on how much is too much angle and if these are 930 style cv joints or not ( 930 joints can handle a good amount of angle).
here is the befroe angle (stock location ) :
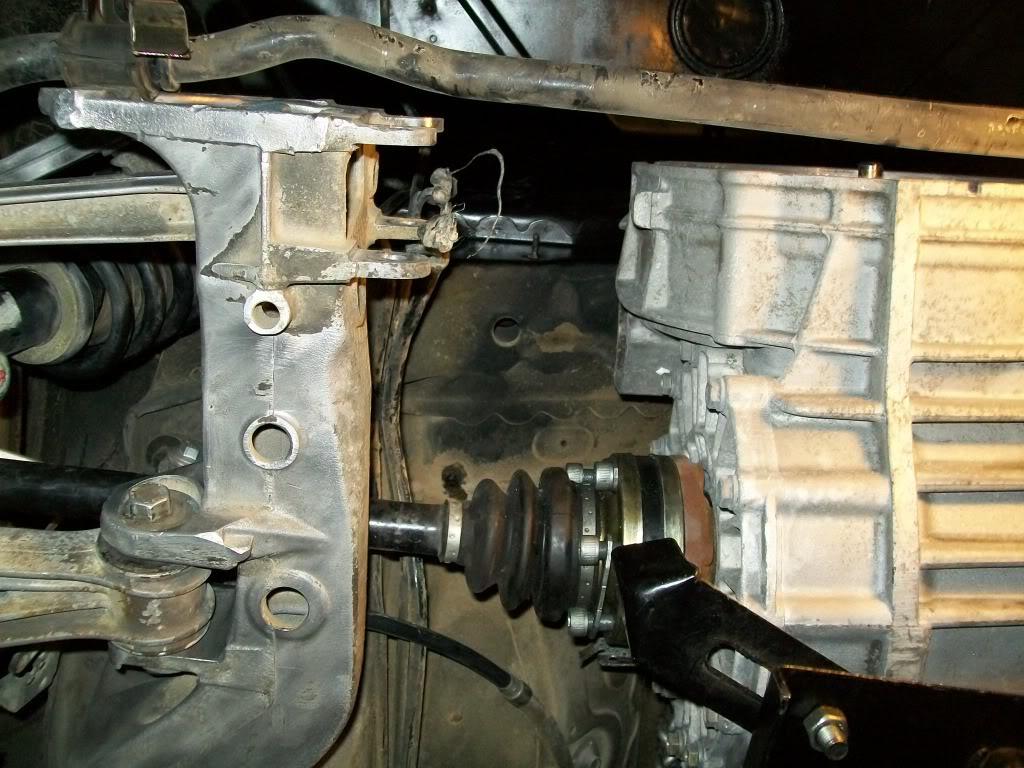
and the relocated angle :
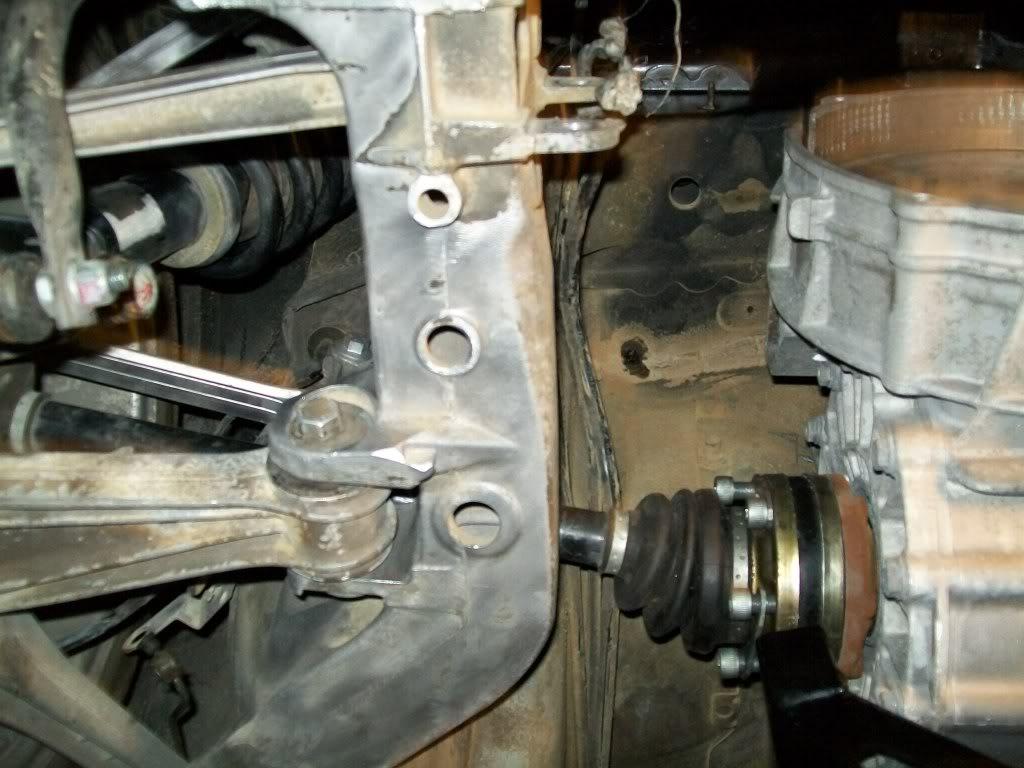
what do you think?
(note , did some onscreen measurements and it seems the angle of the axle is around 12 deg.)
so , right now i'll just make the trans mount without cutting anything on the car ( so as to go back to stock location if need be) . it'll most likely be a plate that bolts to the 4 bolts and has a tab running under the trans mount .
if the relocation process fails , i guess its time for the sawzall !
04.29.10
easy, i looked into different axles and just like you said there are options
i do agree the weight distribution comment , but over all moving the tranny that much is just too much of a hassle. soooooo, the next best thing is to move it just a bit!
i turns out if you flip the trans mount around and machine the small pad on one end that interferes with the transmission case, you end up moving the tranny forward about 2 inches !
here are some pics :
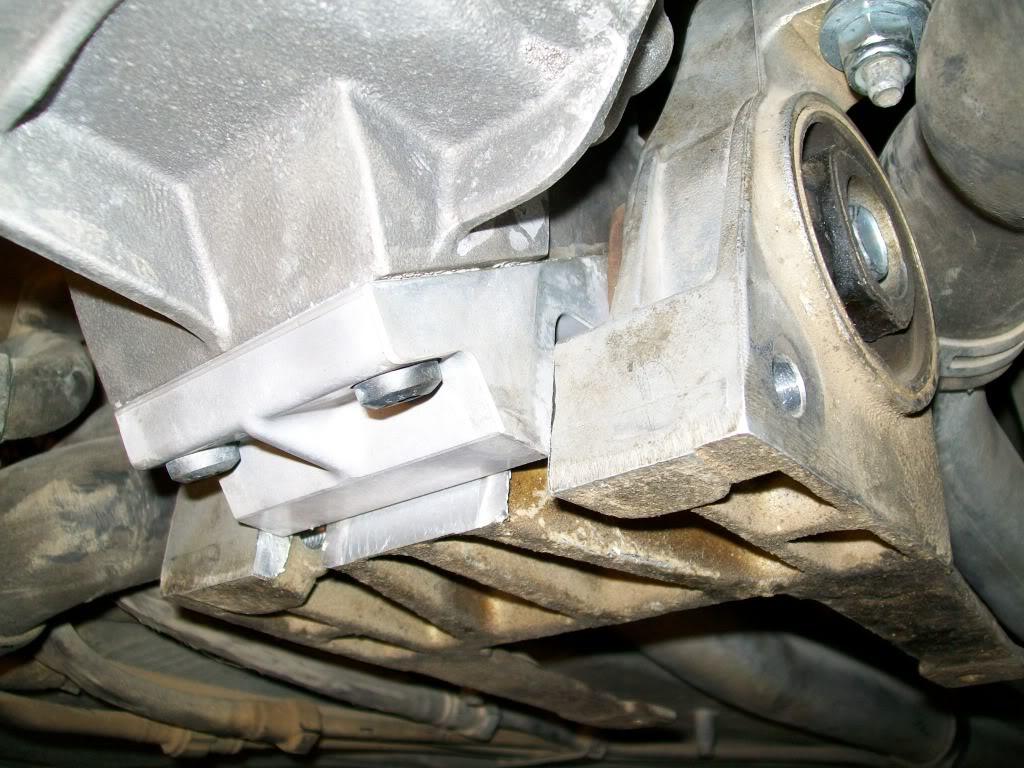
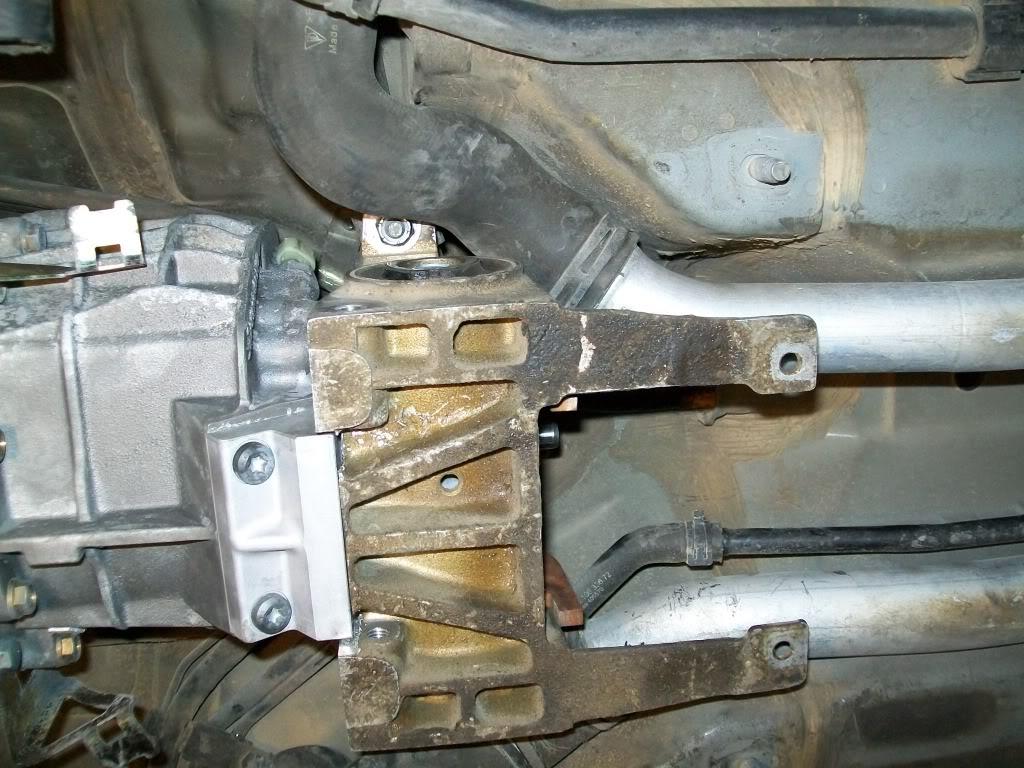
and the result :
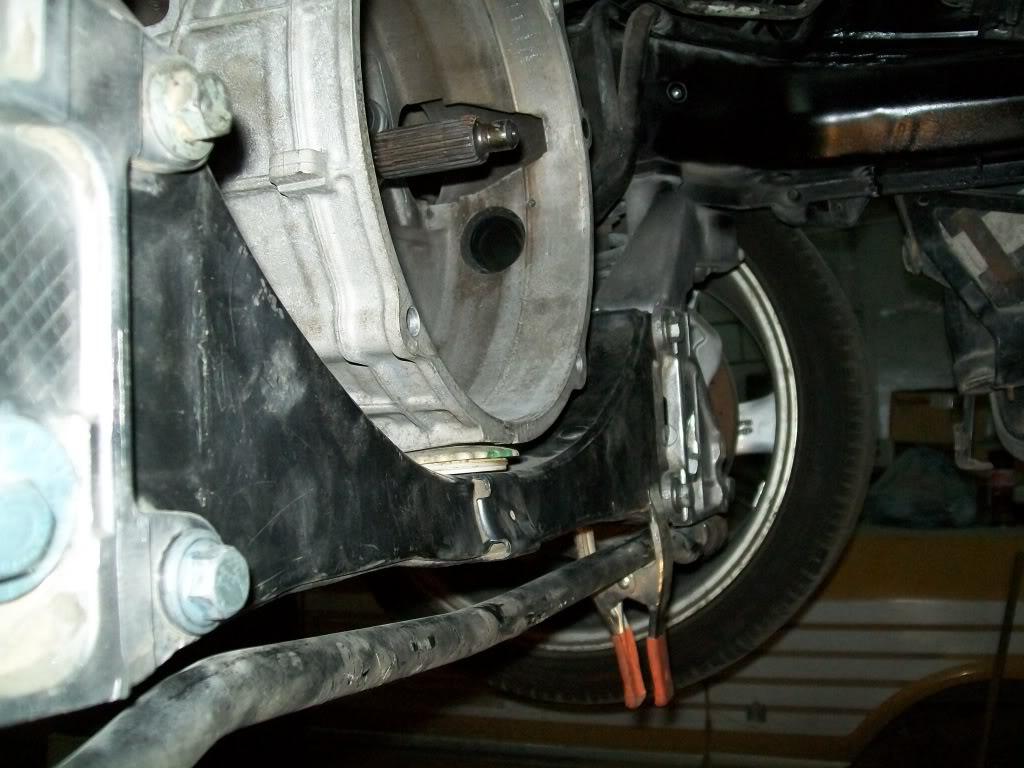
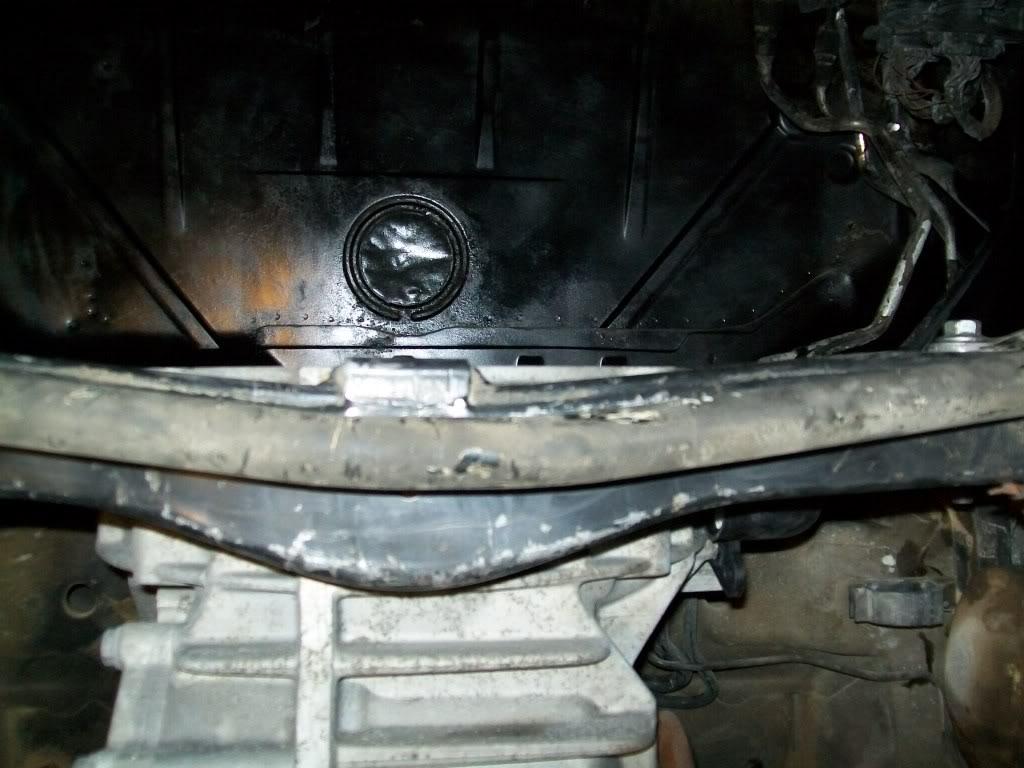
cool thing is the cv axles are just slightly changed from stock , shifter works without interference and i get better weight distribution ,,, all while using stock parts
more progress news, i finished cradle V3.0 and they look like this :

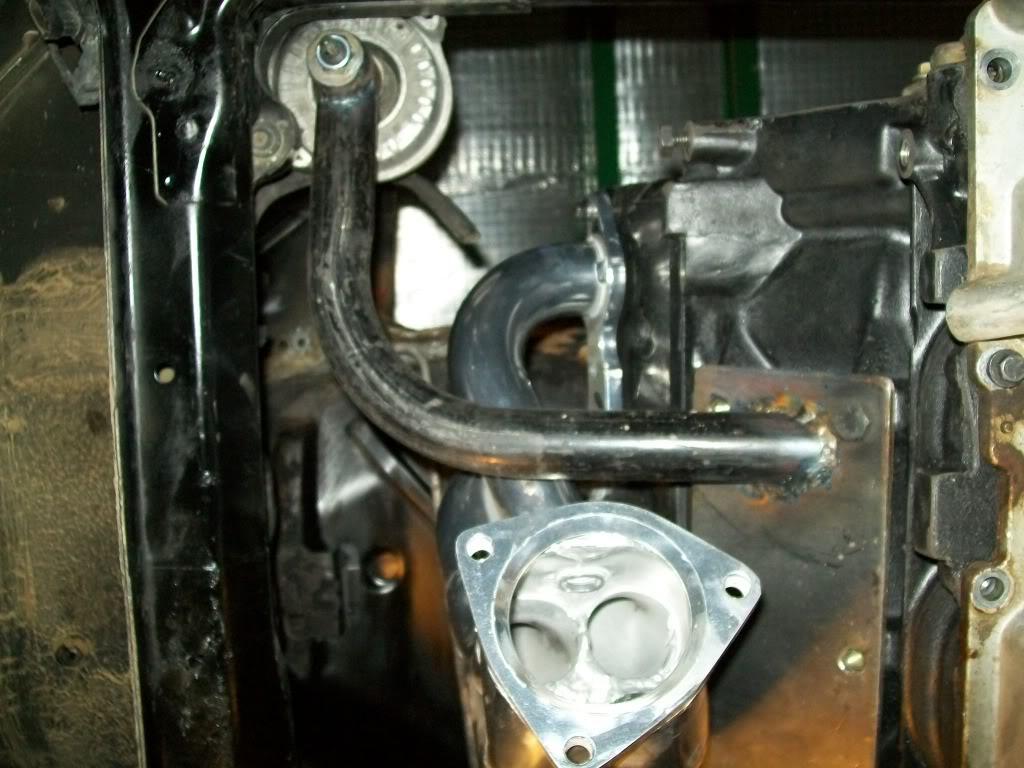
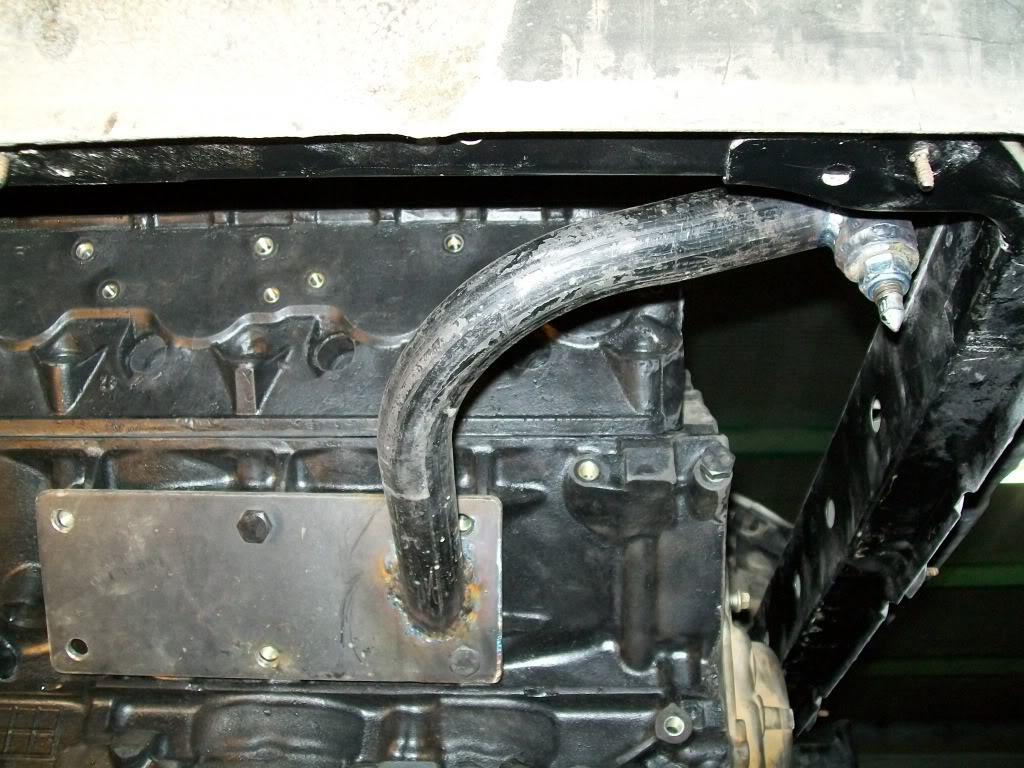
and header clearance :
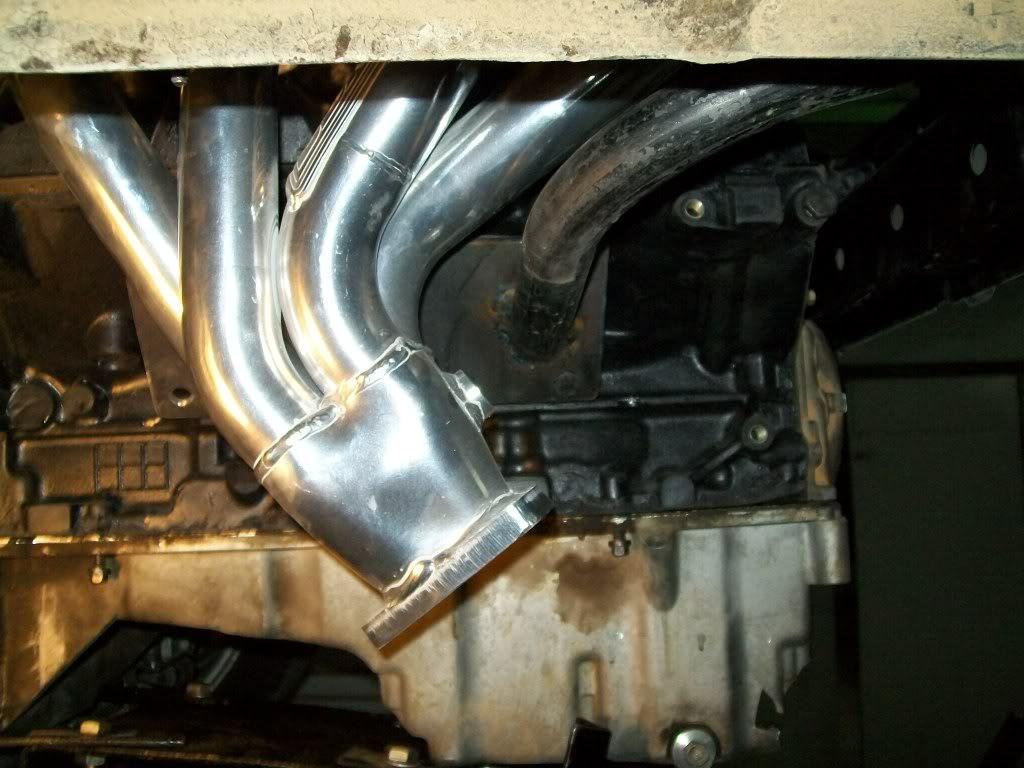
only thing that worries me with this design is the stress or leverage that is placed on the part itself.
so after thinking some more and noticing that the engine now is sitting almost flush with the brace , i though why not do it like the porsche engine was mounted ,,,, soooo here's my other other other engine mount idea :
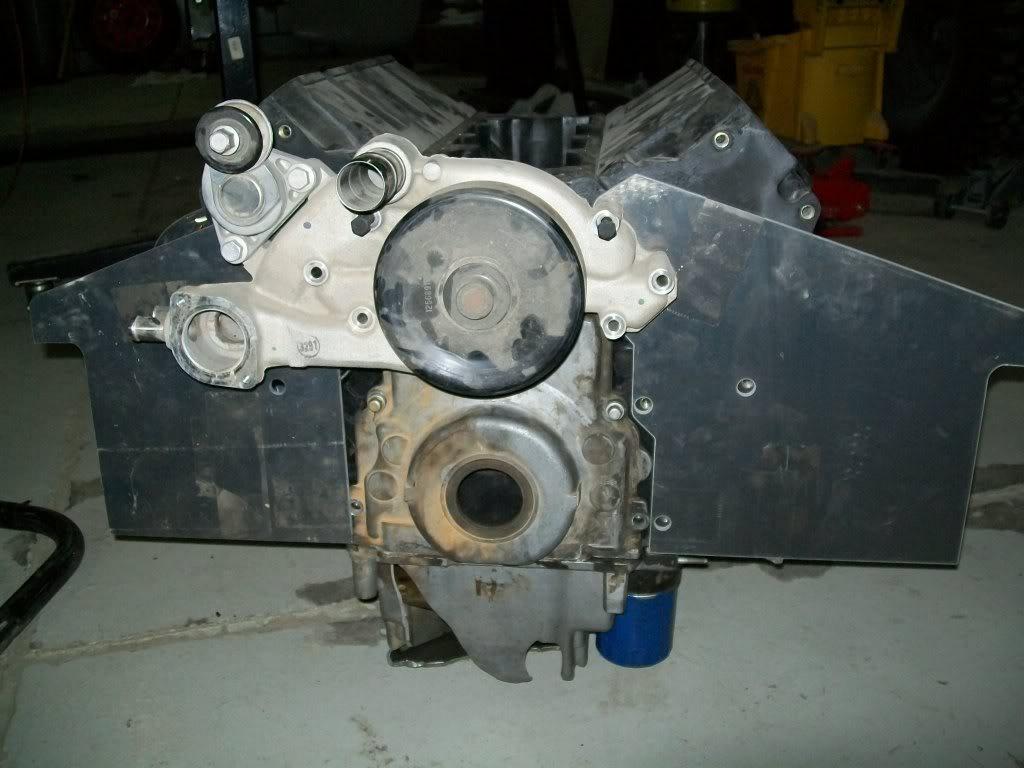
it fits nicley and lines up with the original mounts , i just have to make sure i can have everything lined up first ; the motor plate will cause both the water pump and alternator mount to be moved forward . so i plan on machining the waterpump mounting surface the thickness of the plate to compensate and pull the pump back in. the alternator bracket is not that easy ; i can't machine the back side of the mount cause there isn't enough material , so the solution is to bolt it as is , but move the alternator back by machining a bit off the alternator tabs and getting a small spacer to compensate . ( sorry forgot to take pics of that )
so more on that later
04.30.10
the motor plates were just there so i threw them on . i totally agree that using only the waterpump bolts is not a great idea in my opinion. i am thinking in the same lines you are when it comes to building a new plate ,,,, actually i have that already done for another project i was toying around with :
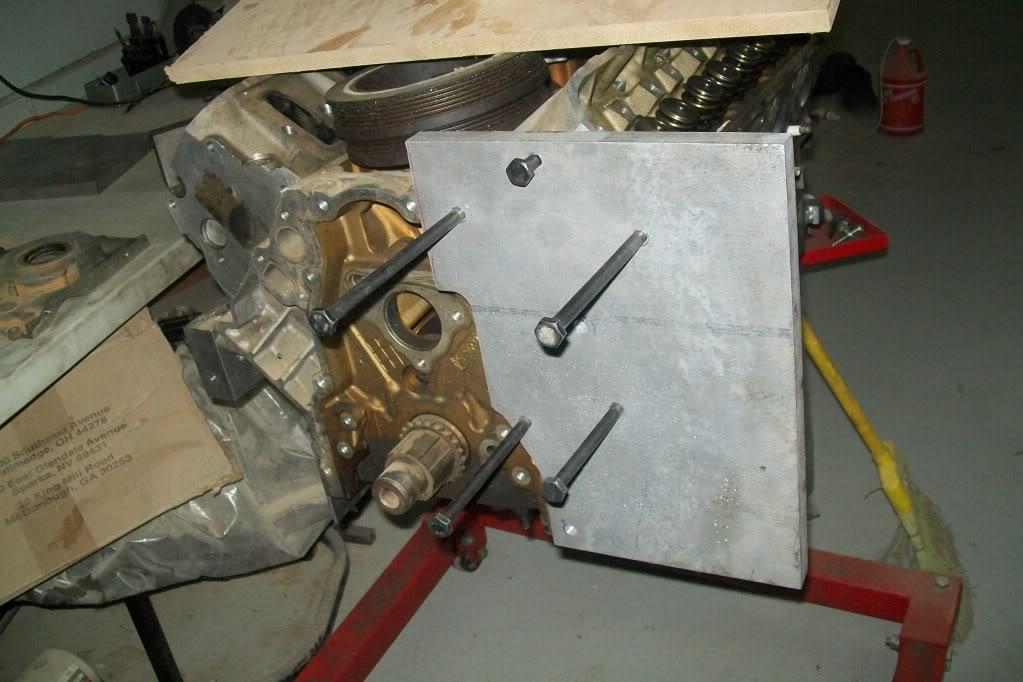
i most likley will use more mounting holes on the plate and even use spacers on the passenger side head to tie that in with the plate as well.
i've also been toying around with another accesory drive idea :
the plan is to use a remote waterpump ( fittings on the block water outlets would be much shallower than the pump itself) as well as an electric powersteering pump. by doing so i can have the accesory drive - which will consist of an alt. beltg and an A/C belt - run under the brace , while the water and steering pumps be located somewhere else .i've looked into MR2 pumps , and after some deep research , i found out that skoda Fabia's, Seat Ibiza's , Mercedes A class and BMW mini's all have electric power steering pumps,,,,, then i found the big surprise : the poreshe 996 GT3 CUP had electric power steering from the factory! which means i might find a bolt in electric power steering if i look hard for it
so now i'm researching more into the electric power steering route to see if i can use it or not and to see if it is reasonably priced to go with
05.16.10
back to working on this again,
the adapter finally showed up !
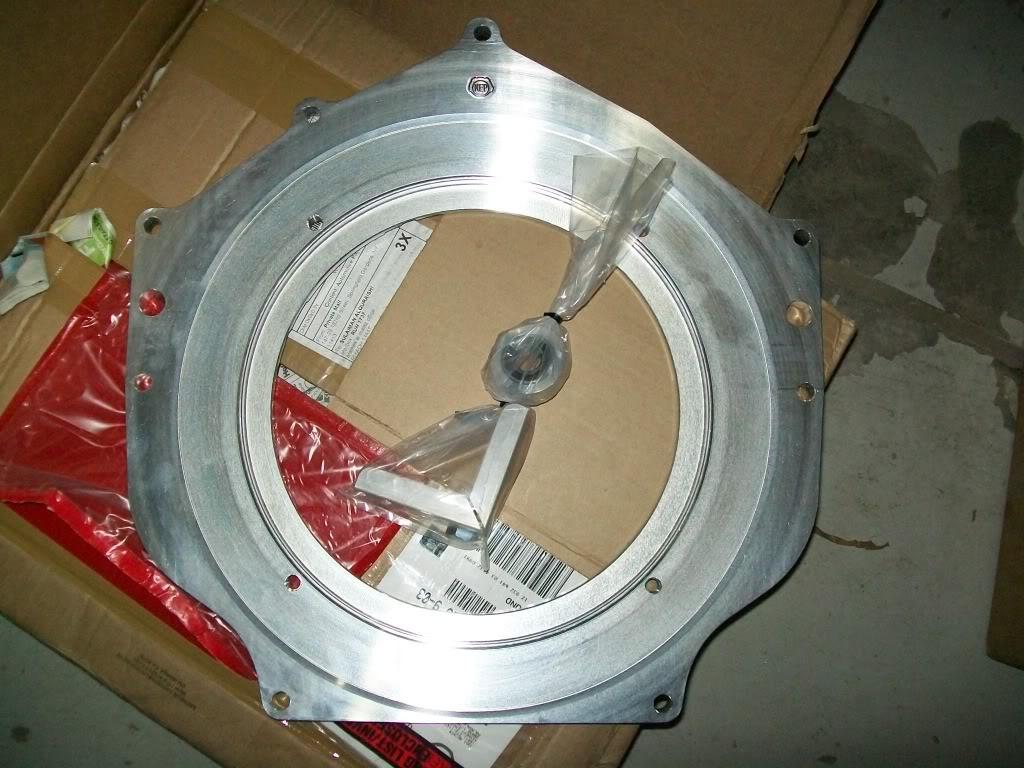
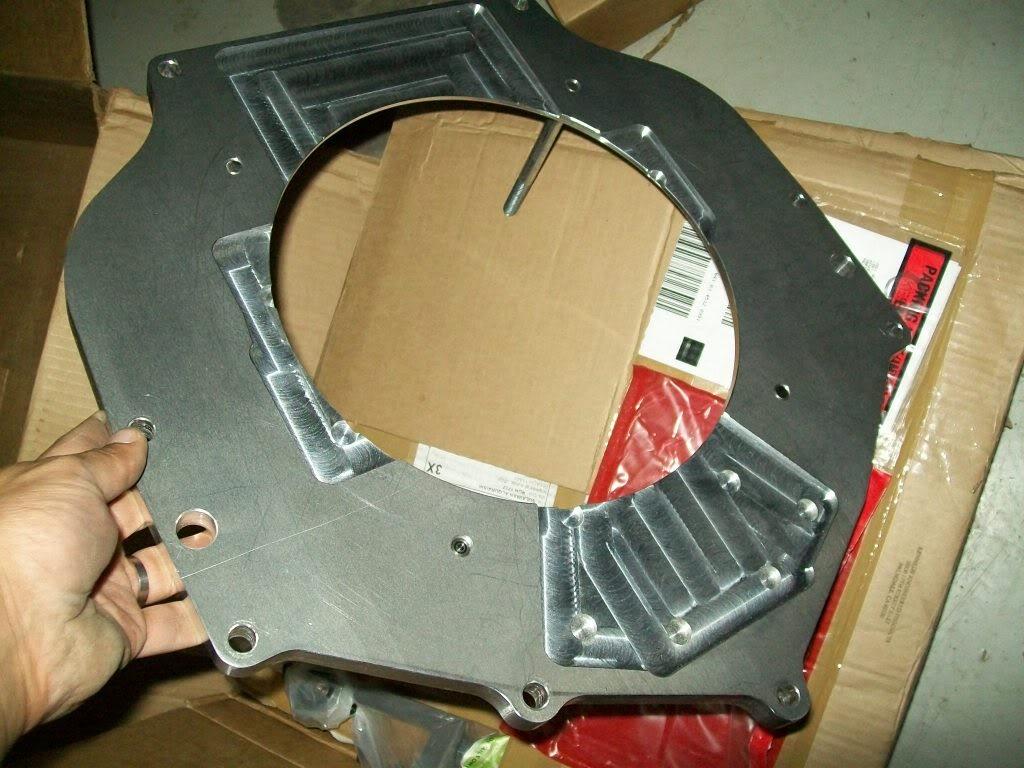
and the flywheel that makes it all possible
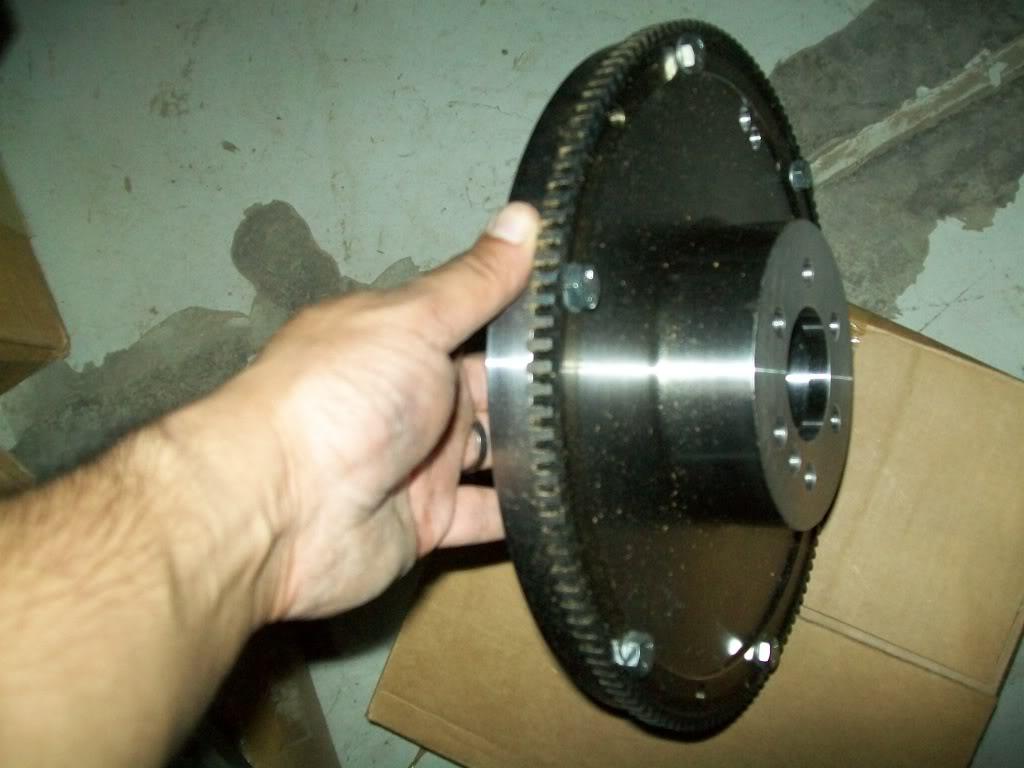
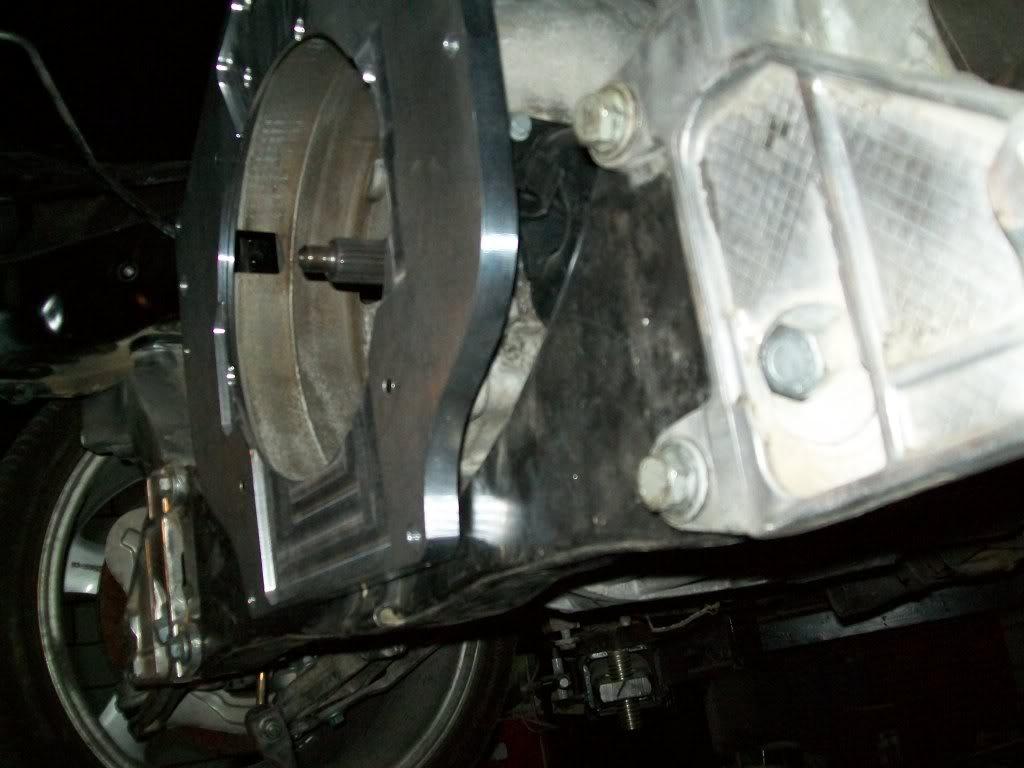
i placed the adapter on the tranny and found out i need to cut it from the bottom to clear the crossmember , if i didn't do so it would hit the crossmember and i would need to pull the trans towards the back an inch or so .
i already took it to a machine shop and told them to take out 1.5" from the bottom , i should have it back today.
you can see here how it touches :
i also ordered some bushings from welderseries that showed up yesterday , so i should be able to finish the motor plate soon and start moving on to other parts of the build . i also plan on going with a different oil pan , this one just sticks too far down for my liking . found a place called kevco that can build any design pan you want , so i'll be hitting them up for one that is 3.5" deep and is basically a rectangular box with baffling .
also ordered the GT2 clutch conversion ( basically ditching the leaky, bulky , assisted slave cylinder with a manual one), makes life much easier when plumbing the clutch since the original 996 setup used a hydraulically assisted unit that was driven off the steering pump. another benifit is the better clutch feel , since it makes the pedal a bit stiffer ( the stock one felt tooooo soft and almost had no feedback).
i also finished running the clutch hydraulic lines from the rear to the driver footwell , i just need to get the pedals and reservoir in there and finish connecting the hoses.
05.19.10
more progress
i finished the engine mounting plates and bushings last night , here's the driver side mounting point . this bolts to the frame where the original engine mounts used to rest :
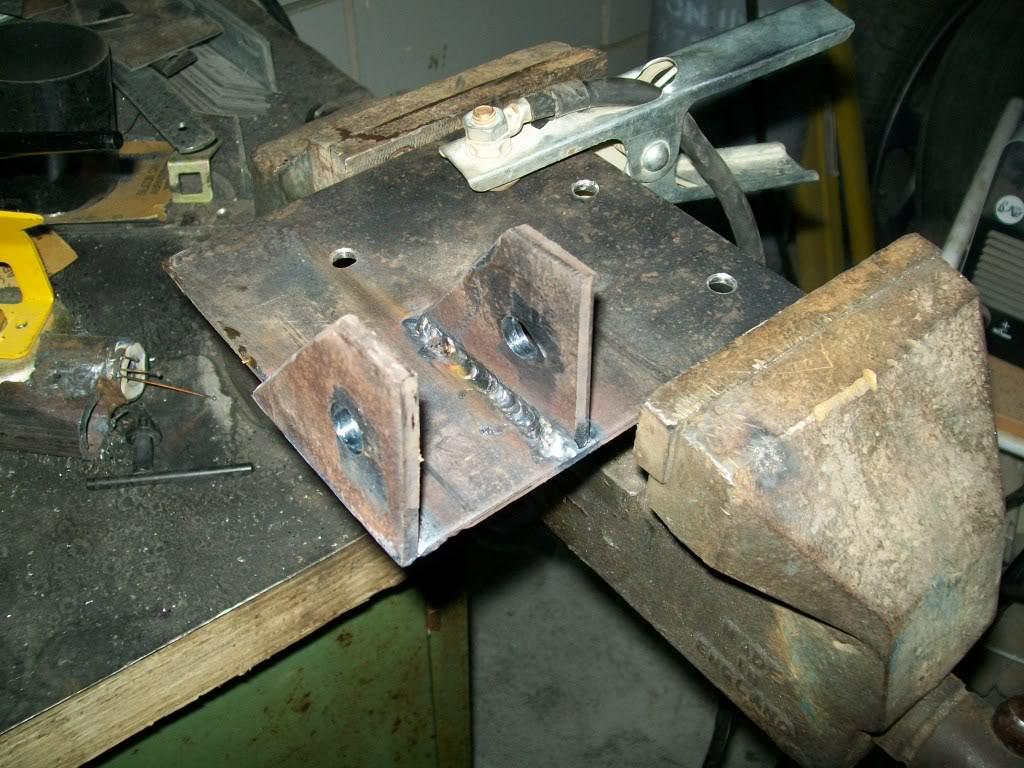
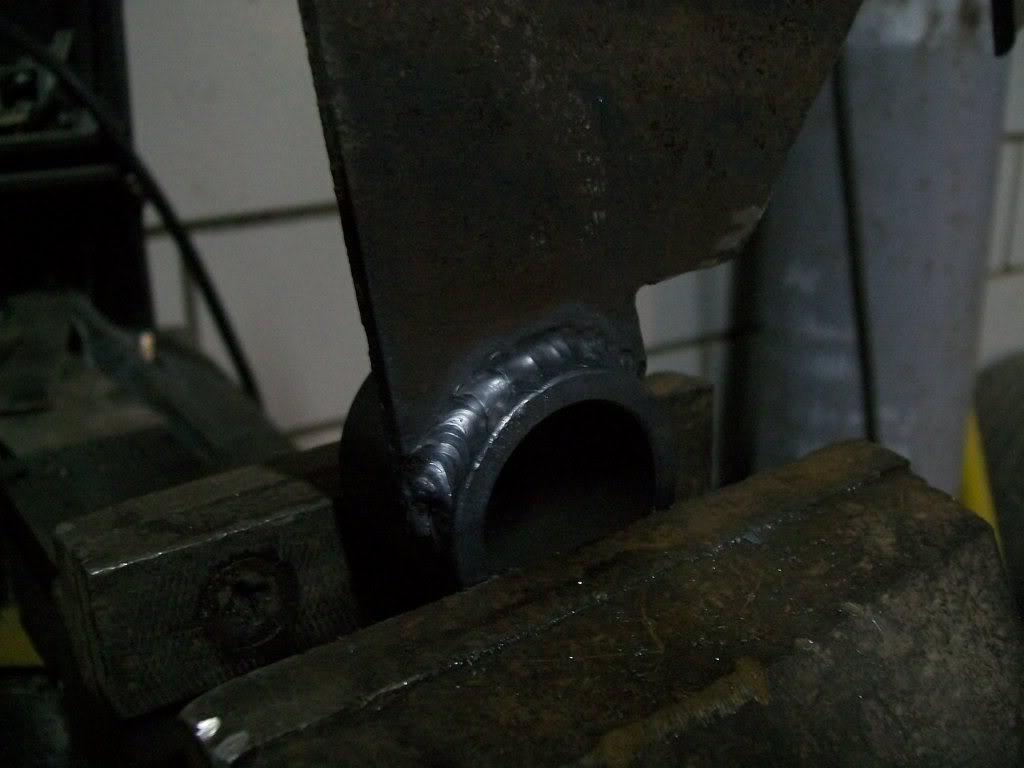
and here is the bushing sleeve that i welded to the motor plate :
and here is the finished product on the driver's side :
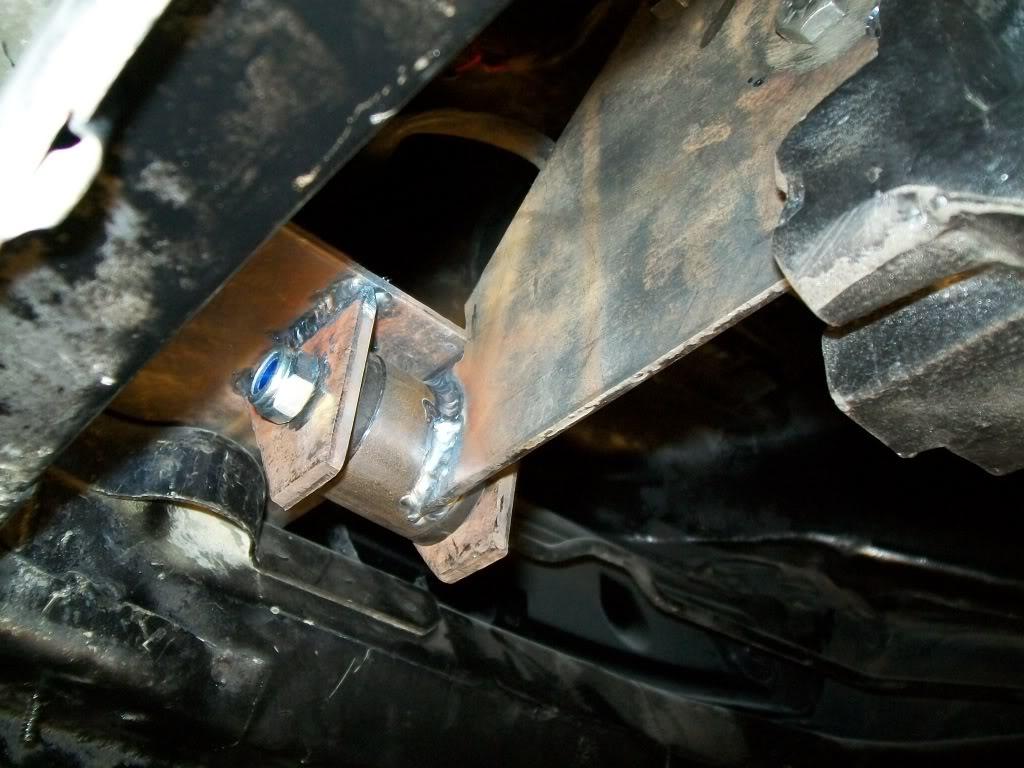
and here is the passenger side mounting point :
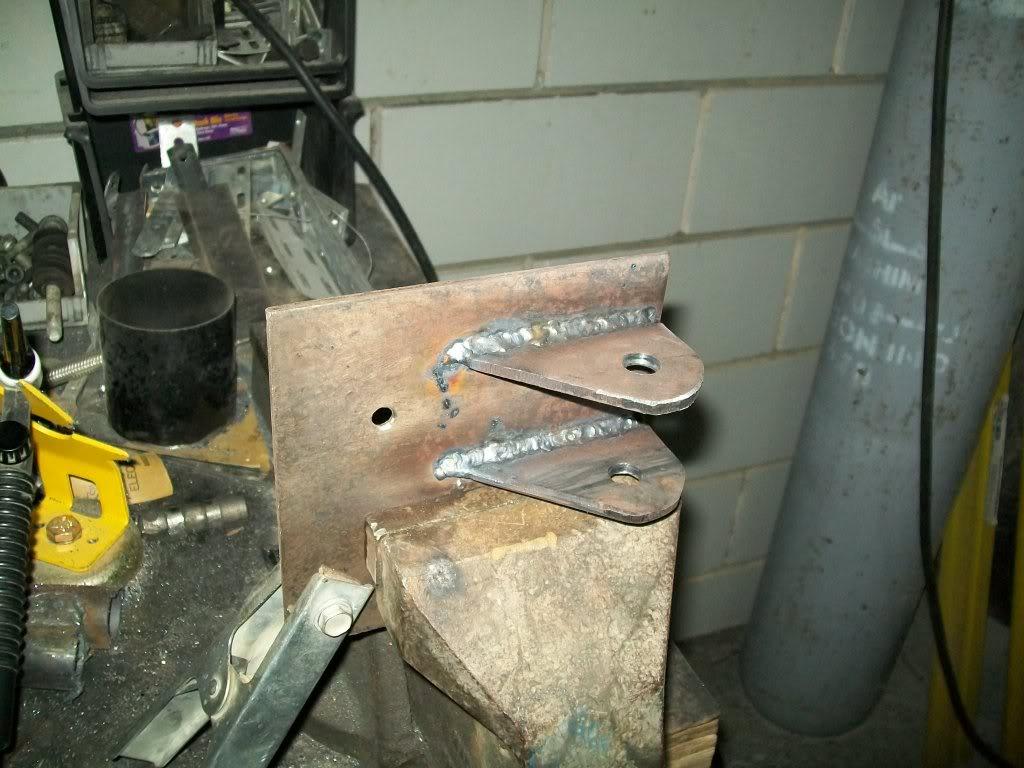
and the finished (for now ) product :
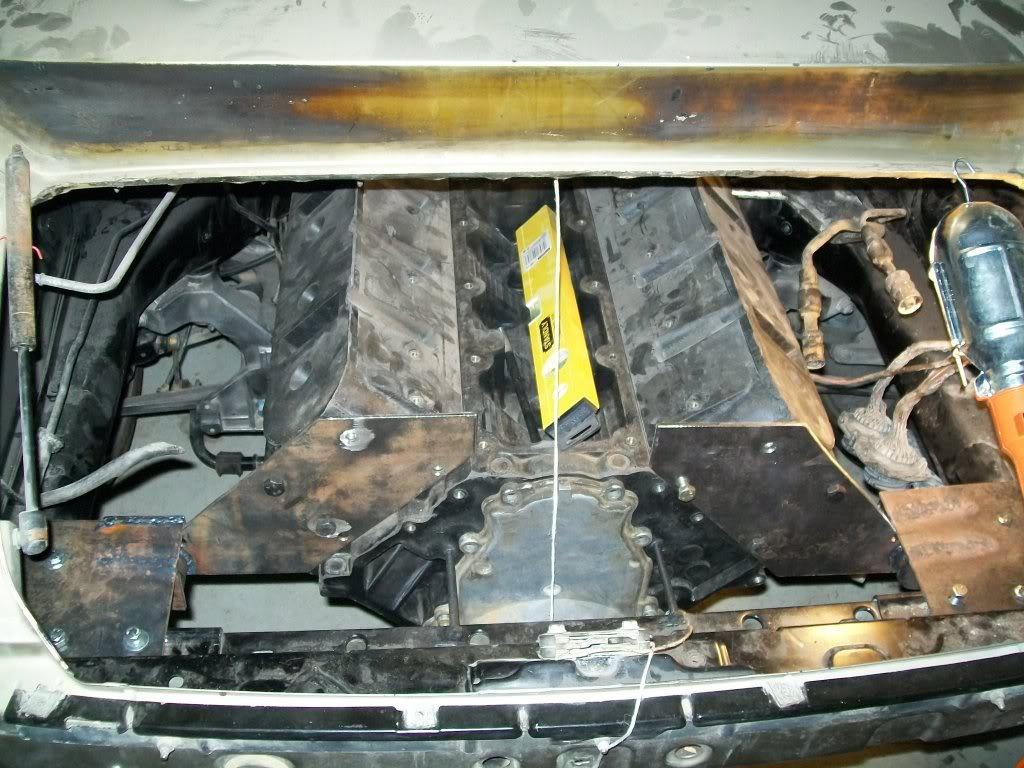
i just have to do a bit of grinding here and there and cut the top parts to clear the intake to pretty them up and make them look nice . and when i'm done with all of the mounts , then its off to the powdercoaters !
so now the engine is suspended by itself , i think that should be considered a milestone
next up : making the mounts that will be located between the engine and trans; they will use the two bolts on the side of the engine (above and below the bellhousing dowl ) and extend down to the suspension crossmember , where i'll weld up some tabs for the another set of bushings, think of it as extra insurance
after that i guess i can start tackeling the accessory drive and/or the exhaust . which should be interesting for both .
found this exhaust idea while messing on google (<---- gotta love google images!)
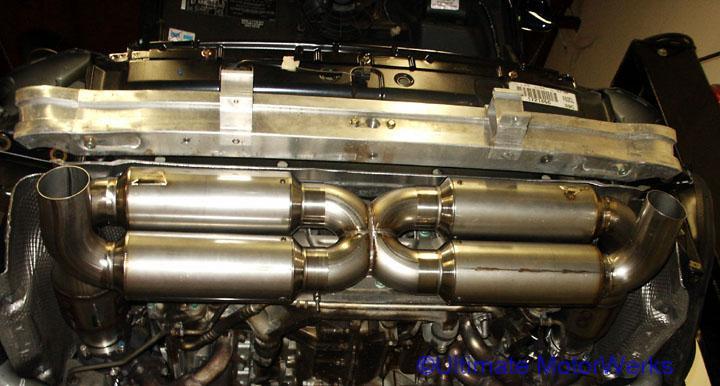
or i might go with an x muffler like the magnaflow 12469 in place of the original unit .
05.21.10
a bit of progress today , and a minor setback
first off the setback : found out i have the whole pass side e-brake assembly missing. the only thing there is the the cable and the upper brake shoe :
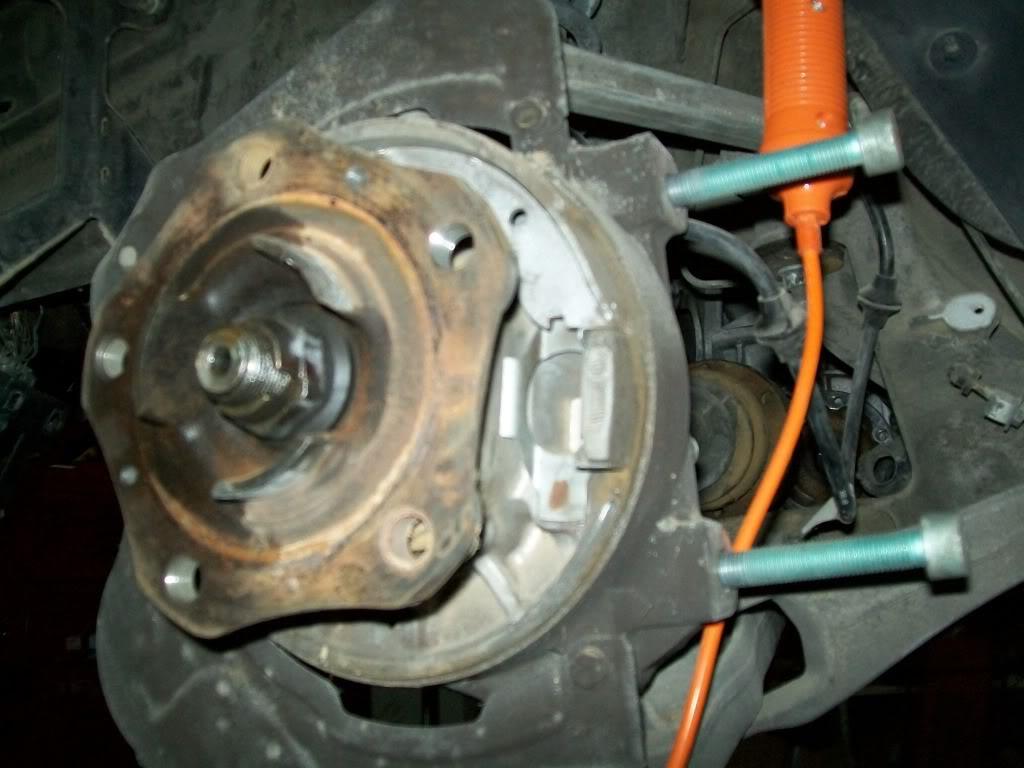
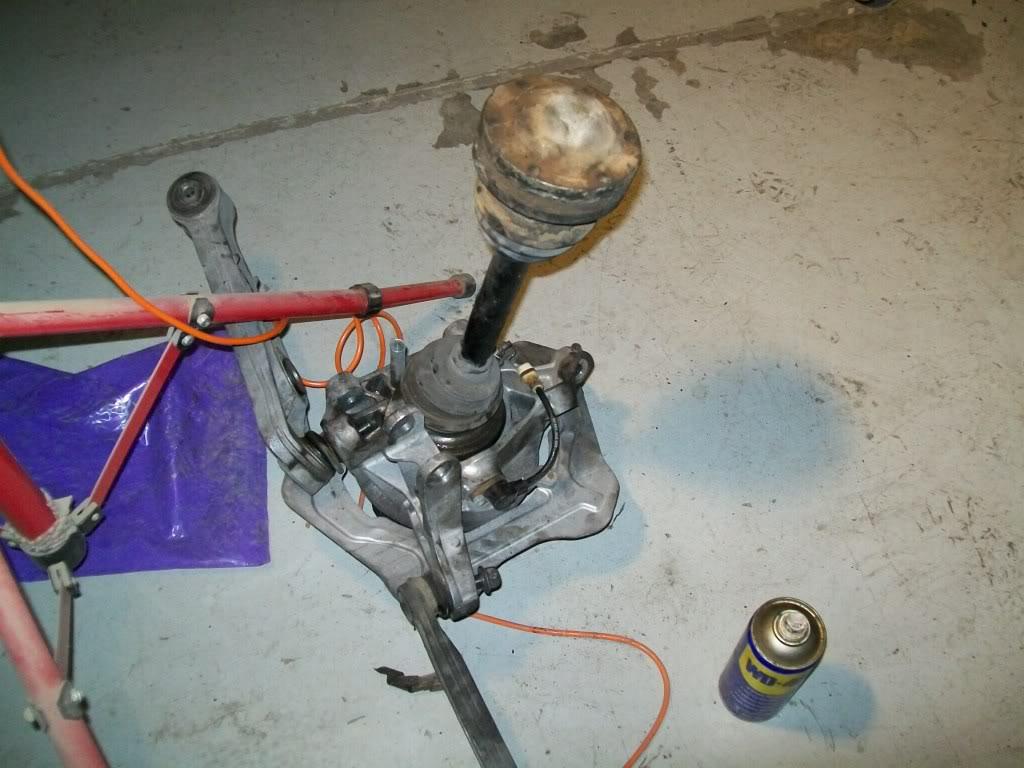
i also could not get the stupid axle ( from the auto transmission) off the spindle , guess the splines were pretty rusted in there , so it was off with the spindle!
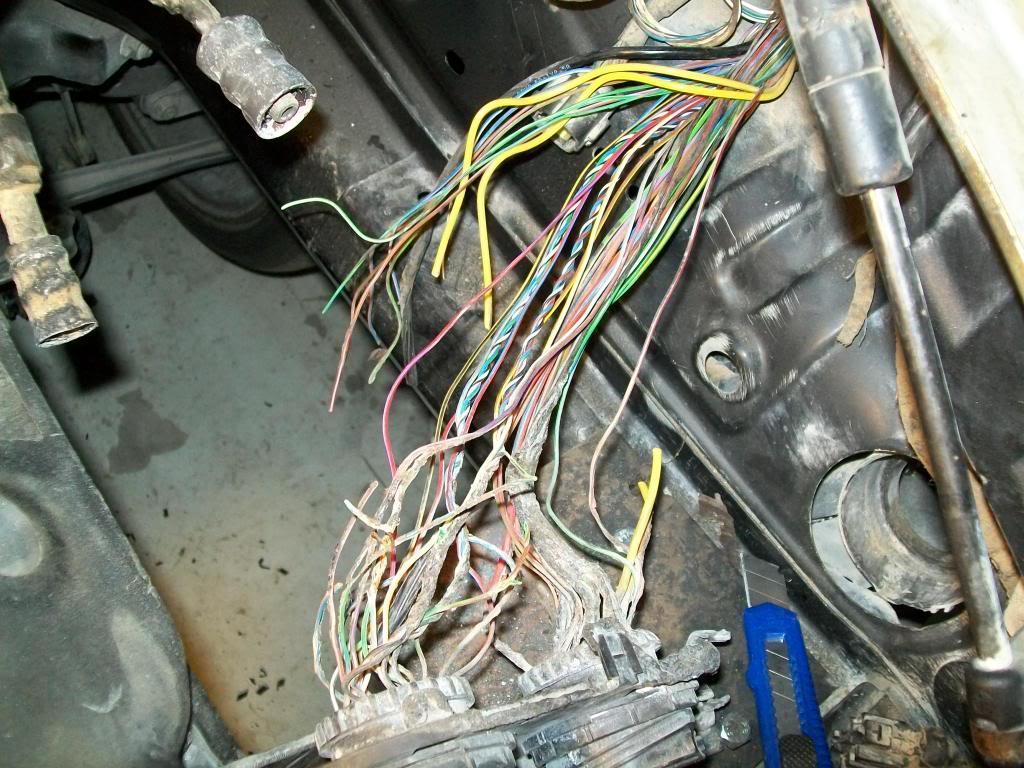
on the other hand i finally seperated the wires i need from the engine compartment :
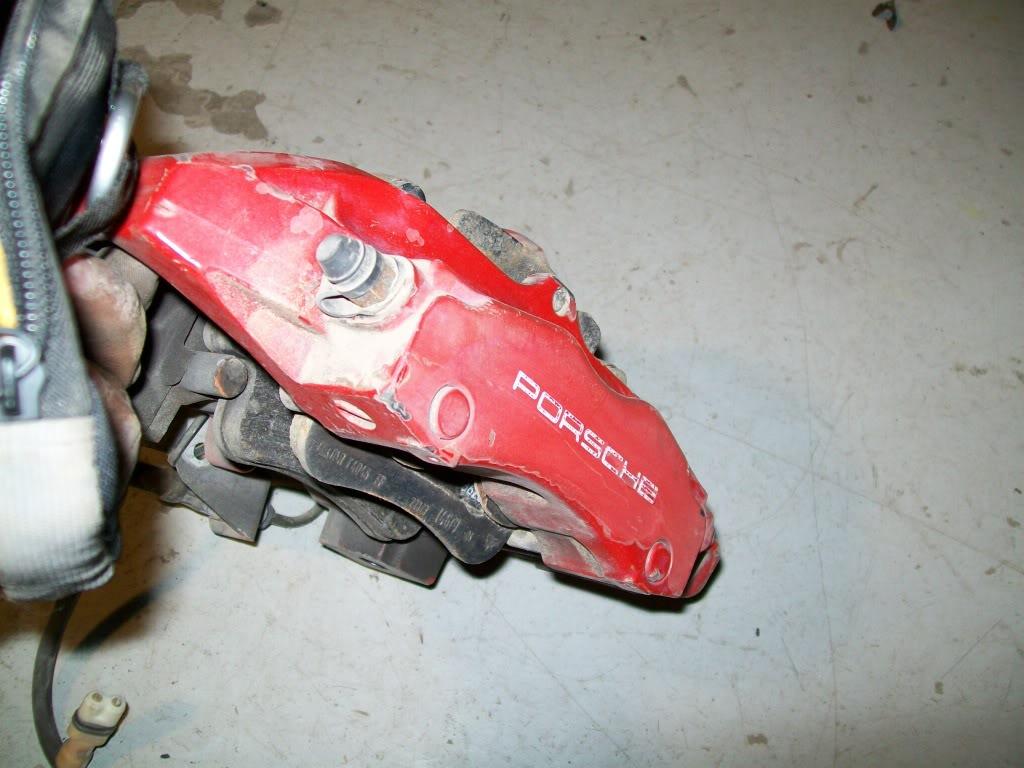
and i think i should repaint the calipers since they are off now , (well the rears at least ) and they are rather faded .
thats it for now , i have to finish up the mounts between the trans and the engine and then i should be done with the hanging the engine .
after that i guess it would be time to start fabbing the exhaust and messing with the accesory drive.
05.28.10
Nothing much to report ,
i'm just waiting for the next batch of parts to show up. i ordered a magnaflow muffler PN12469 with dual inlets and outlets , the muffler is kind of an "x" design inside but without the pipes actually opening into each other . this would be the muffler that sits infront of the balancer where the original stock muffler used to be.
another thing i ordered is a couple of mufflers from extreme mufflers , these are "U" mufflers that have both inlet and exit on the same side.
http://www.extrememufflers.com/index...p_image&pID=54'
these mufflers will be on both sides of the engine and will flow into the "x" muffler.
also ordered an engine harness, and drive shaft for the tranny, coolant expansion tank , exhaust flex coupler, as well as the missing brake caliper and emergency brake parts. and i should get the exhaust flanges from the machine shop tomorow .
the oil pan has been shipped as well
untill then , i guess all i can do is cut the brace and start routing some wires and hoses.
05.30.10
Here a couple of cell pics ( sorry for the quality ) of what i did last night :

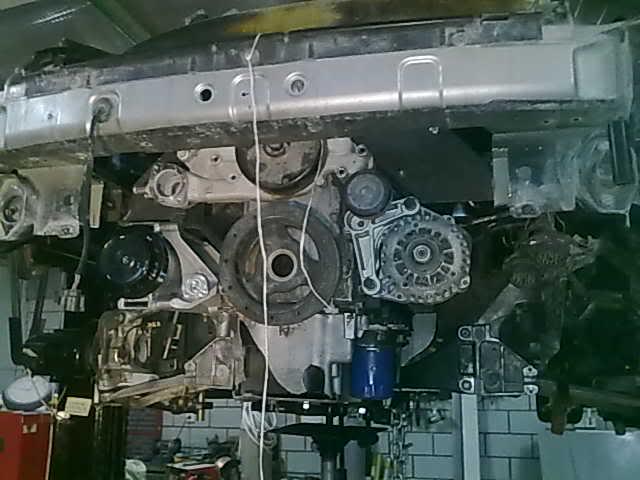
will get better ones soon
on a side note , found out that a stock F-body alternator will not work with an ls3 alternator mount.
06.14.10
sorry for the lack of updates , but i've been busy andout or town , plus i've been waiting for the batch of parts i ordered to show up.
here's what i did so far:
i cut the brace and welded patch panels to close the holes , i also found out that the muffler i ordered (magnaflow p/n 12469 ) is not the design i was thinking it was : apparently it was dual inlets aand outlets that merged in the center of the muffler , i was hoping that it would be two seperate paths that crossed in an x pattern but did not open up on each other.
any how here are some of the parts that already showed up :
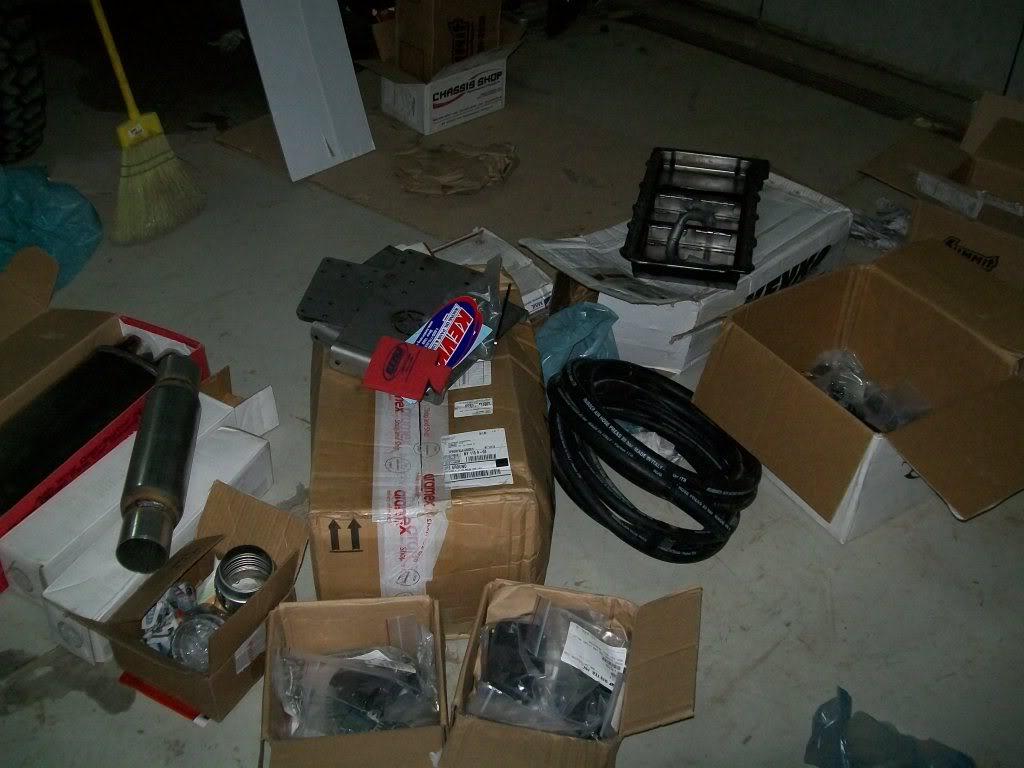
and here is the ultra sexy kevko oil pan and integrated baffeling :

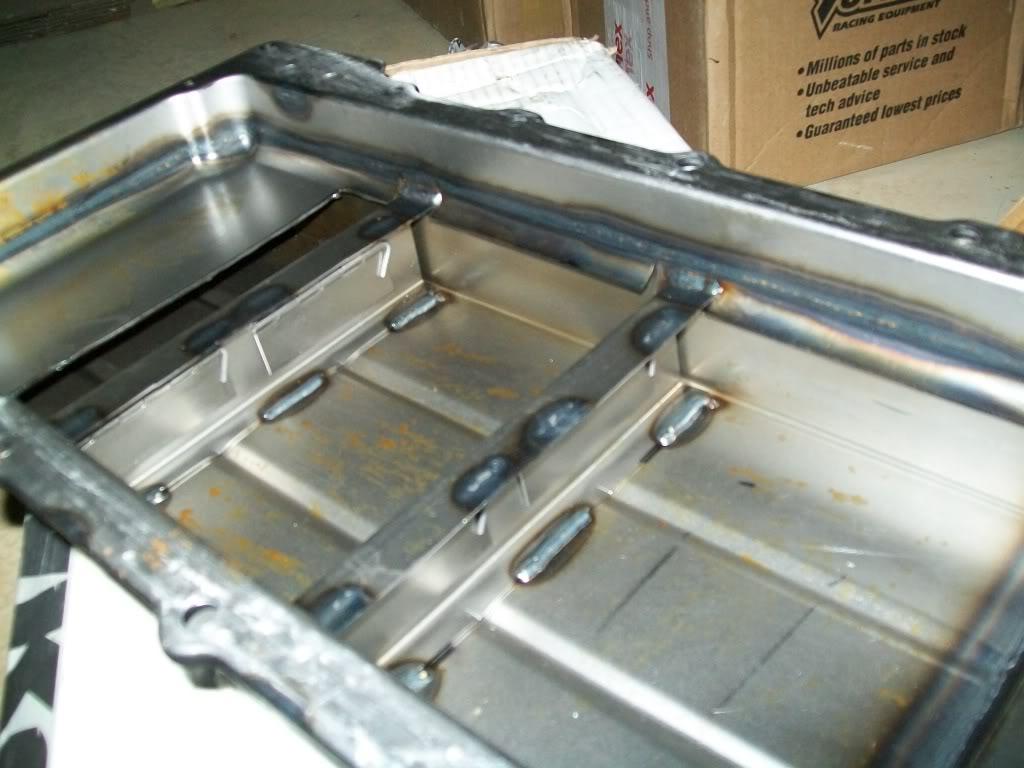
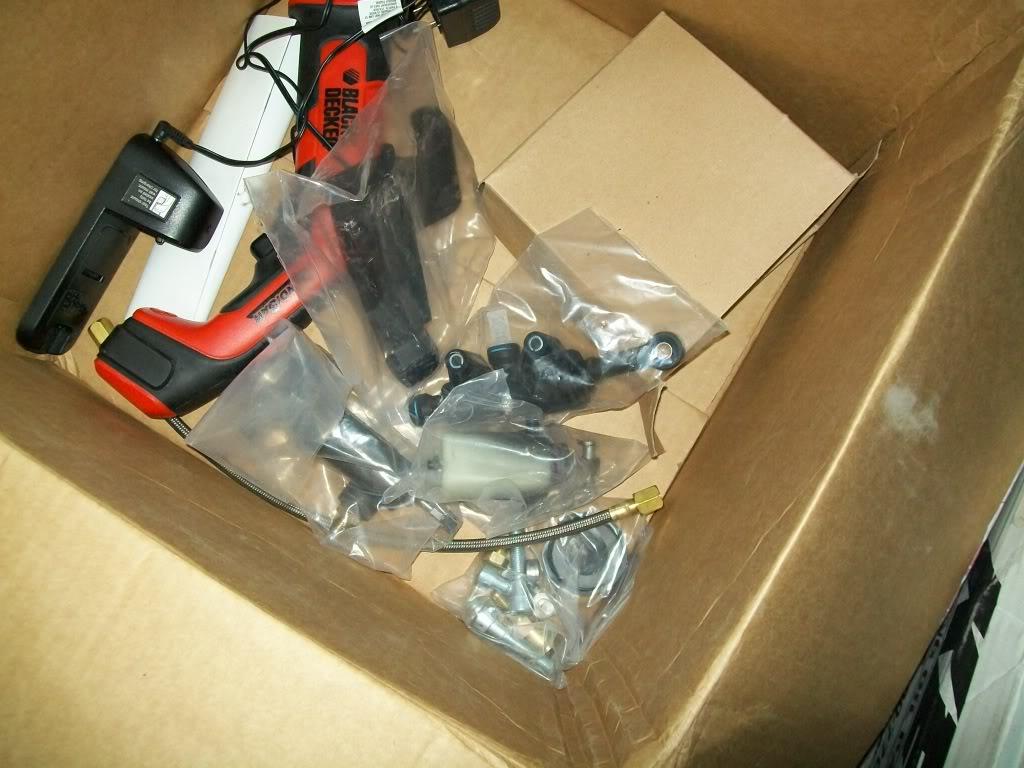
EVOms GT2 clutch hydraulics conversion :
and here is how the brace looks like after cutting and welding the patches:
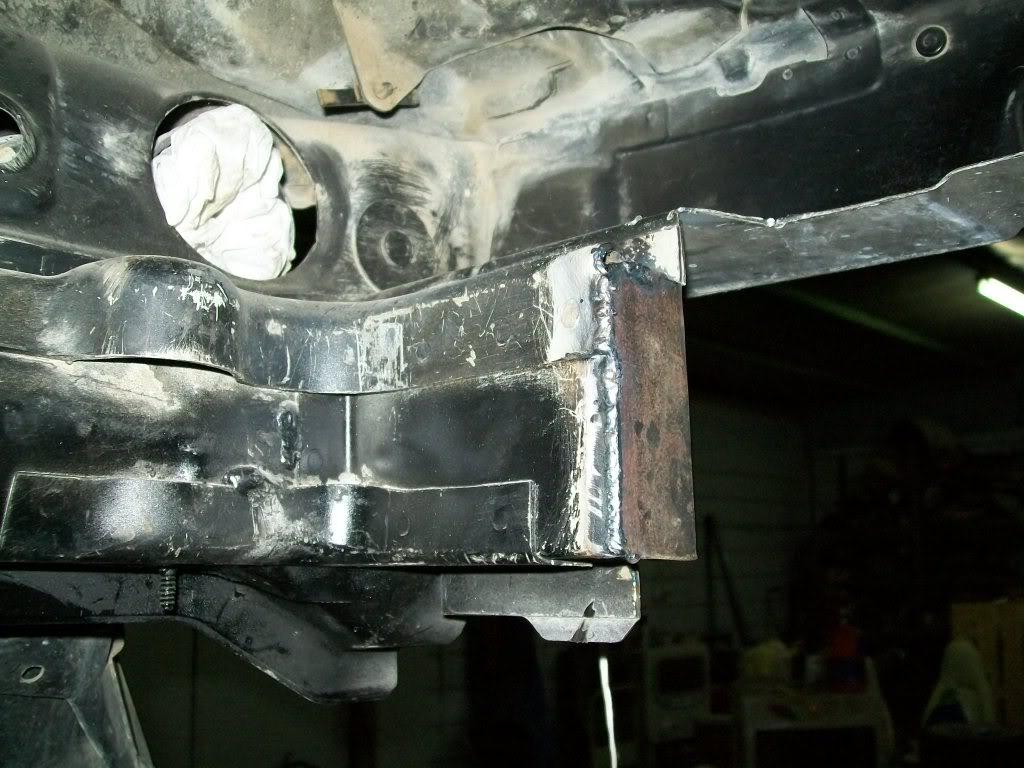
ike i said i'm still waiting on some parts to show up like the harness and extreme racing mufflers and the GT2 solid bumper braces so i can begin fabbing up the exhaust and brace reinforcement and the rest of the brake parts . i'm also am waiting for the driveshaft to show up along with some other things here and there
so as for now , all i can do is build up the mid mounts ( between the engine and trans - to help support the two just like a mid plate) as well as route a few hoses here and there. after that i should start thinking of where and how to route the LS1 wiring harness and clean up the existing wiring in the engine compartment.
06.23.10
time for some updates,
been waiting for parts to show up, and most of them are here now;
the wiring harness from ls1wiring.com is here

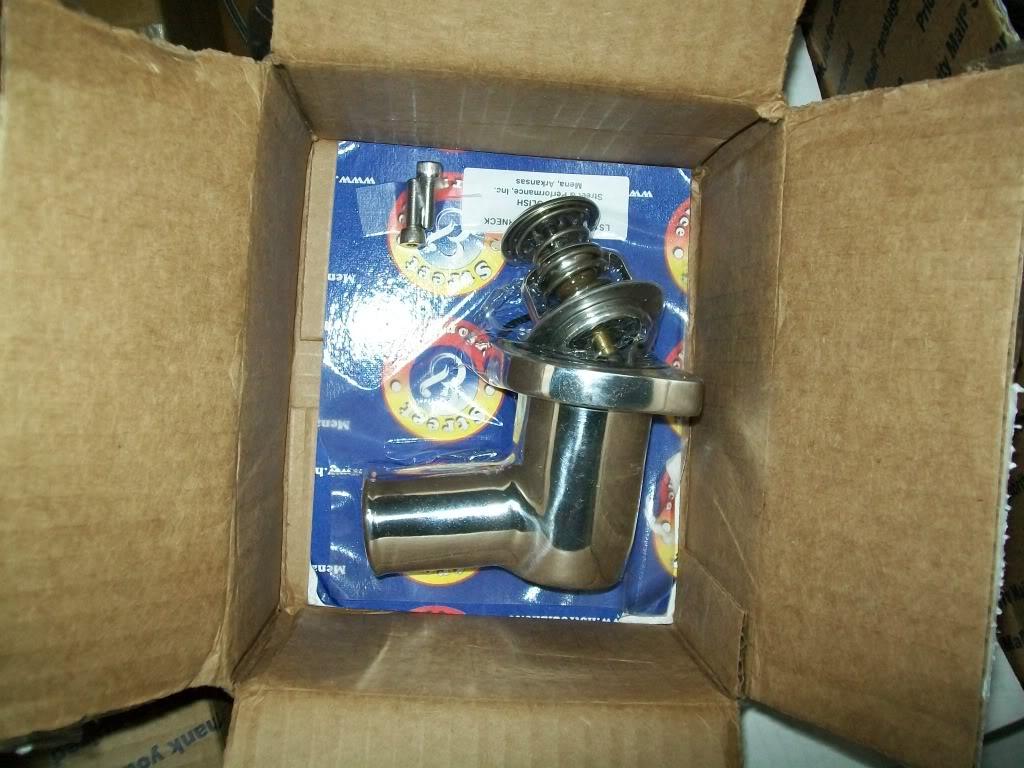
and so is the 360 deg. swivle thermostat housing ( i was hoping it would be smaller than that , but oh well,,, )
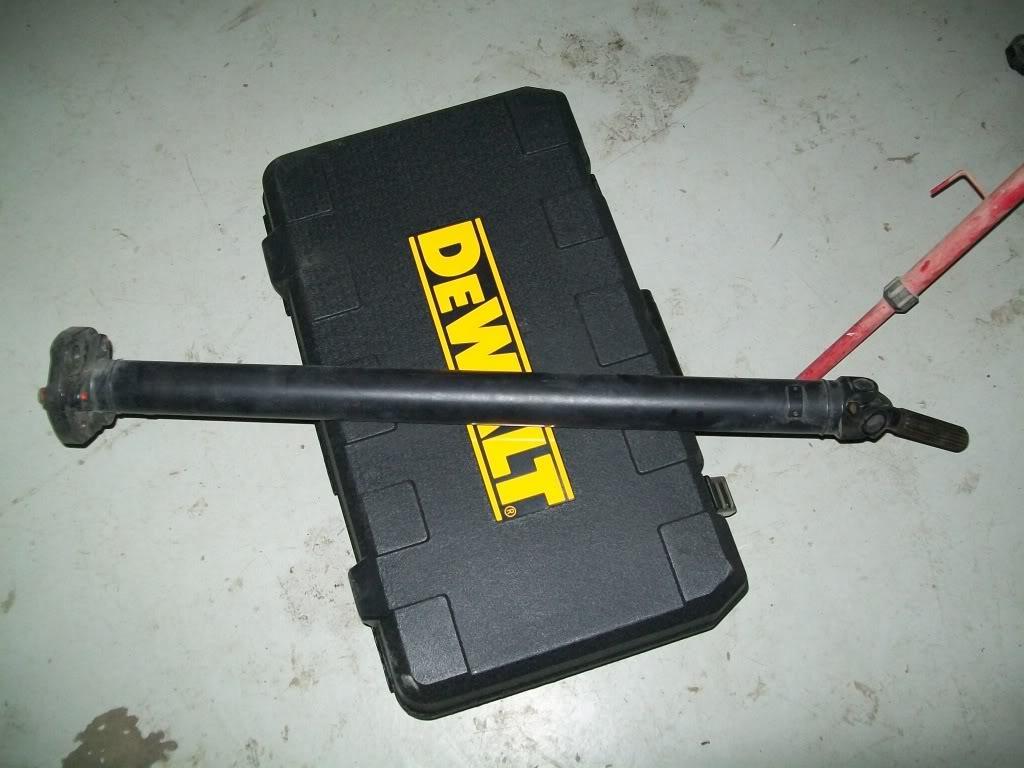
the front driveshaft also showed up , and it seems i have to shorten it by 3 to 4 inches!
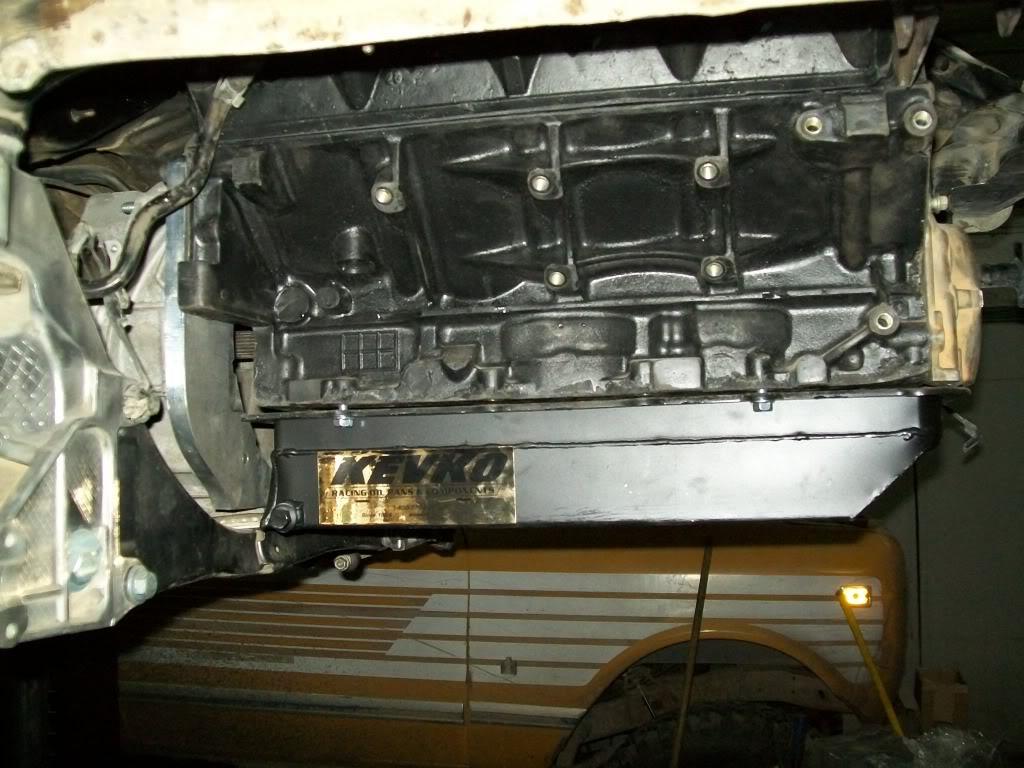
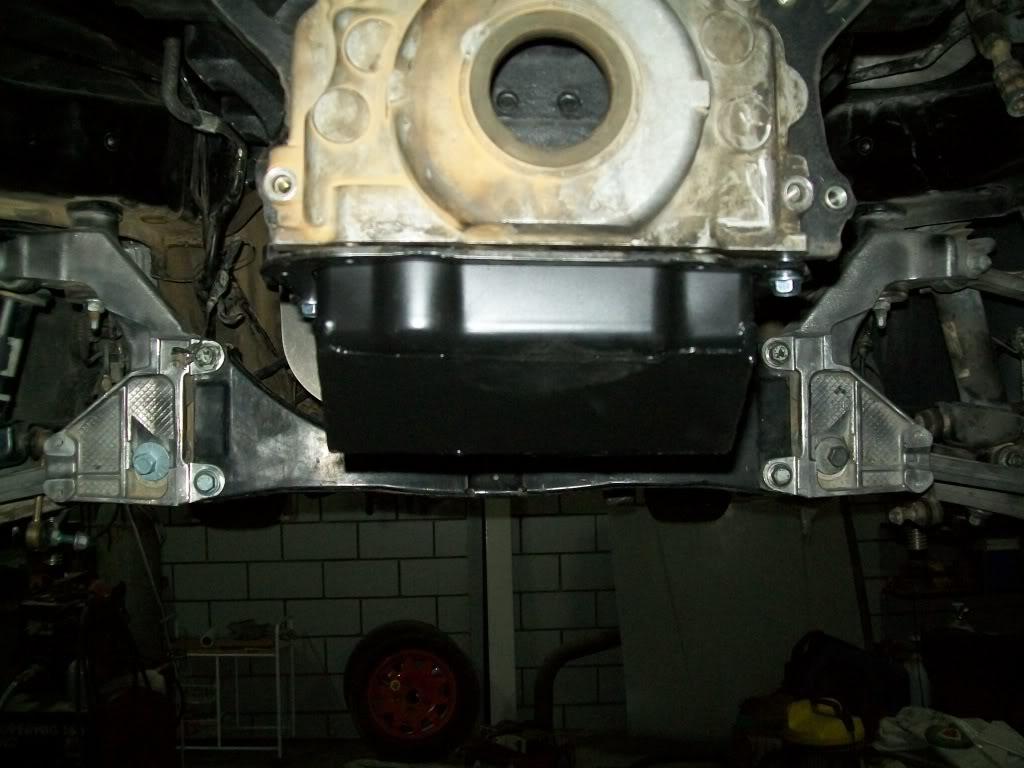
here you can see how the kevko pan fits , and how much clearance that got me :
and since i had some time on my hands while waiting , i decided to make something ,,,,,, you guessed it ! MORE ENGINE MOUNTS!
the thinking behind these mid mounts was that the front plate provides side to side bracing as well as lifting the front of the engine, while the trans mount kinda provied front to back bracing ( i say kinda cause its a huge floppy rubber donut mount), so i thought adding a bolt-in mid mount would not hurt anything and would provide front to back bracing ( helping to prevent the mounts on the face of the engine from bending ).
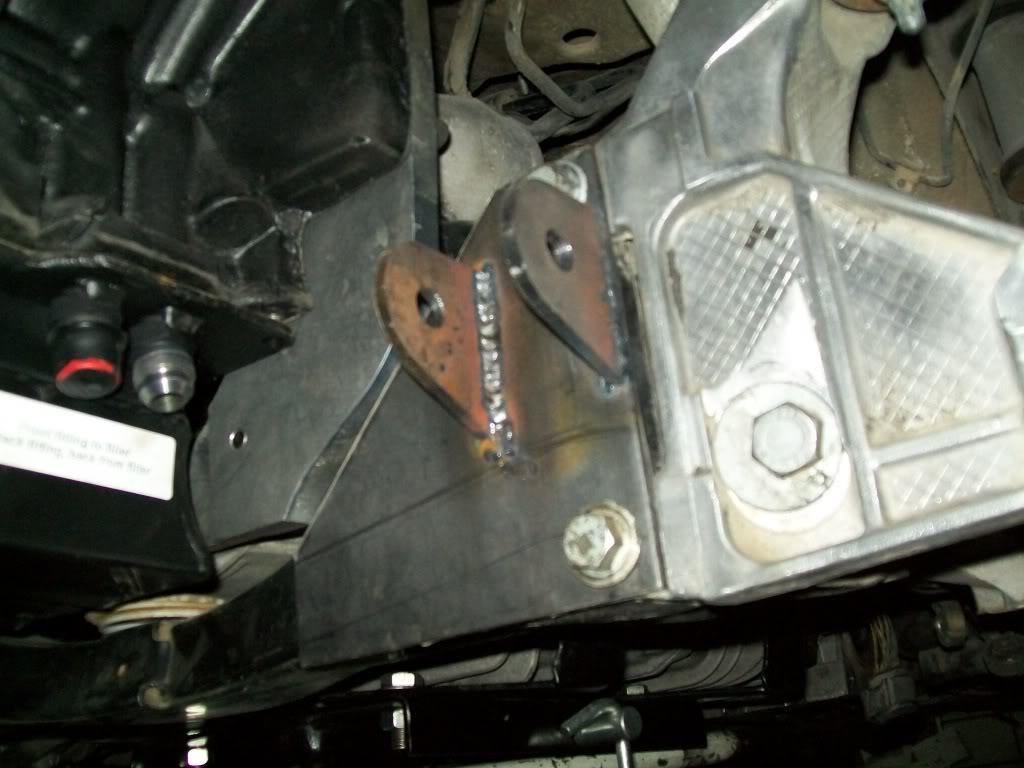
i started off with making two plates with tabs on them for the bushing , these plates would bolt to the suspension cross member on both sides:
i then started building the part that connects the plates to the block , it just a simple tube with a bushing on one end and a plate that bolts to the block on the other :
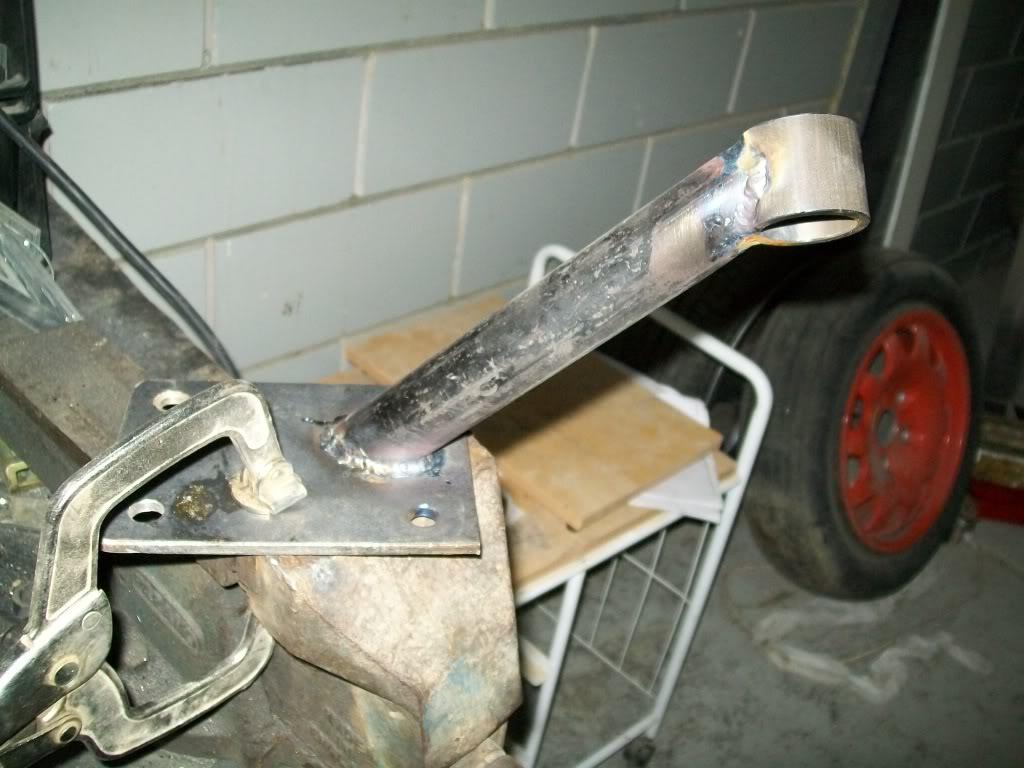
i like welding stuff

this is how it looks when done on the driver's side:
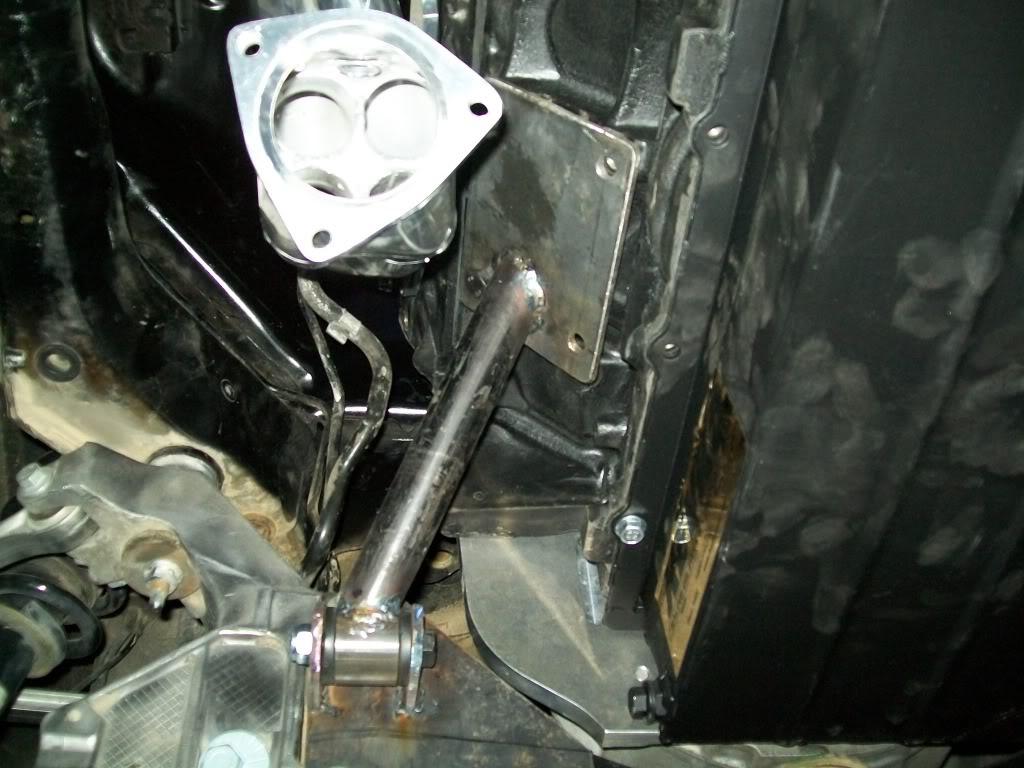
and on the pass. side :

and how it looks from under the car :
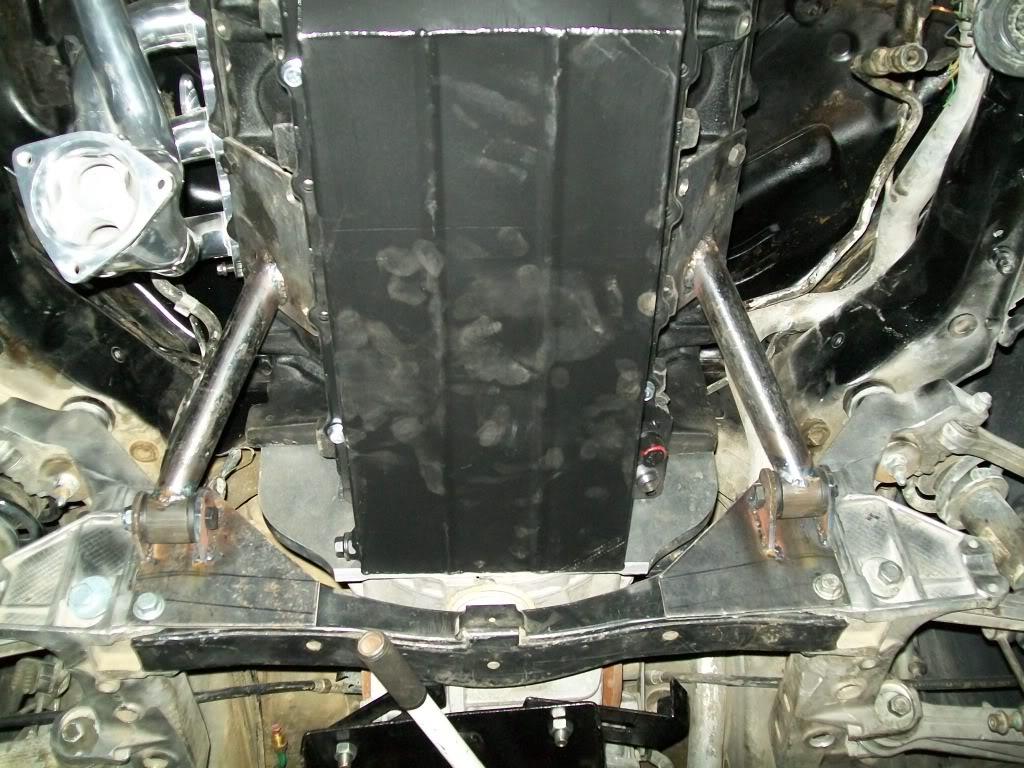
and here is a shot showing both front and mid mount :
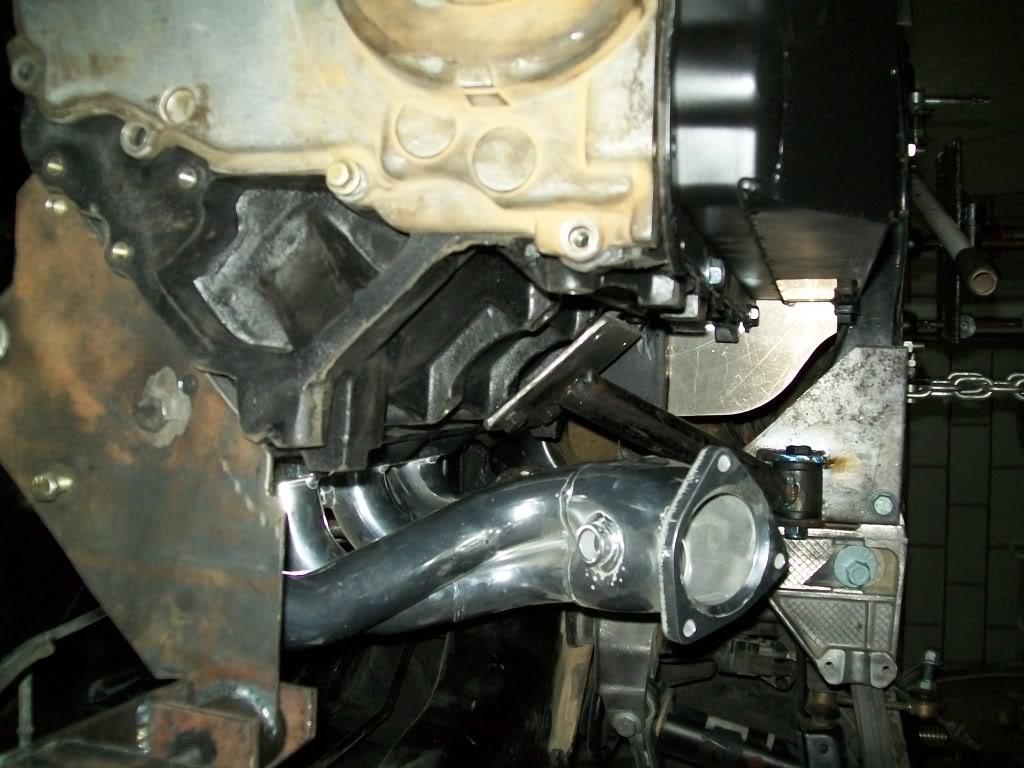
so i guess i can scratch building the mounts off the list now
there are a few more parts on the way ( brakes and "U" mufflers ) that have to be here before i can continue , as well as some other assorted thingies here and there.
so when those show up i will start on the other things on the list :
- start fabbing the exhaust system
- finish bolting up the brakes and e-brake
- build the cradle that will be used to lift the engine/trans in place
- finish plumbing the clutch hydraulics
- start working on the coolant lines
- probably make some more engine mounts
07.06.10
major mile stone acheived last night !!!!
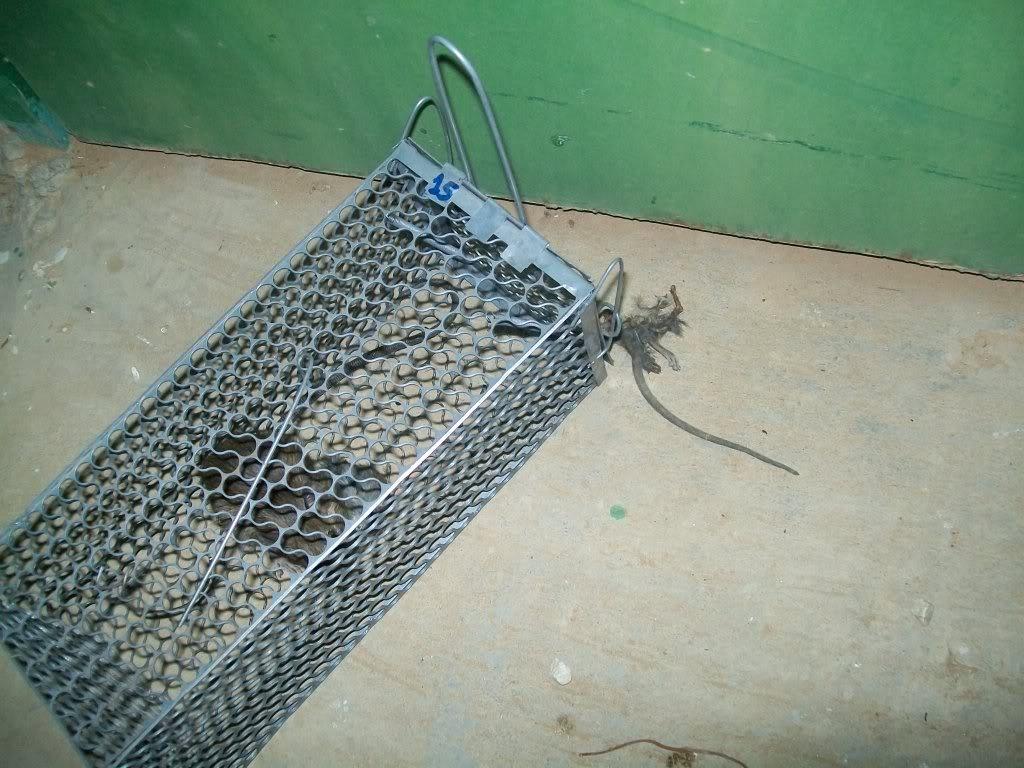
i caught the martha foaking rat in my garage !
(i actually caugth two but this $hit ate the other one - all of it except the head and tail end ! )
other than that some parts showed up but not all of them. got the caliper , most of the ebrake parts , puke tank, sway bar links , and hood struts in today , but the whole brake thing is on hold till i get one itty bitty part
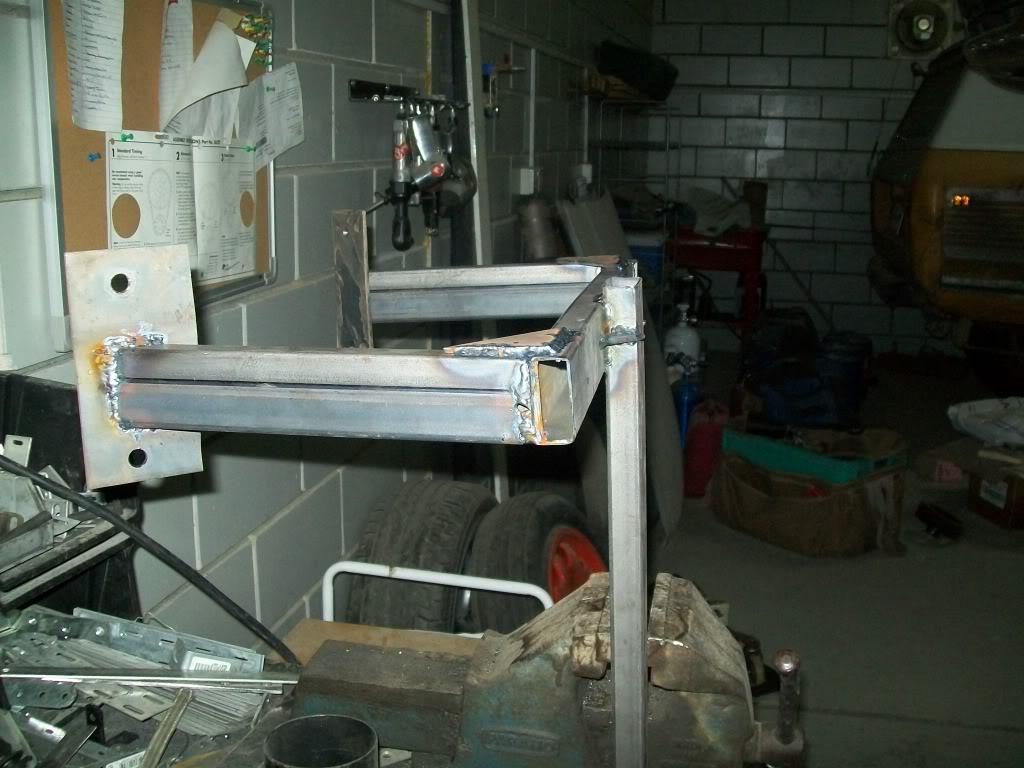
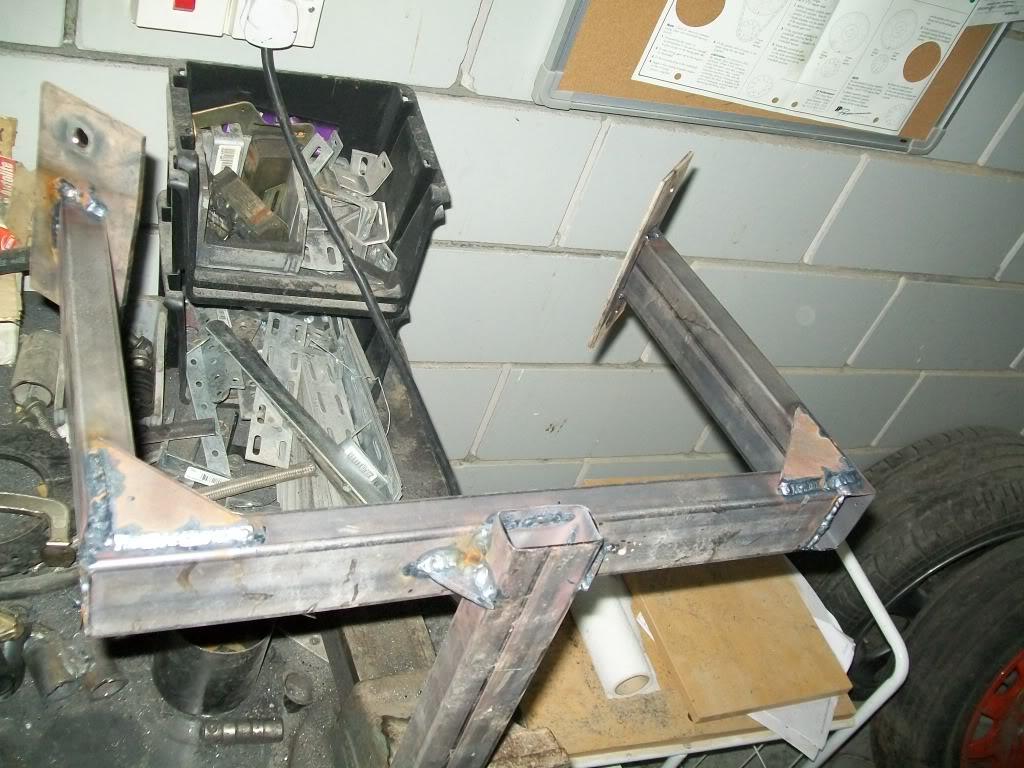
i'm almost done with the engine cradle that will be used to move the engine and trans in place :
also finished mounting the GT2 solid bumper mounts , making the rear bumper a stuctural peice :
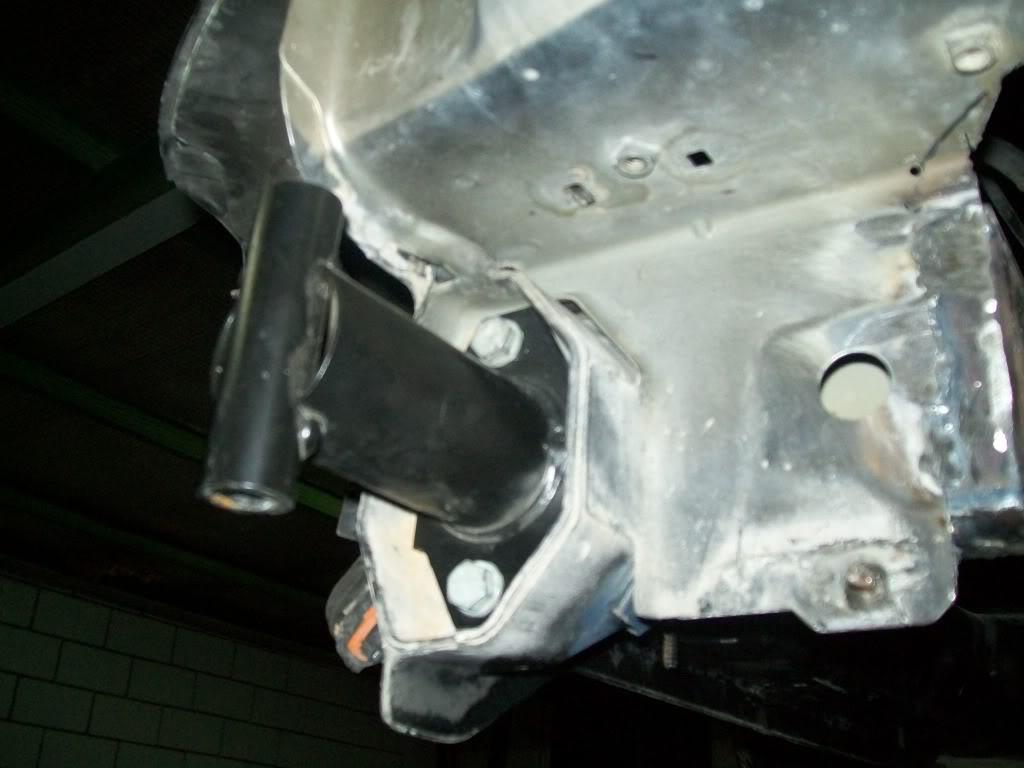
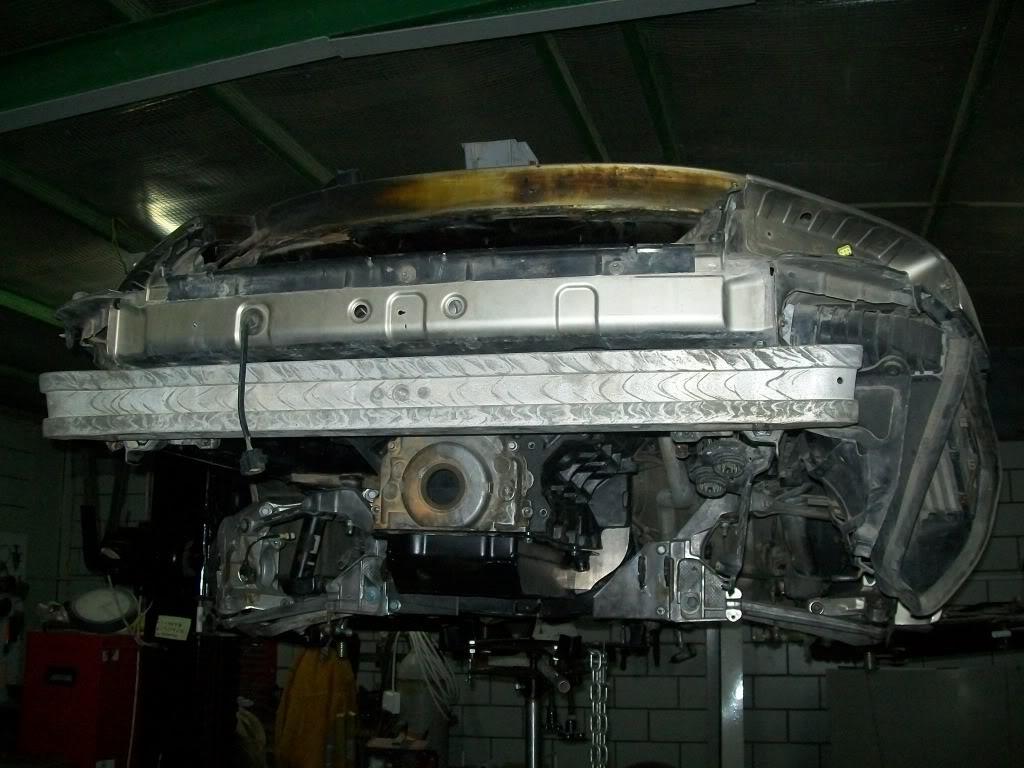
mufflers should be here any day now , so when they show up i can start with the exhaust system.
i probably will start routing the coolant hoses for now untill i get some more goodies in .
07.12.10
got the oil cooler/fan assembly in , this will most likely be fitted on the decklid :
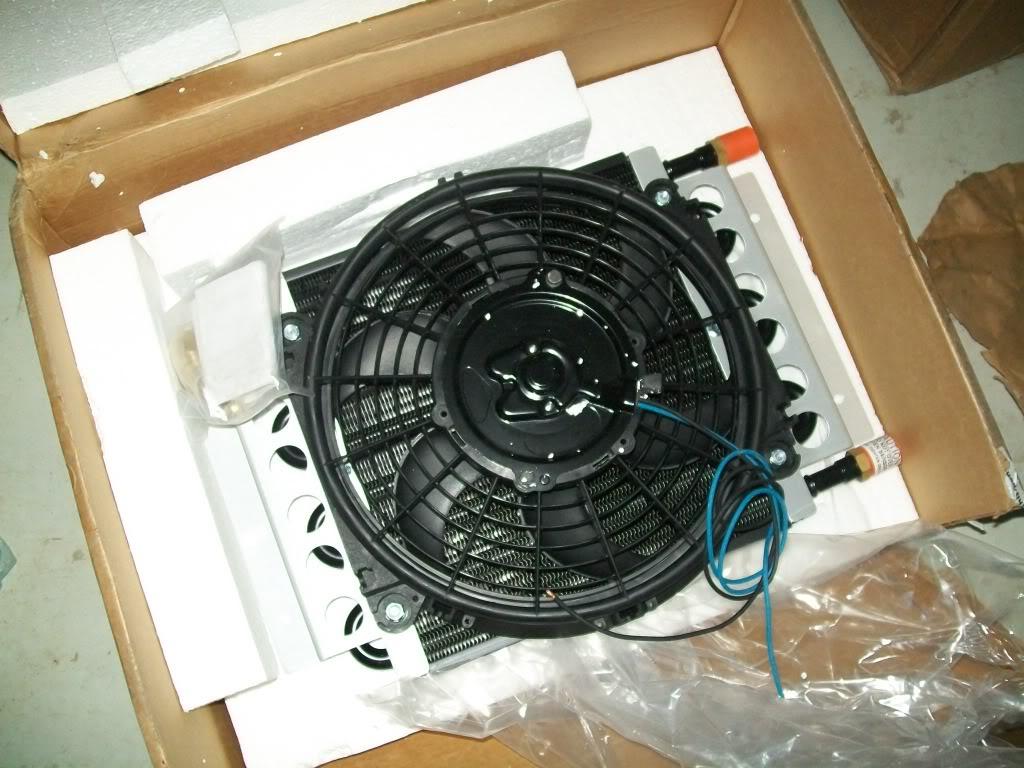
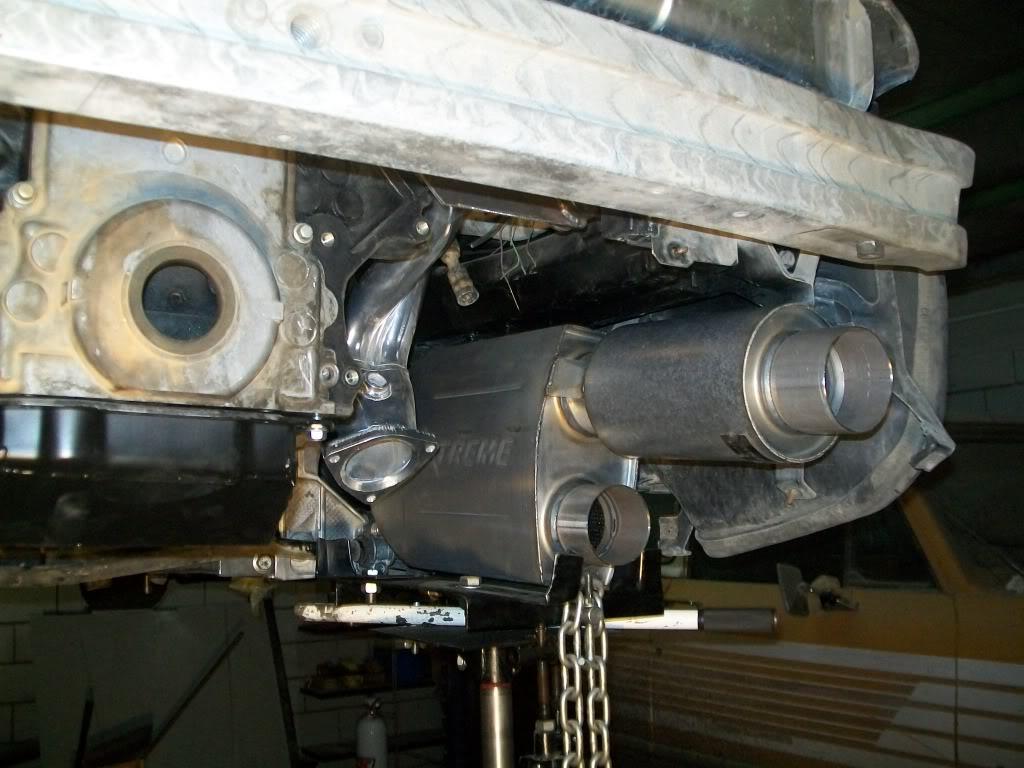
the mufflers also finally showed up from extreme mufflers , and man do i like'em !
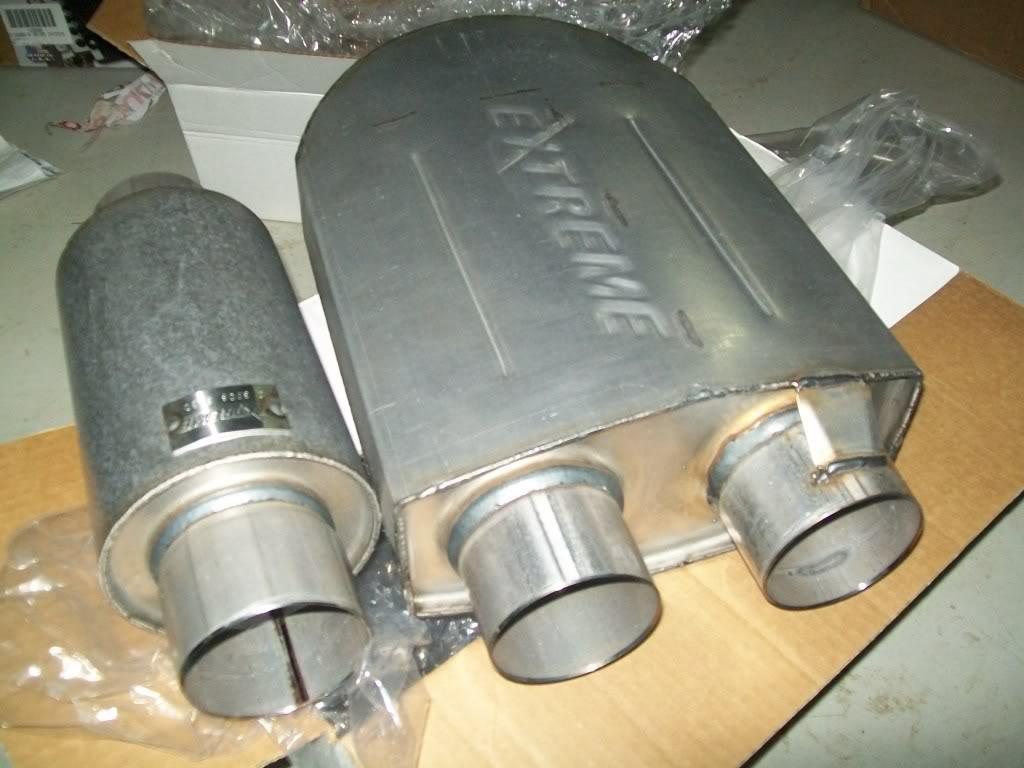
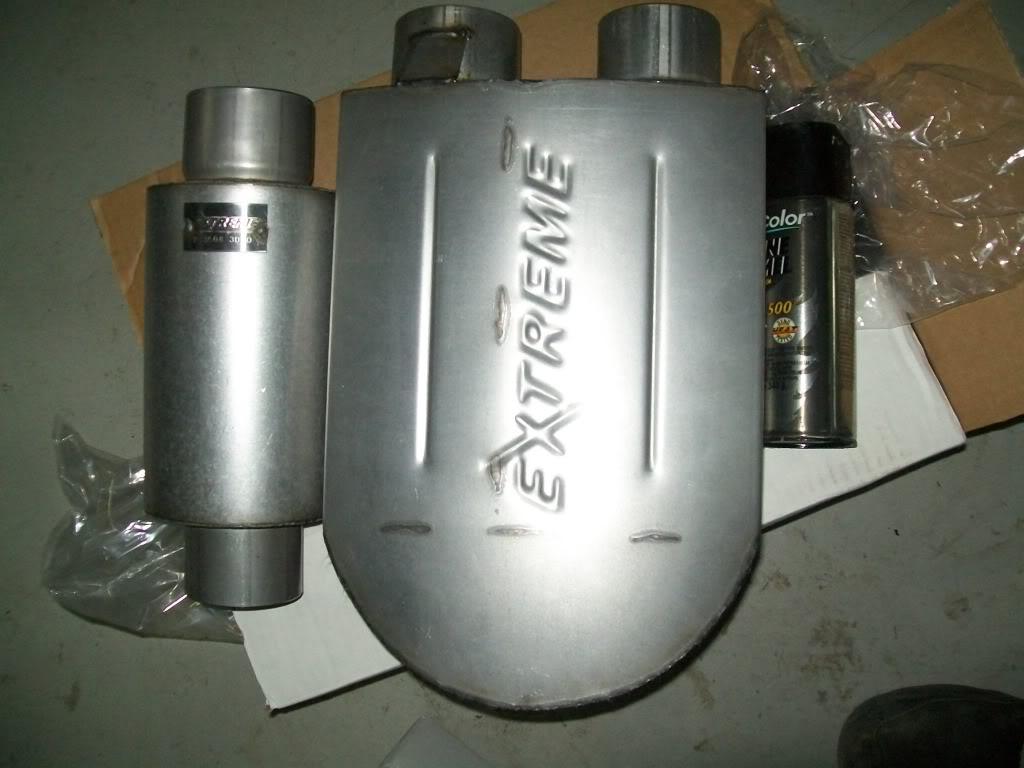
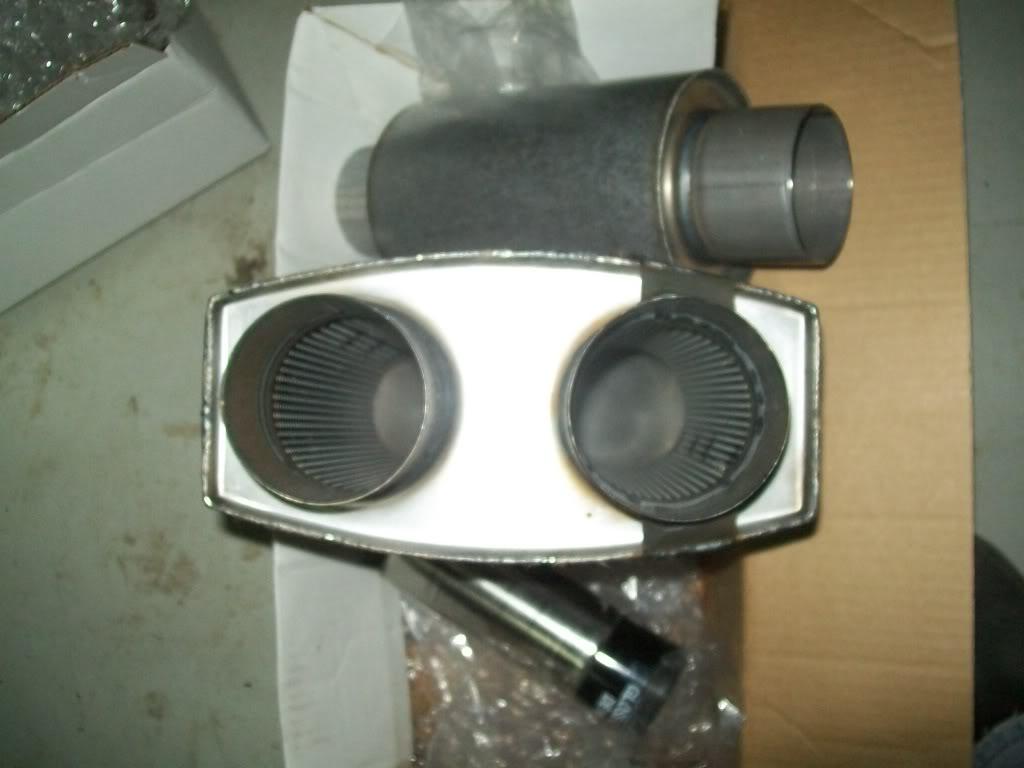
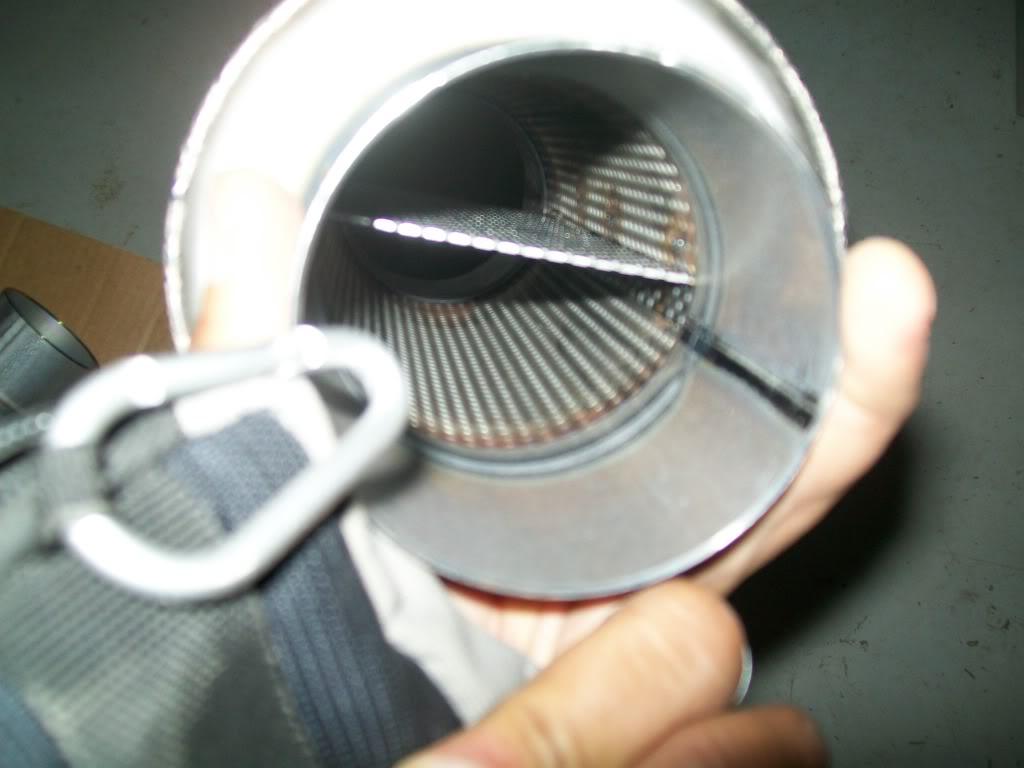
as you can see they are two "U" mufflers and two bullets , they are both as free flowing as they get and the plan is to use one of each on each side.
the headers will face backwards and i will not use the stupid stock flange on them , i'm going to port the lip on the original flange cause its only 2.5 inches in diameter ( seen here :
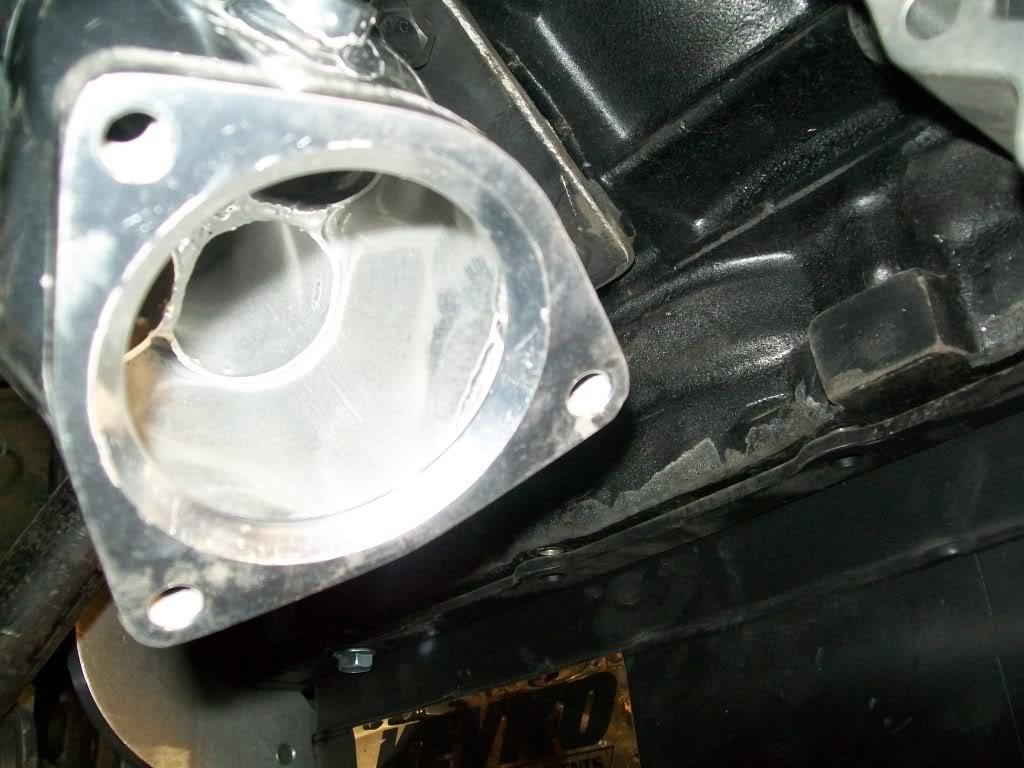
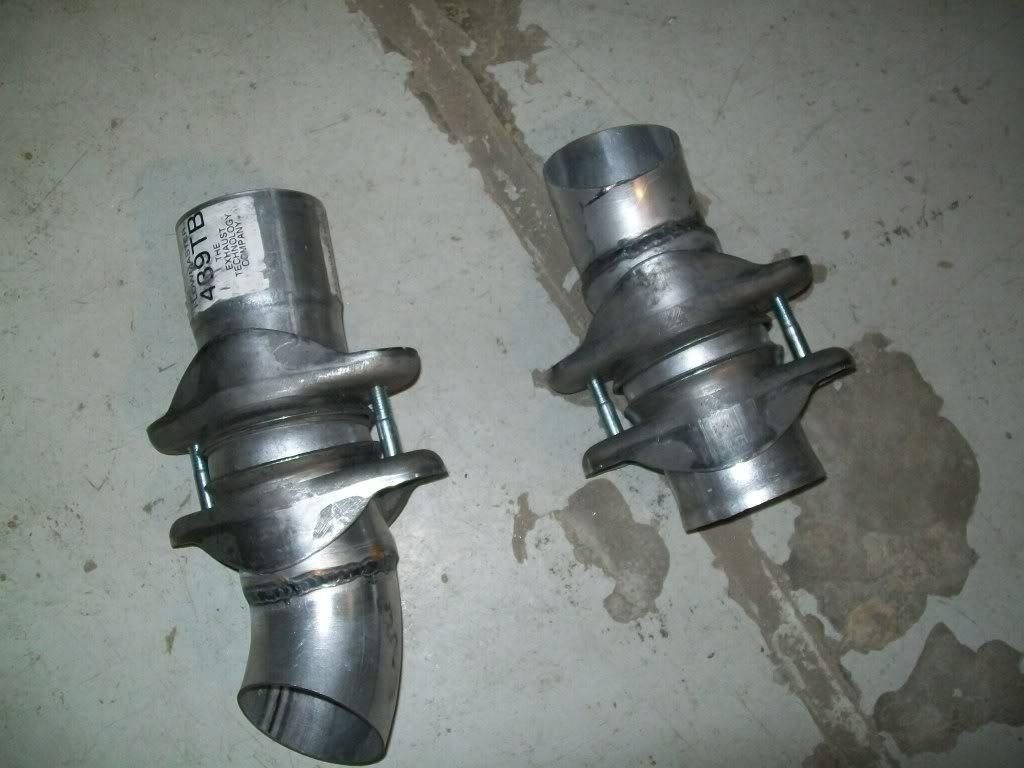
and will weld a small extension with a 45 deg. angle on it ending with a ball flange , i was going to go with flanges but using ball flanges offeres better fittment and is more flexible when it comes to pipe missalignment . after the ball flange there will be a U back into the muffler then the gases make another u turn and exit the muffler into the bullet muffler and the exhaust tip. here is approximatly how the mufflers will be placed :
and the extension and ball flanges that will be welded on to the headers :
and here's a weird occurence , as soon as i finished cutting the metal donuts to make the 180 turns the pipe split at the seam :
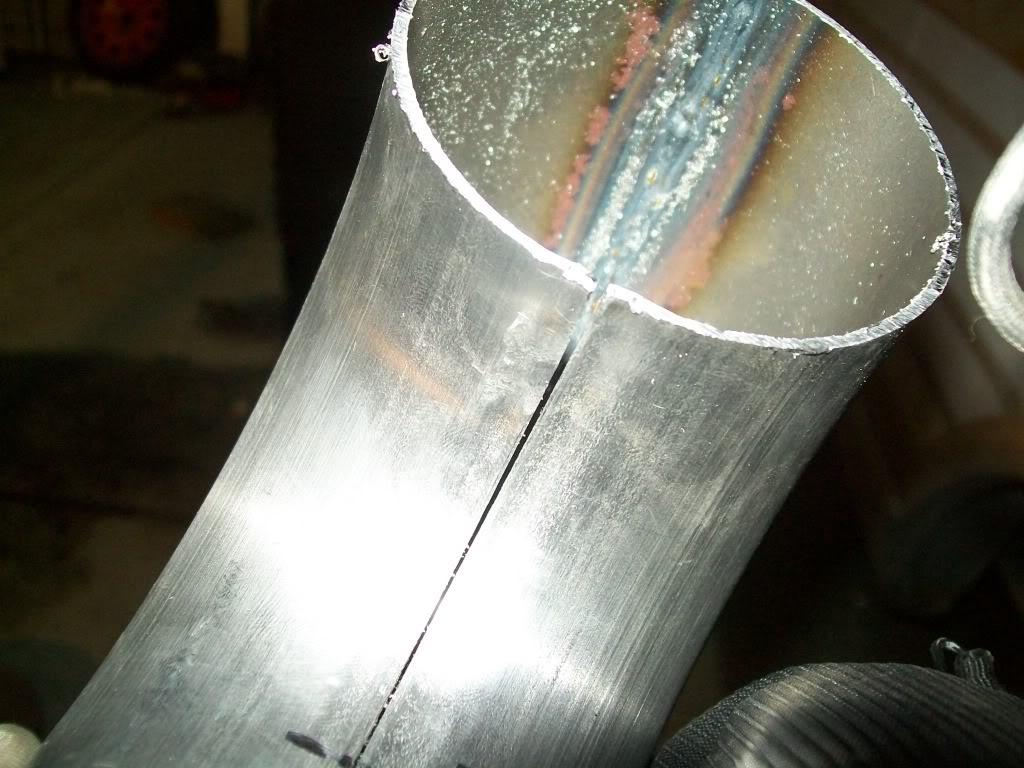
but that wasnothing that the TIG welder couldn't fix
the oil cooler lines , remote filter and fittings should be here very soon as well as the rest of the brake parts , so finishing up the bottom side of the car should be happening soon
so the plan tomorow is to:
- port out the header flange so i can weld on the 3 inch ball flange.
- weld the rest of the exhaust and figure out where to mount the hangers
- put bait on the mouse trap to catch the other martha forking rat that i saw today
- i might just lay the harness in the compartment and see where i'll route it into the car.
- clean the mess i made over the last few weeks
07.13.10
on with the build , i got some oil filter fittings in today as well as the remote oil filter housing , fuel filter and lines as well as fuel line fittings .
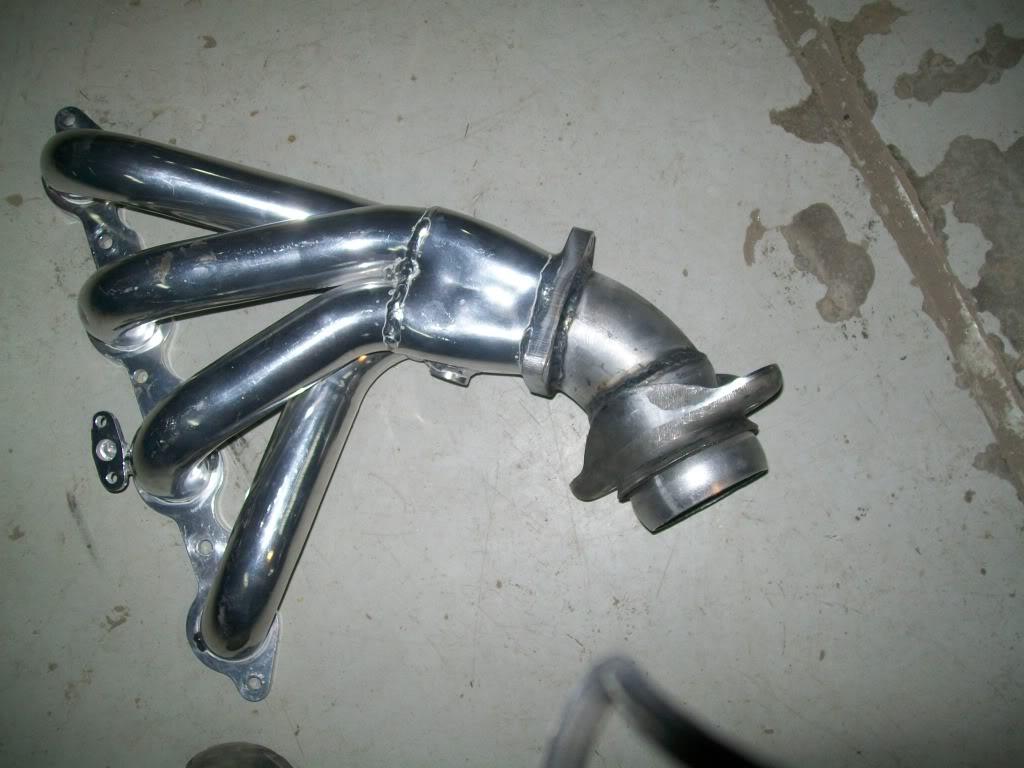
i didn't get much done today cause i got there late , but i did manage to weld the 45 deg extensions on the headers :
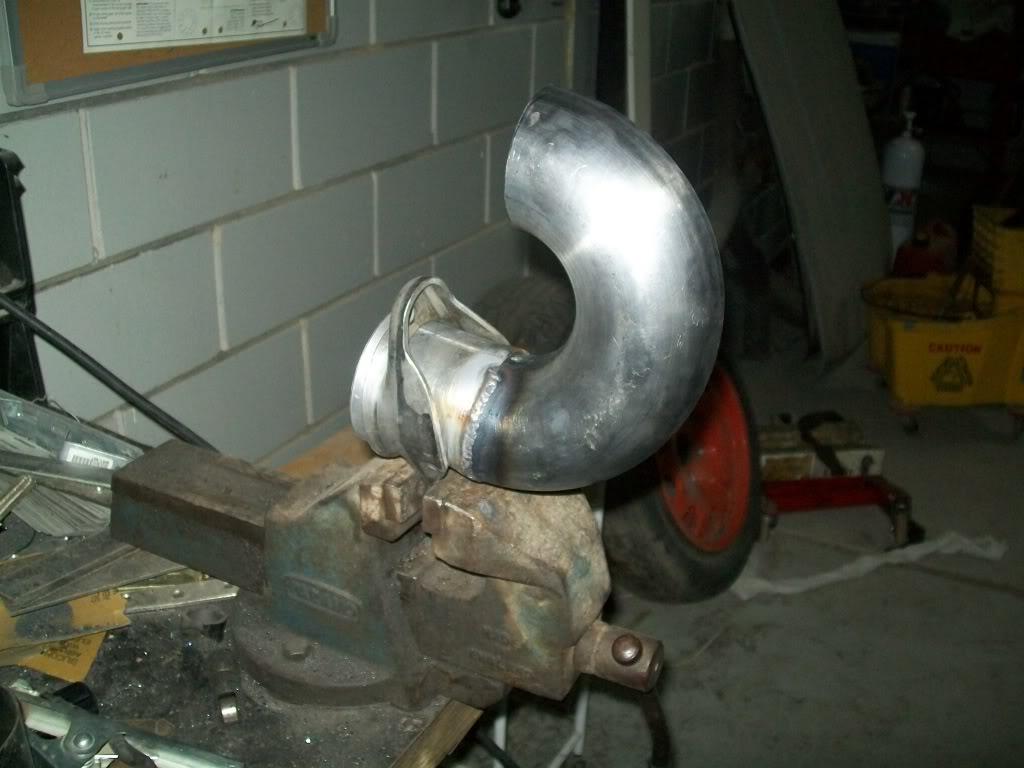
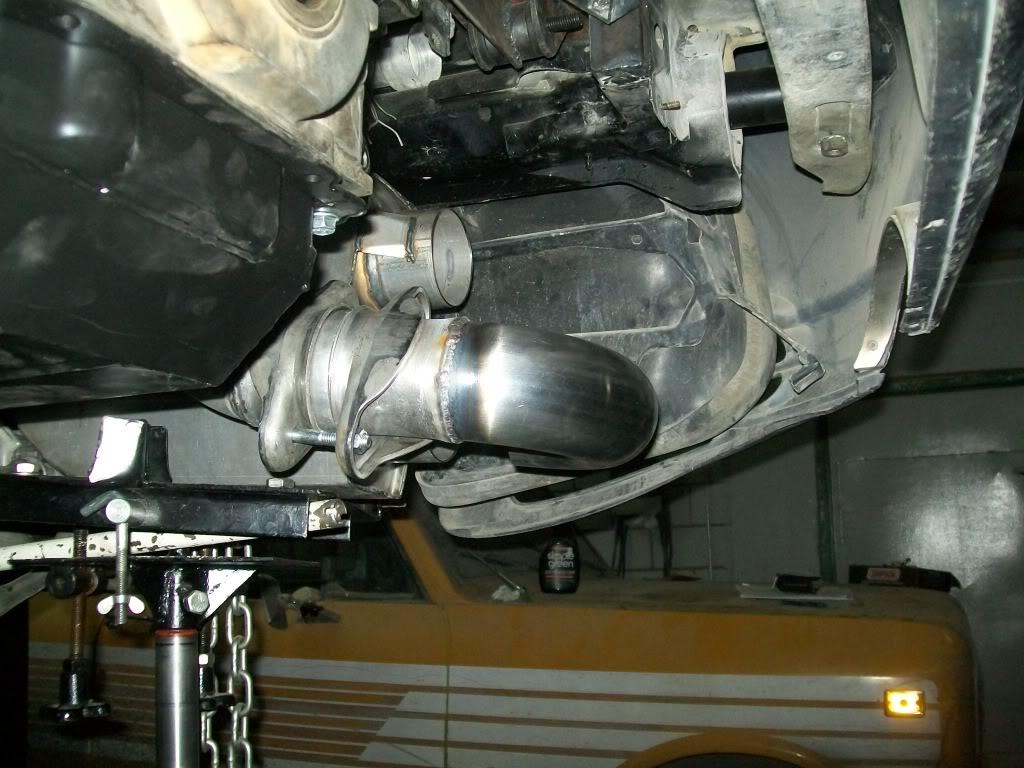
and finished welding both 180 deg bends to the ball flanges :
and yes ,,,, i did bait the trap
07.15.10
i'm almost done with the exhaust now
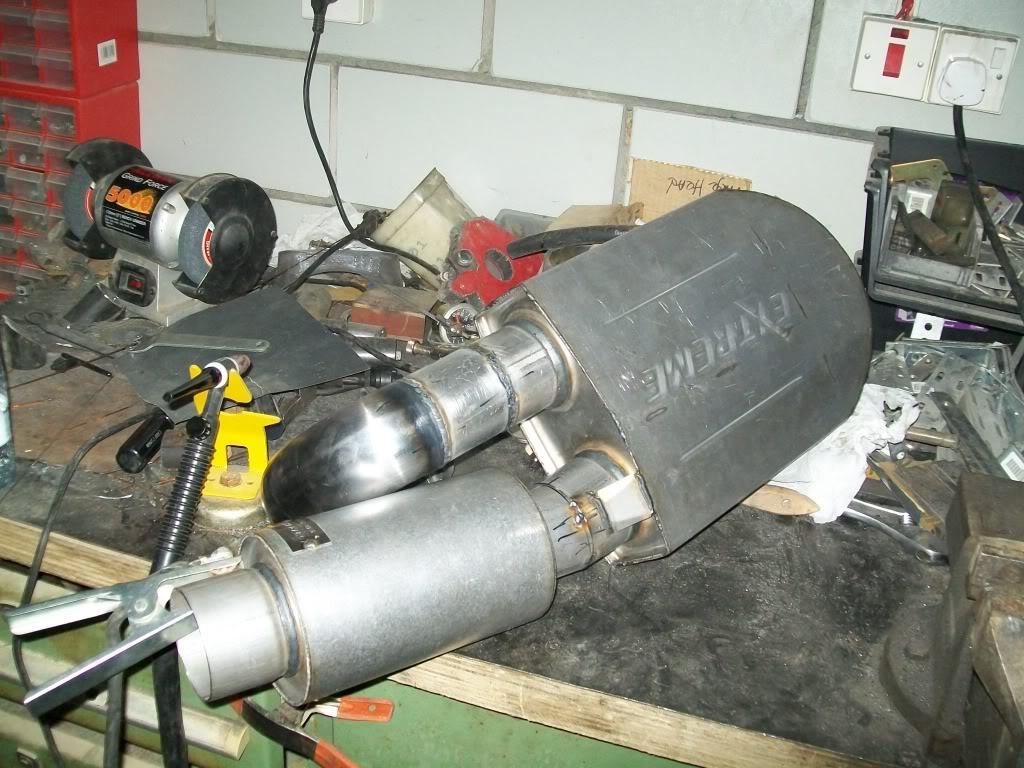
here is how the final product looks:
and this is how it looks on the car :
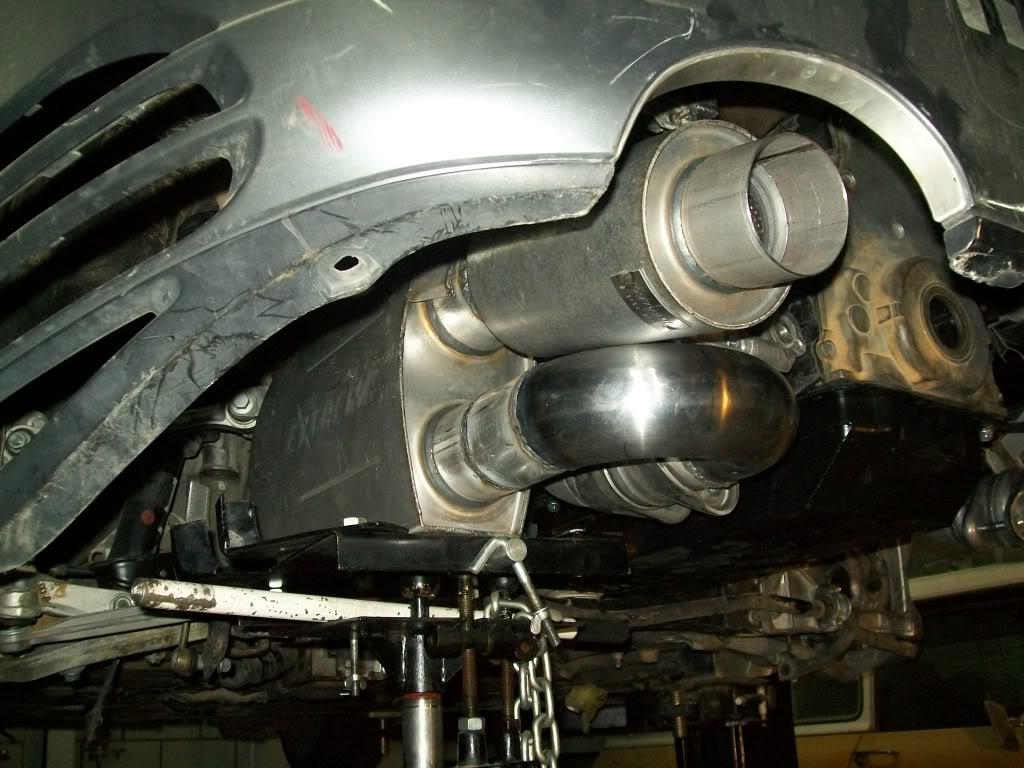

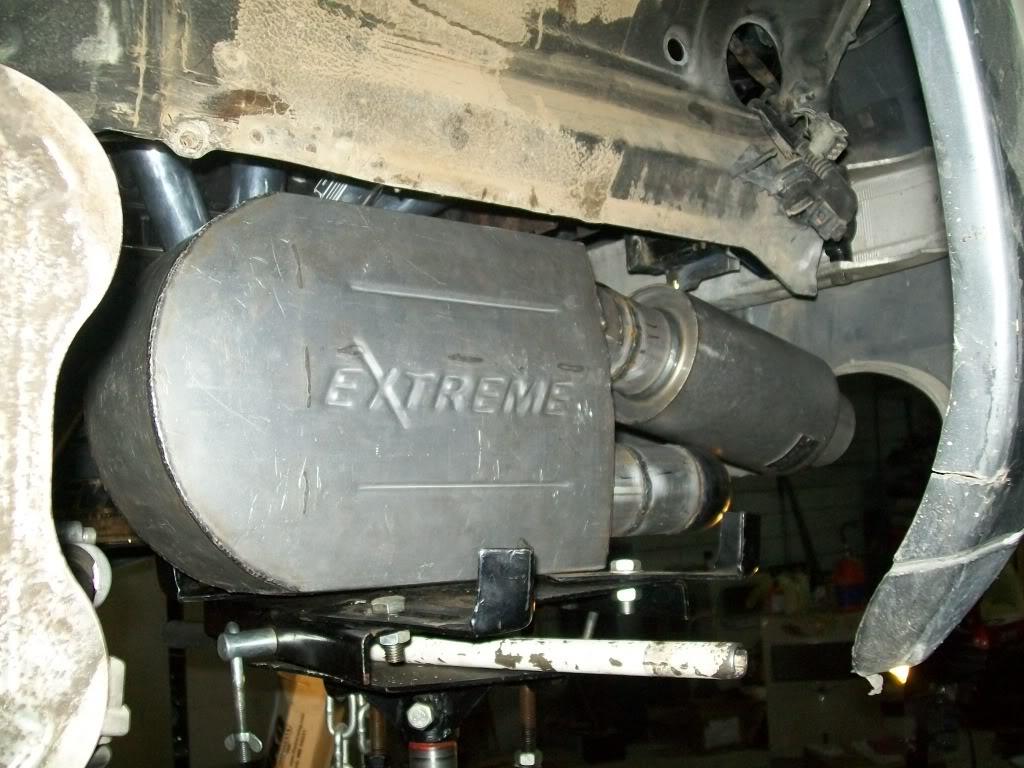
and here is how it looks from behind :
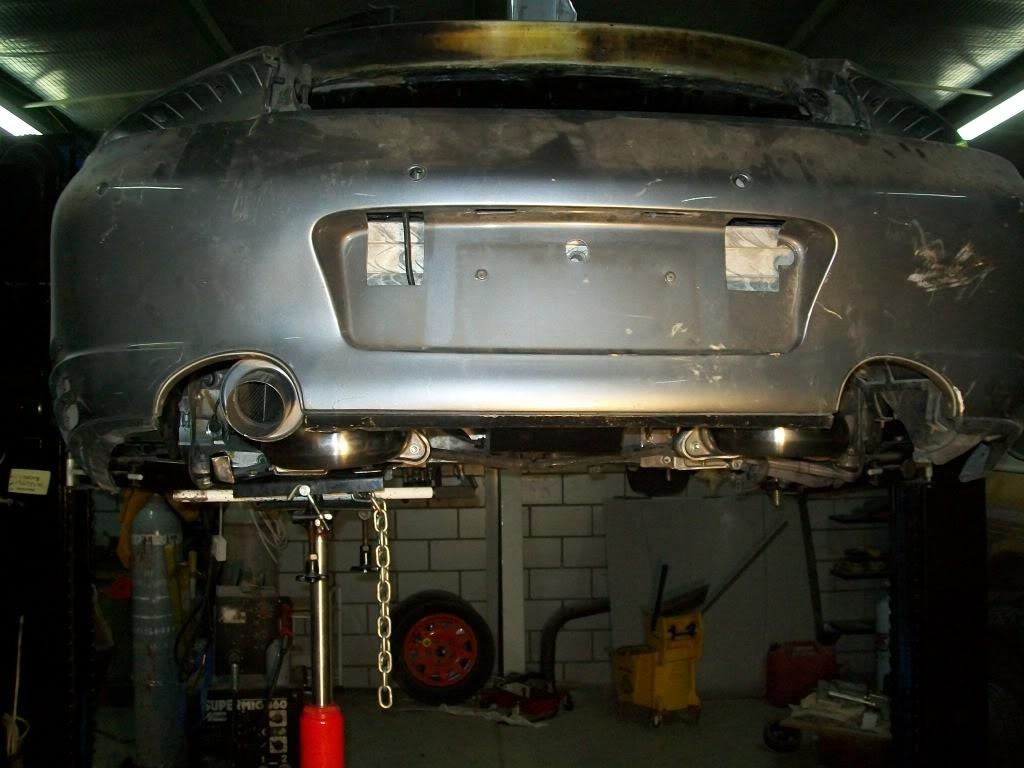
i still have to finish one more weld and place a couple of tabs and both muffler assemblies will be done .
next up is figuring out where to place hangars and getting some porsche tips, then later put some heat shields on them for some added comfort .
next up on the to do list is to finish the brakes , coolant lines and i should be mostly done with the bottom side of the car.
07.18.10
i guess i can say i acheived one of the milestones of this project; i am completly done with the exhaust. ( well,,, i still have to do the tips )
i finished welding the last muffler and hangers , and to tell you the truth i'm impressed with what i did
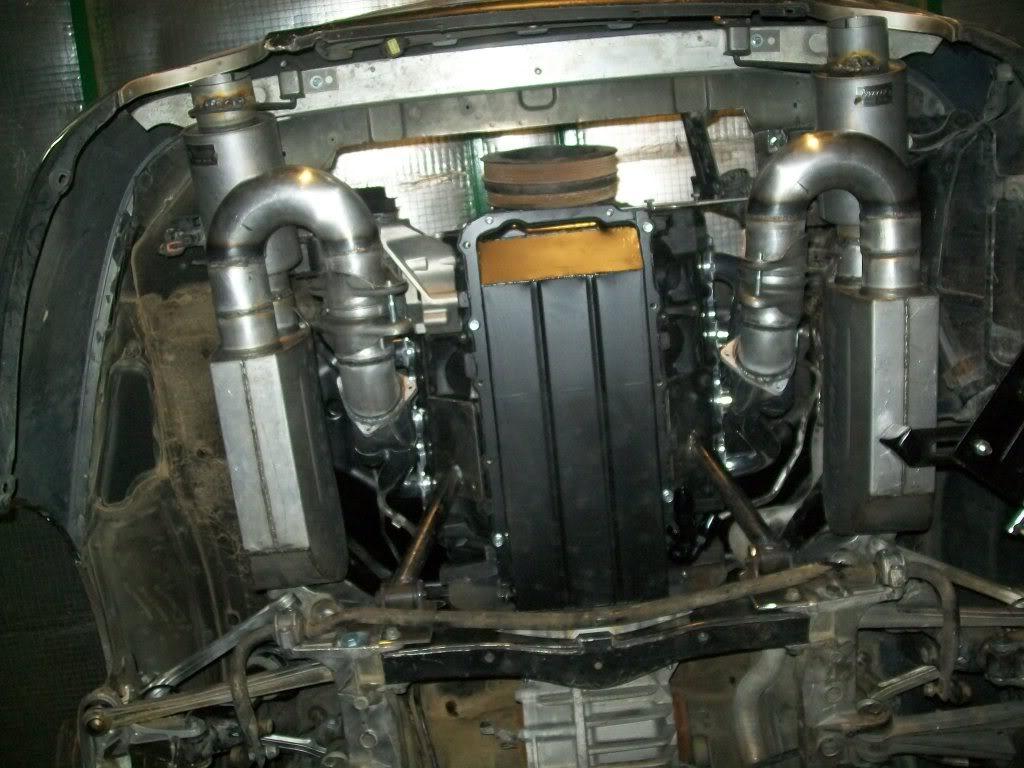
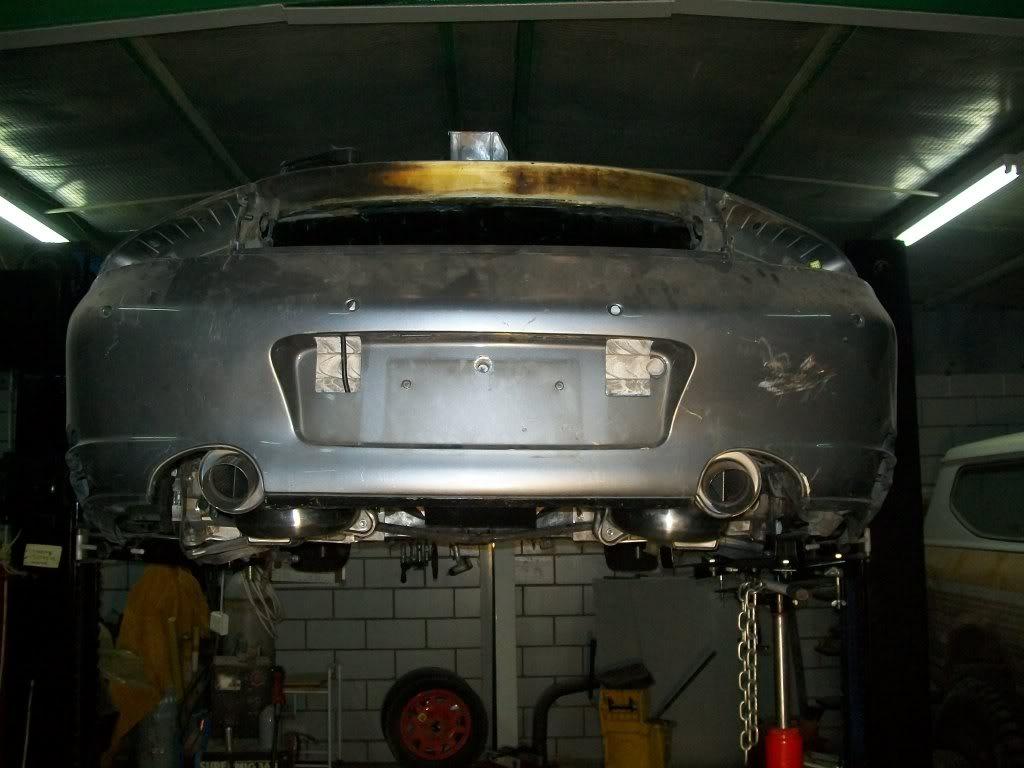
rear view :
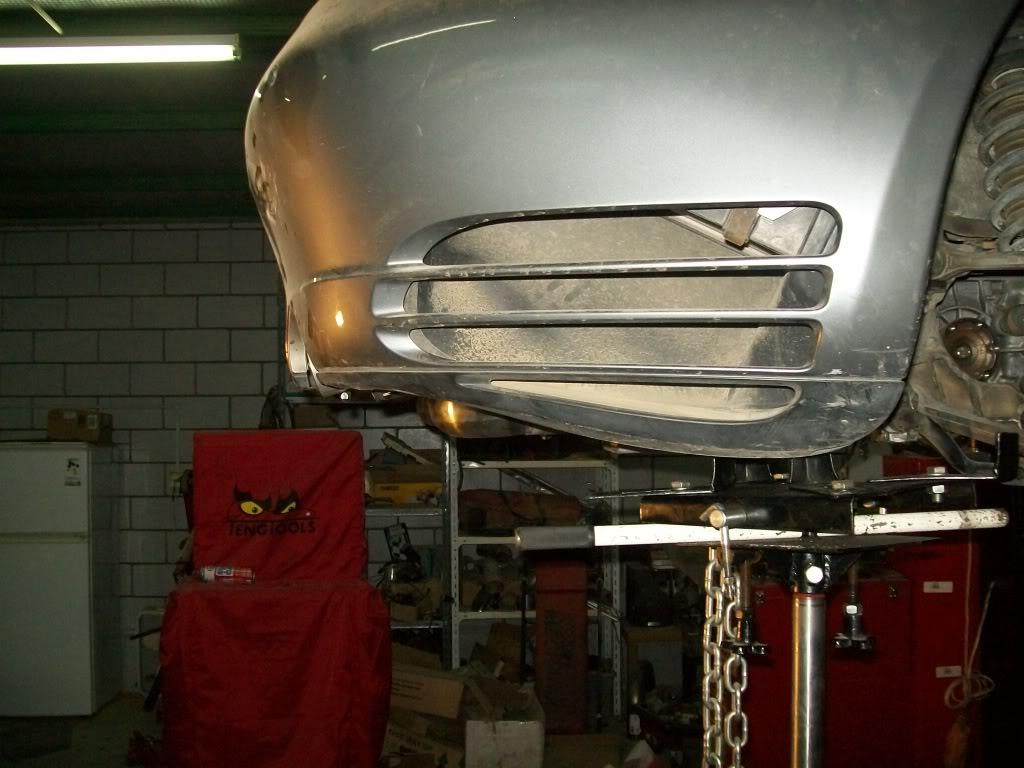
and a side view ( i actually have more clearancce than stock ! )
i also started thinking of where to mount the cooler and oil filter . and after many minutes of head scratching and staring at the engine compartment i came up with this location :

and the oil cooler will be next to it and stretch across the bumper. i also plan on using some quick disconnect fittings from the oil pan to the oil filter for ease of removal .
07.19.10
so now its on to other things
i still have to measure how much the driveshaft needs to be shortened , and i really need to work on the hoses under the car which includes clutch ,fuel , coolant, heater , and p/s lines.
any how , according to my list the next thing to do is :
- measure and cut driveshaft
- oil lines, filter, and cooler
- finish routing the hydraulic lines for the clutch
- start on the fule line stuff
- i guess i will delay the harness for a bit , i want to do all the electrical work at once.
- install some heat shields around the mufflers
should keep me busy for a while
08.11.10
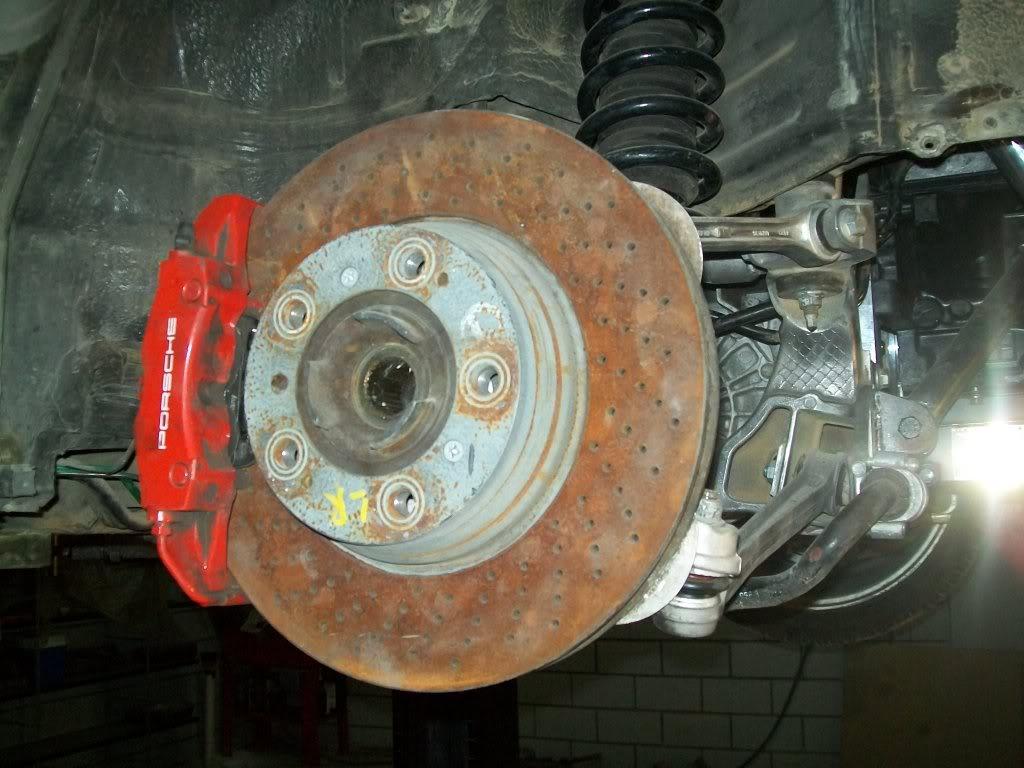
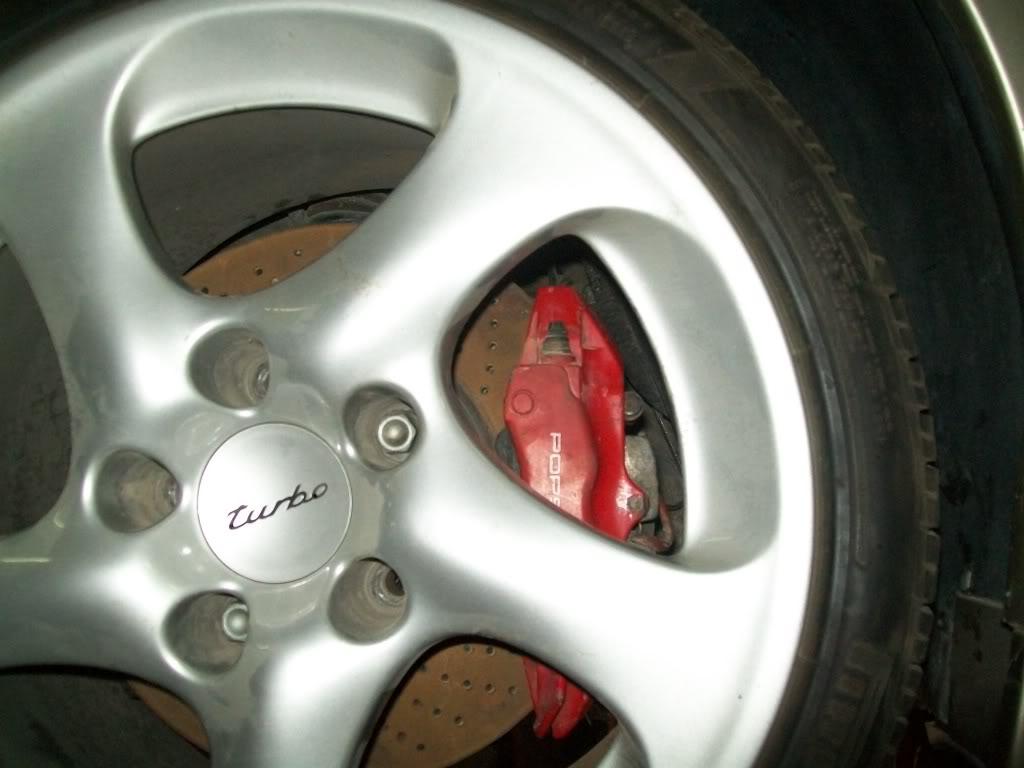
i finally have the rear brakes done , all i have to do now is bleed them and later down the road paint them and add the "porsche " stencil to them :
gotta love the rusty rotors
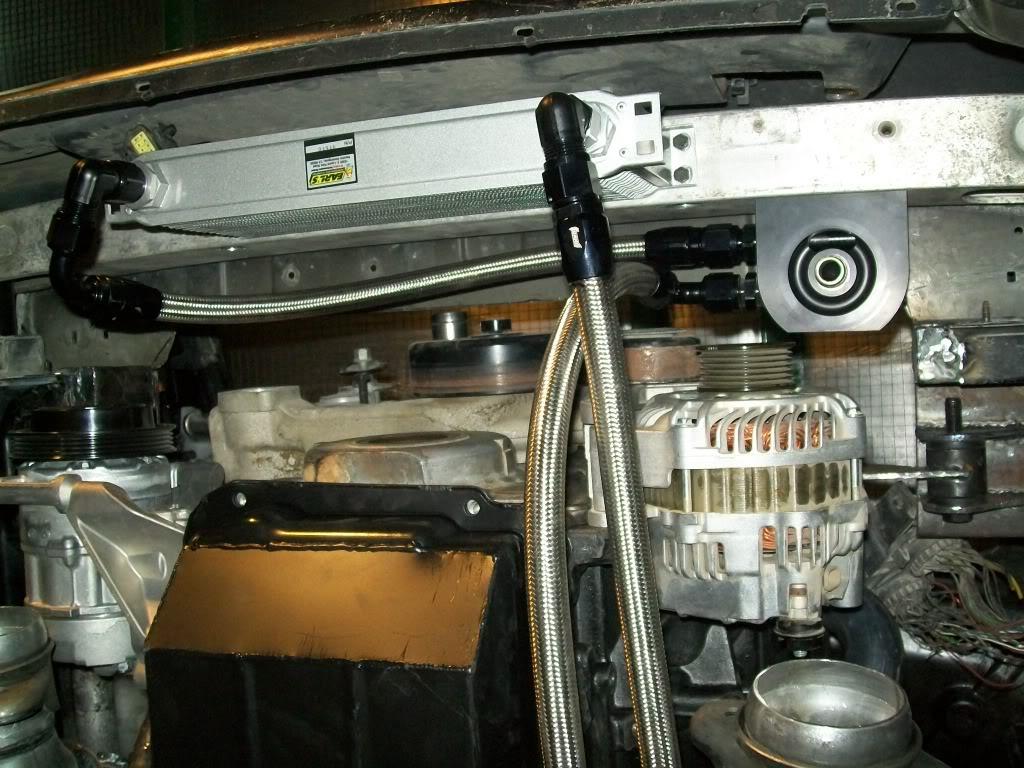
i also figured out where to mount the oil cooler :
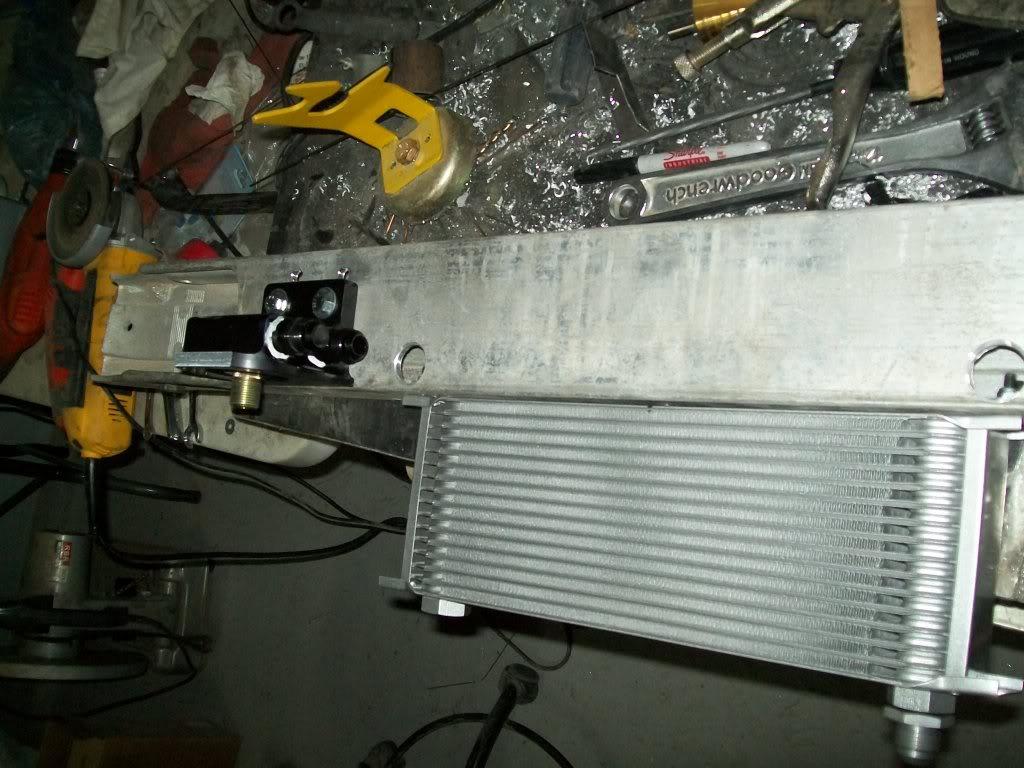
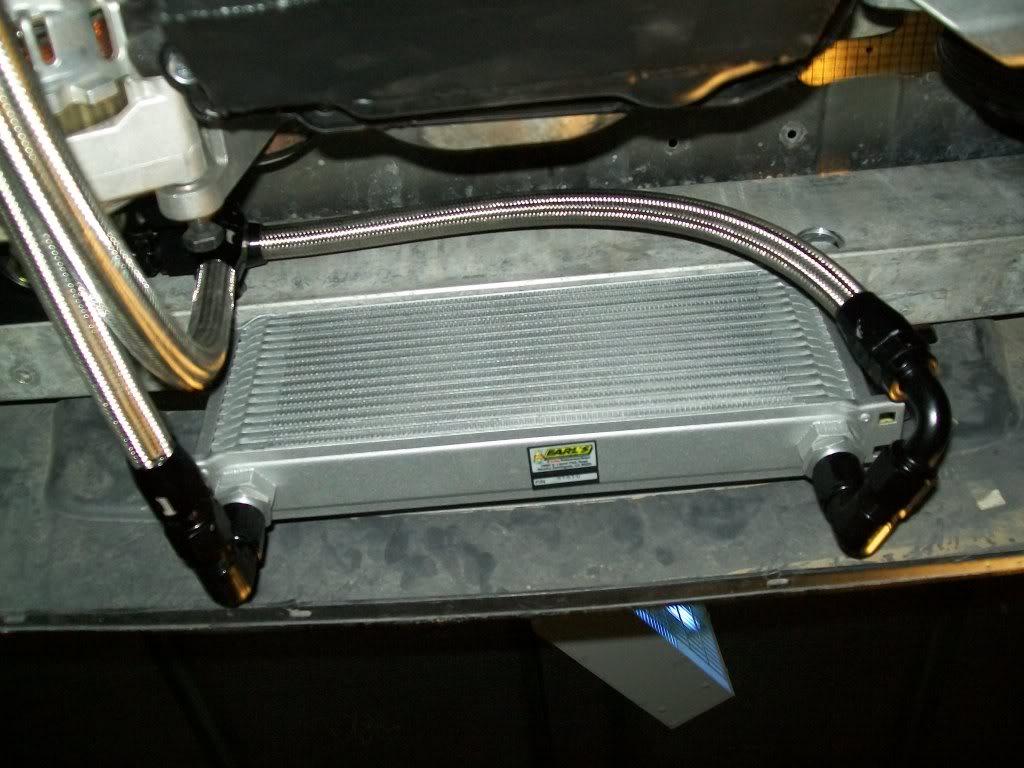
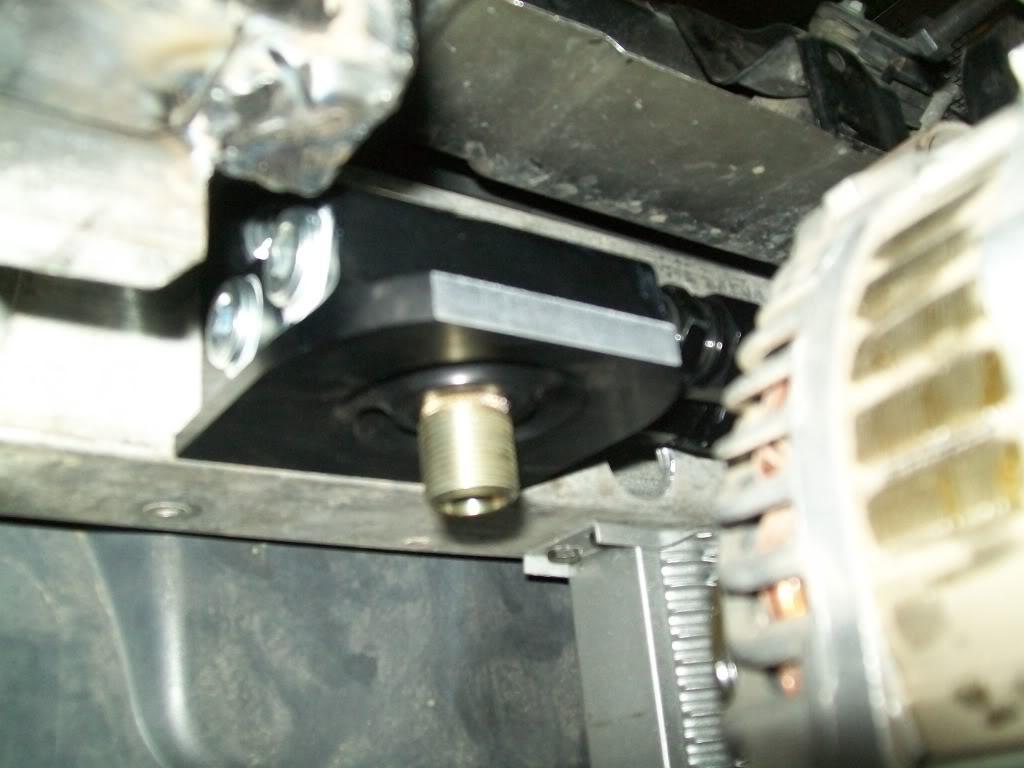
i also had to clerance the oil filter pad to clear the belt :
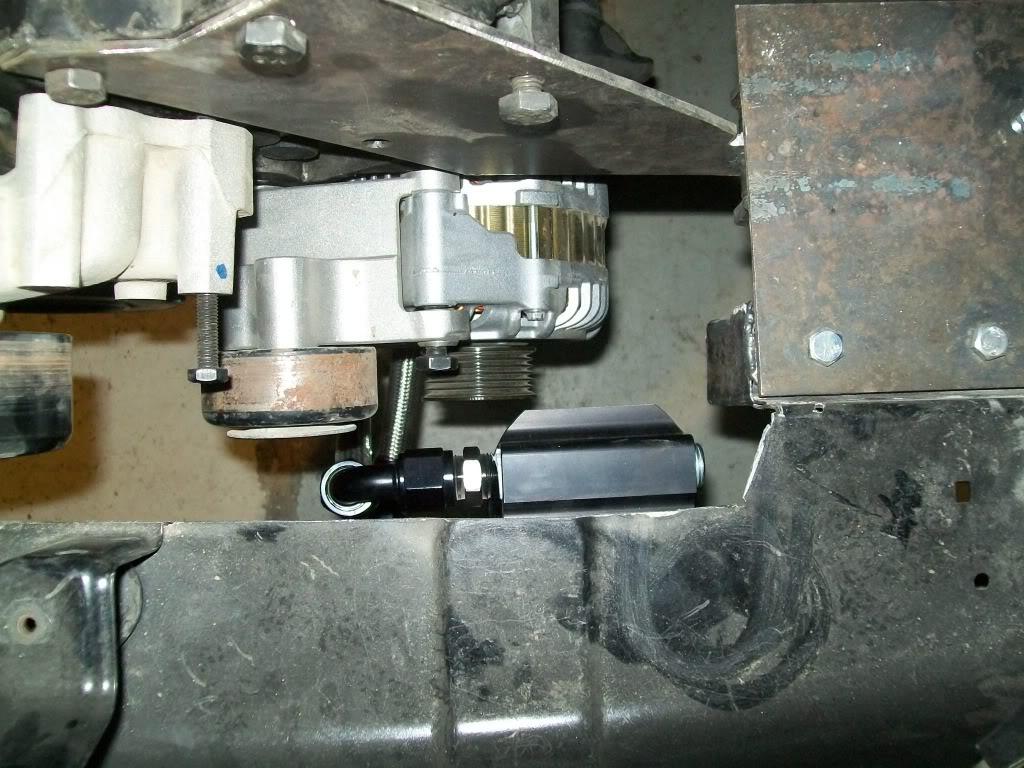
here you can see how close the belt would run by the oil filter:
i also found these cool hose seperators from summit , nice and clean :
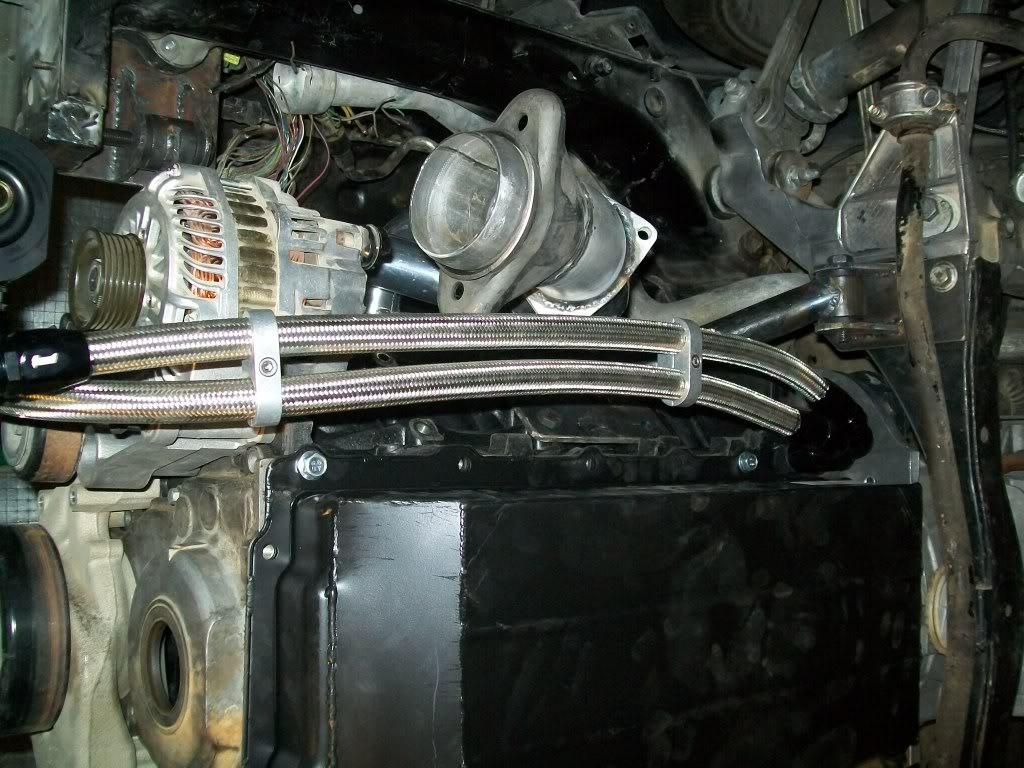
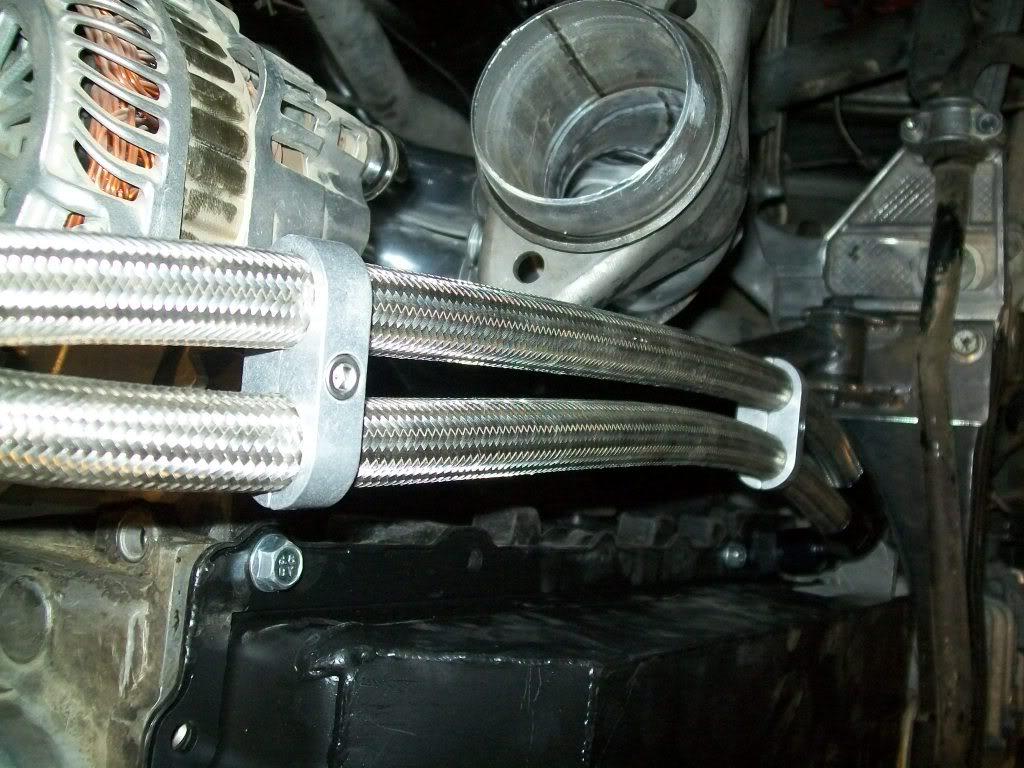
also got the puke tank and vette filter/regulator mounted in place :
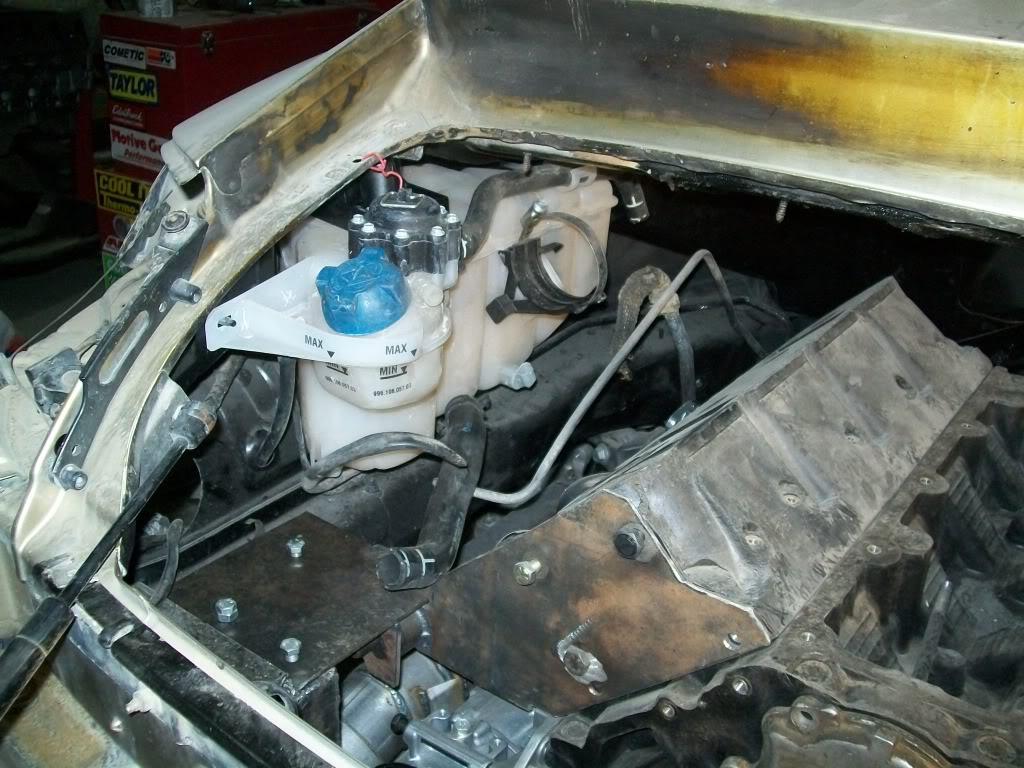
and here are all the fittings on the filter :
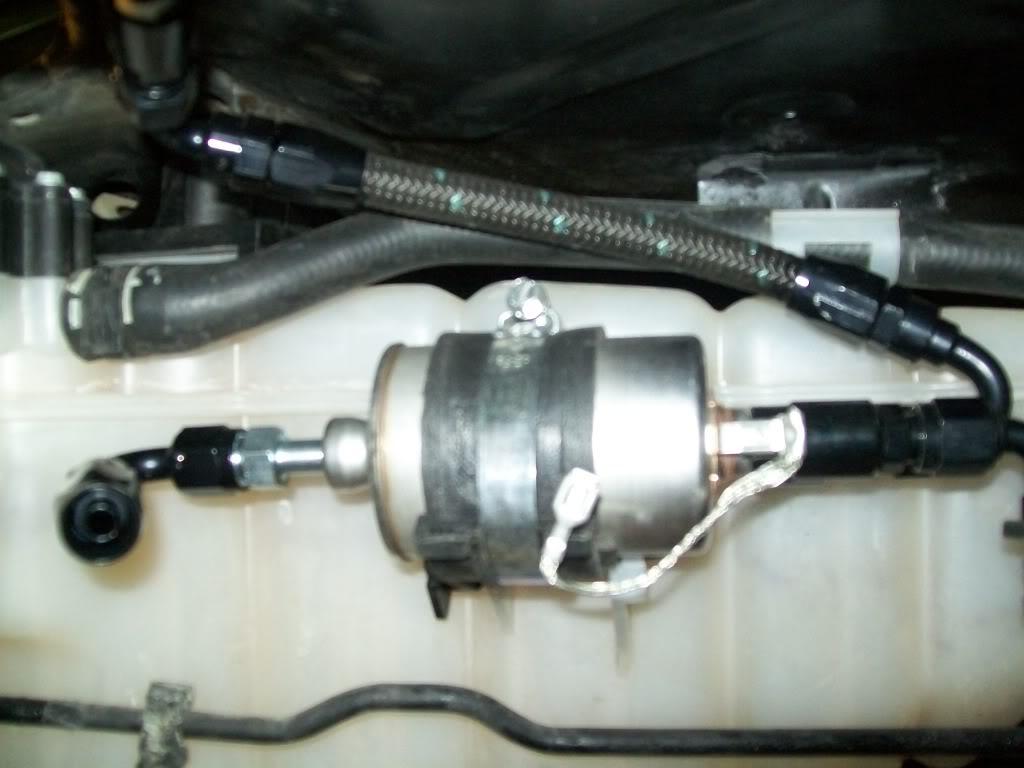
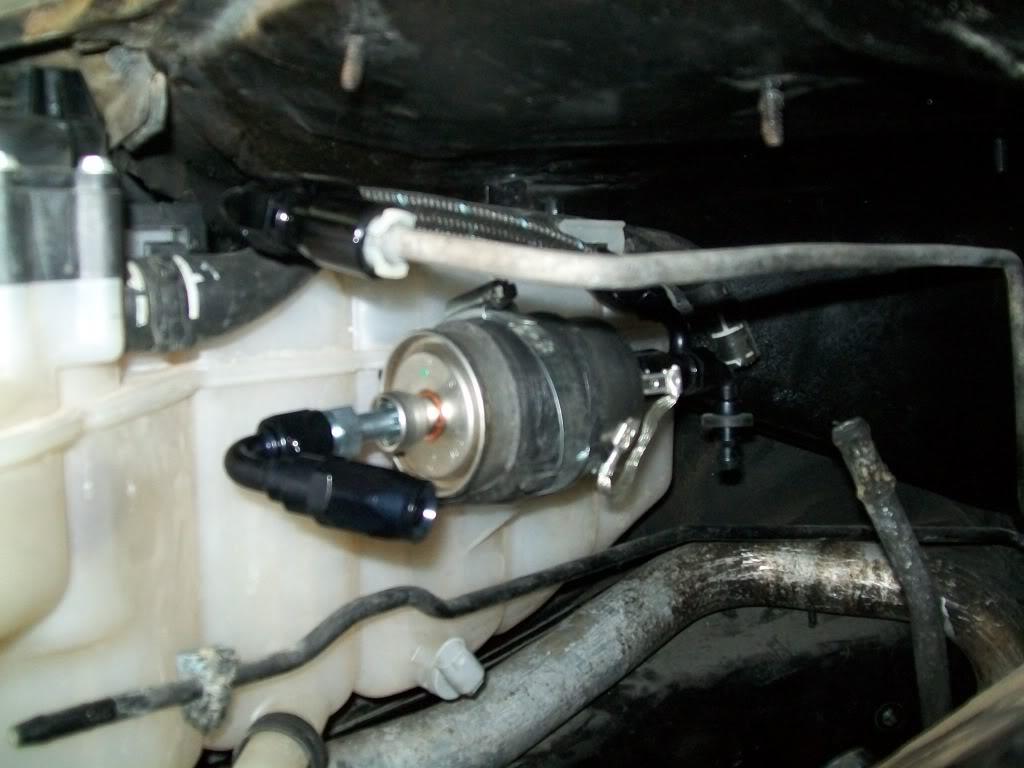
all i have to do for the fuel system is run a hose to the fuel rail and attatch the return line and that should be it for the fuel system .
also looked at the cooling system plumbing ; for the heater hoses i'll be using an ( of all things ) f-body heater hose assembly wich fits and tucks in real nice under the puke tank and connects to the stock porsche stuff . and on one of the hoses i have to T in the puke tank itself just like on vette cooling system. all that is left to do for finishing that is a couple of under car soild lines i ordered to show up.
as for the rest of the cooling plumbing , i decided to just get some stainless steel pipes and elbows and make my own coolant lines after messing with countless rubber hoses, this way i guarantee myself a better fit and one less thing to go wrong in the long run.
so next up on the list is finishing the fuel lines , fab up some heat shields to seperate the headers and mufflers from what ever will be above them as well as isulate the cooler lines, alt. and A/C compressor where they get real close to the exhaust .
i'll also see if i can the heater hose done as much as i can without the parts i ordered .
08.23.10
some updates to report :
i took everything off the car in preperation for painting the engine compartment and putting the real engine in there. i also just got the coolant hoses and engine mounts from the powdercoaters today ( the hoses are silverish in color but for some reason they show up white in the pics) :
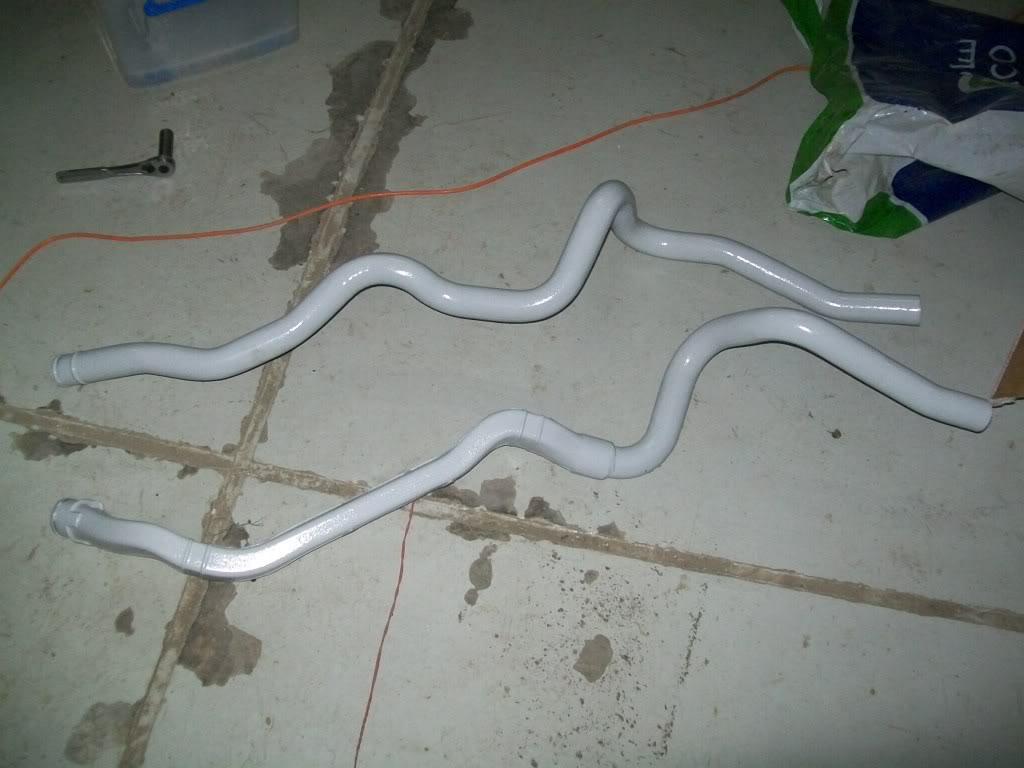
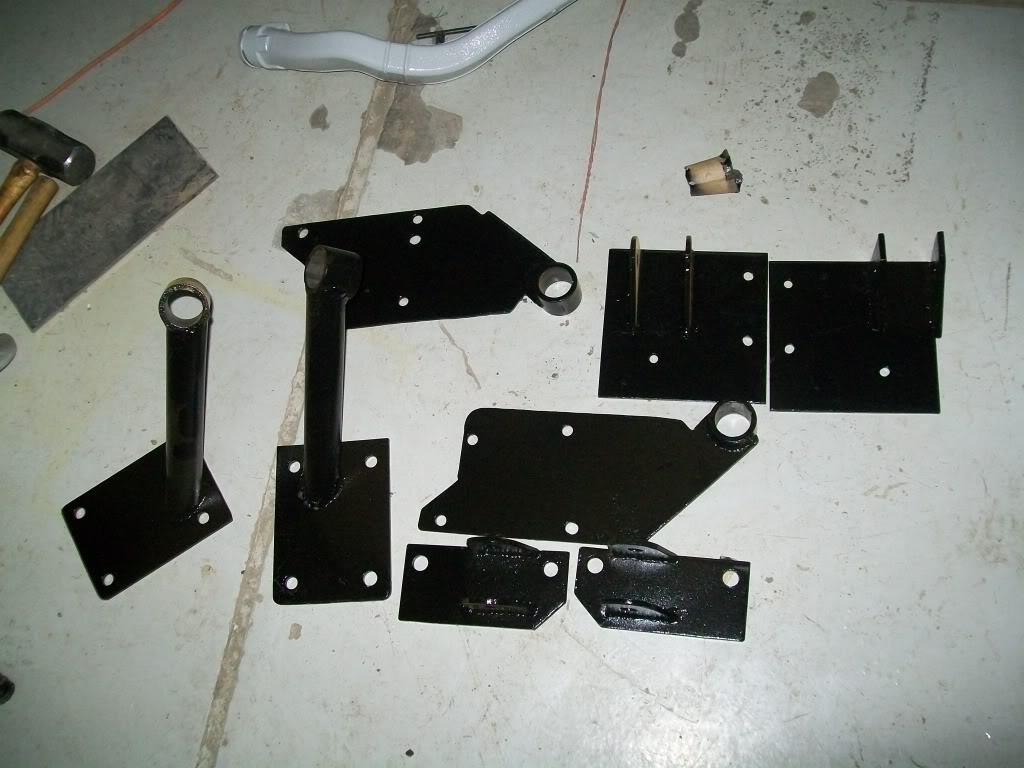
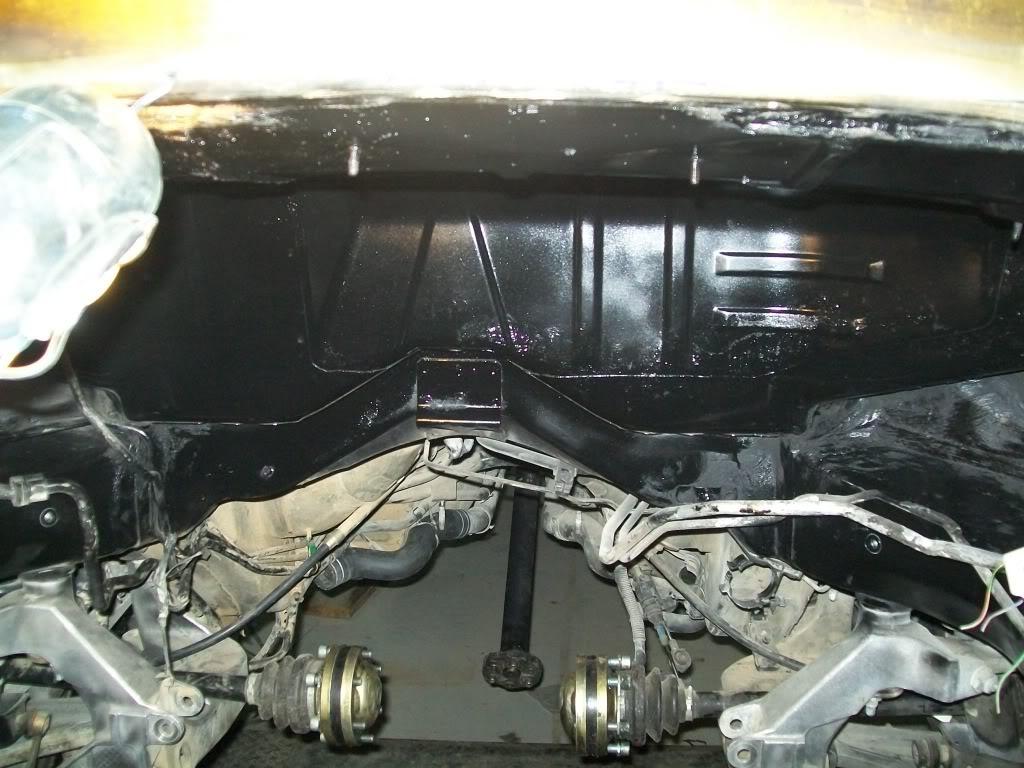
i also just finished painting the engine compartment ( just need one more coat to make sure i covered everything):
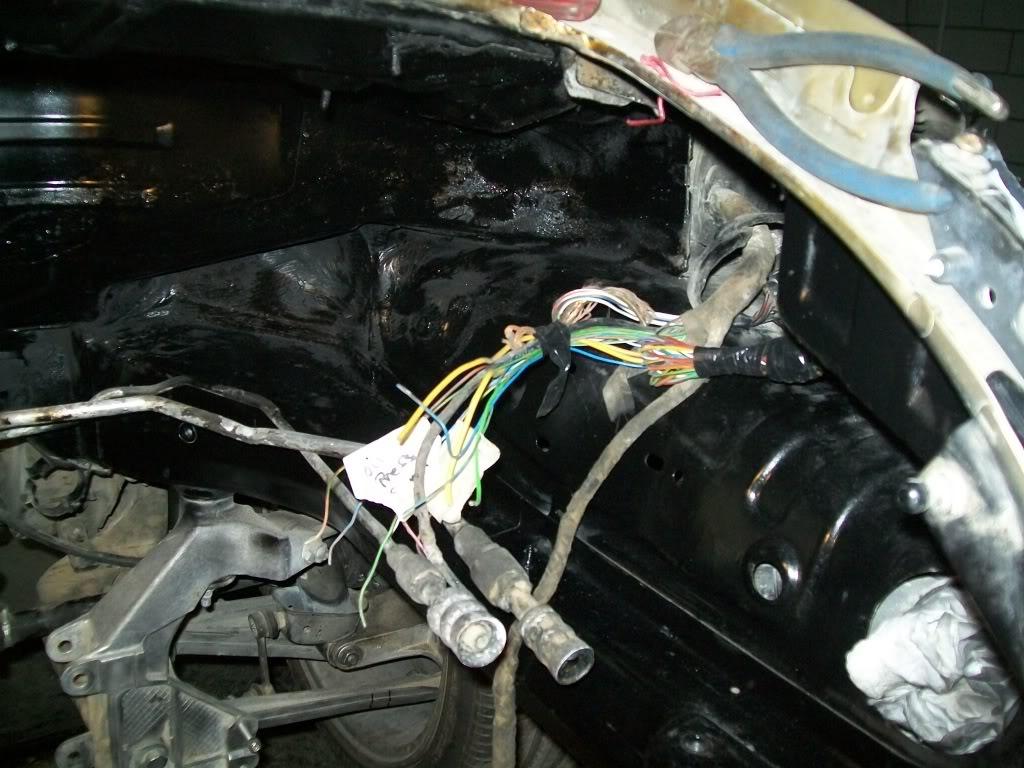
and i finally cleaned up the old porsche harness and cut/removed what wires i don't need , now they are nicely tucked out of the way:
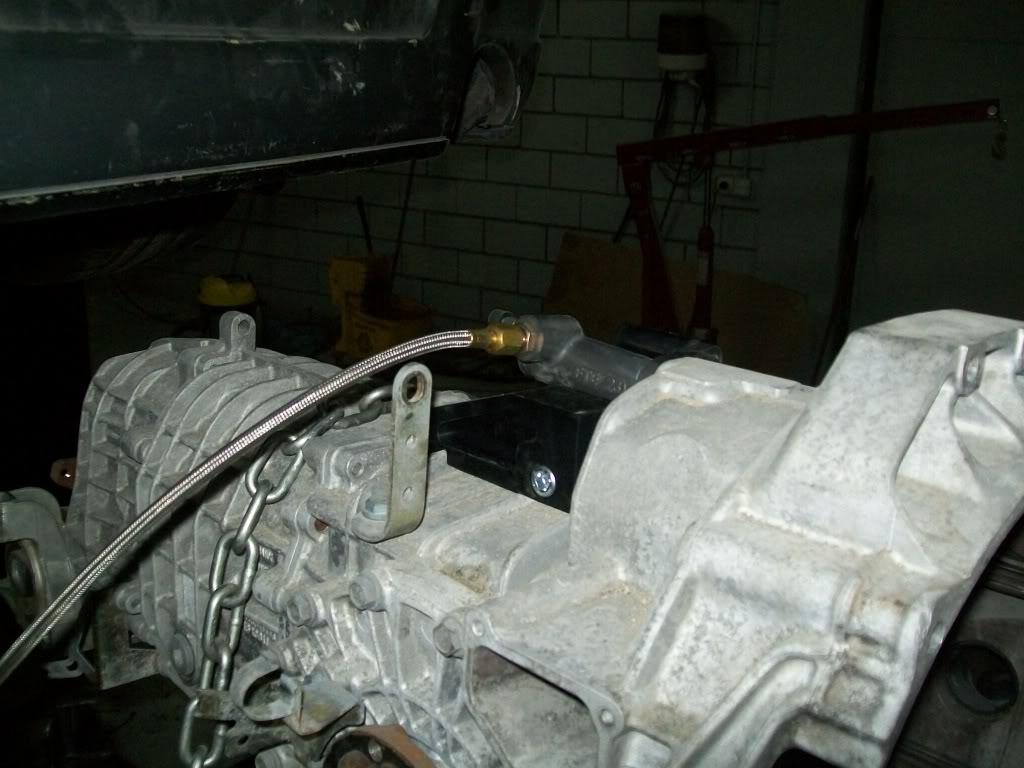
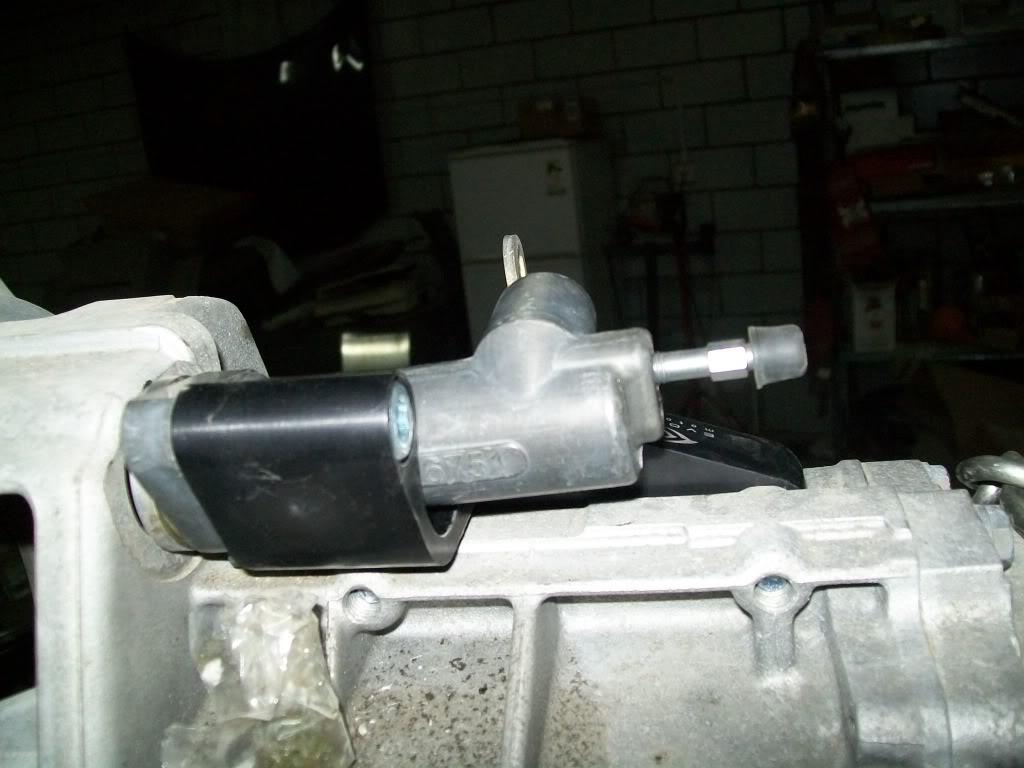
and to cap all that i installed the GT2 slave conversion from EVOMS that gets rid of the bulky original clutch slave cylinder ( which by the way uses the power steering pump to provide the "assist" ) , evoms basically sells you all original parts along with their adapter bracket for the actual slave:
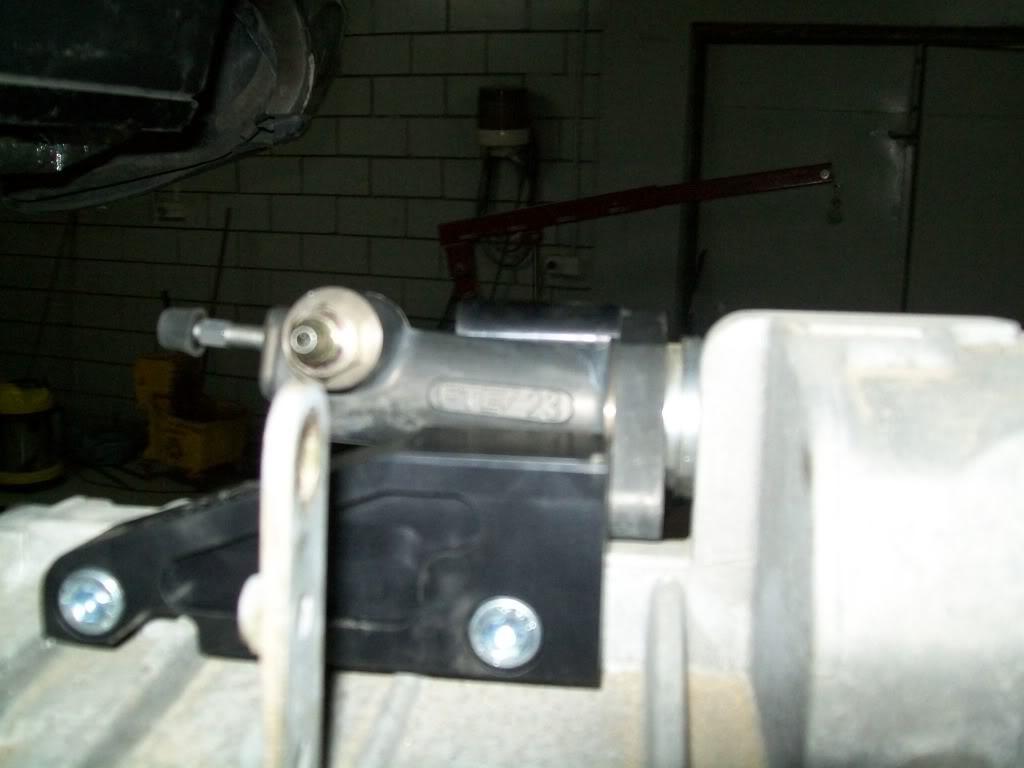
off course there has to be a hitch .,,,, i ordered some clutch fork shaft needle bearings and bushings a while back , and for some reason i can not find them !
so i reorderd them again and am now waiting for them to show up,,,, which means no engine trans mating ( and lift up ) untill they show up
i also finalized A/C hose and heater hoses routing , the heater hoses will be just like the
original porsche design and routing ( waiting for the metal hoses to show up too) , while the A/C lines will be routed in a way that they go over the trans , but more on that later .
so , next up on the list :
- paint compartment
- make a mini engine harness for the starter, porsche sensors , and other thingies
- fab a stainless steel section of coolant hose to tie into the original hoses
- install adapter plate and clutch on the the engine
09.15.10
some updates to report :
clutch fork stuff finally showed up!!
i started working on the stainless coolant tubes ( i want to run as little rubber hose as possible ) should have it knocked out tonight.
i also mounted the driver side intercooler bracket / bumper bracket.
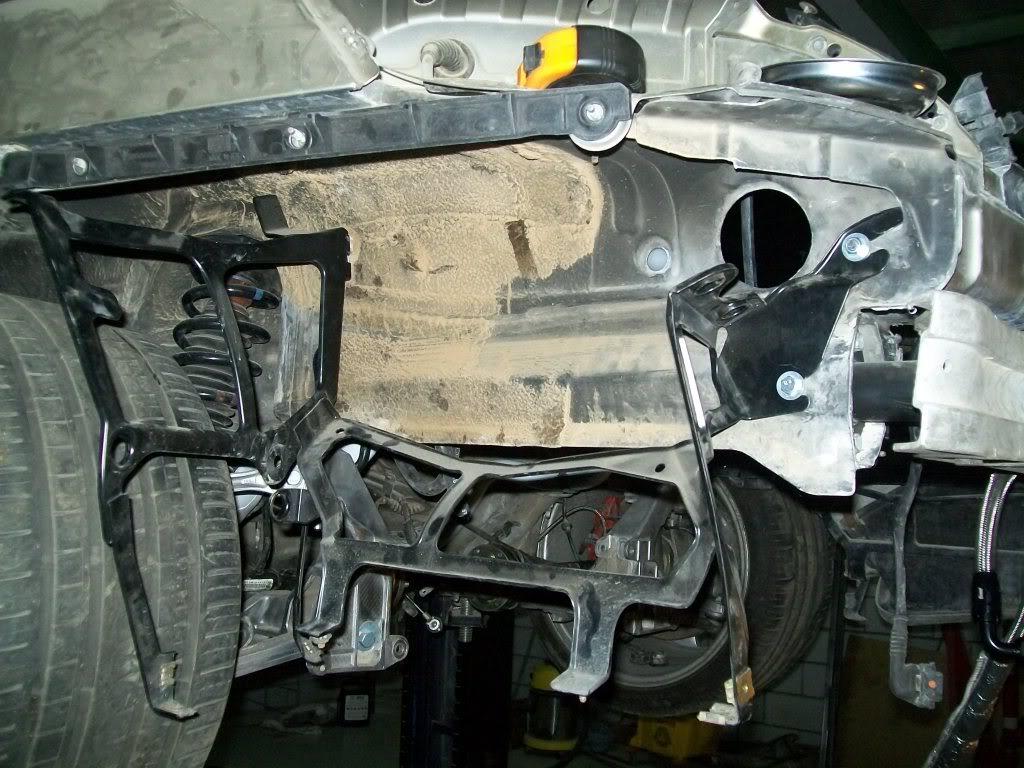
also got the original coolant hoses in place as well as the axles:
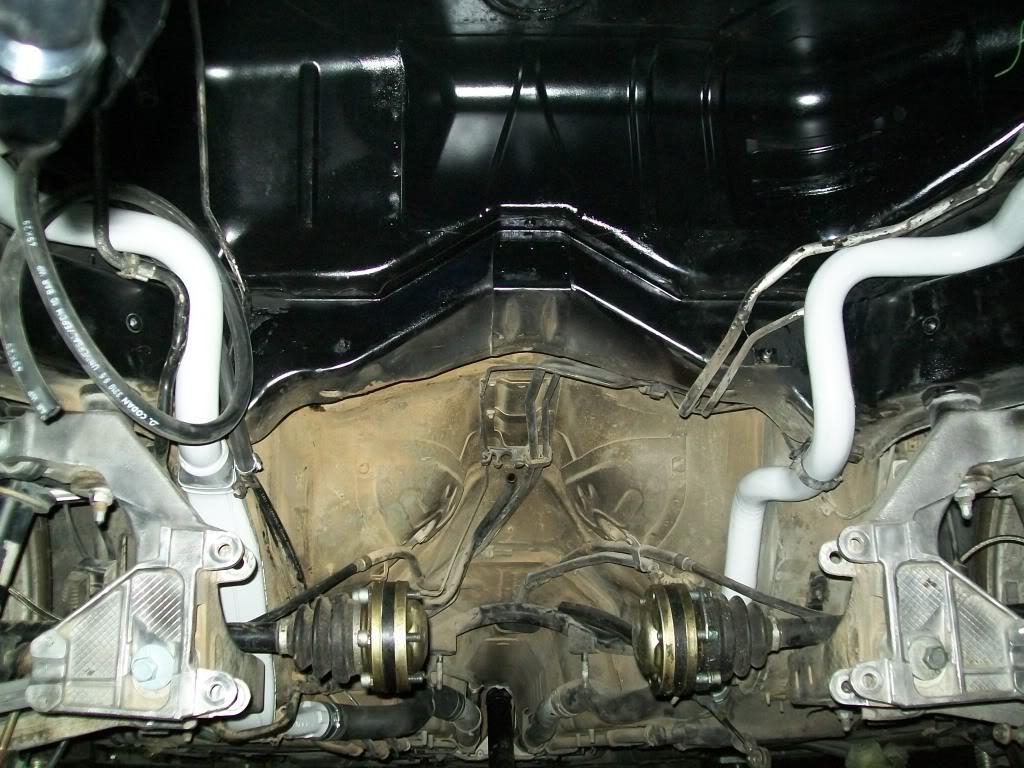
other than that ,,,,nothing
now that i got the clutch stuff i can get the engine inplace finally
more to come soon !
09.16.10
finally some progress
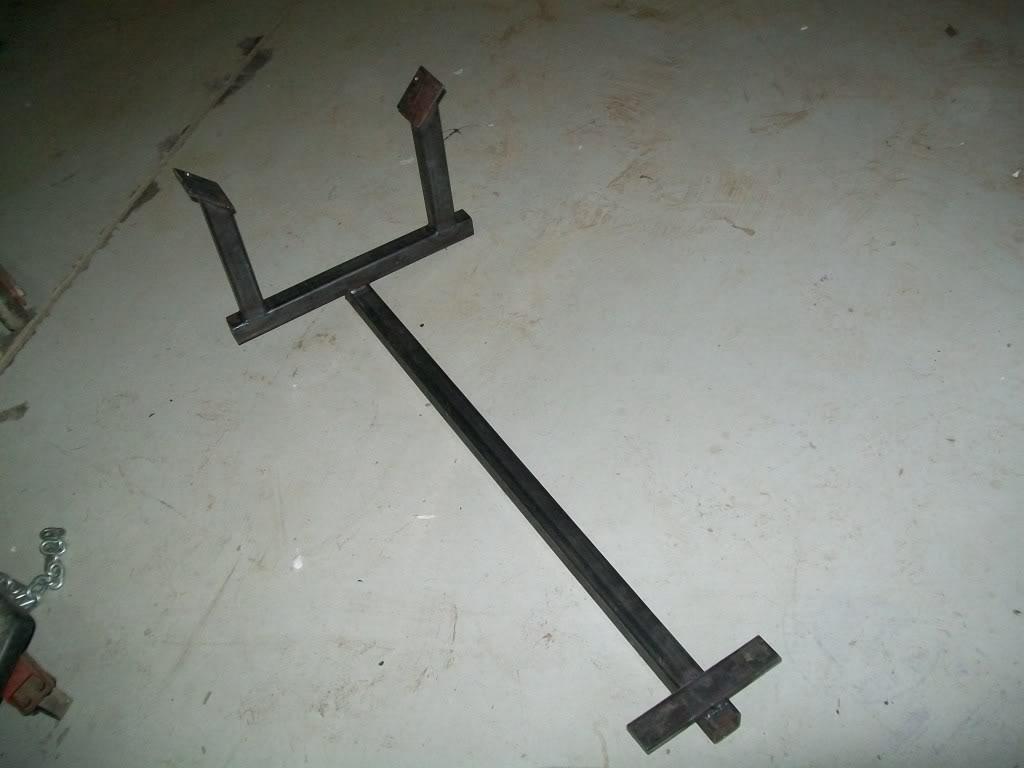
i had to build a new lifting cradle cause the first one i made was,,,well,,,, kinda flimsy
this one is made from much thicker material. this is really important cause you can't install the engine alone or remove the tranny by itself cause of how the flywheel fits ( more on that later ) so you have to mate them both on the ground then lift them as one unit into the car. This will have castors installed to make it easier to move the combo around and will have a jack adapter welded somwhere near the center of weight of the combo :
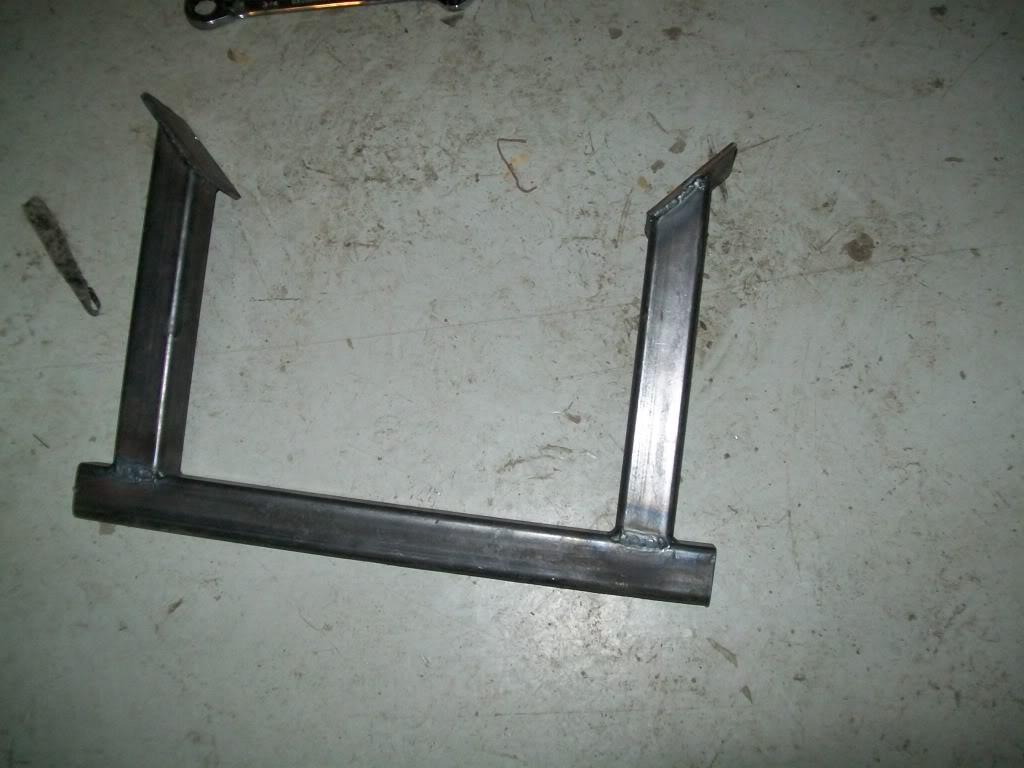
almost finished product :
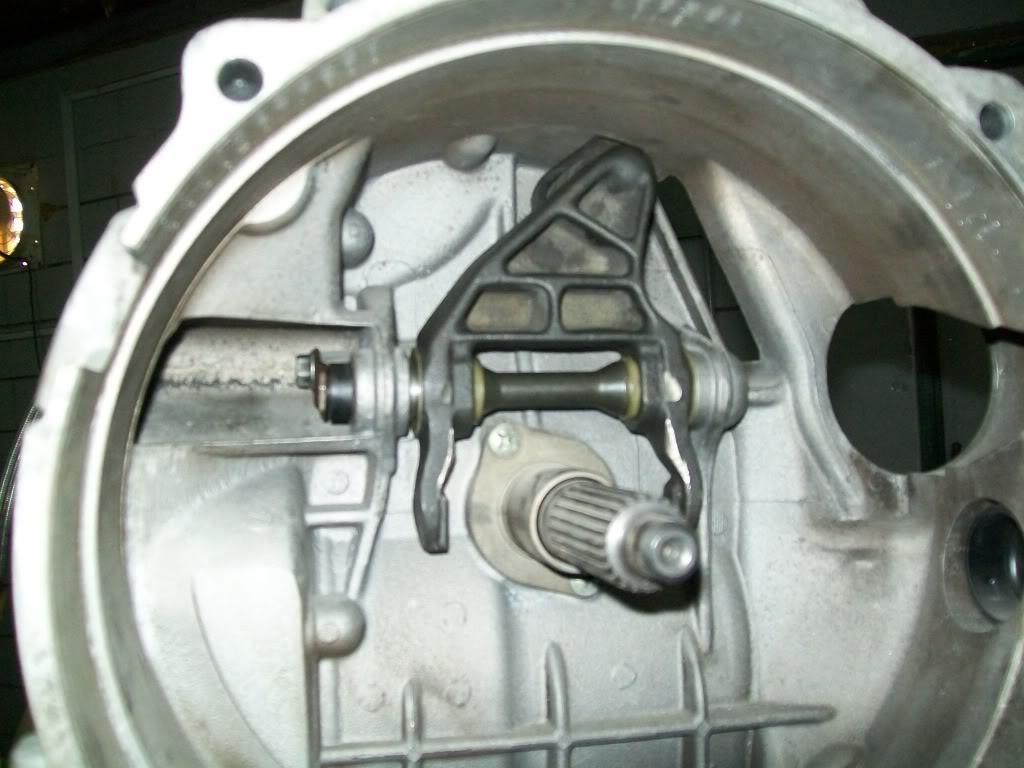
i finally finished the clutch fork thingy
and i took the engine off the stand to install the adapter and flywheel:
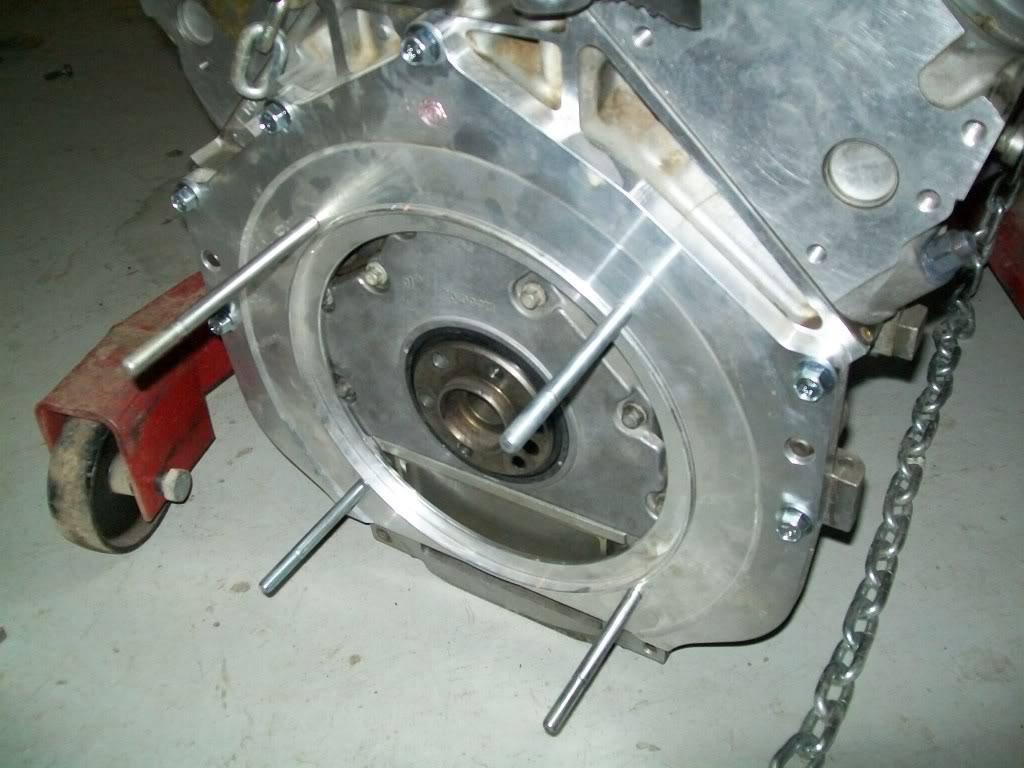
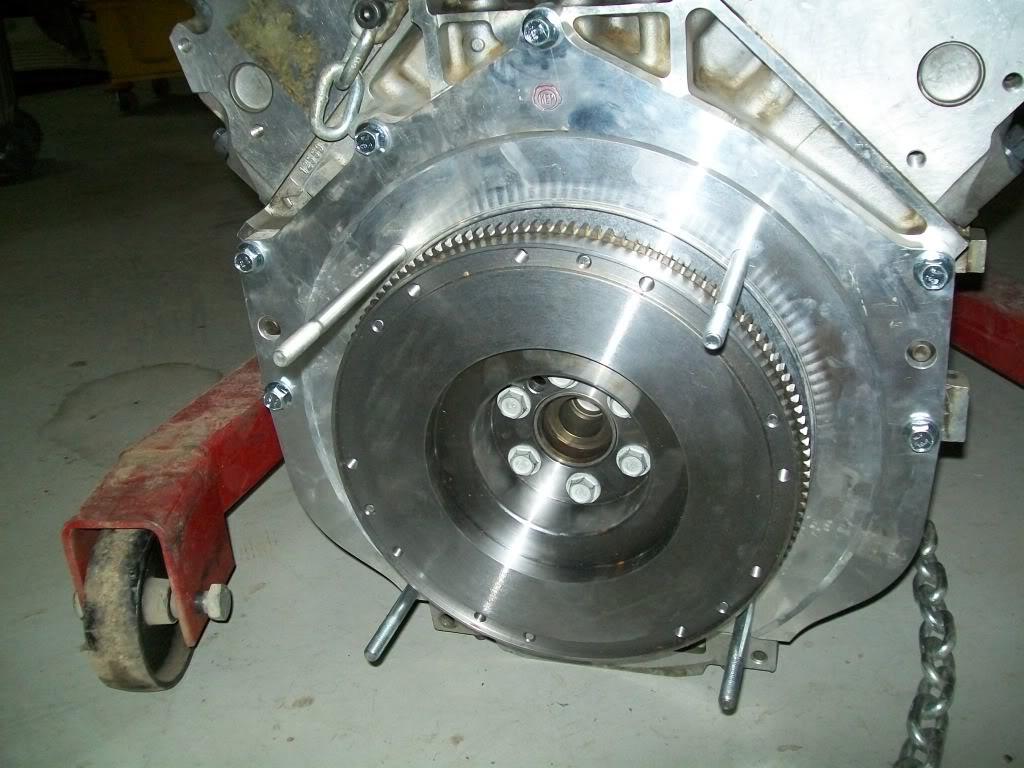
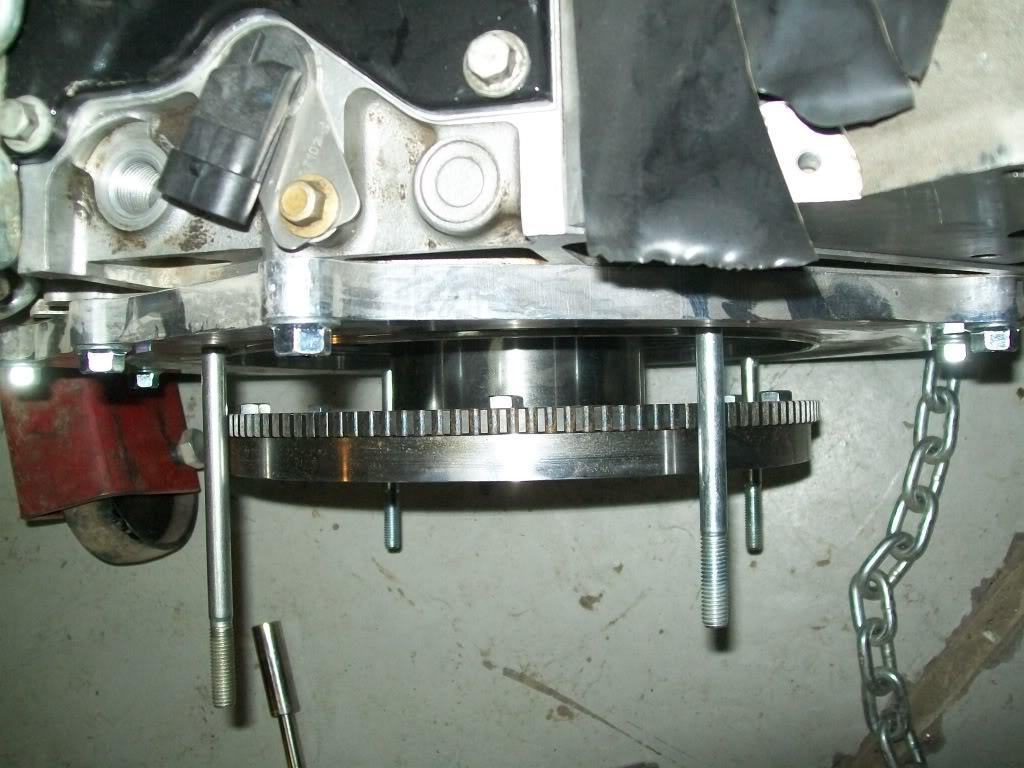
notice how the flywheel is larger than the adapter opening , which means you have to install the adapter then the flywheel , then slip the trans on to the adapter studs ( can't do that while they are in the car) .
and here you see the engine on the lifting cradle :
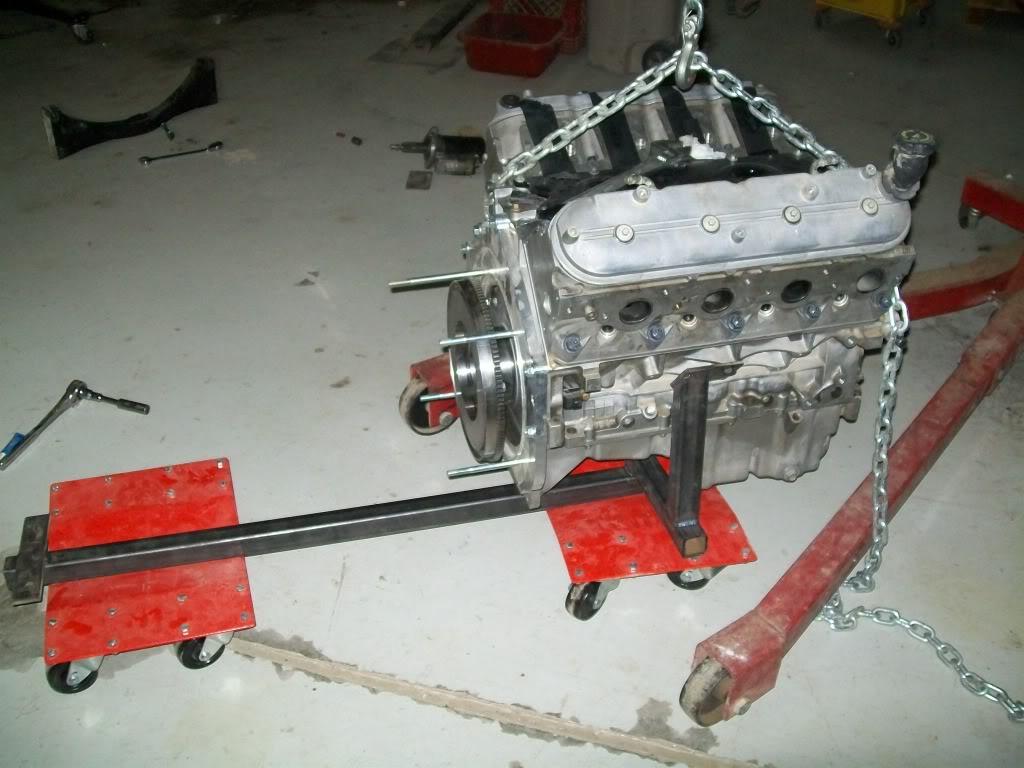
so tomorow i have to:
- torque down the flywheel bolts
- pop in the pilot bearing
- and bolt up the clutch and tranny.
- lift up the engine/trans into the car.
- install all the accessories on the engine
- hook up clutch lines and shifter cables.
- install the powersteering pump and measure how long the lines need to be .
09.17.10
on to progress
i torqued down the flywheel , poped in the pilot bearing , then got the disk and pressure plate on there :
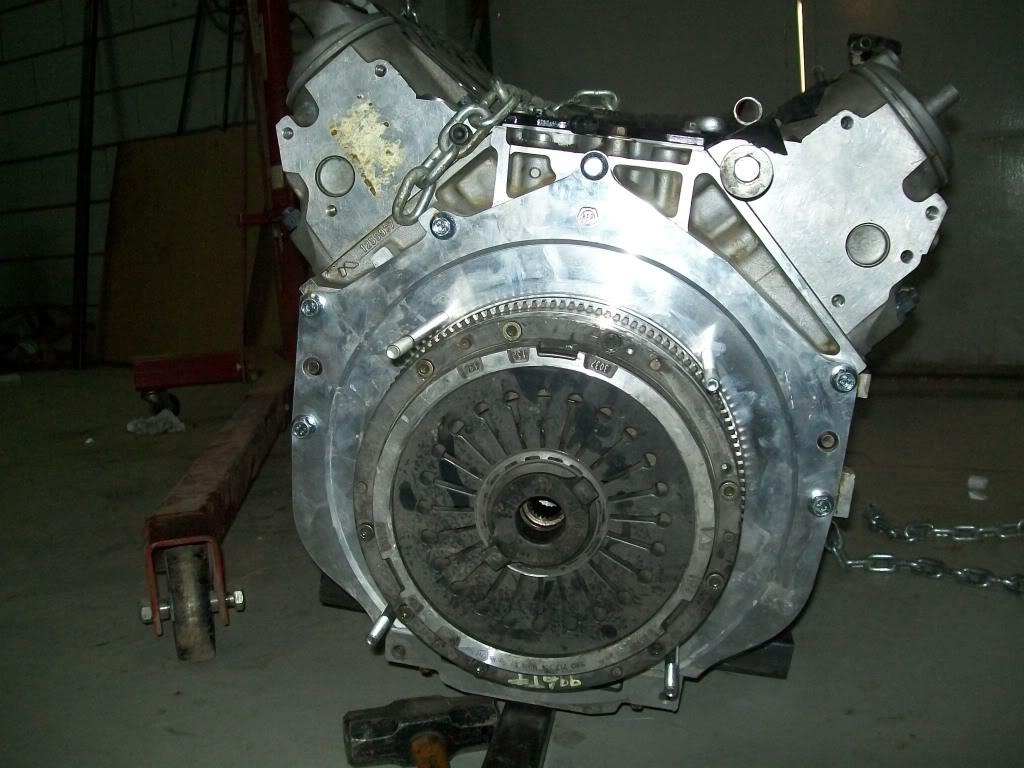
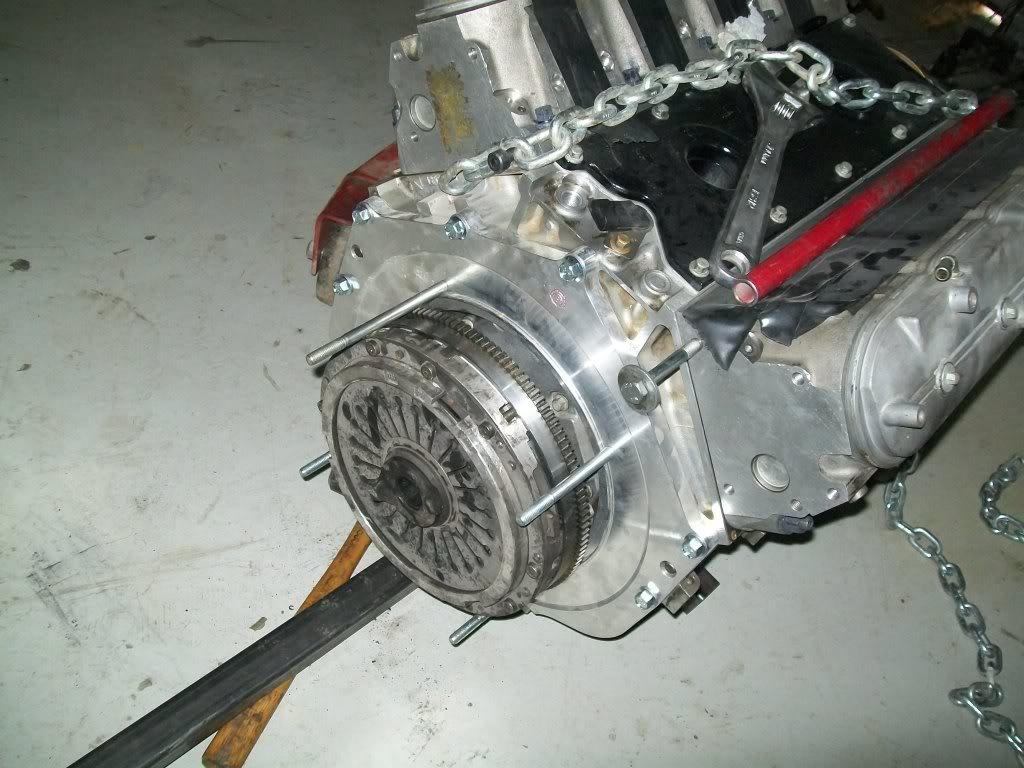
thats when i hit a small snag , the pressure plate uses some funky size torx bit bolts, which i didn't have at the moment , so i just hand tightened it by hand till i get some proper grade 8 allen bolts tommorrow .
so i decided to just see how it looks when done
"one small step for man , a huge setback for porsche purists " :
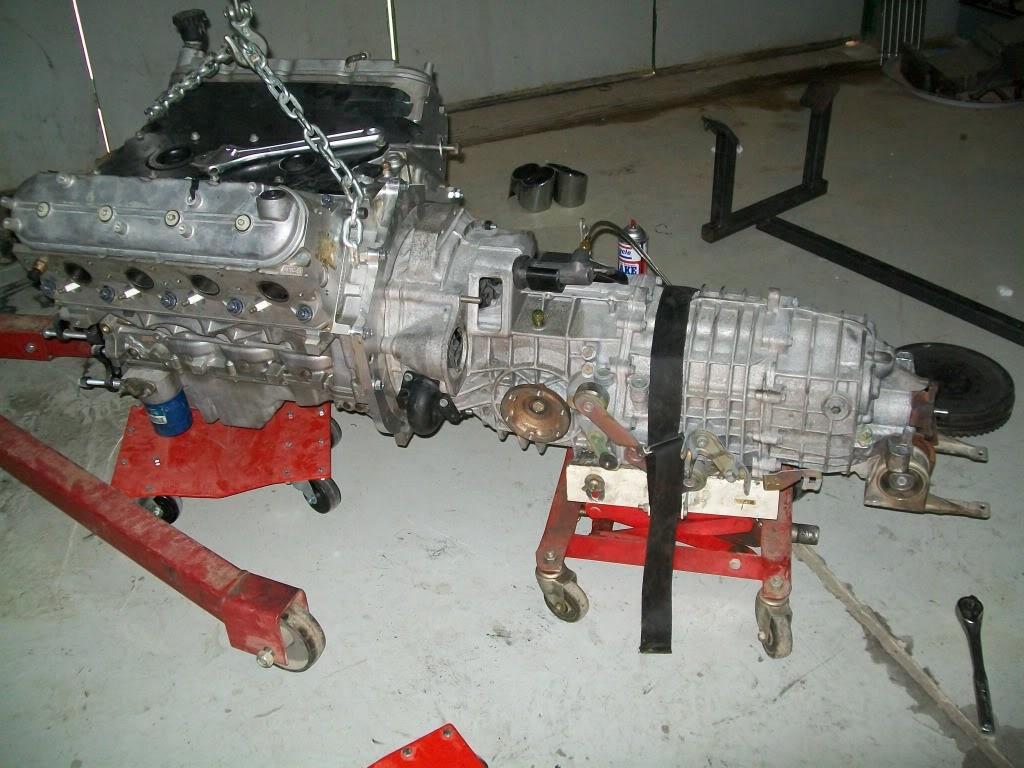
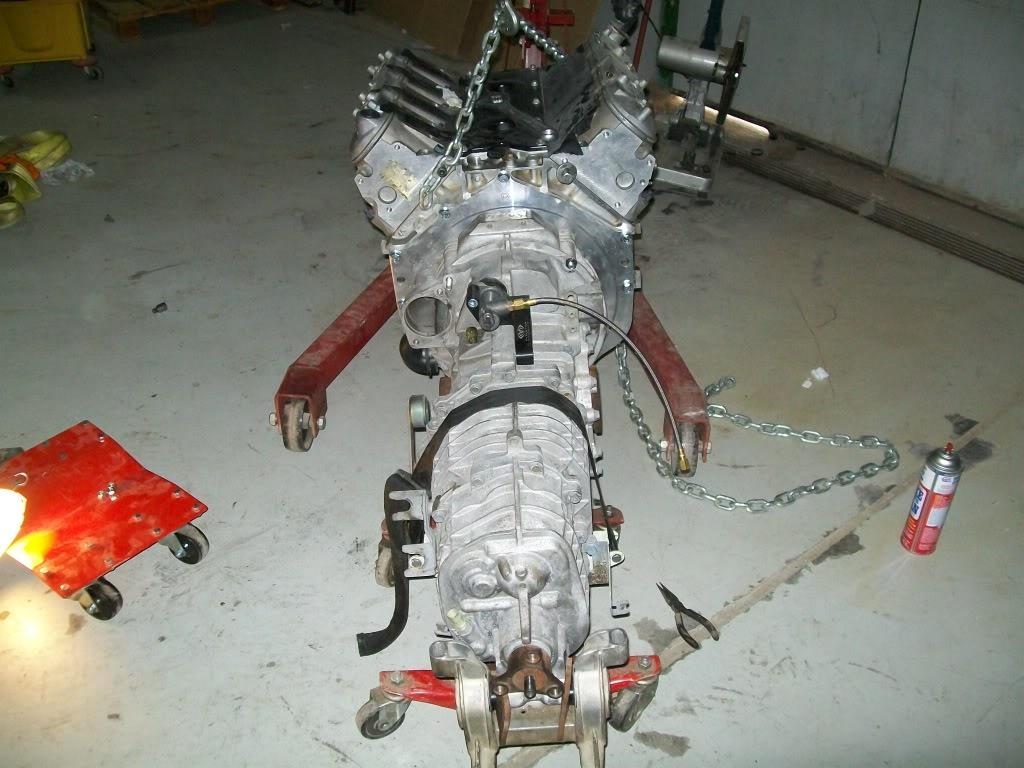
i think at that moment i felt a teardrop hit the ground in stutgart
anyhow i almost had an "oh crap!" moment; when installing the trans on to the engine it looked like the starter ring would not fit into the bellhousing , but after a few words of pursuation it went in man do they have some tight clearances; you can see in the next pic the clearance between the ring and bellhousing is about nothing of an inch ( sorry for the out of focus pic but i could not get a proper pic no matter what i did )
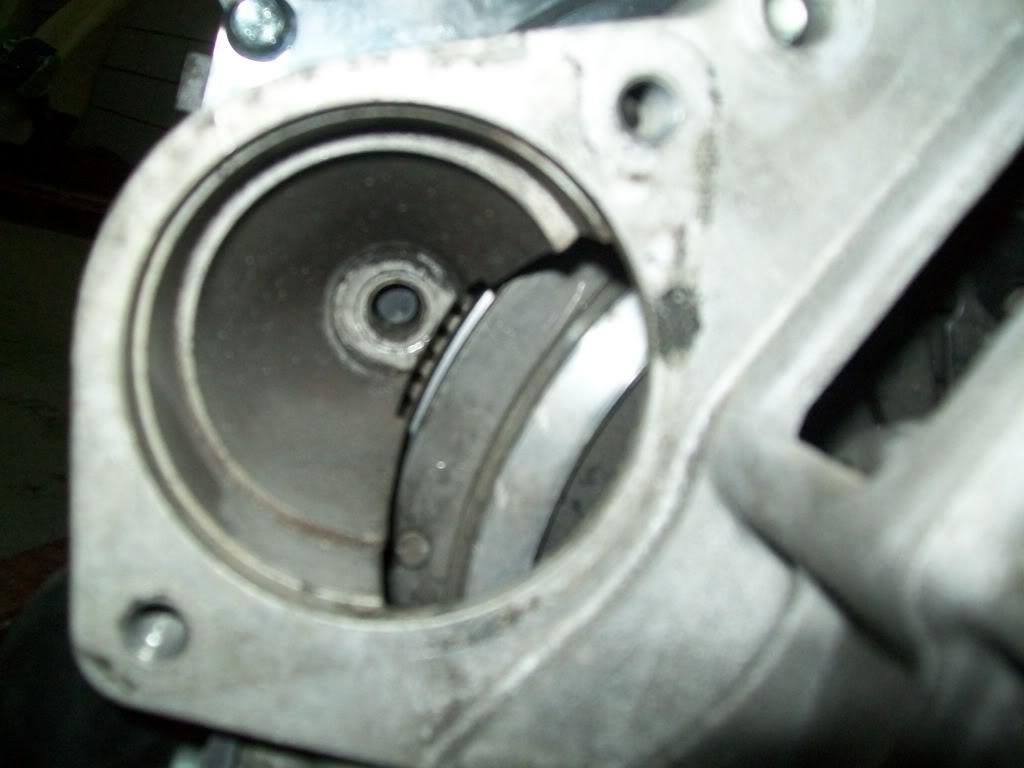
i also made some templates for the heat shields that will cover the alternator and A/C compressor, i'll try to finish them soon using some sheetmetal or aluminum .
sooo, tommorow i'll get the allen bolts and finish bolting up the clutch , mate the trans to the engine , weld a few tabs on the lift cradle as well as castors and a jacking point to finalize it , then hopefully lift it into place in the car
and if i have time i should also mount the powersteering pump and figure out where to mount the reservoir ( its a GTO style unit with a remote resv. ) after that i have to take it off to compensate for the added thickness of the plate on the head by either machining the pad that the pump mounts to on the head or machining a bit off the back of the powersteering pulley so when i push it back on it lines up properly with the rest of the accesorries .
wish me luck
09.20.10
well got to work on it again last night , i got the new allen keys for the pressure plate and did the tape track to hold the fork in place ( thanks marky) as i mated the engine and trans together for the last time ( i hope ). i was not planning on doing much more other than a few odds and ends here and there ,,,, but
at 12:55AM monday the 20th of Sept. 2010 - one day ahead of schedule - the engine got a new home
pics of the whole process :
i rolled the engine into place under the car and started to lower the car on to it , when it got close enough i started to raise the tans end up into location to bolt up the trans mount , then proceeded into lifting the engine into place :
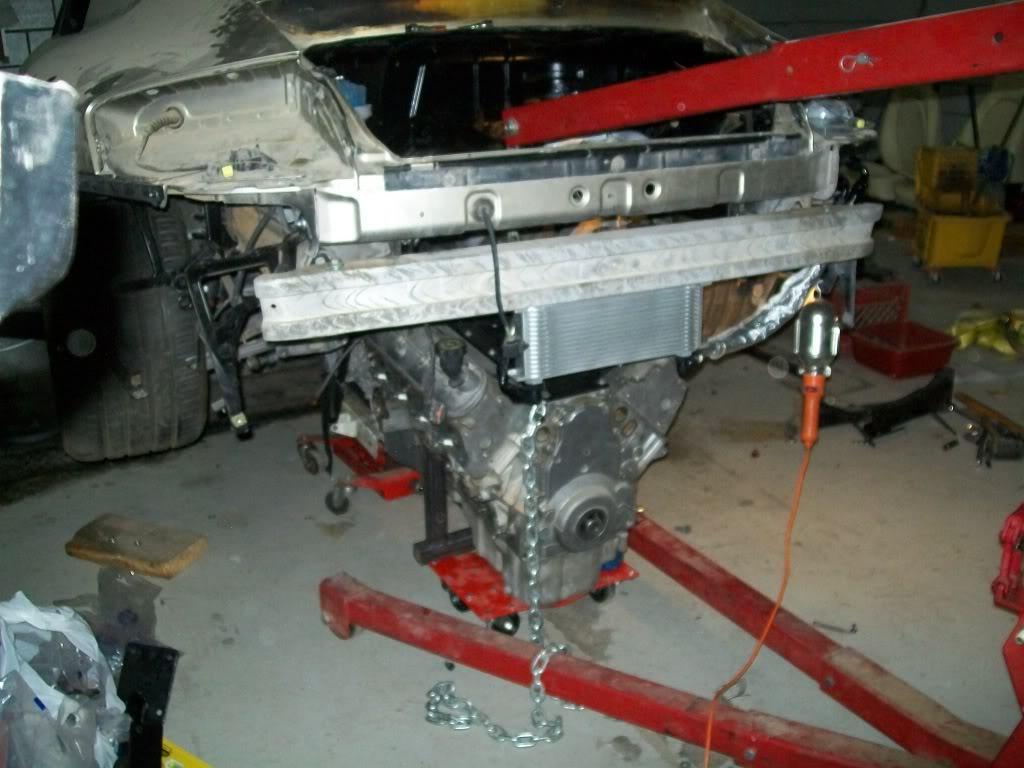
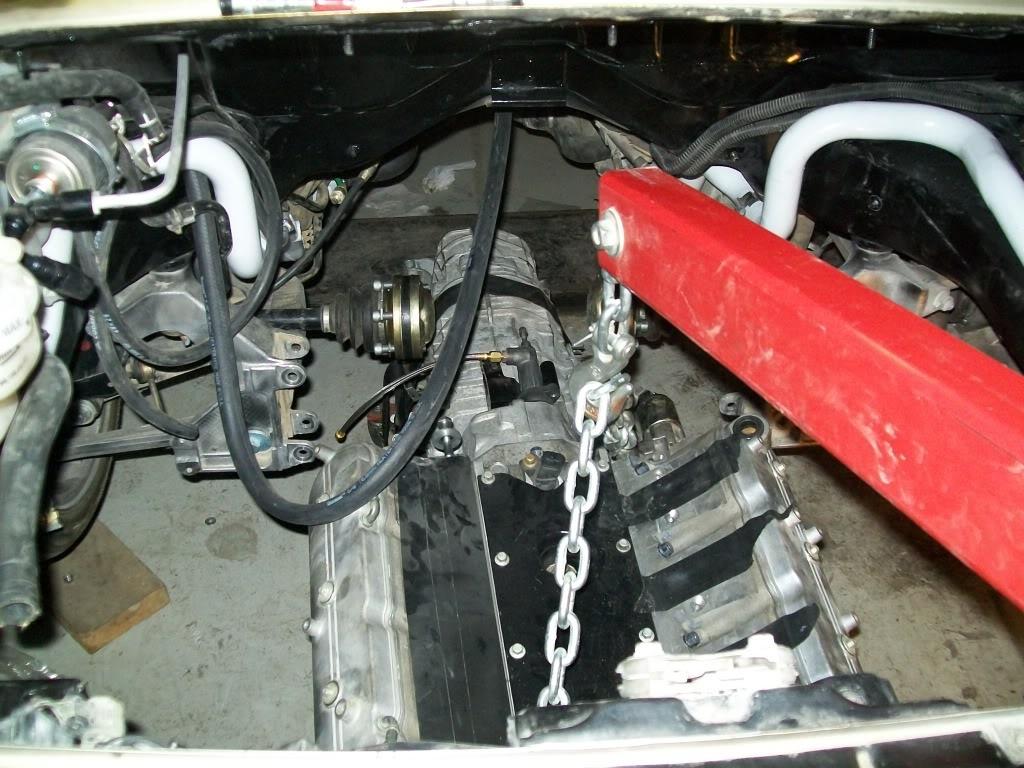

after bolting up the head plates / motor mounts i proceeded to cut the umbilical cord
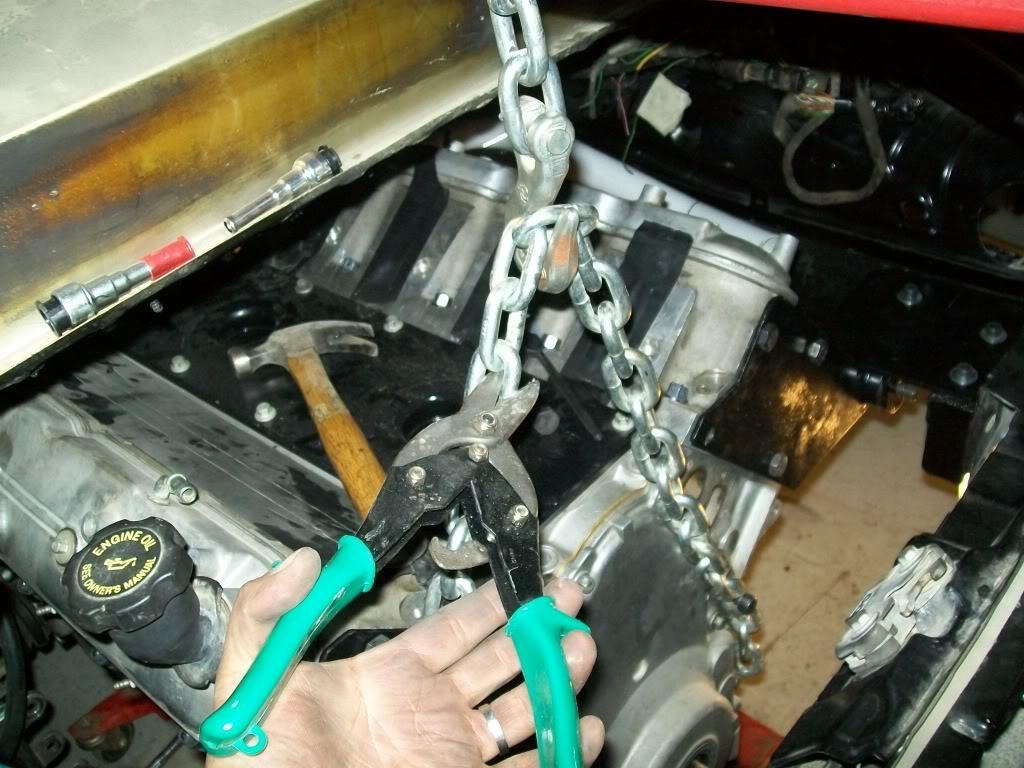
and now i have a fully self suspended engine
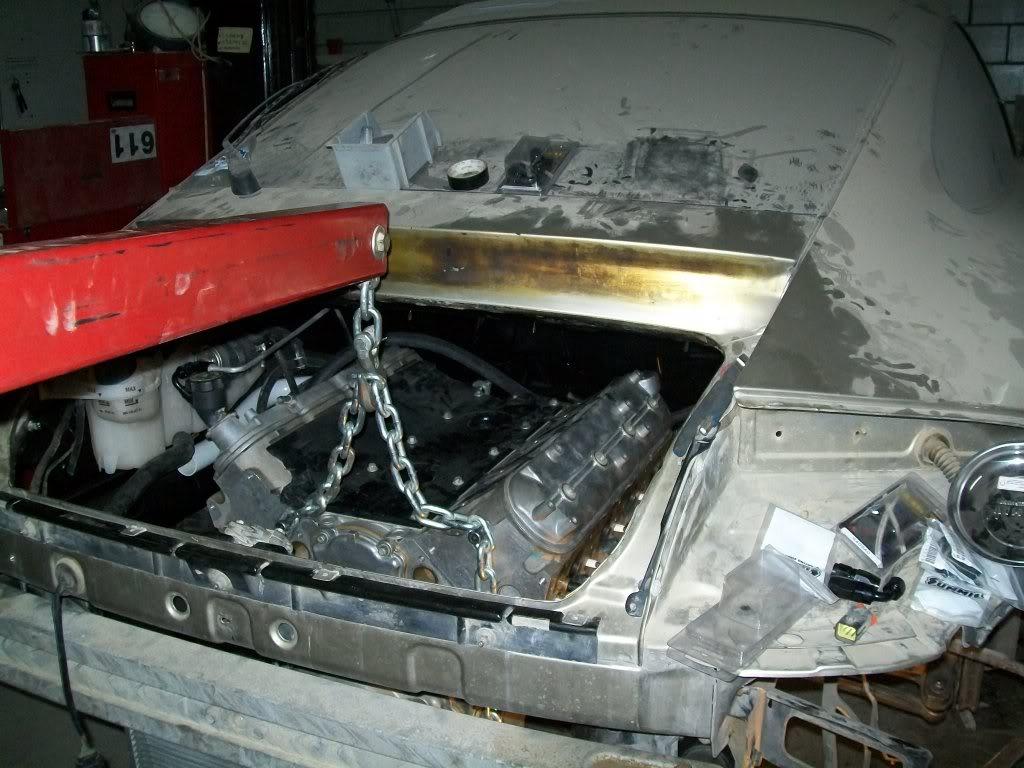
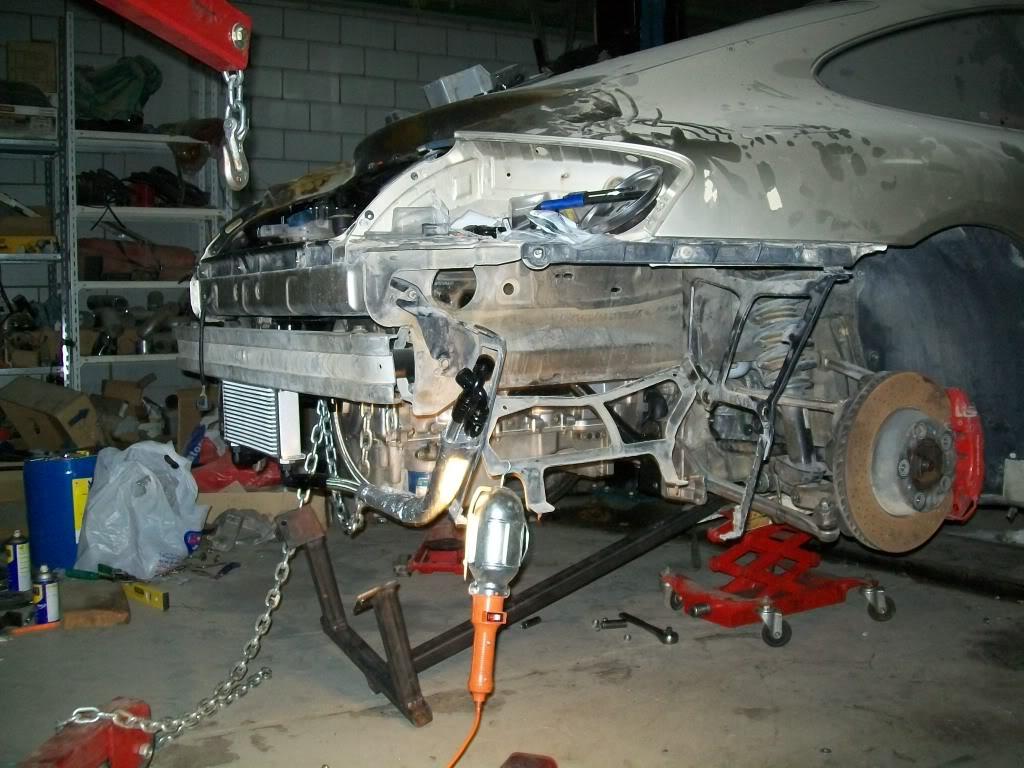
so now i a acheived a major milestone in the project , and things should start rolling a bit faster from now on
funny thing is a i got a bit caried away with the instalation and never finished the lifting cradle , thats why you see me using the engine hoist and the rolly thing underneath the engine , but now i know how important the cradle thingy is.
so next up on the list :
- replace the bolts i used on the head plate with allen bolts ( looks cleaner / better
- swap the gto oil pan to the kevko pan and pickup i have
- bolt up the suspension crossmember and finish tightening the engine mounts
- install accessories like the alternator and waterpump and other stuff.
- finish fabbing up the heatshields on the ac compressor and alt.
- finish ( or atleast start working on ) the engine compartment mini harness
- route the heater hoses under the car
that should be enough to get the car down and off the lift so i can roll it back and start working on the interior and engine electrics and harness.
after that its on to :
- palce engine harness and mount PCM
- intake / throttle and injectors
- power steering and lines
- mount rear bumper and trunk lid
- finalize coolant tubes
- install new dash ( converting from auto to manual requires swapping the under dash assembly for the pedals )
- widndow and regulator
- check gas tank
- and it goes on and on and on
got cracking on it again and finished quite a bit of the things on the list above:
got the head plate bolts swapped out to allen bolts , swapped the pan and pickup tube, atttched the oil cooler lines, bolted up the suspension crossmember and tightened the engine mounts , mounted the alternator and bracket, installed the starter and the starter cable , bolted the driveshaft and tightened the axleshafts ( on the tranny side), and installed the swaybar.
up next is installing the headers and exhaust , water pump , tightening the axleshafts ( spindle side ) , bumper brackets , tightening the aluminum bumper , slapping on the bumper cover , and building the AC and alt. heatshields and i should be able to roll the car of the lift
i'm almost done with the bottom of the car but there are a few things i'm waiting on to really call it done. things like the ac lines and fittings to the compressor ,heater hoses ( still waiting on them) , and the mini harness .
i did get a few pics but its late and i'm too tired to upload and post them, will do it tomorrow
09.21.10
sexy oil pan and lines
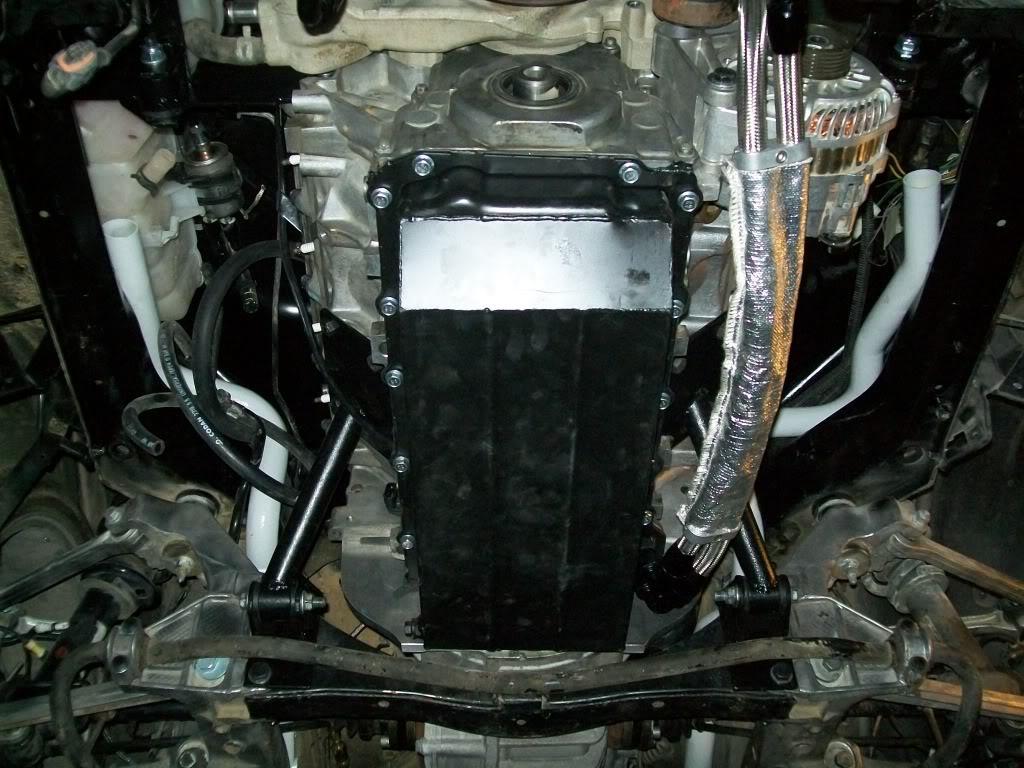
axleshafts and driveshaft and another angle of that sexy oil pan ( don't you think i have an oil pan fixation
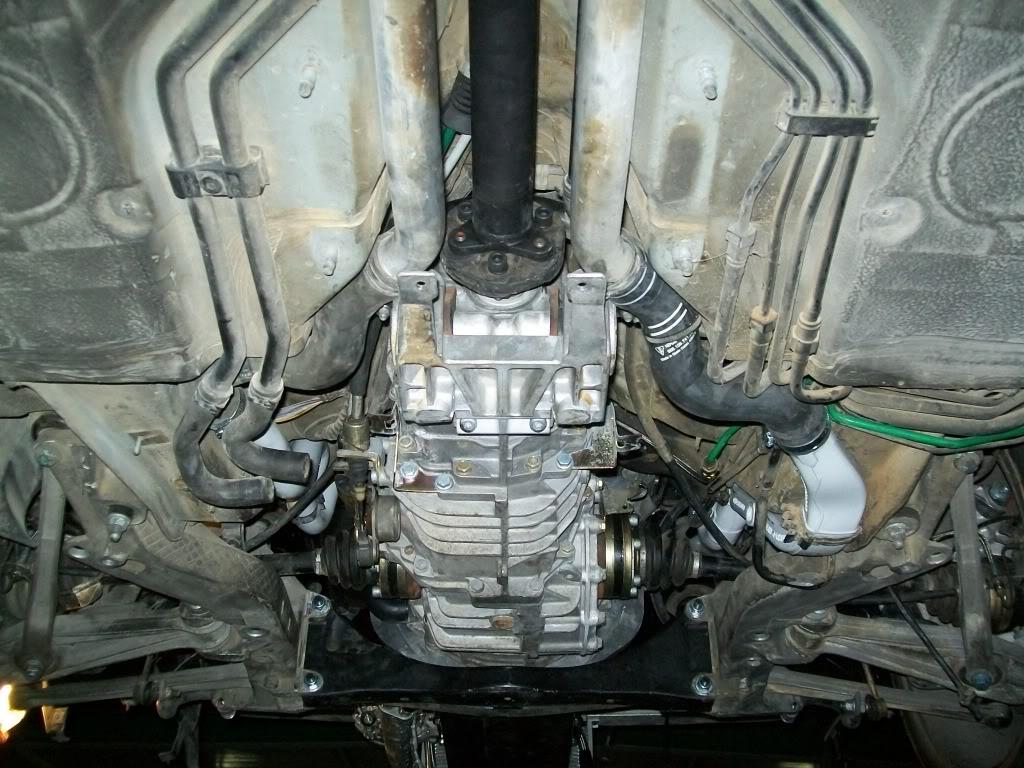
forgot to mention that i installed the dipstick
10.06.10
sorry for the lack of updates , just been busy with other stuff and just found out that the racing season here will kick off in about two weeks ! ( great job BIC for telling us that just now )
For some reason , routing the coolant hoses is kicking my butt! i don't want to do a hack job on it and just run some flexi hose deal , i'm trying to make it look decent and somewhat OEMish , which doesn't seem to be easy !
so , there are two sides to deal with regarding the cooling system hoses in the engine compartment ; pass. and driver sides.
on the driver side , you have the two heater hoses ( still waiting on the stupid metal hoses - the first time the mail service i used lost them , and now i''m still waiting for the replacements) , main porsche coolant line , T from the main coolant line to the expansion tank, and the "L" to the waterpump outlet.
on the passenger side , you have the porsche main return line , the funky stainless hose i made , and the thermostat housing .
on the driver side - after many a head scratch and visits to parts stores , and countless $$$ spent on some really weired looking hoses - i decided to do the following :
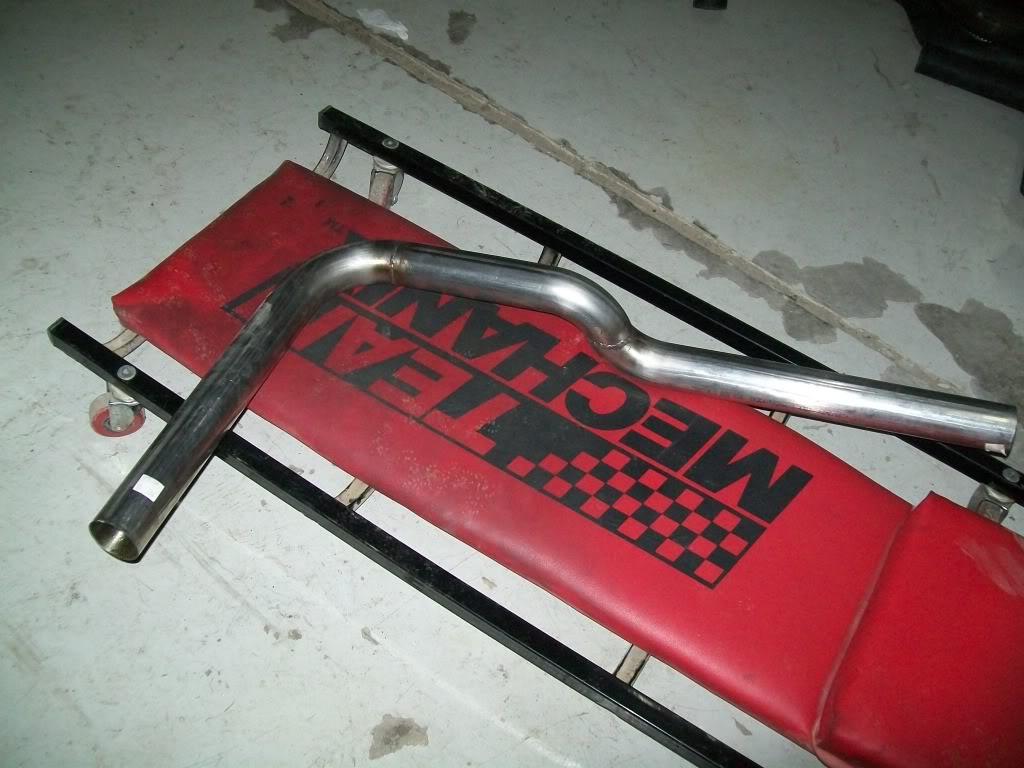
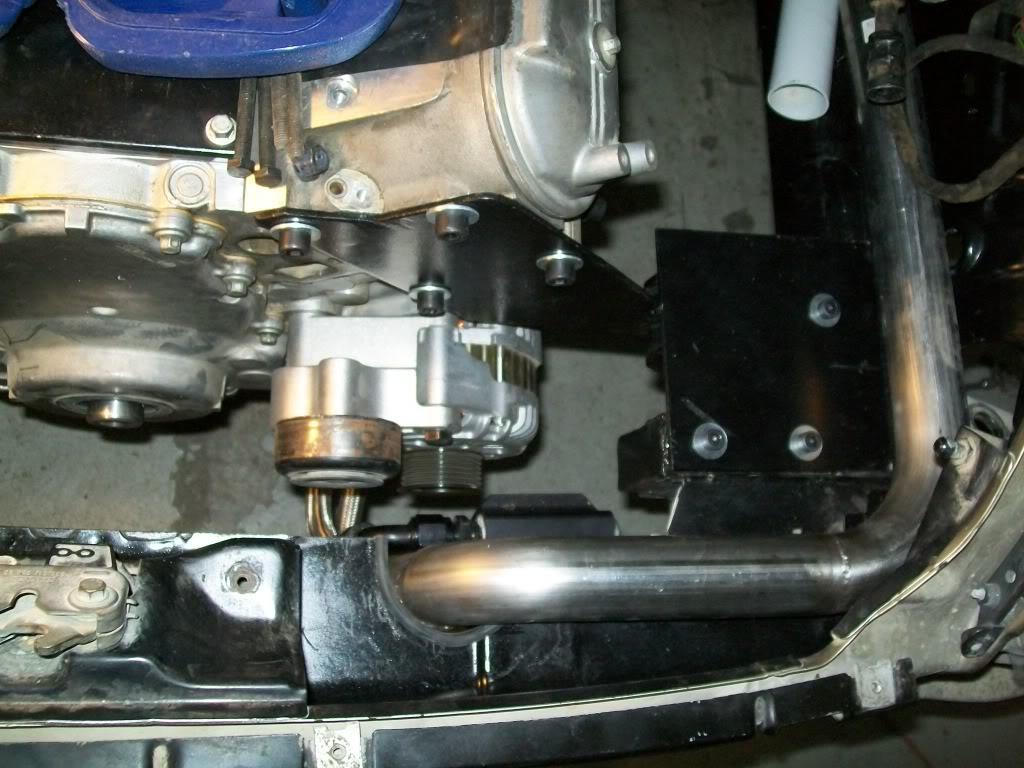
from the main porsche hose use a rubber coupling to the funky tube i built , then run a 90 deg rubber elbow into the "new" thermo housing . why a new housing ??? cause the freaking angle and size of the orginal one was giving me a hard time , so it was just easier to go to a machine shop and tell them to make me a straight up housing with a 1-3/4 neck.
here's how the 1-3/4 stainless hose looks like :
and how it looks in the car :
it terminates just before the thermostate housing location , so now all i need is 90 deg 1-3/4 elbow and i'm set ( sorry no pics of the housing or the end result yet)
as for the driver side ,,,,, it gets a bit more complicated ,,,, so to solve this i decided to use a few rubber hoses as possible . i fount a small plastic coupler that has a nipple so i can conncet the main line to the expansion tank , and from that plastic paice i'll run a stainless hose along the engine compartment wall to the water pump outlet. kinda like this :
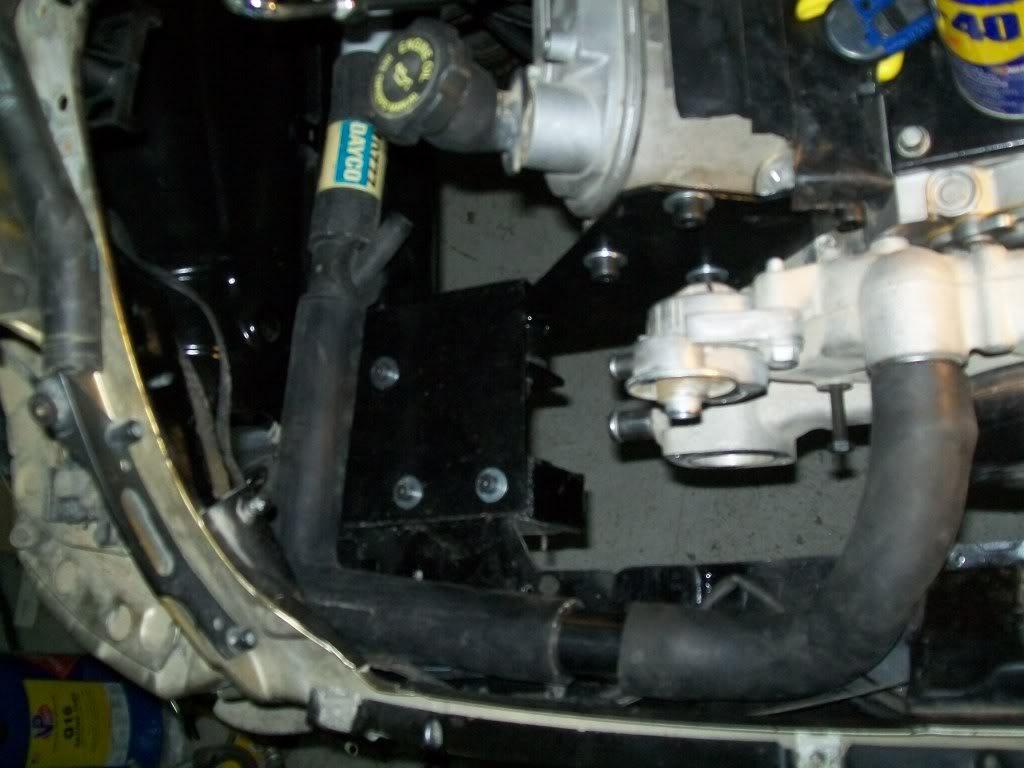
but then i realized the just where the bend is is the air intake tube hole , so the hose can't run there . so the solution was a few 90 deg. bends to snake around the engine mount bolts and then back to the rear engine compartment wall. this is how the other "funky" looking stainless tube looks like : (trust me the welds look much prettier in person )

this inturn will lead to the other stainless hose ( i'll make these all one peice later on ) i made which is the water pump outlet hose.
for that hose to work it had to clear the engine cover latch ,,,, wich means more elbows!
well since it will take quite a few words to explain , i'll spare you the novel and snap a few pics soon
moving on ,,, i also got the inner fenders in a few days ago and bolted them on and i also got the AC pump fitting in , so i can start routing the AC hoses now
and i machined a fitting/adapter to mate the stock porsche oil pressure sender to the side of the remote oil pump mount .
and i ordered a CTSV powersteering pump setup so i can finally be done with the steering and its hoses . also ordered was an ATI| balancer and a starter to alternator to main harness cable ( oem porsche ) , those should be here in a week or so .
another cool thing i found out is that i don't need a boost guage
i always wondered why i could not find any aftermarket boost guages for this thing,,, and found it odd that there isn't one on there . well it turns out there is one and its a digital one on the dash information panel ( saw it in action last week on another porsche )
i'm still working on the ALT. and A/C heat shields , and also started to work on the upper heatshields ( kinda isolates the coils and other stuff from the headers).
i know its alot of talk for not so much progress , but i will make it up to you guys
as soon as i'm done with this coolant crap , i'll slap on the harness and intake, connect the fuel lines, and maybe take the car off the lift and start working on the interior for a change .
( and no ,,,, i still didn't work on the engine compartment harness )
10.09.10
i think i managed to hit a small milestone last night ;
the car is off the lift and rolling at its own free will
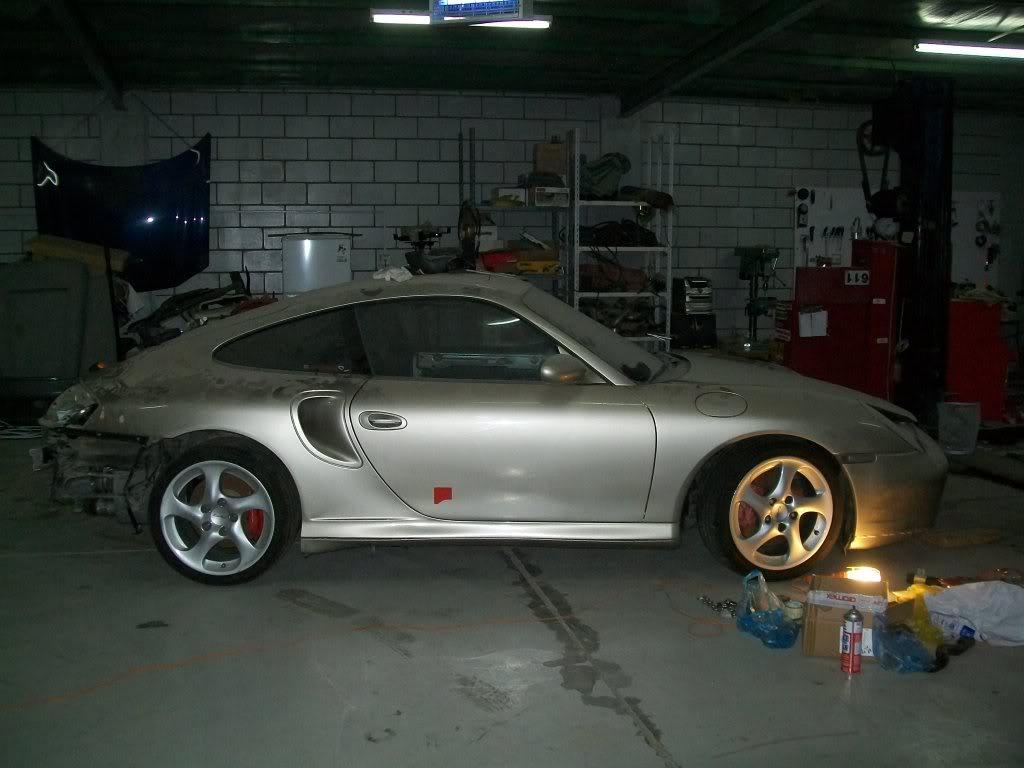
funny thing is like all ls1 conversions ,,,, i need to lower this one as well
check the fender gap in the rear !
and i just noticed something while i was pushing the car into place , the damn thing is light! so light that i had no problem steering it with one hand while pushing it and while at a standstill. this is causing me to possibly rethink my powersteering plans
i also almost finished the driver side coolant tube , its now all stainless with just a few sections of rubber for when the engine vibrates:
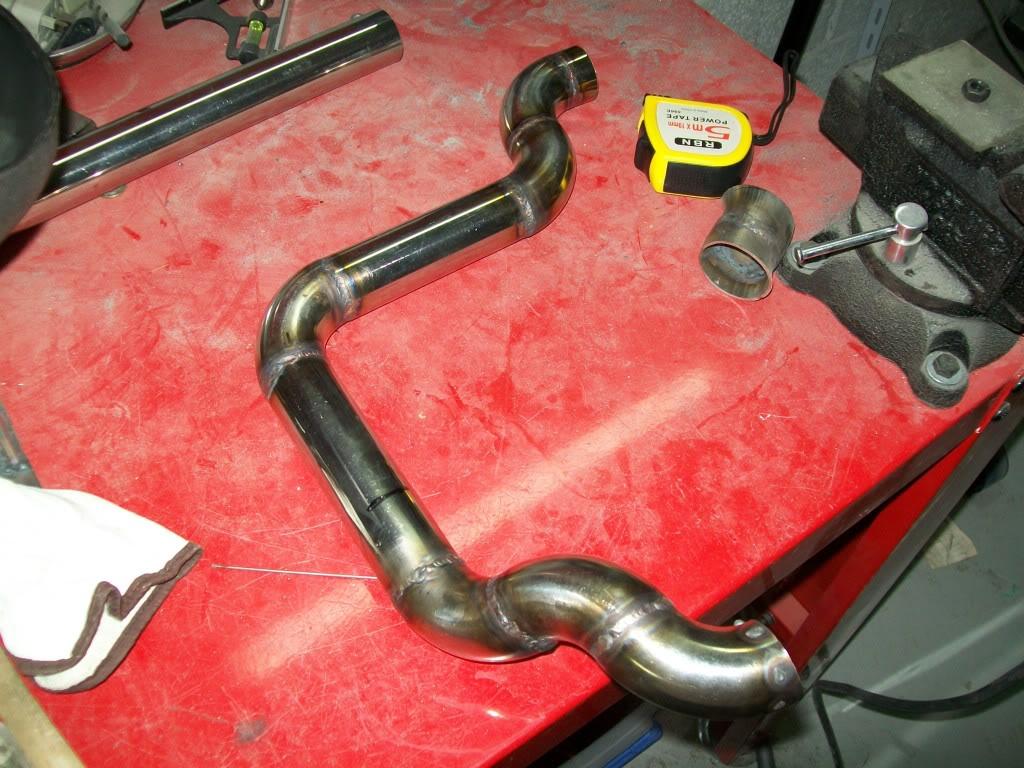
here it is before welding it :
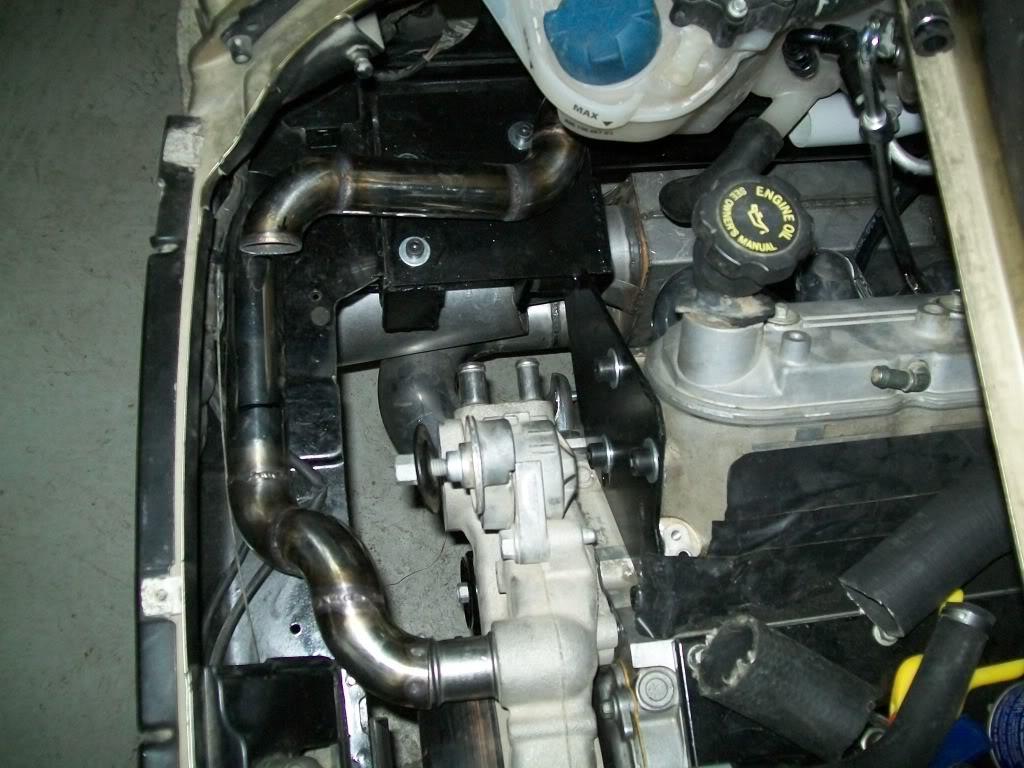
you can see how i had to cut back the outlet tube on the water pump a bit to give me more room . i also got the thermostat housing from the machine shop , i had them make me a straight outlet that is 1-3/4 OD to make life easier for me : all i have to do is get a a 90 deg. elbow that is 1-3/4" od and be done with
offcousre after all is done and finished i'll be taking everything to the powdercoaters to get a nice coating of black or silver maybe.
here is how the new thermostat housing looks like :
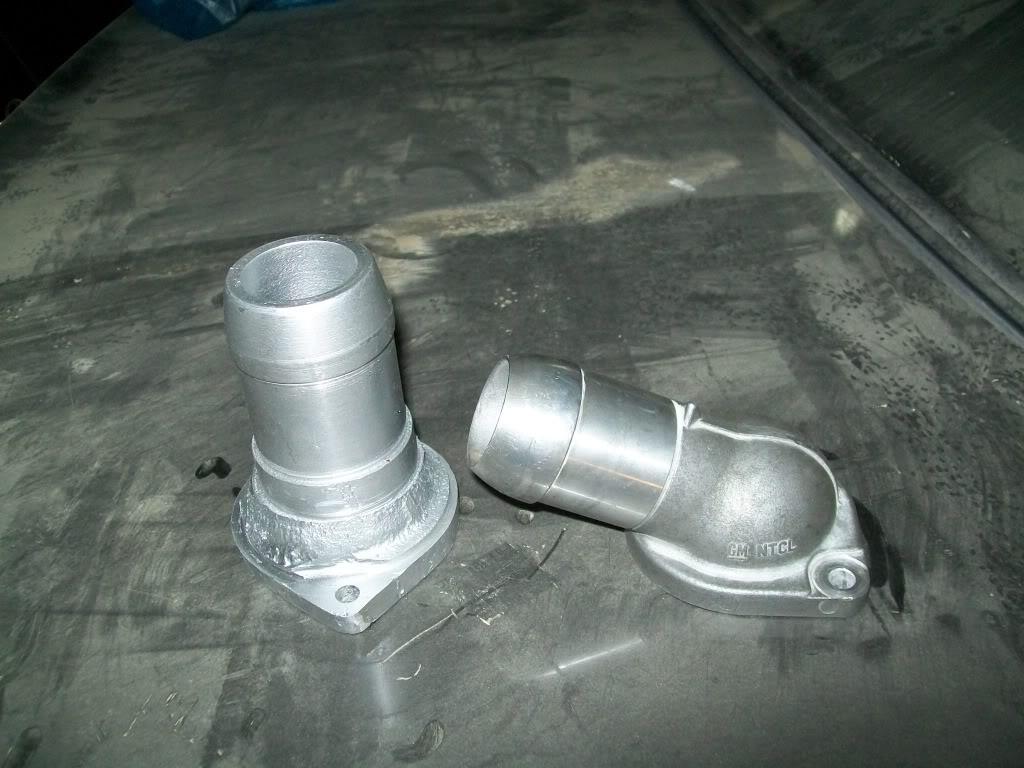
but there's only one problem : the neck is too long , so i'll be taking it back and shortening it along with the porsche oil pressure sensor adapter that i made ( taking it back cause i told them to machine the threads on the wrong end )
the sensor will be located out of the way on the side of the remote oil filter.
and i finally got the alternator to starter cable done now i have to get a block grounding cable fabbed up and i'll be happy
so now that the car is on the ground, i can take a brake from working under it and focus on the top part , some of the things i'm planning on doing now :
- install intake manifold and throttle body
- plug original oil sensor hole
- get some waterpump bolts and permanently mount that thing
- hook up fuel lines
- modify then lay the ls1 harness in place
- get a throttle cable made
- remove the existing under dash brace ( need to do so so i can swap to a clutch pedal)
- figure out where to mount the PCM
that should keep me busy for a while till i get some under car parts in ( like the balancer and heater hoses )
10.16.10
moving on ,, i got some work done last night
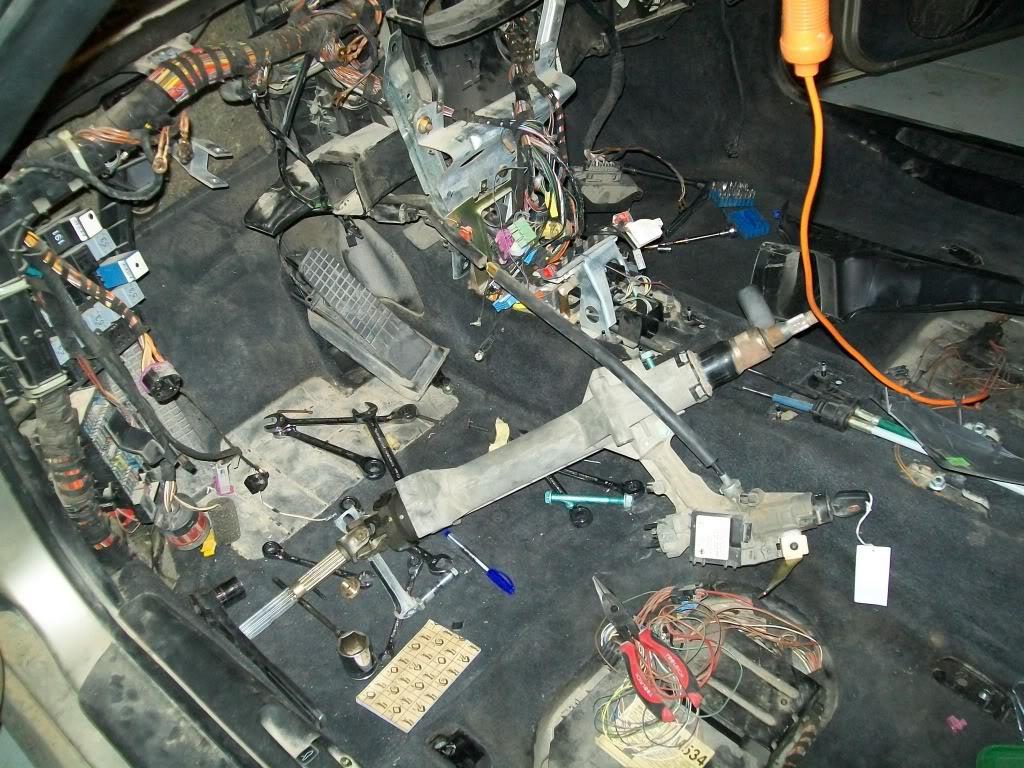
i finally got the dash brace out ,,, after many nights and days un bolting and un screwing and looking for hidden bolts and screw , i finally got the dash out , and i have enough bolts and nuts and screw to re build the titanic
here is the after math
and here is what i got out
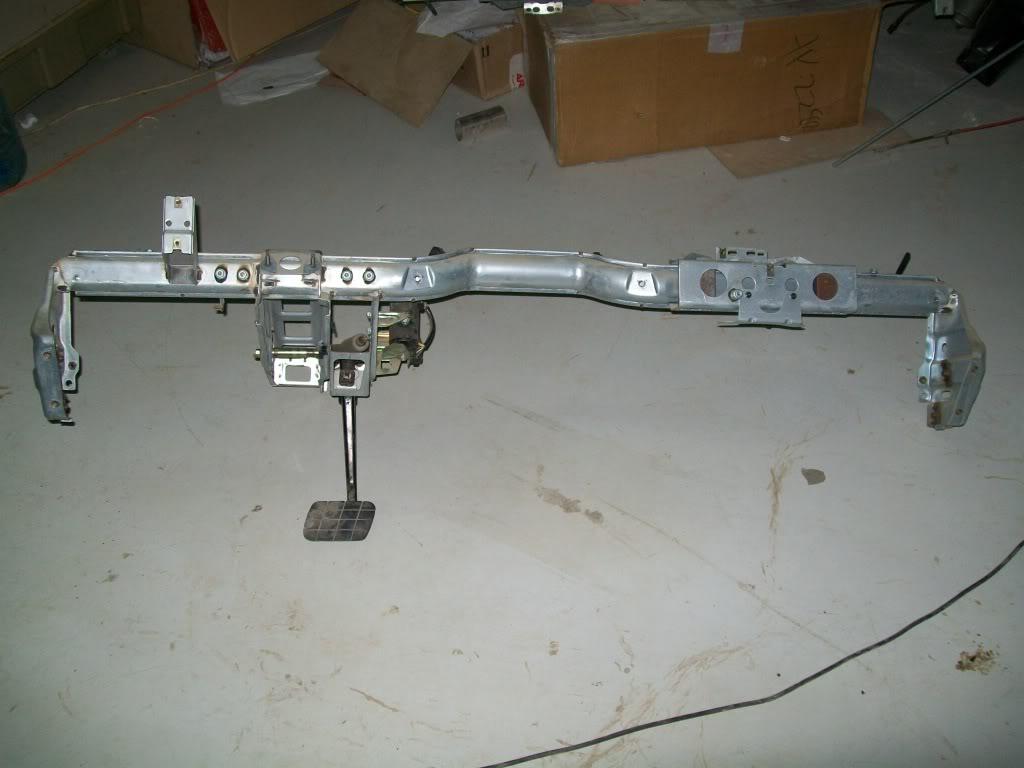
i was happy i was done with removing it ,,, but then i realized something !! the damn thing is identical to the new one except for the clutch pedal bracket and bolt!!! i could have just bought the bracket, pedal, and a few other dodads and just bolted them to what i had and be done with it ! i guess is should have researched ( and poked my head under the dash ) a bit more
http://i896.photobucket.com/albums/a...p/100_2469.jpg
another point in the project i reached and was postponing is the gas pedal deal; the porsche uses a pedal unit that bolts to the ground , and has a cable that runs out of it and up into the dash ,,, which is fine till now and looks promising ,,,,, untill you find out that the cable is only about a foot long and ends under the dash at the TPS sensor !?? why wouldn't you just incorporate the sensor into the pedal assembly ??
here is how the pedal unit looks like :
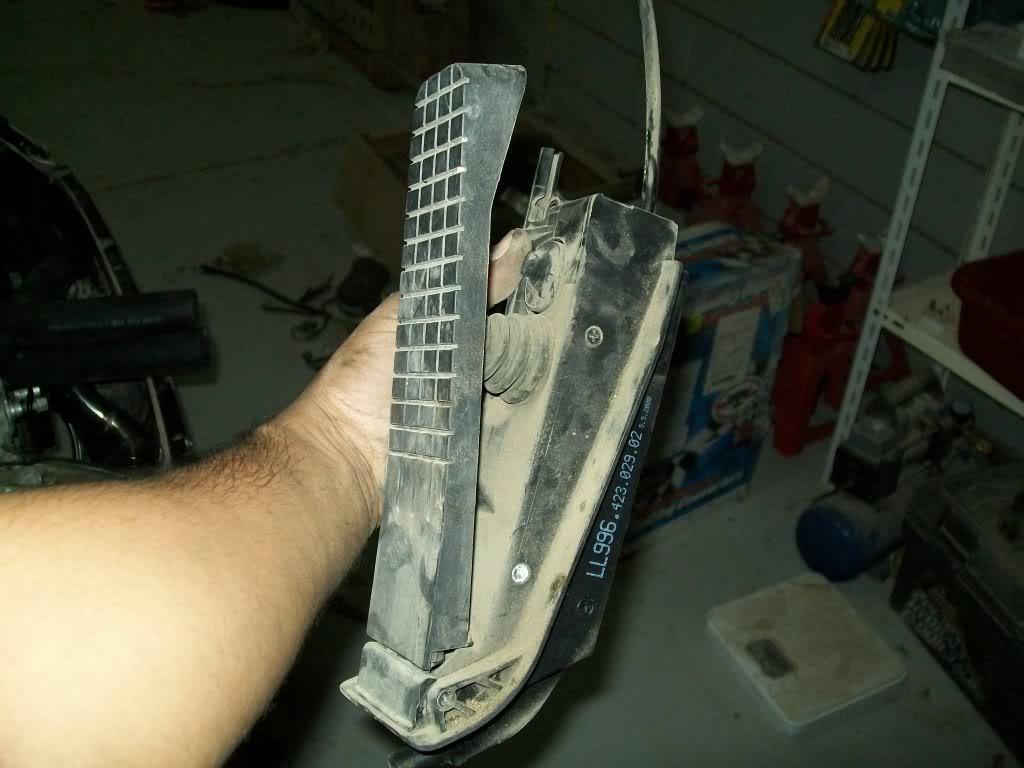
it basically has a cam inside that the cable runs over , then goes out to the sensor , which has another cam and the cable is attatched to it :
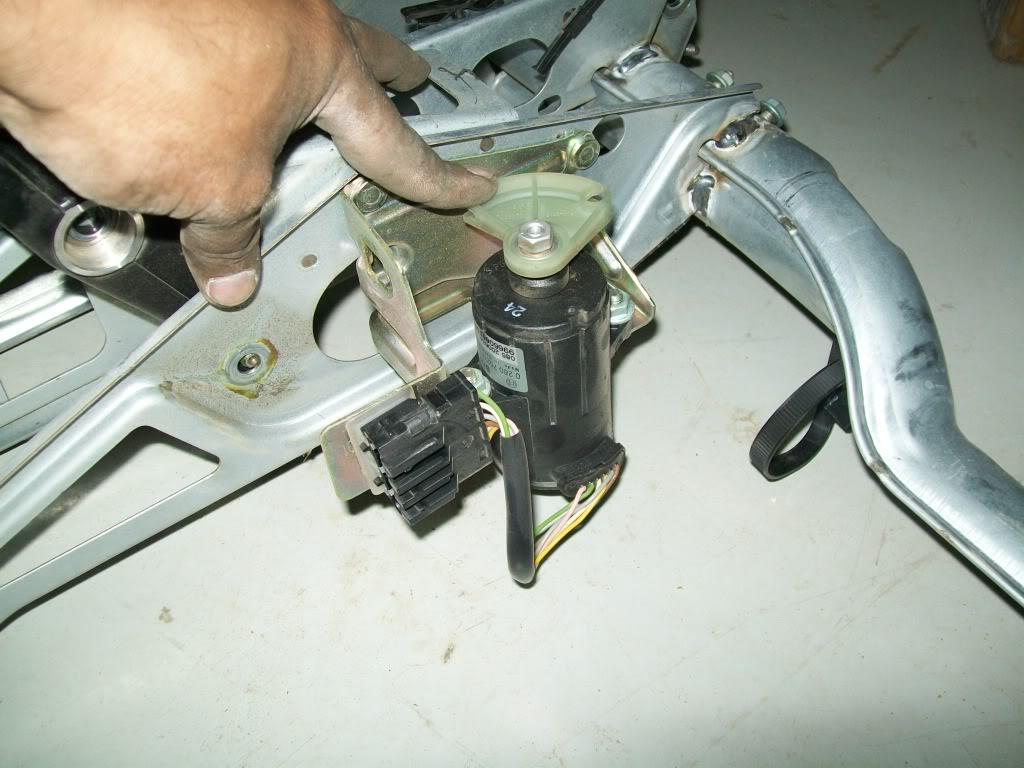
at this point i don't know if i should keep this unit or go with something different , the problem with this unit is that it does not have that much travel , which leads me to think it won't open up the LS1 throttle all the way . on the other hand , it would be nice to keep it and keep the sensor working , and find some way to use them both so i can retain the stock tps signal for later use , plus this being an automatic car before, it had the benifit of a kick down switch built in to the pedal ! you never know when that will come in handy ( finger is pointing to it )
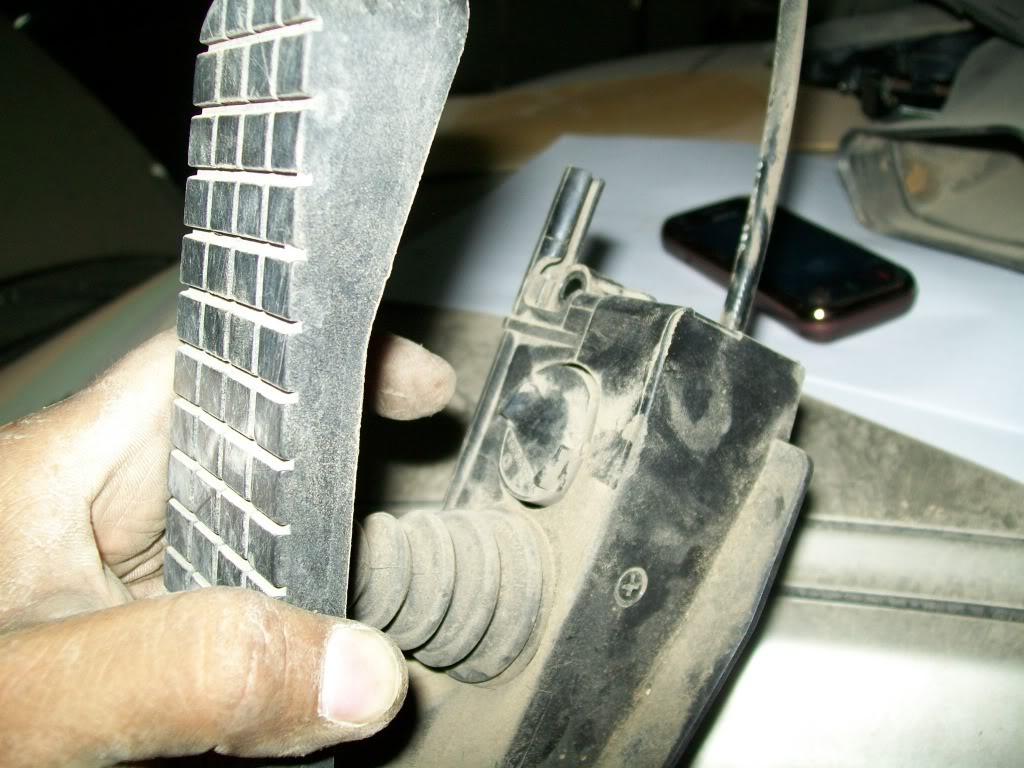
either way the cable routing is pretty straight forward , from the throttle body it will go back and up into the hump behind the passenger seats ( there is a hole already there- just above the intake manifold) and work its way on top of the driveshaft tunnel ( and under the carpet ) towards the shifter , then goes through the center of the dash anturns into what ever solution i come up with for the pedal
anyhow , i'll keep banging my head till i find a solution cause only then can i bolt up the dash .
furthermore, i installed the steam vent tubes on the engine , i'm planning on running two vents ( front and back ) and have them tied together and connct to the puke tank. the reason for that it that the engine sits pretty flat if not tilted backwards ( think hard acceleration ) and having the vents plugged just seemed it would cause steam pockets, so i used two cross over vents front and rear.
i also got the ATI balancer in finally and plugged the oil sensor hole in the block , and bolted in the porsche oil pressure sending unit on to the remote filter thing ( sorry no pics ) and got the shortened thermo. housing inplace , and finished the driver side coolant tube , here is a picture of the finished product in place :
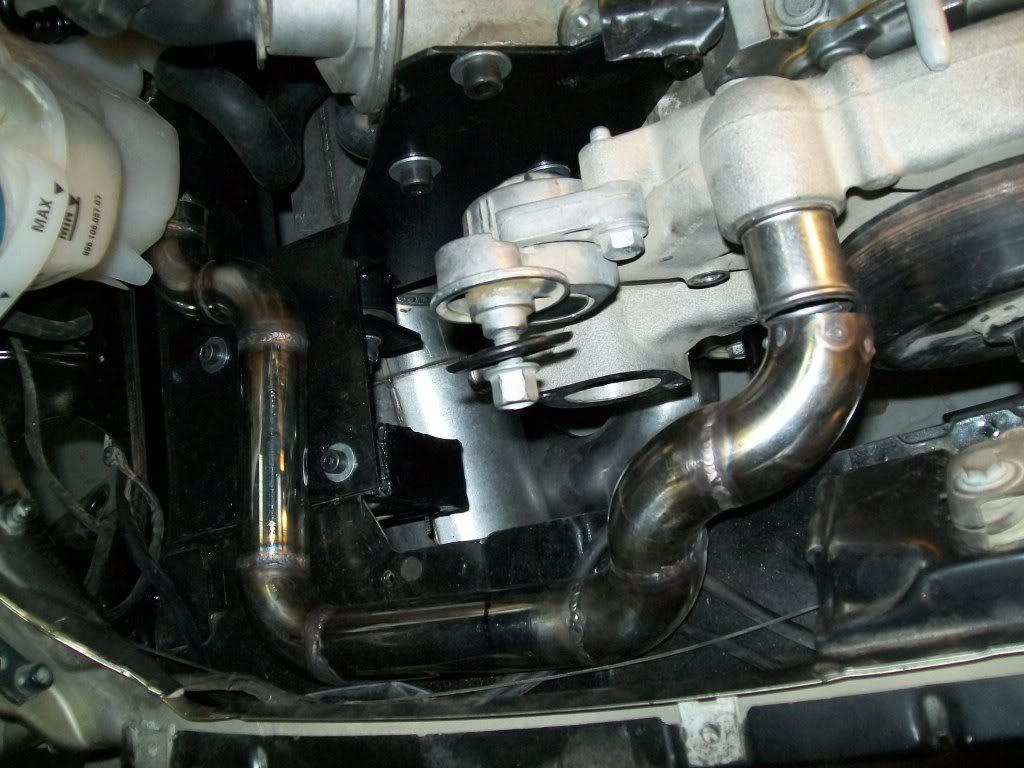
up next on the list :
- figure out the throttle cable/pedal delimma
- once that is done , bolt the stupid dash back in place
- connect the vent tubes together and tie into the expansion tank
- clean and install the intake, fuel injectors, and rails
- finish up the coolant hoses.
10.24.10
i did try out the porsche gas pedal and its a no go it just doesn't have enough travel - it moves the throttle body about 1/3 of the way only.
so i'll be ordering the pedal soon and and have the cable made locally to the length needed.
furthermore, i did bend the aluminum sheets that will be used as upper heat shields, as well as the ones to be used for the alternator and A/C compressor. also sent the injectors in to be cleaned and should have them back today.
i should start getting back into it this week ,
i should have the intake all cleaned up and installed along with the injectors and rails.
also should start putting the dash and berace back in , which should be a fun process
11.06.10
time for a minor update:
i made a set of upper heatshields to seperate the coils and top of the engine from the heat generated from the mufflers right underneath it , its basically a bent sheet of aluminum with notches cut into it to clear the plug wires:
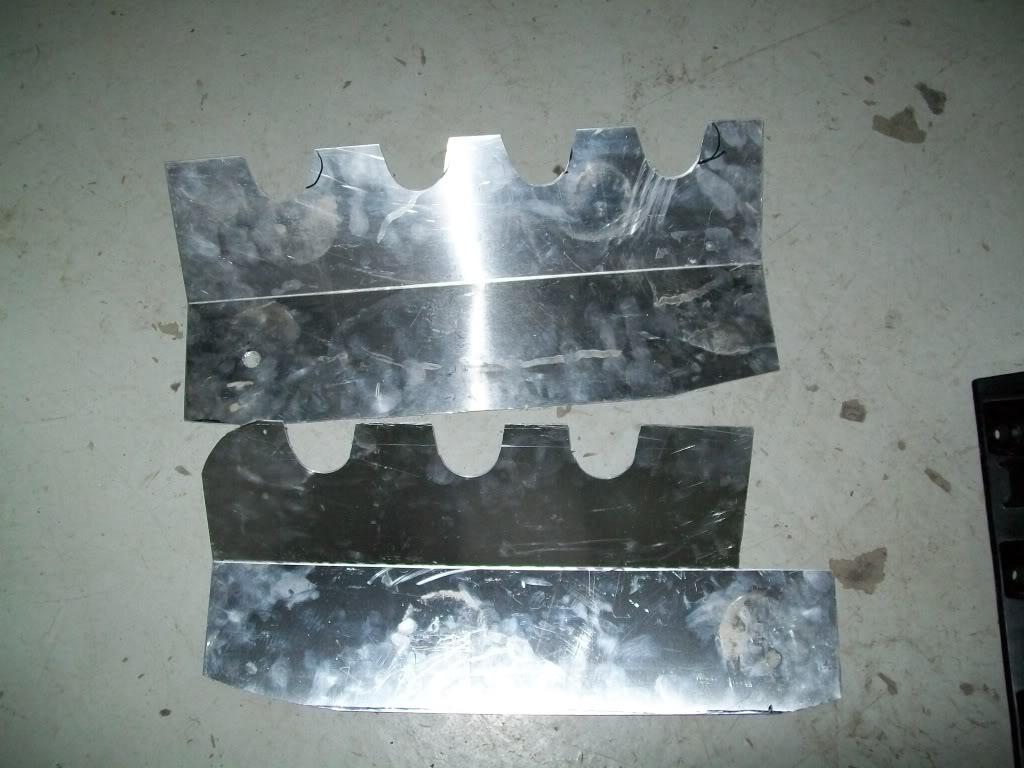
and here is how they look on the car (before notching) :
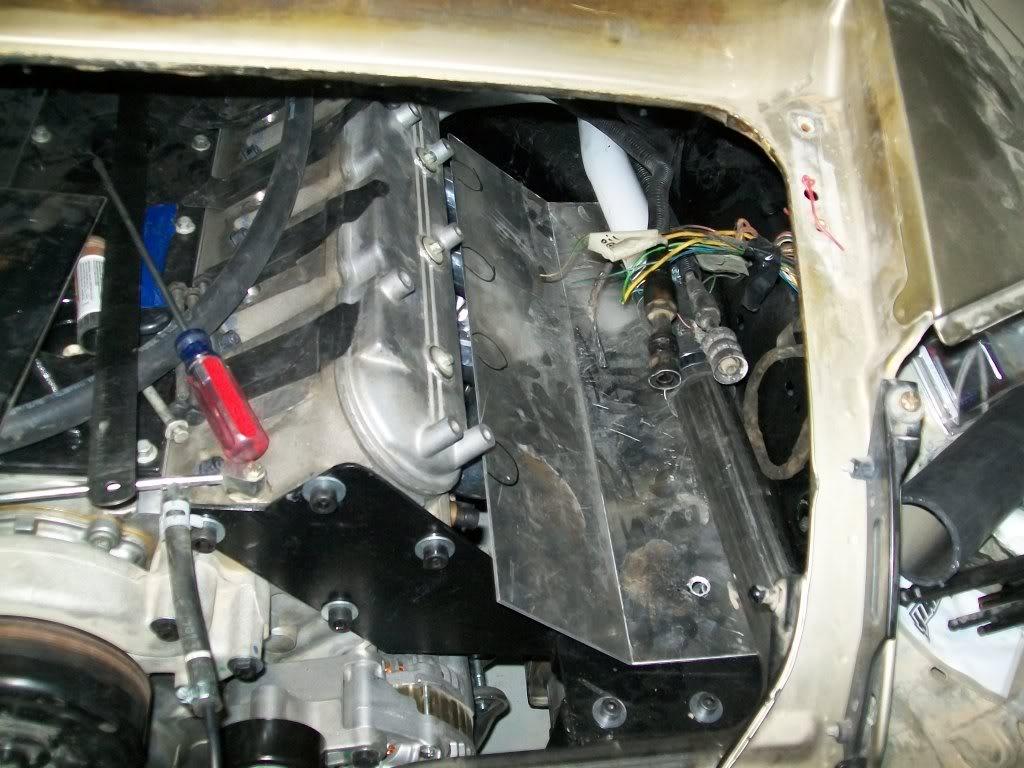
also got the caddilac CTS power steering pump in , but for some reason when i bolted it on the engine it was sticking out about 3 grooves out ( serpentine belt grooves ), so i got a hold of a '08 caprice pump ( we still get these over here, thery're the holden veresion) and stood them next to each other and still the same result,,,,, only difference is the CTS pump is mounted on a bracket and theCaprice bolts right to the head , so we'll see how that goes when i get back to it
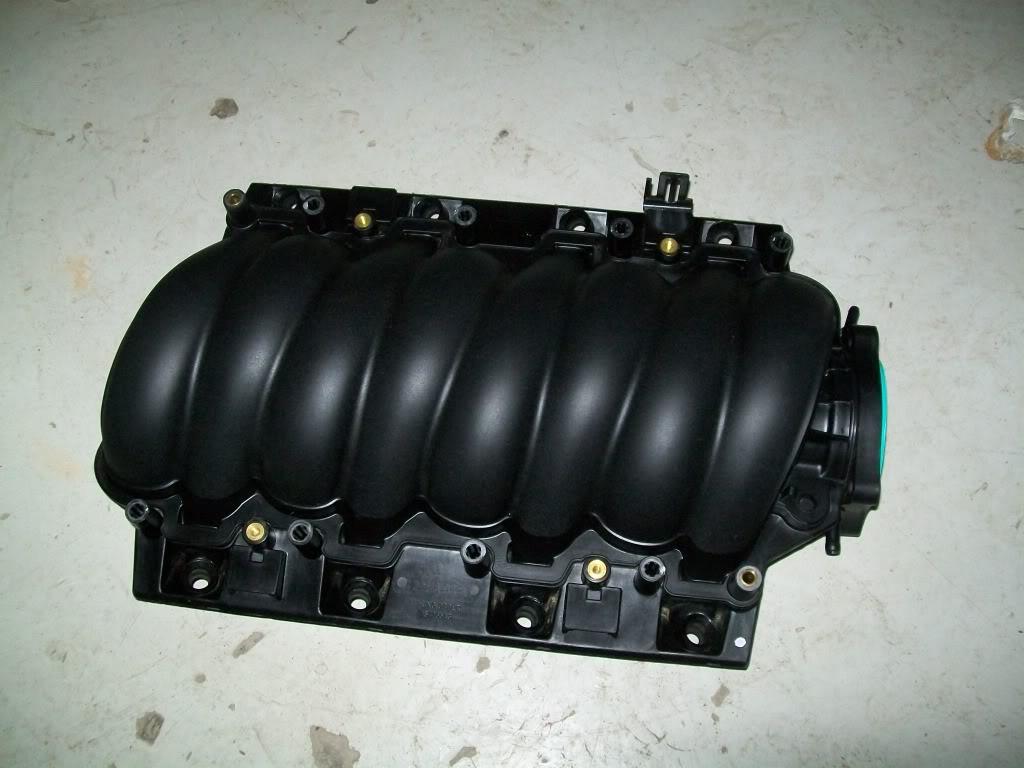
i also got the ls6 intake cleaned and prettied up
almost looks like new !
and i got the injectors back in from cleaning, these are green top ford units ( i think they are 43lbs /hr IIRC) , so i'll be slapping those on the stock rails i have somewhere here and then bolting them up to the intake. that and bolt up the lokar throttle cable bracket
meanwhile , i did bolt up my sexy black 90 mm throttle to the intake to see how it looks in the car :
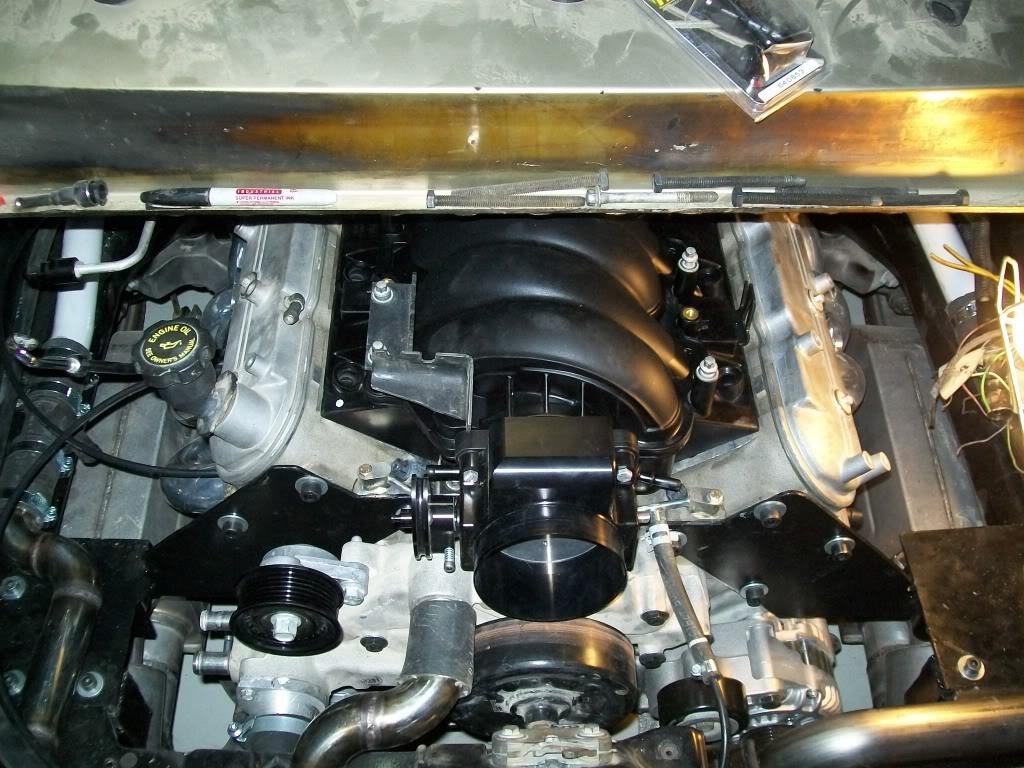
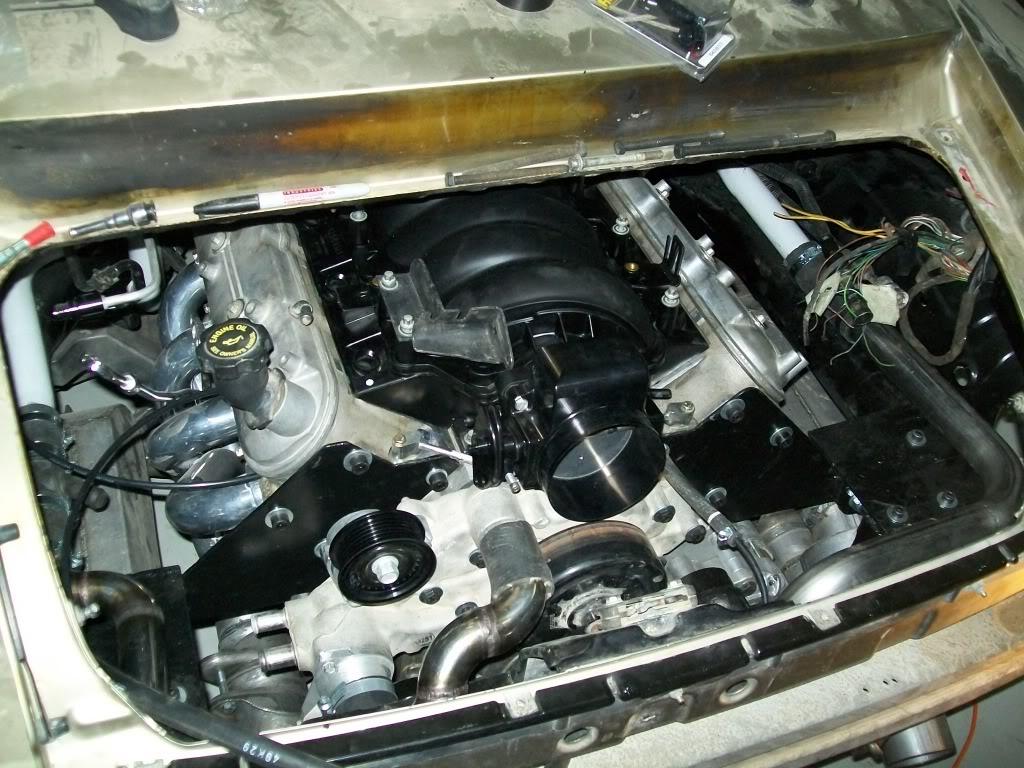
and might i add it looks sexy
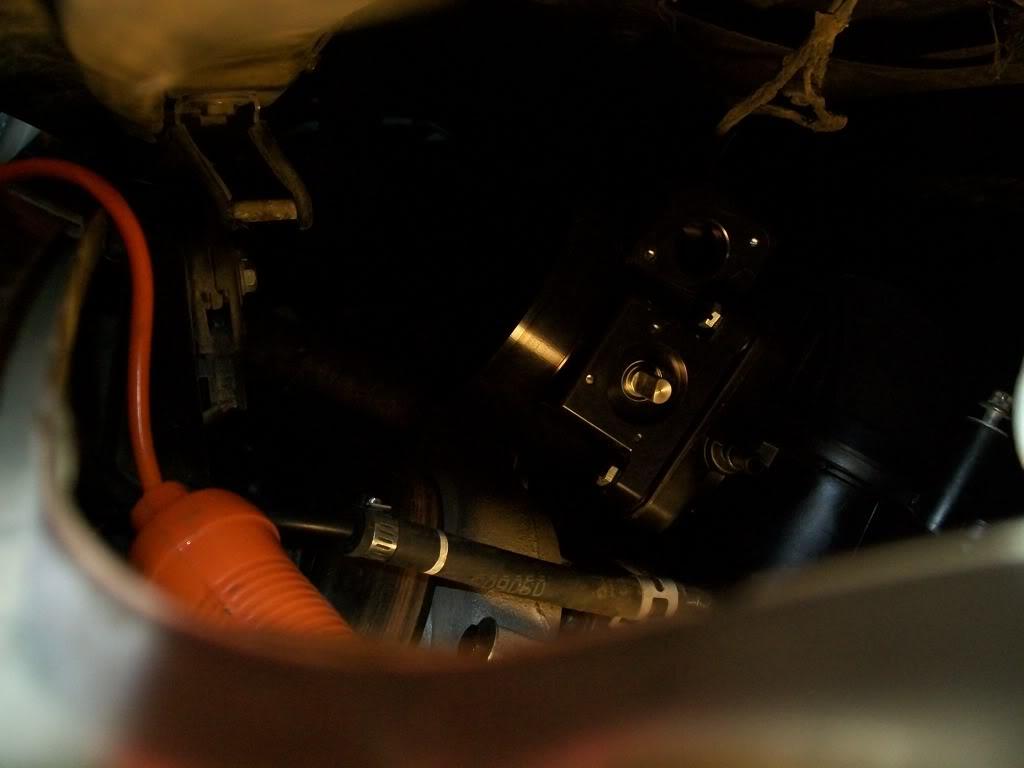
seriously , i had to do so to double check throttle elbow/ intake clearance ; i was worried that the latch assembly would be too close to the throttle body so i installed it and put the engine cover back on , and luckily i have enough room
(sorry for the crappy pic)
furthermore, i also started on making a new radiator hose on the pass. side of the compartment , the one i have now is 1.75" and is somewhat in the way of the intercooler hose route ( in the future) and is rubbing on the engine mount plate bolts. so i decided to make a 1.5" tube that snakes away from all that and is a better fit in the compartment, plus it standardizes the hose sizes in the engine compartment . i also installed the steam vent tubes on the engine ; i used two stem vent tubes one for the back and the other for the front. i did that because the engine sits so flat i was concerend that under acceleration i might get some steam pockets at the rear of the engine , so this was a little added insurance .
moving on ,,, i finally got the dash brace all in what a pain in the a$$ ! i keep reminding myself how much easier this project would have been if this was a manual car to begin with , but oh well ,,,
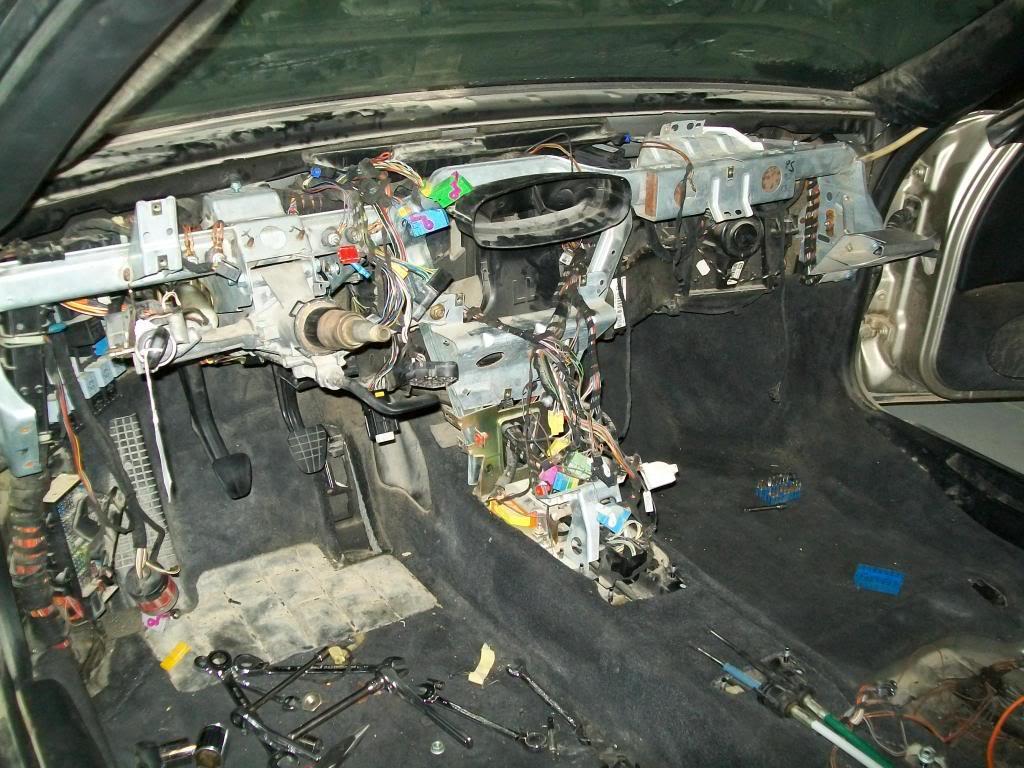
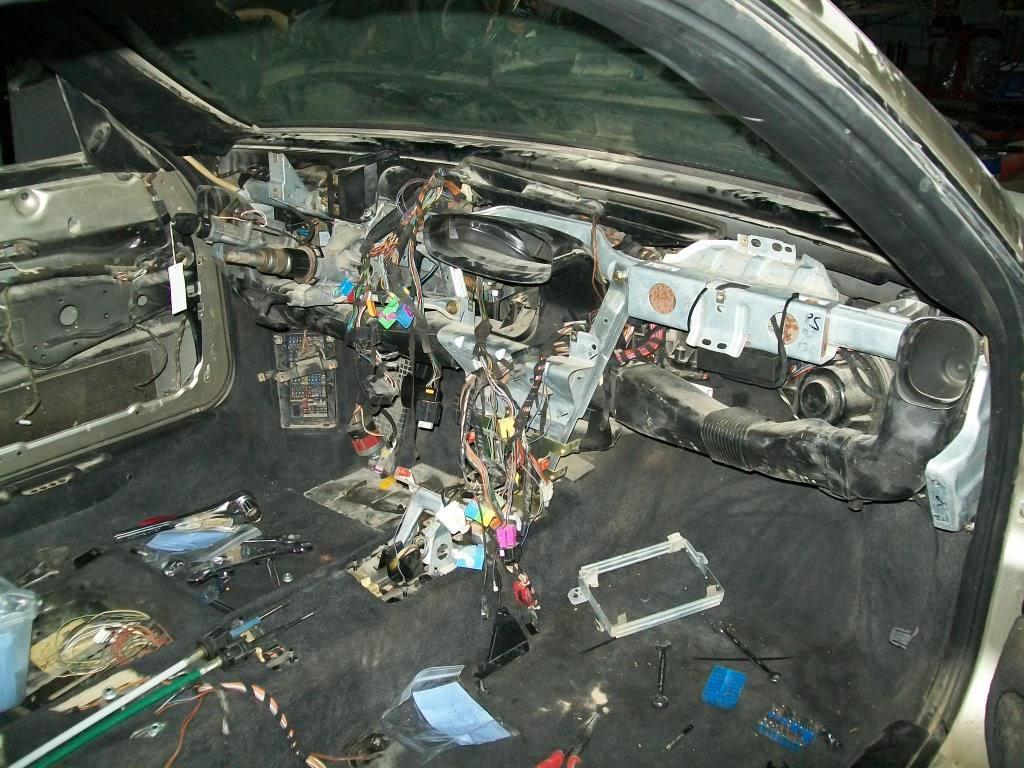
i didn't install the actual dash cause i was still debaiting and thinking about the pedal issue . like i mentioned before, i ordered the lockar pedal and i got it in , its a bit smaller than what i anticipated , but not by much. however after getting it in and seeing and thinking of how to mount it i came up with the following conclusions: i could either build a bracket to mount it in the stock location and have it sit a tad higher than the stock location and loose the TPS sensor signal ,,,,, orrrrr ,,,, just use the stock one!
how you ask after seeing it and seeing how messed up those germans made that pedal assembly , well to make my life easier and others who might be doing the same project in the future i decided to use the stock pedal assembly and just install it like it was before and with the sensor connceted and all that , but the only diffference is that i would drill the top of the pedal horizontally and place a long through bolt that whould would act as the mounting location for the cable end ( think of the bolt going across your toes when your foot is on the pedal ) , the cable would be held in place with a bracket in on the trans tunnel or under the dash and the wire that moves exits it to the pedal , the closest i could think of is a gokart pedal assembly. the cable would mount on the right side of the pedal and close tot he tunnel , which should make it out of the way of my foot
another benifit is that i can change the pedal ratio just by relocating where the bolt goes in on the side of the pedal ( the higher up the pedal i mount it , the more travel i get , and the lower the less travel i get
that sums it up for now , like i said , its a bit slow since i'm putting more effort into the camaro now that the season is ramping up, but i will be working on this nontheless
so next up :
finish as much as i can with the interior , which means :
-throttle pedal and cable
-install dash
-hook up master cylinder and fill clutch hydraulics up
-center console and seats
then there is the rear of the car :
-install intake , fuel lines, and throttle and other related stuff
-start building the mini engine compartment harness
-install the standalone harness and mount the PCM
-finalize coolant system ( still have to route the puke tank hose and the steam vents into the puke tank )
11.26.10
well i've been busy with the camaro and the race that just took place in bahrain , then i went camping and just came back a few days ago , so sorry for the delay in updates
anyhow,,,, i think i can call the clutch hydraulics done now; i finally hooked up the reservoire to the master and the master tot he rest of the plumbing. all i have to do now is fill it with fluid and bleed it . also i can scratch the shifter and e-brake off the list sice i installed them both too.
also installed the dash pad finally , the weird thing is that it went in quite easily and i only have 3 screws left over
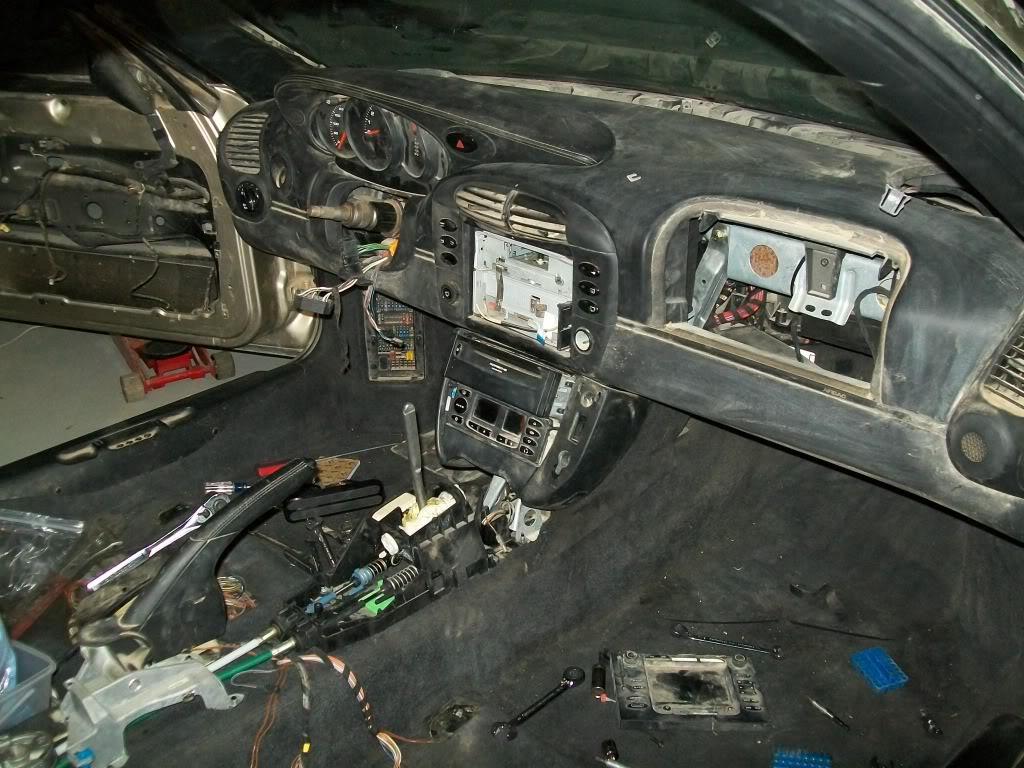
i didn't install the center console cause i still have to route the throttle cable - and fab a bracket on the gas pedal ( more on that later).
i also decided where i want the pcm, it will be in the cabin and right where the porsche unit would be. here is how it looks in place :
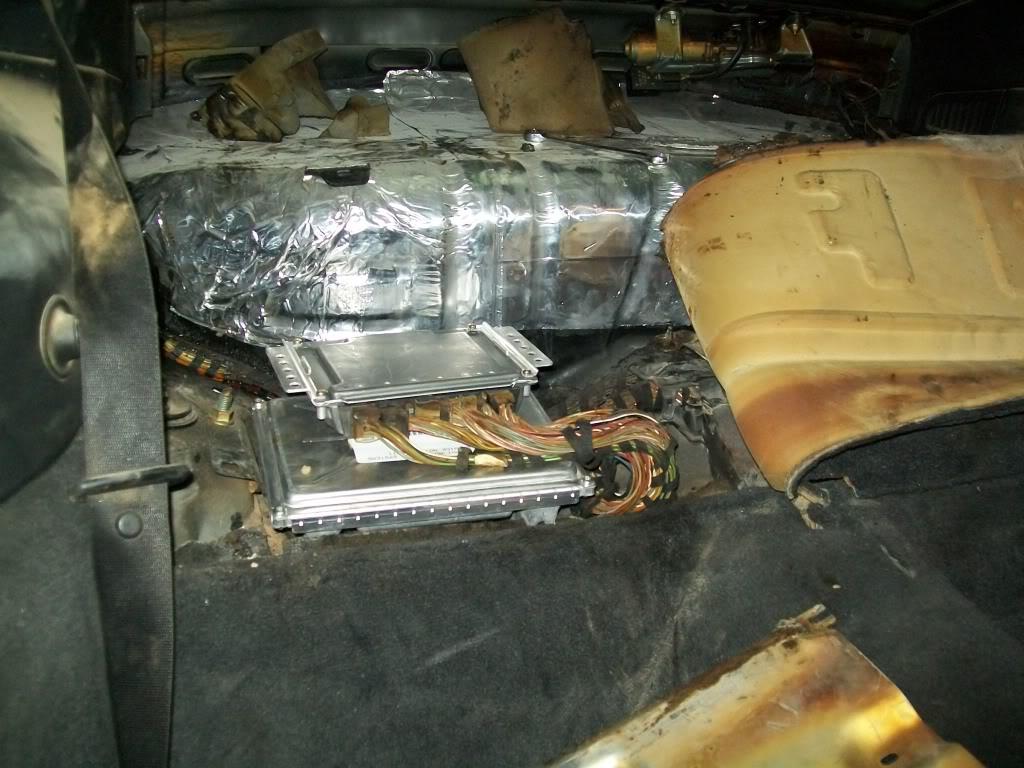
and how it looks when covered with the stock carpet :

i just have to drill a hole on the pass side rear bulkhead ( just above and to the left of the pcm - in the pic above) to route the harness through .
moving on ,,, i got me an ls2 fuel rail and slapped it on the intake along with the injectors , but when i tried to install the intake the top of the fuel rail (crossover tube ) hit the top of the engine compartment , so i guess i have to get some aftermarket rails for clerance reasons
also finished connecting the vapor tubes to the puke tank , as well as puke tank to the coolant tube .
so thats what i got done recently , next up is taking the powersteering pump bracket to have 4 mm machined off its back ( so the pulleies allign) and installing it . after that i have to do the p/s lines.
also on the to do list is drilling a hole in the rear bulkhead to pass the harness through, clean up the harness , and mount the pcm
also have to fab a bracket on the pedal and under the dash to hold the throttle cable
furthermore , i guess i can roll the car back on the lift so i can :
- install the balancer
- install the alt. and A/C heatshields
- route the heater hoses ( if i ever get them)
- route the AC lines and compressor
- run a grounding cable between the block and the frame
should keep me busy till i get some of the interior parts i ordered in
12.04.10
i know i've been slow with updates on this project , but i've been busy with the camaro and the racing season that just started over here .
speaking of updates , guess what ??!! this is one
i got the power steering bracket back from the machine shop. they took off 4mm from the back to compensate for the thickness of the motor plate / mount thingy.
so i got it on there and slapped on the reserv. and connceted it , all i have to do is finish two lines ( return and feed lines) and be done with the power steering
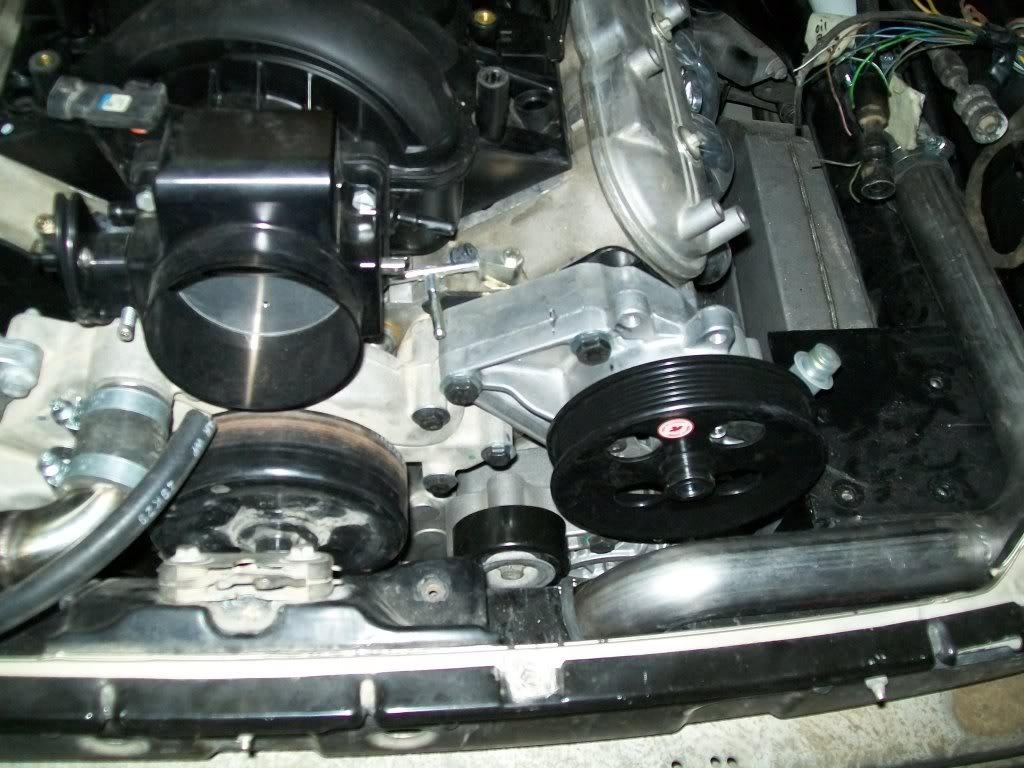
moving into the cabin , i managed to take offf the passenger side rear inner panel , sponge/foam stuff behind it ( man do the germans like this stuff ! ) , and the seat belt bracket . here is what it all looks like :
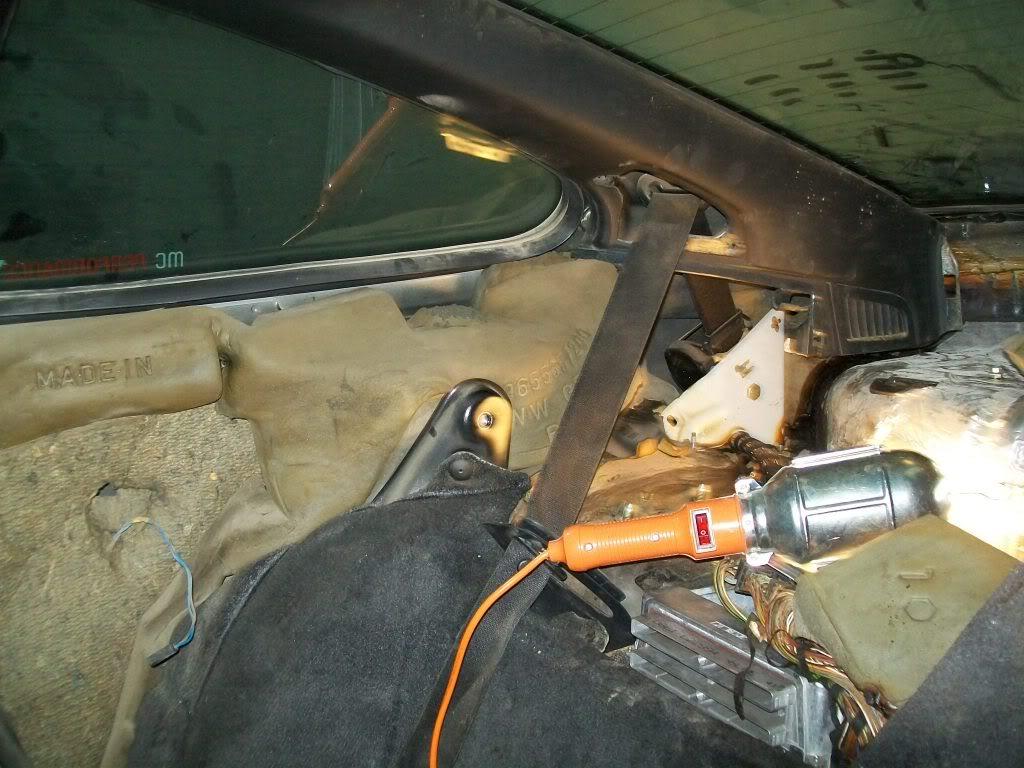
and after removing all that ,,,, i found the elusive grommet
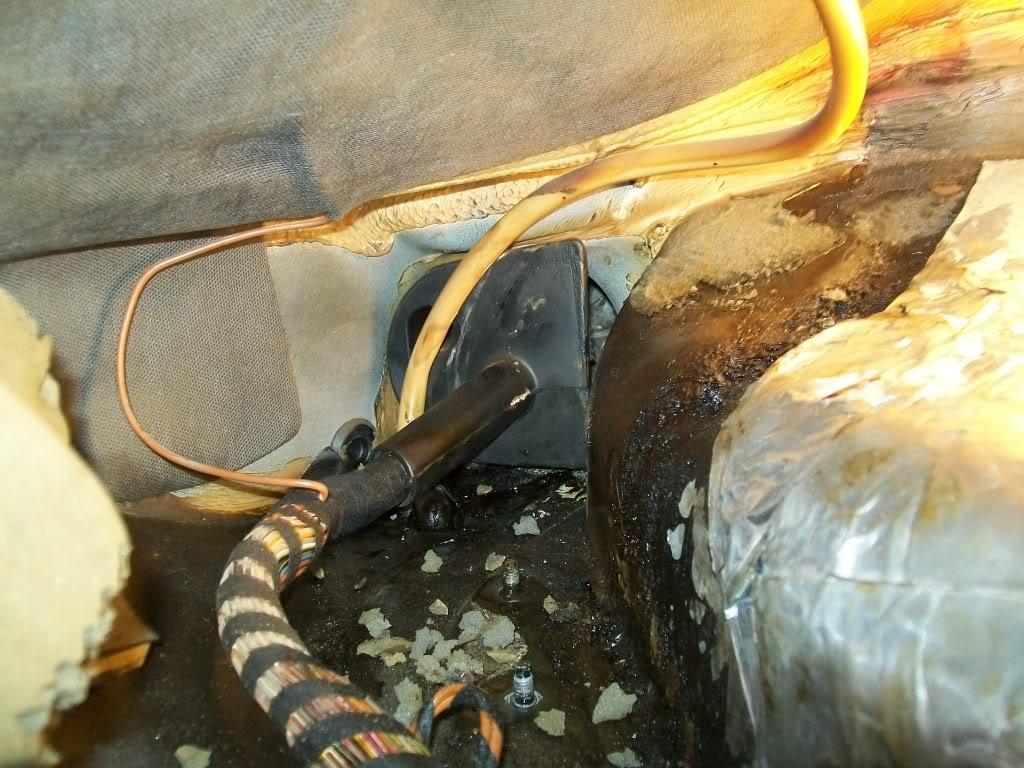
so after givving it a good yank i released it and now i have a nifty little hole to run my harness from ( thanks marky ) as well as a new place to shove the pcm in
here is how it looks like when looking at it from the engine compartment :
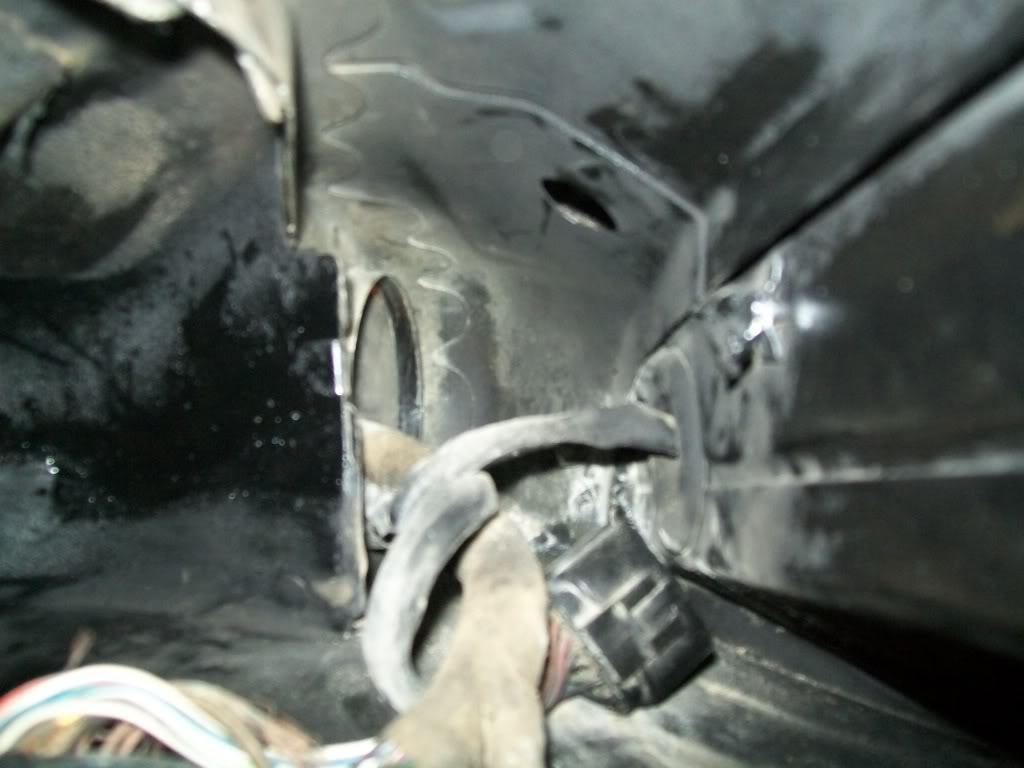
i also messed around with throttle cable placement , and i think i found a nice little place under the dash towards the center console to mount the cable bracket.
and as you can see i still didn't roll it onto the lift , i want to be done with the interior first then move on to the outside. furthermore, i just ordered new fuel rails as well as few interior peices like the driver A pillar and defrost vents,signal stalk assy. , as well as the window motor and regulator and a bunch of other stuff. should be showing up real soon
so next up :
-clean the ls1 harness from any unneccsary wires
-route the harness through the gromet hole
-mount the pcm and fuse block
-finish the interior ( put the panel back on , rear carpet, steering wheel , etc)
-install the new rails and finish the fuel system
-power steering hoses
12.14.10
i got the fuel rails in today , but i have to take their brakets/bases to the machine shop to have another set made so they fit on the ls2 intake (these are ls1 rails ) , and i have to make a crossover and connect it to the filter :
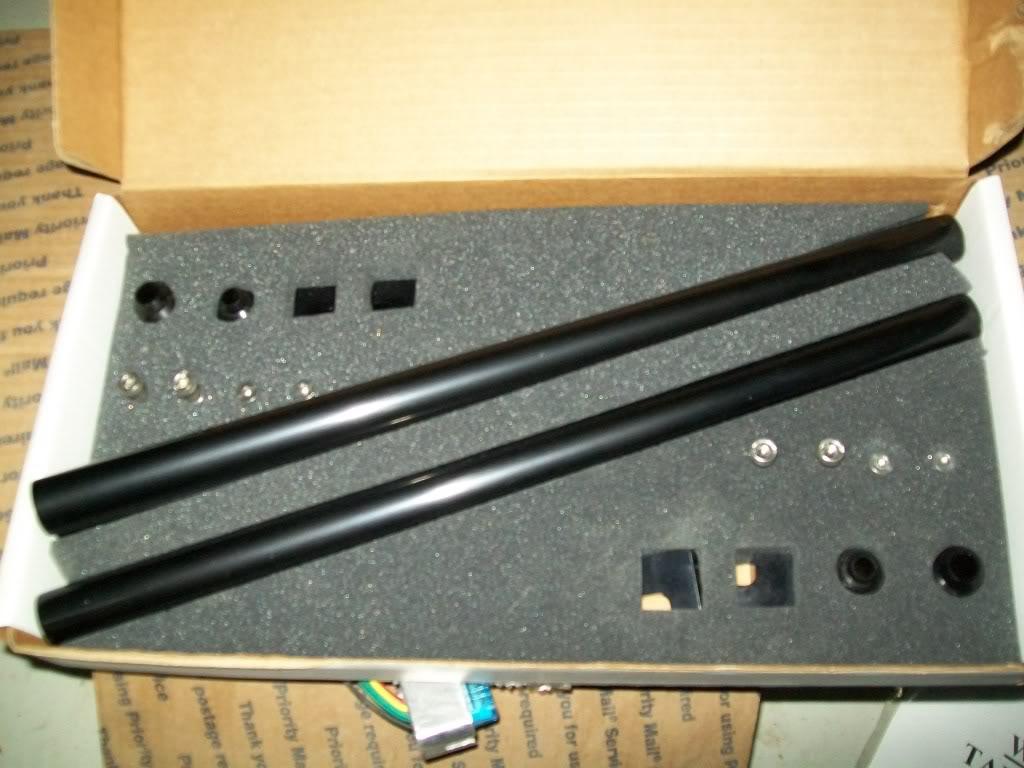
i also layed the harness in through the hole in the side of the engine compartment, and figured out how to mount PCM and DME , the PCM will have a bracket holding it down while the DME will mostly be velcroed in place:
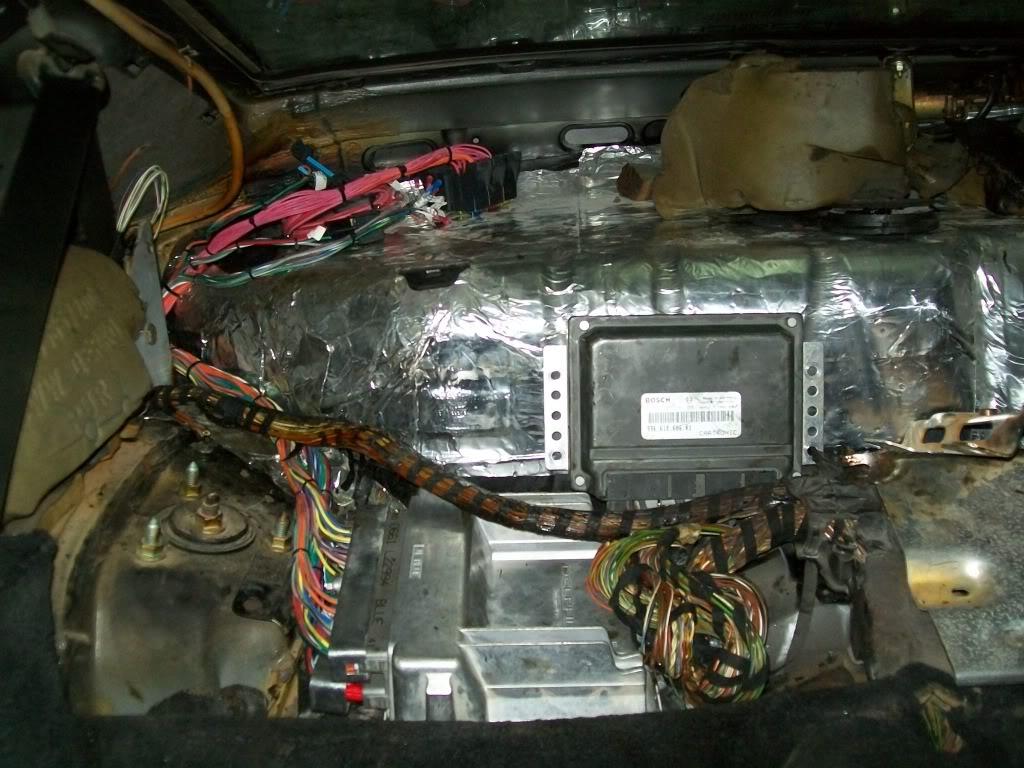
and this is how it looks with everything back in place, the fuse block and the OBD port will be hidden behind the removable panel under the rear window.
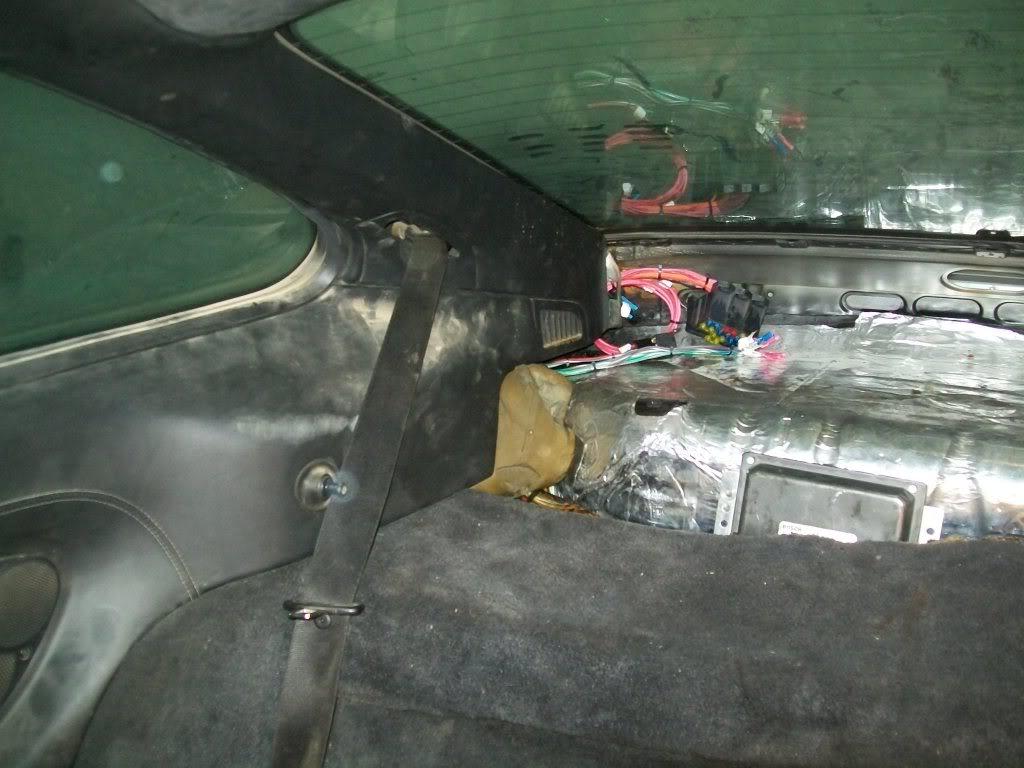
what i have to do next is finish the wiring ; i have to connect a switched source and an all time positive source as well as ground the harness. also have to connect the fan signals and maybe ,,,, just maybe ,,,, make an engine compartment harness for the porsche sensors
i also gashed my thumb while making a bracket for the throttle cable but i think i'll spare you the details
so the plan is to finish as much of the electrical stuff as possible , this way i can scratch it off the the list and get that much closer to firing up this thing
i also found out that i don't have the pressure hose from the pump like i thought, so i have to see if i can get it locally , but untill then i can only make the return portion of the hose.
next up is finishing the rails , connecting the harness and mount the brains, and finishing the throttle cable
then its back to the engine compartment where i should start buttonning up the engine and get it ready to start ( i hope ) .
also as soon as i get the rest of the interior stuff i'll finish the interior an scratch that of the list
12.20.10
i did manage to inch close to my goal since the last update
i got the new rail adapters back from the machine shop , i have to test fit them and then powdercoat them. ( sorry no pics)
i also finished the last peices of the fule line i need to hook everything up :
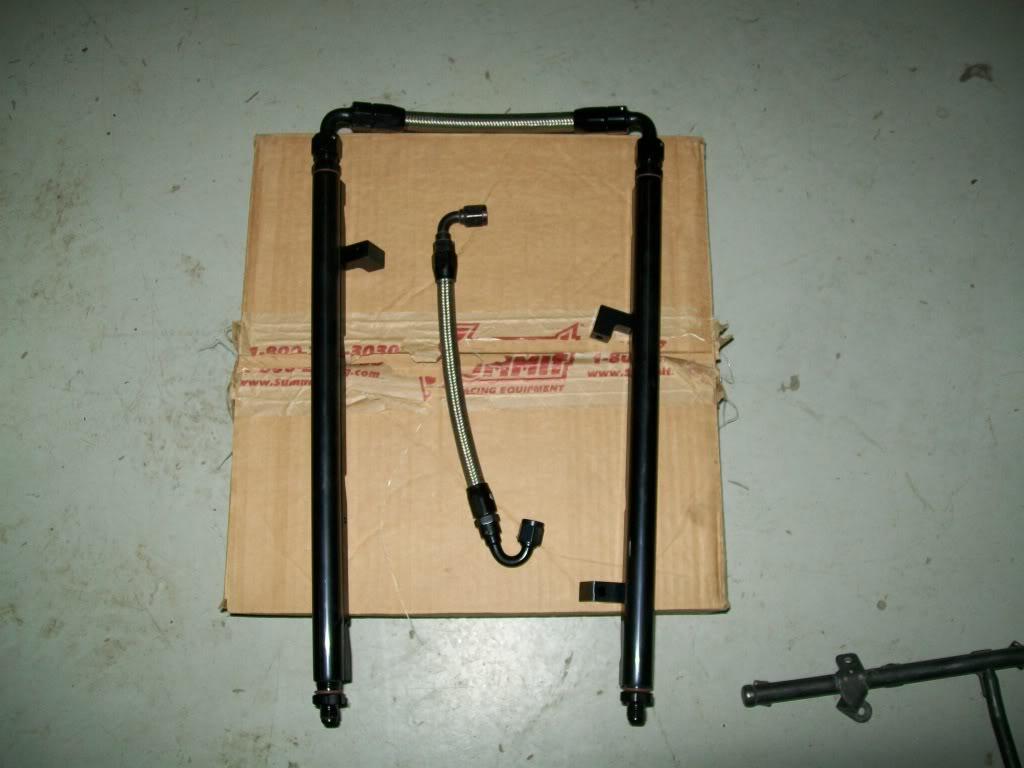
also finished the sexy , yet thumb cutting throttle cable bracket ( this needs to be powder coated as well ):
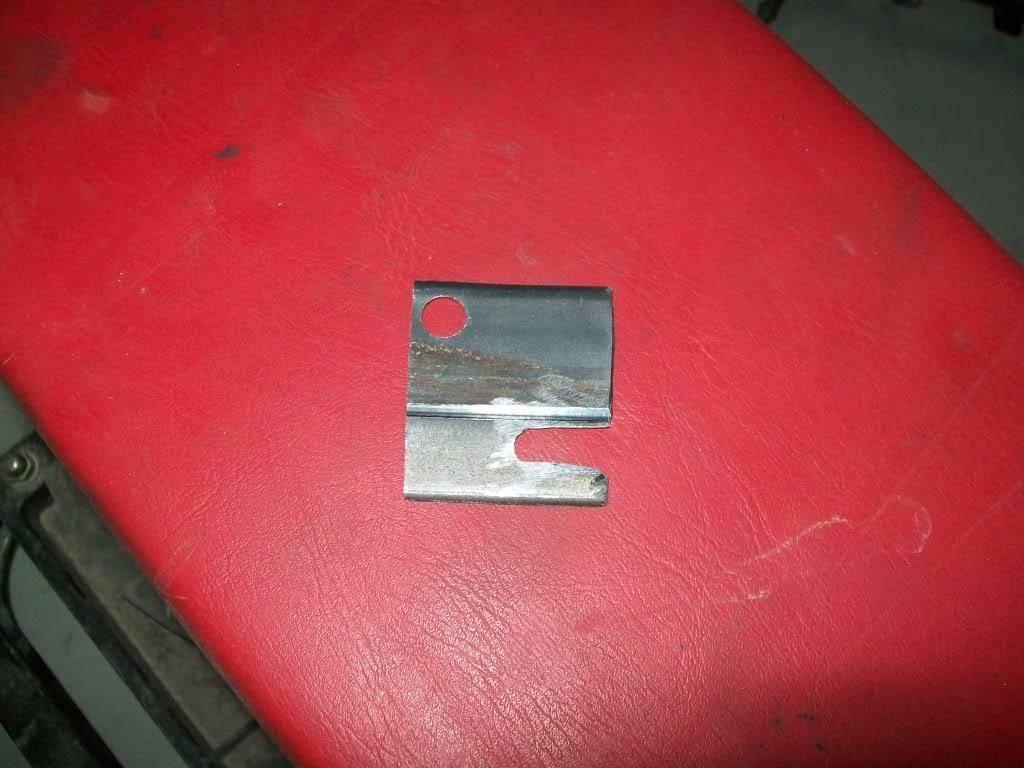
and this is where it will be located - poking from behind the gold colored brace :
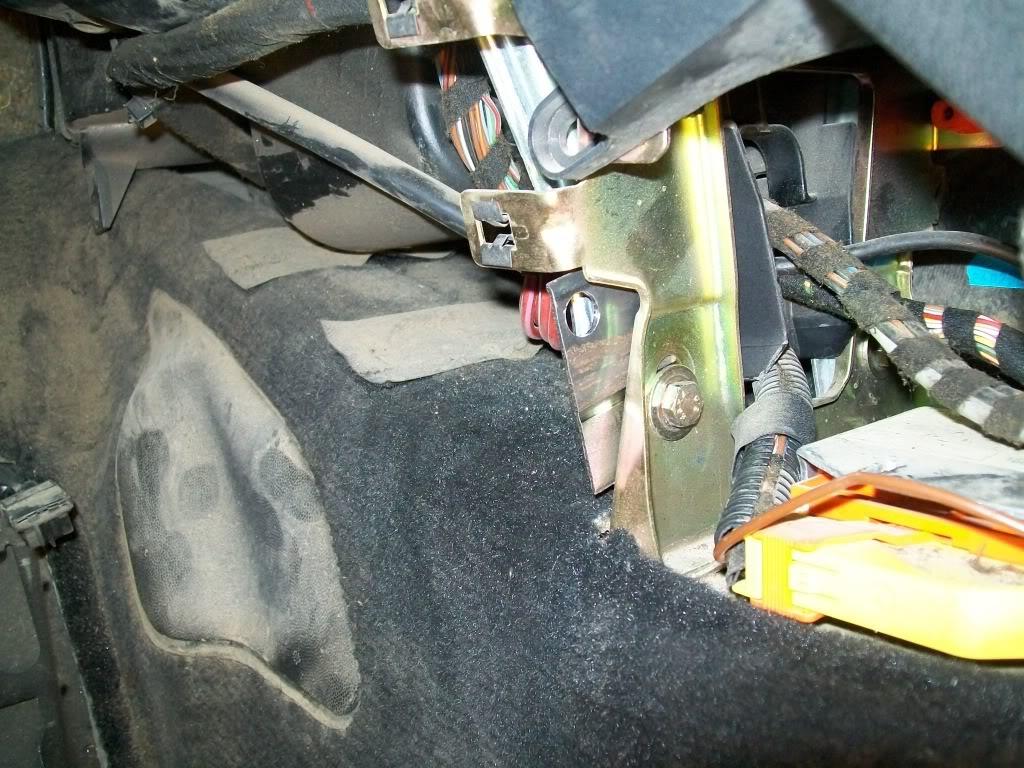
i also strated on making the engine compartment harness (finally !!!!) , it will be using this connector ( can't remeber what its called) and will run next to the ls1 harness through the grommet hole :

i'm also going to get a throttle cable made today so i can finally be done with the the throttle pedal deal
so next up on the must do now list is :
-wire the + and switched + wires
-wire the fans
-fuel pump wire ( i'll be popping the fuel tank open to check on things in there , just to check )
-disconnecting the pump so i can cycle through the ignition to check for the wires i need .
-finish the engine wiring ( extend MAP and Crank sensor connectors, grounding cables)
-engine ground
-get a pressure line made up for the P/S pump and have it mated to the stock one.
12.22.10
any how , i got some stuff done recently ( not as much as i was hoping but atleast its something off the list )
i got the fuel rail brackets done and the rails mounted , all i have to do now is bolt up the intake and hook up the fuel line, but this will wait a bit till i finish fooling around with the harness ( given how the harness is placed in the compartment i had to extend the MAP, crank , and ground wires).
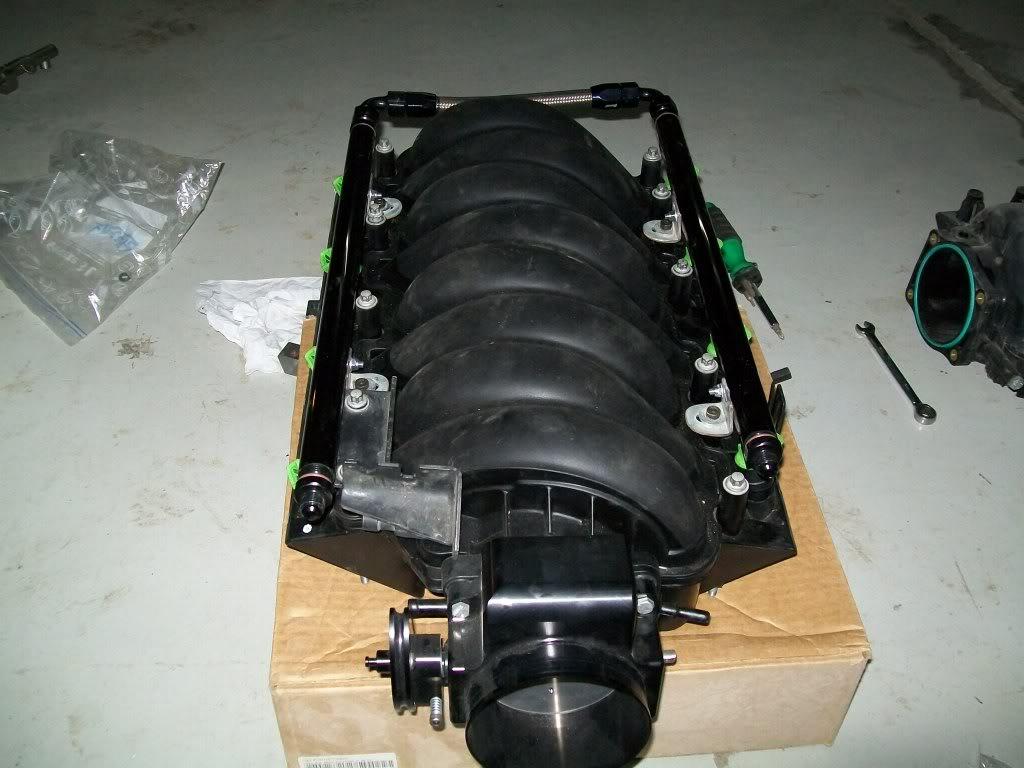
i also ( finally) finished the throttle cable deal , routing 13 feet of throttle cable can be a pain
the cable goes from the throttle body through the gromet in the engine compartment where the harness goes through , then snakes its way next to the pcm , and then under the rear seat area then turns towards the center console where it goes forward to the attatchment point right under the dash . positioning the cable turned out to be crutial cause due to the added length , more places where pressing on the cable wich made pushing the throttle pedal hard if not imposible . so after spraying th inside of the cable with lube and moving it around to get bends as wide as possible i finally came up with the location of the cable as described above .
as for mounting the cable to the pedal , i just hooked it to the top and side of the pedal
here is how the able attaches to the pedal ( as well as more thumb **** for jimbo ):
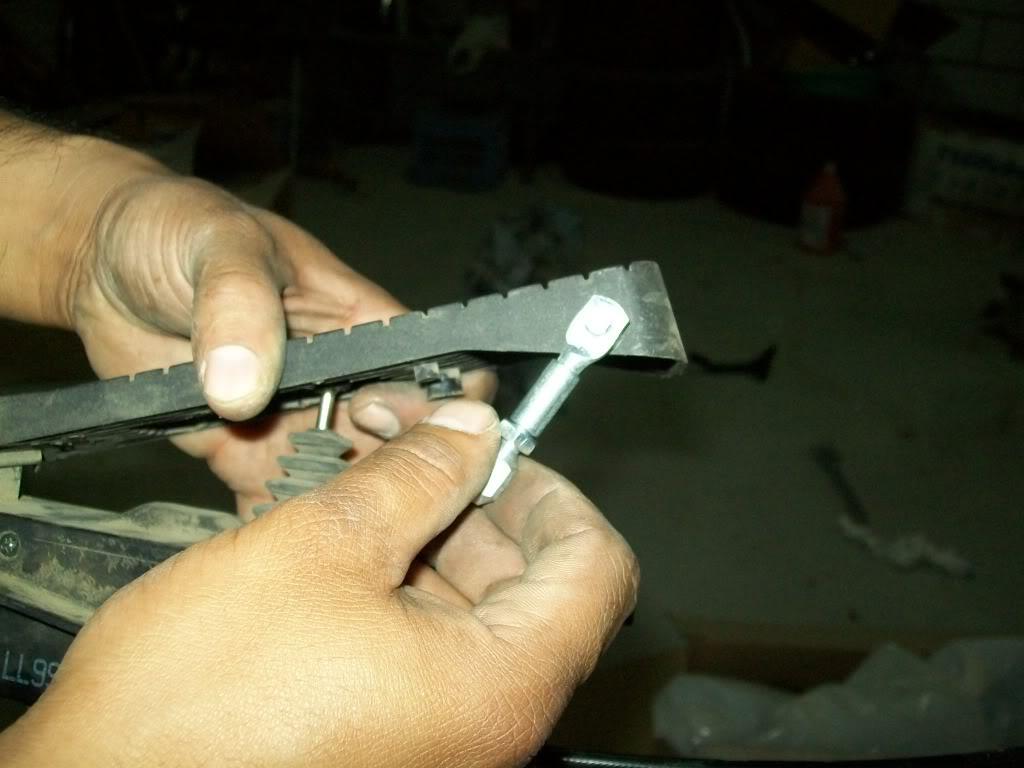
and this s how the cable looks in place and attatched to the pedal :
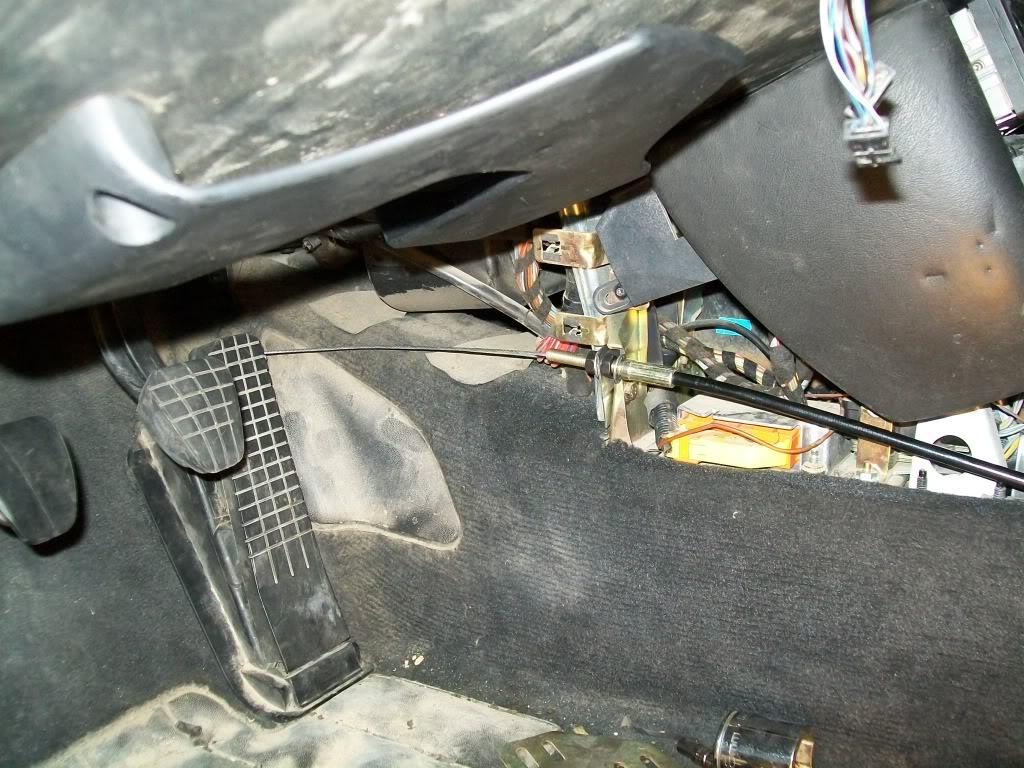
and how it looks with everything in place , you can't even see/feel the cable when you're in the car
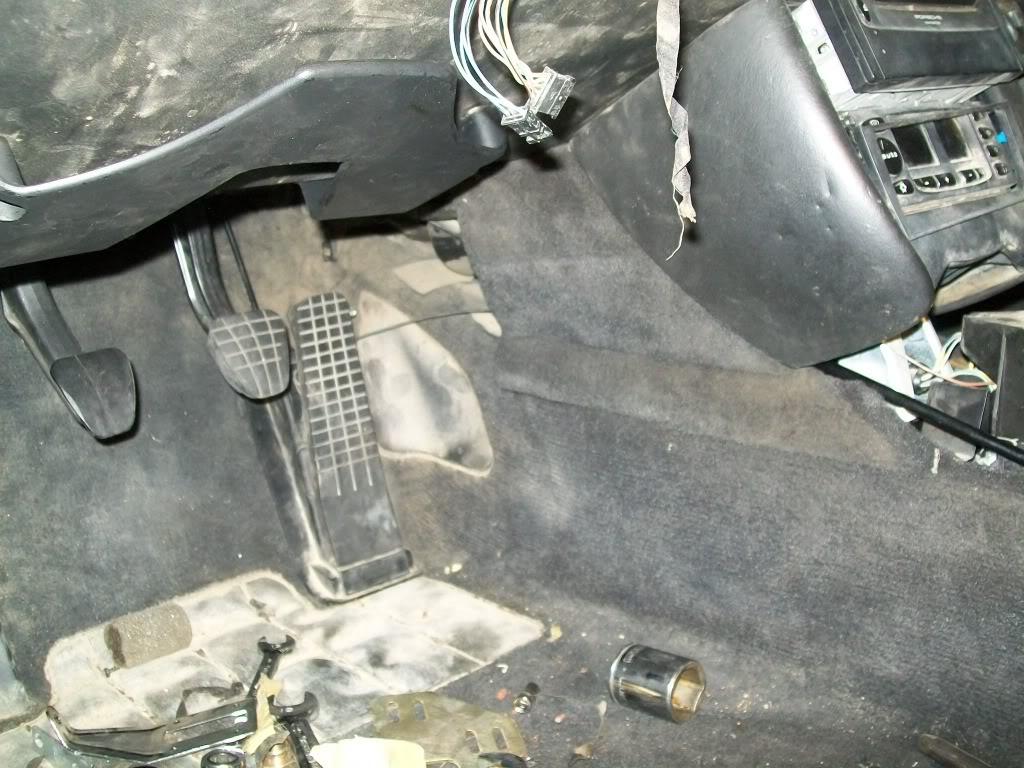
moving on , i took the fuel sending unit out ( well i tried to ) to inspect suff ; well it smells funny , and al the hoses seem intact as well as the wires, i was afraid that te stuff might be deteriorated from sitting that long , but nope ( i guess we have different additives in our gas , it doesn't go bad as quick as it does in the states )
also dropped te battery in place and hooked it up so i can verify some wires.
note : F-body owners ,,,, eat your heart out ! took me 2 minutes to get to the fuel pump
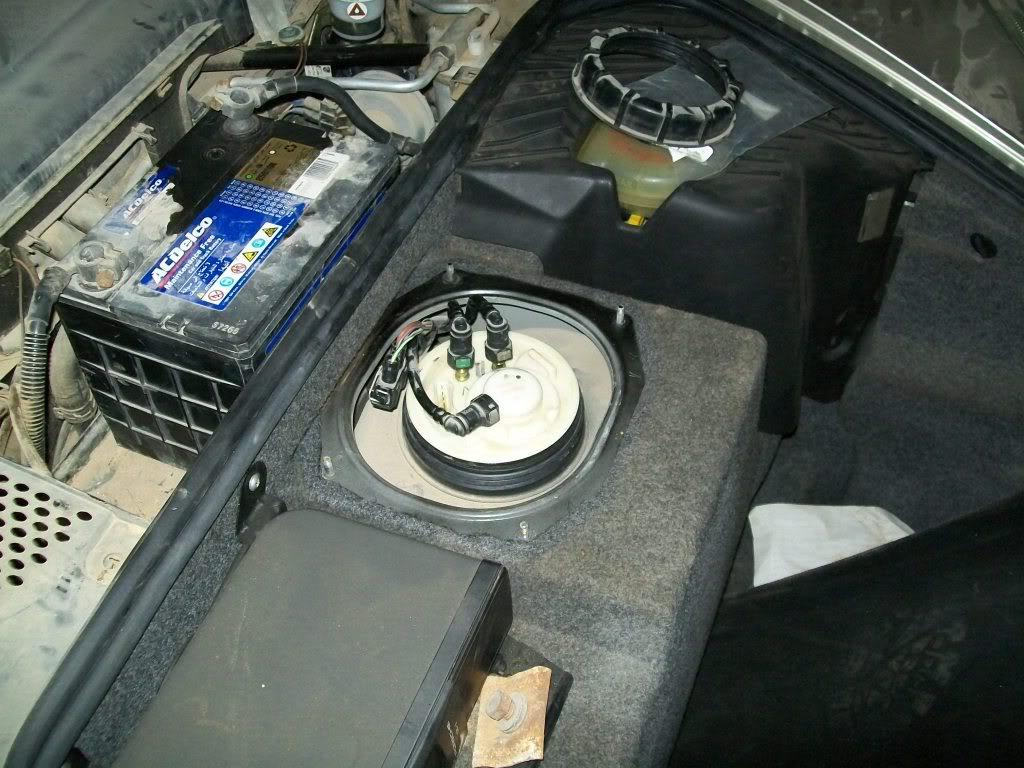
i was pleasantly surprised with a whole slew of warning lights and messages on the information center it came to life!!!
the bad news is that i could not find a ignition hot wire in the relay box at the rear ( next to the pcm and DME , i did find a constant hot but i'm not sure if it is constant through cranking .
another bummer was that i couldn't get a starter signal , i don't know if this is because there is a switch that has to be triggered in line to have it work or what, but ill chip away at it till i get it finished
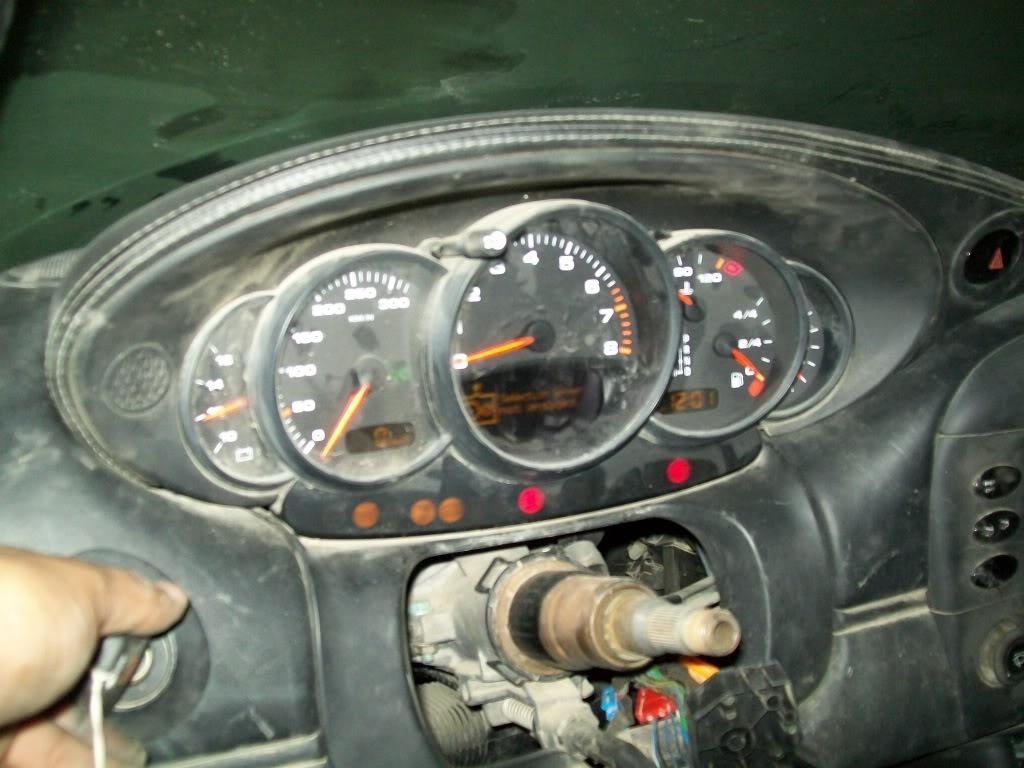
in a dumb move ( as with many others i made ) i mounted the pump on the gine , and now i had to remove it so i can get a pressure hose made for it ( weird fitting) , i'll be doing that today and hopefuly have it all finished and scratched off the list .
so , next up :
- finish runnung the wires in the engine compartment
- finish hooking up the engine harness
- figure out the wiring inside the car ( starter signal , switched source , etc.)
- install the center console
- install the steering coulm stuff when it shows up
- driver door stuff
- maybe push this thing on the lift again so i can do some stuff under the car
12.23.10
i installed the intake manifold for the last time ( i hope ) and connected the fuel lines , all i have to do now is to plug one of the fuel rail ends. also extended a few wires on the harness and connected the injectors and what sensors i could.
also started tackeling integrating the ls1 harness into the car:
i broke it down to several tasks to make it easier for me ( given how much i like wiring ) and started chipping away at it :
i started with figuring out where to connect the all time positive and switched positive for the LS1 harness , after thinking about it for a while i decided the best palce to connect the wires was at the all time feed going to the MFI-DI relay ( basically the ignition relay for the car) . porsche set it up so that the all time + goes through a relay that is triggered when the switch is turned on , thus giving you a switched + .
so with that out of the way i looked at the starter signal , after messing around with the wires trying to bypass the starter signal relay , i found out that some of the wires were damaged in the fire . so i had to cut and bypass the whole relay altogether and now i have a working starter signal
moving on , i turned my ( limited ) attention to the fuel pump signal . the ls1 harness i have was already setup with a pump relay , so i ran the + wire from the relay al the way to the stock porsche relay under the dash, where i disconnected the relay and just pluged the + wire into the terminal going to the pump
next on the list was the fans , now luckily the porsche also uses a pcm ground trigger so all i had to do was find the wires going out from the porsche pcm and just cut them and connected them tot he ls1 harness , and now i have the fans set up for two speeds : fan 1 on the LS1 pcm turns on both porsche fans on the low setting , while the second fan on the LS1 pcm activates the HI setting on both porsche fans . scratch one more item off the list
technically i can now start the car , but it still has some ways to go .
so now the car interior is all wired and done , all i have to do is go over the fuses and replace any blown or missing fuses ( don't ask how i found that out ) and install the pcm back in - which i took out to have a sd tune written on to it .
so next up is install the center console , and the rest of the panels and the carpeting when it arrives .
i guess i'm done with any work on the inside ( other than putting everything back in ), which means i can focus on the outside again, which means next up is :
- finish the engine compartment mini harness
- coils and plugs/wires
- push the car to the lift so i can install the balancer
- FLUIDS!!!! (engine/trans oil, coolant, brake fluid, clutch fluid) and bleed
and its late and i can't think straight , but for some strange reason i found working on the wiring quite satisfying
so wish me luck
12.24.10
well just tease you more here's a pic of the interior after i installed the driver seat and center console
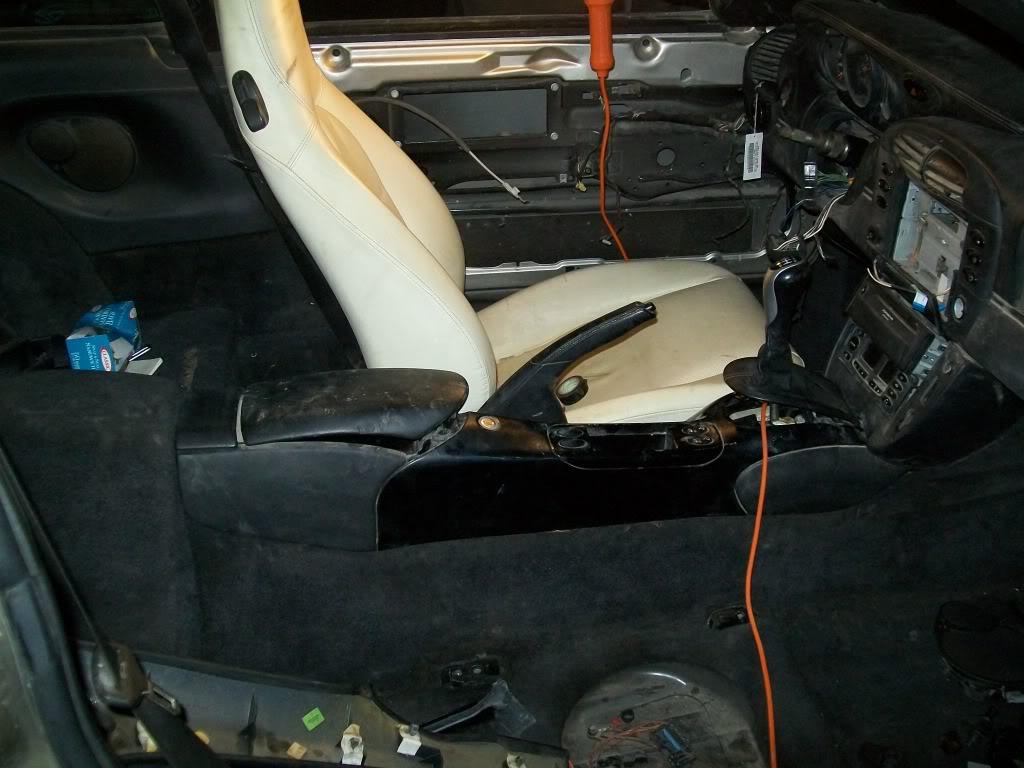
all i have to do in the interior now is install the rear panel and carpet ( when it gets here)
as well as the steering wheel andstalk ( turn signal/ hi low beam , etc)
so now i can go back to working on the outside of the car.
like i mentioned , i have to install the harmonic balancer and finish the mini harness , and button up the fuel and coolant system ( i decided to bypass the heater hoses - for now- untill i get the ones i ordered ages ago ) so i can get to start the engine .
i also have to get a battery for the car that fits, along with all the needed fluids .
the plan is to first fill all the fluids and check for leaks , then pressurize the fuel system ans see if that leaks. after that its starter test time and see if she fires up
12.27.10
not much progress to report , i wasted all of last night pushing the thing back on the lift and trying to install the balancer . long story short: balancer needs to come off (again) cause i did not put the AC pulley on ( don't ask) . i lent out my impact gun so i could not get the bolt to come out and i found out that the passenger side Ebrake does not work
had to loosen the front timing chain cover cause i noticed the seal was not sitting right , which meant the alt and water pump had to come off .
coils, wires, and plugs are on , as well as all the sensors are connected . all i need to do now is finish the mini engine harness ( and the balancer )
i'll be picking up some transmission oil today as well as some other vital fluids
start up should be soon
12.28.10
well i was hoping to atleast fire her up tonight, but i guess it will have to wait for a bit : i guess the fuel pump is seized up
and to make things worse , i managed to crack one of the hoses
so now i have to remove the pump and bucket and replace the crappy accordion hose with propper fuel injection hose. i just have to figure out how to remove it from the tank.
the pump looks like it could be easily swapped out with a bosch 044 pump or maybe the new aeromotive 340 pump .
here's what i have to deal with :
http://i896.photobucket.com/albums/a...p/100_2630.jpg
another thing i also noticed is that the pump signal only comes on for a couple of seconds AFTER i let go of the ignition switch. so i have to look into that too .
i did think of replacing the whole factory setup with something different , maybe drop in an intank 044 pump and simplify the whole mess in the tank by having one pump and hose in one of the bladders and having a small transfer tube between the bladders to equalize the fuel level . but thats just thinking to far ahead
i did finish installing the balancer, so now i have to get a belt and finish the powersteering pump plumbing and i can call the accessory drive done .
and like i mentioned earlier , i got some interior stuff in and i installed them i just had to stop cause i didn't have the correct size screws to hold the stalk assembly in place . i did however get the window in , and it actually works ! i just have to figure out how to adjust it so it goes down all the way like the other one .
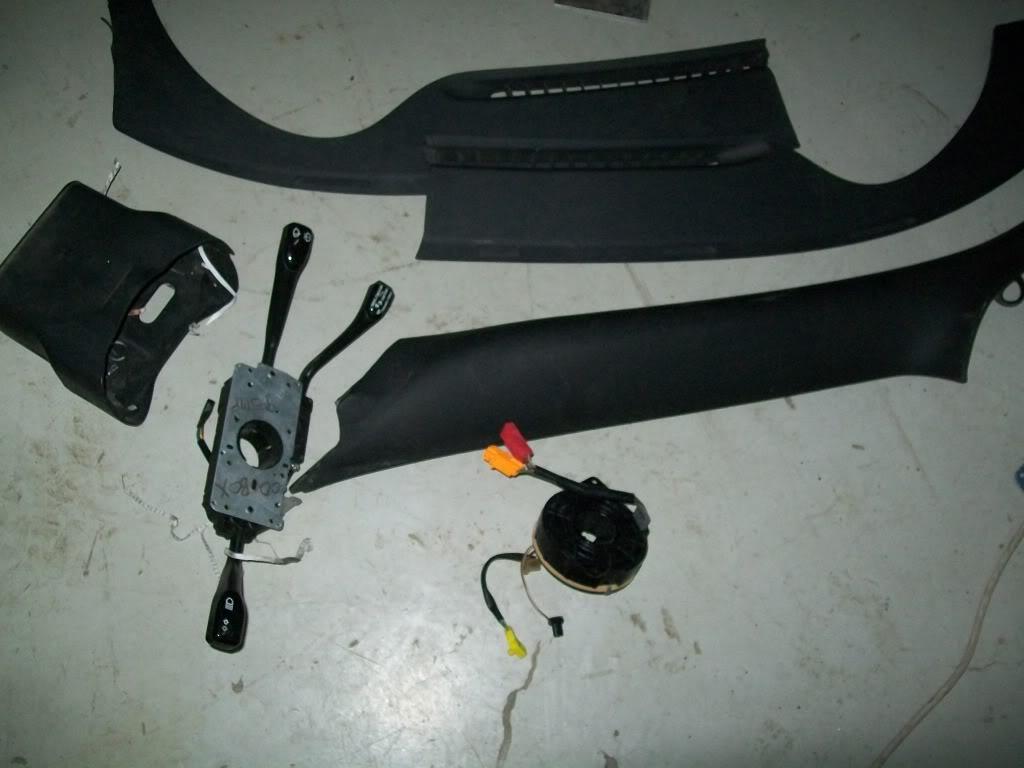
i'm kinda bummed out cause i didn't start it and now it'll take a while before i do ,,,, but things happen for a reason i guess
so , no checking for fuel system leaks next time , but i will try to :
- get a new battery in
- get the pump out
- finish the steering column and wheel
- then finish the door panel/ a pillar / defrost vents
- engine compartment harness.
12.30.10
i managed to get some stuff done last night ,
i bought a nice big battery and dropped it in to replace the old dying not holding a charge one i was using , i also got cracking on the harness deal , got most of the plug done , just need to run the wires to the sensors.
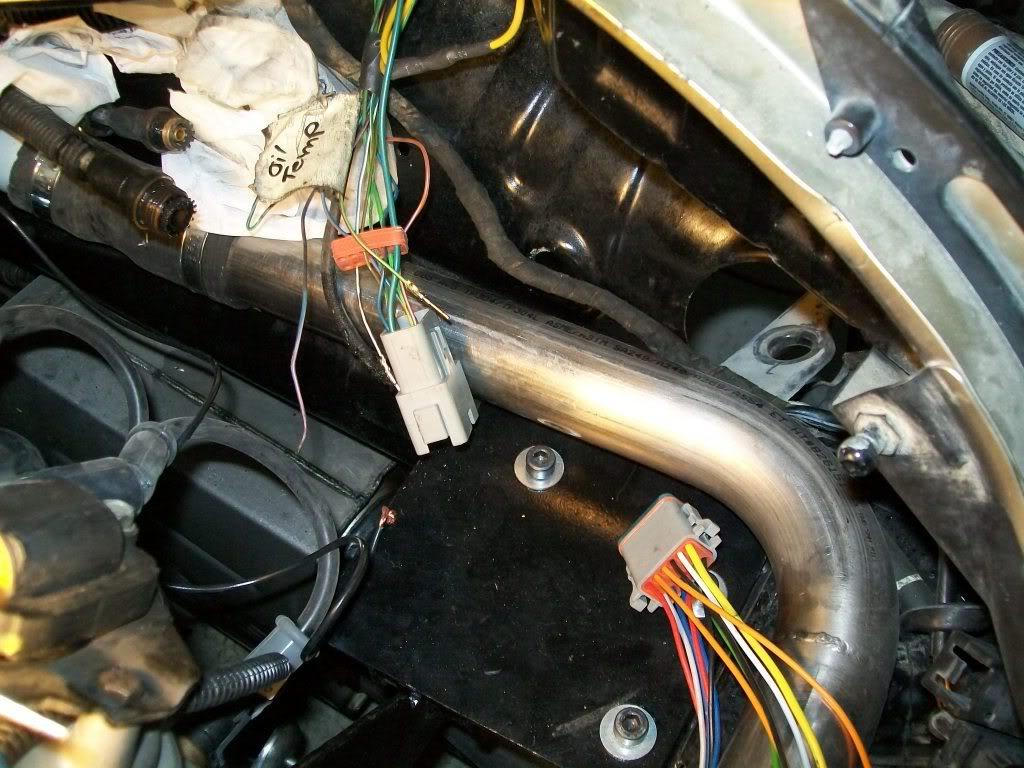
also got working on the fuel pump deal , i managed to take it out as per marky's instructions , but upon touching it plastic hoses started snapping left and right
here is how it looks after i took it out :
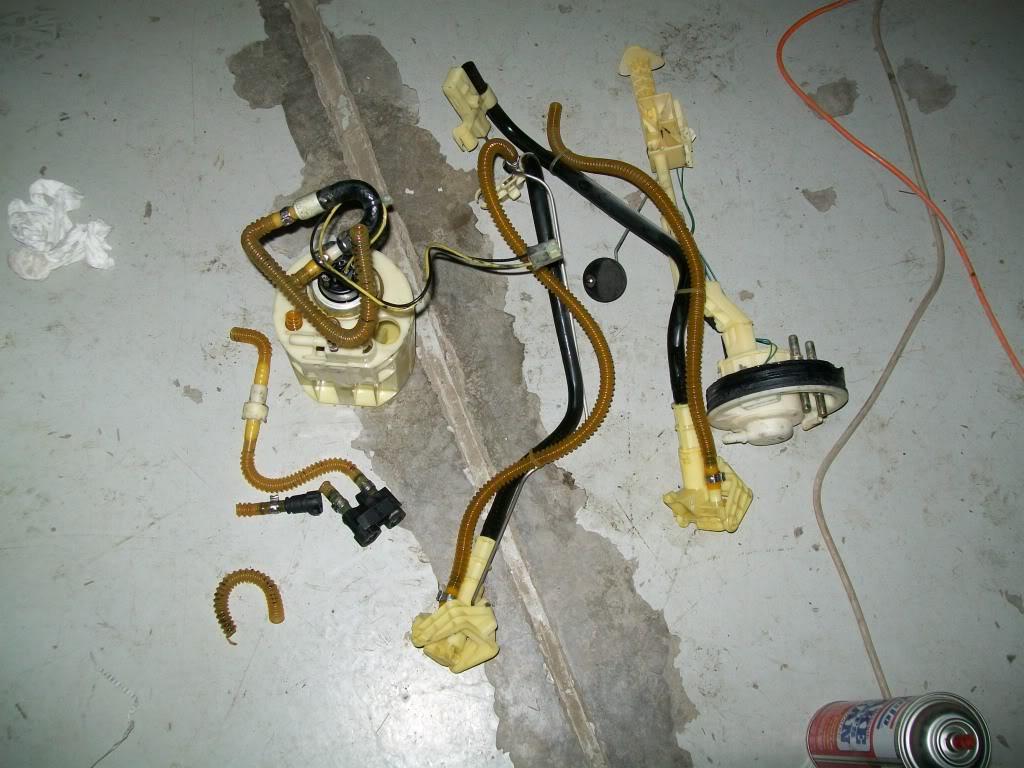
and after fanaggeling with it a bit i got the pump itself out :
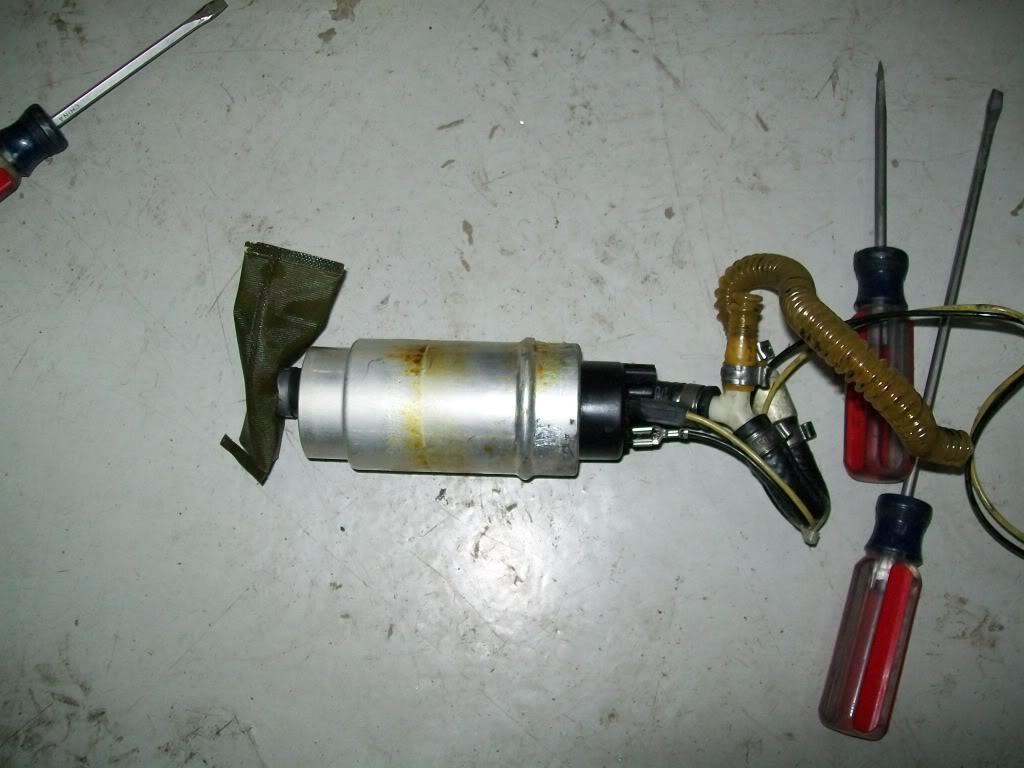
its a bit bigger than the walbro 255 and smaller than a 044 pump , but i think an aeromotive 340 should fit finei guess, i just have to do my research. off course i did take a look at fitting a bosch 044 pump in there , and it can be done with minor trimming of the bucket , here's how it looks: ( pump looks much bigger in the pic than it i really is )
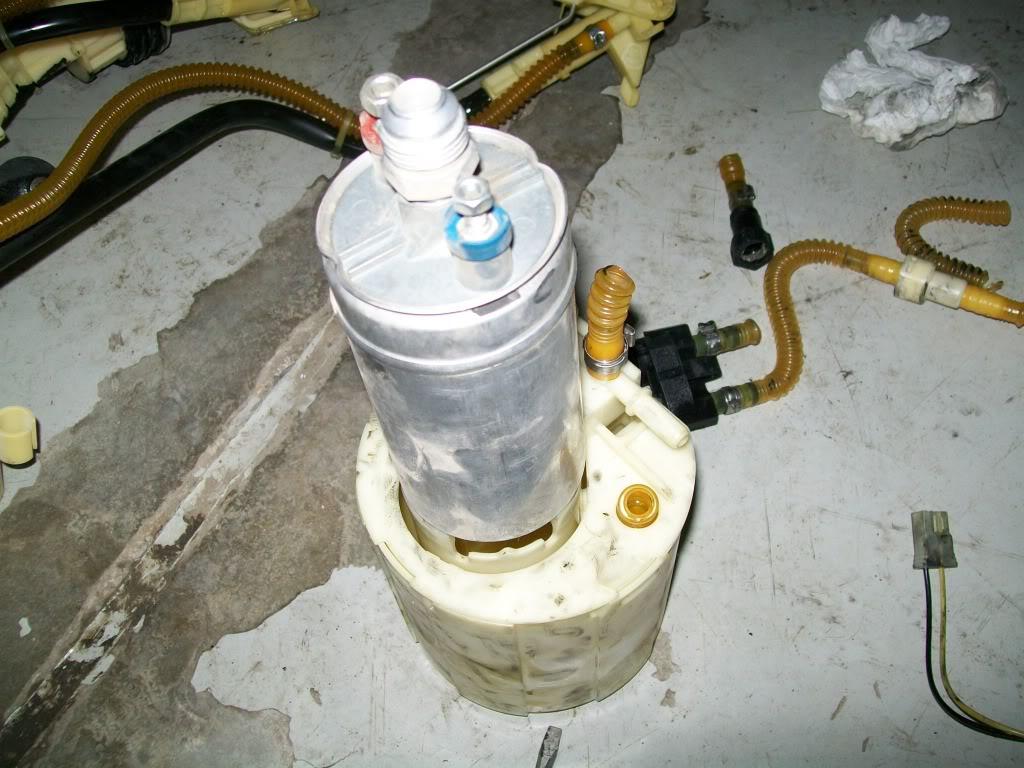
so i started trying to fix this mess , first order of bussiness was replace all the crumbling accordion plastic hose with proper fuel injection rubber hose , and while i was doing that i noticed that at the bottom of the suction tubes porsche installed what seems to be a prefilter , only problem is that that thing is tiny ! i'm thinking this would be a restriction when pushing the fuel system later . so i decided to remove them , here is what i'm talking about :
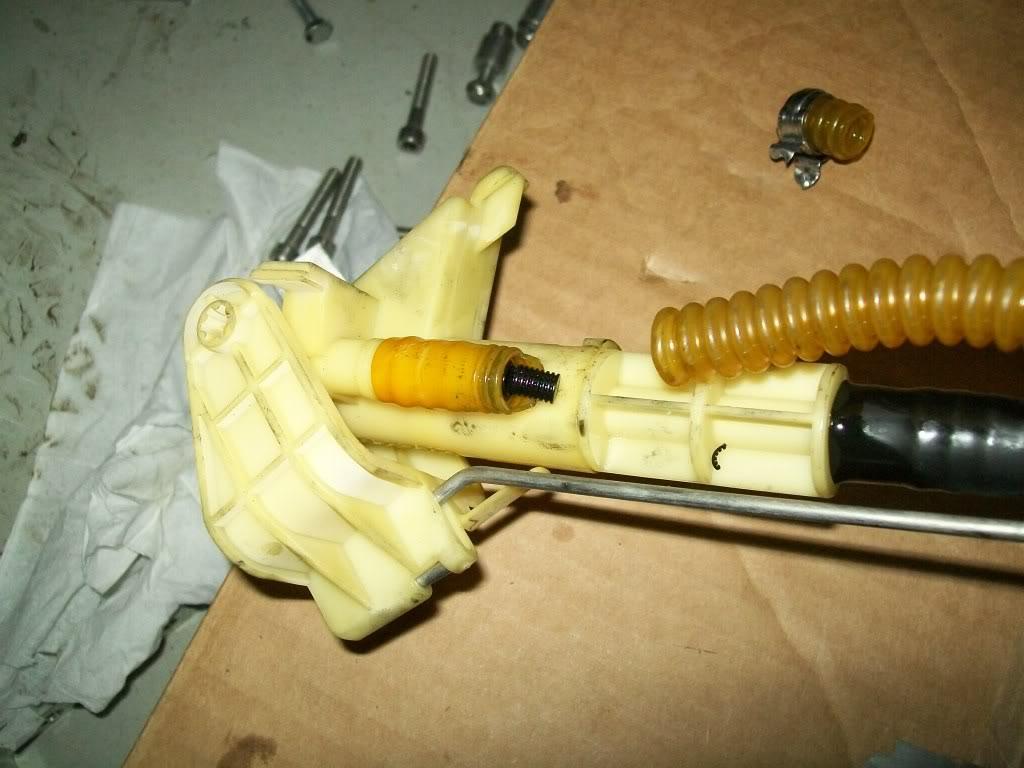
and after a few cuts and a hose clamps i got this :
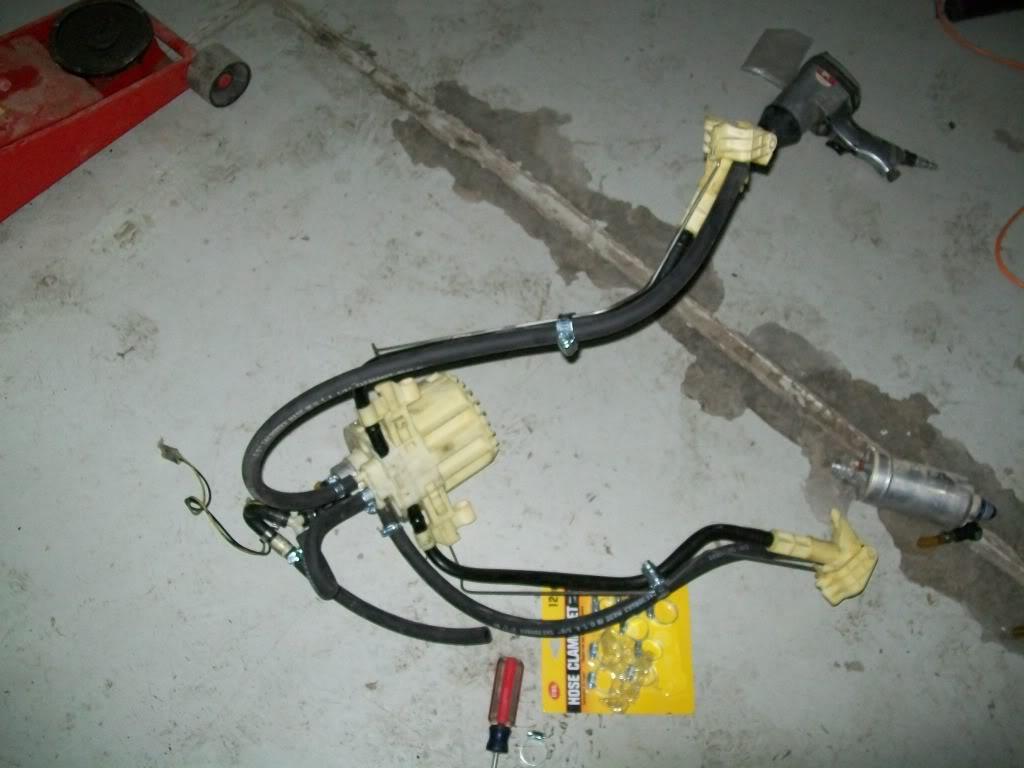
all i have to do now is get a new pump and connect it to the hoses i made and call it a day ,,,, that and replace the deteriorating sending unit / tank gasket .
also figured out the fuel pump priming thing ( after spending close to 30 minutes searching for the 3 test lights i have in the garage - i swear the mice here are fooling with me ) , as it turnes out i tapped into the wrong relay for the ignition on source , so after figuring that out i had to run a wire to under the dash to the fuse center and now it primes with everytime i cycle the ignition and stays on during starting .
01.04.11
i decided to make sure the pump is working so i dropped it in and hooked it up ,filled the tank with 10 gallons (i still have to put the sending unit gasket when it gets here) the good news is that it works the bad news is that the rails leaked , so i had to fix them ,,,, which meant new rail brackets and a new 90 deg -8 hose end on the back of the intake . sooooo ,,,, after getting my shirt soaked with fresh gas and having the garage turn into a giant fire hazzard , and at exactly 12:49 am 5th of jan 2011 it came to life
i still have to verify i'm getting oil pressure , and still have to install the powersteering pump as well as other stuff , it still has a way to go before i can drive it , and even longer before it can be called done .
one thing it is for sure ; not quite
well now that i am sorta fully awake and the effects of the fumes wore off , i can reflect on last nights events
first off, when i came to add transmission fluid i found out that the transmission already had it! they shipped it full of oil , i'm sure that the shipping company would have reaaaallly approved of that
and since the only method i have for reading the oil pressure is through the stock porsche guage, i have to finish the mini harness as soon as possible in order to verify oil pressure.
I also just remebered that i didn't plug any of the ports on the intake manifold just behind the TB , which explains the high idle and surging i guess.
as for the cooling system , i'm still waiting on filling it up untill i get the porsche coolant sensor ( should be here any day) and figure out where to mount it . and i just bought som aluminum tubing which i'm planning on using as hard line under the car for the heater hoses as well as for the new routing of the A/C lines.
so next up :
-bolt in the power steering pump and the new hard line i made
-get a serpentine belt
-finish wiring the mini harness ( i swear this thing has curse on me , its just a few wires i have to connect but i always seem to find a way not to do it )
-fix the ABS wire that is cut on the driver side rear corner so i can get one more warning light to turn off ( i got a list for those too )
right now i just want to start it again and rev it just to feel good
01.05.11
i worked on it abit more today , found a few oil line fittings loose ( forgot to tighten them) and i hooked up the oil pressure sensor . i also plugged the O2 sensor holes and fired it up again just to see if i got oil pressure ,,,, the good news is that the car sounded real good with the two holes plugged - just like a vette with an aftermarket exhaust , the bad news is the guage didn't register anything
i took the valve cover off and checked and it was dry , so i started it it again and let it idle for a bit but still no oil to the rockers .
i'll try to get a decent external guage on the engine and see what it says , if still no oil pressure i'll drop the pan and try to stuff the pump with grease .
i guess this is to be expected when you run an external oil cooler and remote filter while using -10 hoses to connect them to the engine .
i also got the power steering pump pressure hose made , and i should have it as well as the pump in the car by next time .
01.08.11
well i took another swing at it : i got me a new guage , plumbed it where the porsche one was ( on the filter housing) and tryed again ,,,, no luck
so i decided to take the pan off and see if the pickup tube oring was cut or not , and to pack some grease into the pump to help it prime. whell when i started taking the hoses off oil started coming out of them , which indicated there was some pressure. and when i dropped the pan i noticed there were some shavings ( very small) in the bottom ; this got me concerened as to where they came from , it didn't look like bearing material , so just to make sure i took number 7 rod cap off and looked , the bearing looked perfect , not a sigle scar on it. which leasd my to belive there was some pressure but not enough to register on the guage. and the oring looked perfect .
so i thought time to pack the oil pump , so i took the pick up tube off and started shoving grease into the pump . off course i did look inthere to see if there was any sign of damage to the teeth of the pump but could not tell from the angle i was looking at.
i then proceeded to bolt everything up and put 8 quarts of oil in and fired it up again , but still no pressure
after bangining my head on the wall for a few minutes i remebered that i forget something ! i should have checked pickup tube clearance (pan to pickup strainer) before i bolted the pan on.
so now i'm stuck with no oil pressure but with a running engine ,,,, talk about a tease !
so the plan now is to figure this out in the most efficient manner , so first i compiled a lift of possible problem areas or issues that can lead to this , please feel free to add in what ever i missed :
- oil pan to strainer clerance
- oil pump oring
- oil pump not packed with grease to help prime it
- relife valve stuck on oil pump
- bad oil pump lobes or teeth
- pump did not seat well on block ( i used spacers on it to clear the double chain- which could also be the source of the shavings)
- barbell missing on back of block ( i'm starting to doubt myself)
- plug missing on front of block
so inorder to make this as painless as possible ( im really getting sick of removing and installing the balancer ) i'll be doing the following : ( see i'm using what i think i learned in collge here ! - process engineering and effeciency crap )
- drain the oil - again
- drop the pan and check for clearance using some clay
- if clearance check ot ok , move on to the next step
- remove the rear bumper and lines to gain access to the front of the engine
- remove every thing from the front of the engine ( damn balancer, water pump , alt.)
- check that the plug is in there
- remove oil pump and inspect , and most likely replace it ( melling) wth an OEM 6.2 pump and pack the crap out of that one
- put everything back in place
- go do some good deeds; give to the poor , help old grannies cross the street , be pias (sp) for a few days and pray like there is no tommorow that i get some oil pressure
- check for pressure again .
now if all that fails then i have a major issue , which means i have to drop both engine and trans to fix the barbell .
i'll be doing this probably within the next week or so , cause i have a race in bahrain coming up and the camaro needs some love
forgot to mention that i finally got the power steering pump and lines in :0 so that gets scratched off the list !
01.11.11
well the small issue just got a bit bigger ,,,,,,
i dropped the pan again and checked for pickup tube to pan clearance and it came out to 1/4" which is pretty good . so i took the balancer out again , pulled the timing cover off and took ther pump off , i also checked it the spring was in there , and it was. so i swapped the oil pump with a factory unit that i packed with grease and bolted that in.
i filled it with oil again and fired it up again but no luck , still no pressure .
onething i noticed is that when i dropped the pan the first time , i saw grease coming out of the hose going to the filter , so it did make it at least to the hose .
i also took out the filter and found grease in there but the hose going from the cooler to the pan had no oil in it .
so this leaves me with one last thing to check , which is the dumbell plug at the rear of the engine, which means i have to drop both trans and engine inorder to get to it.
but as i was heading home i thought of something, i was wondering if i can check to see if the dumbell is in there by removing the oil galley plug at the back of the engine ( kinda where the crank sensor would be but on the other side) and taking a peak . what do you guys think?
this is really pissing me off now , it is so annoying to know that you are almost there and then having to rip it appart.
01.14.11
well some goosd news to report : i swapped the oil lines going to the remote pump ans sure enough there was oil pressure but not content with that i had to make sure so i took the valve cover off and let it idle a bit while raising the idle a bit and a few seconds later i got some oil up there !
i got a vid of it ideling i just have to upload it and will post it soon .
i still have to take out the damn balancer again!! the car is leaking from the front main seal , so i have to loosen the cover bolts and and center it then put everything back again .
and funny how the human brain works ,,, you would think mine would be busy thinking about how to fix the oil pressure problem and other current issues ,,,, but not the rock between my ears i think i now know where and how to mount the twin turbos while still retaining the current mufflers ! but more on that later
so lets see,,, next up is :
-fix the front main seal
-get a serp. belt on there,
-fix the ABS wire under the car
-start routing the AC line
-bleed the brakes and clutch
and as soon as i get the parts i ordered in i can :
-seal up the fuel sending unit and call the fuel system done
-connect the heater hoses under the car to the pump
-find a place to install the water temp sensor and wire it and call the cooling system done
-install the tail lights
-start messing with the rear bumper
-finish the interior by installing the door panel, steering wheel, rear panel, and seats
-other assorted odds and ends
01.20.11
i guess i can scratch the clutch and brakes off the to do list ; i finished bleeding the clutch hydraulics as well as the brakes .
the front airdam came in so i slapped that on :
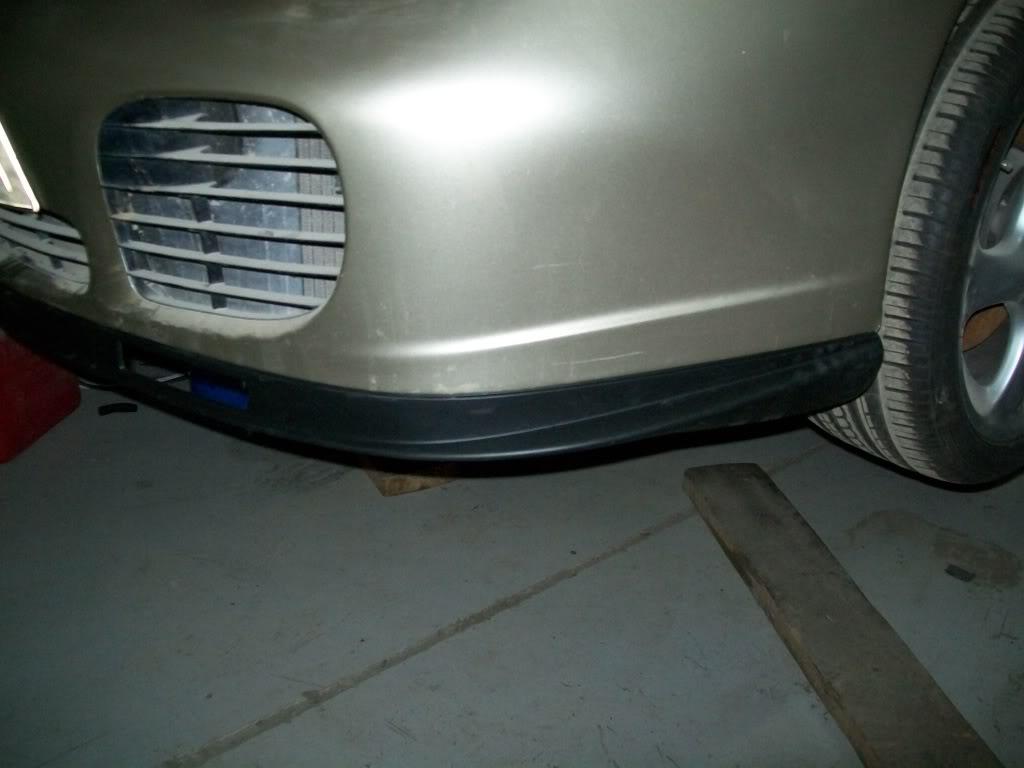
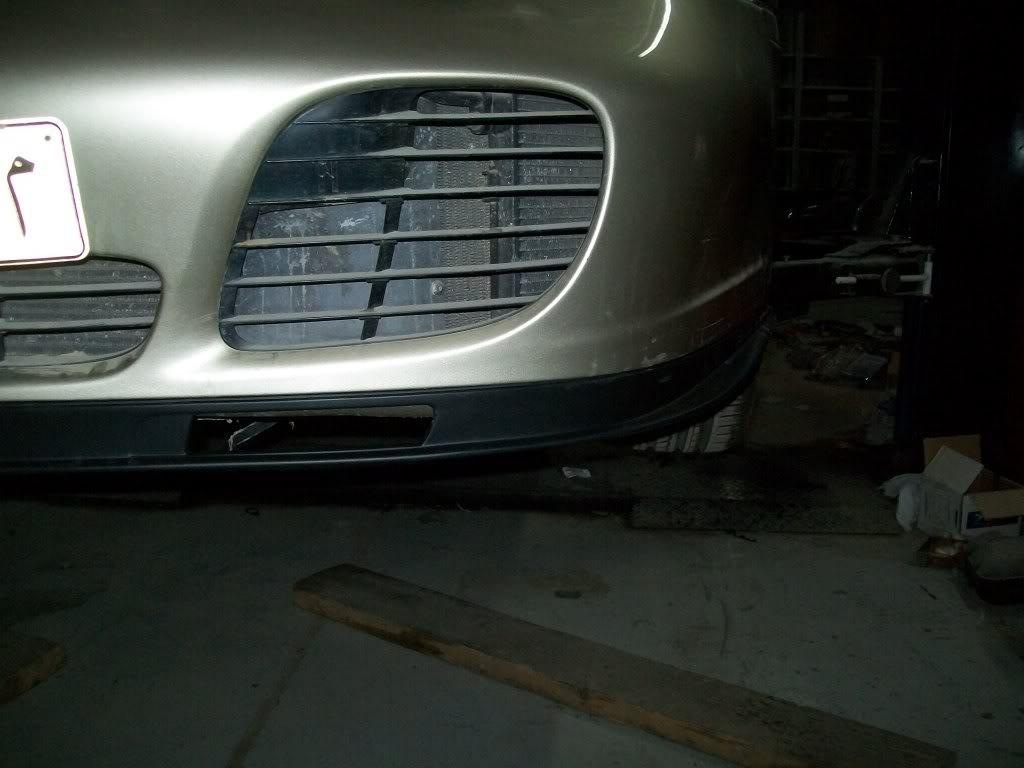
and then i decided to place the engine cover/ hood/ trunk or what ever you call it on the car and adjust it's latch. i thought now would be a good time to do so since i have to see how much room i have with the rear spoiler rams ( they take up some space and stick out quite a bit in the compartment) cause i should start working on the intake tube(s), any way here is how it looks on the car :
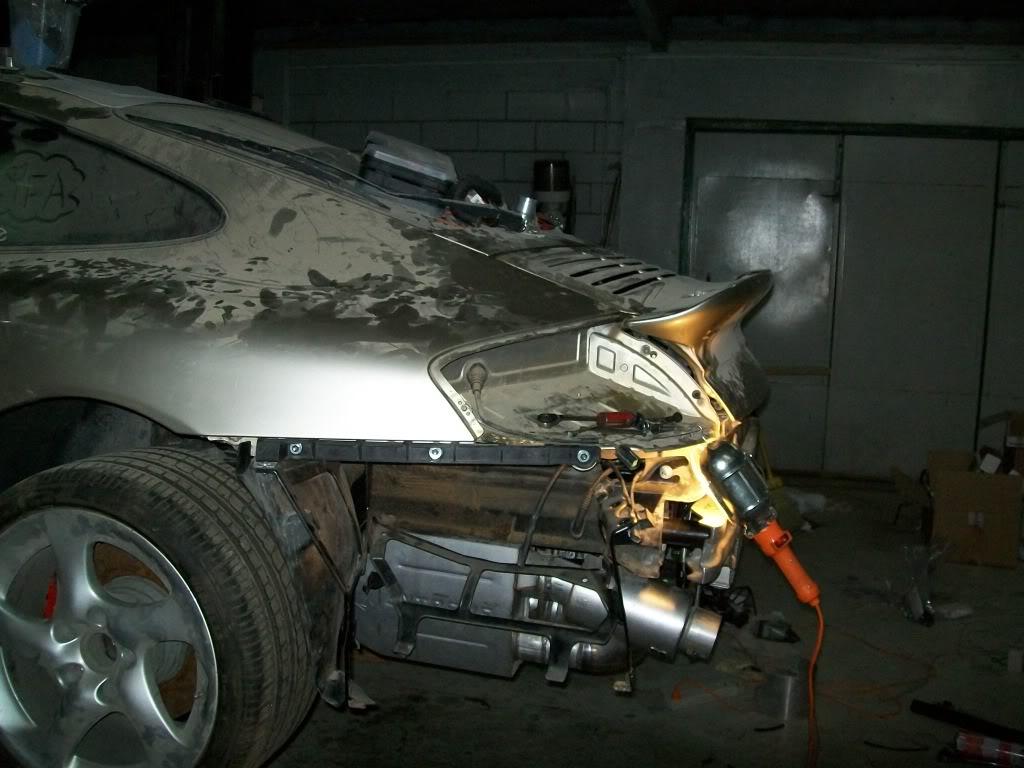
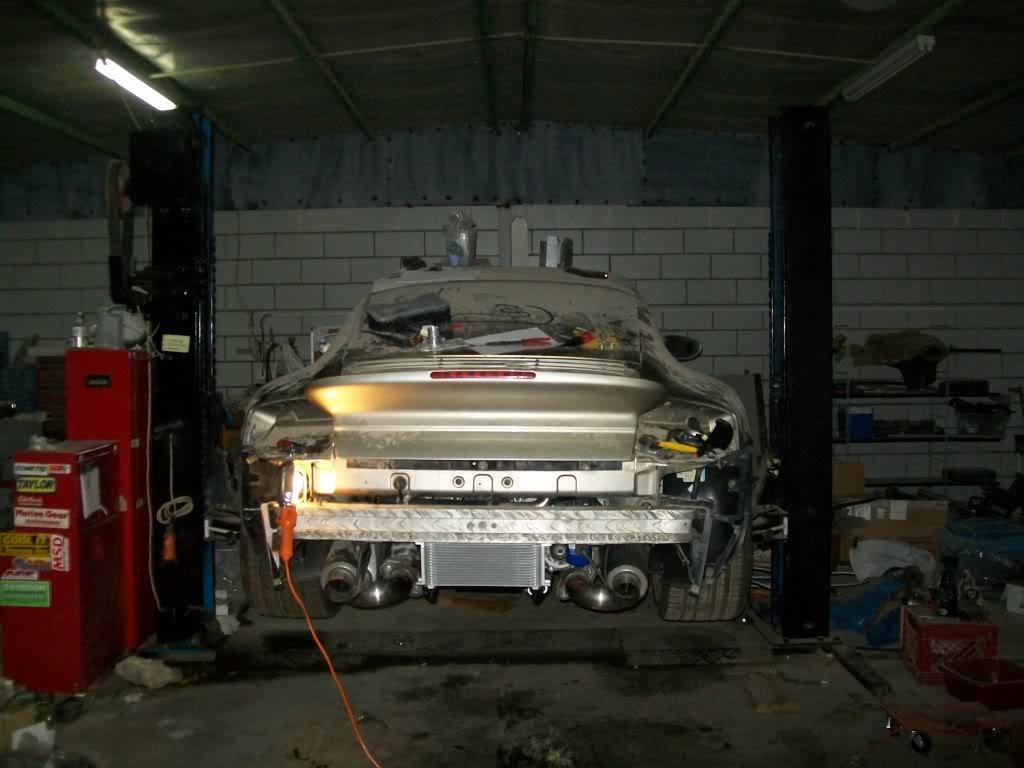
and i took the powersteering pump off again , this time i wanted to chage the way i had the pressure hose routed , the way its set up now is it makes a loop to connect both ends and i really didn't like how it looks , so i'll be redoing it in favor of a cleaner lookign setup ( more pics soon ).
and after some thinking ( that rarely happens ) i noticed that the only thing stopping me from starting the car and driving it is just filling the cooling system , but i don't want to do it twice so i'll just wait for the coolant temp sensor to show up as well as the heater hoses so i can plumb them all in and then call the coolat system done.
so untill those parts show up , i'll be doing:
- door panel
- defrost panels
- A pillar cover
- front main seal
- new pressure hose for the power steering pump
01.27.11
got to spend some quality time in the garage today
first off i got the water temp adapter fitting back from the machine shop, this will enable me to fit the porsche sensor on to the LS engine's head :
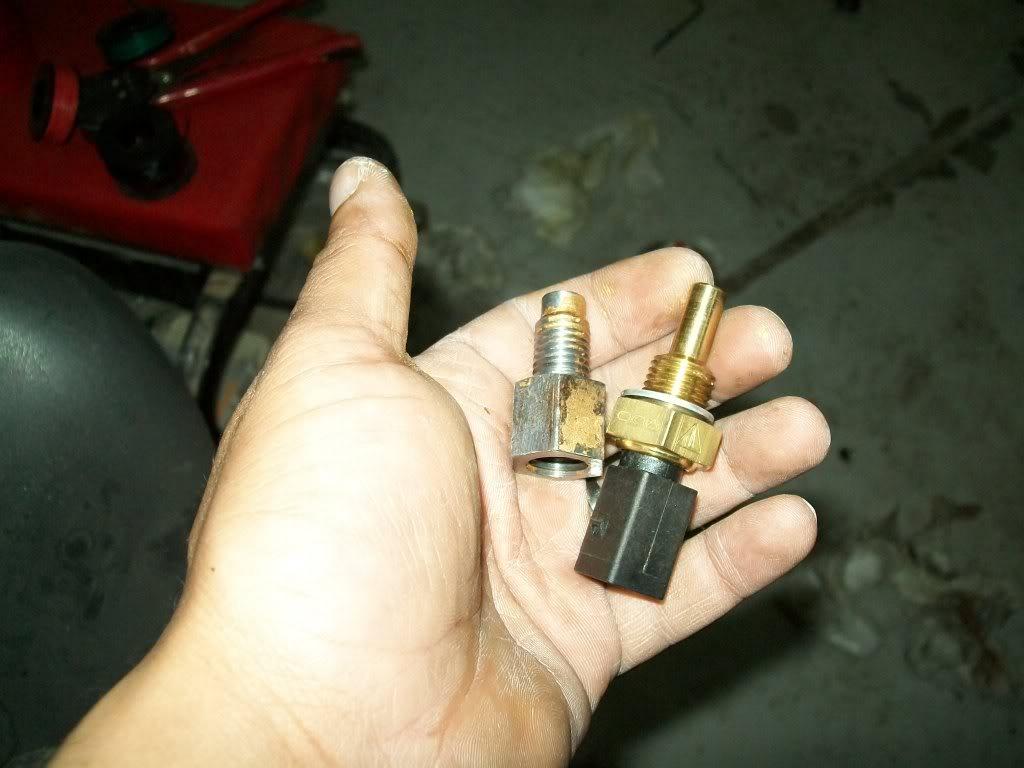
also got the new shortened powersteering hose and installed that in , which fit great by the way , and i also mounted the pump and bracket to the head, but more on that later
and the new trigger wheel came in today, just need to drill it and mount it then make a brace to hold the sensor :
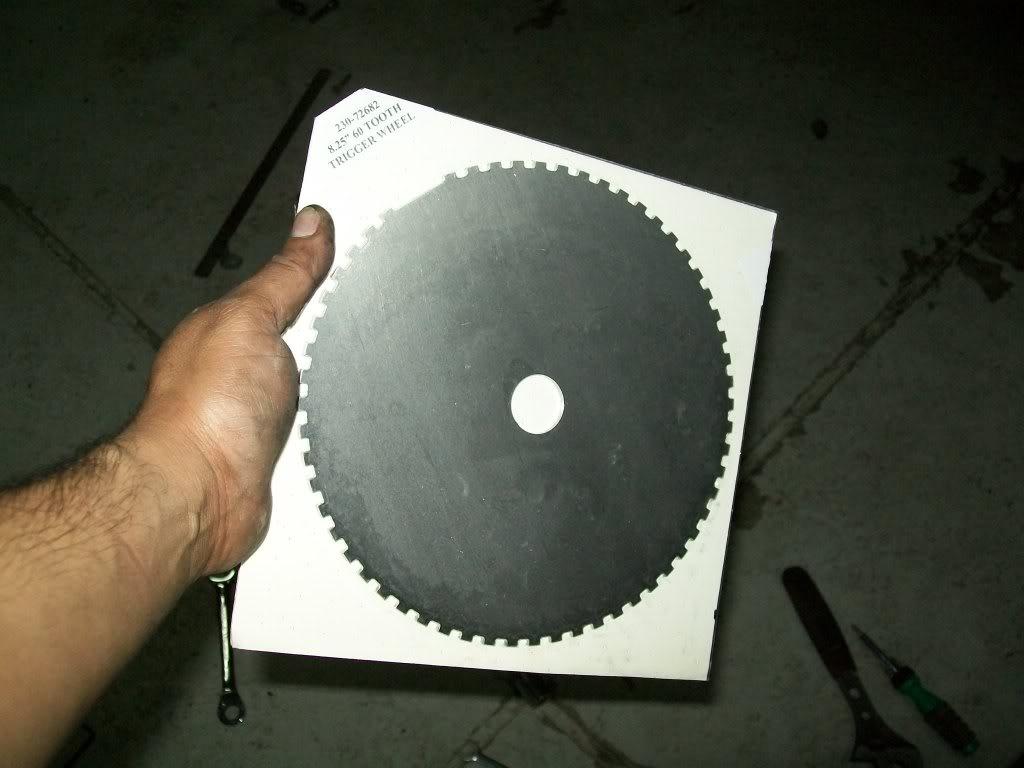
after that i installed the sending unit gasket and tightened the retaining ring, so now i can call the fuel system completly done
i also connected the tail lights and noticed that the work funny; as soon as you cycle the ignition the inner most light works and does not go off and they are very bright ( brake light ), if you turn the lights on the lights the center ones come on and when you turn the fog light on the outer most come on, but the brake pedal does nothing (could be that i didn't connect the switch ) .
can some one tell me the assignment of the lights in a turbo tail light?
then i decided to start filling the cooling system and power steering ( bad idea ) coolant went smoothly with no leaks , and so did the powersteering up untill i started it and then it started leaking from the connection from gm line to the porsche line, specifically the porsche connection where the hose goes into the end peice . it seems that the engine fire ruined the oring that seals everything . i managed to fix the pressure side ( well at least i think i did ) but could not do so on the return side.
here is what i'm talking about :
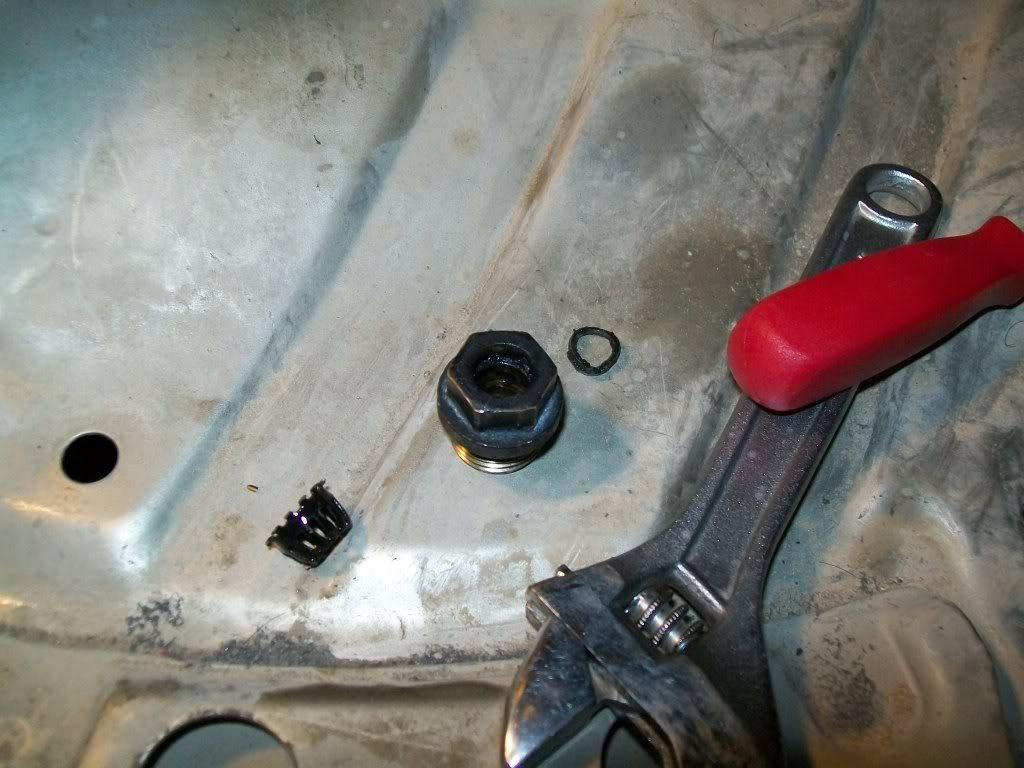
anyhow , i started the car and it had its first little leakypoo
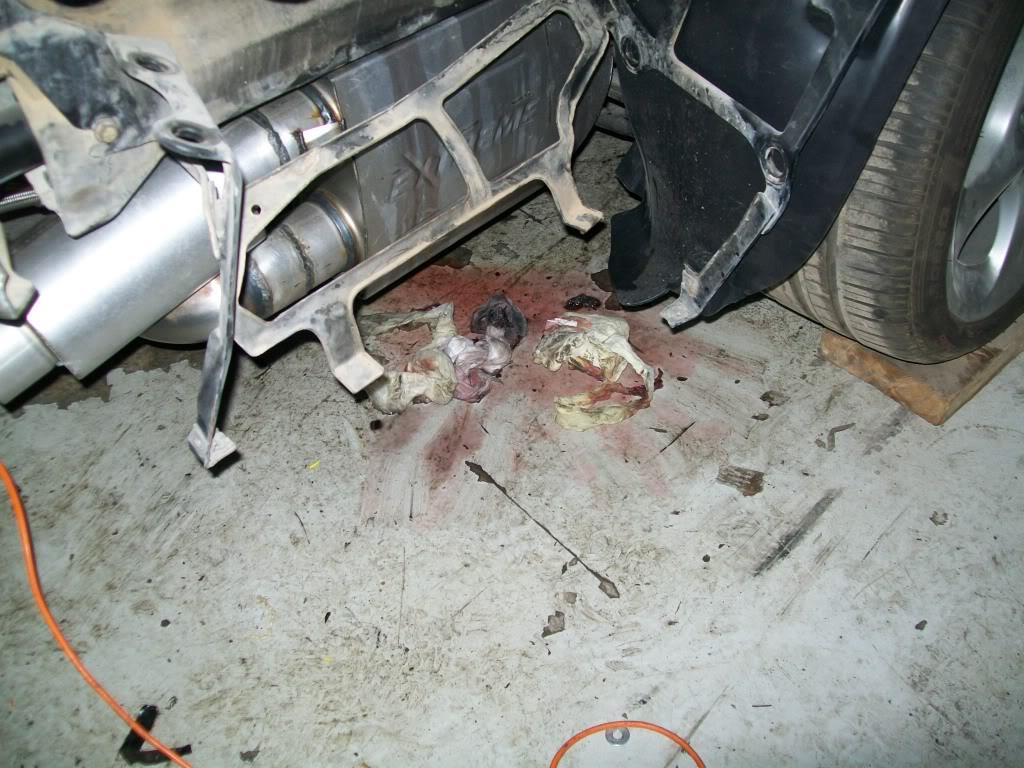
01.29.11
02.14.11
i didn't get to work on the car very much lately , been busy with the camaro and work and other stuff, but i did manage to mess around with the intake tubing for a change
i decided that since this car will be N/A for the time being , then F/I once i get all the bugs worked out , why not build an intake tube that will work with both setups. i was planning on running one tube to the side and slap a filter on it , then i thought , why not TWO !
so the plan is to make a Y ( more like a T) right in front of the TB that branches tot he sides and goes where the intercooler outlets would be . and since there are no intercoolers , thats where i will run the tubes to and connect the filters at. this way , when i put the intercoolers on , its just a matter of connecting them to the intake tube
anyhow , here is what i got done:
fist off i got a 3" dia. aluminum U bend and cut it in half , then scalloped the top part to but the two halves together:
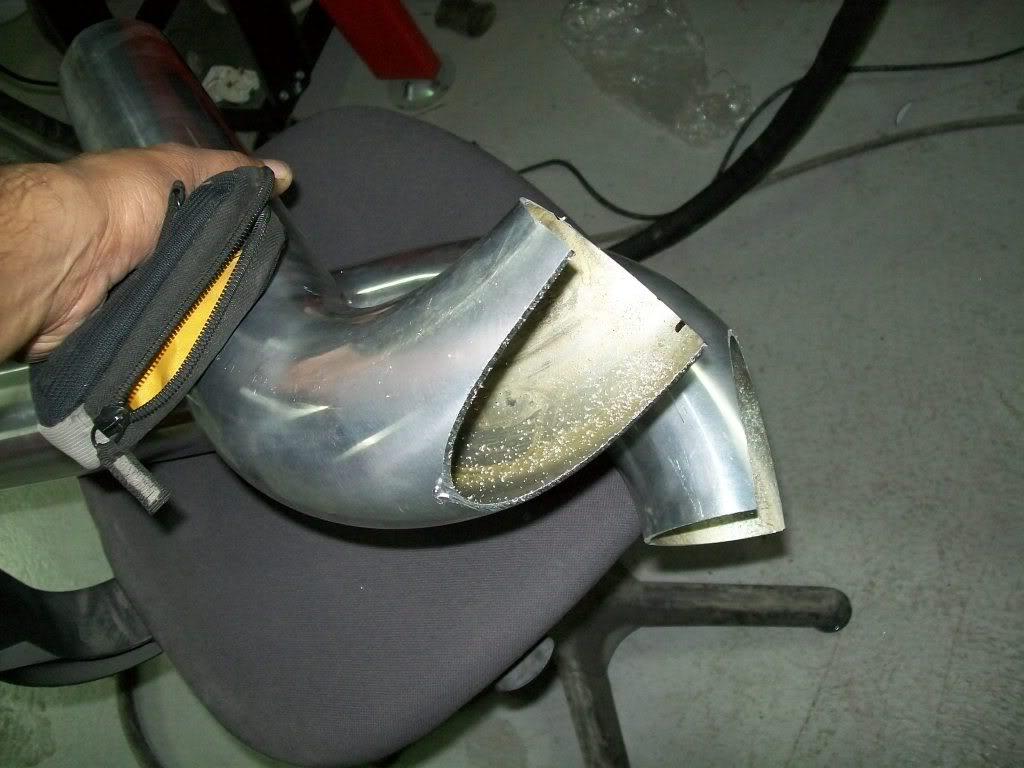
i then fired up the tig welder and set it to weld alu. and proceeded to weld them up to make the Y :
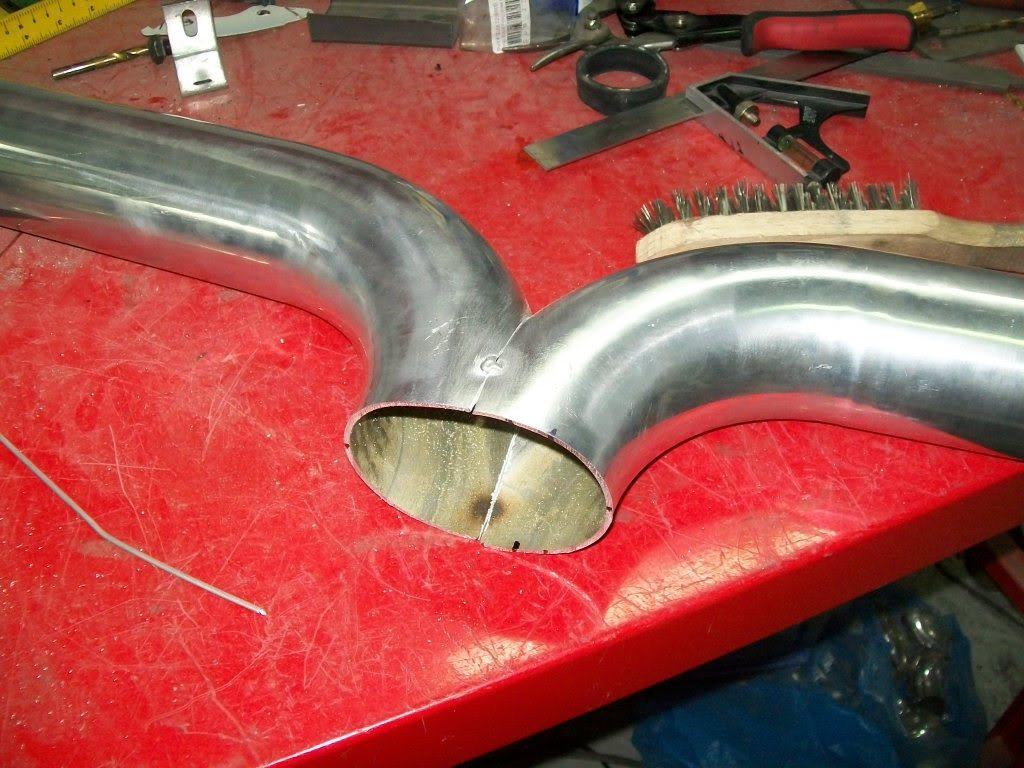
and here's a close up of my handy work
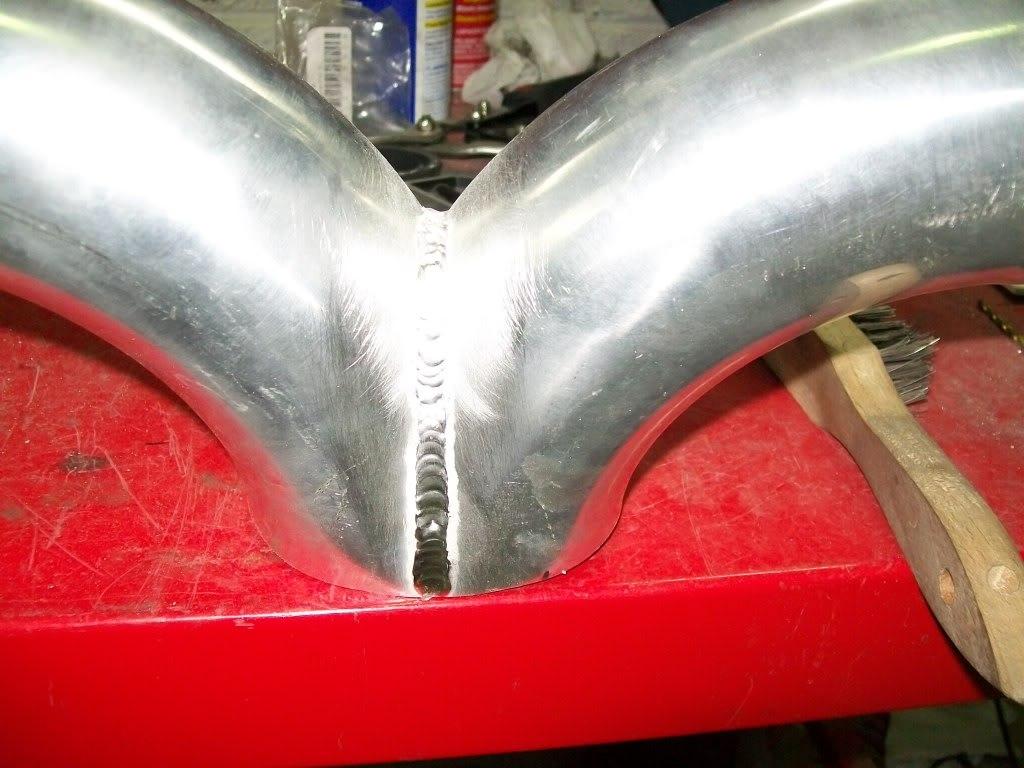
and thats about it
i think i still have to add a few bends so it better fits in the engine compartment , but thats for another day
other than that , the battle to reclaim my garage from the mess i made is progressing well: i managed to clean half of it
( it more like like an archeological dig rather than a clean up: i found stuff from '99 )
02.19.11
not much progress made , but i did manage to connect the alternator and now its charging but right now i have an issue with the alternator light ( charging light ) not going off in the dash : i know the porsche uses two wires tothe alternator : one is the charge indicator and the other is the signal , i tried connecting them and i still get the light in the dash ,,,, marky i need your brains
another thing i'm messing with is the oil pressure guage in the dash; i can't get it to work from the schematics i have the sensor has two wires going to it : one is the pressure signal and the other is the pressure switch ( low pressure warning light) and the sensor is self grounding. why is not working ?
another thing that got me confused is the driver side window , the window rolls up and down ok but i can't get it go down all the way , it always leaves about an inch of glass showing when you roll it all the way down ( as opposed tot he othe side where the window goes down all the way ) . when you roll the window down all the way it hits a stop at the end of the rail, i know there is an adjuster screw on there but that screw is only for adjusting how far up the window goes. any insight would be helpfull
other than that , nothing much going on , i'm going to remove the powersteering hard lines when i get the car on a lift again and solder on some propper JIC or AN fittings on there instead of the leaking ones i got there now. that should put an end to the power steering delima
also on the to do list is the front main seal , which is still leaking ,,,, because i still didn't fix it
i thought about it , but there isn't any as far as i could recall. either way i'll be grounding the sensor tot he frame with a wire as soon as i get back into town .
and since i was on a road trip all by myself , i had alot of time to think and reflect on the project the only thing stopping me from driving the car around is the leaking front main and the power steering line , if i finish those i can drive the car and monitor how well the cooling system works and what not .
so the plan now is :
- fix the main seal
- fix the power steering hose
then worry about the other stuff
on a side note ,after reading a thread about it in the FI section , i ordered a set of stainless turbo headers for a ford 5.0 (cost a whopping $120 ) that i will be modifying to fit on this thing - talk about focusing on the current issues
02.28.11
got the window to roll down all the way thanks to marky's tip, i also put in the speaker in place and then proceeded to put the door panel on , then i found out i'm missing a few pastic rivet thingies that hold the panel in ( no problem there) as well as the storage compartment cover ( on the door). so i need to do something about it . anyway here is how the speaker looks installed ( it has some sort of sound enhansing expansion chamber deal which maked the whole assembly quite huge) :
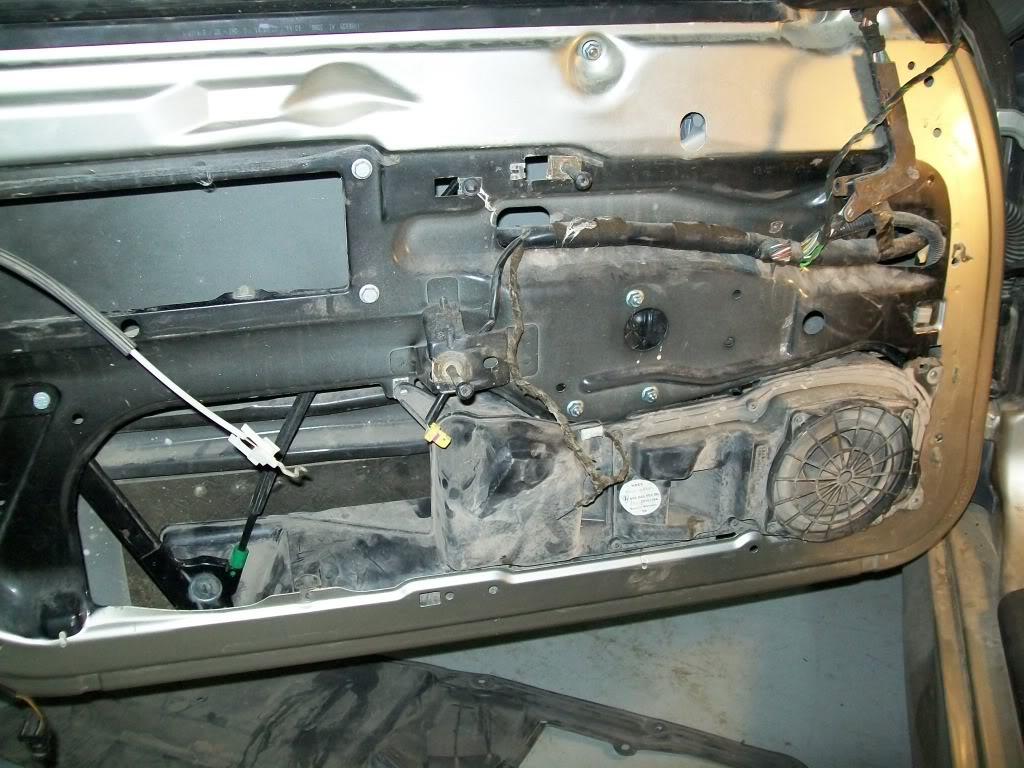
also took the water pump off and the balancer ( again ,,,) so i can fix the front main seal , also will be replacing the passenger side hard coolant hose i made with a 1.5" hard hose and route it slightly diffrently inorder to make room for the intake tubes.
another odd thing i found was this thing ( it was in a bag i used to put parts i found in the car when i got it , any idea what it is? :
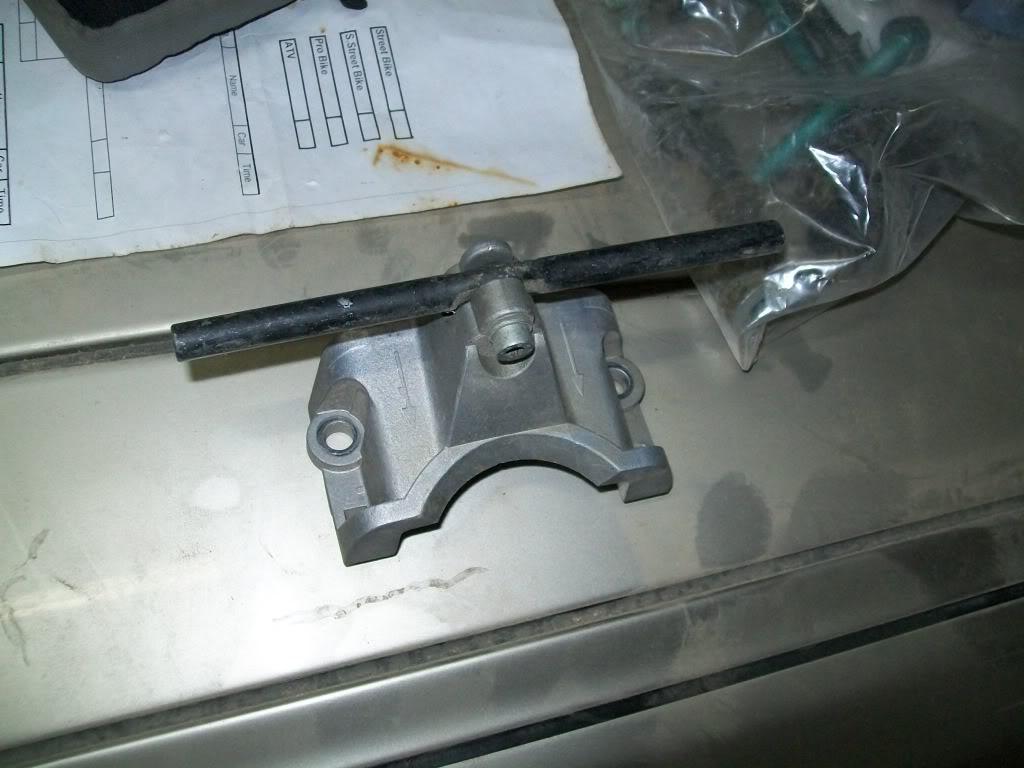
and finally , i got a bunch of parts in , most importantly the heater hoses and a few other things so i'm almost at the point of calling the cooling system done !
03.01.11
i got the trigger wheel back from the machine shop with the proper holes drilled in it :
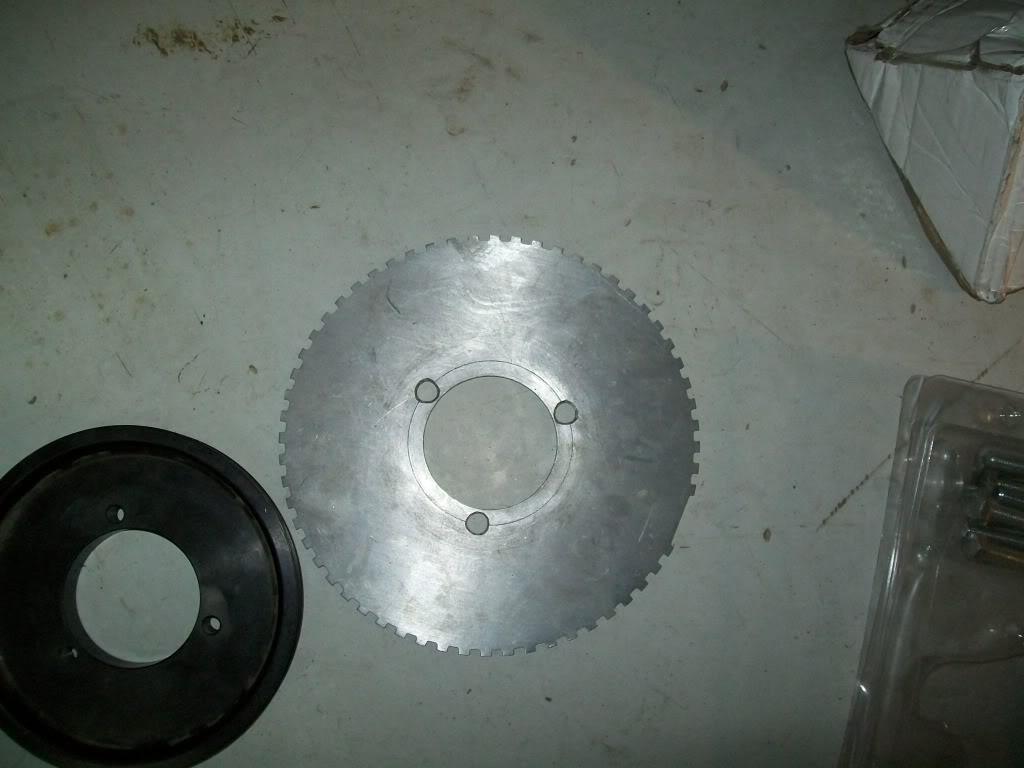
and i also had these made a few weeks ago ; they go between the trigger wheel and the balancer shell because the shell uses counter sunk holes for the bolts so if you tighten the bolts they will try to pull in the balance into the hole and distort it .
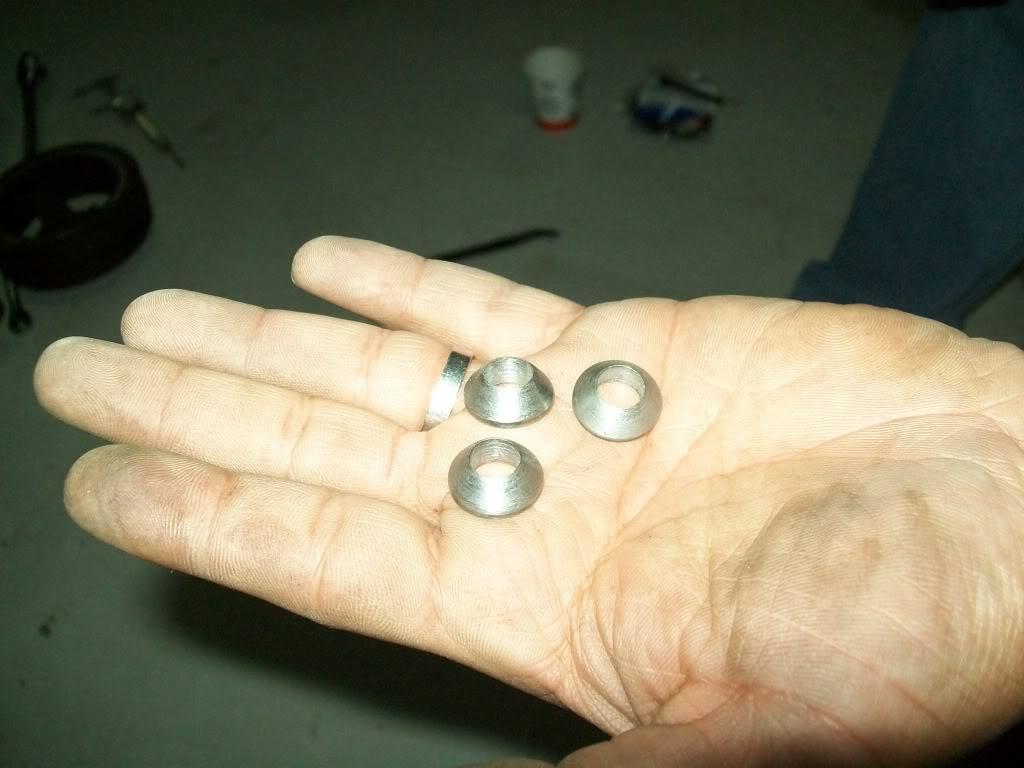
and here is how the the whole thing looks :
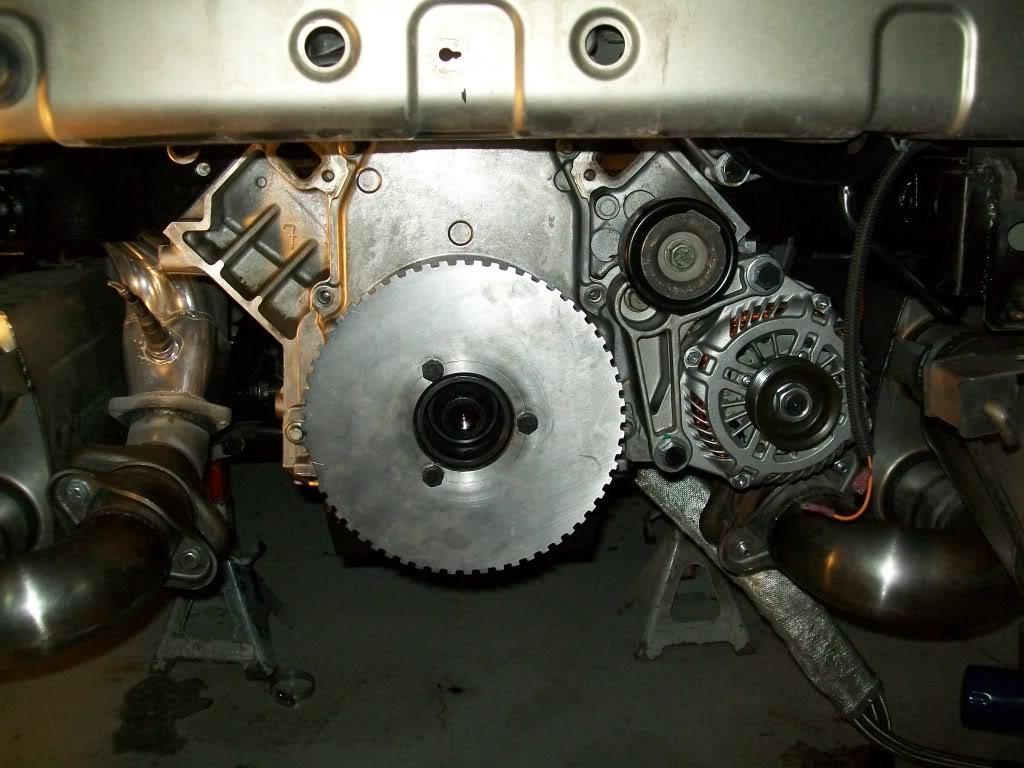
also got the front main seal in , it turns out the leak was because of an off center cover that was caused by the two front hoes in the oil pan ( the ones that go into the timing chain cover) not being aligned with the cover , which caused the cover to be pulled to one side when tigtened . so knowing that , i left the two front bolts off and will enlarge the bolts next oil change .
needless to say , the balancer is back on
and like i said before, the elusive heater hoses showed up
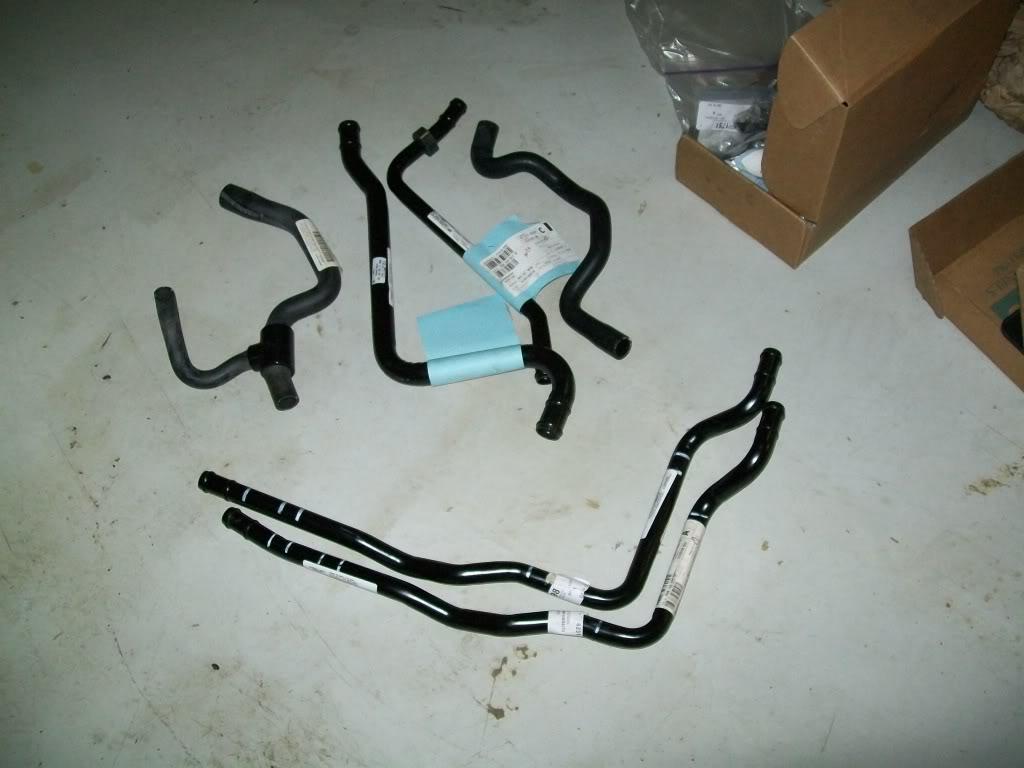
now its just a matter of clamping them on, and redoing the coolant tubes and be done with the cooling system
03.04.11
got cracking on the cooling system again : i decided to swap the driver side coolant pipe with something a bit smaller so the intake tube would fit in there. and inorder to do so i had to replace the thermostat housing with one that fits the smaller tube . i just need to weld a bead on its end and find the correct rubber coupler peice .
i also changed the water pump outlet peice to a better looking and fitting peice , i just need to weld the two peices that form it and place a bead on both ends .
i also fitted the heater hoses under the car and routed the rubber lines toward the water pump outlets , i'll be using stock f-body hoses from the water pump ( wich fit nicely by the way ) to the original lines on the car .
after i'm done with that i'll drop the pipes off at the powdercoaters and be done with that
(sorry no pics cause i forgot the camera )
another thing i did was check if the front main seal leaked or not , and happy to report that its doing ok so far also checked the trigger wheel for wobble or out of roundness and it spun perfect
i also decided to finish the whole powersteering delima once and for all : i cut both hard lines and will be flaring the pressure side and making a new pressure hose from the ps pump to the hard line . the return line will just be clamped on both ends .
so , up next on the list is :
- have the hoses welded up and powder coated
- clamp all hoses in place and call the cooling system done
- make a new pressure side hose to replace the leaky stock one
- flare the hard ps line and connect it to the hose above , and with that the power steering should be done.
- take it for a spin and romp on it
03.06.11
any how here are a few pics of recent progress :
i welded up the updated hard lines and fit them on the car to check how well they fit , and they fit good
i think i'm getting good at this whole welding thing :
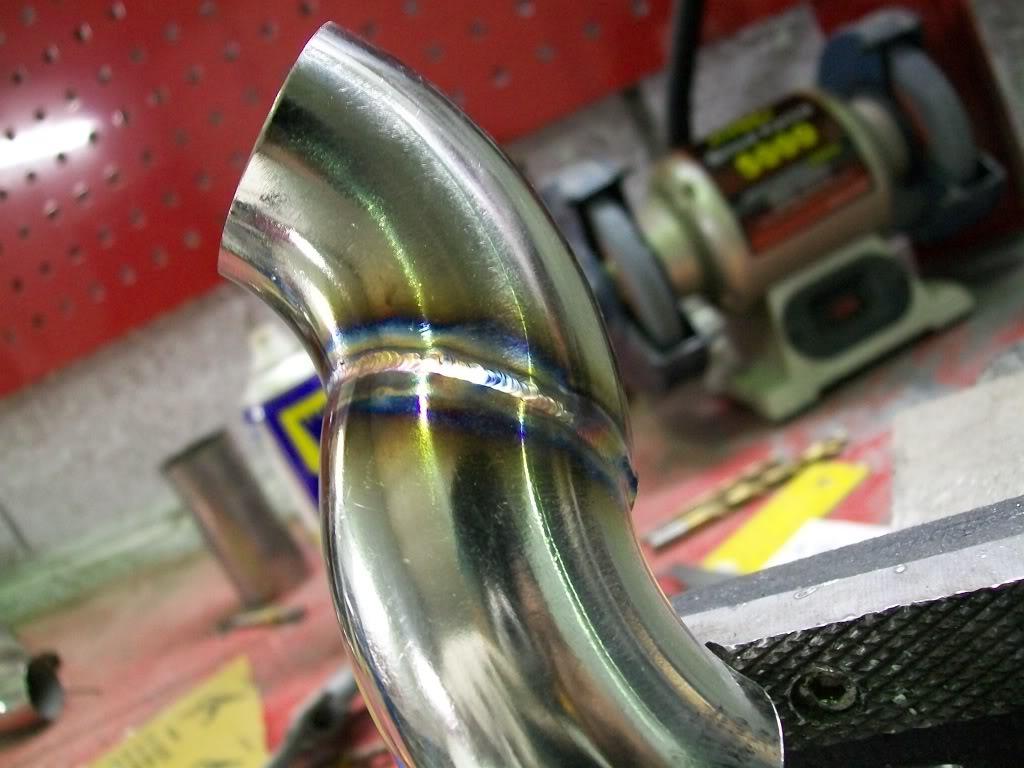
the finished hard lines before powder coating :
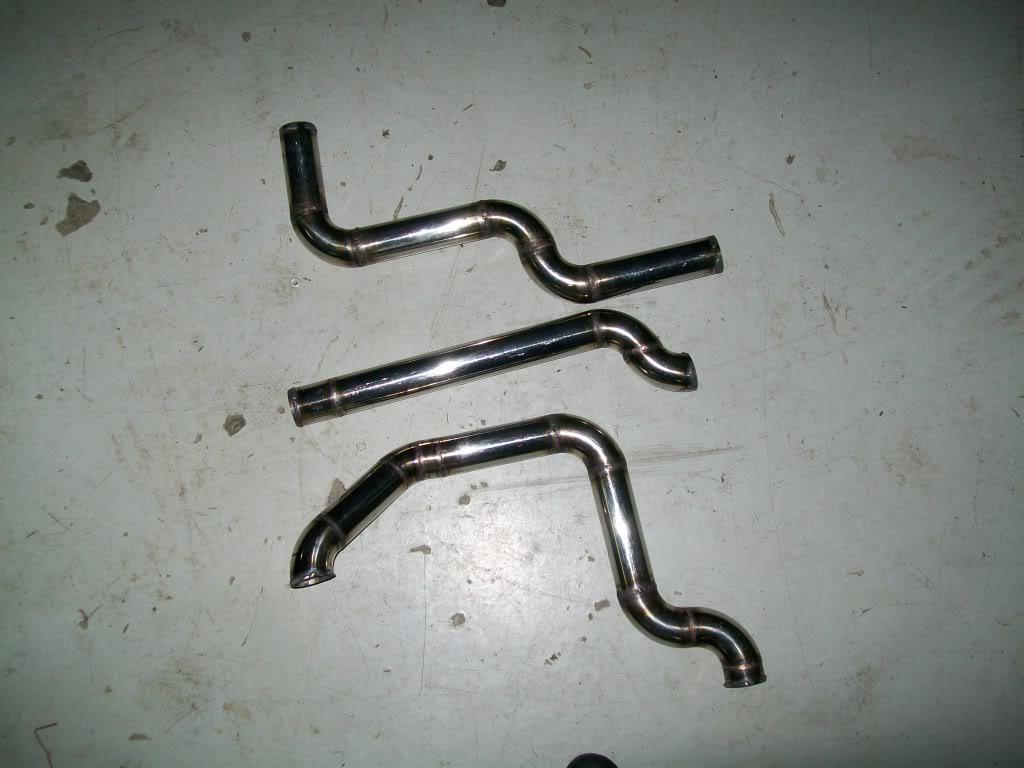
and here is how they fit in the compartment :
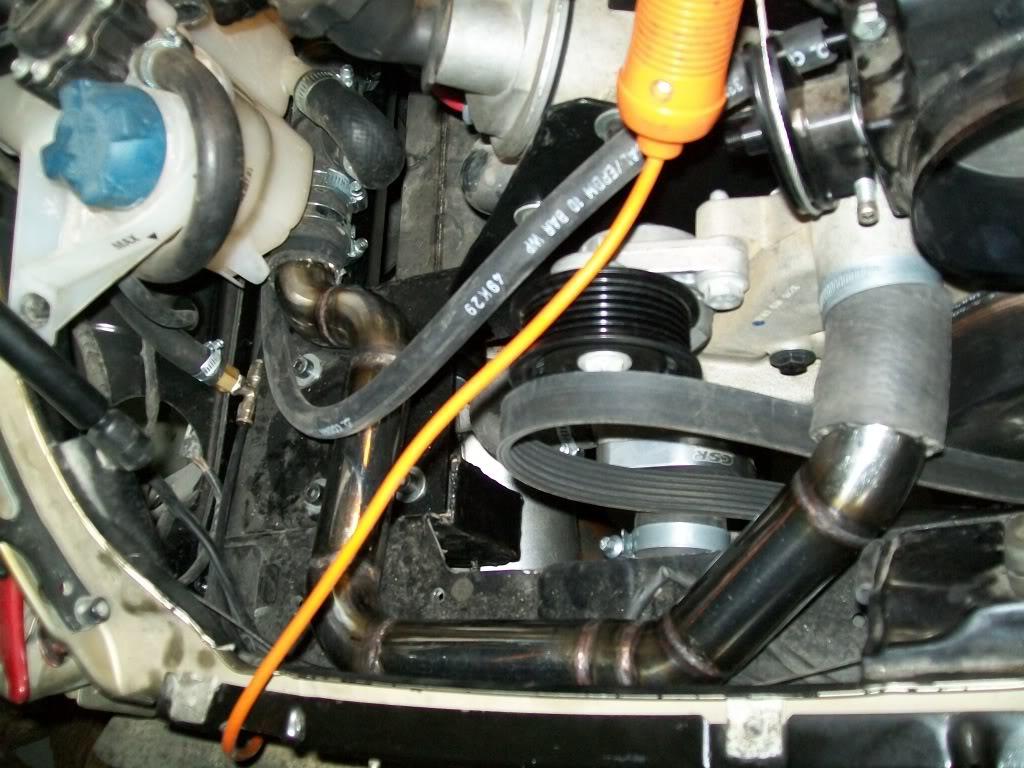
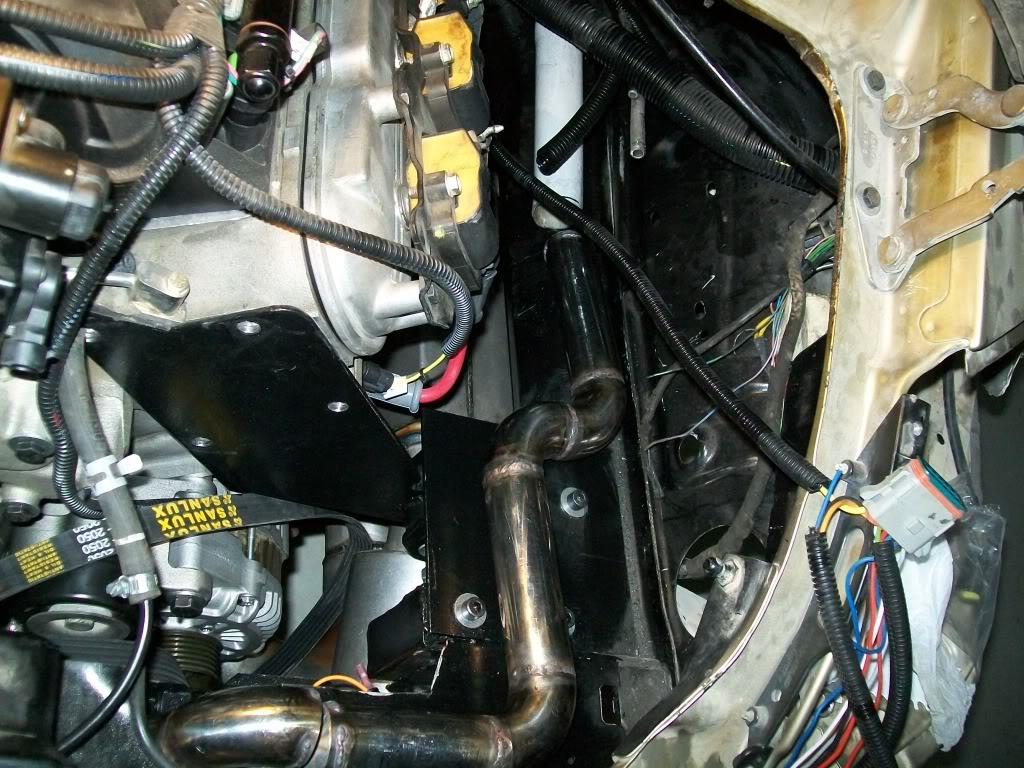
and these are the f-body heater lines ( and they say saving old parts is useless )
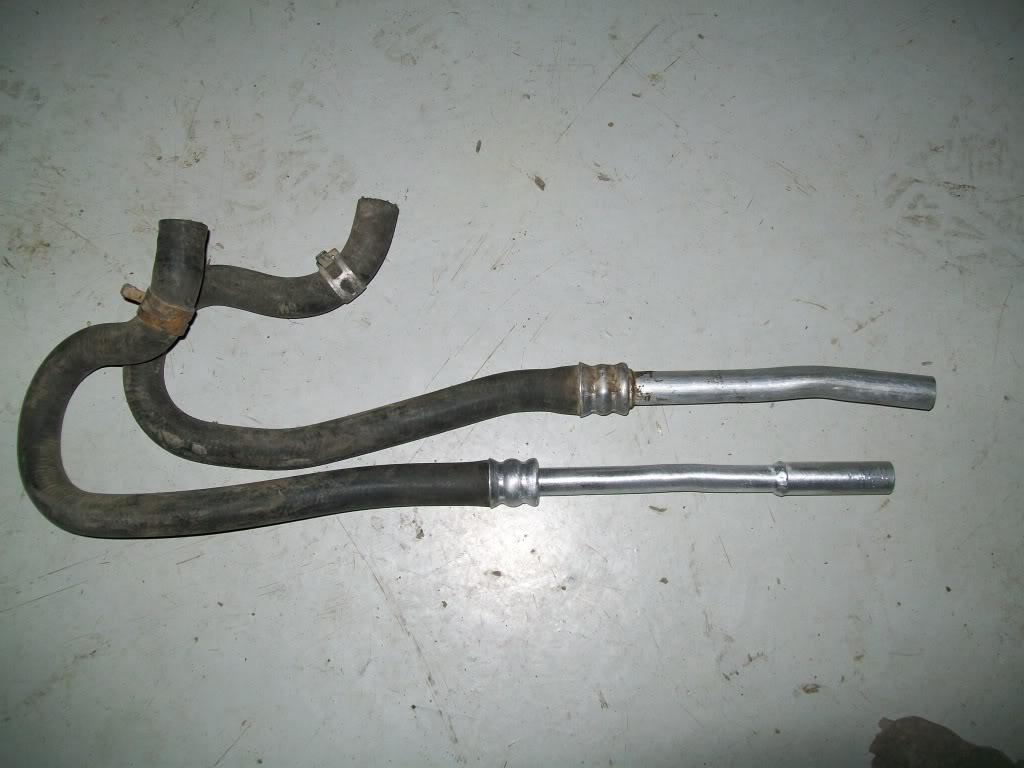
i had to weld a small peice at the end of the smaller tube so i can slide a 3/4 hose over it just like the other line :
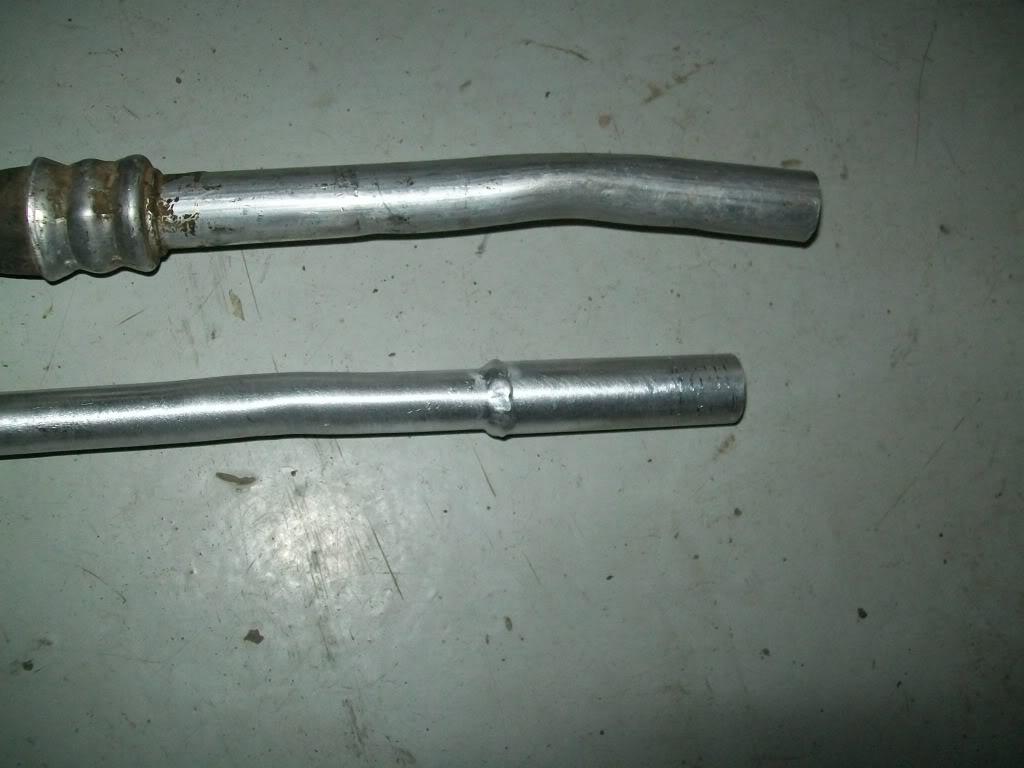
and this is how nicely it fit ( i told you all cars were designed to have an LS engines in them )
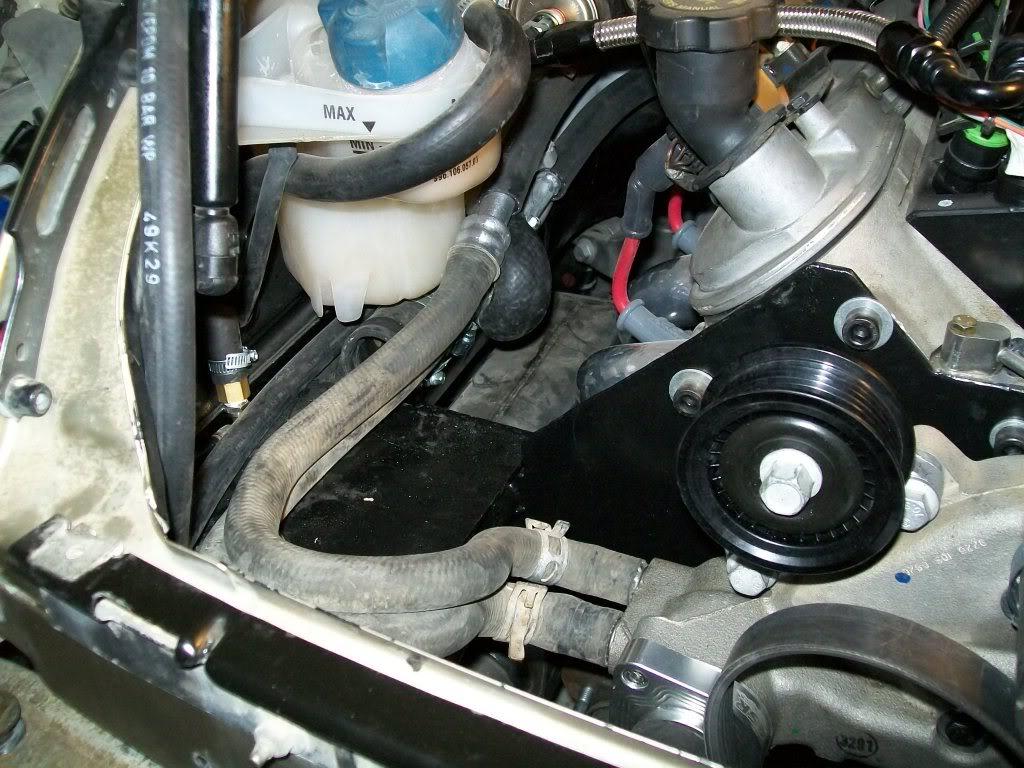
and finally i cut the powersteering lines so i can replace the fittings on them , on the return side i'll just slide a hose on it and clamp it on both sides, as for the pressure side i just flared it and used a JIC fitting on it ( just like an -AN fitting ) and a Male-Male coupler to connect it to the powersteering pressure hose :
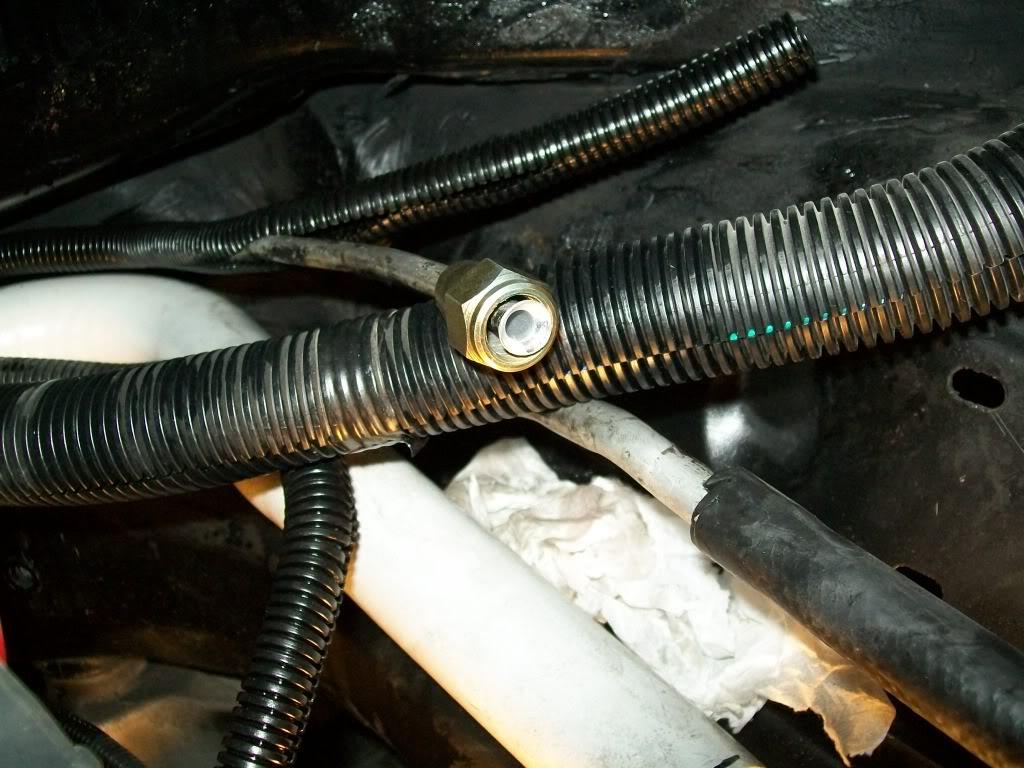
so now i have to drop off the hard hoses to the powdercoaters , and while they are being done i'll bolt in the powersteering pump again and check it for leaks ,,,, again
i'll also bolt on the A/C compressor and see what i can do about routing the A/C lines .
also next i should start on making the crank position sensor bracket to hold the porsche crank sensor so i can get the RPM guage to work .
03.10.11
got some work done today
i got the coolant hard pipes back from the powdercoaters, had them coated in silver:
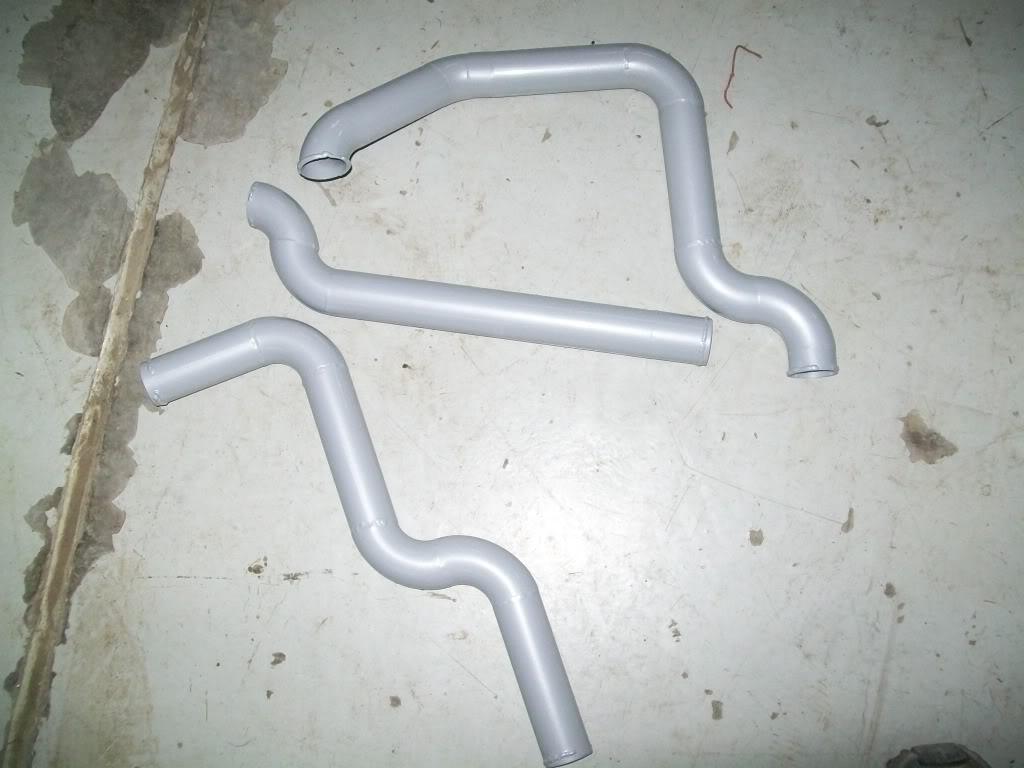
so i got those on the car and clamped everytheying in sight - which includes the heater hoses
i also got the powersteering hose modified so it has a longer flexible part - to make it easier to get the pump on and off . i also got that on along with the pump and connected everything .
so here is how it all looked when i was done :
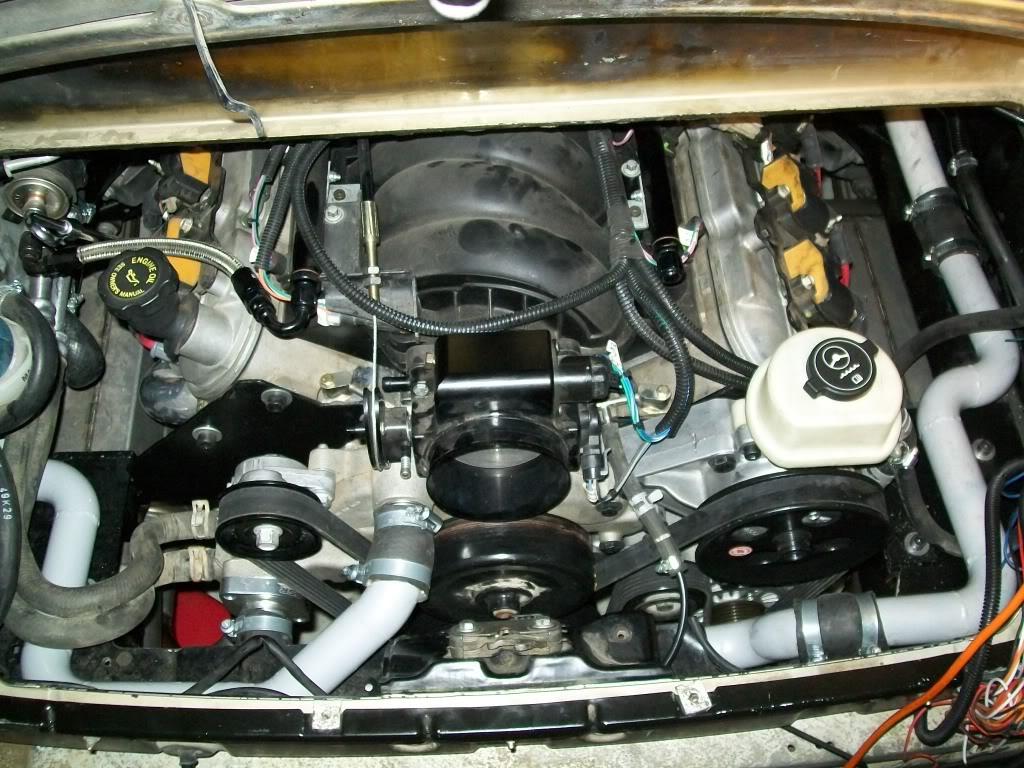
after that i fired it up to check for leakes and happy to say it was dry,,,,,, untill the power steering fluid started foaming out of the cap . i'm not sure why that happened , so i cleaned up the mess and tried again , but this time it foamed and spilled after i shut the car down . any idea why this would happen ? i know its caused by trapped air in the system , but where would it come from ? i turned the wheel from lock to lock but it still foamed the second time . i have a hunch that it could be the pressure hose that sits higher than the reservoir , but i'll have to look into that later .
soooooo after that it was test drive time !!
here's a stupid vid i made of the test drive, i had this camera just outside the garage and the other one is using my phone and in the car .
nothing much going on, you can see me giving it some gas as i got back and you can see that the front tires do spin on the gravel
and don't get your hopes up with this vid , i was trying to drive and shift and get a video at the same time , so i just ditched the camera as soon as down shifted to floor it
aaaaand don't mind the whining noise , its the power steering pump. aaaaaaand don't mind the messy interior , its not done yet
so, what have i learned from this outing :
this thing is more fun than a barrell of monkeys ,, it pulls in every gear ! i'm not sure how high i reved it but having the ring and pinion ratio numerically high sure helps
another thing is i need to rebleed the brakes , cause i had to pump the pedal a few times . i think i have some air trapped in the ABS system.
i'm also thinking of adding some more insulation behind the rear seat ( engine compartment bulge) just to make it quiter , granted i didn't have the factory carpet on there or the panels , but still a little more insulation wouldn't hurt
so next up is to hook hp tuners to it to make sure everything is kosher , then finish the interior , and then put it back on the lift to finish other various stuff like the suspension braces and ac lines and what not .
03.17.11
not much to report , i managed to install one of the suspension braces under the car .
i also managed to scan the car while ideling , the car has a base tune , just to get it running , so i guess the findings are normal ; the car idles fine , but temprature slowly crept up to 233 degrees , the fans were working , but it could be that the coolant system still has air in it . if the problem presists i'll try to put a restrictor in the system to see if it helps.
i'm also not sure about the timing , as the the exhaust ( the stainless part) started bluing , which means either the timing is to retarted or afr is to lean or both , but i'll check that later when i hook up a wideband and fine tune it.
in a step backwards, i decided to install the new tail lights i got , and guess what ! they're for a normal 996 and not for a turbo !!! i'll get in contact with them and see what they have to say.
04.04.11
no progress to report , i still can't figure out why i have no spark
the coils are getting +ive all the grounds and fuses are good , yet no spark .
i tried reflashing the PCM, that didn't work , so i tried the pcm on another car and it fired right up , so that rules out a faulty PCM.
so i got me a set of coils to try and i'll try throwing some sensors on it like the crank and cam sensors to see if that helps.
its just annoying to have this happen so late in the game and not know why
just so i know i went over everything ; what are the reasons that would cause a no spark situation?
on a positive note, i got the front inner fenders and driver door compartment lid in today
04.07.11
i guess i fixed it
i swapped the CPS and nothing , so i decided to take a look at the harness, and as i was fiddeling with it behind the engine i noticed that there were two grounds , one on each head , and one of them was kinda loose , so i tighten it and try it out and viola ! it fires up
so now that we have that behind us on to the other issues :
why is the power steering fluid foaming ???
and i tried to get the air out of the cooling system but i guess it still has some in it ; i let the car idle and the temps slowly and steadily started rising untill about 210 degrees when it started puking out of the coolant tank ( from the cap) and i shut it down . the thing i noticed is that when i hold the rpms around 3k the temps dip a bit and start climbing as soon as i return to idle ,,,, which might mean i need a higher volume water pump or an inline one to help with the flow. but i guess i need to check the cooling system further
04.08.11
any how, i decided today was not going to be a " work on the thing " day ,,, instead i desided to make it a "reliability test" day
i took the car for a test spin around the farm just to get a feeling of the thing , and i learned a few things : make sure the indash CD changer is bolted down or else it will fly out and hit your hand on the shifter. second; i need to adjust the shifter to get reverse to engage easier.third : bleed the damn brakes !
first part : pulling out of the garage and flooring it :
second part is the driving part of the test
then i decided to log a run ( well i kinda forgot to do so in the first outing so i now had a reason to go out again ,,,,, and do some donuts)
i learned a few valuable lessons here ,,,, most importantly make sure you have more than 10 psi in your front tires before you do anything stupid ( helps prevent palm trees )
i look like a complete noob at donuts during this video )
i also have to mention that i drained some of the P/S fluid out of the reservoir earlier and after this i noticed theat the resv. had some fluid in it but it was not foamy !i still have to double check and maybe top it off .
so next time it will be bleeding the brakes , finish some interior odds and ends , and adjust the shifter cable .
04.14.11
messed around a bit today with the car. i adjusted the parking brake , also fixed the cut rear driver side brake wear and speed sensor wires. also adjusted the engine cover latch ( it actualy shuts now ) , also found out i have a bad latch release solenoid that i need to replace . i also noticed that the passenger side dash speaker is missing ( either the mice ran away with it or it never came with the car ) .
and when i was adjusting the brakes i noticed something which might have greatly contributed to the spongey pedal feel : i never tightened the axle nuts which made the wheel wobble on the hub and while doing so it was pushing the pads into the caliper and causing the brakes to fade ( kinda explains why the pedal went firm after a few pumps).
the front lip is also done now ; i tightened the screws holding the edges, so that gets scratched off the list too
also took a quick look in the engine compartment and under the car , and its looking good and the belt is still riding on all six ribs and while there i looked where to mount the rpm sensor and it seems there is a nice spot right off the Alt. bracket which would make for a great location for the sensor while keeping the bracket needed as simple as possible - sorry , forgot the camera .
and i dropped off the rear panel just under the rear window to get reupholstered (fire damage ruined part of the leather) .
next time i should slap on the damn AC compressor , and adjust the shifter ( i just ordered a short throw conversion so i might hold on adjusting till i get the shifter in ) , make the crank sensor bracket and start mounting the bumper.
05.01.11
didn't get to spend much time this week on the car , been real busy with other stuff.
i did manage to fix the cut speed sensor wire and i took the car for a test : i have a working speedo now !
also adjusted the shifter so now the gears go in smoothly. and i got the rear panel ( under the rear window ) back from upholstering , so now that sits nicly in its place and covers my new fuse box.
as for the A/C compressor ,,,, still sitting snugly in its box
i also got some new bulbs for the brake lights but they still don't function properly
the brake light comes on and stays on when i turn the lights on , and stays on even after i turn it off ( untill i shut the ignition ). its got me confused .
i messed around with the front headlights, and i managed to get the driver side light going , but for some reason the turn signal still doesn't work ( i changed the bulb) .
on the passenger side everything works except the hi/low beam , i still have to check on the bulb in there.
another electrical issue i'm trying to figure out is why the oil pressure guage doesn't read, last time i tried grounding the sensor to the frame and still no dice
i'm starting to think i'm using the wrong signal wire in the engine compartment - maybe i'm using the wrong year diagram or maybe the wire has a discontinuity some where along the line.
i'm planning on taking the car into town some time this week to have a radiator shop do a complete cooling system flush , and then take it to the A/C place to have them bend me some lines and finish the system . after that i might take it to the upholstery shop and have them make me a rear shelf carpet with some decent insulation behind it as well as redo the seats .
i still need to order a speaker , rear cover latch, cubby hole shelf thingy under the head unit , head unit , parking sensors, and a few assorted peices
after that i'm guessing i will dedicate a full day for chasing down wiring and trying to fix electrical bugs
06.05.11
time for a minor update
like i said i got the electric water pump in , so i dropped it in the car after welding a bracket for it on the passenger side and finished all the hose connectiones , also vaccume filled the cooling system and wired the pump to work when the fuel pump works . only problem is i forgot my laptop so i couldn't log the temps so i didn't start it
anyhow here is how it looks :
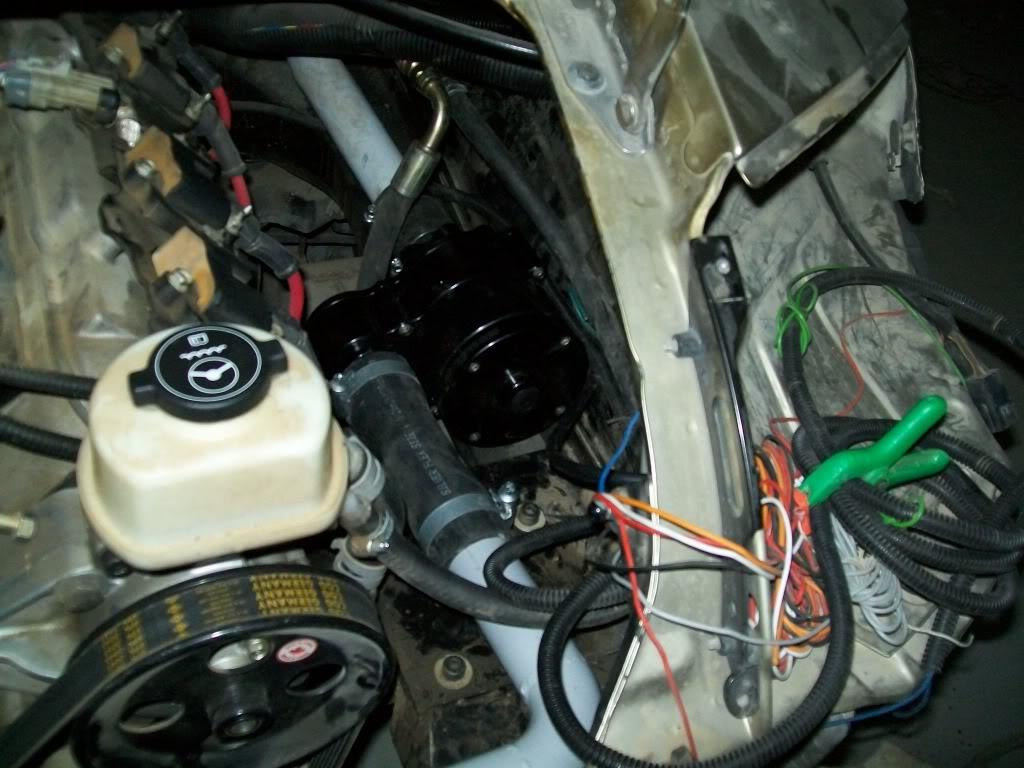
in other news i found out that the broken master cylinder feed line that i fixed before broke again (guess brake fluid and crazy glue don't mix ) , so i JB welded it this time till i get the new one in . i also ordered an electric power steering pump which should be here real soon.
also got a bunch of prebent aluminum tubes so started working on the intake Y again , its a slow process but should work out real good now and later: the intake tubes will snake all the way to the ports in the side of the engine compartment ( where the intercooler outles poke out originally) where the will attatch to a set of filters for now , and when i fo FI all have to do is just put the intercoolers in ther and connect them to the same Y pipe .
i also finished wiring the coolant temp sensor , so in theory it should work now
(still didn't trace and check the oil pressure wires )
so next up is testing that the car doesn't overheat at idle , tune the idle (it has a base tune now, won't hold idle when i first start it and its running super rich - plugs were fouling ) , fill and bleed the clutch hydraulics, install the hood latch actuator when it comes in , mess with the intake tube some more, and i have to remind myself to put some gas in the thing
off course all this has to wait till i come back home in a week or so, and pending other to-do's on other projects . so if the cooling system proves itself i might start taking it out for longer "testing" sessions
06.06.11
one more update before i skip town for the weekend ( our weekend)
i fixed the master cylinger reservoire tube and installed it , all i have to do now is hope it doesn't leak and bleed it .
then i proceeded to the idle test , i fired it up and let it idle for 35 minutes and the highest it ever reached was 190 degrees
which means the cooling system is officially done !
in other good news , the temp guage also works ,,,,, and apparently when id does so does the oil pressure guage too
( i was so happy that all i had to do now is the RPM sensor and fuel level relearn i decided to snap a pic of the dash )
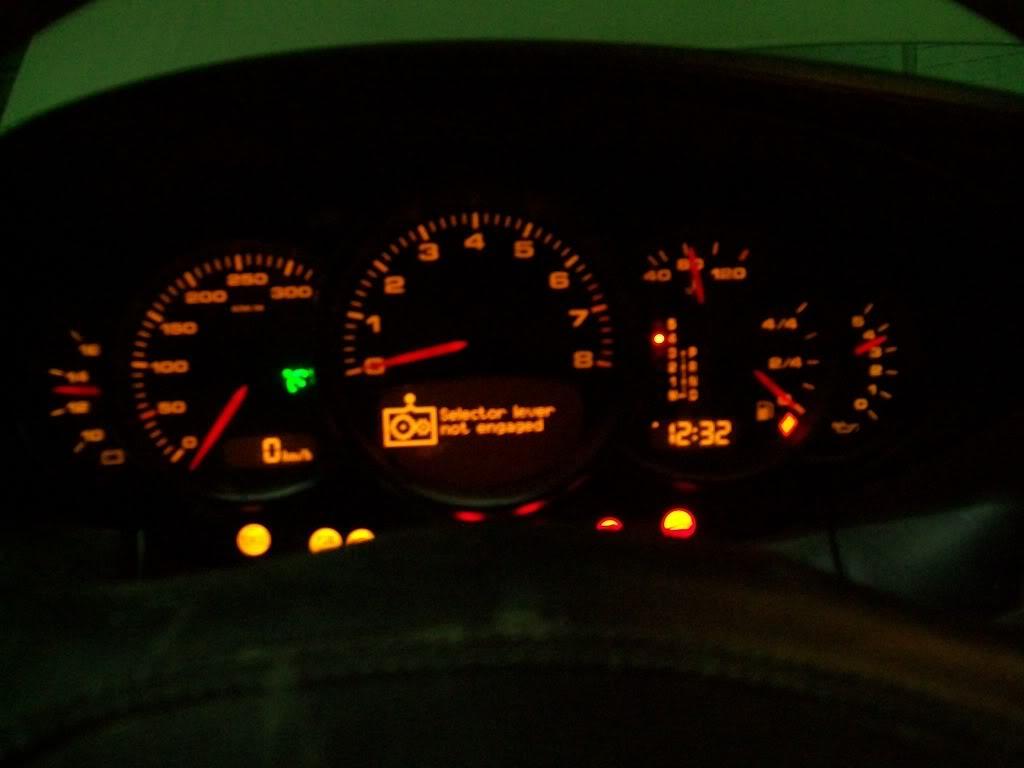
so after finishing with the cooling deal, i went back and started messing withthe intake tube.
i already built two Y's but i couldn't get either of them to fit like i wanted .
so i decided to go with a different approach ; basically a small section of 4" aluminum tube with two 3" 45 degree tubes going into the 4" tube . this should get me the needed clearance i need to clear the hood latch .
anyhow , here is what finished so far :
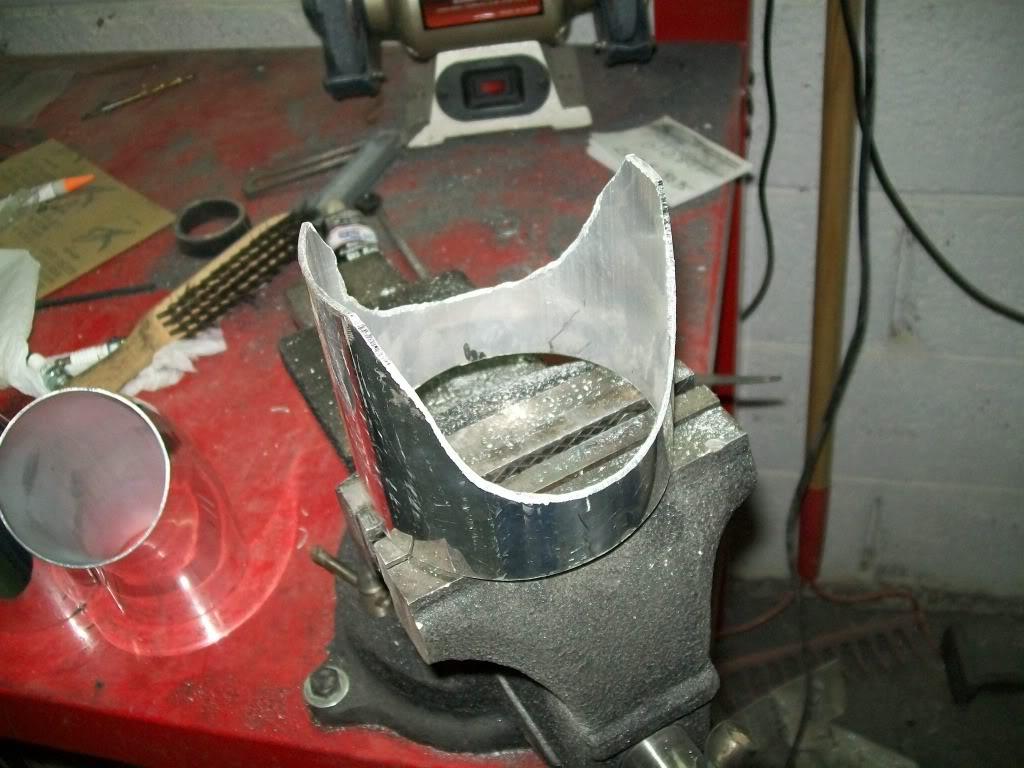
and as usual , the to do list for next time :
-bleed the clutch
-more intake fabrication
-build a crank sensor bracket
-more stuff but i'm too tired to think about
06.24.11
well i got some progress and "regress" to report
in progress news , i finally got around to tuning it ( well,, idle and tip in tunning ) and now she purrrrrrs the thing was ideling at 10:1 AFR before , which explains the fouled plugs and the sluggishnes.
i also finished mounting and wiring the porsche cranks sensor , so now i have a working RPM guage so now all the dash guages work propperly , and all that is left is to tackle the small warning lights .
and in the not so good news side, the damn master cylinder fix didn't work and it leaked again , so all that hard wrok bleeding it went to waste and i now have to wait till the new part to show up
and in other crap ,,, i decided to change the non functioning engine compartment latch but that still didn't fix it , which meant i had a problem with the wiring .
so i started tracking it back into the driver side rear corner inside the car . now i never really looked into that corner because most of the wiring i messed with was on the passenger side corner, and i issumed that since the the passenger side wires were slightly burnt and stiff , the other side couldn't be worse ,,,,,,, well man was i wrong :
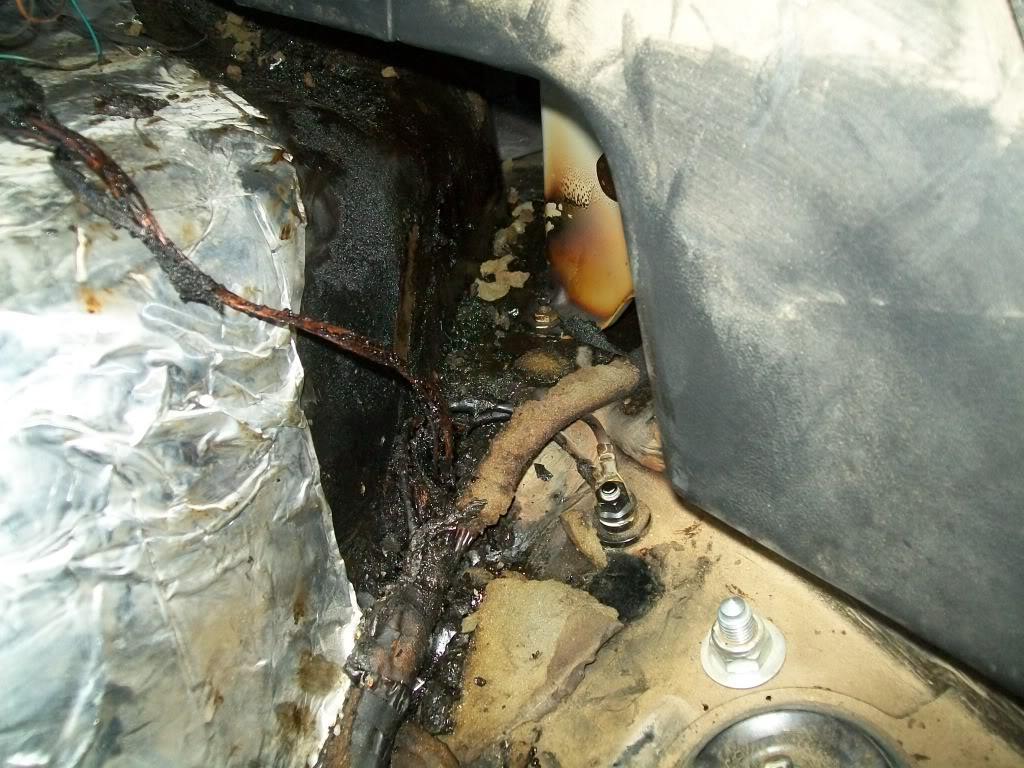
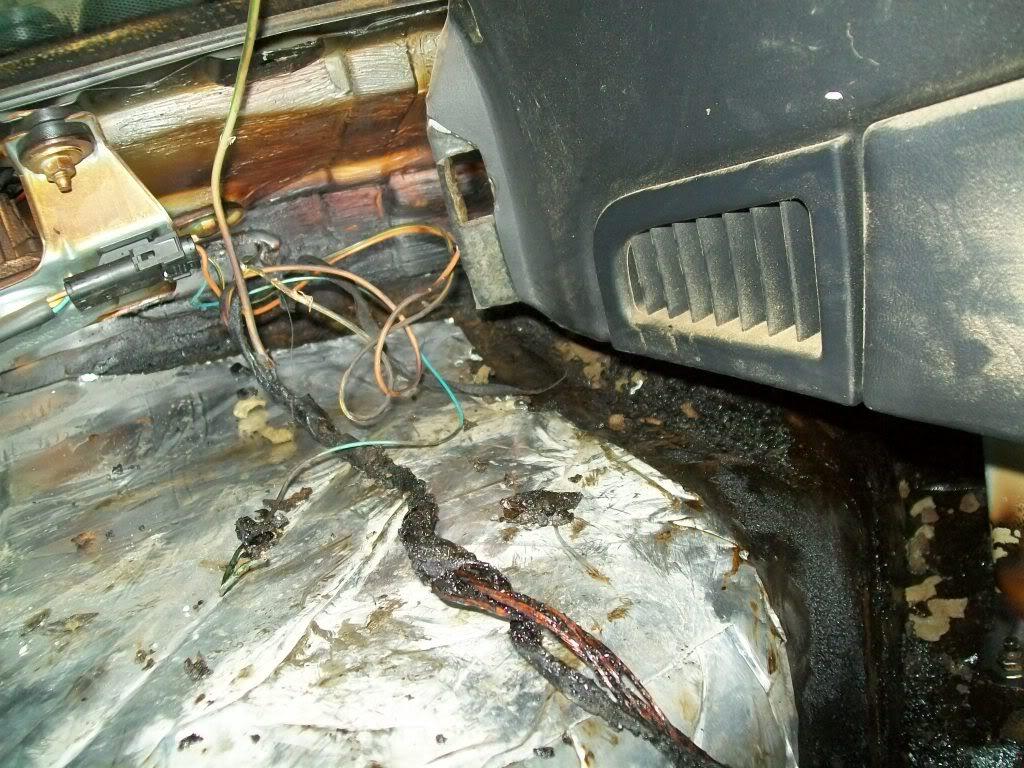
the wiring was burn't to a crisp ! and not just that , the damage extended to other sections of the harness ( i never took a really good look at the harness like i did lately ) which could explaing the sensors not reading and the brake light issues and what not, and potentially being a short and fire hazard down the road.
so the next step was to fix it i decided to cut and "patch" the offending part of the harness , which meant i had to seperate the wires one by one so i can track their colors ,,,,, fun!
well after more than 2 hours into it this is where i ended up :
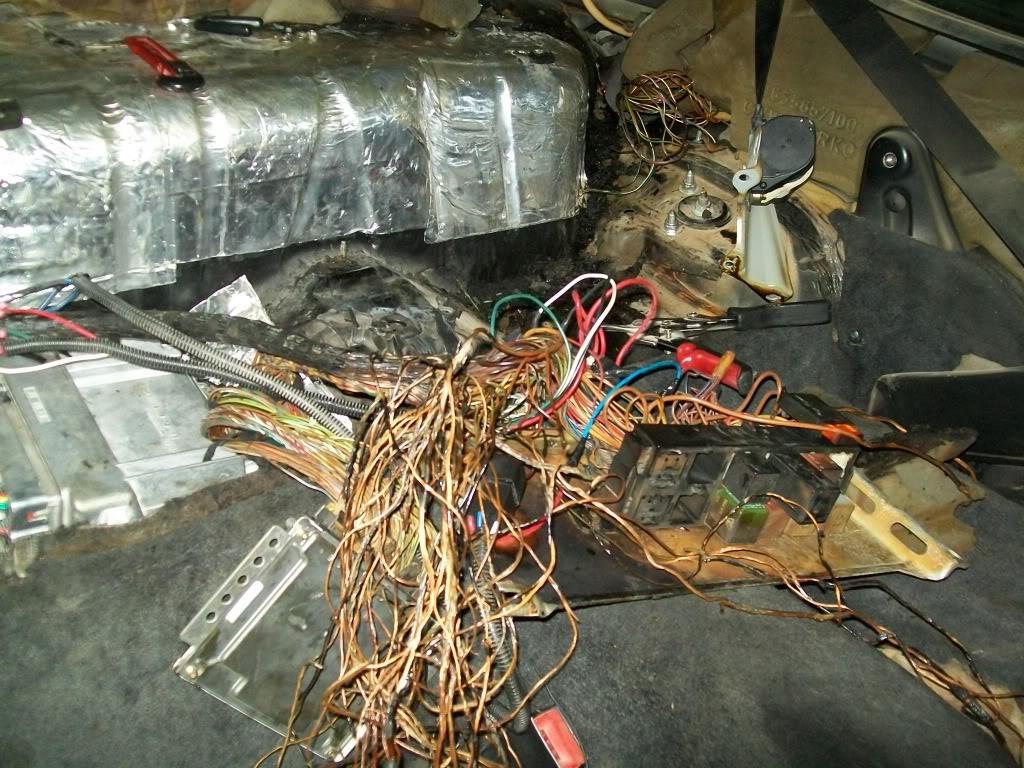
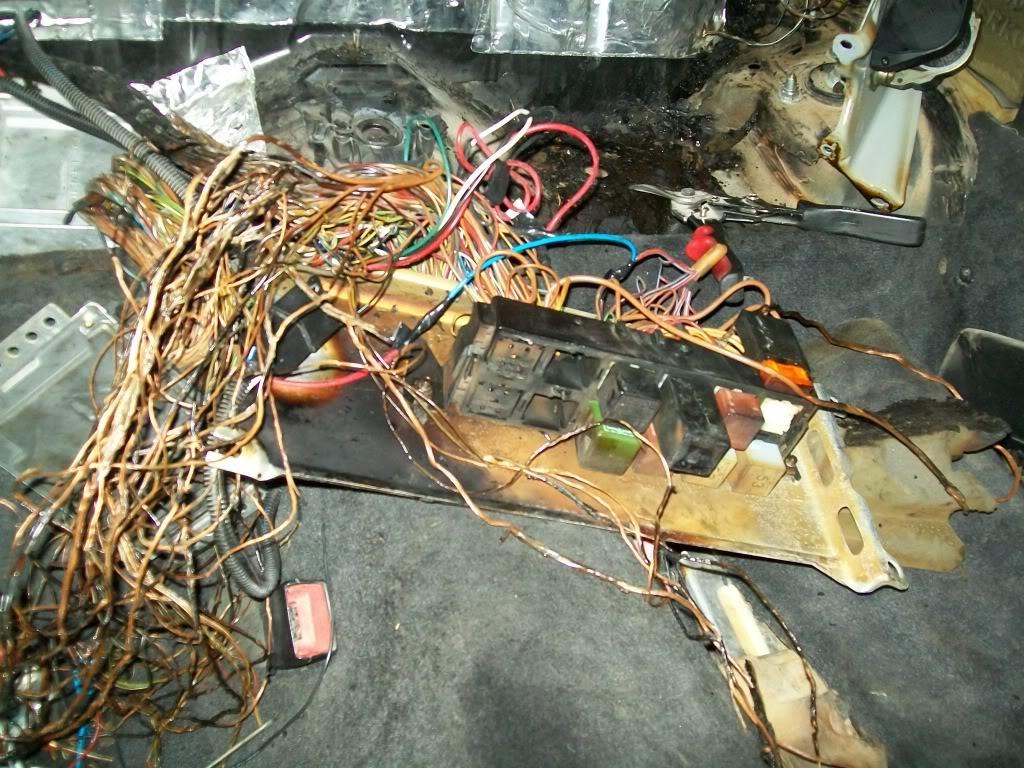
and it was obvious this was going to be a huge - and frustrating task (given my love of wiring ) so i looked into getting a replacement harness and thans to the awsomeness of Ebay , i'm now waiting for the new - un burned, un stiff - harness to show up
so this pretty much sums up what i have been doing lately, so later on i'll be ripping the old harness out in anticipation of the new one getting here, fixing the master cylinder again , replacing the driver headlight bracket, dropping in the dash and door airbag covers, messing with a few odds and ends here and there ( can't remeber what right now )
in hind sight , why didn't i just rip all the interior out of the car and inspected and redid what ever was damaged then assembeled every thing back in ? (guess it didn't look as bad when i first looked at it )
07.04.11
not much to report i guess, other than the new harness arriving today .
i sat down and started cutting out all the unnecissary wires from it before i put it in , and i guess i found a few surprises : the good one is that i have all the missing connectors and burnt ones before (third brake light, brake sensor plug etc ) , the bad surprise is that the harness is not for that specific car , i couldn't find the alt. charge indicator light, and the rear wiper plug is not available and so on . and the worrying thing is that on the side connectors ( just next to the driver and passenger hips) there are a few missing wires and a few extra ones, and there is a small computer thingie on the passenger side that had part of the old harness plug into , but the new harness does not have any provisions for that ( i'm assuming its the transmission contoller when the car was an automatic).
anyhow , after a few hours of cutting and splicing and routing the harness ( man does it feel good to work on a dry, non- gooey harness ) i think i have the thing almost done , i just need to jack the car up and remove the rear tires so i can connect the brake sensor, speed sensor, headlight level sensor, and what i think is the reverse light sensor thingie.
i did cycle the ignition and the water pump worked, and so did the fuel pump which means the LS1 PCM is working. the bummer is that the hood release thingie still doesn't work! i still have to dig into the diagrams and see what i can do , worst case scenario i could just rewire the latch.
another thing that caught my attention is that i got an airbag warning on the instrument cluster
and did i mention that JB weld and brake fluid don't go well together? the master cylinder was leaking and after inspecting it i found that a small repair i did didn't go as planned i should have the fix by tomorow.
so i'm hoping tomorow to connect the brake lights and see if they work now, replace the headlight bracket , install the airbag covers , bleed the clutch and start the car and let it idle for a while to see if everything else works
if it all goes ok ( i hope ) then the interior goes back in and off to the AC shop !
07.05.11
more updates, the harness is fially in place and everything connected , and since i didn't post any pics for a while , here are some
this is how it looks back there with the insulation and harness :
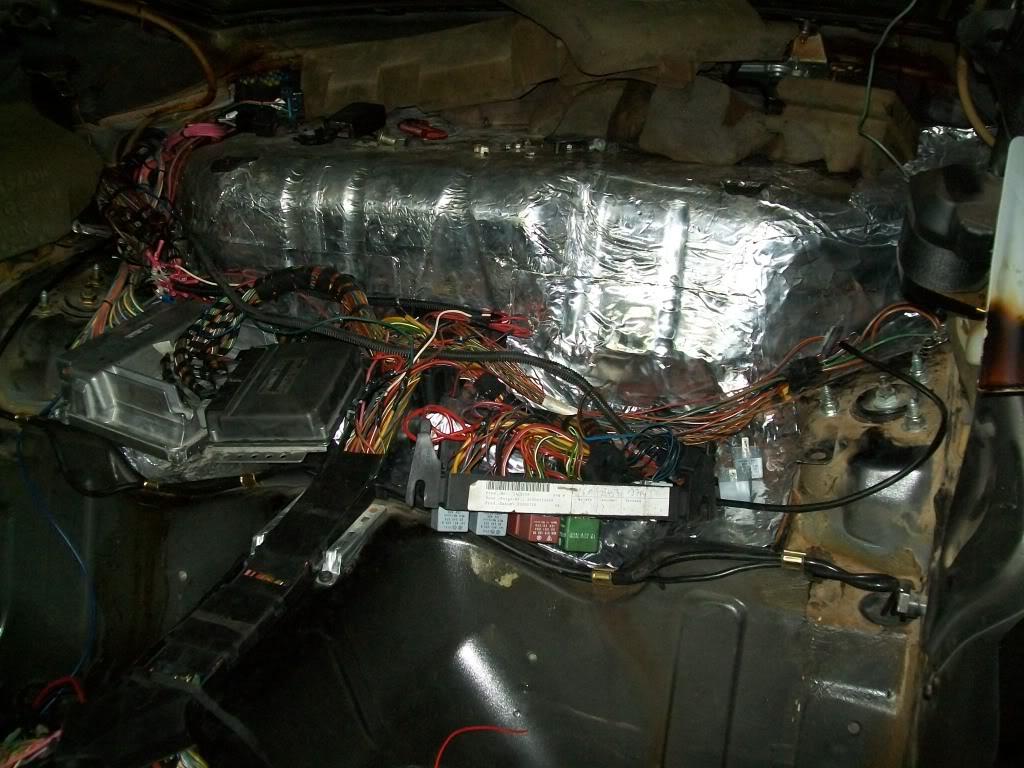
i also messed with the latch and its diagram and found out why it wasn't working : apparently ( and you got to love how germans wired this car) the latch power comes from the retractable wing power source , so the wing has to work inorder for the latch to work :/
since the rear wing harness was BBQed i just wired the latch to an all time power that way i can pop the latch without having the key in ,,, so scratch that off the list!
but the bad news is thatg i connected the tail lights and still nothing the fog light just comes on and nothing else. i'm not sure whats going on , but i still have two more options to check out : the first is swap out the light switch ans see if that fixes it , or run through the harness wire by wire and try to figure out whats going on .
if all else fails i'll just build my own light harness .
i also popped in the driver door airbag cover :
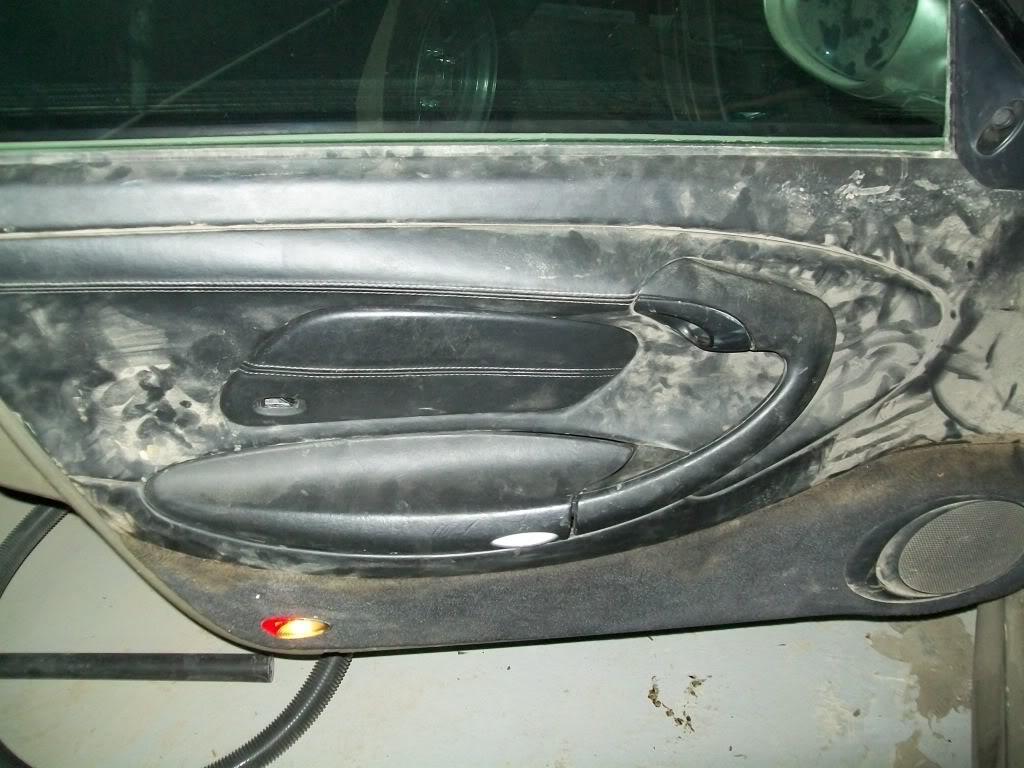
and i placed the passenger side dash airbag cover in , just have to figure out a way to fix it in there without the airbag to hold it in.
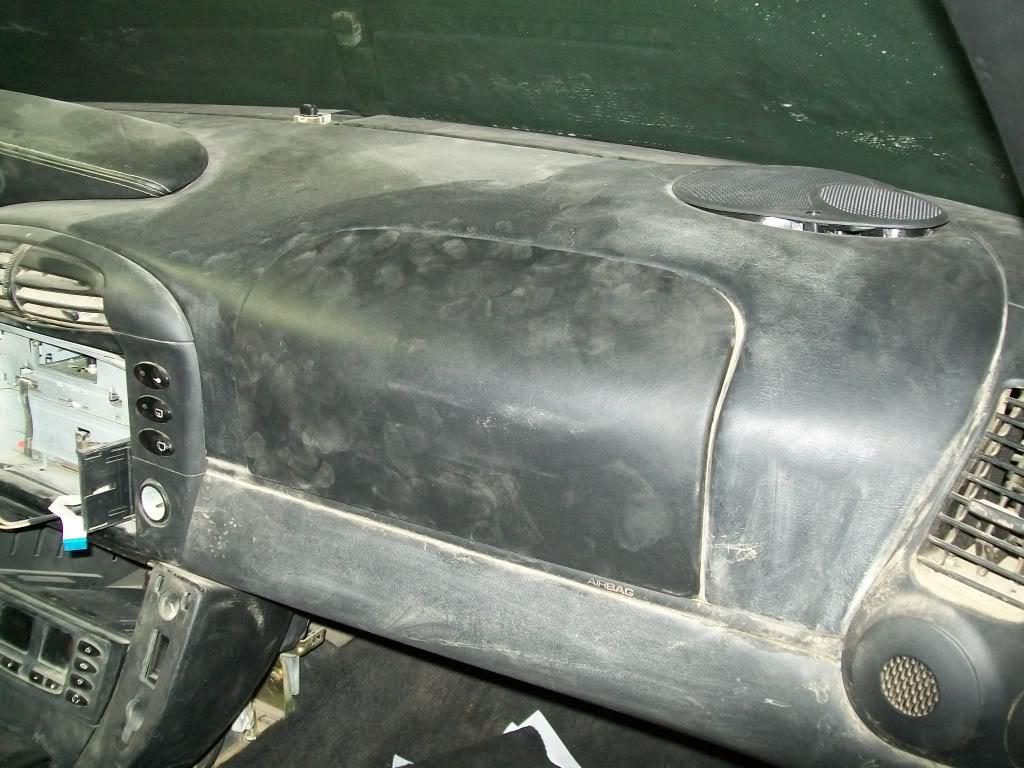
also took the driver headlight assembly out to replace its bracket ( had the part that holds the connector broken off) and swapped the bracket out with this little gem
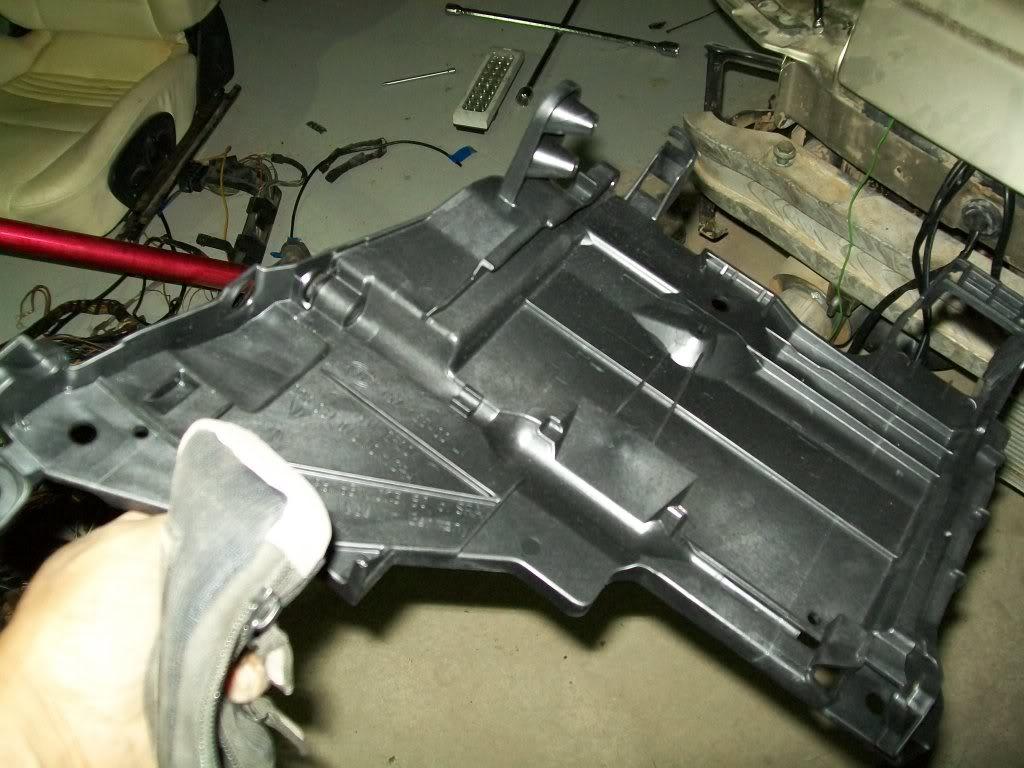
i held off on putting the headlight assembly back in till i get new bulbs swapped in tomorow.
and i finally got around to welding the intake Y , took me quite a while to get the peices to fit properly , i just need to grind the protruding peices from the inside then weld the rest of the tubes. here is what i got done :
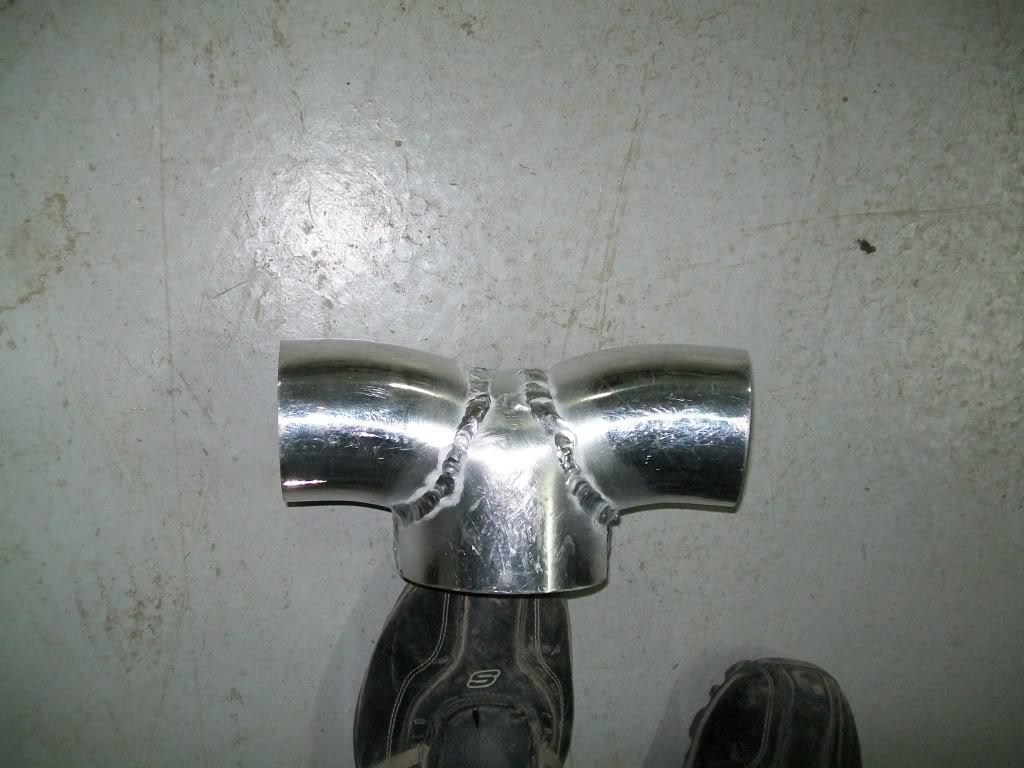
the other thing i noticed is that even with the key in the off position , i had two relays get real het ( O2 sensor and MFI+DFI - think thats what its called- relays)
i don't know whey they were always on but just in case i pulled both of them out and started the car just to make sure everything still worked ( by everything i mean the dash and LS1 PCM )
i still need to fix the master cylinder thingy , and bleed it , and i have to figure something out regarding the lights and remount the relay panel on the holder that i sent off to get powdercoated .
after doing that i think i can put the interior back in , i can also put the darn AC compressor in and get that over with finally
and in other news ,,, i think i found the project after the project after this project
i'm working on getting another project car to keep me busy after finishing the porsche and the scout ,,,, but more details on that later
07.28.11
finally some progress
i've been real busy lately and didn't get to work on the car much , but aftger forcing myself i finally got something major done ( well major in my book ) ; i got my *** in the car and started tracing all the brake wiring , and finally got the tail lights to work
it turns out i had the clutch switch and the brake switch mixed up , as well as having the bracket that holds the switch bent out of place which caused the brake switch not work .
all i have to do now is replace the relay/flasher thingy for the turn signals , i remeber taking it out a while back and now i have no clue where i removed it from
i also have to find where i put the brake light brackets ,,,,, i know i got some new ones to replace the broken ones on the car , but i could not find them anywhere! damn mice
and i found out another interesting "anomily" with this porsche : the brake lights don't work if the ignition is not on i don't know why but it could be due to the wiring job i done
i also started putting the interior back in and should have it all buttoned up soon
so next up should be finishing installing the interior and seats, fixing the clutch master cylinder and bleeding it , swapping the TR8 plugs to TR6 , install the headlight bulbs, and maybe slap the rear bumper on and finally get to drive the thing .
08.22.11
finally some progress to report ,,,, and regress
i got the interior panels back in , and got the master cylinder fixed and bled, and finally swapped the spark plugs. i never got to buying the bulbs for the the headlight and taillights but i decided to slap them on and replace the bulbs when ever i get a chance.
and i also finalized the rear shelf cover thingy- all thats left for it is carpeting. and i finally got the ac compressor mounted. just need tot wait for the fittings to show up so i can make some lines.
after that i started working on the intake piping , like i mentioned before its a tight fit but i think i have it pretty much nailed down , it also has a provision for th IAT sensor. the best part is that i can use this intake tube for now and for when i get the turbo's on there
here is how it looks in the engine compartment :
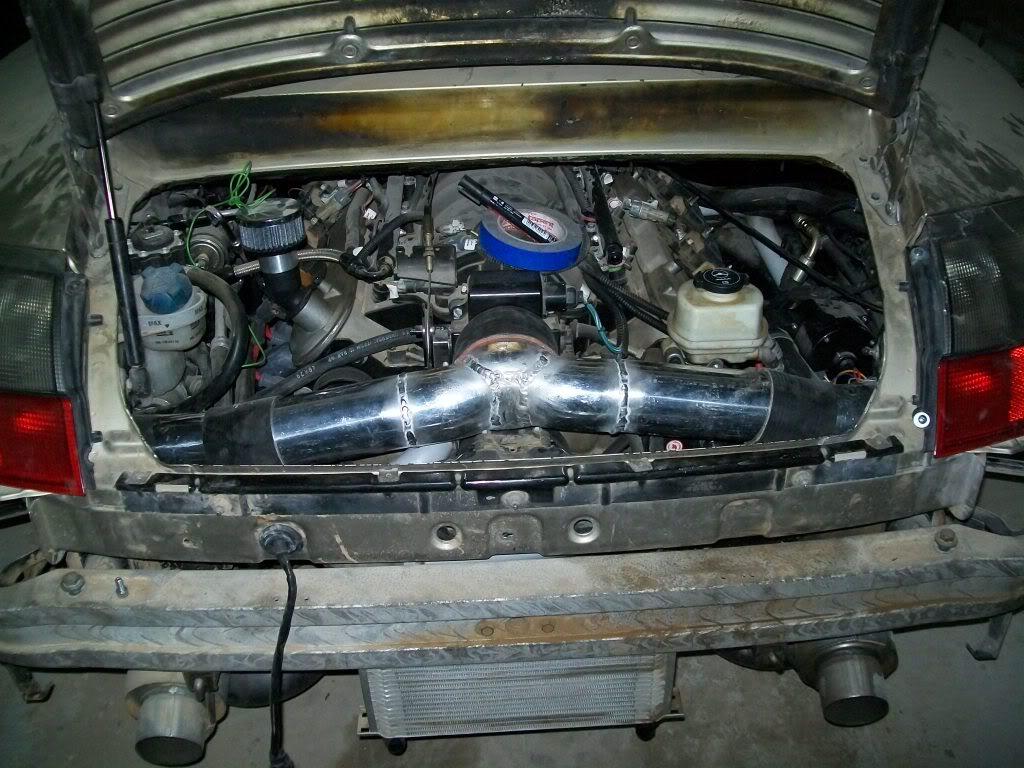
and how much it sticks out in the fenders , this is where the intercoolers will attatch later on :
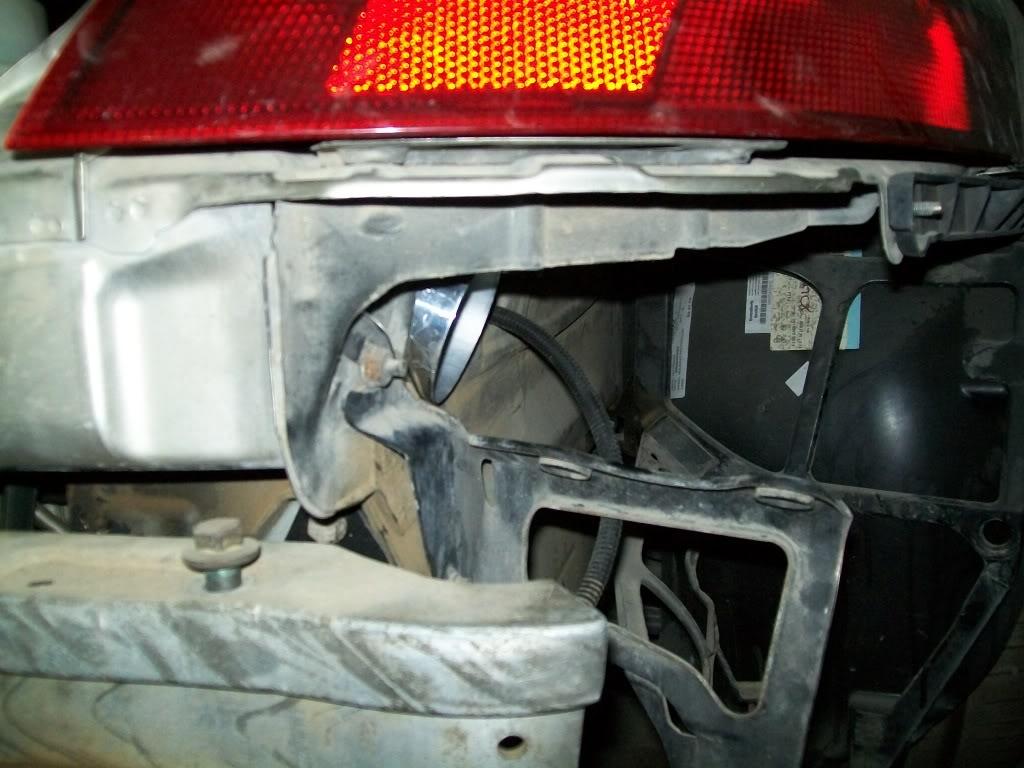
and the other side :
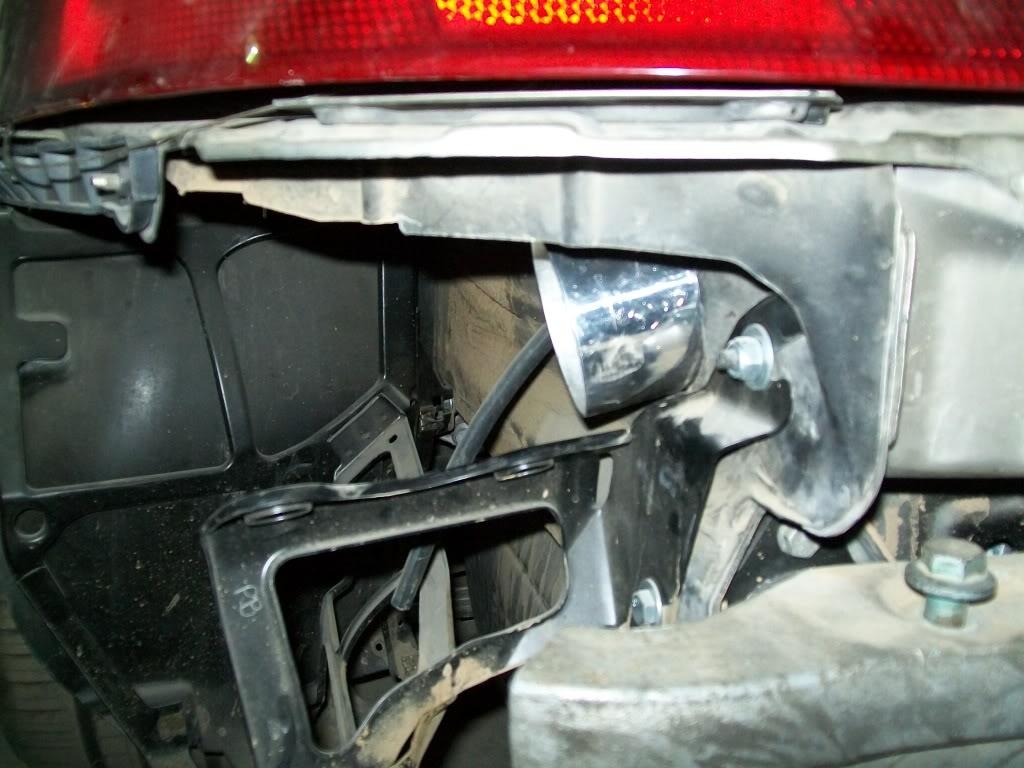
after that i attatched the air filters where the intercoolers used to sit:
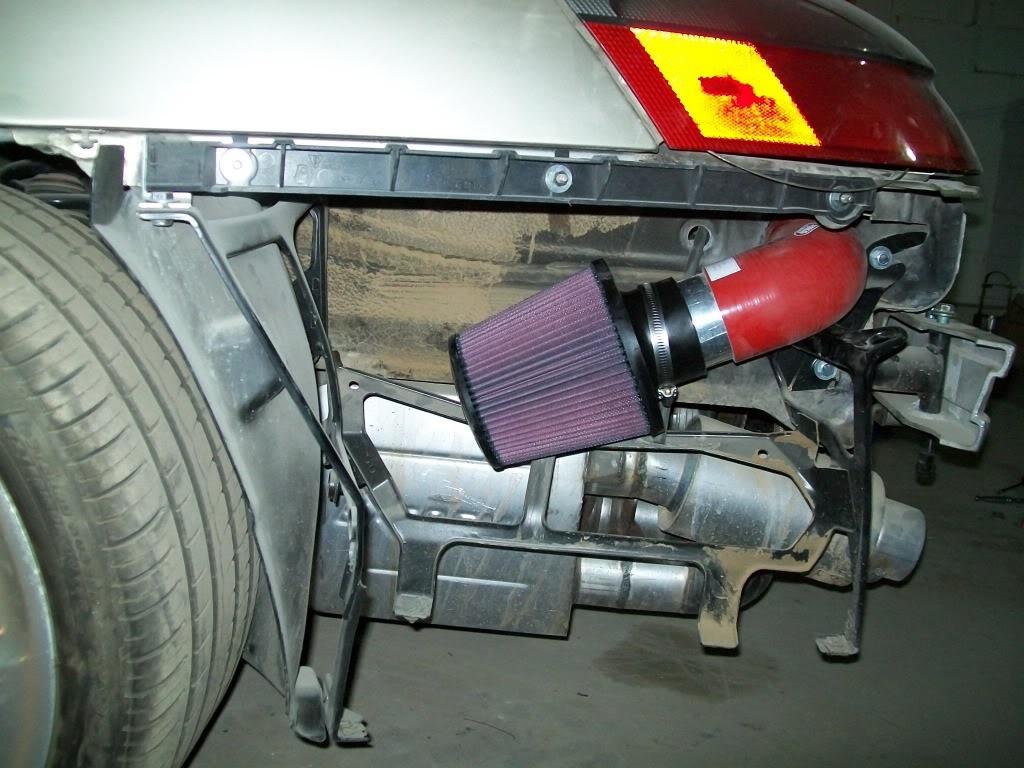
and now for the bad news :
after finishing all that i decided to take the car out for a spin , which didn't happen ,,,, because the shifter linkage under the shifter decided to break
so now i have to wait till i get the replacement ones in .
i also noticed that the water temp and RPM guages were not working, so this means i have to retrace the wires back to the DME (pcm) ,,, which i'm sick of doing
so i guess i have to wait now till the parts show up , i also have to take the intake pipes and and have them cleaned up (the ugly welds ) and weld some beads on the ends of the pipes , then take them to be powdercoated and call them done
and hopefully by the next update the the AC lines will be finished and the lights will be done too
10.09.11
if its not one thing , its the other !
i finally got the linkage in and installed it , started the car and shifted it a few times in several gears just to make sure the linkage was adjusted properly, then shut it down for the night cause i wanted to take it to buddy of mine to fine tune cold idle and startup.
so i come back after two days and i try to start it and it would bearly start and can barely hold idle , then it would just sputter and die after a few seconds. it would imediatly die if i even looked at the throttle .
so anyhow , i statrt trouble shooting , so the first thing i do is pop the spark plugs and take a look , they were sooty and i cleaned them ,,, no luck there , then i decide to take a look at the gas tank ( i don't recall ever filling it ) and wouldn't you know it the sending unit ( aka the bucket ) was dry , so i thought AHA! , so i run down and get me some gas and fill it up untill i made sure the fuel pump was submerged and fired it up ,,,, and it did the same thing
any how the tuner comes around to see what we can check ( i didn't have a fuel pressure guage or scanner so i couldn't check sensor operation nor verify fule pressure , which meant i could not tell if it was being caused by a bad pump , clogged filter or what have you)
so we hooked up the scan tool and checked, nothing there - everyhing was reading fine but nothing was happening ,,,,, untill he changed the commanded AFR to something like 8 ! and viola!!! it idled smooth and reved ok !
so we take it to his shop and checked the fuel pressure and guess what : i had a whopping 9 psi
so apparently there is a fueling issue ,,,, so i took the filter off and checked it , it was ok ( used the blow through test ) which means its somewhere up front : either the pump is bad or the hose from the pump to the top of the tank is ruptured somhow ( i didn't take a good look when i poped the sending unit out )
i stopped there and decided to continue later , so now i have to double check the hoses in the tank , make sure pump is ok , and in the odd case that isn't the issu swap out the fuel filter/regulator with a new one.
10.10.11
messed with the fuel system today , and i think we've solved it. sore some odd reason the check valve in the fuel supply line in the tank decided to take a crap and the feed line started pushing fuel back into the siphon tubes. anyhow , i still need to run the car till it looses some of the gas in the tank to verify the fix , but untill then it seems to work.
also found out that the gas guage works now and the calibration they keep talking about is for the low fuel warning light i guess.
so now i have the speedo , oil pressure , gas guage and volt guage working , i just have to trace the wires from the engine to the pcm to verifiy that the signal is getting there (after swapping the interior harness).
any how, decided it was time for more testing to make sure the fuel system is ok
here's a few WOT runs for your viewing pleasure please ignore the power steering pump whine :
12.24.11
i know its been a while since i updated , but nothing much to report , been bust trying to get the camaro done and moving stuff so not much progress going on .
what i did manage to do is i finally got around to installing the bumper , and i finally got around to welding the tips in place (i just found out that the pics i took are crap , so sorry no pics for now )
i also got some new Xenon bulbs installed , but apparently there is a wire loose or a bad connection somewhere cause the passenger side doesn't want to work will have to dig into that some other time .
another thing i've been messing with was the guages : after i swapped the harness the water temp and the RPM guages decided to stop working . i'm assuming this is because of the different pinouts of the harness i put in. so right now i'm going back to the old pile and trying to figure out how the wires were routed and re wire them like that . can you feel the fun ??
i did score a used cluster from evilbay for a decent price , why you may ask?well i ordered a set of speedhut guages for the '70 camaro and i like how they look ,,,,, and was thinking why not just swap out the sock guages to something more custom ( speed hut can build /print anything you want on the guage faces , and they already have a "porsche" logo template i can put on the guages to make them look original , plus they come in the right sizes for the guage cluster , i just have to find a way to mount them
i know it mans i'll loose the information display on the cluster , but i can live without it ( its just telling me stuff i already know like : where the hell is your engine , and why is there no auto trans in me ), but i'm keeping this as a plan B if the stock ones don't work like i want them to.
i also finally took the seats to be redone , going with black leather to match the rest of the car and should have them finished in about 4 to 5 days. i'll get some pics as soon as i get the seats back. after that ( well some time after that ) i should be able to take it to the upholstering shop again to have them do the steering wheel and the rear carpet.
12.30.11
i got the seats back from the upholsterer and i am all smiles ! they did a great job on redoing them in black leather (sorry didn't have the camera with me so no pics for now ). i also got a new throttle cable made which is shorter than the 6 mile one i had on the car , i got that in and re routed it and now i have a lighter pedal feel
i'm still messing with the harness trying to figure out why the temp and rpm guage don't work, no progress there
so next up is to fix the guages ( and put the interior back in ) take it to the upholsterers to get the rear shelf carpet made , then i have take it to get an stero/nav. system installed, and by then the new decklid should be here so that will be installed and its off to get it as well as the rear bumper painted
another thing i have to adress is the cold idle tune , the car has problems holding idle when really cold , i should have went with a smaller cam but nooooo, i had to put the camaro's old cam in and hope it idled fine at 700 rpm )
01.04.12
not much done , but i did get the seats in
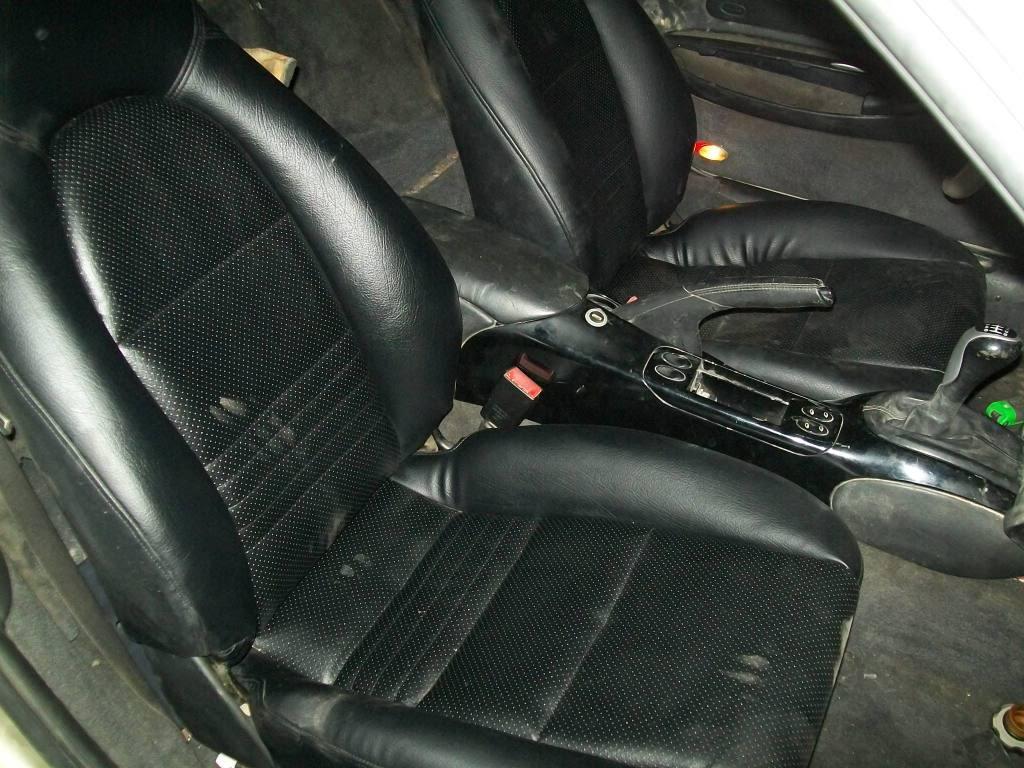
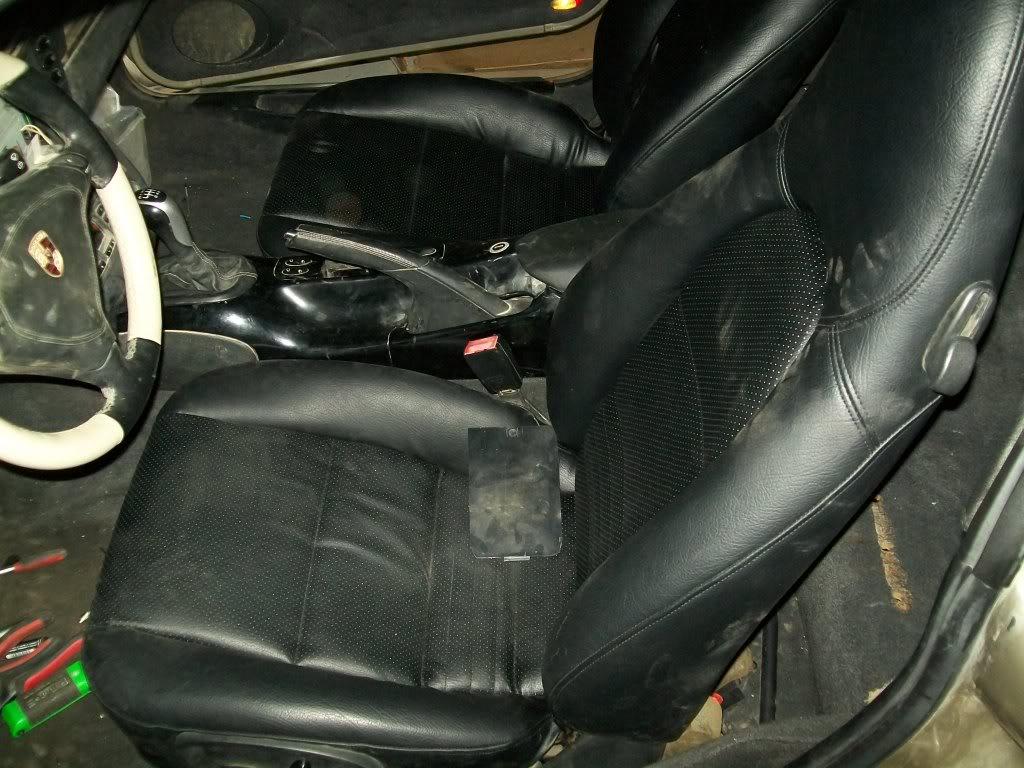
other than that , not much to report . i have to just find an hour or so that i can dedicate entierly to tracing the wires on the harness, and hopefully that will end the cluster dilema. ( marky552 where are you ?? )
i might take her out for a spin some time these days , just to see how it fairs on longer outings
01.05.12
well i just came back from the first real trip for this car i drove the car from where it was to my place for a total of about 15 miles
happy to report no major incidences , the thing was a blast to drive !
temps never went above 160 even though i floored it a few times . the thing pulls great and smooth (even though it was not tuned for WOT) . the cool part is thing is that the car feels like it has oodles of torque because of how tight the trany is geared and the v8 - it accelerated real nice in 6th from 70mph , and power slides are nooooo problem
i still have to tune for cold idle ( it has issues ) , and the oil cap breather was dripping oil so i have to figure out some sort of bafeling or relocate it to a catch can. another thing i noticed is the car is a bit loud for what i want inside the cab, but its not a fair conclusion sice the rear shelf was still exposed and some of the panels were not on. adding sound deadener and a carpet should cut it down considerably .
so ,,, i guess its time to scratch one more milestone from the list
01.11.12
this should sum up where i'm at right now
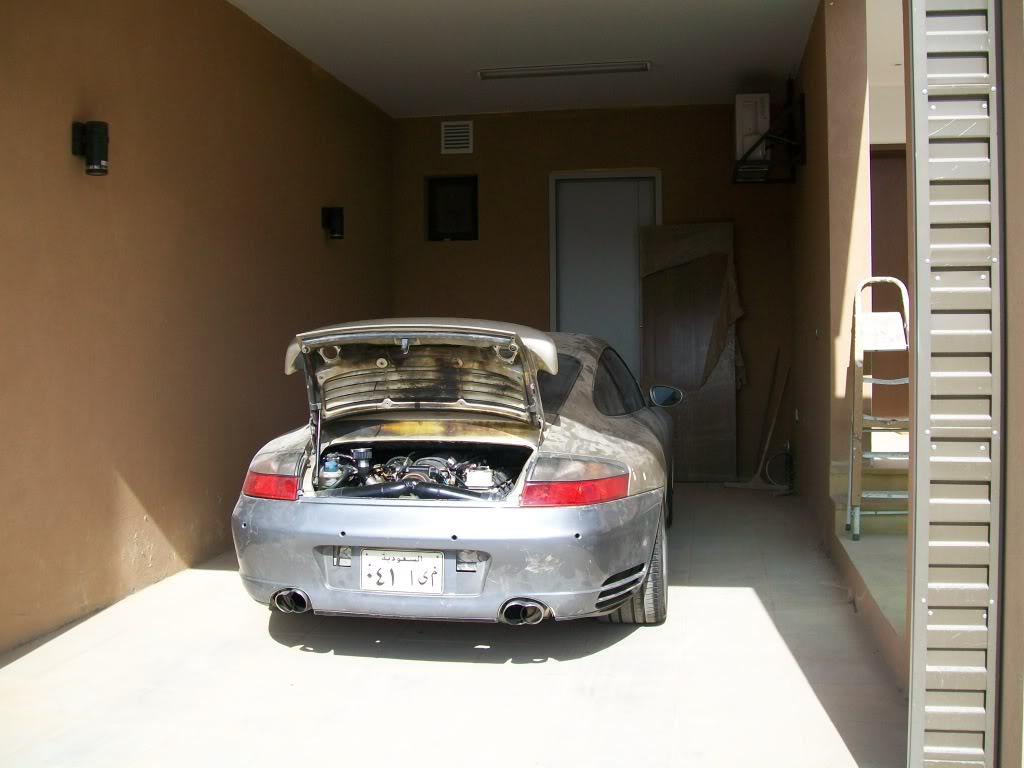
the car is resting peacefully in its new garage , it runs and drives good ( needs to be tuned ) , ac needs to be hooked up ( not a priority in winter ) , i have to finish wiring the RPM and temp guages , and swap the decklid ,,,, speaking of the decklid , look what showed up :
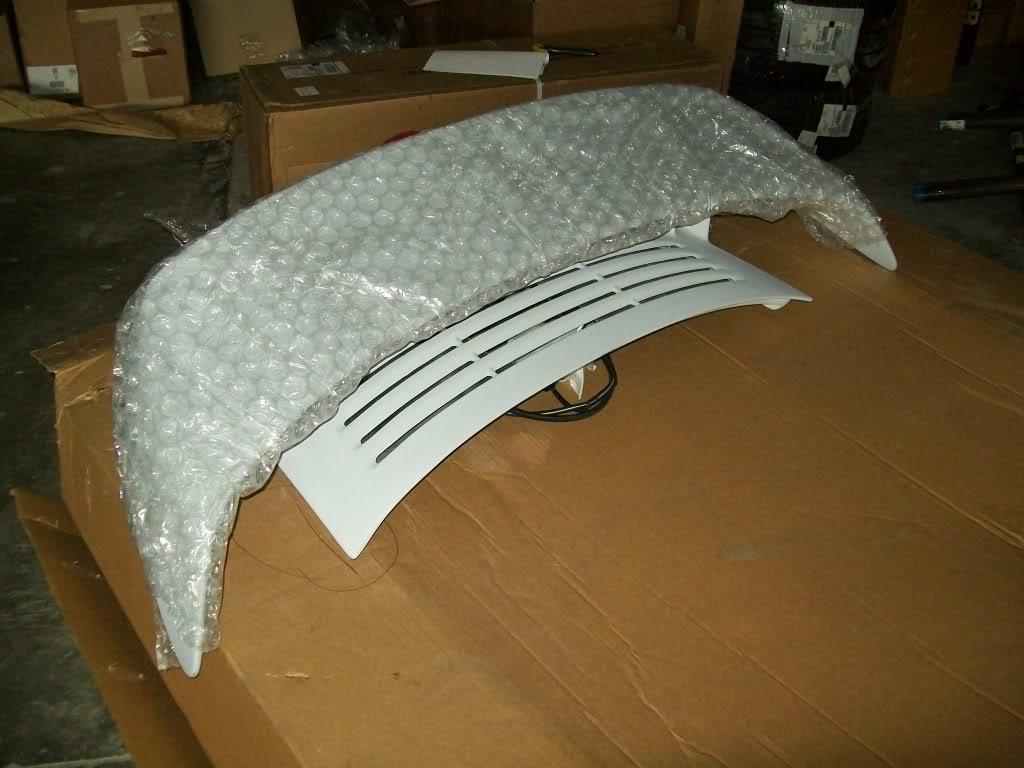
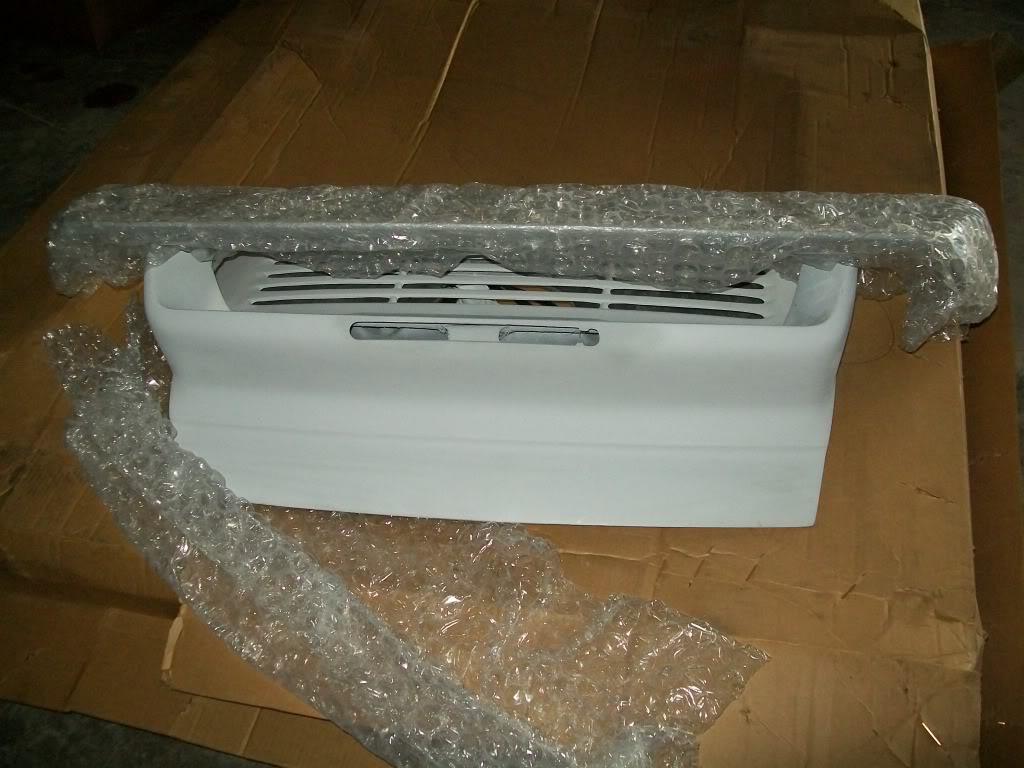
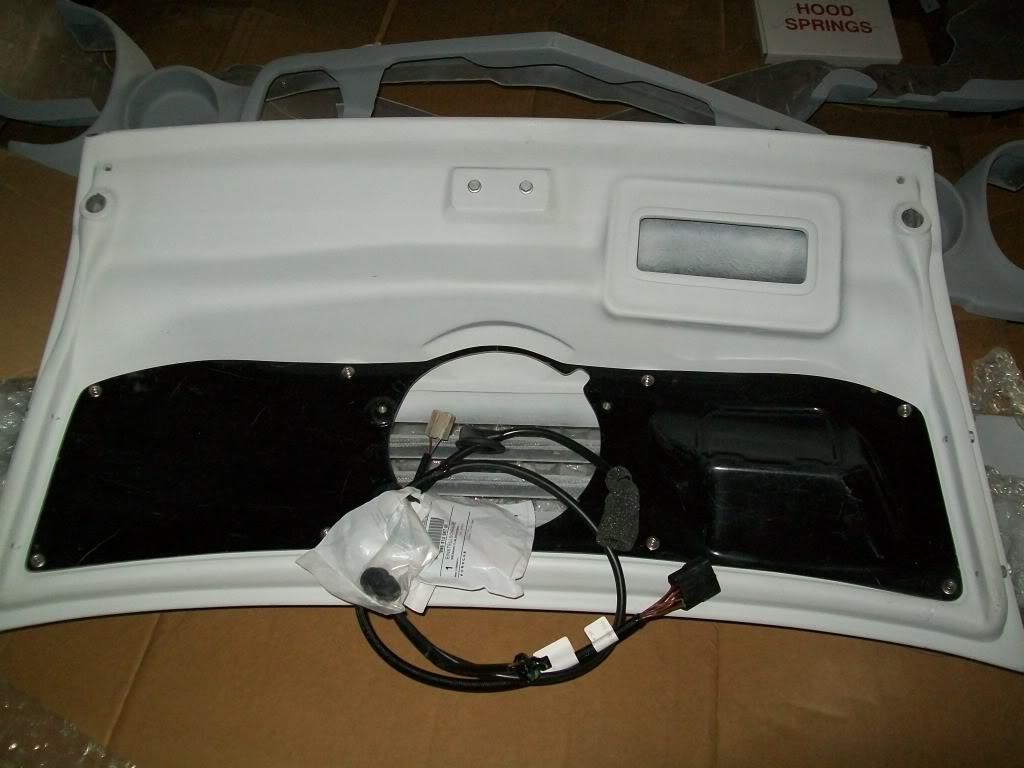
i also ordered the rocker panel thingies ( i have one missing and the other one is not in such a good shape.
like i said , its a bit slow right now cause i'm in the middle of a move and work has just been pouring on me , so bare with me for a couple of weeks untill things settle down.
01.21.12
more updates i guess , i drove the car back to the shop last night to work on it ( well that was the excuse i gave my self , i just wanted to drive it ) .
from that drive i got a better feel for the car ; i like how it pulls in any gear , but hate how stiff the gas pedal is ( i have to do something about it ) , i also hate that i can't read the RPM nor the coolant temp !!!! ) . i also noticed that the engine will raise its idle to about 1500 or so rpm every now and then for a few seconds just like a vacuume leak, i'm guessing its the gas tank purge solinoide venting - i have it connected to the intake- and causing it to surge , will take care of that soon
any how , so the car is at the shop waiting to be tuned ( will be disconecting the front driveshaft so i can dyno tune the thing = donut time ), so while it was there i decided to install the GT2 wing on there. well a few minutes of messing with it and tada !!!:
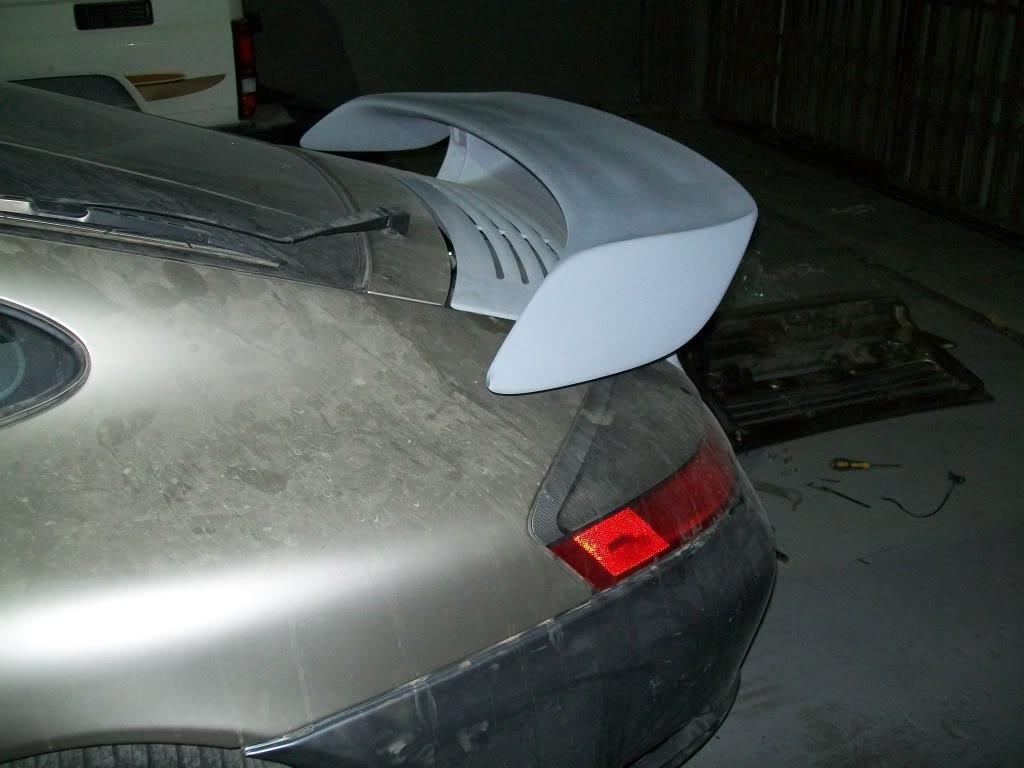
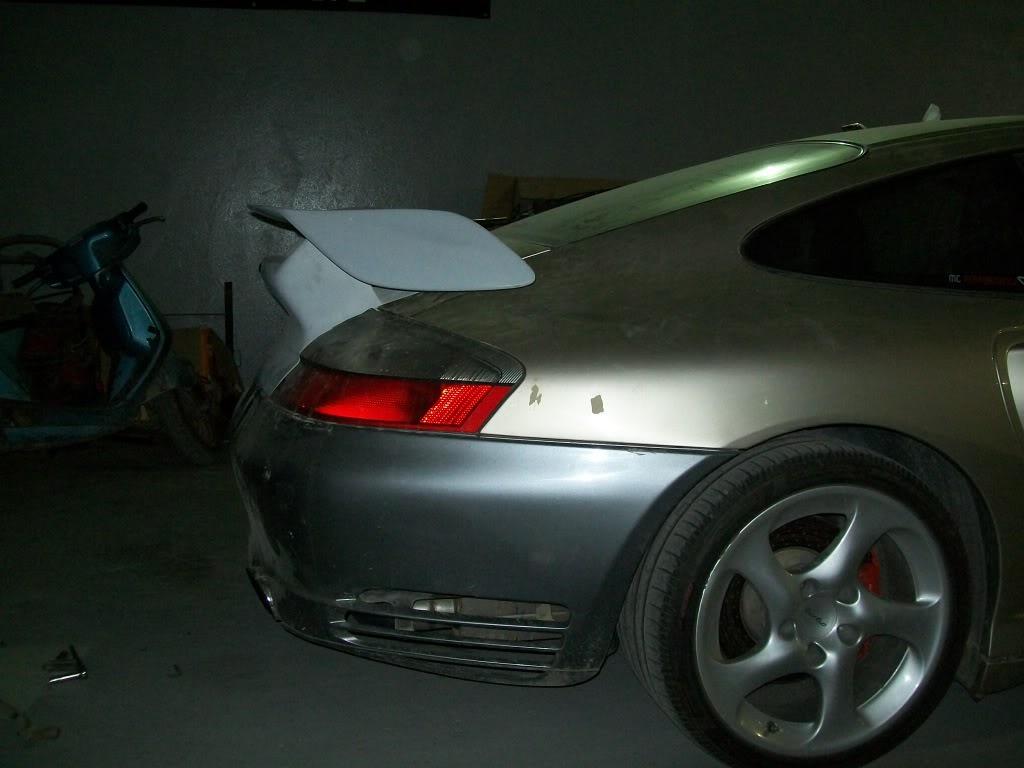
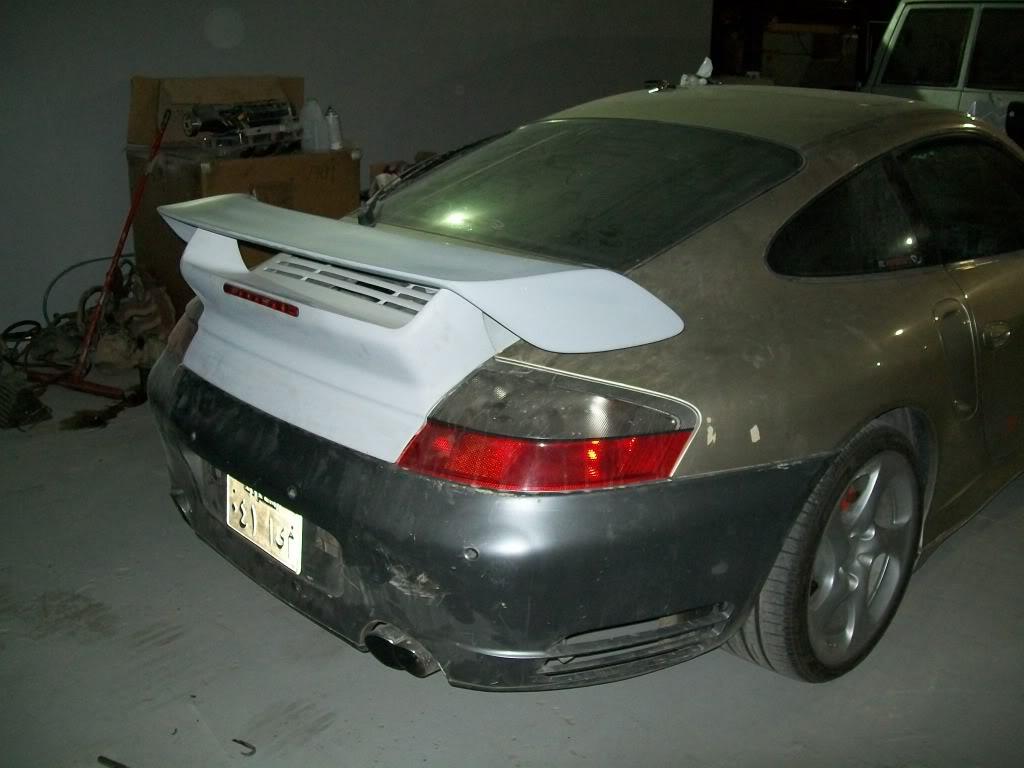
only problem i have now is getting it to close - the thing just won't latch in ! i had that issue with the stock deck lid and it took me forever to get it to close , so i decided to quit and make it the body shop's problem
speaking of body shops, the rocker panels should be here any day now , and as soon as they are in and on the car , its off to get the parts painted
i also spent some quality time on the stupid wiring on this car , and i still can't get the RPM nor the coolant temp to work. i though that the CAN signal wires were not connected after swapping to the new harness but after verifying it turns out they were.
i guess next up i'll have to remove the porsche coolant temp sensor and check whether the wires are still ok on that end . as for the RPM wires , i'm am just as confused as i was when i started. it just doesn't make sense
so , next up on the to-do list:
- disconncet driveshaft and dyno tune
- do a few "test" donuts
- install rocker panels
- redo tank vent and plug intake port
- relocate the oil cap breather to some where else ( don't like how goofy it looks , so i'll plug it and use the valve cover ports to vent to a seperate catch can or something like that.
- more quality time with the harness
01.25.12
i guess i can call this an update: i went to the shop to see how that would do in the rollers , only to find it parked next to the dyno , when i asked they told me i had a serious fule pressure issue ! fuel pressure was at 20 psi and drops to 15psi at WOT .
so, i start thinking of how i'm going to fix this and redo the fuel system and what not . then i remebers my old saying : start with the cheap easy stuff first so i did : the gas guage was reading 1/2 and the car was running fine a few days age , so it can't be something that bad , pluse i remebered that you have to recalibrate the stupid gas guage if you remove the sending unit out ...... so i decided to dump a few gallons in there and see what happens . and guess what ?? back to 60 psi !!
it turns out that i was simply out of gas. so since i was happy and could not put the car on the dyno for the night, i decided to go do the second best thing : donuts!
so i head off to the end of the road and commence the pastry festival !
i did a few donuts , then me and my passenger noticed that there was no one filiming us , so i had to stop and do it again infront of the camera. ( we can't dissapoint fellow LS1tech members )
so i start again and all is fine and danady ,,,, untill:
as you noticed there was a "slight" fire in the *** of the car ( the curse of the roasted porsche strikes again ) , turns out the breather was just puking oil - as eveident on the street and in the engine compartment - which reached the header and you know how oil tends to combust sometime
any how the fire was quickly put out thanks to a local shop worker who happened to be standing next to a fire extinguisher
luckily nothing was samaged and the fire was put out rather quickly, all the rubber and plasstic inthe compartment seemed fine ( dusty but looks fine ) , i started it and drove it back to the shop and it has fine too . here is how she looked post BBQ :
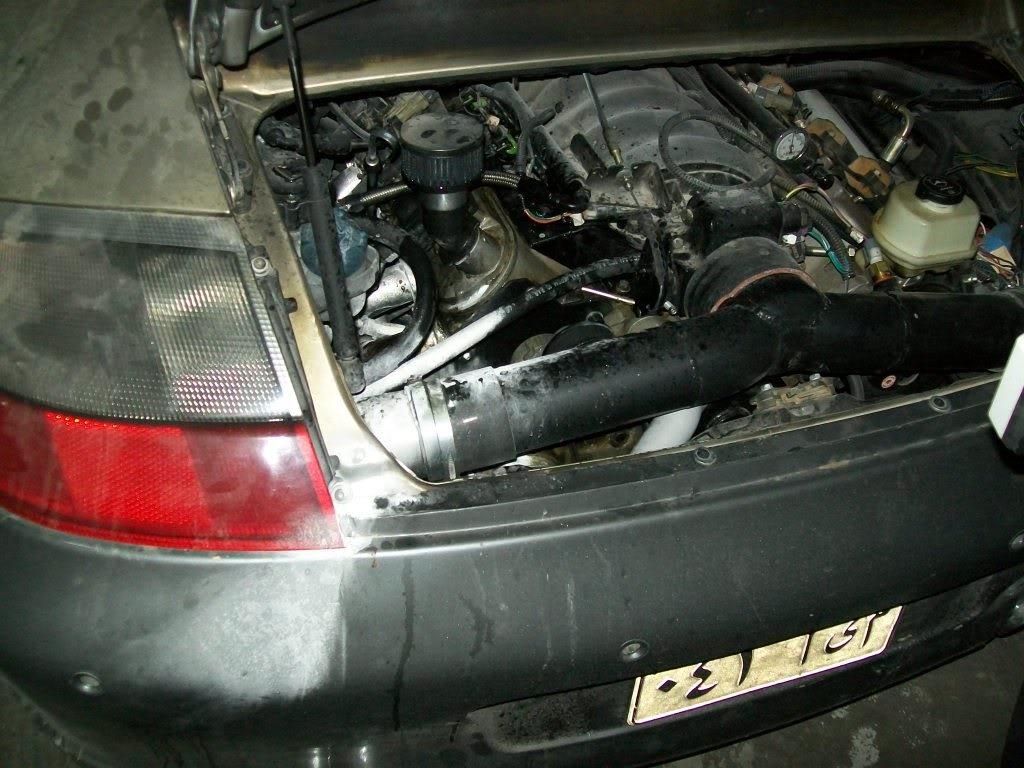
so i guess the breather / catch can project just jumped higher on my to do list
i'll mess with it today if i have some time and see what i can do . i'm thinking of a remote catch can with hoses going from the valvecover nipples to it and venting some where safe , and just closing the oil fill hole with a cap.
did i mention this car really needs an LSD !
02.26.12
so i guess i should update this thread
the side skirts showed up
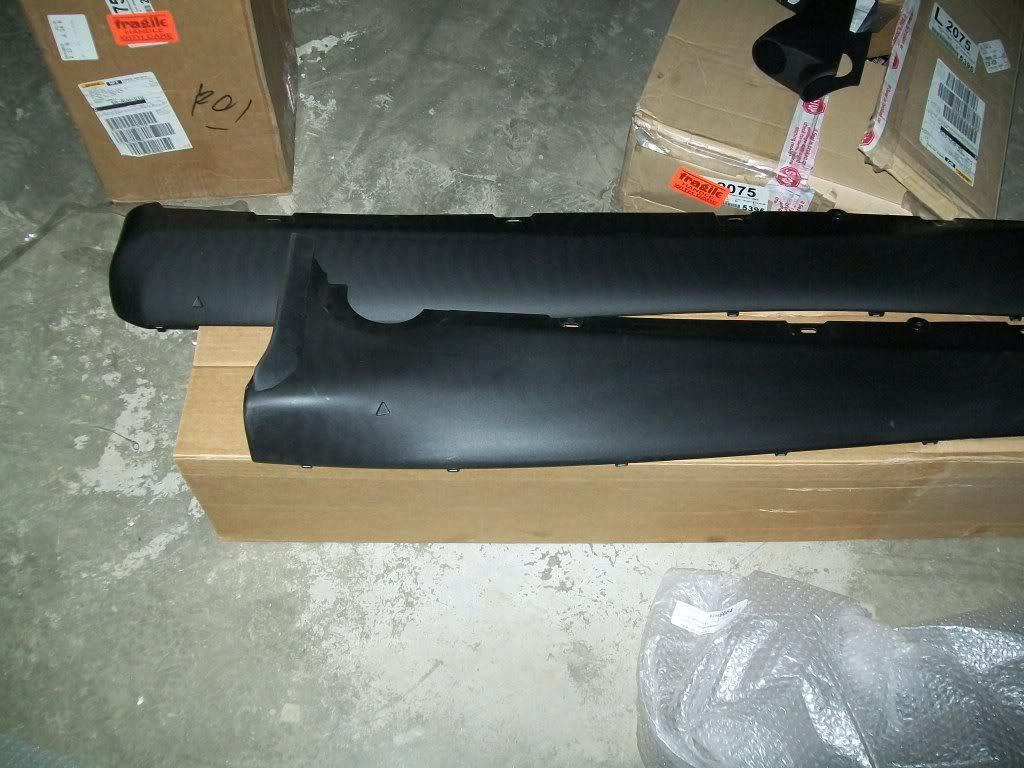
i decided i didn't like how the breather setup is setup
so i started working on a catchcan / breather assembly. the plan is to get rid of the oil cap breather and put a regular cap . i'll then use the two ports on the passenger side of the engine on the valve covers as well as the port on the back of the driver side cover and have them all plumbed into a small catchcan , and then from the catchcan a hose runs to a small air filter located somewhere convenient. ( i will also have another hose coming out of the vally cover plumbed into the can as soon as i swap the covers )
the issue i'm having now is finding a catch can small enought to fit my needs and the engine compartment , i also have to mount it as high as i can so that it drains back into the engine if it starts collecting oil.
so after searching around for a suitable candidate i came up with nothing , so i decided to make my own :
i started with a short length of aluminum tubing that i squashed and welded plates on both ends :
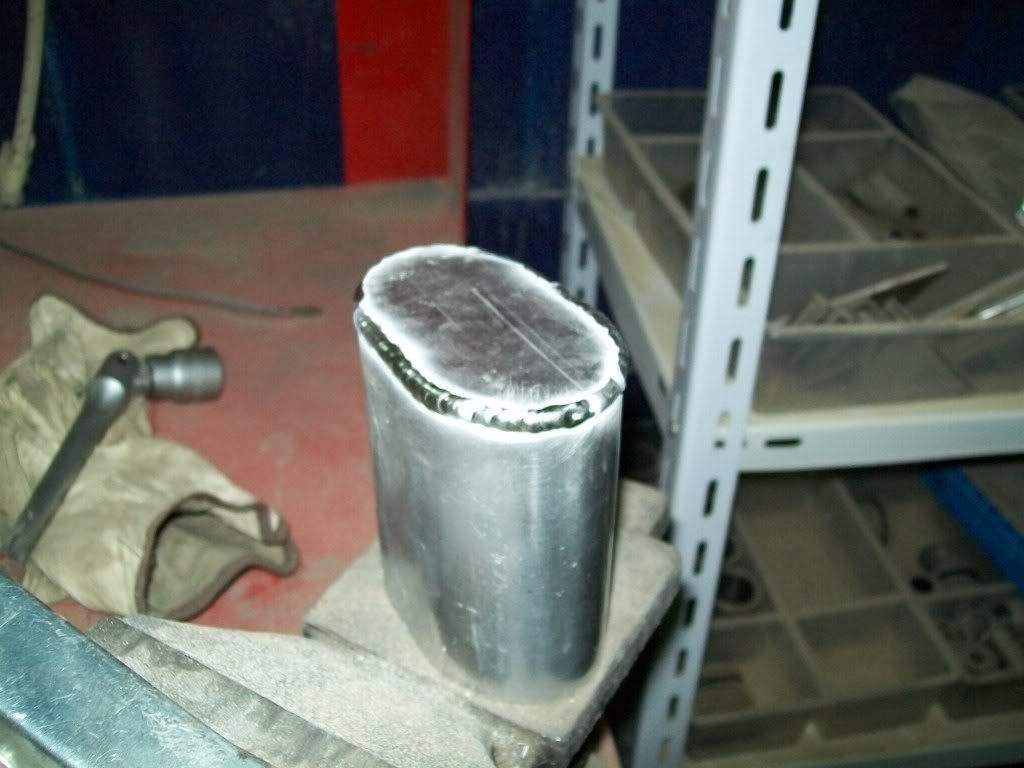
then drilled holes on both ends and will weldsome bungs in there :
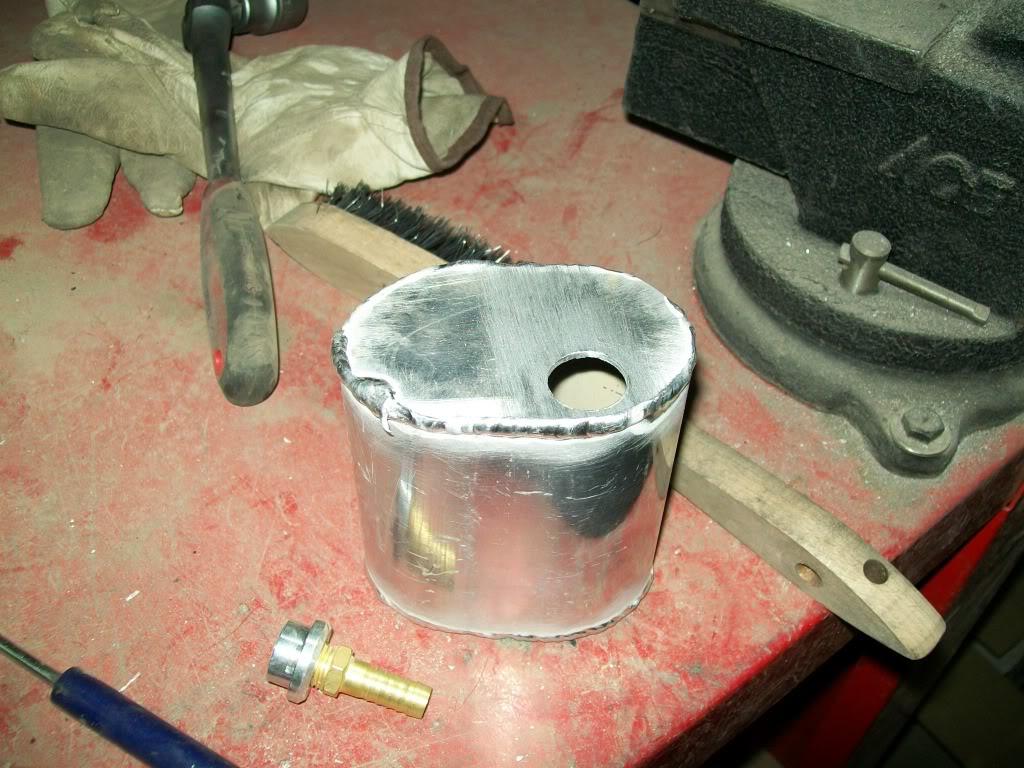
the plan is to have the "in" ungs placed lower on one end of the can , and the "out" on the higher side of the other end.
(will post pics soon )
03.13.12
i finished the catch can :
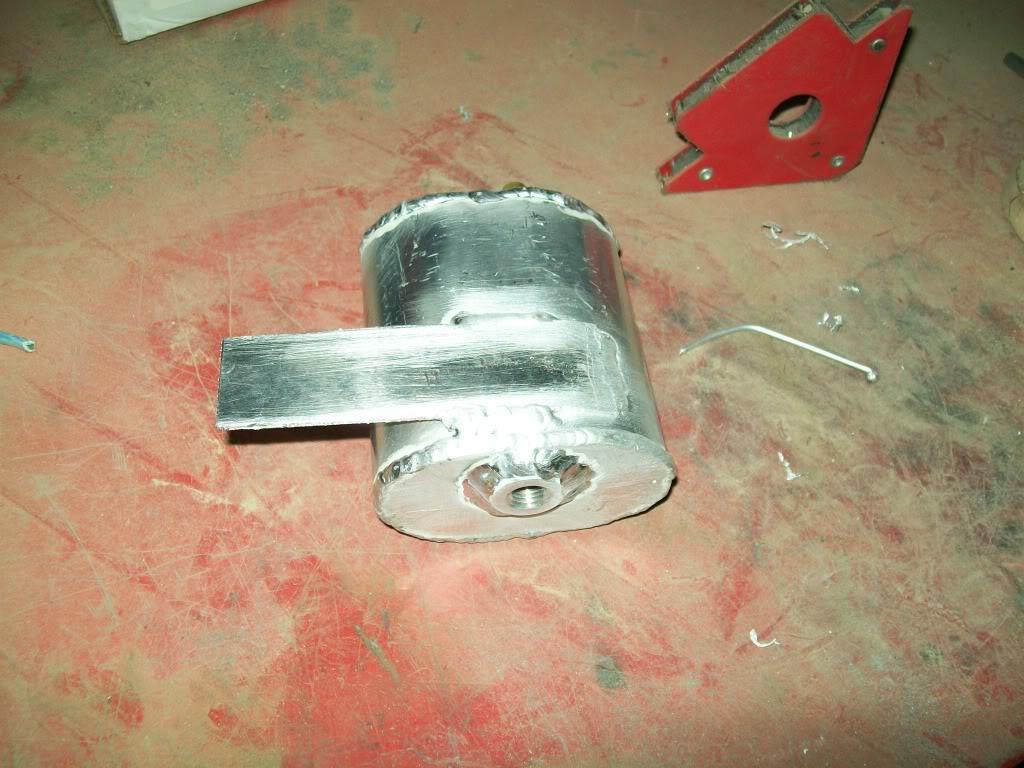
and how it looks in the car:
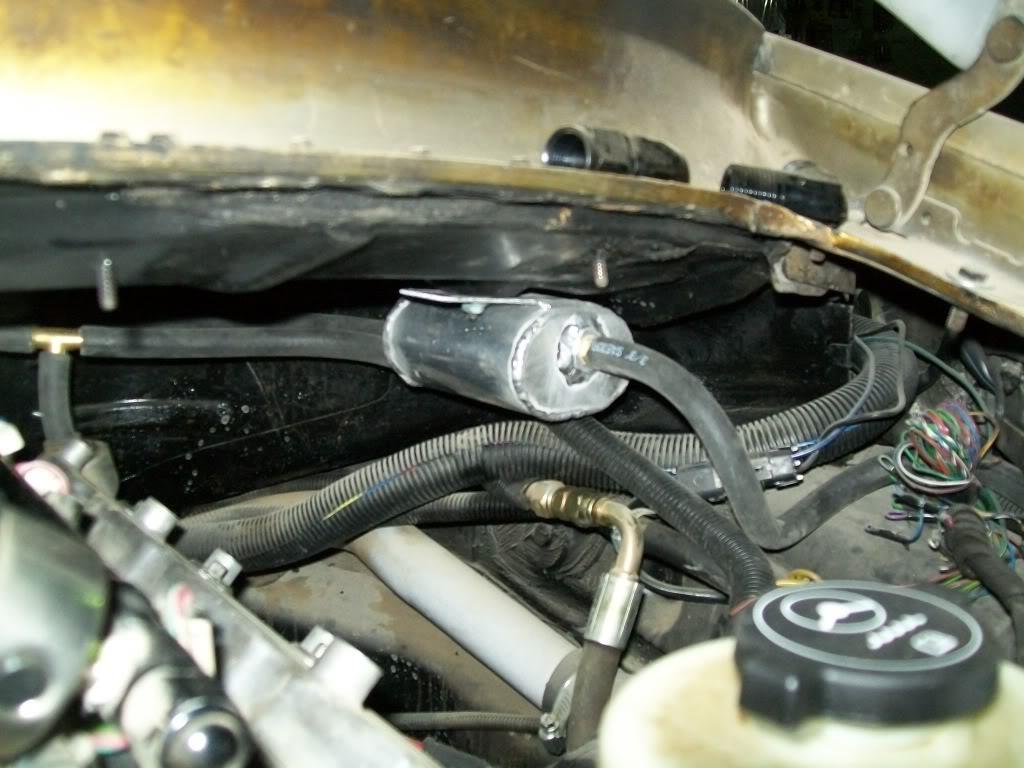
and finally some shots of the new shortblock

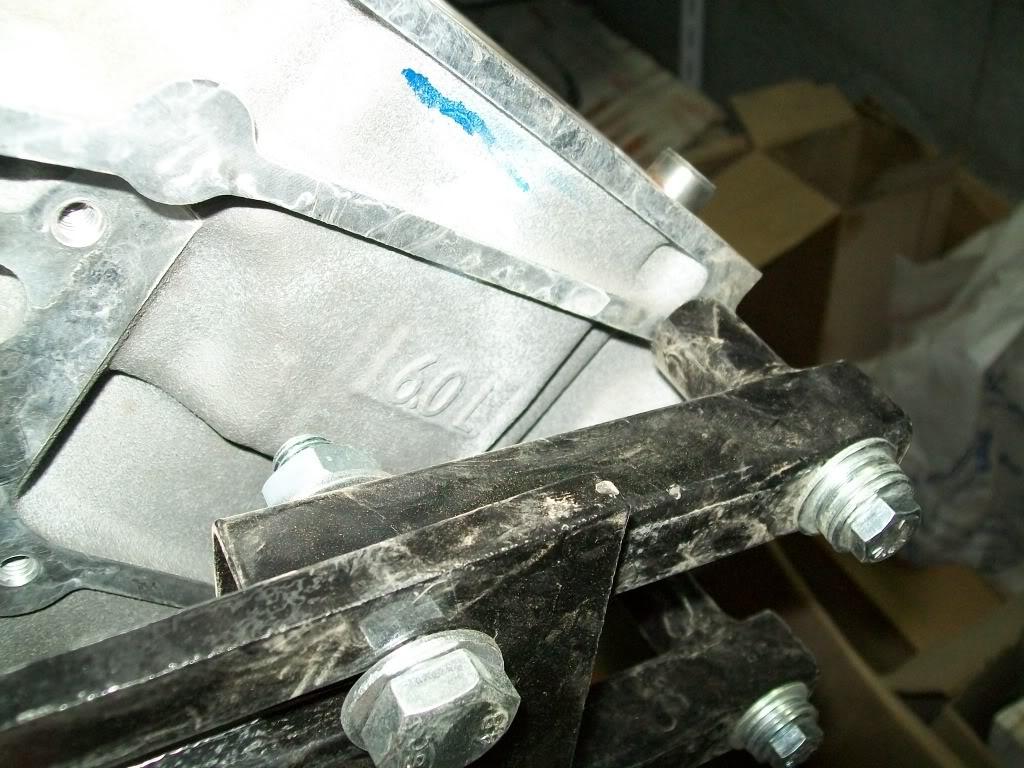
right now i'm waiting for a bunch of parts to show up to complete the longblock , then i should start mocking up and building the turbos .
mean while i need to just sit down and get the wiring done ; the rpm and temp guages are really pissing me off.
i'm also planning on removing the deck lid and bumper , and taking them over to get painted along with the rocker panels . that way i don't have to take the car over to a paint shop and have it sit there for god knows how long.
04.13.12
update time
the camshaft showed up recently along with the lifters, lifter retainers , oil pump, head studs and timing chain and related hardware ,,, so those found their way on to the shortblock
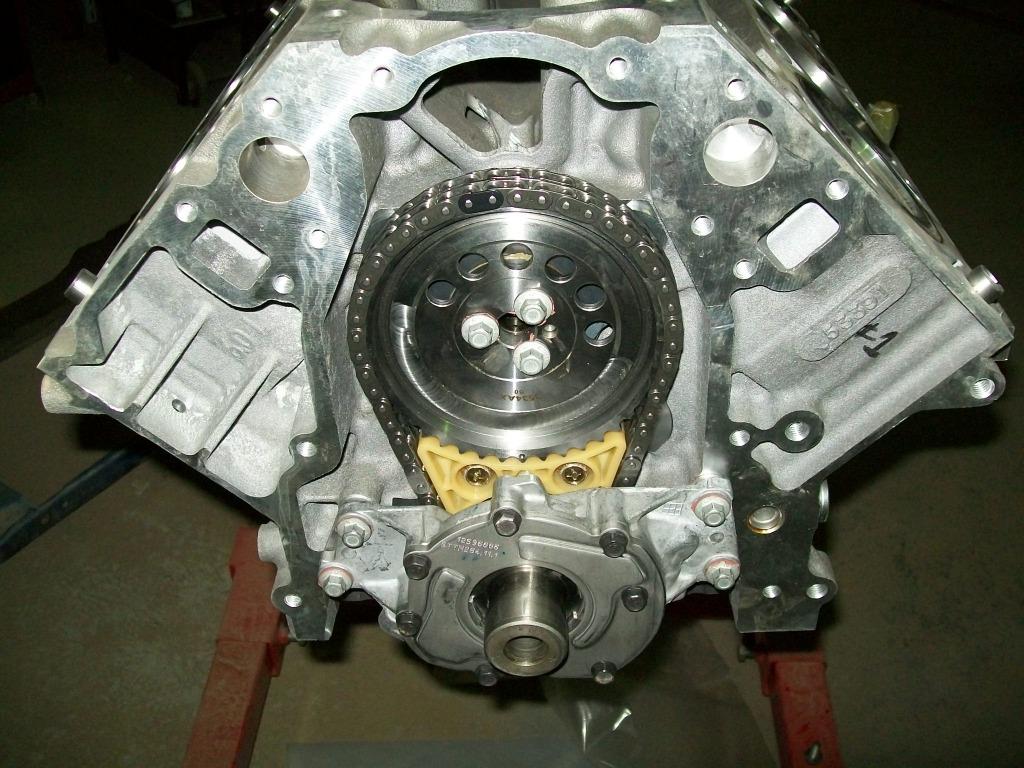
so after spending time on things i should be doing later in the build process , i decided to focus on the wiring again . so i re printed the diagrams and hilighted the wires from the rpm sensor and coolant temp sensor all the way to the cluster. i then proceeded to compare the diagram to the old harness, which turned out to be the same , then i compared the existing harness with the diagram ( checked colors , pin outs , and continuity ) and it all checked out ok . i also checked the CAN BUS wired from the dme to the cluster .
so this means that either :
1- both sensors are shot.
2- there is some thing i'm missing in the wiring , something having to do with the transmission computer i guess .
it just has me really bummed out right now , i really was hoping to have the wiring issue done by now .
i guess worst case scenario is getting a brand new interior harness from an auto car and drop it in there and hopefully that would fix it .
but before that i have one more thing to try with the current wiring harness; there are two sets of can-bus wires going out of the DME , one to the cluster and the other set to the auto tranny computer . the thing that i just thought about is that the second set of wires ties in to the other two , which means maybe the rpm and temp signals are carried on that set of wires then it gets tied in to the other set.
off course i could just be speaking jibberish , but i always say try the easiest and cheapest fixes first .
i'm also waiting on the valve springs to show up , so as soon as they do its time to install them on the patriot heads i got and install those on to the shortblock as well as the front and rear covers and call the engine done for now.
05.23.12
i broke down and ordered a new ( used ) interior harness that is off the same car as mine from LAdismantler, so it should be just like the melted one - for an auto car.
aaaaand thats about it
i have the harness sitting in a box right next to the car and just been to lazy to install it
i should have it in some time this week and hopefully get the whole guages dilemma behind me !
i'm also just about to take the deck lid and side skirts and rear bumper to get painted , just need to get my *** to the paint shop
on a side note, the new engine is a little closer to completion : i have the heads on the short block and all buttoned up so now its officially a long block !
i'm planning on installing the LS3 exhaust manifold on the heads just to see how the turbo routing is going to be ( have you noticed how far ahead of myself i'm going - i should focus on finishing the car's interior first! )
so , on to the never ending list :
- take parts to paint.
- install new harness and test
- if all is well re-install interior , if not set car on fire
- install manifolds on new engine
- install inner fender
06.24.12
update time!
took the stuff to get painted , got it back and it looks good
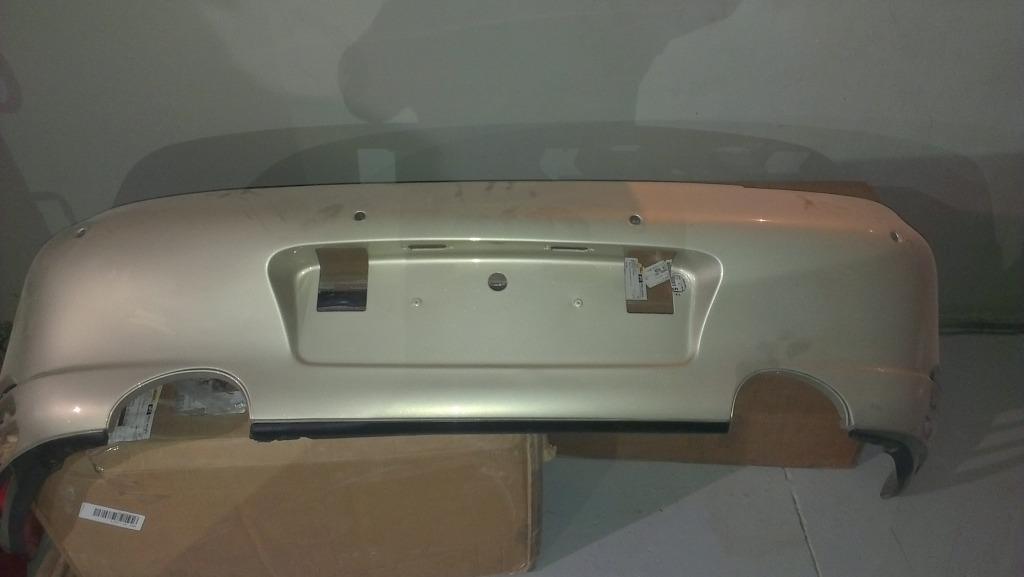
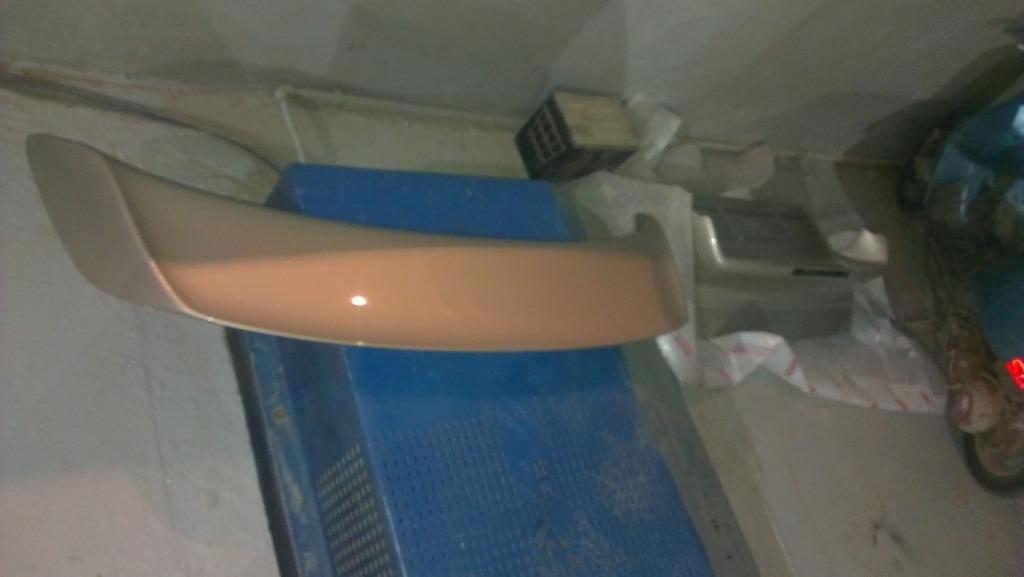
while i was contemplating installing those parts , i decided to install the new harness. i was in no rush to finish stuff, so i did it in stages ; i took the oul one out , layed the new one in place , wired the engine compartment connectors , spliced into the interior harness , and finally put the throttle cable back in .
the result ,,,,, IT WORKS!
rpm worked right away and it took a while to get the temp needle to move , but it did
so this got made me motivated to work some more on the car ( who would have thought it ! ) , so i slapped the decklid and wing and bumper on the car and they look gooood ( sorry no pics )
i still have to install the rocker panels , but those can wait for now.
so next up is :
- putting the interior back in
- retune cold idle ( car just surges from 700 to 2000 rpm regularly )
- pull the car out and get the 10 feet off dust blown off the car.
- install the intake tube
- install the front inner fender
wish me luck !
06.27.12
dropped the car off at a buddy's shop to have him tune the idle surge, calls me up after a few hours telling me it made 378 to the wheels !! and that it idled quite nicly and pulled real smoth and hard .
he then proceeded to tell me that it was not what he expected from a 6.2 and l98 heads ,,,, to which i replied that is was the "***** 5.7" that i built ages ago with 5.3 heads that were somewhat ported ( read porthed a few ports , got bored, decided that those would do ) . needless to say he was surprised
he just has to do one more thing with the cold idle , and then he will add some more timing cause he thought this was the other motor and only put in 22 deg of advance .
sooooo if you figure that it made 378 at the wheels , at the flywheel @ 15% loss that would come out to be just under 435 , which is higher than the output of the original porsche engine of 420 . but that is not my target , i want 420 to the wheels!!!!
anyhow i'm waiting for the guys to send me a video of the runs so i can post it here .
07.07.12
well i guess i have a few milestones to celebrate
after dynoing the thing ( will post the vid soon ) i took the car over to have the AC done. i dropped the car off at a well known shop and told them "fix it " the guys did a great job, and the owner recomended a different style compressor than the one i got , so i went with it and he did the necessary fabrication to the compressor mount as well as cleaning the whole system before installing the new lines.
well after that i took the car over to the upholsterer for covering up the rear shelf area and fixing the airbag cover, which they did quite well!
i already put a few fun miles on the car for "testing " reasons
and just been finishing a few little things here and there since i'm a bit motivated now , i already jacked the rear up and went under the car to see where a small water leak was coming from , turned out to be a loose clamp on the heater hose. also insulated the ac lines coming out of the compressor because of their close proximity to the headers and muffler.
there are a few issues i have to take care of now , first off the rear cover release isn't working , i remeber fixing it with the old harness but i'm not sure what i did so i guess i have more wire tracing to do
also noticed that the AC belt is off one tooth , so i have to realign the ac bracket to get it in line.
another thing i have to do now - which is quite new for me since i never worried about the AC system in anyof the conversions i have done before - is wire the ac signal to the pcm to bump the idle when on and turn the fans on too.
and a bit of bad news to report , i think all the "testing" is taking its toll on the clutch: i think i smelt some roasted clutch today
anyhow, the list of things to do for now is :
- snap pics
- trace latch release wires
- wire ac signal and check
- install rocker panels
- remove whats left of the old stereo
- take car over to get new nav/stereo system installed
- take it to get detailed inside
07.21.12
more updates
i did snap some pics :
here is how it looks after painting the wing and bumper:


and here is the interior work they done at the upholsterer, airbag cover mounting :

how they mounted the DME and fuse block tot he shelf:

and how the shelf looks installed :
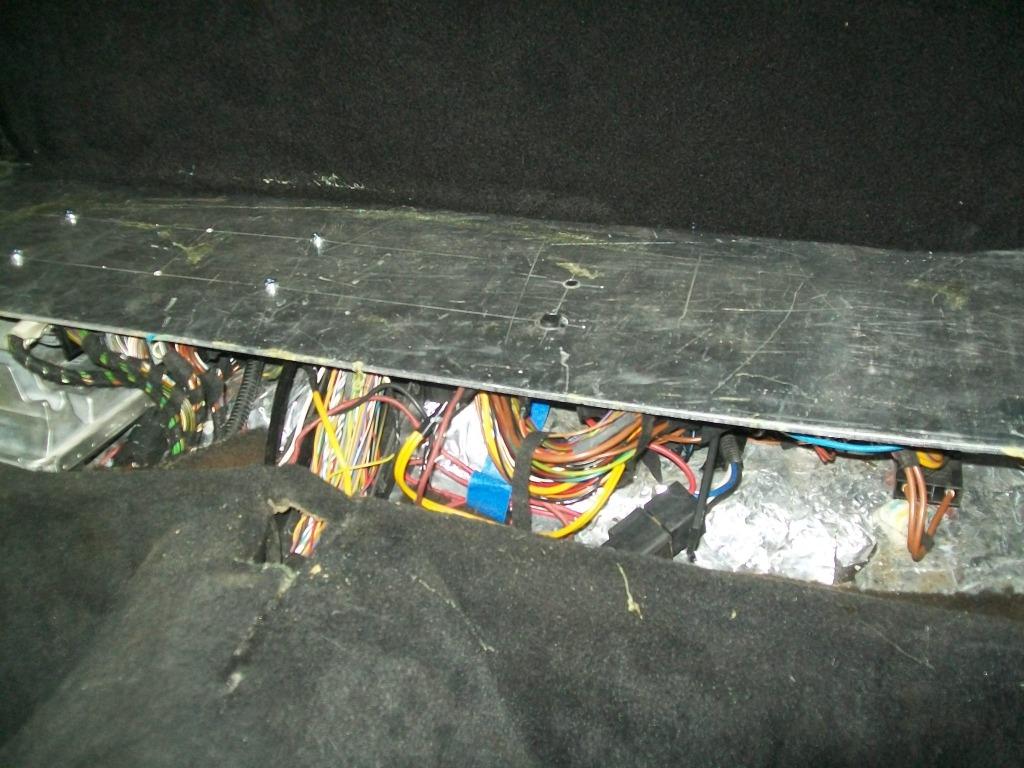
and how it all looks whith the carpet installed :
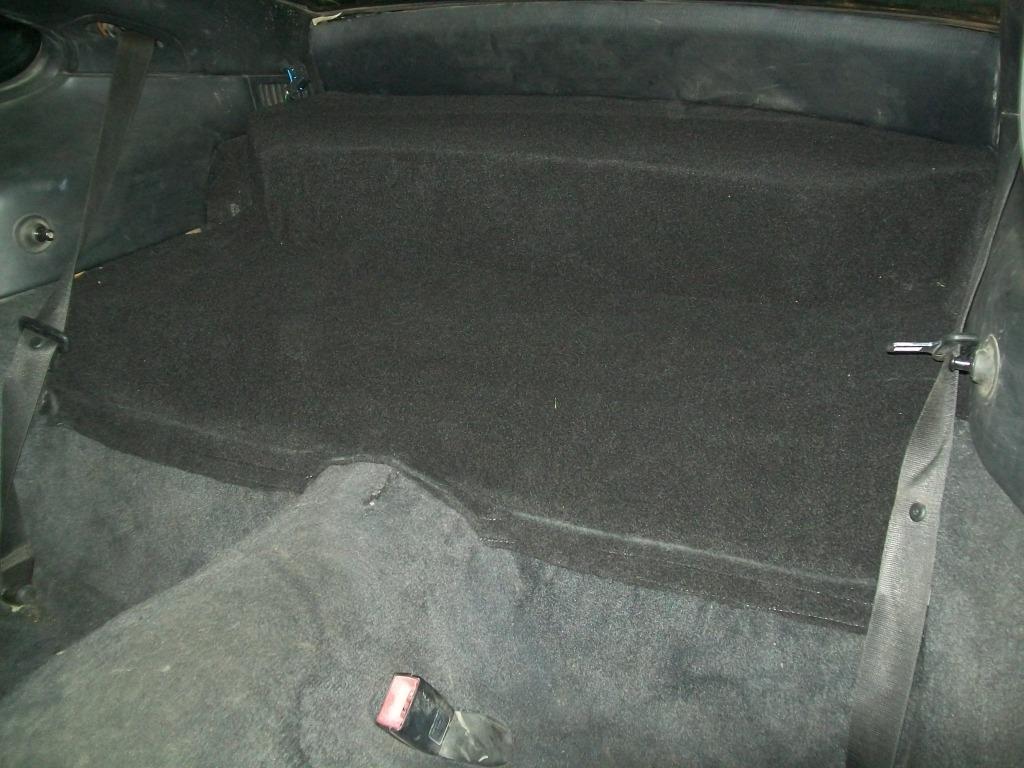
i also fixed the rear hatch release , turnes out it wasn't getting a positive signal (the release switch up front just grounds the circuit and actuates the release) because the positive signal comes from the spoiler ( retracting and extending ).
also checked the AC signal wire and spliced into it and connected it to the LS PCM , now when ever the AC kicks in the RPM should bump up and the fans kick in ( i say should cause i still need to to adjust the AC on idle parameter )
and i finally got around to installing the rocker panels , which i forgot to take a pic of
so right now the dwindeling to-do list is as follows :
- ac bracket alignment
- remove old stereo unit
- take car to get new stereo unit installed
- detail inside of car
- tune ac rpm and more timing
- check why pass low beam not working
- rear wheel alignment
- check speed sensor wiring ( i think i have the brake wear and speed sensor wires confused)
07.24.12
well not much to report but i did put some more miles on the thing and thought i'd share my first ( well sorta first) impressios of driving the thing.
first off the car rides smoothly , it soakes up bumps and imperfections nicely which really surprised me. and i really like how it pulls under WOT .
-the throttle pedal is a bit on the heavy side - no wonder since the cable is about 4 yards long and snakes its way around the car body. this coupled with the small flywheel and huge *** cam i have in there make for some interesting slow launches from a dead stop.
-the thing needs more low end torque just off idle , the 5.7 engine and huge cam ( something like 24x duration and 64x lift ) and low mass flywheel and clutch make moving from a stop a bit difficult , you need to spin the clutch a bit to get it to move without bogging . i guess that the new engine combo shouldn't be as hard to launch as this given the new cam ( cheater cam ) , bigger cubes , and a heavier clutch (dual disk setup).
- car has an issue with ideling with the AC compressor on: as soon as the AC compressor cycles on the engine dies due to the load it places on it , when crusing or on throttle its not an issue just when ideling. i still didn't mess properly with the tune to try to fix this , but i did raise the "ac on" idle speed which didn't help. i'm sure messing with hptuners for a bit will have this issue sorted out.
- the exhaust is a bit on the loud side for what i have in mind - its perfectly ok by muscle car standards - but i would prefer it to be a bit quieter. there is a droning sound , which happenes to be the loudest sound the exhaust is when cruising around 2000 rpm , but i quickly dies down when you pass 2300 rpm. guess thats the price you pay for a free flowing exhaust .
i'm not worried about it right now since the new engine will have lower compression and turbos to muffle the sound even more.
- i still have to get used to driving such a small car !
- steering is on the heavy side , its totaly managable being without power but i'm starting to like the idea of turning the wheel with one finger
- i also found out the horn only works with the ignition OFF , and as soon as you turn it on you get nothing ?? more wiring to trace i guess
- i finally washed the car and cleaned the inside a bit ( wiped it with a damp cloth ) and it looks better than before i did find out there are a few dings in the pass side sail panel ( around the rear window) that i need to have removed , but thats on the might-do-some-time-in-the-distant-future-list
07.28.12
i have to say it was a pretty fun weekend
decided to take the thing to the track, just to get a baseline . i still did not connect the front driveshaft so i was not expecting any great numbers.
i was surprised how well the car hooked ; those are pretty old tires in the back and it was rear wheel only with no LSD in the rear . i guess having the weight of the transmission and engine sitting on the rear tires helps
i also found out that the rev limiter was set at 6000 rpm !! so i ended up using that as my shift light
regardless , the car did a not so great sixty foot time of 2.05 , and et of [email protected] mph i think i can squeeze a 12 second time slip with just changing the rev limiter
but its still a bit away from my target of beating the time this car supposedly did with its original engine ( see the time slip i found in the car when i first got it in the first couple of pages of this thread). funny thing is i don't know which time on the slip was for this car - it could either be a 12.98 et or 12.07 et
anyhow , next weekend the new cd/nav system should be installed , front driveshaft too , and most likely a new tune just to make sure
so far i have the the SRT8 grand cherokee wanting to race me again , as well as a highly modified race evo. i'll try and stirr the local pot and see what other races i can line up
i might just hit the local fourms and start being an *** and see if i get any nibblers
08.01.12
not much to report other than that i have installed a JVC head unit, which looks kick *** and i had them do a quick clean and polish of the interior while it was there. ( sorry no pics yet )
i also reinstalled the front driveshaft in preperation for the weekend races .
oddly the car decided to develope a sudden "rpm Rise " , up to 3000 rpm when ideling . it just happened when i was parking the car and it almost felt like a sudden vaccume leak ; so i poped the engine lid and started to look for leaks , but nothing was evident. so i decided to check the vaccume hose on the back of the intake manifold ( booster hose) to see if it split open or had a cut or came loose, and given that i can't reach it easily i had to remove the intake manifold ( a simple 3 hour job!! ) and when i did remove it i found out nothing wrong with it
so i rerouted the booster line to the front of the intake manifold for my sanity and ease of service later on and reinstalled the intake . i then decided i should check the iac sensor , so i swapped it with the one i had on my camaro , which made no difference ..... so i just sat there and scratched my head for a few hours
then i thought , why not just lower the idel screw!!?? to which i did and the idle dropped down immediatly !!!
so apparently the IAC i had in there was stuck in the closed position before , and decided to pop open when i was parking , which would also explain why the car would not respond to changes in idle rpm i made in the tune as well as dying when the ac was turned on at idle.
so to make sure i let it idle and turned the AC on and it bumped the idle as it was supposed to do and did not die
which means i am now even happier than before !!!
so the lesson of the day is " try the easiest , cheapest fixes first " .
on a side note , it appears this swap is getting popular
08.03.12
quick update , took it to the track for more "testing"
i had the front driveshaft in, so it was time for clutch dumps
i did a few runs trying to get a feel for the car , but i'll cut to the good stuff : i took it up to 4000 rpm and dumped it , which resulted in a 1.93 sixty foot and a 12.7 @108.5
so, am i happy ,,,, kinda i broke the old number i found on the time slip i found in the car when i first got it , but there was a 12.8 and a 12.2 (IRRC) on that slip , so the goal of braking that number is half done
so am i done testing??? hell no , it still have 3000 rpm more to go
the clutch didn't show any signs of slippage , so i guess next time out it will be 5k dumps and more
i also noticed when logging the runs that my timing never went above 24 , so i guess i have to do something about it i'm thinking that 27ish timing should be ok.
another thing to add , the IAC motor decided to take a crap on me and come appart ,,
i'll post some vids as soon as i get them .
08.15.12
not much to report , but here is a pic of the interior after the headunit install, the interior still needs to be cleaned and polished:
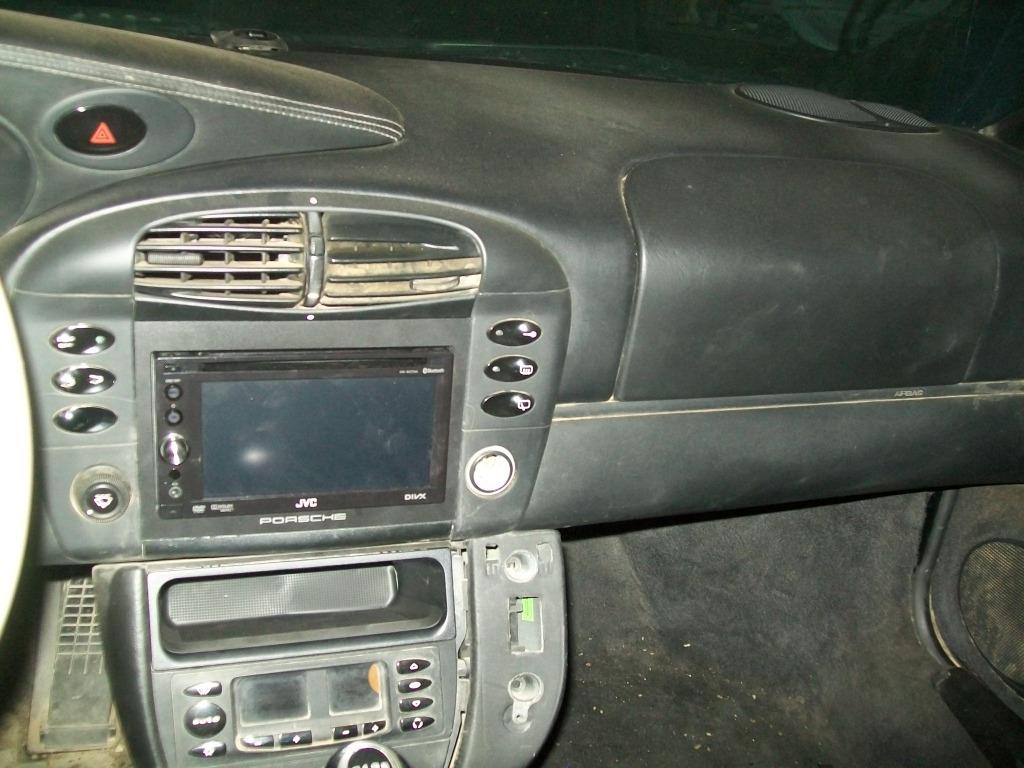
moving along , i got a stock GTO pan and started getting it ready ; i cut the back part out so it would clear the factory rear sway bar:
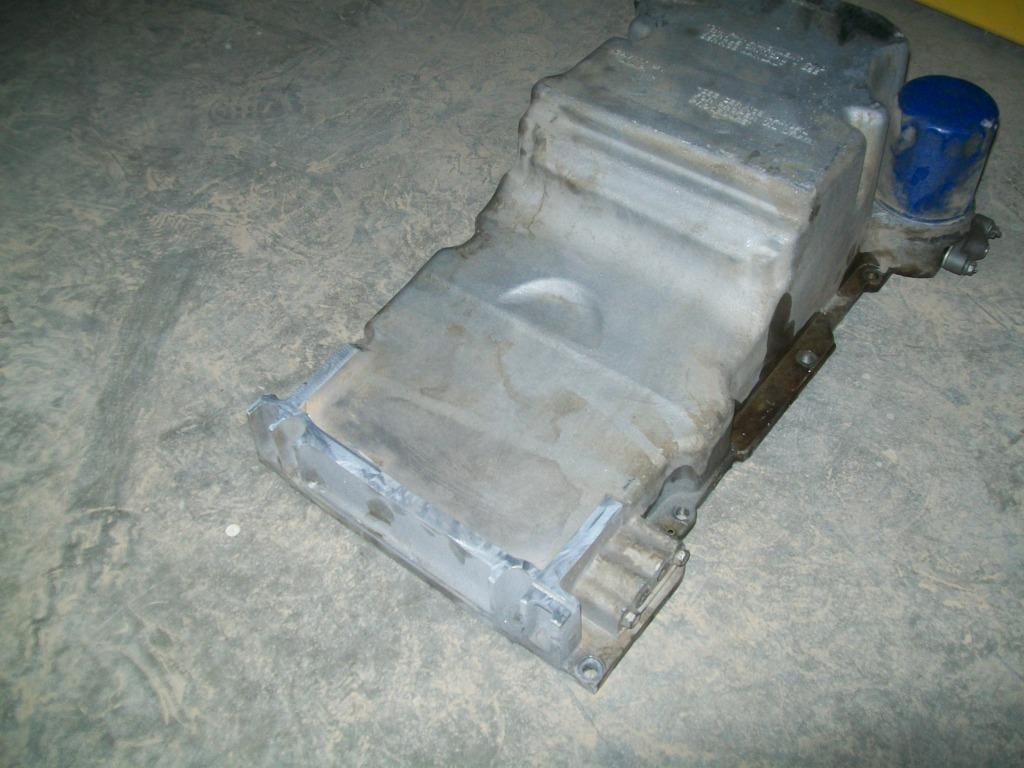
i'm thinking of going with the gto pan to make things a bit cleaner under the car. right now there is some weeping going on from the perimiter of the pan and from the fittings going to the oil filter. plus running the GTO pan will place the filter on the pan towards the rear of the car , wich will free up some space for the turbos previously taken by the cooler lines. plus the GTO pan is alot more rigid than the sheetmetal one i have now and has the sump placed in the right place for acceleration g forces. and if you are wondering if it hangs too low , it doesn't : the GTO pan still hangs higher than the stock porsche stuff. here is a pic of the exhaust manifold i plan on using showing how low the turbos will hang
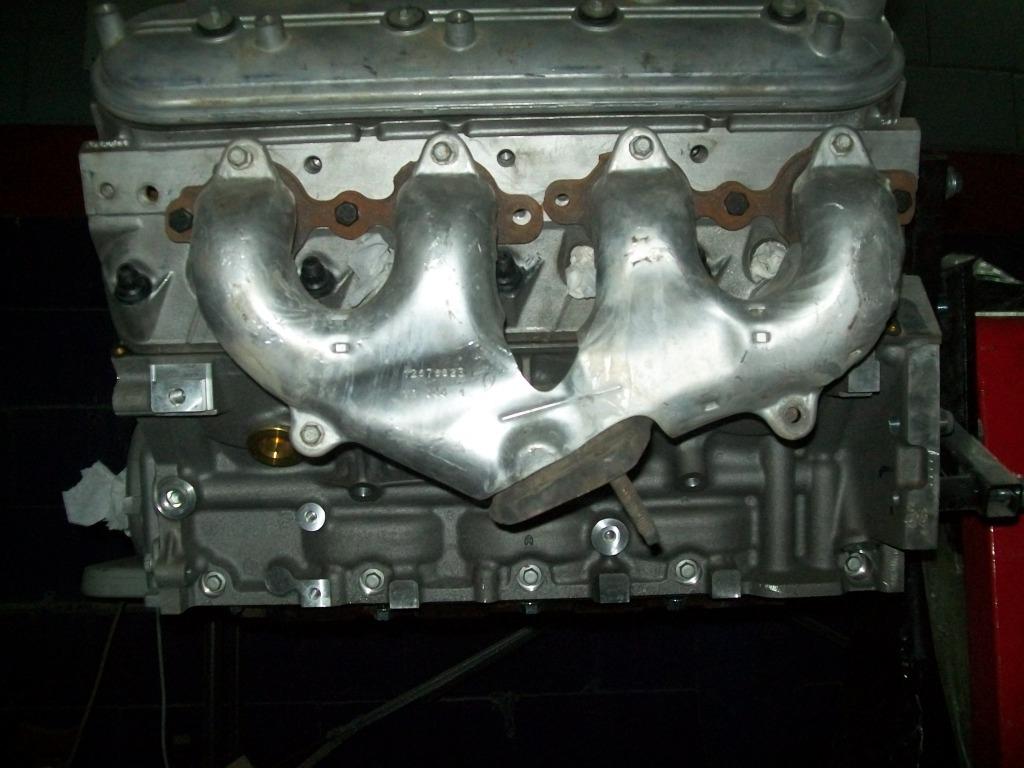
i'm not planning on doing much work on the car right now , i might just take the front wheels off to see why the brake pad light is on in the dash . i 'm also thinking of hijacking the check engine light on the dash and wiring it to the LS1 PCM. i'm also waiting for a repair kit to fix the "rising sun" spot on the AC control screen and as soon as that shows up i'm fixing it. and if i have time i might just drop it off at the detailers to get the interior all prettied up
08.30.12
not much to report , i got the pan on the new engine , i still need to get the oil cooler adapter on the pan and ready to be plumbed tot he existing cooler. i also need to find a spot to mount the porsche oil pressure sensor on the pan. i'm thinking on the little bulge thingy on top of the oil filter .
other than that , just been driving the car and beating on it , trying to get any issues to show right now. also a few new parts showed up
the new tail lights and bumperetts showed up , i should install them sometime soon :
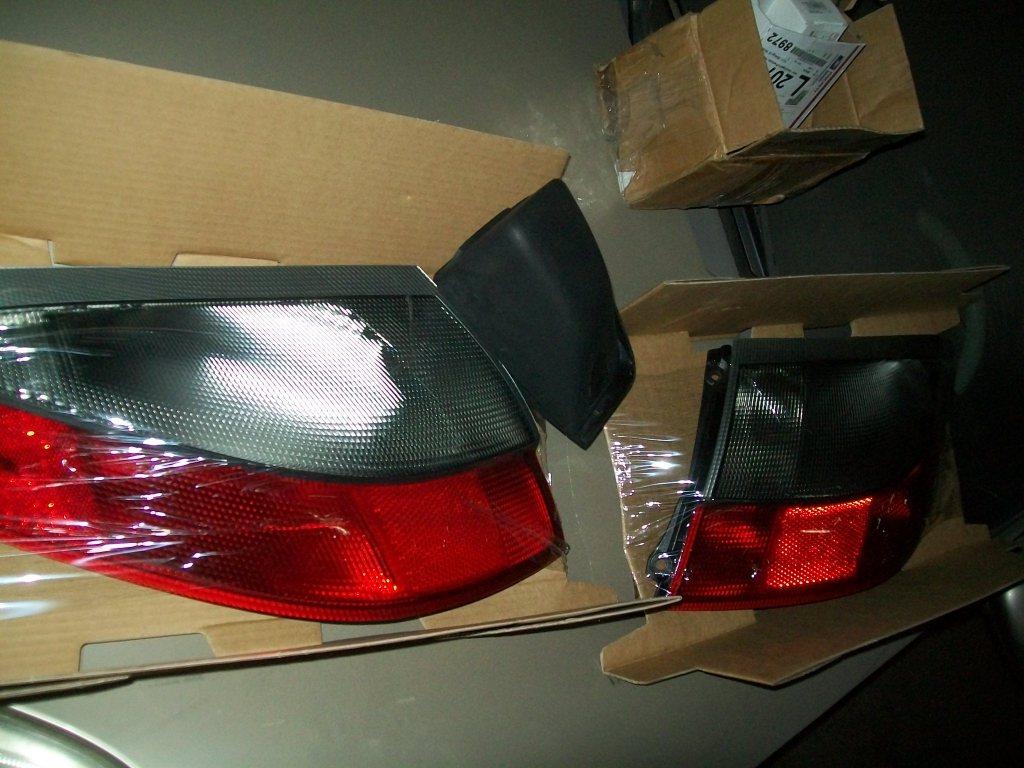
and another little box showed up from comp turbos , the new t3 internal wastegated oil less units were nicely packaged in


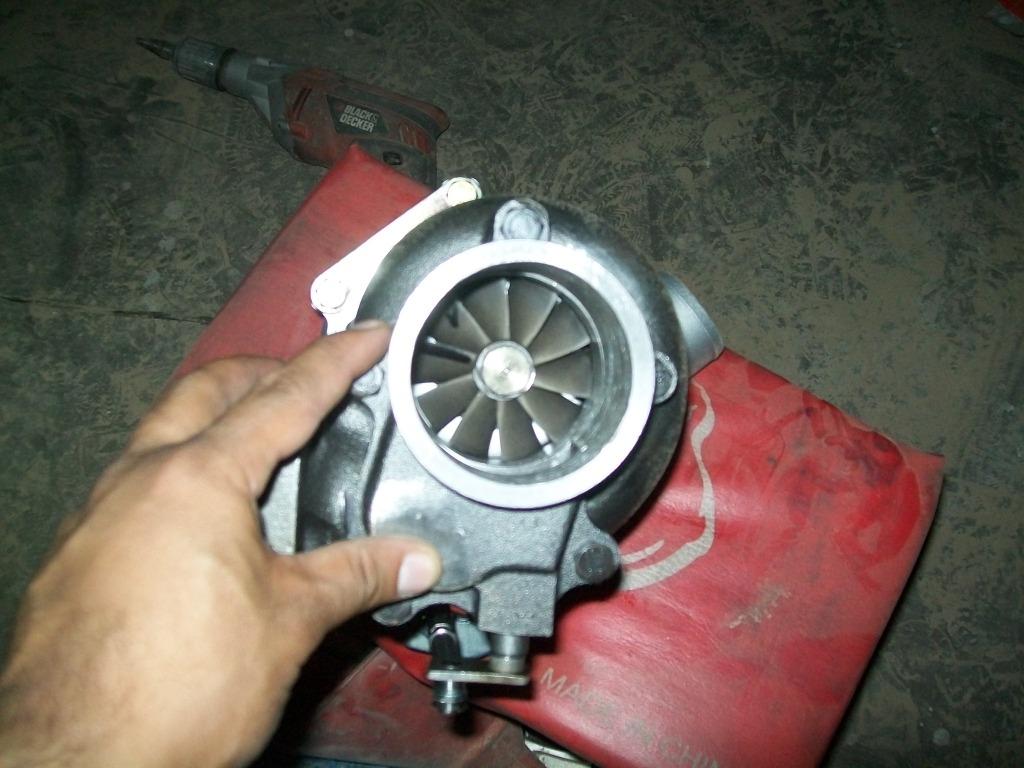
now that they are here , i have to start mocking them up , but the thing is i have to take the header and mufflers off one side of the car and install the new manifold and kinda mock up where i want it to sit and have it connect to the current exhaust . i'm trying to do this with as little down time as i can.
9-7-2012
thanks for the compliments guys ,
and marky , thanks for the offer , but i don't think its the pad wear indicator because i'm pretty sure the pads had quite some beef left in them i'm thinking maybe a sensor or sensor plug in the front hubs i guess or something beacuse ( and i could be totally wrong here) i noticed that there is a 10 MPH difference in what the analaoh spedometer is pointing at and what the digital readout is showing . i know on some cars the speed signal is taken from one or both the abs sensors on the hubs , which is the case in this car .
i guess i'll just have to take the wheels off and double check again .
no marky if you are reading this , do you know which sensors ( location ) are the ones responsible for the speedometer signal?
and in other news , i took the car to the track for another round of beating / testing
ended up with a personal best of 12.65 @ 109 !! i didn't change a thing , but i think the cooler temps might have helped
here is the vid of the run , you can see the car actually spins a bit when launching ( it only got a 1.8 sixty ) , i guess it could use a rear alignment to help out a bit.
man i'm loving this car more everyday
9-9-2012
thanks alii !!
you da man!
i put the thing on the lift last night , and started poking around and what do i find?? well for starters the front brake ware sensors and speed/abs sensors were plugged in each other's hole , so that explaines the speedo error and the abs/brake light .
also found out that i have a cut CV boot up front that needs to be changed soon i guess. guess i never did look at the front end well when i was assembeling the car
moving on back , i found out that the passenger side CV allen bolts where all loose! so a quick cleaning and a bunch of red loctite and that was cured.
after that i took a closer look at turbo placement , and to my surprise using LS3 vette manifolds will actually place the turbos a bit higher that what i need , so i will have to make an extension to lower the turbos a bit down . the other good thing it that if i lower them the exhaust housing will fall exactly in line with the current exaust with minimal fab work needed
so next up is making a jig to hold the mufflers in place and them remove the headers and install the manifolds and start fabbing the turbo piping to connect the two .
i also have to look into the water cooling for the turbos, i was thinking of running a hose from each steam vent ( on the back of each head ) to the turbo on each side and then back to the coolant resv.
i'm also contemplating relocating the electric water pump to somewhere under the car ( to clean up the engine compartment ) but i'll have to look at this idea when i'm under the car again
10-13-2012
loool, any time buddy
well some news to report
took it out to the local street racing spot for some fun ,,, i mean testing
managed to race a Grand cherokee SRT8 two times from a dig,,,,, man i really thought they would be faster
also had a funny encounter with a 5th gen camaro that went like this :
me : wanna race ?
him : whats it got ?? is it a GT3??
me : naaah , its just athe GT wing , nothing much else .
him : man your car is fast , its the best engines that germans produce .
..... please keep in mind that this conversation was taking place while my car was ideling next to him , and loping , and slightly surging ,,,,,, just like a v8 would
me : its stockish ,,,,, it only has a cam .....
him : lets do it from a roll .
me : cool ,,,,
we roll ,,,, i win
the stupid part is after the race the guy pulls up next to me and tells me : i told you german cars are quick even stock !
i just giggle and drive off ,,,,, i think he might of been deaf
and then i race a c6 with a buch of bolt ons , we do it from a roll and we are very close , he slight;ly jumps on me when he shifts or when i do ( stupid close ratio trans ) ,,, and then i hear the rattling noise ,,,,,
so i pull over and luckily it was just the serp. belt that decided to shred itself
there was a little left of it that i managed to slip back on the pullies and decided to drive it home , which it did nicley
total damage :
1 rpm sensor ( looks beat up , yet to test it) and bracket .
2 serpentine belt
and thats about it
sorry for the long storry , but i had so much fun that night i just had to share
11-7-2012
update time
so after the misshap that happened in the last "testing session" the car basically sat in the home garage up untill a few days ago. thats untill i drove it to the shop and decided to swap the belt and check for damage. well thats what i was planning on doing atleast
so on goes the car on the lift and i poke around under there to see what i can find, luckily nothing bad ; just an rpm sensor with a bent bracket and shreds of belt everywhere .
then i thought why not mess with the PS system ,,, i thought sine i drove the car quite a bit with the pump disconnected , the constant cycling of the steering should have forced the air out of the system ,,, so just in case and since the car was on the lift i cycled the steering a few times just for good measure , and then it dawned on me : i never vaccume filled the PS system! ( or atleast i don't remeber doing so )
)
soooo, since i had the car on the lift , and the vaccume filling gizmo was close by i decided to give it a shot. and what do you know ; as soon as i do so i hear a "burp" from the steering reserv so just for good measure i cycle the steering manually again and top off the fluid (incase you are wondering , i'm not using pentosin, instead i went with regular dexIII GM tranny fluid
 )
)
so now comes the moment of truth : i slap the long belt on there and start the car and guess what ! no whining or bubles
off course i still have to verify that it works after i put the car on the ground and place the steering system under load.
so now i'm happy i got that figured uot ,,,, and since i had the car on the lift (see where this is going ) ,,,,, i thought why not mock up the turbos
so off go the mufflers along with the headers and on go the manifolds: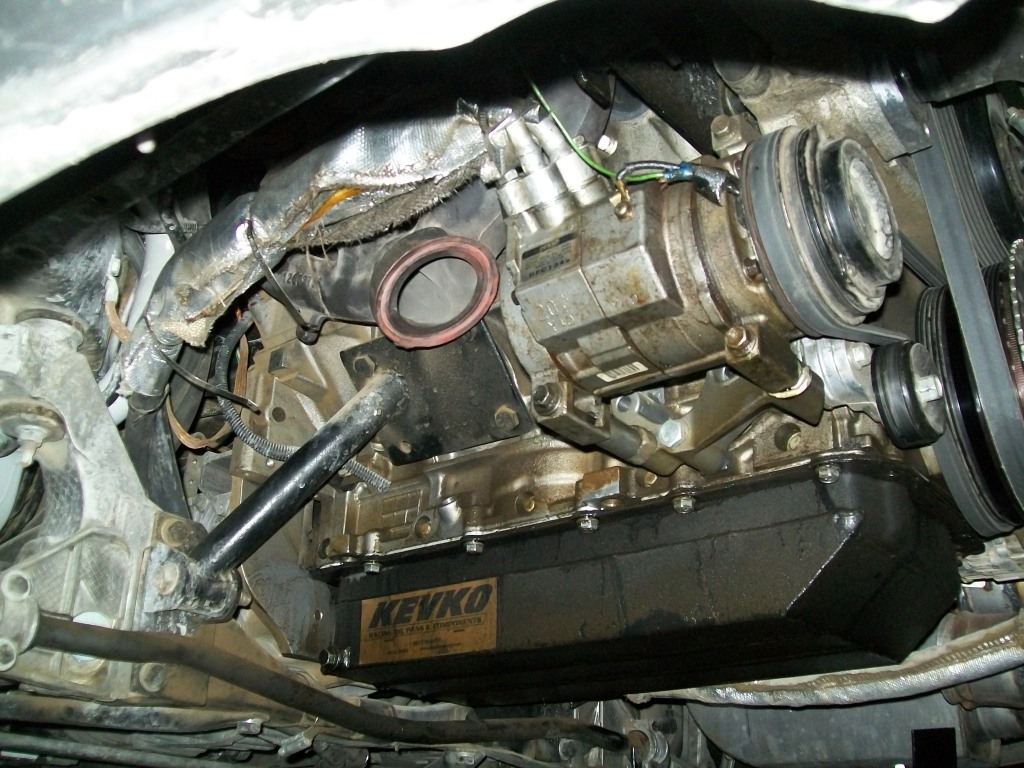
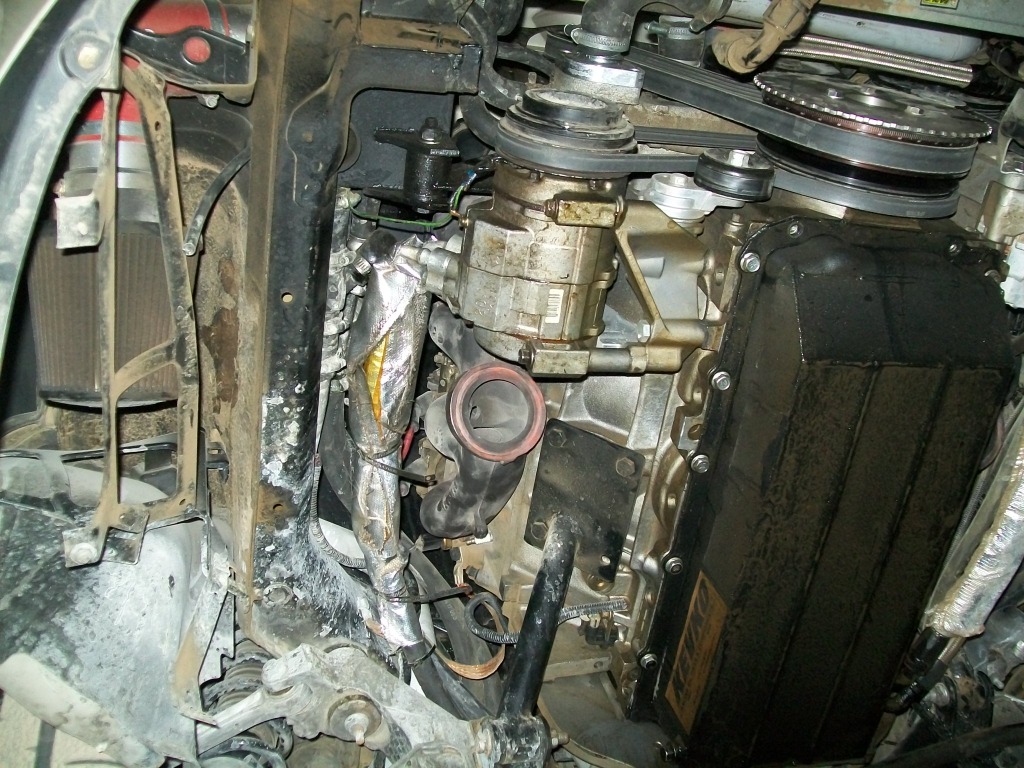
which brought up the first issue of the day : the AC compressor has a small tab on the back that was hitting the manifold , as well as the manifold which had a small tab on one end to hold the heat shield on and that tab was hitting the AC compressor . so a quick round of the hack saw on both cleared up the dispute ( here is the tab on the compressor cutt off and the manifold tab still in place: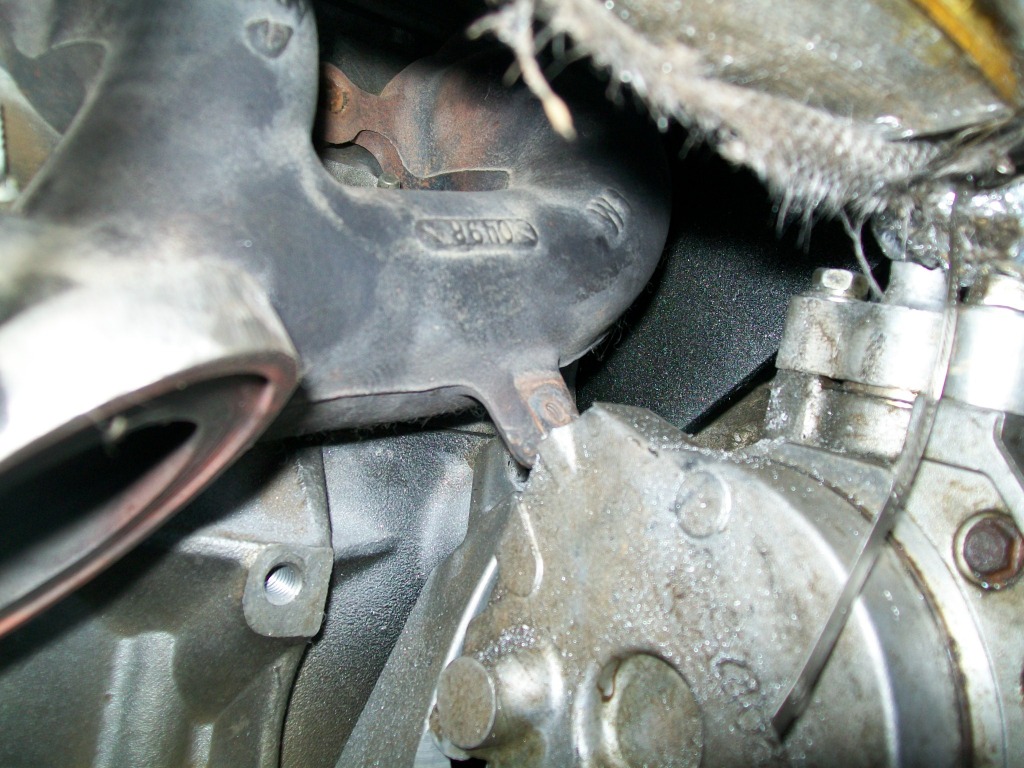
after that was sorted i put the mufflers back on; the plan is to re use the exhaust as it was initially built to be reused with the turbos. i wanted to line up the turbo outlets as much as i can with the existing exhaust to minimize the work needed later.
here is how much space there is and the locations of the exhaust pipes: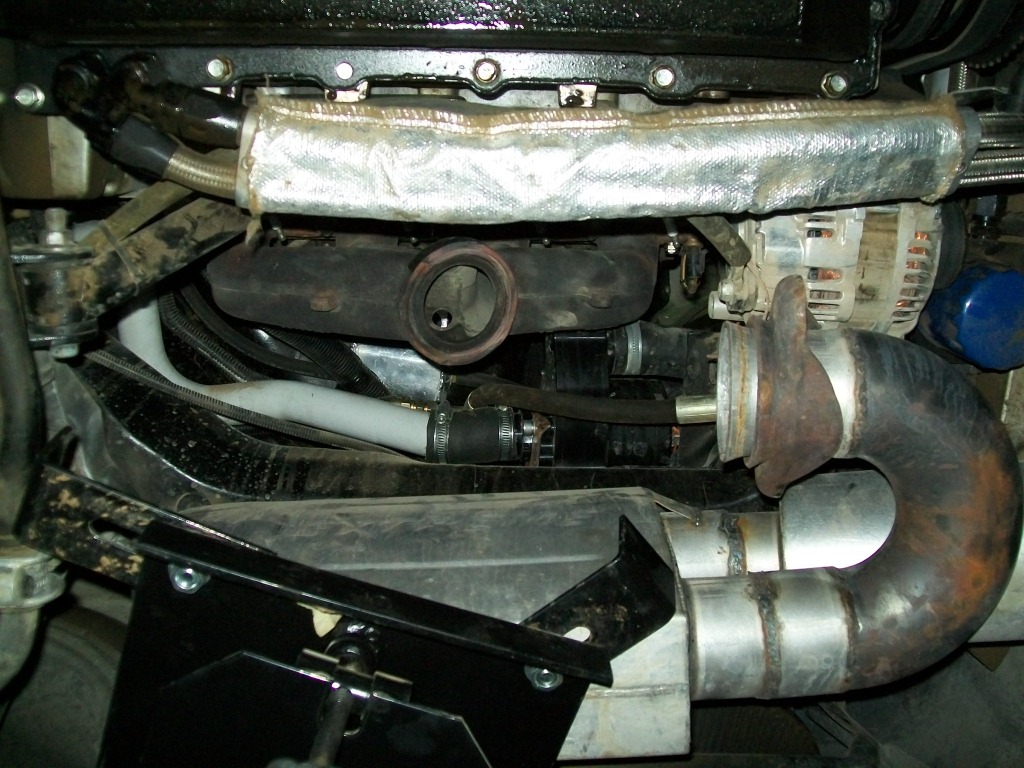
so after a few hours of mocking up and messing around with the position of the turbos , i had two cute little extensions welded on the manifolds that would place them as close to where i wanted them as possible: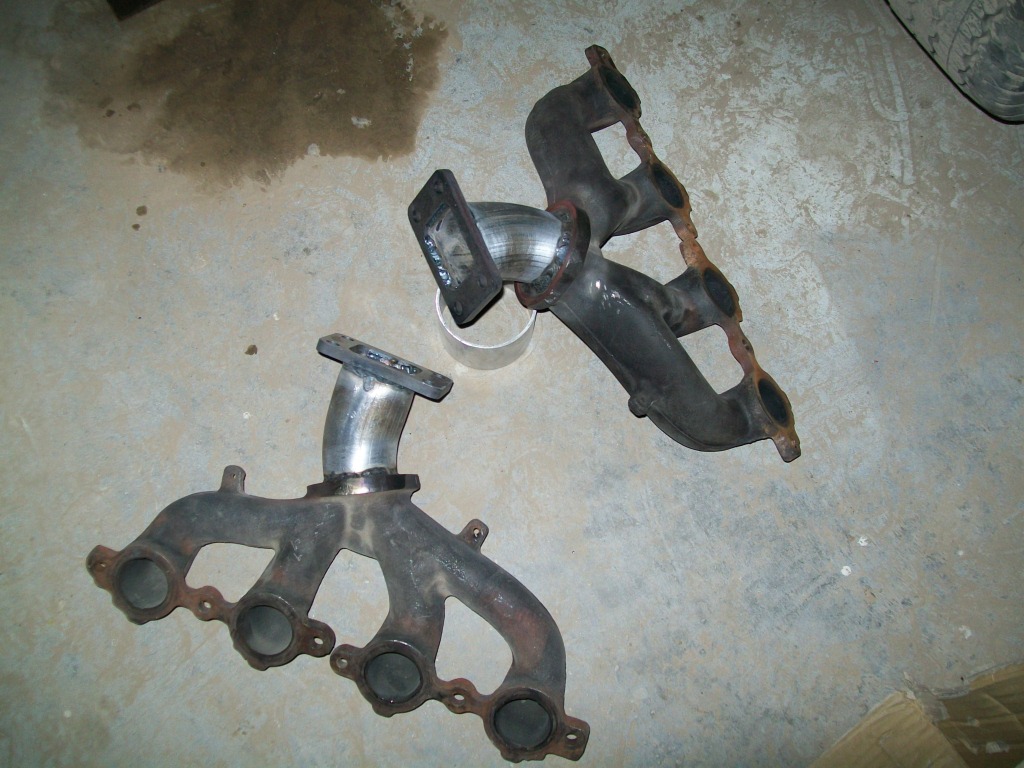
and in case you ever wonderd how a pair of turbos would look like under an LS powered 996 porsche ,,, wonder no more
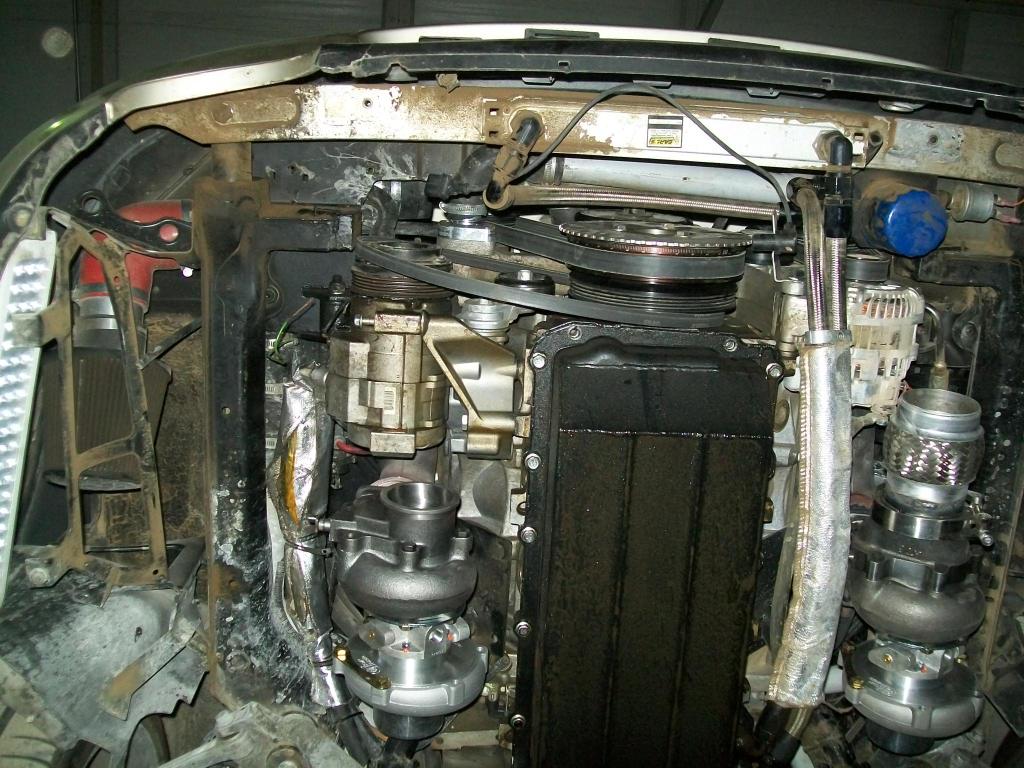
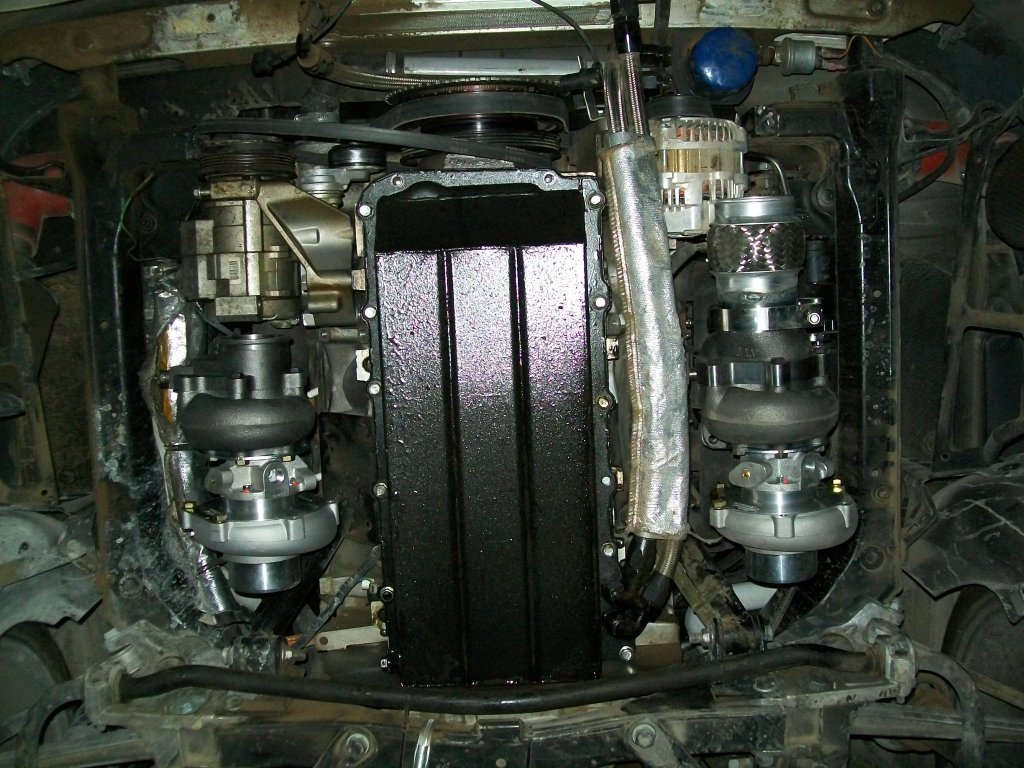
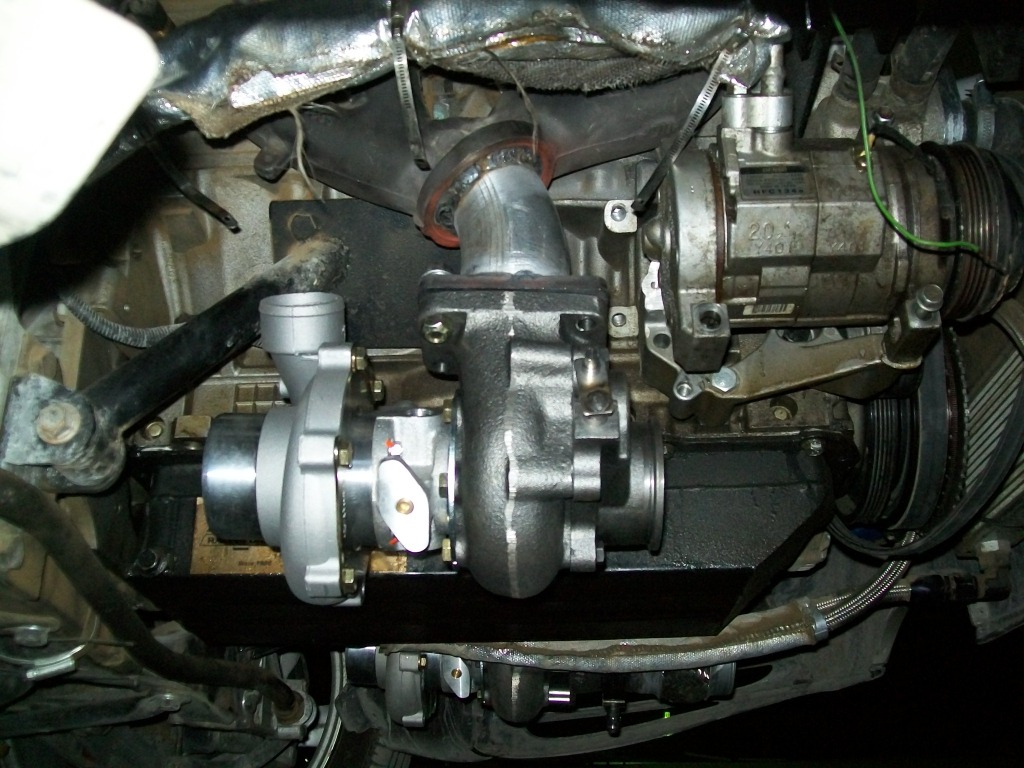
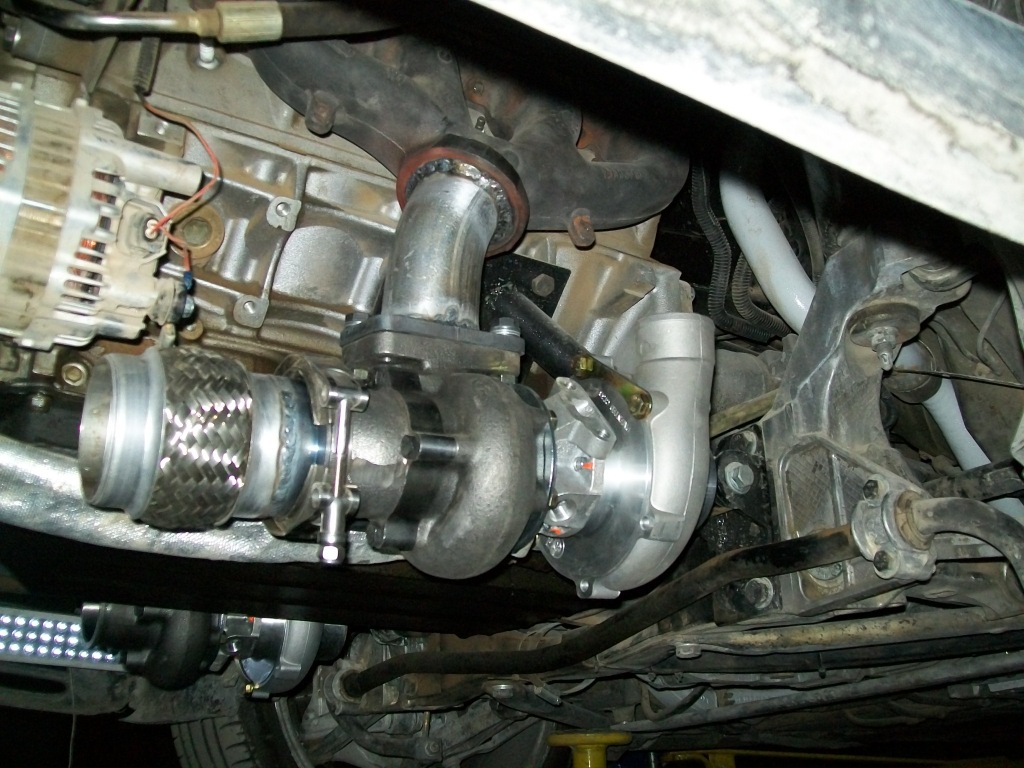
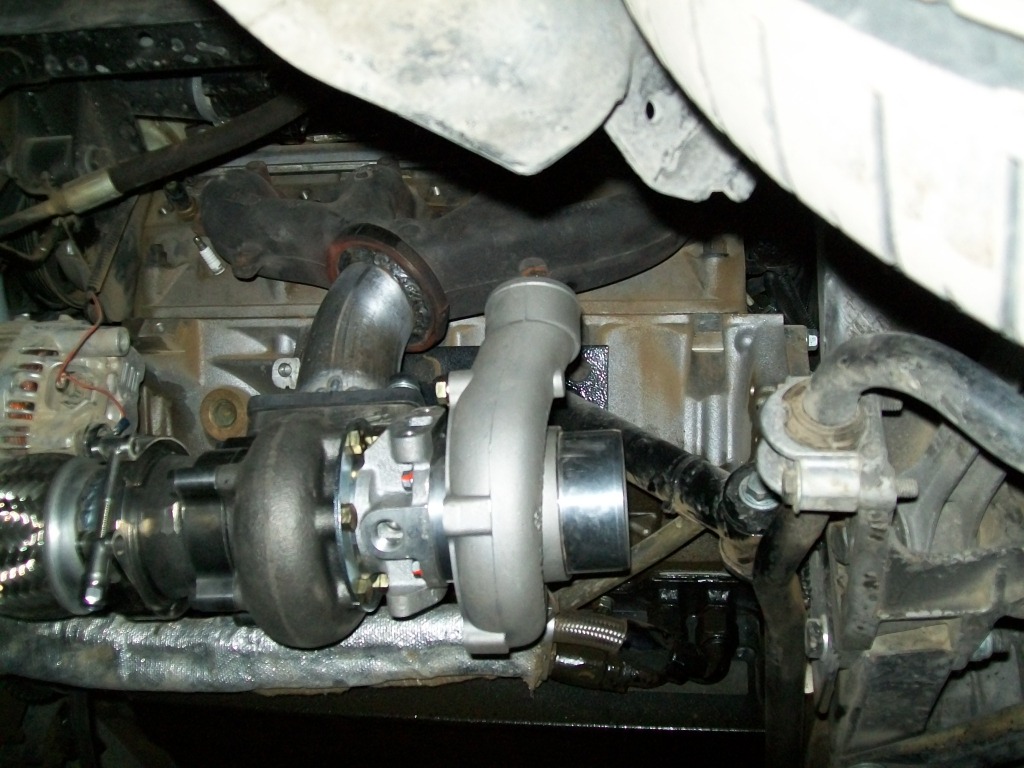
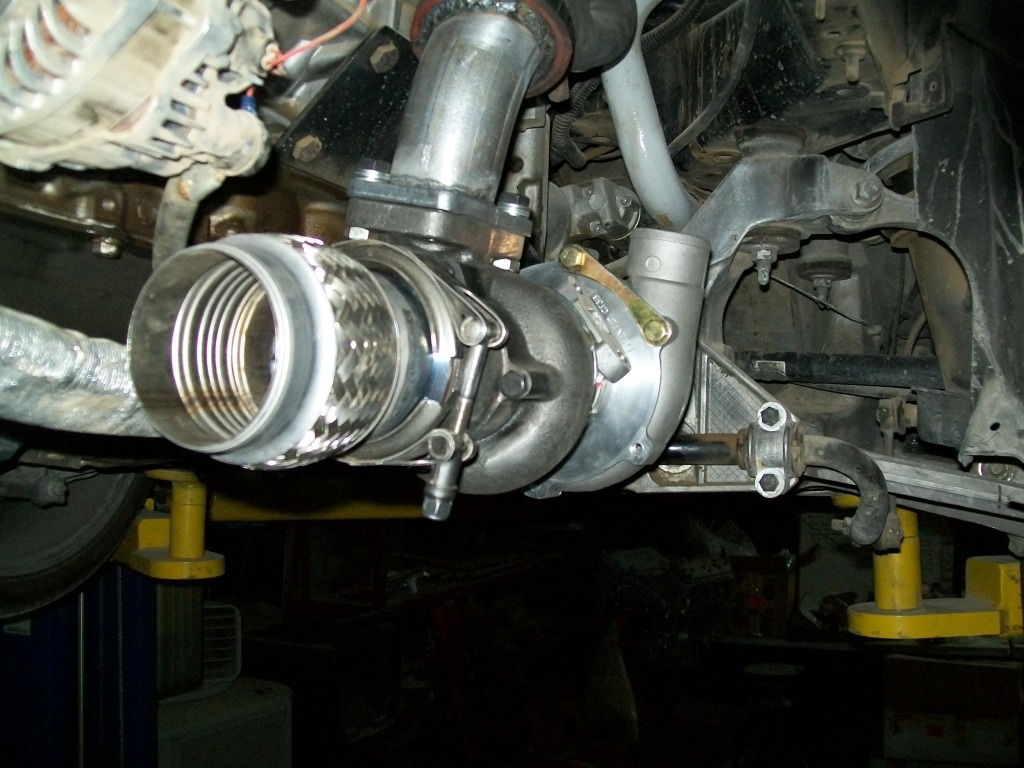
and thats when i called it quits for the day
so now whats left to do is a few braces to help support the pipe coming out from the manifold into the turbo flange, as well as a couple of supporting braces to help carry the weight of the turbo.
and that should be it for now when it comes to turbo hotside piping
all i have to do later is cut the u bend on the exhaust so i can connect it to the flex coupler you see in the pics. but i won't do that untill i put the new engine in .
so next up is to install the intercoolers on each side and figure out how to route and plumb the charge pipe from the turbo to the inlet of the intercooler. after that is done i'll take everything back off and reinstall the headers and exhaust for more "testing"
and install the manifolds and turbos on the new engine to plumb the cooling lines for the turbos. the plan is to use the rear steam vent holes on the back of the heads to feed the turbos water , and then plumb the return side to the suction side of the cooling system.
i should also start getting the new engine ready for the swap; from what i have scribbled down somewhere i have the following to do :
- get knock sensor to block adapters (i'm using ls1 style sensors and want to re use them on the LS2 block)
- oil sensor adapter on the the rear of the valley cover
- install the oil cooler sandwich adapter on the new pan
- turbo coolant lines
- figure out where i want to place the BOV
wish me luck
see what i can do with the
another thing i forgot to mention is that i was expecting that i had to remove the center engine mount brace thingy ( the brace you see mounted on the stock ls motor mount location) i can squeeze in a mushroom filter on there without removing the brace , or even add some ducting and mount the filters somewhere else.
and looking at the pictures you can't tell , but nothing hangs lower than the suspensioncenter brace
4-27-2014
well sorry for not updating you guys as often as I should, but I've done nothing much to the car other than drive it
i've been busy with the race season over here as well as moving so I was kinda pressed for time . but now that the move is over and the last two races of the season are the next two weekends I should have time to start messing with it.
but on a side note ( well more of something to get me to start work on the car ), I decided to take the car out a few days ago and after starting it I started smelling gas,,, so when I backed out of the driveway I saw a puddle , and after further investigation it turned out to be gas . so I now the car is not drivable ,,,,, which means I can't use the excuse of why fix it if its not broken
so I see progress in the near future
7-8-2015
so i guess now is as good as anytime to get working on this thing again
i finally pulled the trigger and decided it was time to start working on the Porsche again. so i pulled the thing into the shop and began ripping it apart
for starters here is how it looked when i drove it in ,,, you can tell it has been thoroughly "tested"
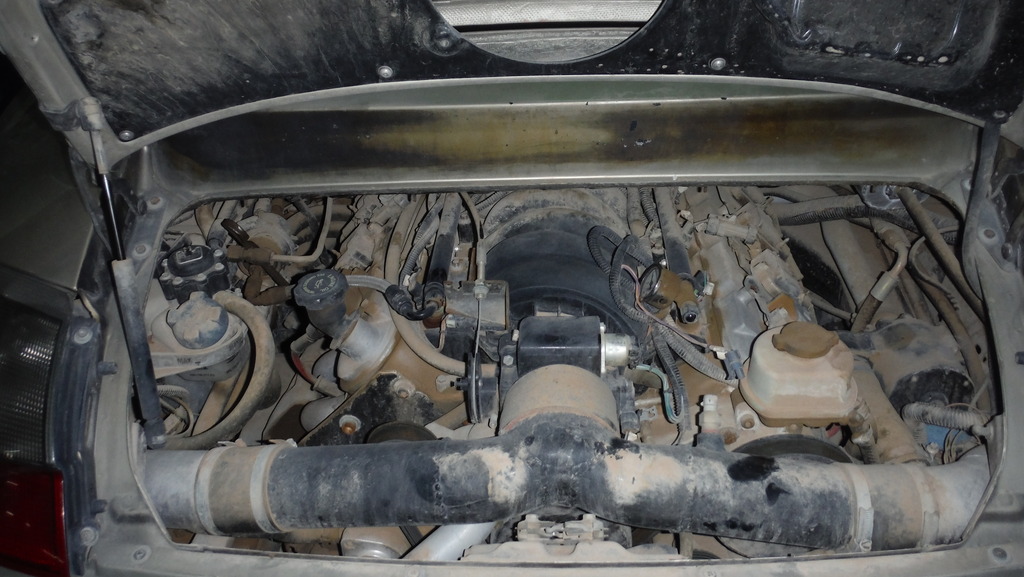
so off came the rear bumper and stuff around it :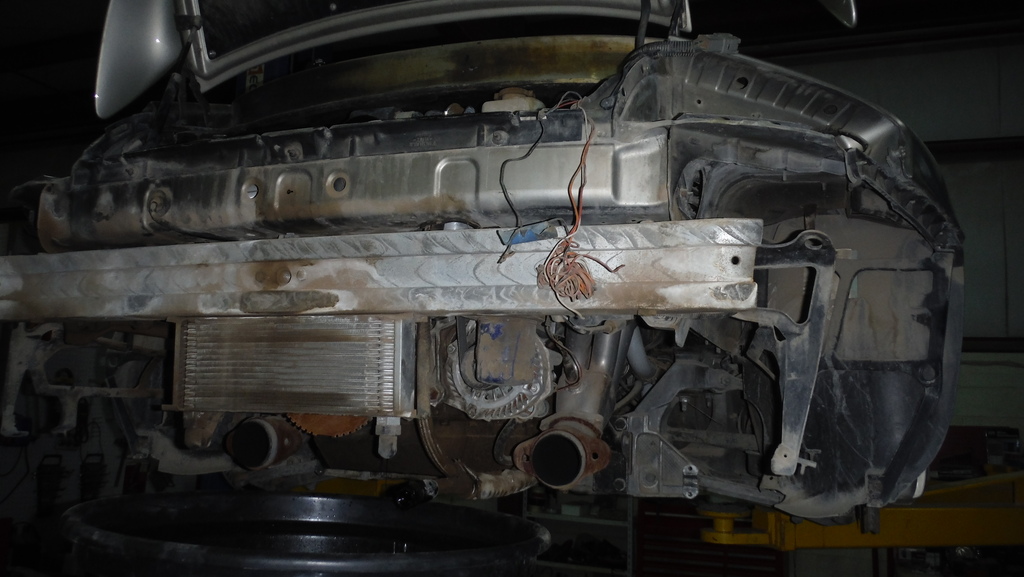
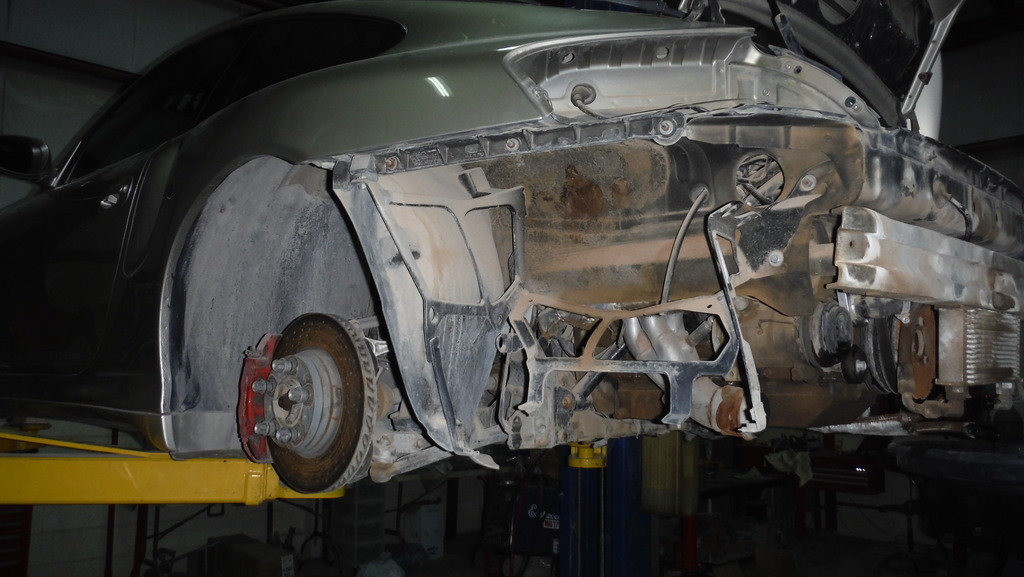
and soon afterwards it was time to separate the engine and tranny from the body :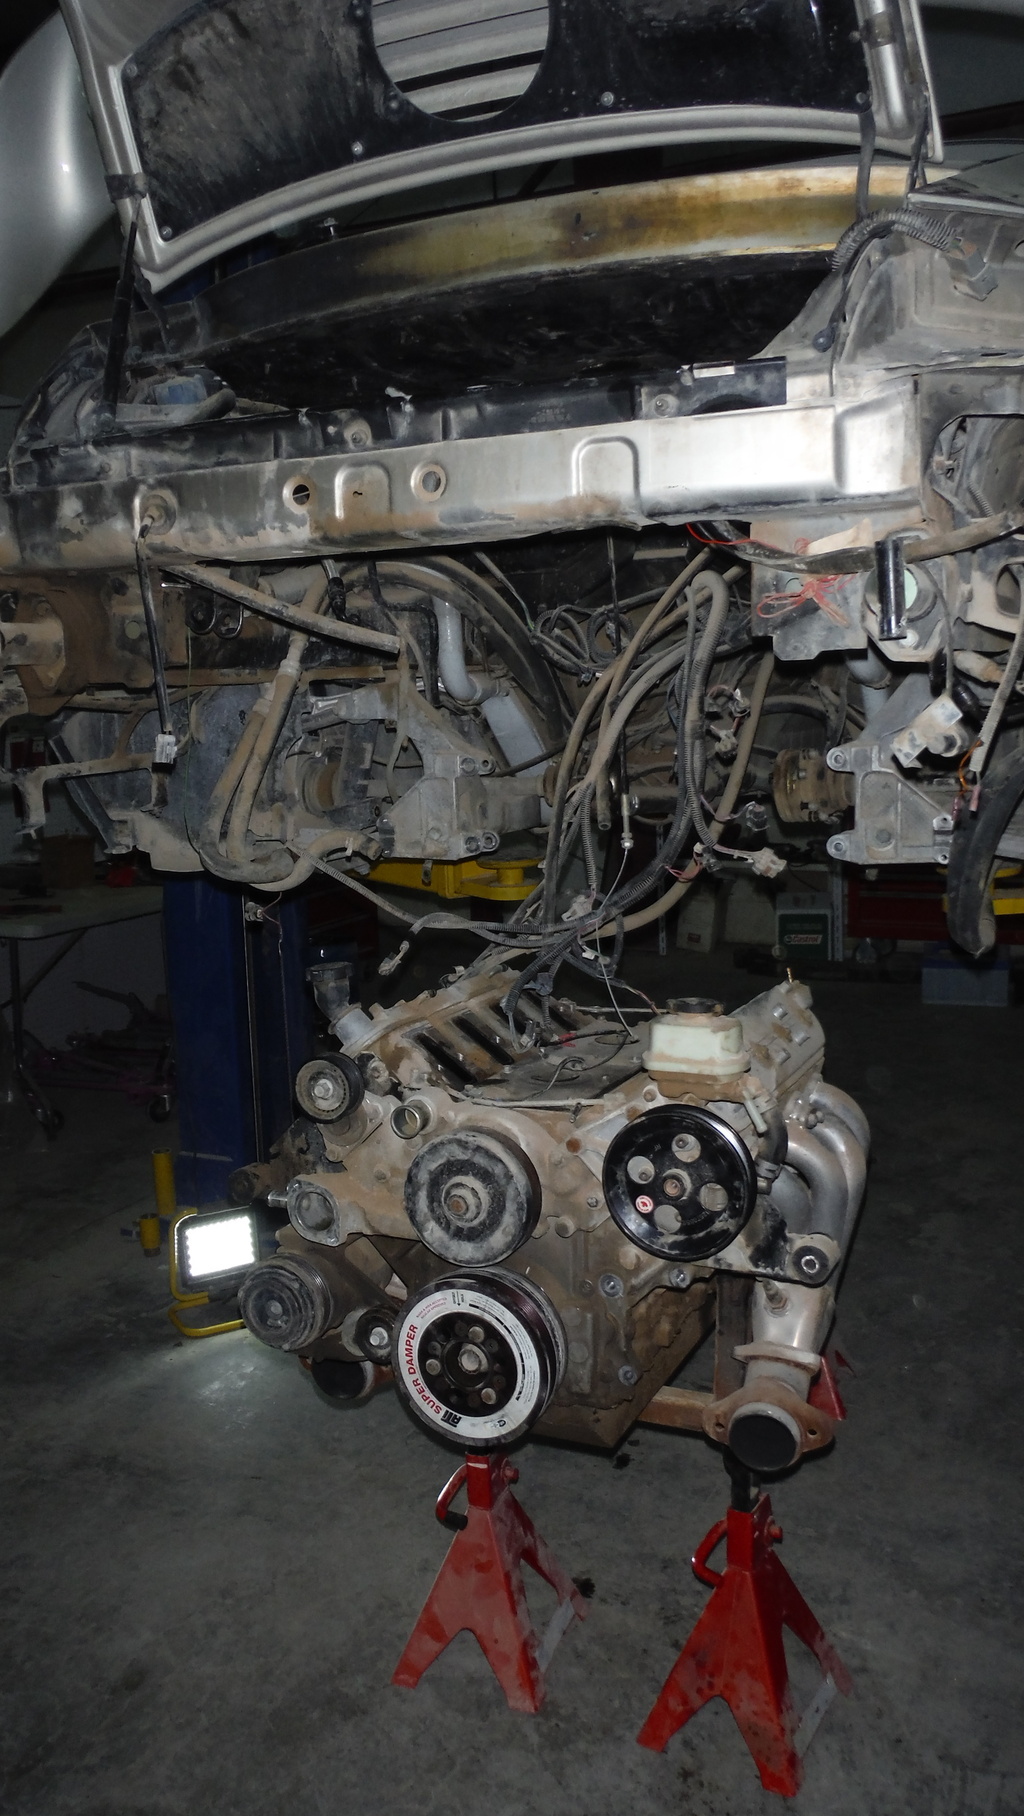
if you recall this was the "bitch" engine that i put in there for "temporary" testing ,,,, well it has served its purpose well
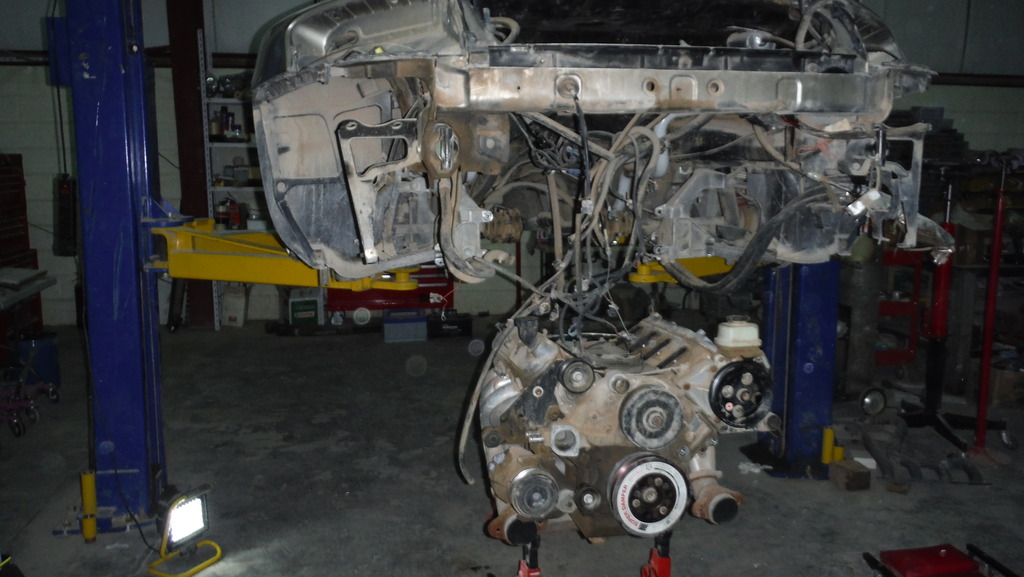
more evidence this thing has been driven every where
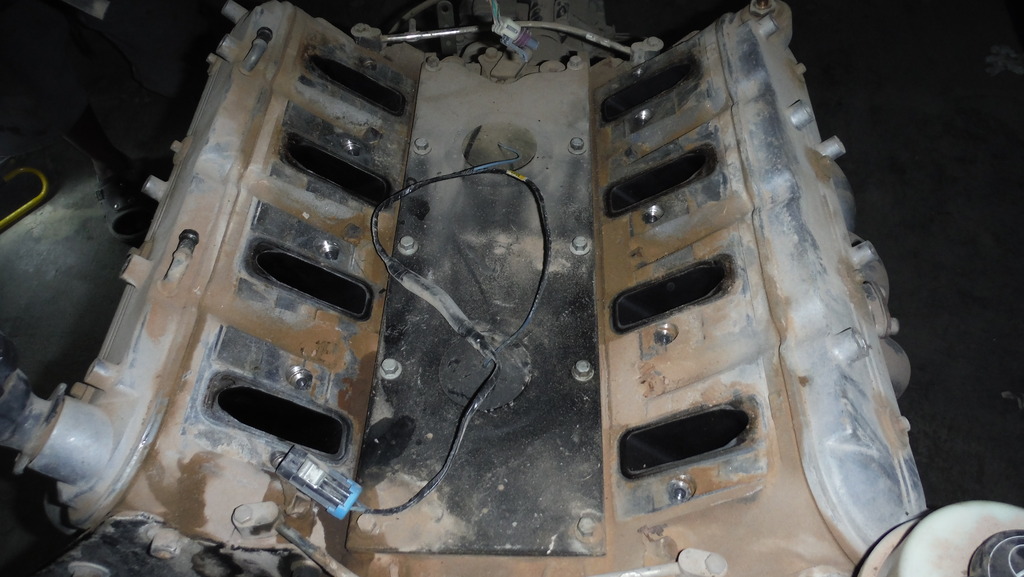
and here is the new engine sitting on the engine stand for over a year and a half now ( ignore the intake manifold - its just there for show) 
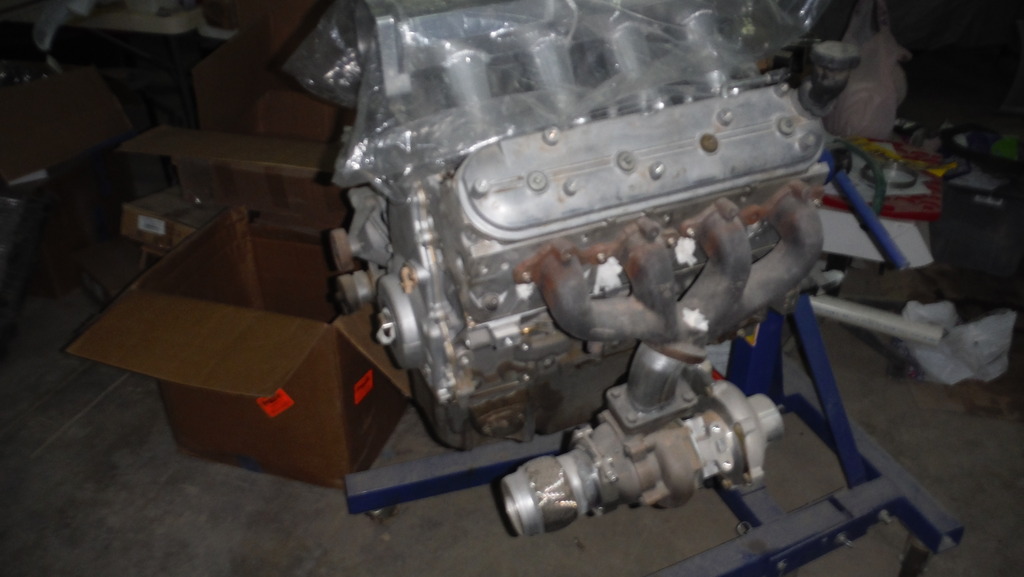
so far i managed to separate the tranny form the engine , and transplant all the accessories over to the new one. i still need to clean the old intake manifold and install the new injectors , then i have to clean the wiring and plumbing in the engine compartment ,,,, currently this is what i have :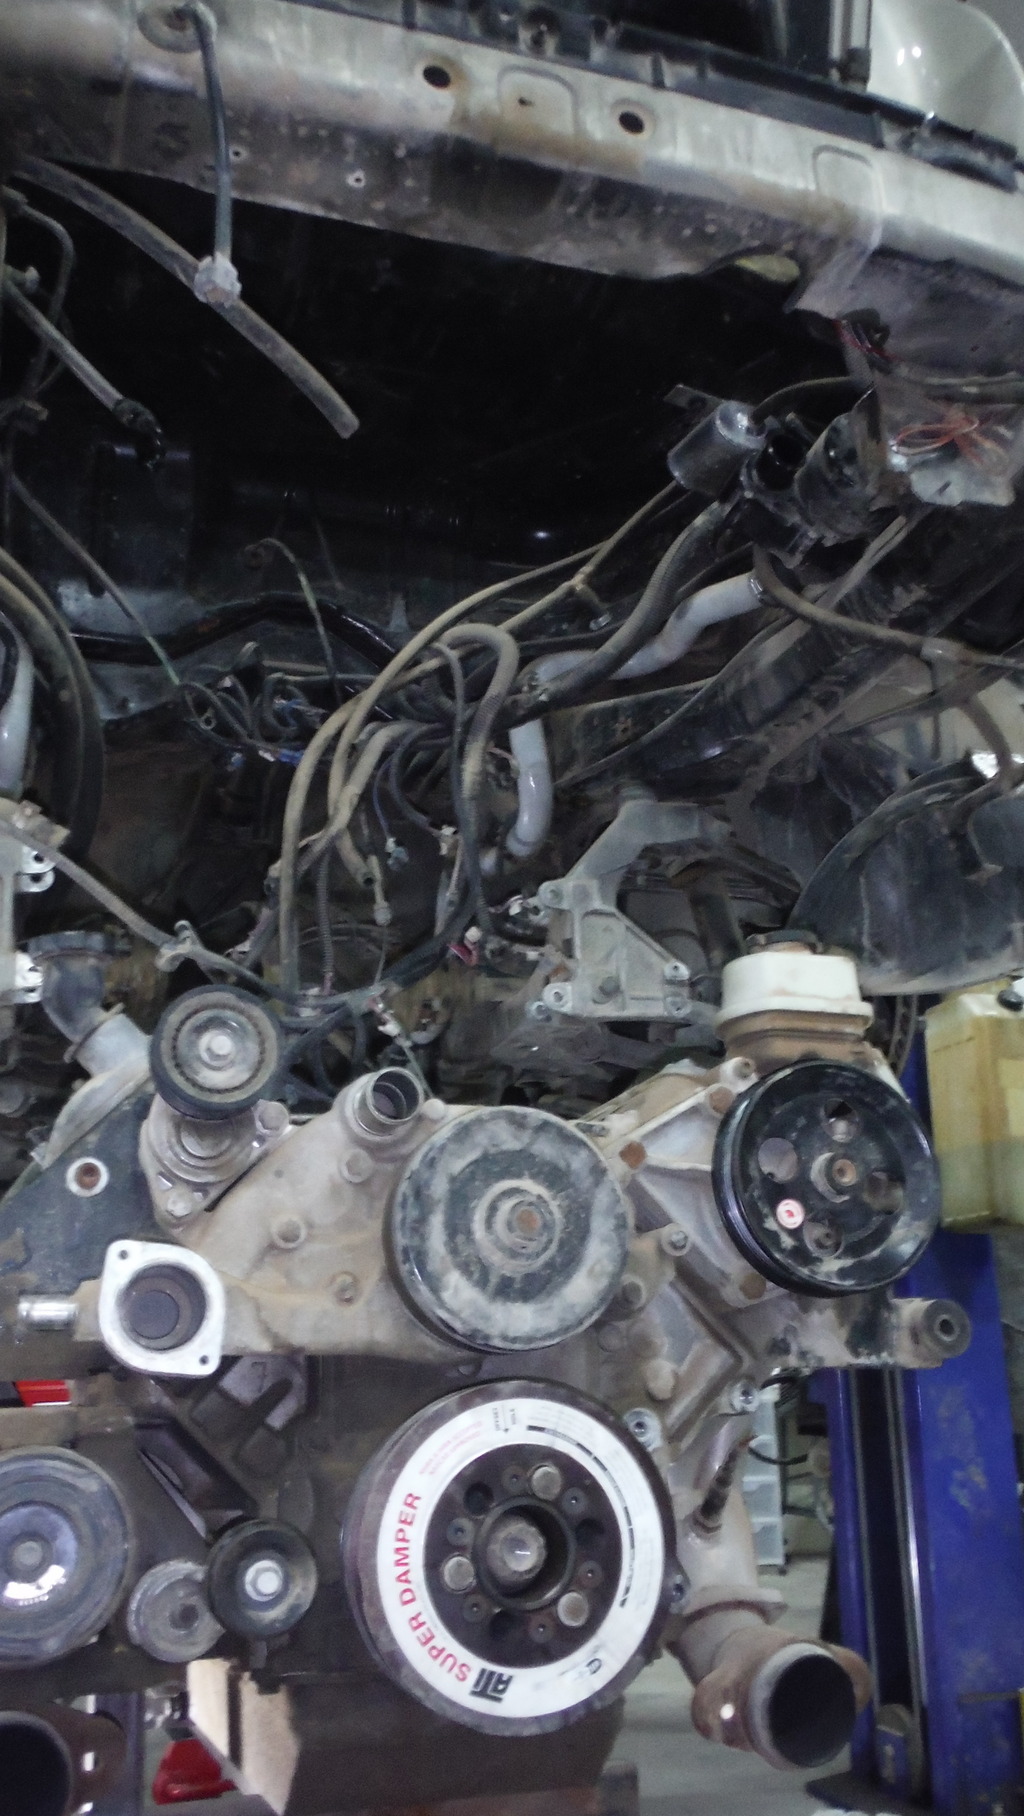
so the plan now is to finish plumbing the turbos' cooling lines , then run the new fuel lines and updated coolant lines . after that i can slap the engine and tranny together and shove them back into the car's ***
i also plan on swapping both front and rear shocks as well as the fuel pump.
and maybe after finishing that i can weld the existing exhaust setup to the flex coupler on the turbo , then work on the cold side piping. but i have a feeling i will finish everything under the car first before doing anything above .
updates to follow soon
8-9-2015
time for a progress report I guess ,
like I mentioned above, the old engine is out , and the new engine is finally sitting in the engine compartment :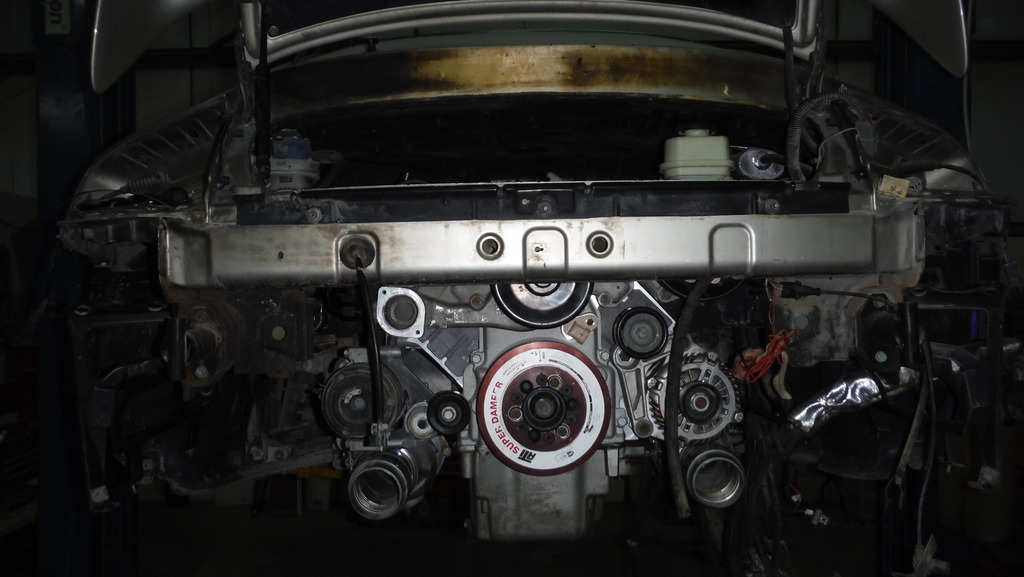
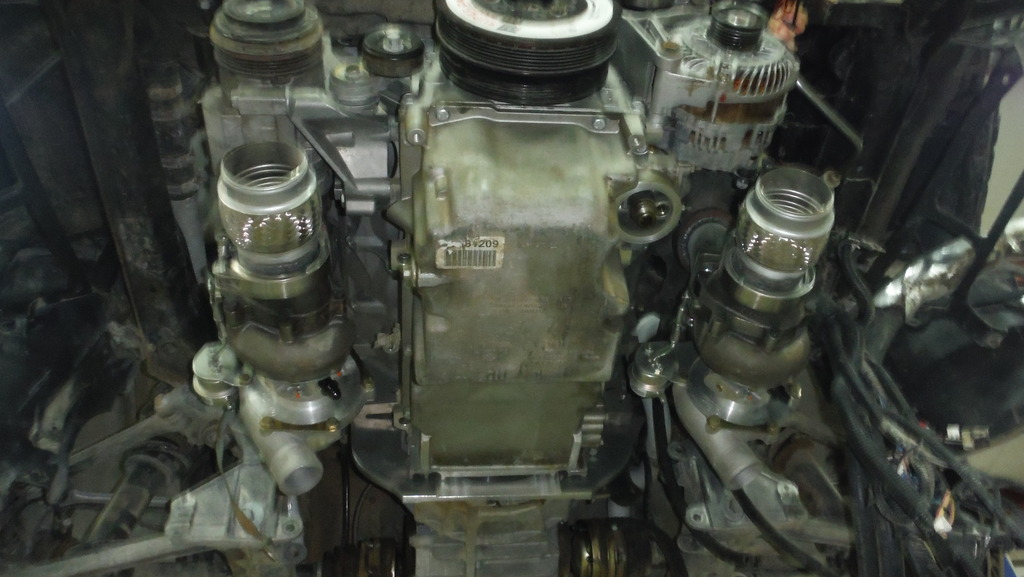
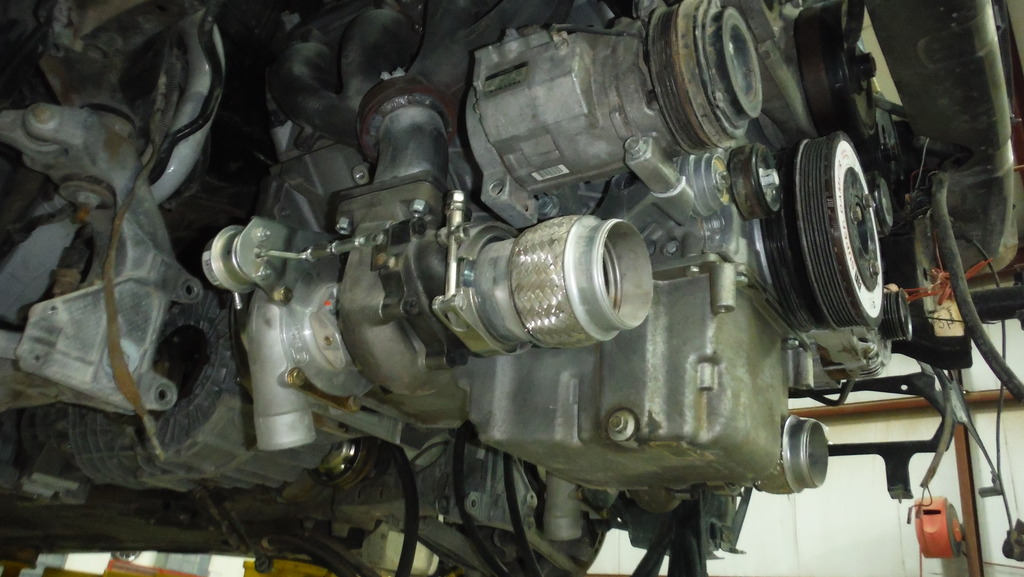
after installing the engine it was time to look in to he exhaust again ,,, the plan was to reuse the old exhaust , which was possible if I cut the ball flange and weld the v band on it ,,,, the problem with that is mufflers sit close to the suspension cross member and I would not be able to route the discharge pipe from the turbo to the intercooler.
so after a bit of head scratching I decided to just build me a new exhaust system using a single muffler on each side instead of the two muffler preside system I had on it before.
I started with positioning the muffler where I wanted it to be , then I welded a "u" pipe to it to connect it to the flex coupler on the turbo down pipe. here is how the two muffler look before I welded the outlet pipe: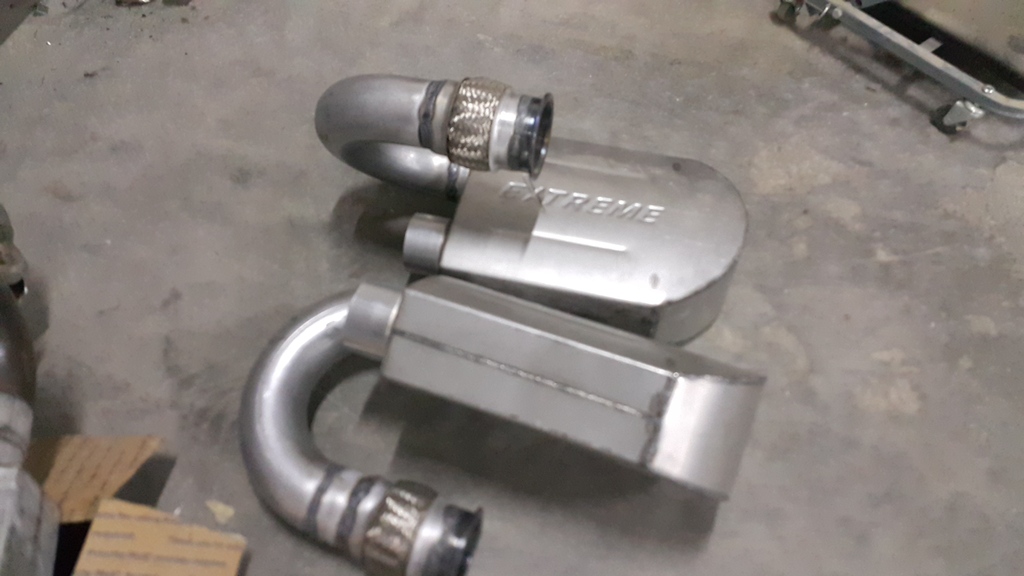
and here is how the mufflers look when done :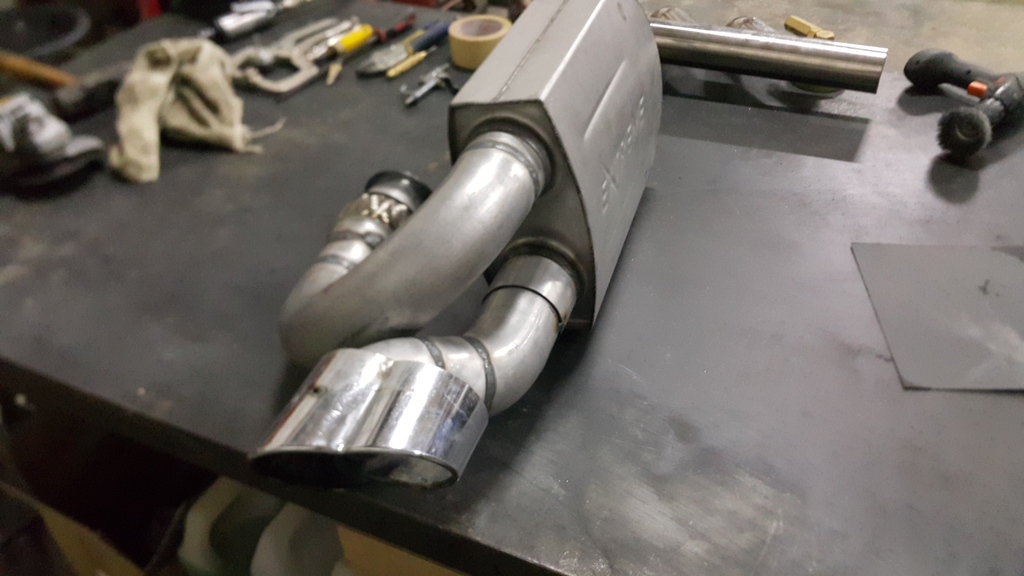
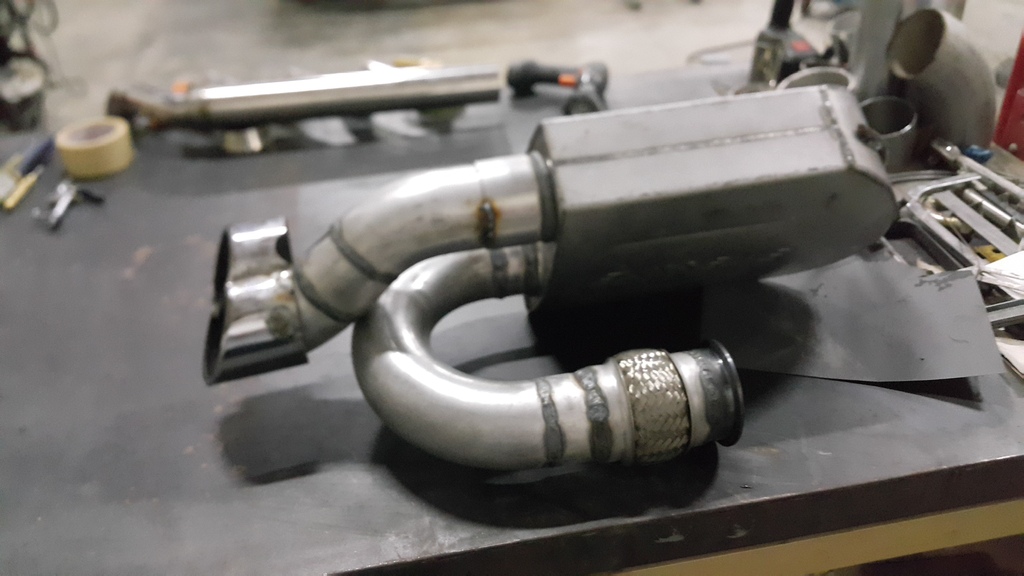
and how they look after some high temp paint :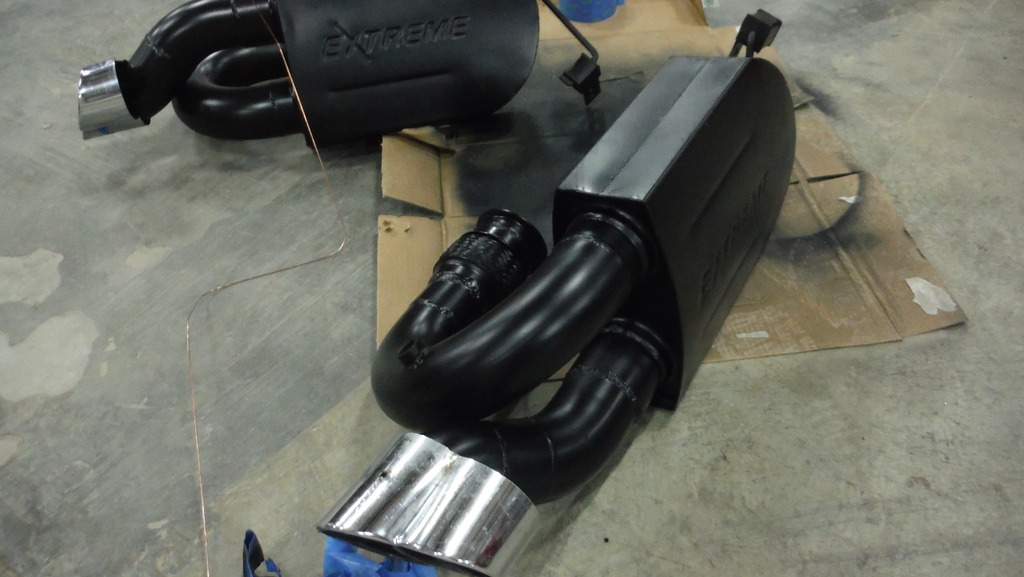
after finishing those I installed the intercoolers and started to make the heat shield between the mufflers and the intercoolers: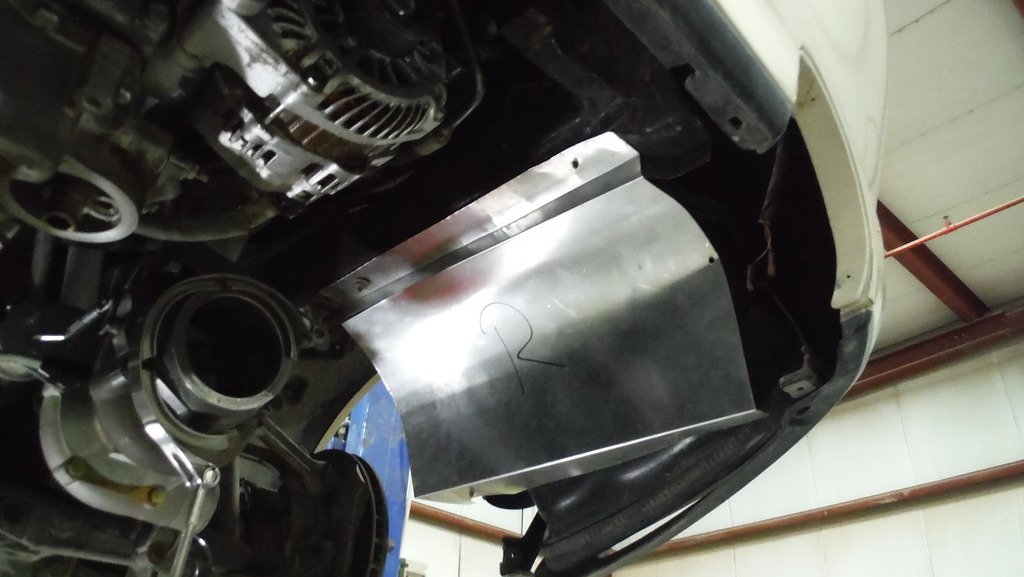
here is how it looks on the car :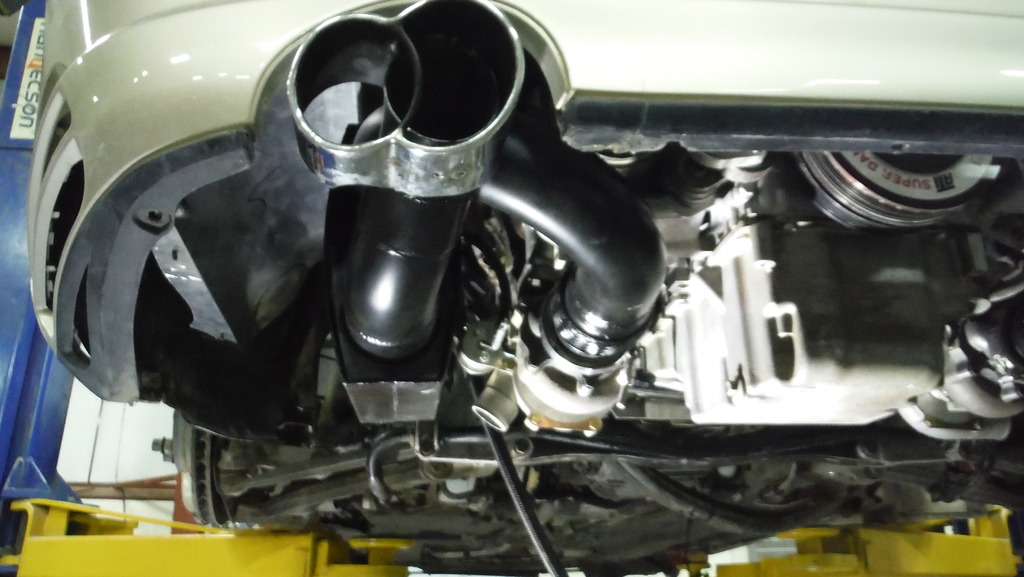

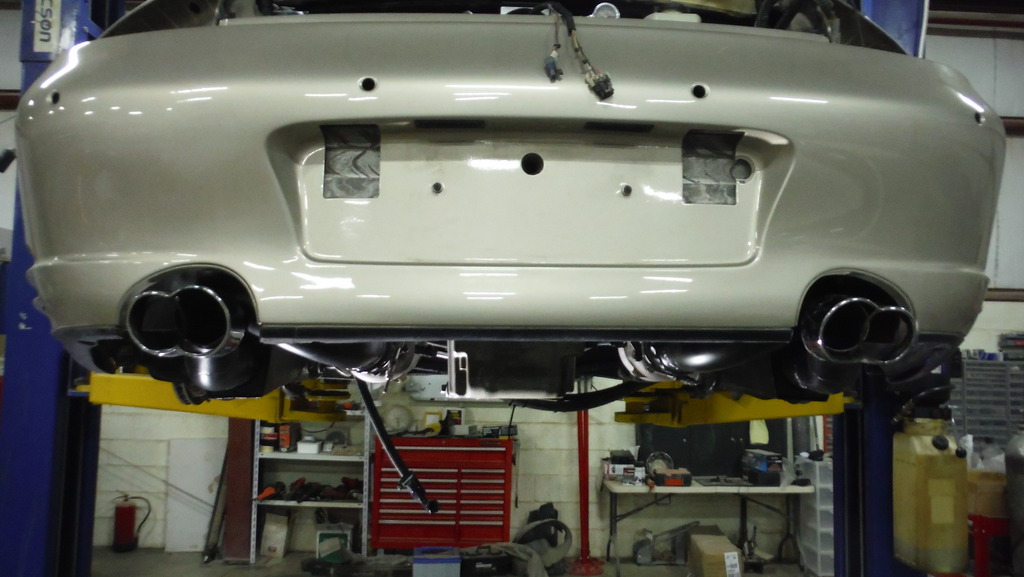
after finishing the exhaust I started on the plumbing for the coolant lines to the turbos.
the plan was to have the turbos get their cooling from the coolant line / heater hose going to the front of the car; where I would splice into that and have the coolant go from the engineto the turbos , then from the turbos to the heater up front then back to the engine again.
I started doing that but halfway through that I noticed that I was having too many hoses running all over the place and it looked messy. so I redid some of with some aluminum tubing to make it look good and less cluttered .
I started with a Y under the oil pan connecting both turbos to the heater hose, then I found out that I don't have enough compression fittings to finish the hoses from the heater hose to turbos. so I just finished bending the lines until the fittings show up
another convenient thing I found out is the Porsche oil pressure sensor actually fits in the holes on the side of the oil pan where the oil cooler fitting goes in , I just removed one of the pipe plugs and the sensor just thread right in :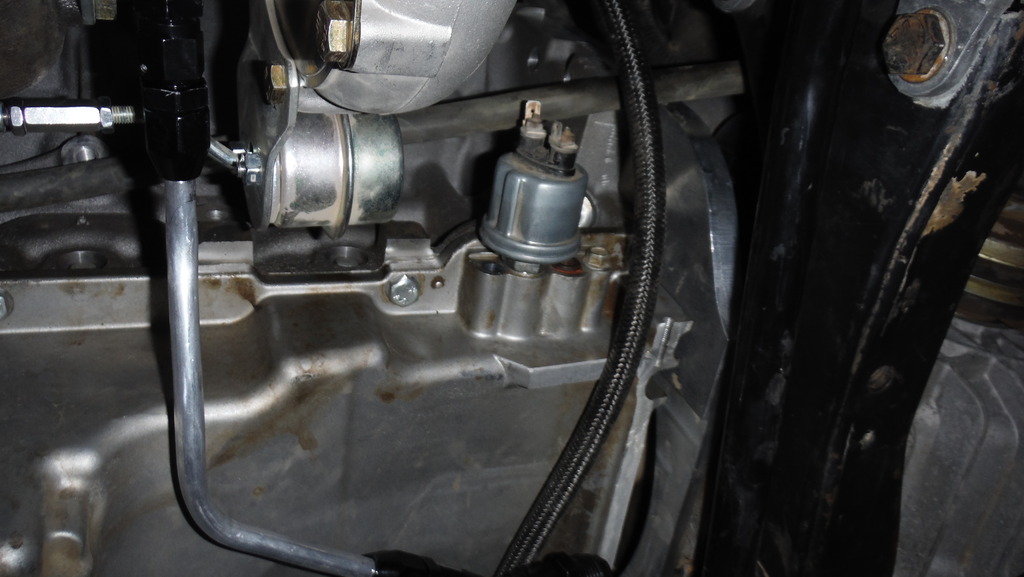
so here is how it looks so far from under the car :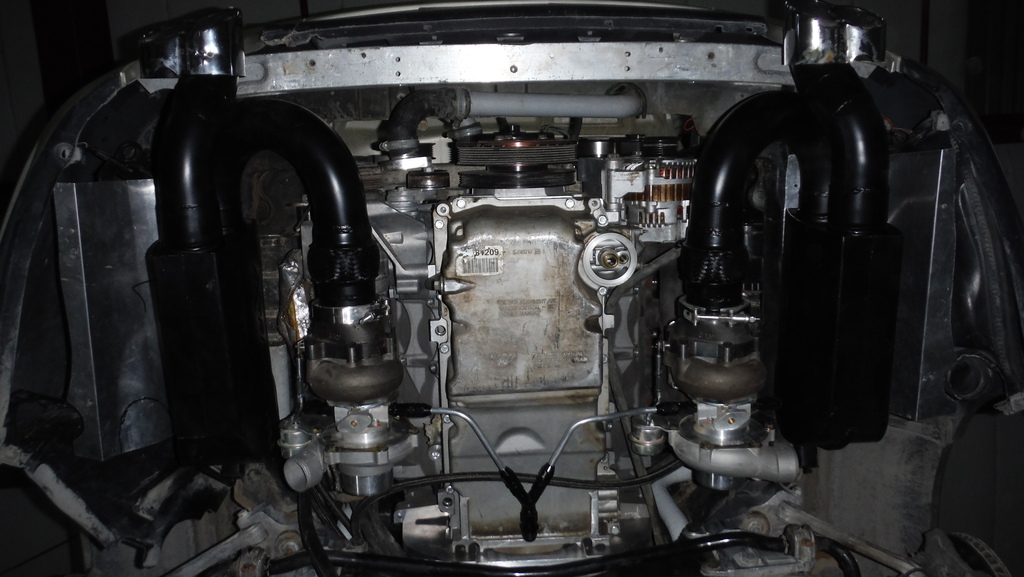
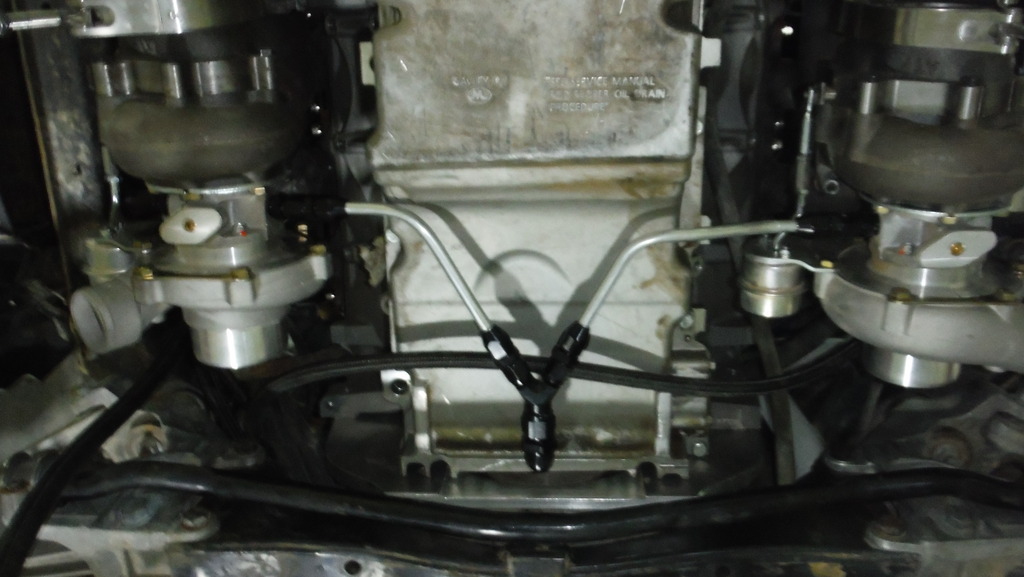
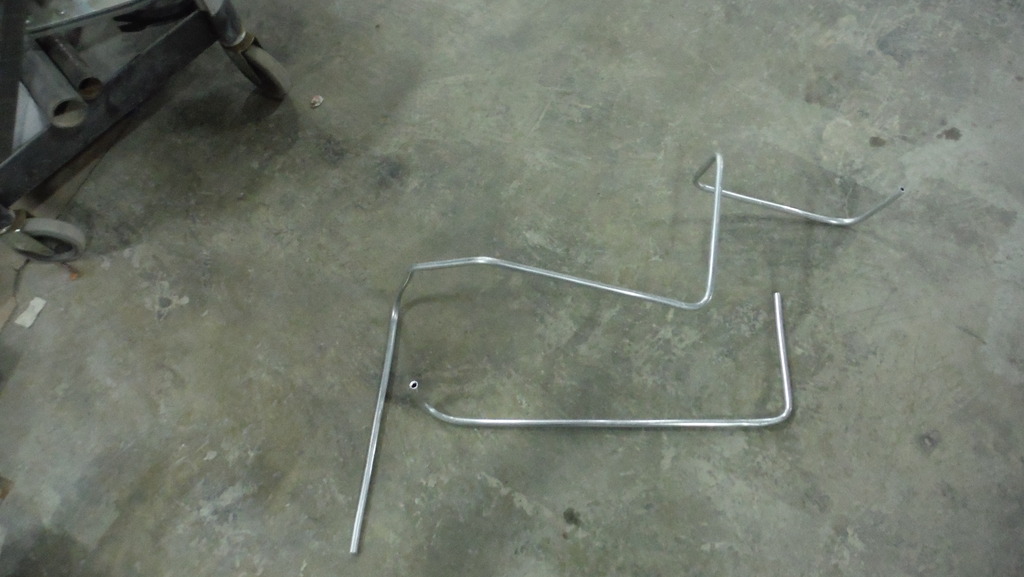
welded AN bung on heater hoses :
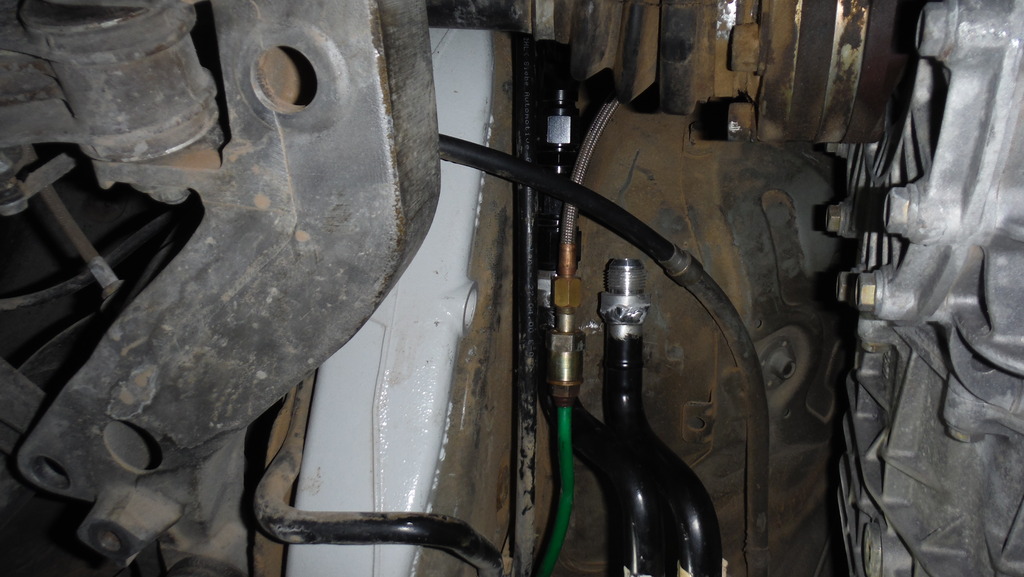
so now that the exhaust side is mostly done ( need to pug the O2 holes in the exhaustmanifolds and install the wide band sensor in the exhaust pipe) I can move on to the next item on the list , engine fuel lines and routing , and fuel system up front. the plan is to run a return line from the engine to the original return line and a new hard line under the car to the front of the car on the passenger side and up the wheel well and into the trunk/ enginecompartment up front.
I thought long and hard about the fuel system up front , and I finally came to the decision that I will use a single Bosch 044 external pump. I was planning on using dual aeromotive in tanks but looking at the sending unit and how f'd up the thing is inside the tank , I decided not to and just do it in a simple and tried and trusted matter.
I will post pics of the sending unit and how it is almost impossible to run a bigger hose through it , which led me to decide that running the external pump was the best way to do it.
the plan is to have the fuel feed hard line come up the front right wheel well along the AC line and end behind the small skid plate they have there , where a flexible hose will connect to it and run along the wheel well / frame rail to a small hole at the front of the well where it goes into the trunk area ( where the AMP is) and runs up to the CD changer area where the pump will sit. from that it will loop into a bulkhead fitting into the top of the tank where a hard line with a Y that runs to the bottom of both saddles of the tank will be plumbed.
so next up on the list is :
- finish turbo coolant lines
- install intake and other stuff on top of the engine
- run hard lies to the front and to the return line.
- plumb fuel pump and tank stuff
- test fuel system for leaks
- fill coolant system and check for leaks
- fill PS system
- swap front damaged CV boots
- replace front and rear shocks
- bleed clutch
- fire da bitch up !
8-18-2015
more progress to report
i managed to finish a few things here and there , first off I installed the intake manifold and the associated stuff along with it . I decided to put the regulator on the exit side of the fuelrails on the passenger side , then run the return line to the front of the car while switching to the driver side when it goes behind ( or in front of) the engine - depending on how you look at it- and then have it connect to the original return line.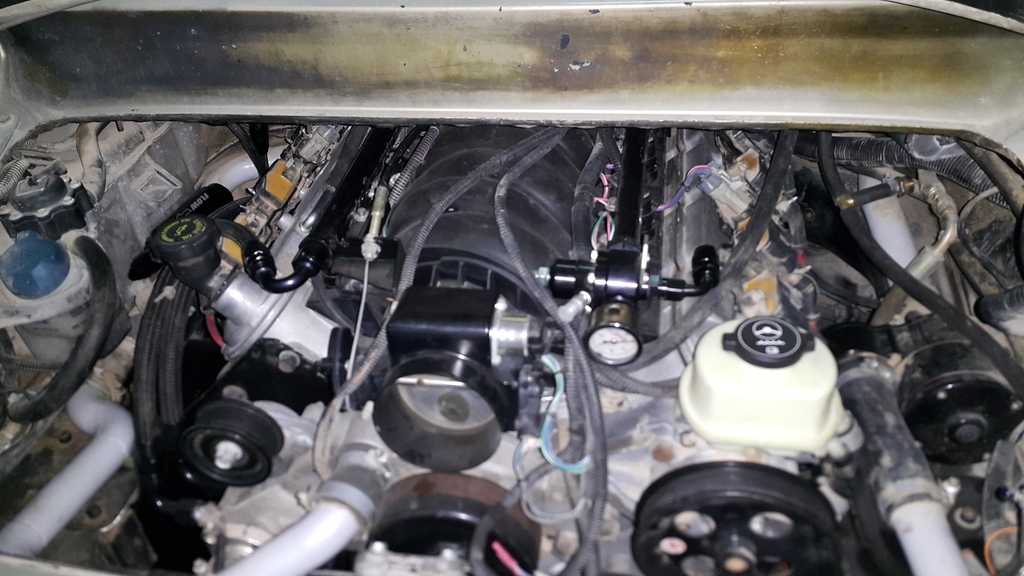
i also redid the coolant lines going to and from the turbo , at first the idea was to have them done in flexible hose ,,, but that looked like a mess, so i went with some hard line and compression fittings ,,, which was fine until i found out they don't make a 90 deg. compression fitting so i had to redo the lines because i had to clock the turbo center sections to gain some clearance for the fittings and line.
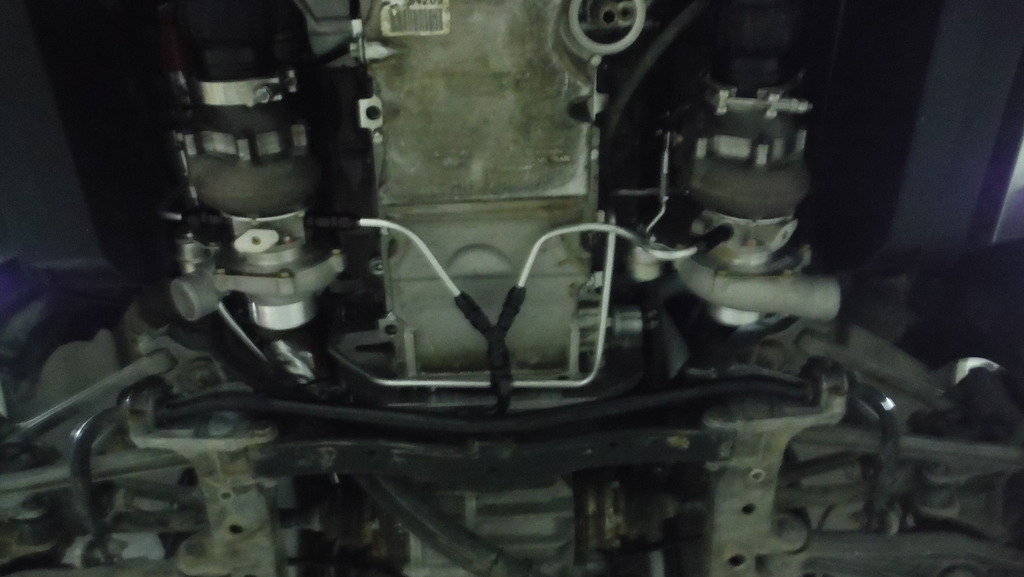
i then turned to the fuel system ; starting from the rear and working my way to the front ( well it was more like a bit here , a bit there ) .
the plan was to run a the filter in the stock location on the coolant tank , then have the feel line snake under the car along the AC hoses to the passenger side where it would connect to a hard line that paralleled the refrigerant hoses all the way tot eh passenger wheel well area , where it goes back to a braided hose and enters the compartment from there .
here is where the hard line enters the wheel well and connects to the braided hose: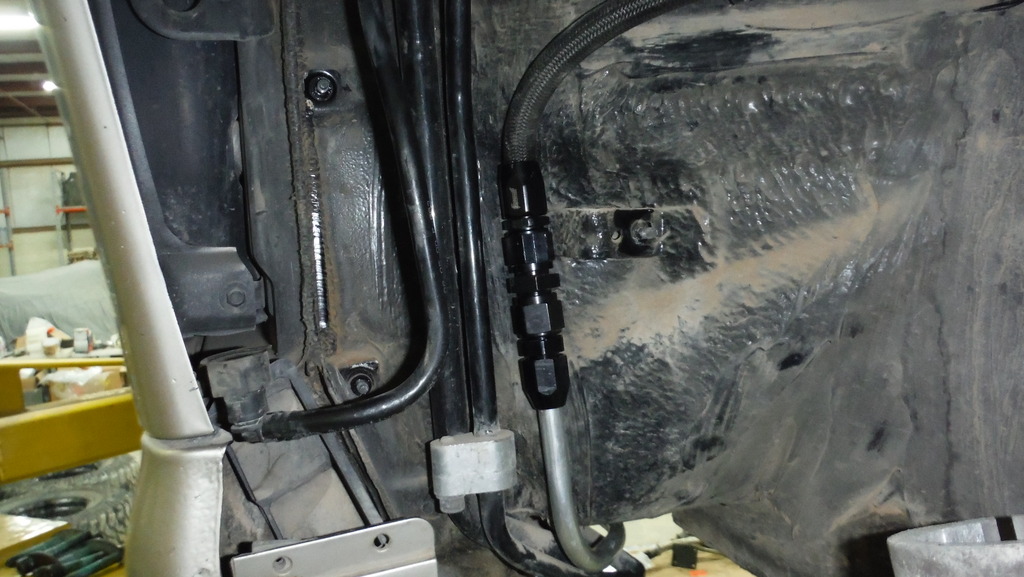
and this is how it looks with the rock shield in place :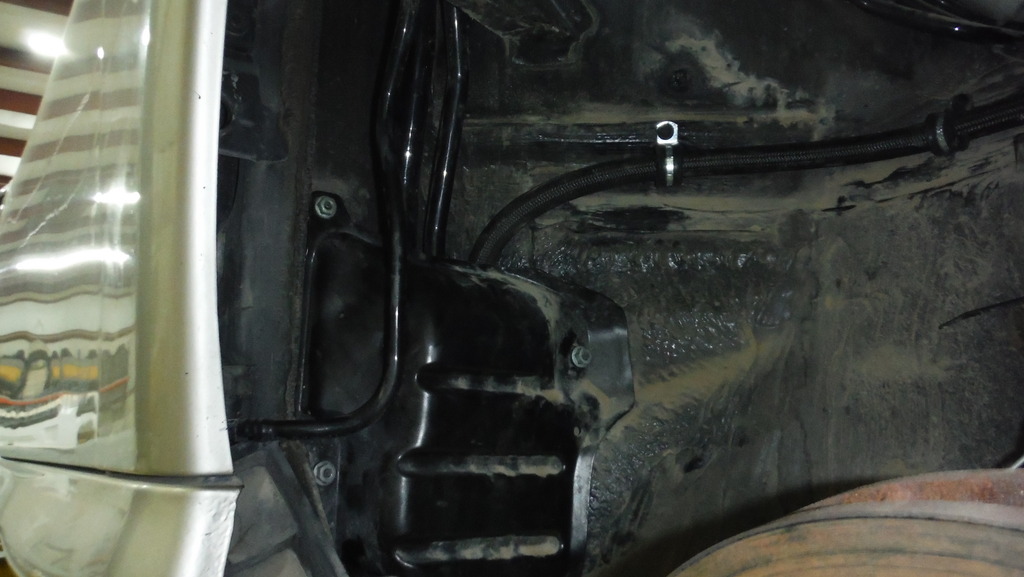
the braided line follows the frame contours tot he front of the wheel well , where it goes in to where the amplifier is :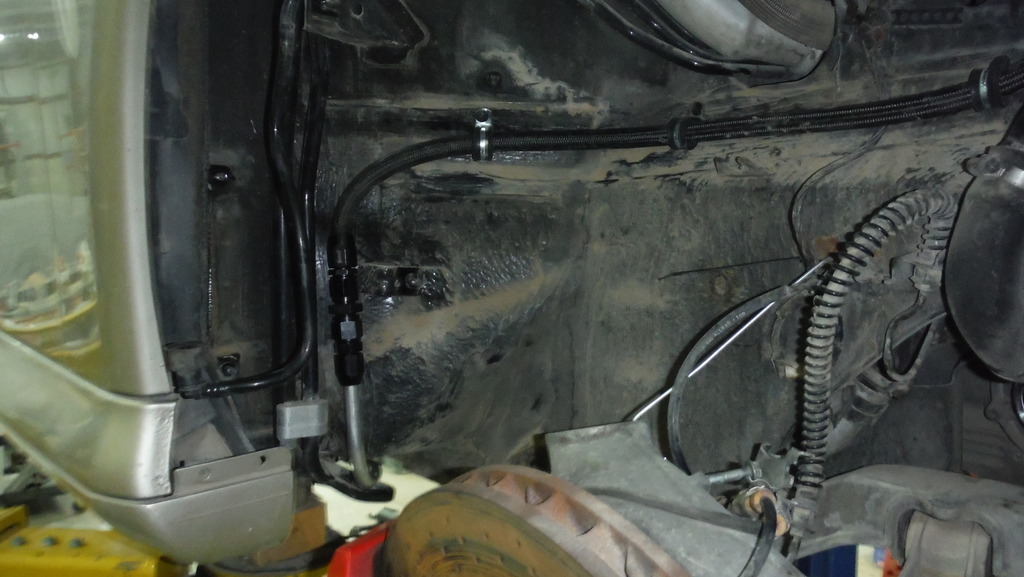
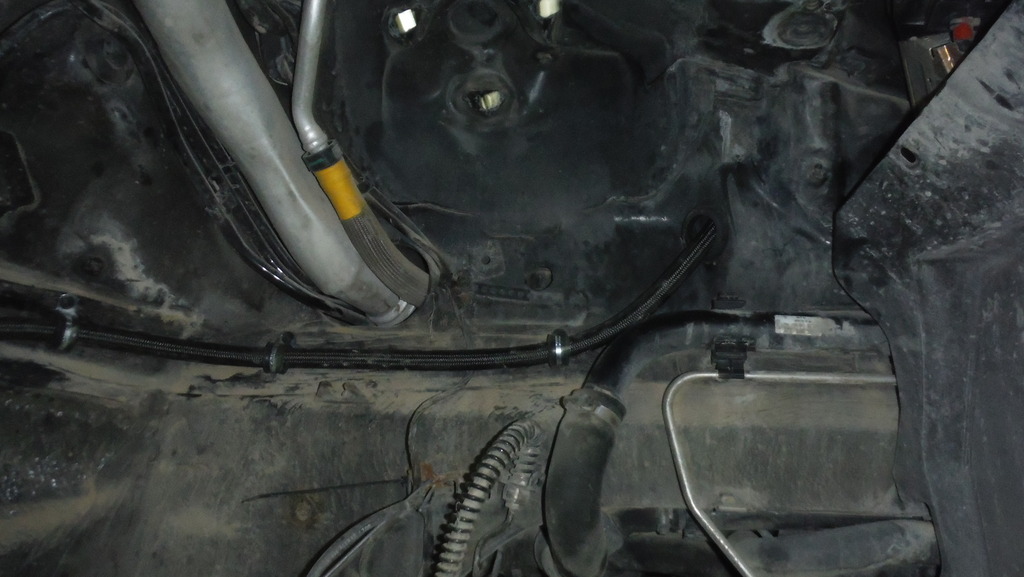
on the inside of the trunk are the hose snakes back to the firewall area and goes up to the shelf where the cd changer was.
i decided to install an external bosch 044 pump there to keep things simple and easier to maintain. i also decided not to use the sending unit for running the feed line through ( no where to drill and install any fittings) , so drilled a hole through the floor and another in the top of the tank and installed a bulkhead fitting onto the top of the tank. from the bulkhead fitting i used a 1/2" aluminum tube that ran from the top of the tank to the bottom where it teed into two smaller 3/8 tubes that each went into one of the saddles of the tank.
this is some of the original crap inside the tank: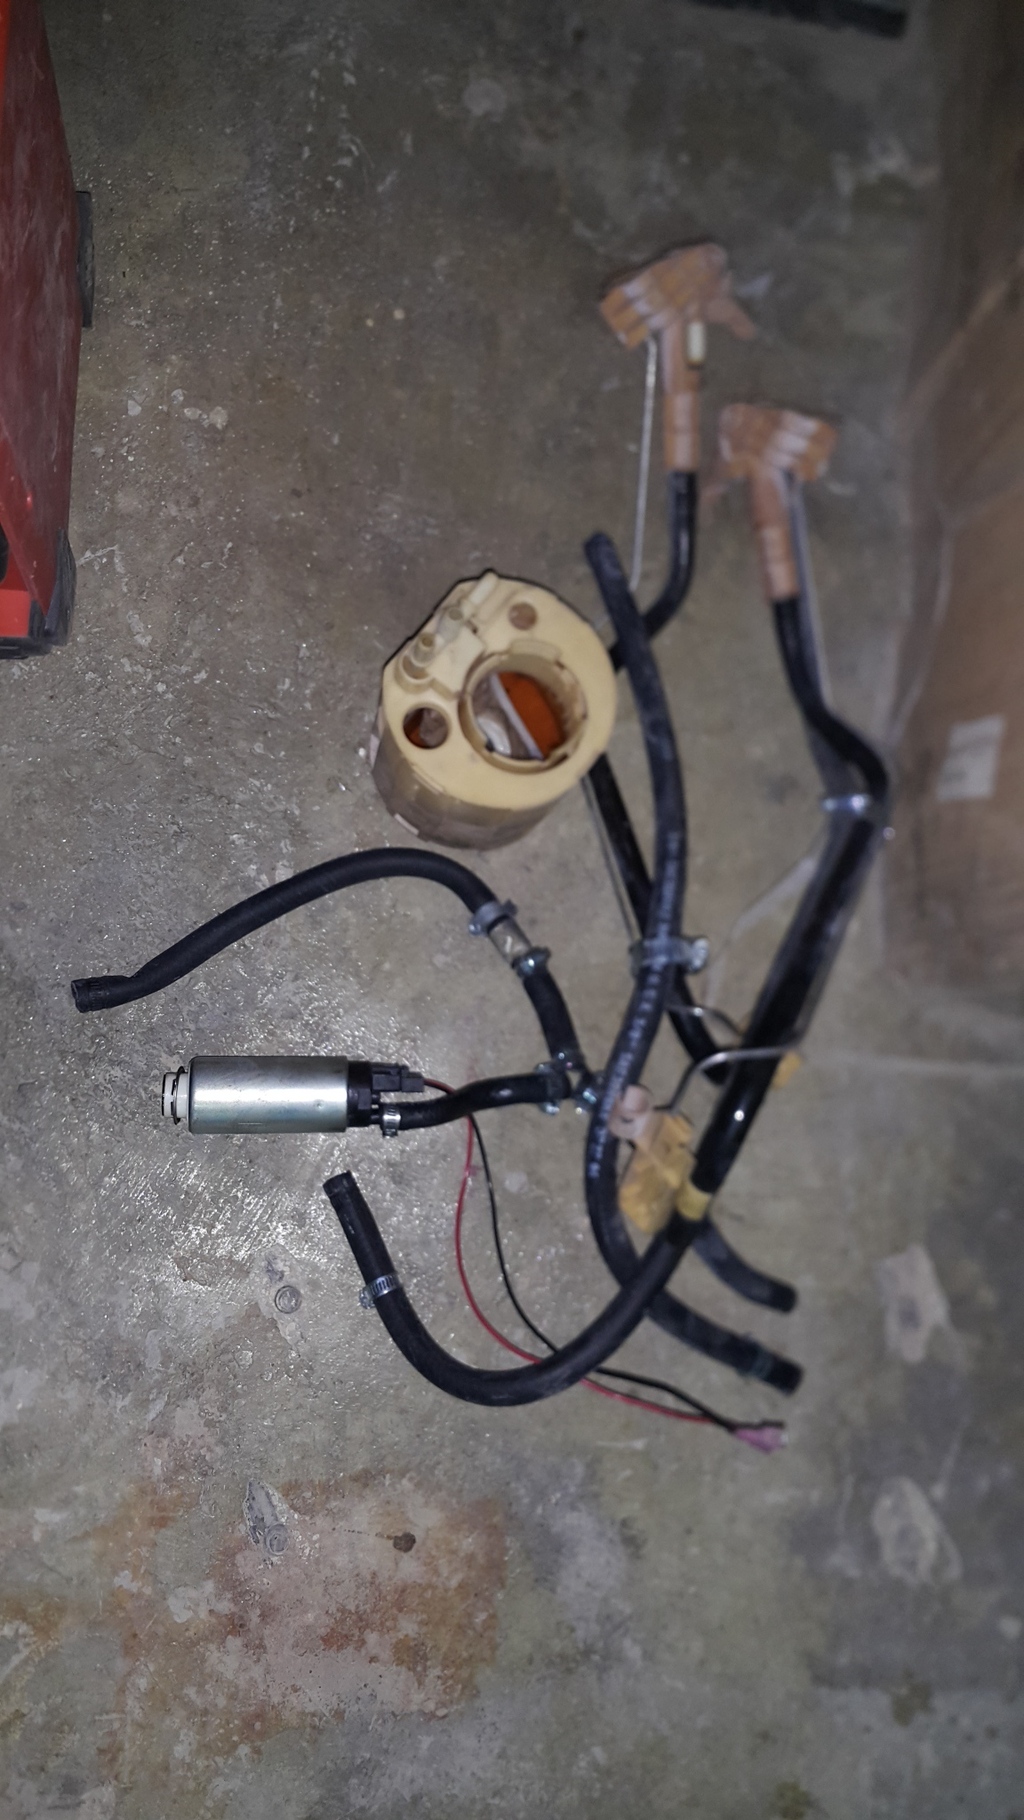
pump and fitting :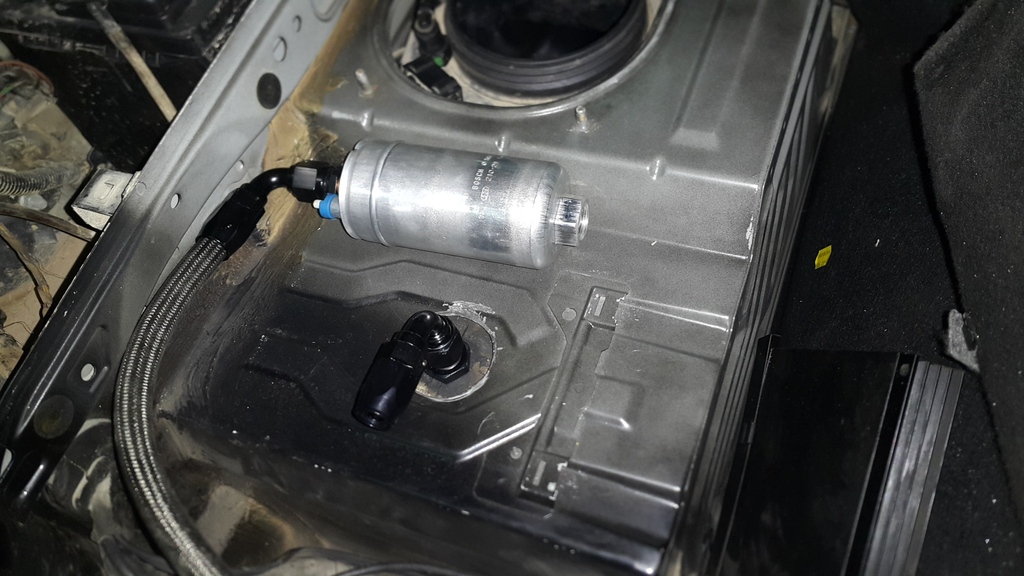
y inside tanks : ( forgot to snap pic of it when it was finished)
so that pretty much takes care of the feed side of the fuel system , all i have to do now is run the return line to the original return lines on the car , drop the fuel level sender in , splice into the pump signal and install the leash electronics relay in place and scratch the fuel system off the list
another thing i got around to do was fixing the front cv boots that were toast. i finished one side and all i have left is to finish the inner front pass side and slide it right in .
.
and i don't know if i mentioned this earlier but i am swapping all four struts on this car to newer used ones
so next up on the list is :
- run the return line.
- wire fuel pump
- test fuel system for leaks
- fill coolant system and check for leaks
- fill PS system and check for leaks
- bleed clutch
- pull pcm out and reflash
- start fabbing the turbo cold piping from turbo to intercooler
8-24-2015
I managed to get a few things done last night ,,,, mainly charge pipes and finishing up the fuel system and hooking up the lines and wires. I did manage to make the charge pipes from the turbos to the intercooler, I just need to have them powder coated and I can slap them on there next.
here is how the fuel pump setup looks now :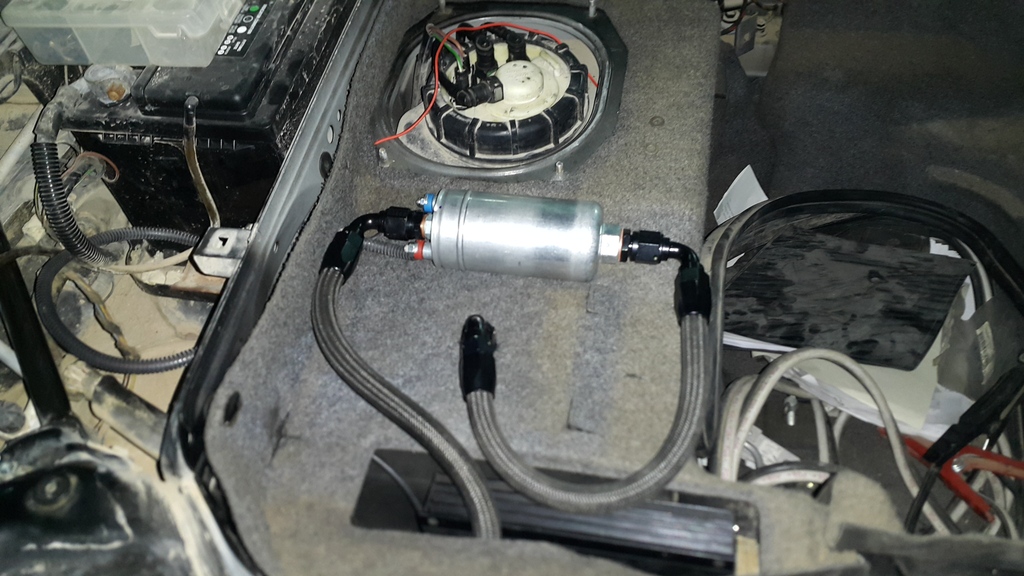
after priming the pump up and checking for leaks I moved on to the cooling system where I began filling it and tightening what I forgot to tighten. I also primed the system with the electric water pump and got that off the list.
next up was installing the newly flashed PCM and dumping some oil in the thing ,,,,then it was time
at 11:09 local it fired up for a few seconds enough for it to fill the lifters with oil idle a for a few seconds
so now that I just crossed a major milestone I kinda feel a bit more excited to finish this thing I guess looking at it now all that is left is a few simple things ( mainly wiring) before she is road worthy again .
so next up on the list is :
- bleed clutch
- install charge pipes from turbo to intercooler
- hookup Porsche crank signal (rpm gauge) and oil pressure sensor
- run wideband wiring and fuel pressure gauge wiring to front of cabin
- install serp. belts and catch can hoses
- install inner fender screws and then wheels and tires
- get her off the lift and start fabbing the intercooler to throttle body pipes and BOVs
11-1-2015
time for an update I guess
I managed to finish the to do list above ; the clutch is bled , charge pipes are done , crank signal done , wideband and fuel pressure gauges done , belt & fender screws are done and she is off the lift.
here are how the charge pipes look before I took them to get powdercoated: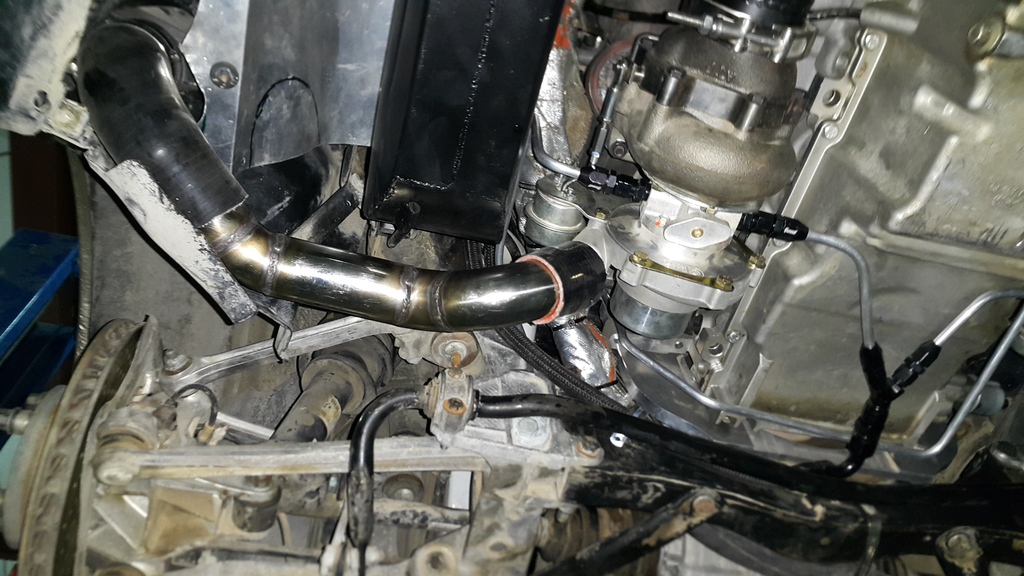
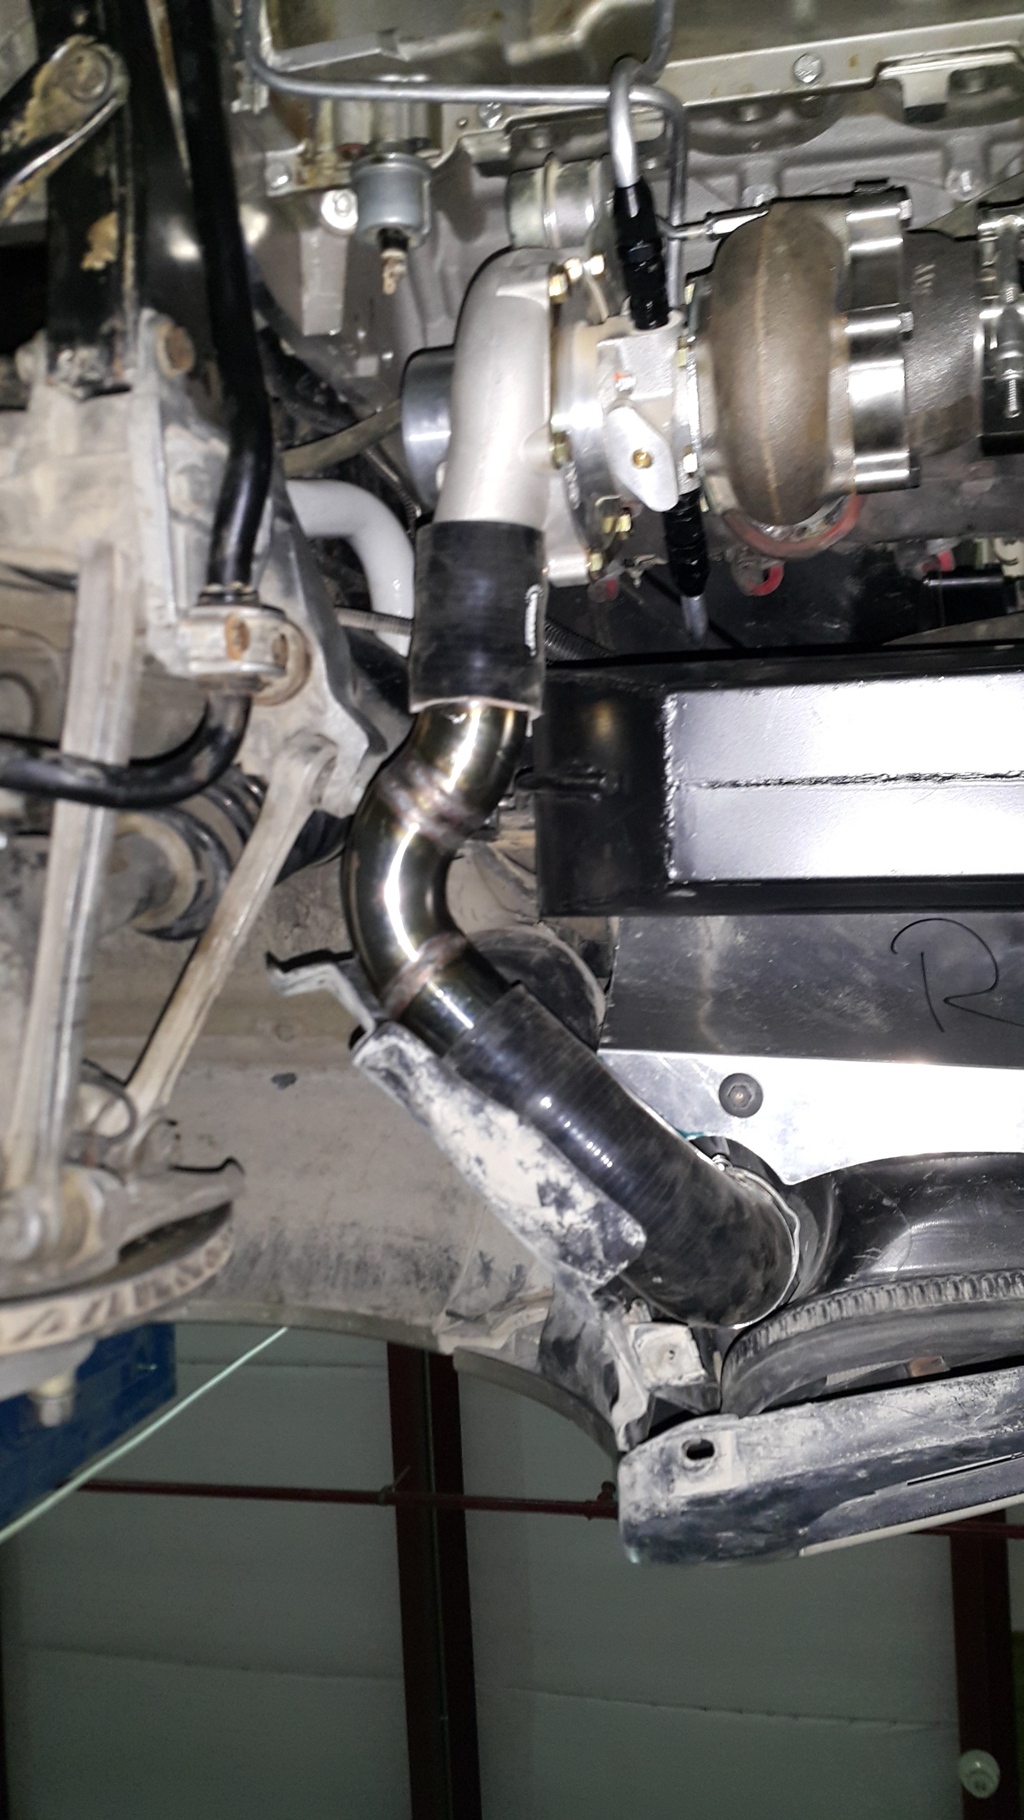
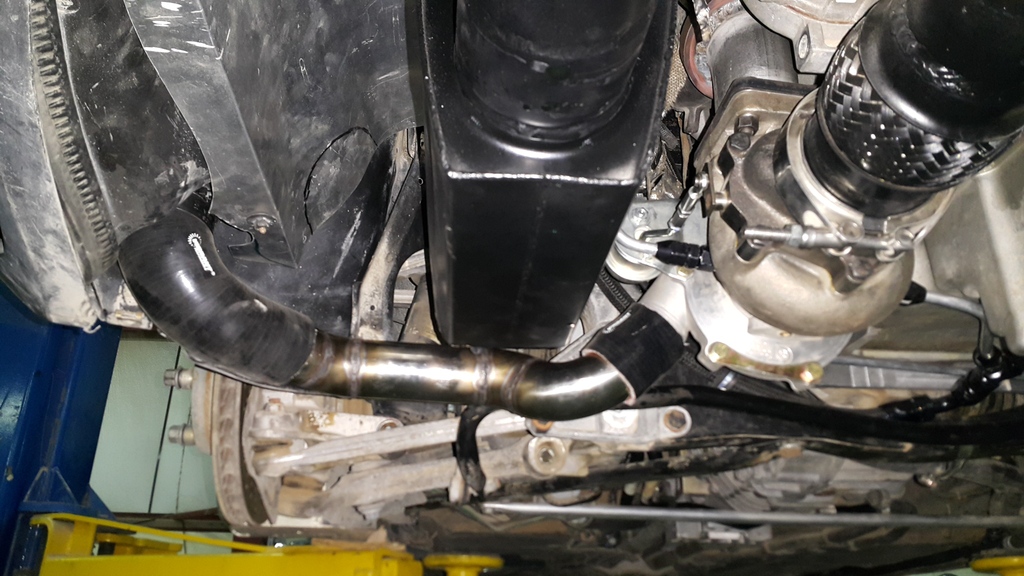
since the car was off the lift it was time to work on the top side of the engine ; I fabbed up the charge pipes from the intercooler to the throttle body and welded the BOV flanges :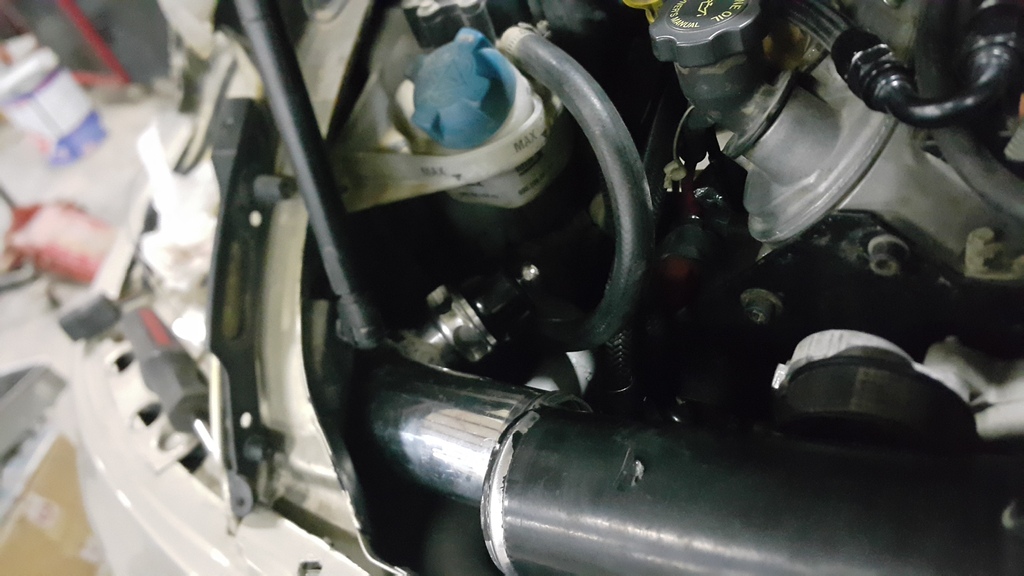
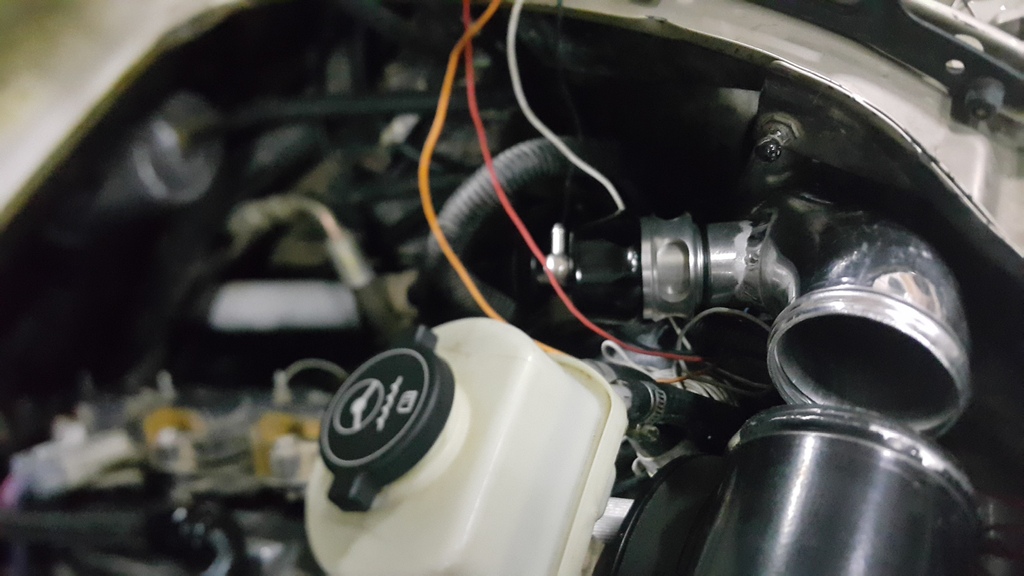
after that I finalized all the plumbing for the vacuum hoses and what not and had my buddy and tuner load a base tune just to get it to idle and putt around till we get it to the dyno and to check for leaks and that everything is ok.
well the car idles just fine and no major leaks to report but there is the issue of the oil pressure sensor , for some reason it quit working after the swap and even after putting in a new one I still can't get a reading on the stock gauge ( I checked with an external gauge and we have pressure )
)
the cool thing is the car's exhaust note is a lot tamer than before even though it has 2 less mufflers . the thing sounds pretty damn stock
so then it was time for the dyno ! I drove it over there and man this things drives great! it idles great and pulls good and smooth . on the dyno we found out there was a fueling issue ; fuel pressure would drop to 36 psi even though the regulator is a boost referenced one.
the good news is that the thing made 500 RWHP at 5000 rpm at 10 psi 
so things are looking good so far, so I took it back to the shop and got to tinkering with it again ,,,, I was trying to figure out why the sudden drop in fuel pressure ; so the logical way is to start ruling out the easy free stuff first ( so no changing the fuel pump for now ).
I was going to pull the sending unit out and check if there was a leak in the pickup tube and if it was siphoning up some air ,,,,, but then it dawned on me : what about the fuel filter ?? I installed a puny little filter to get the car running cause the one I was planning to use did not arrive yet when I did so , and I forgot to install it
here is the filter I'm talking about that is on the car :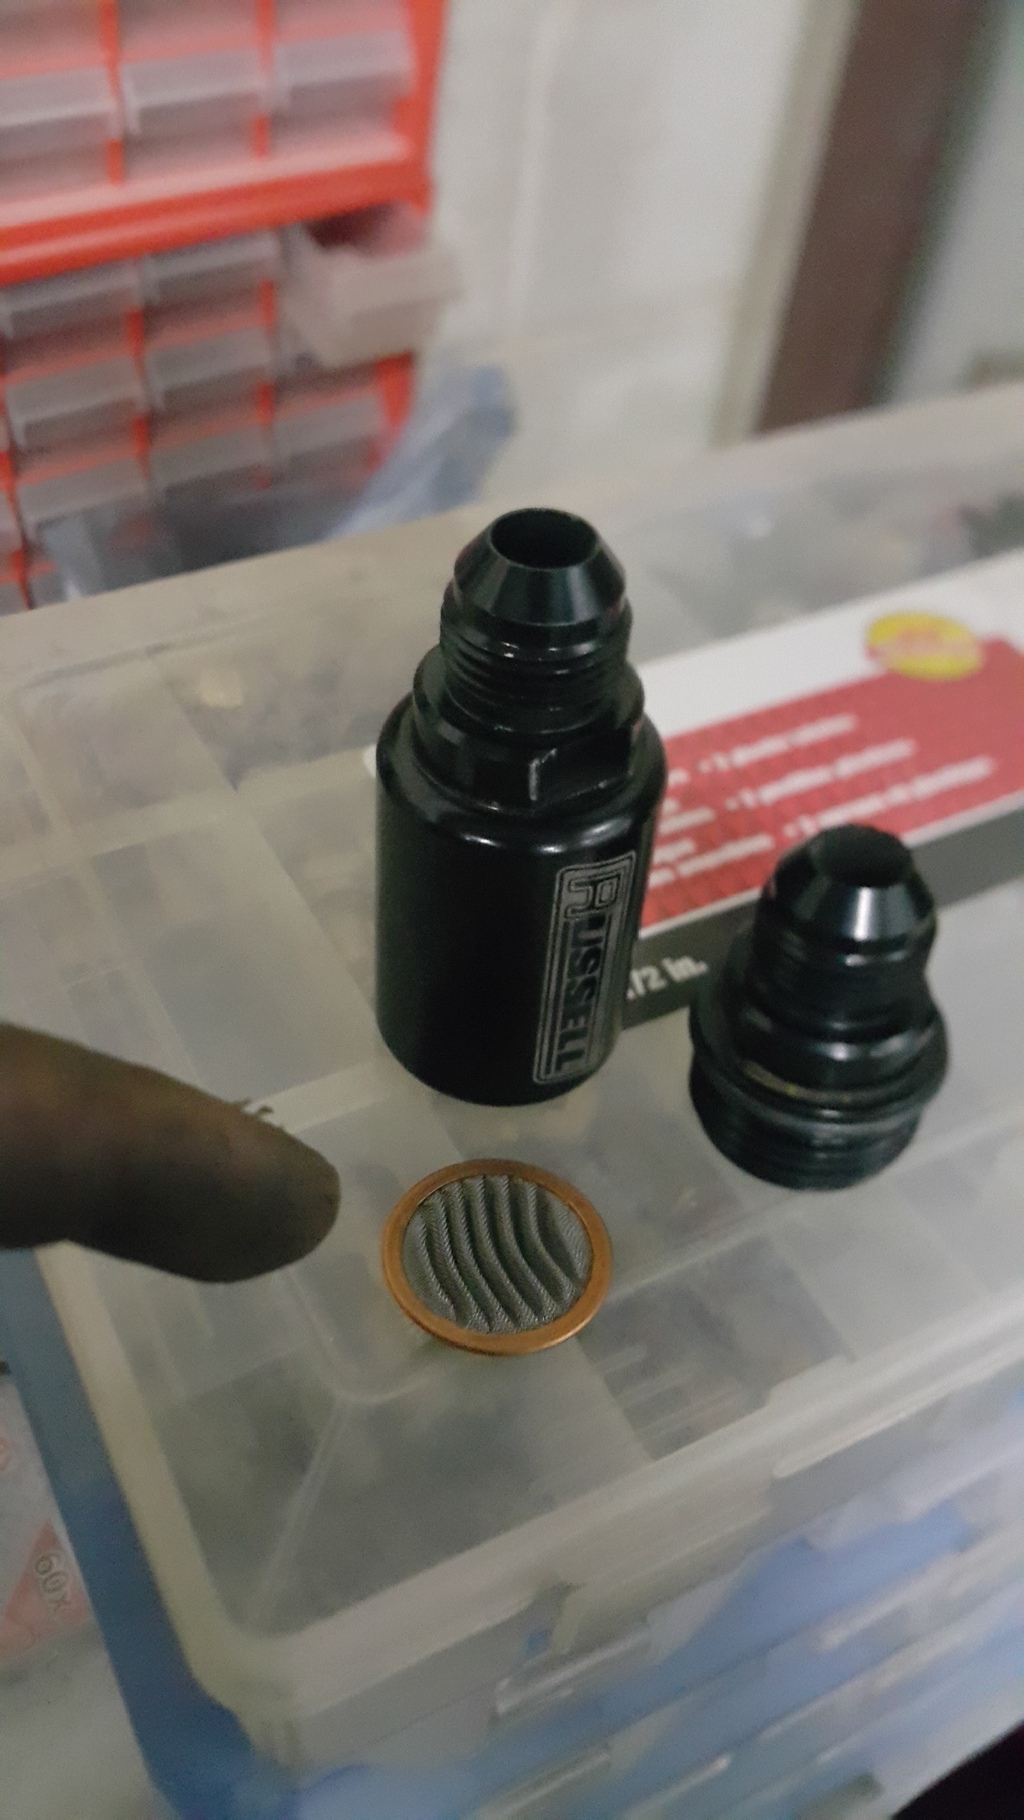
so I promptly took that thing out and put the big one back in ,,, waiting to see the results and if it fixed the issue .
one last thing I did was finally get around to polishing the headlights ,,, and man what a difference did that make! here's a before and after shot :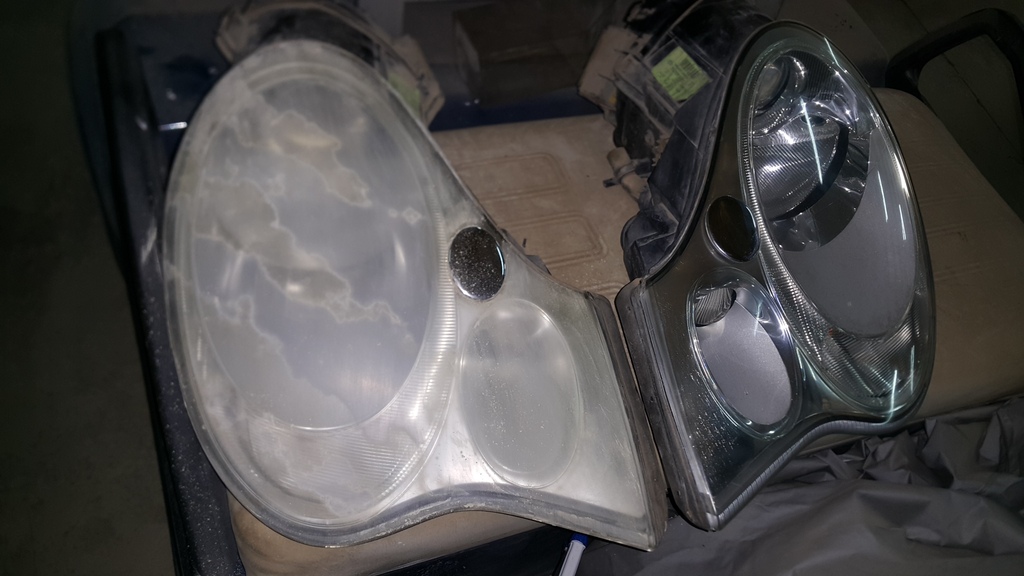
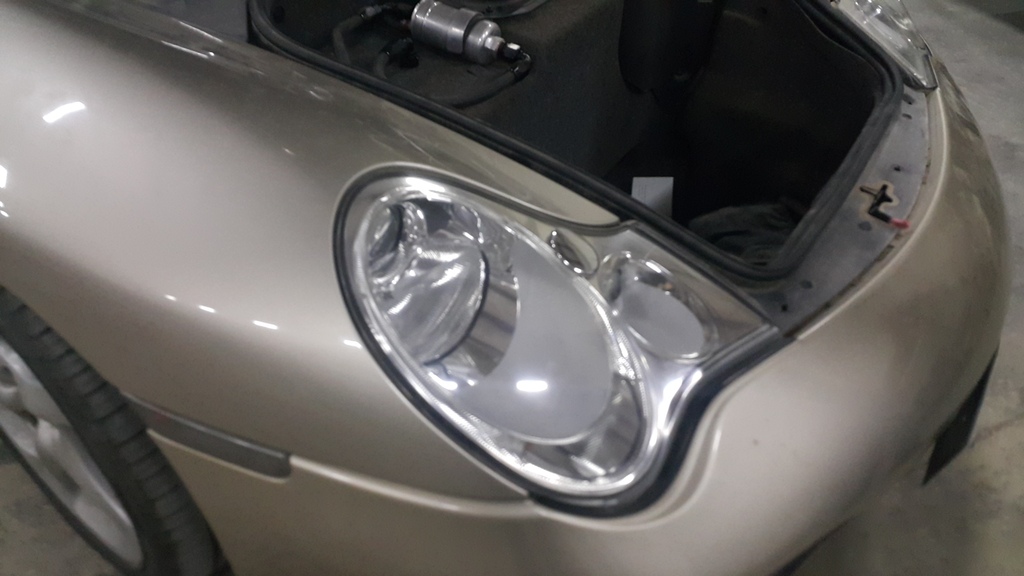
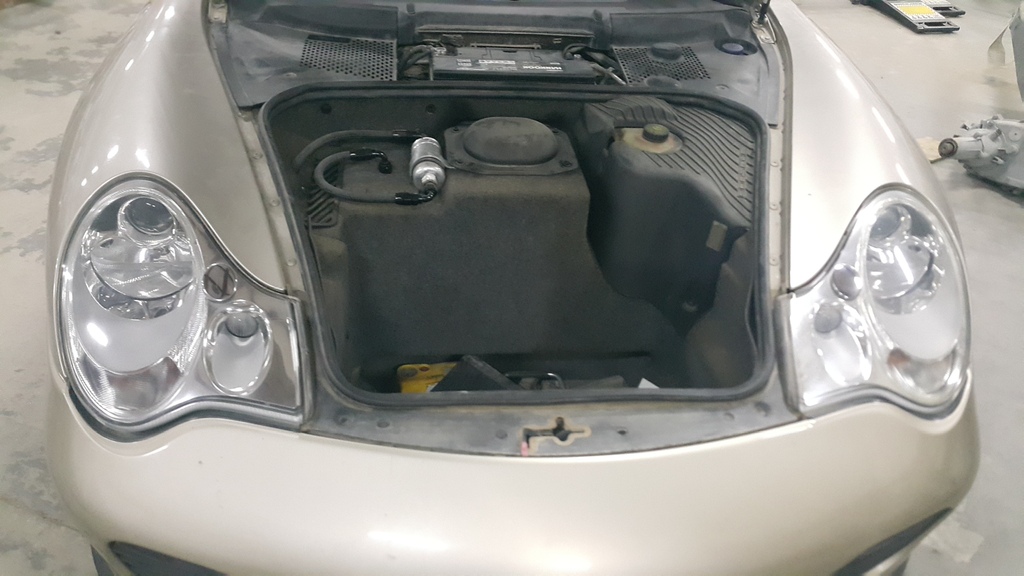
now all I have left to do is get the one light to work ,,, which I guess involves getting a new ballast for it .
so now that the car is up and running, I have a few more odds and ends to finish before I can take it home and start messing with the tune again :
- connect the AC wire signal to the compressor
- charge the AC system
- check if the fuel pressure issue is fixed
- reinstall the front driveshaft ( took it off for the dyno)
- figure out why the oil pressure sensor is not sending a signal
- calibrate gas gauge
- get some new tires instead of these 2005 ones I have on there !
11-2-2015
a few more pics of my progress
guage pod still needs a bit of tweaking
: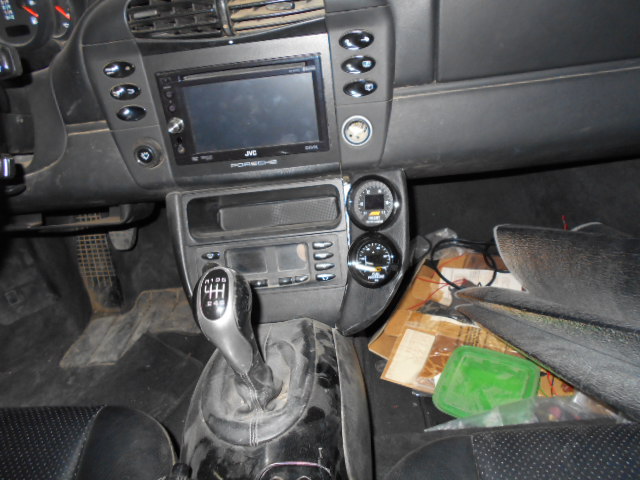
better pics of the charge pipes and BOV (ignore the bunched up wiring on the right side ,,, it will be cleaned up ) :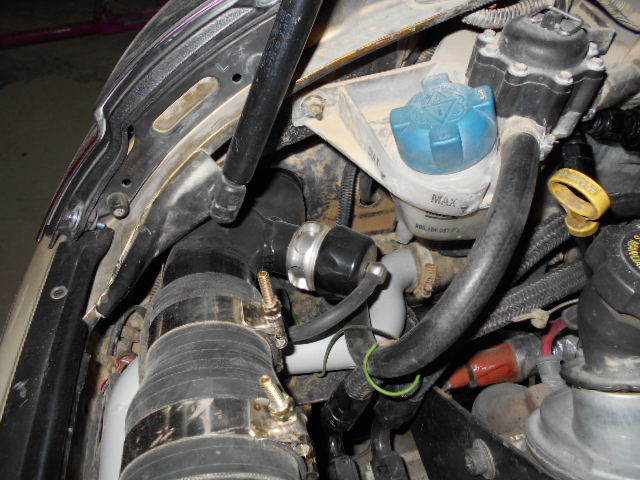
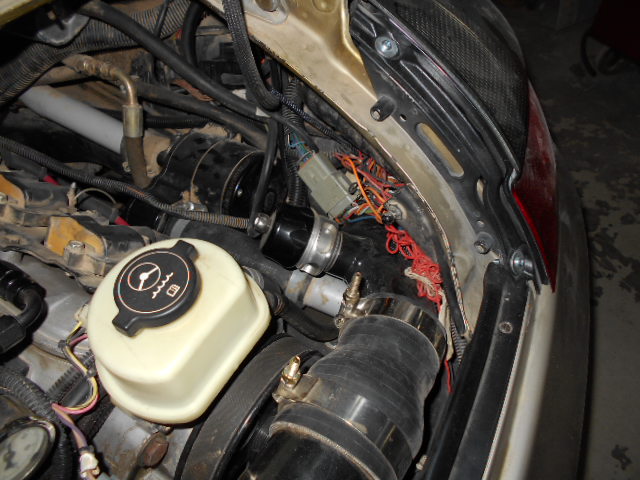
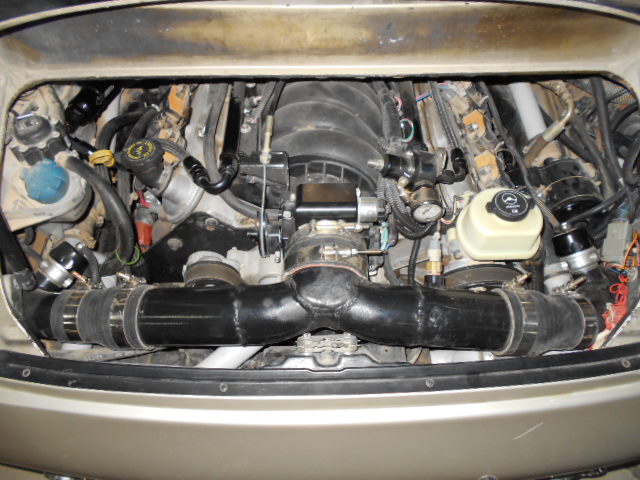
and I finally connected the AC signal wire
time to charge It
11-3-2015
will do
so I took the car home to drive it around and break it in , sadly the fuel pressure issue is not fixed , fuel pressure still drops at high loads .
and since I ruled out the fuel filter being restrictive , I'm now leaning towards fuel cavitation just before the pump.
I'm thinking that since the pump is sitting above the tank , it might be struggling to suck the fuel out of the tank and thus causing it to "boil" and bubble , which in turn leads to the pressure dropping .
the problem is that I have seen some time ago the pump in this exact location on a yellow RSR racing Porsche , which is confusing me right now .
and doing a bit more research , I seem to need around 375 LPH ( comes out to 600 Lbs/hr or 100 Gal/Hr )of fuel to cover my needs on this setup, and looking at the flow charts on the web it seems the 044 pump can only provide somewhere in the neighborhood of 250 -270 LPH at 60-70 psi of pressure ,,, so this might be the issue I'm facing right now.
so I guess I should give the new AEM 380 pump a try since it fits in the same place as the bosch and takes the same fittings.
so ,,, next up is swapping the fuel pump and seeing what this will do
11-22-2015
time for an update
finally got to put it back on the dyno again.
first off the AEM pump was kinda doing its thing , fuel pressure never dropped below 55 psi , although it needed to be something around 70psi at WOT. I'm not worried about that now since it still has that restrictive check valve in the outlet, I'm sure the pressure will be ok as soon as I remove that valve and replace it with a straight through fitting.
well on to the stuff you guys want to know ,,, but before that I just wanted to let you know I didn't take the car to get the rear alignment yet
so what did it make on the dyno at 14 psi and pump gas???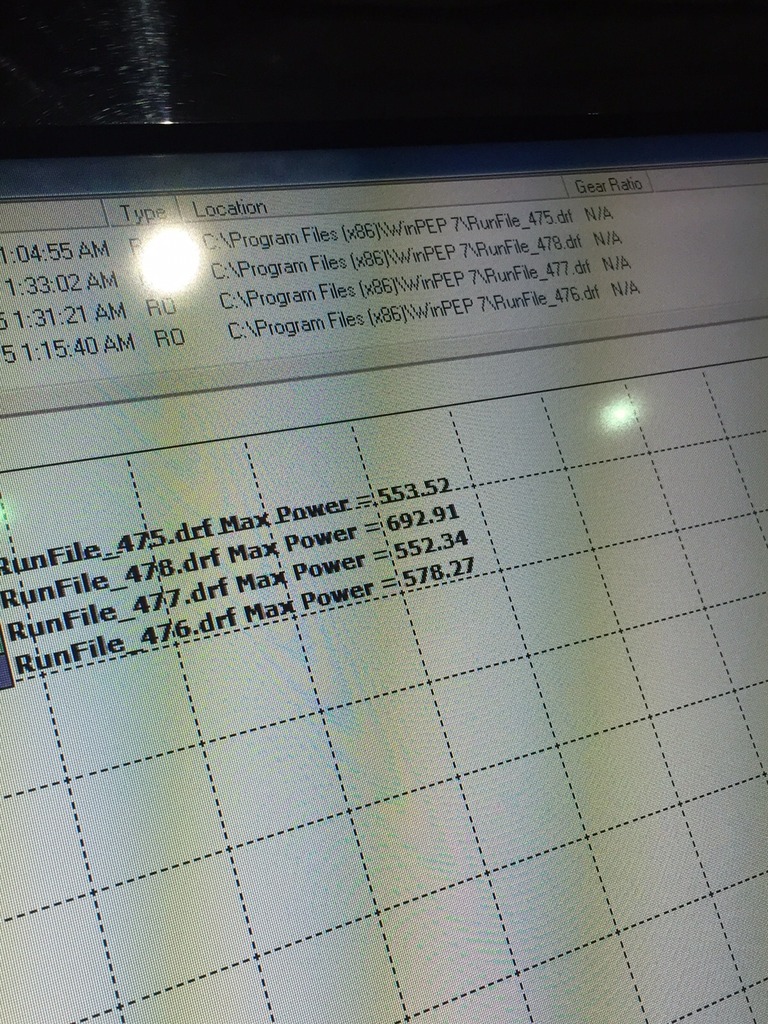
not to shabby for a daily driver off course there has to be some bad news in there ,,,, apparently the stock clutch has its limits I guess , some where around 600whp or less , since the dyno graph was showing horse power dropping off top end while boost was also dropping , couple that with how fast the engine revs to the rev limiter and the face that the car made more horse power when the it was dialed down ( less timing and richer AFR ) , which means the clutch was holding at lower hp levels but when turned up it slipped.
here is a graph I managed to take of one of the runs ; boost is at the bottom :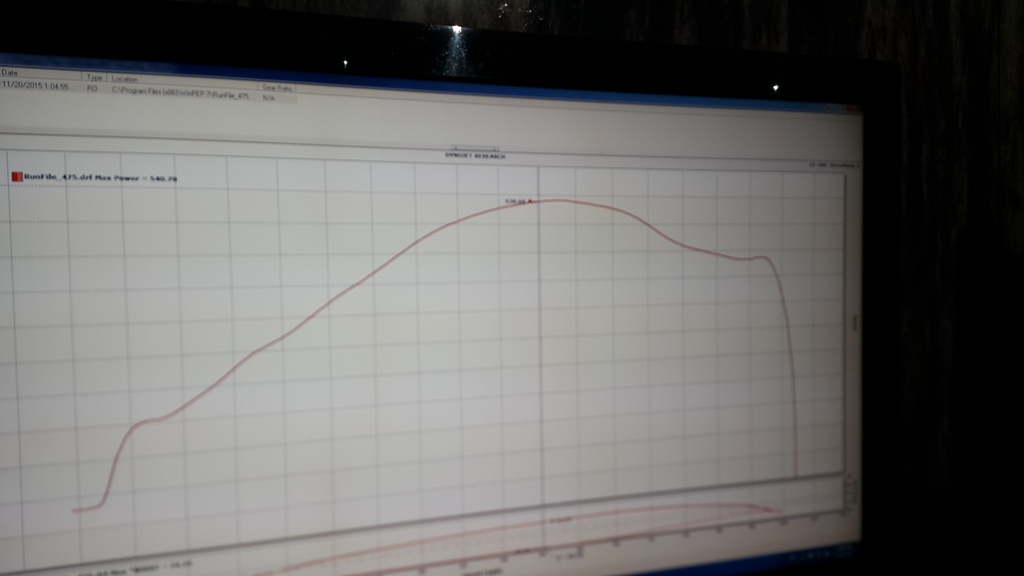
all of that was confirmed when I stuck the front driveshaft back in to the car and took it for a spin , the added load immediately showed how bad the clutch was spinning - at around 4500 rpm in 4th the rpm would shoot up .
I couldn't notice it when it was 2wd because the car would loose traction before the clutchwould slip and there wouldn't be much load on it then.
any how I'm just giddy with joy right now , knowing this thing has 700+ AWDRWHP in it as soon as I iron out all the bugs . it drives great and pulls in every gear - including 6th ! I just can't wait to get this thing done so I can start picking on some other cars
so next up on the to do list :
- install a better clutch
- remove the one-way valve in the fuel pump
- rear alignment
- new tires
- retune and maybe do a race gas tune
- charge the AC system
2-7-2016
I guess its time for an update ,,,
I did get around to changing the clutch to the one I got from Kennedy engineering. at first I was a bit skeptical thinking that the stock clutch was a twin disk setup ( don't know why I was thinking that ) , but when I took the old one out I found out it was a single disk unit ,,, which meant I felt a bit more comfortable putting the Kennedy unit in since they said that it should hold quite a bit more than the stocker.
I also managed to fix the driver side headlight , It had a bad ballast/ transformer which I just changed ,,,, and now I have two working headlights, all be it one yellowish in color and the other more blue - I changed the bulb a while back thinking It was the culprit and never knew what the original color was
and for some reason the dash lights are all on now . it seems in the re-install process I may have forgotten to connect a ground or something. and my rpm gauge doesn't work either due to a faulty sensor. so if anyone would like to give me suggestions why my gauge lights are not working as well as my oil pressure gauge and horn please chime in
so after all that I put a few miles on the clutch to brake it in and then I took the front driveshaft off to take the car to the dyno .
happy to say I overshot my goals
off course this brought in a new set of issues
first off I don't want it to be that powerful ( can't believe I'm saying that ! ) , 18 psi and climbing is a bit high for what I want . I have to bring it down to a more pump gas friendly 15-16 psi , this way I save the heads and gaskets from getting lifted , plus gives me a good buffer timing wise to take into account varying grades of pump gas.
the other issue is at this power level it was at the limit of the fuel system if not over it , fuelpressure would climb with boost then drop down to 50 psi at the top end , and my injectors were at - get this- %150 duty cycle !!
so now I have to add another fuel pump in parallel to the one already there and get a set of bigger injectors ( I think the ones on there are somewhere between 60 to 75 lbs/hr - not sure since they were taken off my mustang ) , I'm thinking anything over 85 lbs/hr should do the trick .
other than that I'm a happy camper
the plan now is to loosen the adjustment rods on the waste gates to turn the boost down a bit , install the second pump and plumb it , and mess with the wiring to see why I have all the dash lights on
5-16-2016
quick update time ; well nothing much going on , I loosened up the actuators on the turbos' waste gates to try to turn the boost down a bit , still need to verify it . another thing I noticed is I was getting a misfire lately , and once I started investigating the causes it found two issues: the first is the number 8 spark plug is being coated with oil, I'm assuming the valve stem seal is going bad , but I have to double check with a compression and leak down check just to make sure.
the other issue I found out is when the car was idling I did the "jiggle " test and the car actually died when I moved the harness. so now I have an electrical issue with the harness I have to fix.
so now that the harness needs to be checked or fixed ,,, I decided this was enough reason to swap it out for a Holley harness and ECU ïŠ so I ordered the harness , ecu and injectors . This way I should be able to tune the car easily and log stuff and have the benefit of a self-learning ecu .
I also had a cut front cv boot to fix ,,,, so I did , and while I was under there I swapped both sides as well as the front wheel bearings.
I also I decided it was time to fix that annoying weak starter that seemed to lose all power once it got hot. So I ordered on a while back and once I came around to installing it the shift arm mechanism on the transmission bumps in to the rear of it, you can see why in the next pic; for some reason this starter is about an inch longer.
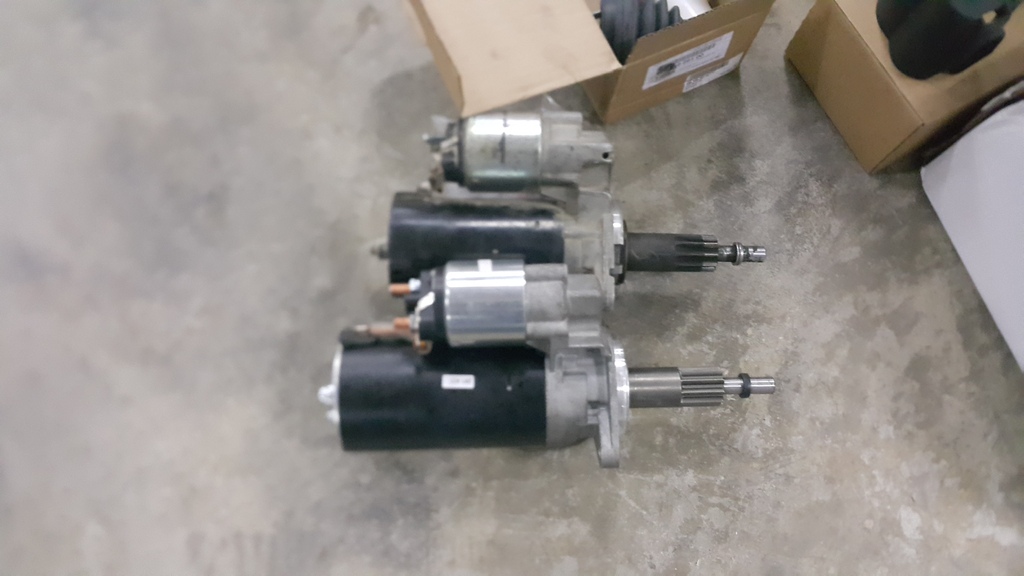
And here you can see what hits the back of the starter , it’s the round weight thing on the top of the shift linkage :
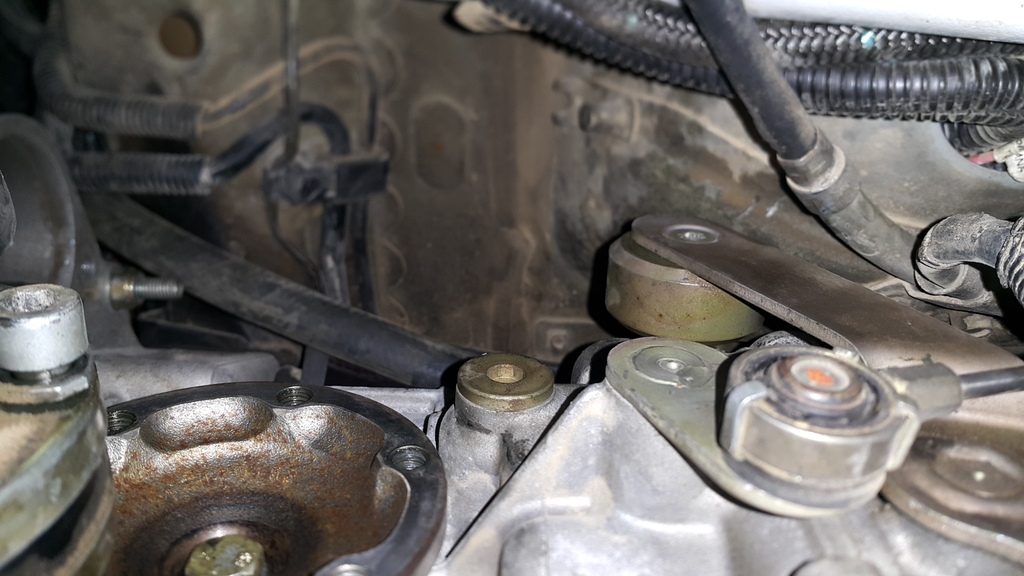
And while the car was on the lift I kinda noticed a small problem
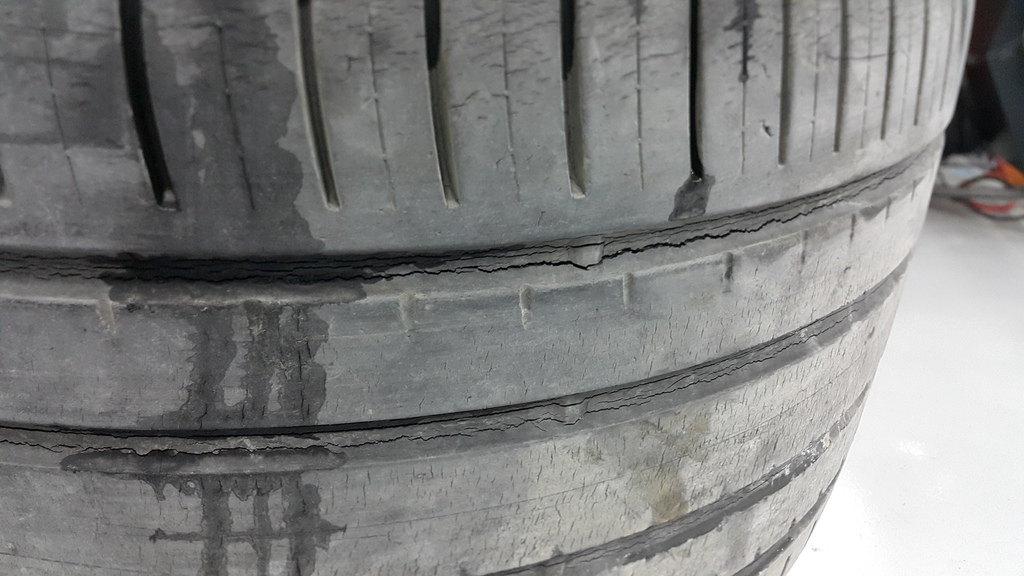
But luckily I just bought a set of mickey Thompson 305/35-18 drag radials last week ,,, geuss it was racer’s intuition
And here is how they look side by side and what not :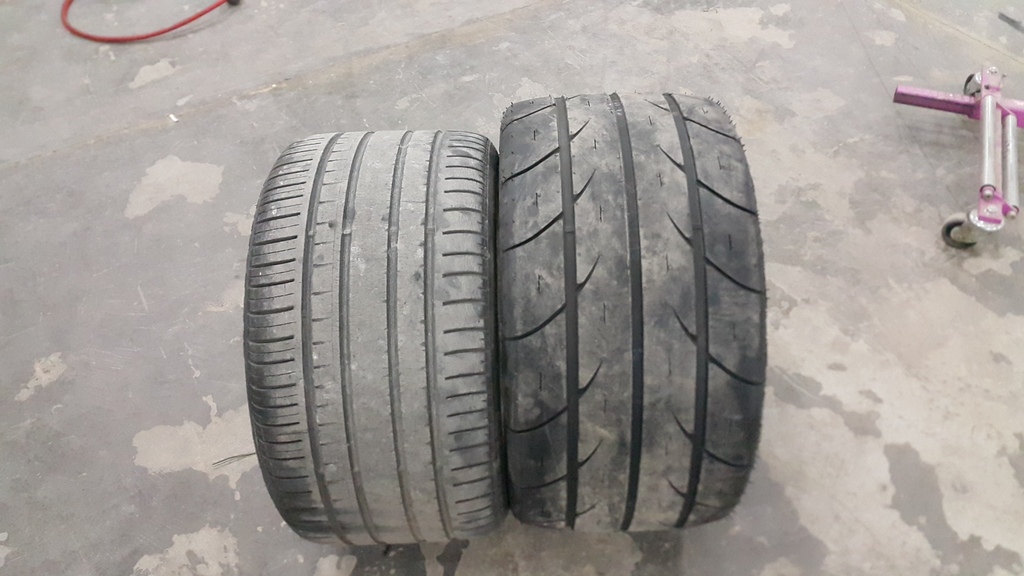
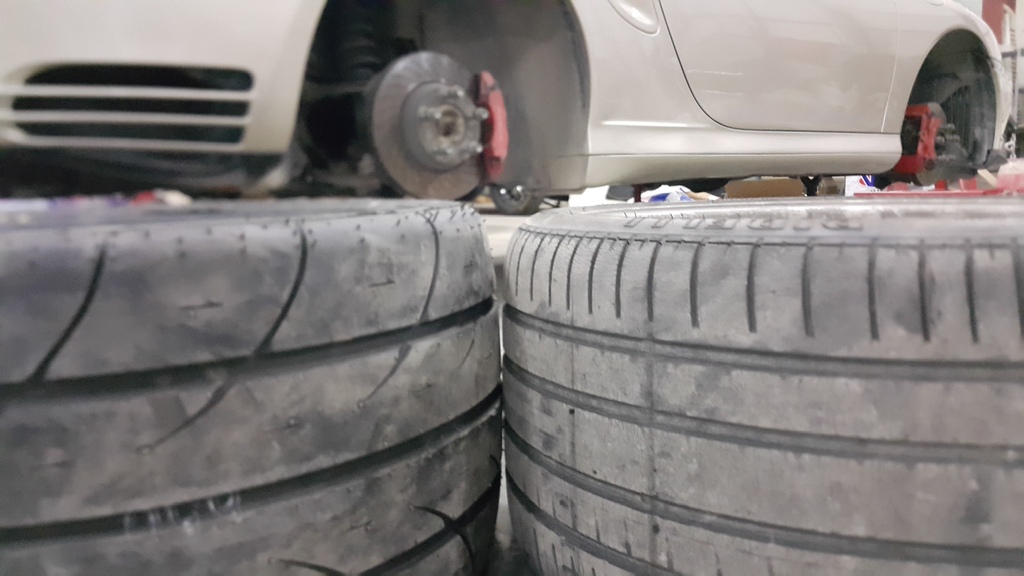
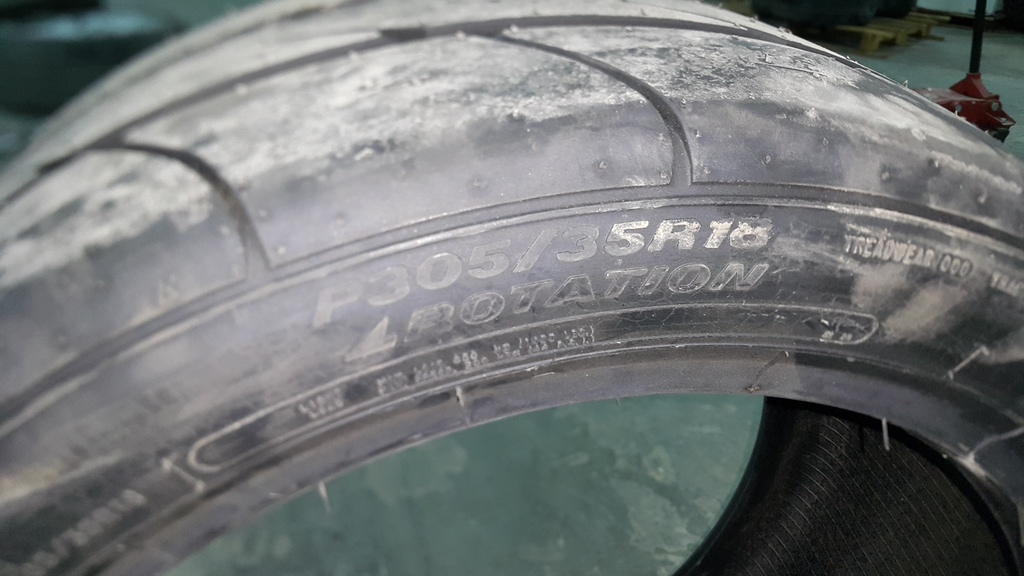
And here they are all mounted up and pretty:
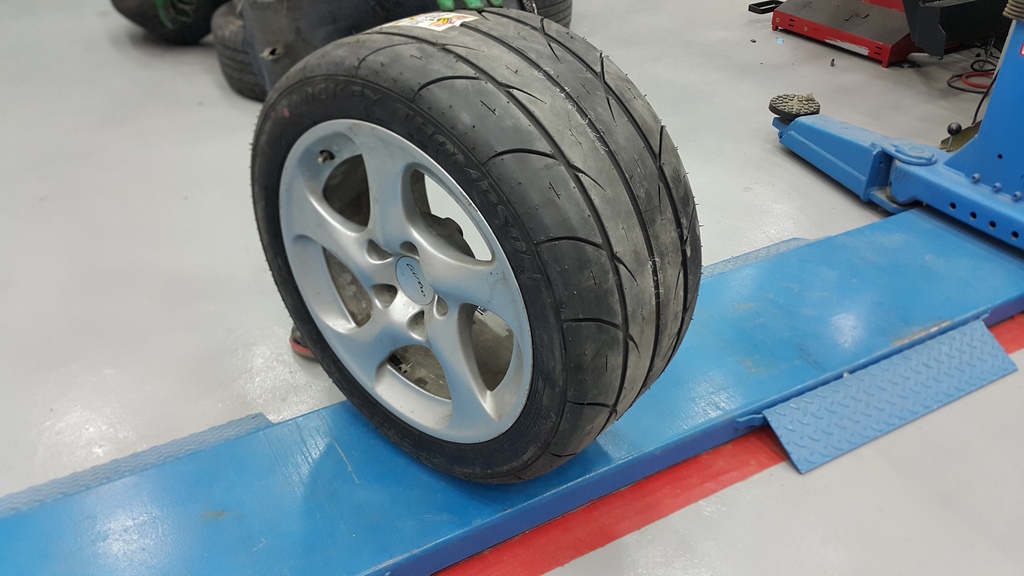
I’ll also be changing the front tires too , I will be going with a 245/40-18 fronts to match the added height the rears have . the good thing about these new sizes is that they fill the wheelwell nicely , and give me a slightly taller gear ratio which should make the car even more fun to drive around .
So next up on the to do list is :
-swapping the front tires
-waiting for the new starter to show up and install it
-Change the headlight bulbs ( right now the color is off on both sides)
-Swap out the old valve seals ( that should be fun )
)
-Install the holley stuff once it gets here and wire it.
5-17-2016
and incase anyone is wondering, the tires fit in the rear ok but they rub slightly on the rear back of the inner fender . I already ordered a 10mm spacer and longer lug bolts that should get me right were I want to be .
here are how the new tires look on the car :
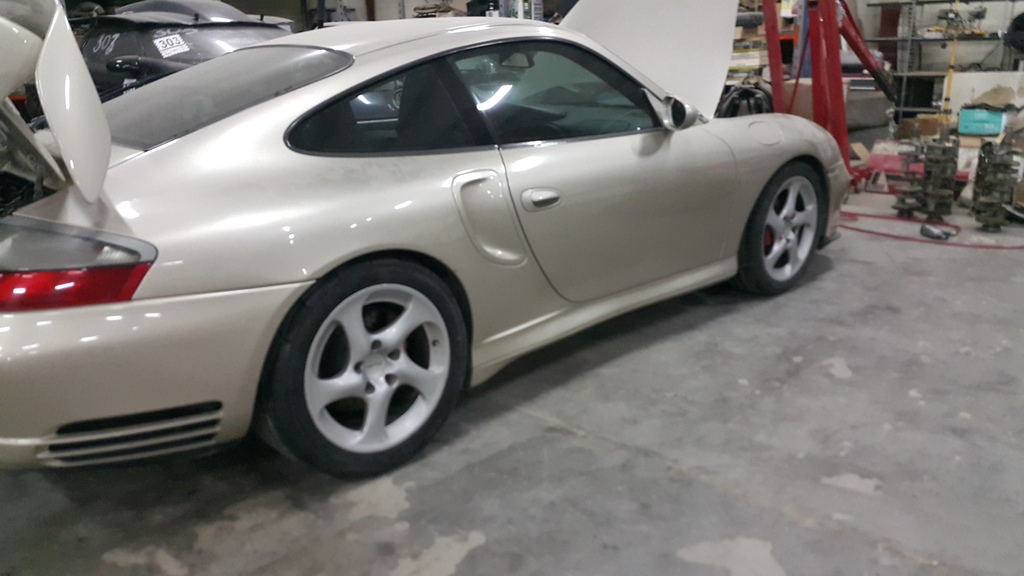
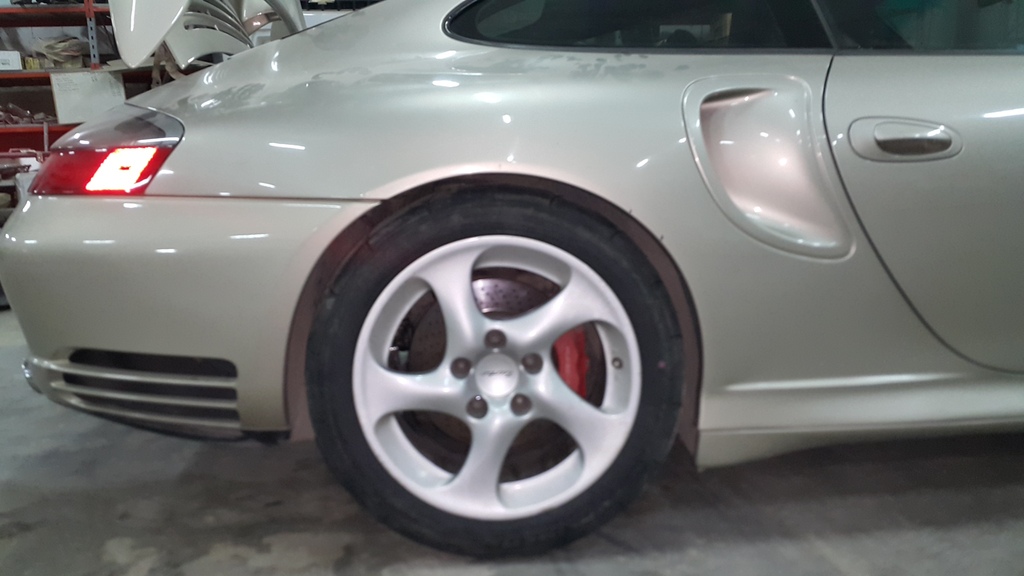

and this is how far they bulge out,,,, not much ! the rubbing issue is mainly due to the increased height.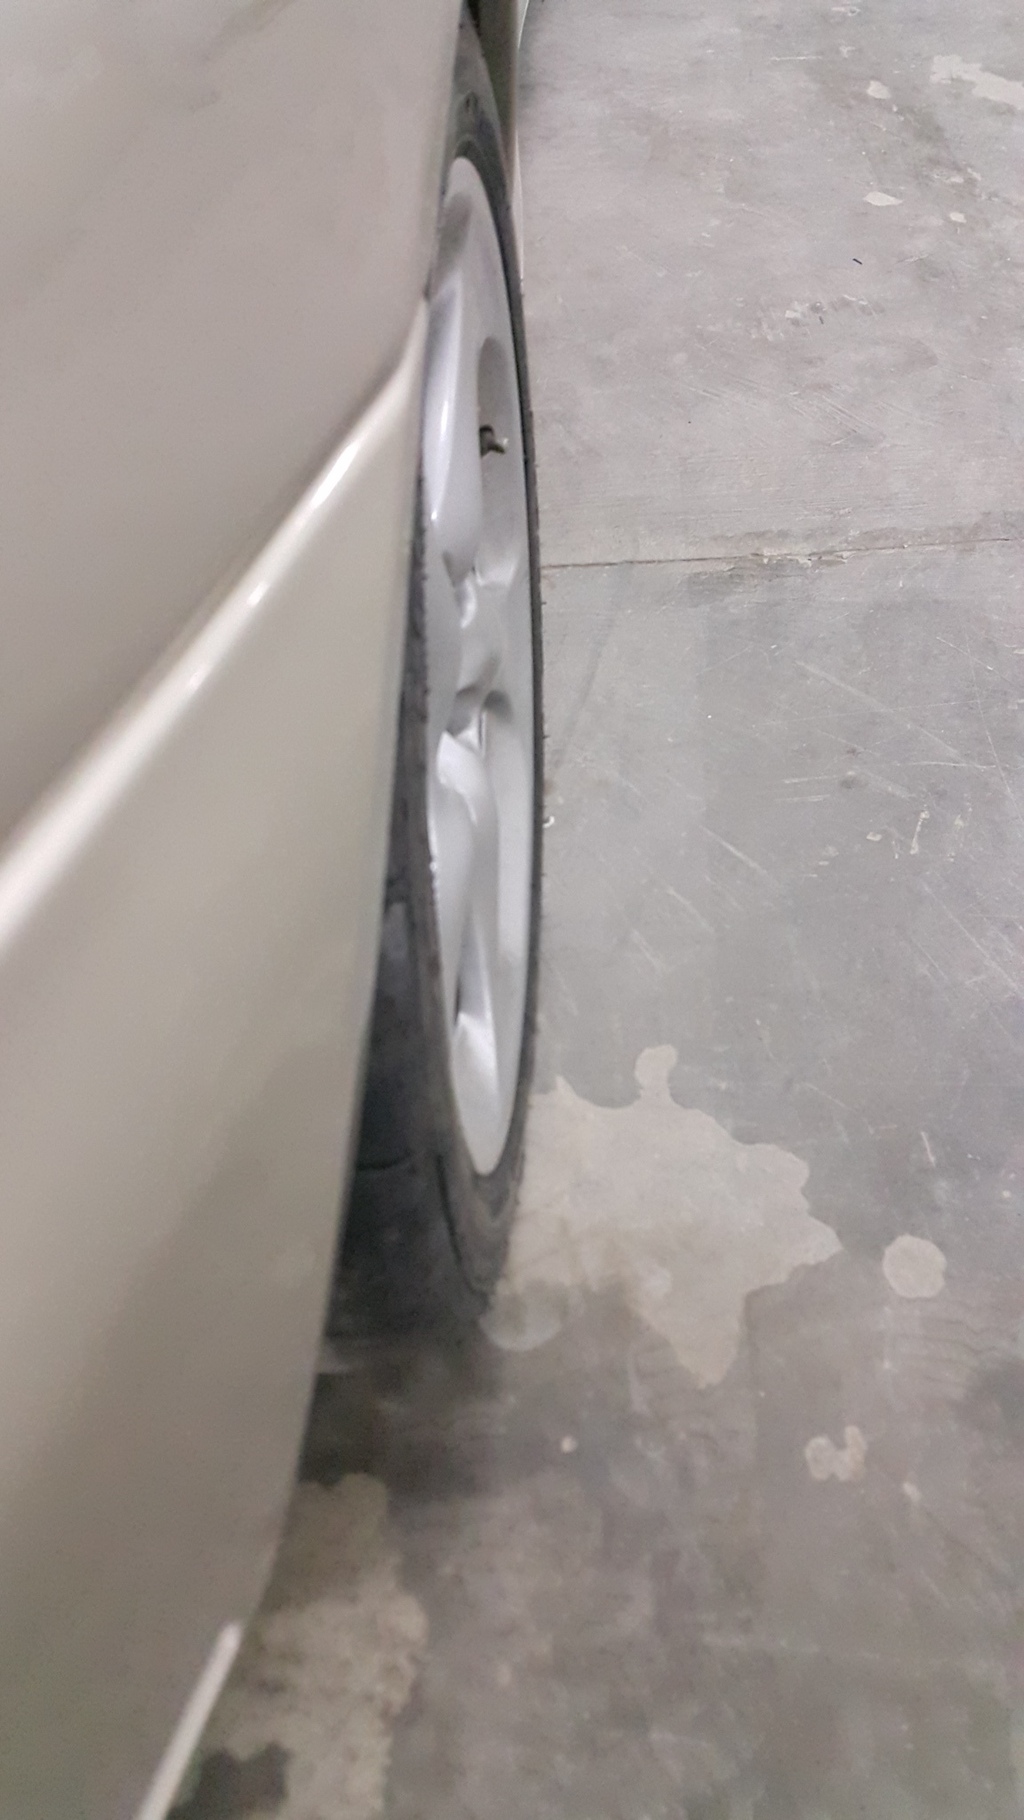
6-13-2016
well I got some stuff done
what I didn't get done was the shifter weights ,,, I installed the new starter I got and was in a hurry and tired that time that I completely forgot to remove them . so I guess it will be a project for when the car is on the lift again .
as I said , I got the starter in , and got my new wheel spacers in and on the car; I ordered a set of 20 mm spacers along with longer bolts to help push the rear wheels a bit out. the tireswere slightly rubbing the inner plastic fender and I really didn't feel comfortable leaving it like that .
here are the spacers :
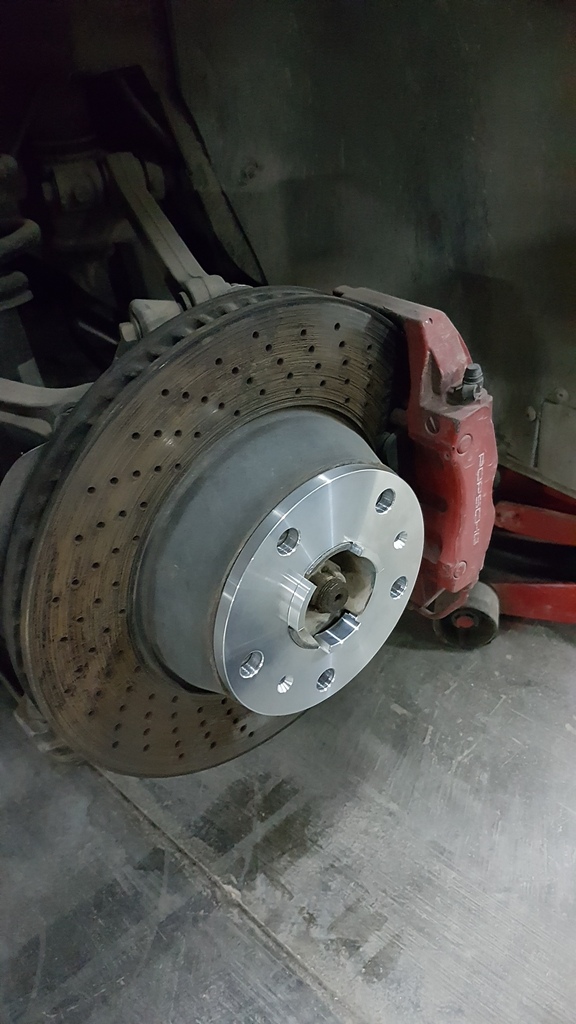
I didn't get a pic of the wheels after the install to show how much they moved out ,,, but if you ask me its impossible to tell,,, its that subtle
moving on , I got my holley hp ecu and harness in along with the 120 lbs injectors . 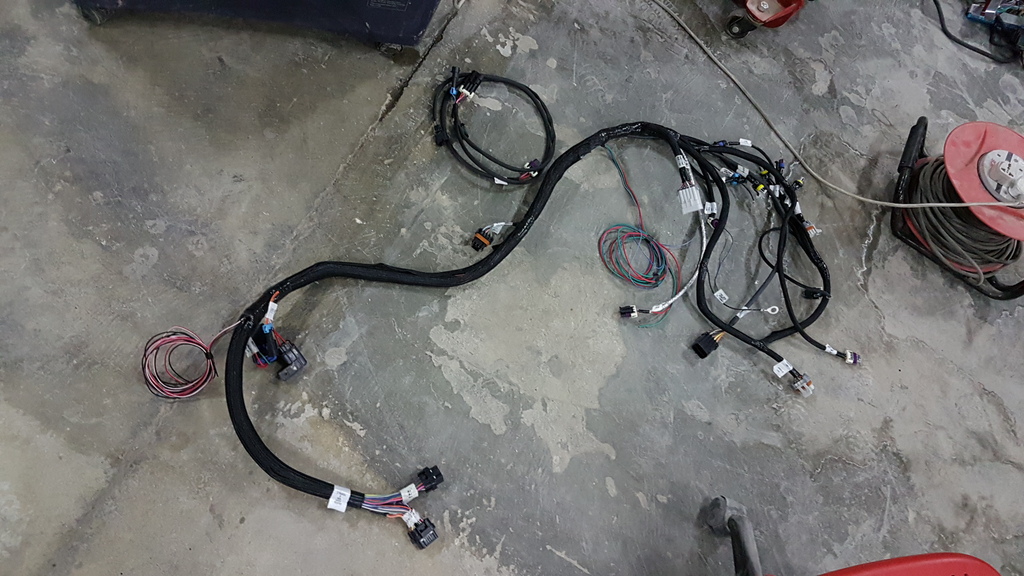
so it was time to remove the old harness - its still in decent shape , but I have to trace down where the issue was coming from ,,, it could just be a loose connector or something simple like that. after a few minutes finageling with it I managed to pull it out :
the old one being pulled out :
I routed the main power cable from the ecu down to the bottom of the passenger side rear seat where it went through the hole in the floorboard and out along the A/C line towards the front passenger wheel well, from there it went through a hole and into the batterycompartment and battery where the I conveniently ran out of cable . kudos to holley for having the power cable that long,,,, its almost like they knew it was going to be used in a setup like this
moving on , wiring the holley was pretty straight forward , and in no time I had it ready to fire. so I updated the firmware on the ecu before starting it and in a testament to how well the holley system is built the thing fired right up the first try and idled like a champ!!
I still have a few odds and ends to finish wiring before I can button up the interior , but its pretty much done when it comes to the wiring part
so next up on the to do list :
- wire the inputs / outputs such as the ac kick wire , fans , and clutch pedal signal ( for tying it into the two step function ), as well as a warning light wire up front.
- install interior
- swap head light bulbs
- take the car to alignment
- charge AC
- start tuning
6-22-2016
thanks buddy ,
well I got it all wired up and done , the car works great and I started messing with tuning it while I'm driving it around. there is one small issue that is giving me a hard time ; the car has a very hard lean stumble a hair of idle . if you lightly touch the gas pedal ( about 1% throttle) the car will go super lean according to the scanner and the rpm will actually drop just before dying. this is making the car a bit hard to drive from a stand still.
I tried everything in the software to correct this but there is no change , so this is leading my to the next possible culprit ; a faulty map sensor or O2 sensor. reason I say that is because the map sensor is old plus it reads off the log manifold I have ( I tried changing where it reads) ,,,, and the wideband I installed on the Porsche is just as old and is off my Camaro ,,,, which is old and abused
so to address this I will swap the NTK sensor I have on there today to a bosch new unit , and I already ordered a zr1 3 bar map so I can install it in the original location next to the throttle body .
other than that the car pulls hard and hooks good ,,,, right now its just under 8 psi of boost , i plan on raising that back to the 18 psi soon and see how much the new tires will like that
plus there is a test and tune session this Friday at the local track , and i plan on attending it to see how it does
wish me luck !
7-12-2016
quick update ,
I swapped the map sensor to a ZR1 map sensor and it seems to have done the job.
I drove the car to the shop and it seems to drive fine and the dead spot just at tip in seems to be all but gone.
I still need to redo the vacuum lines and properly position the sensor , but so far it seems ok.
9-17-2016
well i'm finally back home
I did get the bushings in the car a while back and did a four wheel alignment and the car drives and tracks sooo much better now.
here is how the old bushings looked like :
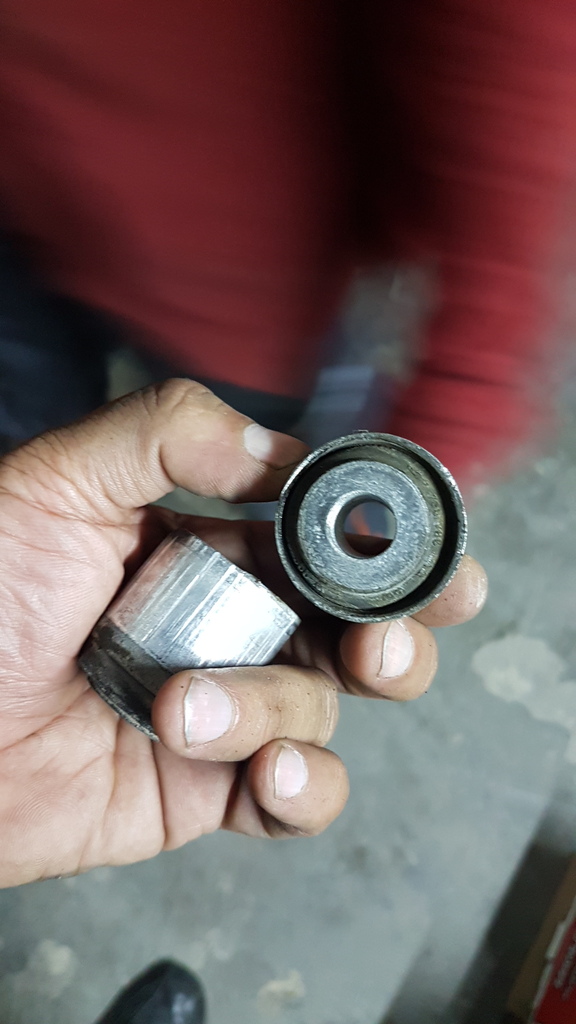

and this is how it looks after they were installed :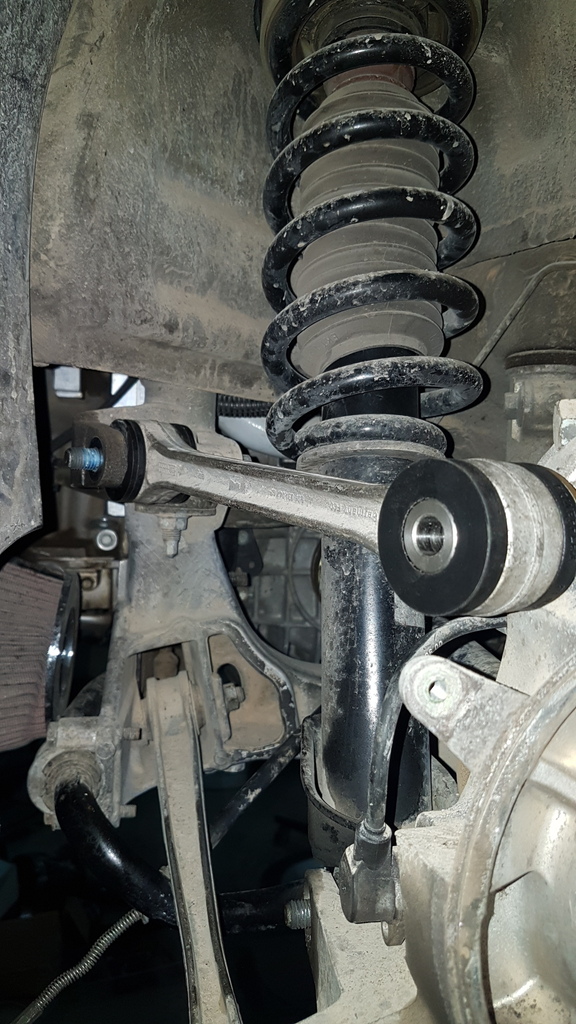
and i guess this explains why the car was all over the place :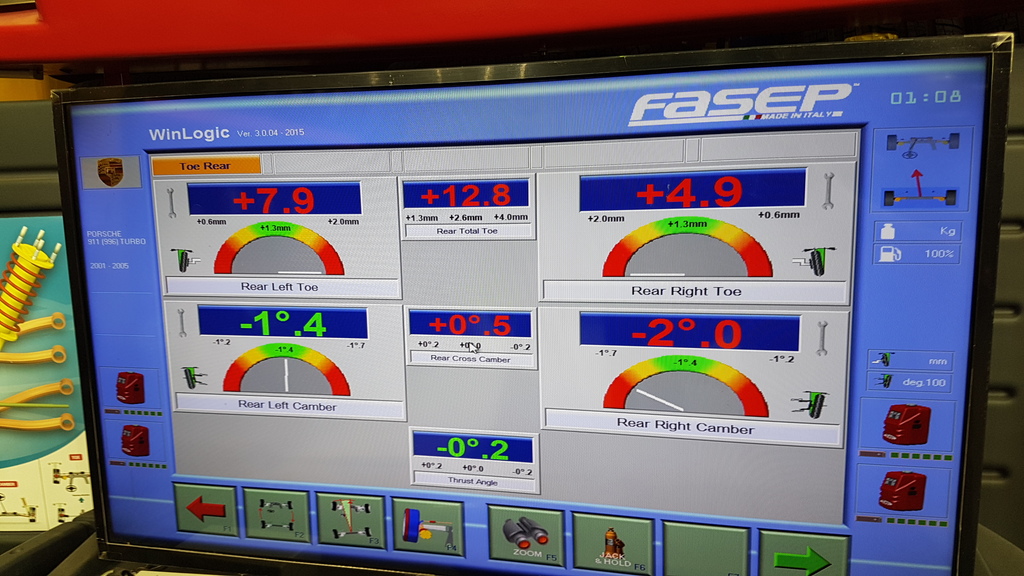
i also swapped out all the valve seals to see if it would help with slight smoke i get every now and then.
and since the last time i dynoed the car there has been two issues that have been giving me a hard time; the first one is an issue with the boost reading of this thing; on the dyno it made something around 18 psi on the wastegate actuators it had on it ,,, which did not make sense at the time but i was happy so i didn't care
after a while the car stopped making the 18 psi like on the dyno and now would not go past 8 psi . i tried adding preload tot he waste gate actuators to try to eek out a few more psi but no luck. so i assumed there was something wrong with the actuators before and then they got to work properly later since they were rated to 8 psi. i did check all the wastegate lines and everything was in order. so got a new pair of wastegate actuators that are the 17-18 psi version and just installed them to see if they fix the boost issue .
the other issue i was getting was a missfire under WOT after 4500 rpm where the carwould buck violently under WOT . i tried swapping plugs from TR8 to TR6 , swapped plug wires , and coils with new ones but with no luck.
so i took the car out this weekend to a local race spot , and did a few passes to see if i fixed anything ,,, and oddly the bost is still at 8 psi ( and since i did nothing to the missfire it was still there
 )
)
the logs show that the boost hits 8 psi and flattens out , and you can see the AFR spikes when the missfires happen . the fuel pressure is rising with boost and holding steady for the most part.
i'm not really sure why this is happening , but i think there might be one of two possible reasons ; the first being that the air filters are restricting the air going into the turbos , and the other is that the BOV's i'm using are opening under boost .
as for the misfire ,,,,, i'm still scratching my head ,,, i'll try a new set of coils to see if that helps . i'll aso see if i can clean the filters to see if it makes any difference , or maybe run the car without them or install a better set.
other than that , i'm taking the car to have the AC carged so i can have a nice cold AC ( just in time for winter )
)
9-19-2016
as for the mixture its ok at 11.7-11.9 just prior to the misfire , and right after the miss happens it shoots up to 23-24:1 , the pulse width soon follows the afr to try to correct the lean spike then settles back down . fuel pressure acts weird sometimes after a few of the misses and not all of them; the pressure dips about 10 psi after the missfire ,,, i thought that was because of the back fire lowering the boost and thus the signal the regulator is seeing , but boost never drops....
so from the above i can assume that the car is not back firing through the exhaust and not the intake , and it doesn't do it becaue of fuel pressure drop ( the drop in pressure happens after the miss) . so this leaves me with the ignition as a culprit.
i'll try to swap coils first , check the plugs again to see if there is anything to see , and maybe try to move the main harness around to see if it it could be some electric noise.
here is a capture of log :
i also have to adjust the new wastegate actuators ,,, apparently i installed them with zero preload on them which might be the cause of the missing boost
9-20-2016
the holley ecu is set up for closed loop so it does the fuel learning by itself, so technically I have it setup to fix any fueling issues that might pop up like a drop in fuel pressure or a spike in boost.
as for the maf ,,, ain't got none but the map has been re located to the port just behind the throttle body on the driver side of the car. this might cause the issue , but the boost reading and map numbers are steady during the events , which rules out the map getting a faulty signal.
( I did have that happen on my friend's car where the map was located just under the throttle body flange on a holley hi rise intake, and I guess it was seeing some turbulence under WOT which was showing in the log,,, we cured that by inserting a long rubber hose connected to the map so it reads from a cleaned area inside the plenum).
the rpm trace is like that because that is how bad the miss is . the cam and crank signals seem to be perfect. I should run an internal log of the specific signals to see if there is anything funny going on with these.
10-10-2016
been messing around tring to figure out why the car was missing at the top end,, well i did a system log and did a few WOT pulls to see if i can see anything ,,,, and i think i found something. during the misfire both cam and crank signals go flat ,, which rules out the reluctor as an issue ( if it was i would still see the cam signal when the crank signal would drop off.)

so this leads me to believe that i have an electrical issue somehwere along the cam and crank wires to the pcm ,,,, so next step is the wiring diagrams
11-28-2016
well I found out why was the car missing at high rpm's ,,,,
turns out the reluctor started to come apart.
so it was time to drop the engine again ;
and this is the culprit:
so that piece was replaced with a billet CBM unit that was pressed then welded in place. And since I had the engine down I decided relocate the map sensor to the back of the intake to get a clean reading at lower rmp's , I also decided to make a hole in the "fire wall" to run the harness through instead of having it go through the stock location behind the tail light and snake its way around. this way I also have easier access tot he engine compartment if I need to run any other wires later. I also used two rubber flaps to seal the hole along with a ring to hold them in place :
and since I had everything apart I got a chance to inspect stuff; the clutch is holding very well with no signs of wear, same as rod and main bearings .
I did also notice that cylinder #8 exhaust port was leaking oil ,,, which explains the puffs of white smoke I had before ,,, and I assume its just normal guide ware ( normal in the sense that these are patriot heads that I bought around 2002 and had them on my Camaro for quite some time - read " abused " )
so after that it was time to shove the engine and trans back in :
so all that is left now is to finish up the wiring , install the accessories and plumb the cooling lines , and add fluids
I also am thinking of running a new positive cable from the battery to the starter instead of the stocker - been getting a hard to start when hot issue that I could not get rid of so far.
12-21-2016
well I finished putting every thing back together again ,,,, and guess what the problem is still there
so I decided to throw in a new set of cam and crank sensors just to see if it helps , I also relocated the cam harness and used the stock cam harness extension and shield that routs the harness under the engine ( it also made the cam sensor extension not needed in my application ) and that seemed to fix the misfire issue!
so now the car revs to the redline effortlessly , and it hits 17 psi right away ,,,,, and starts drifting sideways in 4th gear !
the thing is scary under WOT , even with the drag radials in the rear.
but that brought out the next weak link in the chain ; the new clutch
kennedy told me that this clutch was good to 750-800 hp at the crank , but when I got it I wasn't expecting this thing to make more than 600 at the wheels , let alone 840.
so for now I guess i'll turn the boost down to 12-14 psi which should help a bit .
and I have to start looking for a solution for my clutch problem .
I need to find a twin disc setup that fits on the stock Porsche flywheel ( since it has the same pressure plate bolt hole pattern as the flywheel I have ) , I remember seeing a setup like that a while ago but can't find it anymore.
anyone have any leads?
Nice details ????
Posted by Diggymart on 5/1/19 @ 2:11:40 PM