You must be logged in to rate content!
5 minute(s) of a 767 minute read
3-13-2019
Well, I have enough material for a little update. I finally got the restored rear window trim installed. It wasn't too bad, and it helped that I "preloaded" the clips. In other words, I went around to each clip and bent it up a little with a small flat screwdriver. This took some of the tension out and made it easier to slip the trim in underneath each clip. It also helped a lot that I marked the location of each clip, so I knew exactly where to press the trim in. A final tip on this - just use your hands to install this trim. No tools, no rubber mallets, no blocks of wood, just your hands. It may be stainless, but it can ding easily. It is doable by hand when you preload the clips.
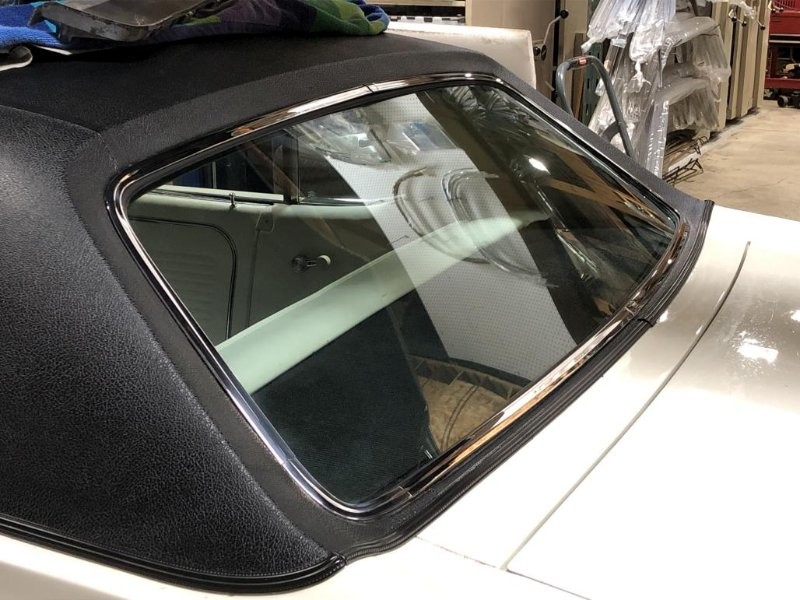
Cleaning up all the black goo took a while, and there's still a little left to do. But I'm glad to be done with the rear window saga. Here's hoping it won't leak!!!
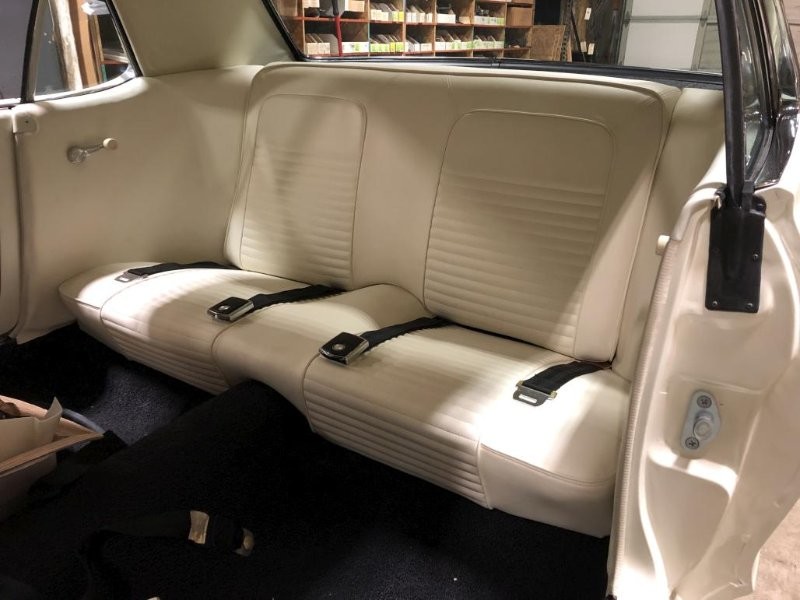
Next, I continued pressing forward with the interior. Don hooked me up with a good set of used / re-dyed black seat belts with new "deluxe" chrome bezels. Once I got those in I could slap the rear seat in.
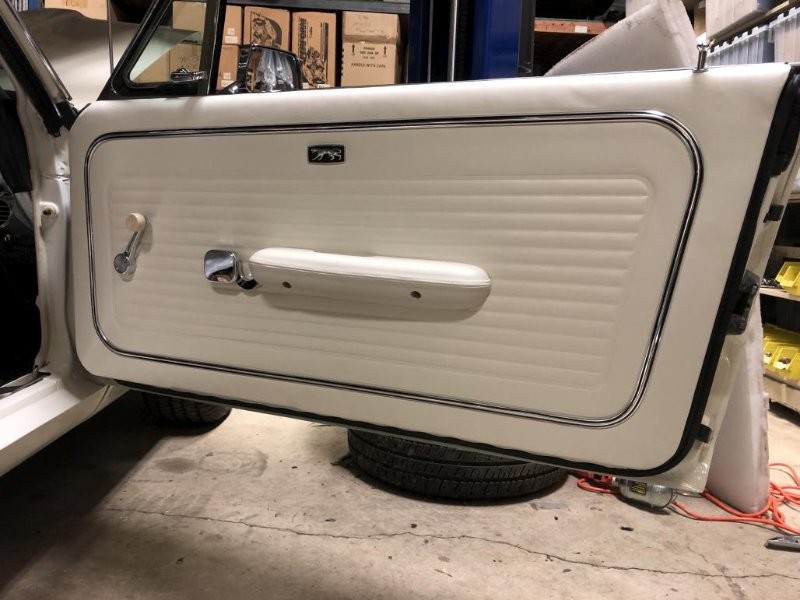
I was also able to finish up the door panels / armrests / handles. We got in the latest batch of repro Scott Drake interior door handles and they fit perfectly, which is a relief! Previous versions by them and others had the splines indexed wrong, and the handles were fitting crooked. I'm glad they got this fixed, they look excellent.

Next it was on to the sill plates. I wanted to get this done before putting the front seats in, but this is what happened when I tried to install the premium stainless sill plates from Dynacorn.
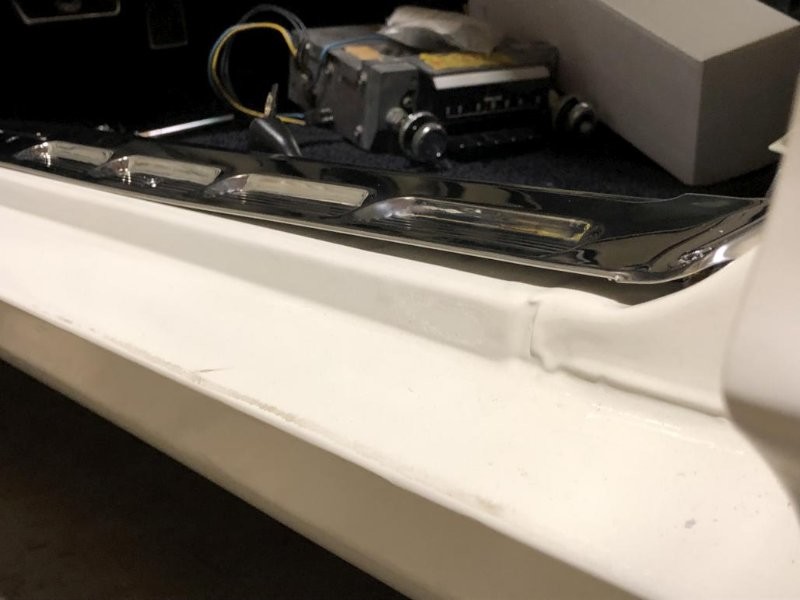
They are nice and shiny and straight, but the corners don't have enough of a cutout for the windlace and kick panel.
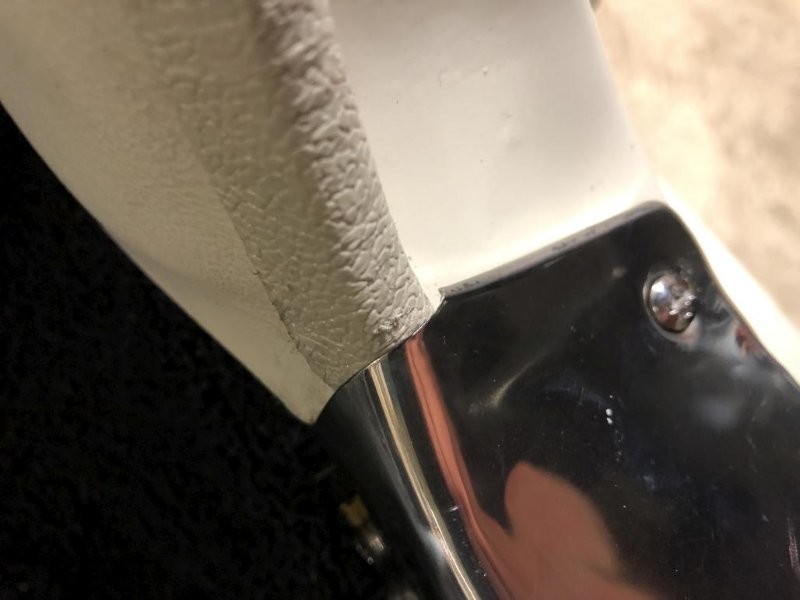
It could be something to do with my particular car, but I've seen this happen before. This amount of gap isn't gonna work for me. So my options are: get a Dremel and carve out those corners until they fit right, or try a different supplier. As I write this, we just got in some alternate versions from Scott Drake - also stainless, but more original-looking, complete with some wrinkles in the stamped metal and a less shiny finish. But more importantly, they have significantly better cutouts in those corners. So I'll report back when I have a chance to test fit that version. This may end up in WCCC changing suppliers for that product.
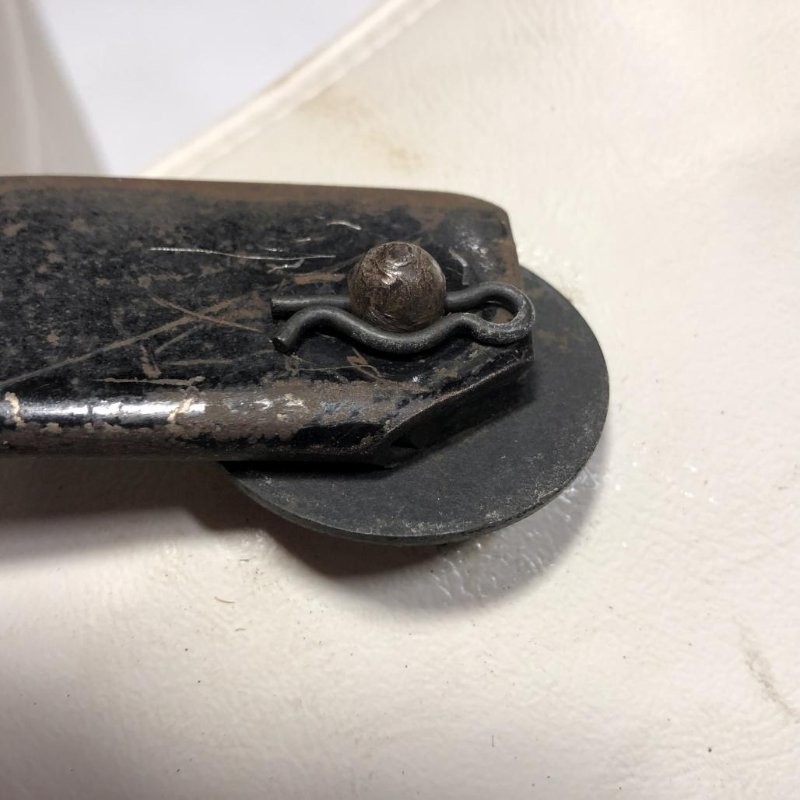
Anyway, next I started prepping the front seats for installation. I should have given the upholsterer the pivot washers and clips, but didn't think about it at the time. He didn't know better, so he used scraps of vinyl and a piece of wire here instead. So I got to pry the seat uppers off the lowers and install these myself. This kit comes with the washers, clips, and screws for the plastic covers.
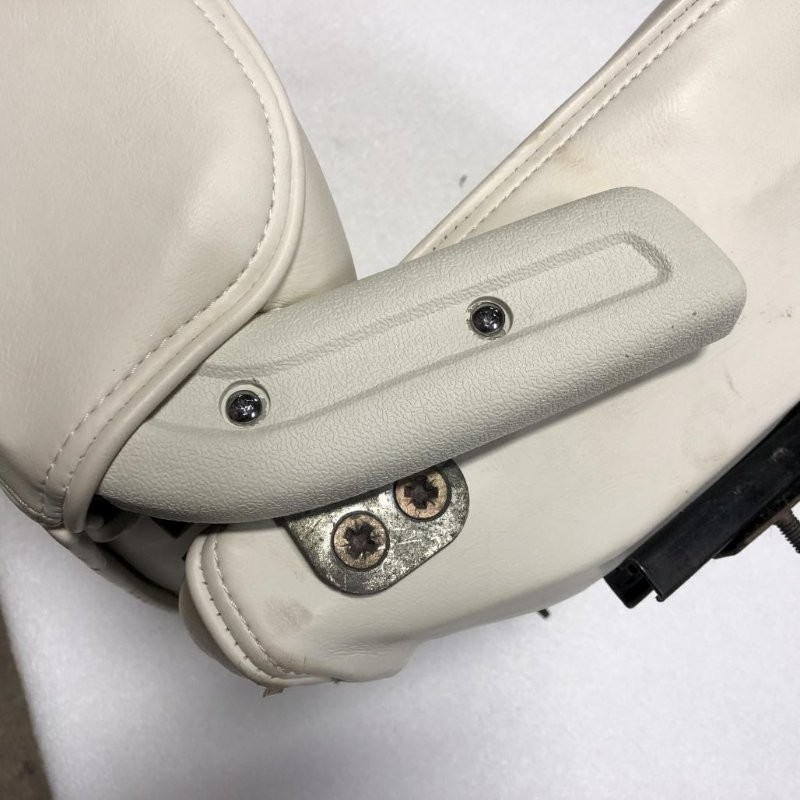
And once again I had to break out the SEM paint to get a decent color match to the seats, for these plastic covers.
Finally I could bolt down the seats. Also installed shiny new seat back release knobs while I was at it.
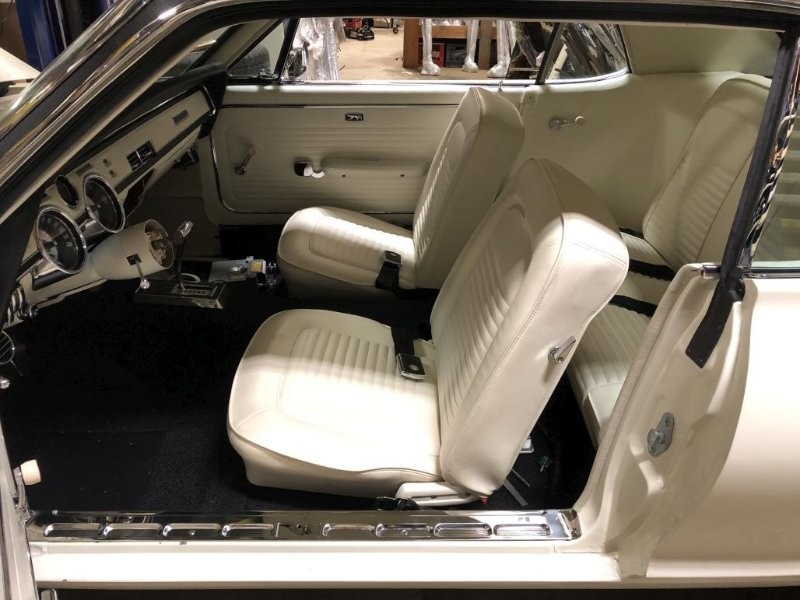
And then I couldn't help myself, I had to bolt the steering wheel on to finish off the major interior components.
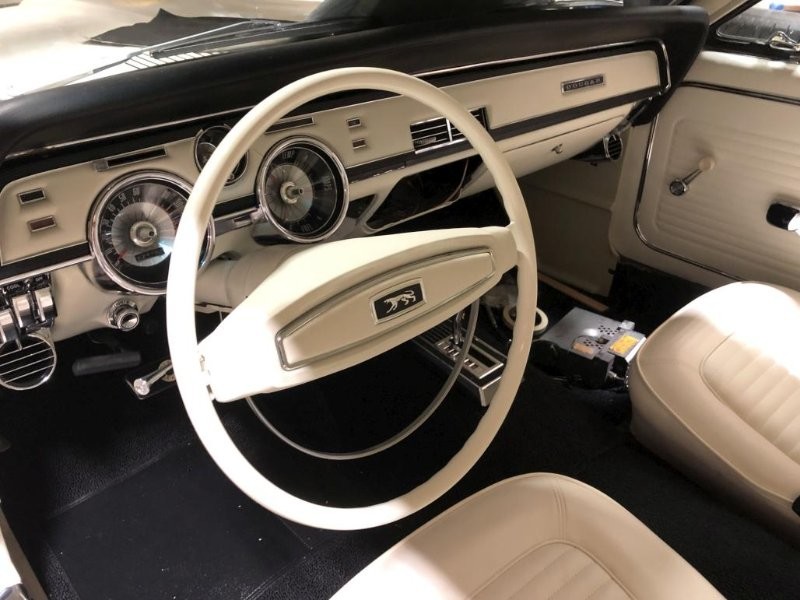
At that point I had to step back and realize... it's pretty much a complete car again! I'm not done, by any means... there are still plenty of loose ends to finish up, but it pretty much looks and functions like a car! I took it for a quick, tentative drive right after putting the steering wheel on.
I didn't really get going too fast because it still needs an alignment and tune up, and I wanted to make sure the brakes were ok. But it felt pretty cool to actually sit in it and drive!

So nice in honor of your grandparents.
Posted by Diggymart on 1/3/20 @ 8:04:16 PM