You must be logged in to rate content!
12 minute(s) of a 620 minute read
1-14-2012
You are correct Mike, no plow. There's just something about having one of the more capable vehicles to handle the deep snow. Things have to get really bad to stop the ole' Willys.
I mentioned building the crossmember in a box design would be a test of my patience. It has tested that and has raised the bar as to when I say it's too technical. The easy part was creating the full length side walls, just a matter of using the cad system on the computer letting it do the cutting.
As I was creating the side walls of the crossmember one thought that kept coming forward was that every bump and curve in the side walls is every bump and curve I'd have to put into the top and bottom flat that will enclose the entire crossmember.
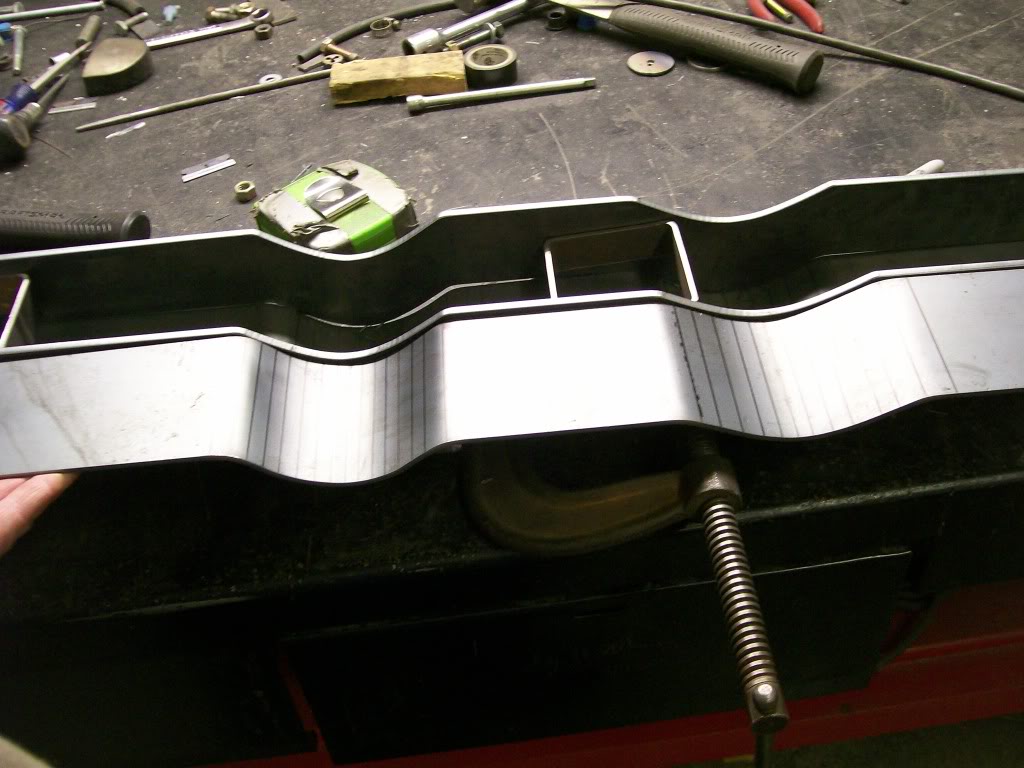
With that said, I need to first place spacers between the two side walls. These pieces of 3" square tube will be perfect. Notice they are thin wall. Where I placed the clamps is directly where the strength of these 3" tubes is the best.
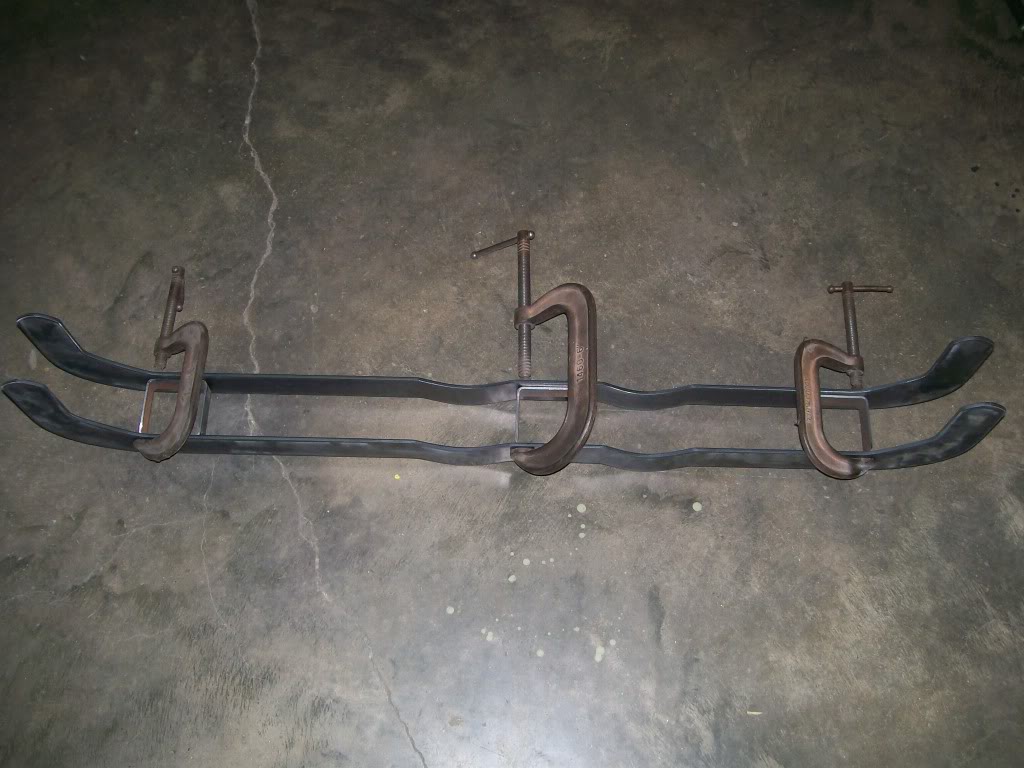
Once I clamped the side walls with the spacers together I can take an exact measurement of the width of the top and bottom plate. This fit in the next picture is exactly what I'm looking for. The weld will penetrate into the "V" perfectly. My hat goes off to the designers of the Torchmate. I wanted 4' of flat plate that was 3.150" wide for this fit, my plate is within a couple thousands of that, awesome.
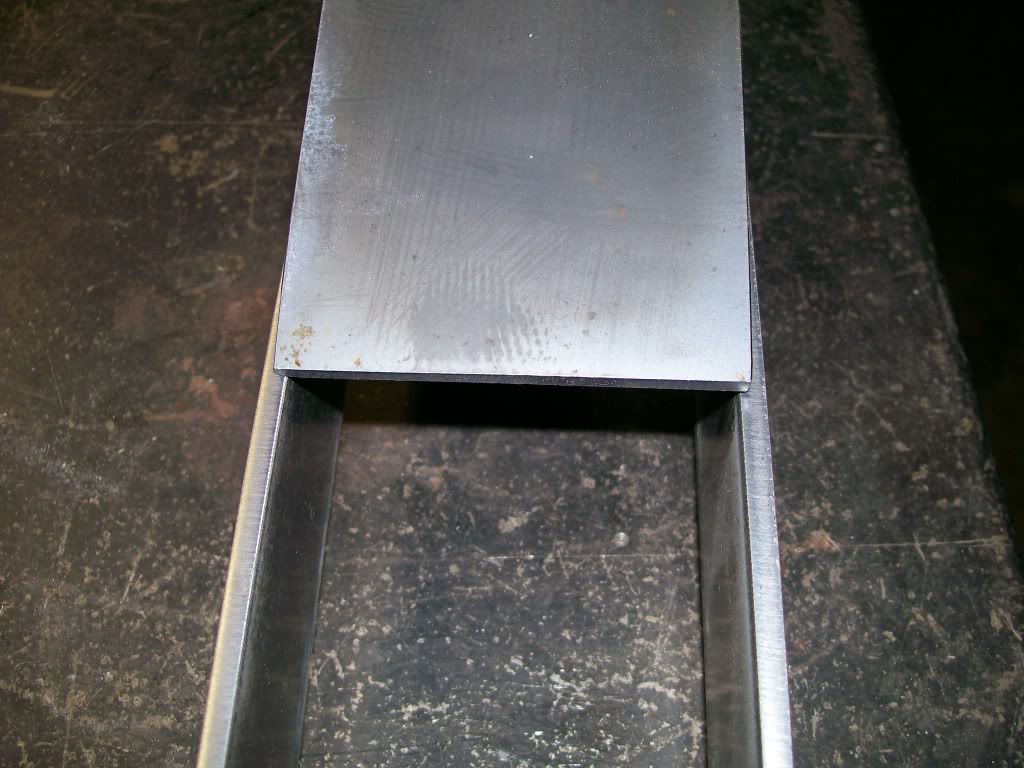
Now's when I get nervous. The flat plate is 4' long. I don't want to cut it, I want to go from one side all the way to the other side. I can only describe the bottom plate as a cradle. This bottom plate will play a big roll in the strength and flex of this crossmember. If I didn't care about the strength I could simply cut pieces to cover the flat straight areas then fill the tricky areas with short pieces.
Ok, here is a picture of the beginning of shaping the flat for the curved area. This is not a fast process, but trust me, this is gonna look absolutly fantastic when done. By the way.... any body want to guess how I got the nice smooth bend into the flat plate? No heat used either.
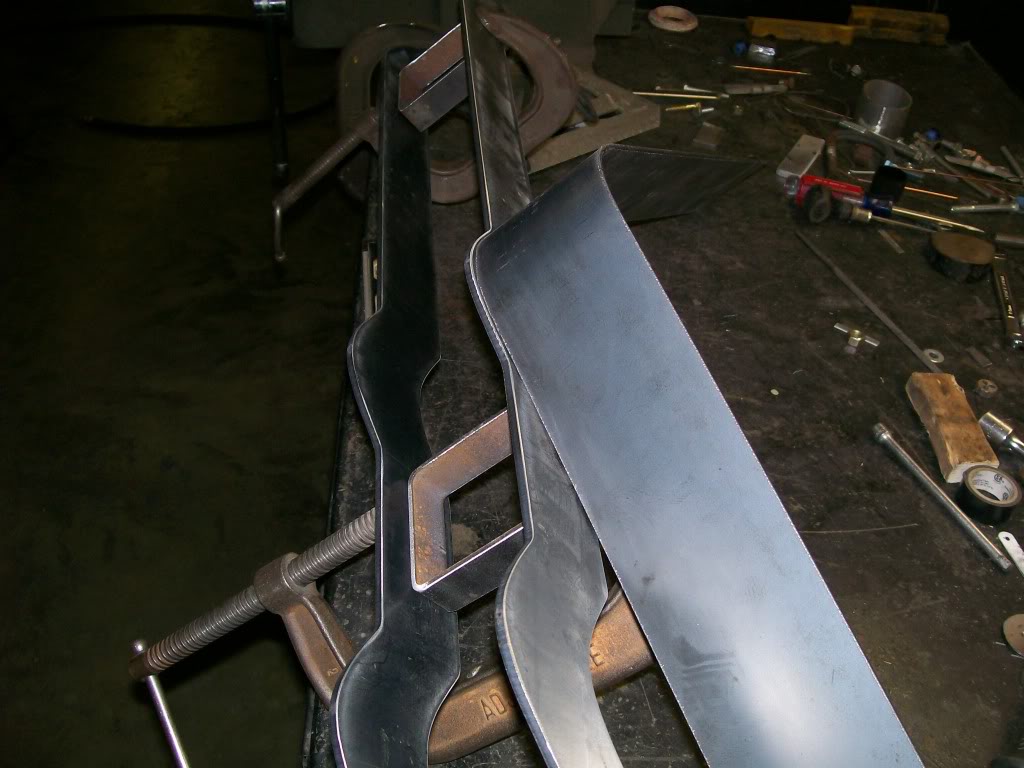
1-15-2012
So far so good, I think I've got this crossmember fabrication figured out. I was a little nervous for a bit, but it's coming together nicely.
In the last pic I figured out how to shape the flat into the rounded drop. The next issue was switching from shaping the round and following the flat area of the side walls.
The picture is self-explanitory...
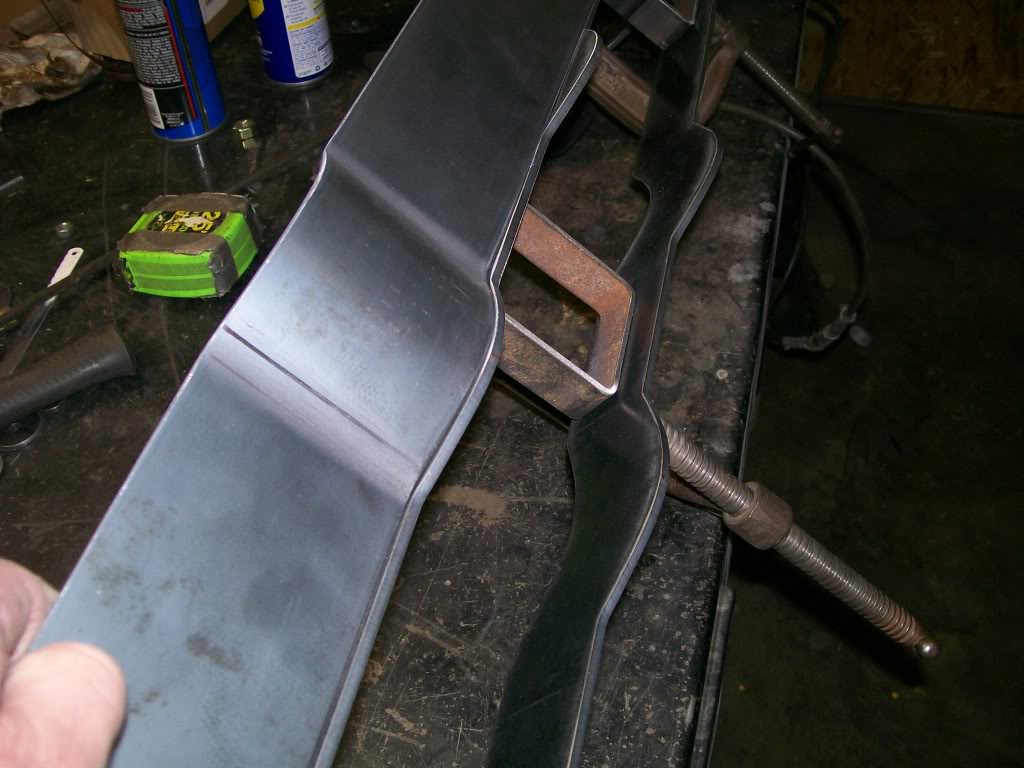
Here I've got it shaped to the follow the rounded drops. Patience, patience.
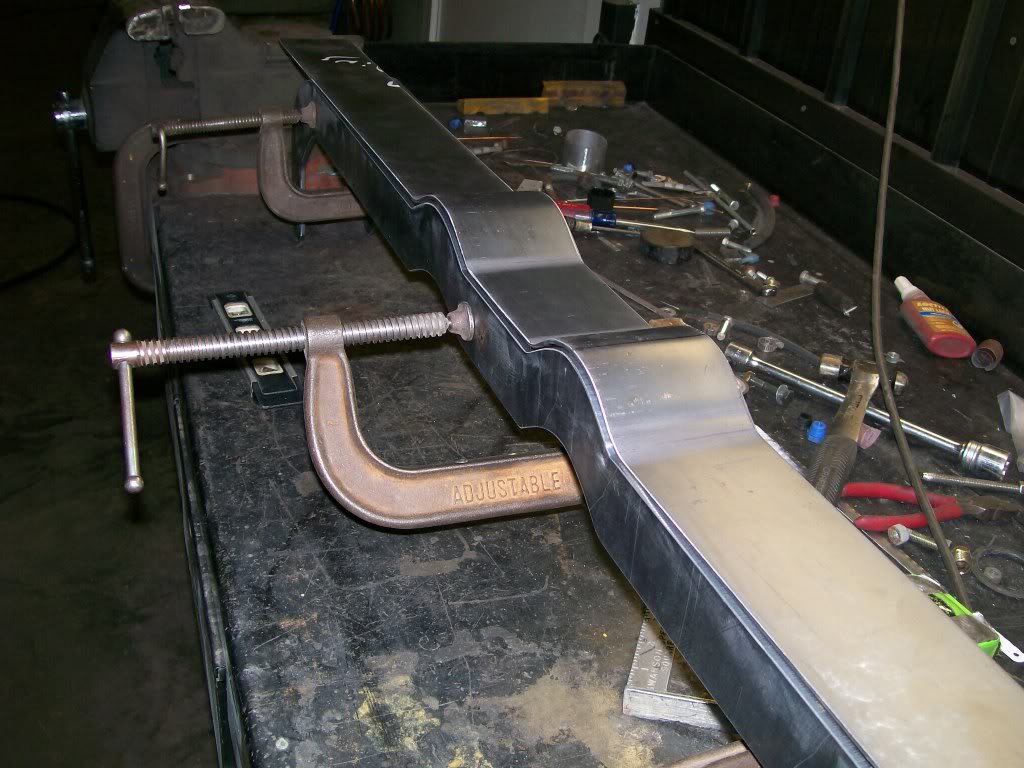
The plate that I cut the flats from is 4' by 4', this picture shows how far I got with a 48" piece. This is fine with me. Once this is all welded together at least it extends to the outer ends of the crossmember, my desire to maintain the strongest possible way to create this is satisfied.
1-16-2012
I'm glad this project of making the crossmember is capturing everybody's curiosity. During this whole thread one of my goals is to literally shake people back to the idea of being creative and inventive. By showing how to use tools in many different ways is the beginning.
Jeff88, to be honest, I like looking at the pictures too....
Superman, ha, you guys are creative.

94yjstocklook, ahhhh, thinking back to past projects, I like that, you get a star for trying, thank you. No relieve cuts though. The answer will be a simple one, it was very pressing to come up with the idea in the first place.
Deuskid, thanks, Only a couple hours down 44.....maybe.
I started with the bottom side of the crossmember for one good reason. I'm working with a 4' piece of flat, if I started on the top side I'm stuck between the kick-ups on each end. I figured if I started on the bottom side I'd be starting without the confinements of the kick-ups. I was already knowing that if I messed up a bend I'd have to scrap the plate and start all over again.
 Not working within the confines of the kick-ups eliminated some of the stress.
Ok, so here I am, working on the top side, my confidence is up, and things are starting to come together very nice. Sorry, but I'll have to make two of these crossmembers, one to hang on the wall, and one to install under the truck.
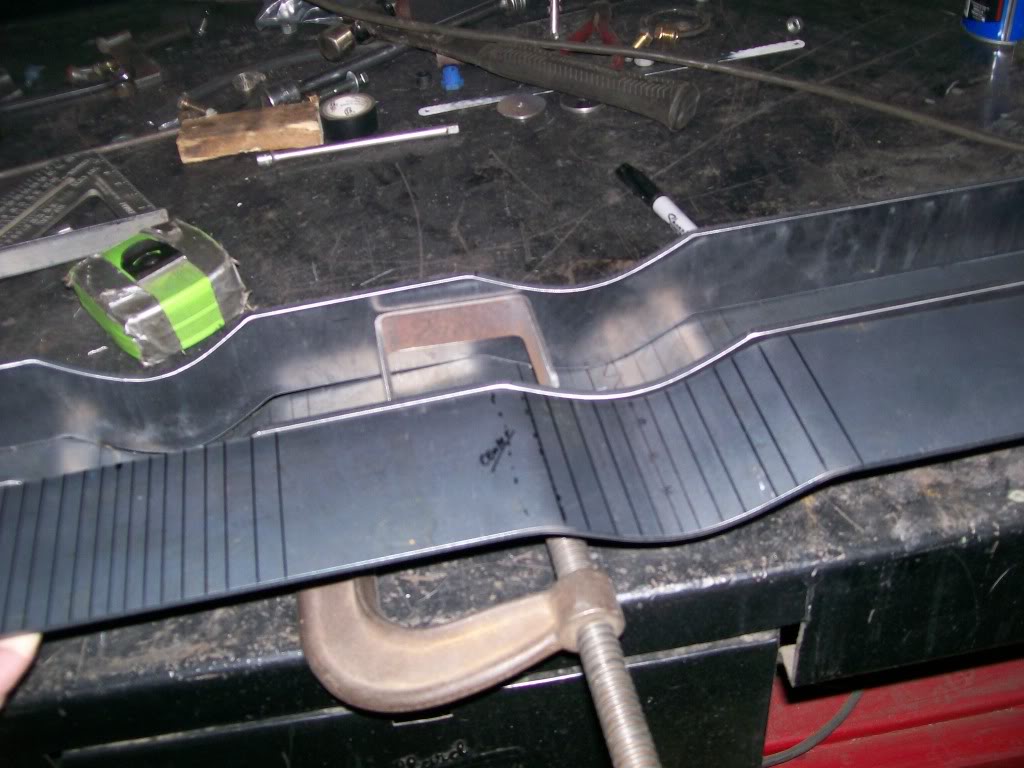
Once again, just showing the steps of getting the bends to follow the contour.
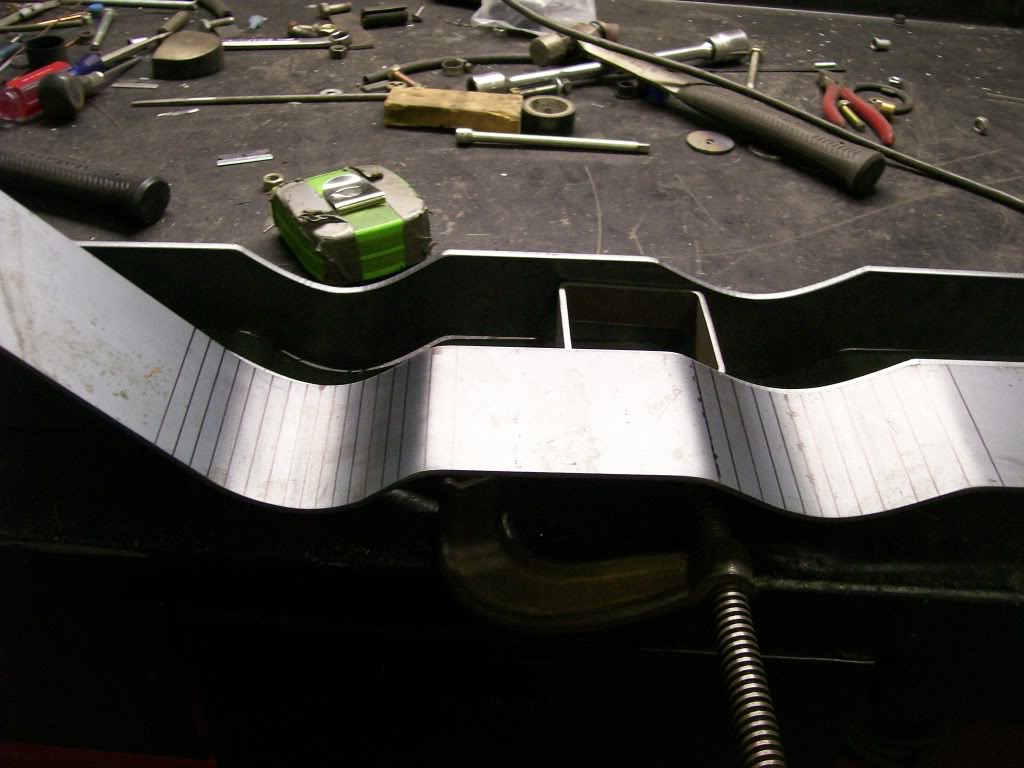
And one more bend.
I think you are bending these the same way I have to carefully fab sheet aluminum to make odd shaped and curved fascia for houses. Sometimes there's not enough room to simply fasten and bend with the curve as you go, so you have to pre-fab a bit before you install. The sharpie lines give it away but since I can't mark up the white surface, I keep those to the brown side and make sure I'm in no hurry. The thinner the material, the easier it is to get yourself in trouble with a crease instead of a fine presentable curve. With heavier material it's nearly a different ball game and it will be harder to keep proper leverage the shorter the final product is. Leaving it long will increase your mechanical advantage and using a flat edge like an I-beam to brace the metal will keep the flat sections true and flat. Of course you can always torch the excess off later. I'll keep my yap shut though and let you do the rest of the explaining. Great progress!
In case I'm wayyy off track, I'll stand ready to eat my words.
hallsofstone, you also get a star. Altough I have used a different method, yours can not be counted out. There have been many times I have used that method to get a final shape on sheet metal when installing quarter panelsand such. As long as the curve is close you can weld, but just before the next weld you can keep tapping the edge of the metal to the desired fit.
Being this is much thicker and wider also I'd have quite a battle trying to manage a 4' piece also. I spoke to another fellow yesterday, he used a method I was hoping to stay away from, but I would have done if all else failed. The idea is like hallsofstone mentioned, but adding the heat of a torch to make the metal easier to work with. I've been down the heat and beat method before and I always feel like I'm in a rush to work the metal before it cools, no fun for me...
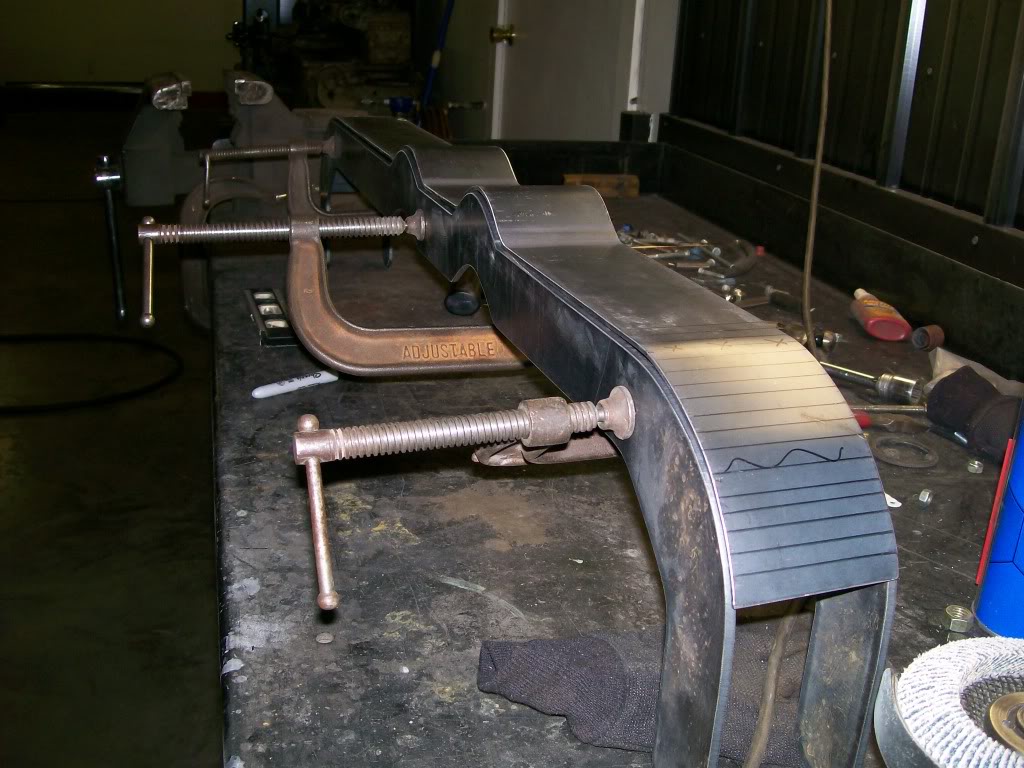
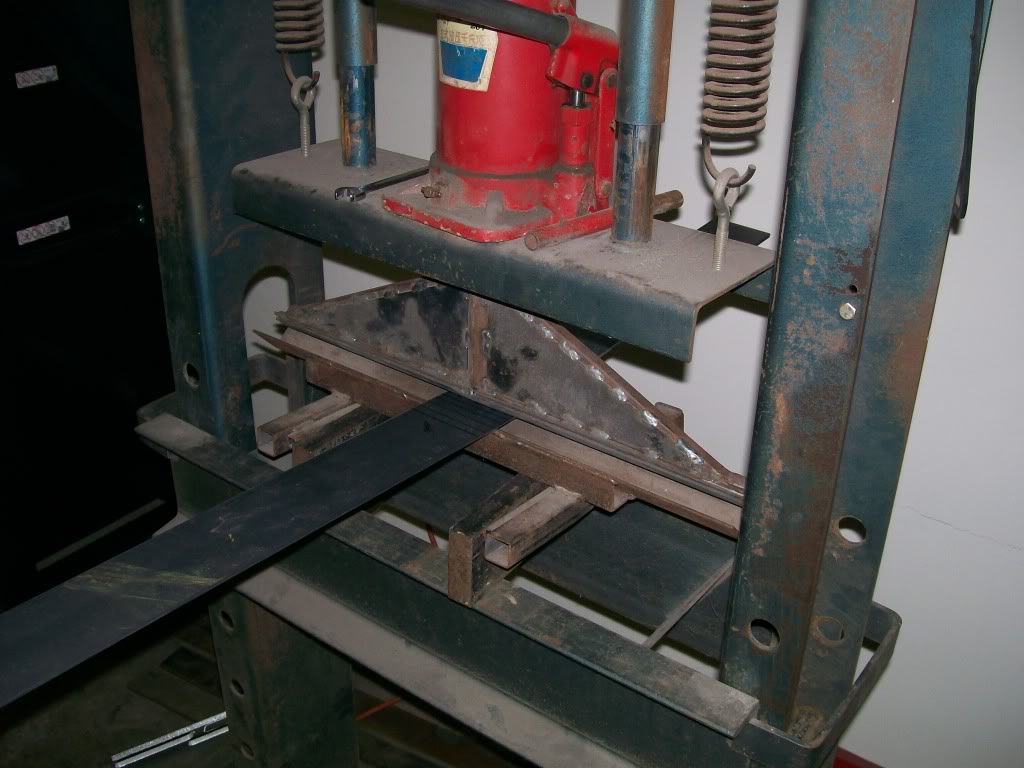
The way I'm bending is simply using the press with a home fabricated bender.
The sharpie marks do three things for me.
1) In most of the markings you see, there is one that has cross hatches. These cross hatches represent the focus point of the curve.
2) The ones before and after give me a reference point as to how far I'm spacing the press points so I can keep a consistant force all around the curve to maintain a good roundness.
3) This one is huge!!!! The extra cross marks allow me to always press at a 90 degree angle to the flat. If at any point I begin to press at a slight angle I will no longer have a consistantly straight piece when done. When the flat is 4' long, the non-perfect bend I put in the metal will be multiplied from end to end.
We've seen the press before. First when I installed the carrier bearings in the rear end and again when I pressed the bushings into the leaf springs. This is another tool that's not much more that a couple hundred bucks. I can honestly say there's been times I won't use it for months at a time, but when I do need it, it's so worth while to have.
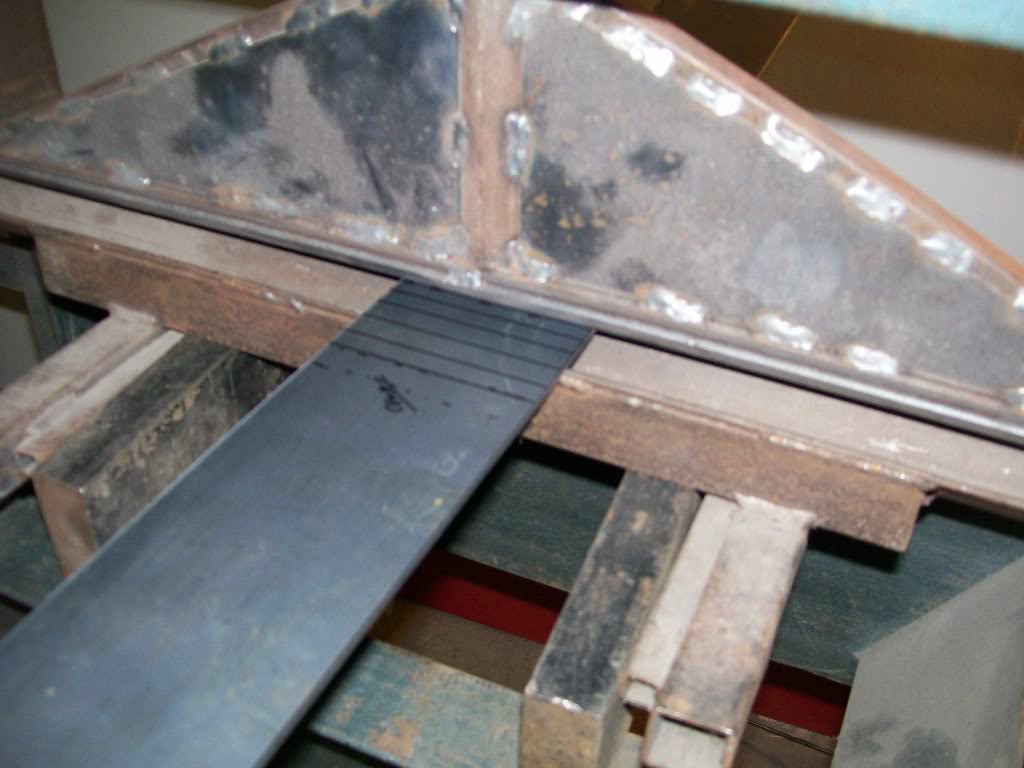
When I kept writing patience, patience, this is the time. To create the smooth round bends it was a matter of just touching the flat with pressure then moving about a 1/4" and press again. Then after the rounds I had to flip the metal and press again to get it back the the flat again.
There we go. Yet another tool adapted to perform multiple tasks. My dad had a saying, it took a few years to get a real grasp of the meaning, but here goes....."Can't never did nothing." Thanks pa.
 I give a big wave to all for all the compliments.
This next pic will show where I was a little nervous, there's alot of bends between the two outer risers. It was a good feeling to finally get this plate all fitted and in place.
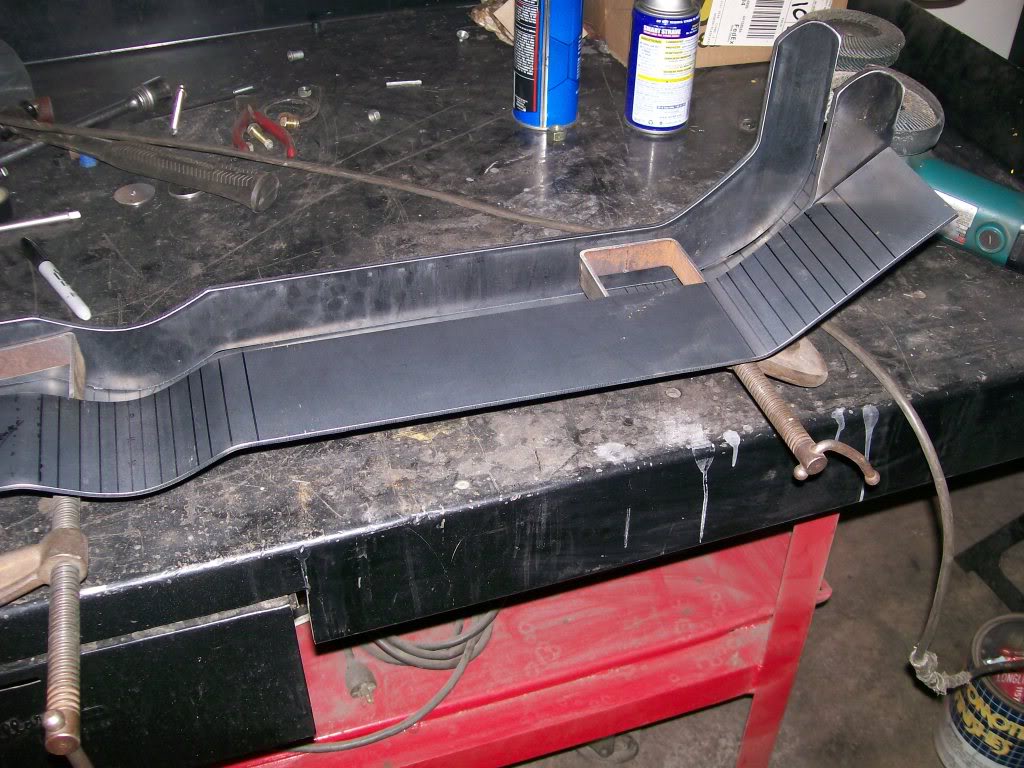
Another pic of the plate tack welded in place. Tack welding is necessary because once the pieces are all shaped to fit, I'm gonna disassemble so I can drill the outer crossmember to frame mounting holes. Also, just as I did with the rear bumper, I have to fit small tubes into the mounting holes to keep compression from happening when I tighten the mounting bolts.
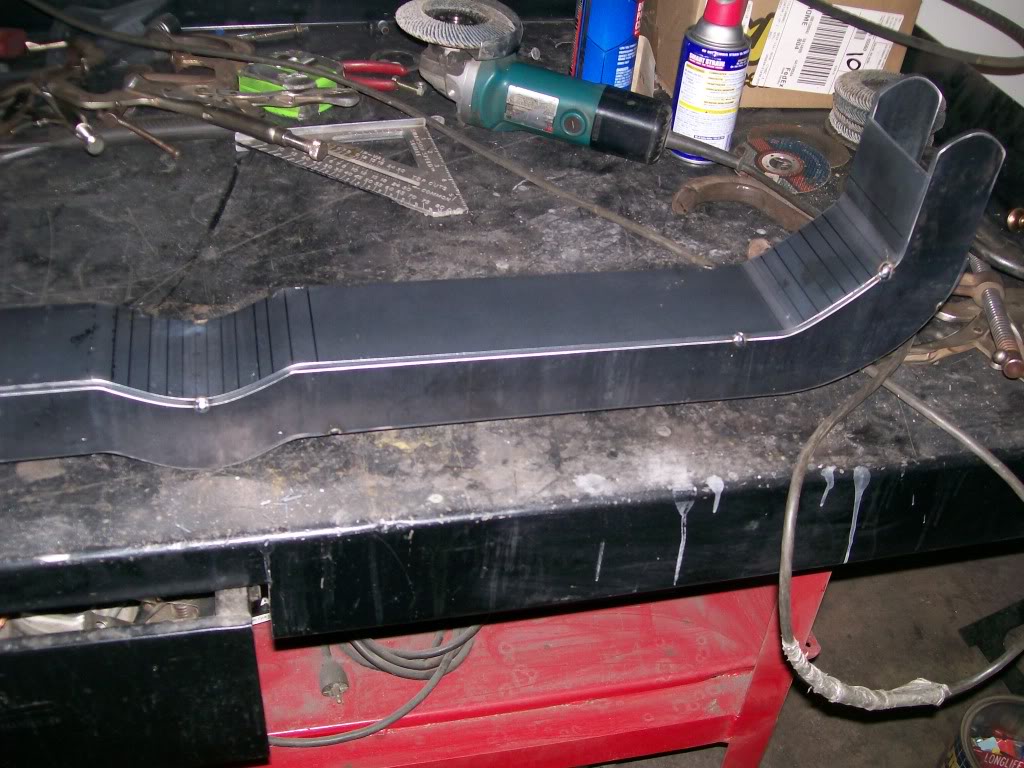
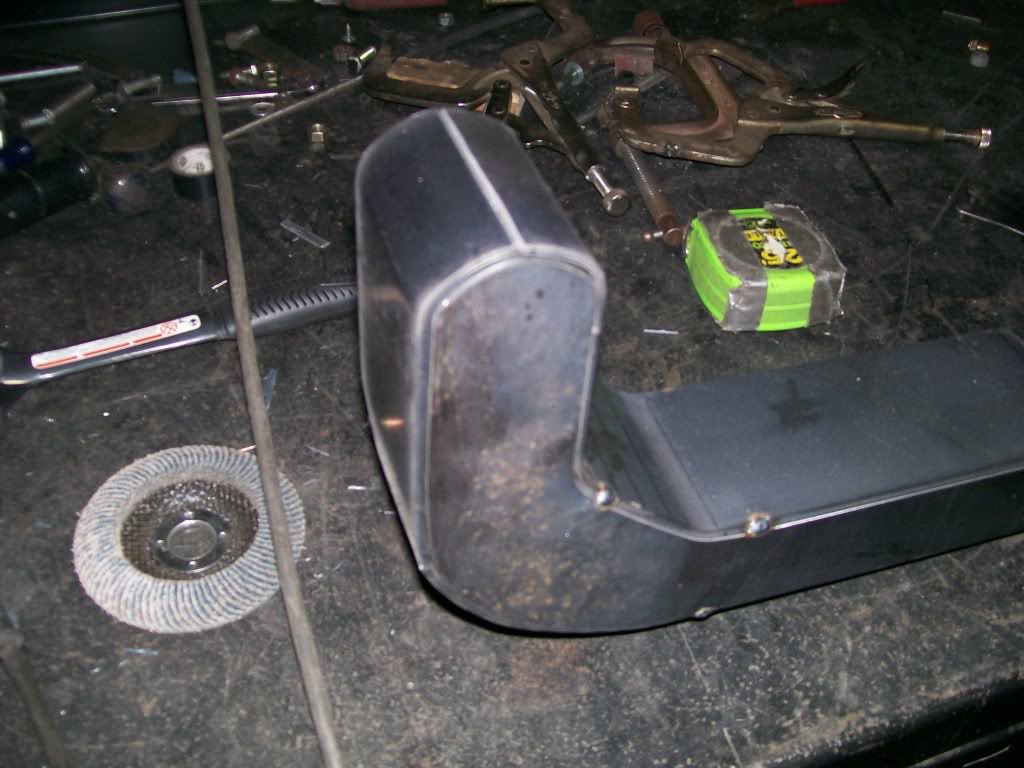
The two long plates I shaped came up short to wrap all the way to the top. Since there is a very tight bend to get around the top, I had to do this in two pieces. I'll grind a "V" where the pieces meet and weld all the pieces together when I reassemble.

Ultimate classic truck right there
Posted by CCmyVW on 12/26/20 @ 4:17:42 PM