You must be logged in to rate content!
3 minute(s) of a 620 minute read
8-3-2011
School's back in session. We're gonna take a look at the pinion shaft and all that's involved with it.
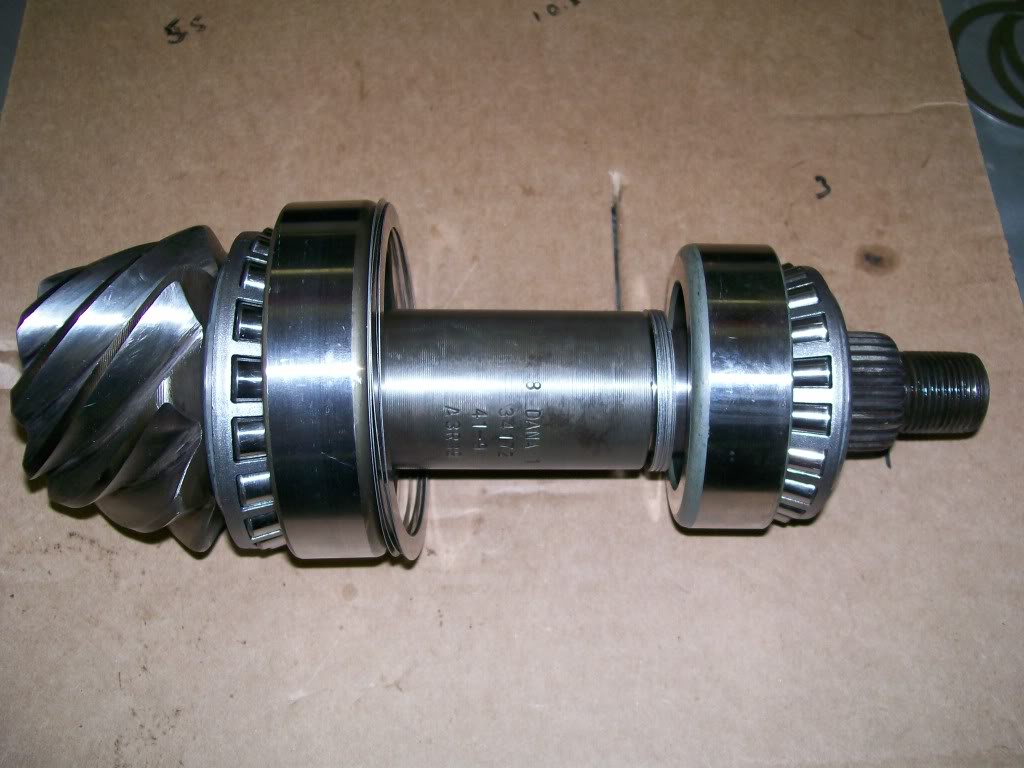
Here's the main transfer of power from the driveshaft to the ring gear. On the right hand side there would be a yoke that the driveshaft bolts to. Just left of that is a bearing, then the outer bearing race, then shims, then further down another set of shims, outer bearing race, bearing, then the teeth that mesh with the ring gear.
Imagine between the two sets of shims is the cast iron of the differential. The left, or the larger set of shims will set the depth of the pinion, how far it will set into the pumkin area. The second set, small shims will be what is used to set the pre-load on the bearings.
Know that the two outer races are firmly in place in the housing. It's easy to imagine that more shims on the big side will force the pinion gears farther into the housing. Now try to imagine that the more shims on the smaller side will push the smaller bearing further from the outer race in the housing. More and more shims and you would push the bearing right off the shaft. Obviously you wouldn't go that far, I just wanted to create an image in your mind to help you understand.
Too few of shims on the small side would allow the smaller bearing to be closer to the gear side of the shaft. But before it got too far, the smaller bearing would run into the outer race. Now if too few of shims are used, and we install the yoke, washer and nut. Then torque it down we'd be crushing the bearing into it's outer race. We need to install just the perfect amount of shims so that the time the bearing makes contact with the shims, the bearing is also making contact with the outer race. We have a small window of happiness here. Once again, we want to have a very slight pre-load now of the bearings meeting the races. Many manuals will give an inch pound reading of how much drag you should have when you turn the pinion shaft.

The lift was easy... On these trucks originally the leaf springs went under the axles. I didn't use the original axles so I had to weld on the spring perches so I welded them on top of the axles so now the springs are over the axles. No blocks, no extended shackles, no special arch to the springs.
I still see these trucks popping up in ads once in a while. I suppose the biggest decision would be how much work you want put into it.
The bed has a diamond plate floor and most of the bed is made from galvanized metal, rust up there hasn't been much of an issue. BUT... I'd like to put some kind of a liner on the inside of the frame rails when I'm done. I want to leave the exposed rails nicely painted.
Comments

Great before & after!
Posted by Diggymart on 1/11/20 @ 4:10:28 PM

Gotta love the Willys! Good job...great build!
Posted by Diggymart on 12/10/18 @ 8:34:21 PM

Ultimate classic truck right there
Posted by CCmyVW on 12/26/20 @ 4:17:42 PM