You must be logged in to rate content!
45 minute(s) of a 97 minute read
8-1-1493
1973 Camaro Z/28 Build
Compliments of 91gti20v @ http://forums.fourtitude.com
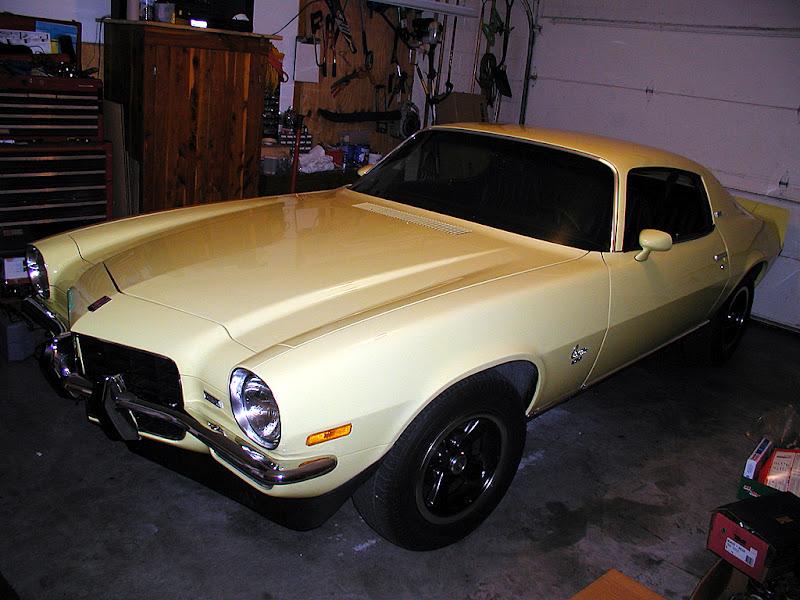
Ok, so thesteve requested that I post more pics of my money pit. The repercussions if I didn't were to GTFO. Well, seeing as TCL is my home away from home, and if I couldn't spend time on here while at work that would mean I would actually have to do work...here we go.The car:
1973 Z/28 Type LT
Before any of you knuckleheads say "Where are the Z/28 badges, where are the Z/28 stripes...???" I will explain fully. The Type LT trim package could be ordered along with the Z/28 package. When this was ordered, the LT trim superseded the Z/28 trim. BAH. I don't like it, but I am not in a hurry to change it. The Z/28 stripes were optional. I am the second owner of the car. The original owner ordered it just this way. I do plan on adding Z/28 stripes in the future, but only when the CF hood goes on the car.
I purchased the car from the original owner 8 yrs. ago. The car has been repainted once, but it is unrestored for the most part. Original interior, original engine block. The motor was rebuilt by Bo Law's speed shop in 1980. Better heads were installed at the time, but all the original parts were retained and passed on to me in the sale. Same with intake. Port and polish aluminum intake was installed (port match to heads). In 1973, Chevy went back to cast iron intakes on the Z/28. I still have the cast iron intake as well.
Car as i purchased it:
Car remained untouched for several years. First mod was a complete MSD ignition. Magnetic pickup distributor, 6A box, etc... I think I had the Q-Jet rebuilt along the way too. Vinci High Performance in Orlando took care of that.
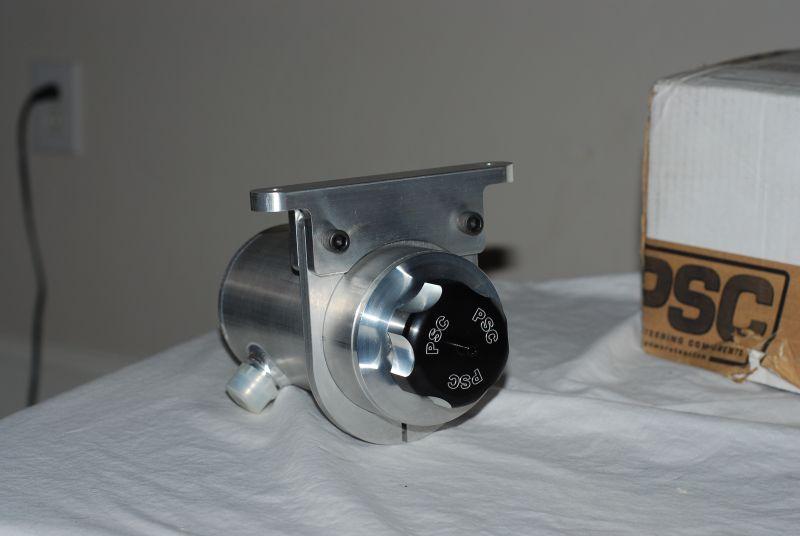
Fast forward a couple of years. I get bit by the Pro-Touring bug. First mod was to install a new Lee Manufacturing 670 steering box, KRC pump, & PSC baffled remote PS reservoir. All plumbed with purdy AN fittings.
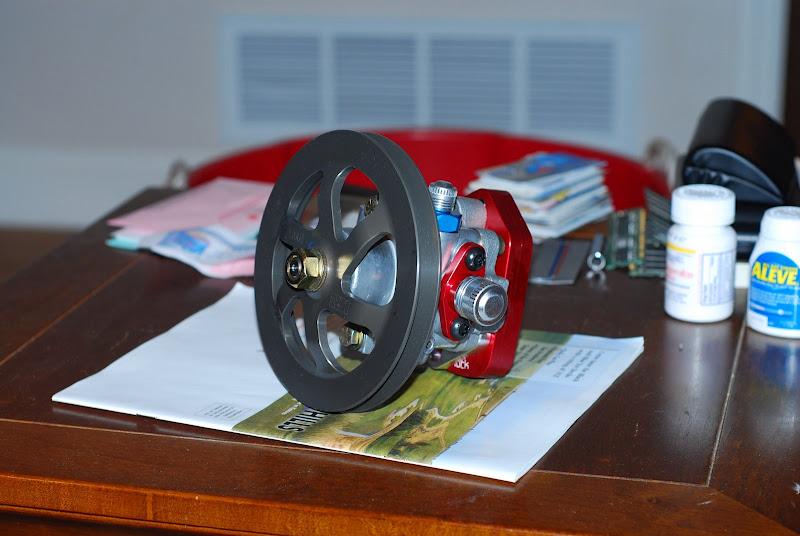

Custom bracket to mount reservoir to fender.
To be continued, need to go take care of a few things....
Ok, next mod was to get some more supportive seats in her. I wanted something period correct, but that would hold me in better than the stock flat seats. In went some E21 BMW Recaros.
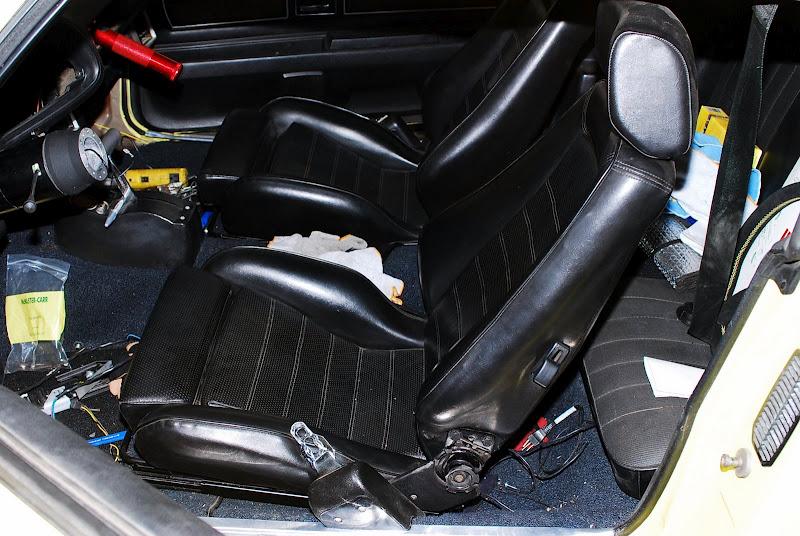
Time for some actual performance mods. I decided to go with Minilite replicas. Wanted to kinda go with a Vintage Trans/Am theme. 17x8 fronts, 17x9.5 rears. 245/45/17's and 275/40/17's.
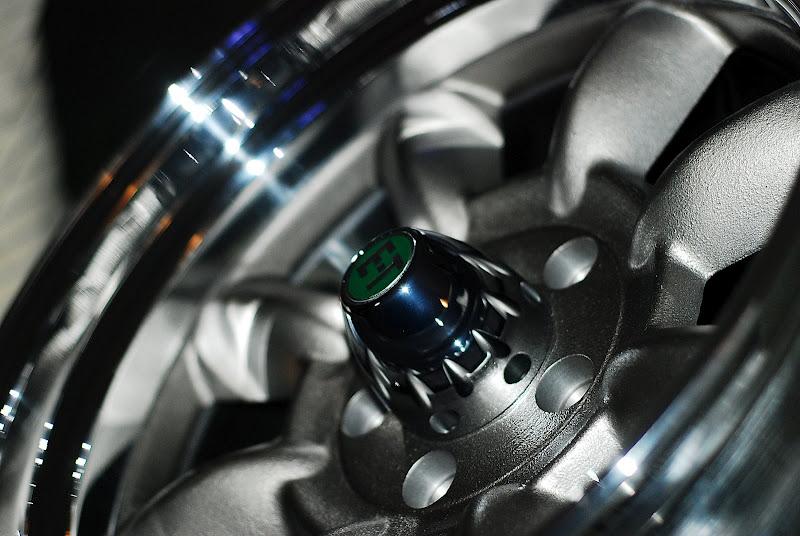
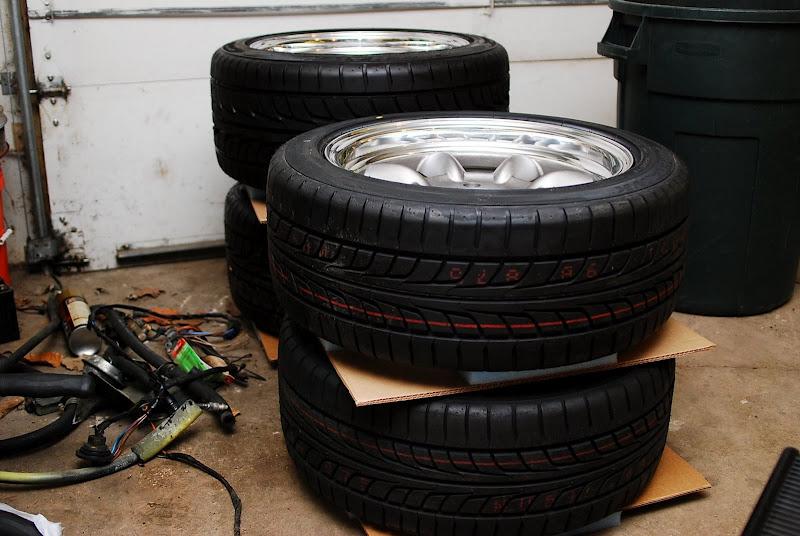
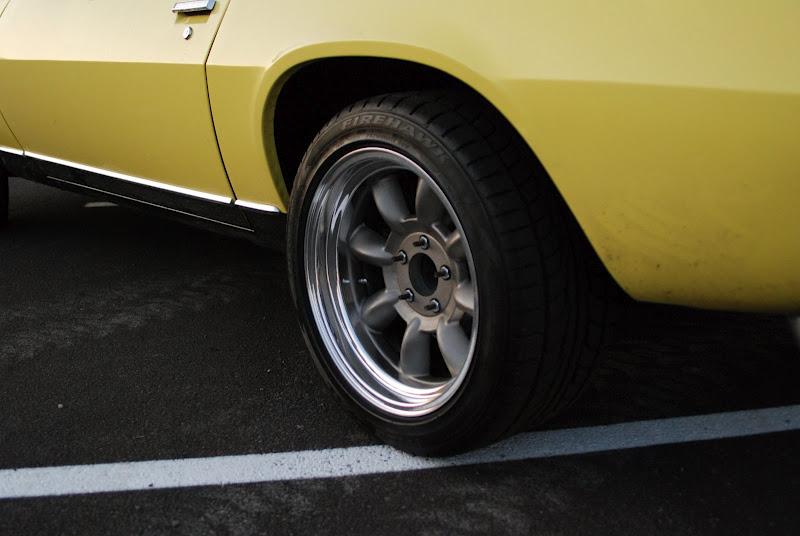
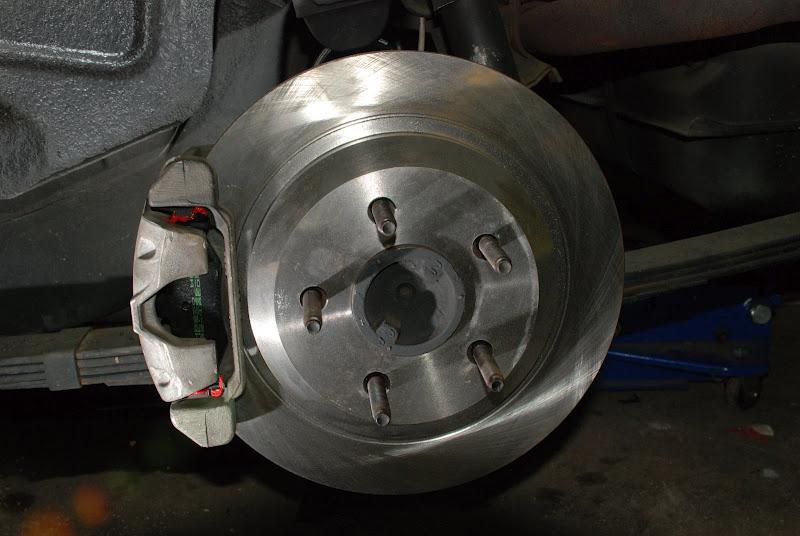
At the same time I installed the wheels and tires, I upgraded the rear brakes from the factory drums to 4th gen F-body LS1 discs with drum in hat E-brake. Unexciting pic coming up.
Front needed some updating as mentioned a few posts below. New parking lamp lenses. New bumper to eliminate the bumperettes. The 70 1/2 - 72's had small bumperettes. 73 added the large ones with additional holes in the bumper. So an older bumper was needed. Was waiting on gaskets and the NOS lenses in this pic, but you get the idea.
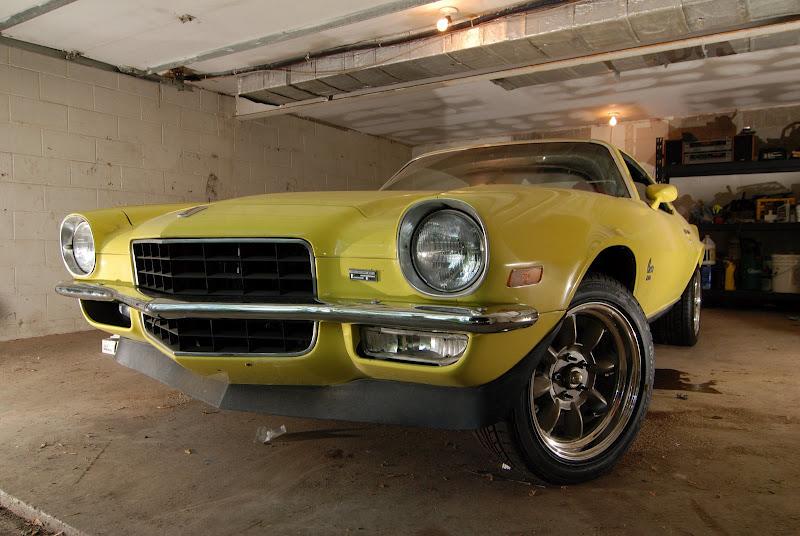
Fast forward a little while longer. Sale of a house put a nice chunk of change in the bank. Pulled the trigger on some much needed upgrades. Tremec TKO-600. Hotchkis upper and lower control arms. I will be taking the cutoff wheel to the factory shock mounts and making my own double shear mounts to install coilovers. The brand spankin new Hotchkis lowers will be going under the knife to install double shear mounts as well. At the same time, I will finish the install of my Vintage Air A/C, smooth the firewall and detail the subframe.
So, I will post some pretty pics, then some scary ones to show the current state of disassembly.
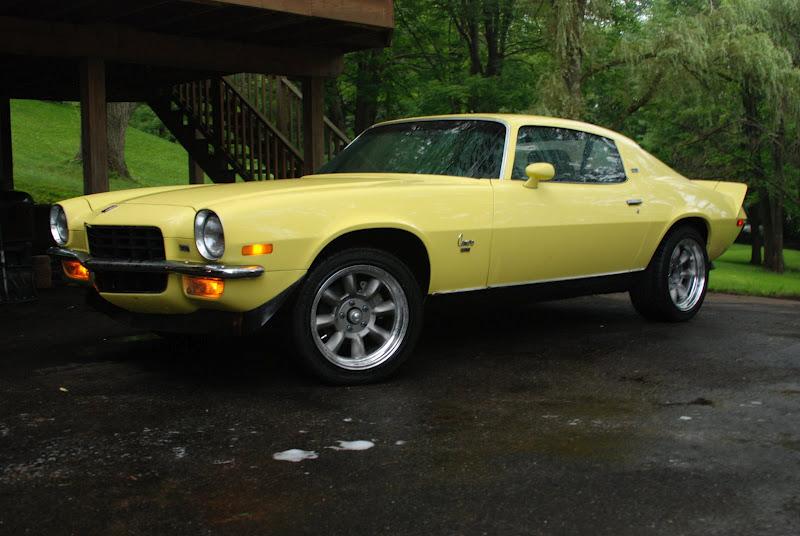
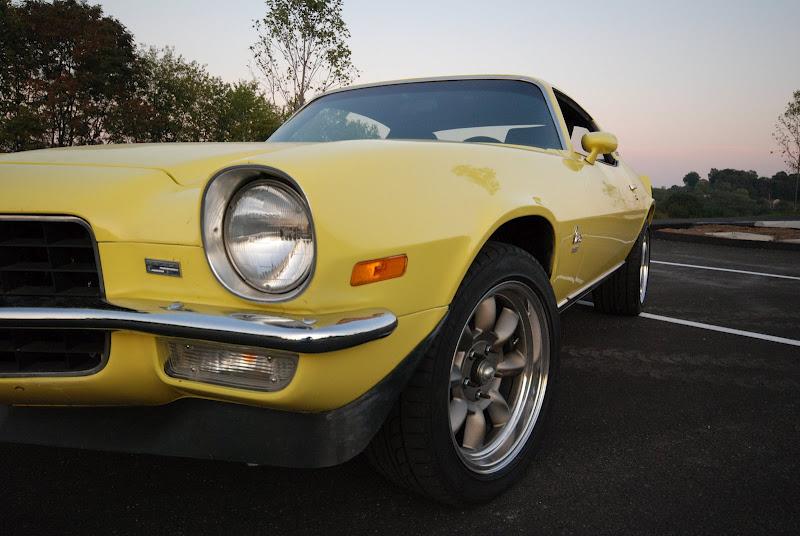
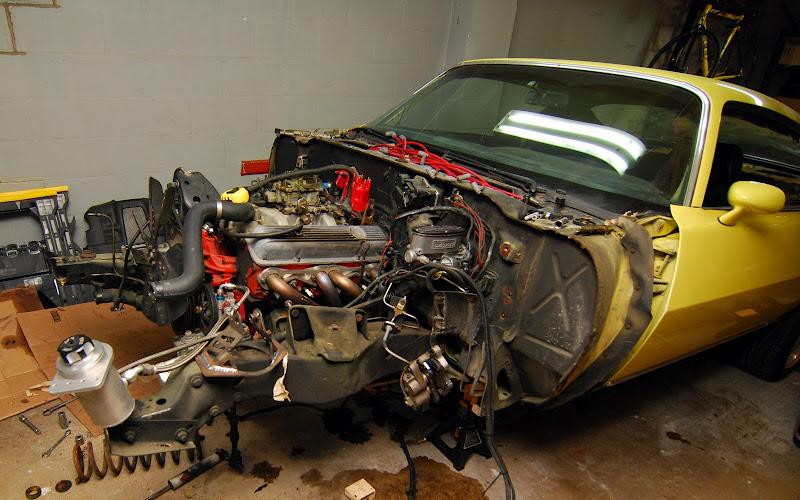
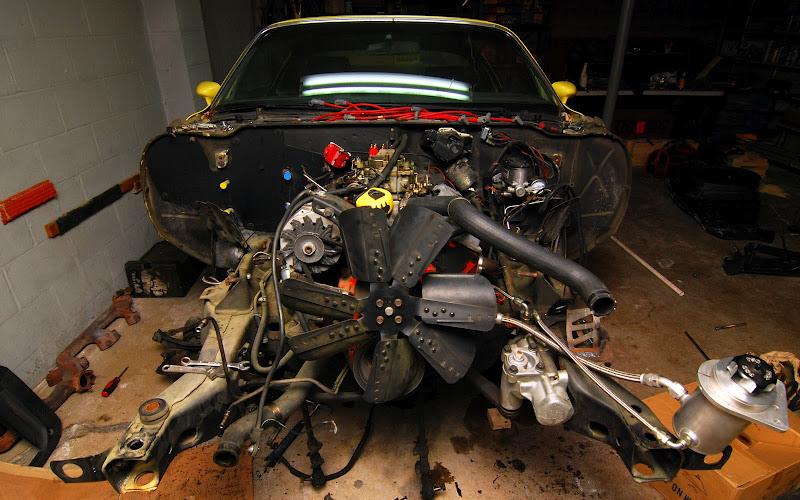
I forgot... Somewhere along this path, I had Detroit Speed and Engineering subframe connectors installed. The floor needs to be notched for them, but they tuck up tighter than any other SFC's out there. They also are stitched to the floor around their perimeter, so (albeit minimal) they add a bit of structural integrity. No pics of those at the moment. I will have to take some later.
I promise to video the first fire after the TKO-600 is installed. To give a quick breakdown on the to-do list....
Transmission swap:
Pull engine
Separate TH400 from engine
Install bellhousing, dial indicate bellhousing
Order offset dowels for bell if needed
Install transmission
In parallel...
Remove factory shock mounts
Finalize upper shock double shear mount design
Rapid Prototype design, test fit
If ok, send drawing to water jet shop
Weld in upper shock mounts
Modify lower control arms for double shear mounts
Also, moving battery to trunk at same time
SO MUCH to do... Fortunately the car cant be driven until spring anyhow.
I am really not departing too far from stock. The only modifications that will be truly irreversible are the firewall mods and upper shock mount mods. The floor board mods for the manual will mimic a stock manual floorpan in appearance.
Reason I have just said screw it and pulled the trigger is I really enjoy driving the car and I want to improve the driving experience.
To answer your question about value... Of the early second gen Z/28's, 73's are the least valuable. 70 1/2 - 72 maintained the LT1 solid lifter motor. They were not available with A/C... 73 was really watered down. The HD suspension carried over. The bottom end of the engine assembly carried over. The top end was luke warm at best. Lower compression, smaller cam... Actual sale prices? Not sure to be honest.
My engine is reasonably built already. The previous owner sent the car to Bo Law's speed shop in Orlando back around 1980. If any of you guys are into circle track stuff, you will probably know who Bo Law is. Anyhow, they mostly do custom carb work now, but back then offered full machine shop services. They did a mild rebuild. The large combustion chamber (low compression) heads were swapped out for a smaller cc pair that were reworked. A custom ground camshaft was installed along with higher ratio rocker arms. The assembly was topped off with a port matched aluminum intake. The hang up might be the stock Q-jet. I plan on doing something about that though.
I want to see how the car feels without that power sap of a TH400 behind it. If I build anything, it will be an LSX of some sort. And I wont be shy when I build it. 500 crank at least. With this beaut sitting atop...
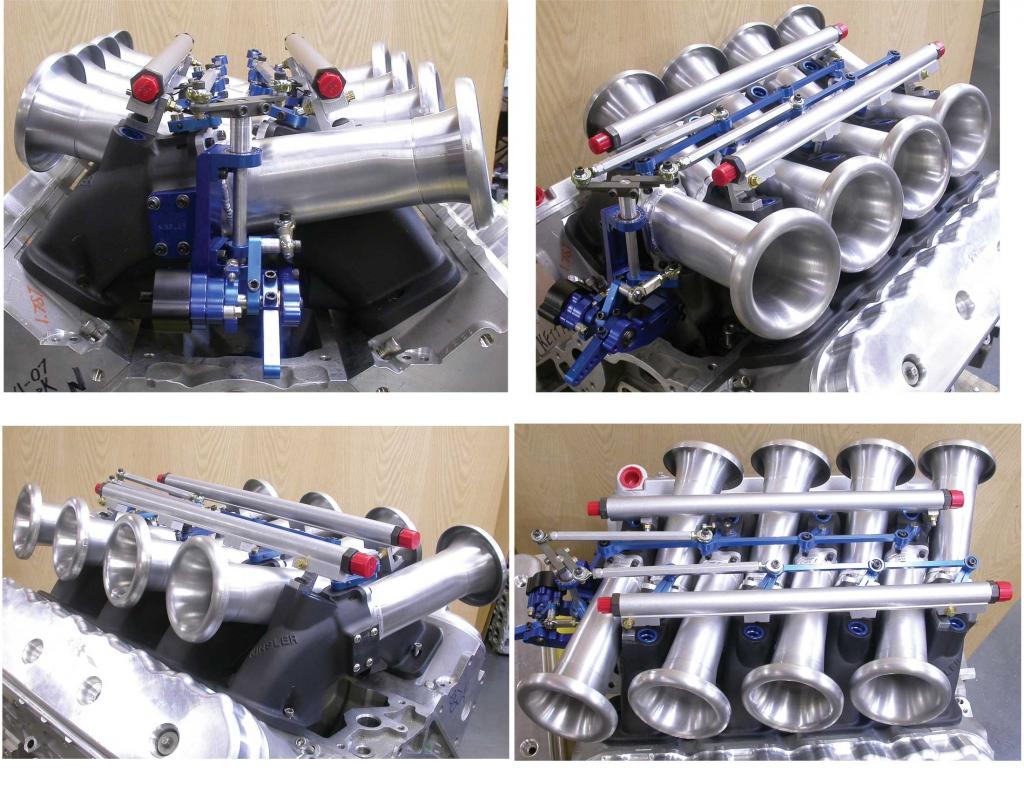
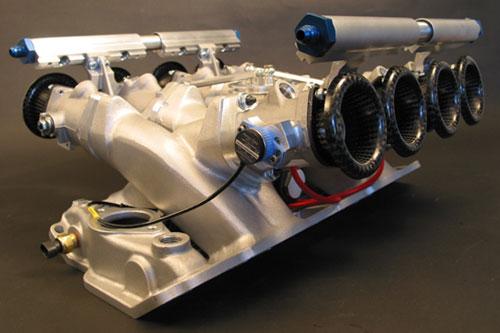
Yeah, that Kinsler EFI setup is pure sex. If I am happy with the current power levels once the 5 speed is in, I think I will change the current induction setup and leave it at that. I can do an ITB setup using an old Moon 8 carb intake. Would be "slightly" cheaper than the Kinsler setup 
2nd gens have VERY little hood clearance. I couldn't run an Edelbrock Performer RPM and Holley carb without cutting a hole in the hood... WHICH I WILL NOT DO. That is kinda what steered me towards the crossram induction. 
I should be able to scrape together some spare change for those... 
If I stay Gen I SBC, this is the setup I will run:
2/1/2010
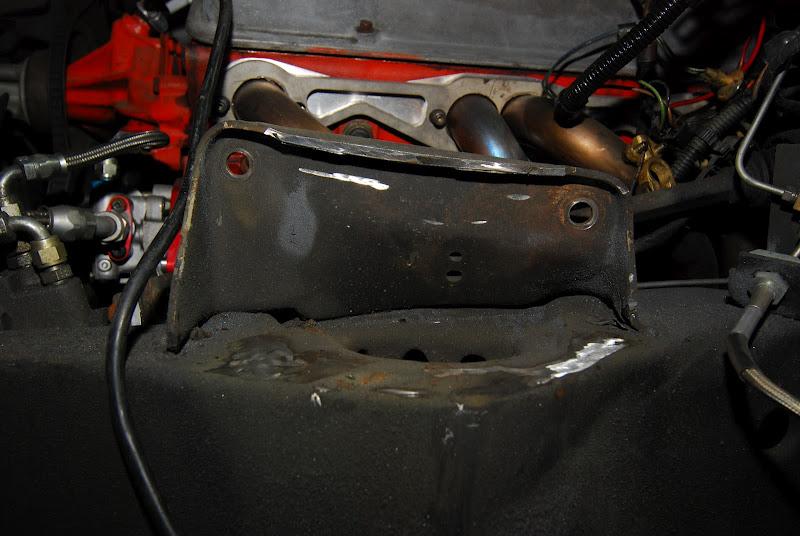
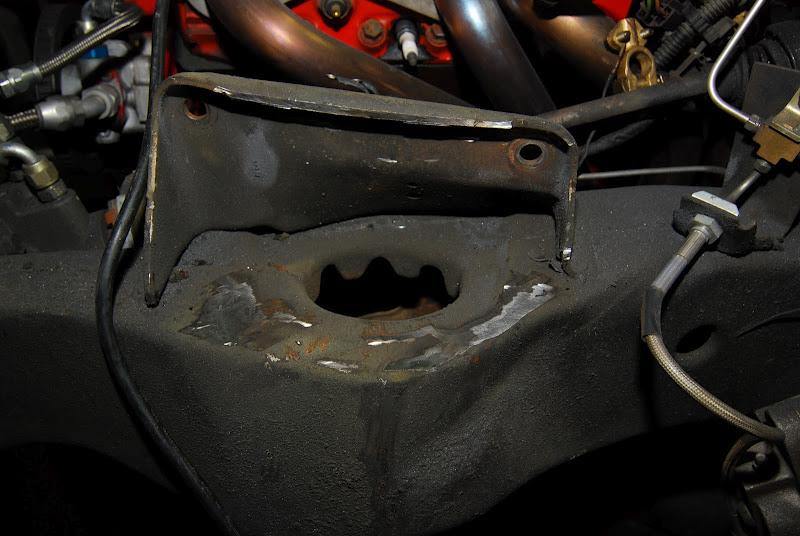
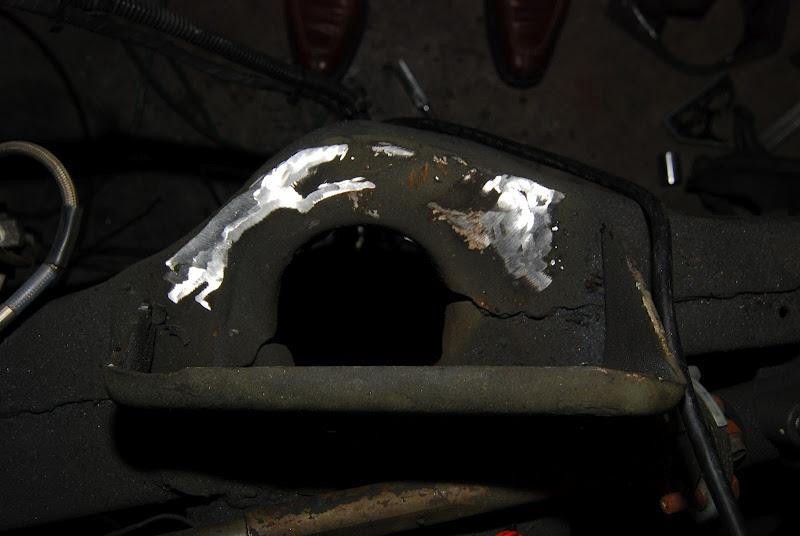
No pics yet, but the point of no return has been reached. Factory shock mounts have been removed. Currently working on the design of our upper shock mounts. There will be lots of mock up in the coming weeks before final drawings are sent to the machine shop. Pics tonight.
2/2/2010
Carnage!!! Shock mounts are out. Just gotta finalize our replacements design.
73 T/A Numbers
Engines:
350 V8 150 bhp.
400 V8 230 bhp @ 4400rpm, 325 lb-ft @ 3200 rpm.
455 V8 250 bhp @ 4000 rpm, 370 lb-ft @ 2800 rpm.
455 (SD) V8 290 bhp @ 4000 rpm, 390 lb-ft @ 3600 rpm.
The Hemi was gone in 73. So I would say that the T/A was top dog.
3/12/2010
Progress is slow.
Initial bellhousing readings taken. Ordered the offset dowels today to square that up.
Hmm, lets see. Spacers for the C5 front brakes are getting anodized. Slacking on the coilover bracket design. Pics up this weekend.
Tremec TKO-600. I prefer the gear ratios. I considered the T56 route, but would have wanted to go with a custom gearset. And the T56 requires extensive tunnel mods.
Here she is tucked in the corner of the garage. Once I get the offset dowels in, I will be able to start mocking up the rest of the trans for install.
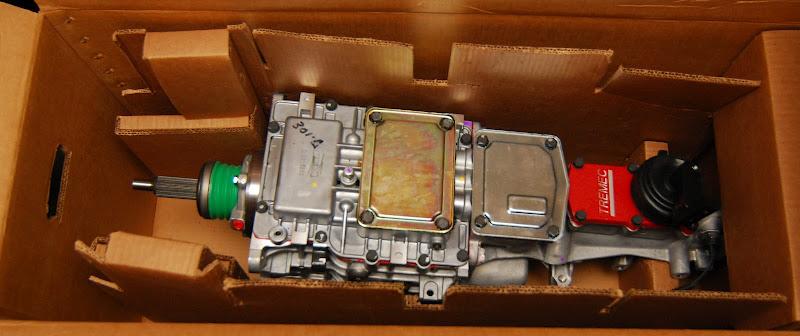
There are two models of the TKO now. The 3550 went away a bit ago. You have a choice between the TKO 500 and 600. Rated for 500 and 600 ft-lbs respectively. The 600 has two different gearsets available. The standard set is what I chose.
GM TKO-600 (TCET 5009)
2.87, 1.89, 1.28, 1.00, 0.64
The road race version swaps the 0.64 OD for a 0.82 gear. I plan to do some solid road trips in the car, so I went with the higher OD ratio. They are both $2195 for the bare trans. I think I paid close to $3500 with all of the pieces parts needed for the swap. Going from auto to manual I need a ton of pieces. My car currently has a posi unit with 3.42 gears. A 2.18 final drive will help the fuel economy on the highway and I will still have great gear multiplication through the first 4 gears.
After driving the car with an auto for the last 7 years, I can't wait to bang through the gears. 
3/16/2010
Updates... Sort of. Preliminary coilover bracket design done. I will be changing it though.


Redline Goods made a custom shift boot for me. It arrived today.
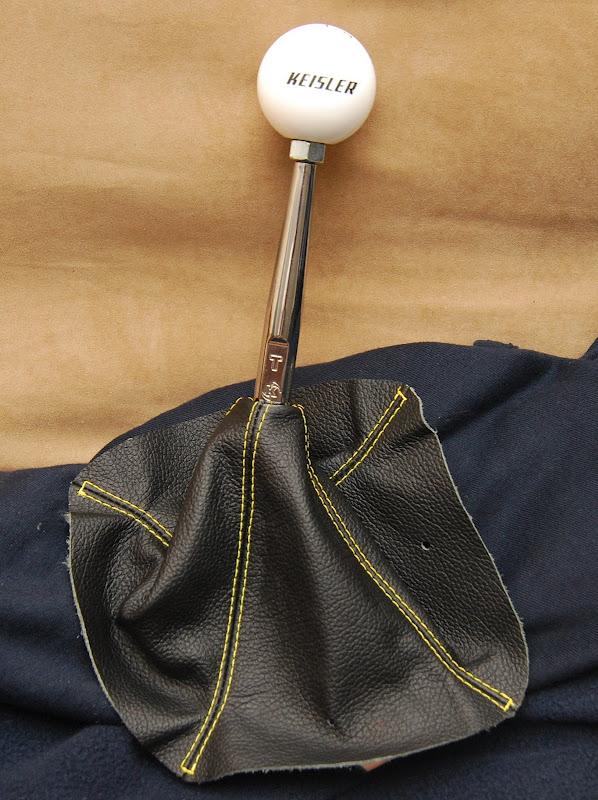
Thats all for now.
3/17/2010
MORE PARTS! We designed some custom hubcentric rings for the front wheels that will also act as spacers to clear the C6 Corvette brakes I will be running.

6/21/2010
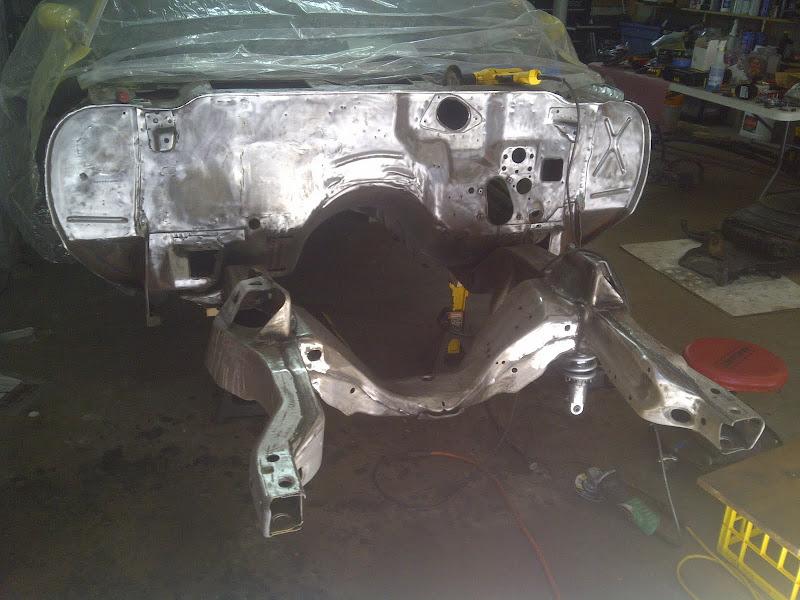
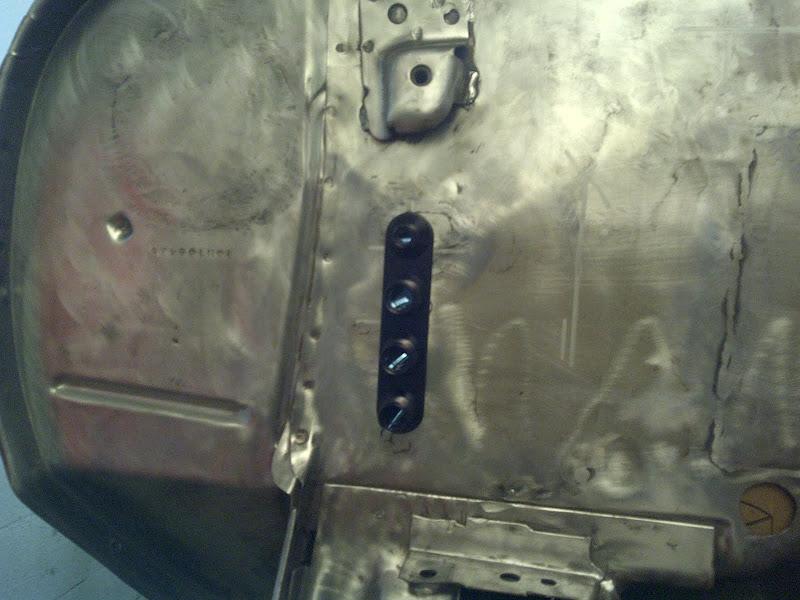
Firewall work has commenced.

7/7/2010

7/29/2010
Ok, so I know I don't have any pics... However I do have lots of parts ready to be installed finally.
Just received my spindles back from the powdercoater. They look great. This weekend, I will assemble my brakes and get the Wilwoods all shimmed up.
Also, the critical piece to my puzzle is here. The coilover brackets along with the coilovers. I hope to have everything mocked up and will work on getting it all welded up next week. If all goes well, the car will be sitting on the ground in the next couple weeks.
7/31/2010
Crappy cell phone pic.

8/3/2010
Brakes are all built and shimmed properly.
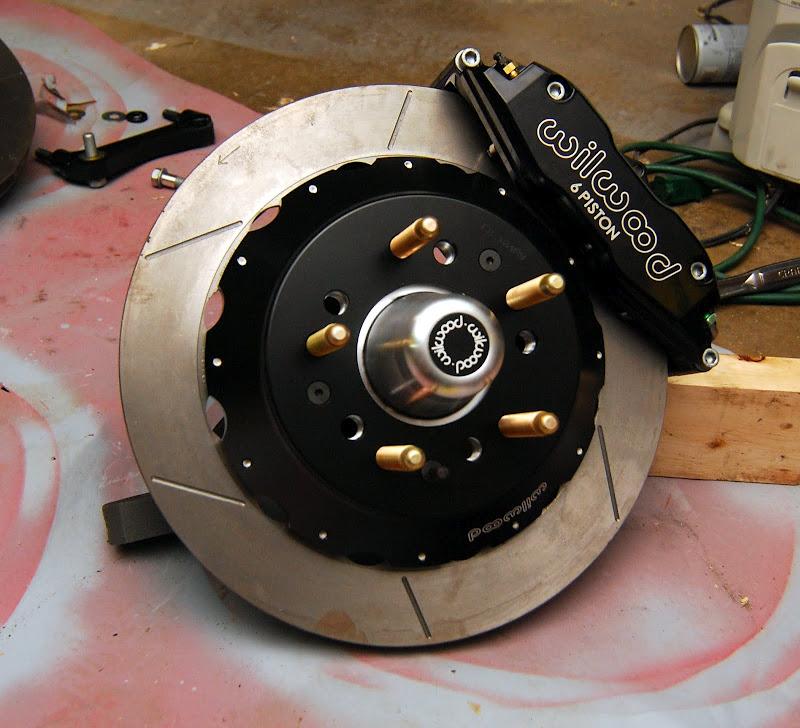
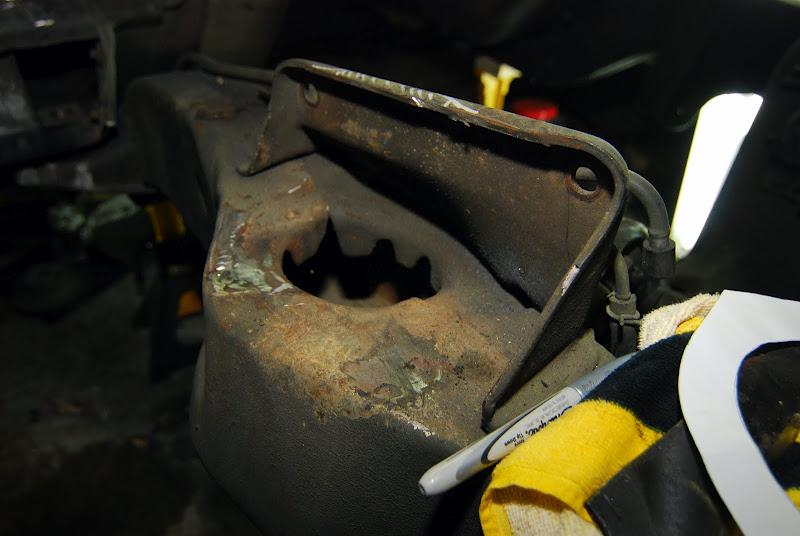
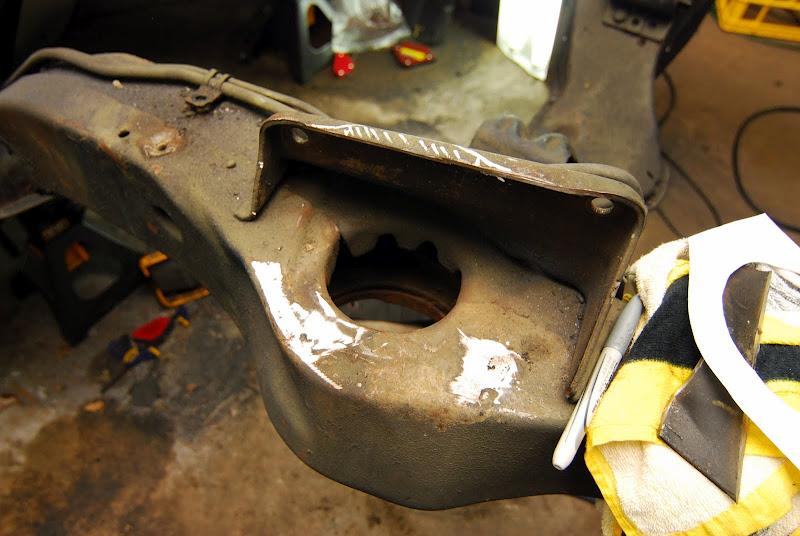
I decided to burn the midnight oil (and most likely keep my neighbors awake) and begin the cuts on subframe to clearance for the coilovers. Drivers side is done.
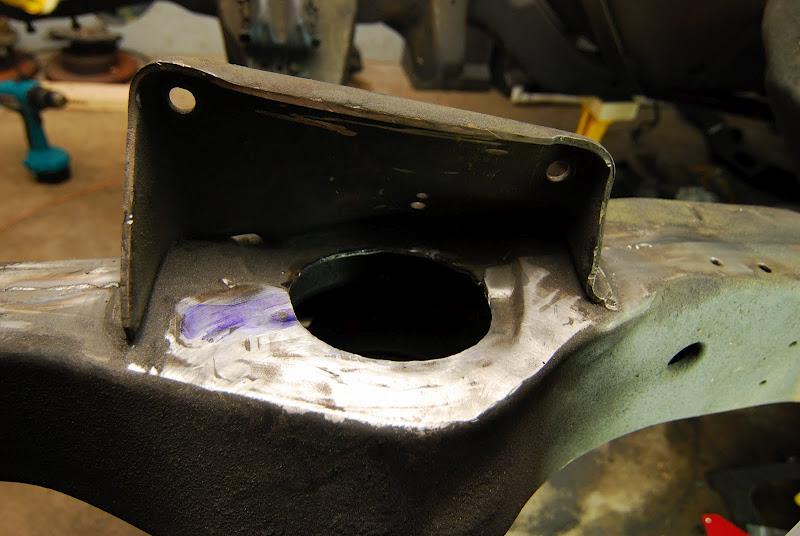

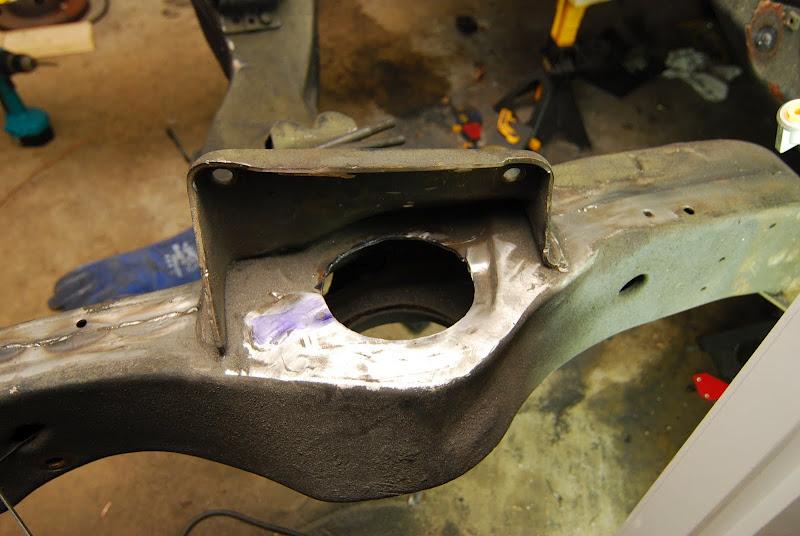
Uncut passenger side for reference, it will be done tonight. Need more cutoff wheels. 
8/4/2010
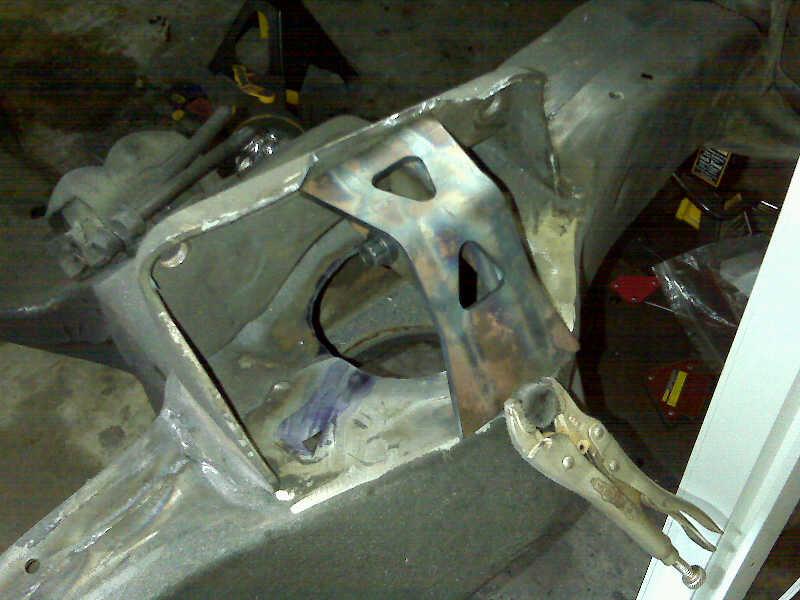
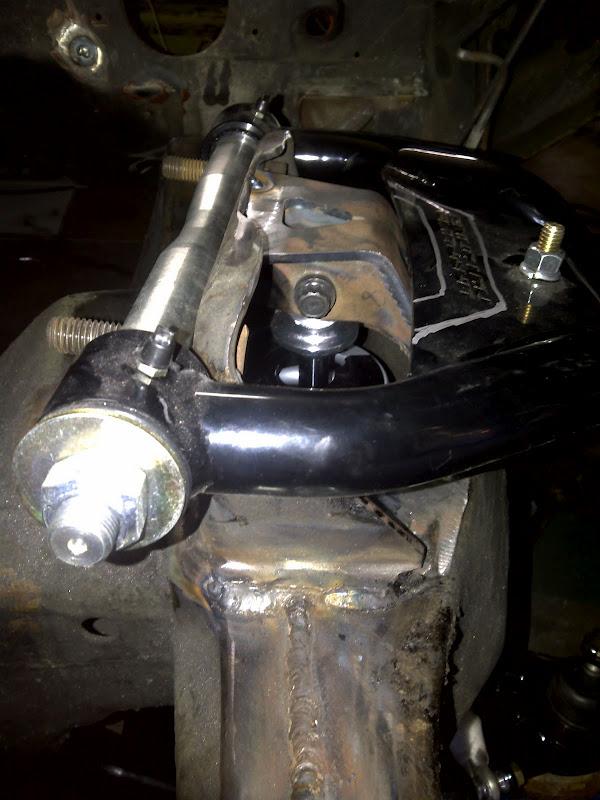
More test fitting and the first pic of the speedtech coilover brackets.
Crappy cell phone pics. I spent my lunch hour at the house and ran an angle grinder for most of it.

8/26/2010
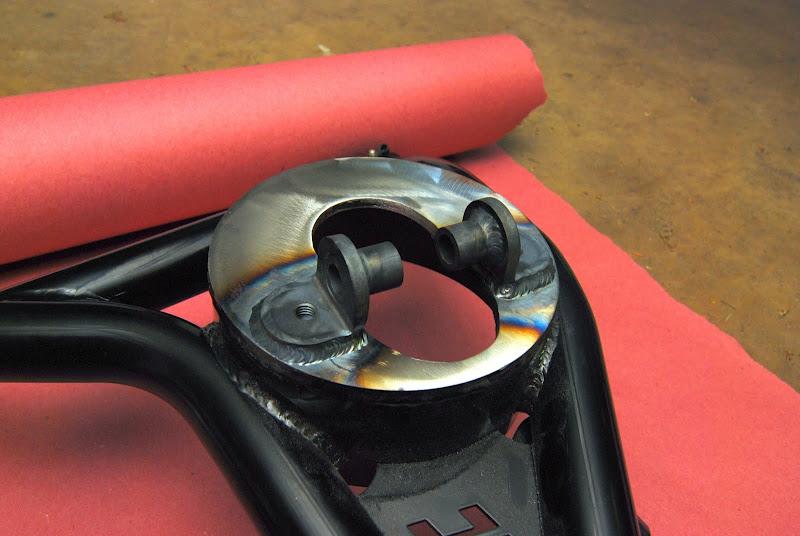
Man, I was away from home far too long. I have made some progress, but work keeps getting in the way. The control arms are all finished up.

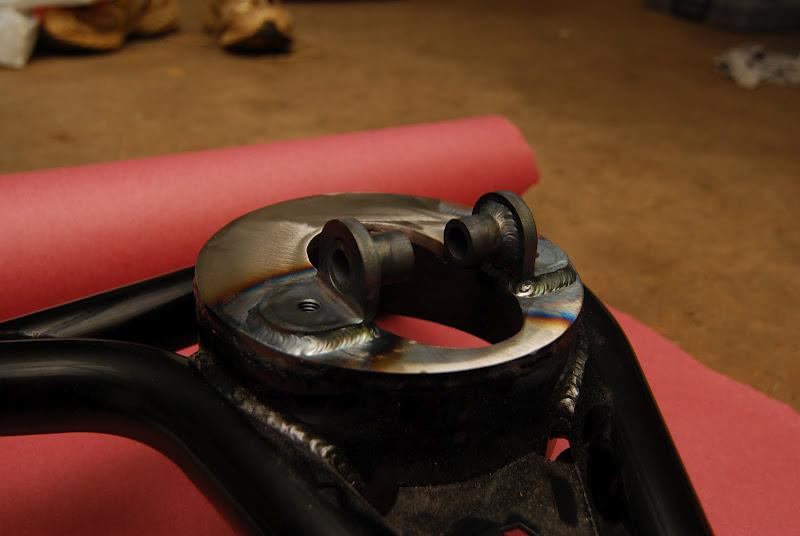
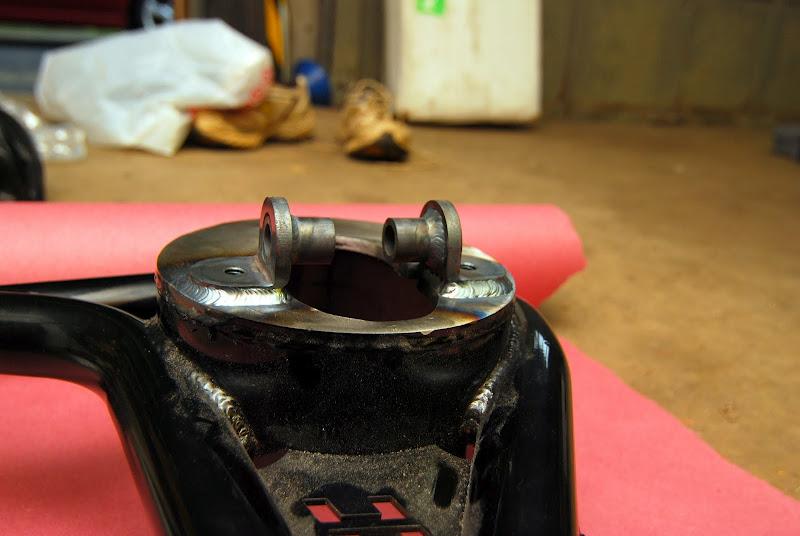
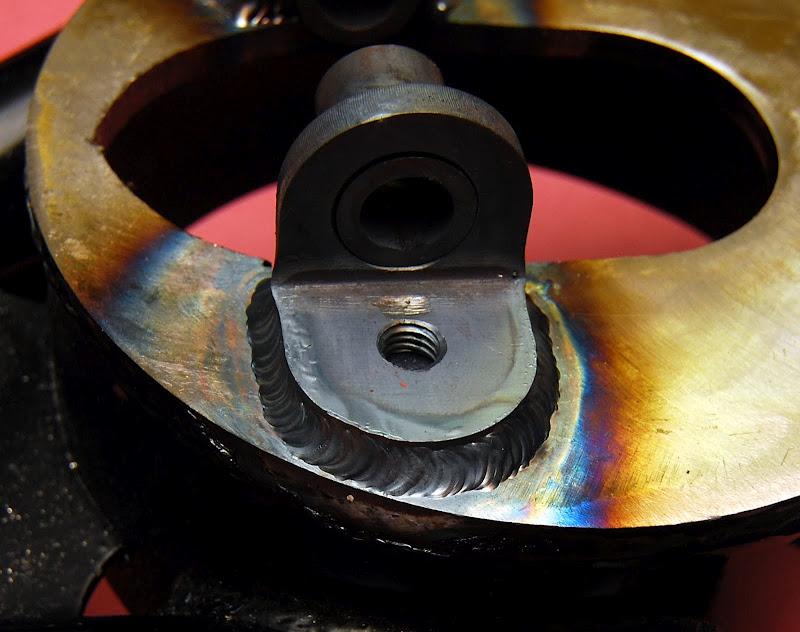
As far as the EFI is concerned, the answer is yes. The route to EFI is yet to be determined. I would prefer to do an LS swap eventually. Mainly because the LS benefits from years of R&D over a Gen 1 SBC. Much more efficient combustion chambers, better flowing, etc... I haven't ruled out the idea of just installing EFI on my car. Look back a few pages, there should be pics of the Moon crossflow ITB setup I would run if I stay with the Gen 1 SBC. Main reason I think the LS swap will happen is the fact that my engine is tired. It needs a rebuild. I think my plan will be to start building an LS once I have the car back together and in one piece.
Also, any of the EFI systems worth an isht are several thousand dollars. Seems senseless when I could buy a low miileage LS motor for not much more.
8/29/2010
WOOT!!! One side done. I am in a rush this morning, otherwise I would post more. We also seam welded my framerails. Big thanks goes out to my buddy Chris, he can run a TIG torch far better than I.
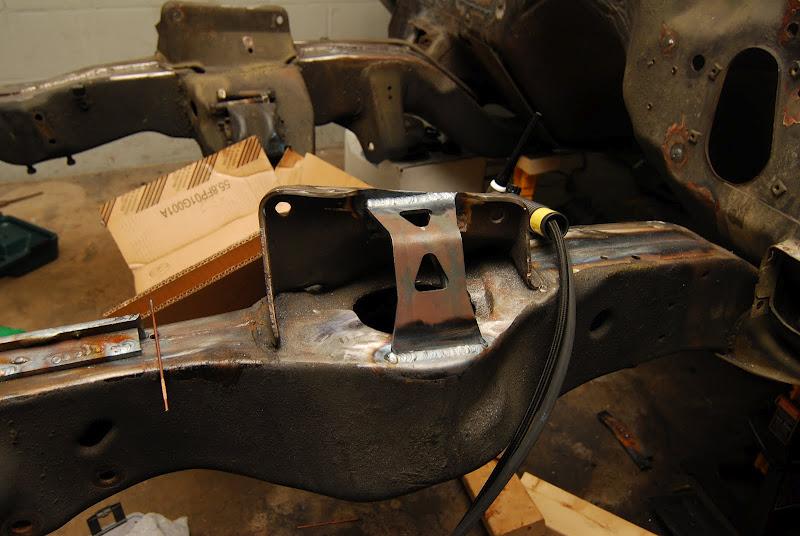
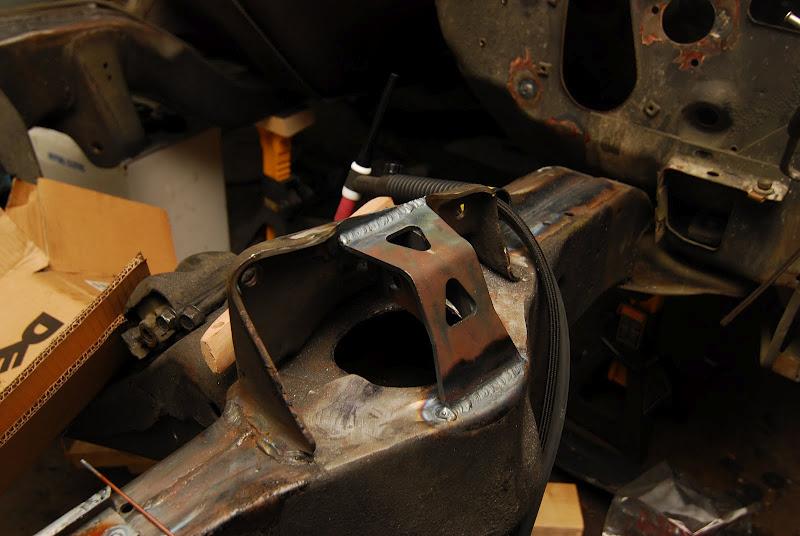
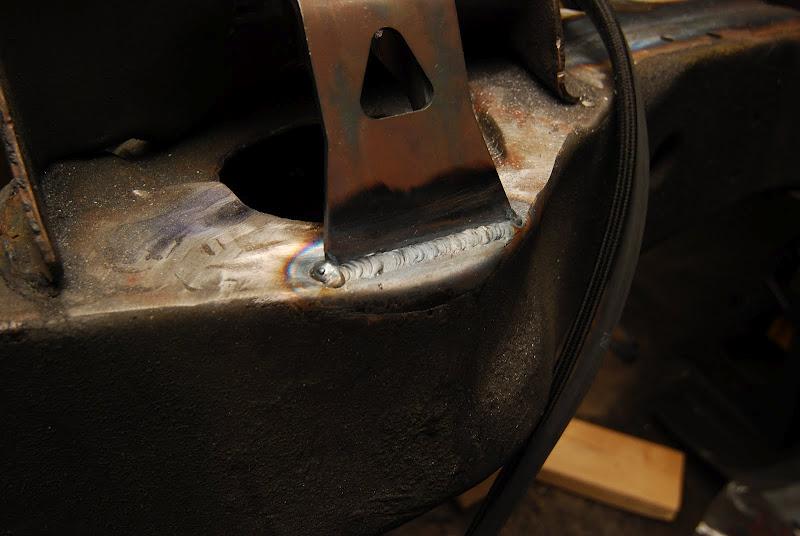
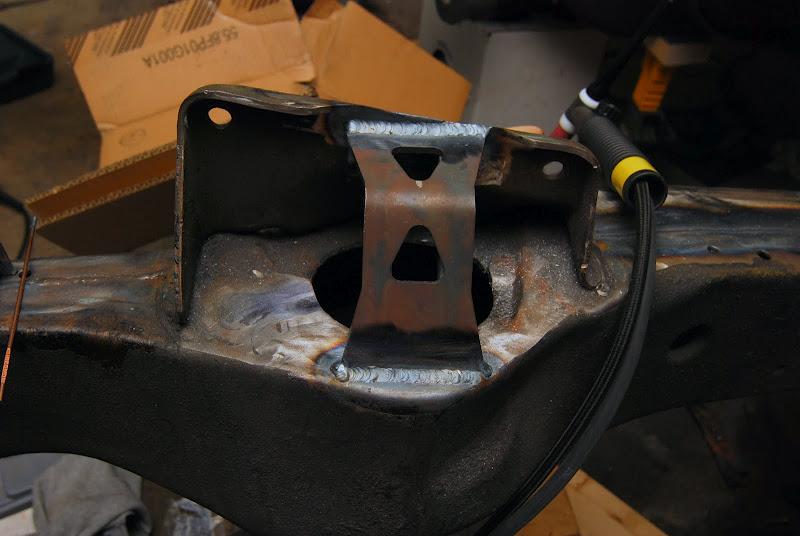
One more... Crappy phone pic taken during test fitment. I was filthy, had no intentions of getting anywhere near my D-SLR.
3/22/2011
Back from the dead. Yeah, I have some updates. Just haven't been judicious in taking pics. I am in my busy season for my job and only get a minute here and a minute there to work on the car.
The frame mods are done. The area to be painted is stripped and primed. Now I just need to get my dad up to help do the paint work. I was going to post a huge update when I got to that step. Pops did professional paint work at one time in his life and knows a crap ton more than I about how to run a spray gun.
9/5/2011
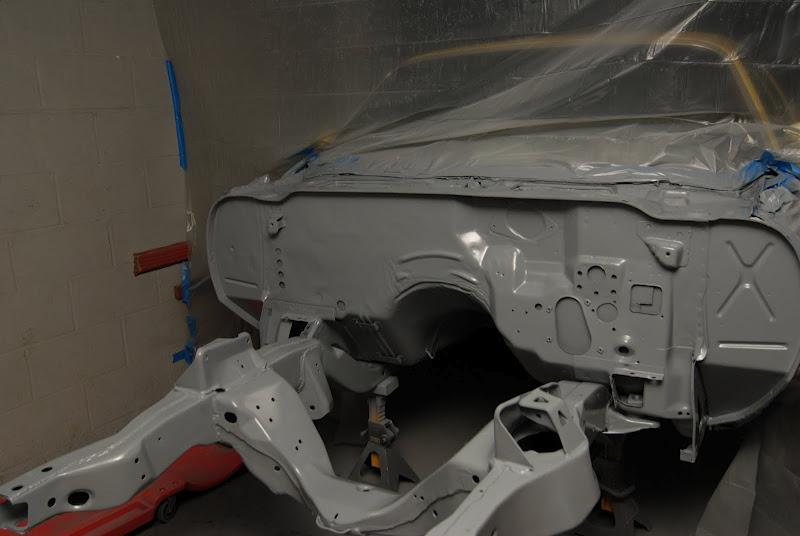
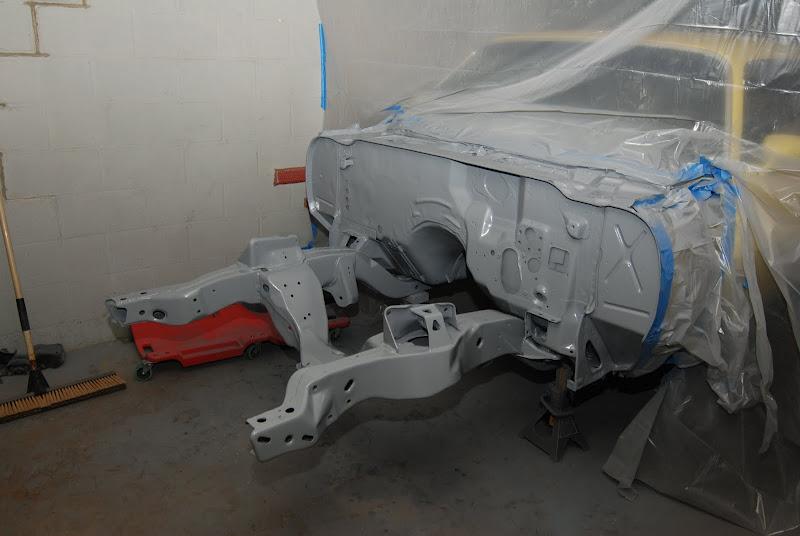
Y'all probably thought this build was dead. It has taken a while to get the tools and equipment in the garage and then arranging for pops to fly up to help lend his painting skills to the project. Looks like I have finally turned the corner. It is just epoxy primer now, but color will be on shortly.
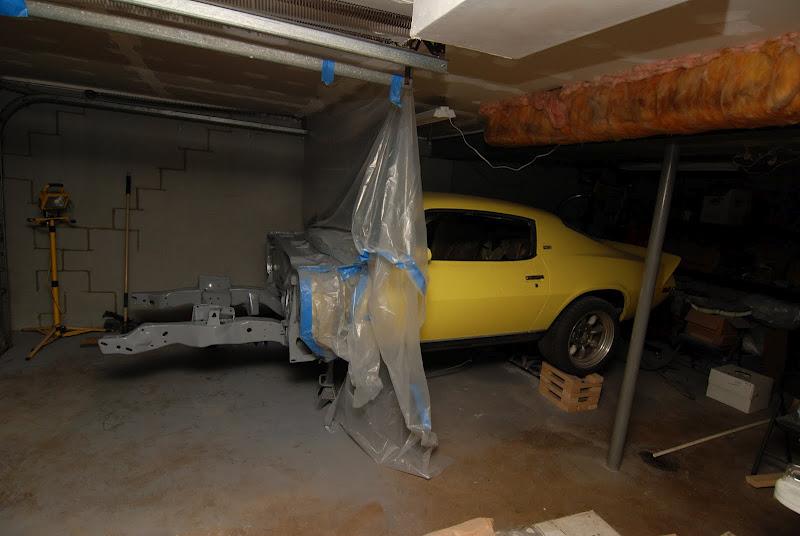
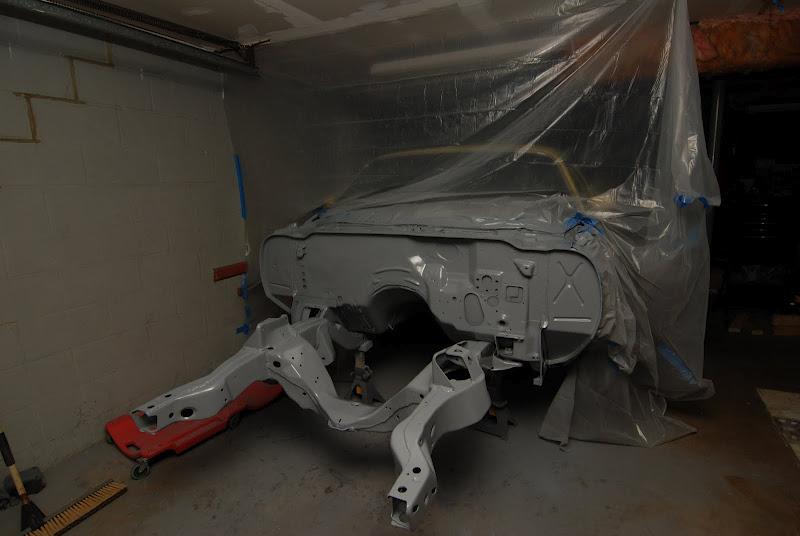
1/25/2012
Back from the dead
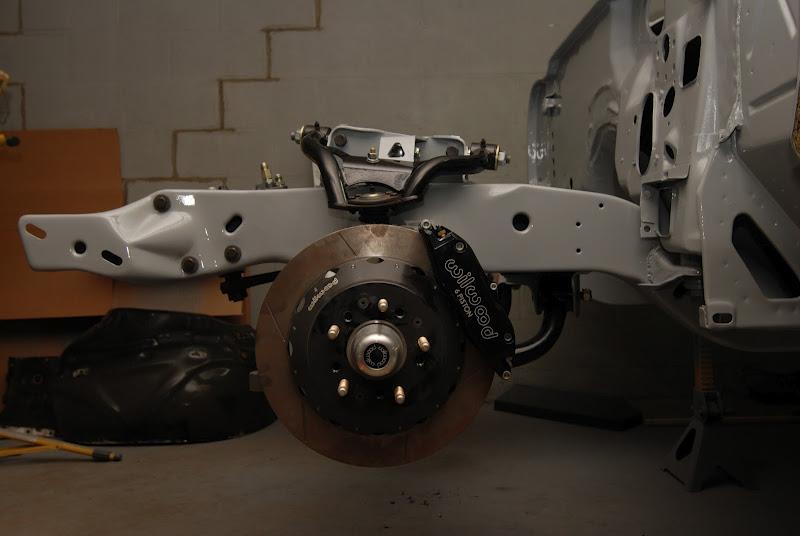
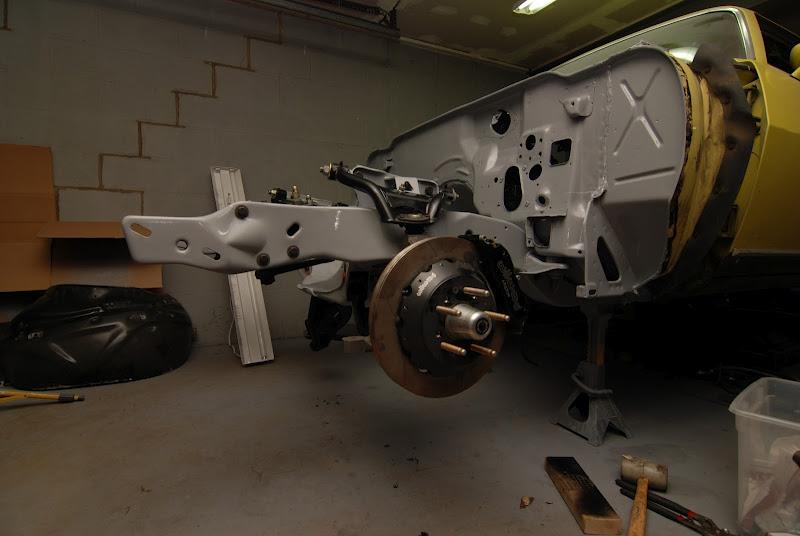
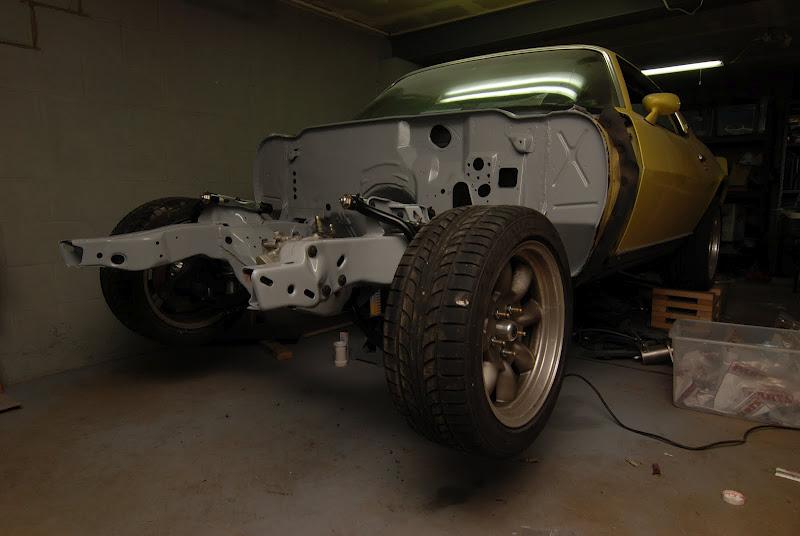
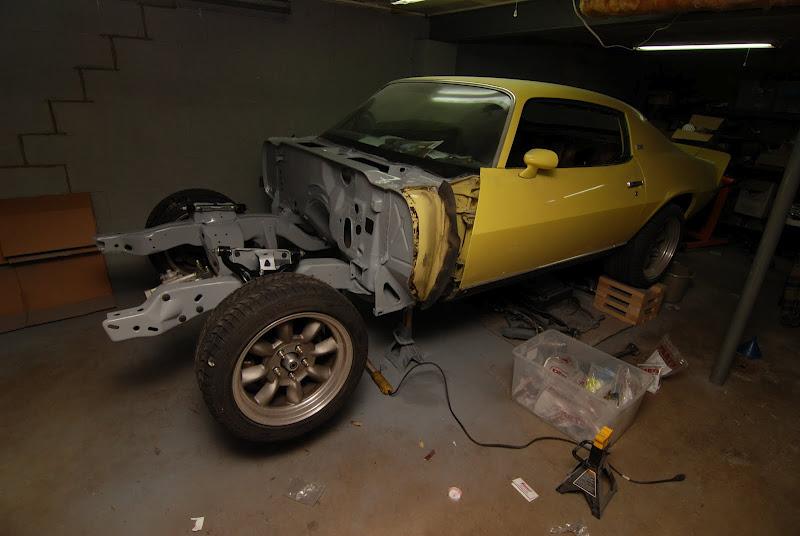
2/14/2012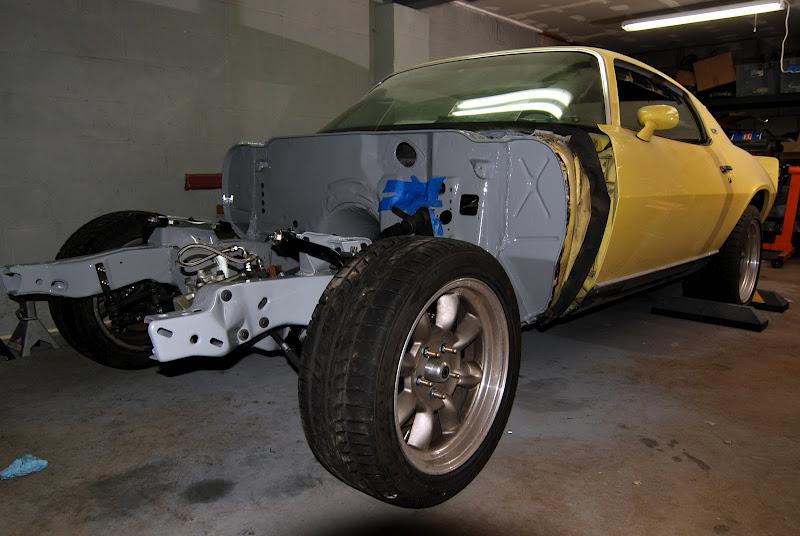
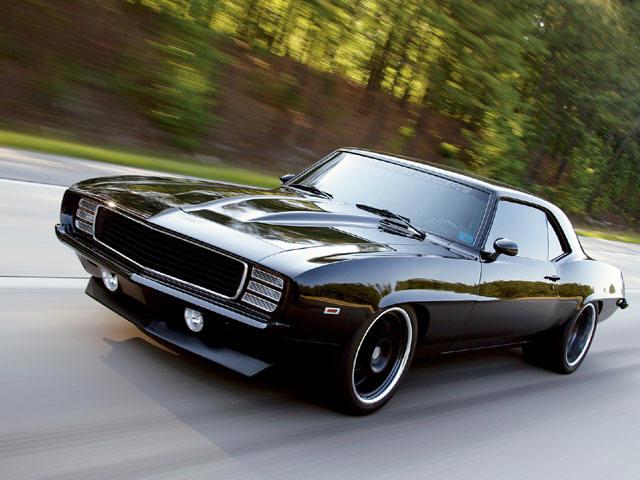
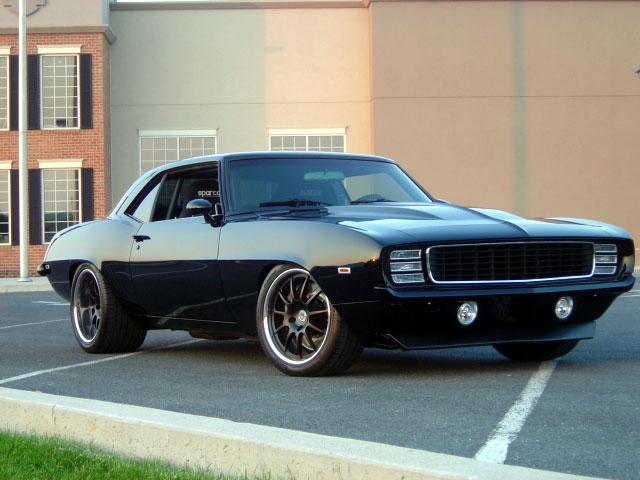
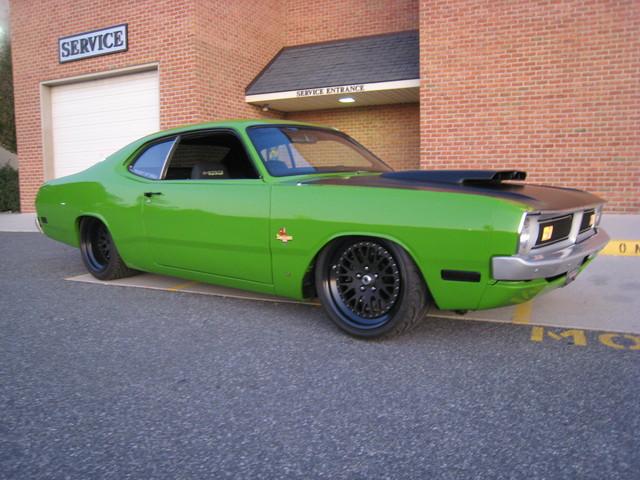
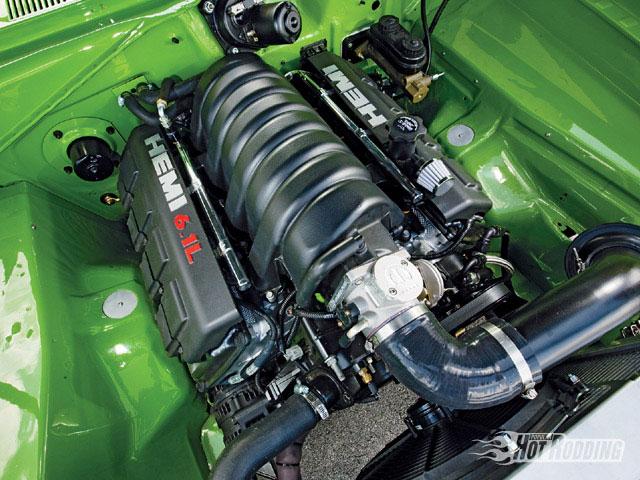
Really excited to make a little more progress. The shop doing the work is top notch and I feel my car isn't worthy of their work, but that is besides the point.
Here are a few pics of their builds:
7/16/2012
Any interest in this still?
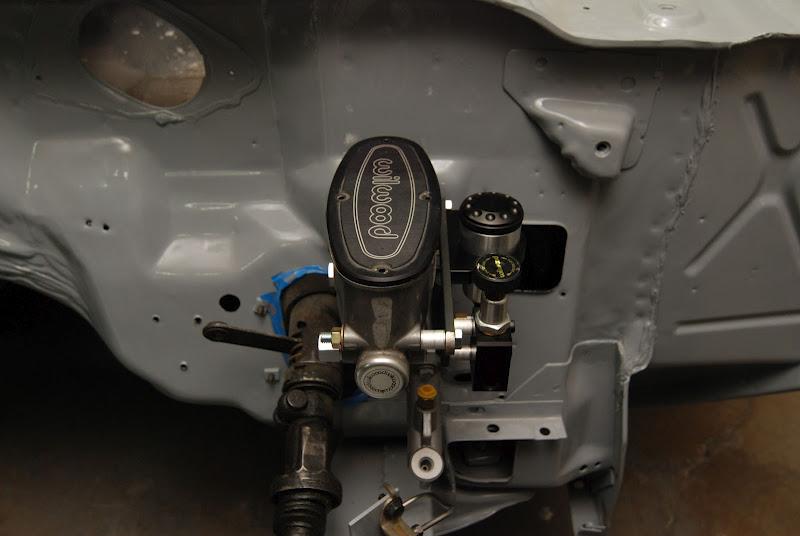
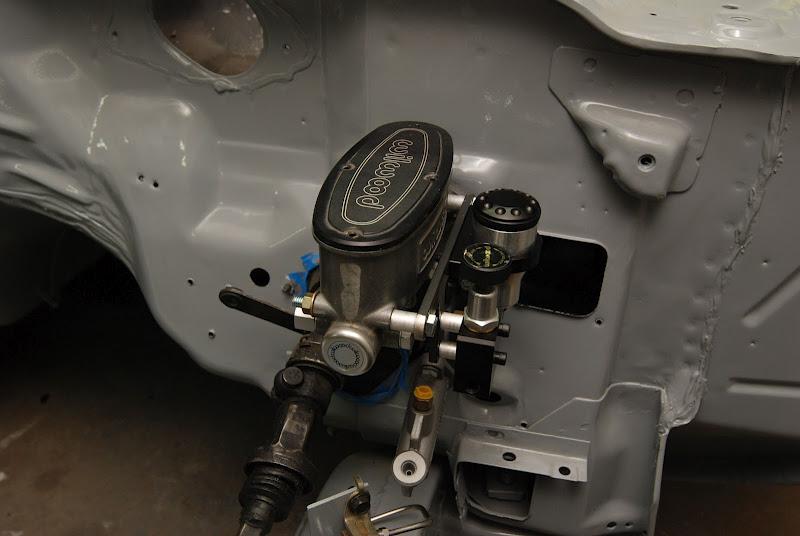
Was working on plumbing the brake/clutch system this weekend. We fabbed a bracket to mount my prop valve and clutch master cylinder reservoir.
7/16/2012
Crappy pic with the point and shoot, but here is the back after it was lowered on the new rear suspension.

Money and time (or lack there of) are quite the hindrance. I spend most of my time traveling for business. It doesn't leave a lot of personal time.
Last two puzzle pieces, transmission and radiator/cooling fan assembly, will hopefully be ordered soon.
To give you an idea of my timeline... I expect to drive the car for the first time come Spring 2013. It will go straight to the body shop that sprayed the shell to have the fenders and hood clear coated to match the rest of the shell... And it will get mini tubbed at the same time.
7/16/2012
Also working on installing a handbrake between the seats. Still need to fab a bracket at the axle for this.
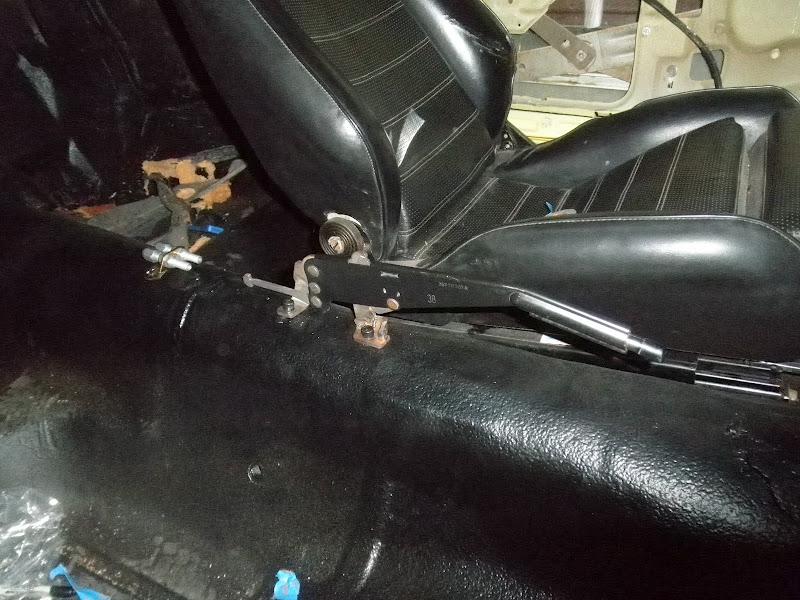
I am not sure how this setup will work, it is merely a stop gap. I redid the front suspension with the bracketry for the coilovers knowing that in the future, I will 3/4 link the back and at that point buy a matched set of coilovers.
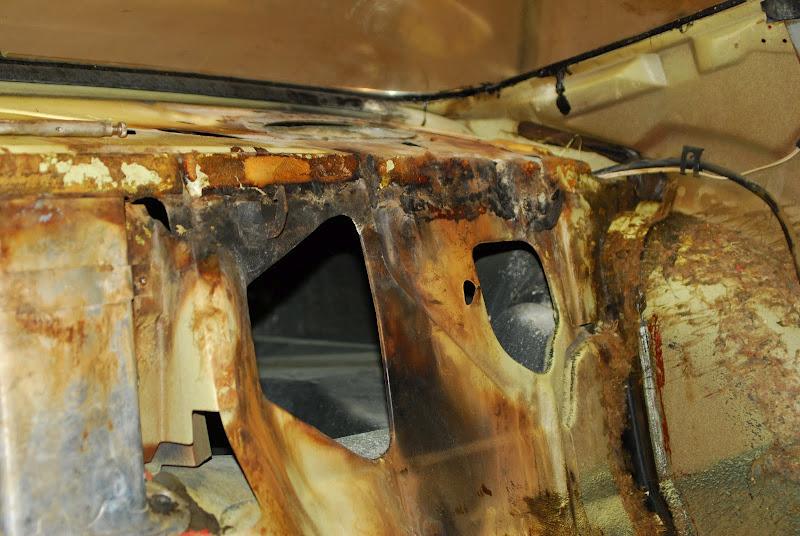
Understand that these upgrades all were driven by the fact that the car incurred accident and fire damage. I have just been slowly progressing on this. I went all out on the front suspension (not counting shocks), modifying the frame to accept coilovers, seam welding, smoothing the firewall, completely repainting... All the while knowing I was just going to slap some 3" drop leafs on it until I could afford to 3 or 4 link it. Nice thing about shocks is they are really simple to replace, so when it comes time to putting the new coilovers on all the way around, it will be an easy swap.
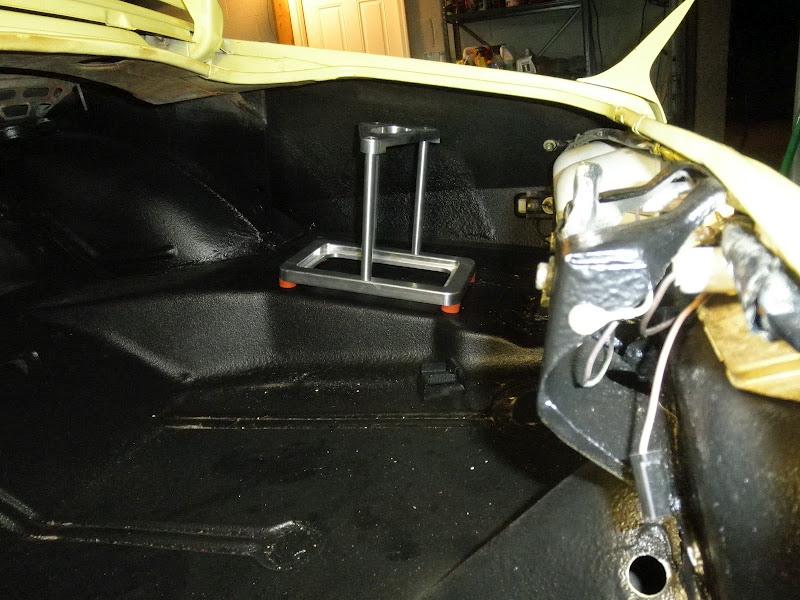
It is also hard to portray all of the little work that I have accomplished. Brackets getting powder coated and ready for reassembly. Acquiring the mess of crap I need to finish the car... Also got this done while I had the leaf springs out (provides better access to that corner of the trunk).
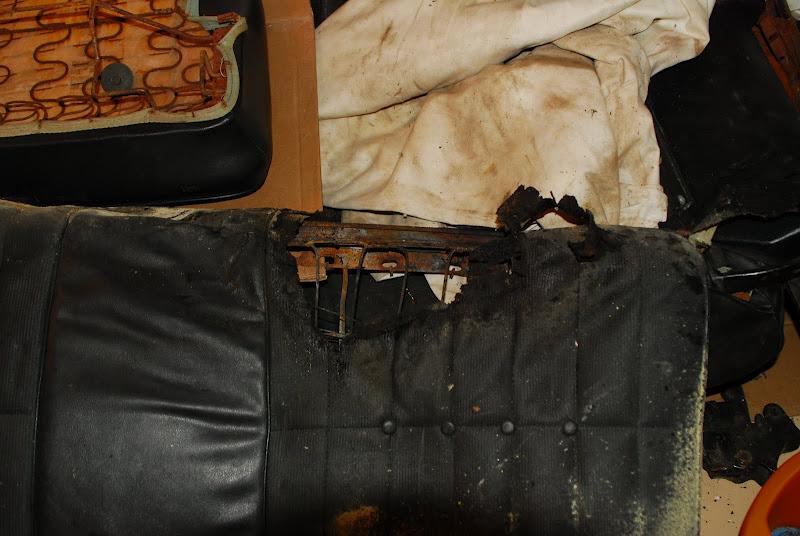
Local shop caught the interior on fire doing welding on the underside. As a result, the interior looked like this:
Little while later, I was hit in the quarter:
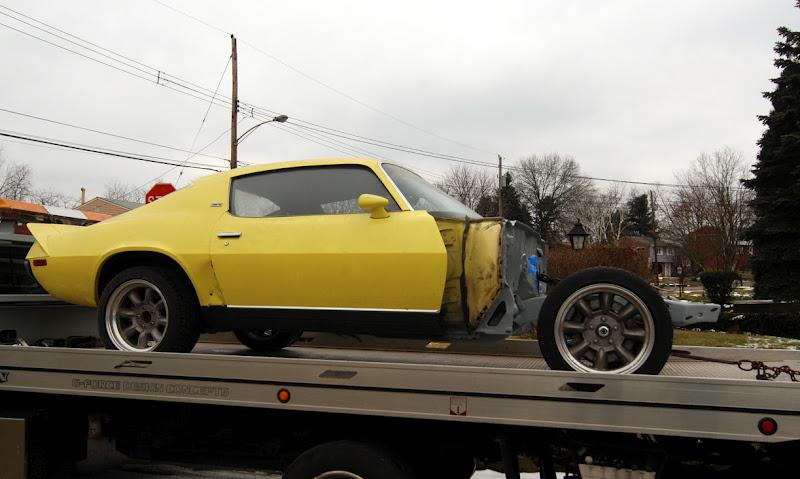
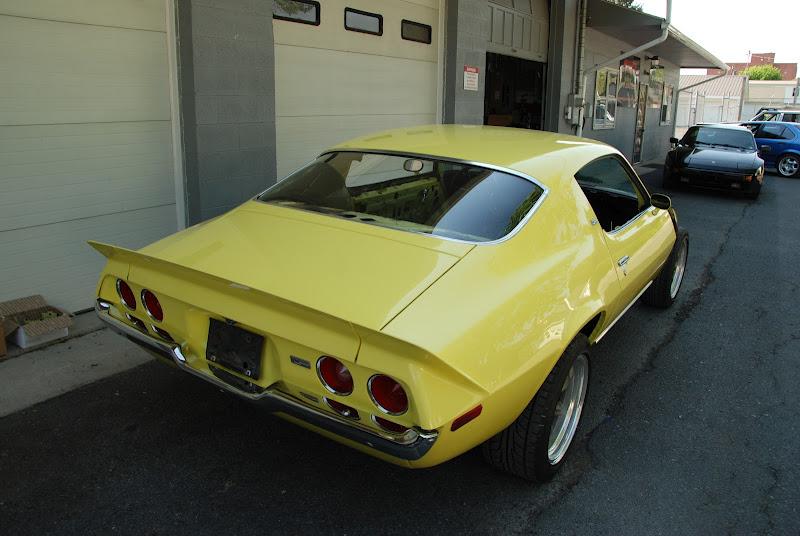
The shop refinished the floors and repaired the quarter. The quarter paint work was blended and the unibody wetsanded and cleared.
7/17/2012
Rob,
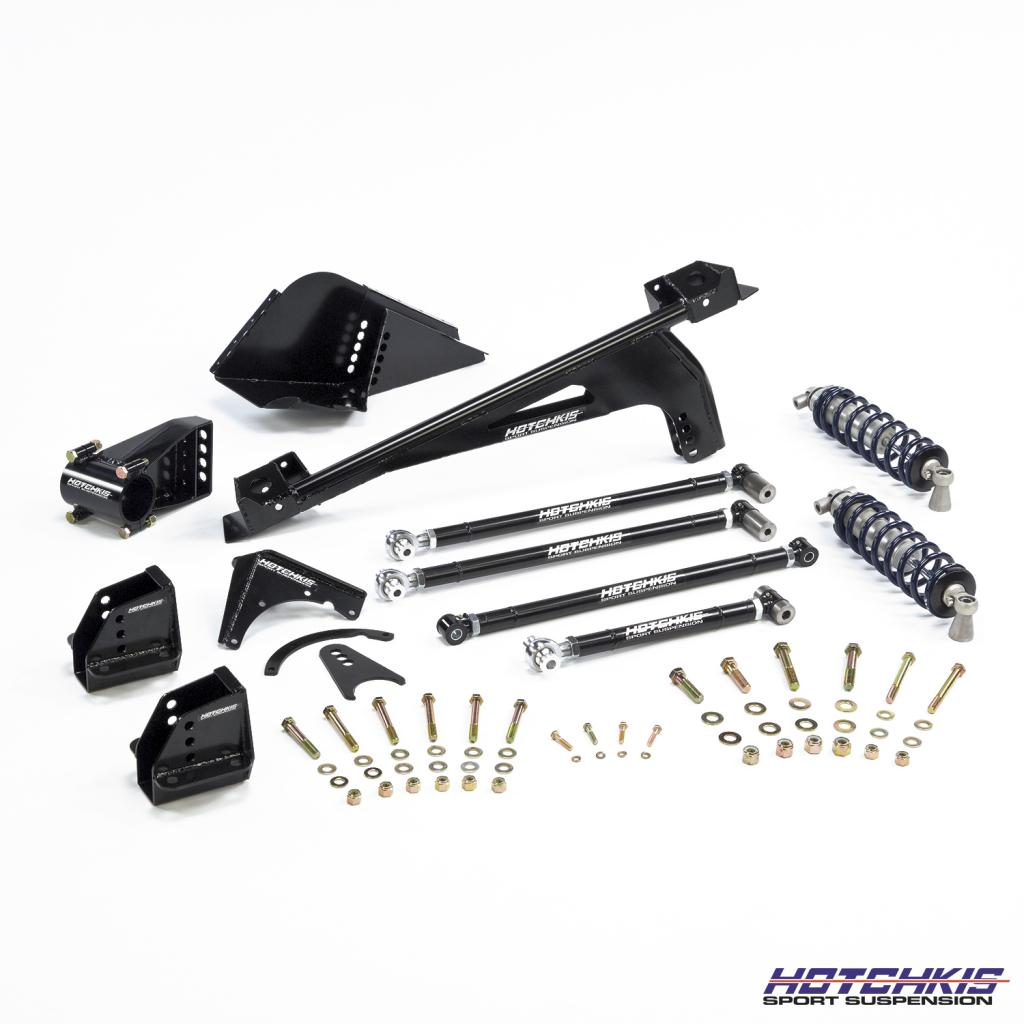
That Torque arm setup is pretty nice. I have also looked at Jakes Rod Shop's torque arm...
http://www.jakesrodshop.com/public_h...CTURES.html#18
I am really leaning towards Hotchkis' 3 link however. They are still in testing phase at this point though.
I will PM you my phone number. I may be away for meetings that week though.
7/18/2013
A little history lesson on this style wheel and also why I chose it. For starters, Panasports are copies of Minilites. Minilites have been around since the early 60's at least. They were used on various racing cars from SCCA to Formula One. The wheel of choice for early SCCA Trans Am was the American Racing Torq Thrust. As seen here on the 68 Penske Hilton/Sunoco Camaro.
Rumour has it that because of some wheel failures, the torq thrust was replaced with the Minilite. Here is the 69 Sunoco Camaro wearing them: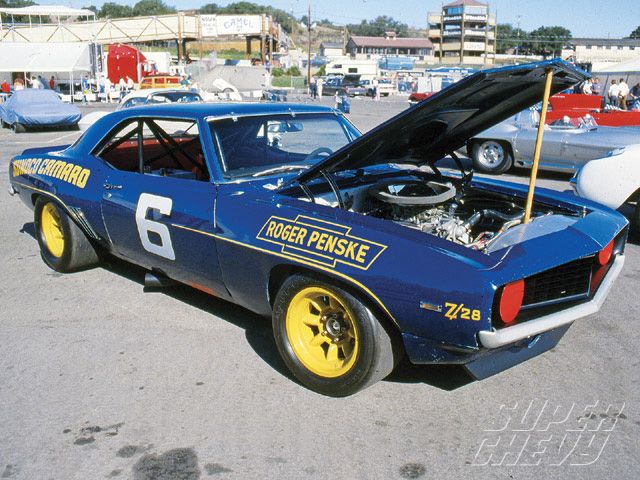
I don't like to speak in absolutes unless I am certain, but every vintage SCCA Trans Am 2nd gen I have seen is wearing Minilites. Here is the Warren Agor Camaro on them:
And here is my car on the 17" Minilites.
My choices for both the wheels and the finish on the underside and engine bay are to emulate the vintage Trans Am racers. Here is the engine bay of another vintage racer:
8/14/2013
Slightly boring update.
I have been away for work doing some training classes for our field guys and am now on a job assignment.
Air and Water, I am at a powerplant near KSC, but not on Space Center property.
For the updates:
- Headers have been shipped to Jet Hot. Jet hot tells me I should have them by the end of this coming week.
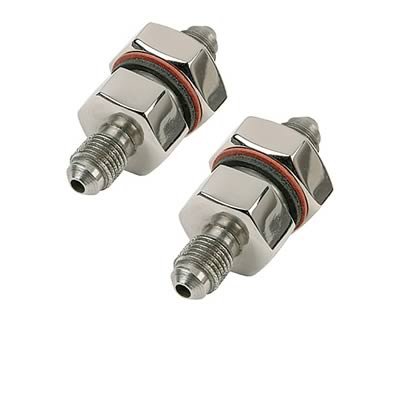
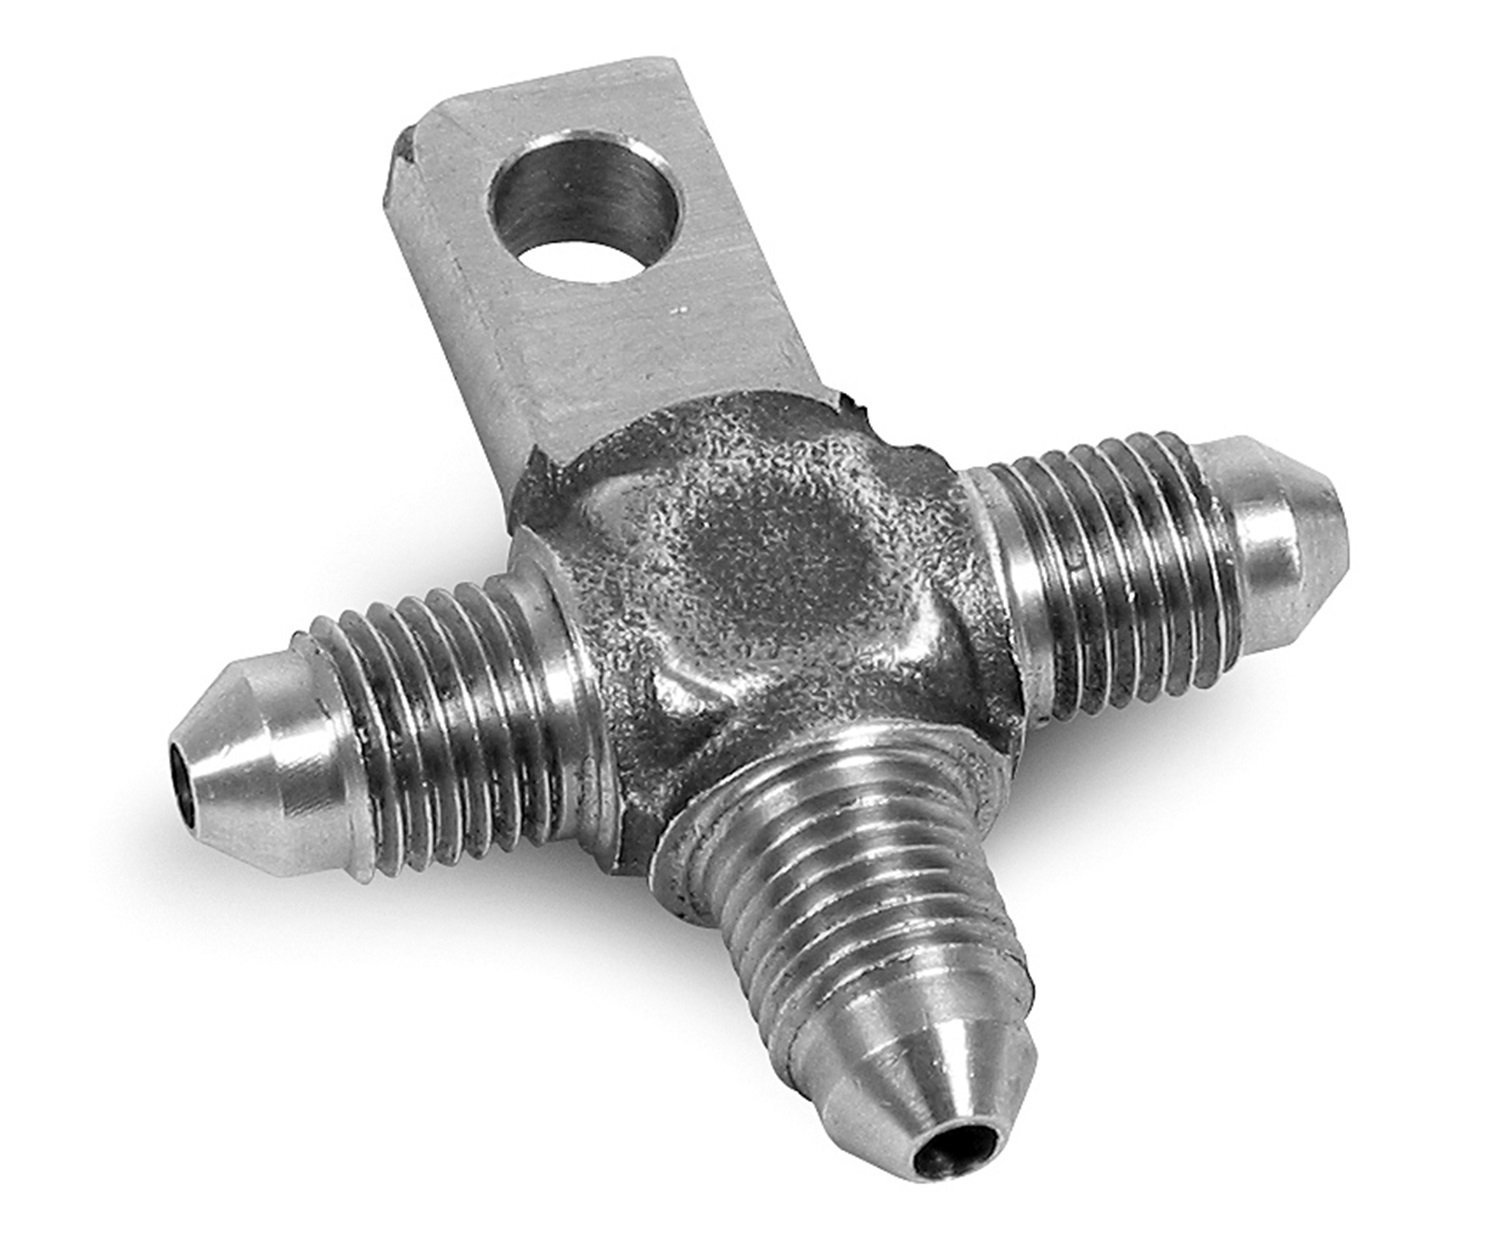
- I have purchased all the tools I need to fab my AN lines (Brake and fuel).
- I have ordered a bunch of the fittings I need to complete the plumbing.
- Several random pics below
- As soon as the headers return, I will begin assembling the front end.
9/23/2013
Yes yes, I suck at providing updates.
I have some engine assembly updates, just cant seem to find the pics. Headers, intake, harmonic balancer, water pump, starter, all installed.
Probably the biggest news I have is that I ordered deeper front inner fenders after taking measurements for the front tires. They are 1/3 carbon and 2/3 fiberglass. The exposed surface in the engine bay will be satin finish carbon fiber. Exactly as the pic below, just satin finish. They will hopefully ship at the beginning of October.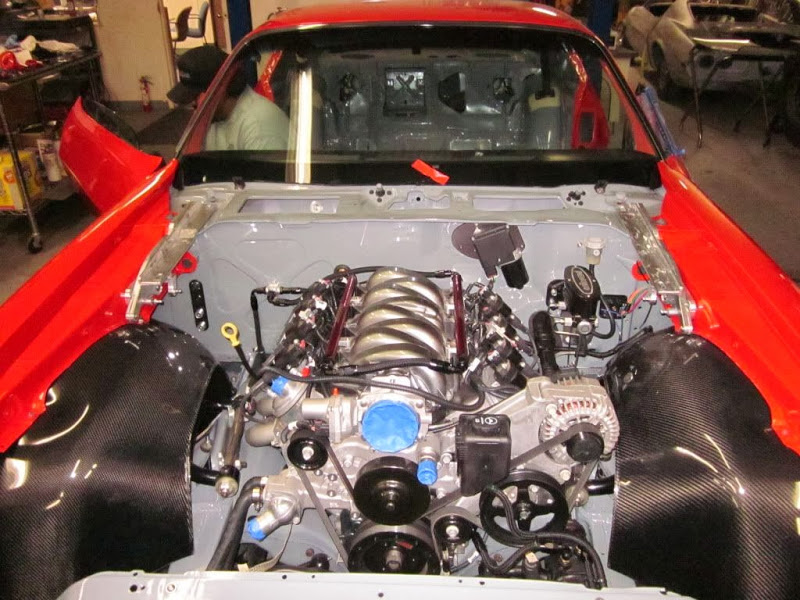
The headers are 304 stainless and were $799. So now I have $1200 into a set of headers...  I wanted the coating for heat control under the hood.
Yeah, it is frustrating to say the least. Oh well, we are really busy at work with the end of the fiscal year being September, so not exactly getting much garage time.
I have managed to get the majority of the ebrake and cabling fabbed. All of the Lokar brackets needed to be modified (one of them cut, bent and welded). Those are out getting powdercoated right now before I mount them on the car. The rear axle brake lines are done. Single flares were sooooo much easier than double. I also used that Nickel Copper tubing this time and it was so easy to work with compared to stainless. It could be bent without a bender. I still used my benders though to get really nice tight radii.
In regards to the bending and flaring... It isn't hard with the right tools. One drawer of my toolbox is dedicated to bending/flaring tools. Good benders make bends a piece of cake, even with stainless. Flaring can be tricky. Significantly more specialized tooling is needed. I have a Blue Point/Mastercool Hydraulic flare tool and a Ridgid 37 degree flare tool now. The Blue Point/Mastercool is a really nice piece and dies are available for every type of flare possible. Since I eliminated the stock distribution block and master cylinder, all of my front lines needed to be custom along with the axle since it wasn't stock. I just plunged right in and bought everything needed to fab them.
As far as the heat control with the Jet hot coating, it should be pretty significant. Literature out there states it should reduce the surface temp of the header by 50%.
Yeah, a month will be tough, but I have other small things to work on along the way. I just need to be better about posting updates.
9/24/2013
Some crappy cell phone pics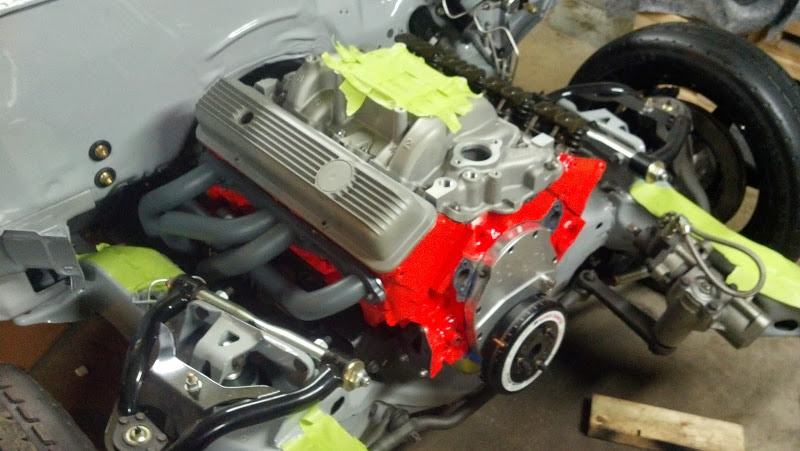
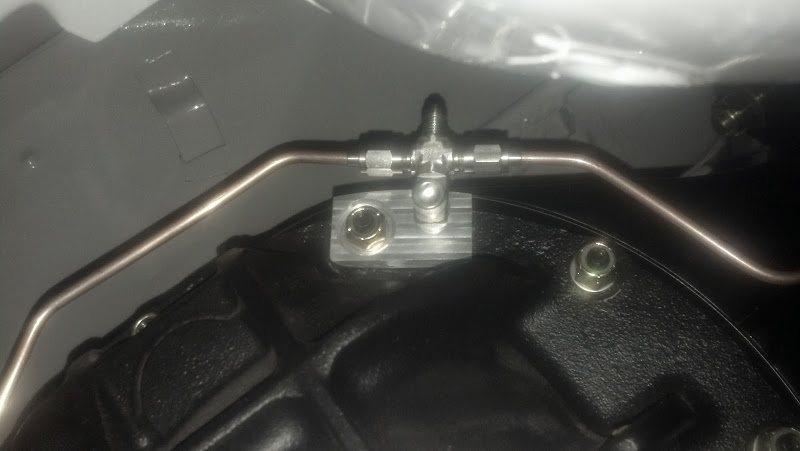
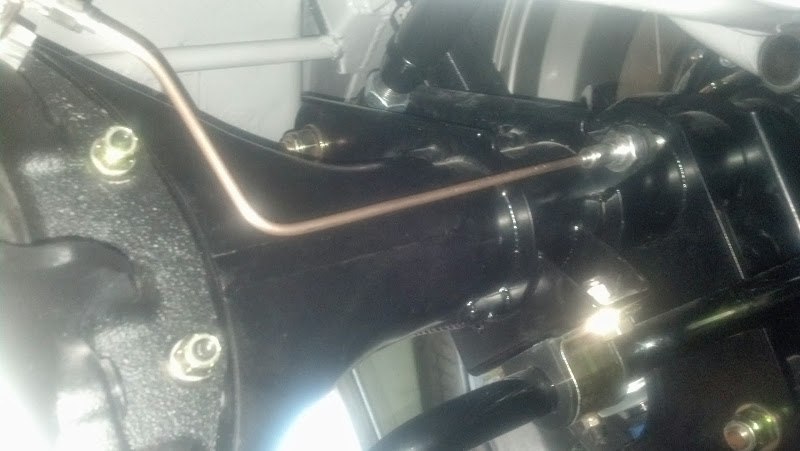
Cut, bent and welded up bracket for the ebrake cable adjuster
11/14/2013
I figure I will tease everyone into thinking there is an update. There are several little things, but nothing major, nor pic worthy. I still sit waiting for my inner fenders to do the front end assembly 
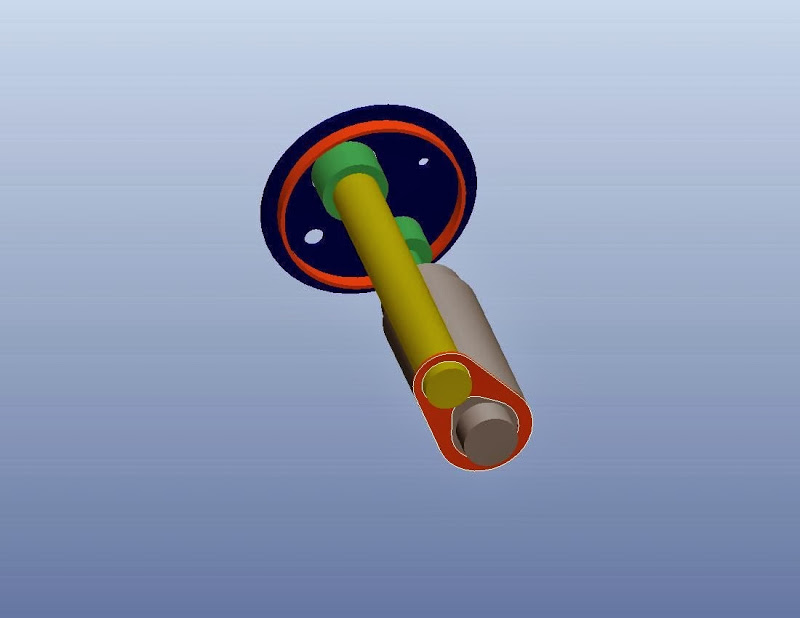
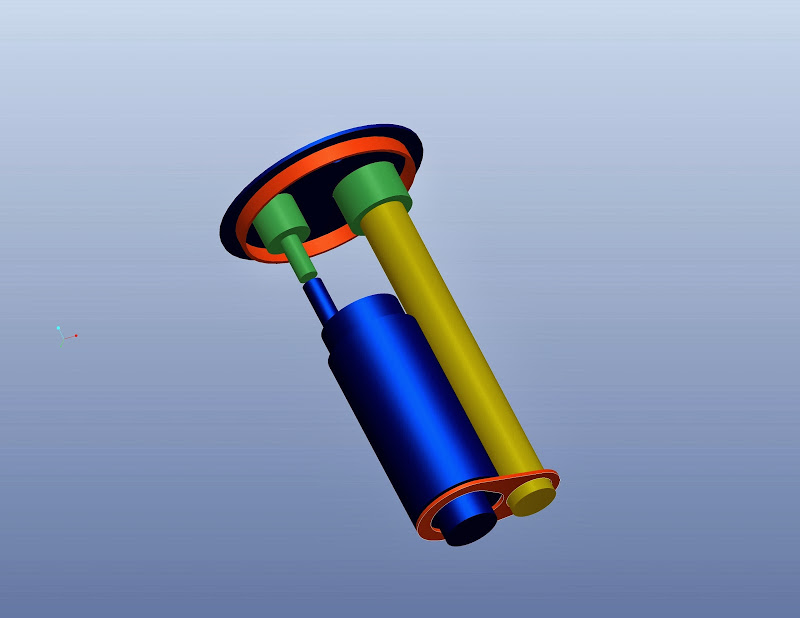
In the meantime, I am building a new fuel pump pickup to use my in tank pump with a carb. I will post the Pro-E model later tonight of the new fuel pump pickup.
11/15/2013
BLAH BLAH BLAH. Boring stuff. I hate my job. Been on the road for basically the last 6 weeks. UGH. Anyhow, at least I could work on this stuff remotely.
Long story short. Bought an EFI tank because I got a good deal on it. However, carbs don't use same pressure nor flow as EFI so I have to regulate it down. This also necessitates enlarging the return to handle the amount of fuel the regulator will be dumping back into the tank. Explored several avenues, easiest was redesigning the in tank pickup to work properly with the carb. Models below. Parts getting laser cut this weekend, welded next week. THEN I plumb my fuel system.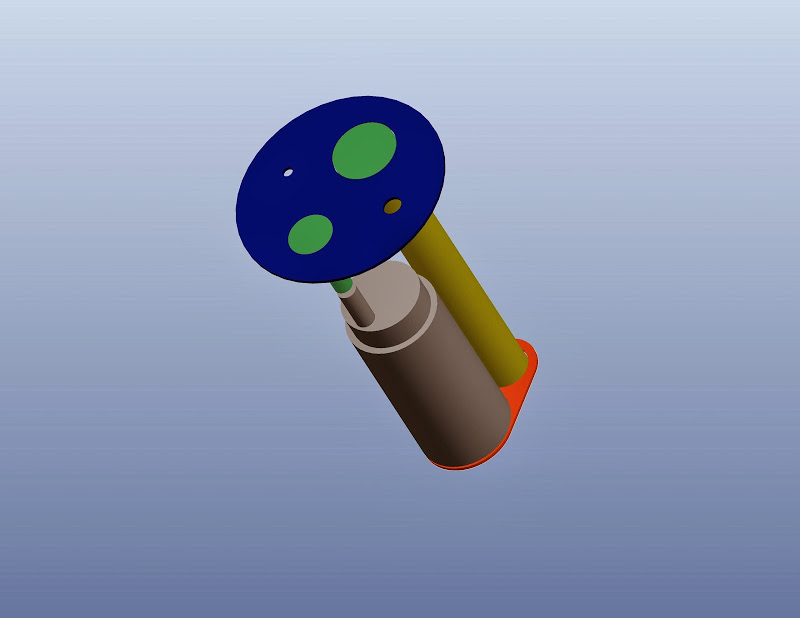
12/28/2013
It won't take long once I get back from vacation. For now though, I am enjoying sunny Florida for a few more days before I return to the frigid north.
I can't seem to get away from wrenching though. Dads car needed some refreshing in the fuel delivery department (stock replacement stuff). The car is minty and 100% stock, just is suffering from lack of use. 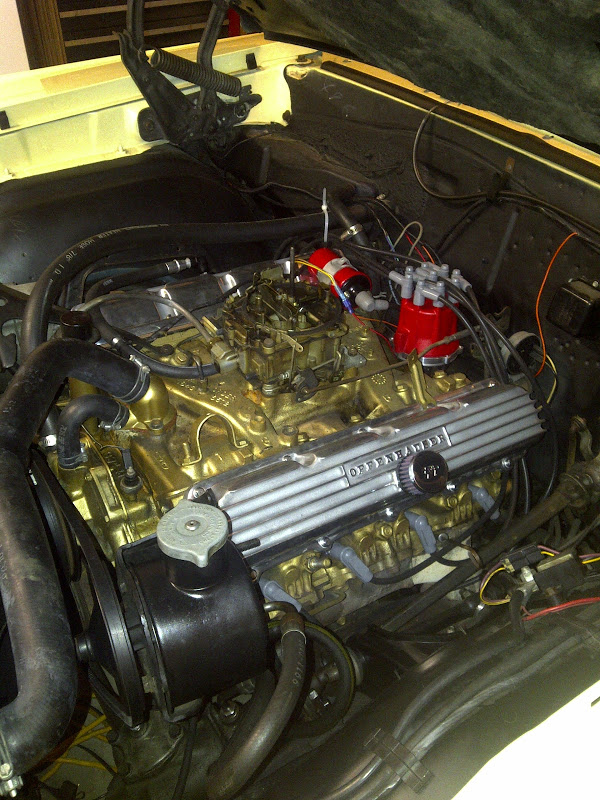
4/10/2014
Well, inner fenders, core support and some of the accessories finally on the car. Waiting on some machined parts to finish the accessories as there were some significant belt fitment issues with my Type II power steering pump. Radiator hold down plate out getting powdercoated right now. Fuel lines on order. My basement is finally emptying out of large parts.
just running standard V belts. I made a promise that I would not dump a ton of money on this motor. I looked at the Vintage Air Frontrunner setup and just didn't feel like spending the money on it. I have OEM brackets and pulleys for the water pump, crank and alternator. The PS pump was upgraded to a Type II GM unit long ago and the only thing i needed to order to make this work was the Billet Specialties A/C Bracket. I am using the same bracket I already had for the PS pump, just flipping it down 180 degrees. The pieces I am having machined are just to space it out properly to line up the belts.
8/2/2014
Ok, it has been ages since an update. I just haven't been able to work on the car. The daily driver got in the way a bit too as I needed to do an evap/heater core job. BAH. And now, contradictory to a post several up above this one, I ran into issues trying to make the V belts work with the Type II power steering pump. Ditched it in favor of a Vintage Air Frontrunner assembly. We knocked it out last night as it was pretty easy to install.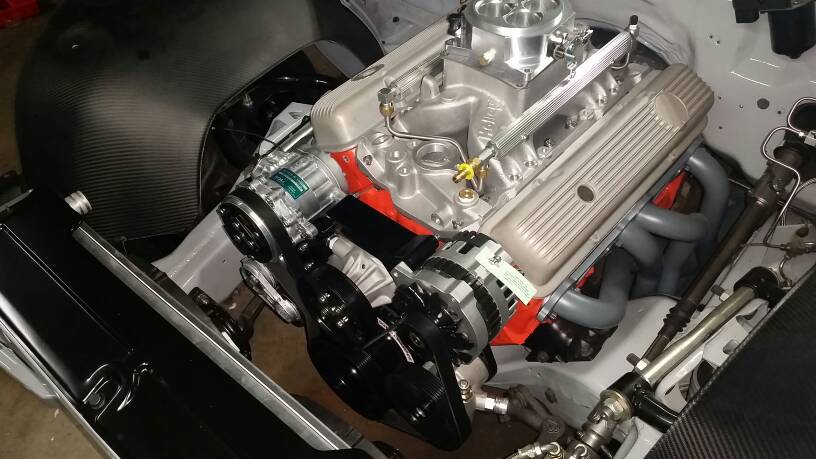
I originally wanted to incorporate something like this: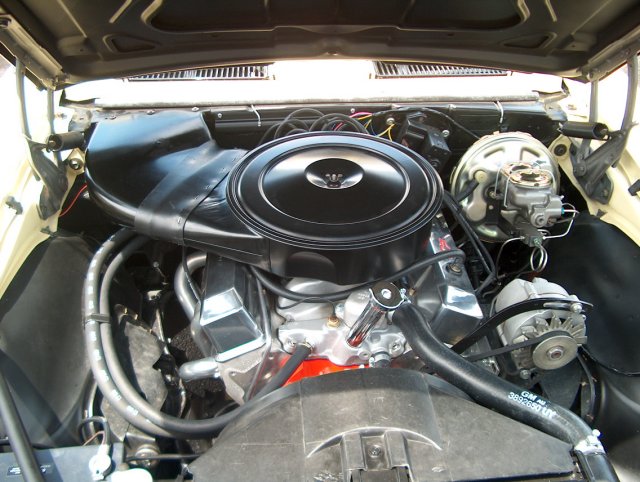
However, I am not going to cut a whole in the firewall to do so. I am really not sure yet to be honest and am in complete agreement with you in regards to a regular 14" round cleaner assembly. Since i intend to run the factory valve covers, I may just stick with the factory piece and see how it looks. The factory lower piece doesn't clear the throttle body linkage. I will try using a small spacer on top of the throttle body, but may need to swap the lower out for something with more clearance. The one saving grace in using a boring 14" round cleaner is that is what came on my car... 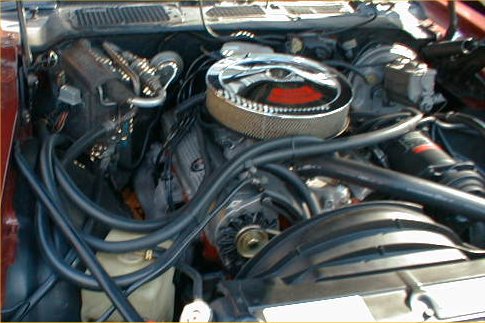
11/21/2014
Ok, I owe you guys some updates. I have been working on little things here and there in between field assignments.
The gas tank caused me nightmares. The smaller footprint tank to accommodate the mini tubs and 4 link would not locate properly on the frame rails. As I tightened the straps, the tank would pull too close to the rear tail pan and the filler neck didn't line up. This piece was drawn up. The pieces were then laser cut and welded. It locates on the same bolt that the strap goes to. Simple but elegant enough. It works perfectly. The gas tank is now permanently in the car.
Now onto the hood latch. I ordered a repro hood latch as the factory piece was never meant to be disassembled. This was all in the name of having a pretty one that matched all of my other fresh paint.
Here is the old piece. Solid, but just needing fresh paint.
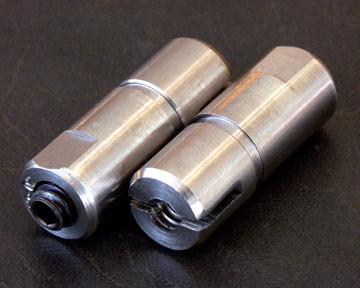
Ok, so keen eyes will notice that they basically have pivots/pins that were pressed into shape and not removable. The repro piece just wasn't up to snuff... So, I destructively removed the pins. Measured them up. Drew them in CAD. Then machined them with grooves for C clips/snap rings. The parts were all powdercoated prior to reassembly.
Finished product:
I also ordered this since I got a killer deal on a blem. Satin CF power bulge hood. Top side will be body color. Underside will be satin clear to match my satin clear inner fenders!!!
Not a great pic (Someone needs to tell Andrew San to lower his exposures a bit), but here it is installed on another car. 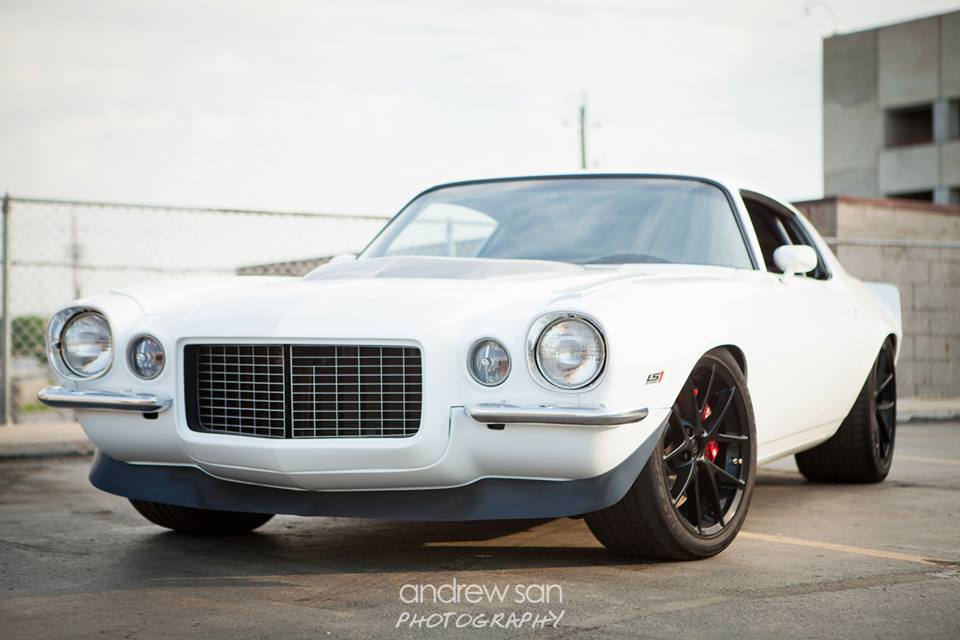
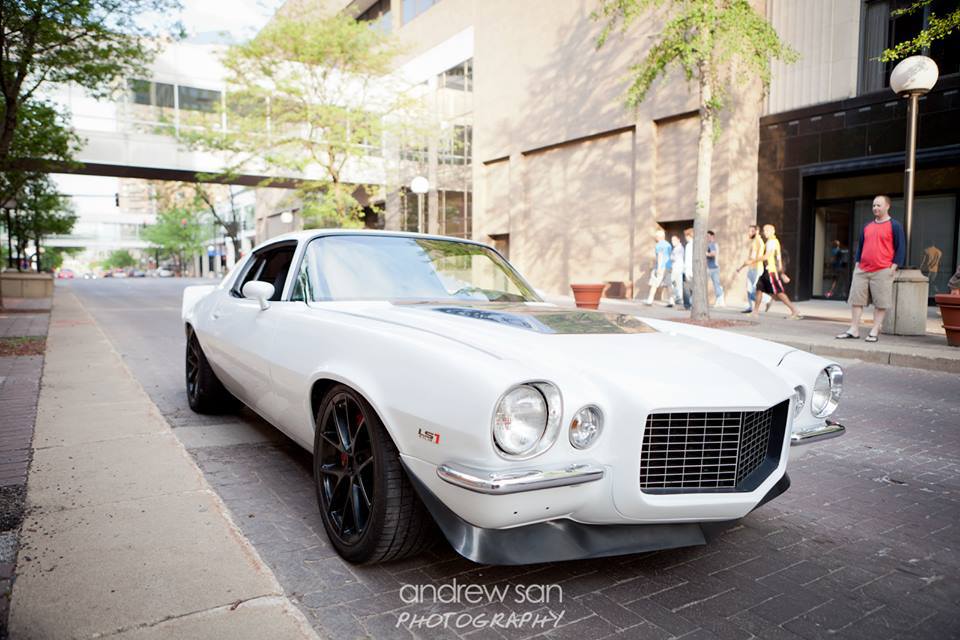
11/30/2014
Ok, so everyone clicking on this thread will be expecting to see a Camaro update. Well, I hate to disappoint, but this post has absolutely nothing to do with the Camaro.
A deposit has been placed on this:
I expect to close the deal after I return from my business trip in a week. I couldn't be more stoked at the moment. I assure you guys this will not distract from finishing the Camaro. I found what I feel is a killer deal on ever increasing aircooled 911's and it is a bucket list item. 88K miles. Pristine. Meteor Gray (961 Paint code) over bordeaux red leather. Never driven in the winter. Only nit to pick, one squeaky suspension bush somewhere. I may end up replacing the Cup 1's with Fuchs, only change I may make... Expect a ton more pics when I bring it home to hibernate until spring.
4/29/13
You had asked a while back about the locating brackets we made for the gas tank. I crawled underneath the car tonight to snap these.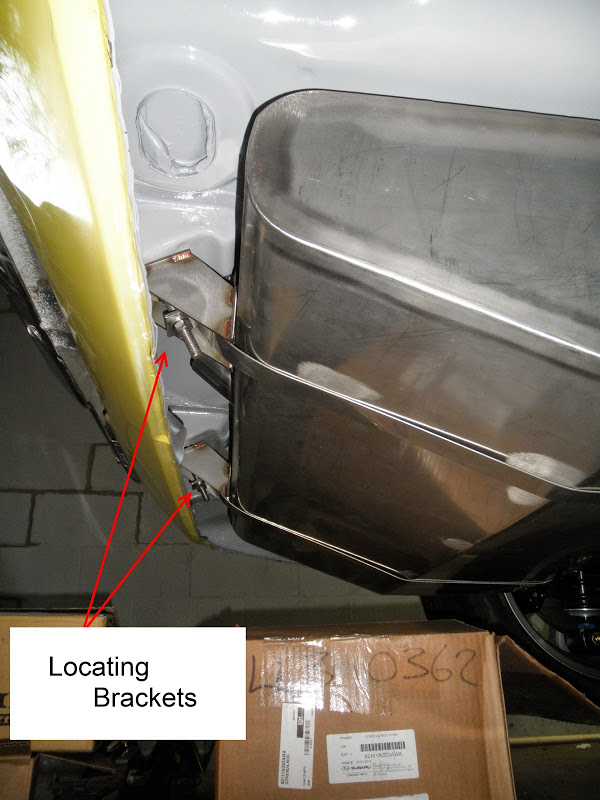
I am ordering power cable for the trunk mount battery this week!
I will still need exhaust, but I will definitely fire it up with open headers. Cause why the eff not
5/4/2015
30 feet of 1/0 ordered. Who wants to help wire the beast up?!?!
I have got an American Autowire Classic Update harness, the EFI and the Vintage Air setup. Should be lots of fun!
1/31/2016
I haven't updated this thread in ages. This project certainly isn't dead, just a little stagnant.
I currently have the front suspension apart as I await for my JRi shocks to replace the QA1's. The DSE Quadralink came with JRi single adjustables, so I wanted the fronts to match. I won't get into it on here, but just ordering those shocks was a f*cking ordeal.
Here goes my exciting (at least to me) update for today. I will try and make this short and sweet. The Keisler shifter didn't come up perfectly centered in the opening in the floor. This was going to bug the isht out of me. I fired up Solidworks and drew this little piece up and then printed it up on the 3D printer at work: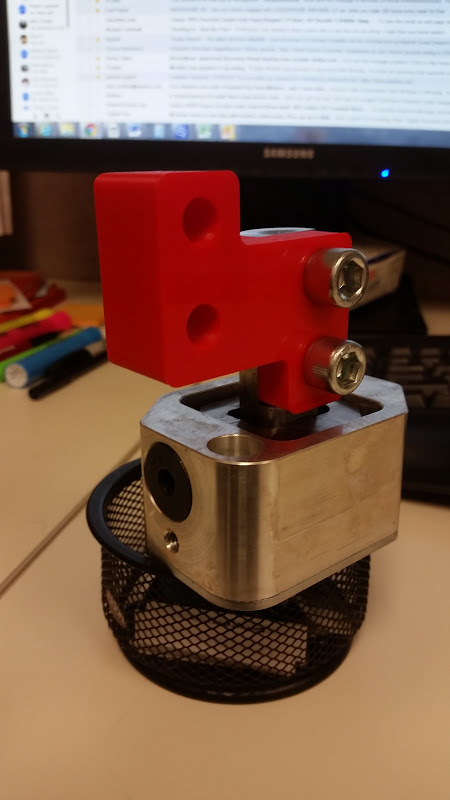
Test fit in the car with the shifter: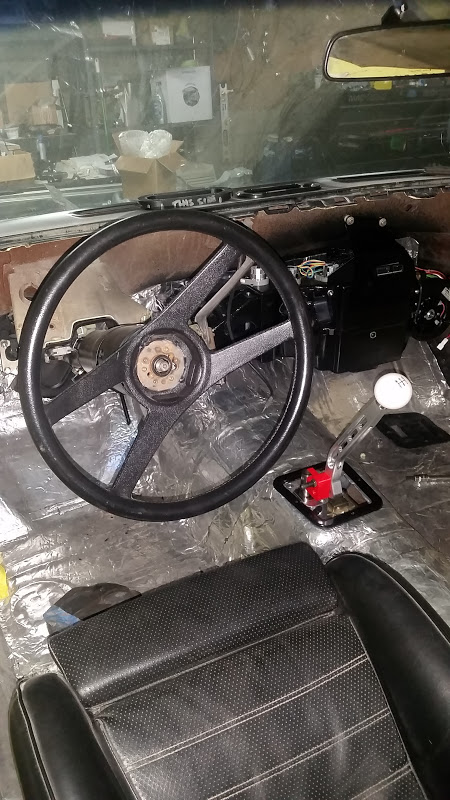
The machined part was finished this week and I buttoned up the shifter linkage this afternoon. Please excuse me for the vertical video. With the shifter much taller than wide, it made more sense to shoot it this way. There will be some updates in the coming weeks as I finish tidying up the harness. Need to order my Amphenol bulkhead assembly for the Holley harness...
I should have my custom JRi's in two weeks or so. As soon as I have them, it will be back down on all fours.
The cliffs of the shock ordeal... Apologize in advance if this is long winded.
- Remove QA1 shocks
- Measure QA1 shocks
- Call JRi and tell them my setup and give them the QA1 specs minus valving
- JRi tells me that since I have a DSE rear setup, I should deal with them
- I kindly explain to JRi that I DO NOT have a DSE front setup
- They still tell me to call DSE
- Call DSE
- First guy takes my info and says this shouldn't be a problem
- I wait a few hours. Get a phone call back from DSE telling me to go JRi
- Few phone calls and emails later, I finally end up talking to the DSE operations manager
- He agrees to help me out and deal with JRi to spec out shocks that will work for me.
I mean f*cking christ. I even admitted to both parties that I won't know squat about the car until I put some miles down tuning the thing. I very well may need to re-valve the shocks at a later date. Though they are adjustable, so I should be able to get close.
Also, once I have it on the ground, i will measure for the driveshaft.
You can try to picture it with all 4 down with these two shots:
1) After I mounted the 18x12's out back. The fronts in this pic are the 17x8's that are long gone.
2) Here are the front 18x9.5's tucked inside the carbon inner fenders
2/16/2016
There are only a couple of options for Minilite (NOT PANASPORT - Yes, I am looking at all of you that call this a panasport style wheel) reps in these sizes. ET and Vintage Wheel Works. VWW stops at 17x11. So my money went to ET. I also think the ET wheel is more attractive. VWW's spokes are almost completely flat in nature and do not curve out. The only thing incorrect is the lip around the hub pad. That was used on a slightly different Minilite variant and I am not sure why both ET and VWW chose to incorporate it.
Vintage T/A racing Minilite for reference: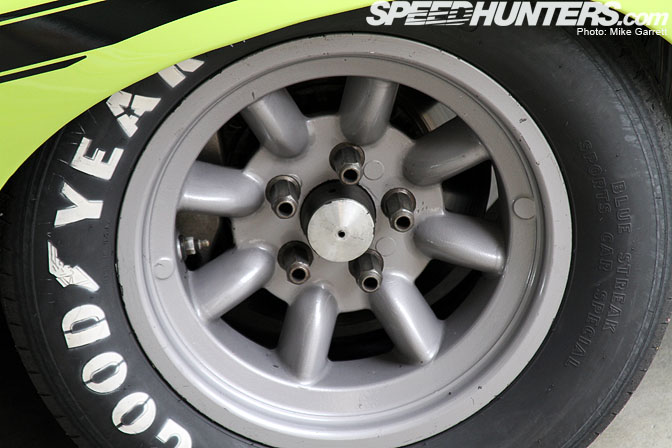
VWW: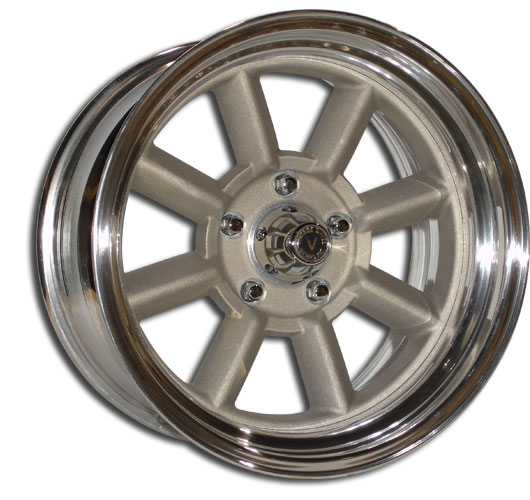
Minilite sport with the lip around the hub pad:
2/16/2016
And now for a small update.
The new reproduction dash is installed. Had to take two pics. The iphone camera didn't go wide enough. National Parts Depot has retooled this piece and I have to say, it looks great.
With the help of a buddy and some brainstorming, we picked this spot for the ECU. It is right above the Vintage Air unit on a small flat section of the body.
If you look closely at this pic, you will see a sharpie mark next to the vintage air bulkhead and on the dynamat. That is where the wiring bulkhead will go.
Nut inserts / Rivnuts / Nutserts were used for mounting the ECU. I still need to drill the upper two mount holes out a touch. I need a right angle drill to do so... Hoping to snag that tonight.
3/16/2016
Random dribblings
My new job is pretty consuming and I don't really have a ton of free time. Been paring down the EFI harness in preparation of soldering the bulkhead. Since HP EFI is meant to be used on a multitude of applications and with different distributors, extra sensors, blah blah blah, there is a bunch of isht I don't need.
Before pic - Two blue arrows on left were for sensors I will not be using. There is a third not in the pic as well. Blue arrow on the right is excessive length. 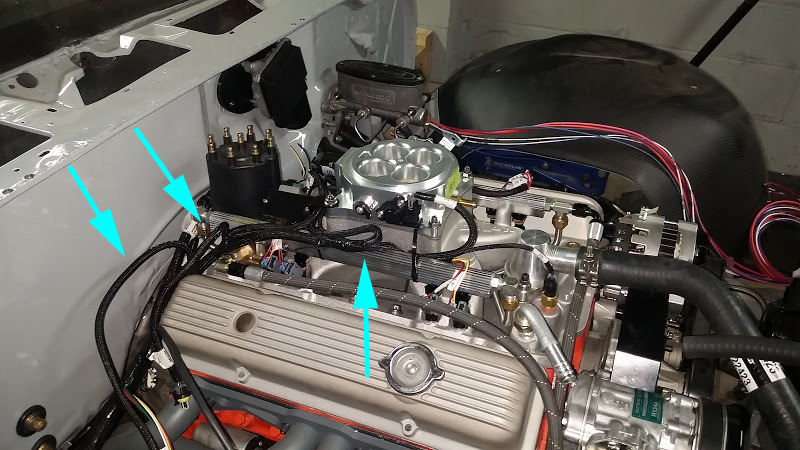
Post pic showing the same harness with all of the extra isht removed:
Here it is back off the car with split loom back on most of it:
And last but not least. Some shock smut arrived today. Front JRi Shocks to match the rear JRi's that came with the DSE Quadralink.
5/26/2016
Anti-climactic teaser.
Received the shocks a while ago. The springs were then ordered about a month ago.
I spent two weeks out of town for business trips and my sisters wedding. First focus when I got home was to get the 911 to paint for the decklid.
Last night I started putting together the front shock assemblies so I can set this beast back down on the ground. Ran into a stumbling block when I noticed I didn't have cotter pins for the lower ball joint castle nuts.
So... To be continued. I did get the one side together and torqued. See below. The car will be down on all fours Saturday.
5/27/2016
Ok, couldn't wait til Saturday.
I clearly guessed wrong on the ride height, but hey, thats why they are adjustable. I will let them settle for a bit before I start making adjustments.
Also, please forgive the poor focus on a couple of these. I think my Nikon has some issues.
5/30/2016
Gave her an altitude adjustment today. Once the car is all together, I am sure it will need some tweaking. I will also corner weigh it eventually.
Anyhow, at least for the time being, she looks much better.
Love the 70’s Cameros!
Posted by Diggymart on 1/29/19 @ 2:44:21 PM