You must be logged in to rate content!
4 minute read
Hood Pad Installation
Compliments of ProfessorCook @ www.bimmerfest.com
Thanks to a good thread (http://www.bimmerfest.com/forums/sho...d.php?t=393092) and encouraging information there, I decided to get a hood pad.BMW lists the thing as an insulation pad. 'Haven't driven it yet to see if things sound different. I rather doubt they will. I do think the pad will keep the hood cooler. I've noticed how quickly water steams off the hood after a drive.
I was able to buy the pad directly from my dealer at the same cost that Tischer would have charged, but of course without the shipping.
The pad feels like a strange sort of sandwich: two stiff pressed fibrous layers sandwiching different regions of soft foam. It's about 4.5' by 2.5'. (The yard stick shown is, oddly, a yard.)
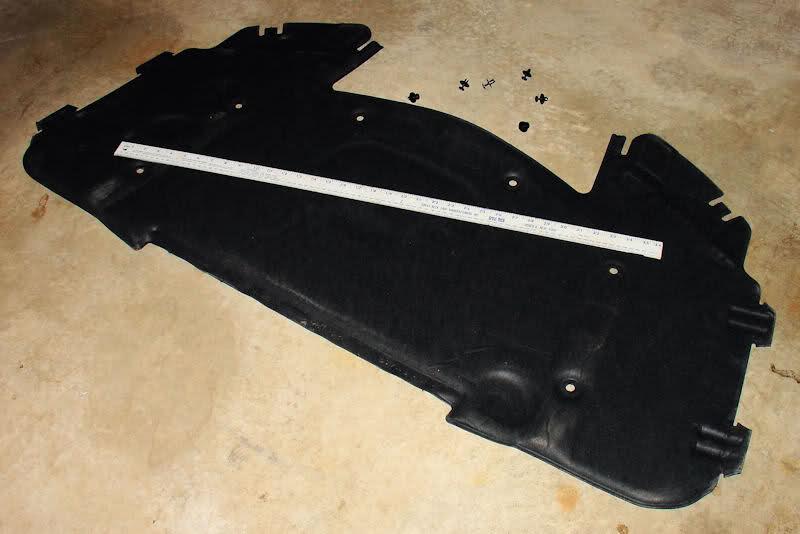
You'll also need six plastic rivets, but I'd order eight, just in case.
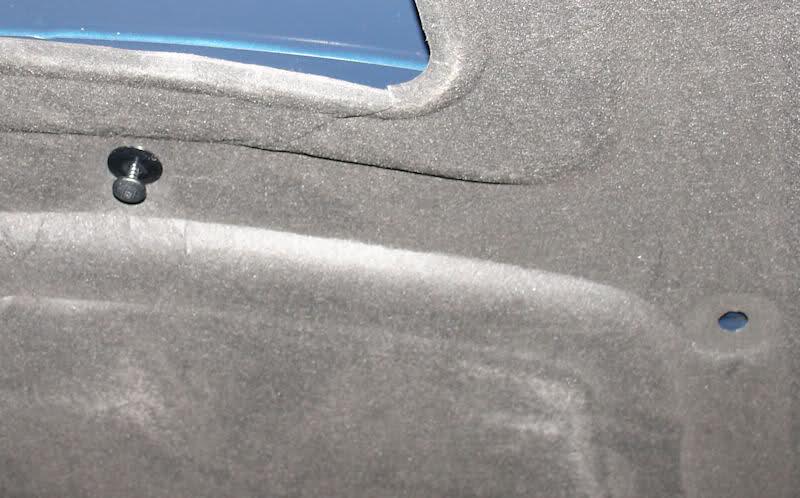
When you look under your hood, there are some pre-existing slots (red arrows) into which tabs on the hood pad will slip. Closer to the windshield, there's a long slot (red line) into which the back of the pad slips. There are also six holes, roughly 1/4" in diameter (green arrows) in the ribs under the hood into which will go the rivets.
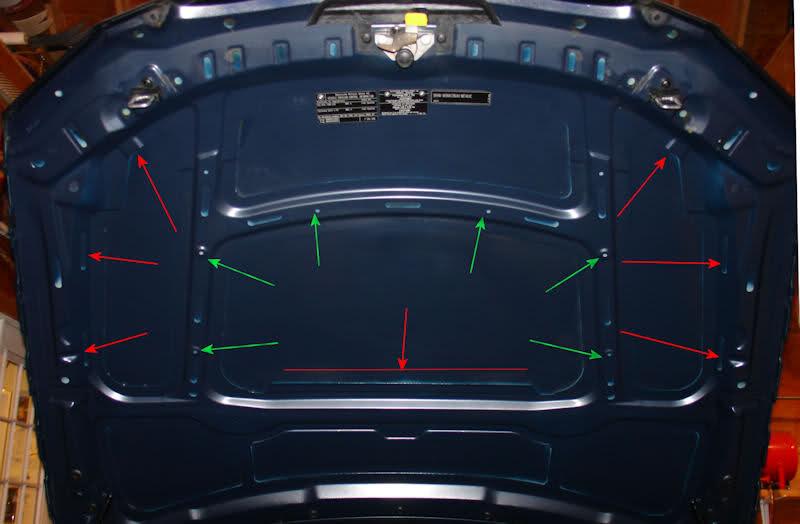
You install the pad by simply fitting the tabs into the slots. When that's all set, you press the rivets into the holes being careful to push them in by their flanges, not the push pin style head.
Only when everything is right, should you push the heads home thus locking the rivets.
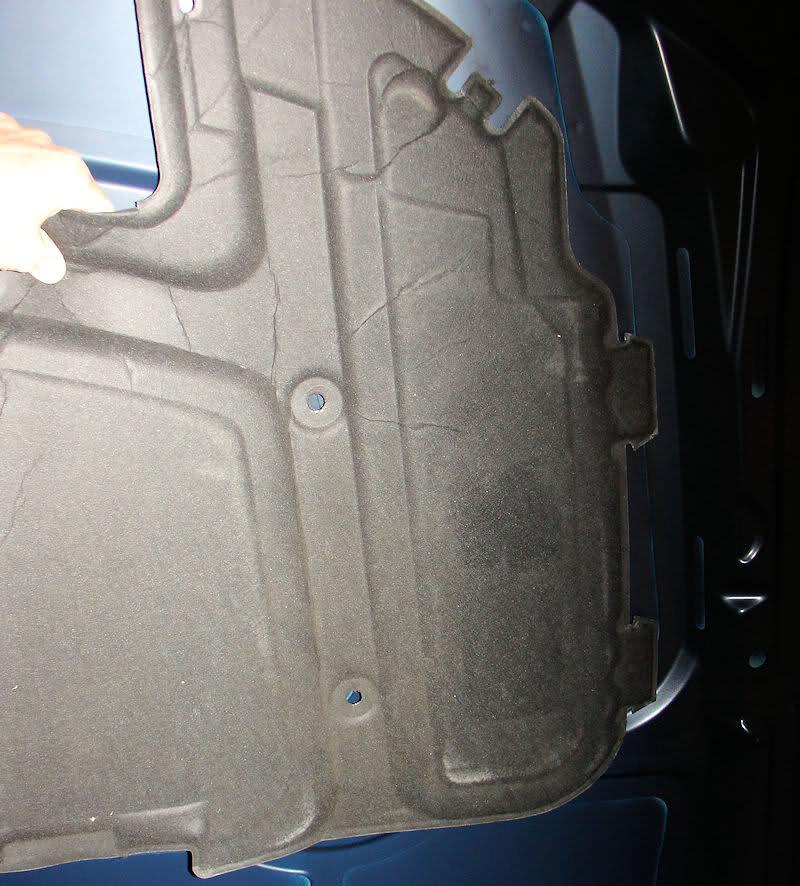
So what can go wrong? Well, if you look at the previous picture, or the next one, you'll see that I installed the pad with the rib troughs facing me. That's a mistake. Those troughs are molded into the pad, of course, to fit around the ribs and allow the pad to fit flat up against the hood. I had unfortunately pushed home all the rivets before realizing this and slapping myself on the forehead with a sharp, Homer Simpson "doh!"
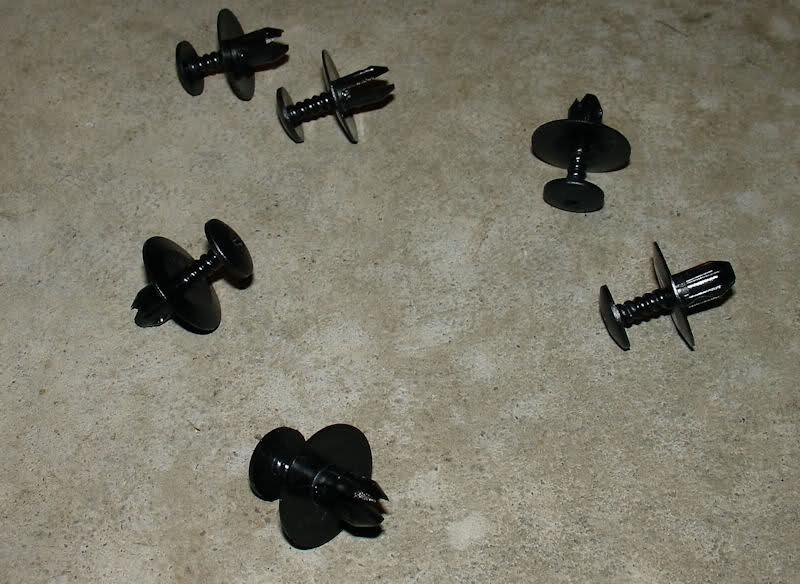
If you have a pair of diagonal cutters or one of those shown in the next picture (as I was lucky enough to have handy), you can grasp the inner part of the rivet and pull it out and then remove the rivet body.
However, great care must be taken! If you squeeze the pliers, you'll cut the inner part of the rivet. You'll then have to drive the pin out the backside and pull out the flange. Fortunately, I didn't do that. What I did do though, is drop a rivet into the engine where I heard it rattle down to the pan below. With a stick and a loop of duct tape, I was able to retrieve it. But I got extremely lucky. That's why, for something like 50 cents each, I recommend you get a couple of extra rivets.
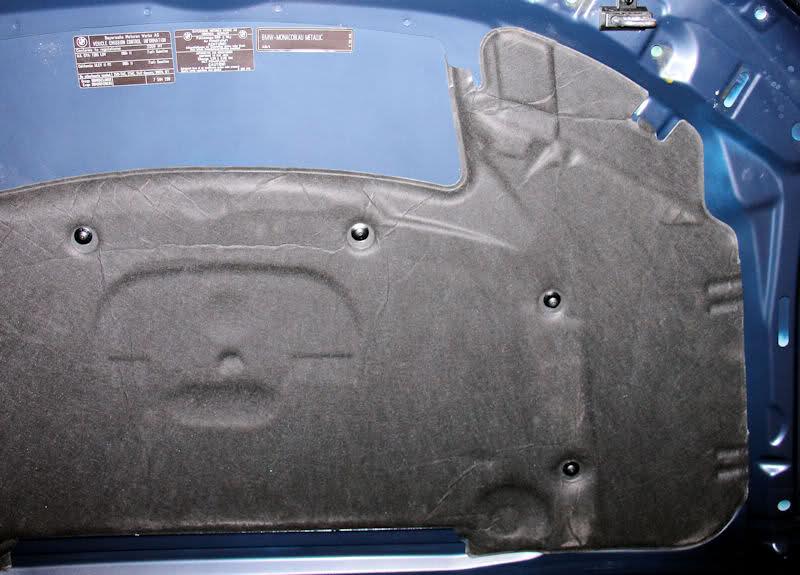
When it's all done, it the hood pad fits something like this.
If you're careful not to install the thing upside down, not to lose little plastic rivets, and are not taking pictures, you can probably do the whole installation in five minutes or so. You could probably even do it in the dealer's parking lot.
For less than $80, it's an easy mod that just might make a difference to the longevity of your paint.