You must be logged in to rate content!
61 minute(s) of a 219 minute read
6-7-2012
6-7-2012
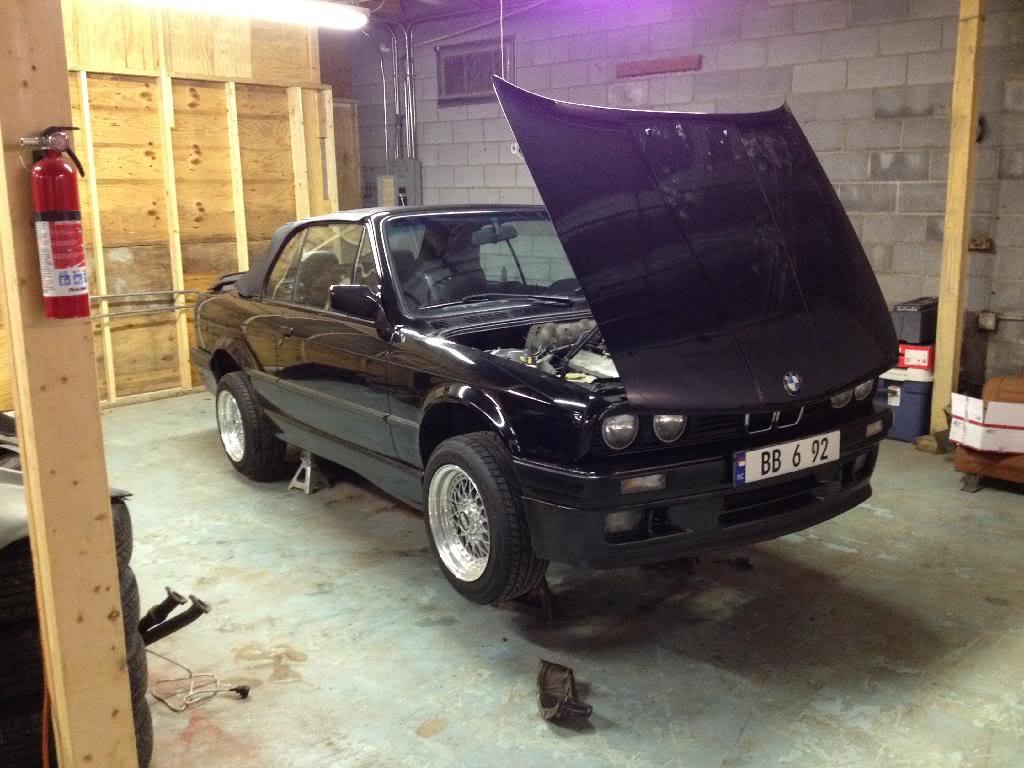
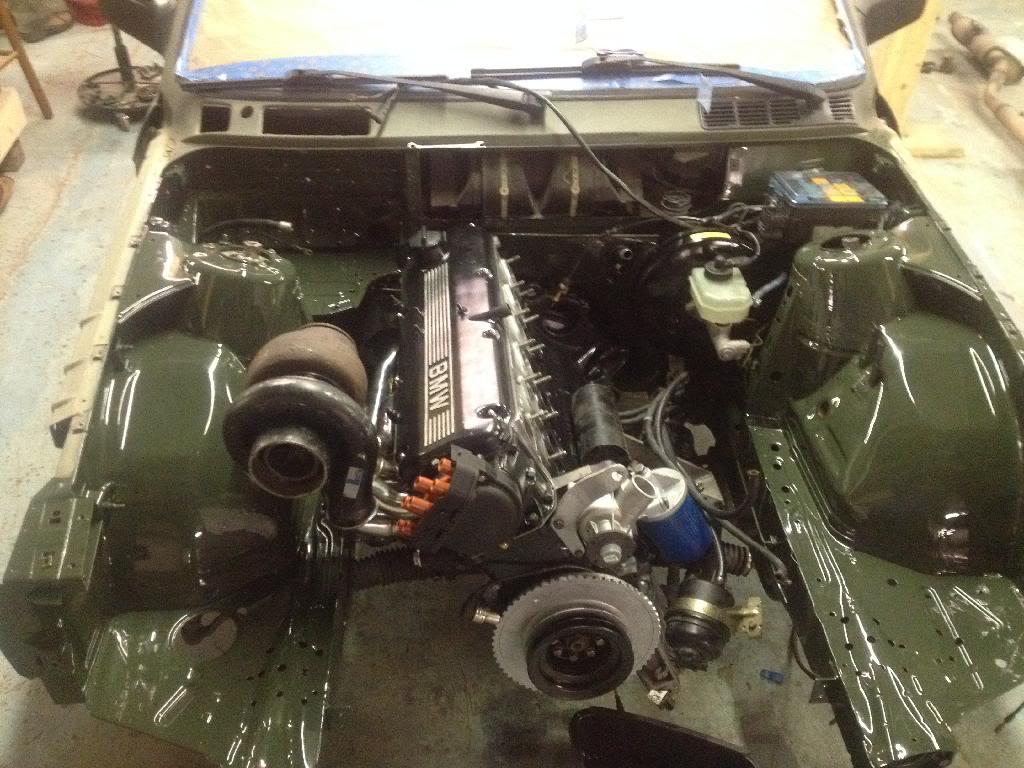
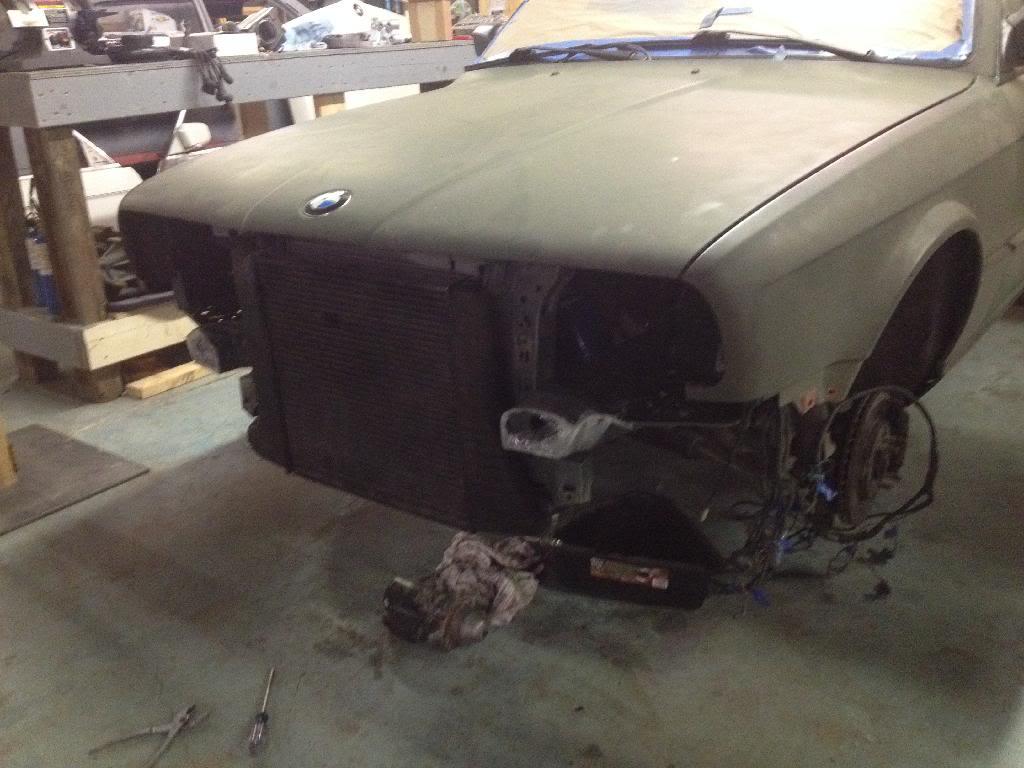
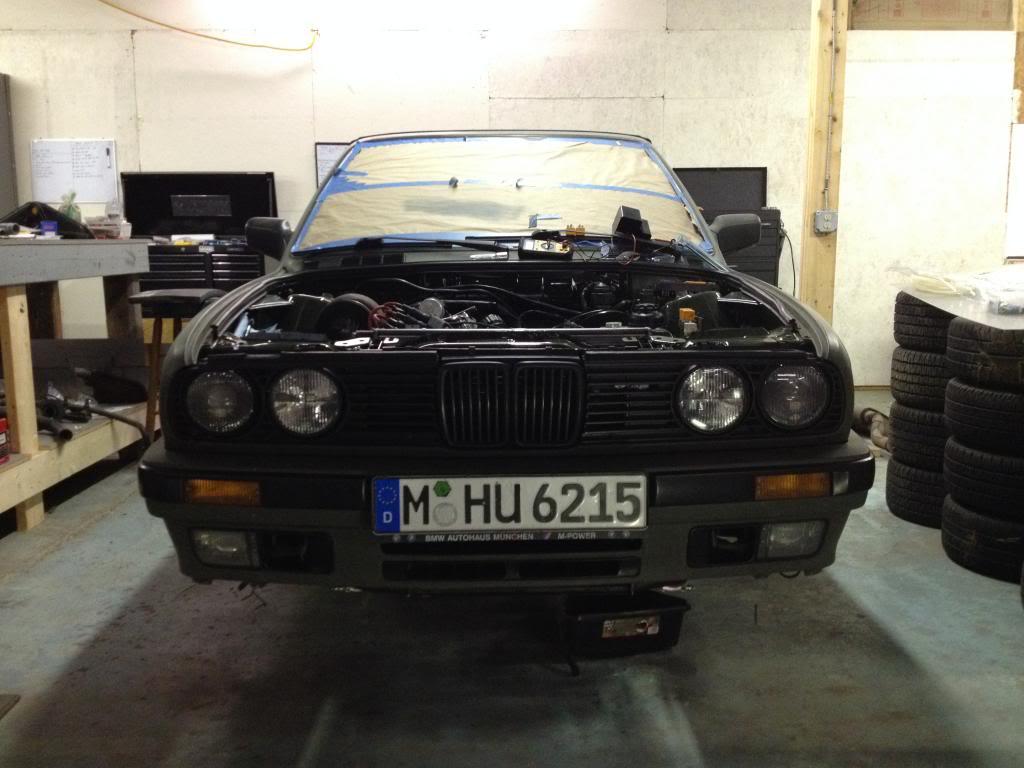
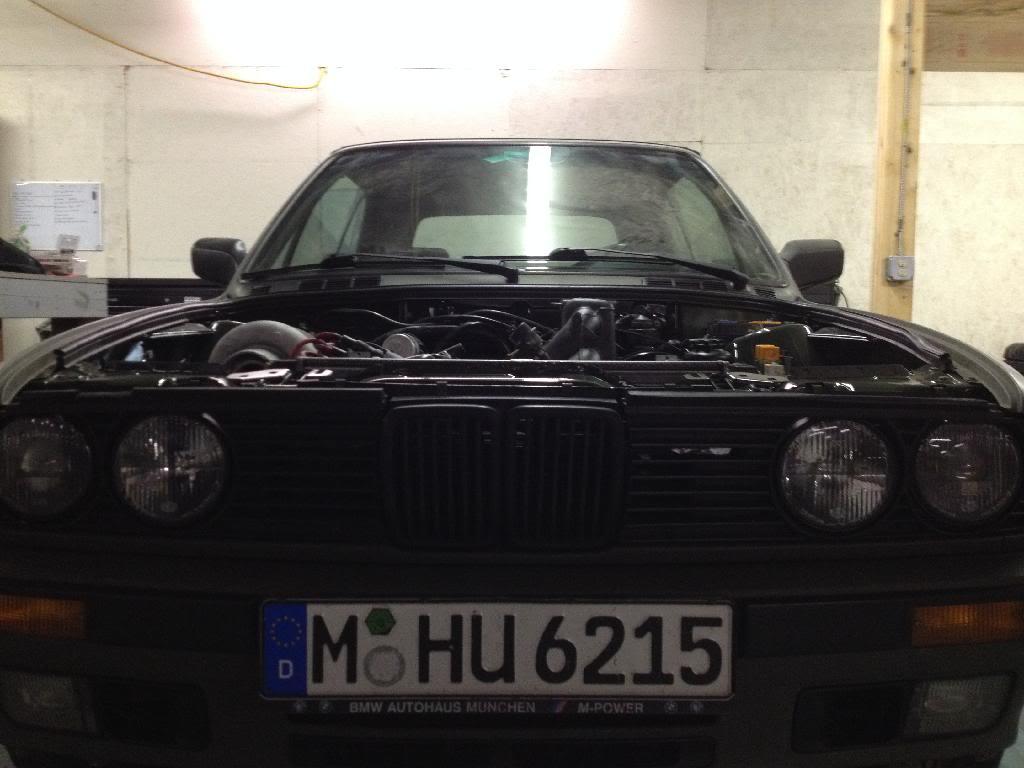
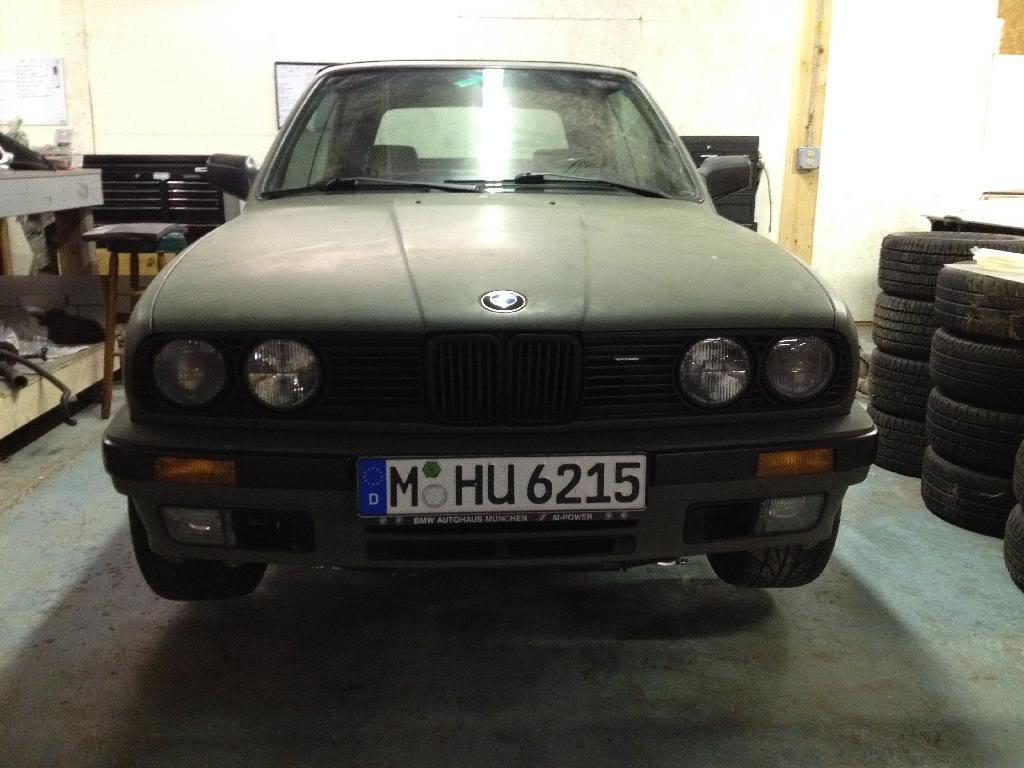
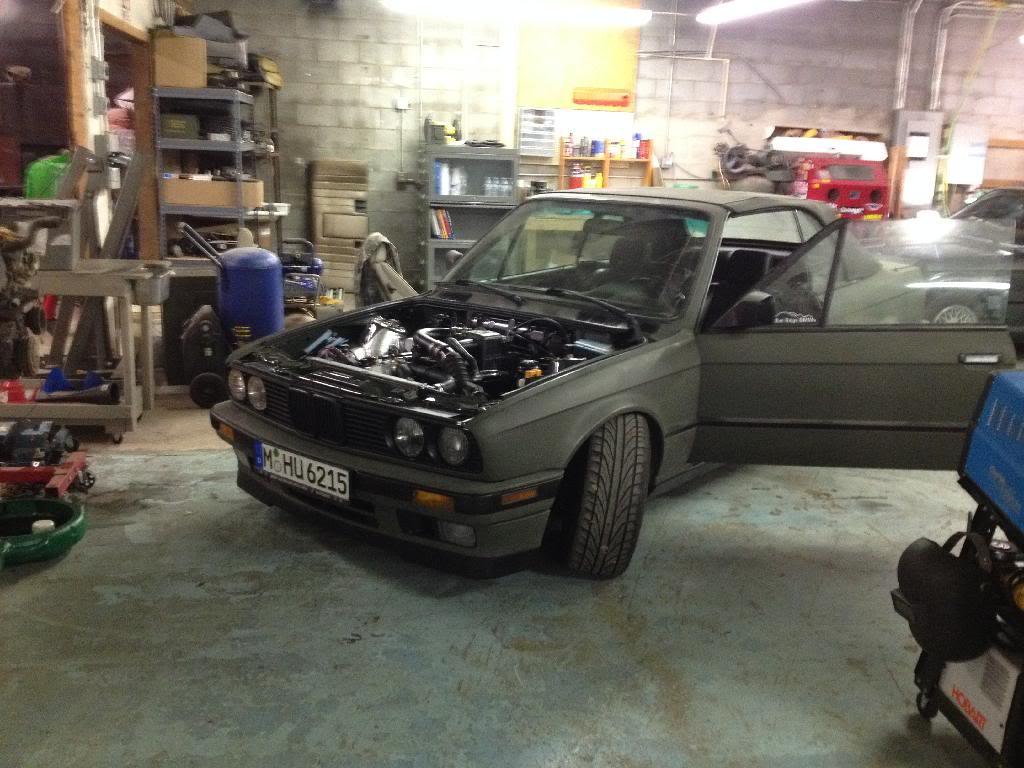
It is an '88 and came with the DB's but I swapped it with extreme prejudice! Paint is rattle can Krylon Camo paint followed up with #0000 Steel wool and soapy water.
Oh I saw you but I was wearing my camouflage and was laying down in the grass. All I got to say is crosshairs=face!! LOL
I will post more pictures soon. And thanks!
6-24-2012
Ok so it has been a few weeks but I finally have an update! The next updates will be kinda slow due to a new job that takes me out of town for several months.
Up first, we partially reassembled the head in order to CC it. Each combustion chamber CC'd right at 64cc, this will be vital to future calculations in the build of this monster!

After the bookkeeping was done we reassembled the head completely and coated it in some storage oil. Sealed it up and put it on the shelf. Next updates will be of the crank and block work.

8-2-2012
I havent forgotten about this project or updating the thread. I am still out of town working but my machine shop is still making progress. They are currently working the crank and block. I expect to be ordering the pistons any day now!
8-8-2012
Reece Racing engines. They are a small company that mainly builds big block V8's and motorcycle race engines. They are extremely extremely good at what they do!
11-3-2012
I cannot wait to get back on this build. Sorry about the slack ass nature of the updates over the last several months. I am a Army Drill Sergeant and I have been in Ft. Jackson SC doing what I do! Dec 17th is the day I come home and then it is GAME ON!
In the mean time I have recently purchased a hardtop which needs some TLC and I just ordered AKG bushings to rebuild the rear subframe along with some GE rear 650# springs w/adjusters.
I really need to combine all my pictures into one big build thread...... man I am lazy.
12-20-2012
Sorry about the lack of updates. I am finally off of my orders and back home! I have already spoken to the machine shop and the process will be back on track after Christmas. That is a good thing because Christmas has a way of zapping funding!
Recent work: Resealed and cleaned diff, R&R Subframe bushings, R&R TA bushings, R&R diff mount, Replaced rear springs, oh and installed hardtop!!
1-21-2013
Ok so update time!
I went shopping!

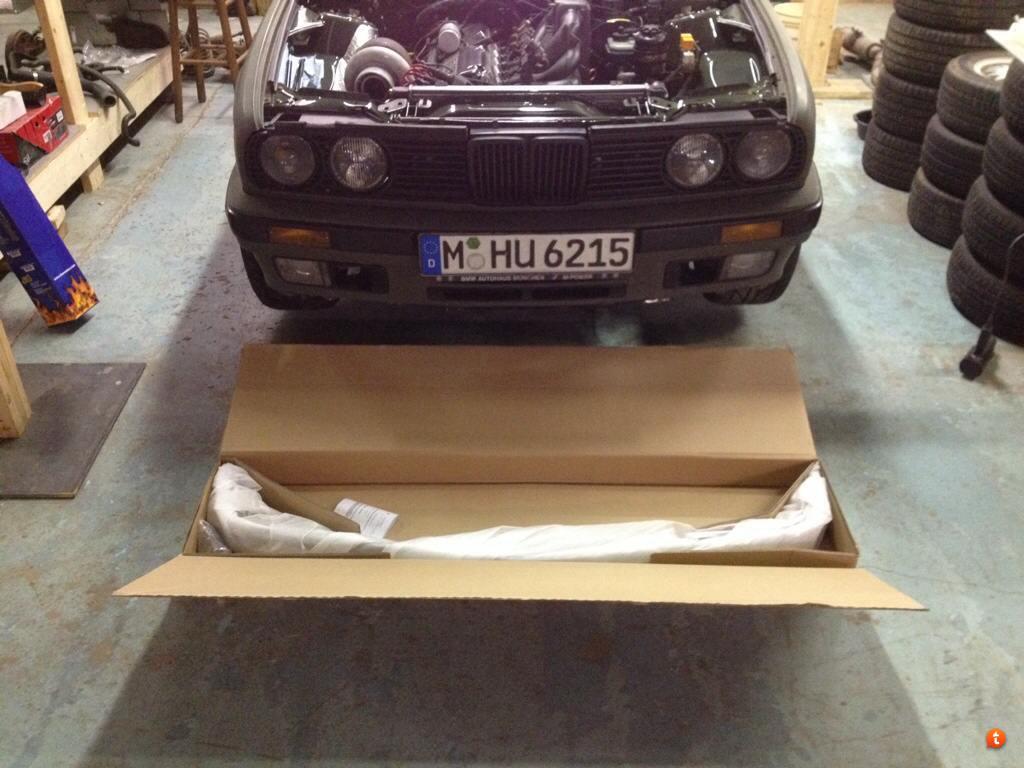
The main prizes in the bunch included a 260/6 transmission and these:


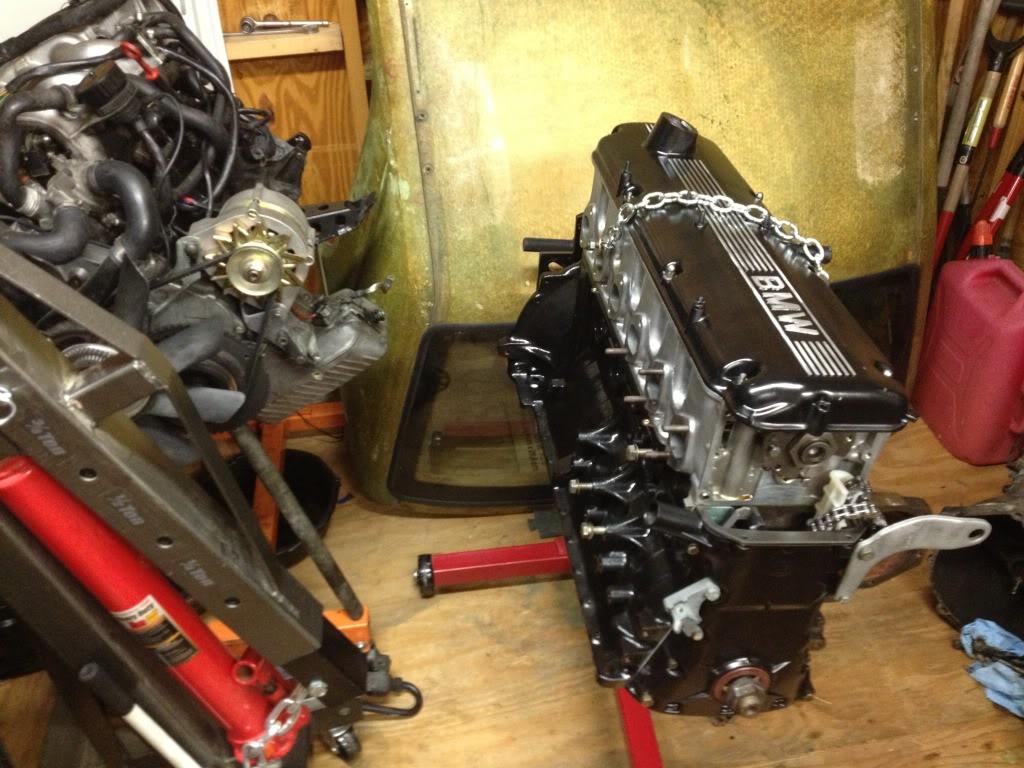
The block has been bored out to 3573cc. So can I now say I have M30b35 3.6?
The pistons are Forged Wiseco and should produce a 9.0:1 compression ratio but the final CR will be posted once we assemble the rotating assembly. I was able to pick up the block, pistons, Transmission, and a bunch of other goodies from a good guy named Mark out in the Piedmont of NC for a really good deal! Thanks Mark.
Oh and assembly would be started but this happened!

I bought a cheap truck and it blew the engine on the way home this weekend! Oh well it was pretty cheap!
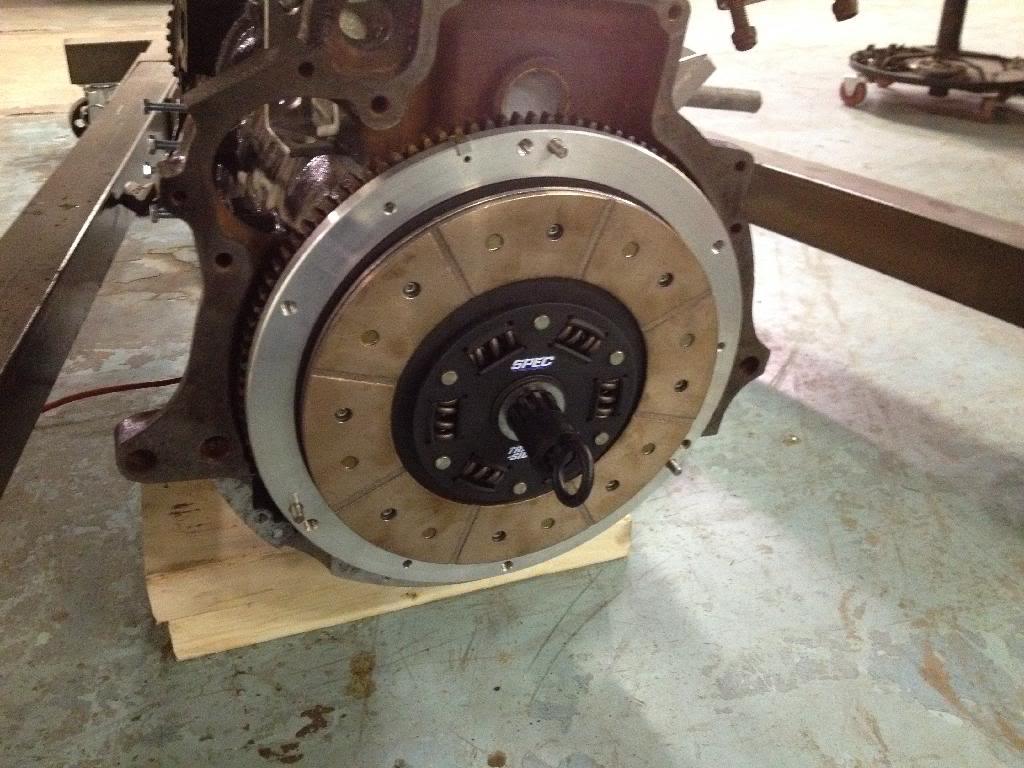
So next up, I am ordering the Cometic MLS head gasket and ARP head and crank studs ASAP. Then assembly will be in full swing. I also need to find out what PP and clutch I can run with the M10 flywheel that will be able to reliably handle the kind of power this thing should make.
2-14-2013
quick update on the truck..... I know I know, No E30 NO CARE! But I thought you guys would get a kick out of this.
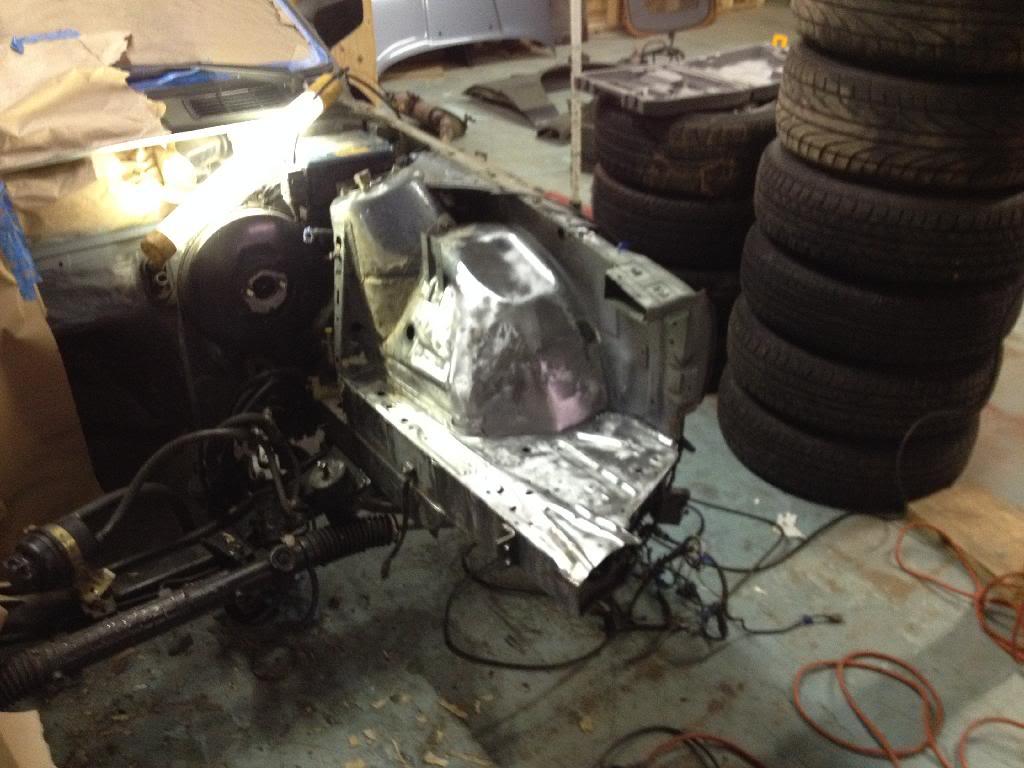
From what we can gather, the engine had hydrolocked at some point in recent history when the headgasket went bad causing a weakened connecting rod on piston #8. The PO replaced the heads and headgaskets but he reassembled everything without inspecting the rotating assembly. What does this mean for me? Well driving down the interstate the connecting rod gave out and mayhem ensued.
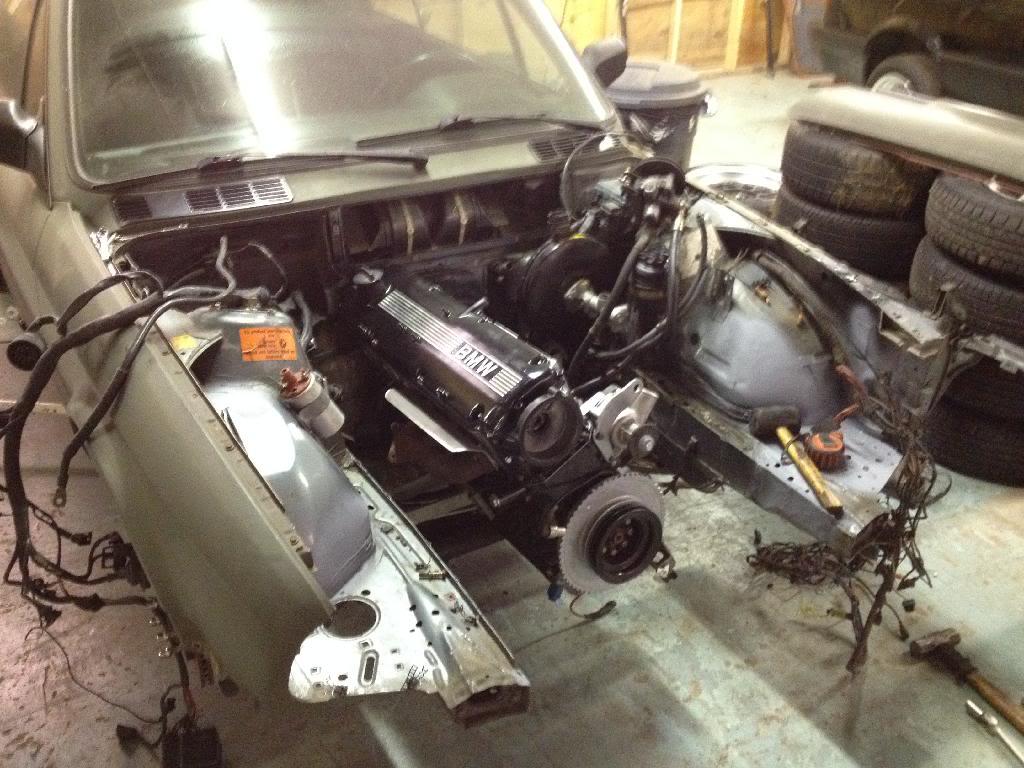
I present for your viewing pleasure or horror the carnage.

Disregard the oil on the floor, it was cleaned up promptly and was there as a result of complete frustration!
3-17-2013
Progress is slow due to lack of funds and time. I do however have a 1986 524td for sale and a 1987 bronzit Convertible for sale. And most likely I will soon have a set of BBS RS001 wheels for sale.... all in the pursuit of boost!
4-12-2013
So here is a tease! I know I know, it should have been done by now but everyone knows how life is! At least there is some progress. I plan on having the engine in the car and driveable as a NA setup no later than the end of May 2013 or preferably The Vintage. I then plan on having the turbo in by the end of summer.
Still waiting for my ARP HSK and 179 DME to show up.
New Parts!!
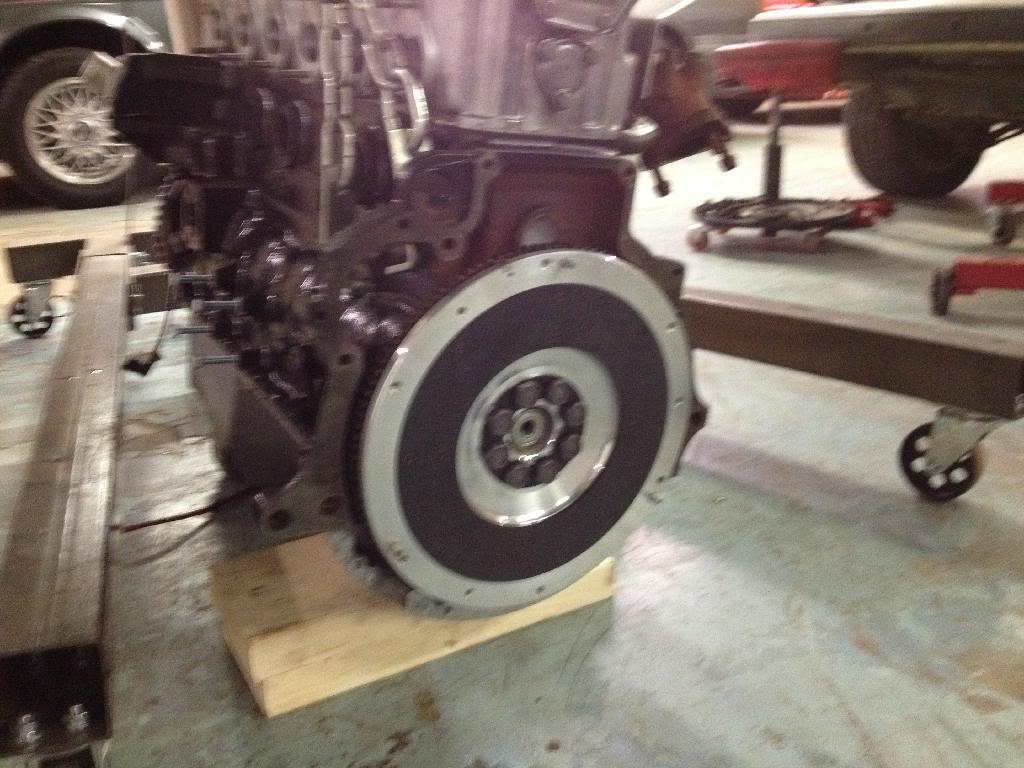
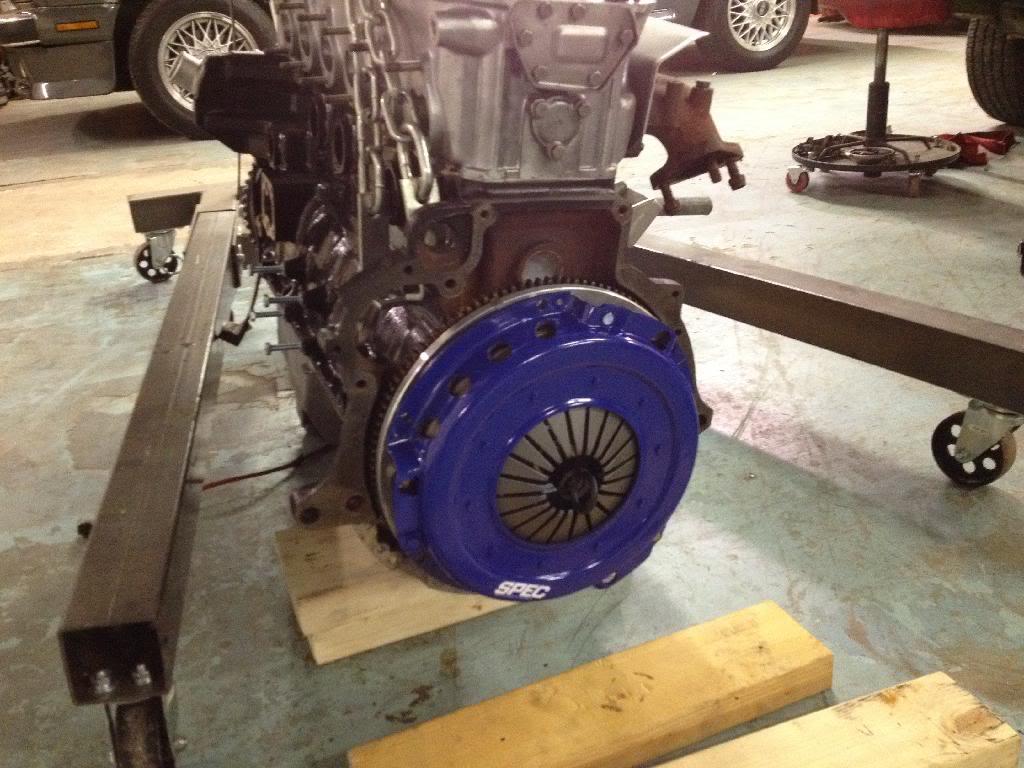
AASCO Lightweight B35 flywheel!


Good&Tight engine mounts!

New oil pump and timing chains and tensioners. Also in the picture is my IE AFPR!

4-15-2013
I got a new sticker today!

8-20-2013
I have not forgotten about this build BELIEVE ME! Now that I have sold the 524td, the summer has calmed down, and my machinist seems to be improving in his health this build will once again get momentum!
First a couple of updates:
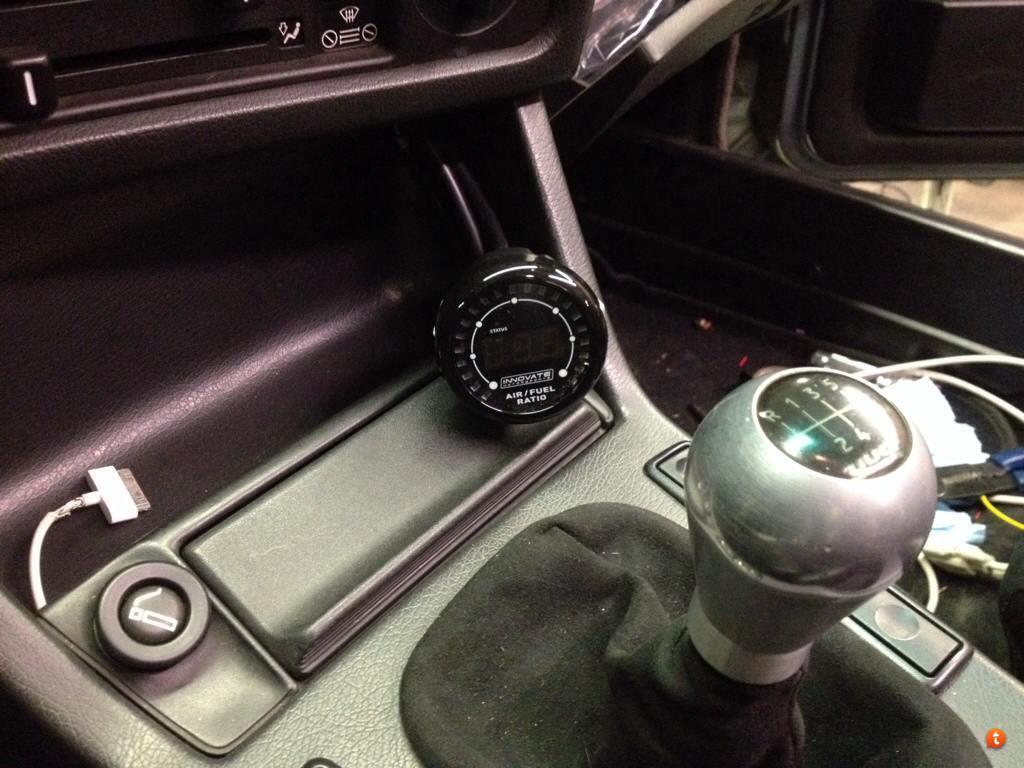
I got my custom boost gauge back from Justrack here on r3v! Check him out!!

Next I got my Cometic head gasket in. It had to be custom ordered for the larger bore.
Excitement!!!

Beautiful!!!

And my Spec stage 3+ clutch kit should be here this evening sometime! I cant wait.
All the pieces are done at the machine shop so assembly is next and I will take a ton of pictures.
Thanks for your patience.
8-20-2013
Look what showed up this afternoon!

OH YEAH!!!! Stage 3+


8-20-2013
^Sorry to hear that man. I have had a very good experience with them so far. I already knew I wanted to use their product and when I was at BimmerFest east this year I spoke with the rep at their booth. He was very knowledgeable on BMW setups and aftermarket flywheels. When I ended up ordering my clutch kit from the online retailer he called me to let me know that he was pretty sure they messed up my order based on our conversation (I did call and leave a message with him confirming the part number before I ordered and thats how he got my number) and he corrected the mistake and made sure I got the right clutch kit. I test fitted the PP to the AASCO flywheel this afternoon and it is perfect. I hope the performance of the clutch is as good as they claim!
8-26-2013
So final assembly of the long block is happening tomorrow. I will post pics late tomorrow night I promise!!!
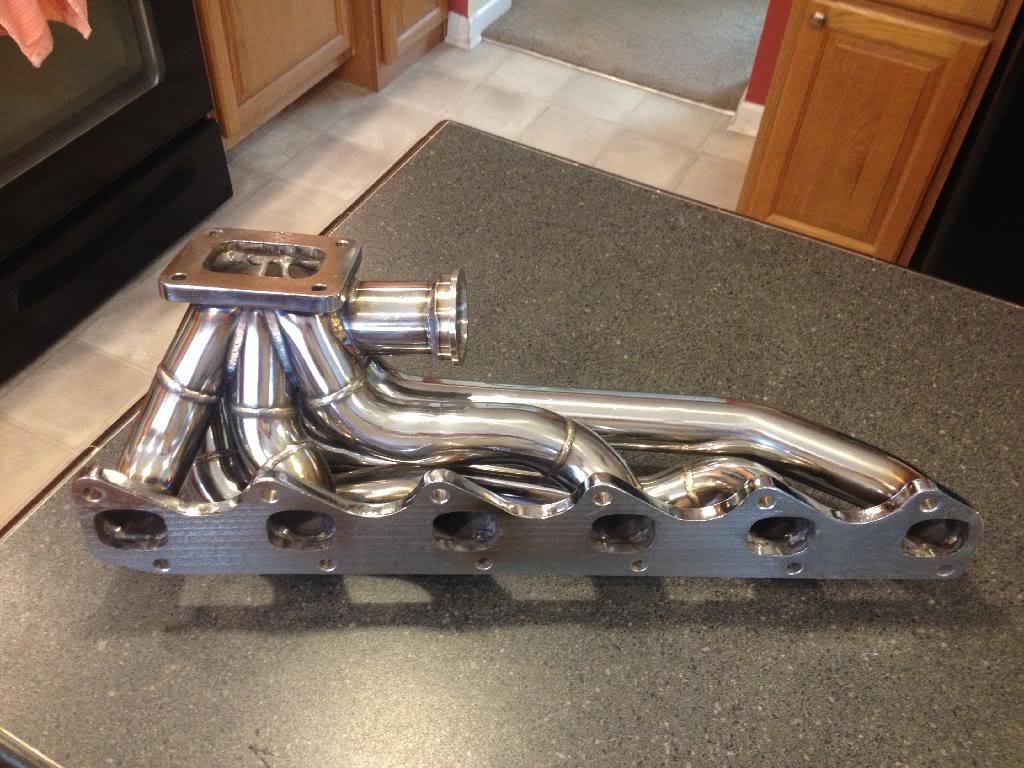
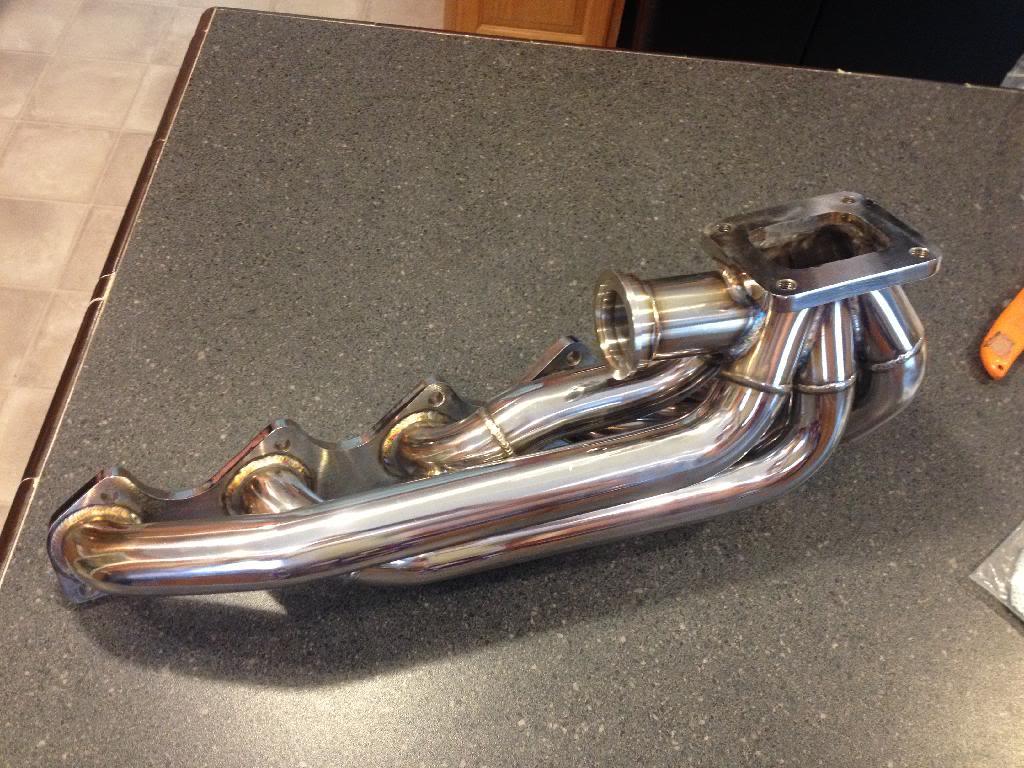
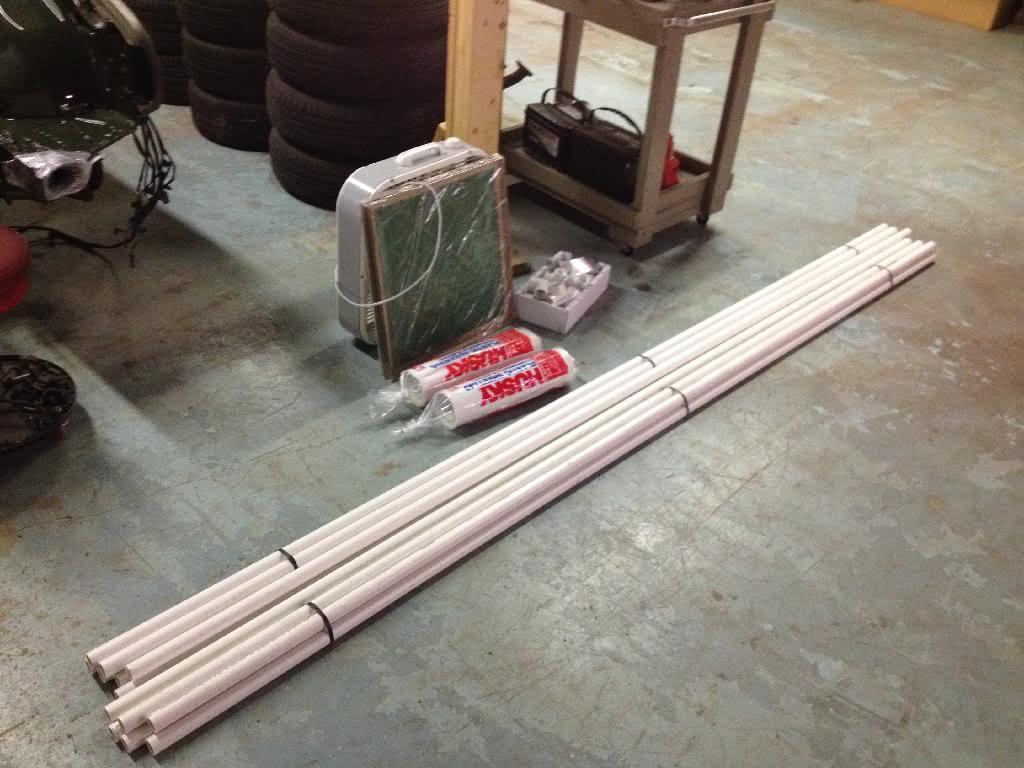
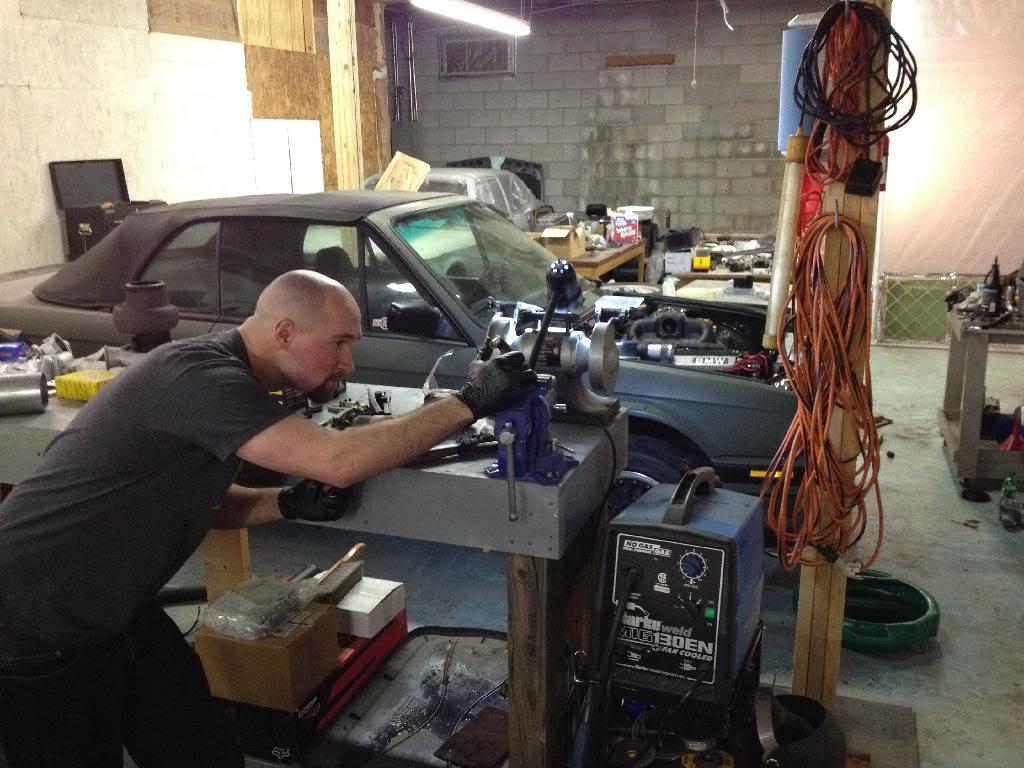
Until then I have a couple of pics of my "boredom" work


8-27-2013
Jeff, I thought about building a stand or a rack to hang the parts from and paint them. But then after looking over all the blueprints and plans for the above items I realized that I didn't have enough motivation to follow through with the very simplistic task of assembling. So I opted for this method. I can send you a copy of my plans for making this apparatus. Oh hell, I will just put them out there for everyone!
First, find a pitch fork ( what I used) or a spade shovel or a sharpened stick with substantial girth.
Second, stick it into the ground. I found that a pitch fork and shovel have an extra feature with which you can apply your body weight for better ground penetration.
Third, using the oil fill hole slide the valve cover over the handle of your chosen tool.
Fourth, let gravity do its job and let go of the cover. Through black magic it will stay where you leave it.
Holy Crap! I just blew somebody's mind!
Oh and I painted my parts with VHT high temp paint and I clear coated the valve cover to protect the exposed metal.
Got a couple of hours in tonight working on the engine. Pistons and connecting rods are assembled. The rods were all weighed and the machinist worked his magic to get them all within .5 grams of one another! Another item, after talking to the crankshaft shop and the machinist we decided against knife edging only because there is not a significant amount of windage due to the small overall diameter of the crank, comparatively speaking. So the crank was machined and balanced. Now it has been reunited with the block. Tomorrow night the engine will actually look like an engine again!!!


Oh and CR is 8.6:1
8-28-2013
Building an engine from parts acquired from different sources can be very frustrating! How is it I over looked ordering the block to head alignment dowels?! And I can not find the rear oil pan bolts or the crank nut! WTF!
Anyways we did get something done today!


8-29-2013
I don't know how you knew that I had a plan and algorithm! I guess great minds think alike. So here it goes. I am confident that you will find my design to be infallible.

8-30-2013
So pretty

Head gasket

Head!!

So I have another dilemma. The block is supposedly from an E34 and is a M30B35. The problem is that the oil pump chain tensioner I bought for the B35 is not usable with this block because the boss for the mounting pin is non existent! So I have to use the old oil pump shims. But from what I can see on realoem all the e34s had the chain tensioners. WTF!
Edit: After looking over the block and the lack of certain engine mount mounting points I have concluded that this is a B34 block that has been punched out to a 94.0056 bore. Not a big deal except I had GoodNTight make me custom mounts for a B35 and they will not work with this block. And I still have to find shims for the oil pump.
Oh and new pictures on post #90!!!!!!!
9-6-2013
The baby is home!!!!! I have to wait for the new oil pump sprocket, chain, and shims to get here before I knock out the timing chain and oil pan but IT IS HOME!!!
10-10-2013
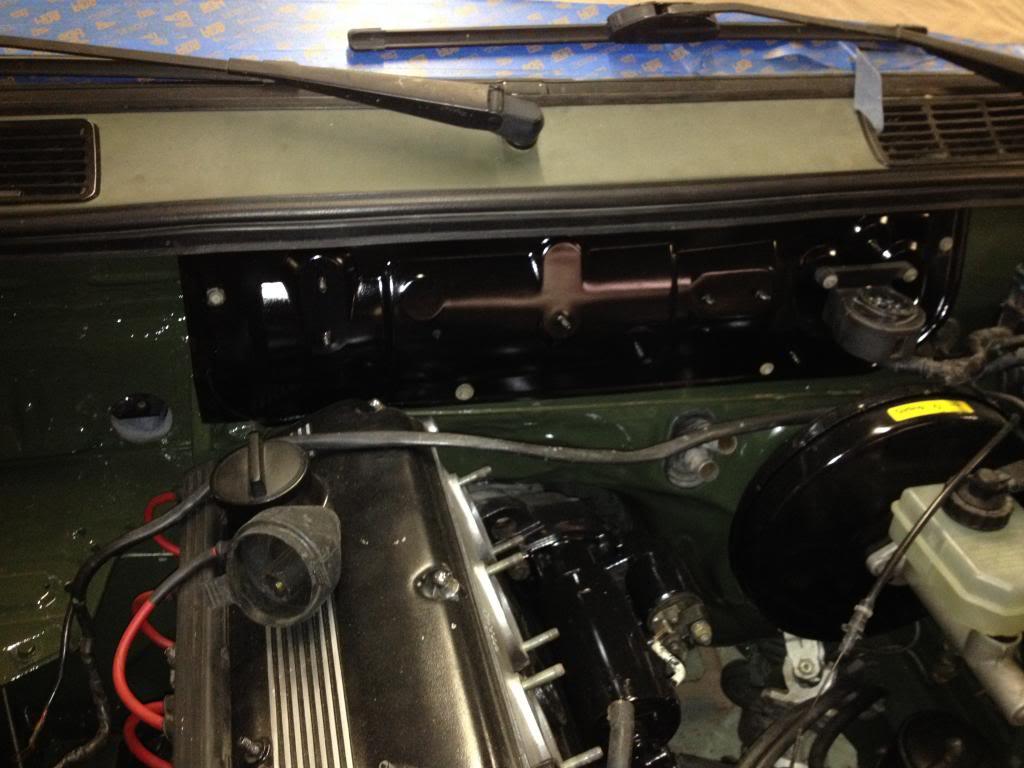
Thanks for the support man! As usual life is keeping this build on the very slow but steady track. I should have the oil pan with oil return bung welded in and the intake with the TB mount flipped back this weekend.
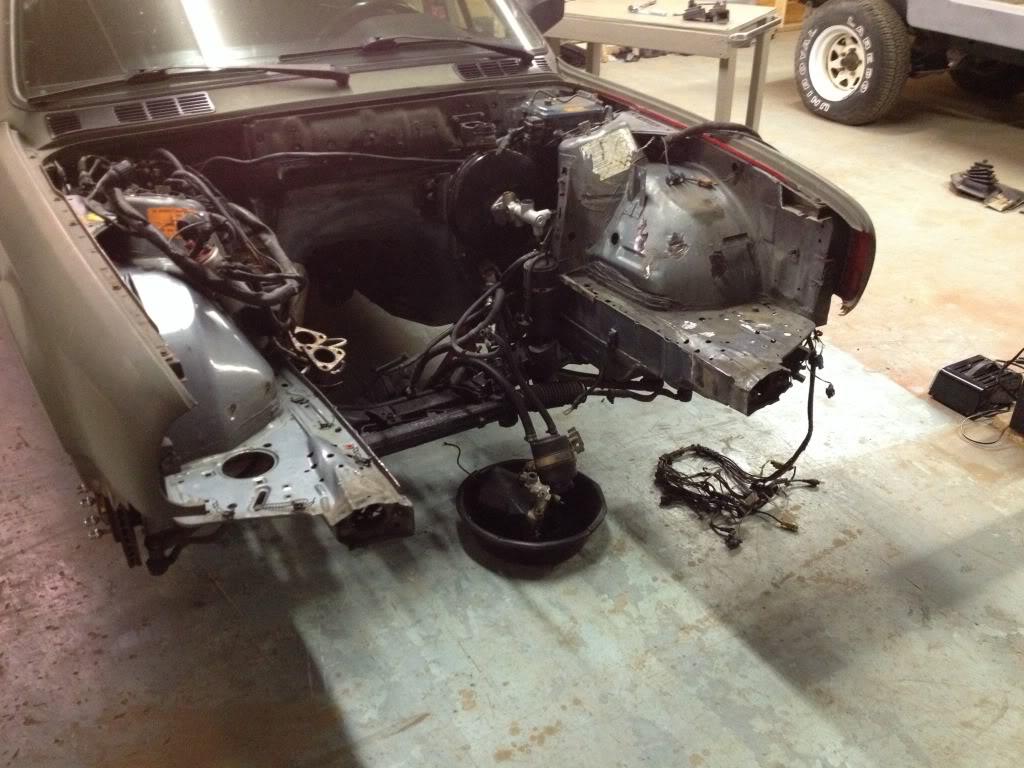
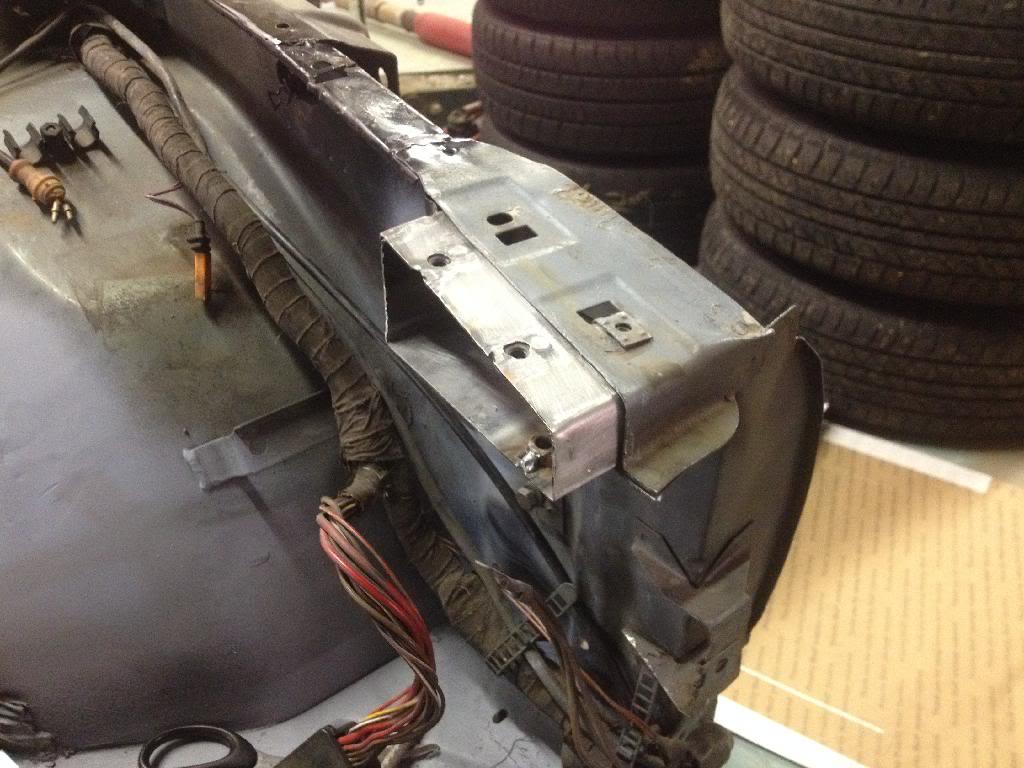
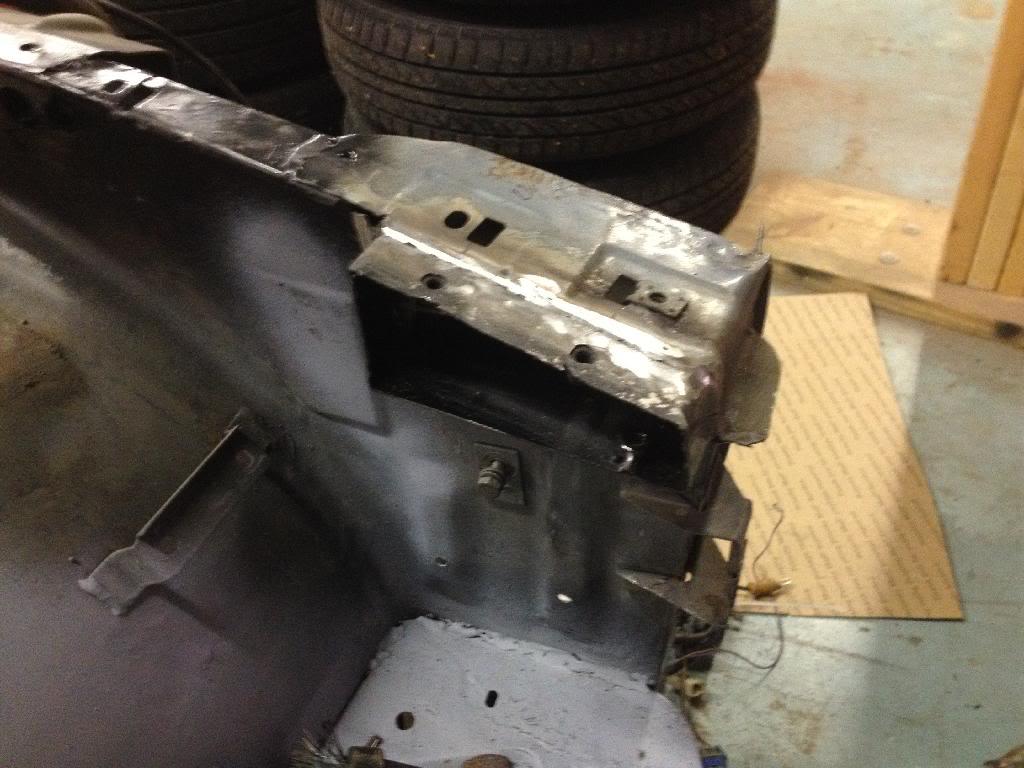
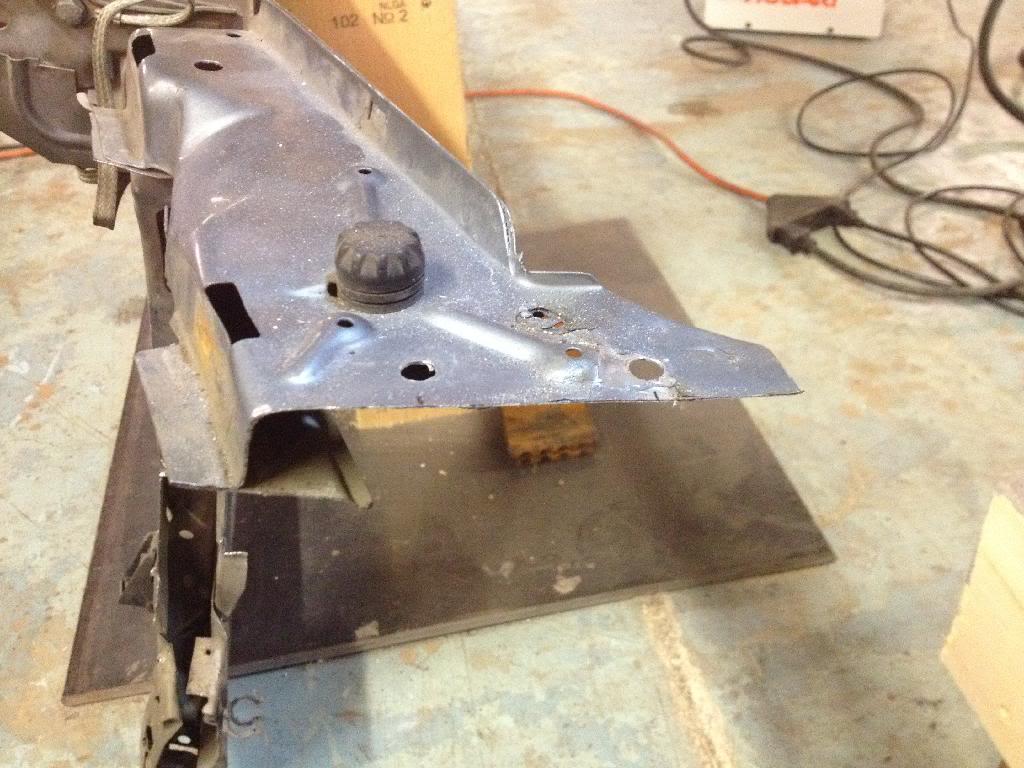
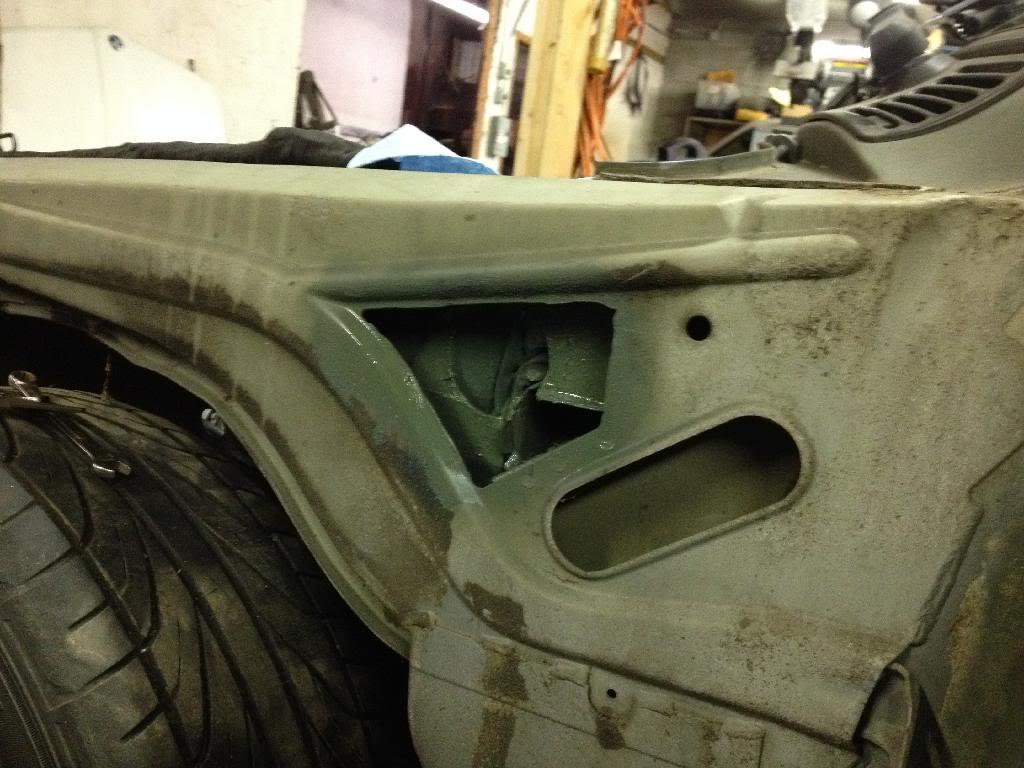
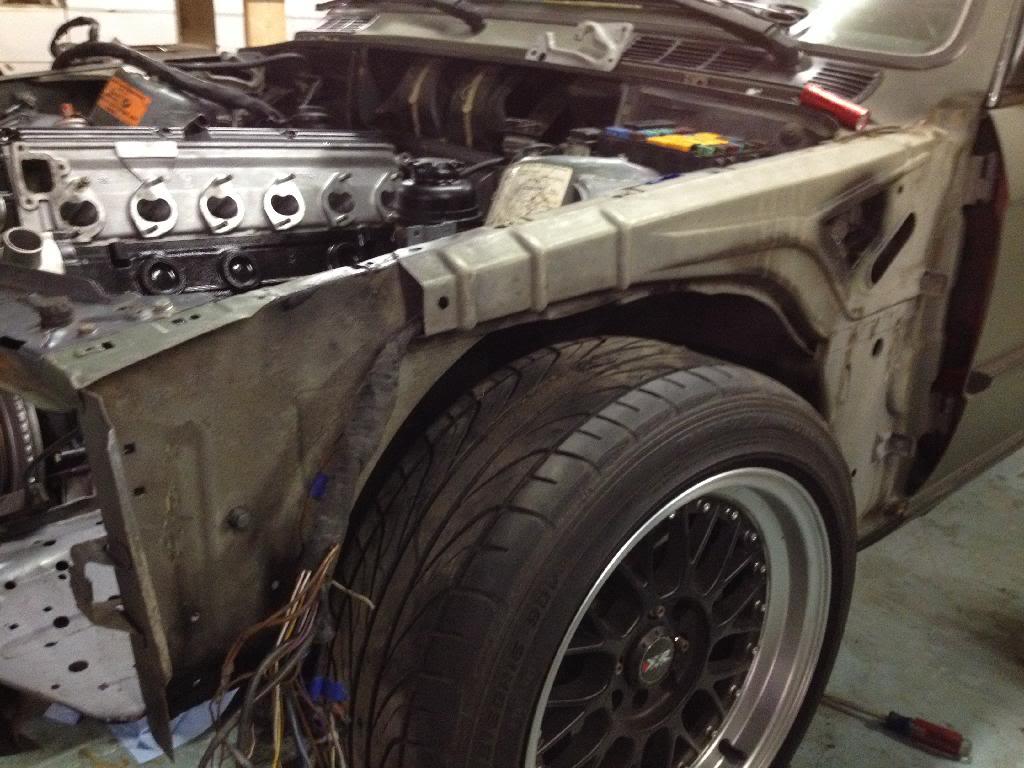
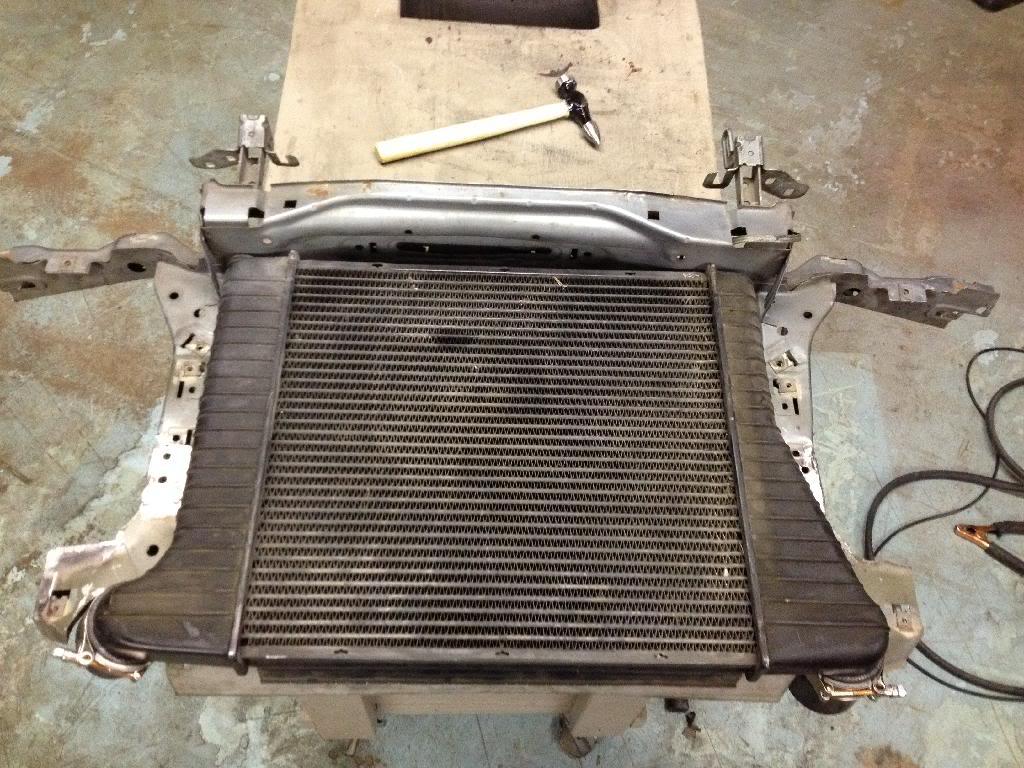
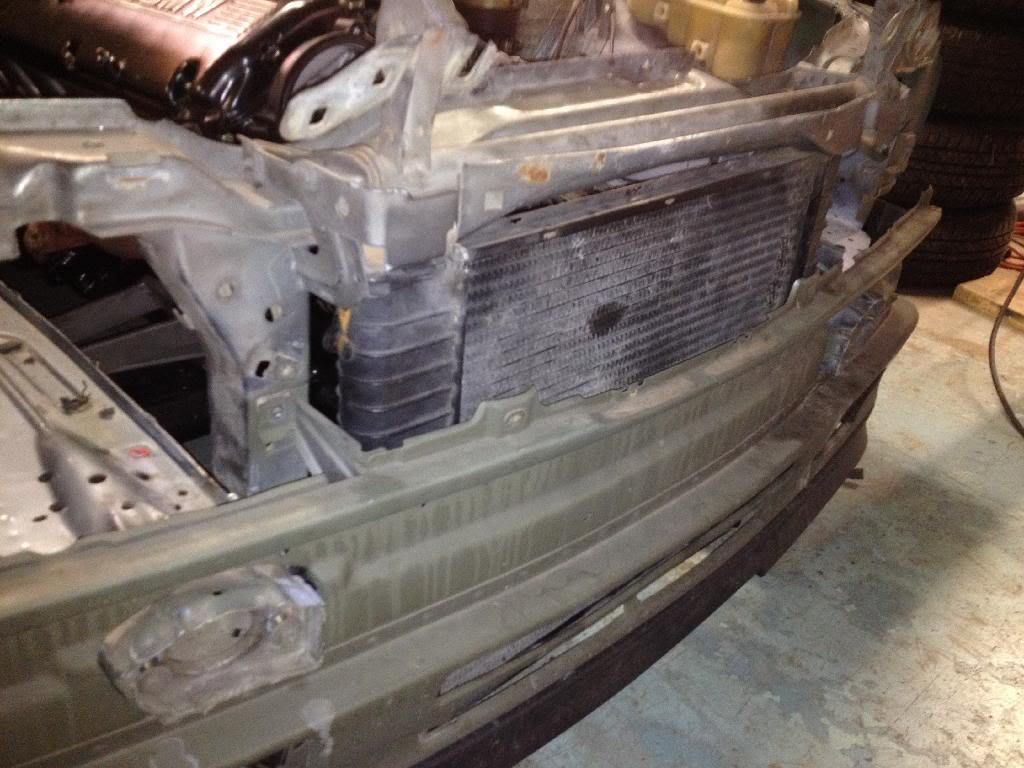
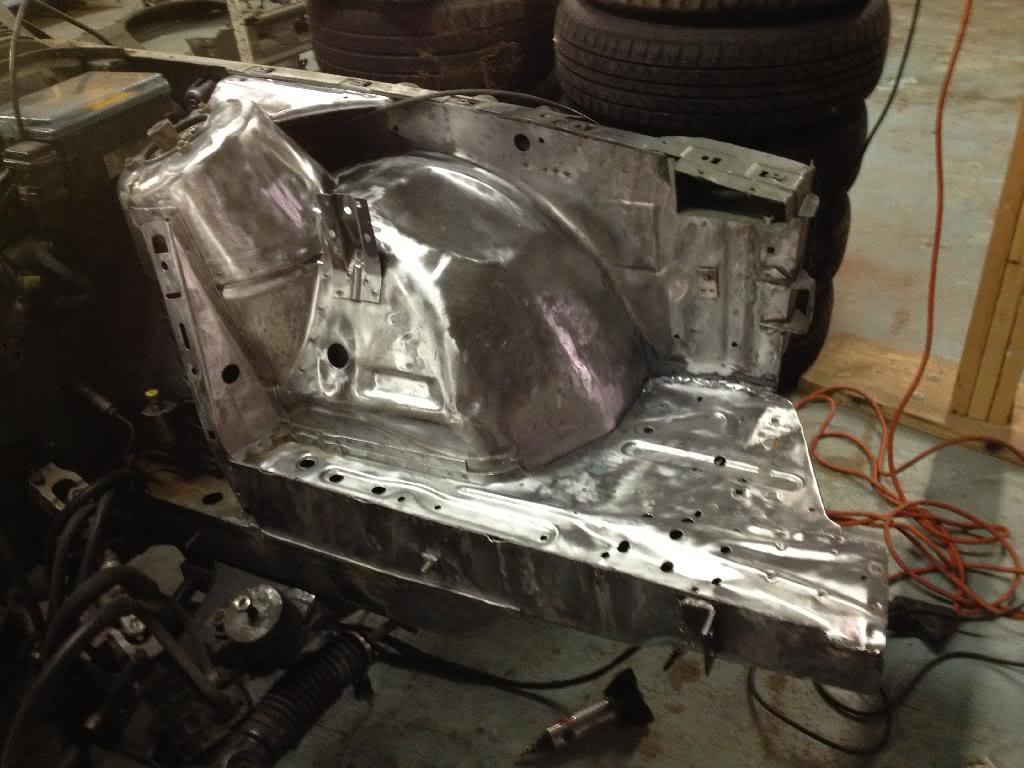
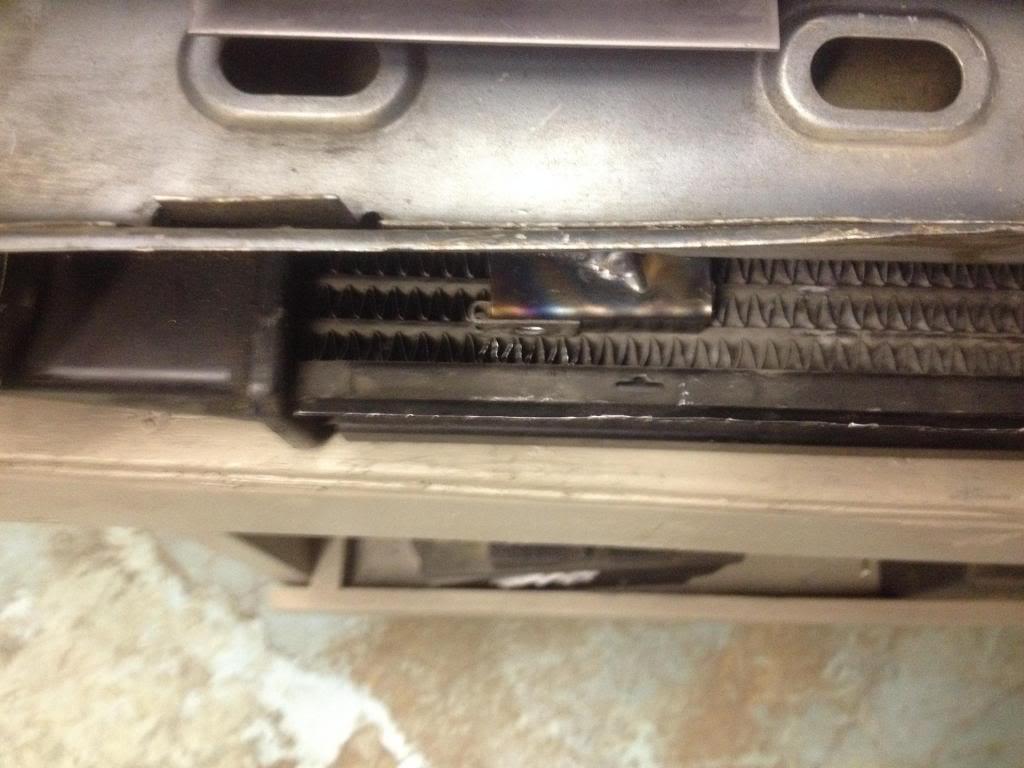
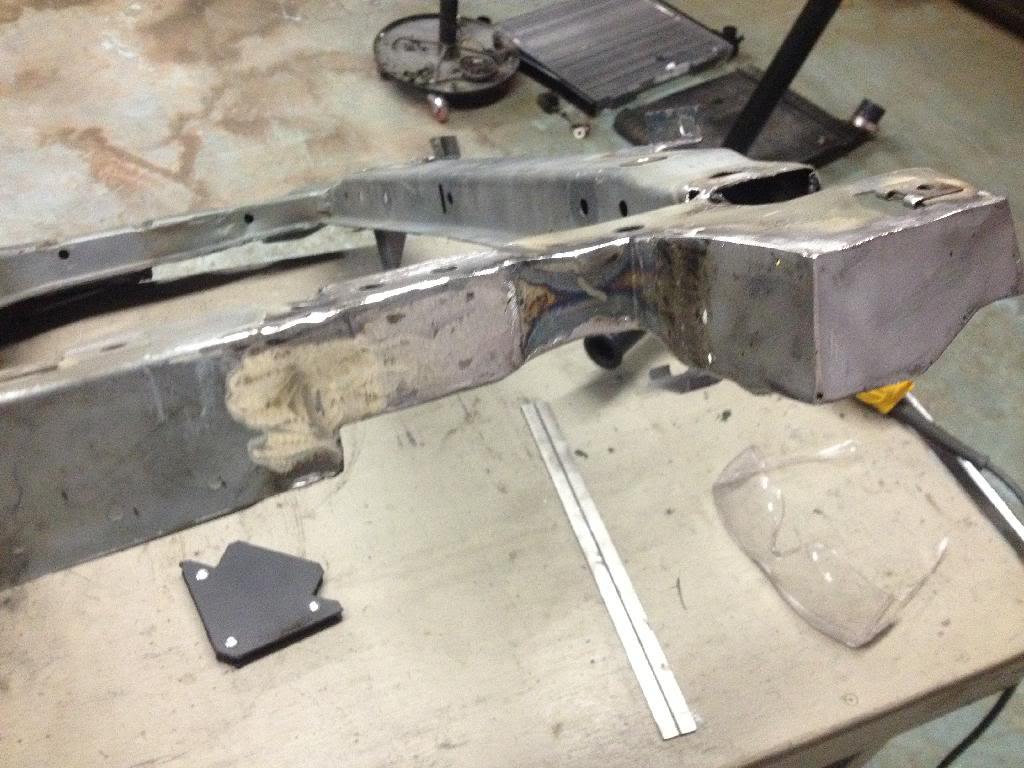
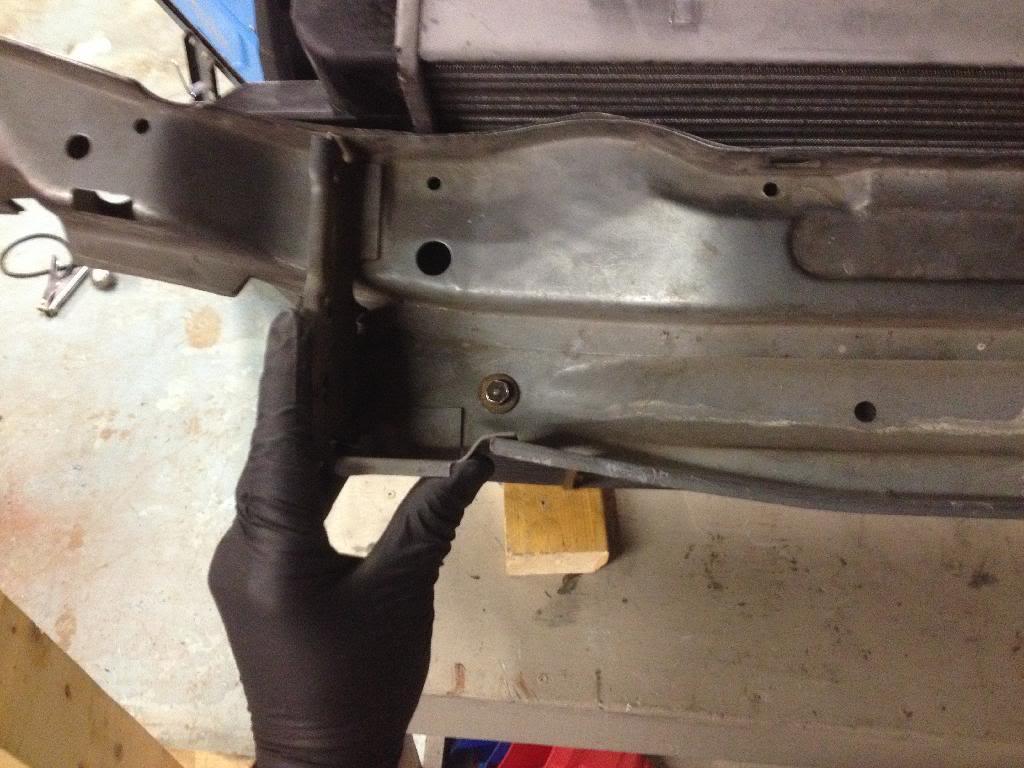
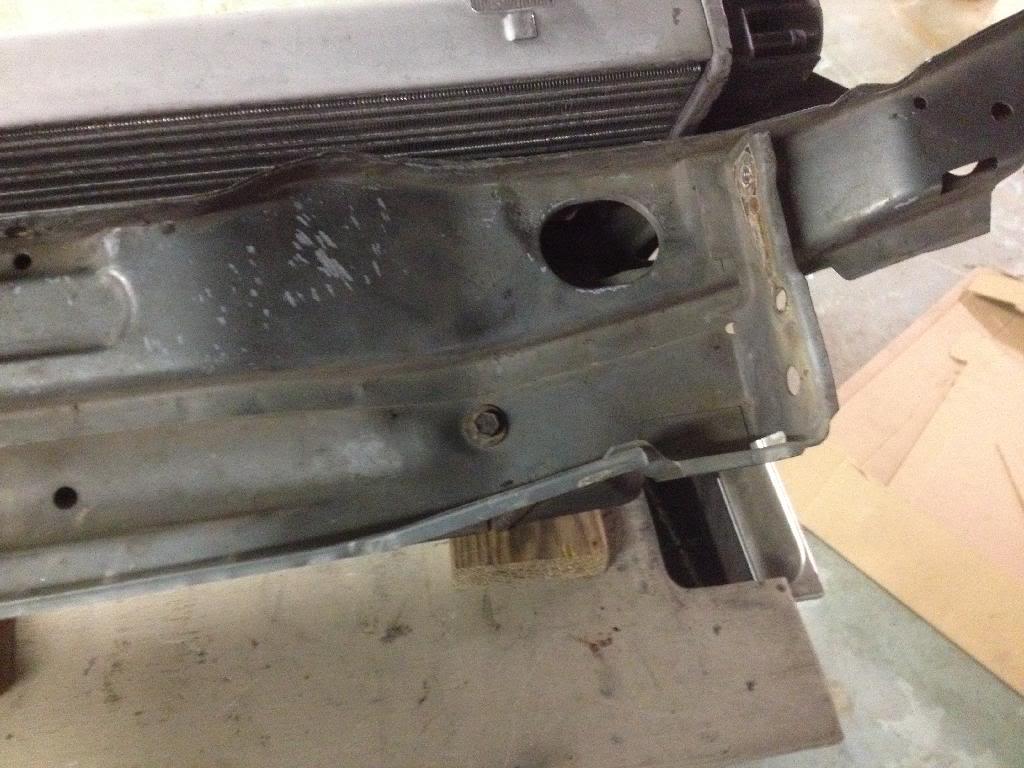
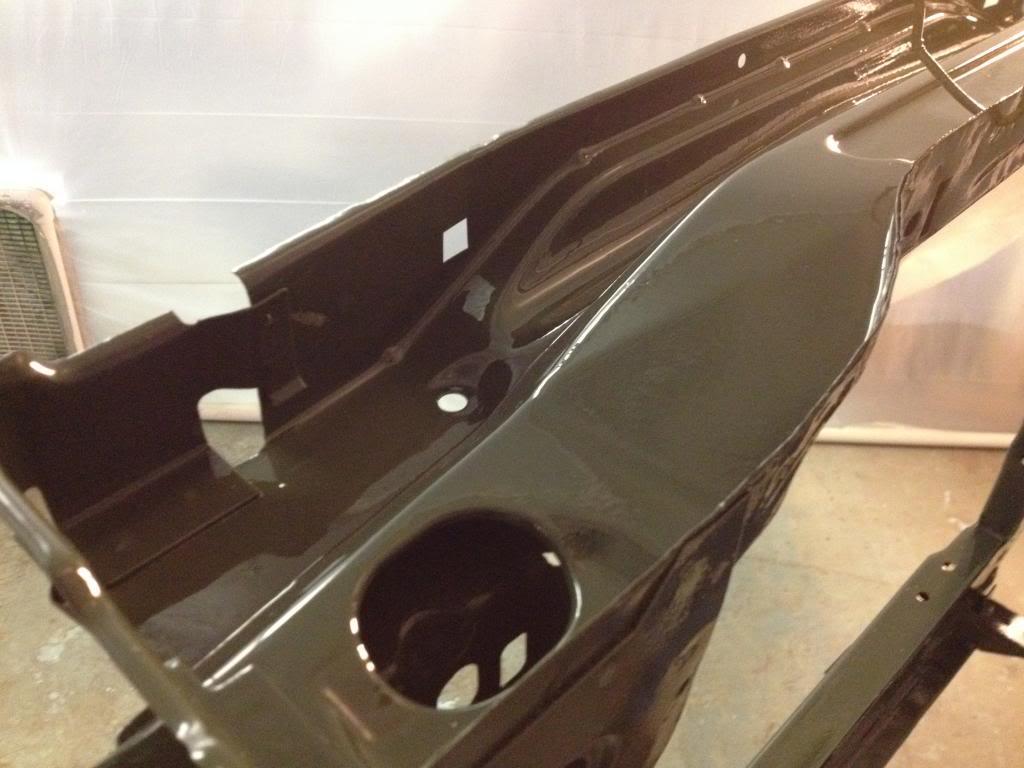
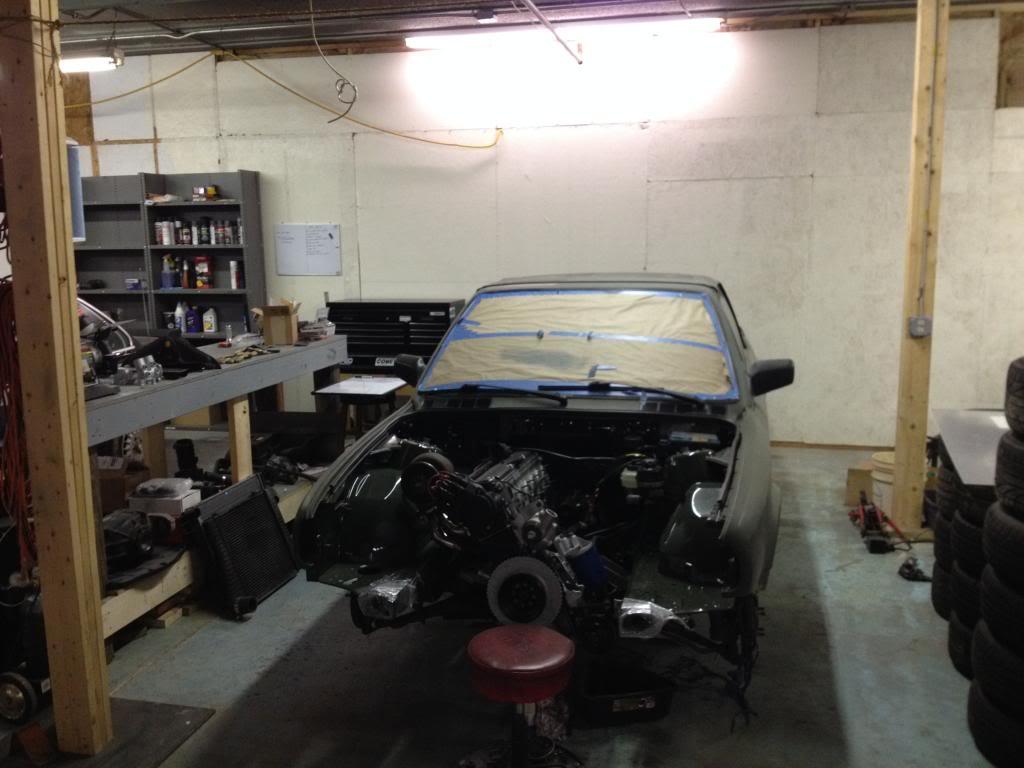
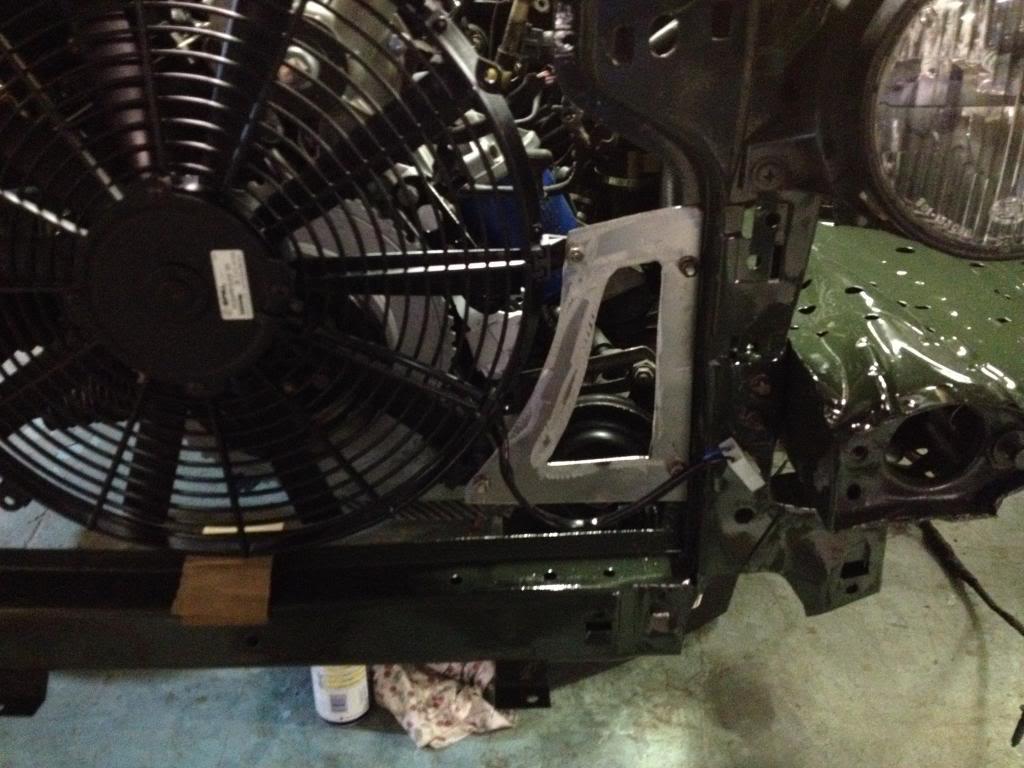
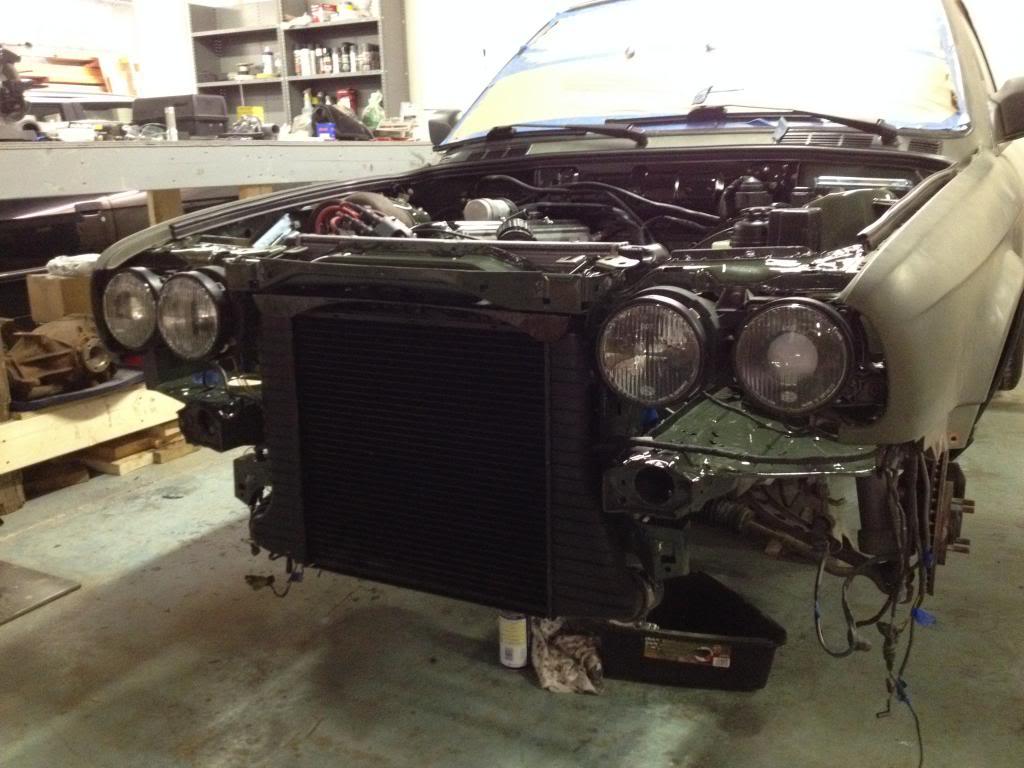
I recently moved into a small shop and I am proud to say that I have removed the radiator support and am working on making it a bolt in affair!
I will add pictures of the gapping hole in the front end tomorrow.
10-13-2013
Got the radiator support completely divorced from the chassis. I spent a few hours afterwards removing unneeded brackets and cleaned up all the old welds and tabs.
While I was in there I also installed my Non ABS master cylinder and lines! Finally! I have had these parts for a couple of years now.

10-16-2013
Damn it! Why do I get side tracked so easily?
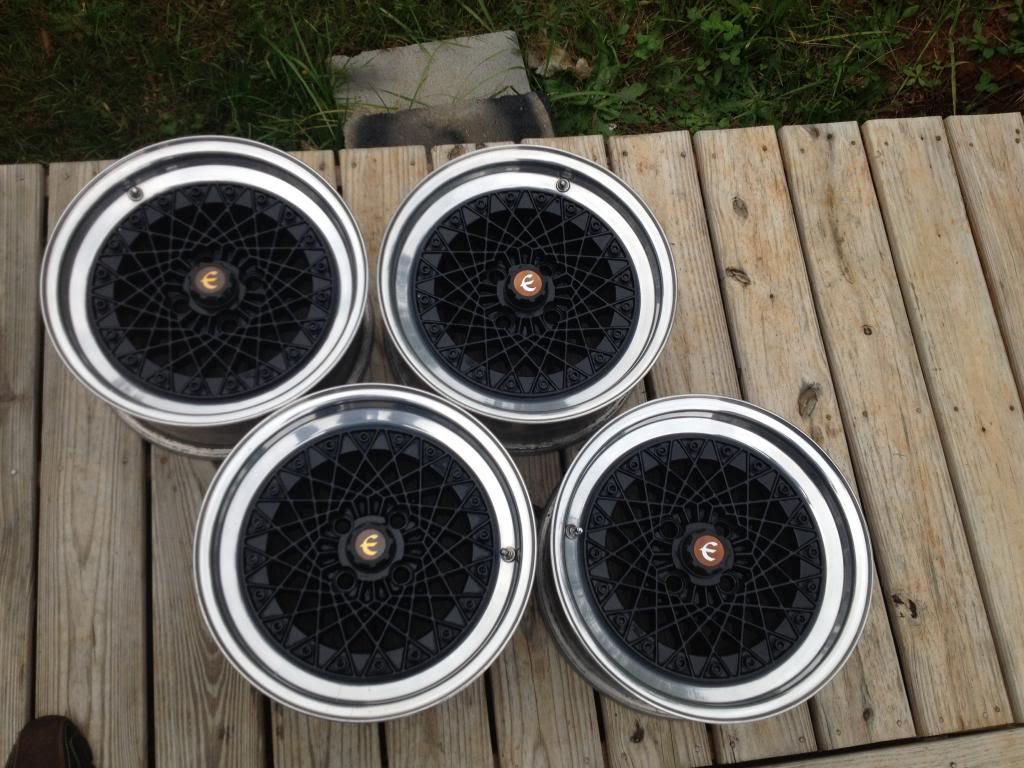
Today's distraction, I acquired some unobtainium that may find it's way onto the vert!
I present a set of 1983 Japan Epsilon 15x7" 4x100 e21 fitment mesh wheels
11-12-2013
Side projects, homework, and poverty keep this build on a slow and steady track
11-15-2013
Goals for reliability and daily driving are 425-450hp to the wheels. This is of course with the mega squirt and moderate boost.
12-11-2013
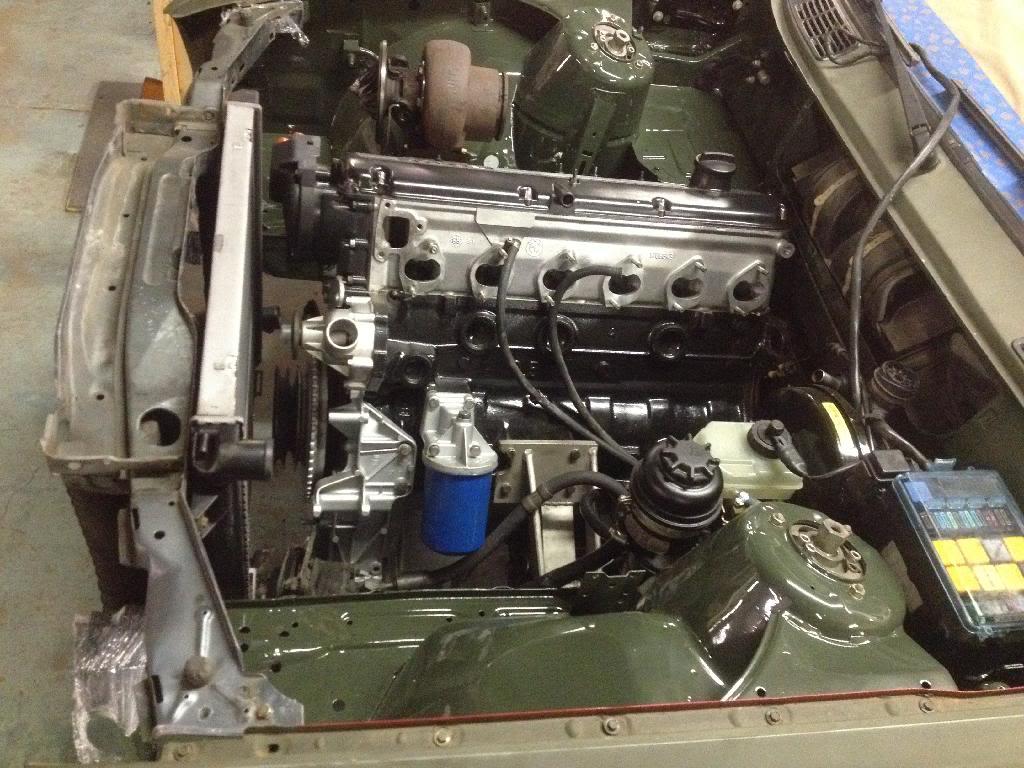
Finally my semester came to an end and I got a chance to catch up on some work. And today I got some progress done, well enough that I thought it warranted a post.
I got my oil pan back last night. The oil return bung was welded in and the adapter is now in place.

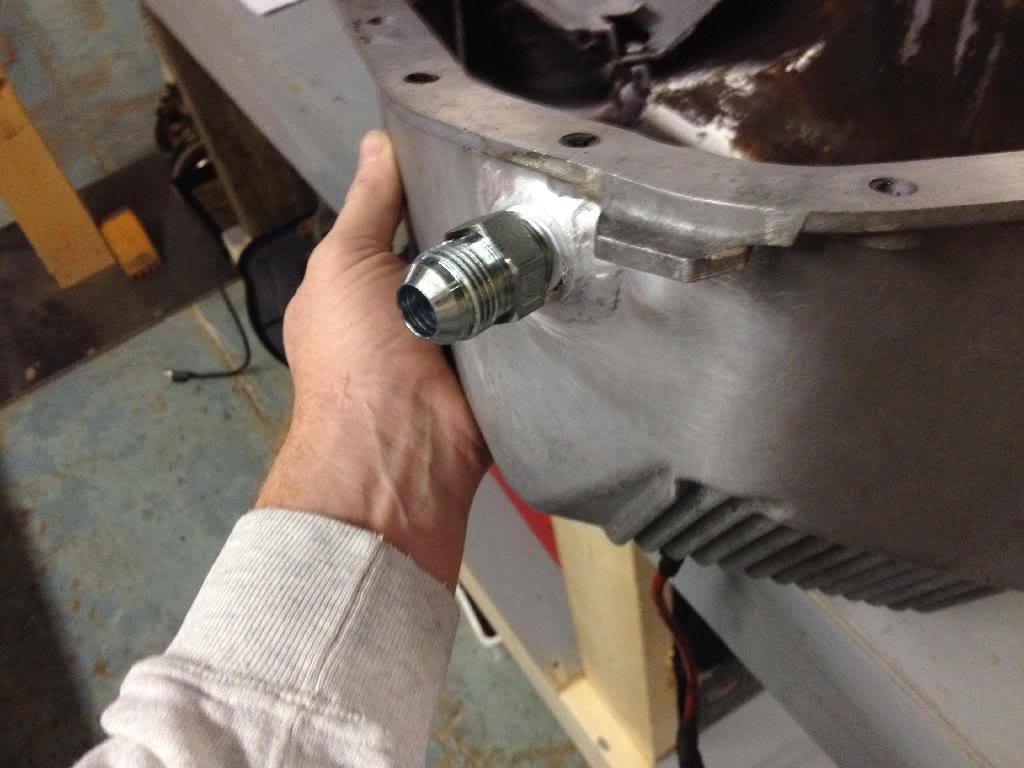
And a cap until the turbo is installed.
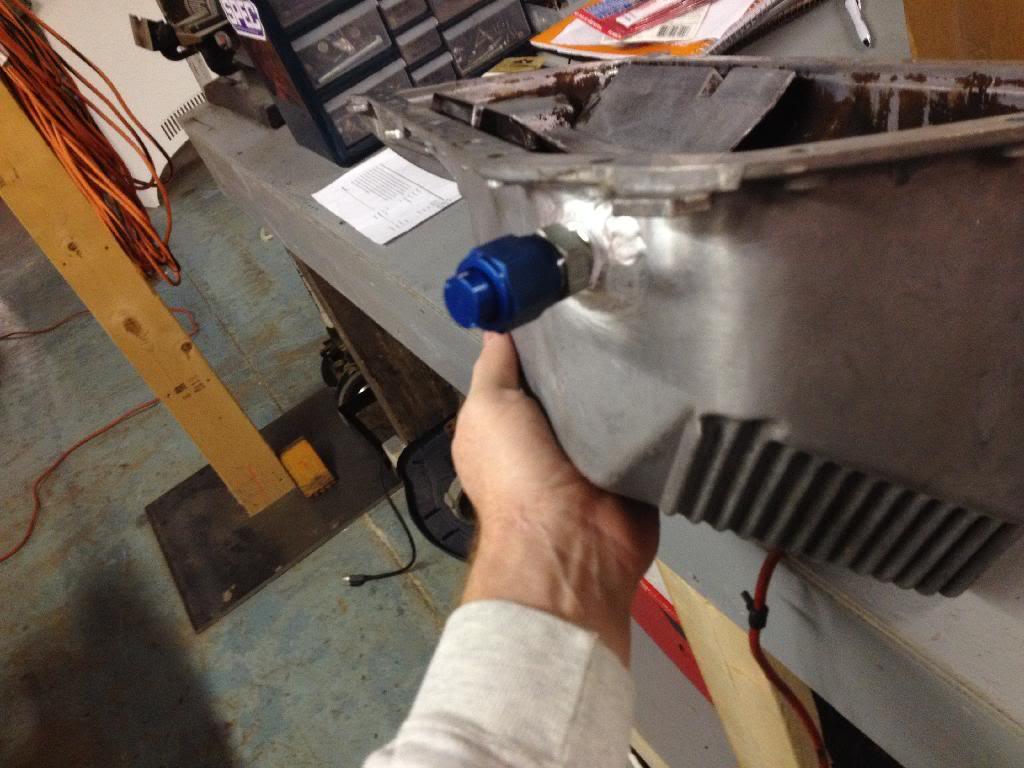
I glued the oil pump gear nut in place with some red locktite and installed the oil pan. I then started with the fun stuff!
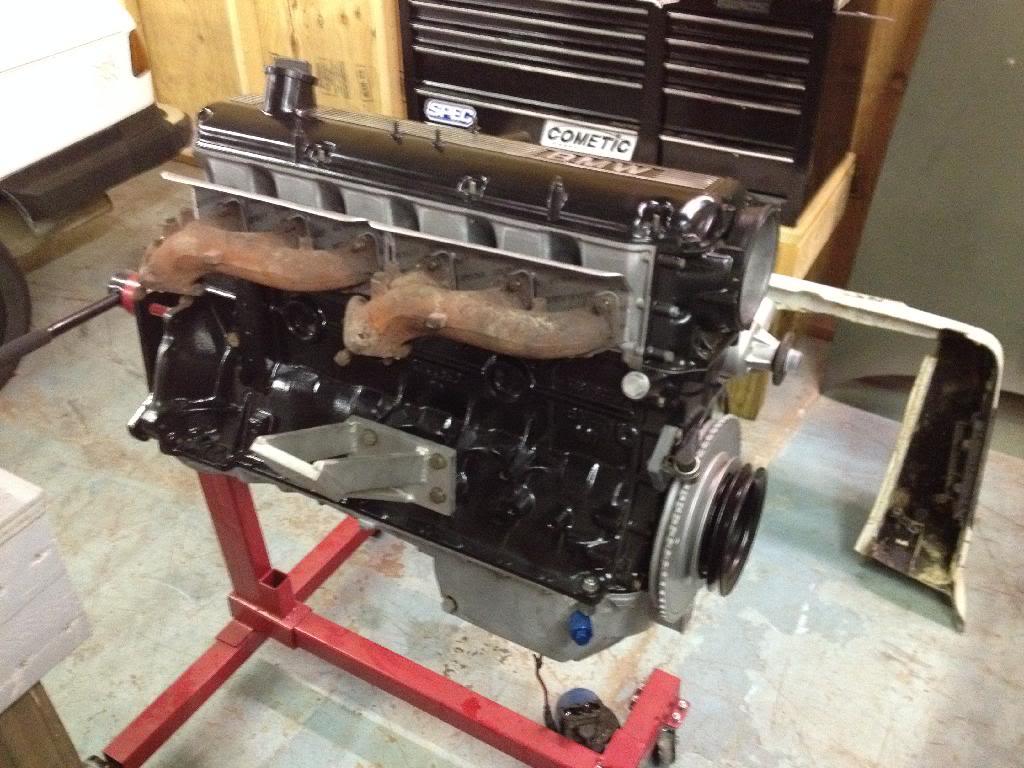
Caution the following pictures contain large amounts of sexy. Even if my iPotato took the pictures
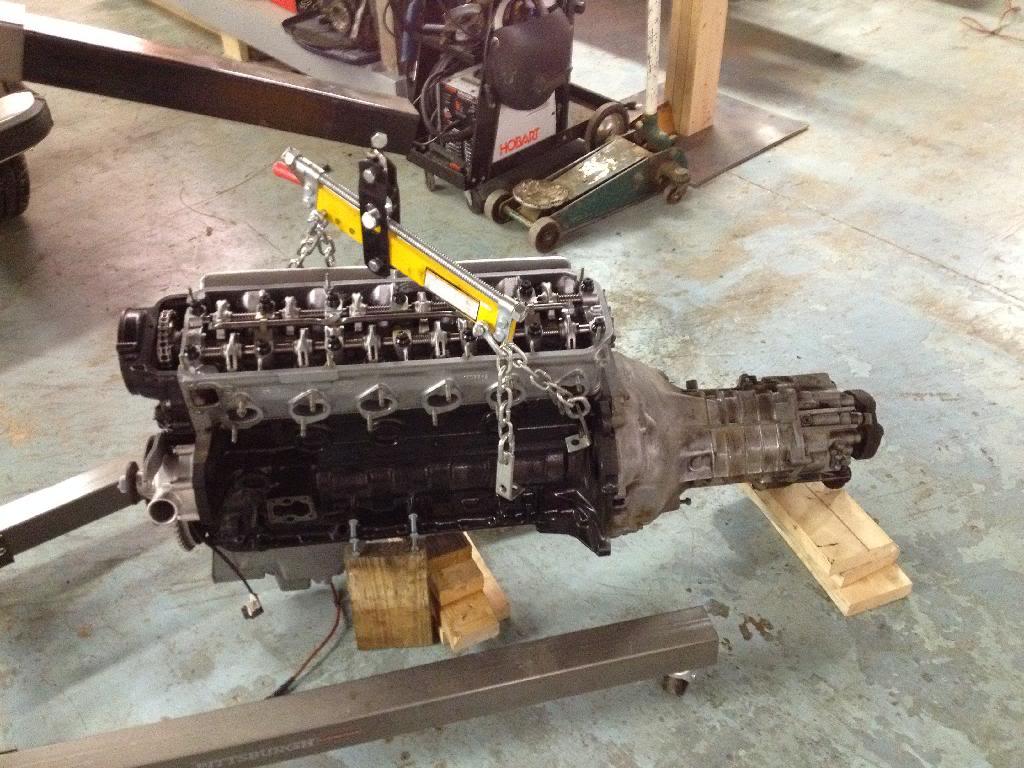
Next up I am going to clean up the transmission a little bit and flush and replace the fluid. Then I will be test fitting it into the car. Hopefully all goes well and it will just stay in there.
12-12-2013
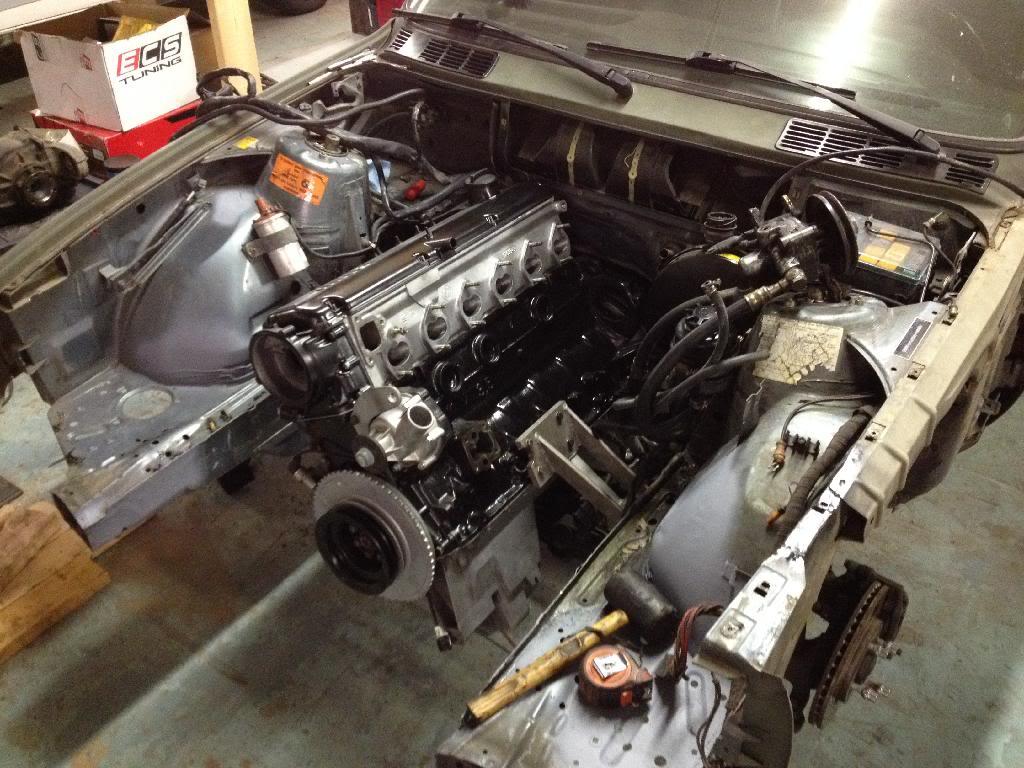
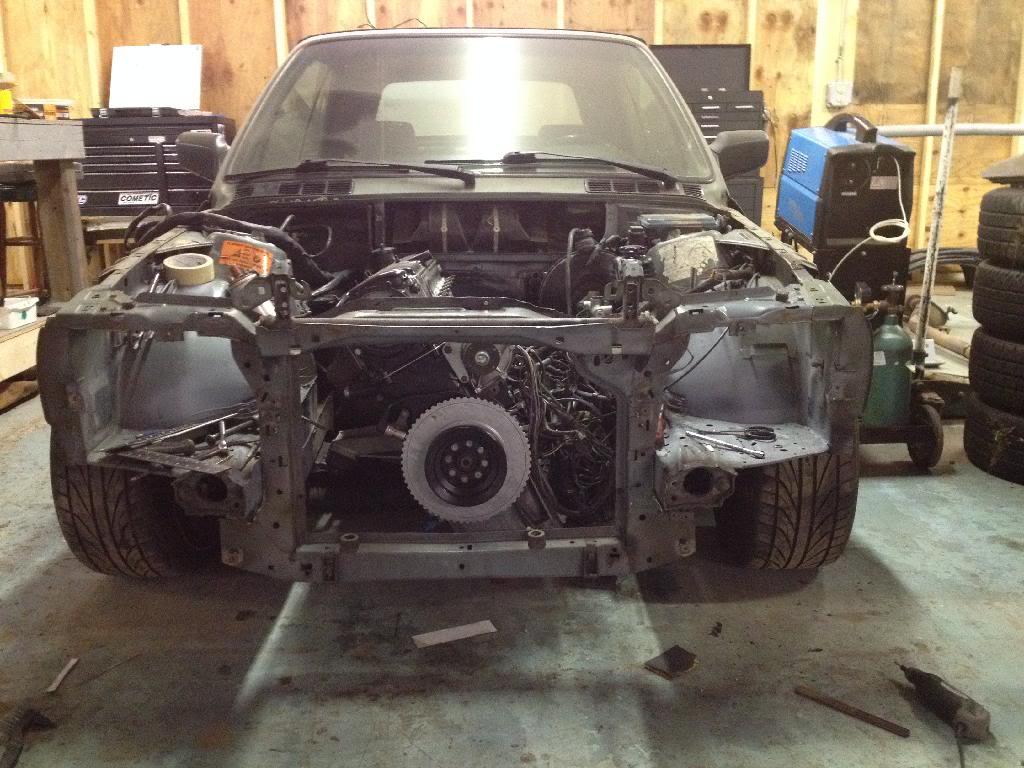
When I read about the "massaging of the firewall" I assumed that because I wasn't planning on using position 3 that I would not have to worry about it. MAN WAS I WRONG! At least the removable firewall made pulling it in and out repeatedly much easier.
Anyways it is in, for now. I need to pull it out one more time to do some final cleaning and painting of the newly exposed sheet metal on the firewall. Then final assembly is on!
Pics for your viewing pleasure.

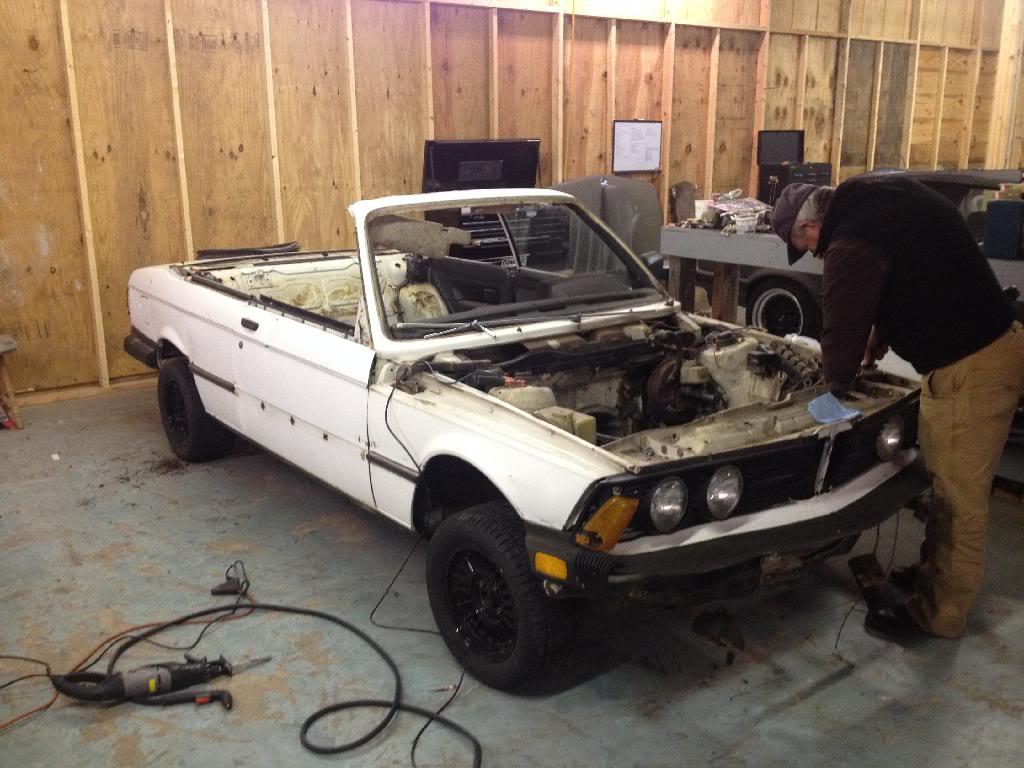
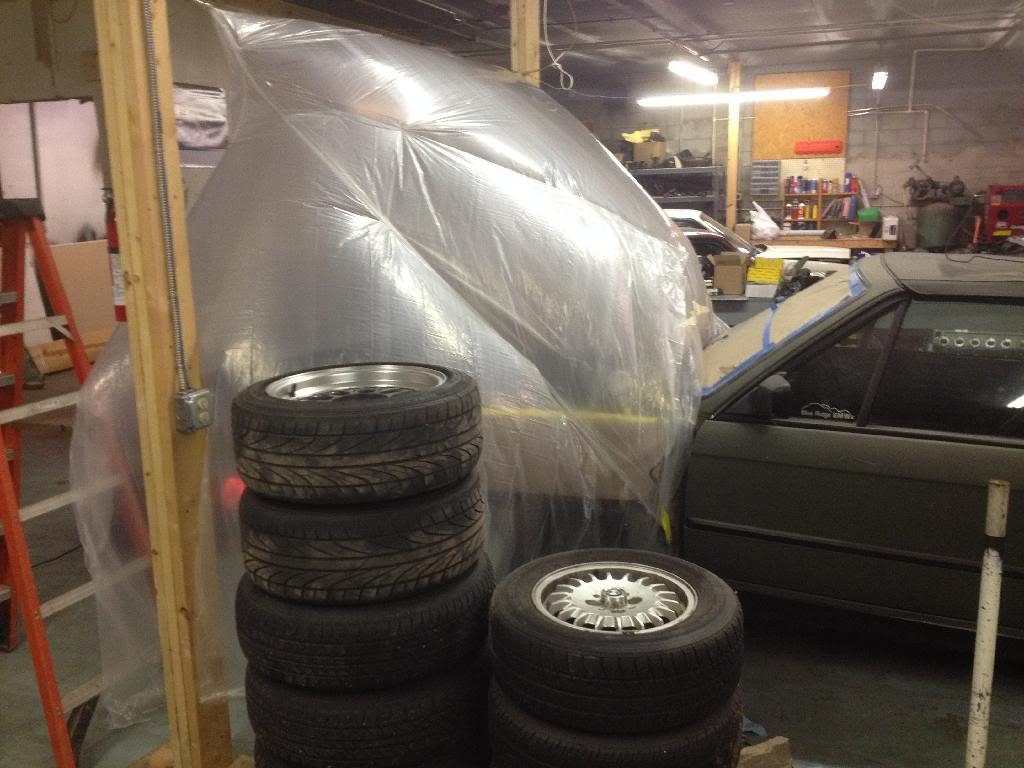
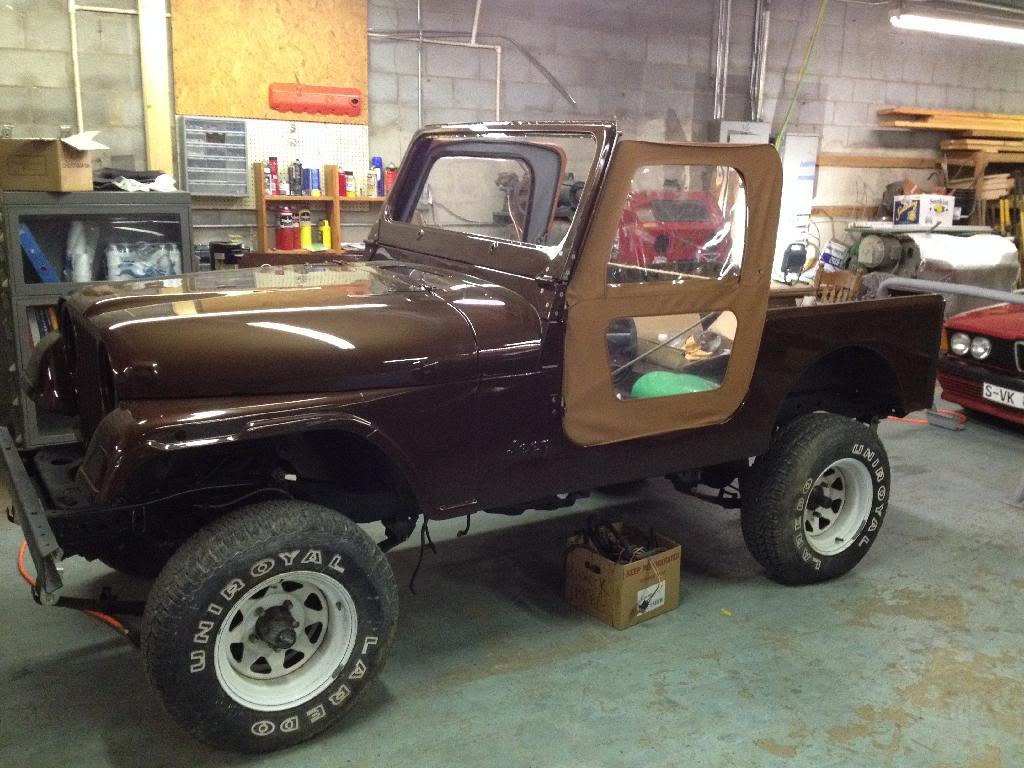
And while she is in dry dock here are a few pictures of some of her stable mates.

12-13-2013
Thanks.
The torque rating for the stage 3+ is 525 ft/lbs
12-17-2013
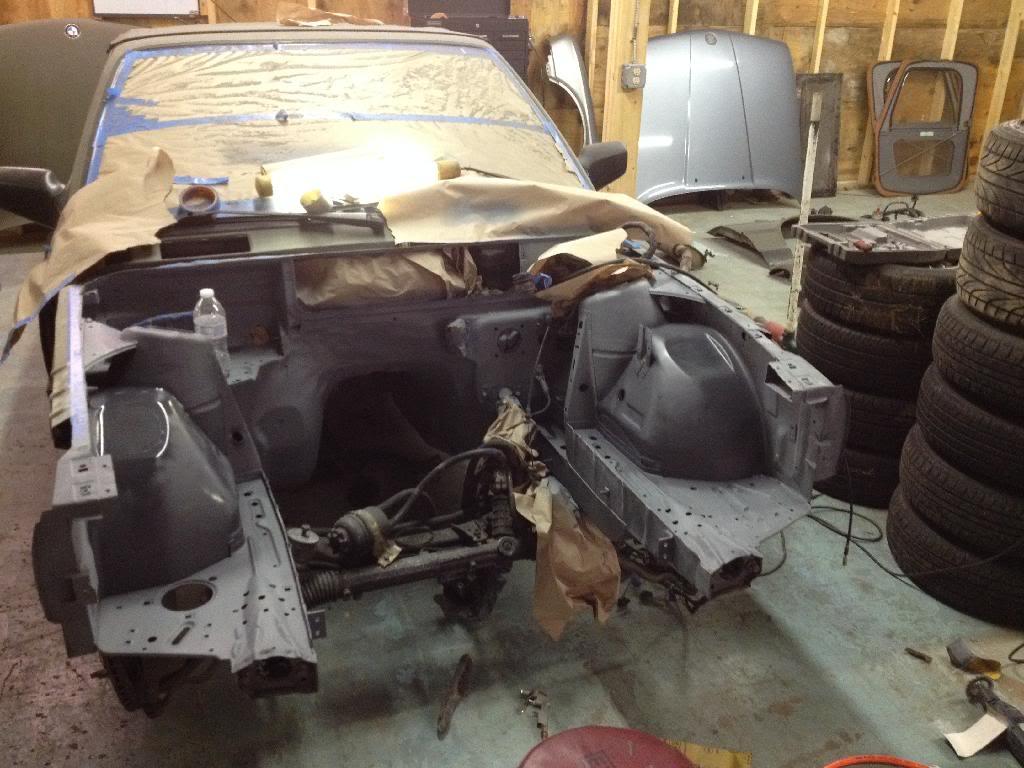
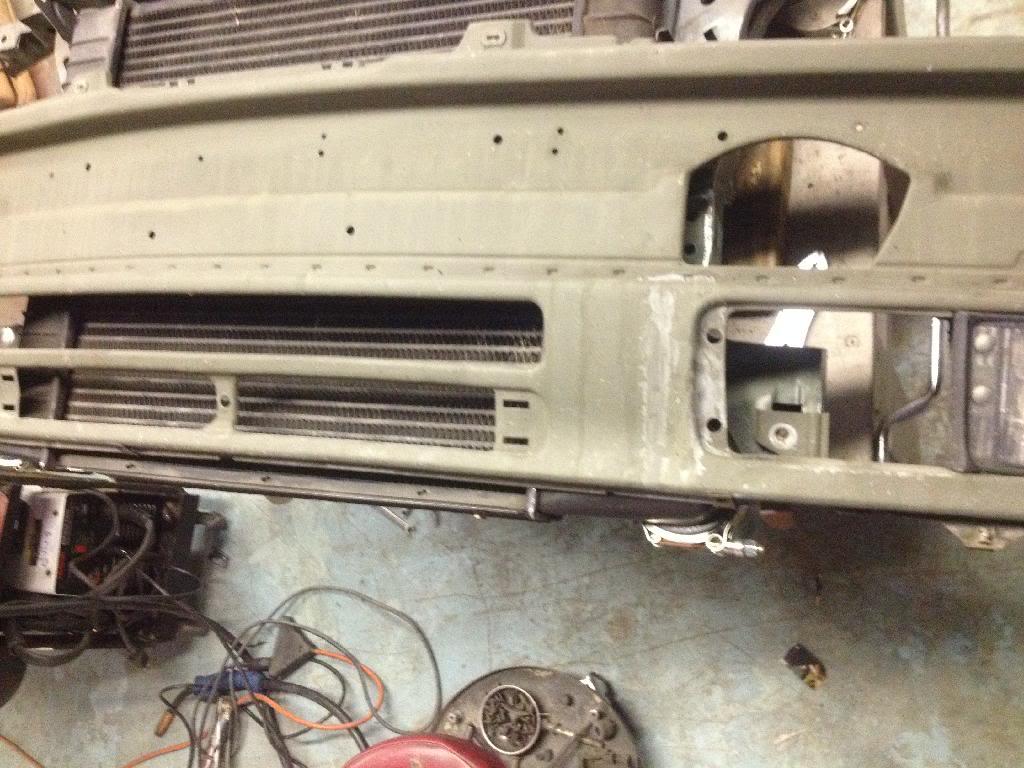
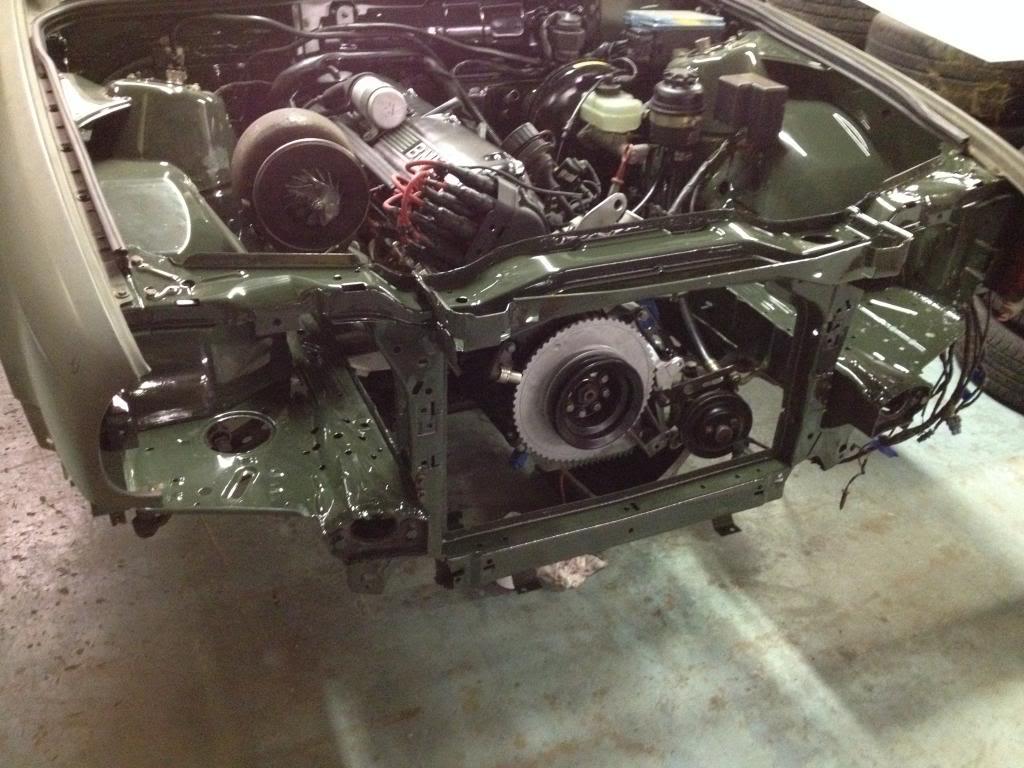
Operation removable radiator support is underway!
I drew up several different ideas of how to make it happen but in a stroke of brilliance I came up with the most complicated way to do it yet! Who likes the easy way anyways.
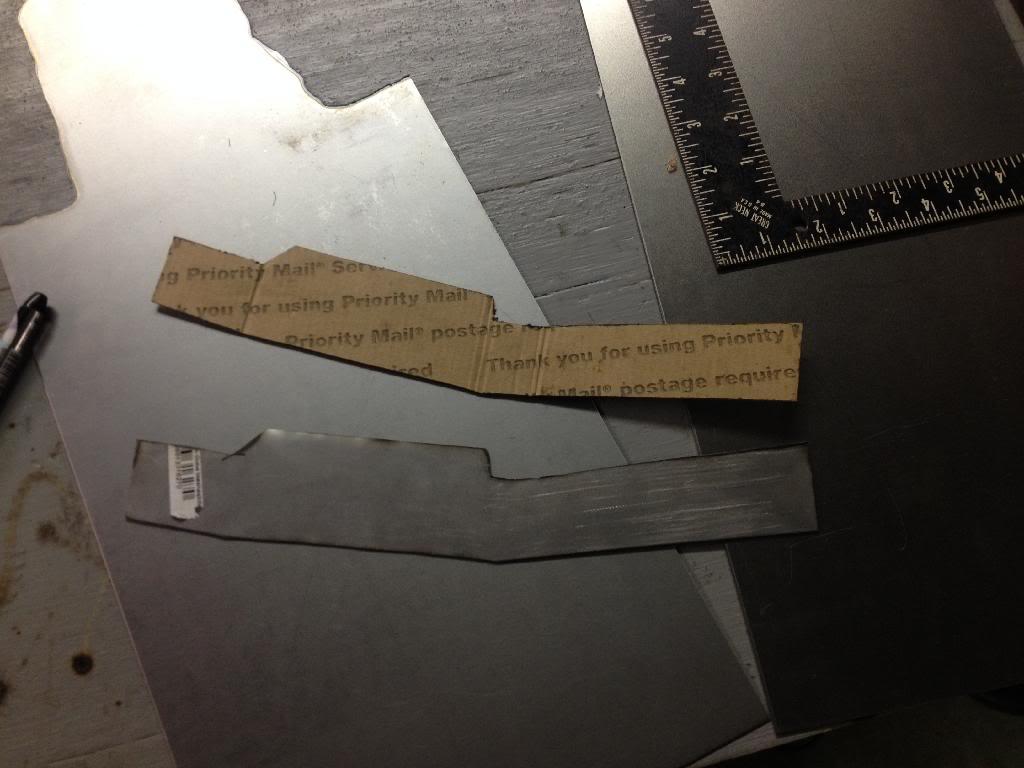
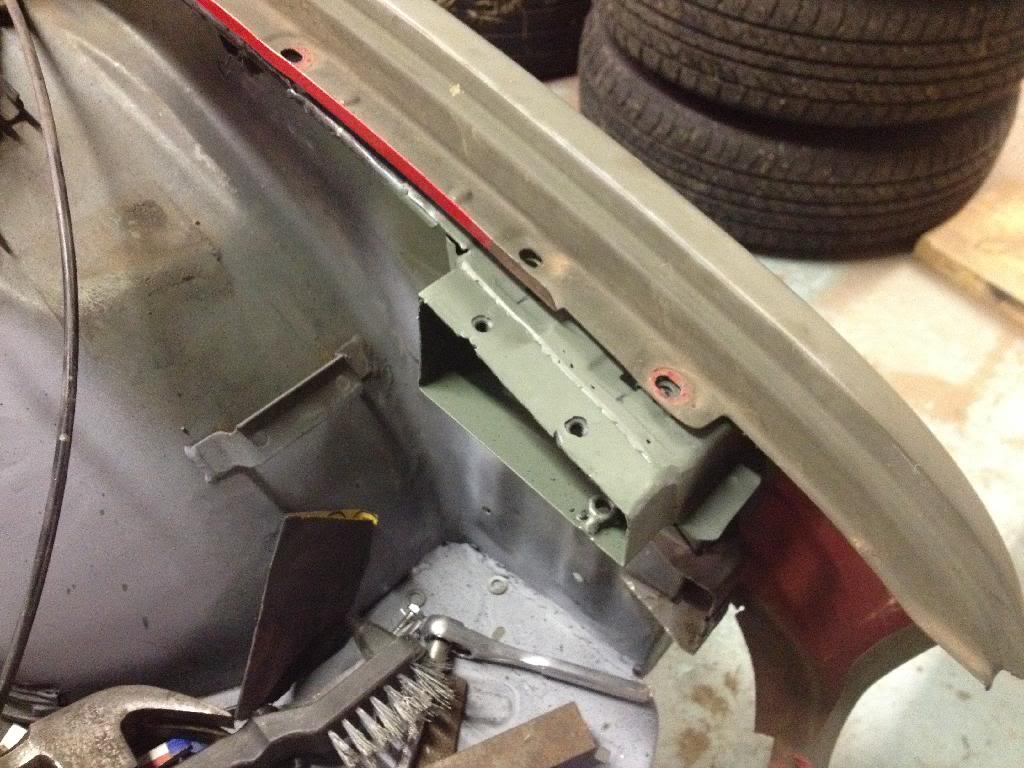
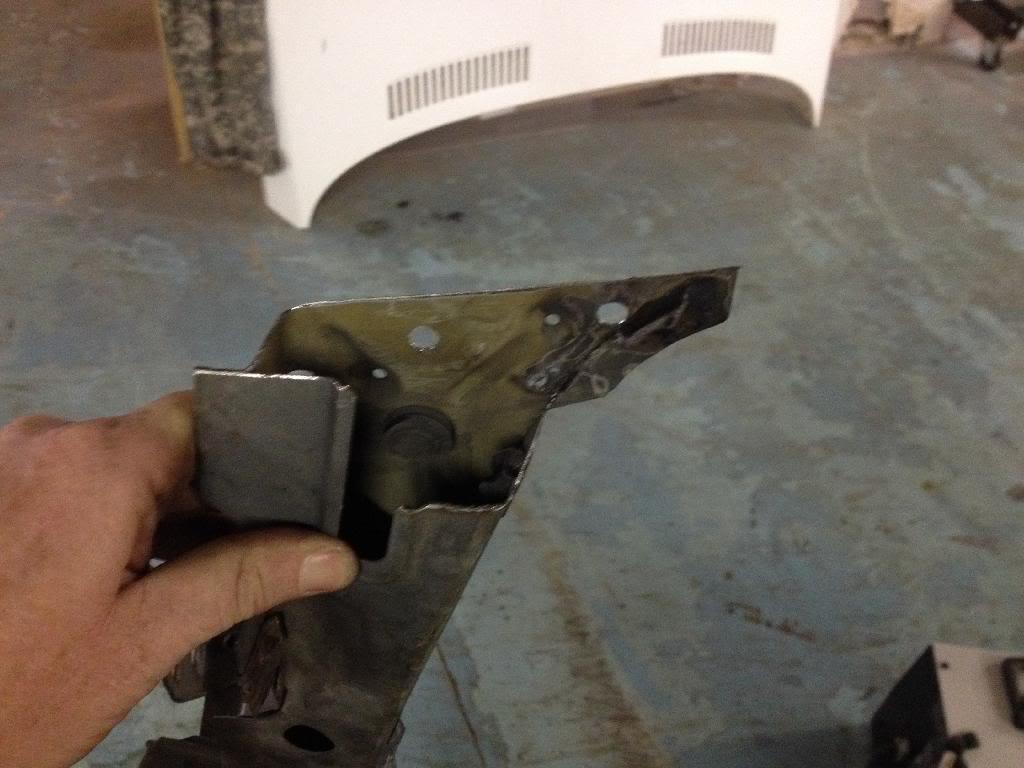
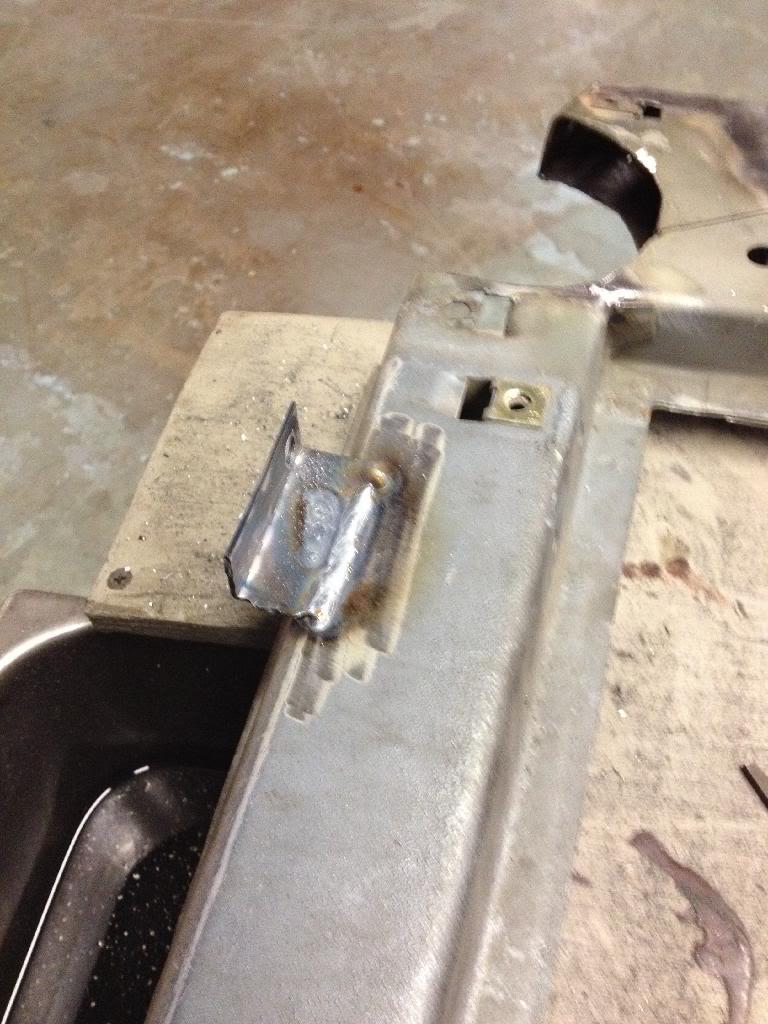
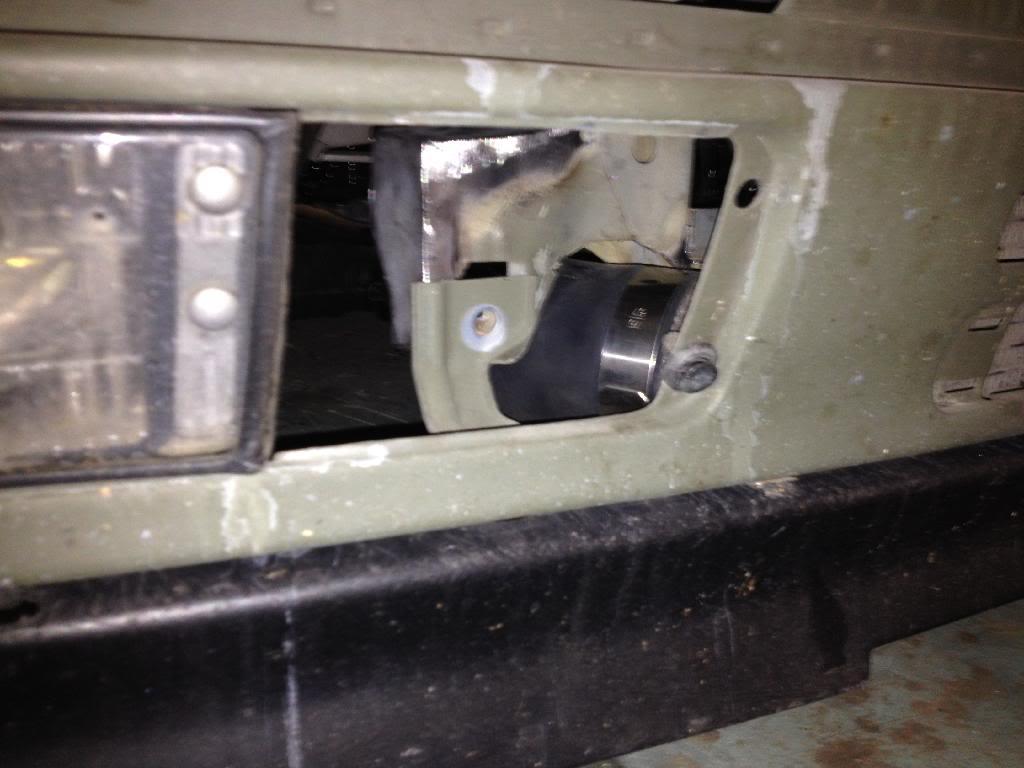
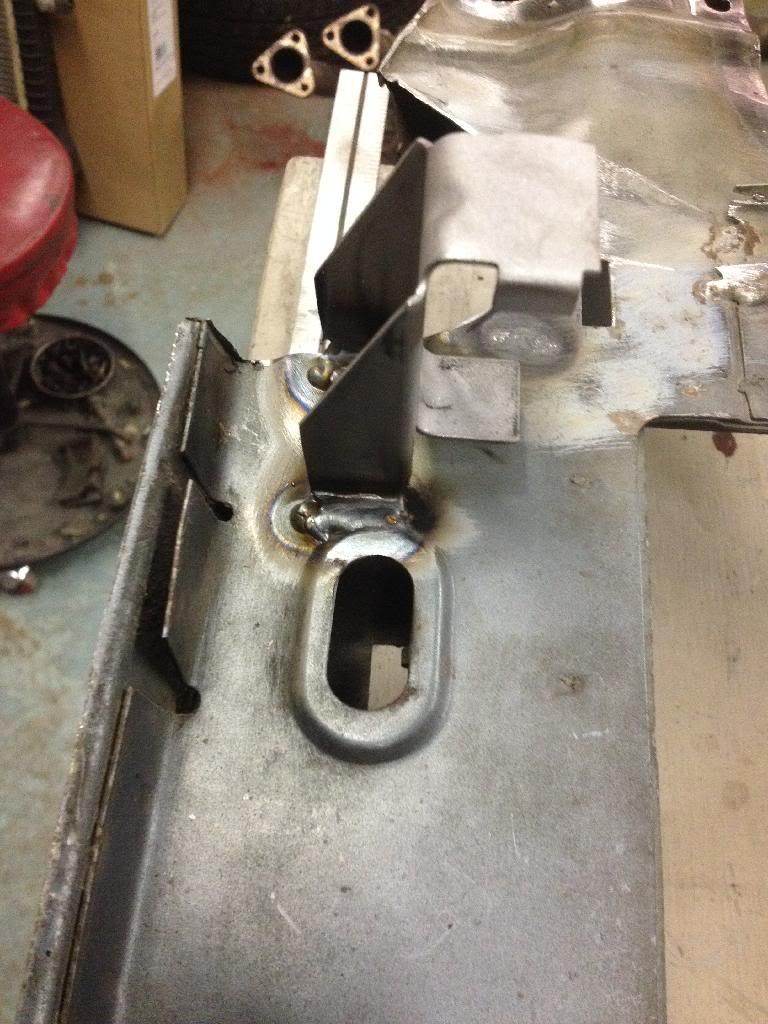
I started by making cardboard versions of the adaptors. I made a sleeve that fit inside of the remaining radiator support pieces that are still attached to the inner fenders. It sticks out about 1" with 3 attachment points on each side. Using m6 bolts (two on top and one on the bottom) I am able to securely bolt the support in place. I then trimmed the radiator support so that it slides over the sleeves. I still have to work out the lower mounting points on the frame but that is the easy part.
Pics:
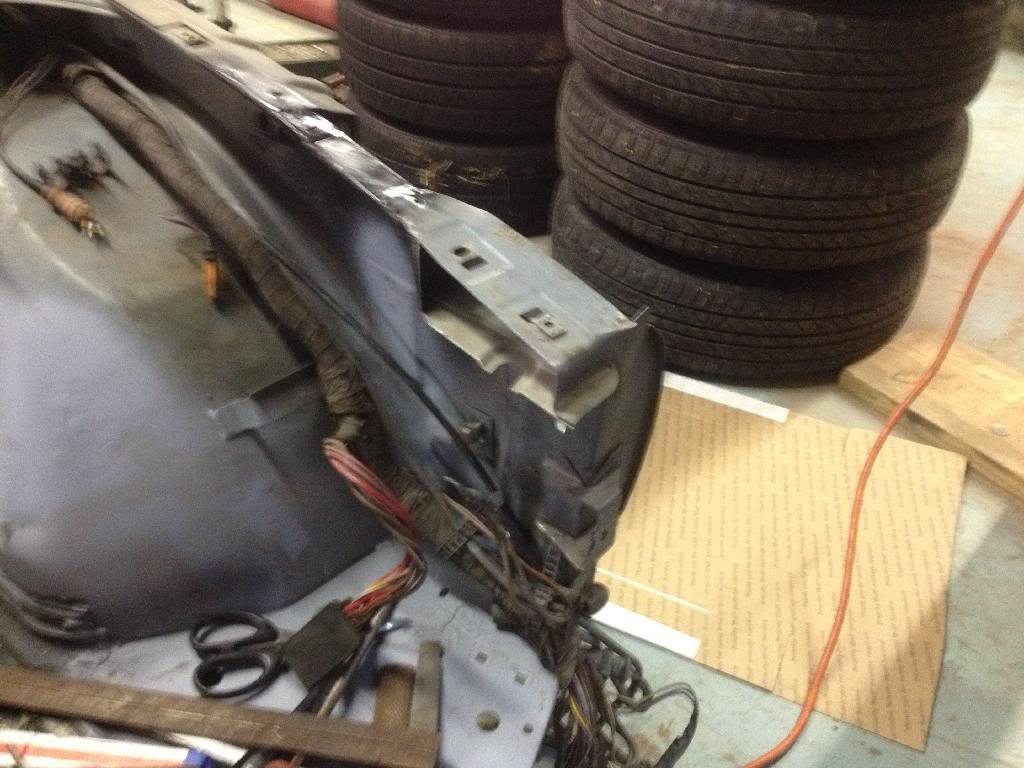
Existing radiator support pieces still attached to inner fender. AKA before!
Template and metal cut out (I love love love my plasma cutter!)
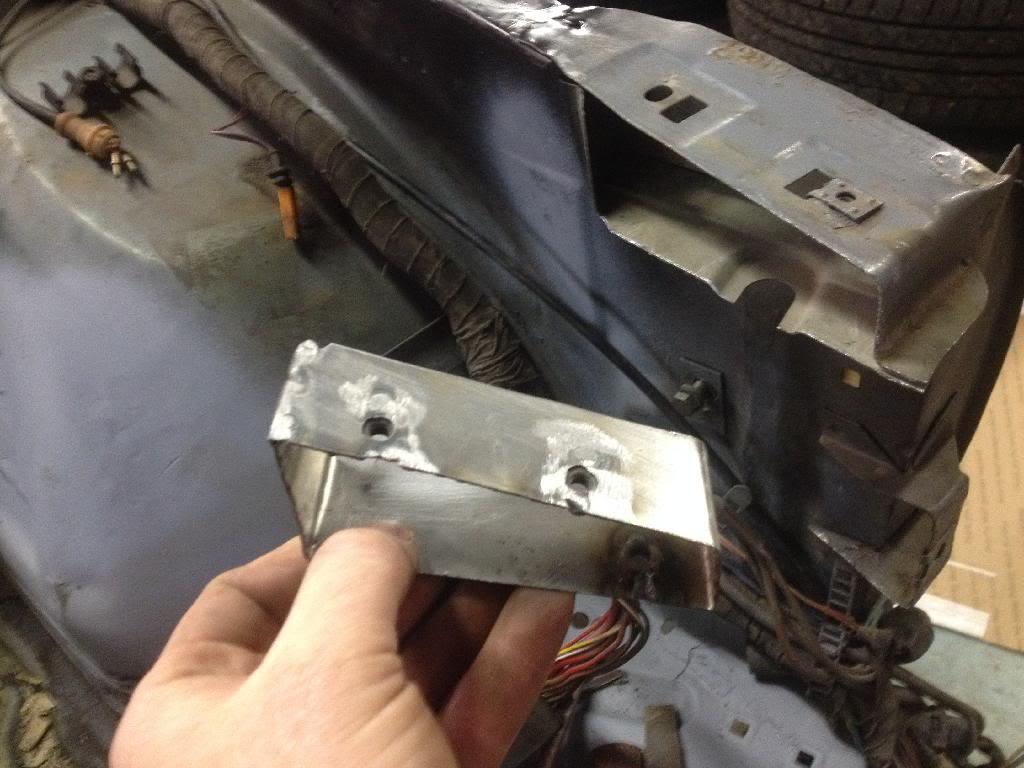
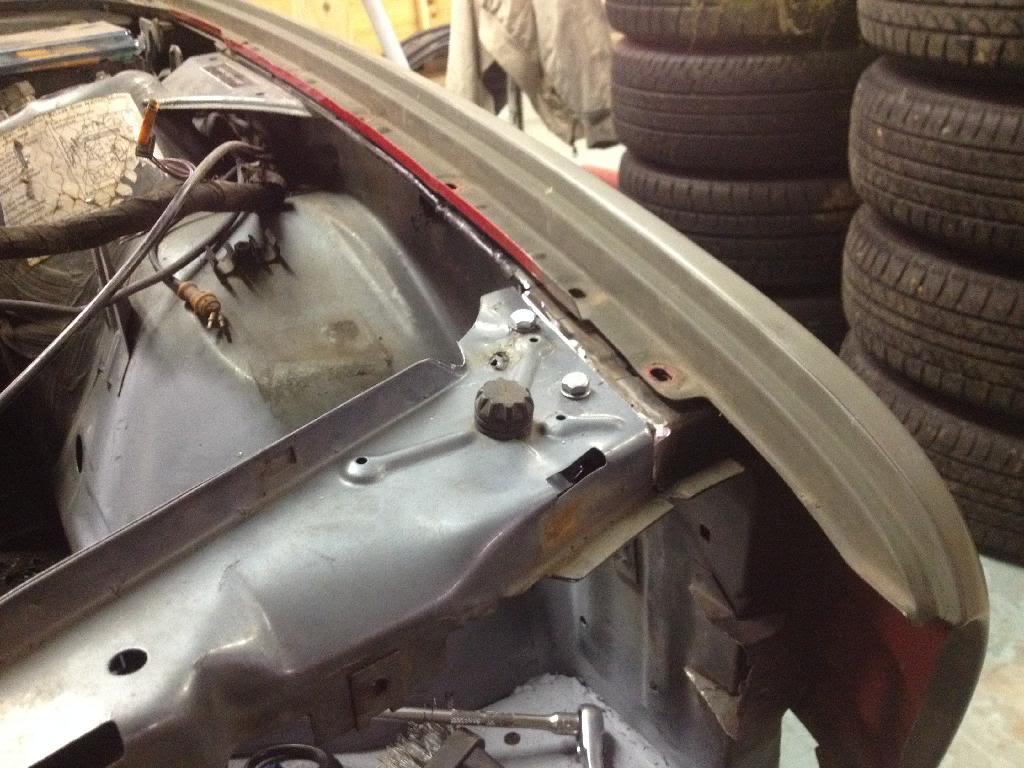
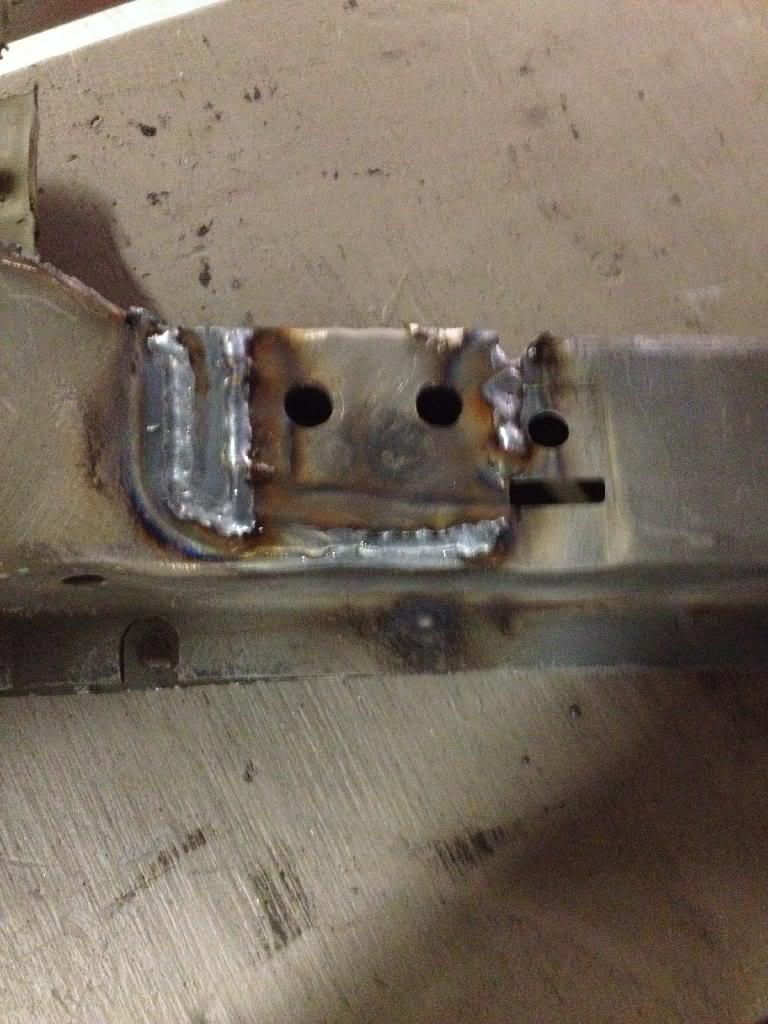
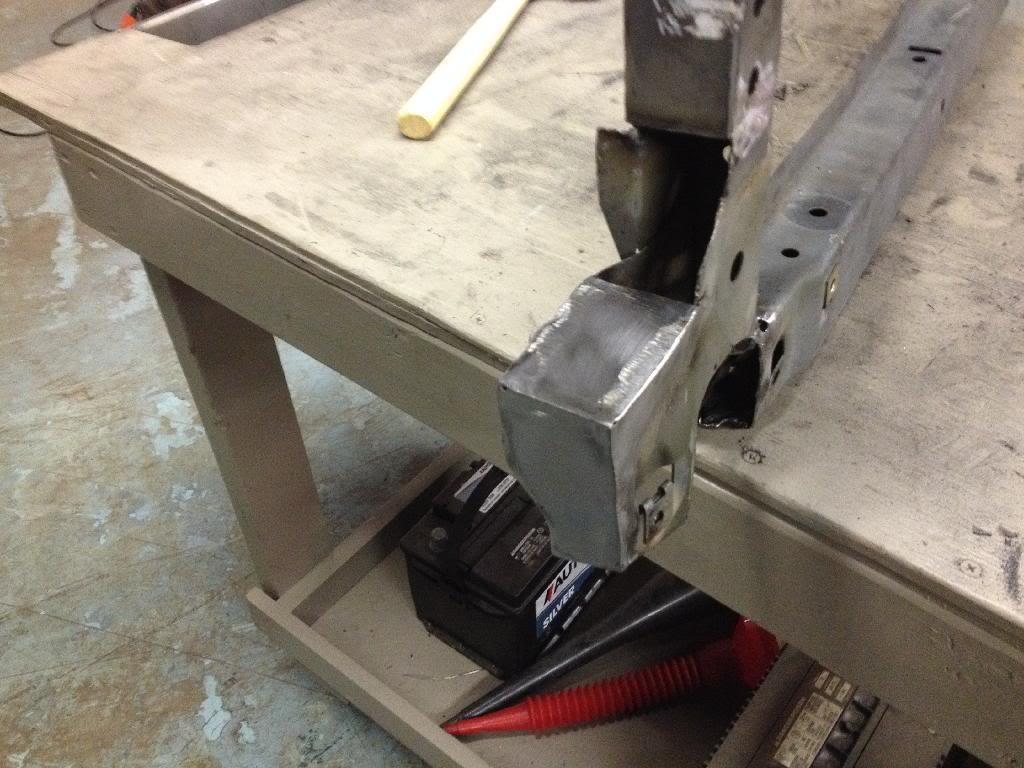
Formed and nuts welded in place. Sorry I skipped a couple of steps.
In place
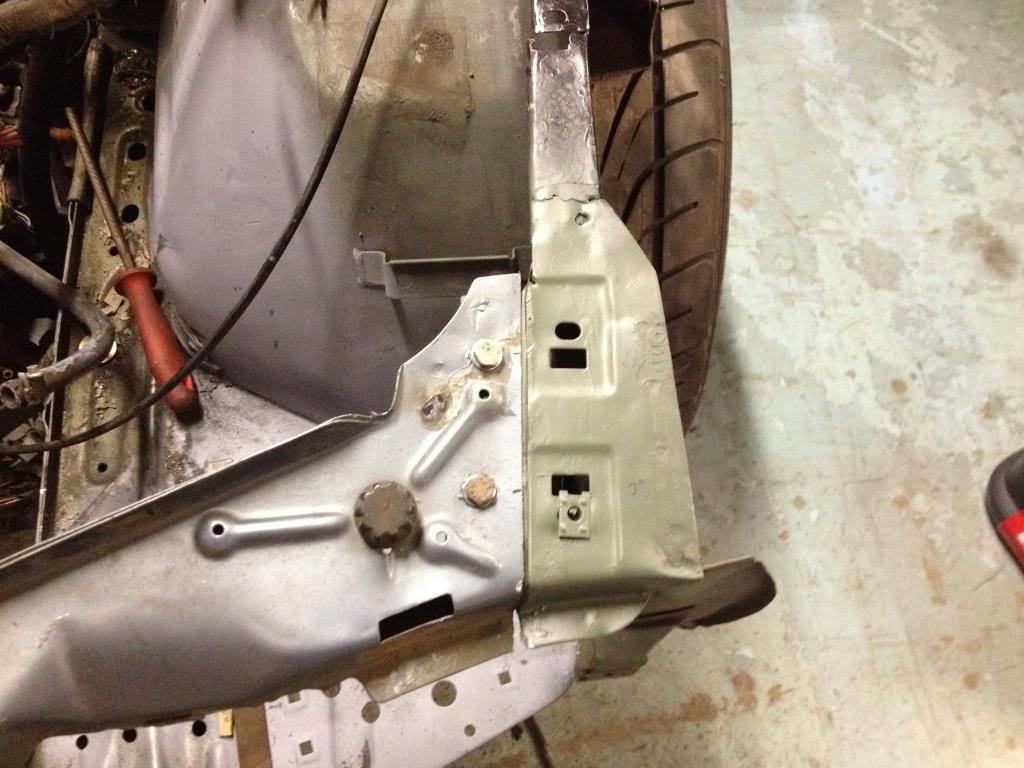
Welded then cleaned and primed
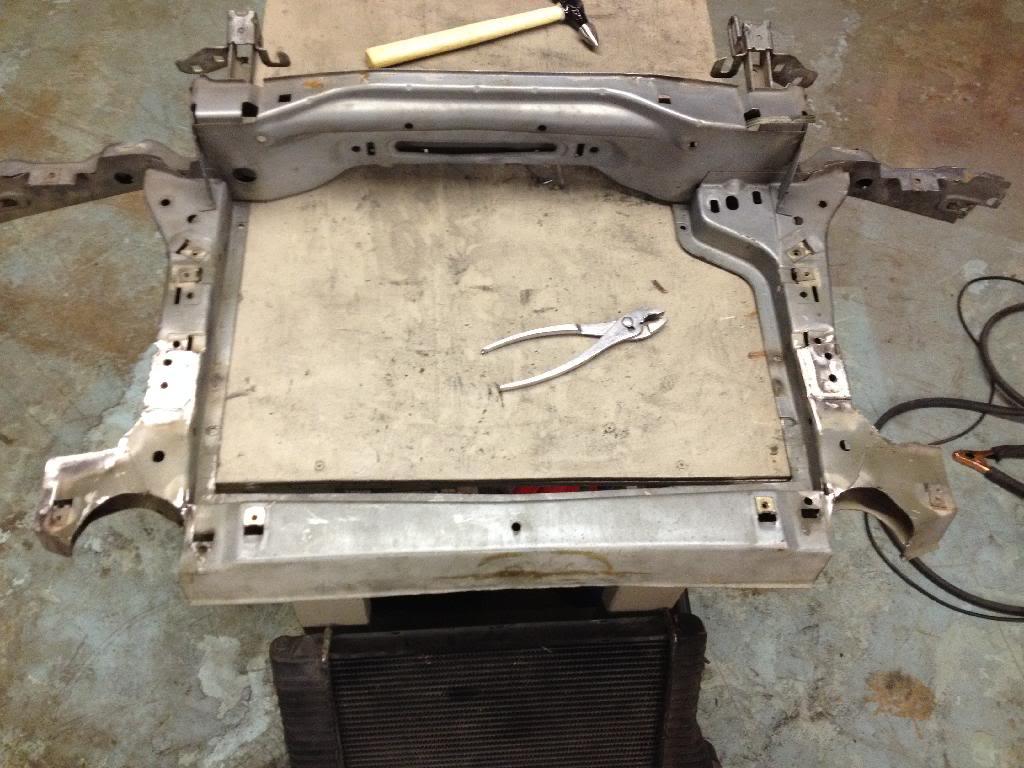
Trimmed radiator support
And in place bolted up. I did measurements before and after and they are the same. I also measured two other convertibles to verify my measurements.
12-18-2013
Finished up the upper mounts for the radiator support. And spent some time cleaning them up to make it look like I meant to do it.

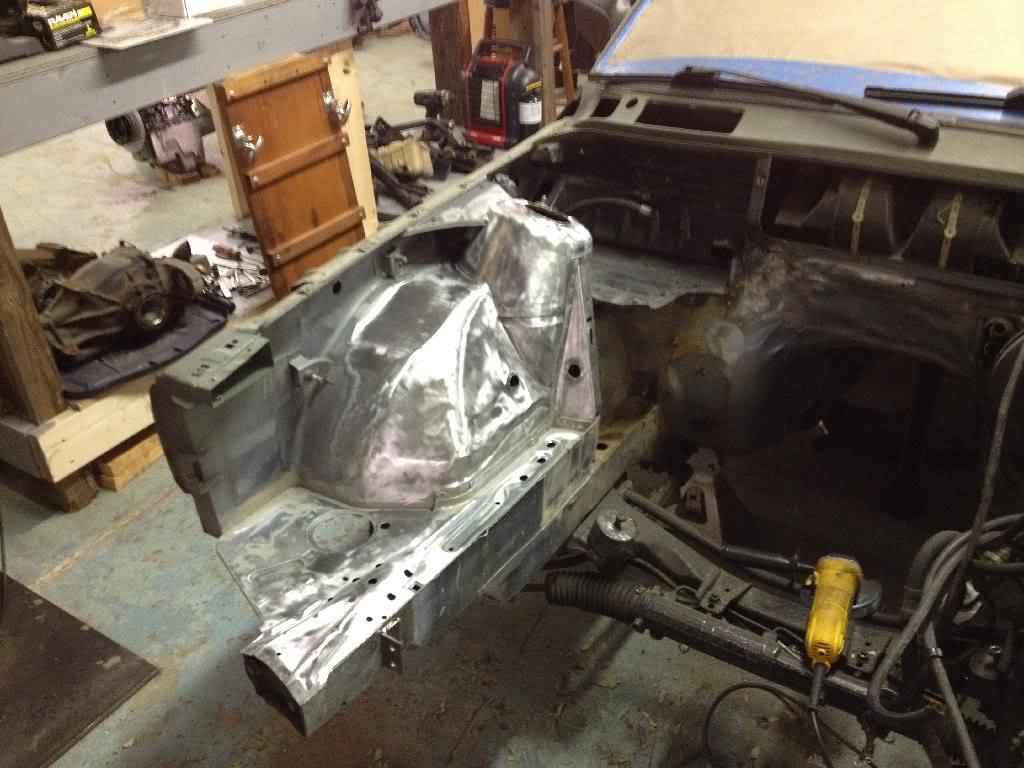
Then I got a wild hair up my bum and figured I would join the tucked engine bay crowd.
First I eliminated all the unused wires such as ABS, AC, and the windshield washer bottle wires. Then I rewrapped the harness in ACE hardware friction tape which is extremely similar to the BWM wire wrap.
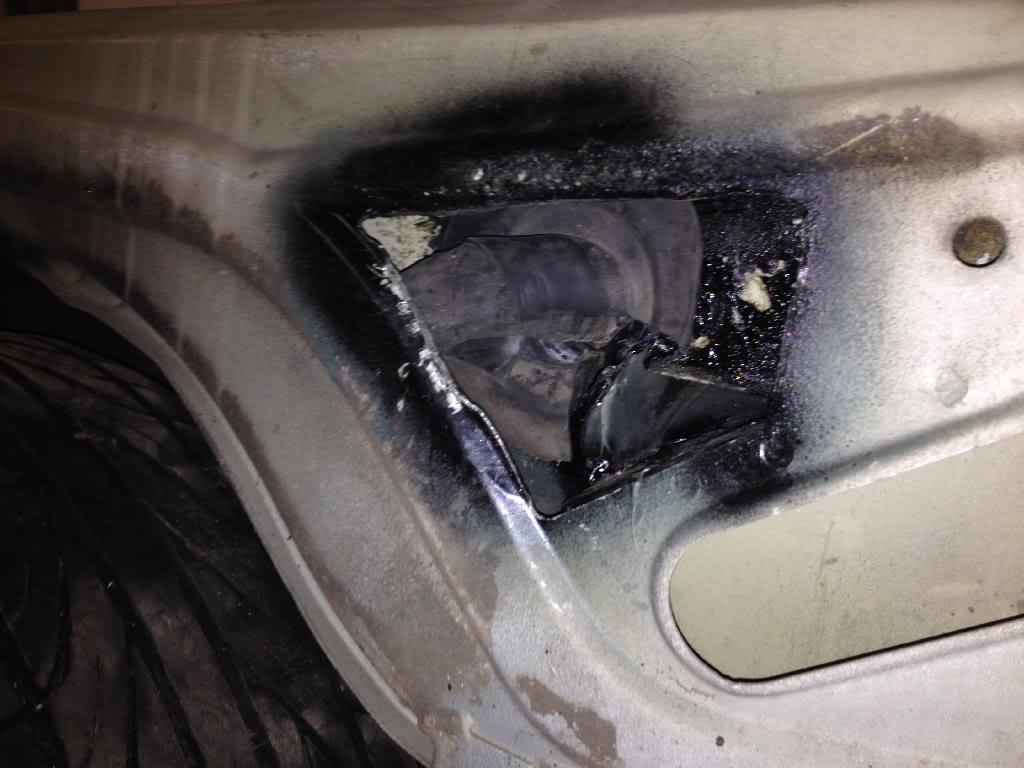
Then I proceeded to poke a hole in the inner fender after cutting out an access on the out side. I used an extra rubber grommet from the engine wiring harness to protect the wires.
I pulled the wires through the inner fender and then carefully routed them through the "tunnel" in the inner fender.

12-22-2013
So I had a slight distraction in the last couple of days. I stumbled across an e21 convertible and then an e21 dune buggy!

Then after 2 loads in the truck I had an empty bay again and some much needed patch panels for my Euro E21 323i.
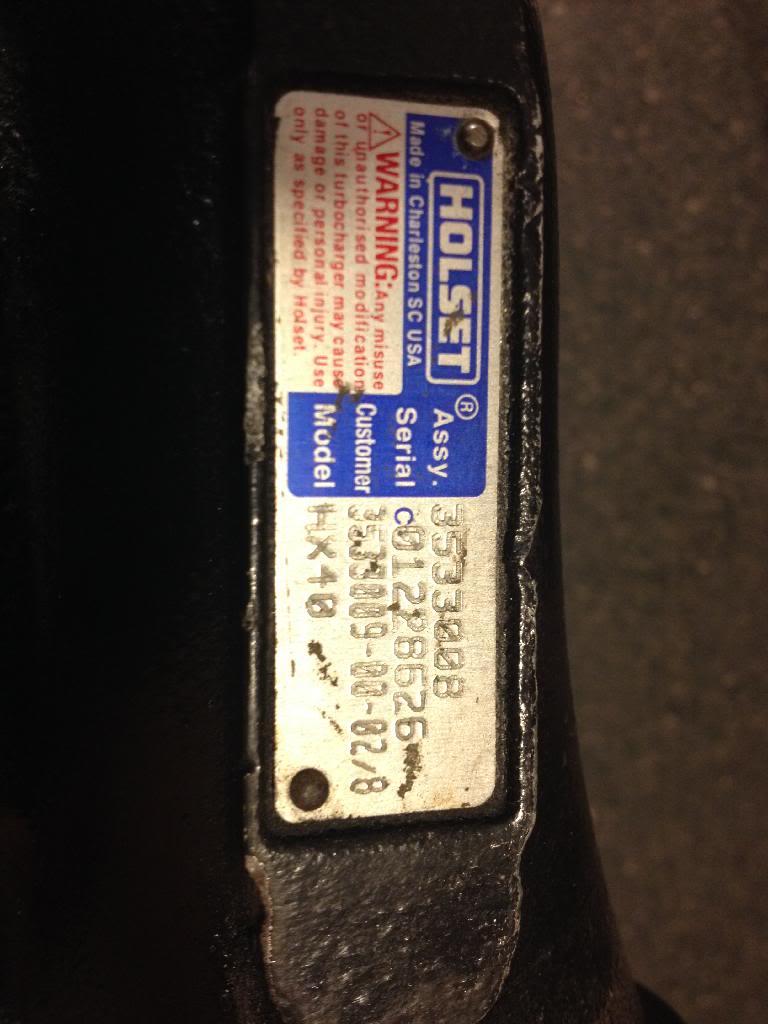
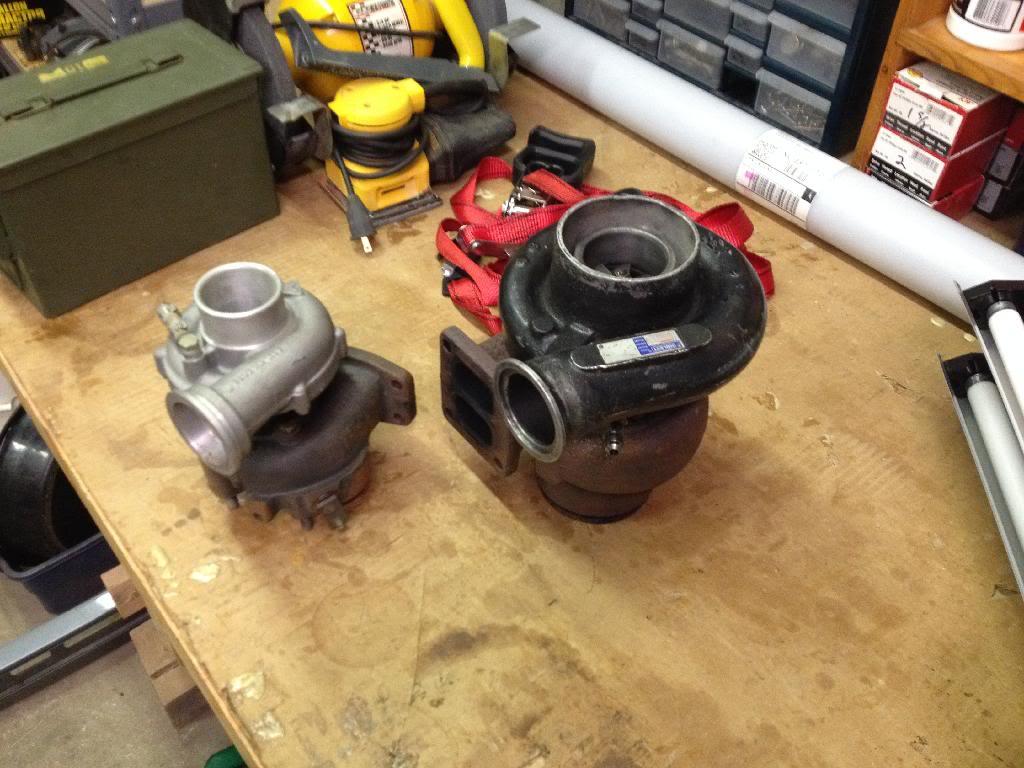
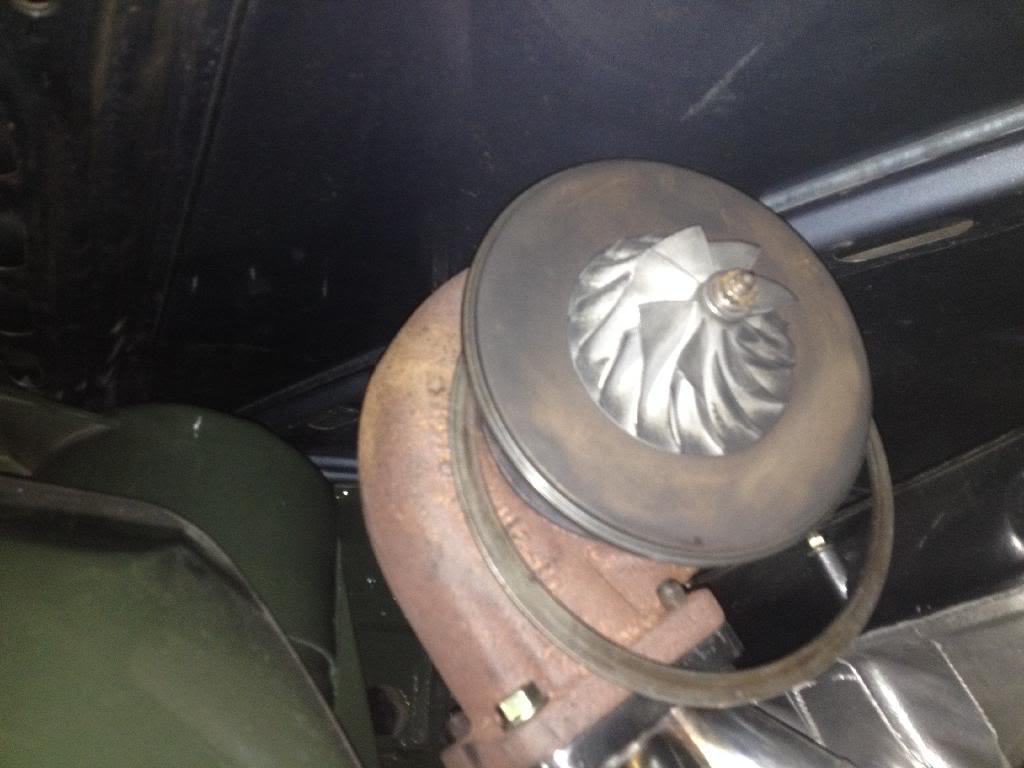
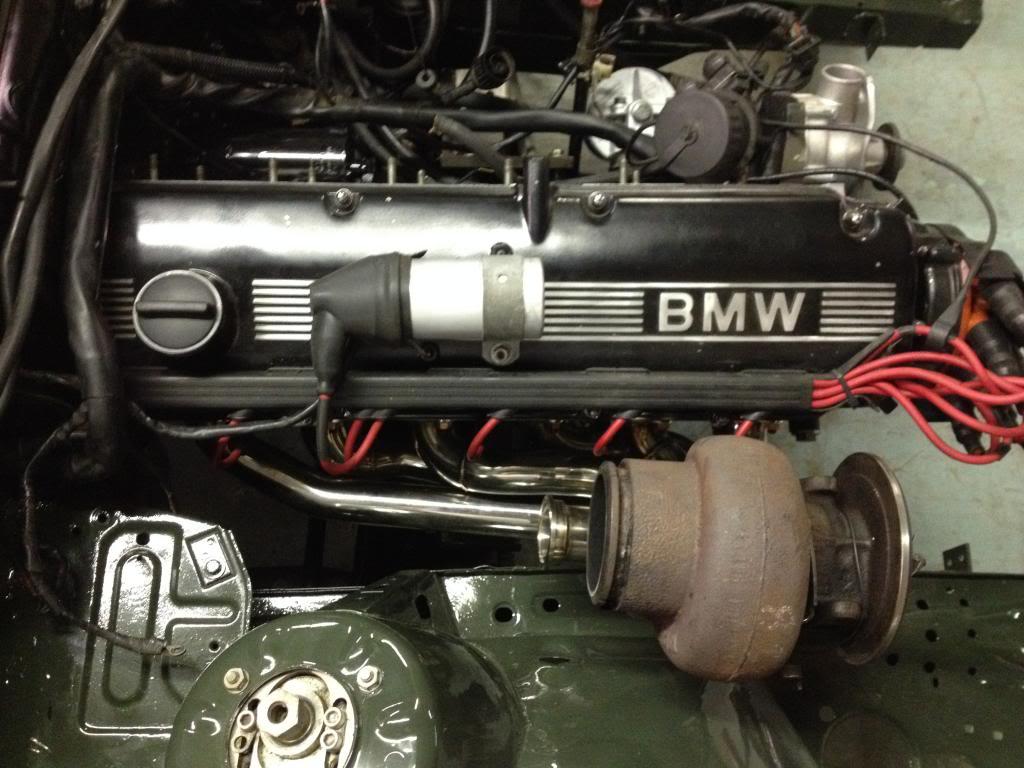
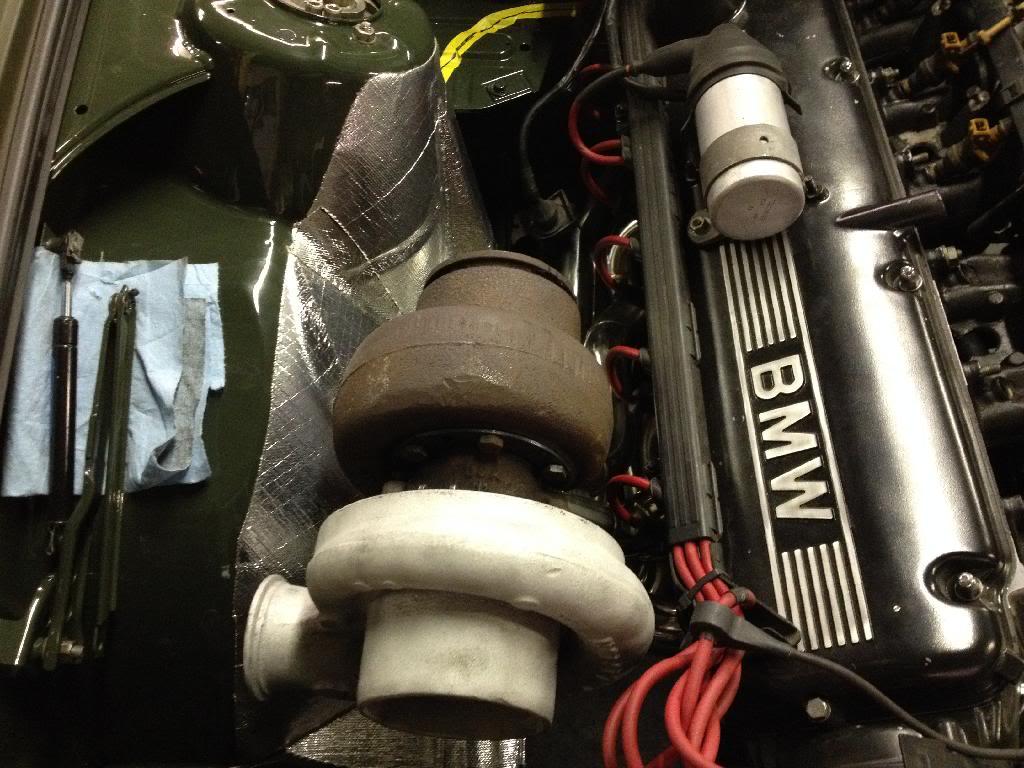
NEXT, I got a new toy today! A recently (within 200 miles) rebuilt Holset HX40 turbo!
I am going to clean it up and polish the cold side while I finish up the build and break in of the M30.

12-23-2013
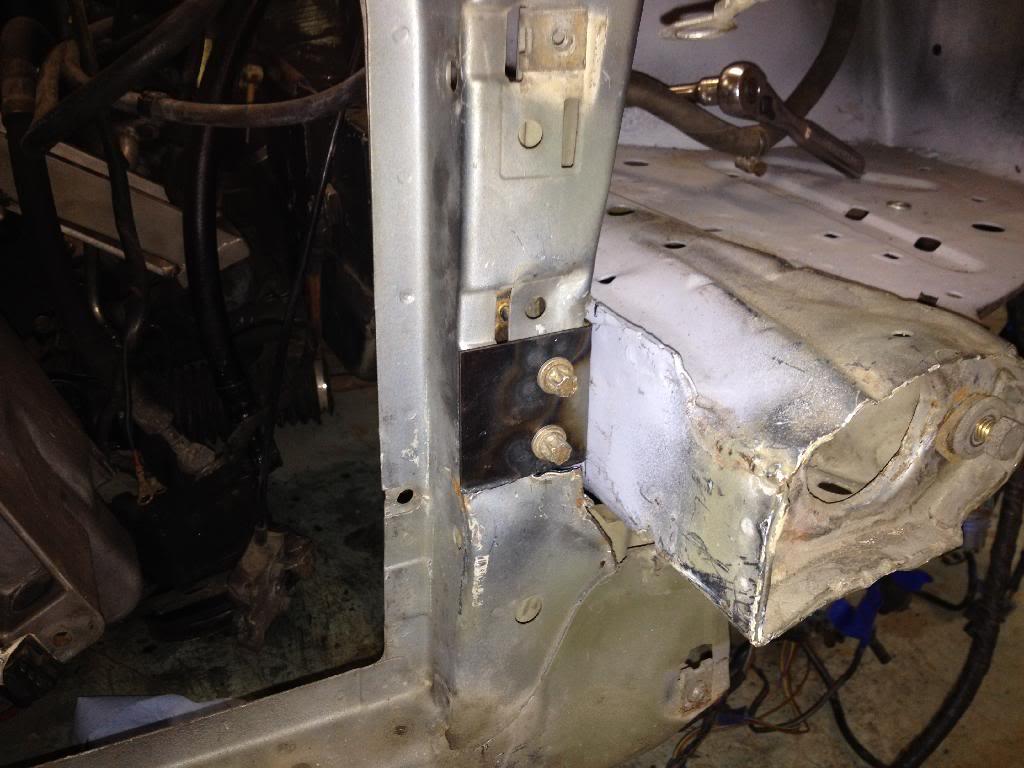
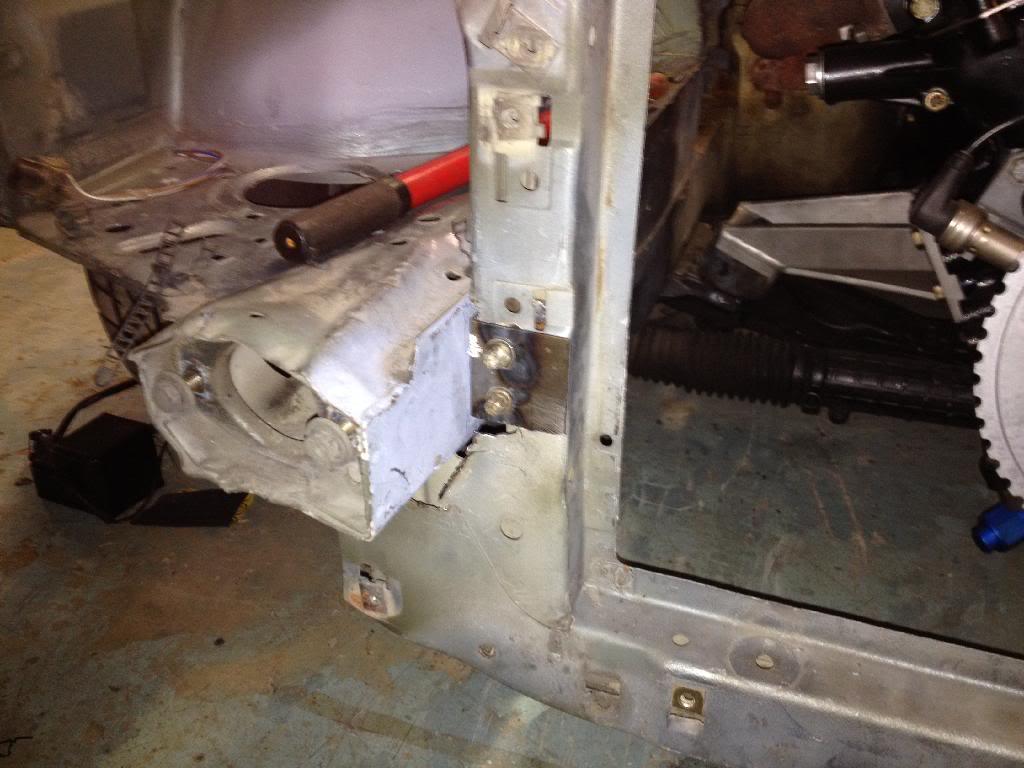
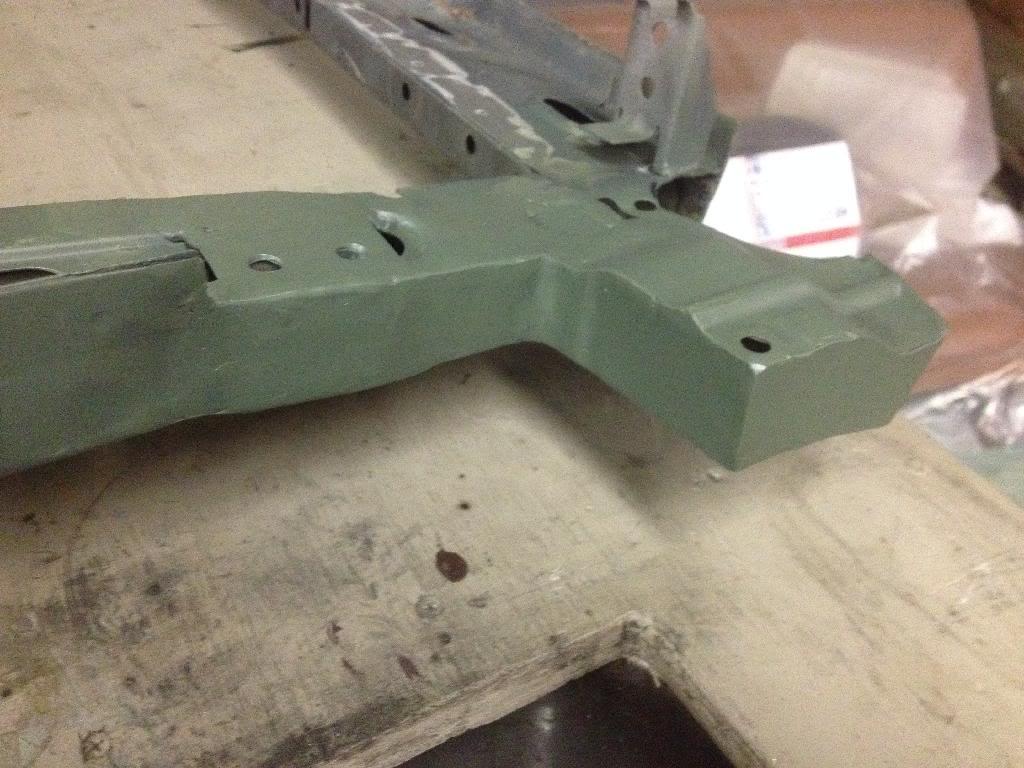
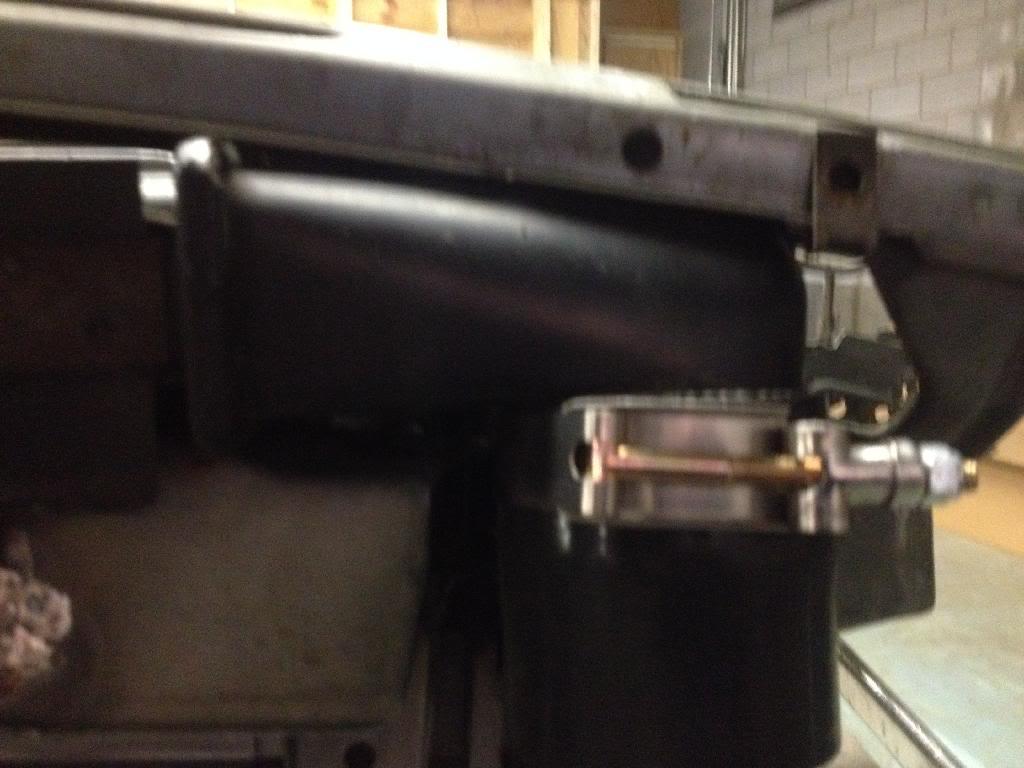
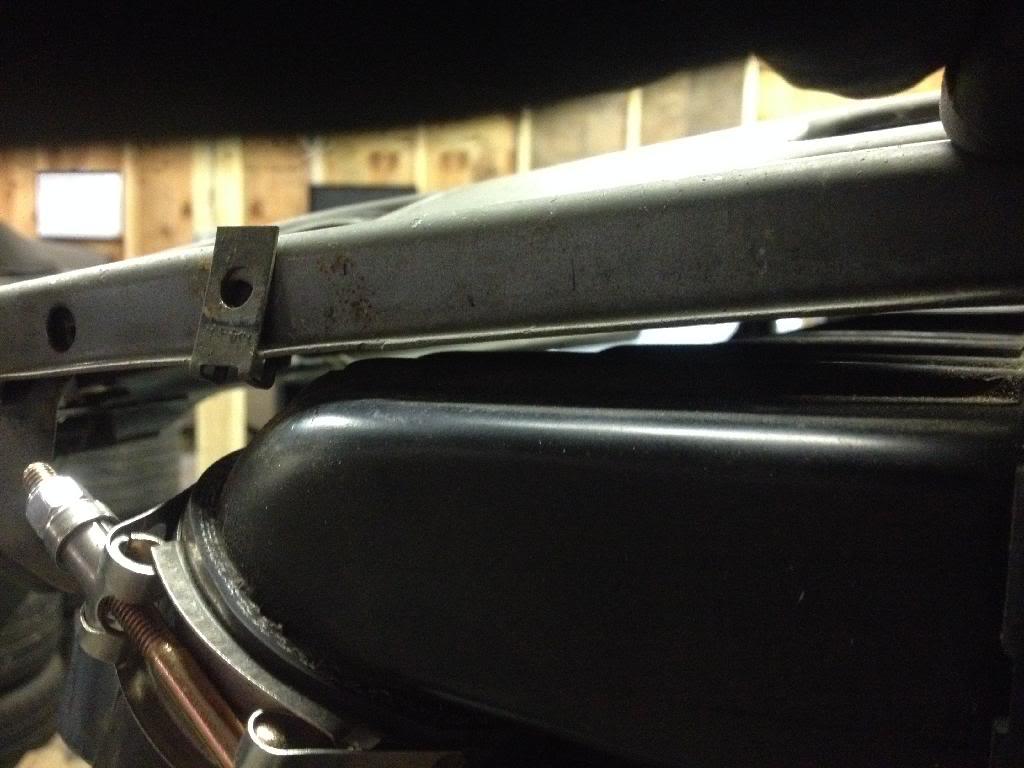
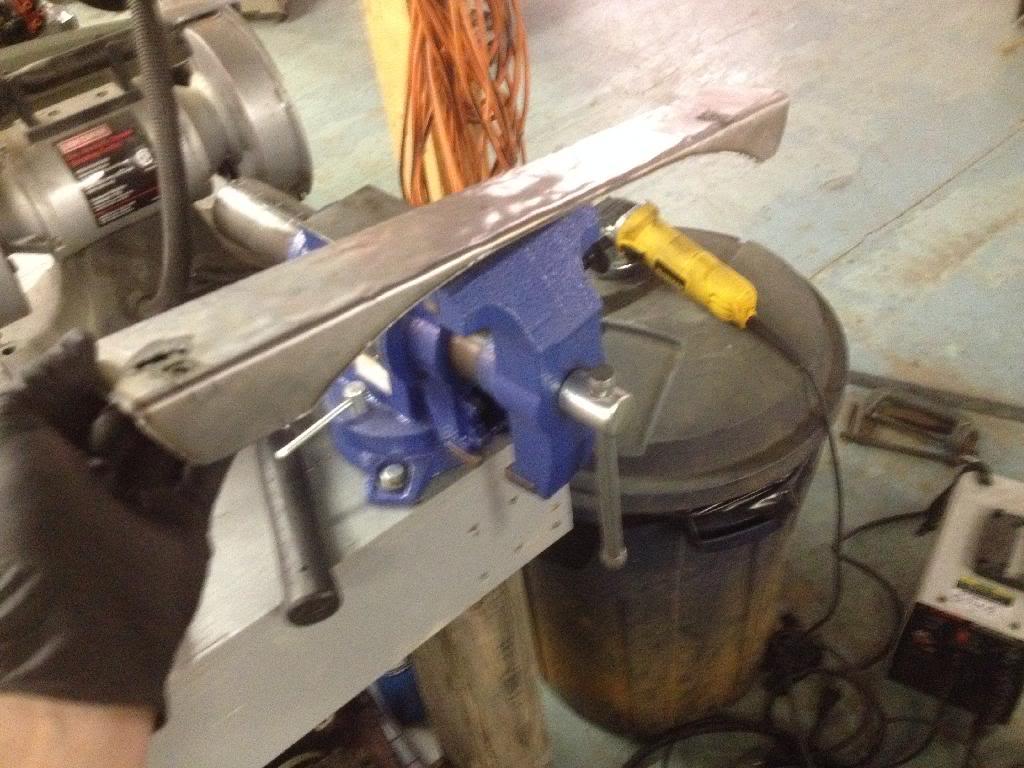
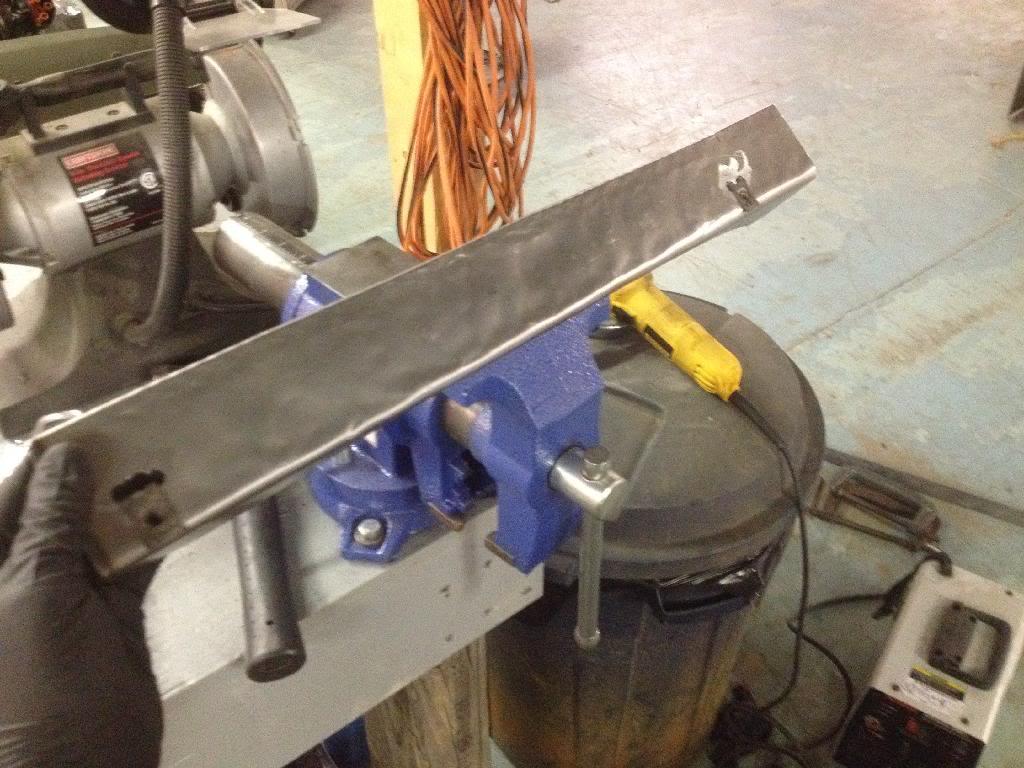
I made the hardware today for the lower mounts on the radiator support.
I cut and then bent some 16ga steel. I drilled holes and then welded in pipes to the center to provide support.
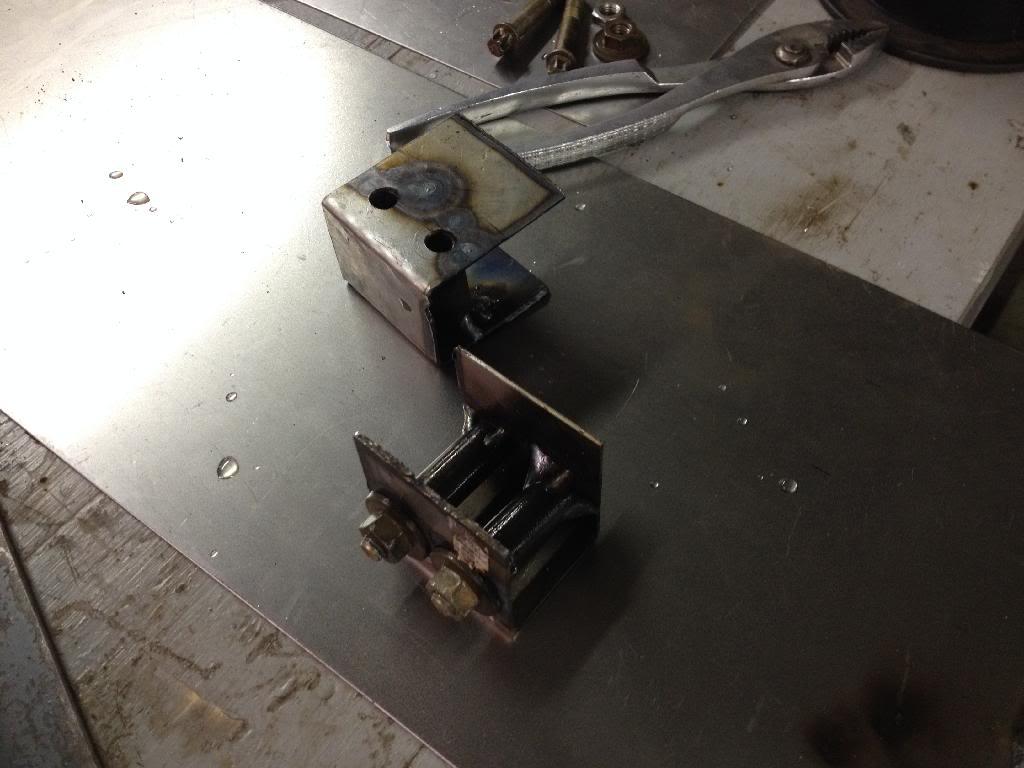
These are designed to slide tightly over the existing radiator support and be welded onto it. The bolts will secure the radiator support to a piece of angle iron that will be welded to the frame of the car. I mocked up the entire set up in the next couple of pictures. I will be welding everything into place after Christmas. Once again there are many ways to skin this cat, this is just the method I choose.
12-27-2013
Got some progress done today. First off, Project Removable Radiator Support is complete!
I welded the brackets in place added some extra metal and then cleaned up the welds. I am sharing a picture of a raw weld just so I can have proof that not all my welds suck.
I then decided that I want to complete all the fabrication for the intercooler mounting and the radiator before I move on. This way I can pull the drive train and paint it without worries of major future fabrication.
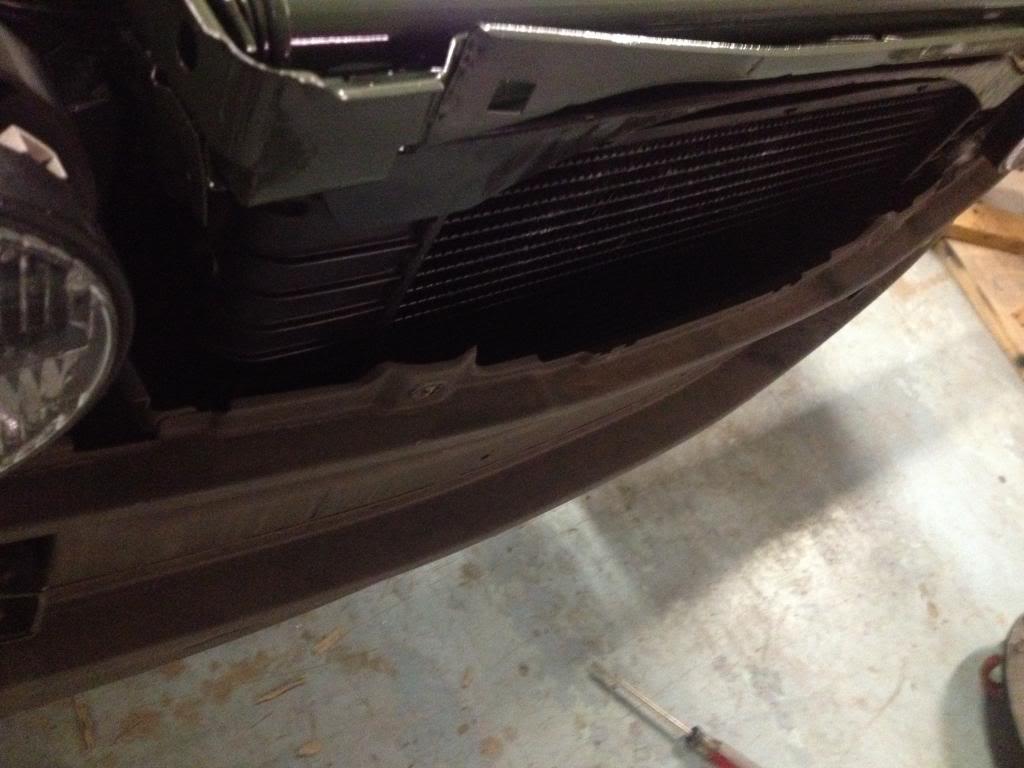
Anyways, I first placed the intercooler where I wanted it and marked the metal that needed to disappear. Then the plasma cutter went to work.
I then boxed in the now flimsy valance mount points. This made them strong again and also made the whole mess look a little better.
And this is what it looks like with the intercooler on the radiator support out of the car.
The bottom mounts are two pieces of 16 gauge sheet metal bent to a 90 and welded in place. I then drilled a hole through both of them and used factory headlight mounting hardware to secure the bottom of the intercooler.
And in the car! This intercooler is huge!
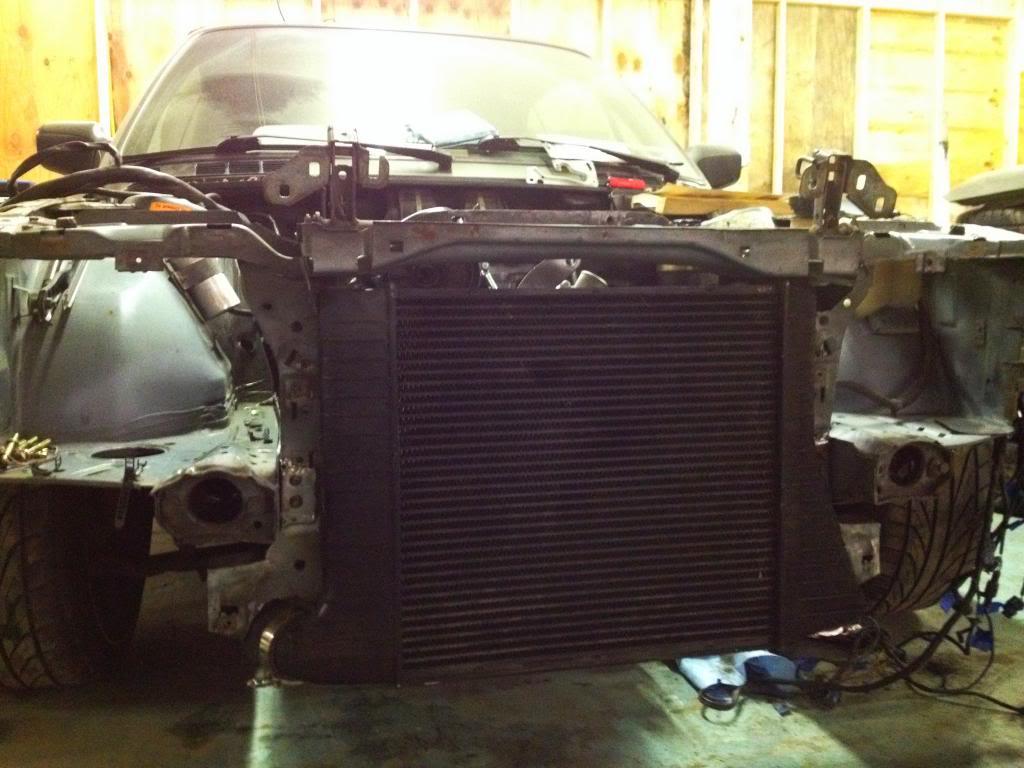
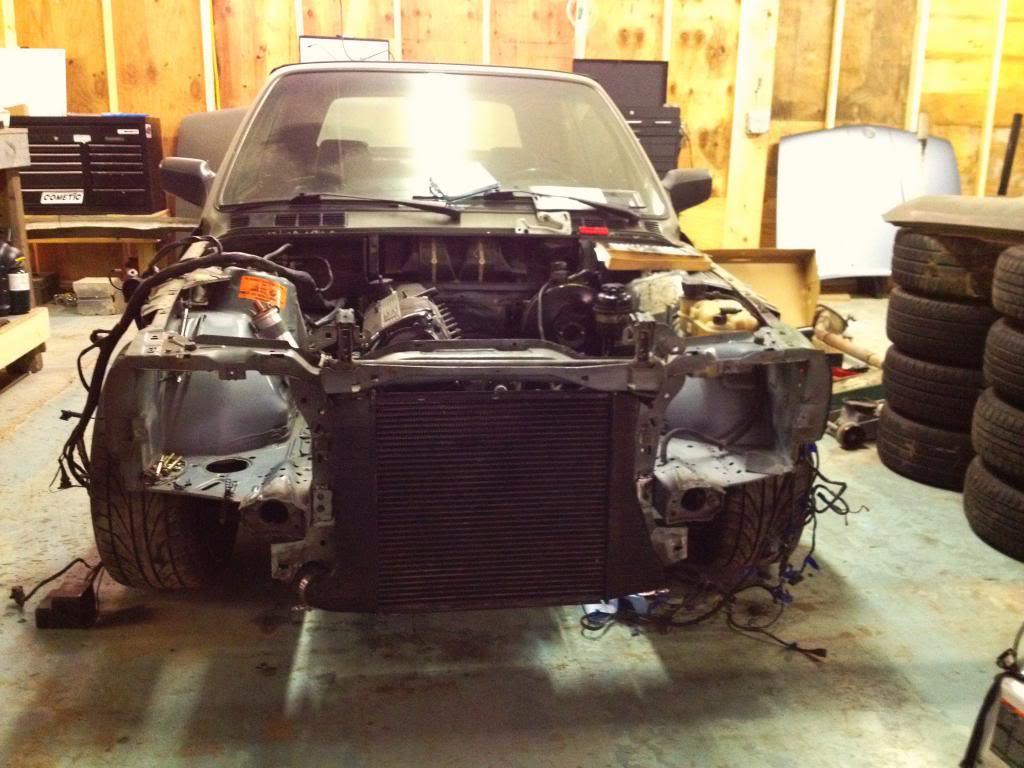
The valance bolts back on without modification. The intercooler fits perfectly! Here are a couple of pics with the valance in place.
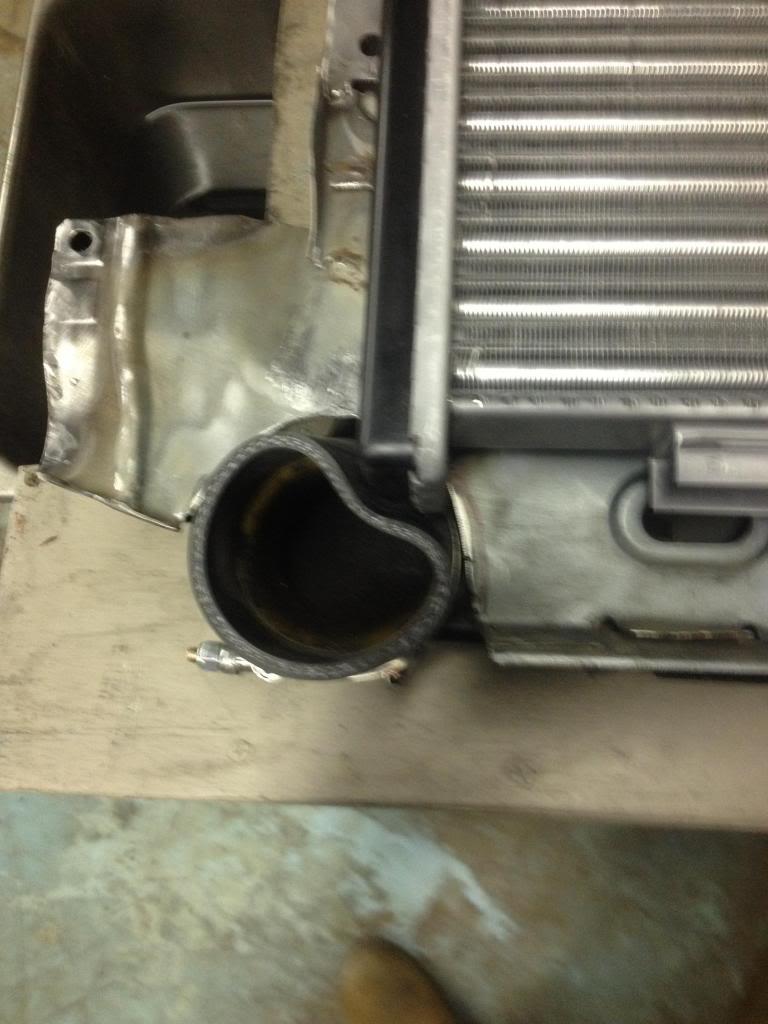
So the next step is to get the radiator mounted. I have an E36 318i radiator with the built in reservoir that I would love to use but I am concerned about the cooling. So I may end up having to purchase a 535i radiator. Regardless, the plan is to utilize the dead space between the intercooler and radiator and put a hi volume electric fan in there. I will be making plastic or fiberglass panels along with foam to ensure that the air moves 100% through the intercooler and radiator.
Getting closer!!

12-28-2013
I wonder which one I should use?
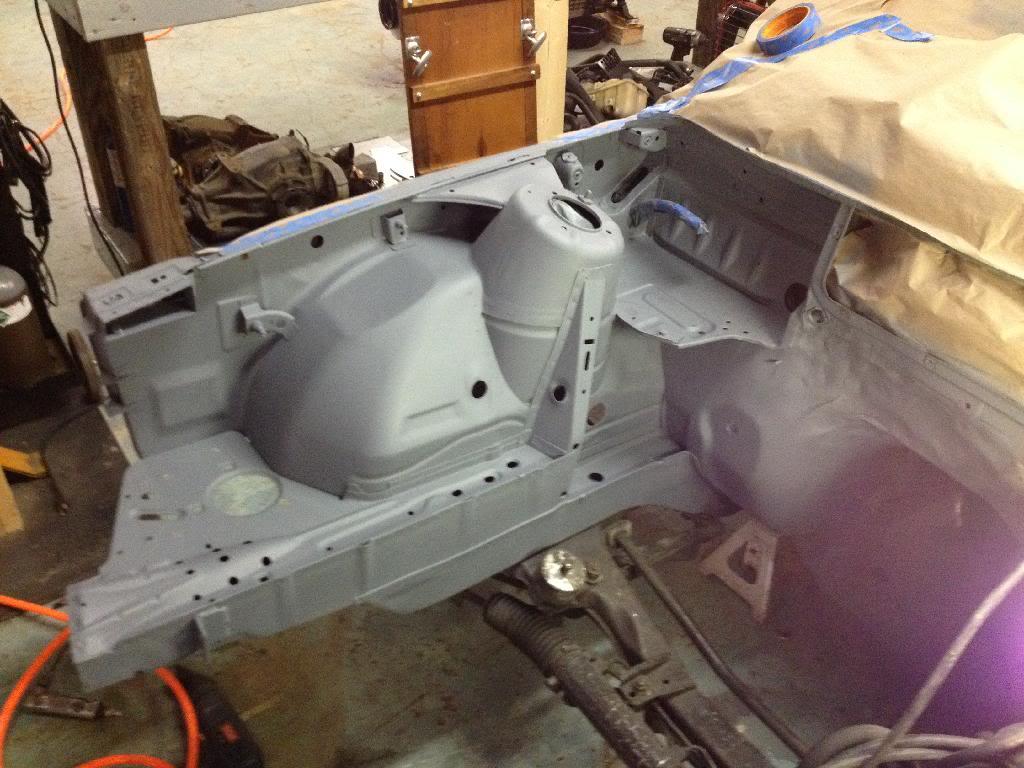
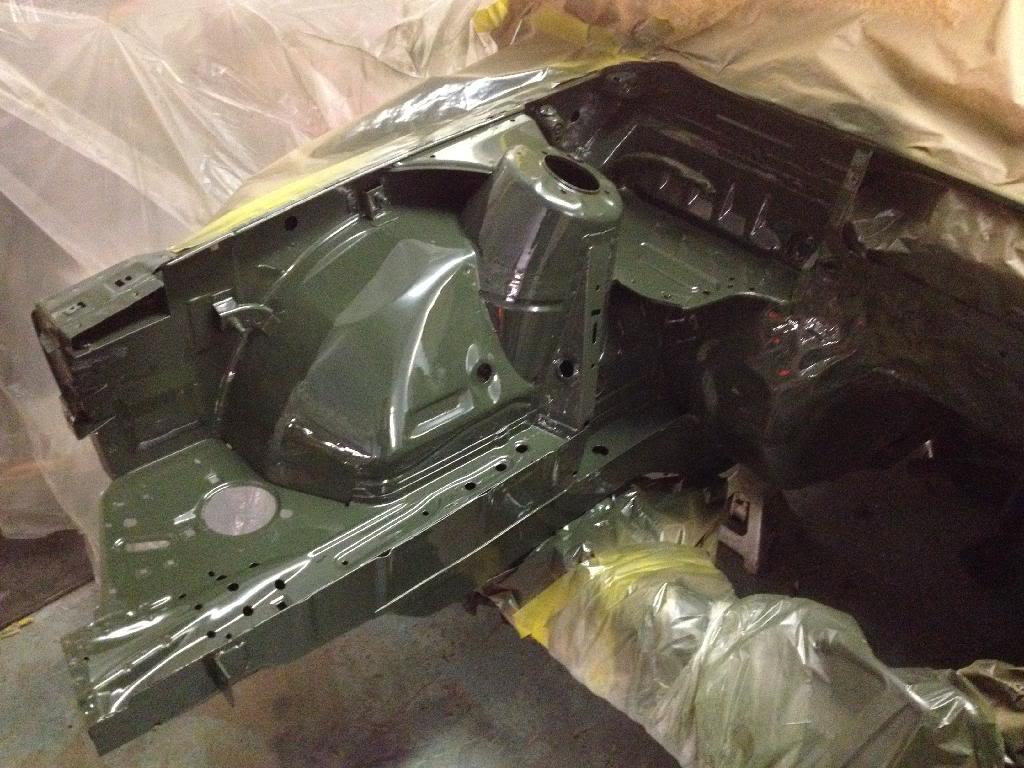
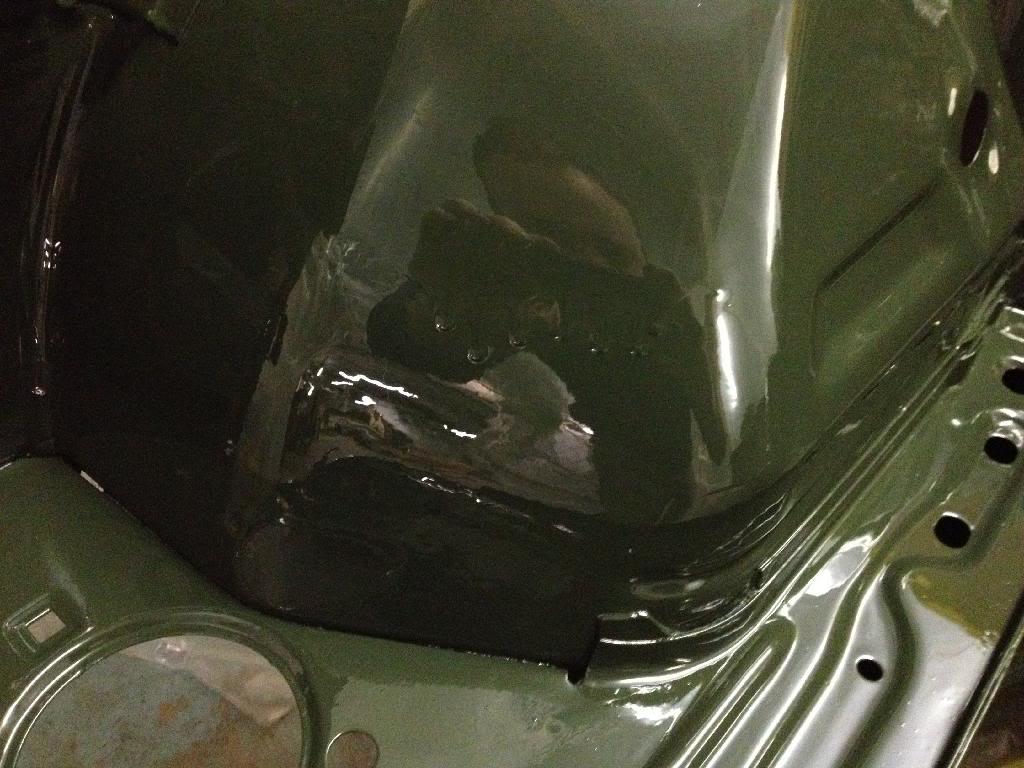
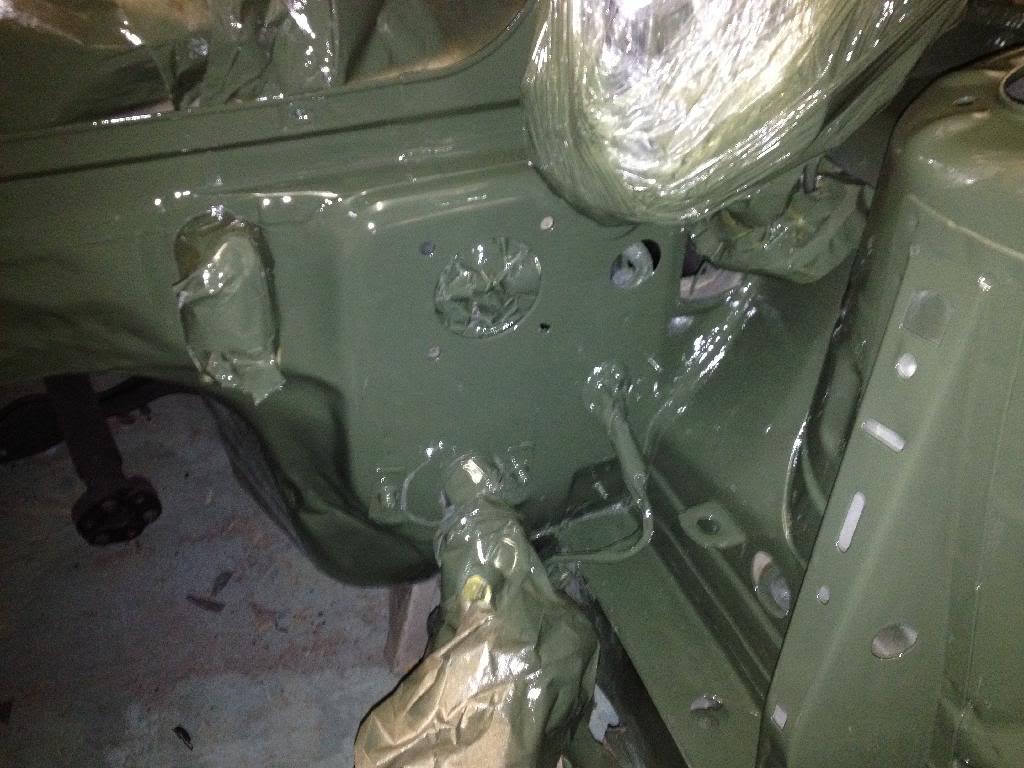
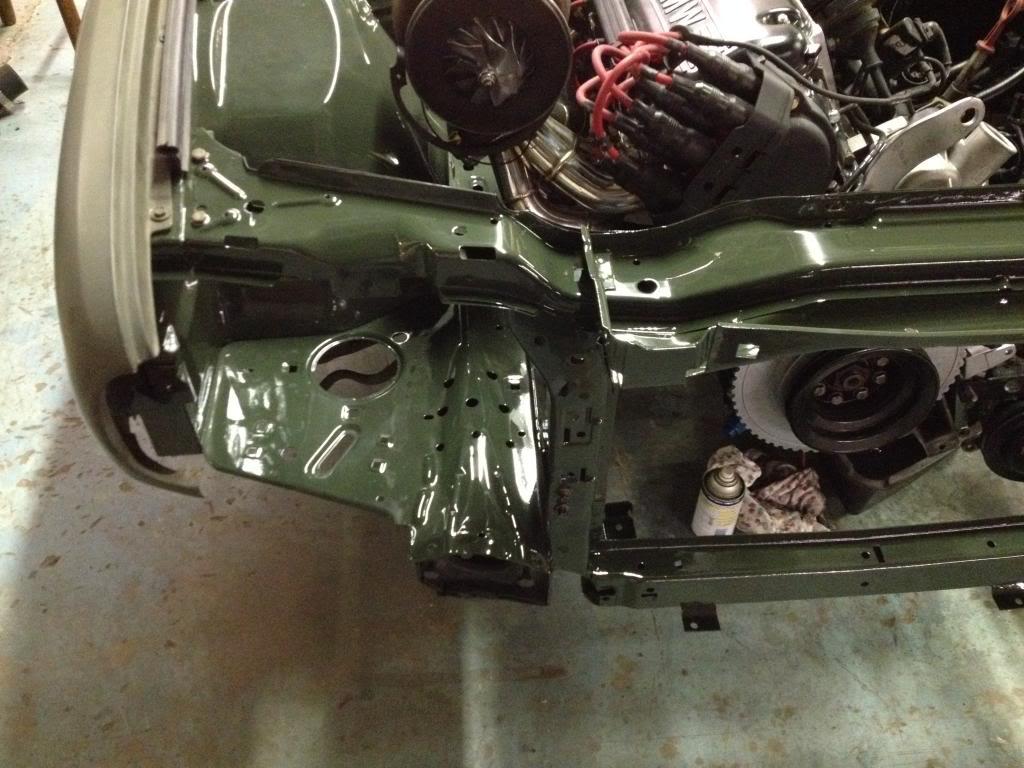
Back on track. I removed everything I installed and started the engine bay clean up process. Ideally I will have it painted and the engine reinstalled before school starts back on Jan 13th.
This rabbit hole is really really deep!
Seriously, today I found myself contemplating smoothing out my inner fenders. As in, welding in metal to close up the extra holes and removing the indentions that are randomly placed in the engine bay.
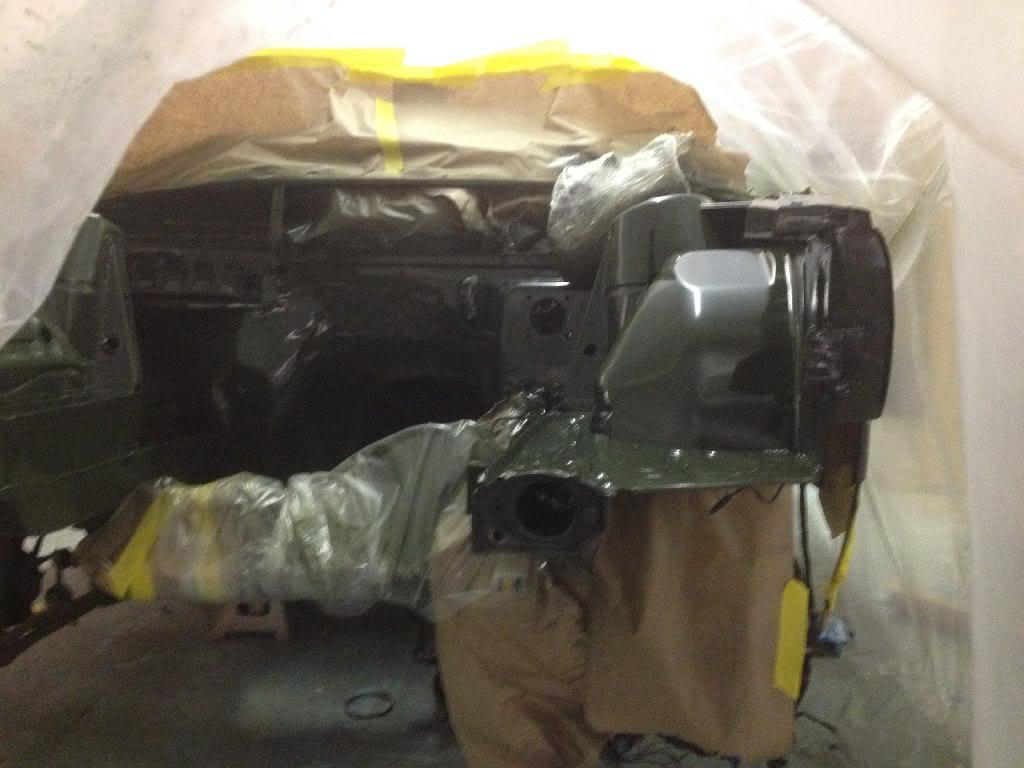
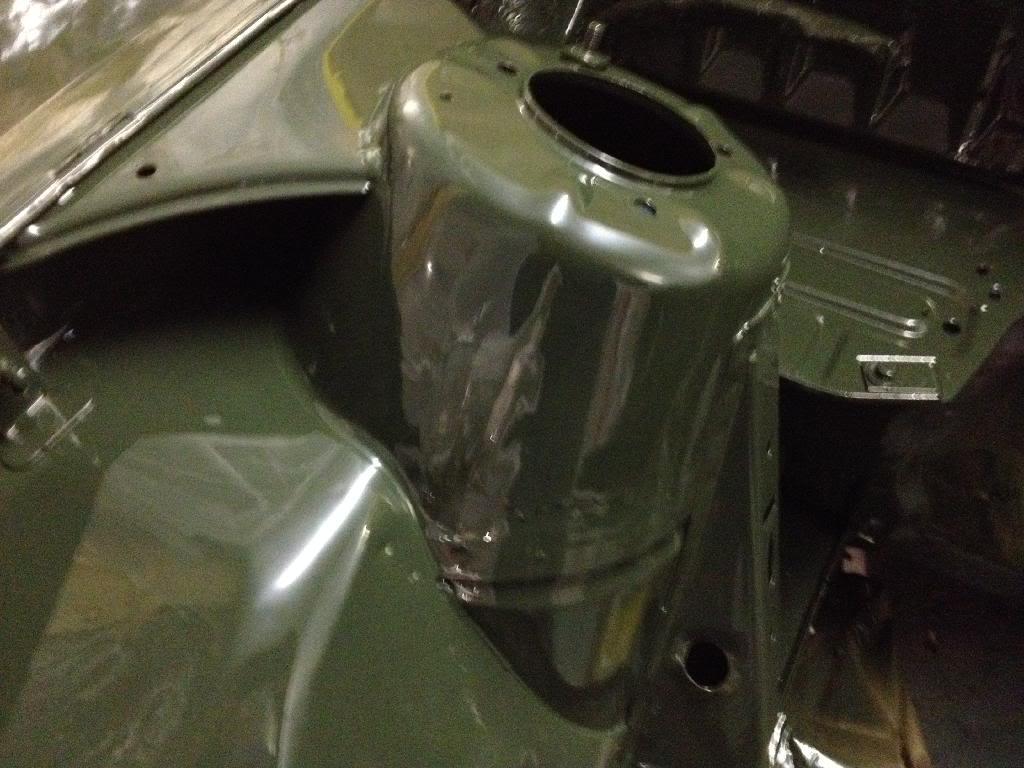
Luckily just as I was about to cut the first piece of metal to delete the AC evaporator hole I stopped myself. I realized that I must have not ventilated my work space adequately because I WAS FREAKIN HIGH! So I have reached a happy medium in my engine bay clean up. I am going to smooth out a few places where the grinder got over zealous and then make every thing from the strut towers and forward as pretty as possible without any more fabrication and then final paint. I am going to go with the Toyota FJ olive drab gloss finish, what do you think?
Progress today:
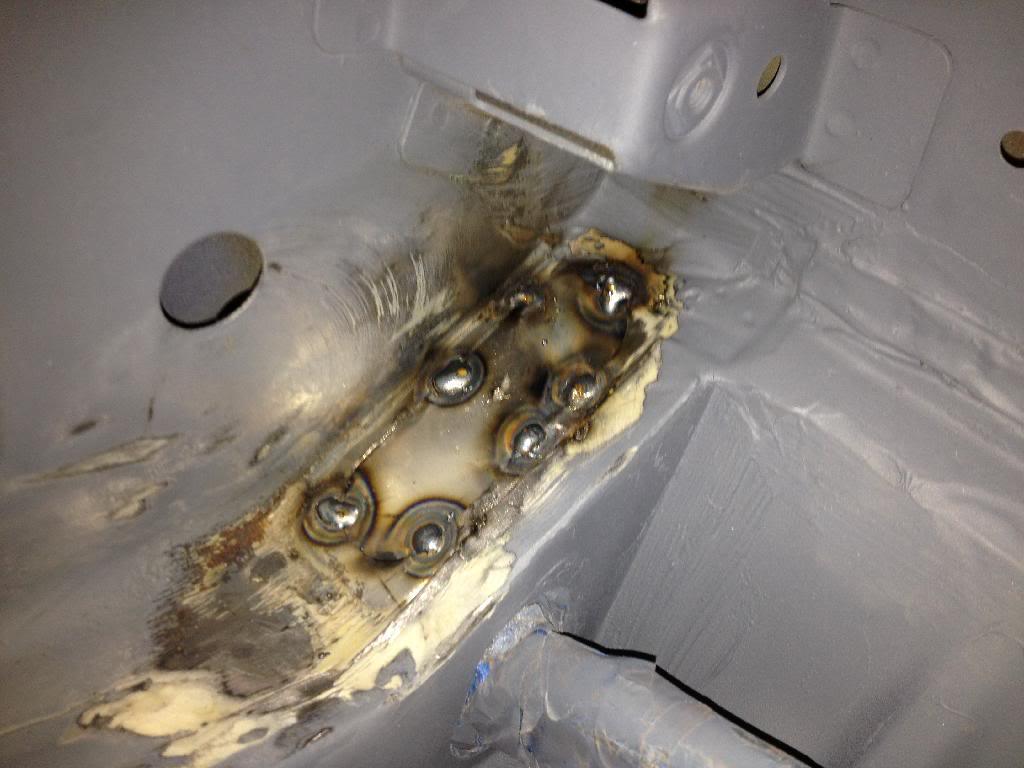
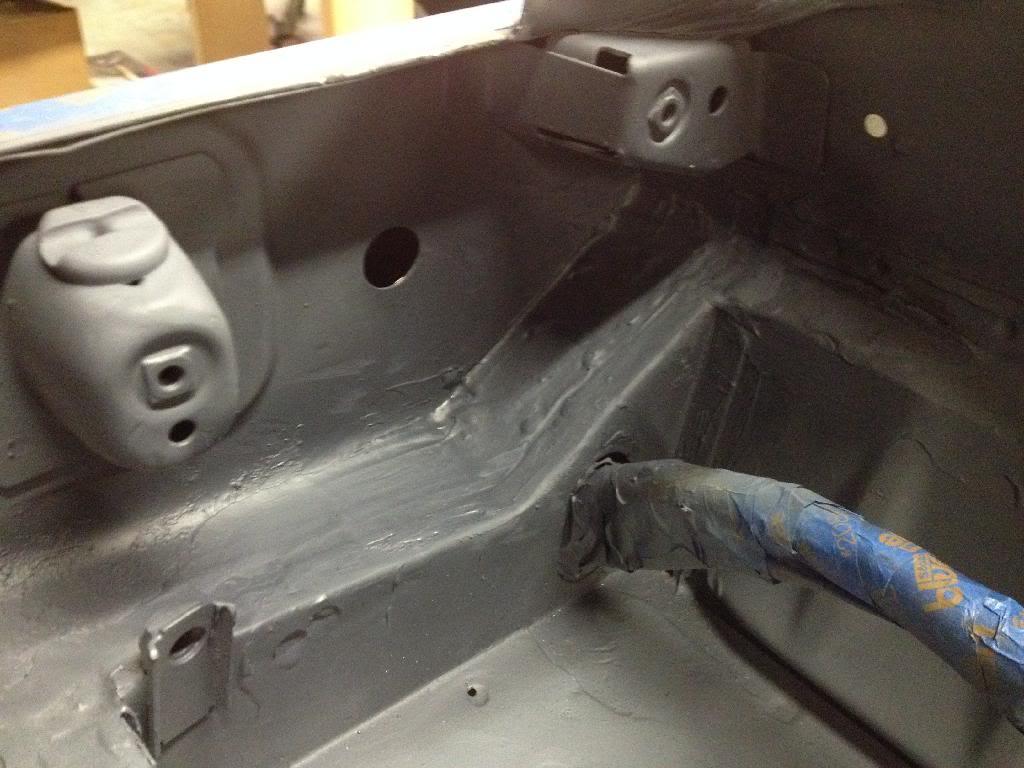
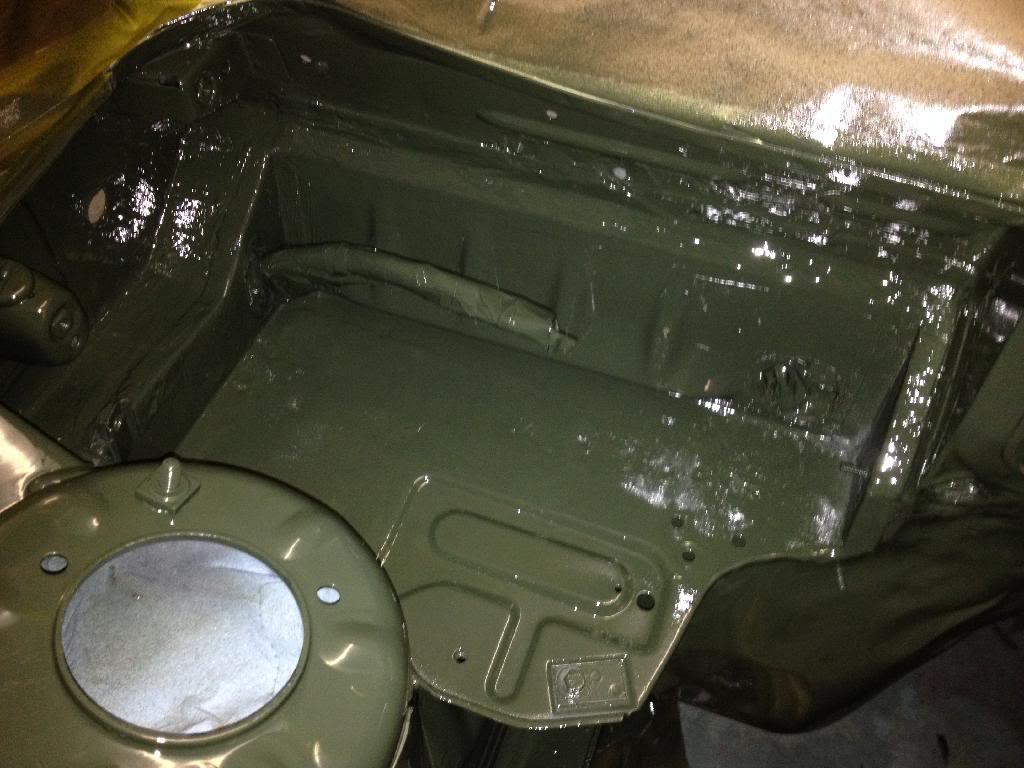
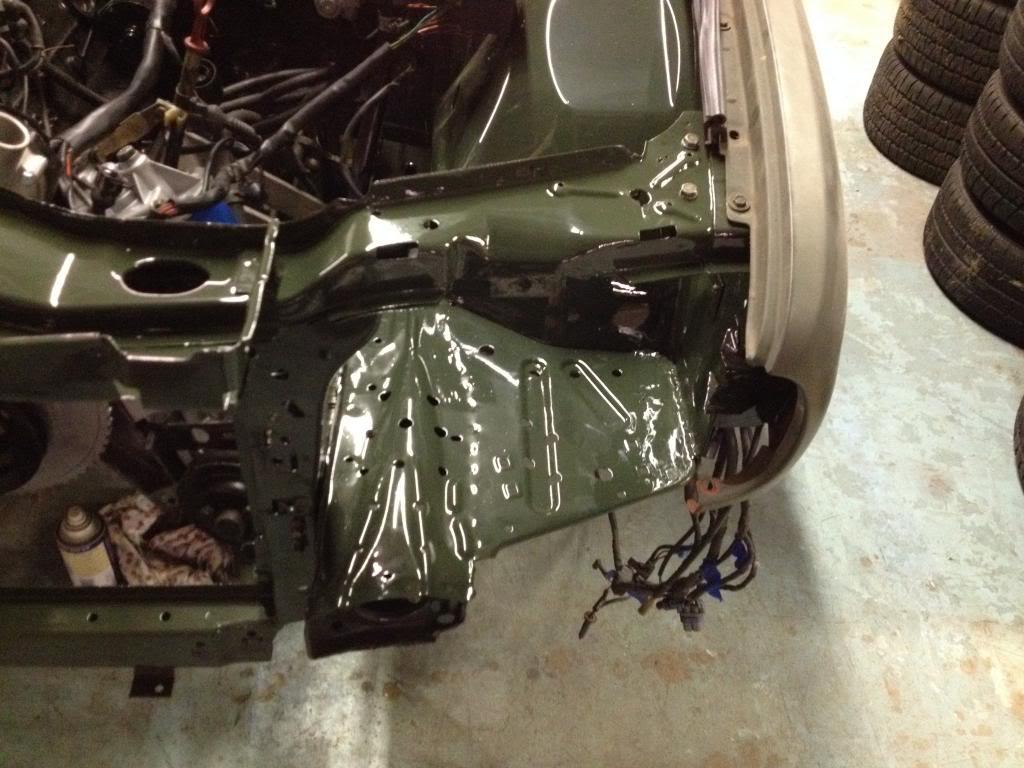
I finished up the seam sealer and paint removal on the passenger side and half the firewall. I then applied several coats of primer. Looks good to me
Then I started on the Drivers side.
Tomorrow I will remove the booster and move everything else as far out of the way as possible and continue. Then I will go back and spread the filler to get it ready for final paint.
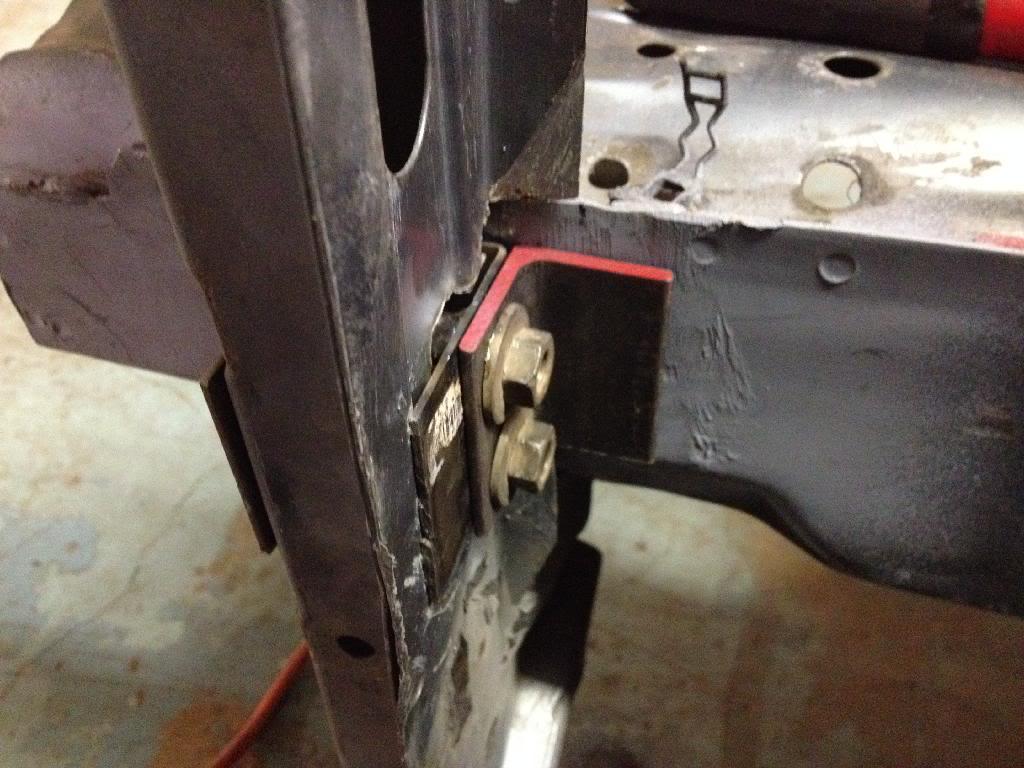
I will also say that I was very disappointed at what I found under the seam sealer. I knew there was surface rust on the non sealed areas but what was under the seam sealer was terrifying! On the top surface of the passenger side frame rail, where it meets the body under the battery tray, the sealer did a better job of holding onto moisture and battery acid and actually made the rust worse. I killed it and fixed what had to be fixed but just a heads up. If you have surface rust in that same spot beware of what you are not seeing under the sealer, especially in convertibles or older m10 cars with the front mounted battery.
1-2-2014
Small bump. I ordered the e28 535i radiator and coolant fan switch today. I was going to use the e36 318i radiator with built in reservoir but it is on the small side and after all this $ I don't want to lose an engine to overheating. Now I have to find a firewall mounted reservoir.
1-3-2014
Because I want the reservoir to be the highest point in the cooling system and I already shaved the mounting brackets for the stock piece. I had planned on using the built in tank on the 318i radiator. But all said and done the firewall mounted reservoir will look fitting with the m30.
And thank you for the pictures. I will be using them as references as I get into final assembly.
I spent a couple hours today continuing to removing paint and seam sealer on the drivers side of the engine bay. THIS IS TAKING FOR EVER!
Then I drove to the closest Pick-a-part in hopes of finding a coolant reservoir or any other goodies and I found a replacement steering wheel! Tri-color badge has been ordered. The leather is in great shape!
I don't think so but I will be checking on Sunday for sure. I do know that my three spoke sport wheel on the vert needs new leather and the Mtech feels thicker which is nice. Plus it has three horn buttons and really who doesn't like having a horn button on every spoke so you can honk your horn like an idiot while auto crossing!!??!?!?!
1-5-2014
I spent 7 hours today working my fingers to the bone just so I can post a pic of what looks like ten minutes worth of spraying primer!!!! This rabbit hole is really deep, I think I have said that before... Fumes man FUMES!
But seriously, I finished stripping the drivers side of the engine bay and killed yet more uncovered rust lurking under seam sealer. I then smoothed out the uglies on the fender humps. Then I just shot it with another coat of primer to sit over night. I will be hopefully final sanding engine bay tomorrow after I weld in a patch panel in the hole that was once occupied by the AC lines. Then PAINT!! It is going to take me forever to clean up this shop when I am done.
Oh, And I figured out how to hide my hood release cable. Score one more for me!
1-6-2014
It works
Very little progress to report today. The weather is turning super cold and the snow was stacking up so I didn't stay at the shop for long.
I cut a patch panel for the AC hole and tacked it in. I then sealed it and primed it. But now the engine bay is ready for final paint. The mud work is not perfect and I mainly focused on the sheet metal on and forward of the strut towers. The battery tray and area around the fuse box will be mostly hidden so I didn't worry to much about perfection there. Plus the battery tray was replaced a couple of years ago so the seams are not perfect anyways.

1-7-2014
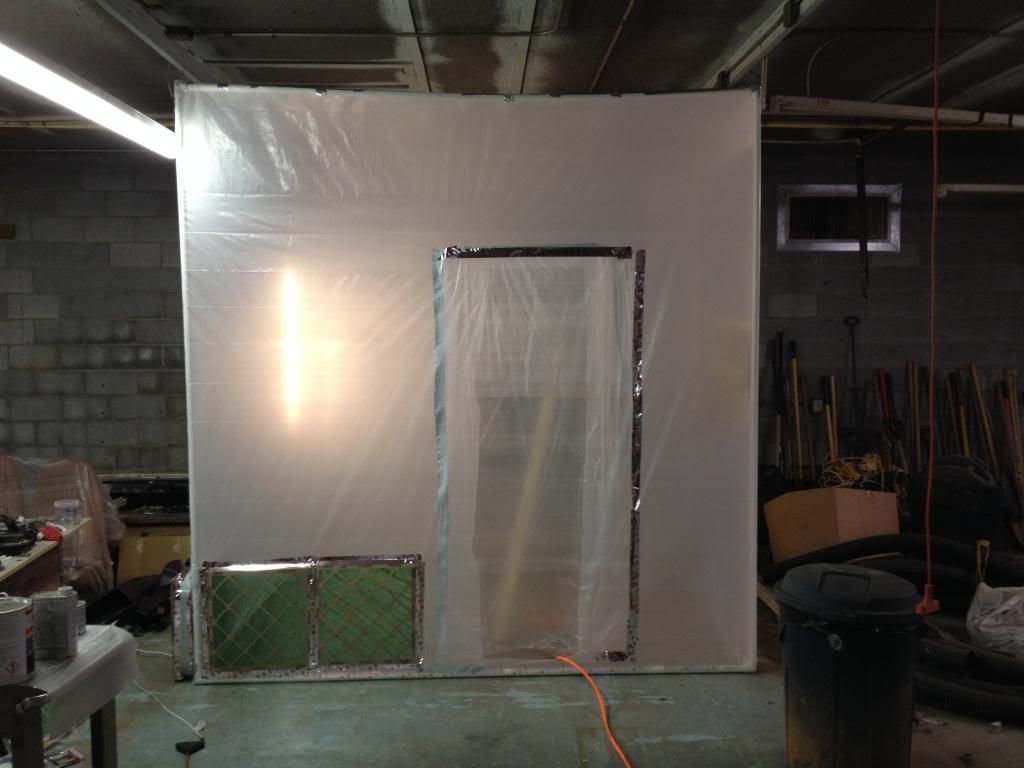
What better way to spend the afternoon of the coldest day of the year but in an unheated shop painting a car with a HVLP gun for the first time ever! Yeah I figured the only way to do this was to stack the odds against myself as much as possible. In doing so I learned a few valuable lessons that I didn't see mentioned in any thread or how to video.
1st - As your spray booth gets smaller in size the protective clothing needs to cover more and more. My "spray booth" was very small and when it was all said and done my hair and eye lashes were crunchy.
2nd - DONT DO THIS ON THE COLDEST DAY OF THE YEAR IN AN UNHEATED SHOP!!
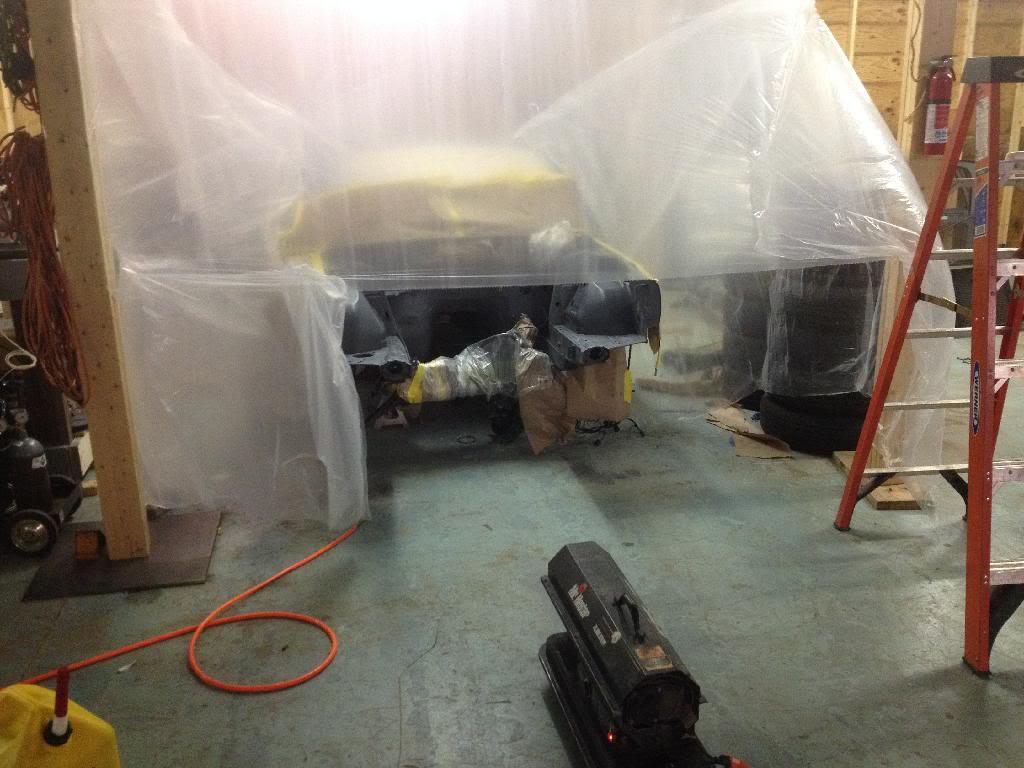
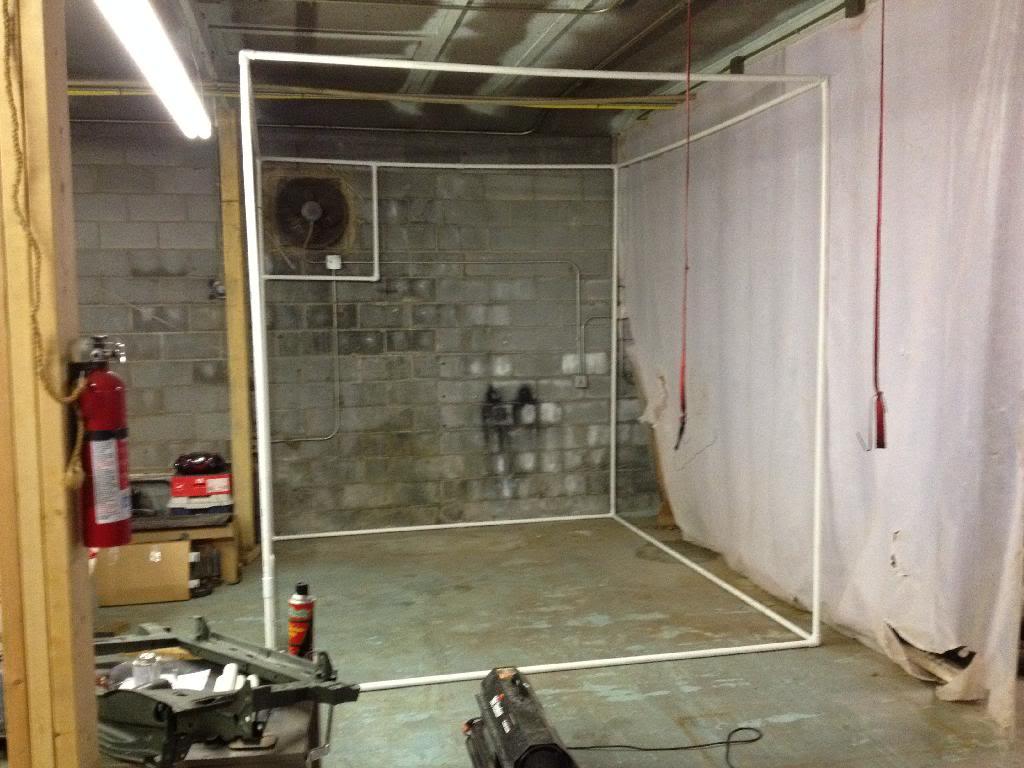
So I made a small enclosure, which I will refer to as my "spray booth" from here on, out of large sheets of quasi clear plastic and packing tape. You cant see it in the pictures but the front of the spray booth has a door that I drop when I started spraying. I masked off every thing I thought was important.
And I started my 75000 btu construction kerosene heater and warmed up the spray booth and sheet metal to around 100 degrees. It was like an oasis of awesome in the otherwise frigid shop.
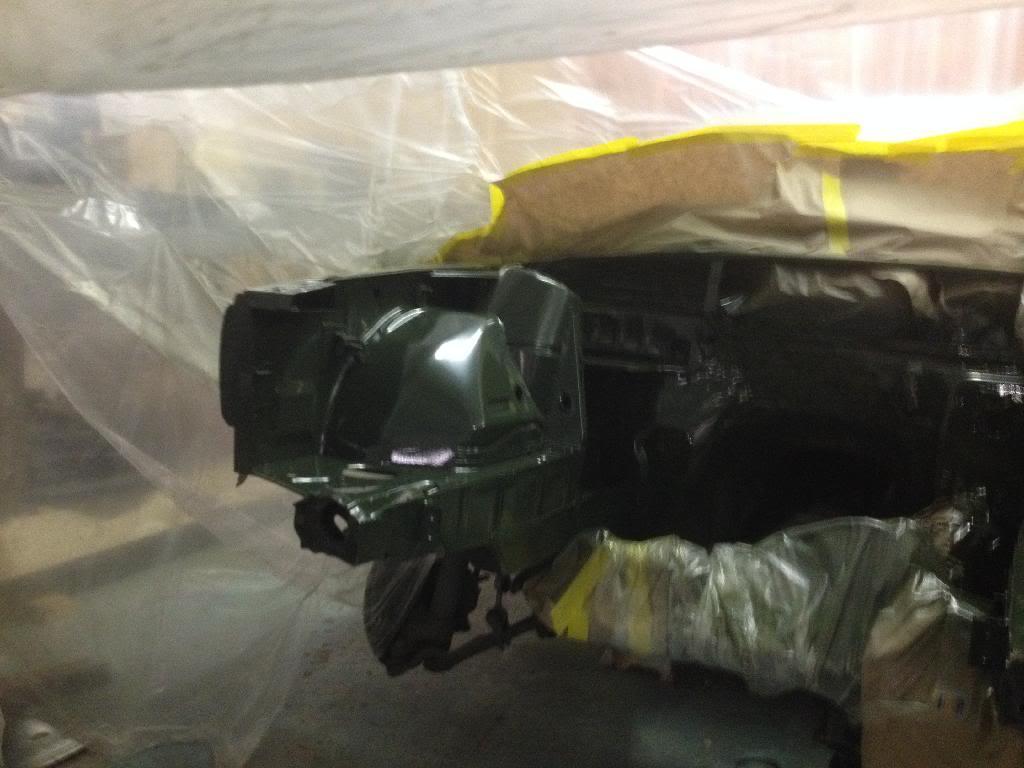
Earlier today I went to the local automotive paint supply store and picked up some Limco Acrylic enamel. The color I choose for the engine bay and eventually the exterior is from the 2011 Toyota FJ. It is the army green paint code 6V7. I also stopped by Home Depot on the way home and picked up a $49 HVLP spray gun. I got it all to my shop and proceeded to read the directions on both the paint and gun and went to town. Yes I did use a pressure regulator and kept the pressure between 25 and 30 psi.
Keep in mind this is my first time painting with a HVLP gun and with enamel so be kind.
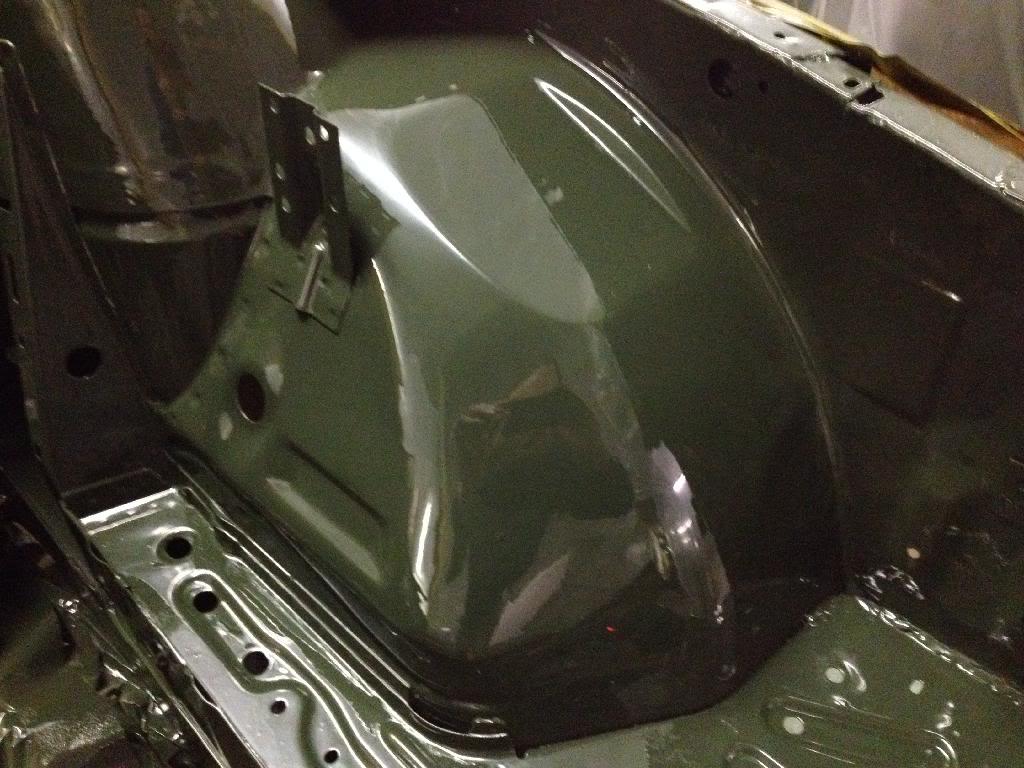
This is a sneak peek after the first coat.
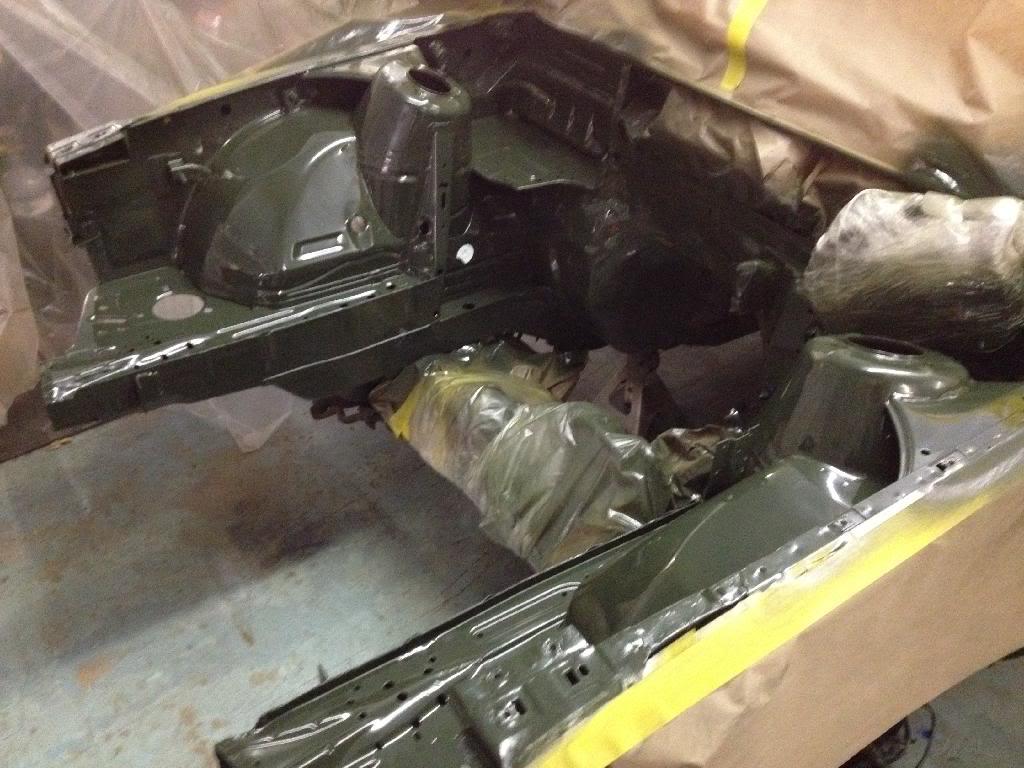
I did a total of 3 coats. The second and third coats were pretty heavy and I went a little to heavy on the fender humps and strut towers on the last pass. I got a couple of runs but I will let it cure and cut/sand them down flush and spray another coat. I did get some trash in the paint but not as bad as I was expecting considering I had no filtration at all and I did very little to prevent dust from entering my specialized and extremely sophisticated spray booth.
This is what I ended up with today. A couple of the pics are only to highlight the runs.
I still need to go back in and shift the fuse box and paint where it was blocking. I will use that opportunity to fix the runs and then let it fully cure for a couple of days. Then everything goes back in. Followed by the final fab and paint of the radiator support once my radiator gets here.
1-8-2014
I went back today and finished up the paint behind the fuse box. There is a little more trash in the paint than I first thought but it really is not bad being my first dance and all.
I looked into how I can fix the runs and all the options involve a great risk of screwing up the nice finish I achieved on the first attempt. Considering that the runs are exactly where I plan on placing the reflective heat protection for the turbo set up I will just knock down the worst of the run and then apply the heat protection. It will be like it never happened and will only leave one singular drip on the drivers side that is pretty hard to see unless I point it out. I am happy with this.
So no updates for a few days while the paint cures. I plan on unwrapping the car and reinstalling the engine and trans on Sunday and then I will post some automotive porn.
1-11-2014
Thanks Otis!!
1-12-2014
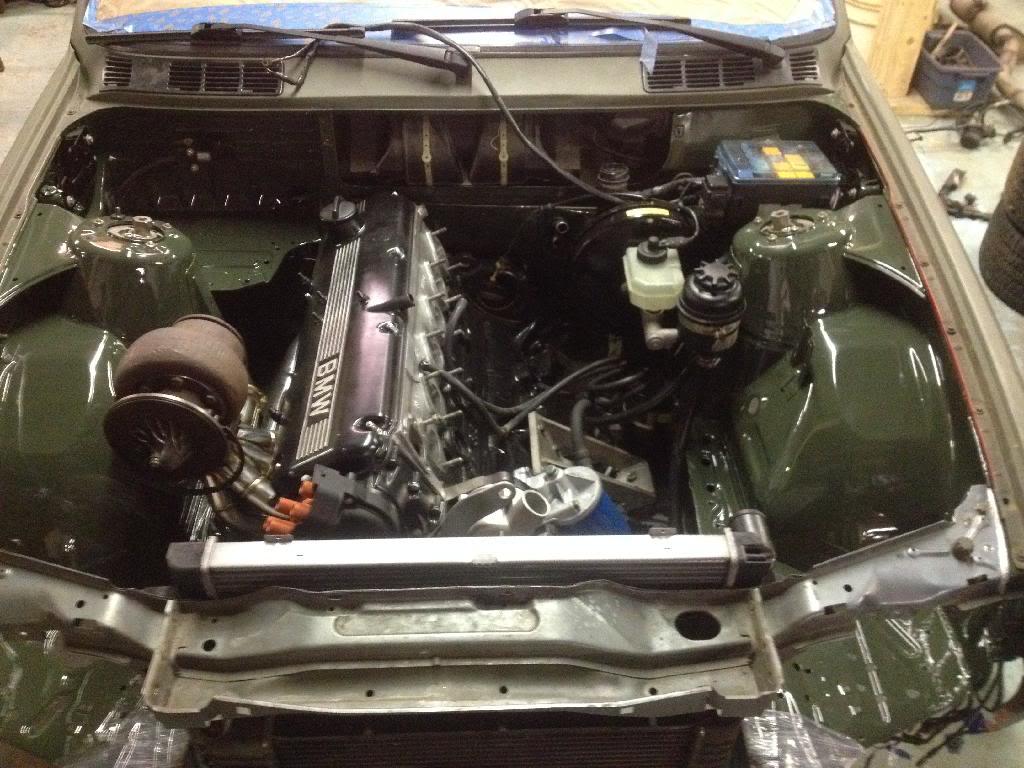
Goal Met!!!!
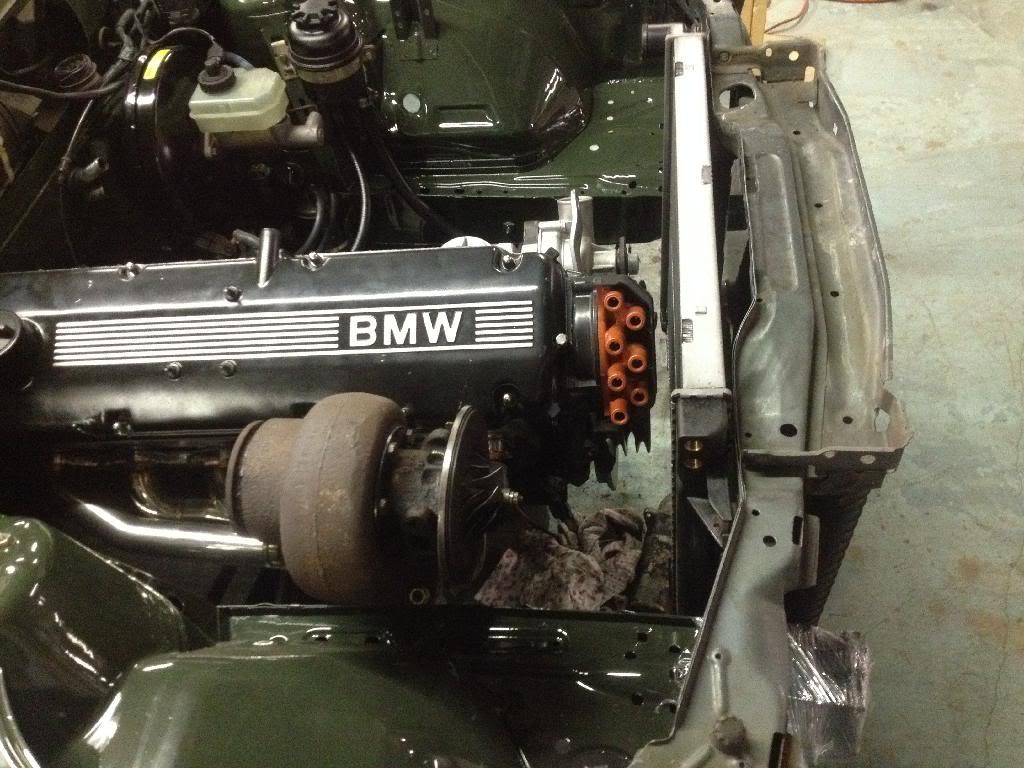
I have to change my engine mounts (not the arms just the rubber pieces) because there is about an inch of clearance between the oil pan and cross member. And currently the turbo is sitting almost an inch to high to clear the hood. So small adjustments aside the engine and trans are mounted in the painted engine bay. I plan on making an adapter to replace the turbo until I am ready for it so that I only have to do the exhaust once. I am have a surprise in store for the exhaust.
1-13-2014
I know I know! Hmmmm What to do with all that room..... Maybe down the road the turbo will grow into it, that is if I can get the current turbo to clear the hood!
1-25-2014
I have had a couple of opportunities over the last 2 weeks to get some work done.
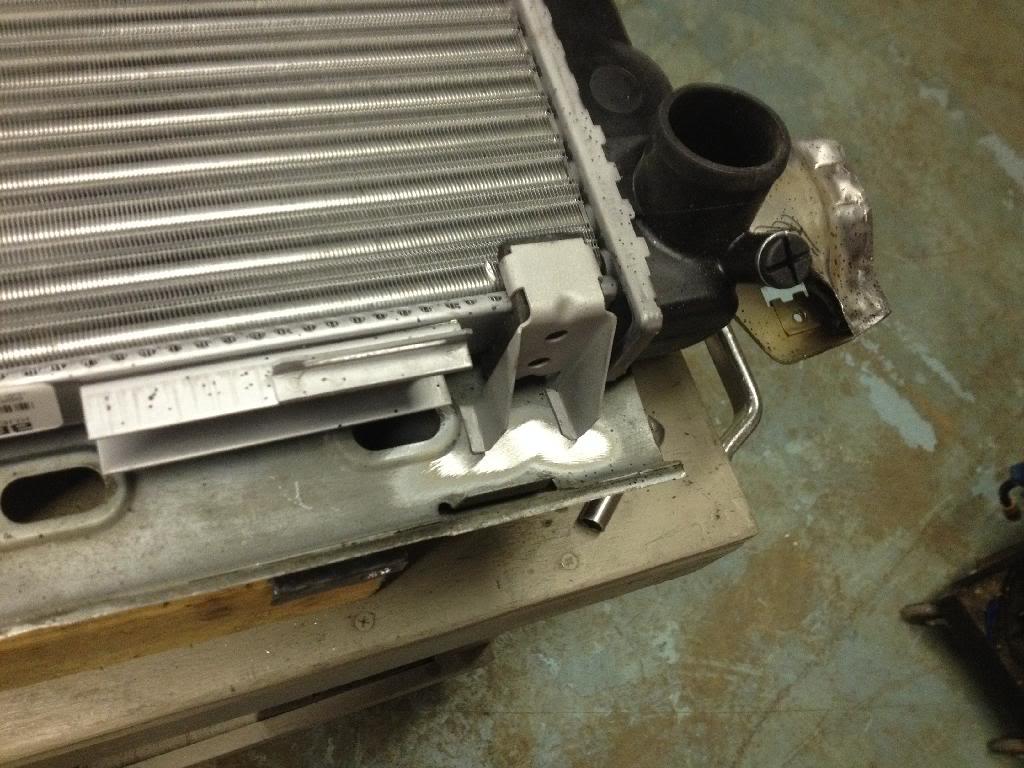
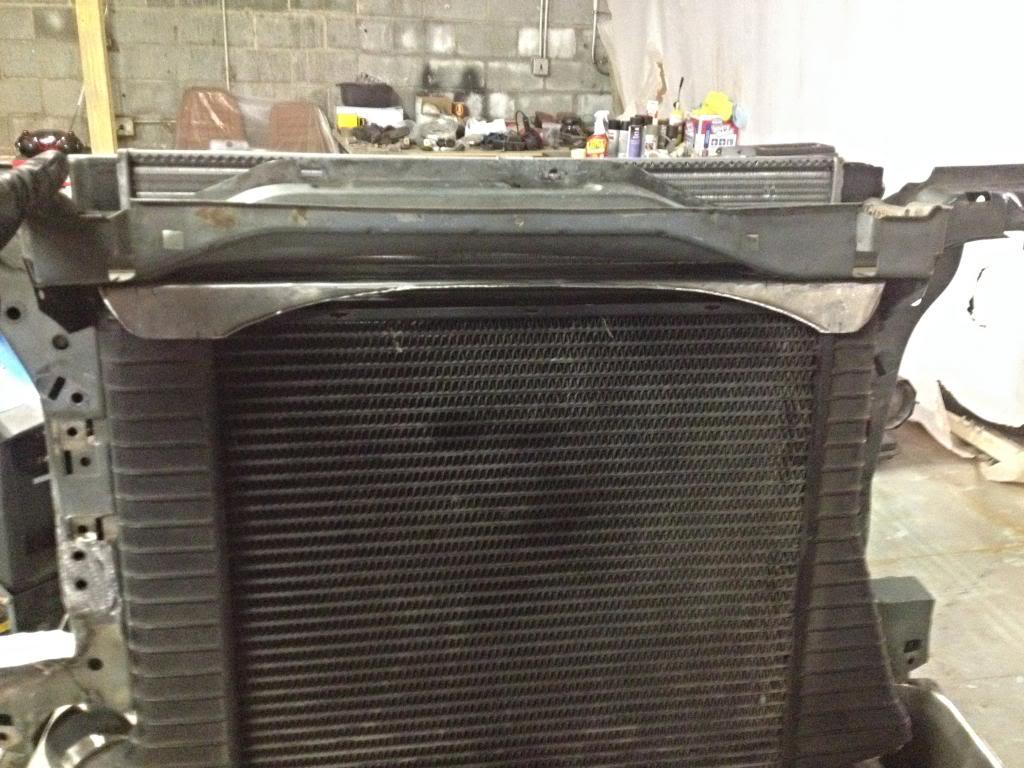
I have a slight obstacle to overcome, the e28 radiator is about 1/2" longer than I expected. This extra length interferes with the drivers side intercooler inlet. So now I need to rework my intercooler mounts.
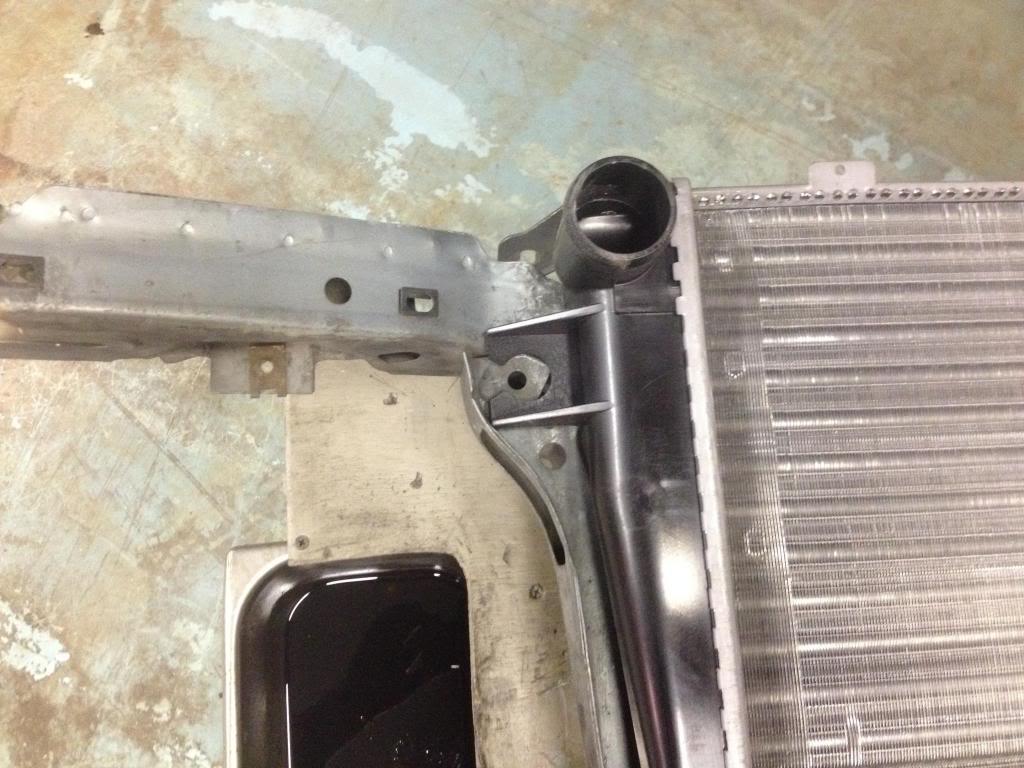
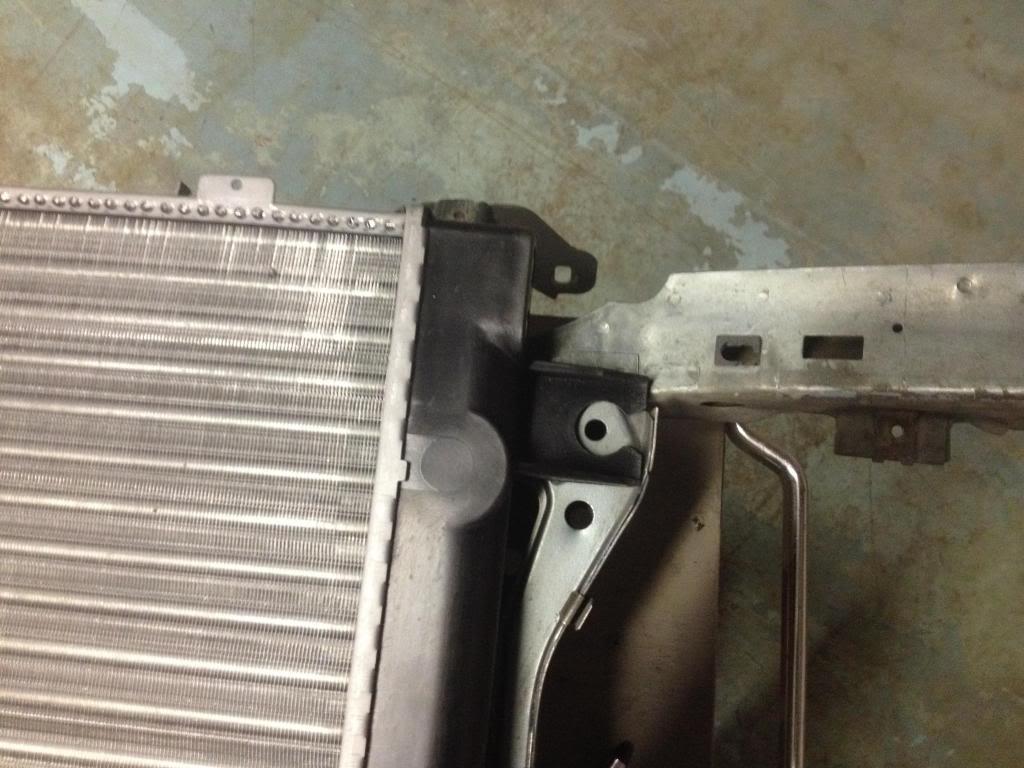
But the work I got done was good. I got the e28 radiator lower brackets installed and looking factory. I found that e21 lower radiator mounts and rubber bushings are a perfect mate for the bottom of the 535i radiator. I cut them off the e21 and modified them to hold the radiator off of the support where I want it. A little trimming and bending and welding and then perfection. I then proceeded to work on boxing in the drivers side of the radiator support around the frame mount modification. Next time I will finish the passenger side and remount the intercooler and start fabbing up the shrouds that will direct the air through both the intercooler and radiator. OH and I have to get the 2 speed fan picked out and purchased and of course installed.
PICTURE TIME!
It looks like this in the original intercooler mounting position.
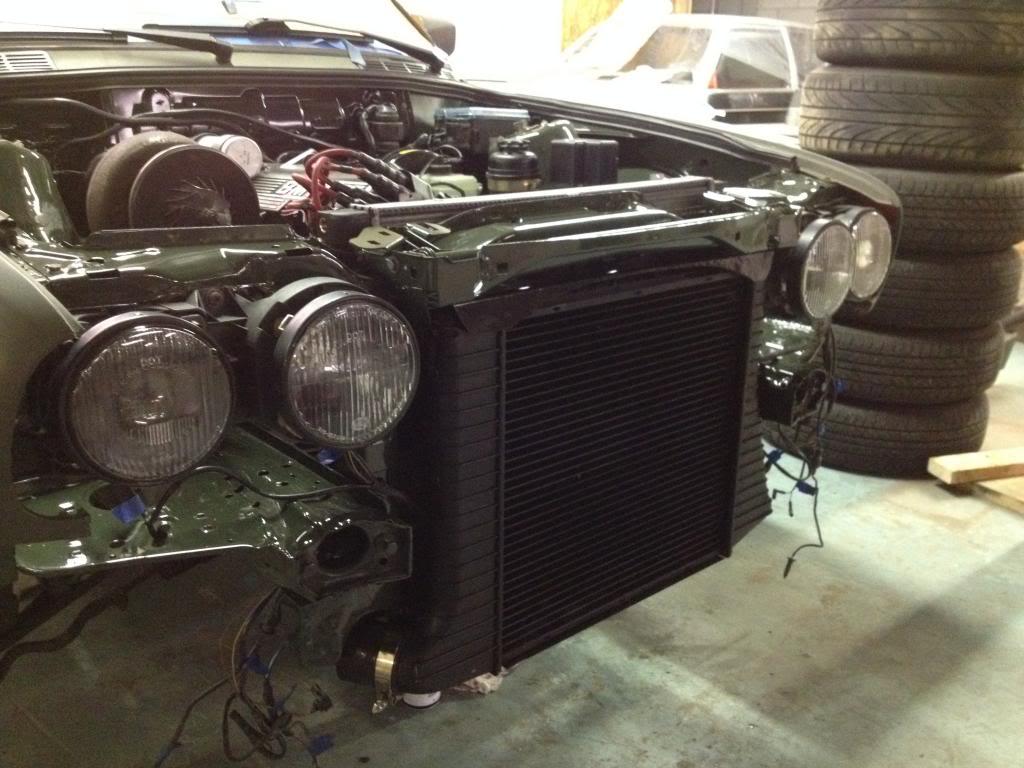
With the radiator using the existing u-nut locations on the radiator support. And I am 99% sure it can not go any higher.
And if I move the intercooler down the gap in the cutaway that I did previously looks like the fender gap in a stock 1985 318i. And it hangs about 3/4" below the radiator support which concerns me a little.
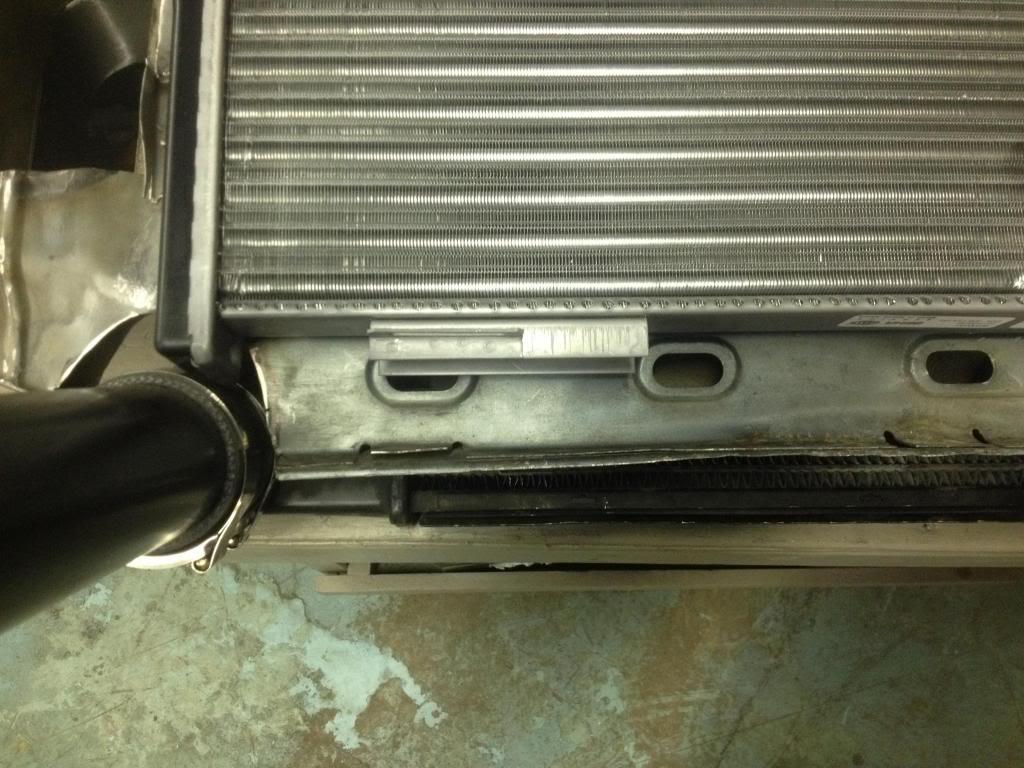
And up next are pictures of the lower radiator mount brackets and the boxed in section. I know it isn't much but progress is progress.
1-29-2014
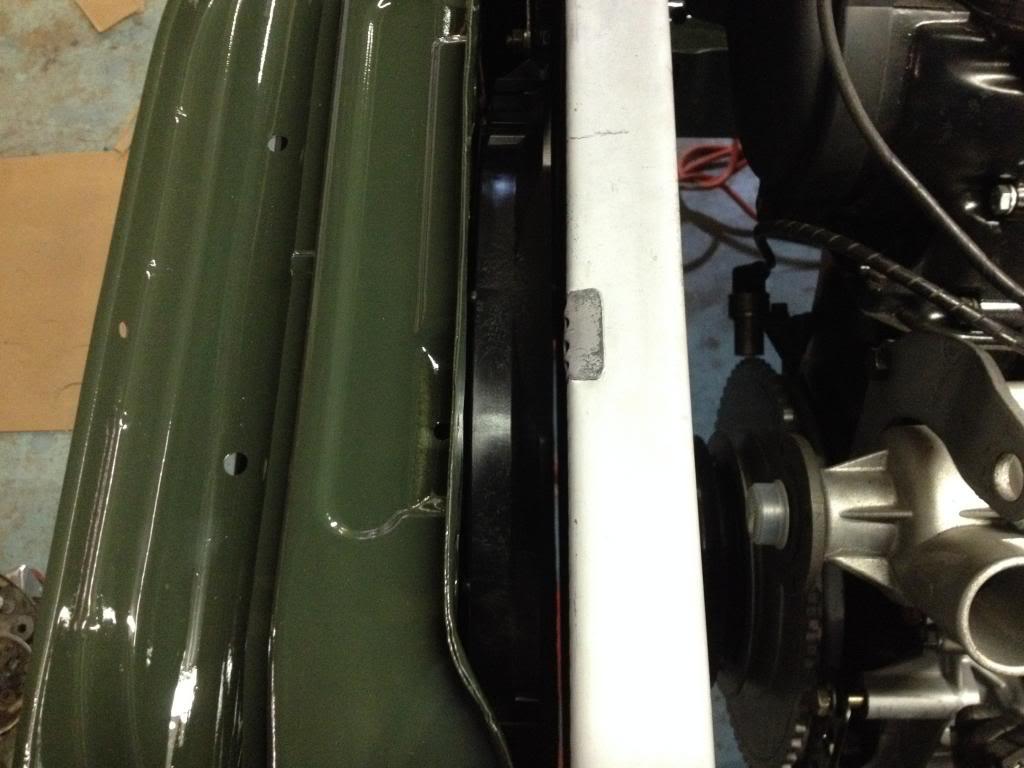
More progress was made today. I finished boxing in the radiator support and remounted the intercooler. I had to start from scratch with the intercooler and I finally found a position that kept it as snug to the radiator as possible and a minimum amount of the intercooler hanging below the radiator support. The lowest point of the intercooler is still slightly higher than the oilpan so I figure I am good. The valance still fits in the original configuration without touching the intercooler even though It is super tight.
iPotato pics
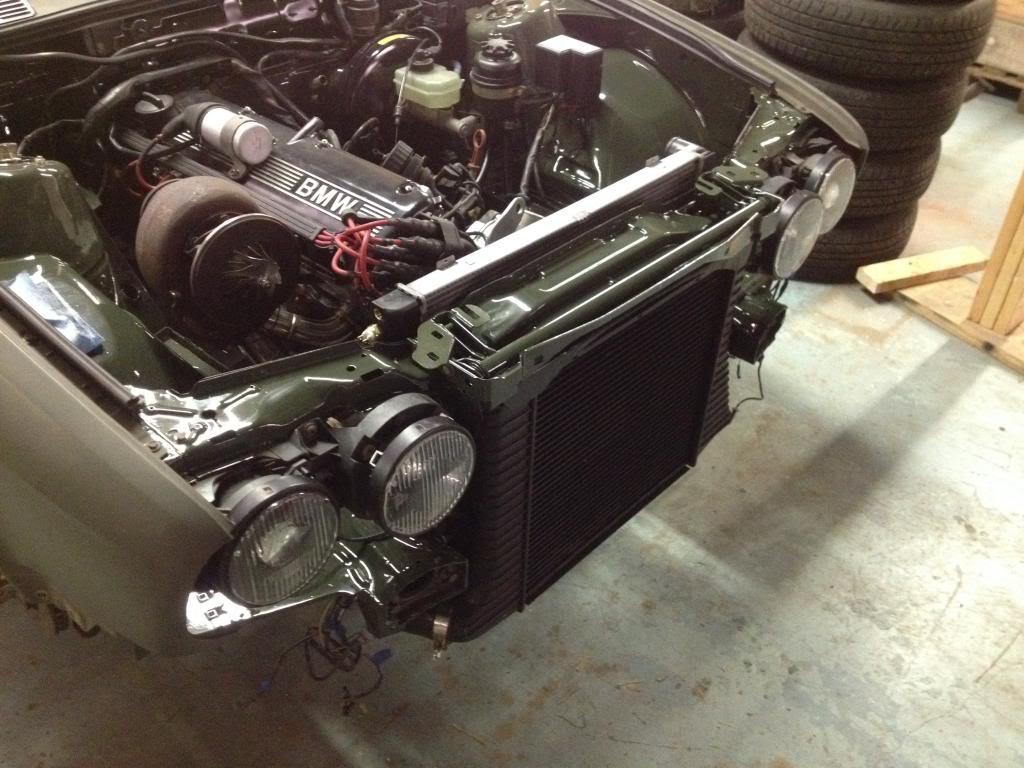
Then I mounted the radiator support (Being super careful with the new paint) and I set the fenders and hood on the car just to see what the clearance of the radiator, dizzy, and turbo looked like. Good news, the radiator and distributor have plenty of room. Bad news, no matter how I clock the turbo it will not clear the hood. I need almost 3/4" in order for it to clear and still be functional. Next step will be to lower and twist the engine using custom solid aluminum engine mounts, which should be a nice little upgrade as well.
2-2-2014
I will start off this weekend's update with some clearance pics. I am happy with it but by all means comments are welcomed. I still have not adjusted for the hood to turbo issues but the over all fitment is nice.
I then set about bolting up the fenders and then took on my next big obstacle the upper intercooler mount.
I made a cardboard template (which I feel is deceiving because it is so much easier to work with) that looks like a U-channel in which the top of the intercooler fits. I also was able to utilize two existing holes on the top of the radiator support to fasten my bracket.
Once I transferred this supposedly simple design to my 16ga sheet metal I remembered that I don't have a sheet metal brake and I had to make two 90 degree bends that were 22" long!!! So after some not so fun efforts with c-clamps, a bench vice, some angle iron, and a 2x4 I was able to kinda sorta make a shitty sheet metal brake that almost worked. I finished the bends with a BFH and an anvil.
I then trimmed off some extra metal to make it pretty. Then I drilled some holes and fitted some u-nuts to it and did a test install. Final assembly will include some rubber bushings around the top of the intercooler to prevent vibration and damage.
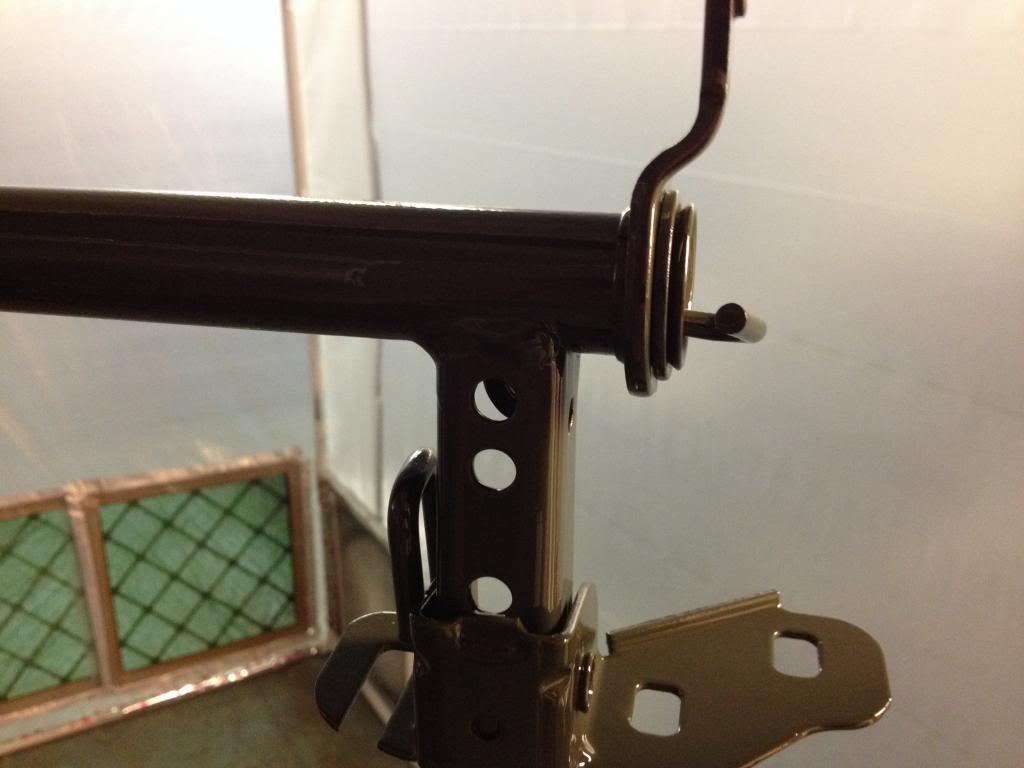
I also media blasted the hinge assembly and all the little pieces and sprayed them with self etching primer. Now they are ready for final paint.
I know that most people have become bored with this thread because it is not running yet and it has been 2.5 years in the making.... Oh well. This project has taken so many different turns and I have taken so many little detours along the way but in the end I don't want to be that guy who says, "Ah man I wish I had done that while I was doing the swap!"
Next steps:
1) strip the radiator support and prep for paint
2) Install starter
3) Install intake
4) Install wiring harness
5) build exhaust
6) crank it up for test fire
7) final assembly and break in (NA, boost after break in and MSII)
2-6-2014
The mounts are from QBang so I assume they are the same as what he always produces. The turbo is pretty freakin big though. I have a couple of ideas on how to make it work so I have no plans at the moment to step down in the size of the turbo.
Otis, I am having solid aluminum mounts made to replace the oem rubber mounts. I have to go this evening and remove the oem mounts and position the motor where I want it and take measurements. Hopefully by the beginning of next week I will have the custom mounts in place.
2-12-2014
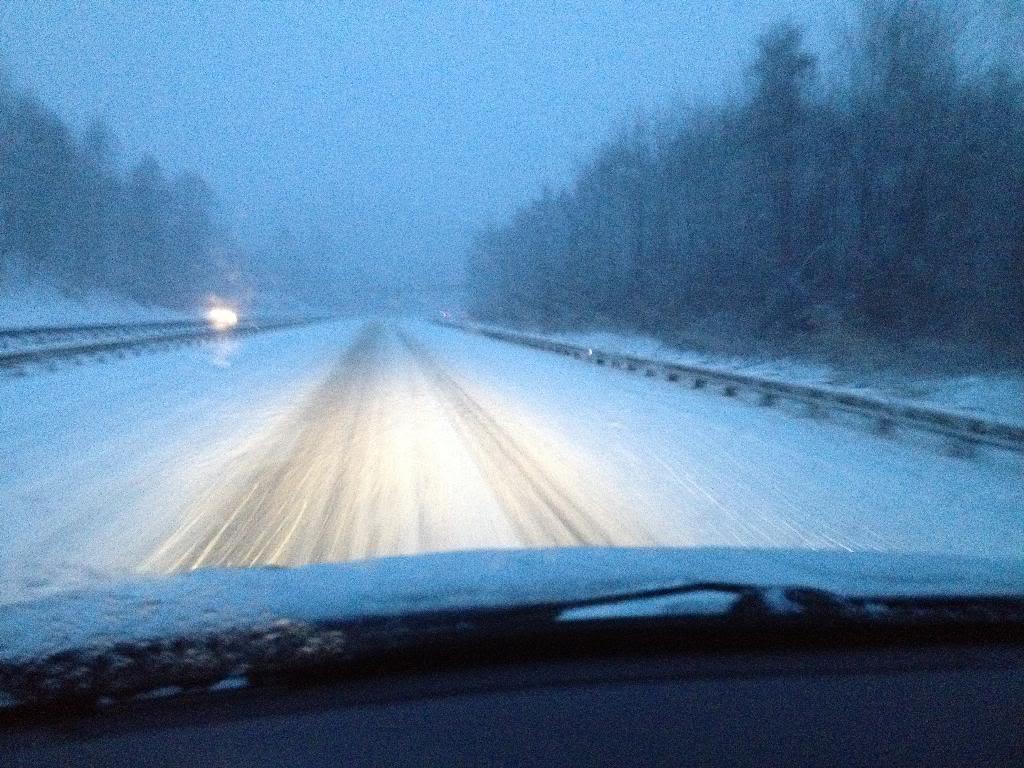
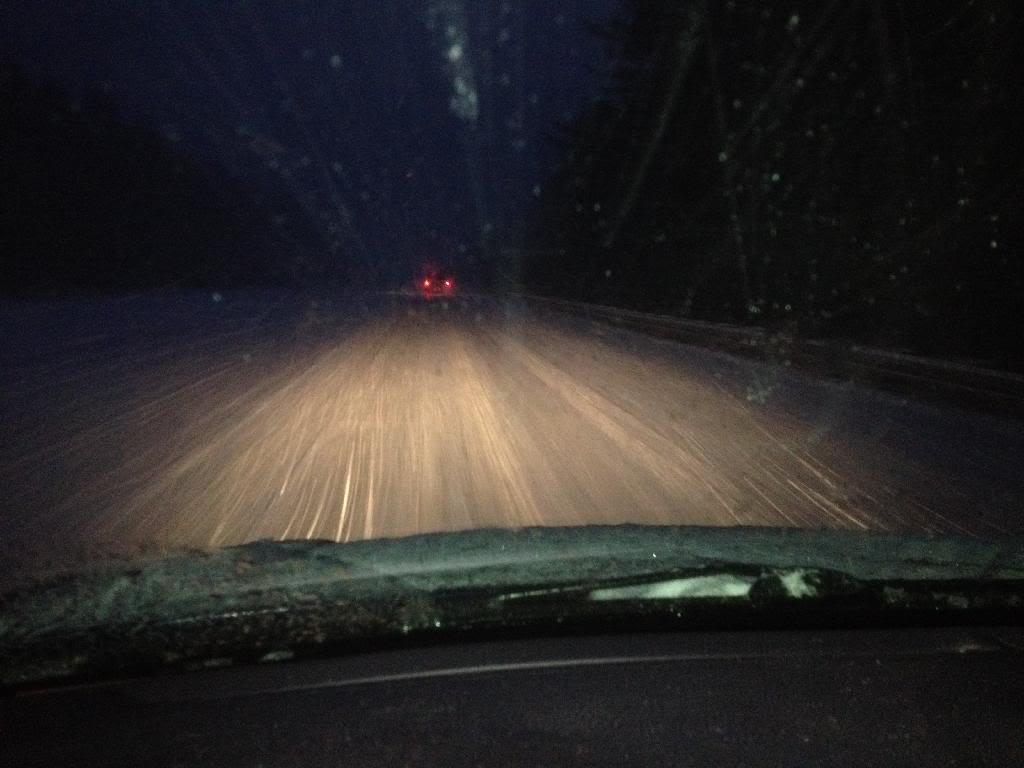
I dared Mother Nature and braved the almighty SNOPOCOLYPSE!!! Why did I do this you ask. Do I not care about my well being and the future of my young family? Have I lost my mind?
Probably
But actually I did it because I finally got my spray booth in a box and I just had to get it set up!
Ok ok it didn't come from the same box unless you consider the big box store a "box".
I have all the remaining parts for the engine bay prepped and primed and I want to get them sprayed but I have a few cars in the shop and a fresh from paint CJ-7 that I can not afford to get overspray on.
So I drew up a simple, low cost, and small but expandable spray booth and headed out to acquire the essentials.
I then followed my own directions very carefully, because I can be a dick to work for sometimes, and pieced together the frame. I didn't get to wrap it in the 4 mil plastic today or seal it or install the box fan with filters or the two fluorescent light fixtures but that is all going to happen if we survive SNOPOCOLYPSE 2014!!!
And pics of the horrific scene that unfolded before me on my way home from the shop! For those of you who are not familiar with North Carolina I live in the mountains so even though this really doesn't look bad the pucker factor is multiplied as you are going through a negative camber curve down hill on ice.
^ Thanks Jesse.
I got more work done today.
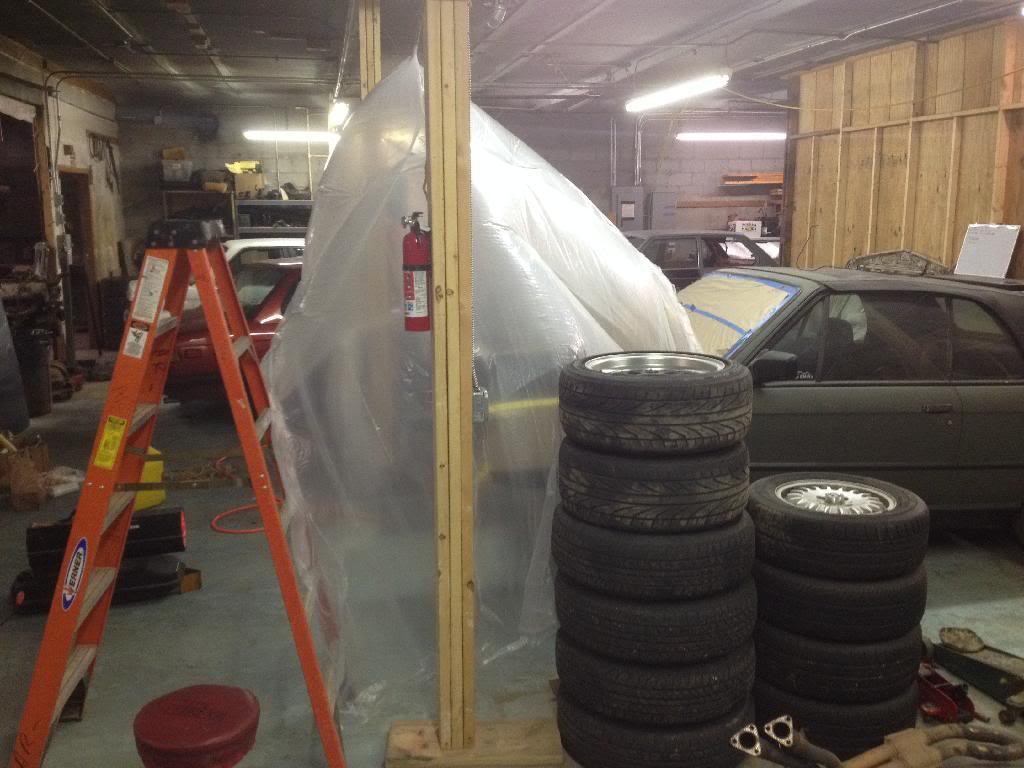
Spray booth wrapped and completed.
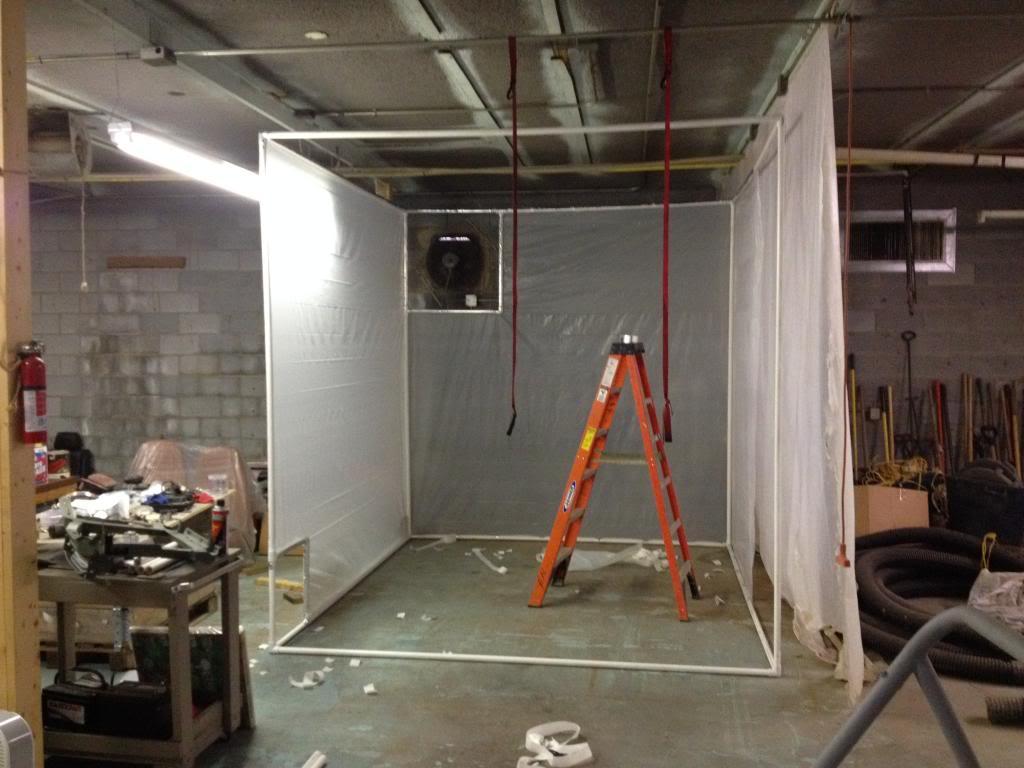

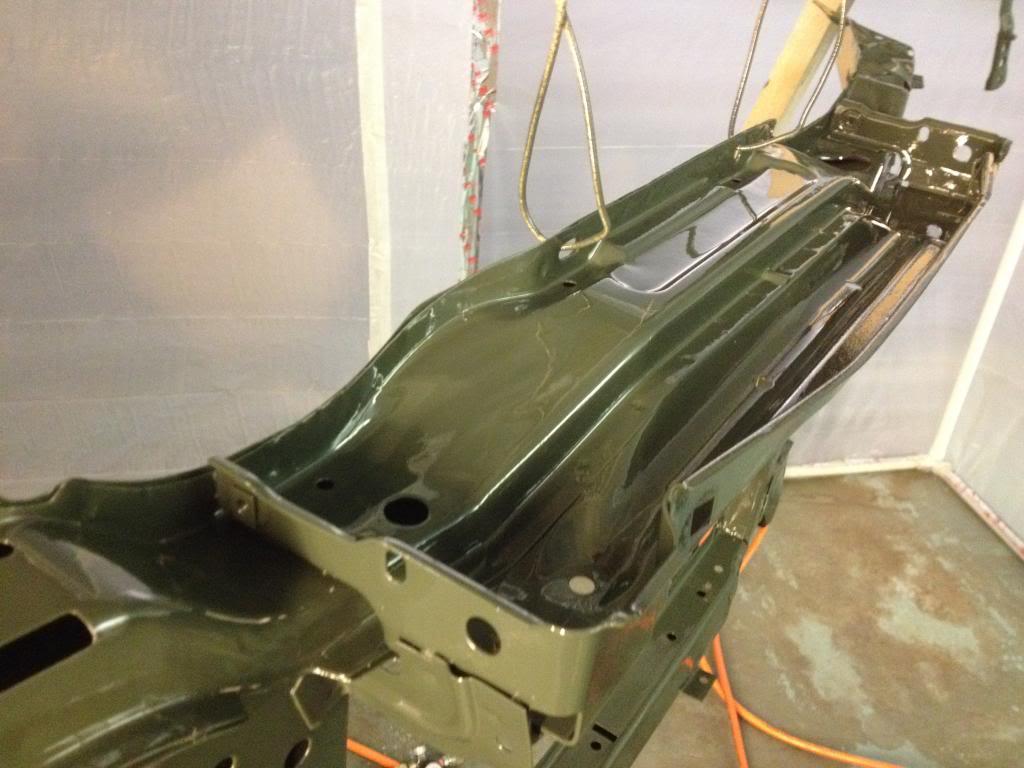
Then I loaded it up with a cheap 6' tall saw horse. From that I hung all the remaining parts that I needed to paint including the radiator support, hood hinge assembly, etc..
There is a fan on the left side of the booth and I pointed the shop heater at the front two filters and let the booth and parts warm up.
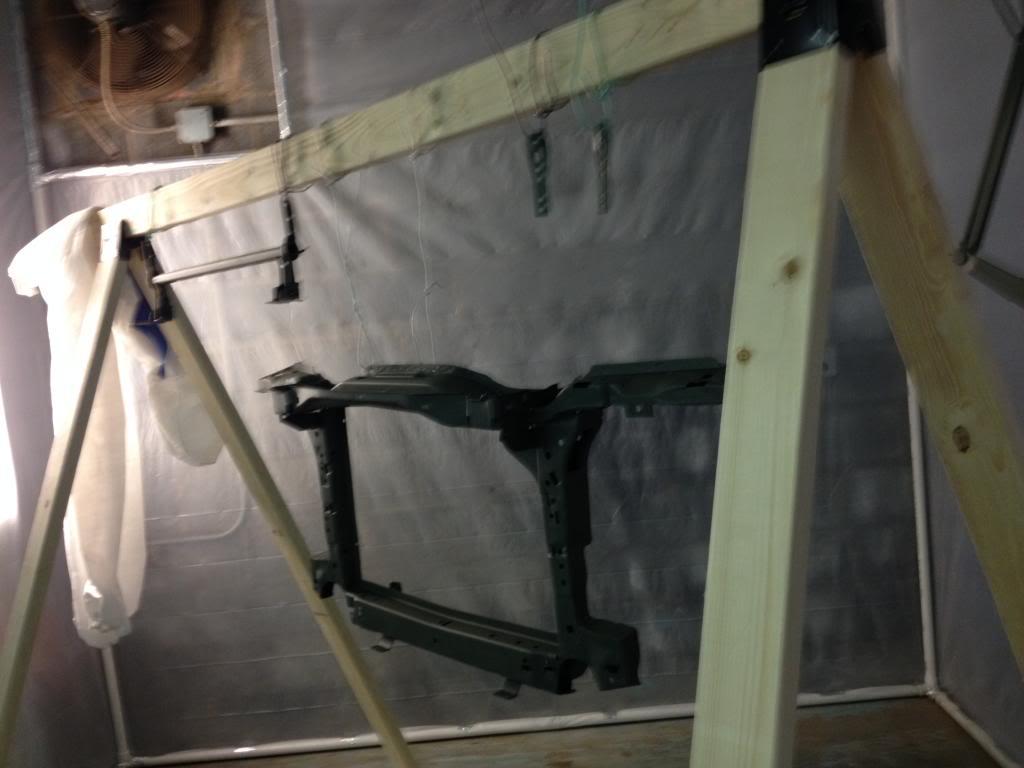
Then I painted!!! Check out the results. And yes if you look closely you will see some mistakes but I am happy regardless.
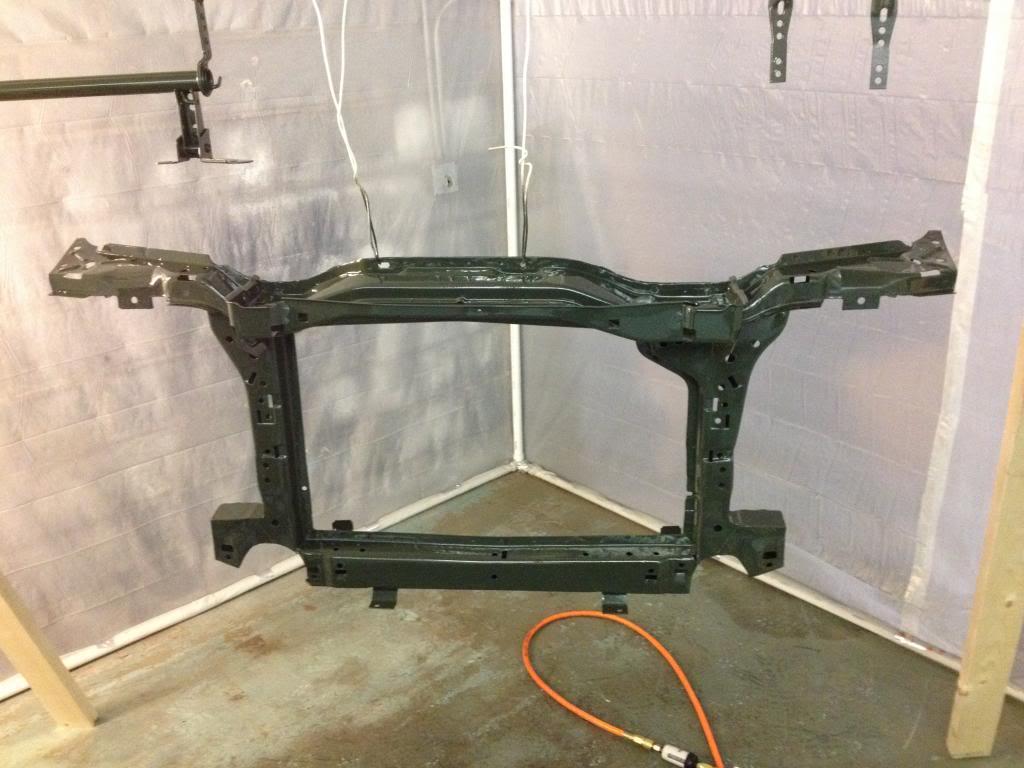
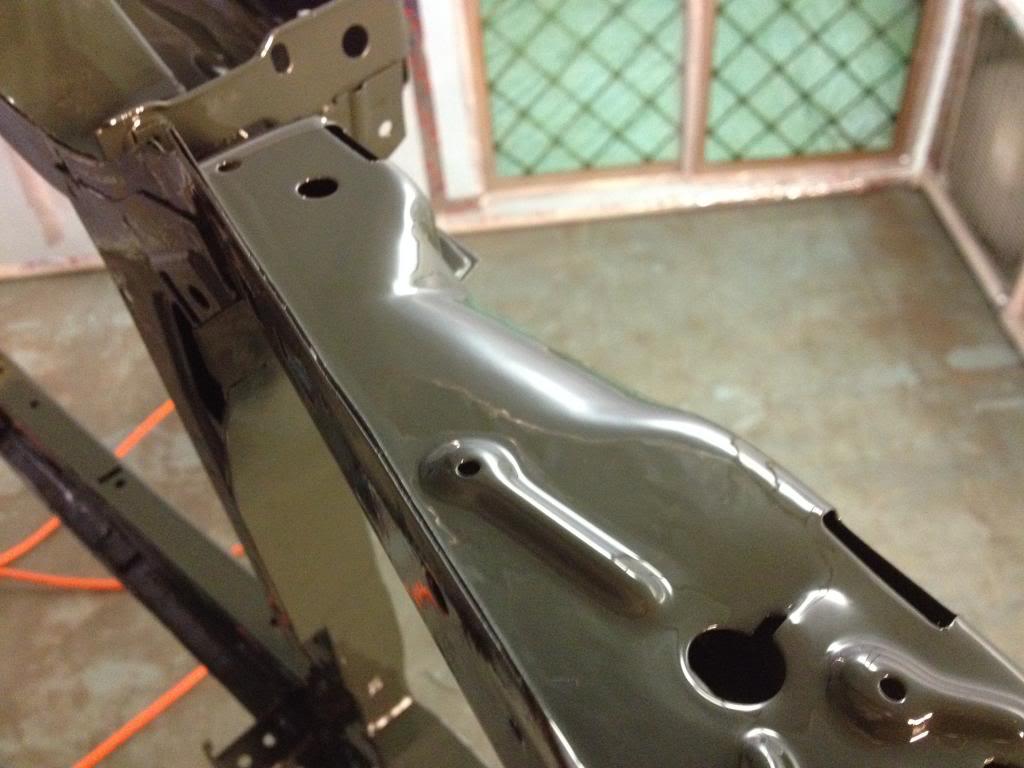
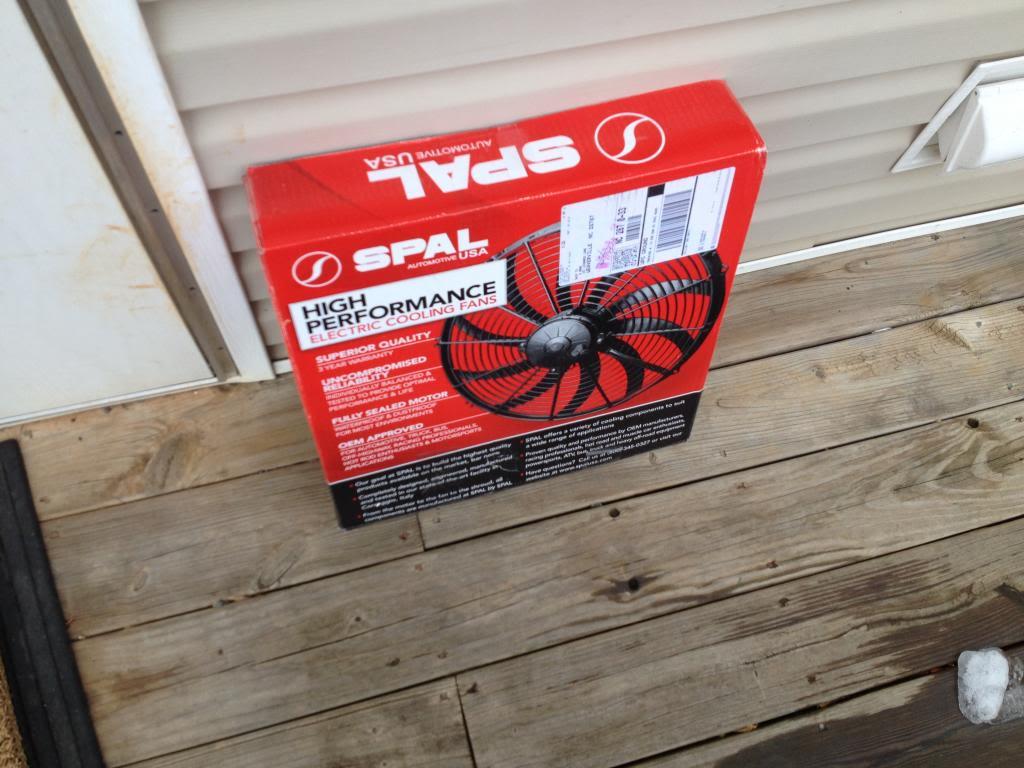
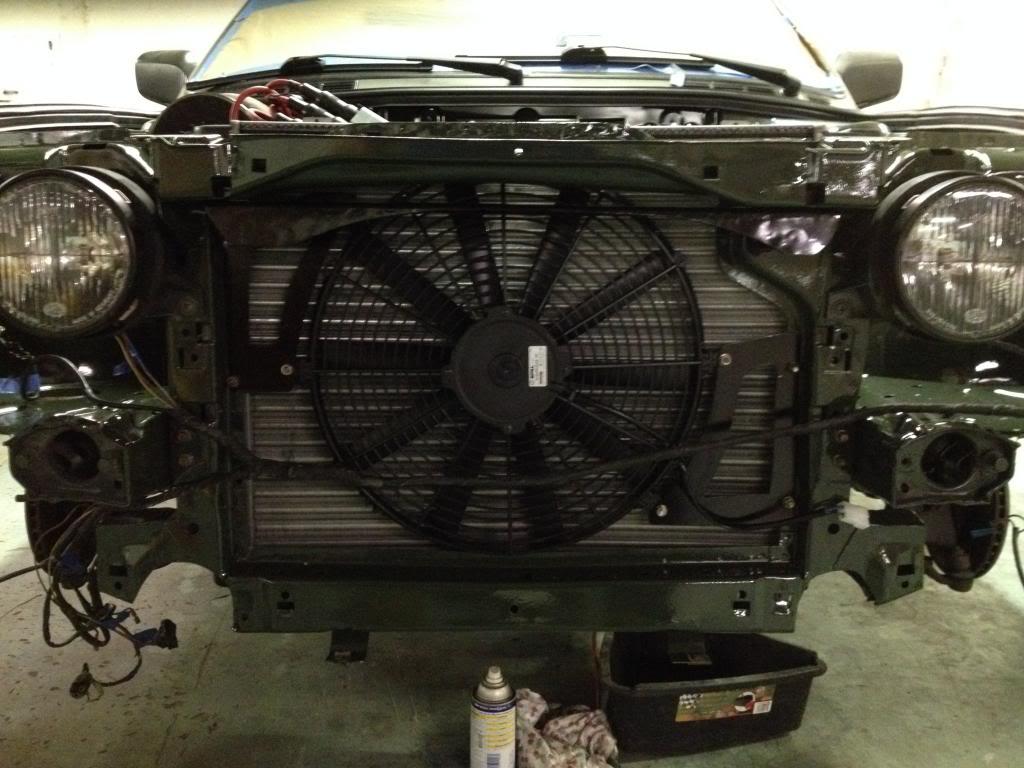
Now to wait for them to cure. I should be able to start final assembly on Wednesday. And now that I have my SPAL fan I can officially install the radiator support for the last time during this build.
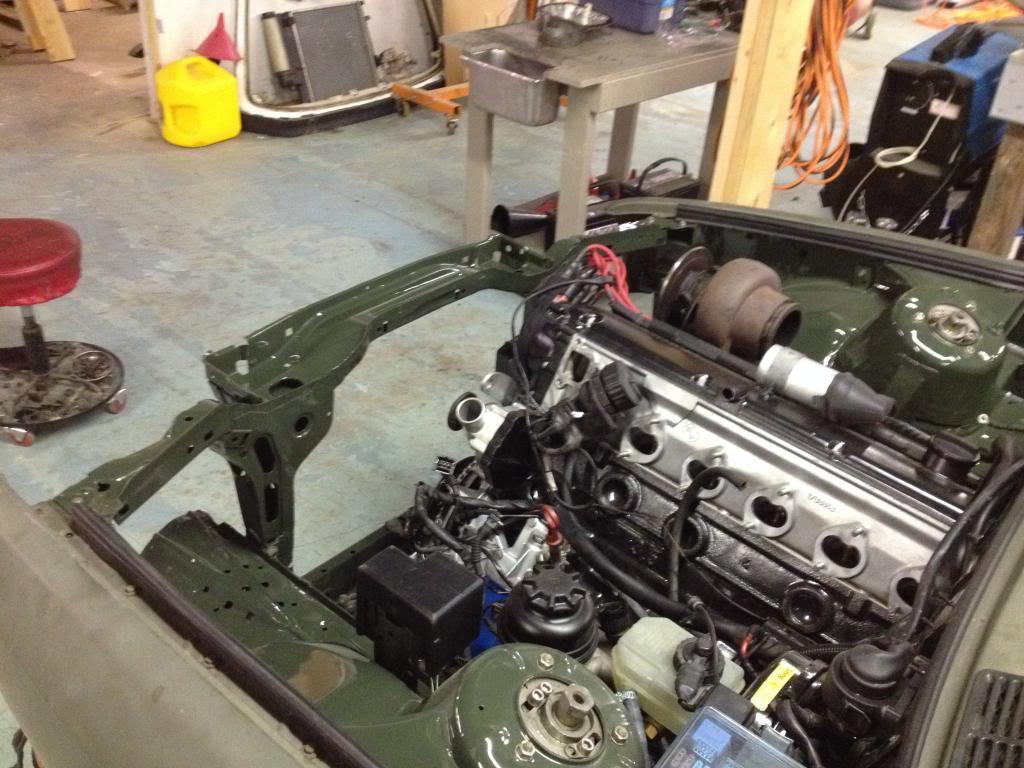
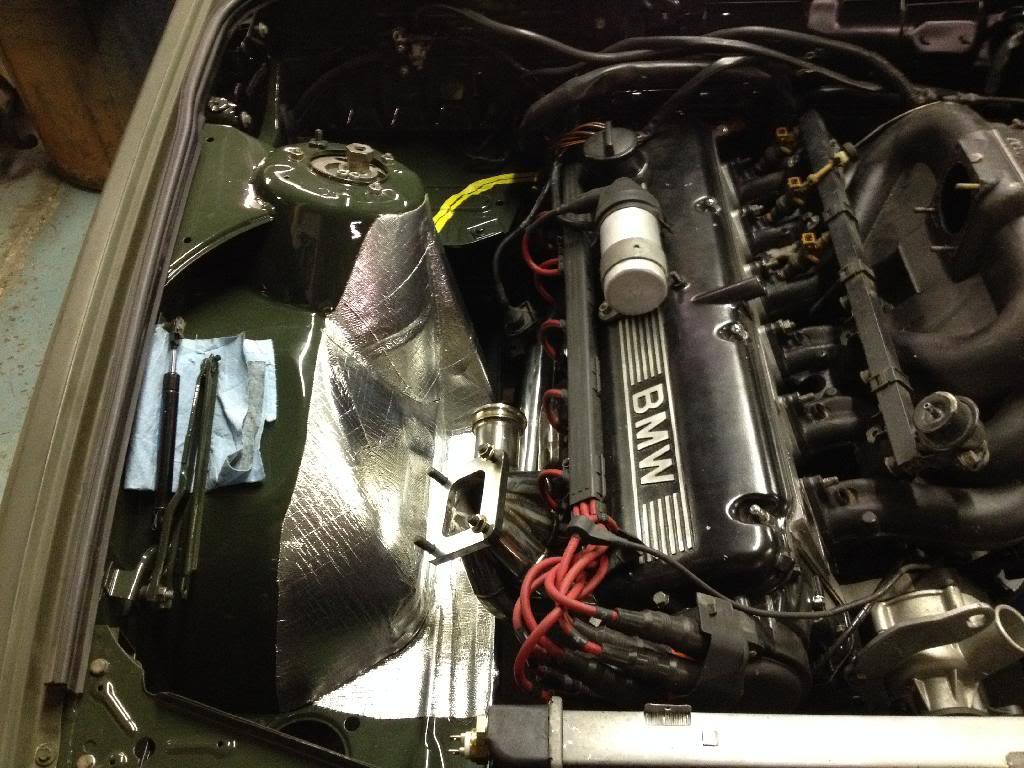
And since I had to wait around for the paint to somewhat cure today I made some progress on the actual car.
I put on the Bavauto sparkplug wires from my M20, I just had to put them into the M30 wire cover.
I also reinstalled the freshly painted blower motor cover.
And I put the wiring harness back in the engine bay.
I relocated the coil to avoid the coil wire being draped over or under the down pipe. And I plan on mounting the wasted spark coils in the same location when MS happens.

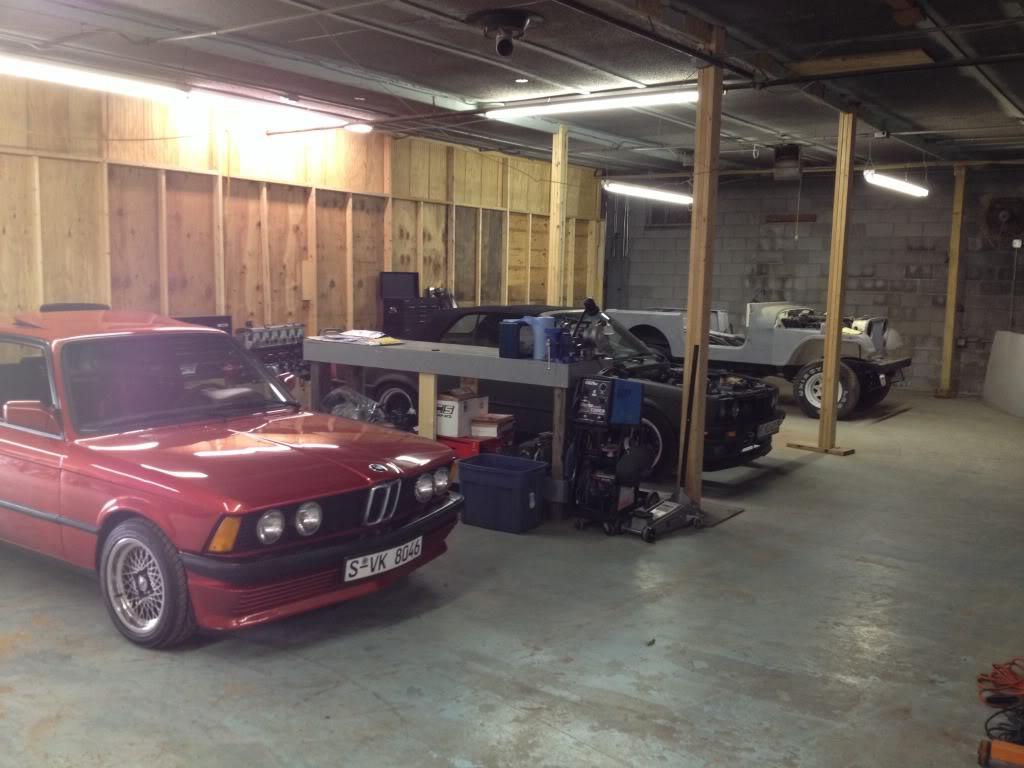
Oh and in the last couple of days I did some shop improvements. Notice the wall behind the convertible, NO more exposed studs and a coat of paint made a huge difference.
2-19-2014
Baby steps are still steps. I got in a few minutes of work today.
2-21-2014
OPERATION: Removable Radiator Support and Intercooler install and Engine Bay Paint and Wire Tuck and Hood Release Cable Tuck and other stuff, IS COMPLETE!!
Got some work done today.
I mounted the headlights
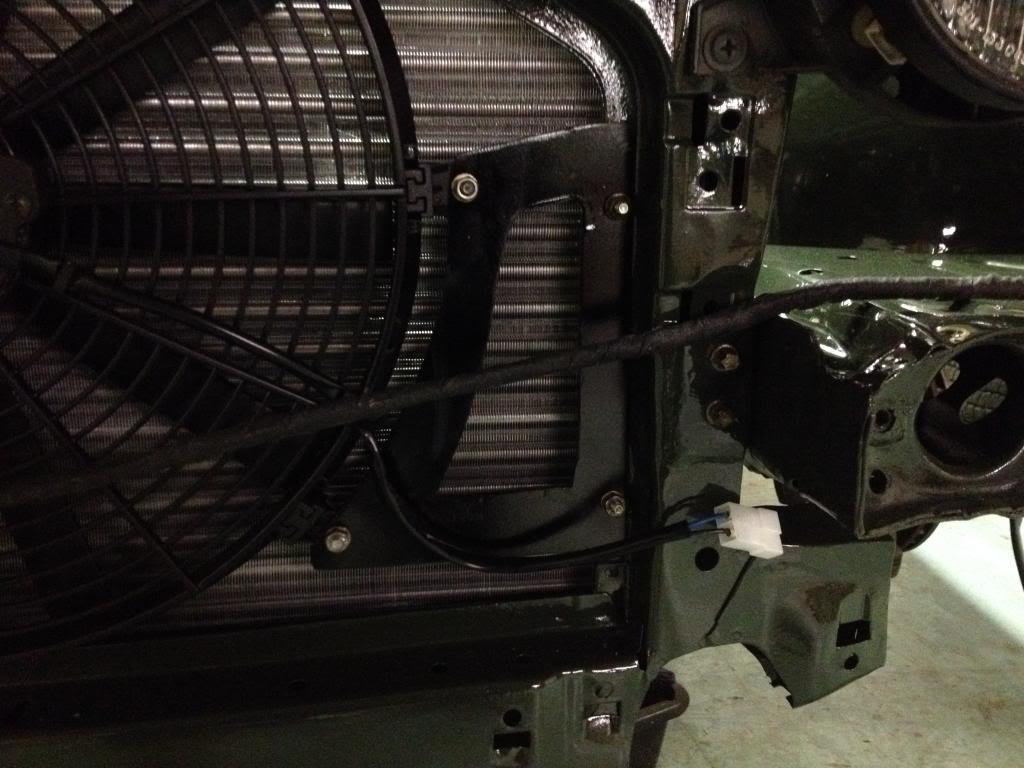
I then started working on mounting the SPAL fan. I had to make some brackets.
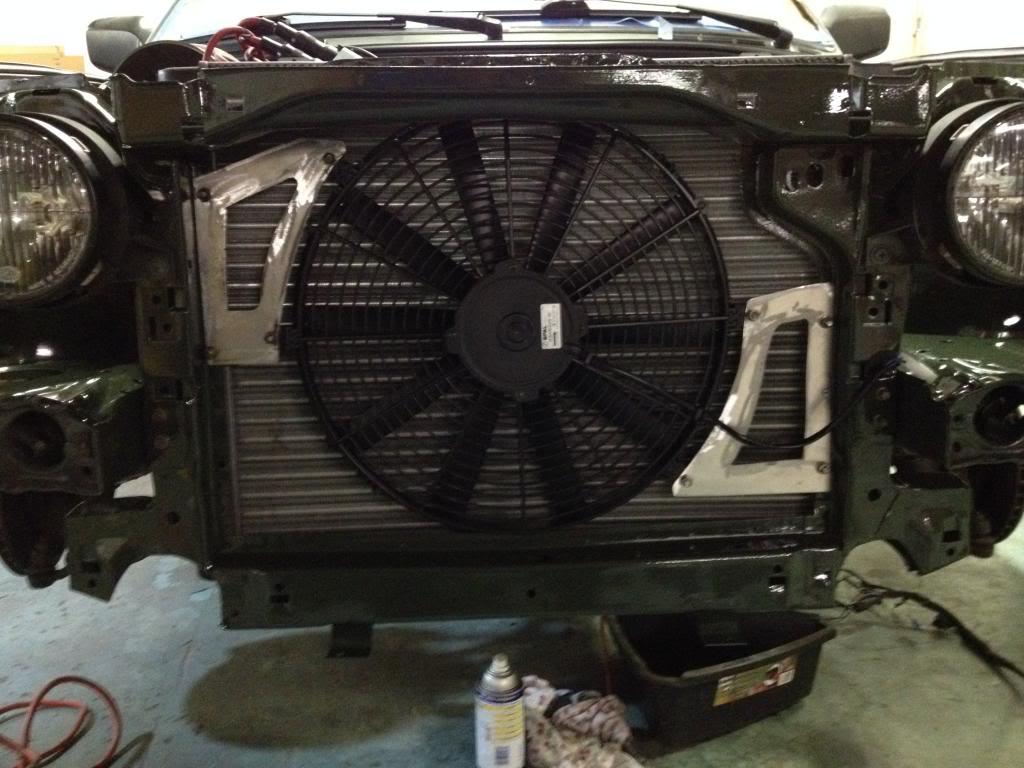
Then I went ahead and mounted the intercooler with the fan in place and the wiring pulled across the radiator support to ensure that I didn't make any mistakes with clearances. It looked like is was manufactured that way!!
Then I disassembled everything and painted the brackets. And finally remounted everything. I cleaned up the intercooler and reinstalled the hood hinge mechanism and the hood shock arm.
I want opinions here. So please give me some feed back.
Here is my dilemma,
I have really enjoyed painting the engine bay and I plan on continuing with the exact same color for the exterior, trunk, and door jambs. My dilemma is that I had planned on finishing the car with a satin clear to continue the theme of subdued military coloring, plus it looks cool in satin, BUT the gloss looks so good! My iPotato pictures do not do the engine bay justice at all. So do I paint the exterior to match the engine bay in gloss finish or finish it with the same color and continue with the satin clear coat finish?
Please consider these before replying:
* I know satin is higher maintenance and that is not an issue
* I will be painting the exterior and have access to a professional booth
* The exterior paint is a little down the road, turbo and MS are first.
* My hardtop has been stripped and is being painted in high gloss black
Let me know.
2-23-2014
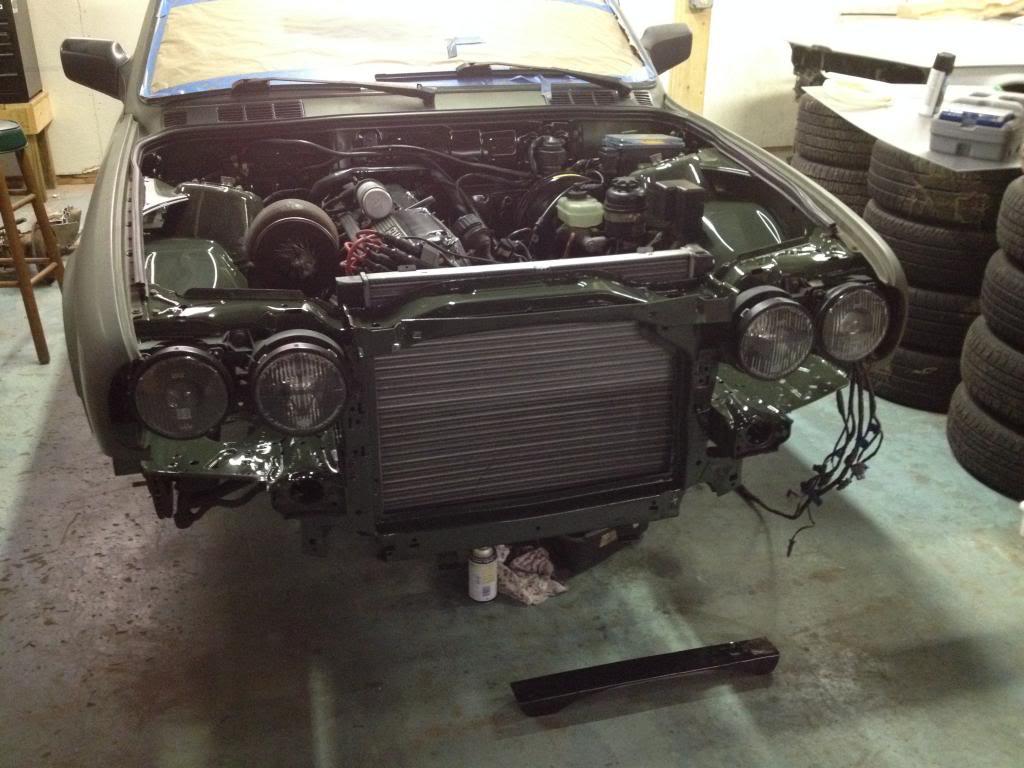
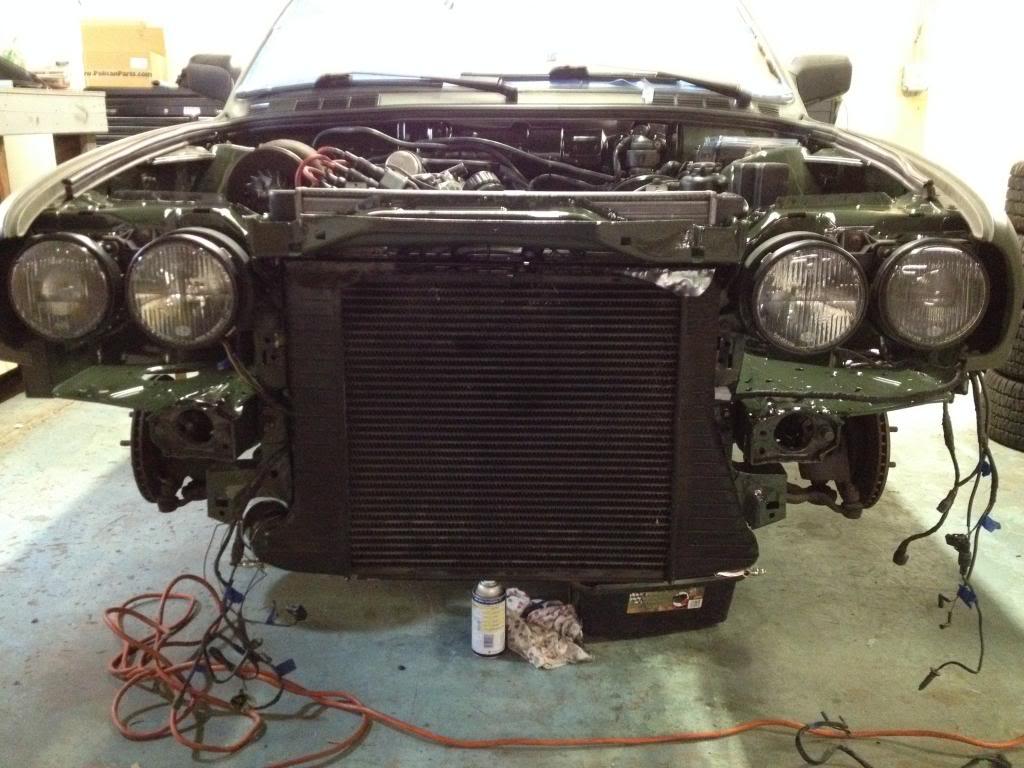
Got the front end back together and the saddest thought came to mind, No one can see my hard work! Oh well that was the idea from the jump.
Valence on without any touching or rubbing.

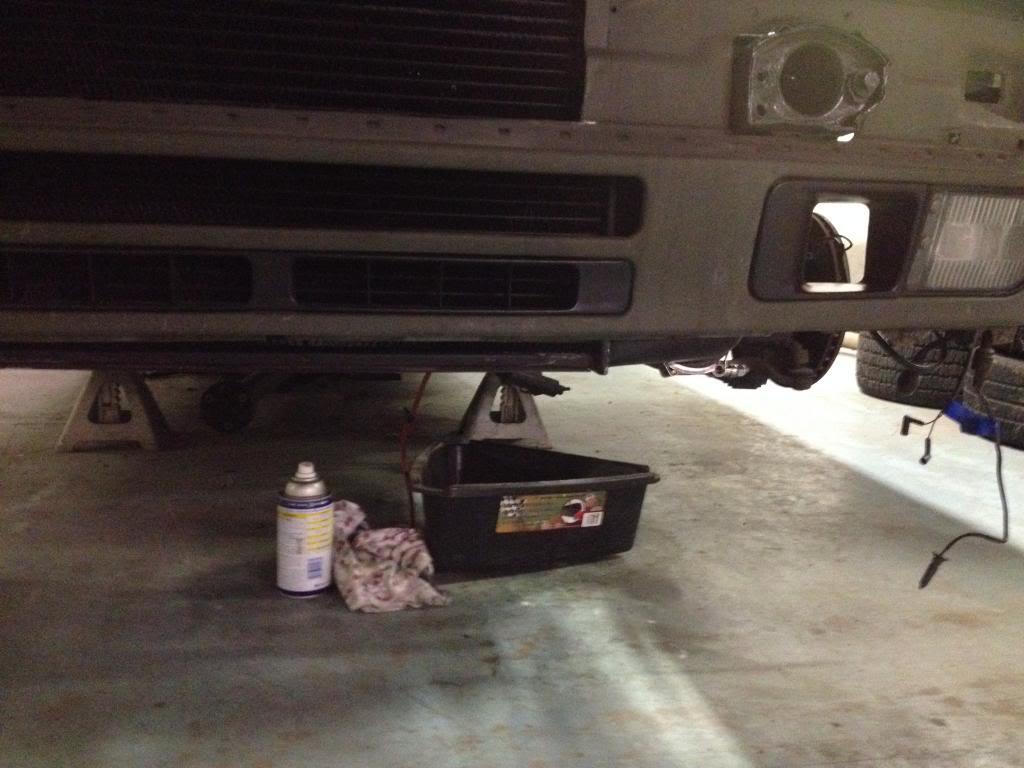
I then cut out another hole for more airflow potential to the intercooler. And mounted the grills and kidneys.
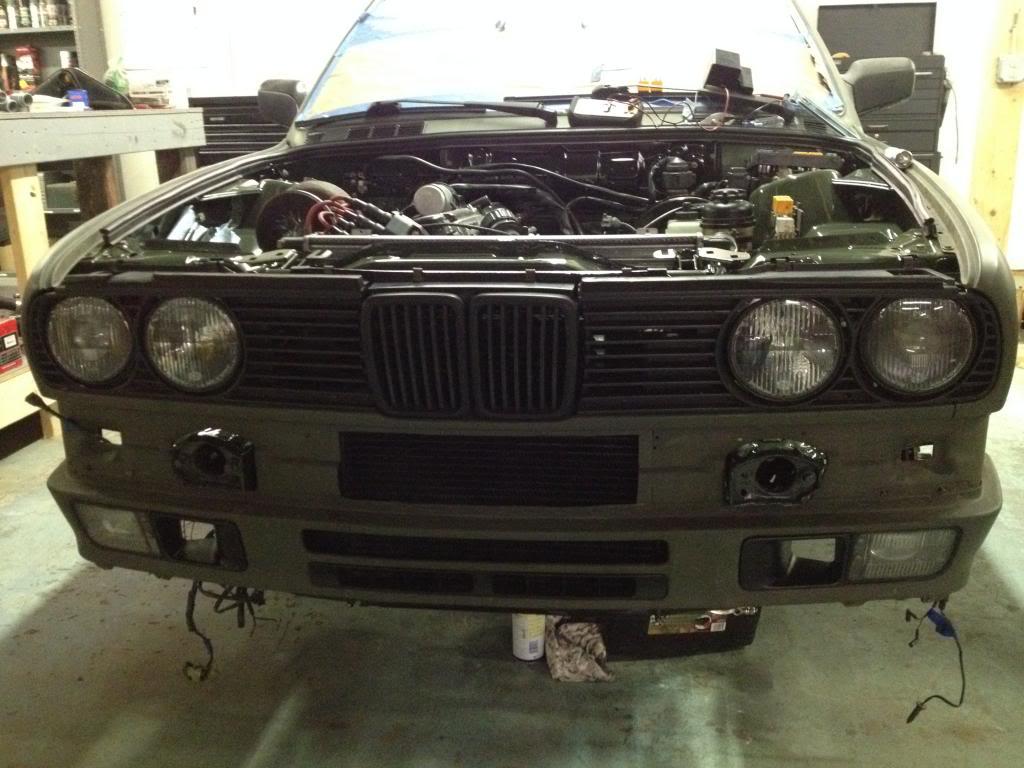
Now that it is done you can really see how well this all fit. Here is a shot of the bottom of the intercooler peeking out from under the valance. It will be invisible once the lip is reinstalled.
And finally it looks like a car again. Like nothing ever happened!
2-24-2014
Thanks Otis. No the engine is still to high I just have the compressor housing off for clean up and paint. I now have an intake for mock up and I will have measurements tomorrow for custom solid mounts. Then it will be lower!
I shouldn't because the rear subframe and diff are already offset by 12mm so the CSB was the lowest point on the drive line. If I lower the engine by +/- 22mm or almost an inch then the straight line will be re-established.
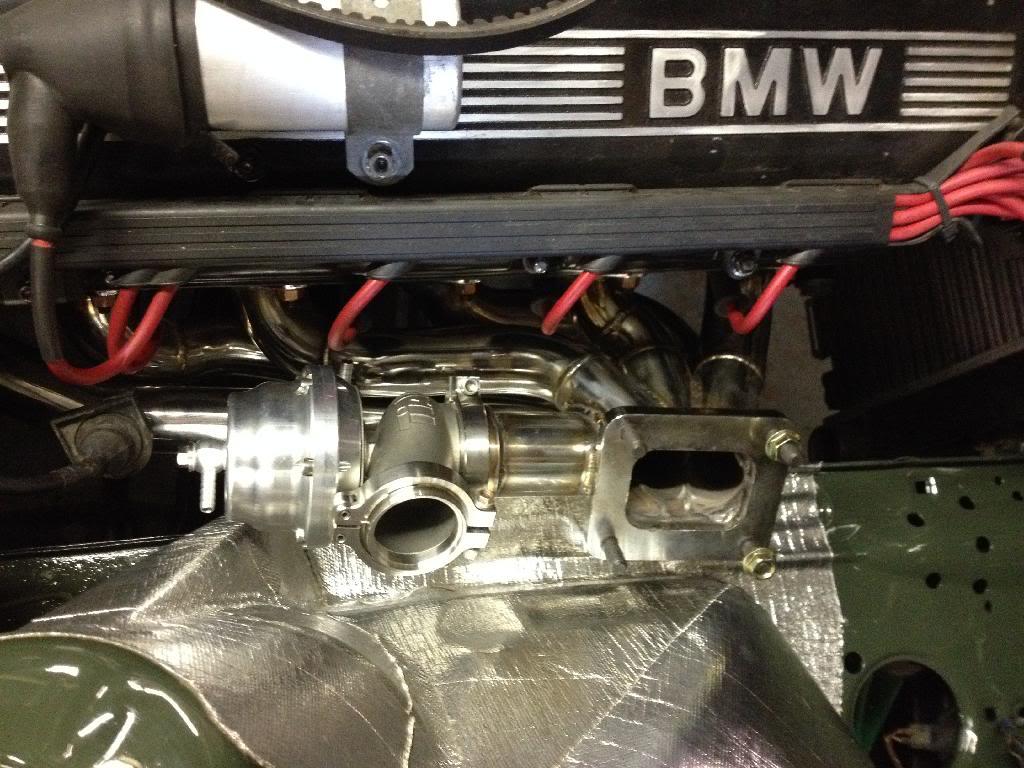
Got a few parts on order today including a new Tial 44mm wastegate. My new ATE slave cylinder and master cylinder for the clutch will be in tomorrow morning. And I had a conversation with WhoDWho about a little thing called MegaSquirt! Tomorrow I will make more progress and post accordingly. I am getting really close!
2-25-2014
Got my slave cylinder in and bled. Oh, and I got the engine positioned perfectly with the assistance of a loner intake manifold. The hood closes with plenty of clearance for both the intake and turbo. I didn't really have to lower the engine but only rotated it. The engine sits at 28 degrees which is right where it needs to be +/-. Apparently it was sitting closer to 18-20 degrees before which is completely wrong and was the reason that the turbo was to high. So with the help of some custom aluminum mounts everything will be perfect.
STOOPID iPotato pictures
Like nothing even happened.
2-28-2014
Small update. My heat shielding came in yesterday so I applied some of it today. I would have done more but I am prepping a car for delivery to a new owner and I picked up two new cars in the last 48 hours, a 1987 325i sedan and a 1985 524td. I am thinking 324td! What do you think?

3-31-2014
Oh man how I want to post that! Seriously like yesterday!! Unfortunately I can only update with a pic of non-Volvo upgrade.

Thanks. And no the coil will be there until mega squirt. It is the best way to keep the coil wire from getting burnt up going over or under the down pipe
3-2-2014
^This car is far from a vulva, thank you very much! ![]()
The intercooler is from a mid 90's Volvo 960 turbo
Thanks to Jim325 for coming up today and lending a hand! I have never ever ever ever seen a power steering pump as clean as mine is now thanks to him. And he reenergized my motivation for this build by taking me for a ride in his underwear staining bad ass Turbo M30 swapped e30. OH MY GAWD!!!
Anyways. With his help we knocked out a few items on my to-do list including: mounting the power steering pump and alternator, cleaning and resealing the 2.93S diff, reinstalling diff, replacing the CSB and then reinstalling the drive shaft and heat shields. We also got the shifter linkage in place. Oh and test fitted the wastegate.
Picture time

3-7-2014
Because race car!

3-8-2014
This was on 10.5 psi on a day that wasent great for dyno tuning.

3-16-2014
I have spared everyone the multiple updates that chronicle every little step of the build over the last week. But I now have an update worth sharing.
She moved under her own power today!!!!!!!!!!!
3-19-2014
Here is the 3" exhaust I finished up today. It starts at a 3.5" down pipe then reduces to a 3". I am using a 22" Magnaflow resonator/glass pack in the middle of the exhaust and I finished it up with a Flowmaster 70 series muffler. I wrapped the down pipe and don't worry the Turbo Delete is only for break in purposes. Once the engine gets it's break-in oil change out of the way and the clutch is broken in I will be pulling the down pipe to weld in the wastegate piping and the turbo will be installed. Also I will be adding a couple of V-bands in the system for ease of future maintenance.


And a couple of exhaust note videos, If you have earphones use them because even though my iPotato has a crappy camera the microphones do a great job capturing the sound. Note how quick it revs!!!!
http://s1219.photobucket.com/user/Mattkoppi/media/My%20Cars/M30%20Swap%20pics/IMG_3080_zpsbab1e121.mp4.html
http://s1219.photobucket.com/user/Mattkoppi/media/My%20Cars/M30%20Swap%20pics/IMG_3077_zps089aab8d.mp4.html
And I will leave you with a pic of the car sitting next to one of her friends. Sexy ladies!

3-23-2014
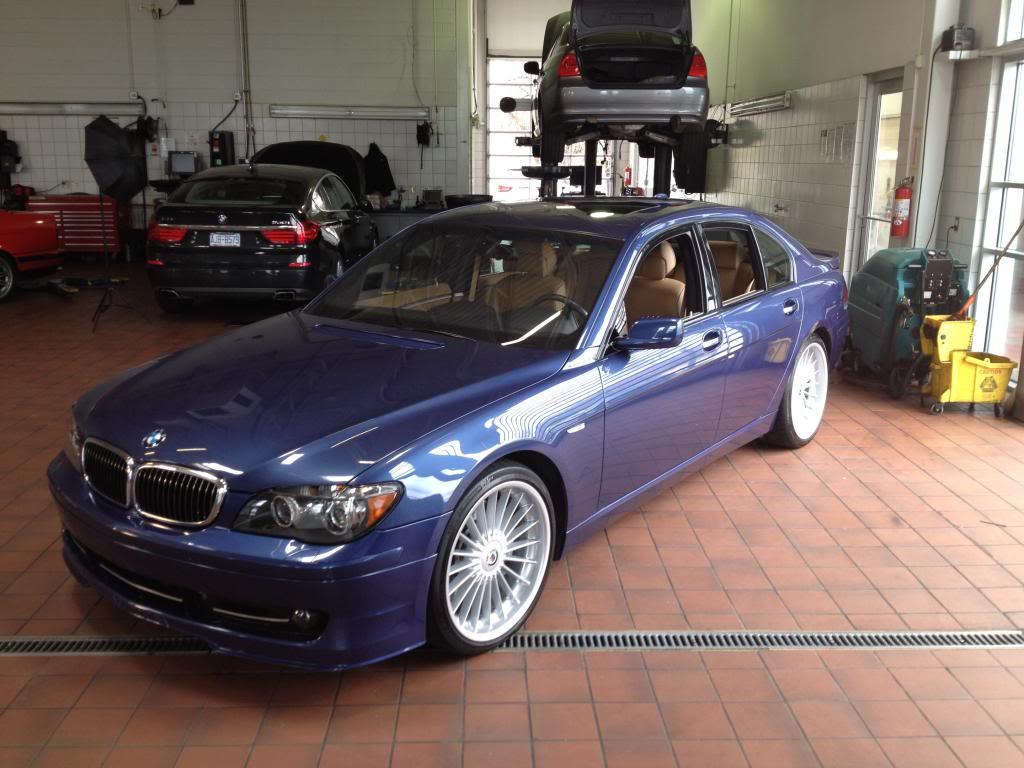
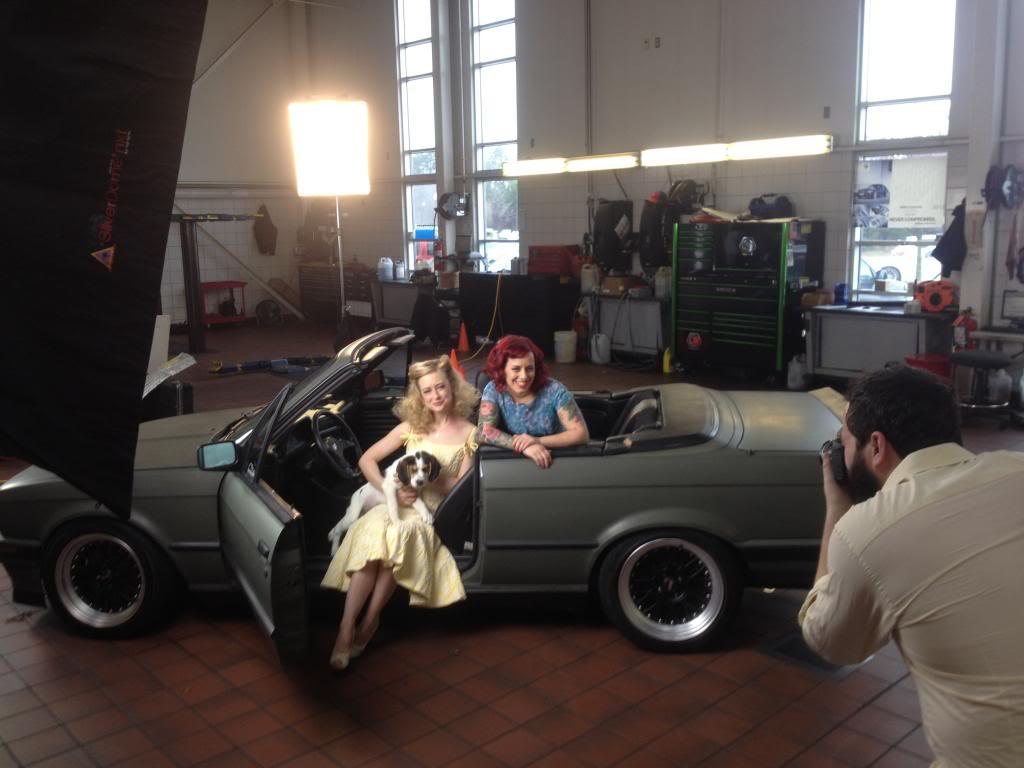
The goal was to get the car running and put together for a charity photo shoot. The photo shoot was today and it benefits multiple animal adoption agencies but mainly the Pin-ups for Pitbulls organization and the Humane Society. I not only got the car running but I had a couple of days to drive it around and clean it up. The shoot was at the local BMW dealership and my car was one of 3 that were involved. Mine, a newer blue Alpina 7 series, and a Sunset red Z3 were the stars. I took a few pics with my iPotato and as soon as I get the actual pictures I will share them as well. And yes I know my hood is a little out of adjustment.
Here is a taste


3-30-2014
Mileage = 565
Valves = adjusted
oil and filter = changed
Megasquirt = installed and tuned as well as possible with narrow band O2
AFM = History
60lb injectors and Innovate wideband = on order!
Holset HX40 = on standby!!!!!!!
4-11-2014
Mileage is just over 1000 now. Last night I installed the 60lb injectors and the innovate Mtx-l wideband o2. Worked on the megasquirt and got it pretty well dialed in. Up next is getting her on a dyno so I can get my "before" hp numbers and smooth out the tune a bit more. Then the only thing left is to bolt on the leaf blower.
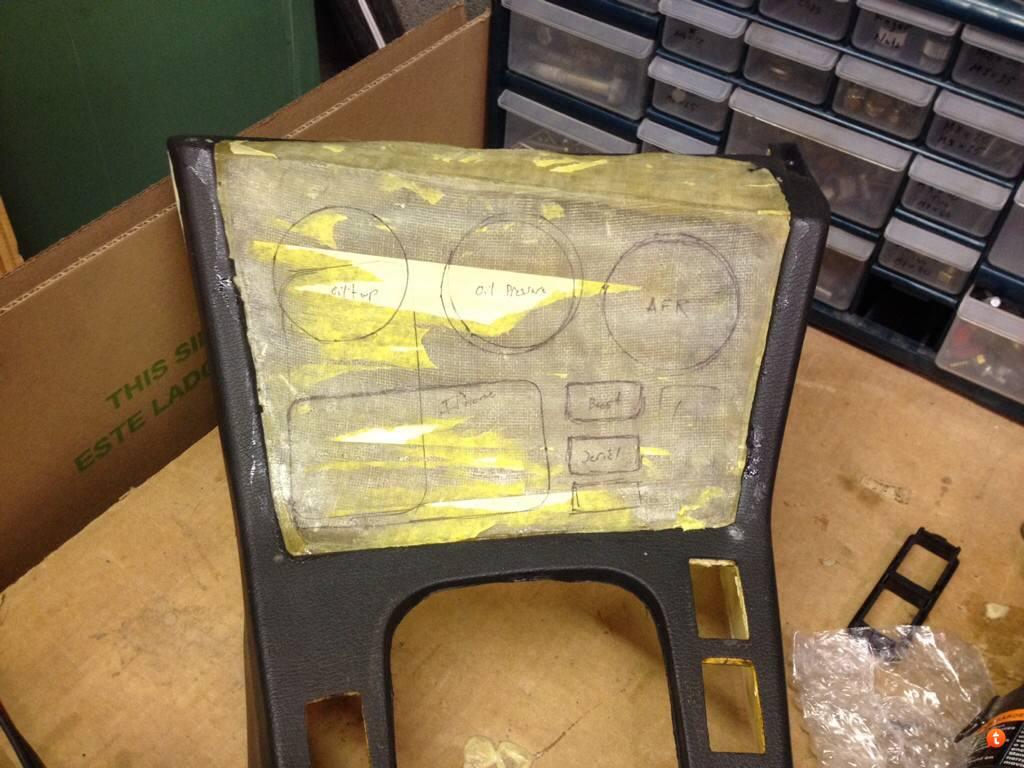
Also, I am working on a gauge pod for the car.
4-24-2014
Update time!
So the car now has right at 2k miles on the swap. The Megasquirt has been dialed in and all systems are running smoothly. Therefore it is time for the Turbo to be installed. BUT first I wanted to see what all this effort netted me on the NA engine since it runs so freaking well.
Keep in mind that this engine is a hybrid B34/B35 and it the compression has been reduced to 8.6:1 for the future turbo. But the displacement is at 3573cc at this point. The car made 223 whp and 252 wtq SAE at 5100rpm on a Dynocom.
Without further ado....

Nice!
Posted by Diggymart on 5/27/20 @ 3:41:07 PM