You must be logged in to rate content!
7 minute(s) of a 242 minute read
8-30-2009
Things have slowed down on the build mainly because I have to rely on others. Not a dig there, just thats how it goes. I decided to have my headliner installed by a pro to avoid wrinkles etc. and guess what? Not only did I still GET wrinkles, I got an extra hole for a mirror that mounts on my windshield. F*%&. Guy says he'll fix it. Oh well. just another test of my seemingly endless patience. I started to install my soundproofing today, and will take some pics and add them tomorrow.
9/5/2009
Once again I spent way too much time on another detail of my car. I spent a lot of time researching for new gauges for my LS2 conversion, and I just didn't really like any of the options available that much. I liked the look of the stock guages, but needed something newer. So I figured, why not put new guts into the old cluster? Easy right? Well, 40 hours or so later, I'm happy with the result. Here's a bunch of pics.
First just to see if the sizes would work, I downloaded images of the gauge faces, scaled them to full size, and set them in their holes.
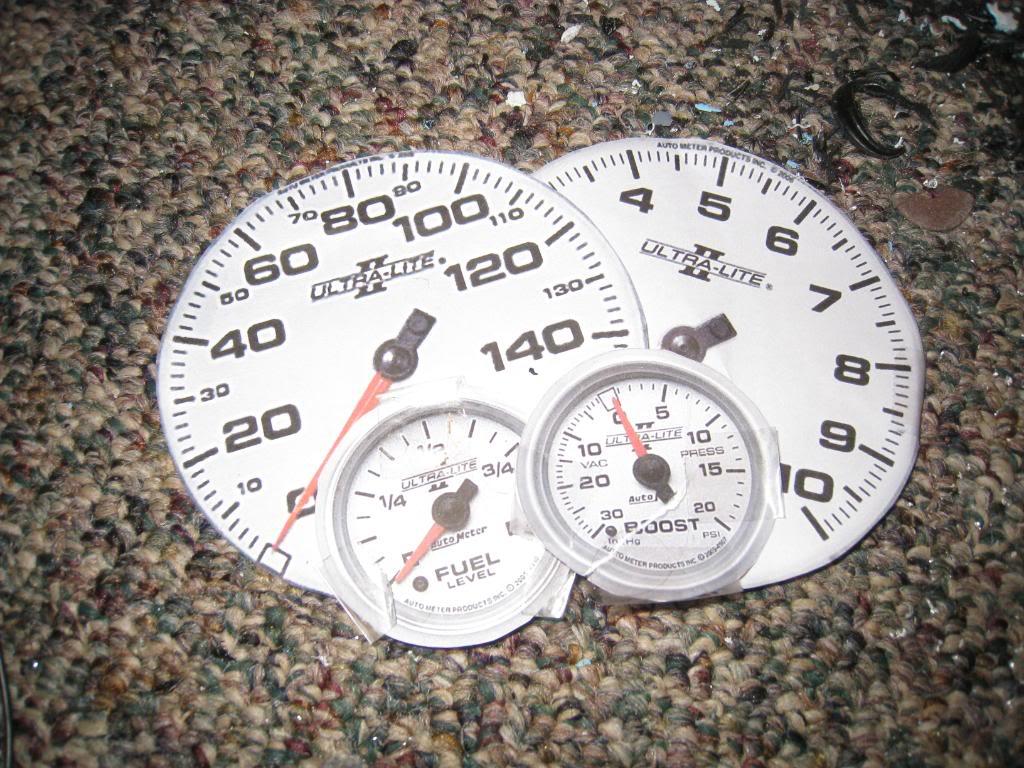
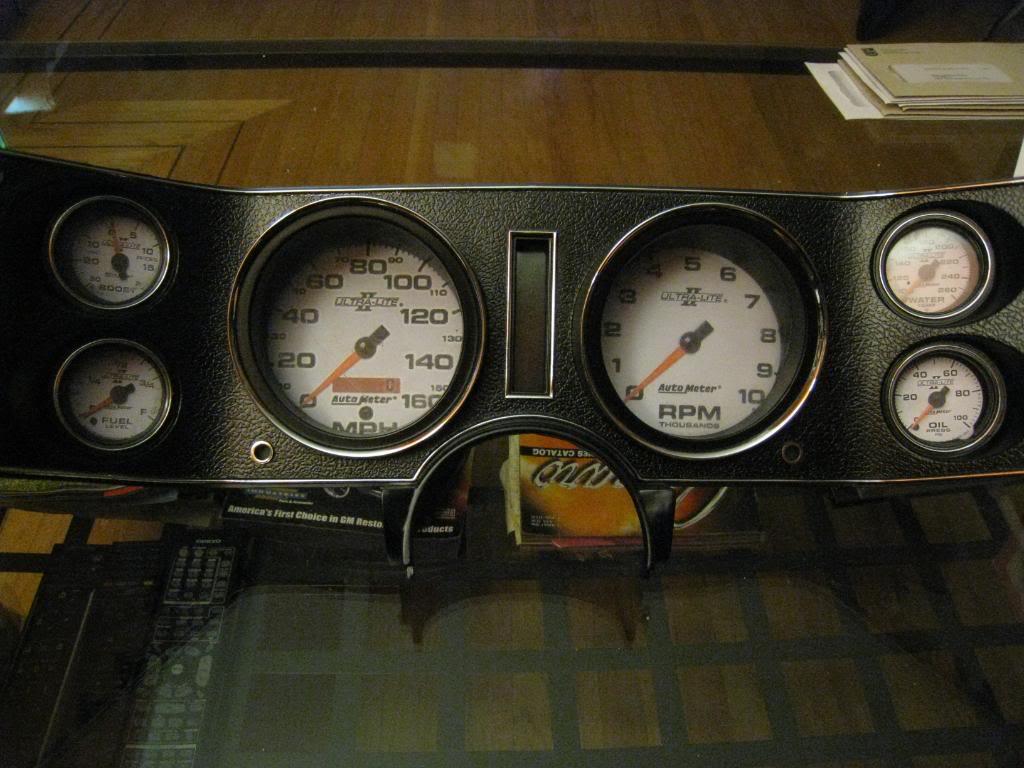
So far so good. Then I bought my gauges, decided which ones went in which holes, and then built up the courage to dis-assemble a bunch of VERY EXPENSIVE gauges.

I peeled the bezel lips back with a thin bladed screwdriver like a can opener and took them apart. (I started with the least expesive gauge first, just in case)
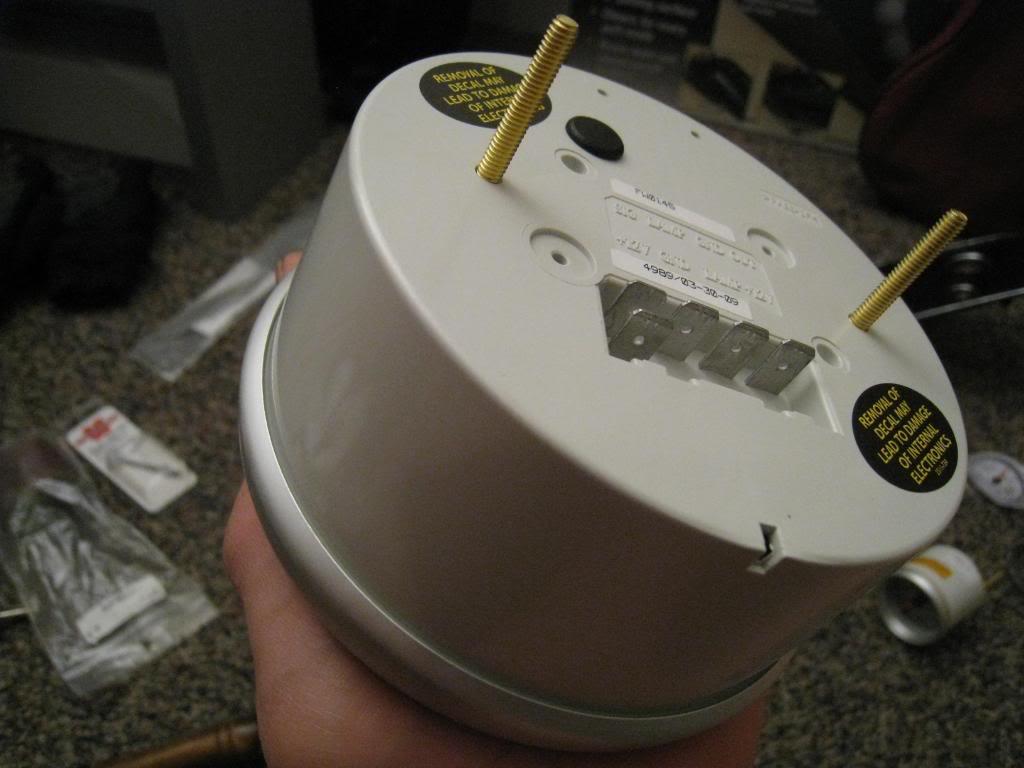

The small gauges, other than the boost guage, rely on the bezels to locate the faces and internals. So when you pull off the lenses the guts want to fall out. What I did was plug in thewiring harnesses to hold the guts in from the back, then held the wires back a little and put a very fine bead of black silicone around the edge of the face of the gauge. This does 2 things, it holds the face into its position and prevents light from bleeding around to the front of the lense(important on back lit gauges)
The stock Camaro gauge lense assembly has a raised ring on the backside which locates the 'buckets' of the new gauges in just the right spot. *I did have to trim the outer edges of a couple of buckets for proper fit, plus the wideband needed the ring sanded down to be even all the way around so the face would sit perfectly flat.
When I was happy with the location of the gauges, I 'tacked' them in place with a little ZAP (crazy glue) then used my trusty hot glue gun to finish glue them in.

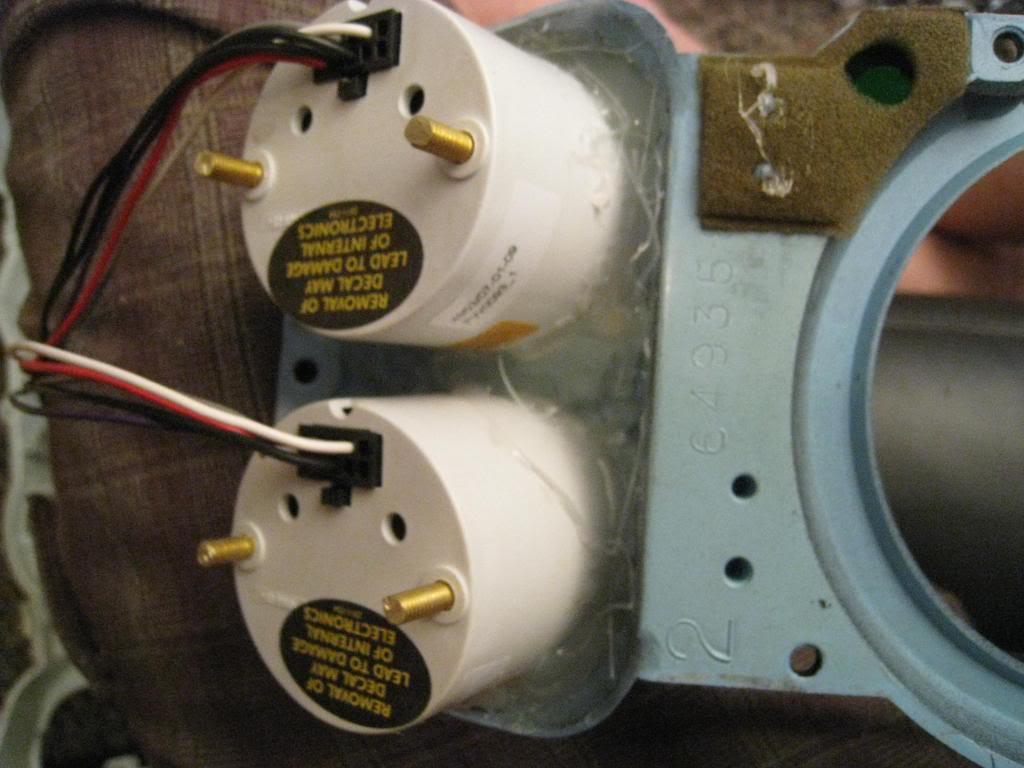
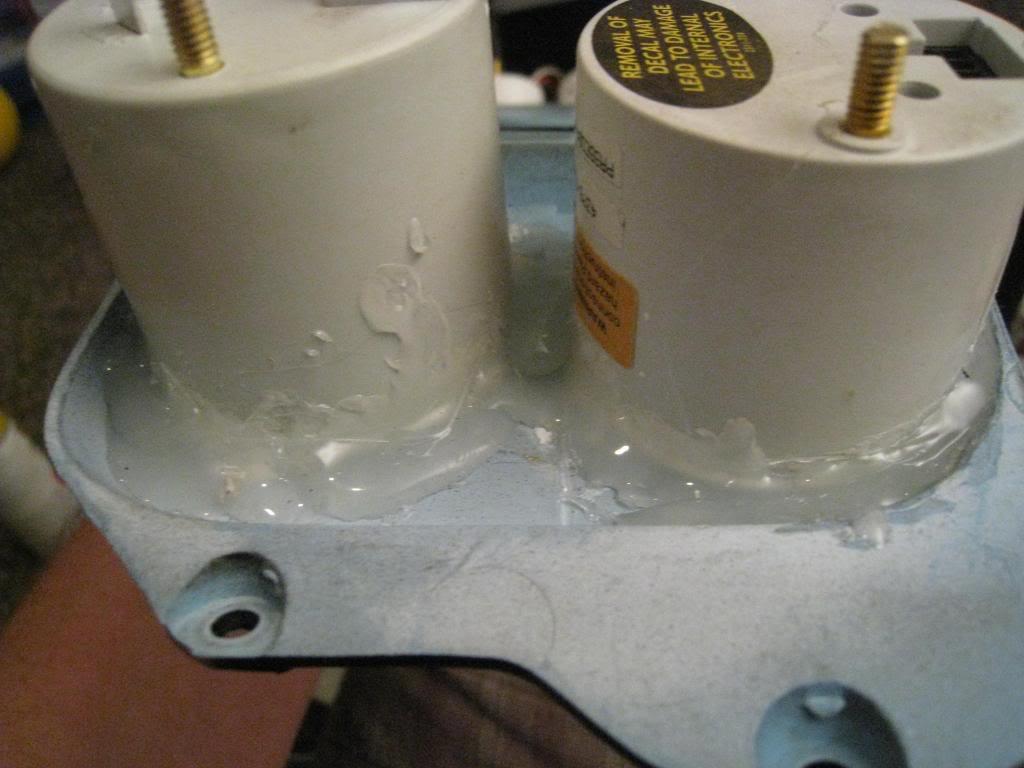
I then cut the back housing to accept the new small gauges.

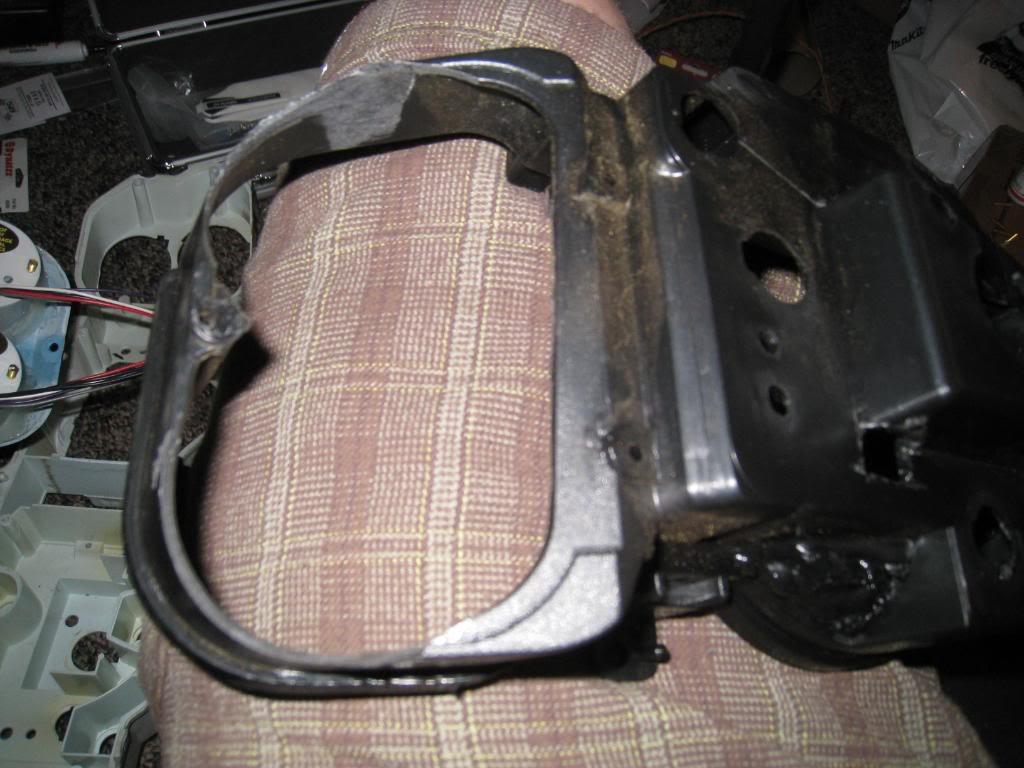
Now that they fit their holes I cut down the studs so they would be long enough to still use, but not so long as to make assembly difficult.(because of the angle of the gauges the studs make it tricky to put the 2 halves together.
The BIG gauges. I found that when the guts are pulled completely from their housings the Autometer 5" in dash gauges are just about the right size to mount in the original holes. You do need to do extensive 'lego welding*' to make the speedo fit. ((*lego welding* as a child over a number of xmas's got lego's / got mechano set / got woodburning kit .....))
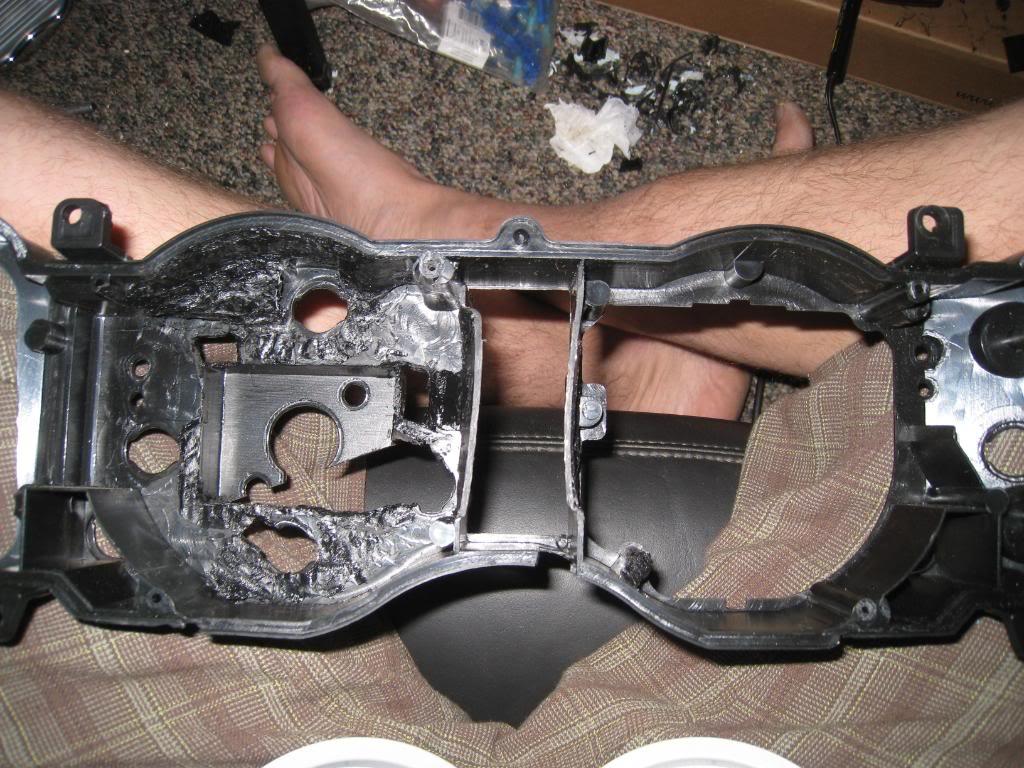
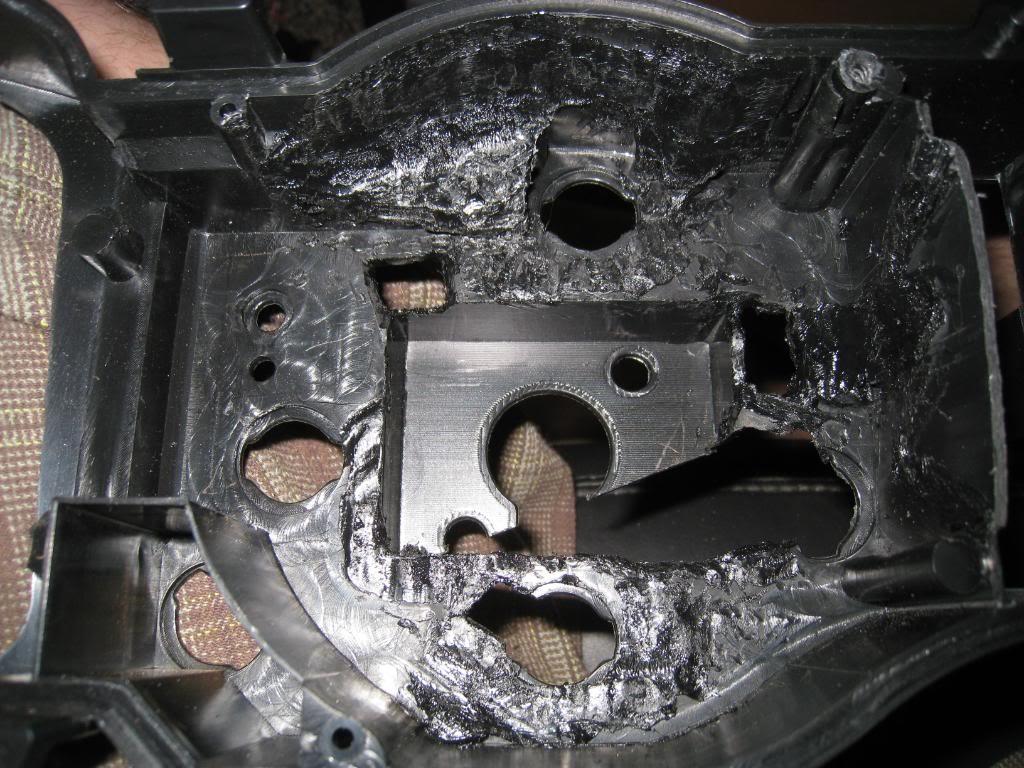
Next you set them in place and bolt the 2 halves together
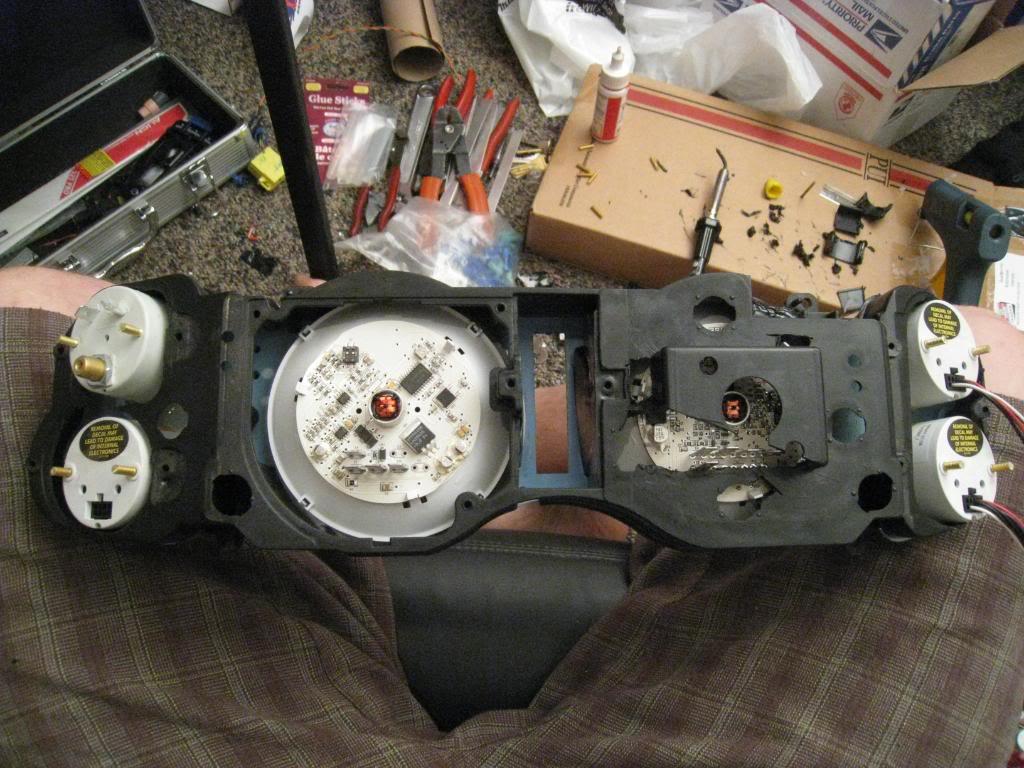
The big gauges are held in place by their lips being pinched by the 2 halves of the factory cluster. Perfect!
I wired things up then built straps out of aluminum for the 2" guages and used the stock holes for mounting the original gauges to hold them in place. (this may be overkill as the glue is really good. If you do this step, however, be sure the straps have no pressure on them. Bend them to fit. If they have pressure on them in any direction they will distort things, and possibly pull the gauges off of their spots.)

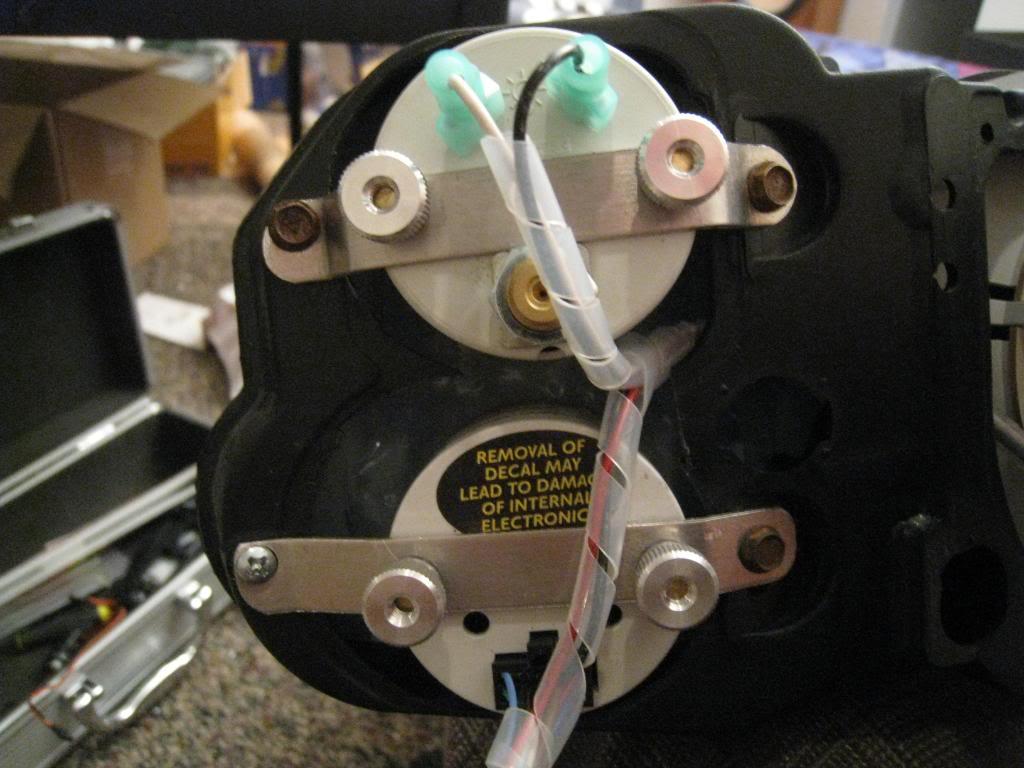

And here you have it. From paper face cut outs to the real thing in around 40 hours or so.
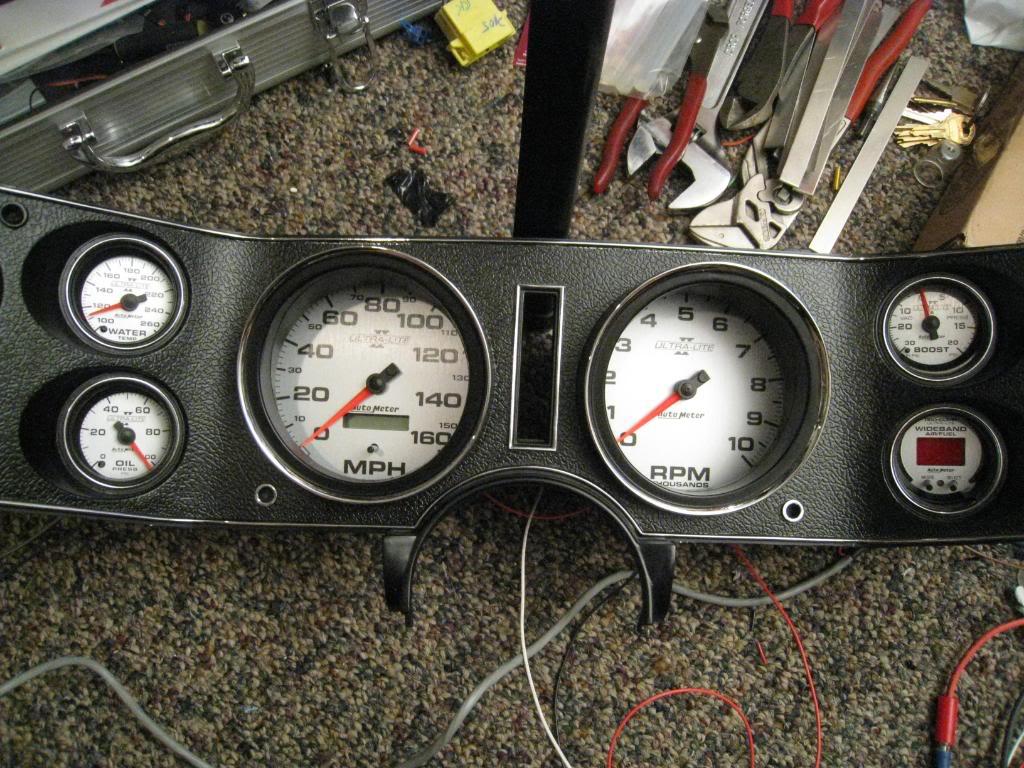
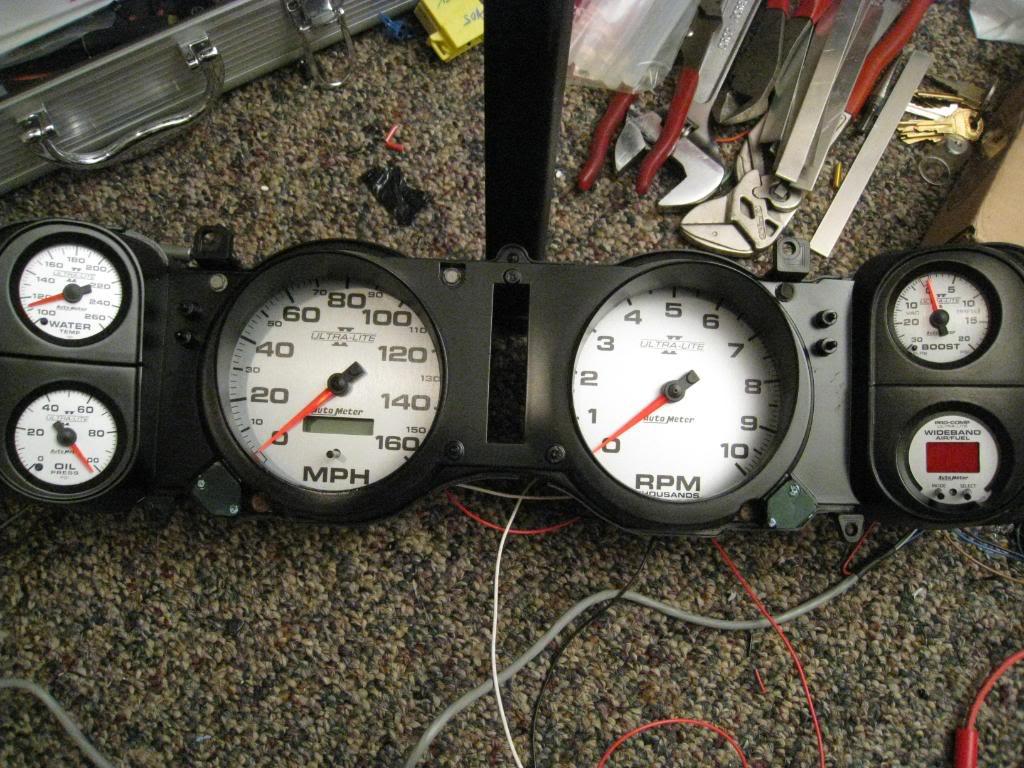
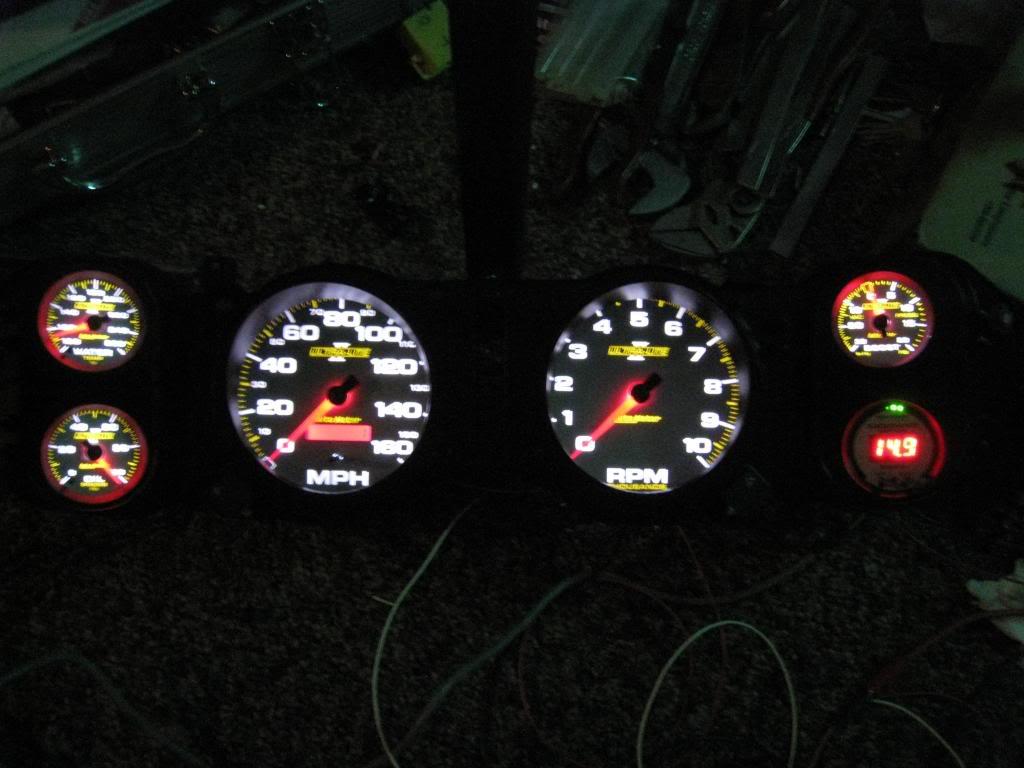
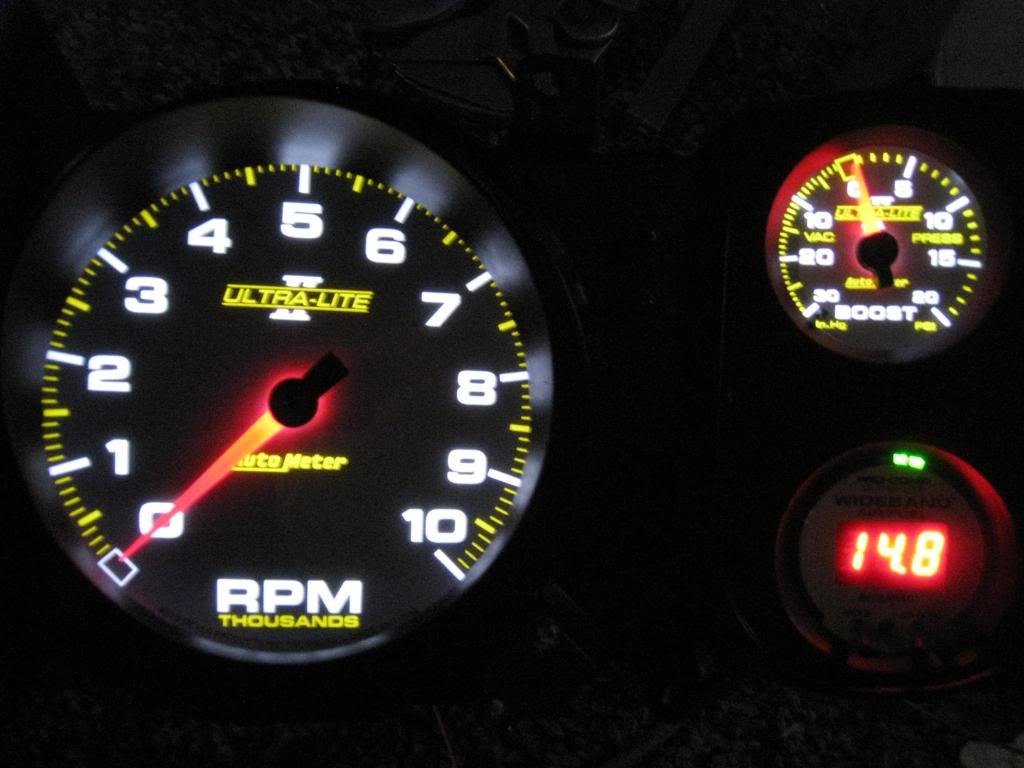
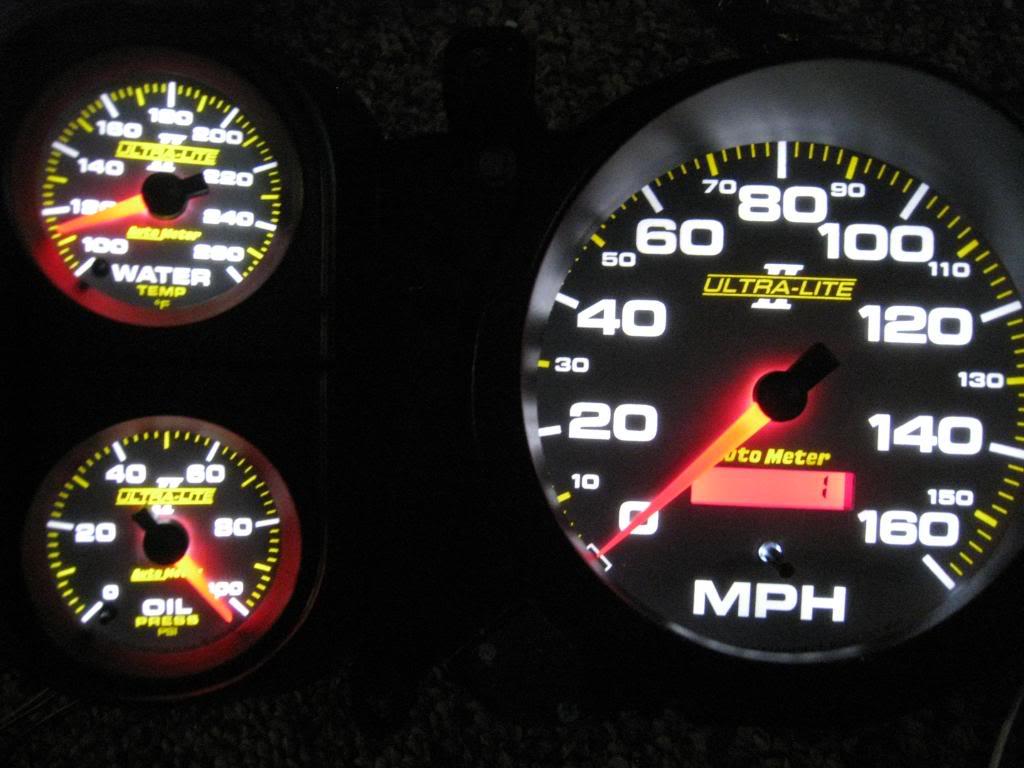


I ordered a new lense for it and as soon as I get it I will finish the cluster including holes for the speedo button and wideband buttons.
Great build!
Posted by Diggymart on 2/14/20 @ 5:54:05 PM