You must be logged in to rate content!
19 minute(s) of a 767 minute read
2-11-2019
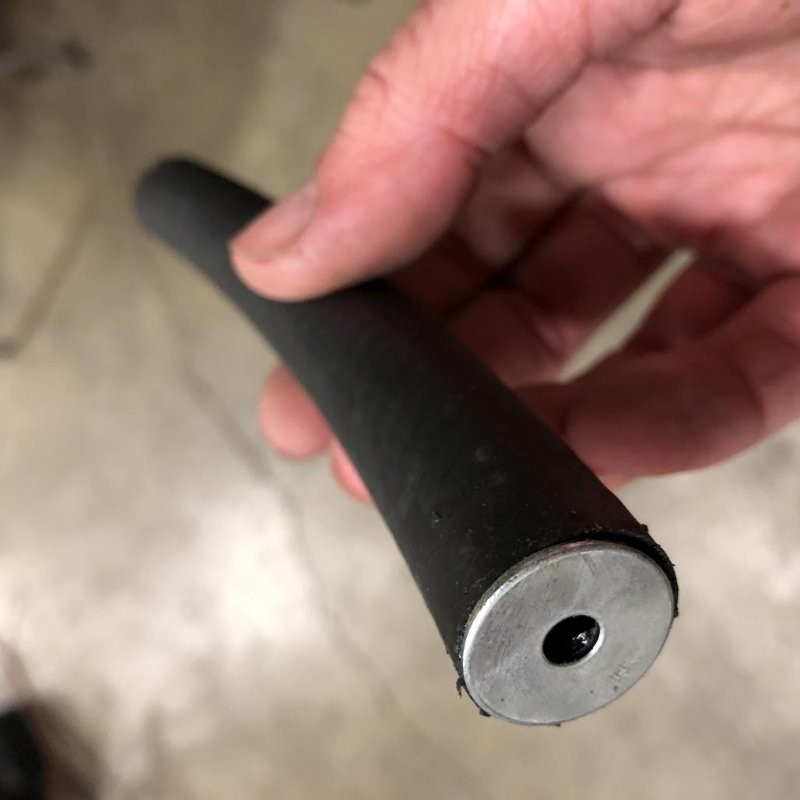
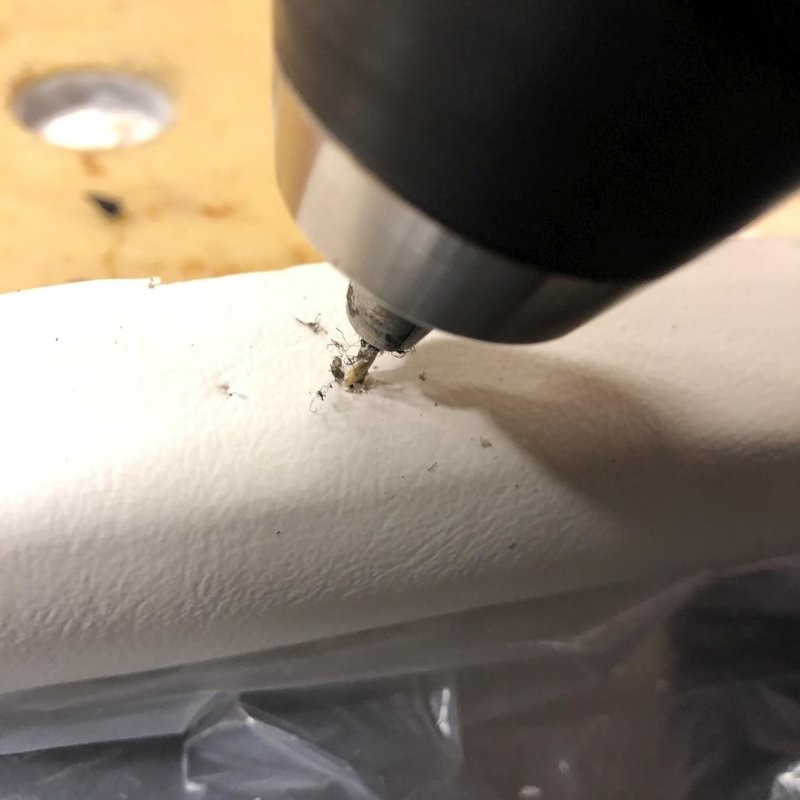
So at this point, I started thinking of what else I needed to do before installing the carpet. One of those items was to finish wiring up the electric headlight motors. The trigger wire is meant to hook in to the center wire of the high beam switch, so I'd have to run the (blue) wire from the front of the engine bay into the interior. I wanted to hide it so it wouldn't look out of place. What I ended up figuring out was to fish it through a ribbed vacuum hose that looks OEM, and use a body plug as a grommet for the hole in the firewall, previously used by the 3 vacuum hoses for the headlight system.

First task was to get the length of the hose right, then cut a piece of strong wire a little longer and fish it through.

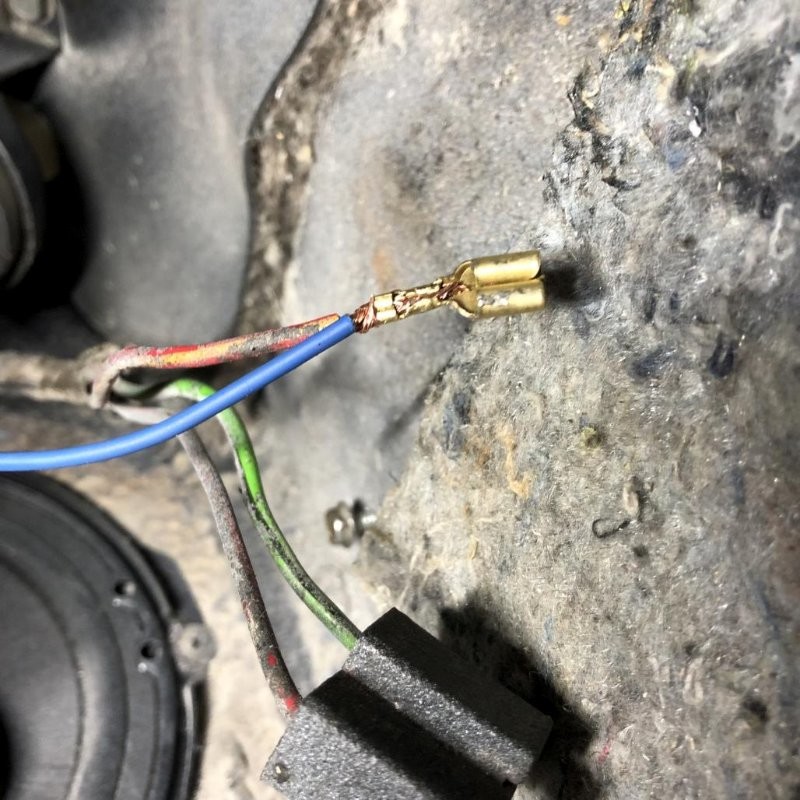
Next, hook the wire up like so and wrap in tape.
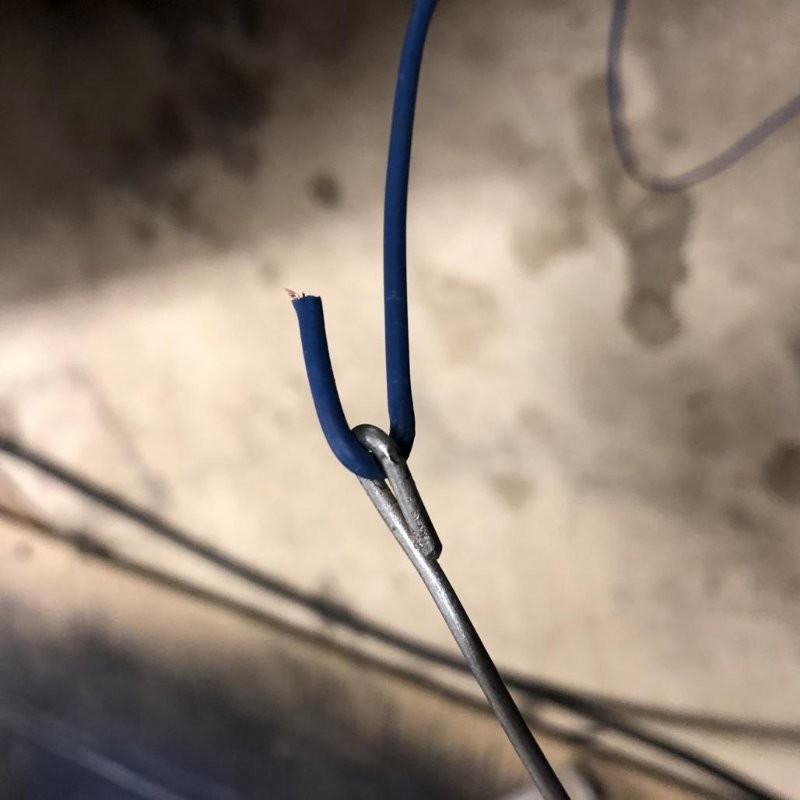
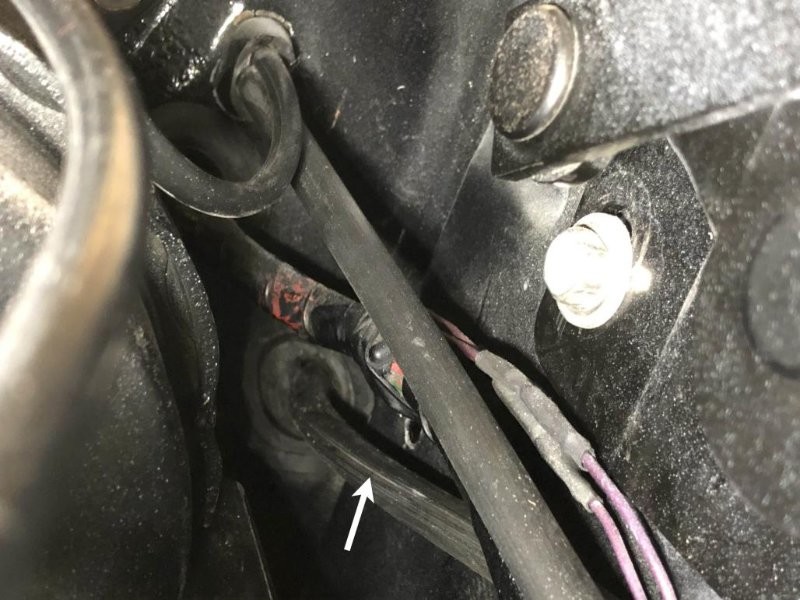
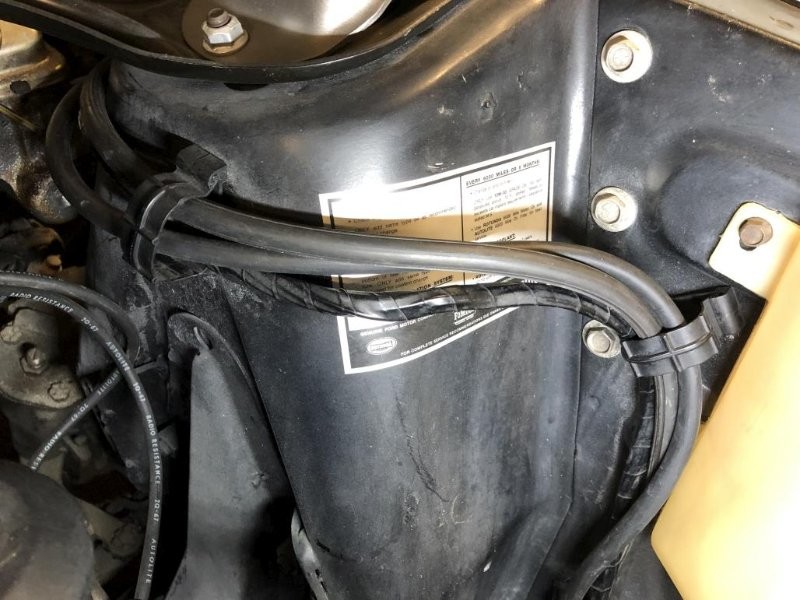
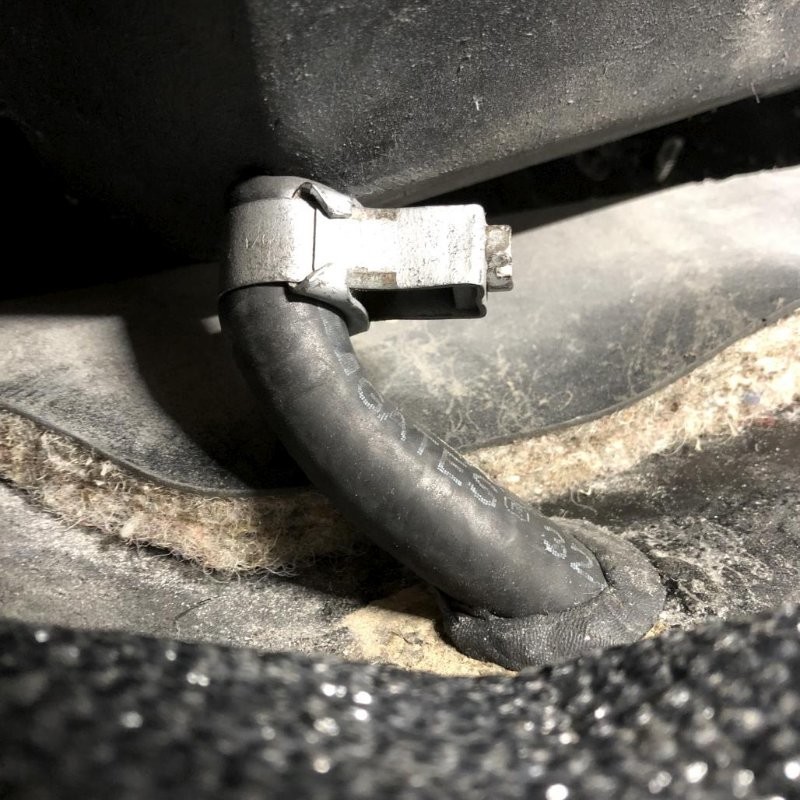
Then I sprayed some lubricant inside the hose until it dripped out the other end, and pulled the wire all the way out the other side. It was a little bit of a struggle but I eventually got it through. Here's a view from the engine bay side after installing the grommet:
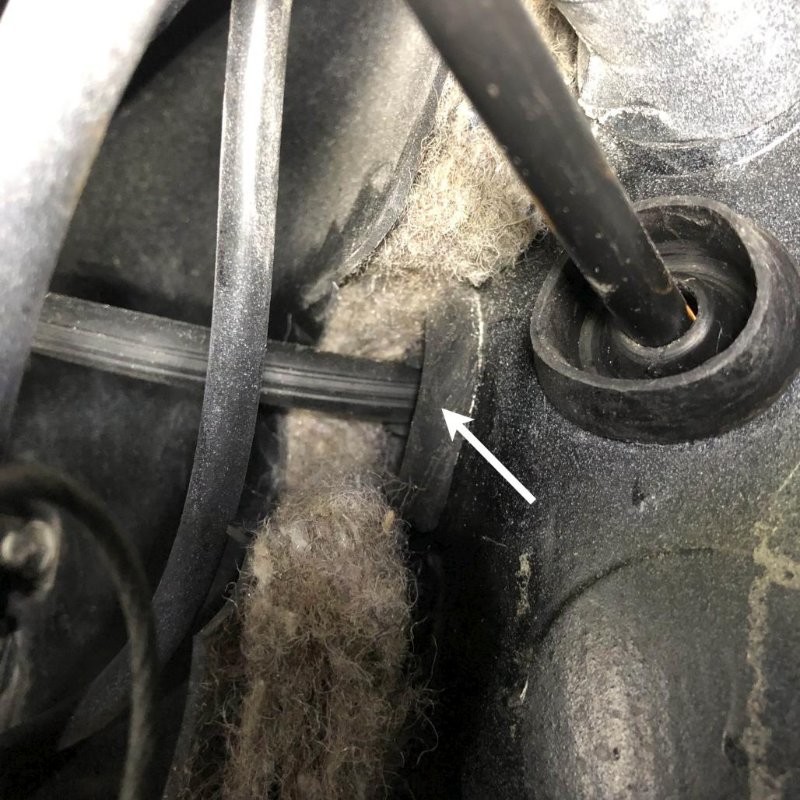
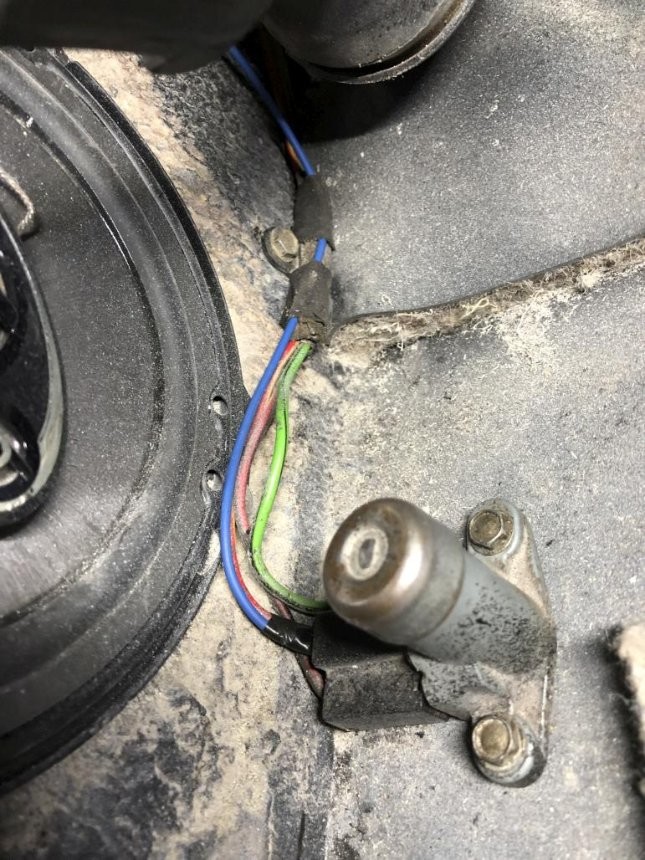
...and a view from inside / under the dash.
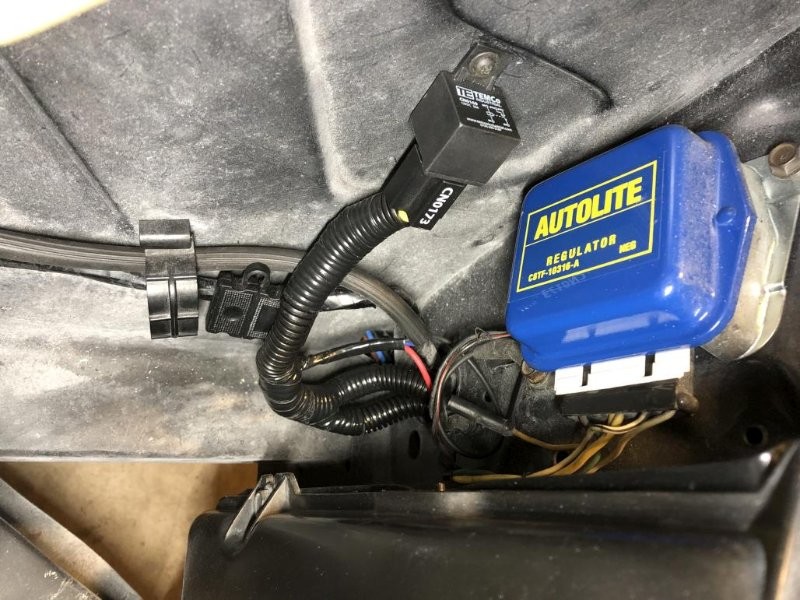
Here's a look at how & where I mounted the relay. Driver's side inner fender apron towards the front. The hole was already existing on the apron, though I'm not sure what for. You can see that I ran the hose about as far forward as I could to hide that blue wire. For the ground wire, I installed a ring connector and used the bottom bolt on the voltage regulator. I ran the red wire across the front where the factory wiring is, but think I'll do the same vacuum hose trick to hide it. Currently, it snakes up under the battery tray and attaches to the positive side of the starter solenoid. Not too obtrusive.
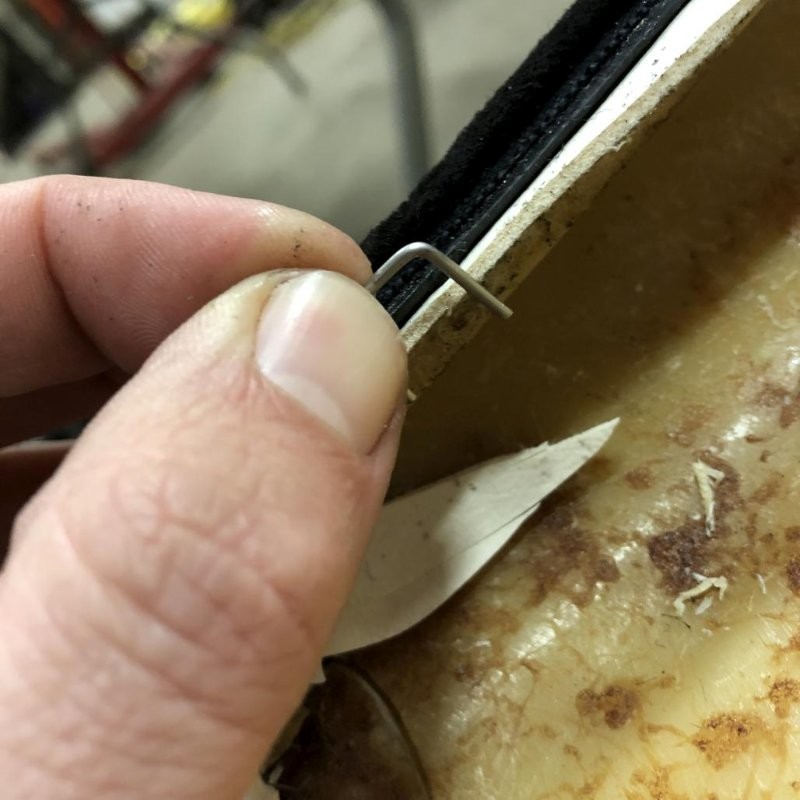
Anyway, the last task was to connect the trigger wire. So first you have to remove the center wire from the high beam switch plug. This is accomplished by poking up the little tab on the connector and gently pulling.
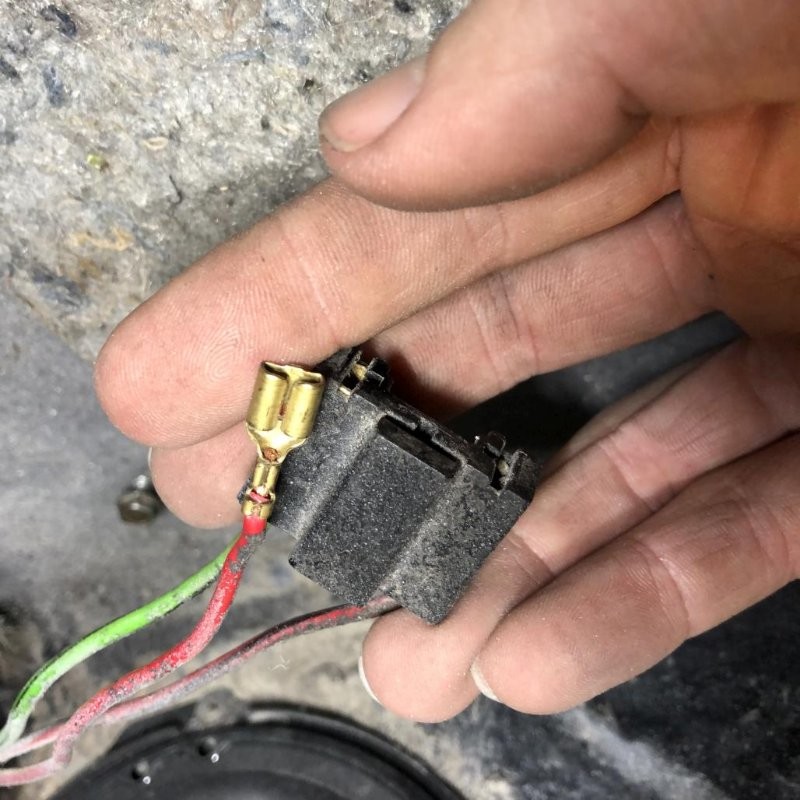
Ideally, you'd want to open up the crimped connector to free the original wire without cutting it. I tried but I just couldn't get it. So I cut it off as closely as I could. Then took the connector over to the bench and after a bit too much of a struggle, was able to get the old copper out and open it up. Then I could combine the two wires together and crimp it back together. After this pic I wrapped it up in electrical tape.
Then I could reinstall the connector into the plug, plug it in to the switch, install said switch, tape the trigger wire to the existing wire holder with cloth tape and intall that, etc. Turned out to be a pretty clean installation.
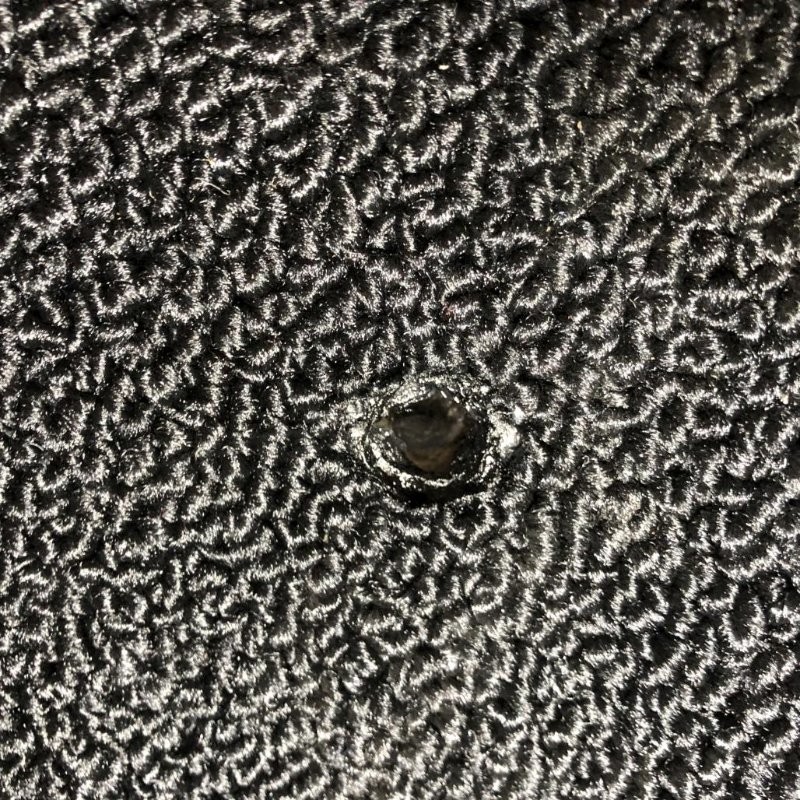
Finally, here's a quick look at how sneaky this is. I know it's not going to fool everyone, but it maintains a stock appearance.
The electric motors work very well. I did have to remove the arms from the motors and move them one tooth over from where they were set. They were clunky with their initial setting, but work nice and smoothly & quietly now.
Still more to come...
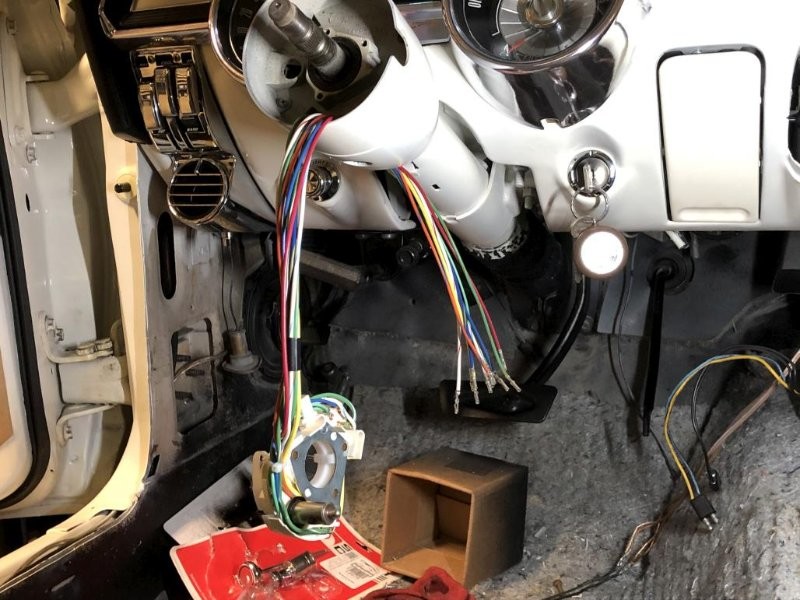
For my next little project... I found that the turn signals weren't working properly anymore and traced the problem to the turn signal switch (with some help from WCCC electrical guru Richard). So I pulled off the steering wheel and this is what I saw:
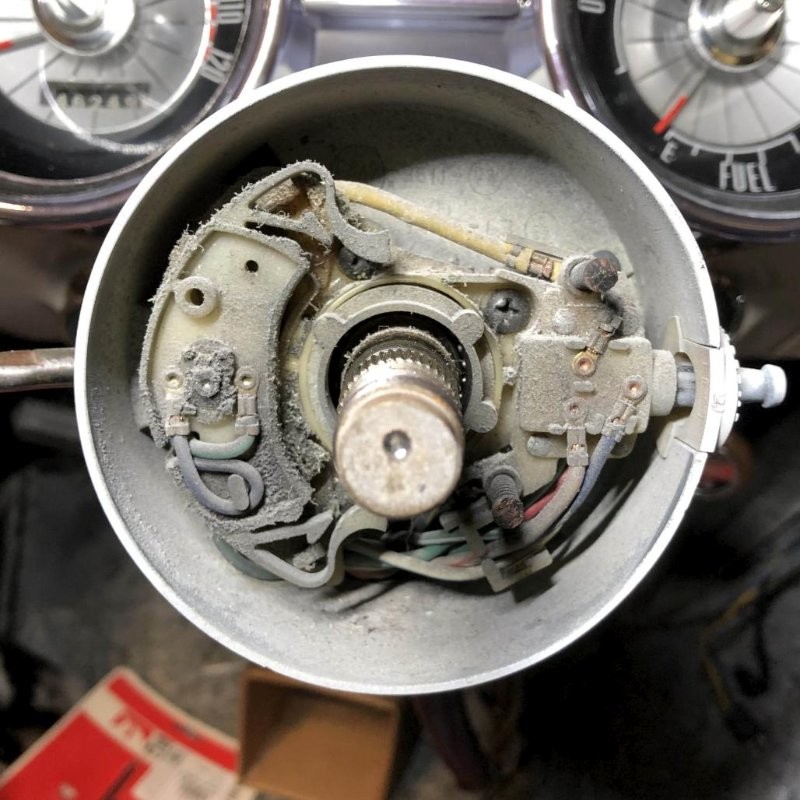
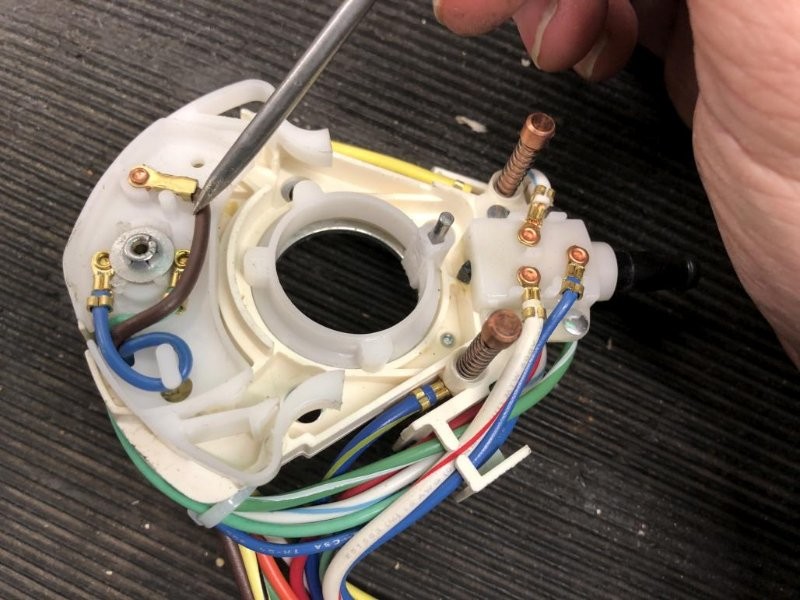
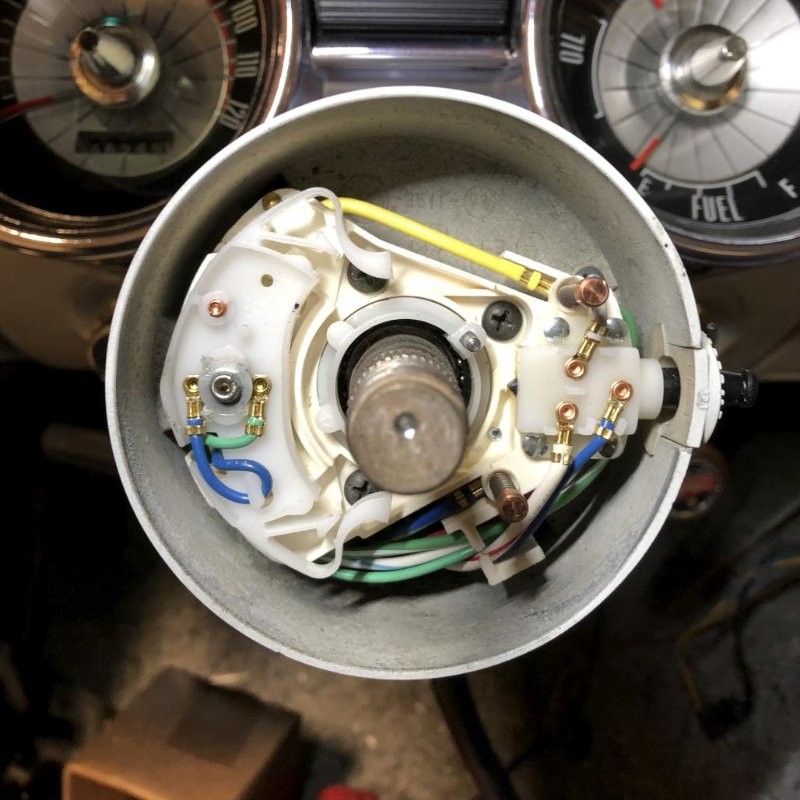
I'm not sure why I didn't try to clean it and see if I could get it working again. I just opted to replace it with a new switch. I feel kinda guilty now, but I ended up cutting the wires to the plug. Anyway, I kept that as a reference to where the individual wires on the new switch would have to go in the new plastic plug.
Pinched wires are a result of me pulling the whole thing through the column with the plug still on... anyway...
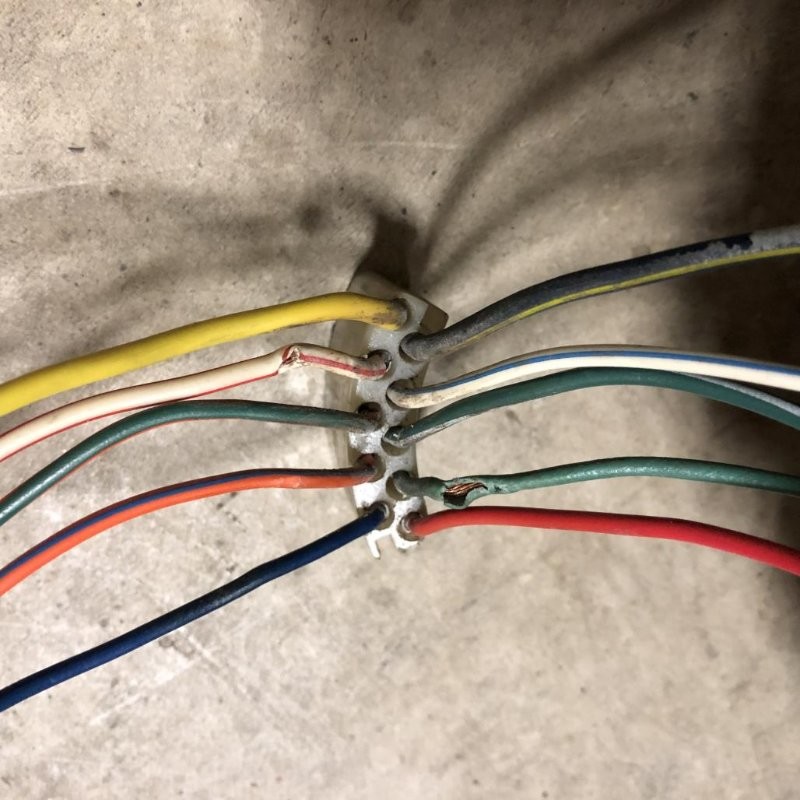
The new switches are for multiple applications, so there are a couple extra wires in place that aren't used on my car. I carefully compared the original switch with the new and found that these two needed to go away. This brown one:
...and this yellow / black stripe one:
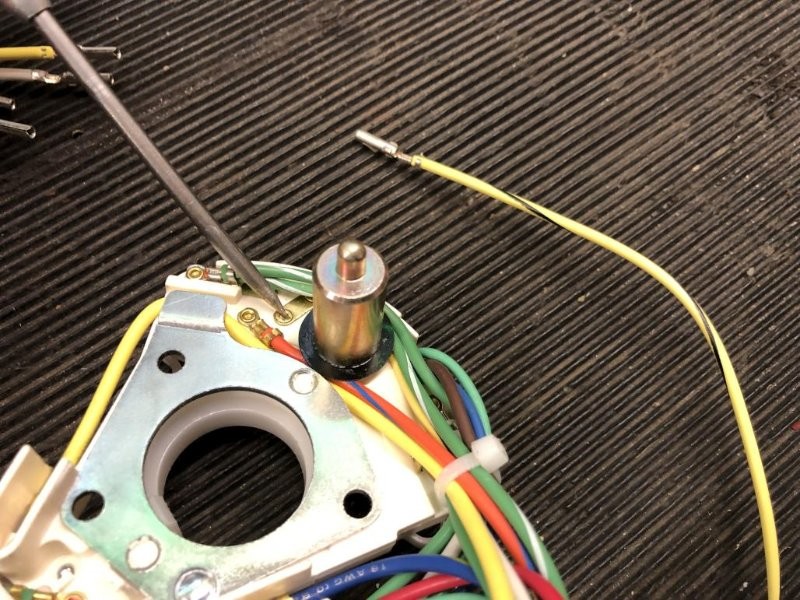
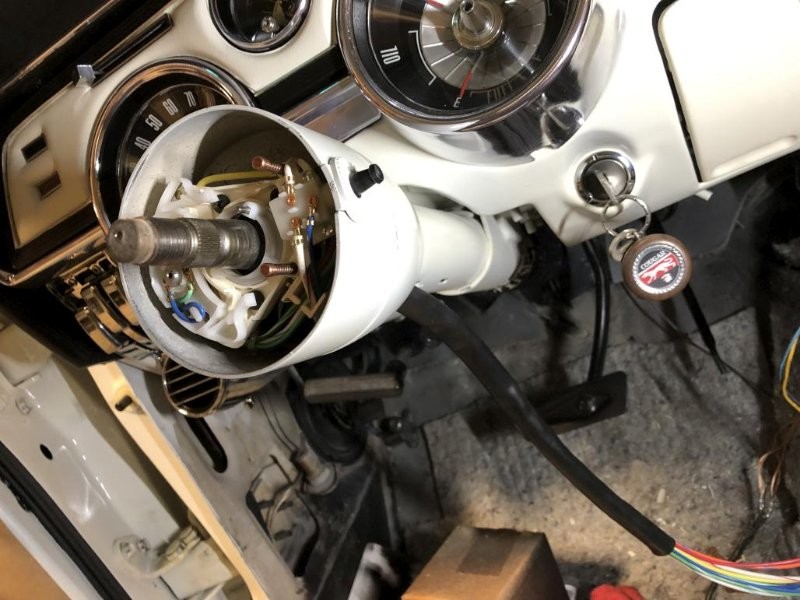
After removing them from the situation, I could fish the new switch through the column:
...install it, and transfer over the protective rubber sleeve from my original switch:
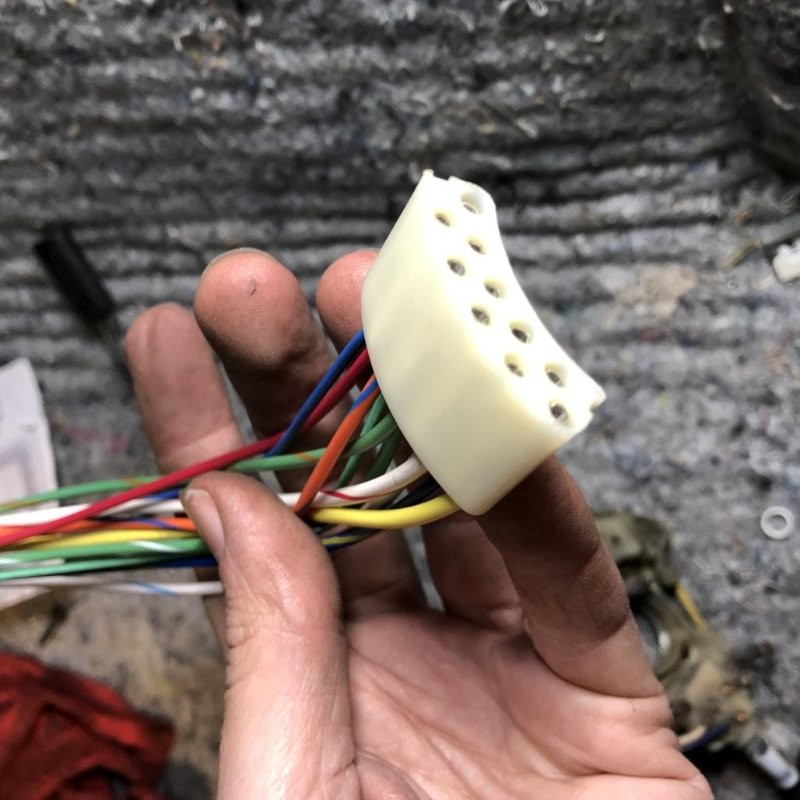
...and then install the wires into the new plug, using the original as a reference. I traced all the wires to make sure the colors were the same, and they were.
And finally here's the result, and now the turn signals work again.
Overall the new switch seems fine, but it feels more brittle than the original. The plastic makes more of a "CRACK" noise when you turn the lever. Maybe it just needs to wear in.
So, on to more interior stuff. One big milestone is that I got my new door panels from SMS! I go more into that whole experience, with more pics, in this thread. It took 9 months but I am happy with the results.
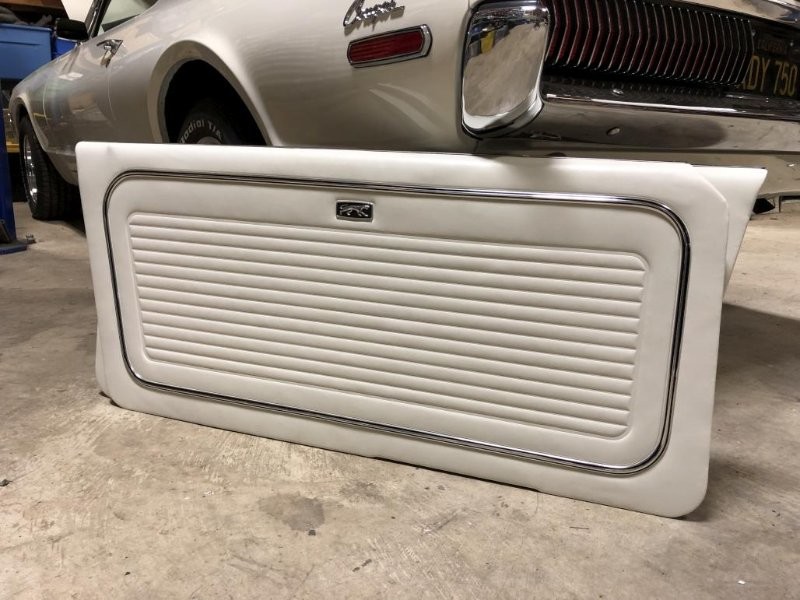
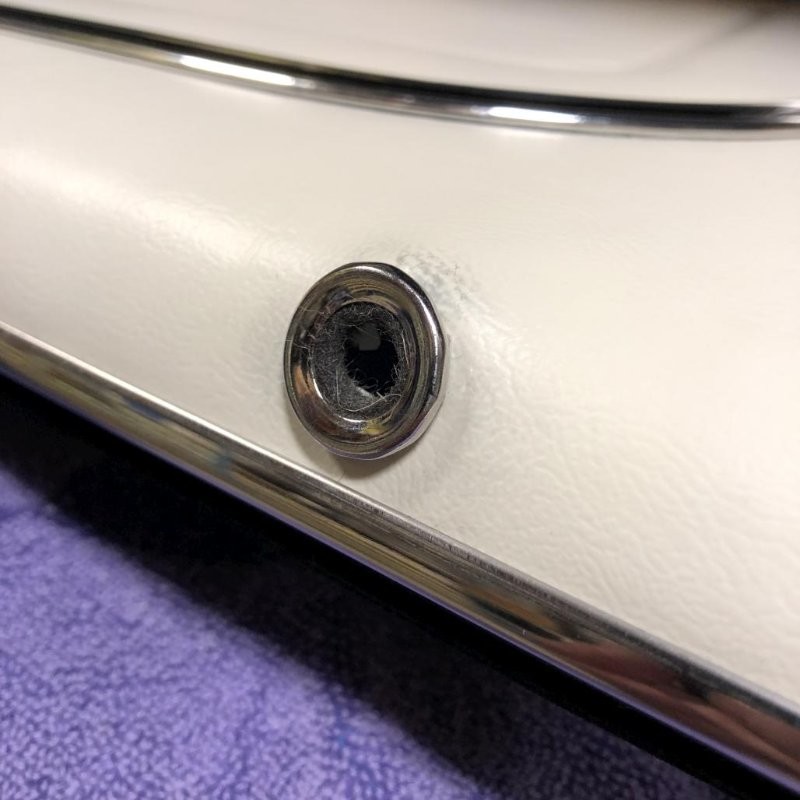
So right off the bat you'll notice that there are no holes in place. So I started by cutting the holes for the lock knob grommets, and installing them. Luckily, since I provided SMS with the WCCC backer boards and my original metal rails, all the holes for handles and armrests and lock knobs were right where they were supposed to be. More on that later.
And there's still more to come...
Alright, so around this time I was finally ready to throw down some carpet. But first, I made some extra little insulation pieces for the seat butt areas. The 7-piece insulation kit came with an extraneous piece that I couldn't figure out what it was for, so I cut it up.
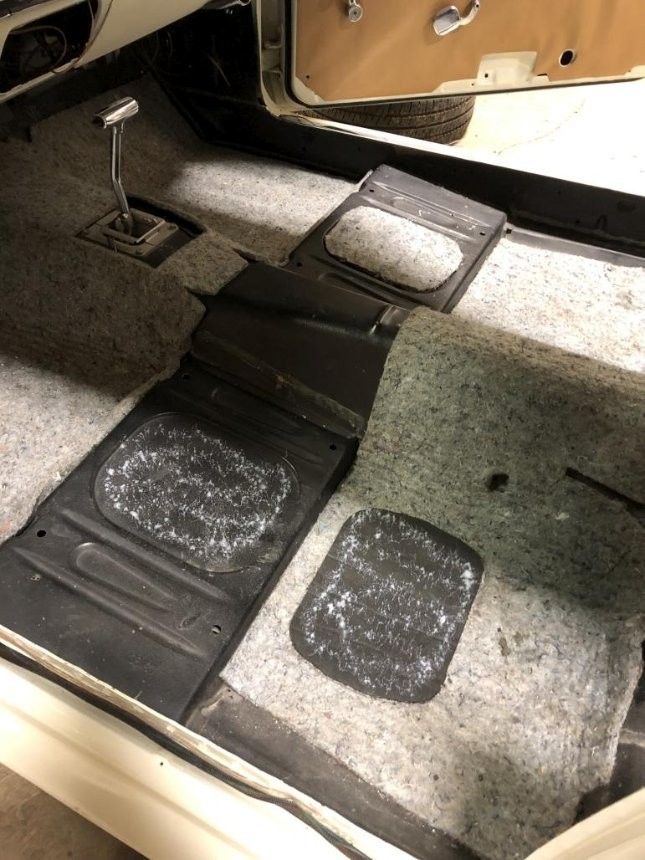
Then it was on to the carpet! I opted for the regular OEM style replacement carpet rather than the mass-backed version, since I had already put down insulation. The regular one does come with some padding on the underside for the footwell areas.
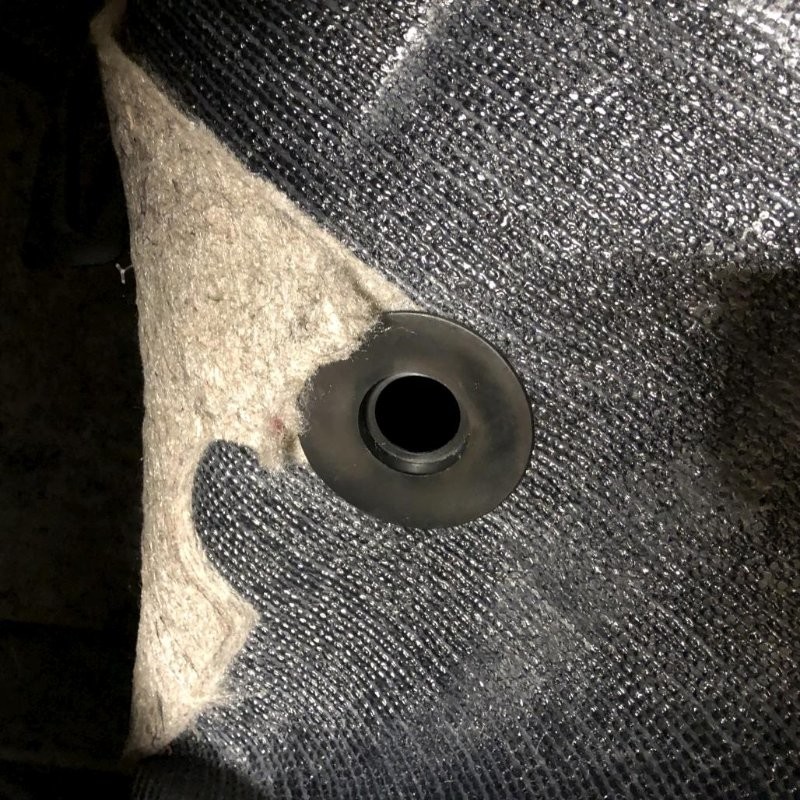
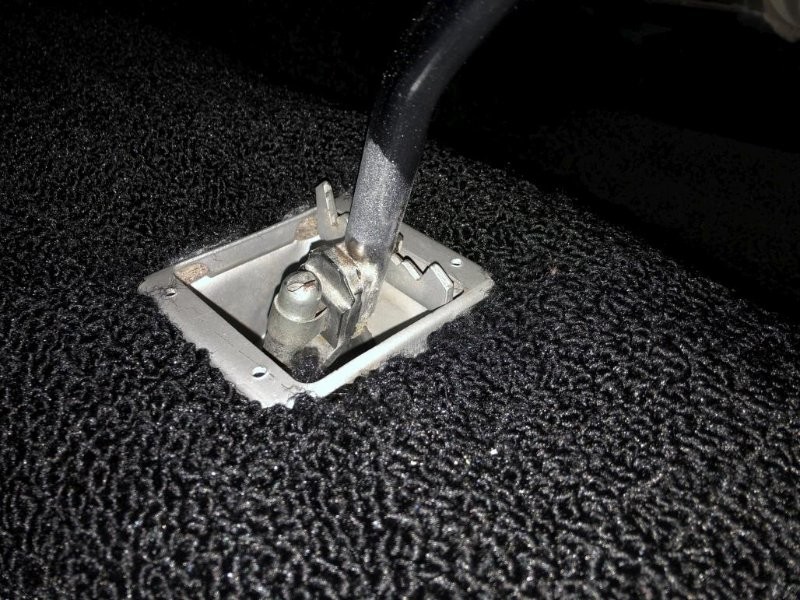
The rear section was pretty straightforward, but the front requires a couple holes to be made. So I fiddled around with it until I like where it was sitting, then made holes for the high beam switch and the shifter. The carpet kit comes with a little plastic grommet for the high beam switch, which is nice. But where the hole ended up for me was a bit off from where their padding would suggest:
For the shifter, I started with a small "X" to get the carpet over the lever, then carefully cut out the rectangle just big enough.
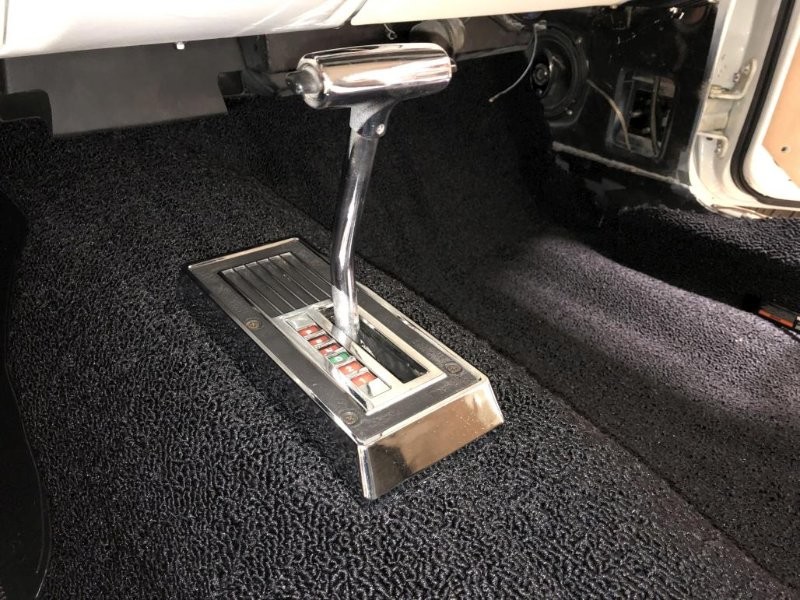
Then I went ahead and installed the remaining shifter bezel pieces to help hold the carpet in place. Nevermind the white overspray on it, I cleaned that up later...
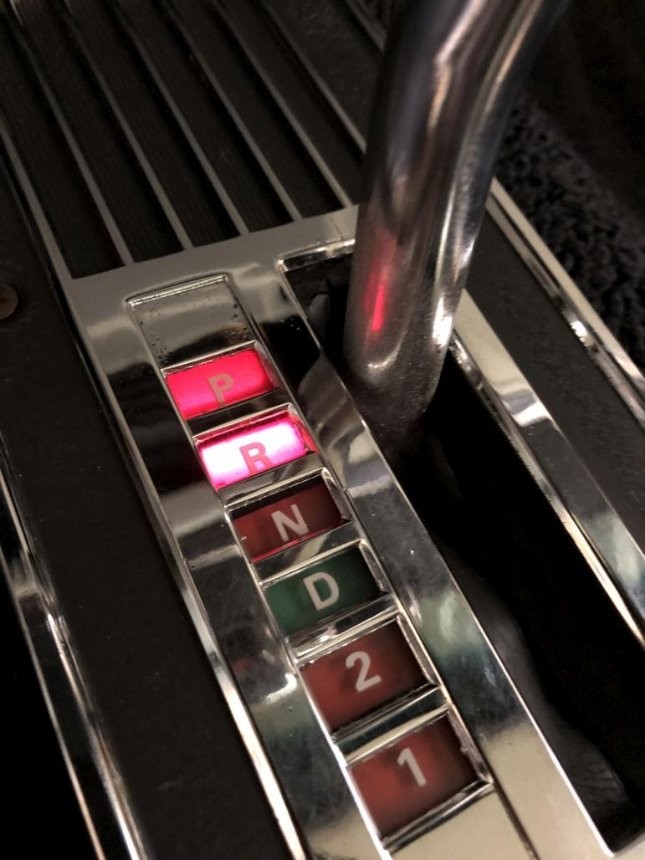
So here's a handy tip. I was a little perplexed at first as to why my shift indicator lights weren't lining up. When I was in Park, it would light up the R, etc. Turns out I had the little plate under the bezel upside down. The ends should curl down towards the carpet, rather than up towards the bezel. So this problem is now solved.
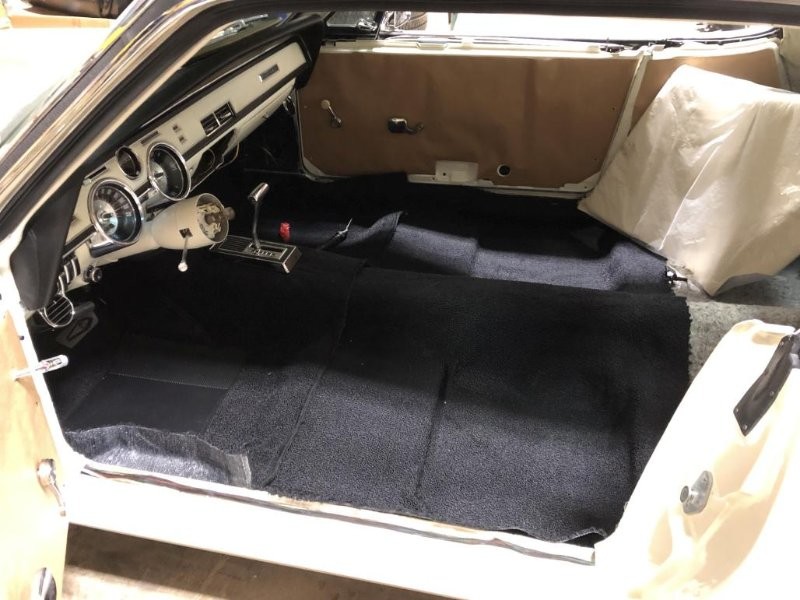
Anyway, here's a "pretty much finished" shot, before doing final trimming:
Definitely starting to look more like an interior now. So, one of the next things was to install a new gas pedal, along with a new spring and special screw, as well as a new disc brake pedal pad and trim.

Also, I finally got around to making a drain hose for the heater box. I couldn't use the repro hose because my box had been repaired with a piece of copper pipe that was a different diameter than the original drain tube. So I got a piece of appropriately-sized hose and glued a washer on the end to mimic the small hole in the original. I think the idea is to prevent mice from crawling up there.
Installed, and gooped around it with some more 3M Strip Caulk.
Here's a handy tip relating to the carpet. When you go to locate the holes for seats and seat belts, start off with a small awl, then a bigger punch to widen them a little. When you're sure of the location, use a soldering iron to melt a hole through the carpet in the correct spot. This creates a nice round hole with hardened edges, so there's no worries of snagging fibers or unraveling strands when you go to screw things in. It also makes the holes easier to see, which will come in handy especially when it's time to put the front seats in.
Still more to come...
Now that the carpet was in, I was looking forward to installing the rear side panels and door panels. I started with the rear panels. I had gotten them re-covered with some extra vinyl I requested along with my seat covers, so they'd match. Luckily for me, having just a basic Standard car, there's no fancy pattern on the rear panels, they are just plain vinyl. So all I had left to do was cut holes for the window cranks, make some refinements to what the upholstery guy did (too much padding which I had to trim away from the edges that mattered, didn't account for the corner cutout where the metal plate goes, etc), and install the beltline strips.
I'll spare you the whole story, but I spent some time trying to make the included staples work, only to find that they were way too short, and there was no way they'd work.
So on to Plan B. I drilled 3 holes in each beltline strip, placed them on the panels and poked through the holes with an awl as a guide, then drilled 3 identical holes in each the panels.
Then I used some small pop rivets, and this actually worked out very well.
I made sure to get them nice and tight, so that the heads are embedded below the felt and won't scrape the glass.
After that, I got them installed along with the windlace and metal corner pieces, which I had repainted. Finished pic coming later.
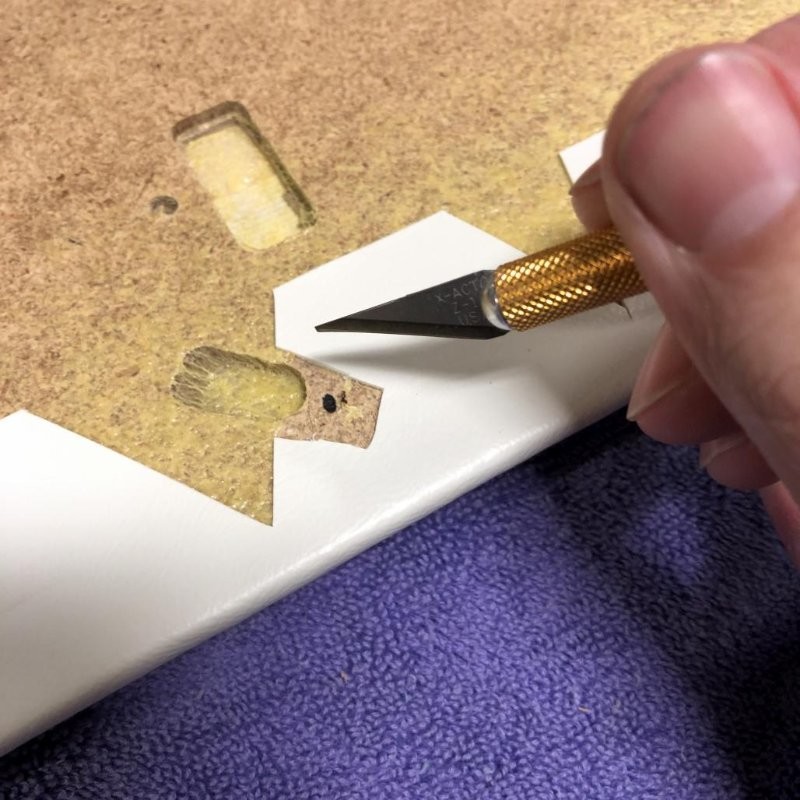
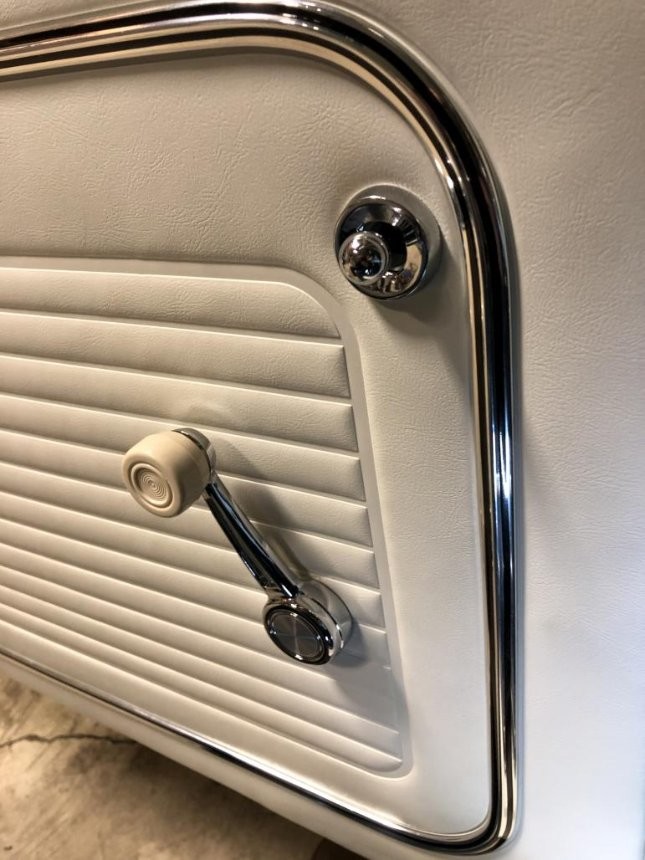
Then it was on to the door panels! I carefully cut out the holes for the window cranks, door handles and armrests, making sure the placement was right by holding the panels up to the car, starting with small holes and slowly enlarging them. Plus the built-in holes on the backer boards are pretty spot-on. Then, using old panels as a reference, installed all new padded clips, making sure they were all facing the right direction.
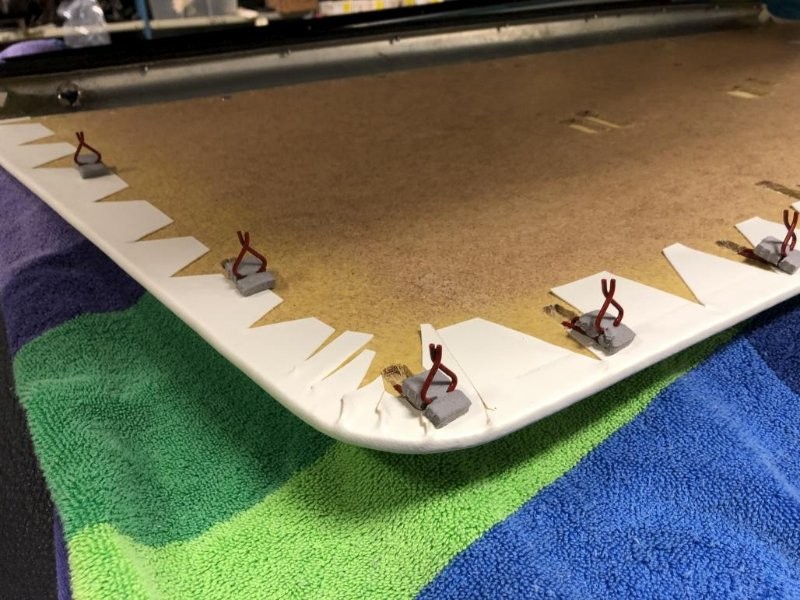
Just getting all those clips in and seated properly took some time. For some of them, I cut reliefs in the wrapped-over vinyl to give the clips a flat place to sit.
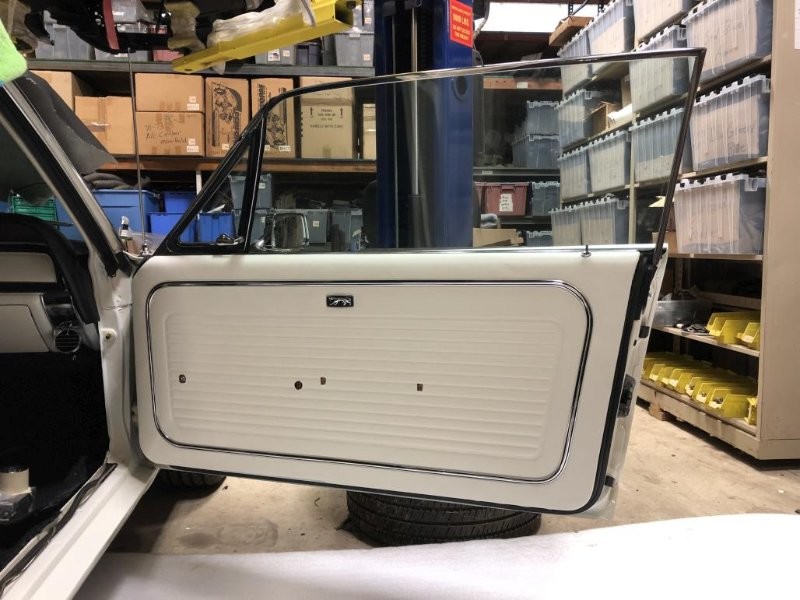
Then it was the moment of truth, and I managed to get them installed, starting with the RH side.
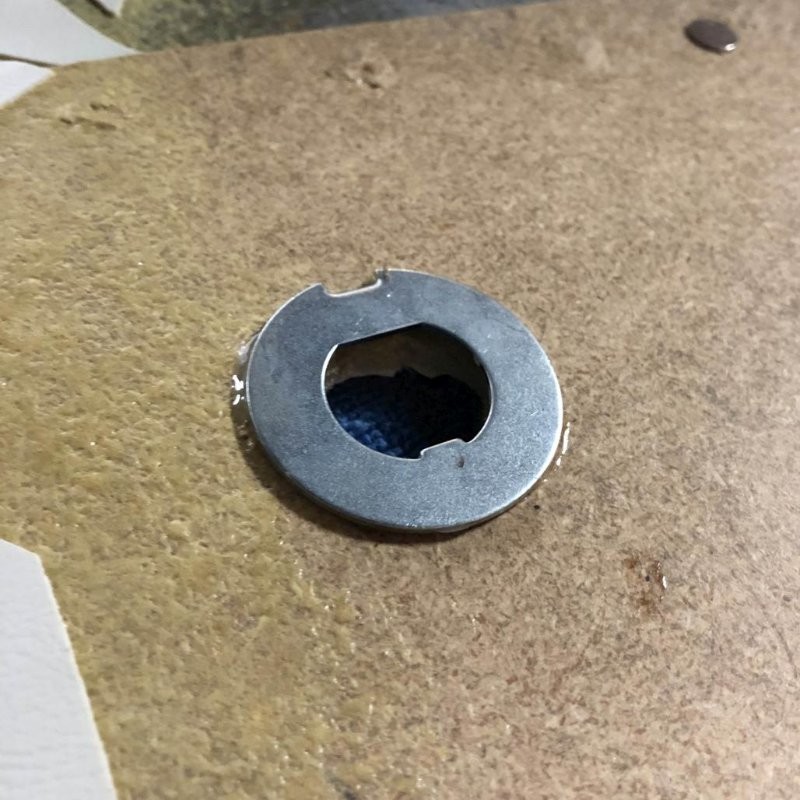
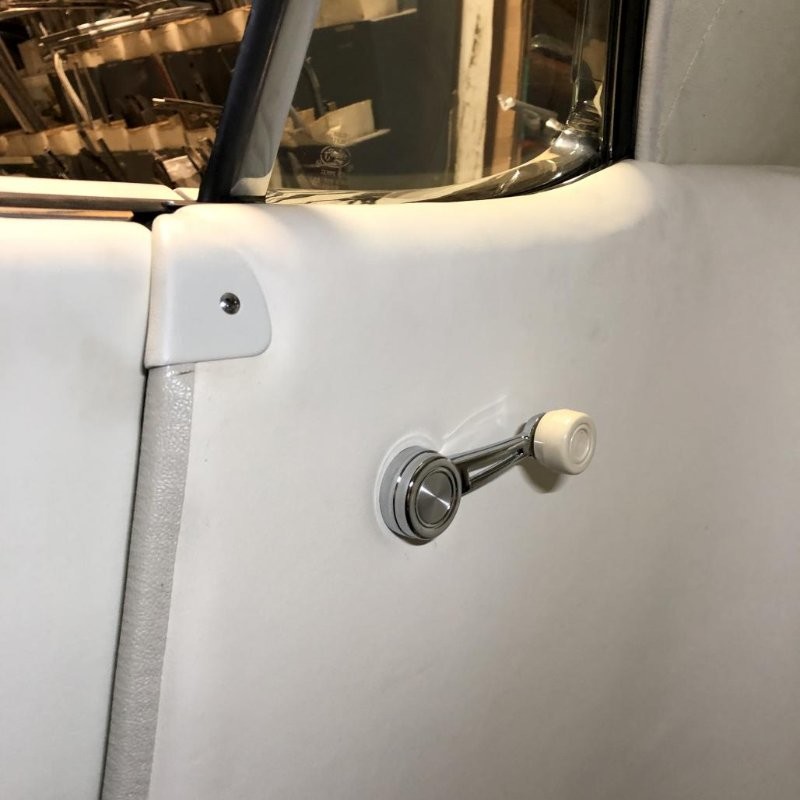
There's an extra step on the LH side, because of the remote mirror control. After making the proper sized hole in the vinyl, I epoxied this mirror nut washer to the back side of the panel and let it dry before proceeding.
Boom:
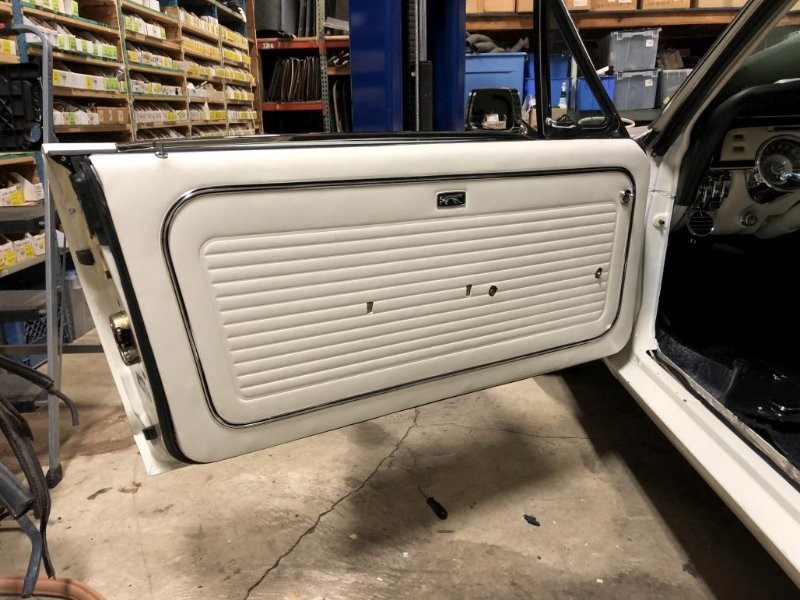
For some reason on this one the bumps where the clips are are more prominent. Wondering if there's something I can do to reduce that. Anyway here's kind of a finished shot. I also put in the rear seat back, because why not? Sorry for the dark lighting. It makes the slightly different shades of white look weird. But it all looks pretty good in person.

Alright, I think one more post after this and I'll be done with this update...
Now for a couple details and links. Here's the new mirror nut and knob installed. Don't forget the special tool. Also went for the longer-than-original window crank handles because they make it easier to roll the windows up and down. Don't forget decals and screws and the nylon washers that go behind, to avoid ruining the panels. Despite all the work I did on the windows, adjustments and liberal amounts of grease, they're still not very easy to roll. The white knobs are a decent match for me, though they would be a better match for the original Parchment, which is darker than what I now have.
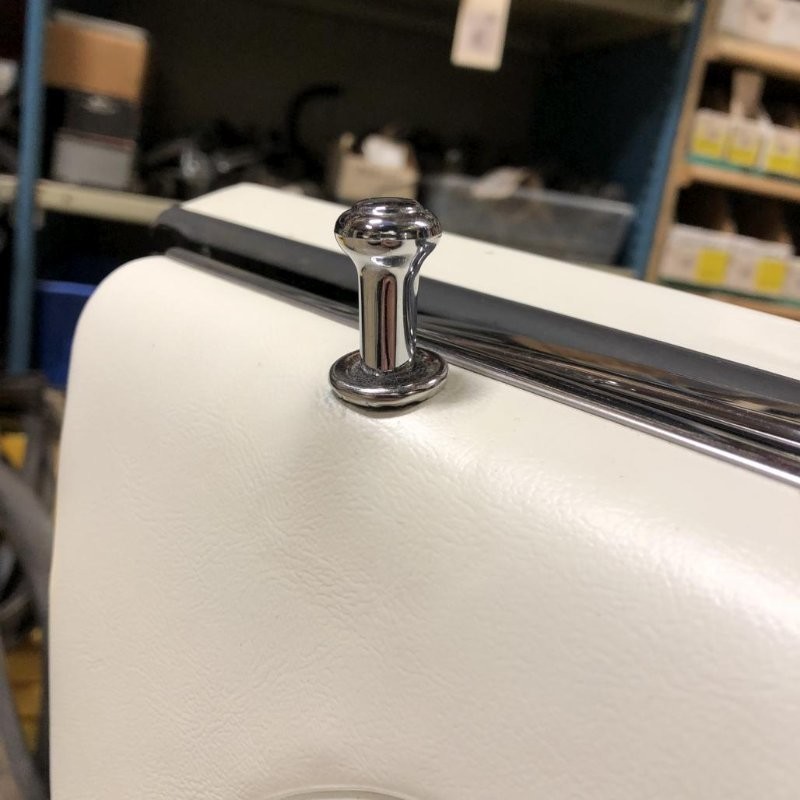
Hardly worth mentioning but here are the new lock knobs installed.
Here's a closer look at the rear panels with new cranks installed. The metal corner pieces were painted with the SEM "Super White" paint, which matches pretty well as you can see. Also you can see that the windlace is a little darker, which again would be a better match for the original Parchment.
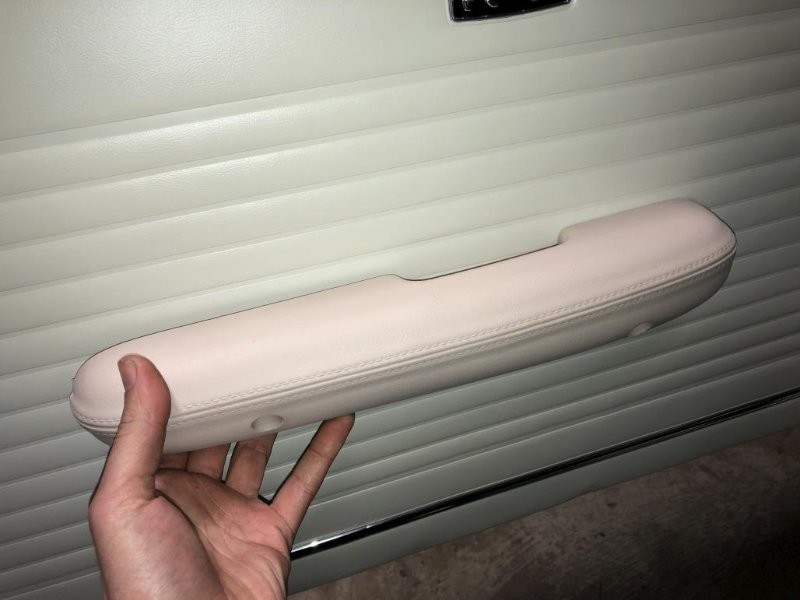
So moving on... I saw this coming, but the color on the reproduction armrests was way off from my door panels. Not even sure if they'd match originals either. So, out came the SEM paint again.
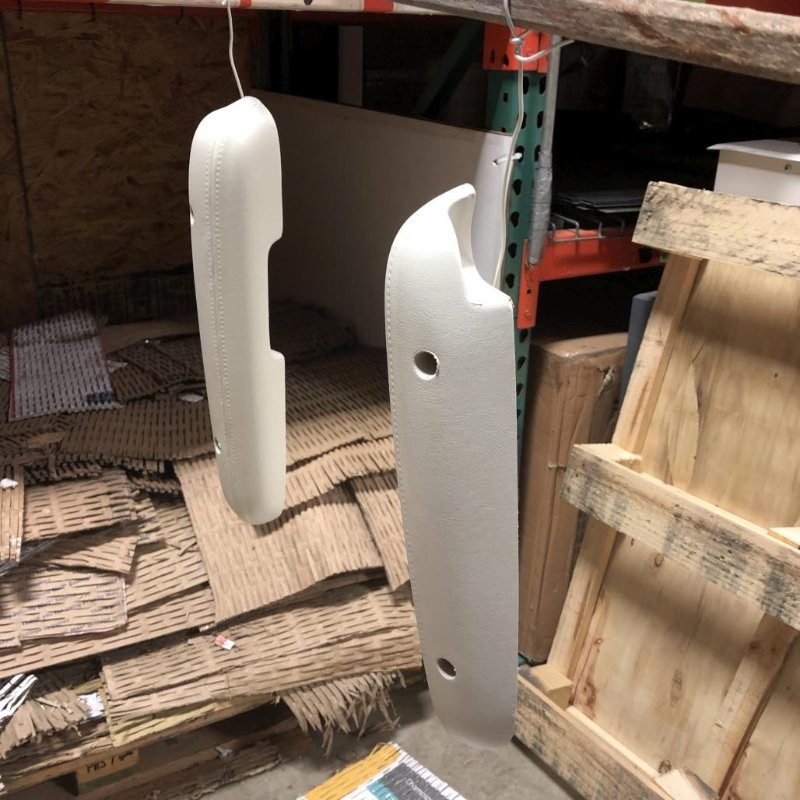
Before I proceed with those, I'll need to install door handles. Right now I'm waiting to find out if the latest batch from Scott Drake will fit properly. I found that a LH handle dated 5/2018 fit perfectly, whereas a RH handle dated 1/2017 was a little crooked. So we have some more RH on the way to see if that issue was corrected.
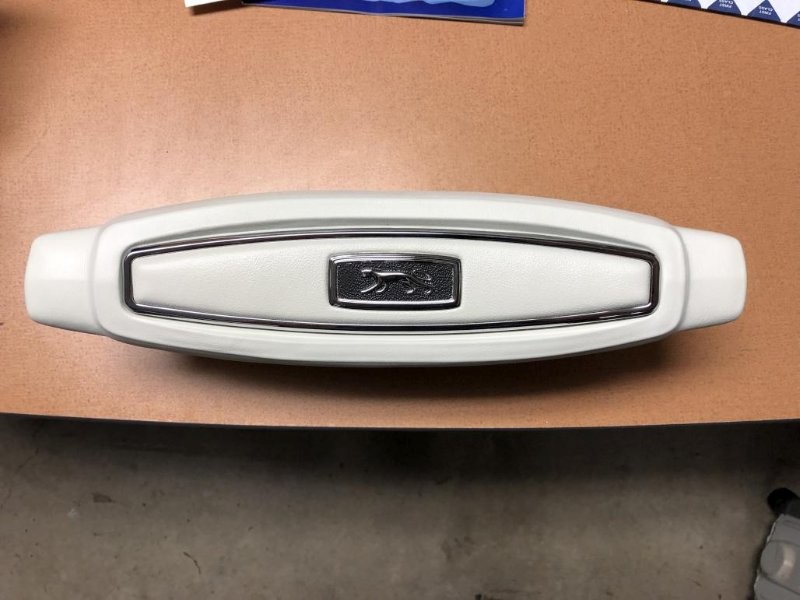
Meanwhile, I got my pieces back from vacuum plating and they came out nice! I used contact glue to attach the emblem to the steering wheel pad. The bigger trim piece is the readily available reproduction piece. And I know that these pieces are supposed to be more of a satin silver, but I like the shiny chrome look.

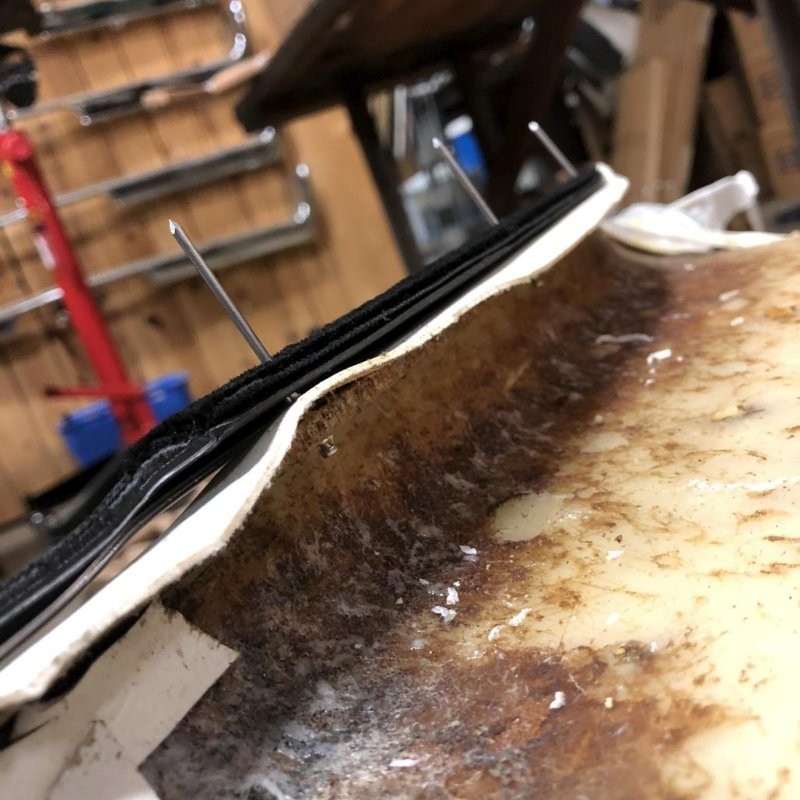
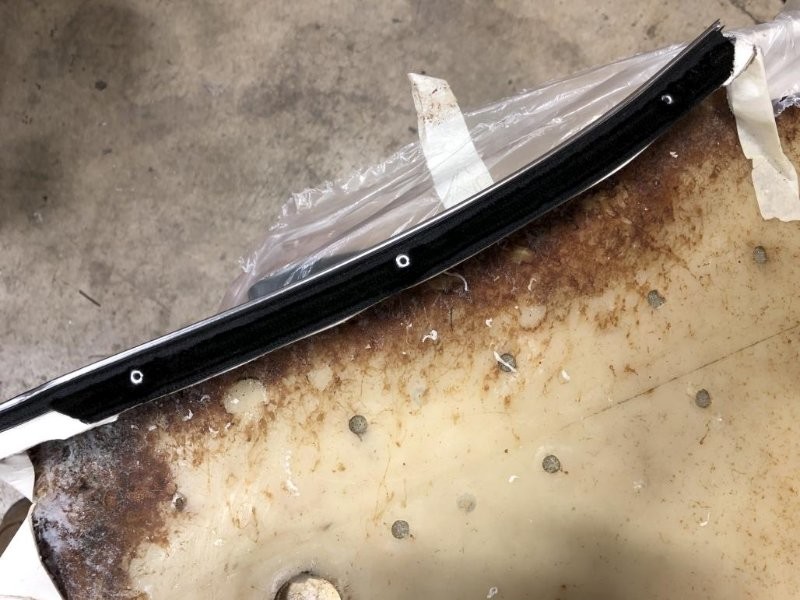
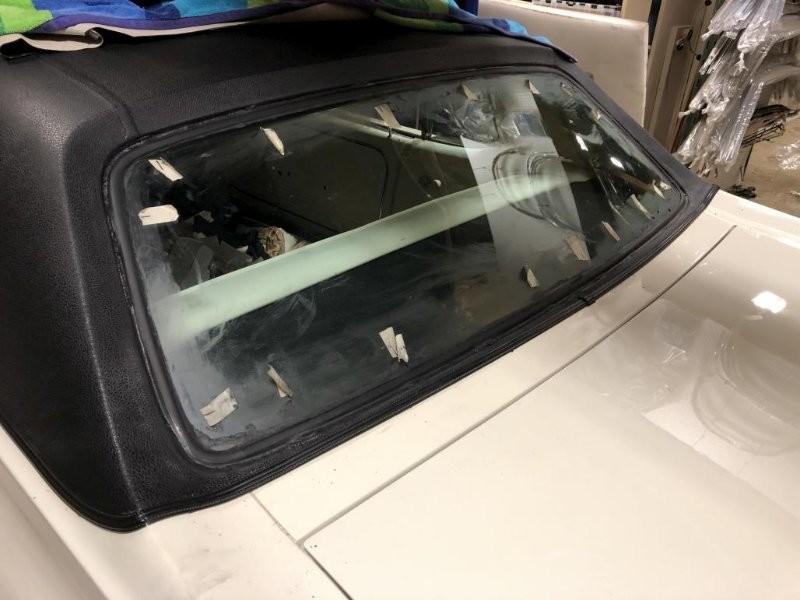
Lastly, I'll end with the couple of things I accomplished this past weekend. I finally sealed the rear window (and this time I marked the locations of the clips for the trim):
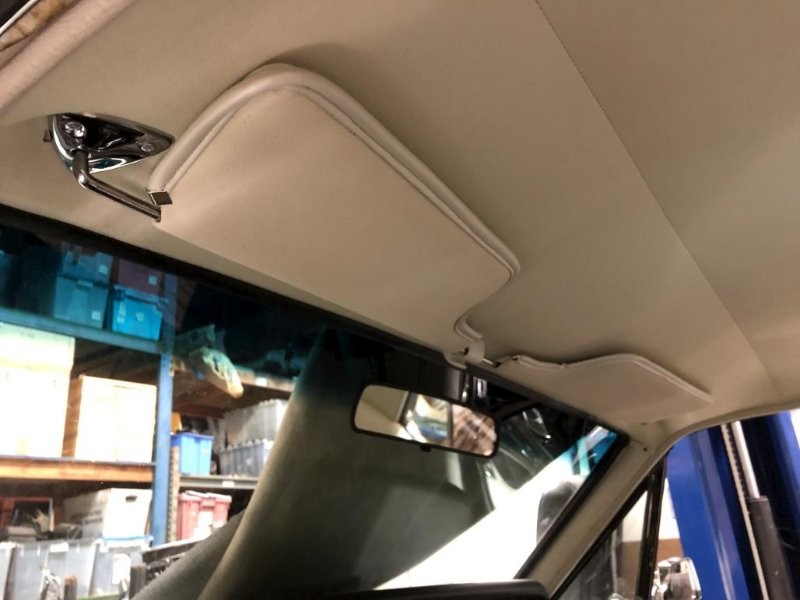
...and the other accomplishment was to install the sun visors, complete with new brackets and screws of course. This was something I was dreading, because the headliner was installed with no indication of where the holes are. And since it's stretched across well below these areas, there's really no hope of feeling where the holes are by hand. So, I took some measurements on another car, and poked an initial hole through my headliner with nothing but blind faith. I then held my light up to the headliner and stuck my eyeball up to the tiny hole, and could just barely see that I was in the right spot. There's a large circular hole for the spring section of the rod, and I was right under it. So I slowly made that hole bigger, then I could catch a glimpse of 2 of the screw holes, and it was downhill from there. It went perfectly on the RH side, but unfortunately my center hole somehow ended up peeking out from under the LH side. So that's annoying! You can see it in the below pic. So I may take that back off and see if I can do anything to hide that.
Anyway, that's the end of this update. I guess I need to do this more often. But things are progressing! It's not that far from being able to be a car again. Plenty of details to finish up but I could bolt a front seat in tonight and drive it if I really wanted to :D

So nice in honor of your grandparents.
Posted by Diggymart on 1/3/20 @ 8:04:16 PM