You must be logged in to rate content!
19 minute(s) of a 767 minute read
12-30-2018
Time to bring things up to speed! My goal is to get it done, or at least done enough to drive, by the end of the year. It's getting harder to work on it this time of year, when it gets dark at about 4:30 and it's getting too cold to paint things. The cold also makes rubber and vinyl items harder to work with. And it's generally less fun. But things are happening!
The next big thing on the list was to get the windshield in. Getting past that hurdle would allow me to start on the dash, and get all that stuff together. I bought a new Pilkington windshield from Summit for about $115 with free shipping. Amazing deal, and it might have been a fluke because I don't see it on their website anymore. I had called Pilkington directly and their price for the glass was similar, but with over $100 in shipping cost. So I think I got lucky.
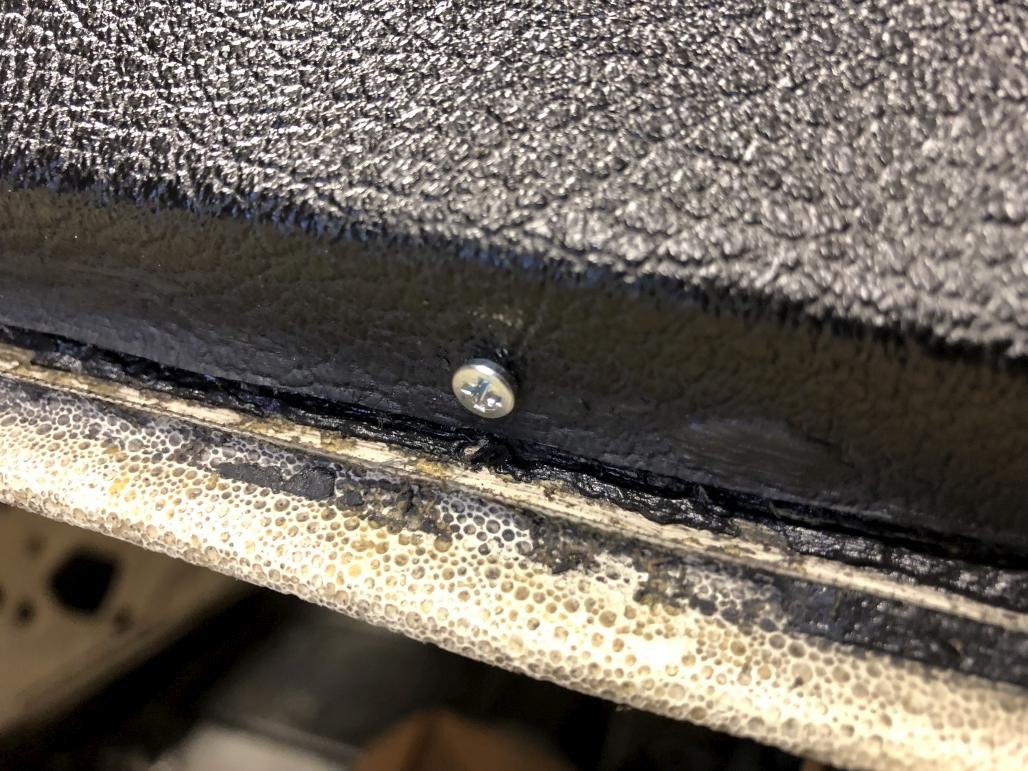
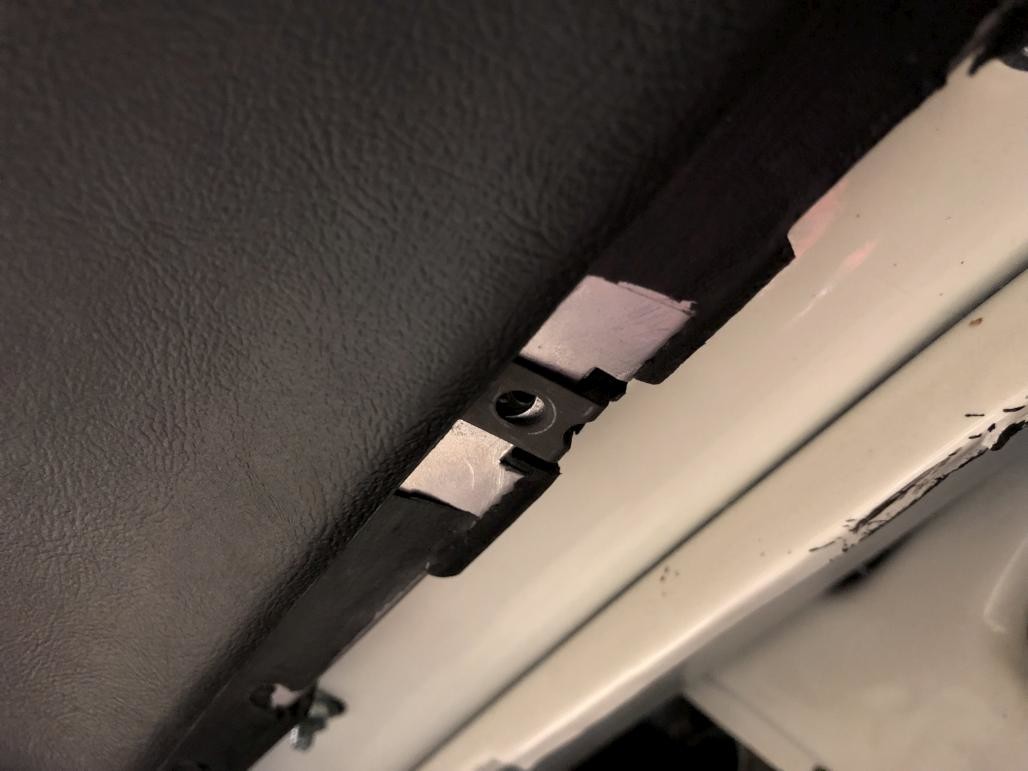
Before I could get the glass in, I had to replace some of the posts that hold the trim clips. Luckily there are these little repair studs that you can just screw in. I needed some for the back window as well.
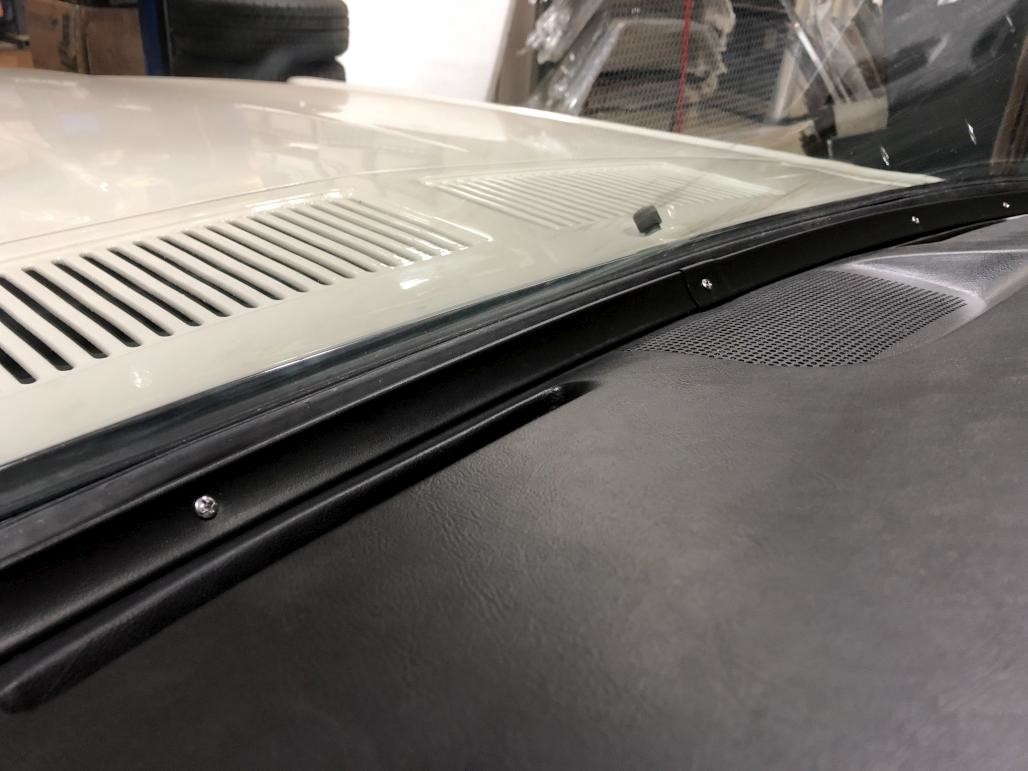
Fast forward, and it's installed! Don actually did the install, and I held a video camera. So look for a "how to install a windshield" video soon (I'll post it here too).
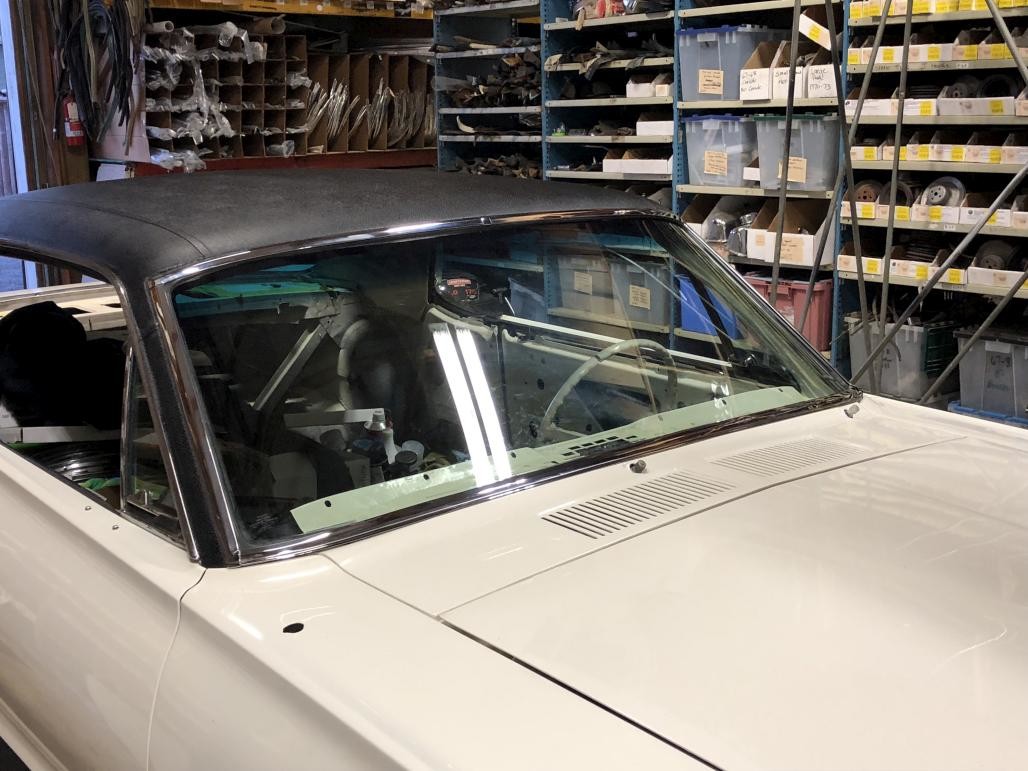
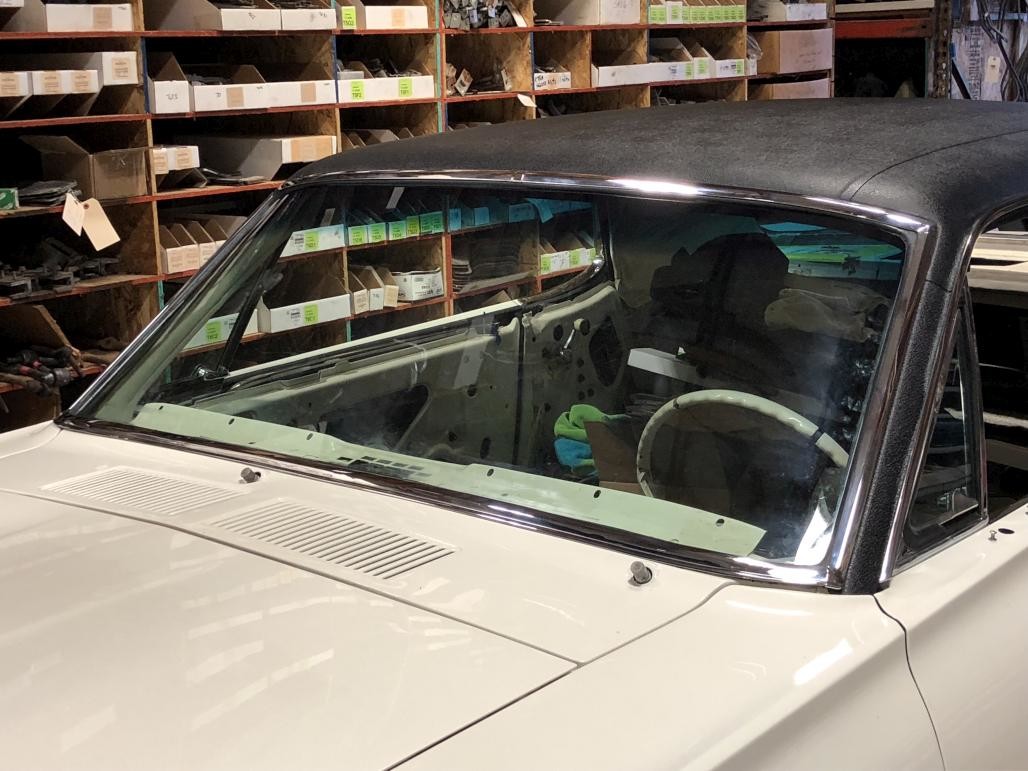
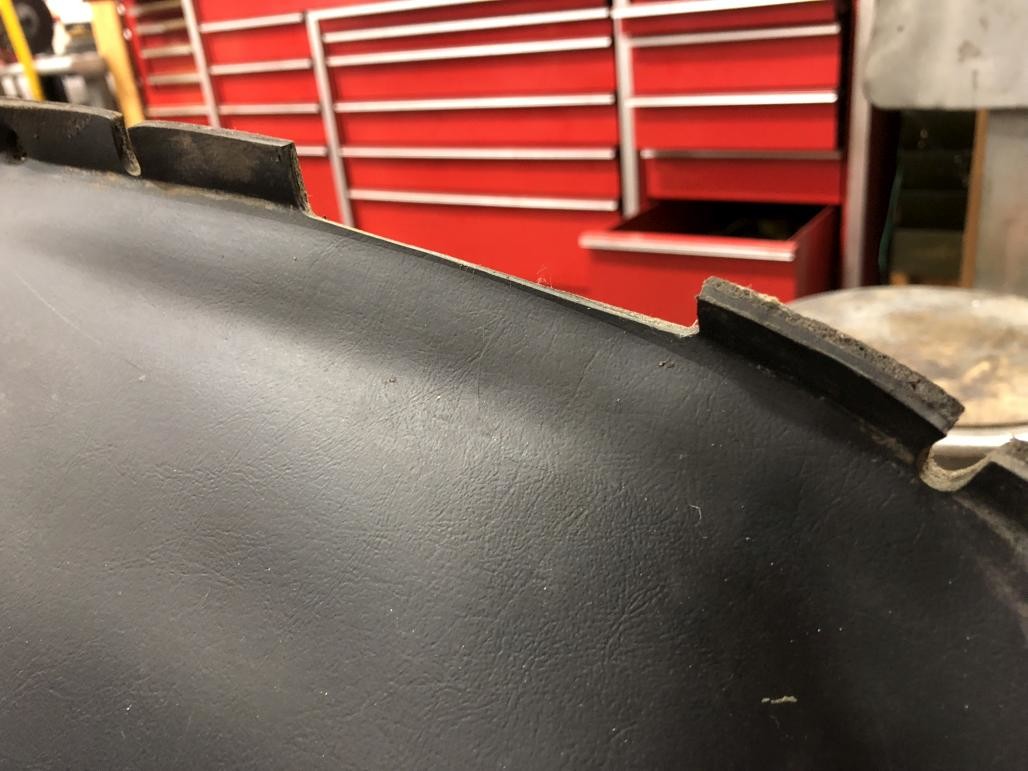
Of course I got restored trim, which looks nice and shiny. The only issue is with the lower left corner, it doesn't seem to quite fit right there.
With the windshield in, I could finally get to work on the dash. My original dash pad was decent, but the speaker grille was completely split open. Kind of a bummer. So I bit the bullet and got a new dash pad. I knew it might need a little modifying to fit, but there are some things I wasn't expecting I'd have to do.
First of all, the original pads had notches for the screws that hold on the metal trim strips by the windshield. The new ones don't.
Secondly, and this is a 1968 only thing, the original pad had a cutout for the VIN plate. So that's something else I'd have to recreate.
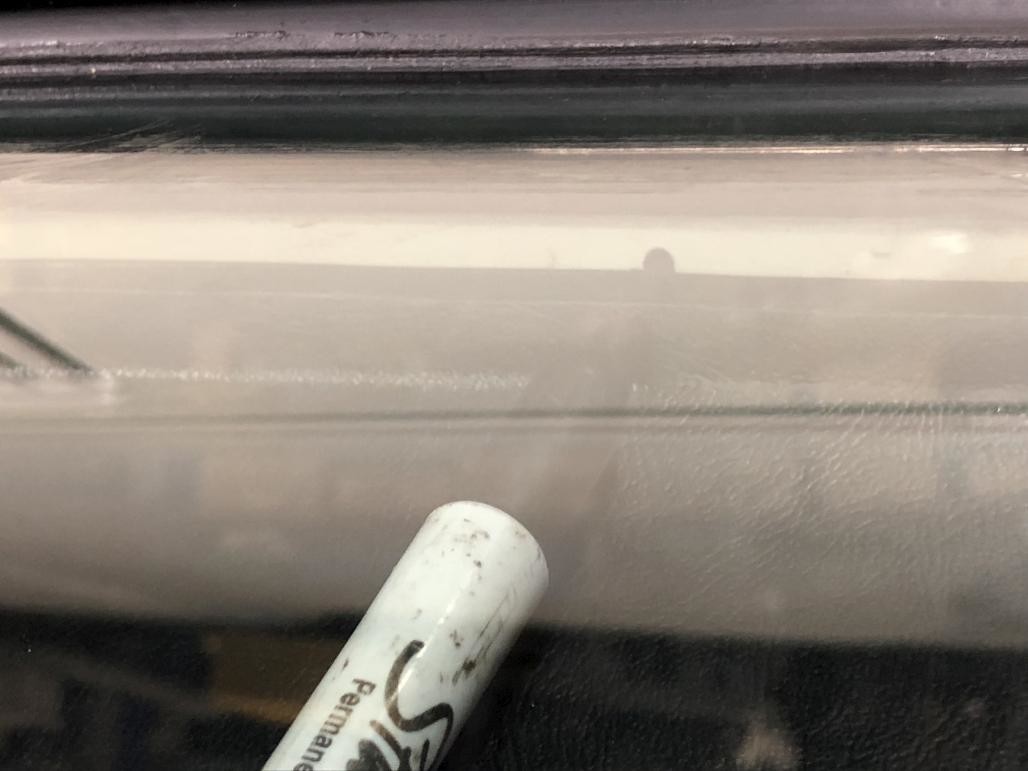
So for the notches, I figured the most accurate way to place them would be to temporarily install the new pad in the car and mark where the holes in the metal were. Here's a crappy picture of that process.
Then it came back out so I could cut them. A little crude but these will be hidden.
And back in the car. Ta-da.
Then the next challenge was to actually get the metal trim on. I got new screws and repainted the trim with SEM Trim Black. I didn't blast them first, just cleaned them and sprayed over the old wrinkle finish so they would still look right. Getting them installed was a little tricky. I used an awl to locate the holes and then got whichever screws started that I could. The outer corners were the hardest part. I had to push down on the trim to get the screws started. It's also worth mentioning that the goal here isn't to get those screws tight, because that will start to bend the trim. Just get them in enough that the trim sits even all the way across.
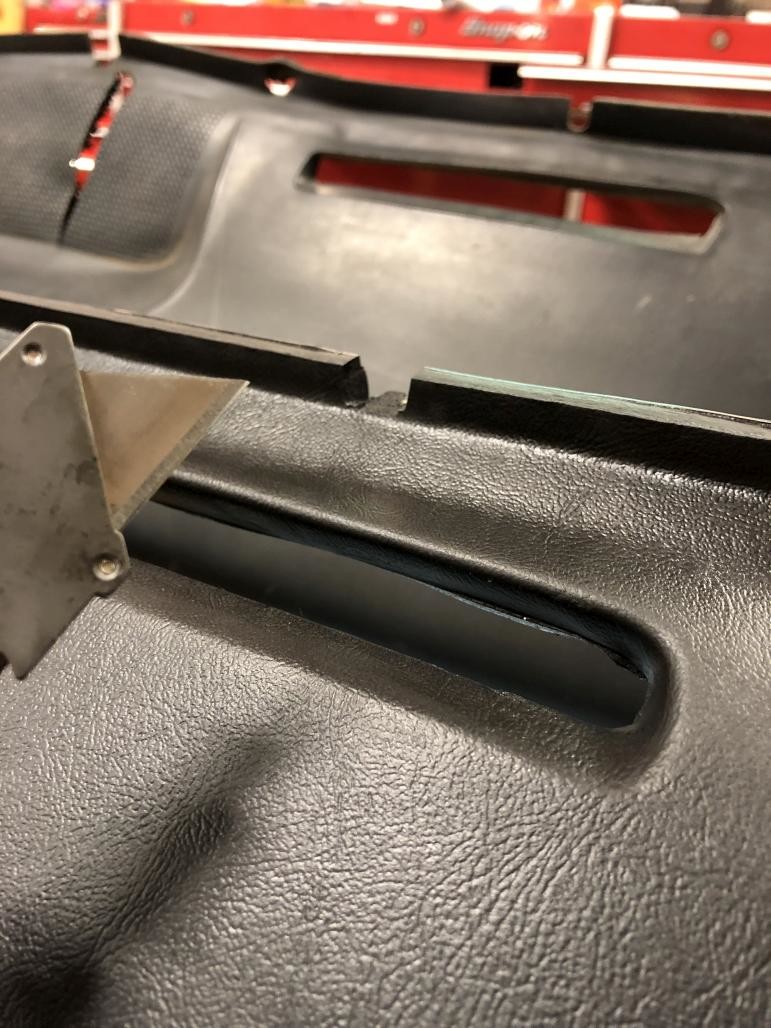
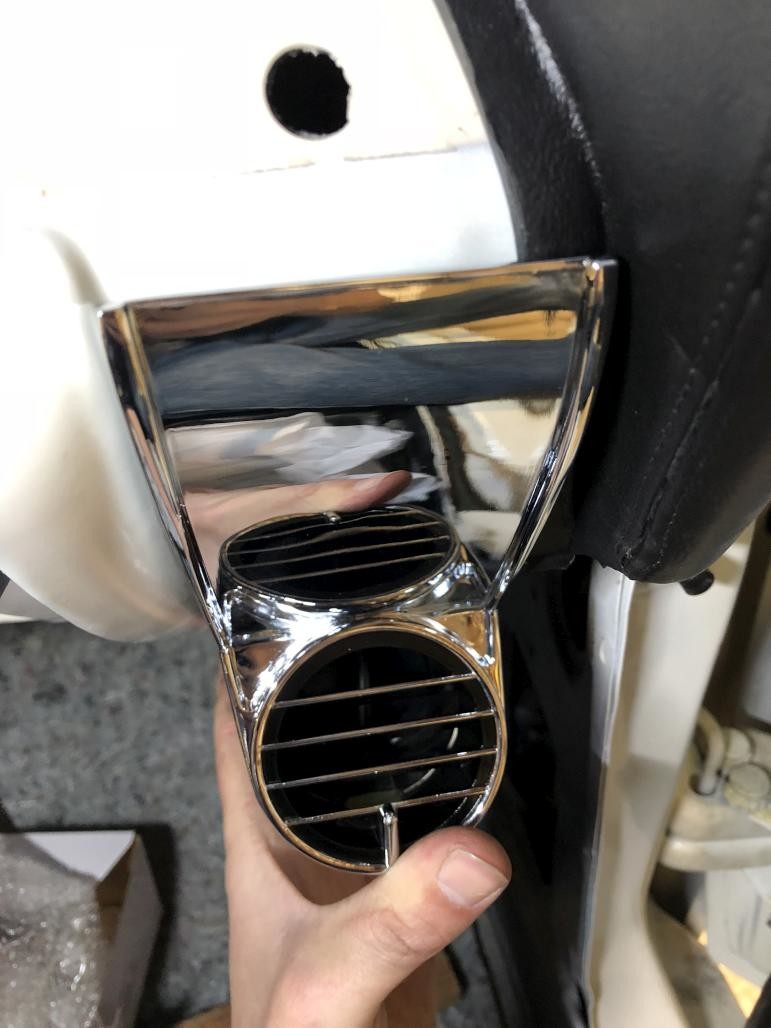
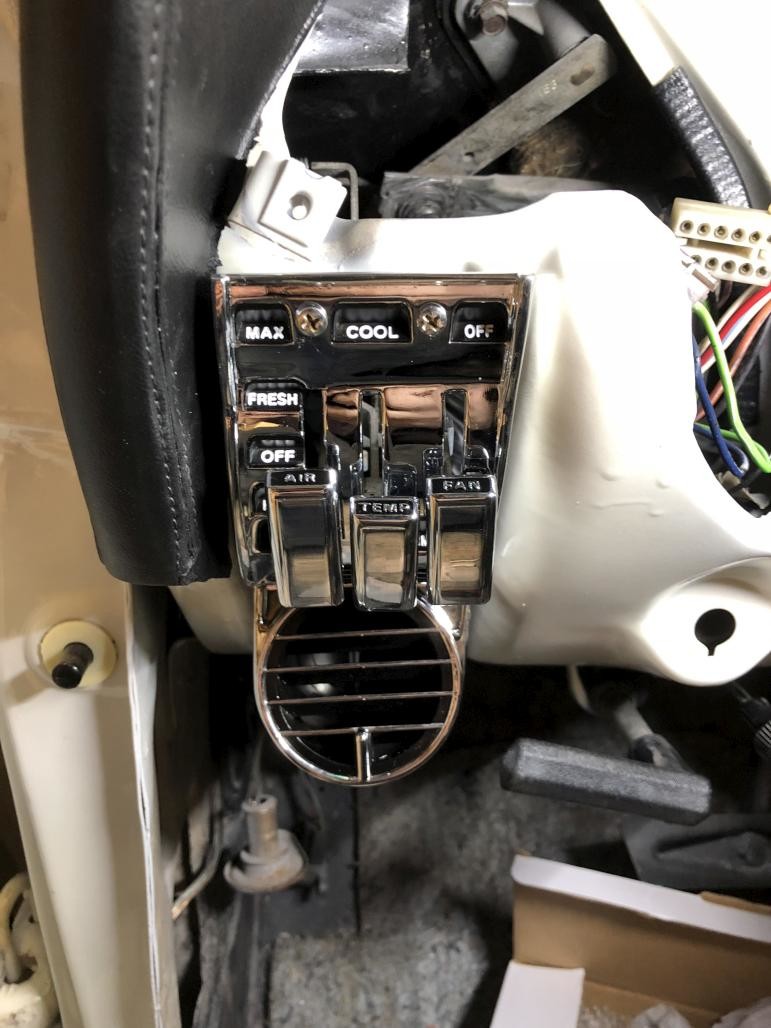
Next I felt like putting something shiny on. One of WCCC's signature items is the reproduction A/C vents. I got the complete kit for '68 with the knobs and everything. When I held up the vents to their mounting places, however, I noticed another problem with the repro dash pad. This isn't gonna work...
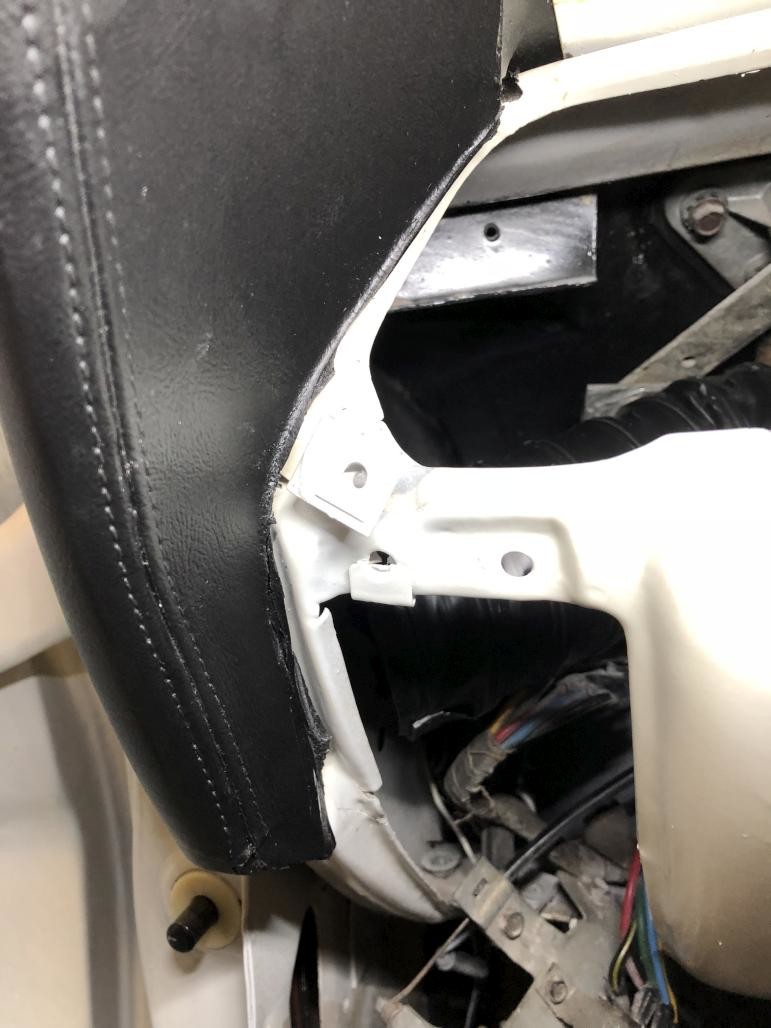
So out came the knife again.
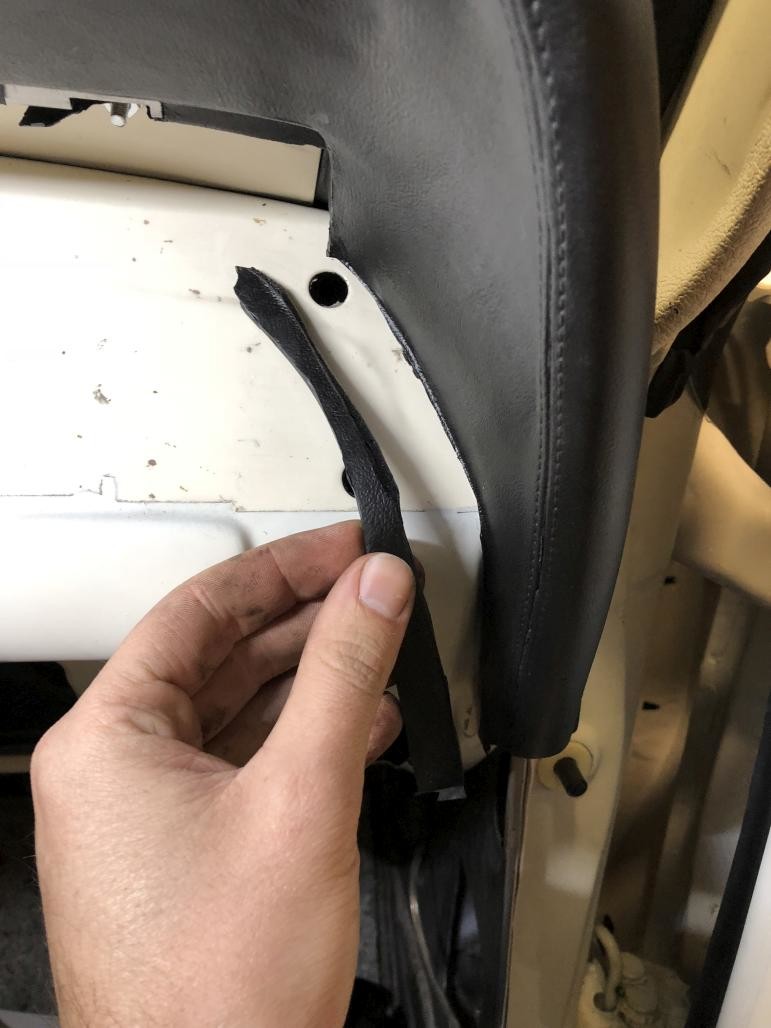
Same thing on the left side. This is after trimming. I just cut right along the edge.
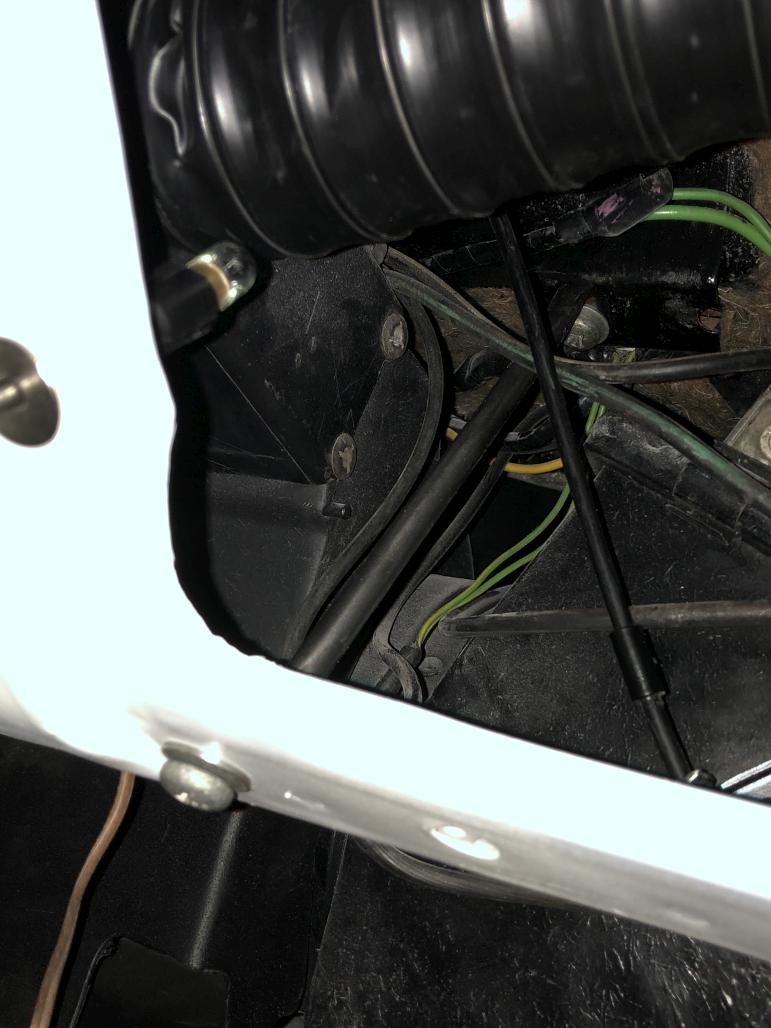
Next I could hook up the controls and stuff. Luckily I still had my old vents, so I could transfer over the needed hardware. I also bought a new heater control cable because my old one was shot. I had to adjust it a bit where it connects to the heater box, it seemed a little too long and didn't work quite right when seated against the built in stop on the cable sheathing. Got it working well though.
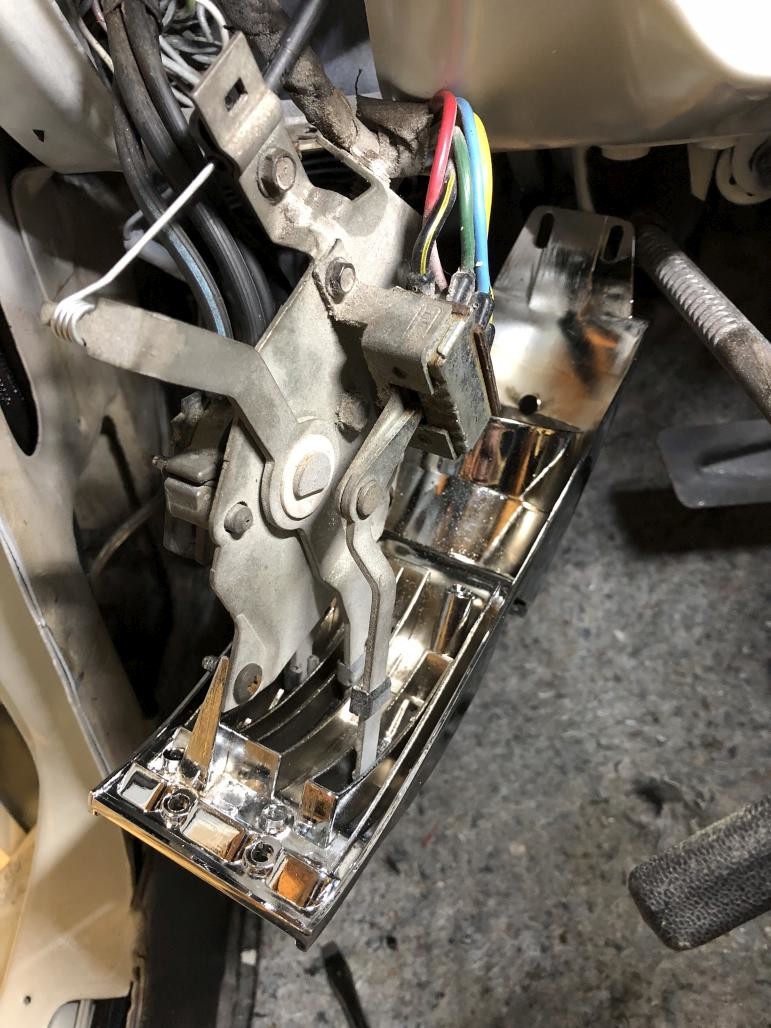
Installed! I had to hunt around a little for the correct screws for these things. And yes I know I have paint runs on my dash, shut up.
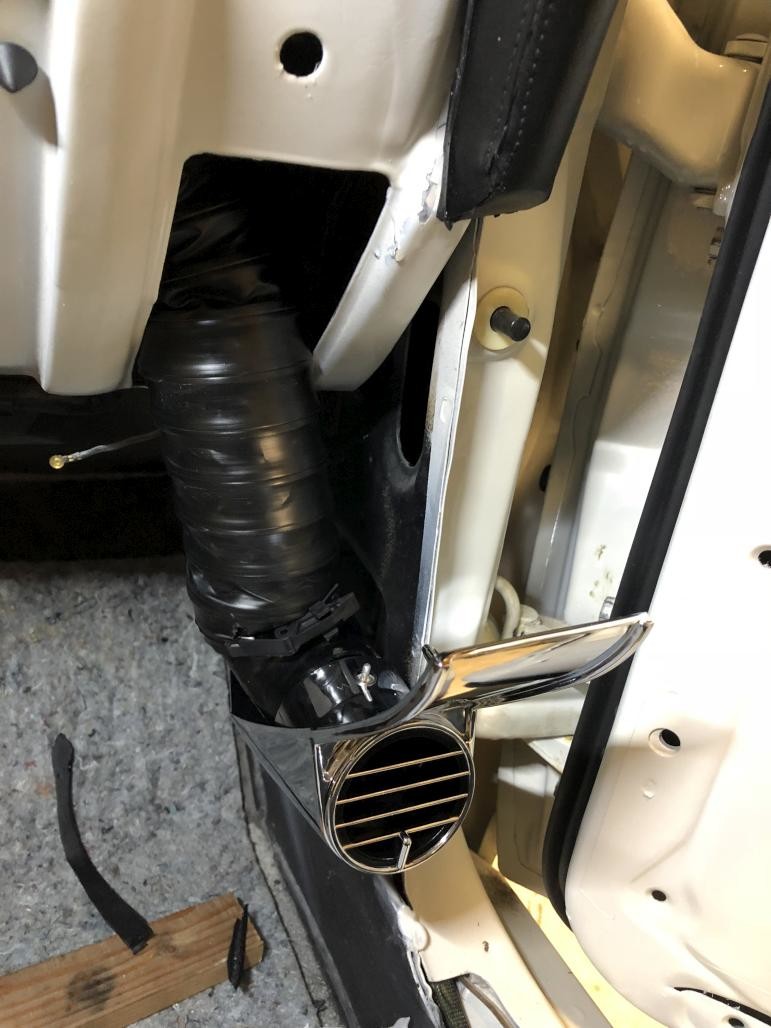
Getting the plastic elbows and new hoses installed was especially tricky on the driver's side, but not so bad on the PS. Also I was lucky that I still had my old vents, because I realized I needed this special spacer piece and the corresponding nut for the back side of the passenger vent. Like most of these pieces, it just needs to be snug. Over-tightening will create a dimple.
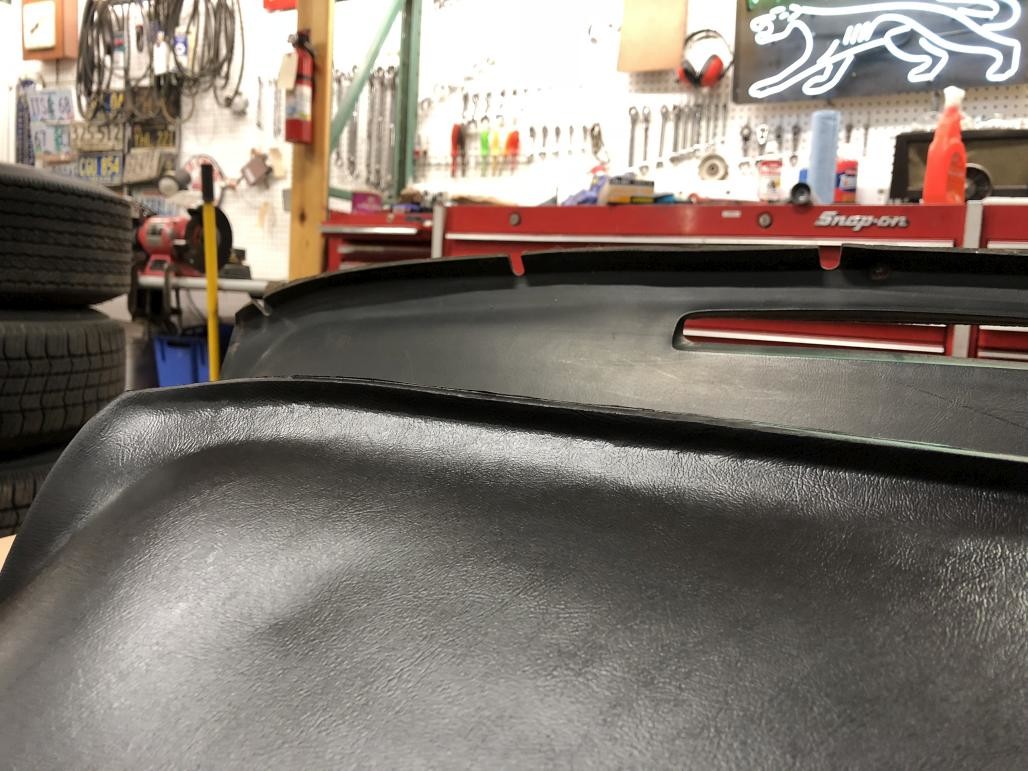
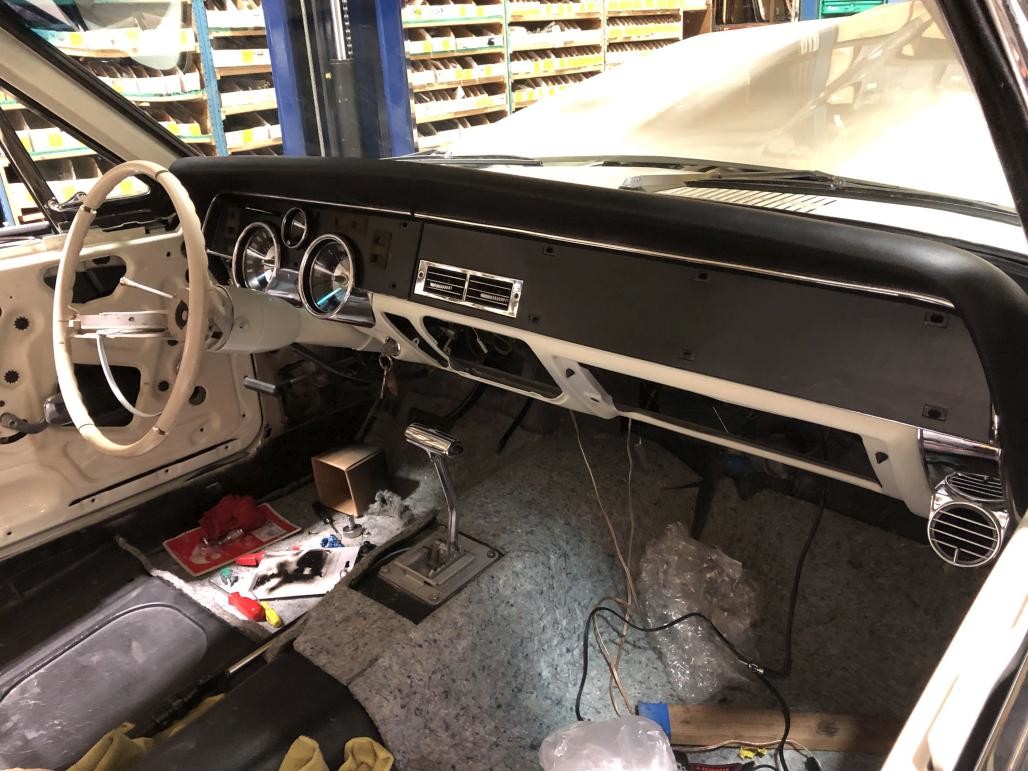
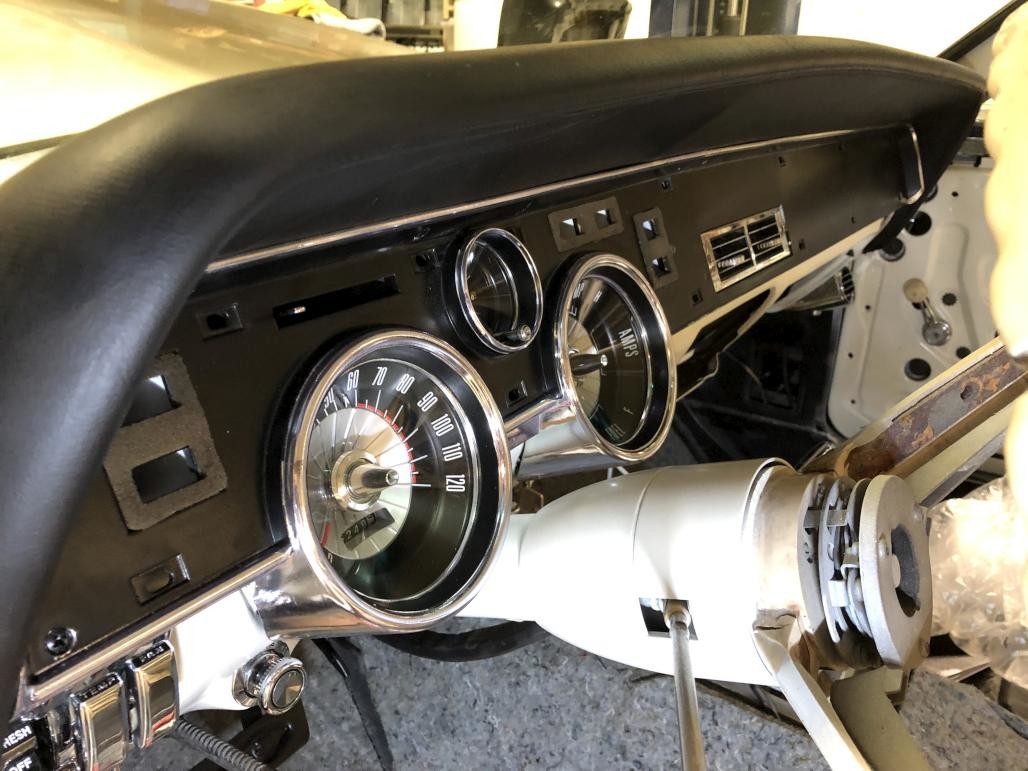
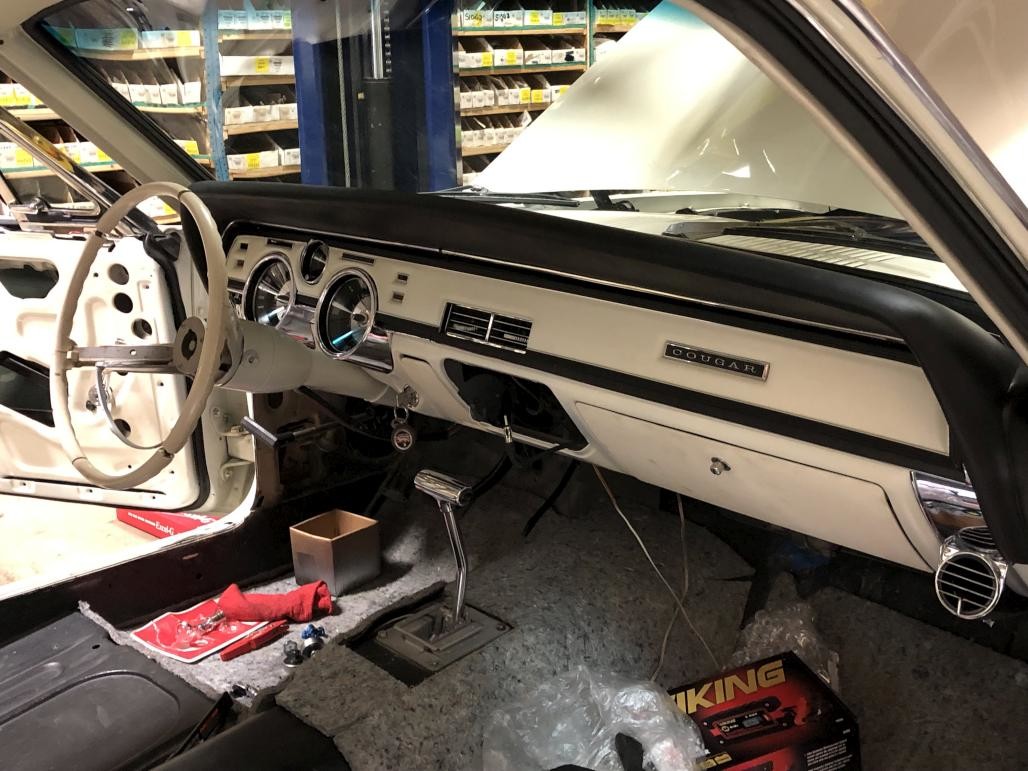
Anyway here's an overall shot with the dash pad in. It definitely has an upward bow. One of these days I might try to put some weight on a board on top of it to try to flatten it out.
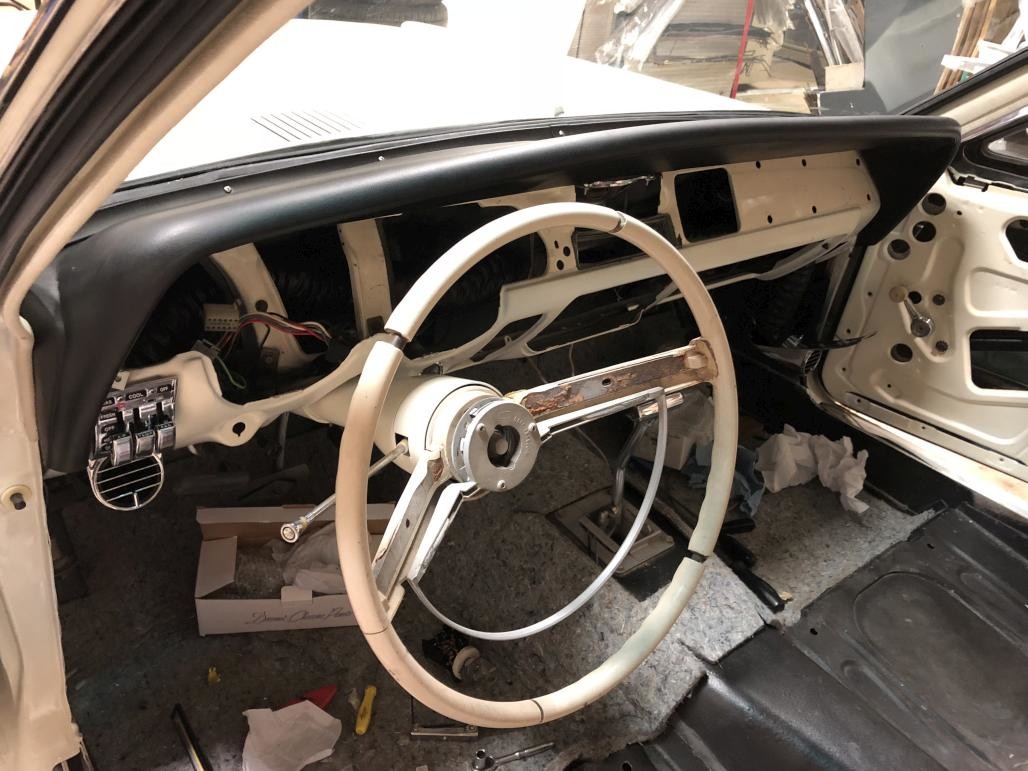
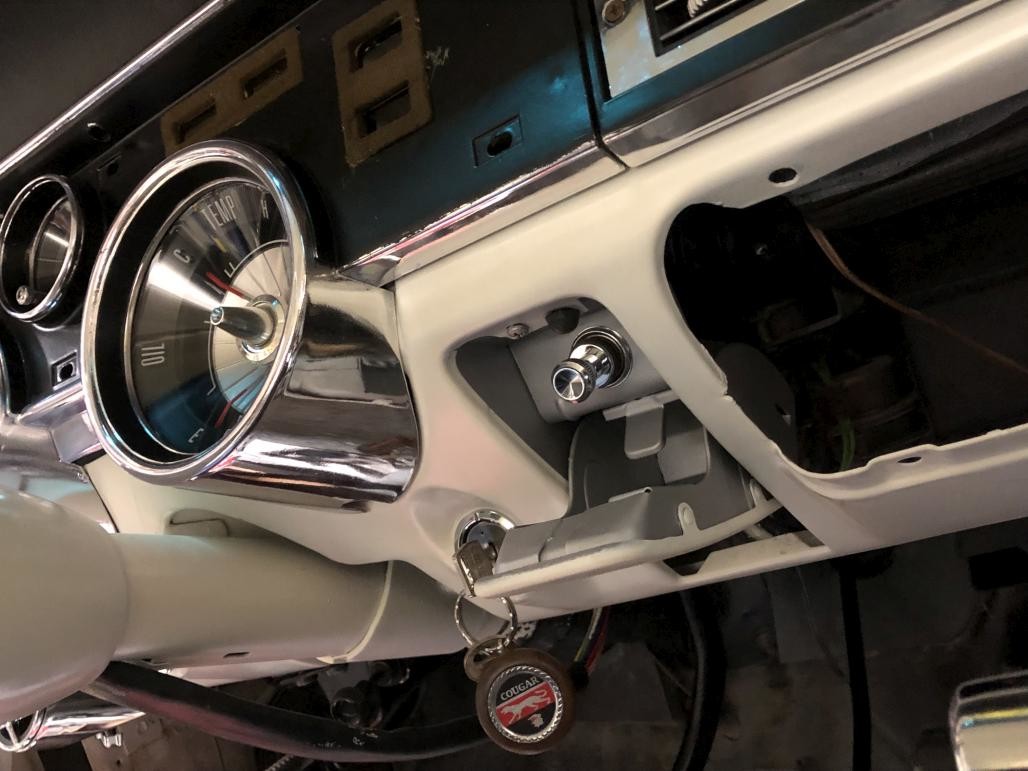
You can see that I also put my headlight switch in. My original was kinda crusty, so I ended up getting a new '67 switch. I got this one because I no longer need the vacuum ports since I changed over to electric headlight actuators. The only thing I had to do was salvage the original spacer and epoxy it to the new switch.
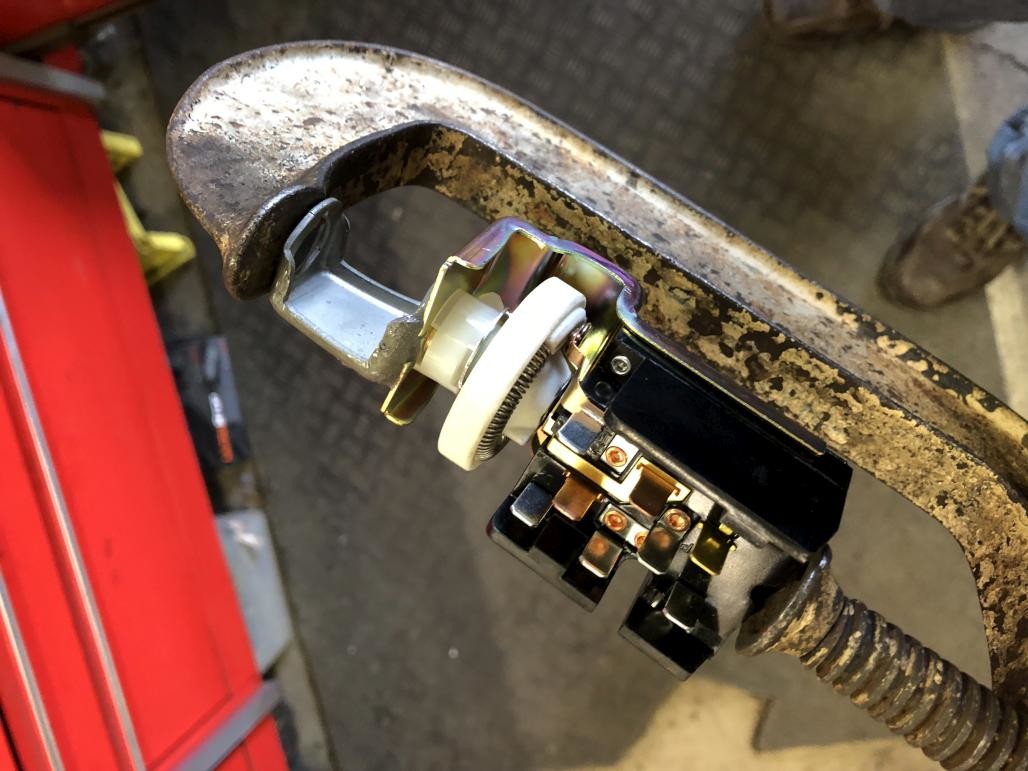
In hindsight I'd recommend doing this differently, to avoid getting epoxy in the threads. Rather than a clamp, screw in the actual bezel nut to hold the spacer in place while the epoxy dries. Anyway...
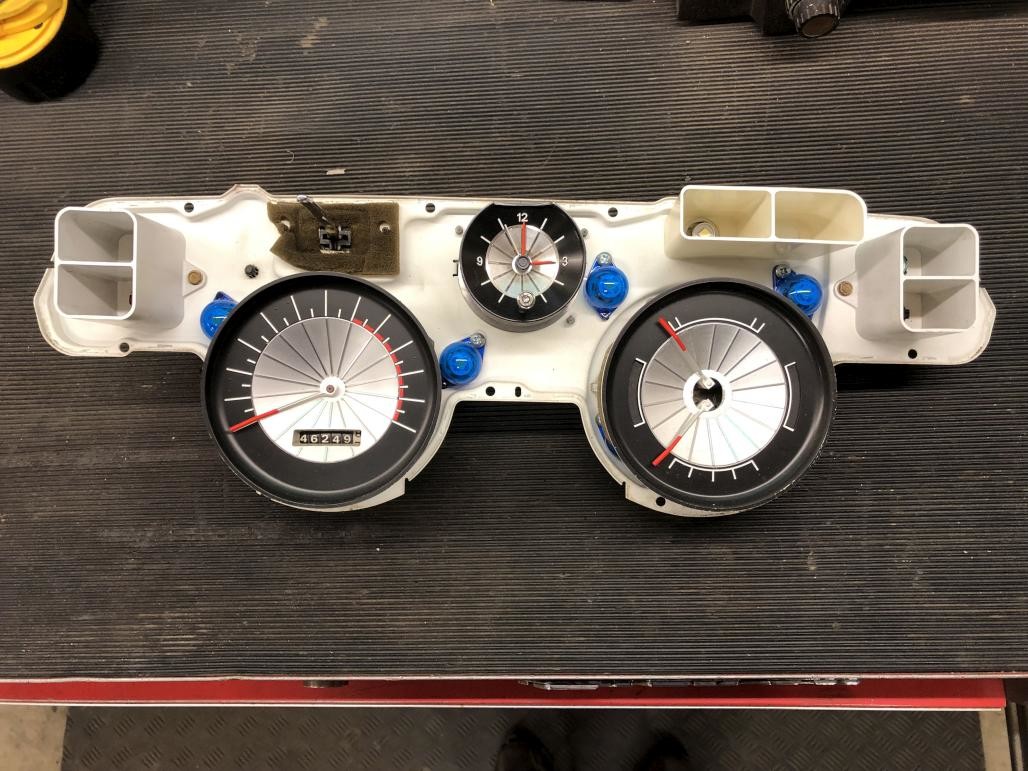
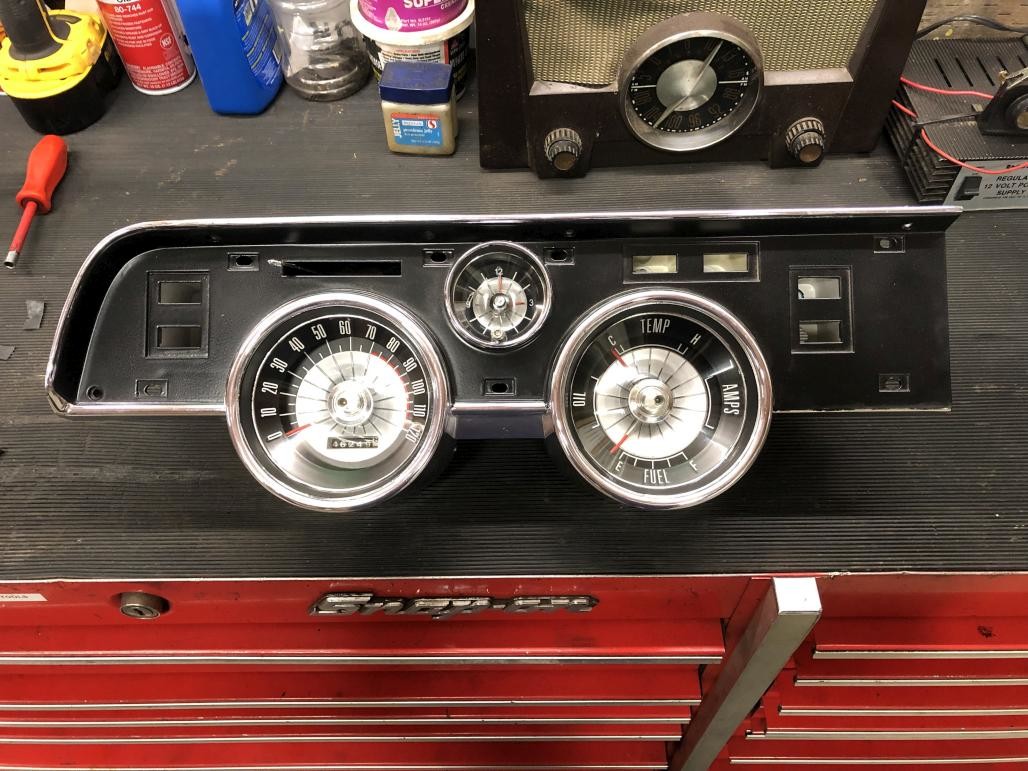
Next it was time to get to work on the gauges. I was kind of excited about this. Here's a before shot:
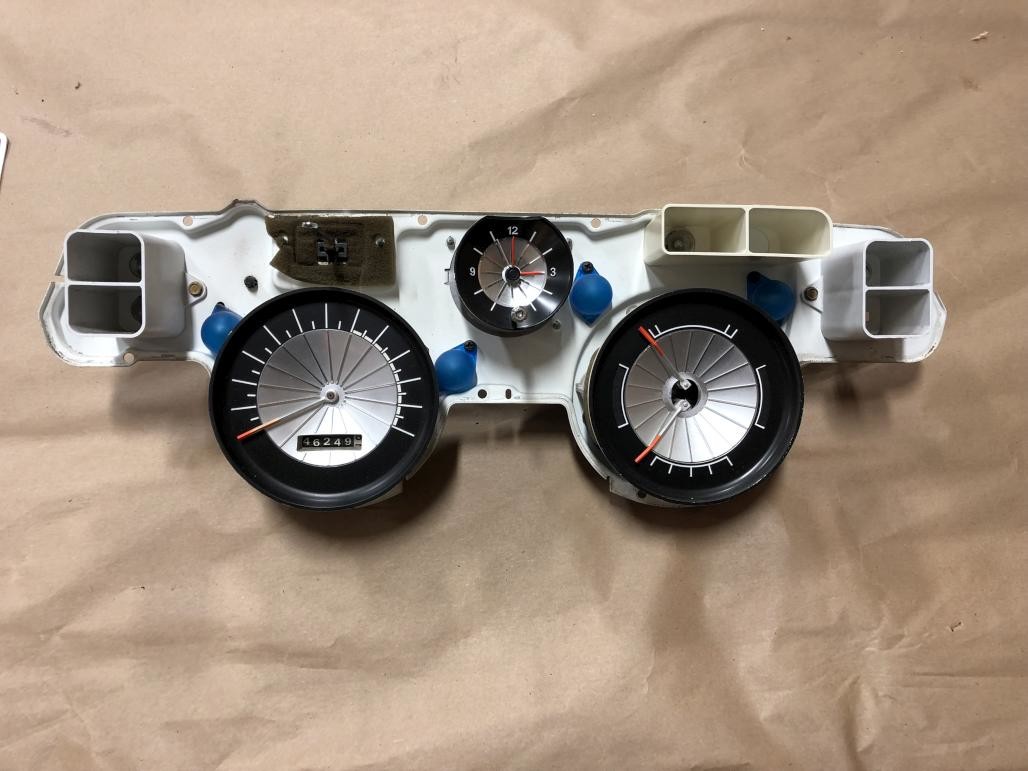
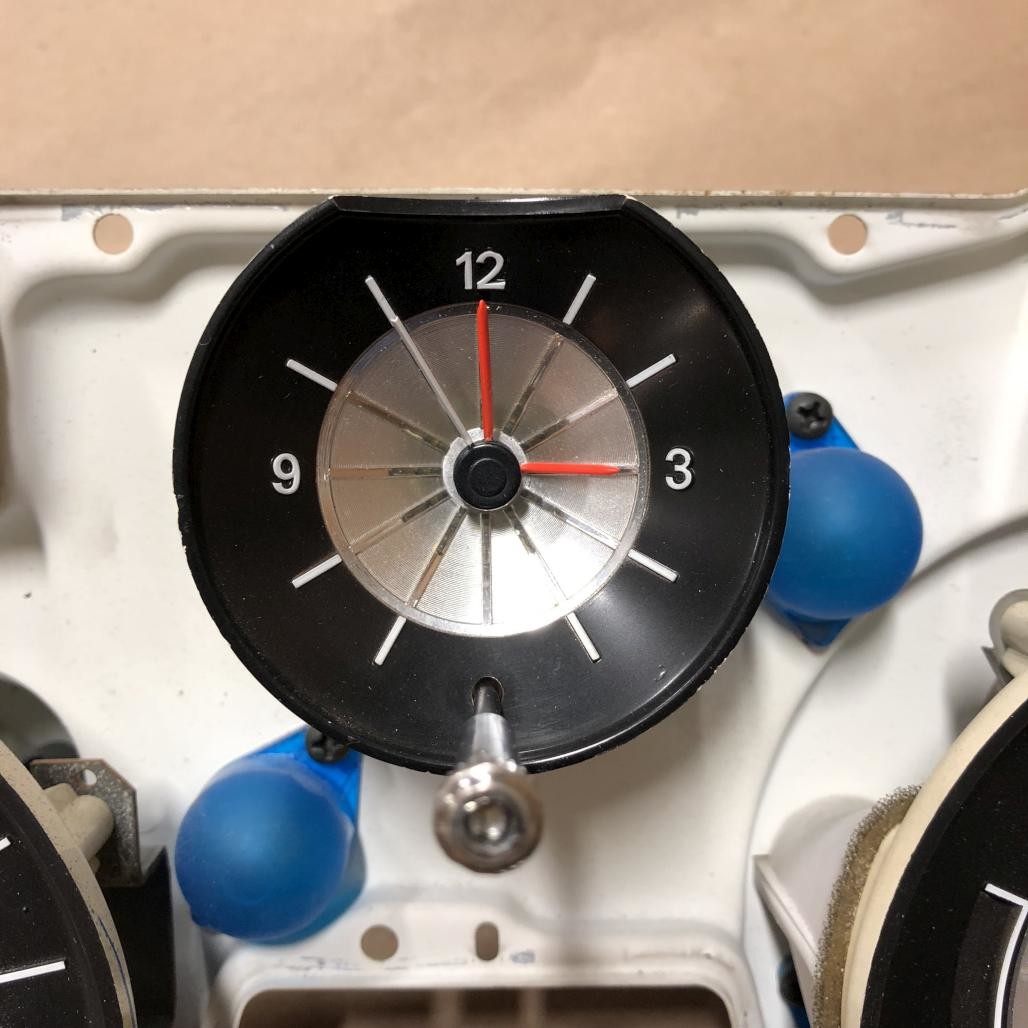
The only thing seen here that isn't original is the clock. I just had the blank panel there originally, but opted to use that space for a rebuilt quartz clock. The wiring is already in place and it's a nice sublte stock upgrade. I was previously planning on using the Rocketman mini tachometer, but decided to go with the clock instead. This is a 289-2V with a 3-speed automatic, I really don't need a tachometer.
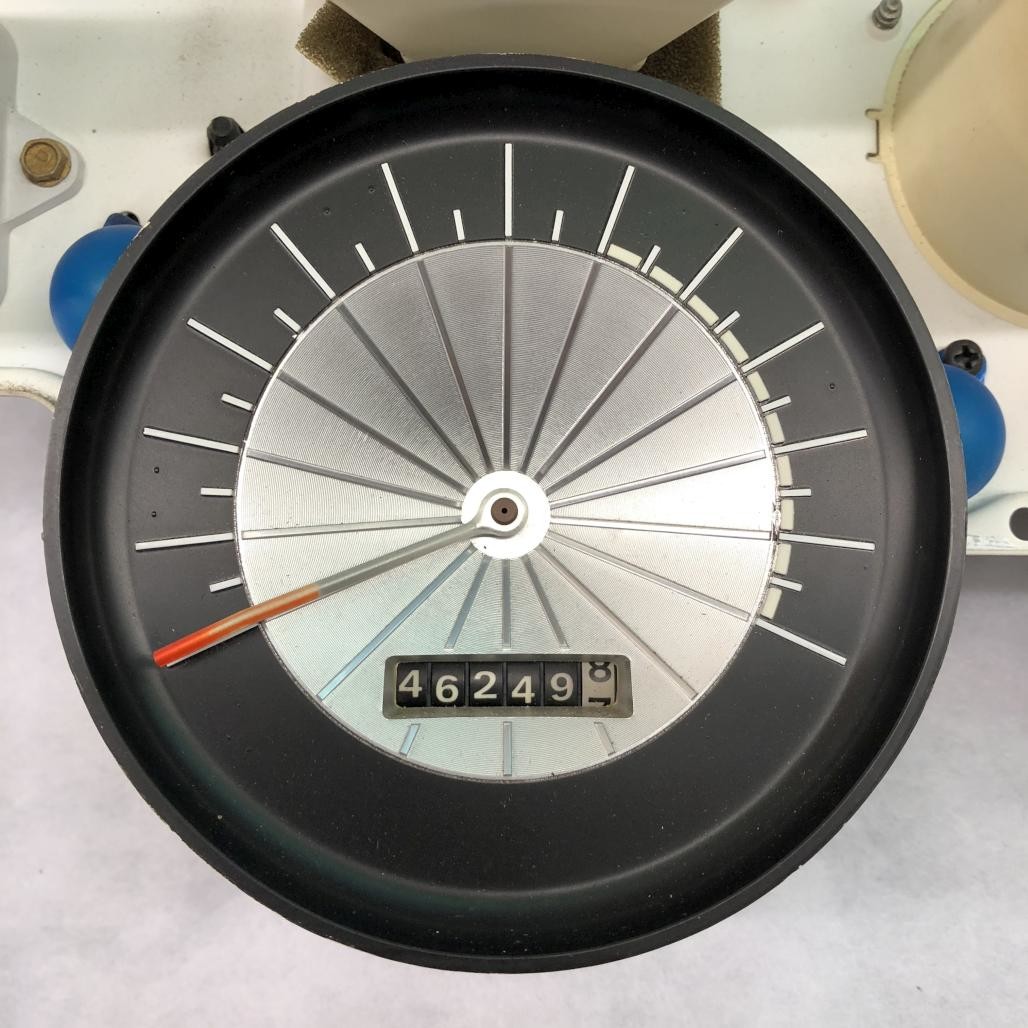
Here's a "before" shot of the speedometer. You can see that the needle is pretty faded.
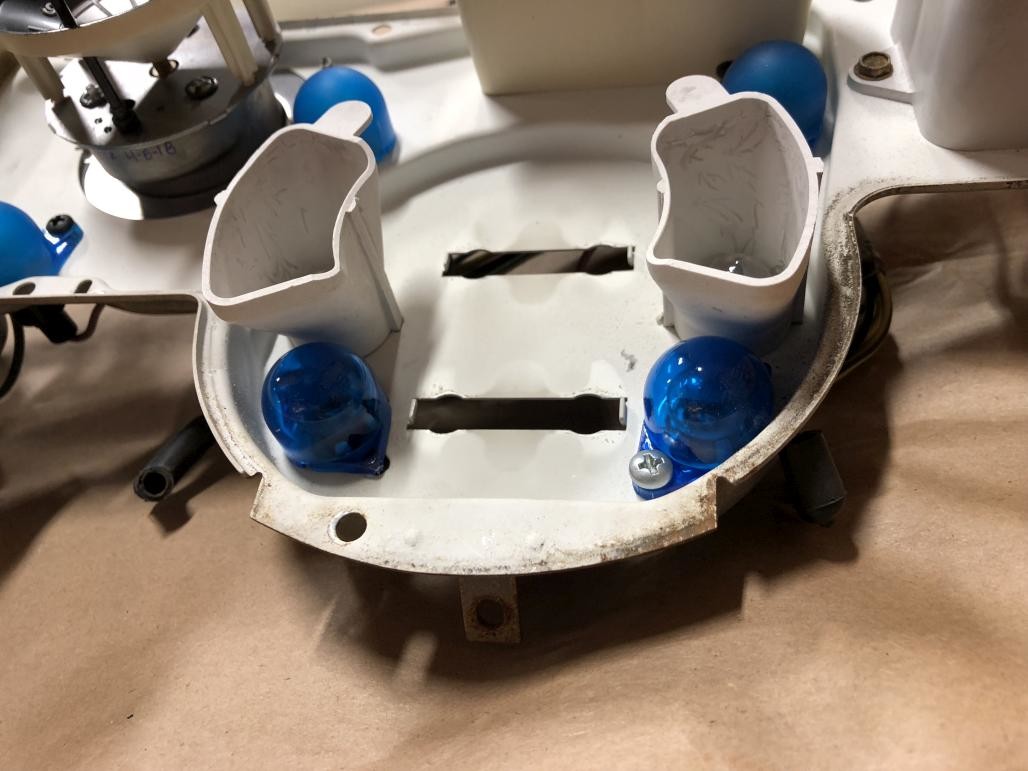
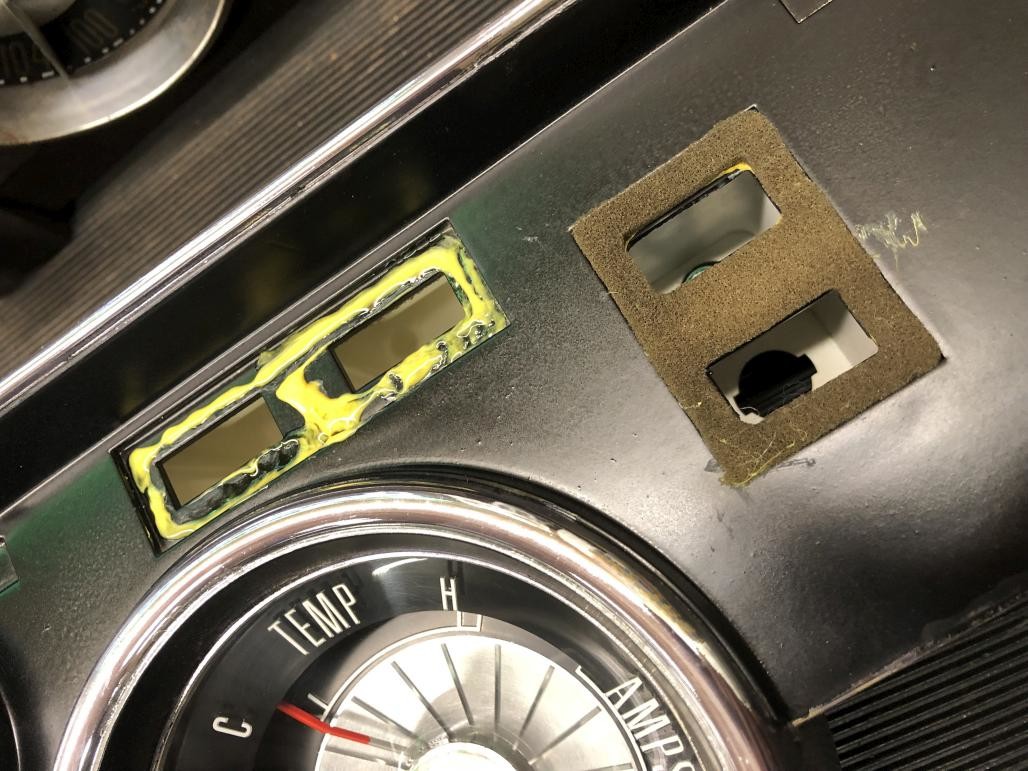
So one of the first things I did was to upgrade the lighting. I started by replacing all the blue light diffusers / filters. These two can only be accessed by removing the right-hand gauge.
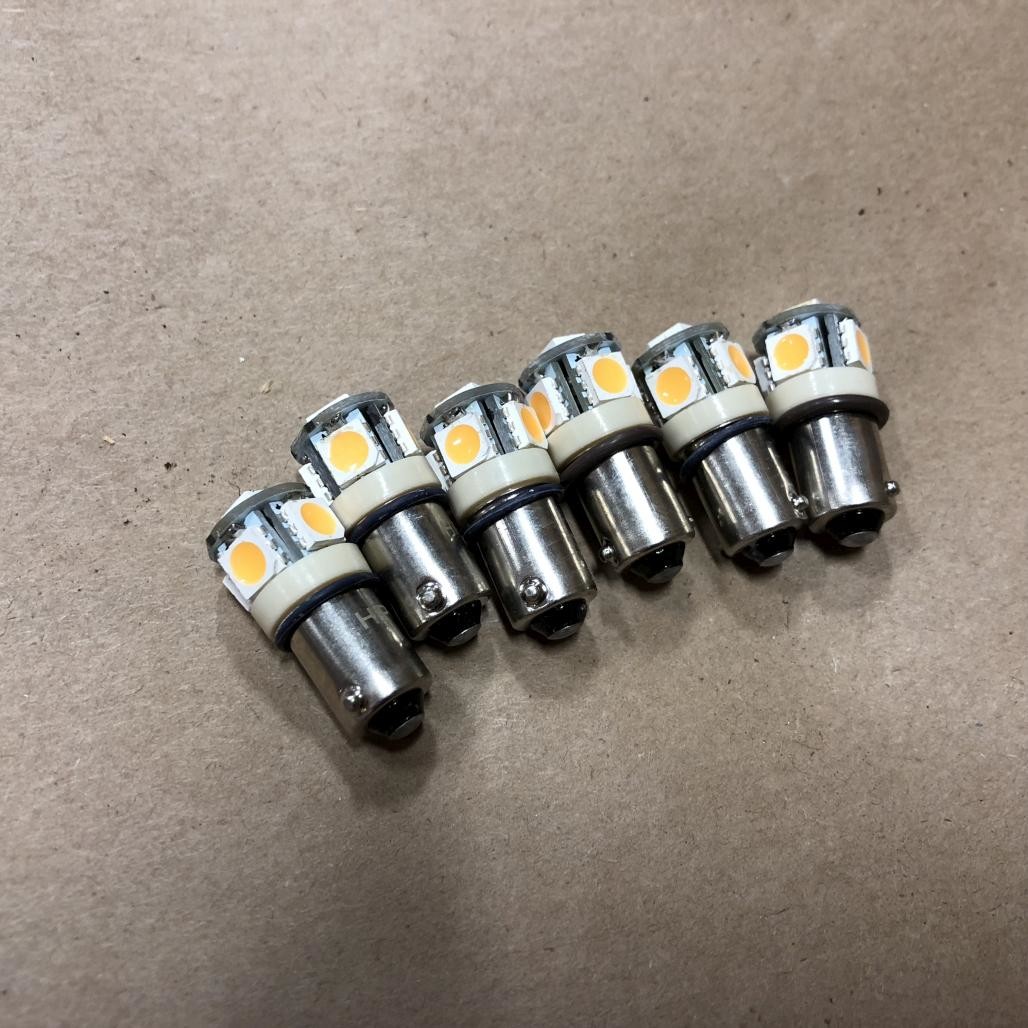
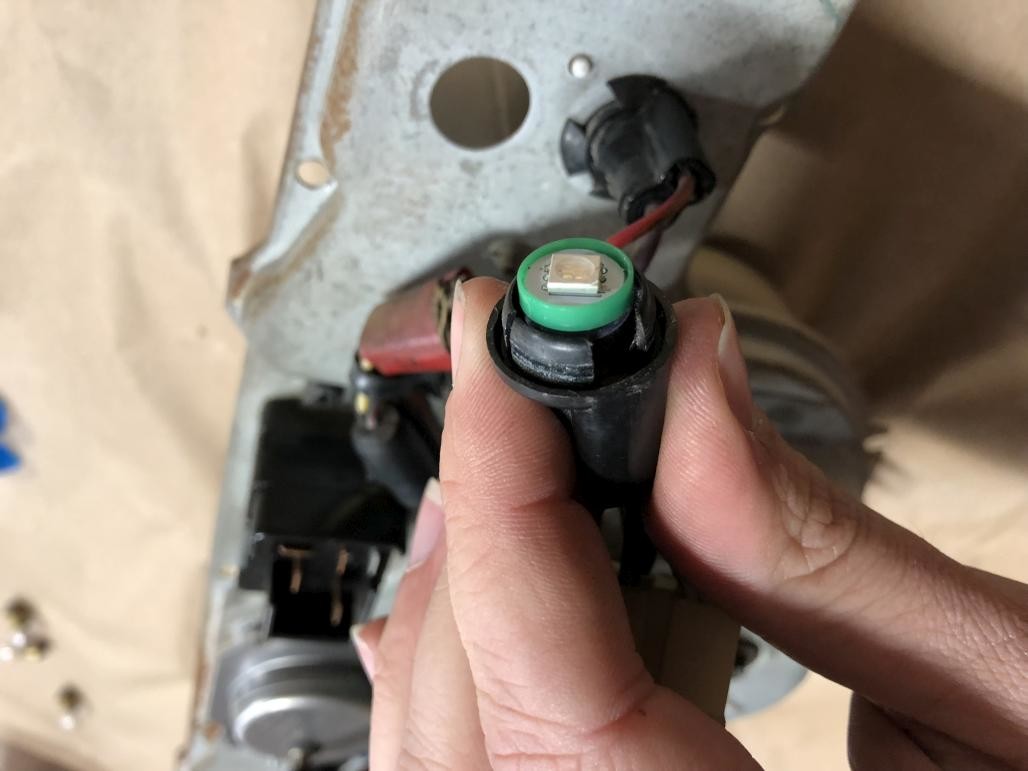
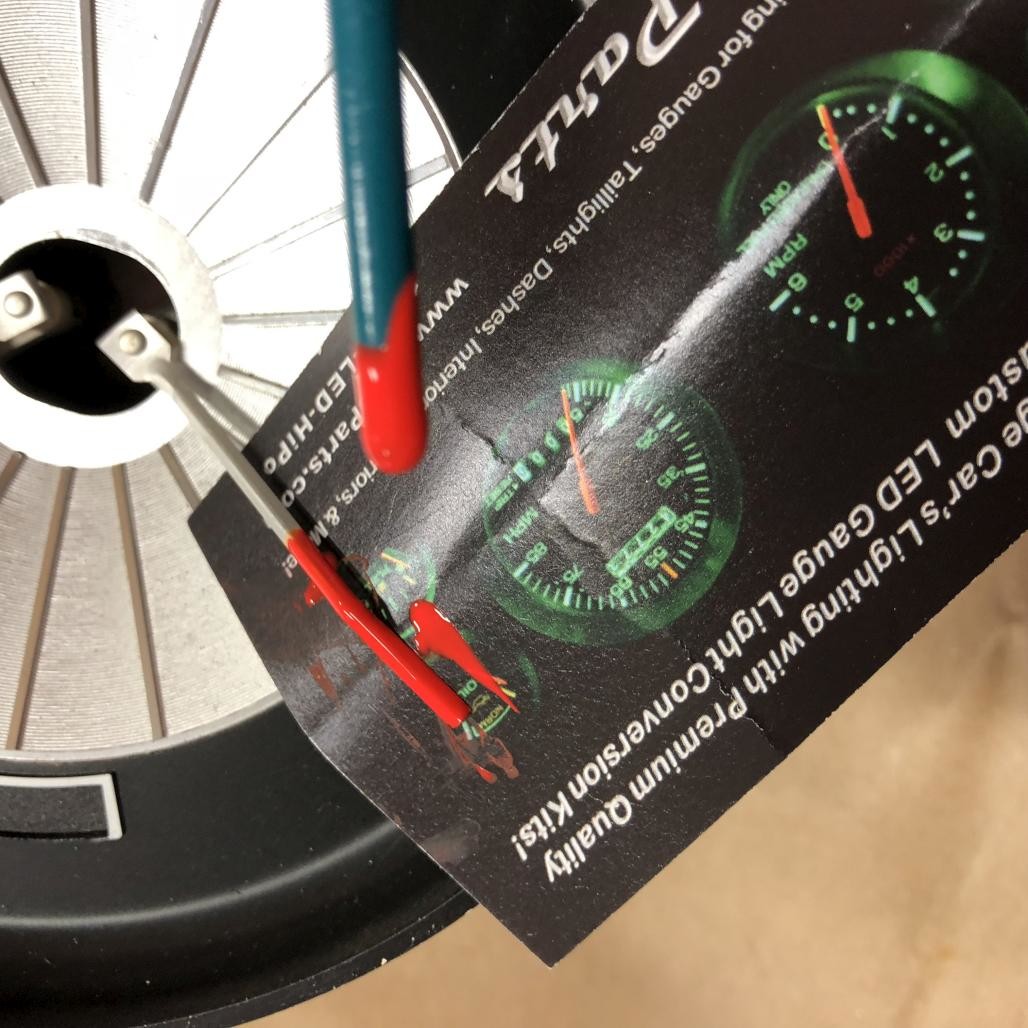
Then it was time for the gauge LED light kit!
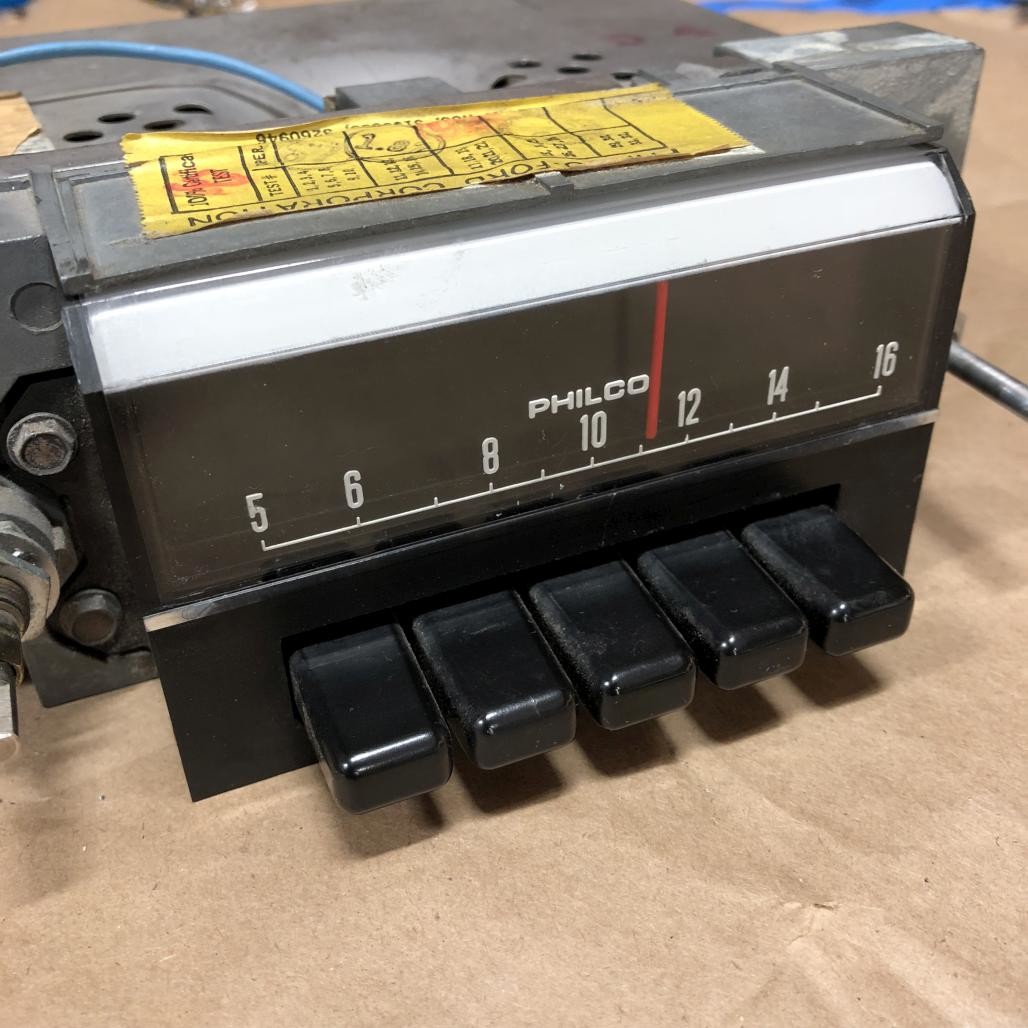
Next it was time to freshen up the orange needle paint. I did this on both main gauge needles, as well as the radio dial needle. A good tip I learned from Darrell was to use the back end of a small paintbrush, rather than the bristles themselves. This paint is nice and thick and you seem to get better control and precision with a wooden stick. It globs on nicely and flattens out as it dries.
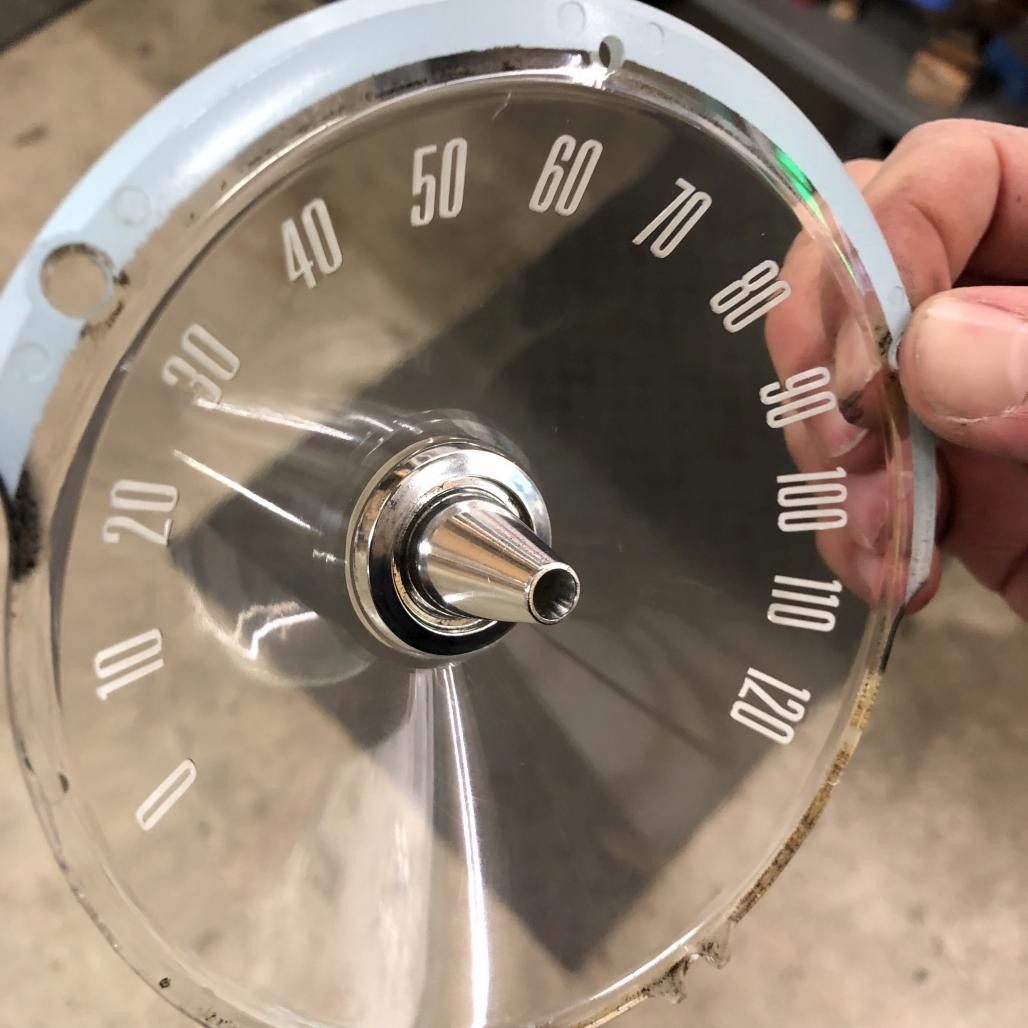
Next I got even more adventurous. It happens that while I was doing this project, I saw some pictures of the 2k-original-mile '68 Cougar for sale online. There's a closeup shot of the speedometer that clearly shows that the extra hash marks above 70 mph are orange. This is interesting because I didn't recall seeing that on other cars, and confirmed this by looking through the box of 67-68 standard speedos at WCCC that almost all of them were completely faded to white. Some had very faint remnants of orange though. I wanted to recreate this cool detail, so here goes.
I decided to go for a half-safe approach by masking off the bottom edges of the hash marks. I felt like I could have better control on the top edges. I sharpened the wrong end of a paintbrush for a more precise tip. It helps that the hash marks are raised up, otherwise I probably wouldn't have attemted this.
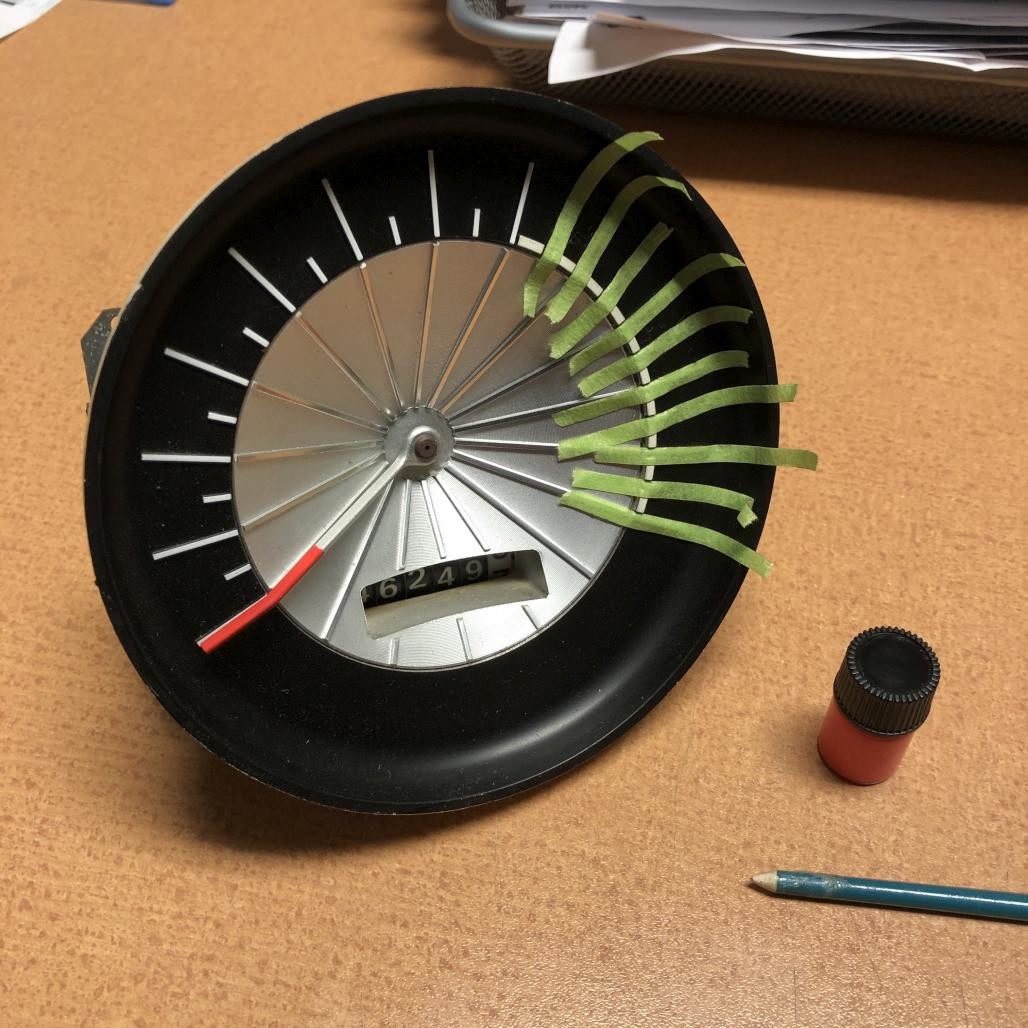
As I went along, I peeled off each piece of tape to do the next one.
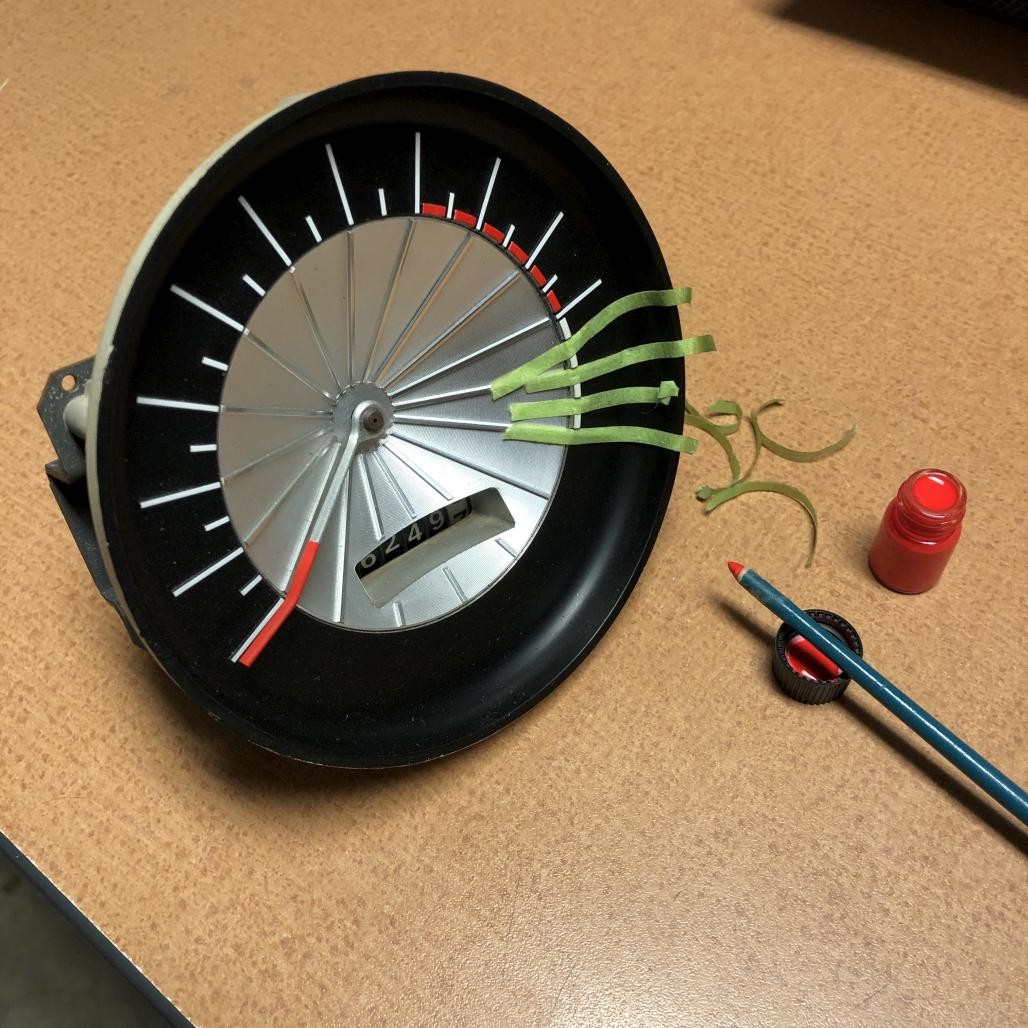
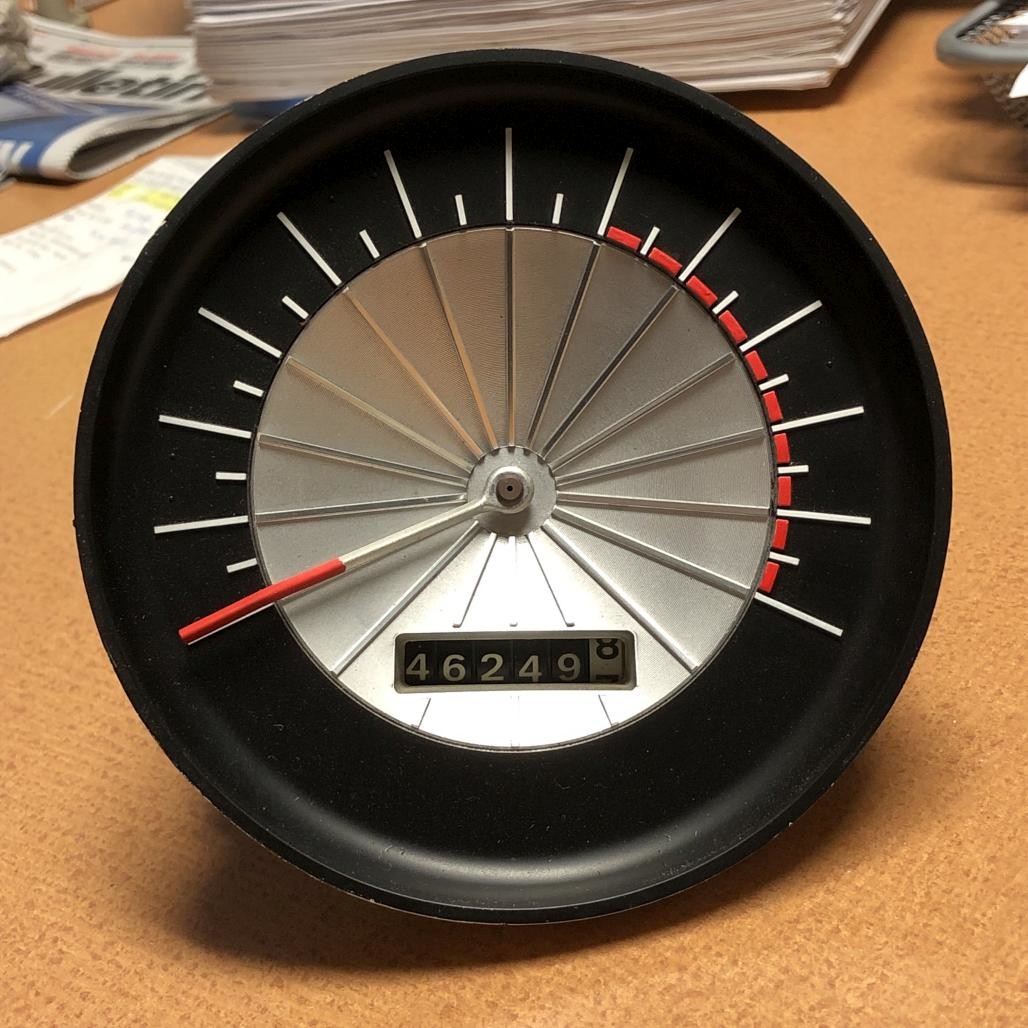
Phew! It turned out great, and I'm glad I did this. Painstaking but worth it.
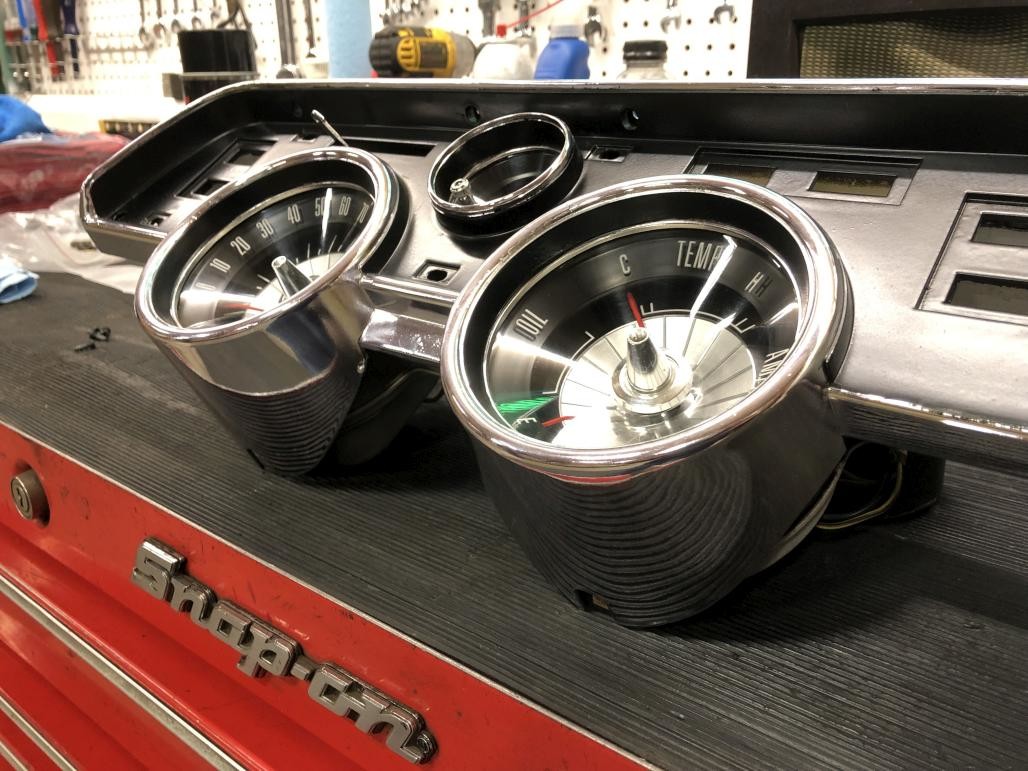
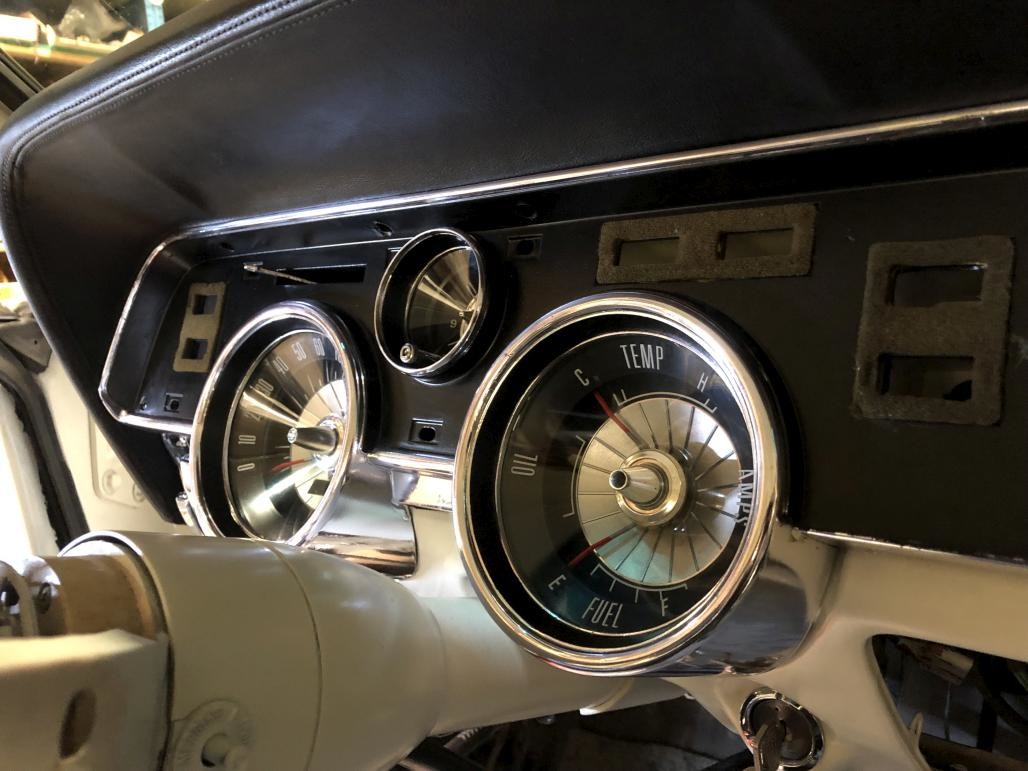
Here's the freshened cluster back together:
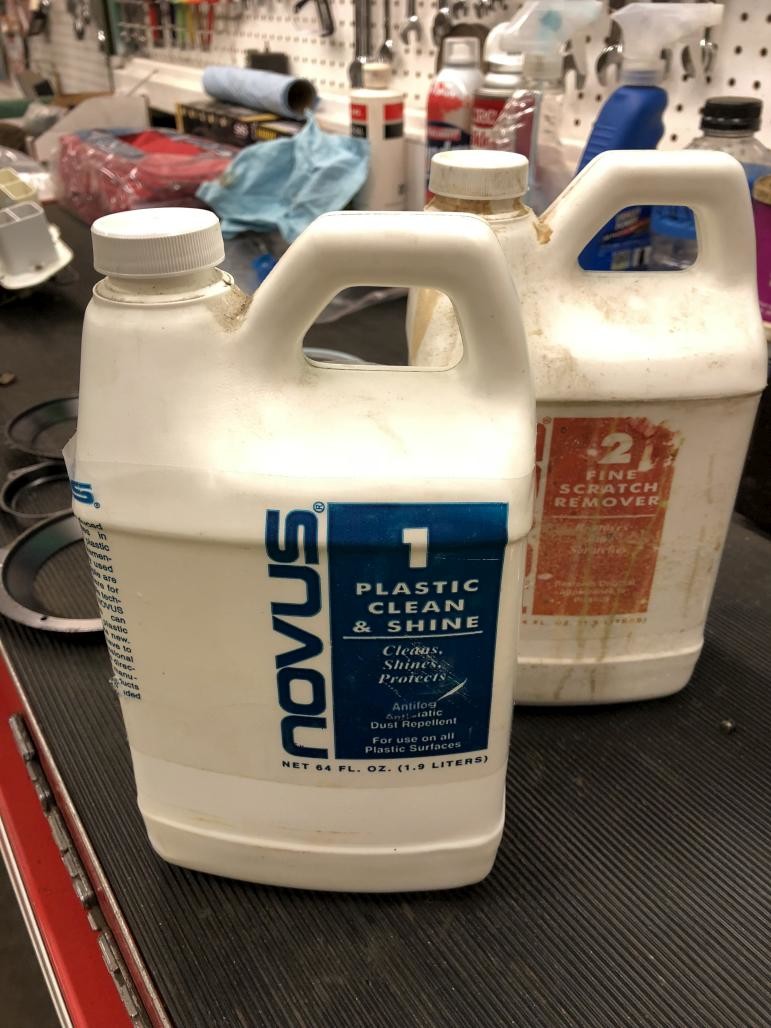
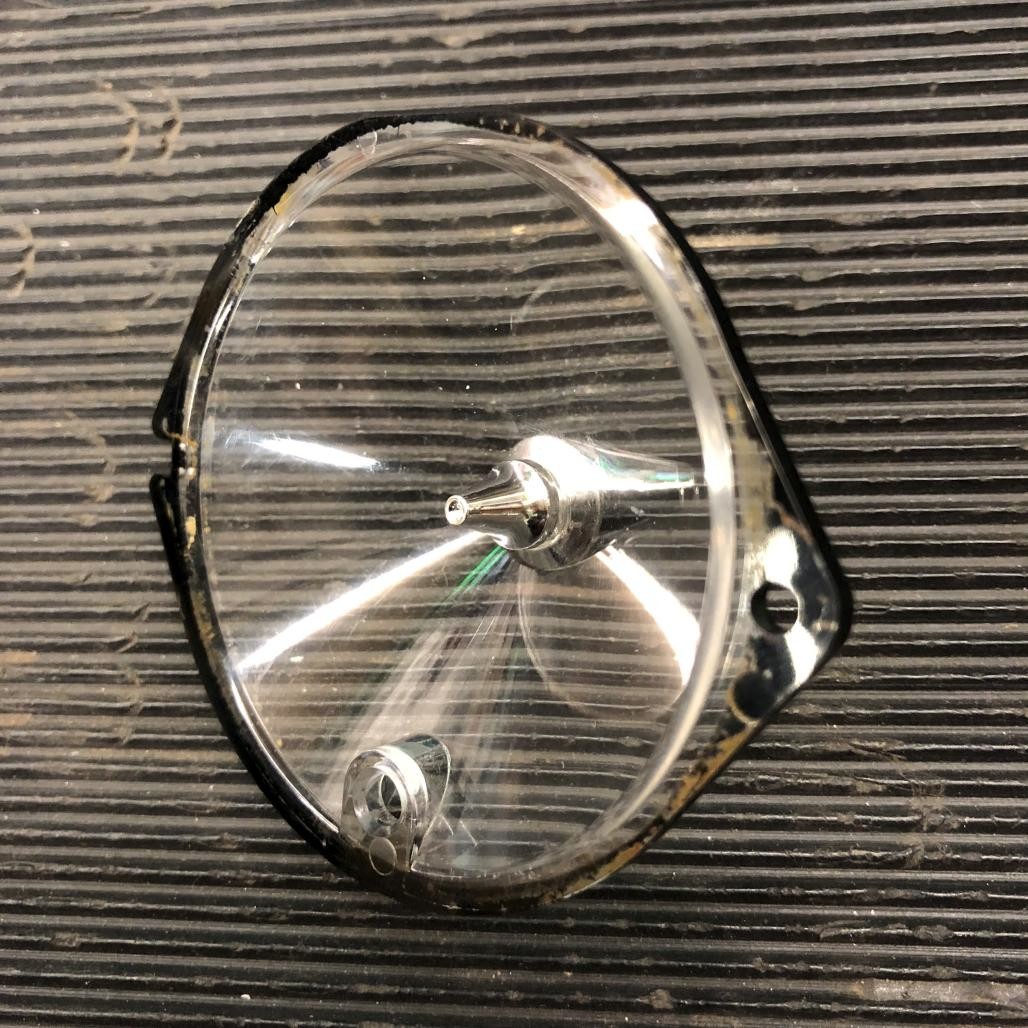
Next I polished the lenses using this Novus stuff. It's awesome. I just did it by hand with a microfiber cloth. Probably could have gotten even better results with some form of power tool, but I'm happy with how they came out.
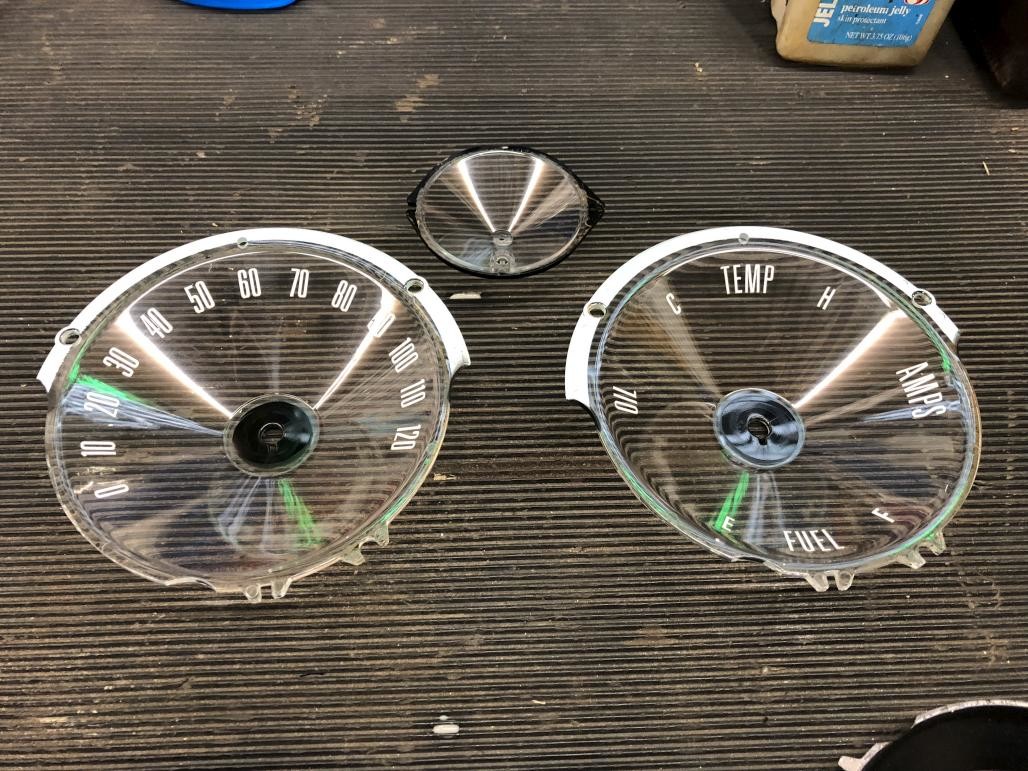
Found some good used cones for the lenses. For the clock lens I got lucky and found a center cap that had previously been rechromed.
So the next big piece of the puzzle was the chrome plastic dash bezels. As you guys probably know, WCCC has been struggling for years to find a reliable, quality source who can restore these bezels using the "spray on chrome" method. Sadly I had sent my original pieces away during one of those attempts, and they never came back, and / or got lost in the shuffle of other core pieces that got returned. At this point my only options were to either get alternate cores and send them to someone like Instrument Specialties to get vacuum plated (to the tune of about $700 and 6+ months) or dig through the few "failed attempt" restored bezels at WCCC and find something that would work. I got lucky and found a set that looked decent, with acceptable blemishes. Still had to pay up for them, but about half of what vacuum plating would have cost. At the end of they day, they look fresh and shiny, so it works for me. Anyway, here's the left piece with the gauges and lenses installed.

Then I glued back on the little foam pads that I had been saving all this time. Luckily I had been smart enough to remove them from my original bezel before sending it away. I used weatherstrip adhesive, but that might have been overkill. A little contact glue would have been fine.
Next, before installing the bezels, make sure these little clips are in place on the dash pad. If you don't have your originals, there is a hardware kit available. They are a little tricky to get to stay in place on the new dash pad, since the material wants to push them back out. You can poke at the material to give the clips more breathing room, and squeeze them together a little before installing so that they grip the metal more tightly.
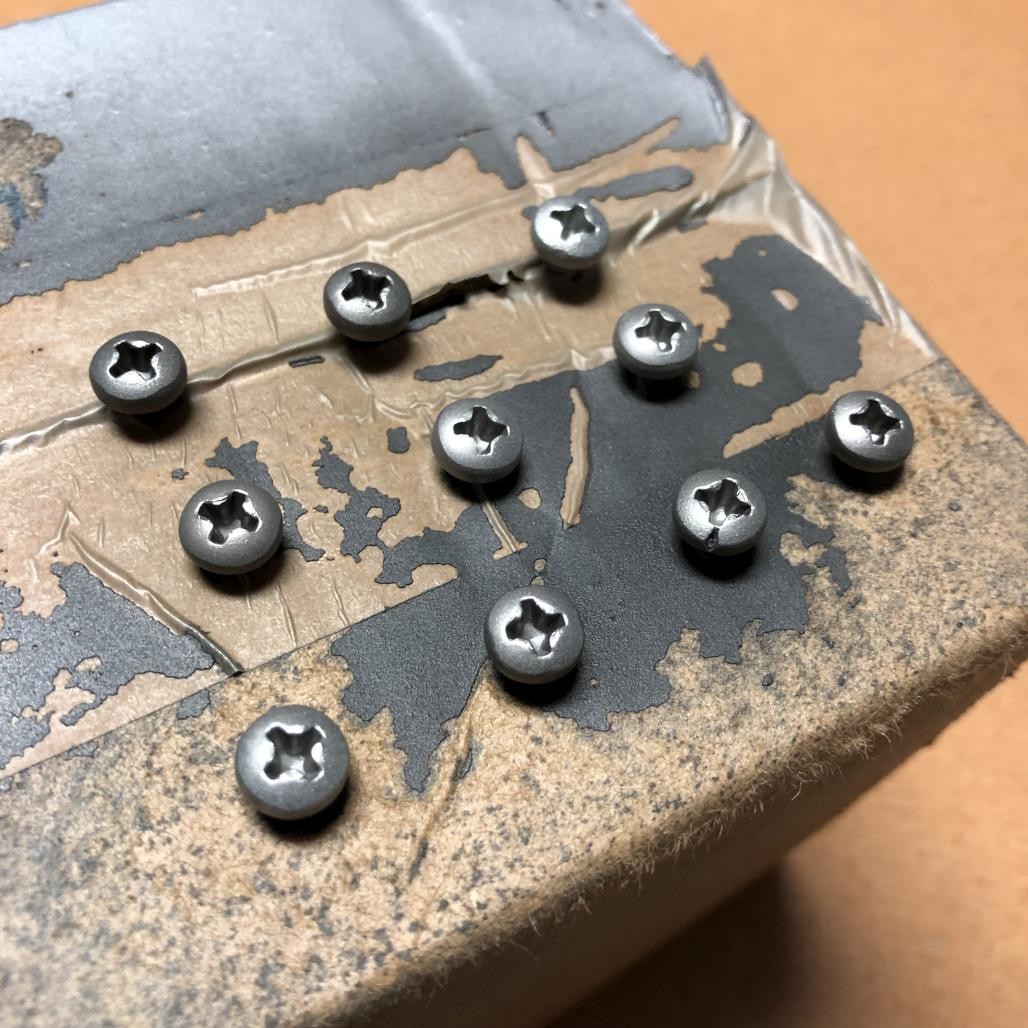
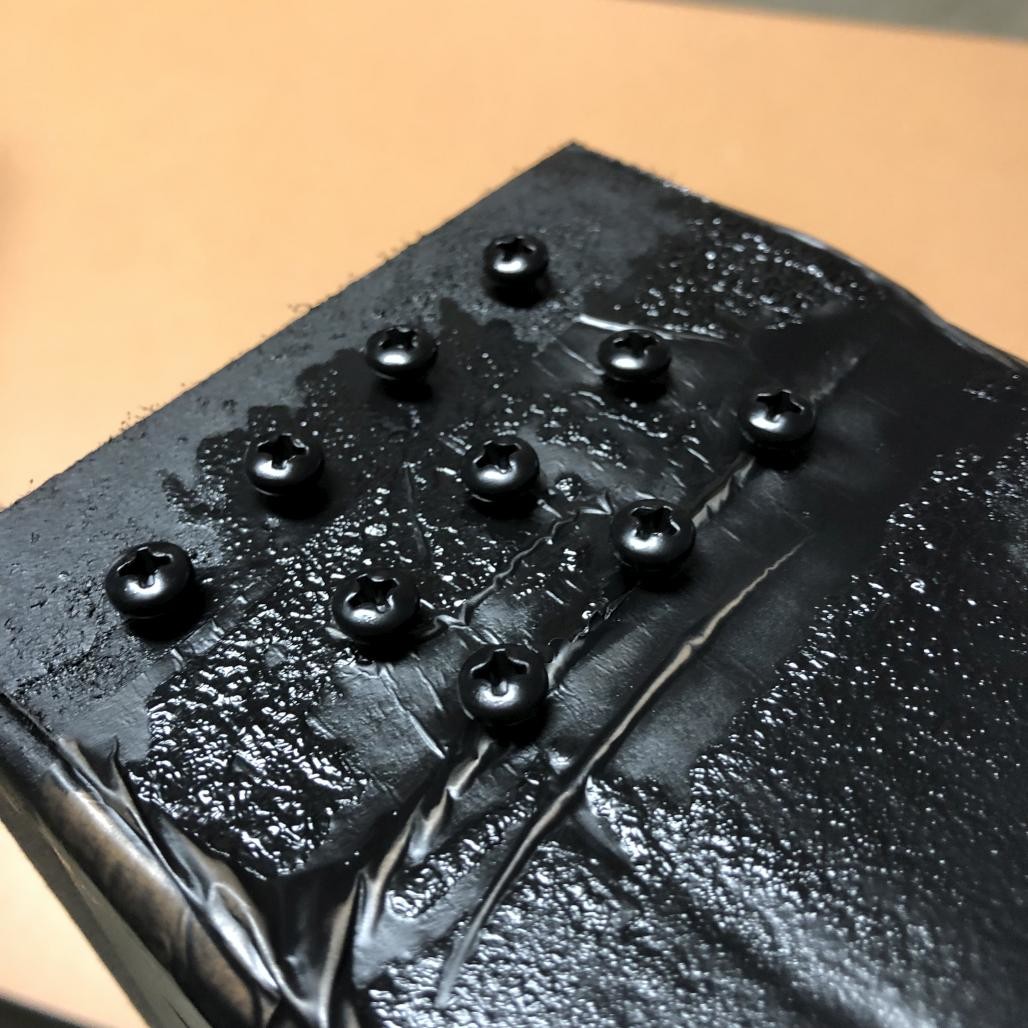
I had my original screws, but wanted to make sure they were fresh black to blend in to the bezels. So I blasted the tops and hit them with Trim Black.
Finally I could install the bezels. The passenger side goes on first, followed by the driver. Obviously, these are somewhat delicate and you want to be careful not to over-tighten anything, especially the studs on the backside. The A/C center vent uses special screws that sit flush.
The driver's side was a bit of a struggle. Plugging in the wiring wasn't too bad, but attaching the new speedometer cable was difficult. The nut didn't want to start. My one luxury was that I hadn't attached the other end to the transmission yet, so I could have as much slack as I wanted. Finally got it on. The other challenge I think was partly due to the new dash pad. It was a tight fit, and I was a bit nervous as I was trying to shove the whole thing all the way back into place. But it worked out in the end.
Then I went ahead and installed my freshened-up ashtray assembly:
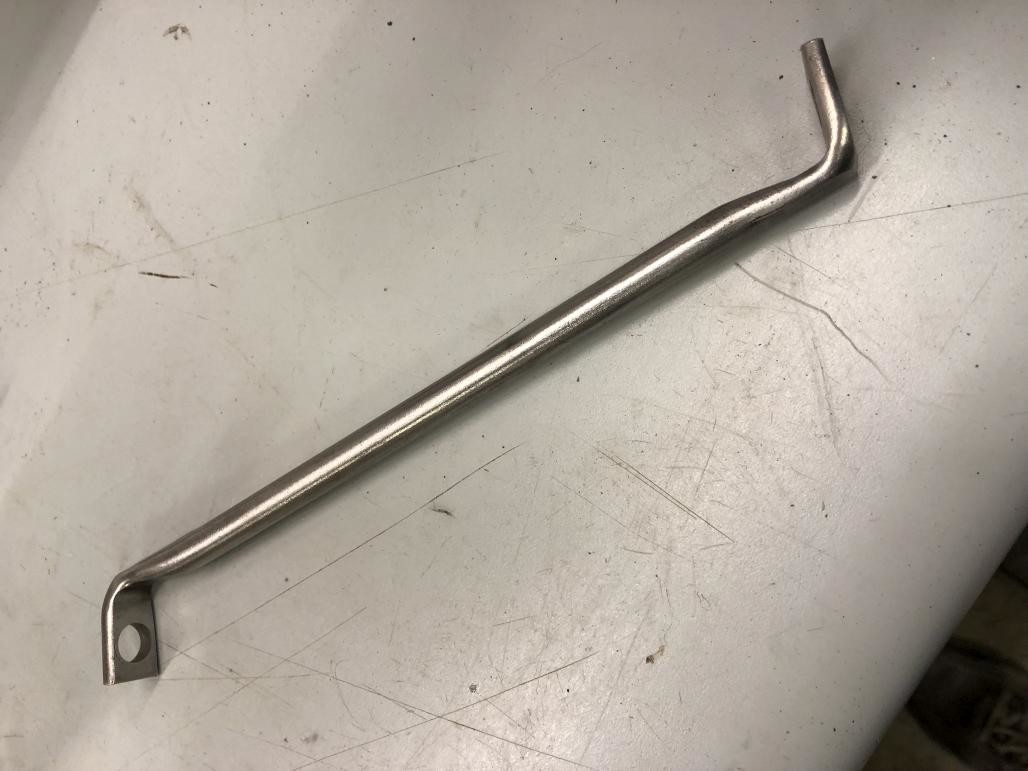
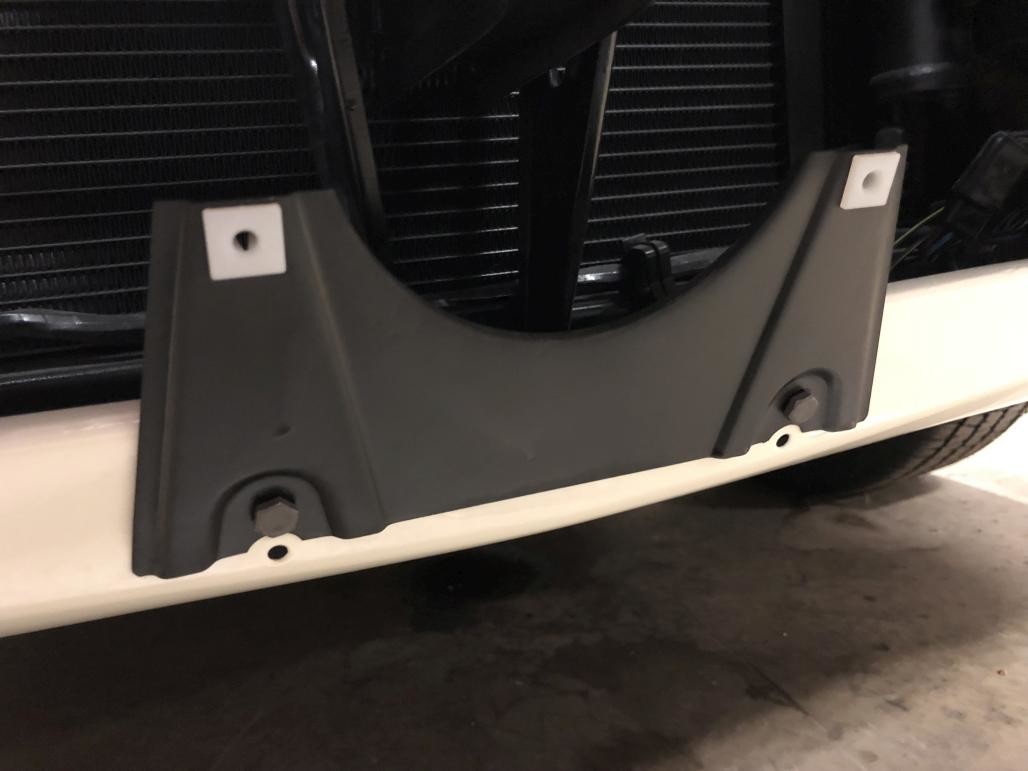
Then cleaned up, clear coated, and installed this dash support bracket. Note that it uses special large Phillips-head bolts, and a nut on the bottom one. I had to hunt around for these. Found some in a parts car in the yard.
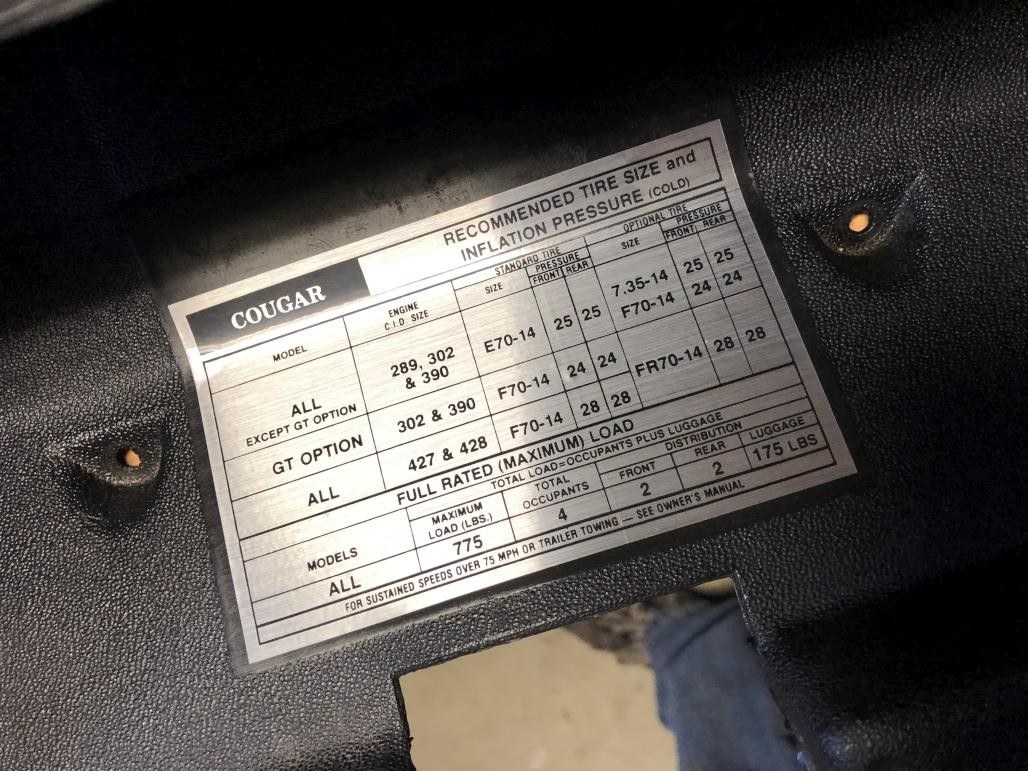
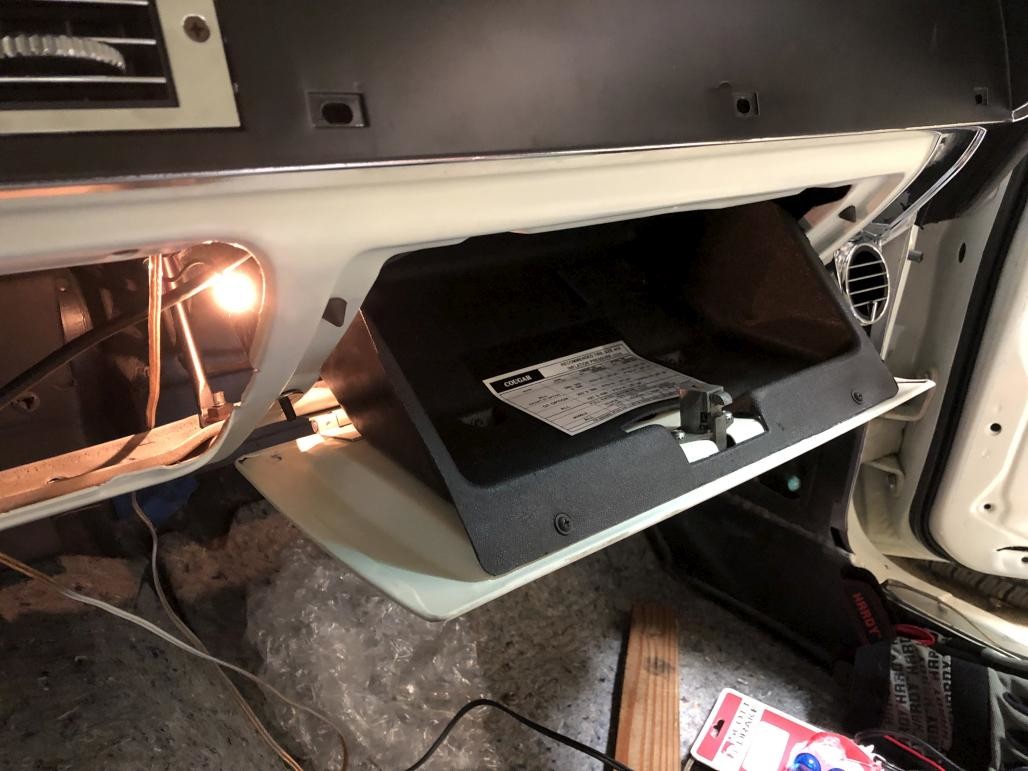
I cleaned up my glovebox liner and installed a new tire pressure decal. The original was still there, but some of it was missing and it was about to fall off.
Then put the glove box together. Luckily all the little bits and pieces are available. I had my original latch and lock, but needed all the screws. Here are some links to those: Glovebox liner screws , Glovebox latch screws , Glovebox catch screws , Glovebox hinge screws. I also put on a new lock bezel, as well as a new light and switch. Don't forget the rubber bumpers. It all may seem minor, but it's nice that all that stuff is available. I swear, the hunt for correct fasteners takes longer than anything else.
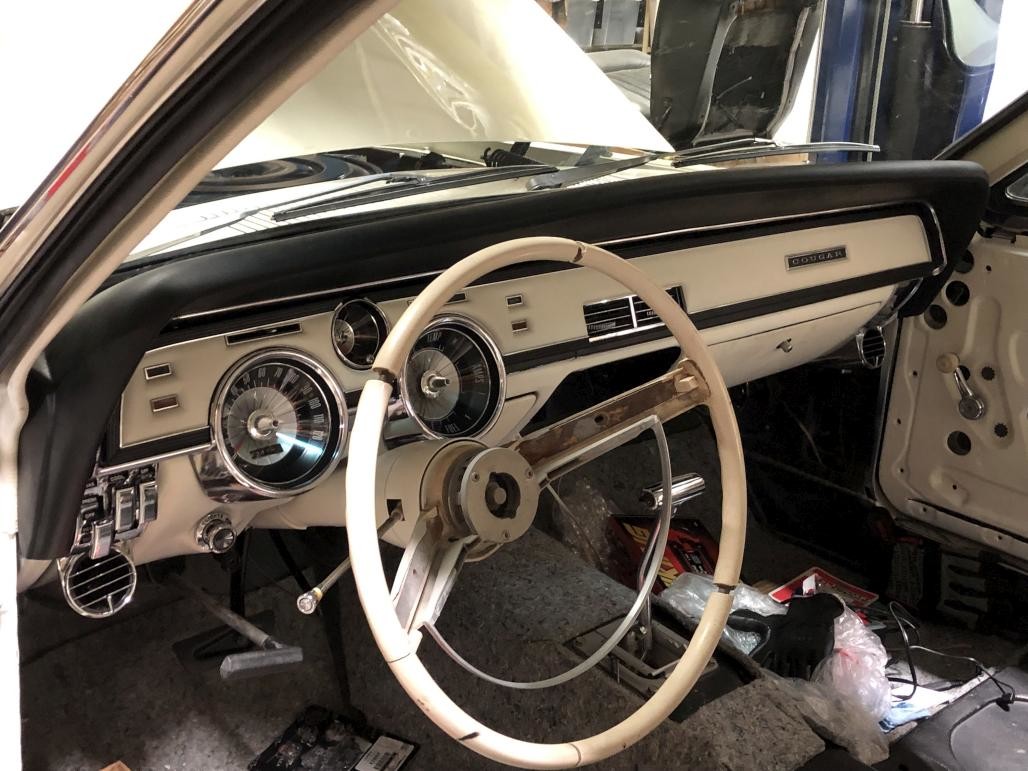
Alright, now the finishing touch is the face pad. My original was in pretty good shape, except for a couple little cracks. I opted to salvage it and throw some fresh paint on it. I used SEM "Super White" which will be a pretty good match for my upholstery. Also freshened up the steering wheel pad while I was at it. I had painted it a few years ago but used "Phantom White" at the time, which is a bit darker.

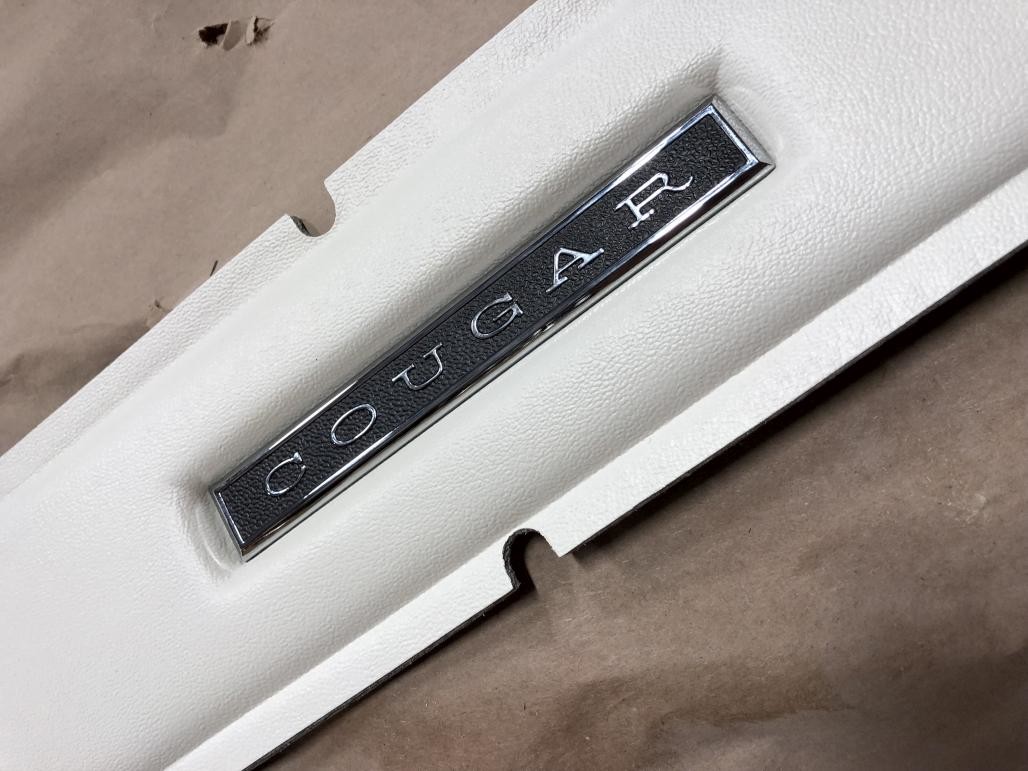
New standard dash emblem courtesy of WCCC. Nice piece, would reccommend.
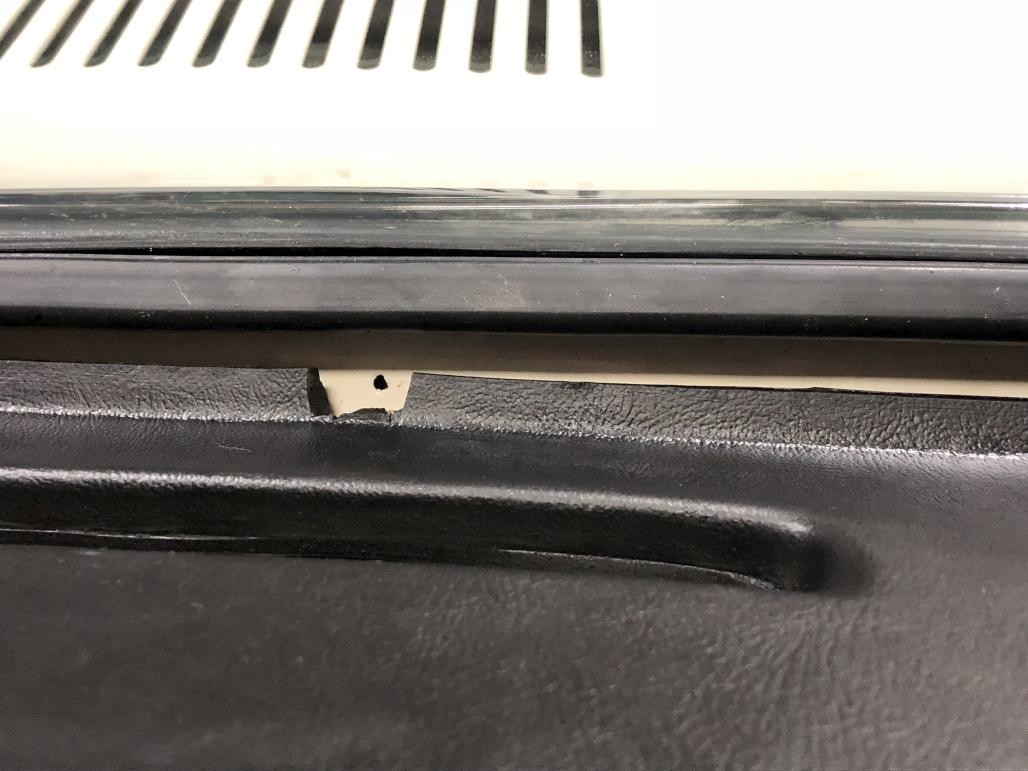
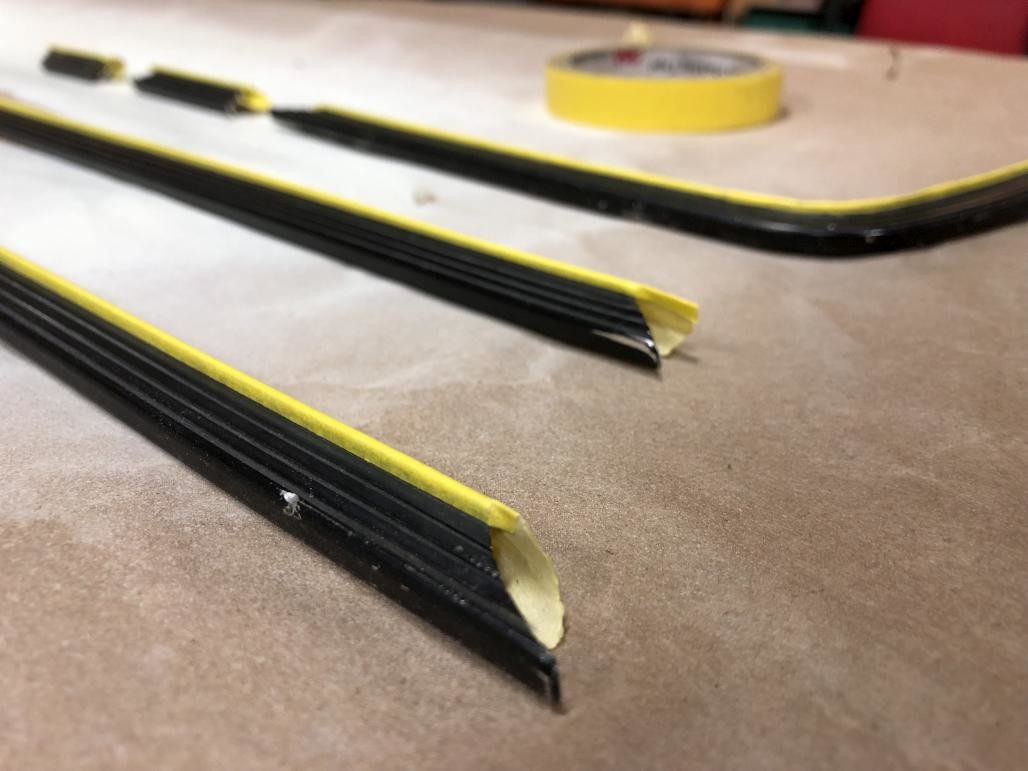
Next it was on to the black trim pieces that surround the face pad. They needed some straightening out and cleaning. There were also some divots in them from when the first body guy tried to remove the plastic bezels with a screw gun. :wall: The very edges of them stay shiny, so I masked them off.
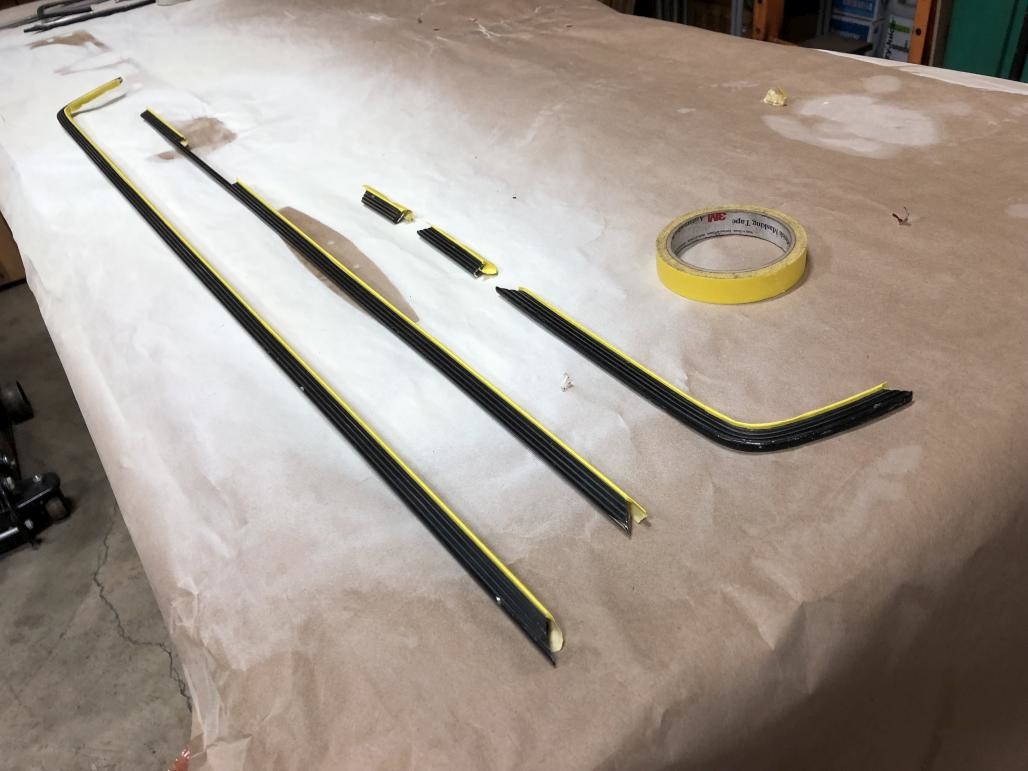
Also note that the LH corner piece is broken. It's supposed to be one continuous piece rather than two separate ones. But it will still be held firmly in place and not be noticeable.
Closeup of one of the many divots:
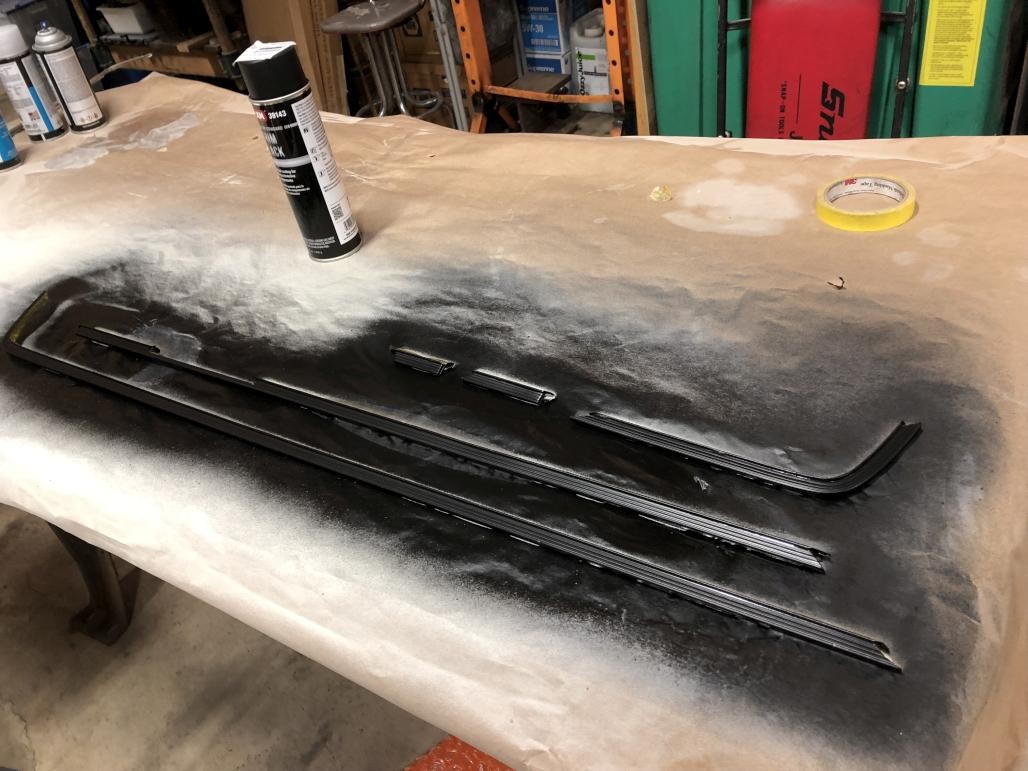
Then after a good wipedown, out came the SEM Trim Black again. It gave these a nice finish and hides those divots well.
Finally, after attaching the trim pieces to the face pad and reinstalling all the little indicator lights and bezels, I put these unobtanium clips in place. I'm lucky that I still had most of my original clips, only missing 2 of them. Not even WCCC has any of these usually, so I had to make do and put the clips I had into what seemed like the most important spots.
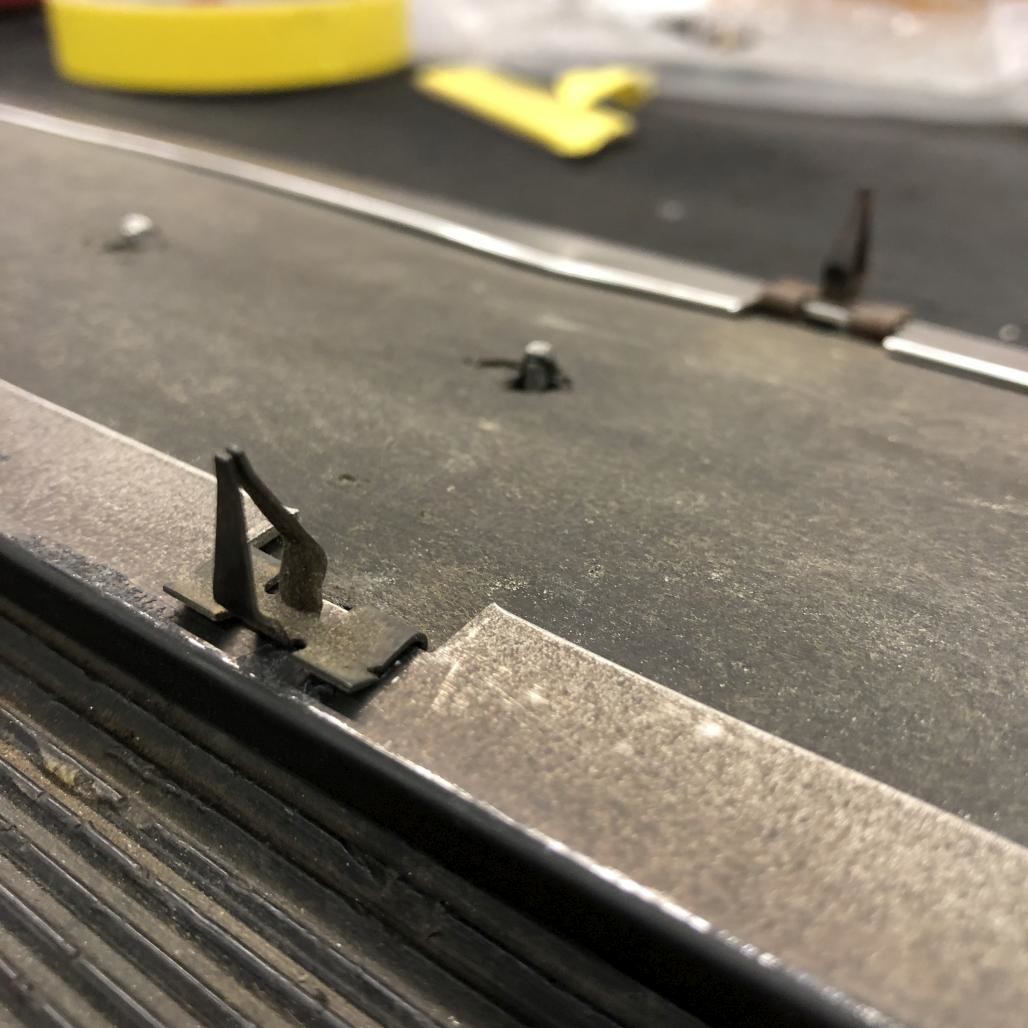
These clips suck. Difficult to line up in the correct place, and installation is generally quite sketchy with this fragile, valuable piece, especially when it already has some little cracks in it. Anyway, after some struggling, I got it in.
Sharp-eyed viewers will note that I forgot to put in the rectanular plastic bezel for the center A/C vent. It goes under the face pad. Oh well, I'll do that later. Might send the bezel somewhere to be "chromed" anyway as I didn't have good results with a chrome paint pen.
Anyway that brings things pretty much up to speed! Rear window is one of the next hurdles, then I can probably do the carpet and other major interior pieces. It's a bit hectic but I'm encouraged by the way things are progressing.
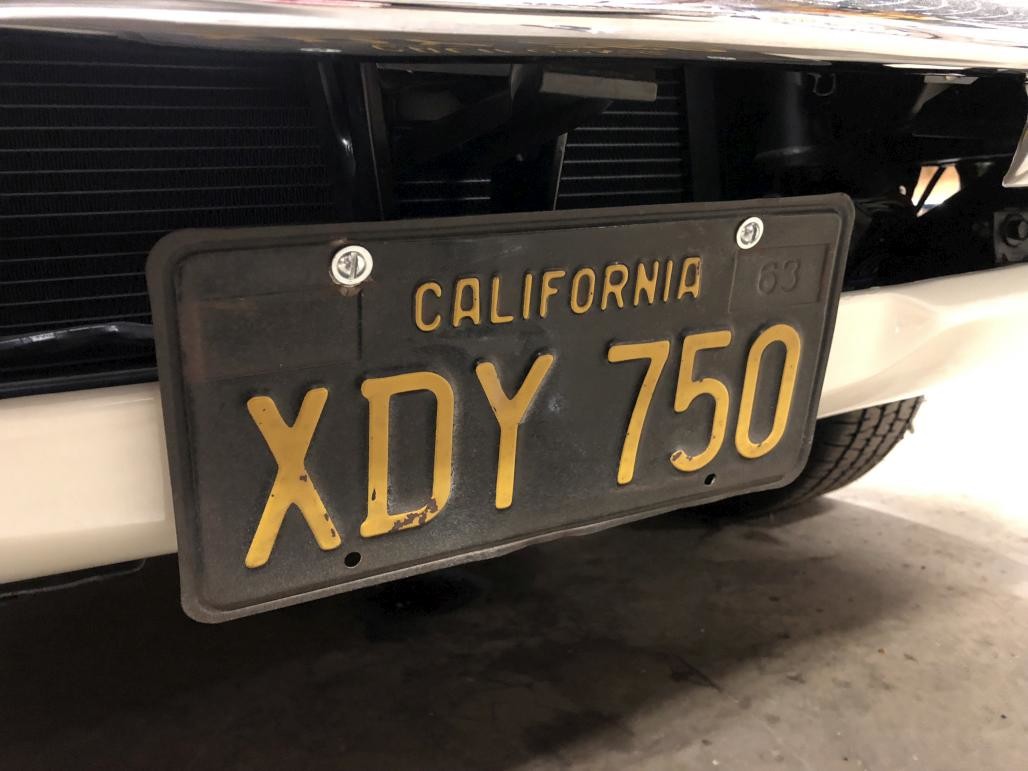
Oh, before I go, here's one last detail. I gave the front of the car its identity back by reinstalling the front license plate. Freshened up the bracket and used new hardware. Not shown are the two little rubber bumpers that go in the bottom holes, which I installed after the pic.

So nice in honor of your grandparents.
Posted by Diggymart on 1/3/20 @ 8:04:16 PM