You must be logged in to rate content!
11 minute(s) of a 767 minute read
6-22-2018
Thanks all! It's great to have it back finally and I've been randomly putting things together, trying to do something every night after work, and on Saturdays. I don't really have a planned approach, I just walk up to the car, stare at it for a bit, and think of what to do next. Having the car and myself at WCCC is a huge luxury because A) it's a place to work on it with all the tools I could need, and maybe even more importantly B) all the parts I could possibly need are just a few footsteps away. I feel very lucky to have this luxury.
So before I update on things I've done, here's a cautionary tale. Don't be like me. Don't restore your car in the wrong order. Which is to say, don't detail your engine bay, under dash area, underbody, trunk, etc. and then have the car painted. No matter how conscientious you think your painter is with masking, there will be dust and overspray in all kinds of places you don't want it. All you want to give a painter is an empty shell.
Obviously it wasn't my intention to do things in this order, but I had already done a lot of work before it became clear to me that the first paint job wasn't gonna cut it. So, now I'm dealing with the frustration of trying to clean paint off of wiring harnesses and other parts, and there will be some items I'll have to remove and re-spray again. Kinda frustrating.
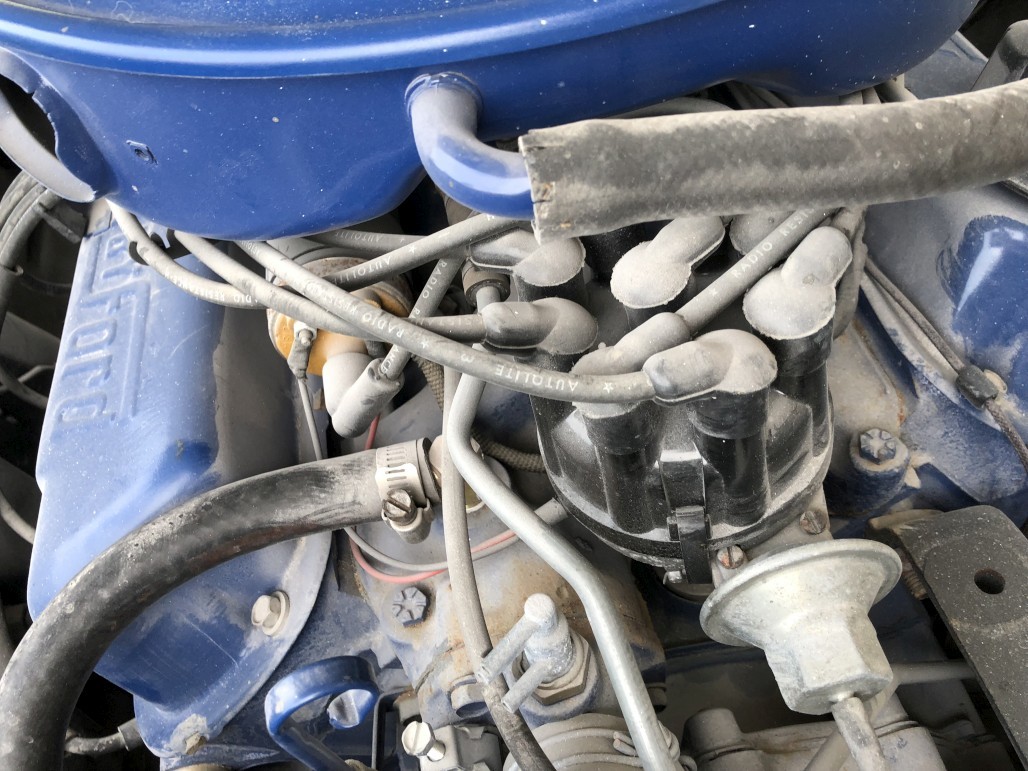
My engine bay is a mess (and this is after some preliminary blowing out with an air hose and wiping a couple things):
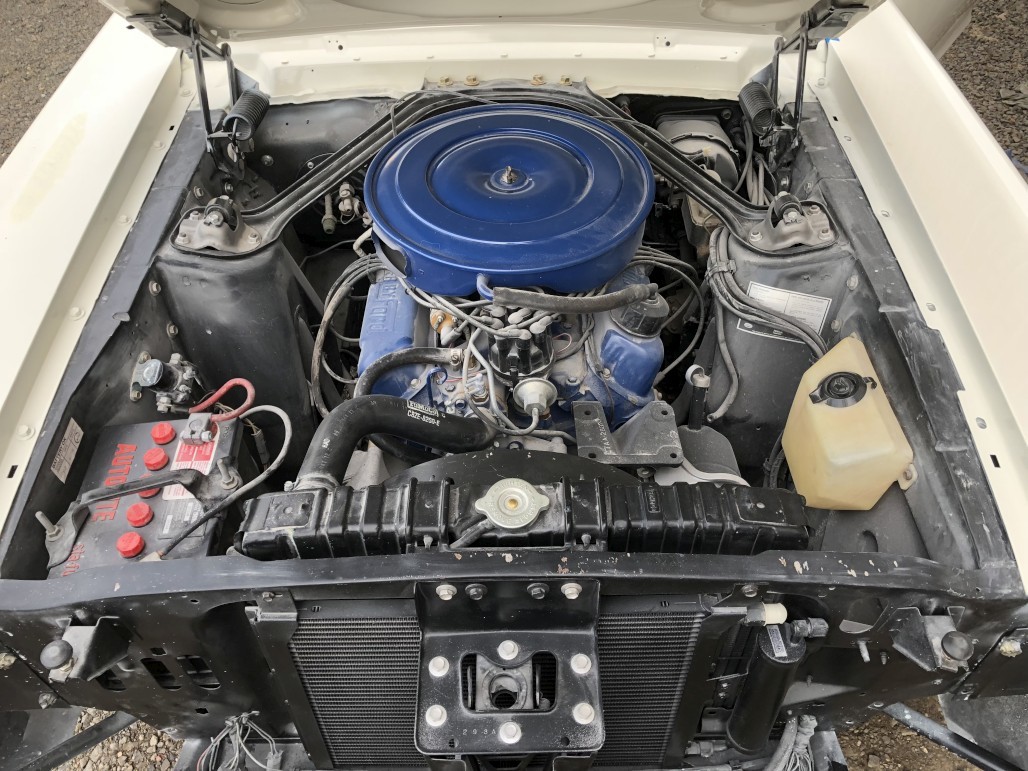
I might have to try to wash out the engine bay, I don't think I can get everything by hand.
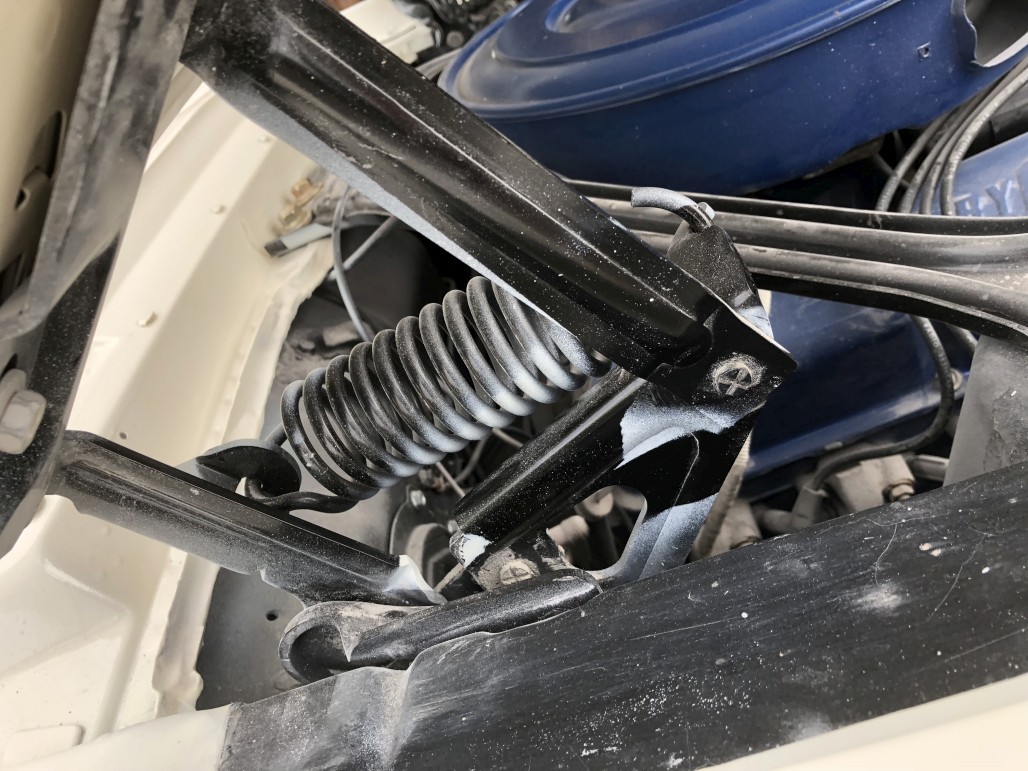
Overspray on my nice new premium hood hinges:
Since I had him redo the lower dash paint, a lot of stuff here got hit. I was hoping he'd do a better masking job, and tried to make it very clear that I didn't want overspray where it shouldn't be. But, it happened. Not terrible but still pretty frustrating and will be a pain to deal with. The lower column black plastic wasn't covered up at all, not were my pedals that I had redone:
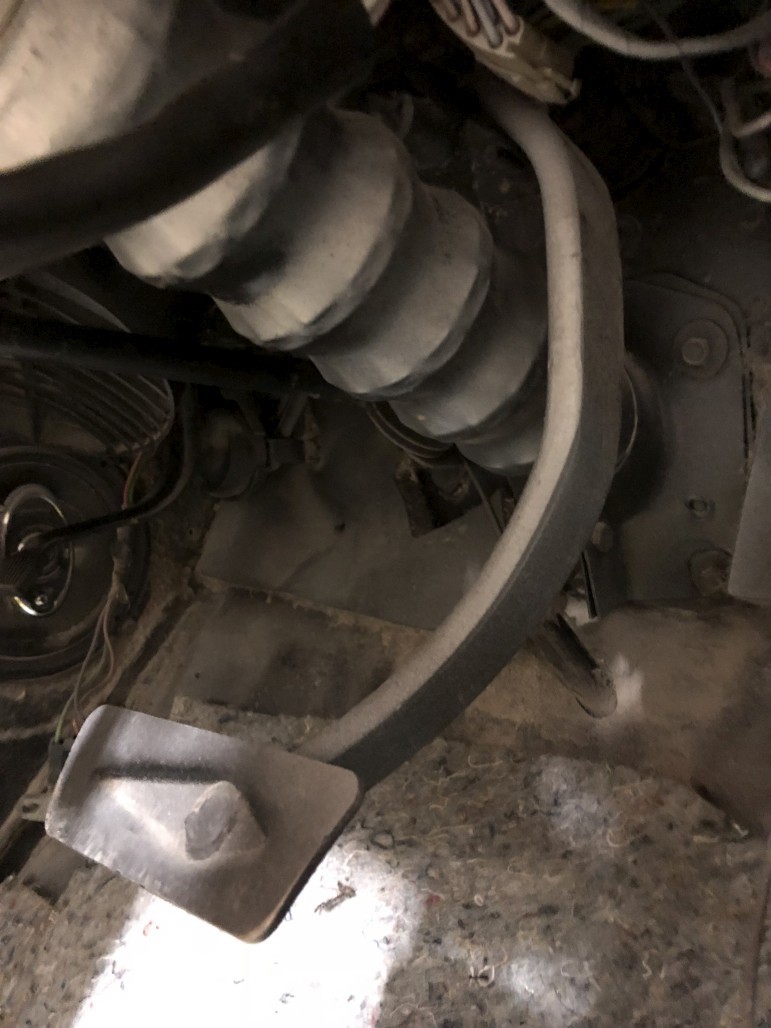
Really thorough masking job here. He could have just taken the 2 screws out for the parking brake bracket, but nah.
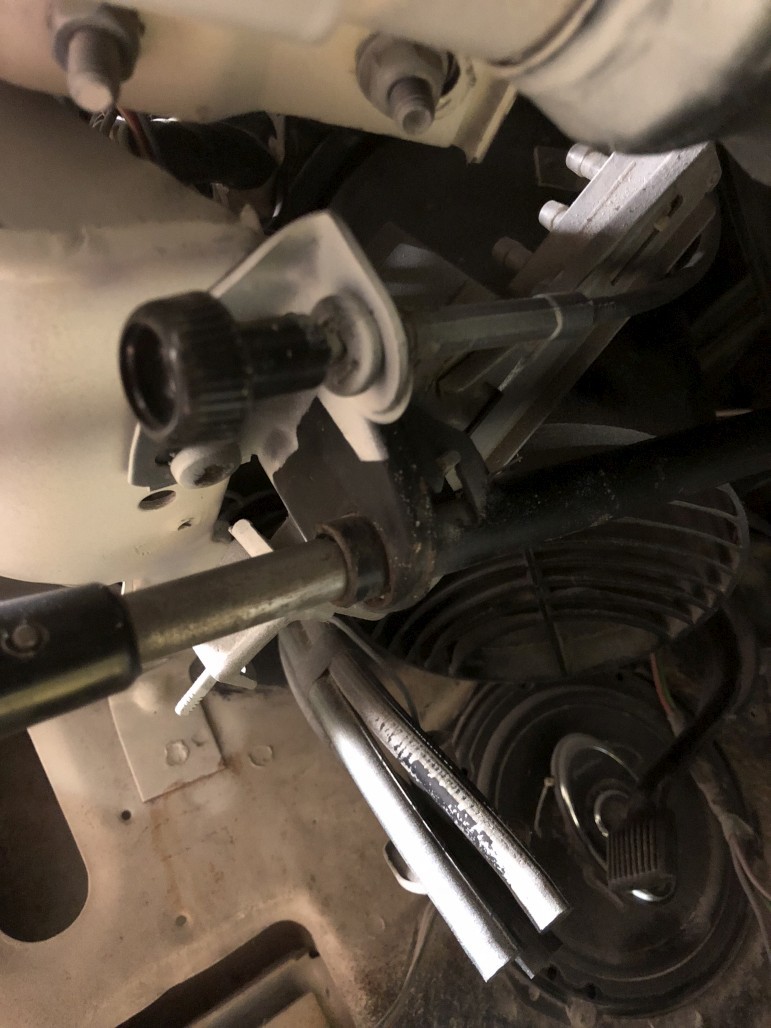
I know most of this stuff will be out of sight, and maybe most people wouldn't care, but it does bother me. I'll never get all of it off the wiring under the dash that got hit, but I'm going to try to go to town with some solvent and a rag and try to get the worst of it. Just sucks to have to do this extra work when I already have so many more important tasks to complete on this car.
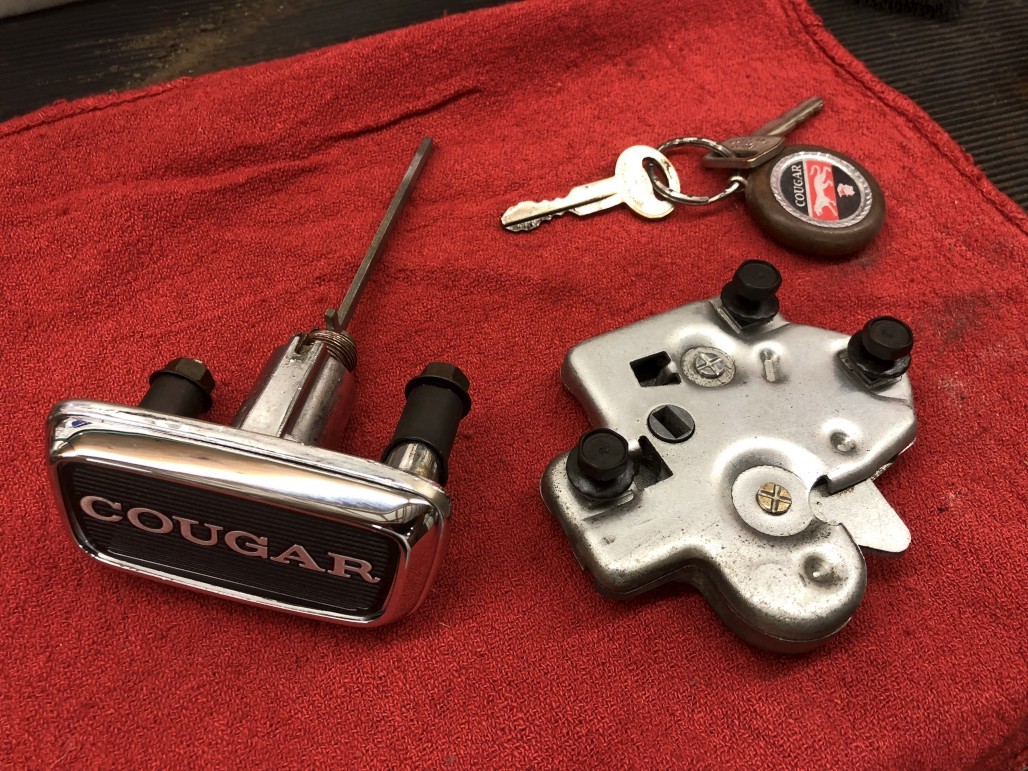
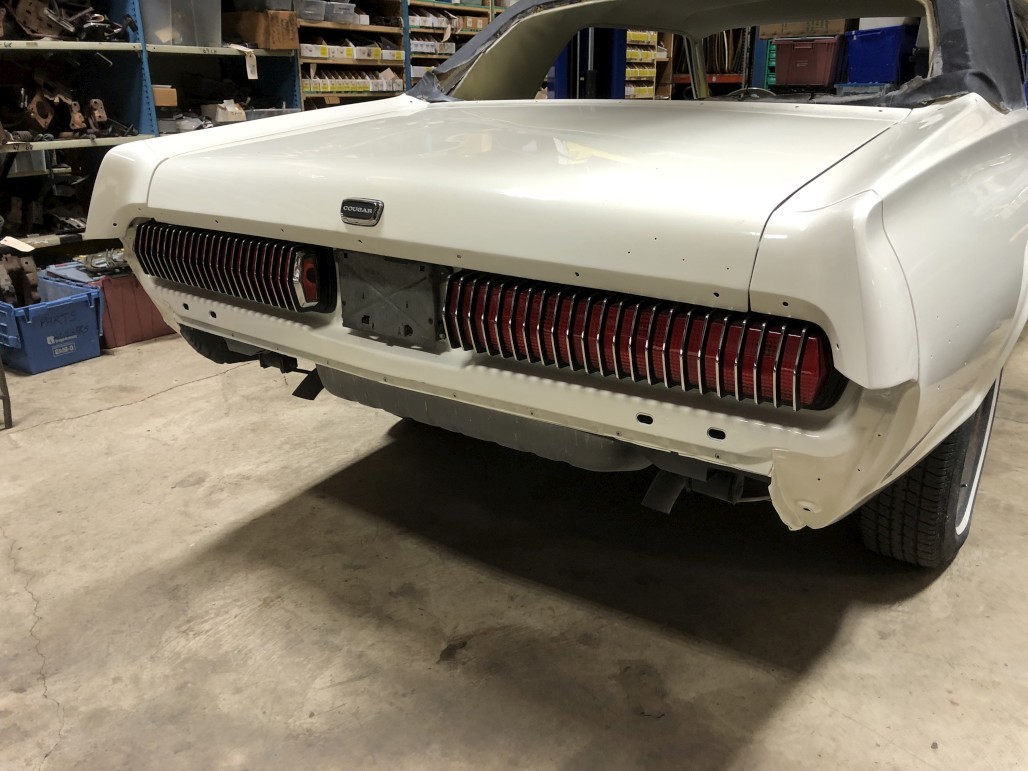
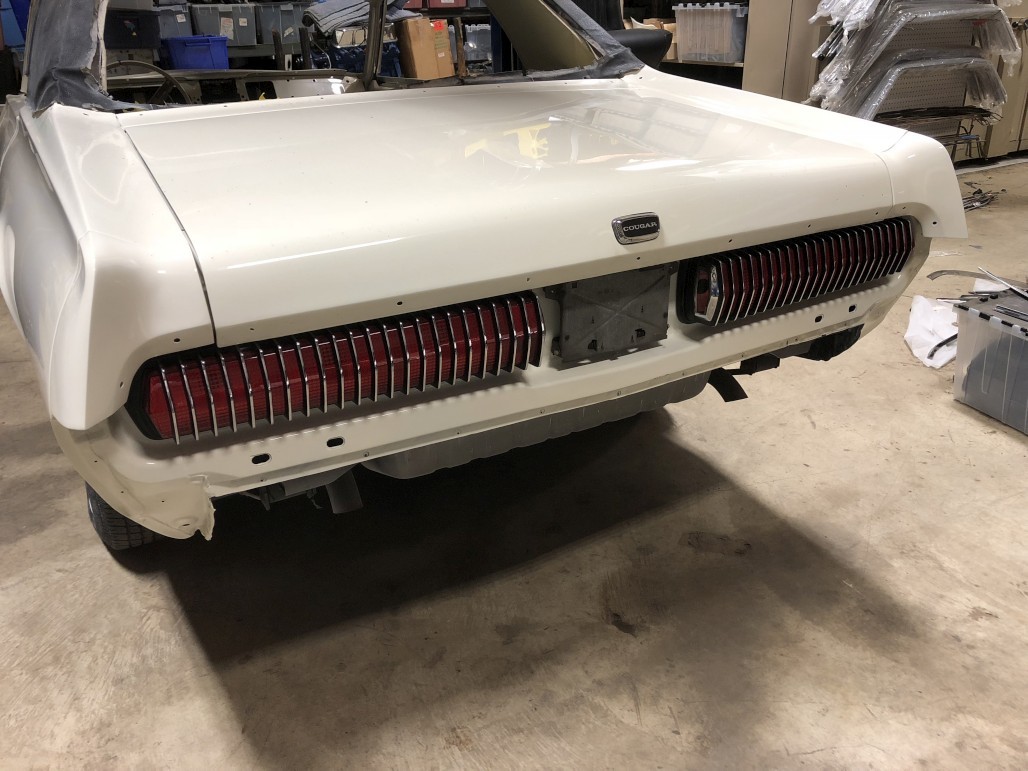
ANYWAY, on to the fun stuff. When I get frustrated about issues like the above, I just start bolting on shiny things, and I start to feel better. The first thing I did when I got the car back was to put the taillights back in, and to put together my trunk lock assembly. I saved my original lock cylinder, but replaced the backing plate with a good used one (mine had the little tab broken where the cover plate rests), then got the repro chrome cover plate and decal. Cleaned up the hardware and my original gasket and installed. (There is a repro gasket but we were out of stock at the time, and my old one still seemed serviceable). I was dumb at first and forgot that the conical sleeves slide on from inside the trunk, after you put the lock into the trunk lid. Then after I got it installed, I realized I couldn't get the latch in. So, more trial and error than expected, but got it in. Luckily the taillights were ready to go, since I had already restored them (see earlier in this thread).
I also stuck my license plate holder back on. This is one item that I chose not to try to restore or repaint. It's in pretty good original shape, why mess with it? I did previously put on new rubber bumpers though.
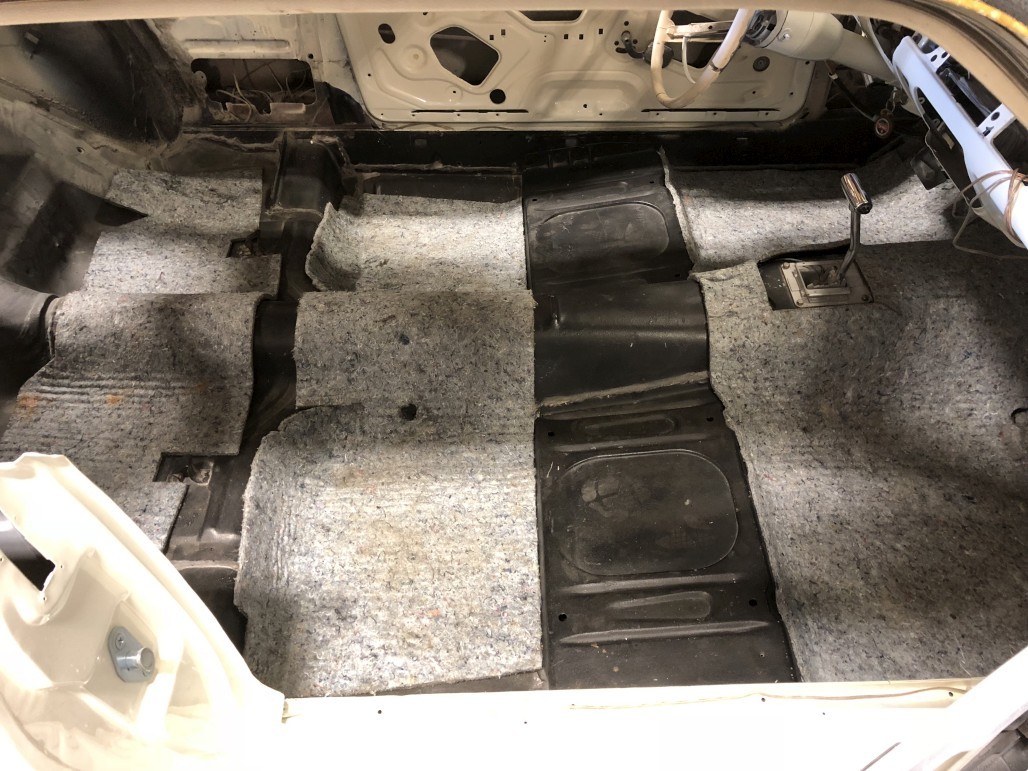
Then one of the next things I did was to stick down the insulation in the interior. Mostly because the box containing it was bulky and constantly getting in my way on the shelf.
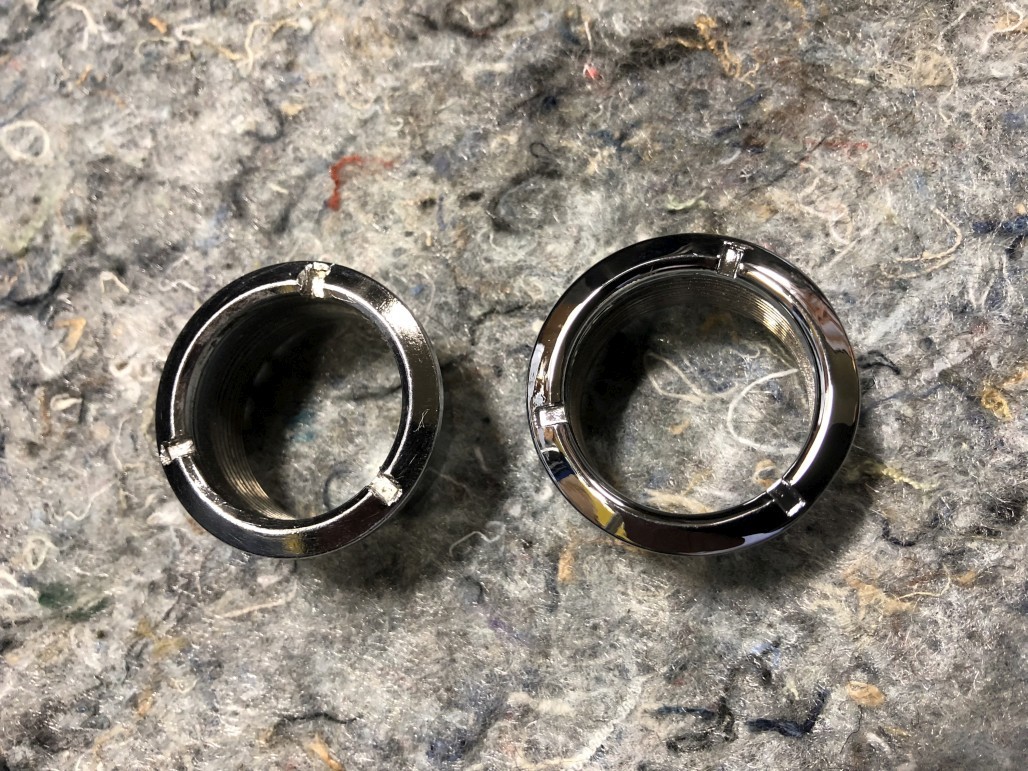
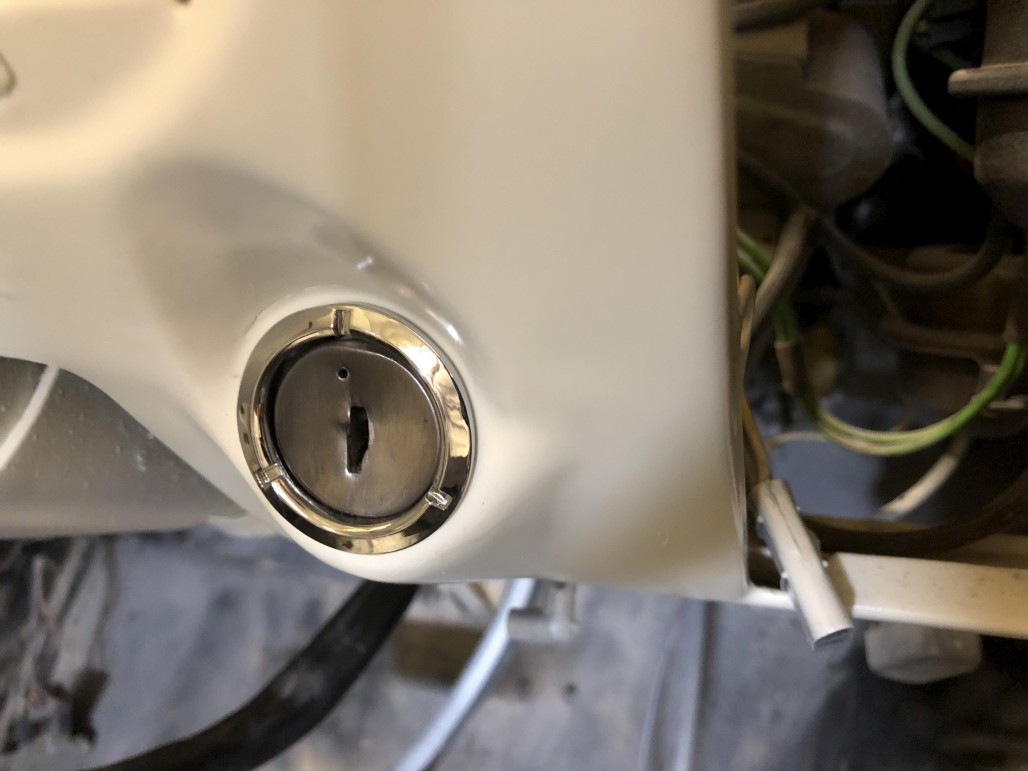
My ignition switch is one of the things that got some overspray on it, so I took it out and cleaned it up. This was pretty easy since I just ran the face of it across a wire wheel, giving it that shiny brushed look. I went ahead and got this kit for the lower dash chrome bezels and knobs, and installed the ring for the ignition switch. Here's a comparison between my original one and the new one.
Installed. The special tool is a must for doing this.
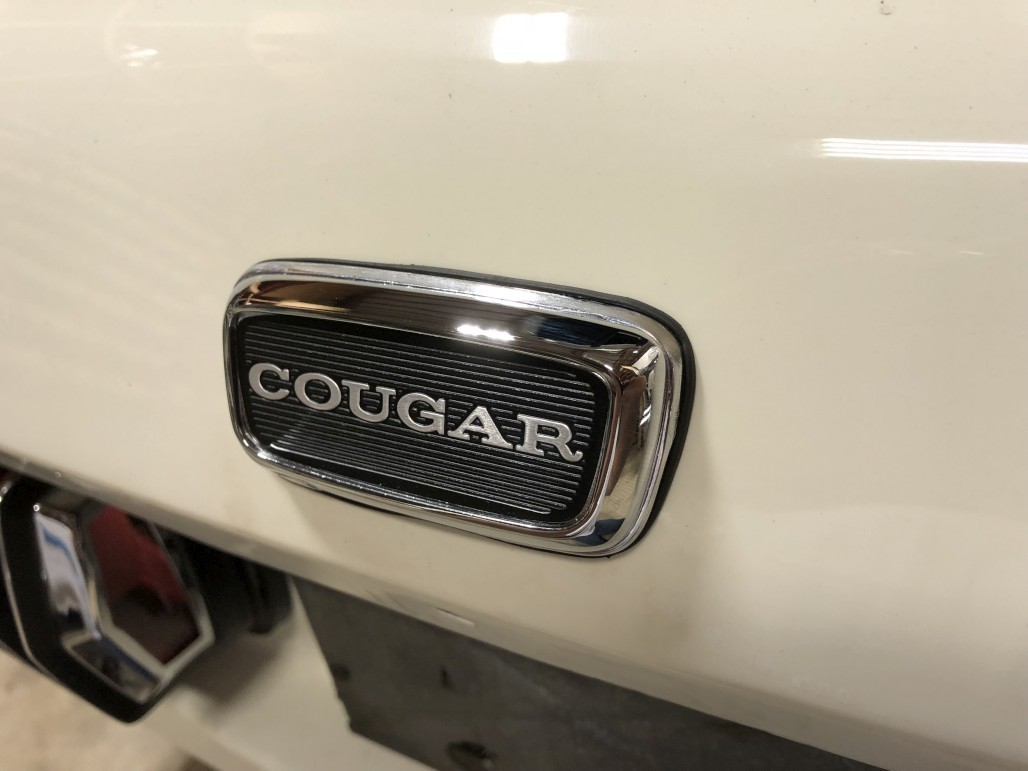
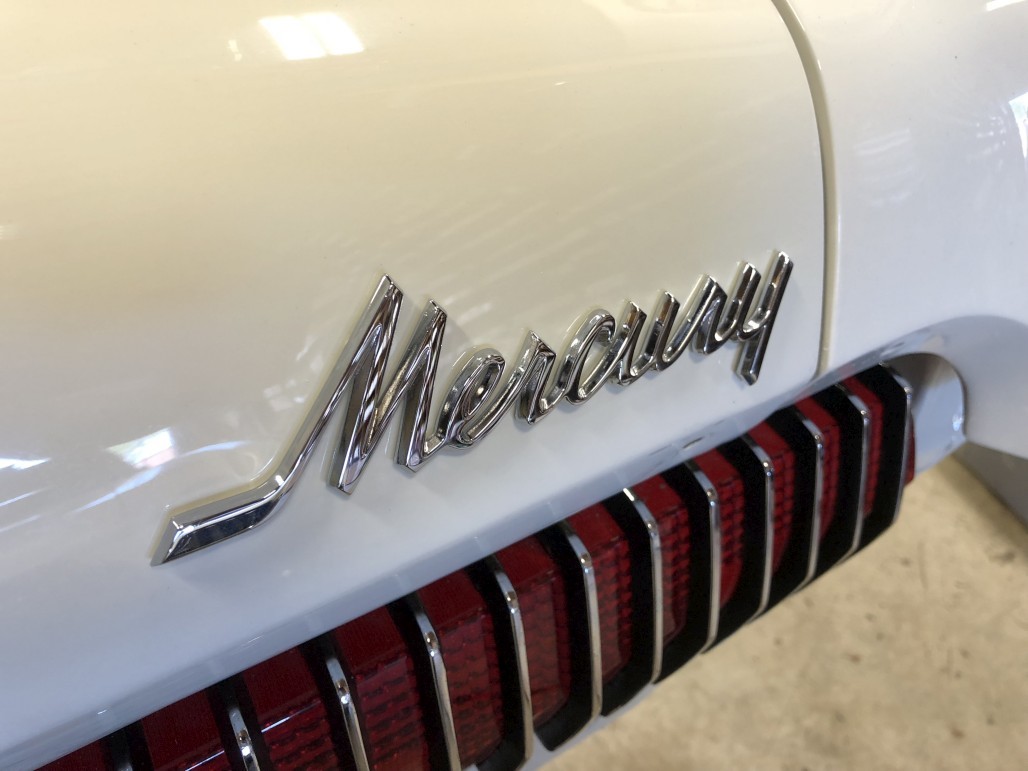
Then, I couldn't resist putting more shiny stuff on. Maybe it's still too soon for emblems, but it's just so satisfying. Here's the Mercury emblem on the trunk lid. What I learned putting this on is to gently file out the holes with a tiny round file (to remove excess paint materials) and to snap the tiny barrel clips into the holes first, before sliding the emblem in. Don't put the clips directly onto the emblem studs before installing, it won't work that way.
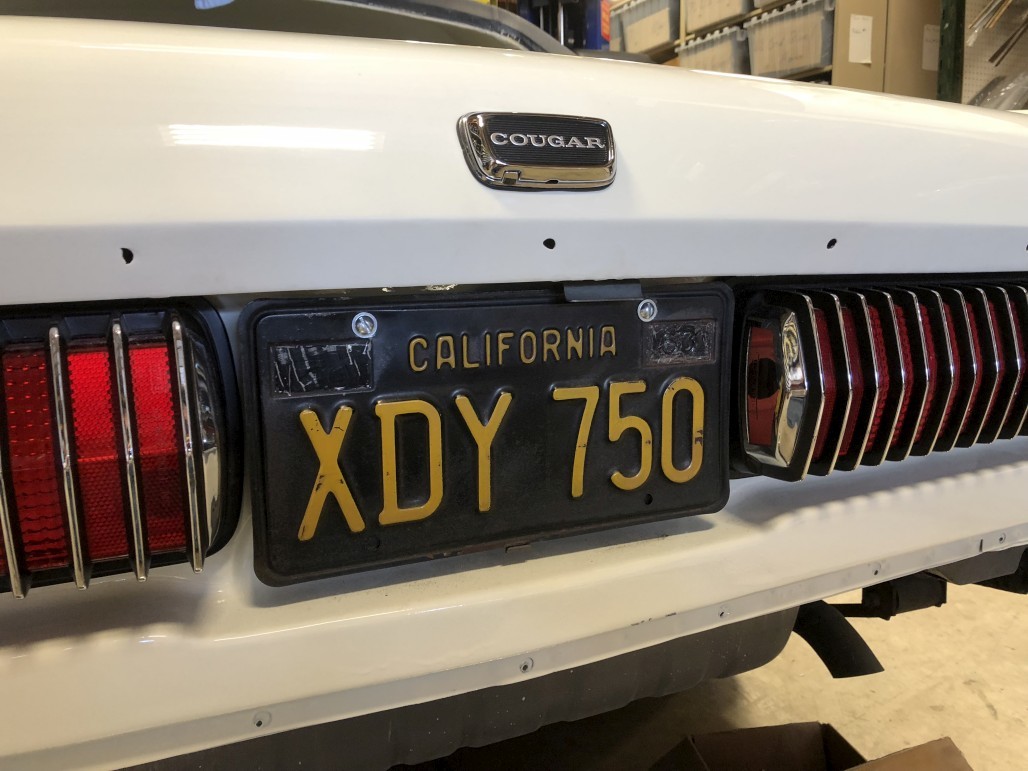
Also put my rear plate on, to give the car its identity back and further motivate me. Being that this is a family heirloom car, the plate is kinda special and meaningful to me. I was looking into getting them restored, but I decided to just leave the original patina for now. Partly because I didn't want to wait months for them, partly because I have more important things to spend money on, and partly because I think keeping them original gives it that irreplaceable authenticity. Maybe later on down the road I'll want them to look fresh and new, but for now they're just going to go back on as is, with a little wax to freshen them up.
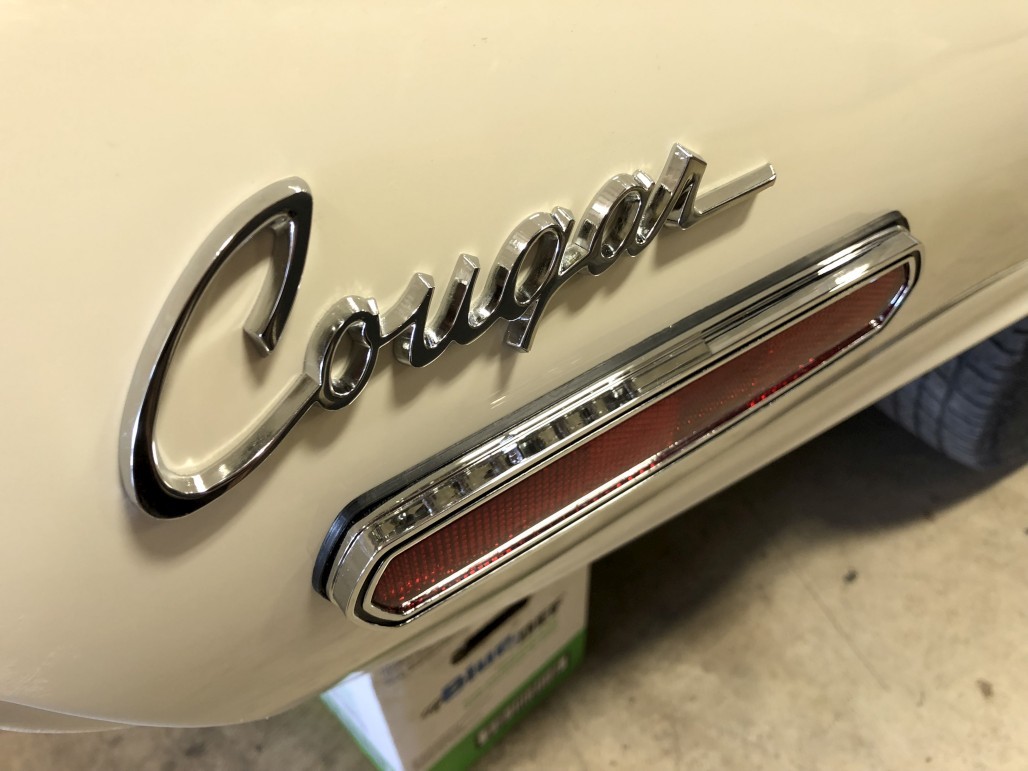
Then, more shiny. I did the quarter panel Cougar emblems and the reflectors. I actually found that the "economy" reflectors are nicer quality, in terms of the chrome and overall fit and finish, than the "premium" ones with the FoMoCo logo. That's another bonus of being here at WCCC, I can take parts off the shelf and compare them, and use whichever I prefer. So in most cases I would prefer to use more correct stuff with the proper markings, but this time I felt that the other option was better. Bonus that the gaskets and hardware are included.
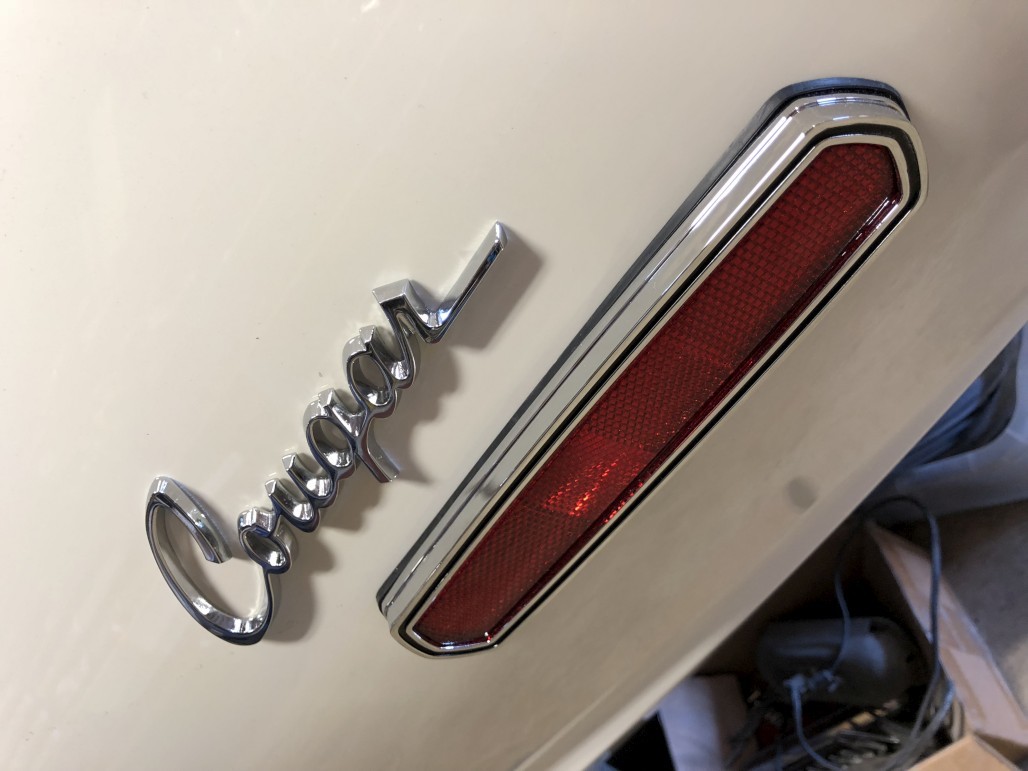
I'm not crazy about how these things attach to the body; they use those dinky little nuts that cut their own threads into the emblem studs. It makes it kind of a one-time-use item, because if you take the nuts off and put them back on too many times, the studs will get worn down and the nuts won't grab anymore. If I had thought it through a little more, I probably would have used a die to cut real threads onto the studs and used real nuts. Anyway, they're on. The Cougar script emblems originally came with covered, rounded "acorn" style nuts, to protect hands or items in the trunk, but the new ones are just plain, so there are still pointy studs poking through. I'm going to try to find rubber vacuum caps that will fit over, or maybe try to find some good original nuts. For the reflectors, I did get the repro rubber caps.
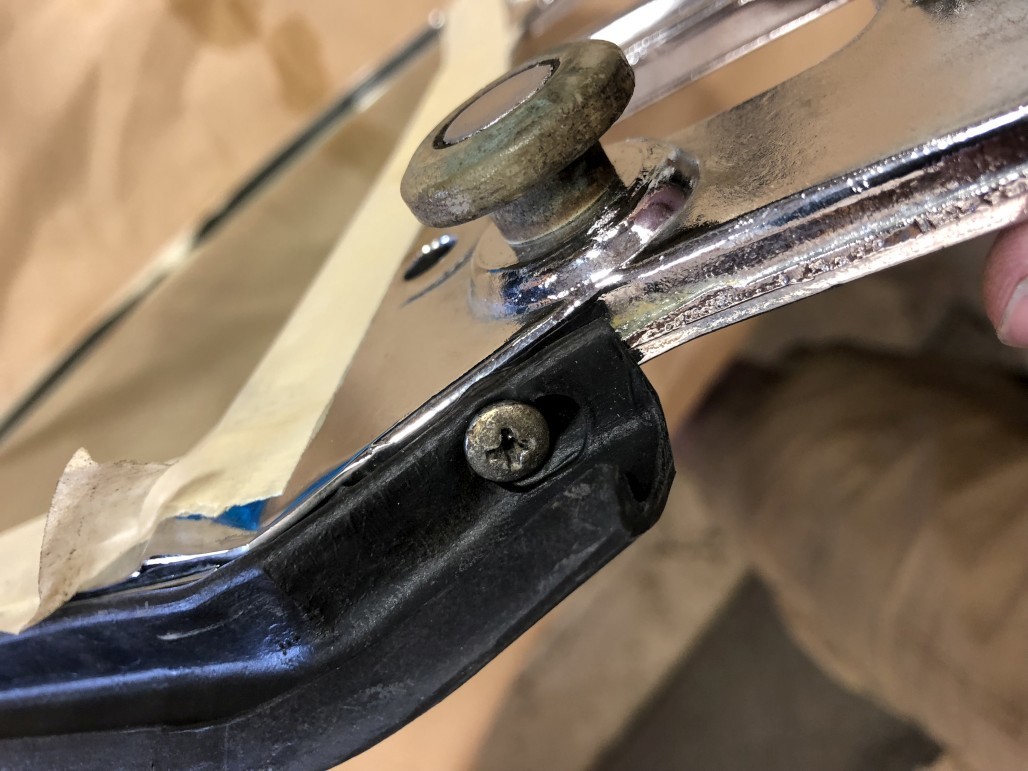
Finally, the most recent thing I did was to assemble my quarter glass. I had previously gotten my brackets rechromed, and I just bought the restored stainless frames to compliment them. Luckily my rubber surrounds were in good shape on both of these, so I just cleaned and left those alone. Will have to improvise on other pieces, stay tuned for that. But here are a couple shiny shots before assembly:
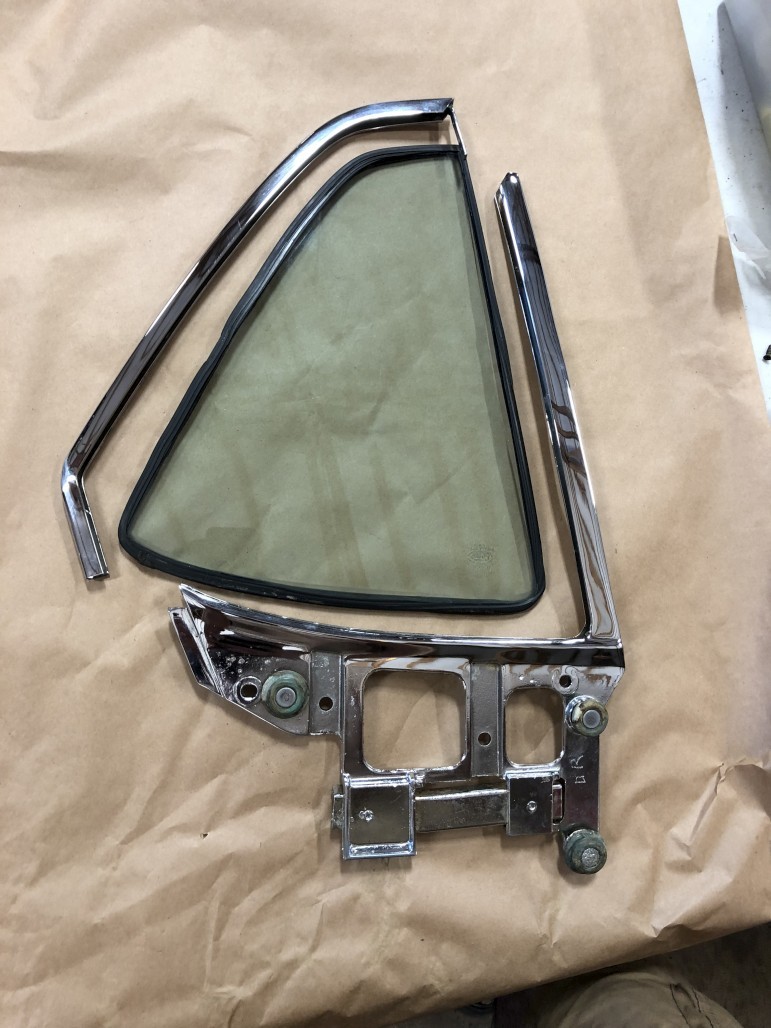
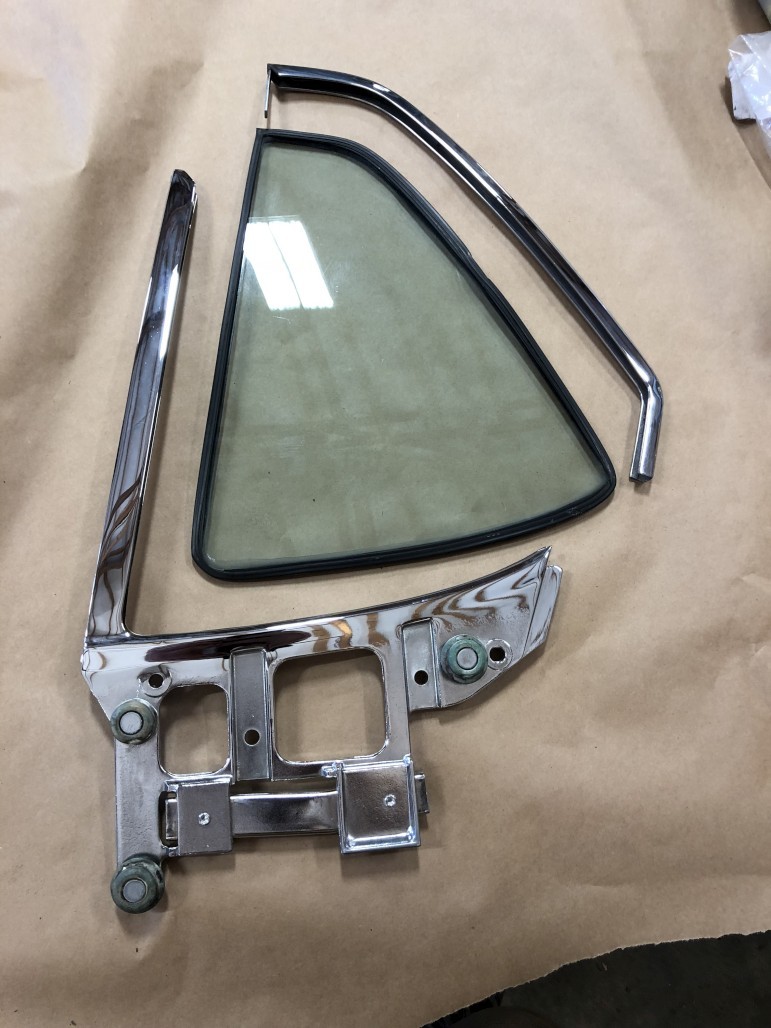
I'm very glad I bagged & tagged the tiny screws for these. Here are some things I learned doing this little project:
- Tape up all the shiny restored surfaces before you start manhandling things into place (luckily I had the forethought to do this)
- Rethread all the little holes, as well as the screws, before you even try to assemble. They are 8-32 NC.
- Lubricate the channels / rubber before pressing things together. I just used some glass cleaner, worked fine.
Here they are all assembled, with new seals installed. Also lube these with glass cleaner or similar to slide them in place. Keep in mind that the smooth part of the seal faces inward, and the "grooved" side faces out, for the door glass to fit into. I almost put them in the wrong way. Sorry these aren't very exciting, I'm going to leave the tape on until I get these installed in the car.
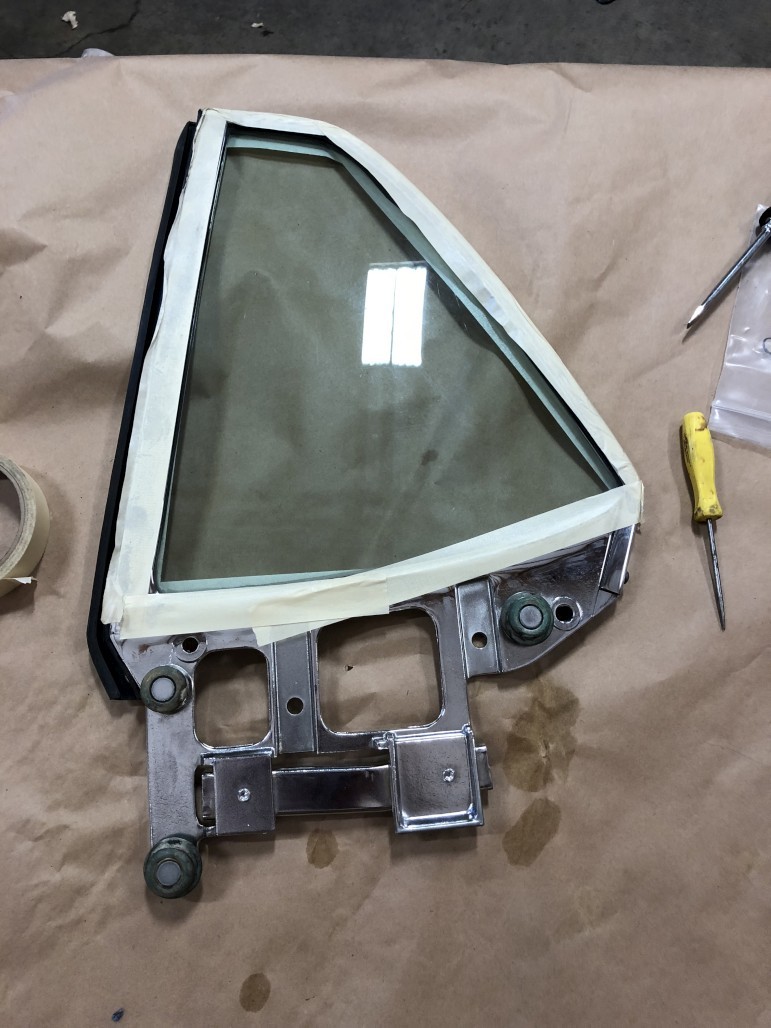
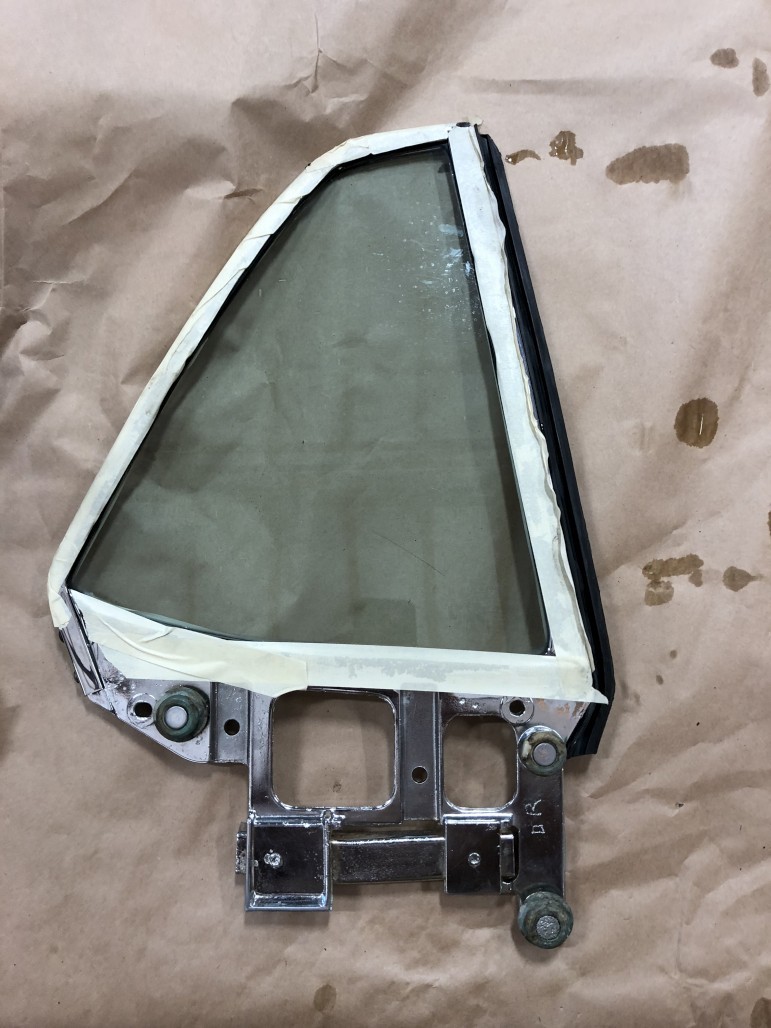
Also don't forget the little screw at the bottom of the seals.
Well, that pretty much brings this up to speed! Not sure how much I'm gonna get done before the WCCC Open House (3 weeks away) but I'll just keep plugging away the best I can!

So nice in honor of your grandparents.
Posted by Diggymart on 1/3/20 @ 8:04:16 PM