You must be logged in to rate content!
18 minute(s) of a 720 minute read
10-28-2012
I'm waiting on a 89+ flat black face fuel gauge to arrive from skipskip.
Two days ago I received the "nifty parts" from philski o'flood. They are illuminated power window switches from a 900 series (IIRC)
Seeing as how my original 240 four door sedan driver's switch to control the right rear passenger's door glass would roll the window down, but *not * roll it back up, and all my power window switches were non illuminated , this mod seemed very sensible to me. Not to mention being an upgrade.
I removed all armrests, removed all switch "pods" and cleaned them up, and installed the 900 series illuminated power window switches in my original 240 power window switch pods.
All seven illuminated power window switches work, and they roll window down and back up, and all are now illuminated at night with the headlight switch on parking light position or HL position.
These 900 series illuminated switches are a direct with no mods needed replacement for the original 240 non lighted power window switches and these also make it a lot easier to see the switches at night, and adds a bit of class to the interior in the dark. A win/win, anyway you look at it.
I'll take a pic of the dvr's door window switches while they are illiminated tonight and post it .
Meanwhile here's a few pics of them in daylight and not illuminated .
Driver's door switches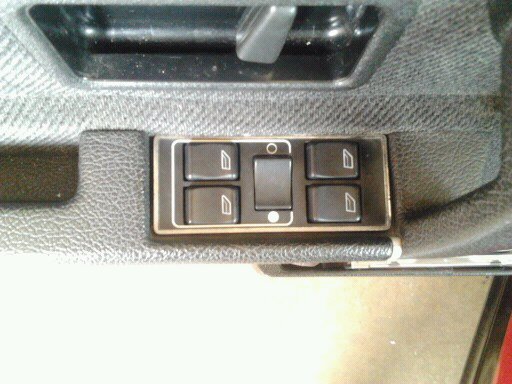
Passenger door window switch
Left Rear (DS) door window switch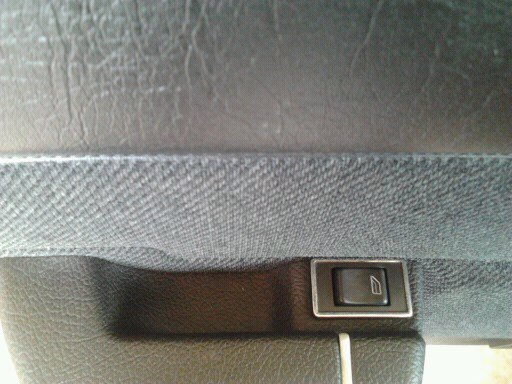
Update: nighttime/in the dark pic.
Milage....196402 miles
I readjusted/tighten the HB to A/C Compressor Belt. The A/C Comp pulley is a two pullies in one set up and also , drives the P/S Pump by a second P/S pump dedicated belt.
I also discovered a better belt dressing product at Auto Zone the other day.
* CRC Belt Conditioner* in a spray can. It is much more belt conditioner for money spent, and being in a spray can is much easier and less messy to apply the the stuff I was using that comes only in a small yellow packet made/sold by another company.
It seems I've now fixed the noisy and annoying belt squeelling it had. I hope this remains quiet. Squeeling belts annoys me a great deal. Sounds like somethings wrong don't ya know. I may have to readjust the P/S Pump in a day oe so, we'll see how it does as is for now.
Next up is dizzy cap, rotor button and spark plug replacement. The 1991 Dizzy has the 10mm dizzy shaft. Installing Bosch ignition components. This to be reay for NC Winter. Rather do it now,,, than in December. I usually replace these items once a year. Just to keep it in "top tune".
I gapped the plugs at .028 with a round wire OEM Volvo spark plug gap gauge(from an old 120/140 points set) at 196402 miles . Iput 3 small dabs of Never Sieze on the upper 3-4 threads of each plug. Plug torque spec is 120-168 INCH LBS per Haynes 240/B230F Manual
I replaced the previous Blue Dizzy cap from IPD with a Bosch orange/red one.
Gonna miss my Pretty Blue Dizzy Cap. IPD no longer carries them. Yep, I called.
IIRC Standard Ignition Parts carries dizzy caps in clear and colors. Haven't located where to order them from yet though.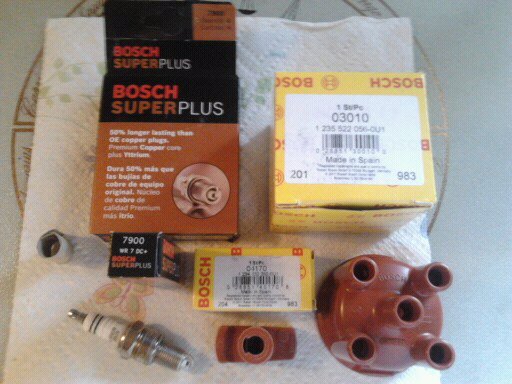
10-31-2012
Today I received the fuel gauge and water temp gauge for the Instrument Cluster I purchased from skipskip in NY, a few days ago. Nice and very clean looking gauges they are too.
My current 89+ flat black temp gauge had been working fine, but it's appearance wasn't stellar. The one I bought and just received today, had much cleaner & whiter appearing white outline, and a much more vibrant red/orangy pointer, than my old one does.........................
The newly purchased and received today fuel gauge , was the correct 89+ 240 flat black like the rest of my Inst Cluster & gauges are, also. Since my old one wasn't registering properly and the spare I've been using was a pre 89 semi gloss face I needed a good proper working fuel gauge. .
I promptly installed both the WT gauge & the Fuel gauge. It was quite easy to do too. Just remove the gauge board from cluster housing, and remove 2 nuts for each gauge and remove the gauge/s, and reverse the procedures.
Took the car for a test drive, and both the WT and Fuel gauges register & work flawlessly. "A Big Thanks To Skipskip !" is in order.
So now my Instrument Cluster looks better and all gauges are registering correct readings.
11-14-2012
Hmmm my 4 year old Advance Auto "AutoCraft" Titanium Battery seems weak ...............
A couple days ago,when it was cold that morning, the battery seemed very weak. It barely had enough CCA to start the engine. I charged the battery fully that evening. And the battery has been starting the car OK for the last couple of days.
I always scratch the battery install date with an ice pick, on the battery's top in plain sight. My markings show 11/2008, so..... I was suspicious, of the low battery CCA and voltage, and felt I should have alt & battery checked out some more.........S
So today I took the car to Alamance Starter & Alternator, as they rebuilt my current Bosch 80A Alt.
They had a new Gizmo, I haven't seen before. A handheld battery & alternator tester. He hooked it to my battery terminals, and it read CCA without load and with load on battery as well as Alt output in volts, and quite a few other things
Turns out that.. with the fog lights, driving lights, headlights, heater fan, and KW stereo on , the alt was still making 13.6 to 13.8 volts.
And with all lights and loads off, it was producing 14.2-14.5 volts. That's the good news............ the alternator passes with flying colors.
But the 4 years old 875 CA/700 CCA battery only had 438 CCA under those same loads and only 500CCA without loads.
This means the battery was missing 200CCA.
Which means it had one or two bad cells. Which of course meant it needed to be replaced. Especially since I hate *unexpectedly* being stranded late at night with a stone dead battery. I hate long walks on cold nights............
So a trip to Advance Auto ,so they can test it,and their battery test also confirmed battery has one or two bad cells And my current old battery class/series/name/ size/CCA and other specs have been "supercceeded" to the Advance Auto "AutoCraft GOLD" series battery.
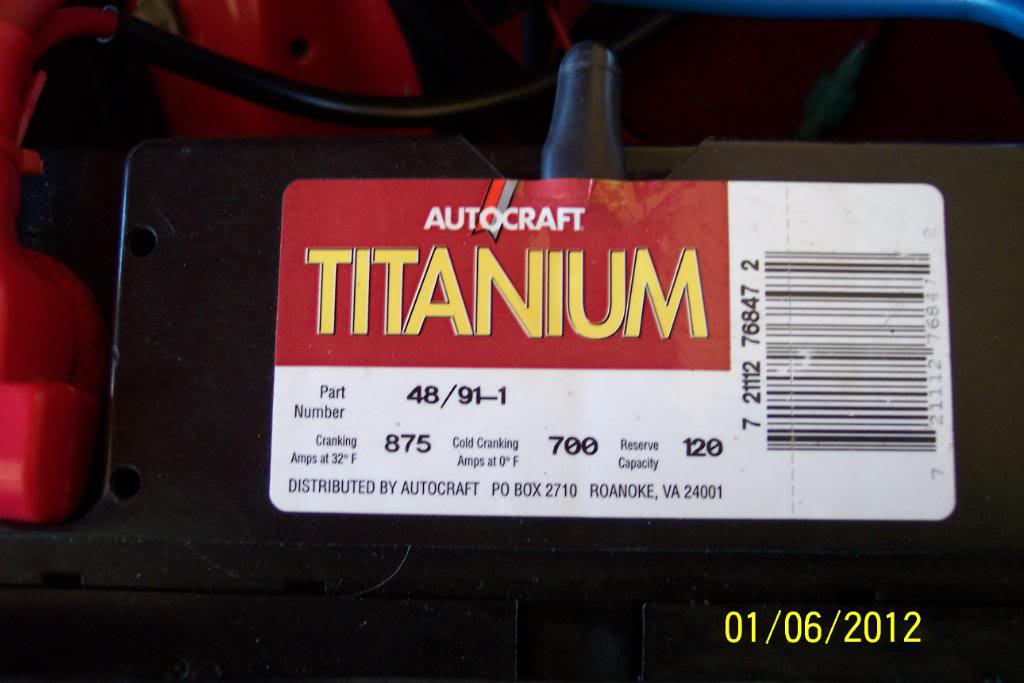
The old battery had 875 Cranking Amps and 700 Cold Cranking Amps.I forget it's reserve capacity, but seems it was 110(my previous build thread pics may show us)
This new battery 48H6 Class, Advance Auto "AutoCraft Gold" battery has a few more of all the ratings. At 910 Cranking Amps and 730 Cold Cranking Amps as well as Reserve Capacity of 115 Amps. An increase of 35 Cranking Amps, 30 CCA, and 5 amps of reserve capapcity. So a beefier battery is always a good thing IMHO, and IME.
The new battery was priced at $136.99, and my old battery was ProRated whereas it saved me $58.43. So for $83.72 I got the new battery
One catch here though. The old battery had a single large vent nipple, in the center of the broad side facing the firewall. And..This new battery has two rather small vents, one each end of the short ends of the battery. Luckily I noticed this and told the Advance Auto guy, & the Advance Auto Rep, gave me the two slip in L shaped vent nipples for my battery.
I had the old vent plumbed to some clear vinyl hose that is routed to under the car, and 3M double taped to the rear side of front air dam.
Why you ask?
Raise the hood on any 240, look at bottom side of hood that is above the battery. See that missing paint with rust in it's place? ( and holes in hood in bad cases) I prefer not to have that issue. NOW...Keep in mind I have CVOCD. (Clean Volvo Obsessive/ Compulsive Disorder)
Whereas & and Therefore.............................
A trip to my favorite, and often never suspected as an auto parts supply house (Lowes) to get some proper sized clear hose, and to Auto Zone for the plastic T hose fittings was in order,and.....................................
With another episode of my CVOCD, I came up with my new battery venting system. I just connected the (now) two hoses to a T, and connected the 3rd fitting of the T to my existing vent hose that goes under the car and is affixed to the front air dam as previously mentioned.
I also installed two of those round anti battery posts corrosion felts (one red, one green) on the battey posts under the cable terminals.
Now my charging system & battery are in top working order. And I'm ready to install the *next modification* to my 91 240 sedan.
More on that in a few days...............
Pics below:
*EDIT* First pic is of the old battery. I just found it in my PB Account. Looks like I *lost* 5 of the Reserve Capacity spec with the new new battery,as compared to this old one.
But I did gain on the other higher CA and CCA specs with the new battery.
PICS OF NEW BATTERY......

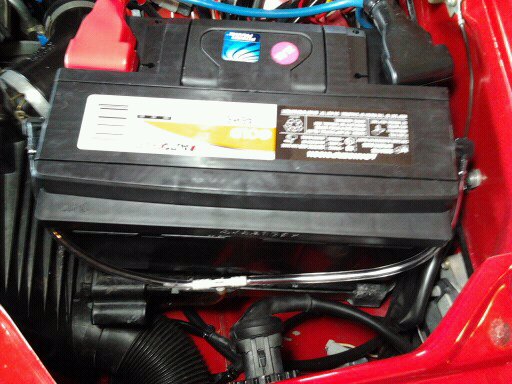
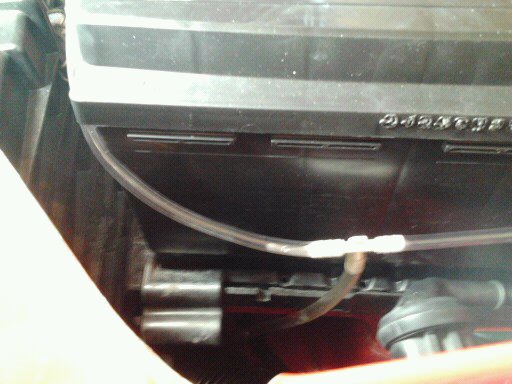
11-15-2012
While this is not the previously mentioned "next modification"...it is something I've been investigating.
And be forewarned, this is one of those "Detail freaks, freakiest detail".
If you're not an absolute detail freak you probably will not be interested in *this mod*, and you might even be in the wrong Build Thread.......LOL, LOL, LOL.
SO........Proceed at your own Peril........................
NOW...........................
The problem is ,that I prefer to turn the dash lighting rheostat that controls the dash lights, down low, so that the dash lights are rather dim while driving at night. This, also cuts down on the Center Console's lighting as well.
And then when I am wanting to use the cigarette lighter to light a smoke, after I light the ciggie, it's hard to see the cigarette lighter's "socket" to return the lighter element without melting circles & half moons into the center console's lighter surround. Luckily I have not melted any circles in it as of yet......BUT.......
Due to the fact that my CVOCD has not let me ignore this problem,I have been looking at different illuminated lighters, whenever the chance arose for the past few months.
I have been wanting one with a greenish illumination. Other than the blue one that won't fit that I posted several pages ago...........But...I have only found this orange/amber illuminated one thus far.
Also... Knowing that many replacement cigarette lighter heated elements rarely fit well/work well in a Volvo lighter socket (they usually pop out into the floorboard or your lap YIKES!), and even cell phone charger fitment leaves much to be desired when plugged into a Volvo ciggie lighter socket.............So,I didn't have great hopes.
I just thought I'd take a wild chance on this one for $7.49 plus tax, at Auto Zone today. So tonight I opened up the package, and compared all of it's pieces, to an OEM Volvo 240 ciggie lighter I happened to have.
FYI,FWIW, it is a "Victor Complete Lighter With Illuminated Well For Chrysler, Ford & GM" . And it's Victor Part number 05140-8
After comparing the new illuminated lighter and all it's parts, to an OEM Volvo ciggie lighter,then, swapping the parts one into the other, checking the operation of it with an OEM Volvo lighter element in the new illuminated lighter's socket, and trial fitting the new lighter on an already removed/spare Center Console Cover I happened to have, to see if it'll clear/have room......................
I have found ......
1) The one part that *is not interchangeable*, is the OEM Volvo knob, will not thread into the new illuminated lighter's heated lighter element, the actual heated element that lights the cigarette. Yea, I know, kinda a bummer there. I was looking forward to having a nice, new,bright red, new element to light my ciggies with a few days if not a few weeks.
2) BUT.....The *OEM Volvo heated element/cigarette lighter* fits in the new illuminated lighter socket just fine. So you have to use your old heated lighter/element in the new lighter's housing.
3)When I temporarily wired the lighter to battery 12V positive and ground and pushed the OEM Volvo heated element ciggie lighter, into the new illuminated lighter socket......, and the lighter element heats red hot, the heated cigarette element pops out *without going flying*, in effect, it works just as it's supposed to. (surprised the heck out of me, this is really where I figured it'd flunk the test, but it did not).
4) Both lighter sockets and outer shells are identically made , *except* of course, for the new illuminated lighter's light bulb attachment/box and it's dedicated hole on it's outer retaining sleeve's housing.
5) BUT.... In order for the new illuminated lighter socket to fit into the Volvo 240's center console cigarette lighter hole, I'll have to enlarge the hole in the Center Console a little. (easy to do with a sharp drill bit turned by hand).........................But this is only due to the fact that the orange sleeve that "colors" the light, slides over the inner lighter socket, requires the hole to be larger................. Without the orange "color sleeve"on the inner socket sleeve, it would fit the existing hole already in the Center Console.
6) *There is enough room*, on the backside of the plastic Center Console Cover, to clear the new illuminated lighter's light bulb fixture, if I turn the "light fixture box" toward one of the four corners, of the Ctr Console's "square lighter hole/faceplate"
7) When the illuminated lighter's "orange lense", is illuminated, by it's small light bulb, it's not overly bright . As a matter of fact, it's just about perfect. Enough illumination to see it by without being too bright/distracting at night. I checked it outside in total darkness tonight.
Seeing as how my current Center Console Cover has a few very small & minor flaws, and is not 100% perfect, and the fact, that I have a perfect Center Console for a spare............
I think I'll wire it up, and install this illuminated lighter and see how I like it. I think I'll be pleasantly surprised during nightime driving.......if not Ican put on the perfect spare Center Console I have a little sooner than anticipated.
I'll report back tomorrow night if all goes as planned tomorrow day. With pics hopefully.
Pics below:
The new lighter kit: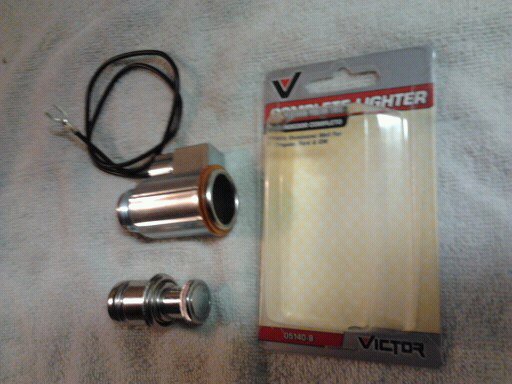
Comparison of new to OEM Volvo lighter. OEM in foreground...
new lighter housings with OEM lighter element
It fits....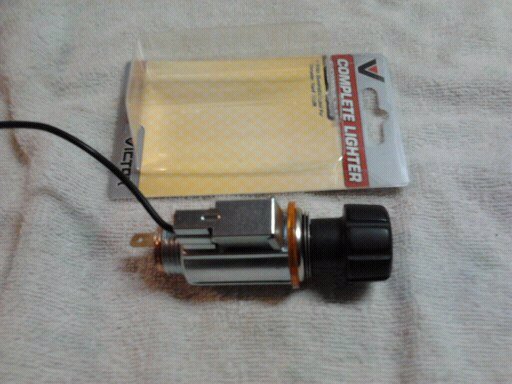
New illuminated lighter trial fit into center console (not drilled out but just aligned with hole)

Update on the battery vent hose........Yep I made a modification to the modification.
After running across some "Instructions" folded up to 1/2 inch square and glued to the + terminal cover today,(just missed them yesterday somehow) then reading it & finding the plug for one of the two battery vents on the positive battery terminal protector, that were on the battery during "storage/shpg", I decided to delete one of the vent hoses and just have one vent hose.
Evidently two are not really needed, and this leaves me a *spare vent elbow* should this one currently on there gets broken or turns up MIA some day.
Not to mention this makes things look a little neater too.
Pic of the (previously missed) vent plug. Choice of which one to plug , is up to owner. I chose to plug the vent on the battery's "fender side"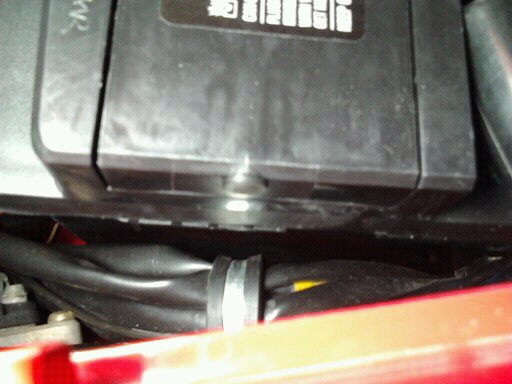
The one vent left...

11-16-2012
Pictures speak a thousand words..........see if you can guess what I'm up to/attempting to do............


The OEM knob cracked upon removing the stud. Not a big deal , JB Weld will fix that. But I chipped the outer edge of this one & it'll be visible. So, I'll try another one I have , now that I know what to expect.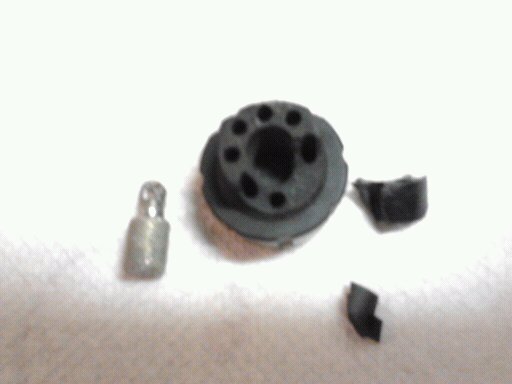
Well, the second time I got lucky, so went for #3 and was pretty lucky on it too. The second one looks the best of the three though, IE *no chips*.
Now if I can *JB Weld* the new lighter element's threaded stud that's knurled on the opposite end, *dead on center* into the OEM Volvo knob.
This way (if things go right) I'll have a *new lighter element, with the OEM Knob on it*, and an illuminated lighter socket for it to fit in.
I'll also have a usable stock 240 lighter element with the 240 knob, as well as a good 740 lighter element with a 740 knob on it.
Now if I could only find/buy a green, or even a red "lense" for this illuminated lighter.....
I have 3 OEM Volvo lighter knobs pictured below. Evidently Volvo either made a design change, or changed vendors whom made the lighter knobs for them.
Notice the one on the far right, has a *longer knob section*, as well as a *longer shank*.
Sometimes the small changes Volvo made, you only notice/find , when comparing early & late 240 parts eye to eye.
This was some of the "nit picking" ,for sure ,IMO.
I find this , & other seemingly insignificant minor changes Volvo made during the production run of the 240 series, a bit surprising .
Maybe it's due, in part to the "Weight Loss Program" Volvo put the 240s on, and later, other series ?
And...FWIW , I *may have another added surprise* to this lighter knob in the near future.
Pics below:


Nice build!
Posted by Diggymart on 3/30/20 @ 2:45:08 PM