You must be logged in to rate content!
20 minute(s) of a 720 minute read
1-4-2012
OK, warmed enogh to install the new OEM quality power antenna mast today. I followed antennamastsrus's online instructions. Got old mast out, but nylon thinky was still inside antenna motor hsg.
Removed the whole deal and pulled off it's drum cover. Sure enough there was 2 separate broken pieces inside. And there is a water drain tube on bottom of the motor hsg.
The hose was completely clogged with what appears to be dead wasps or dirt dobbers.(see pic below) I cruised up to Lowe's and got a few feet of 1/2 clear hose to replace it with. Works great for 33 cents a foot.
I think the clogged hose probably caused water to stay inside the hsg, and it froze, thereby breaking the nylon thingy on the mast. As it was quite cold when it broke.
I removed them and the old grease, and cleaned the old grease out of drum too. Regreased it with Valvoline Molybenum Wheel Brg Grease, reassemble it.
Then I bolted the entire assembly back in car, then I sprayed the new mast with Liquid Wrench's new Silicone Spray, to lube it and then I fed the new mast's nylon thingy in the hole while I had someone else turn on the radio of the Kenwood MP538U AM/FM CD Player.
The power antenna motor pulled it right in , and only had to turn radio off,/back on once more, for it to draw it all in. Imagine that..seems too easy...
There is an O ring under the trim piece that seals it to the top of 1/4 panel to prevent water running down into trunk. I found a new one in my O Ring Box and replaced the old one.
Then I placed the trim piece back on 1/4 panel & tightened the nut whilst David Allen Coe, Long Haired Redneck was playing on the radio, on 98.1FM. Quite fitting I thought, as it's one of my DAC favorites. Yep I love DAC music.
So now my power antenna mast goes all the way up & all the way down like it should on a vehicle wearing the male symbol as a company emblem.
Pic of the dead insects out of the drain hose & the 2 separate broken nylon thingys..........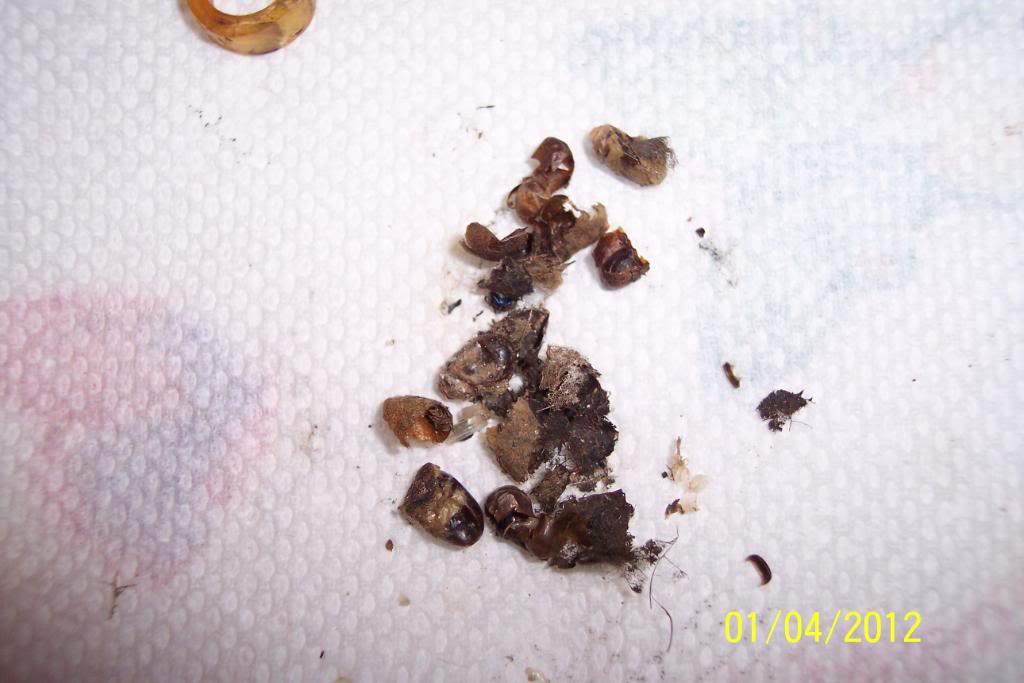
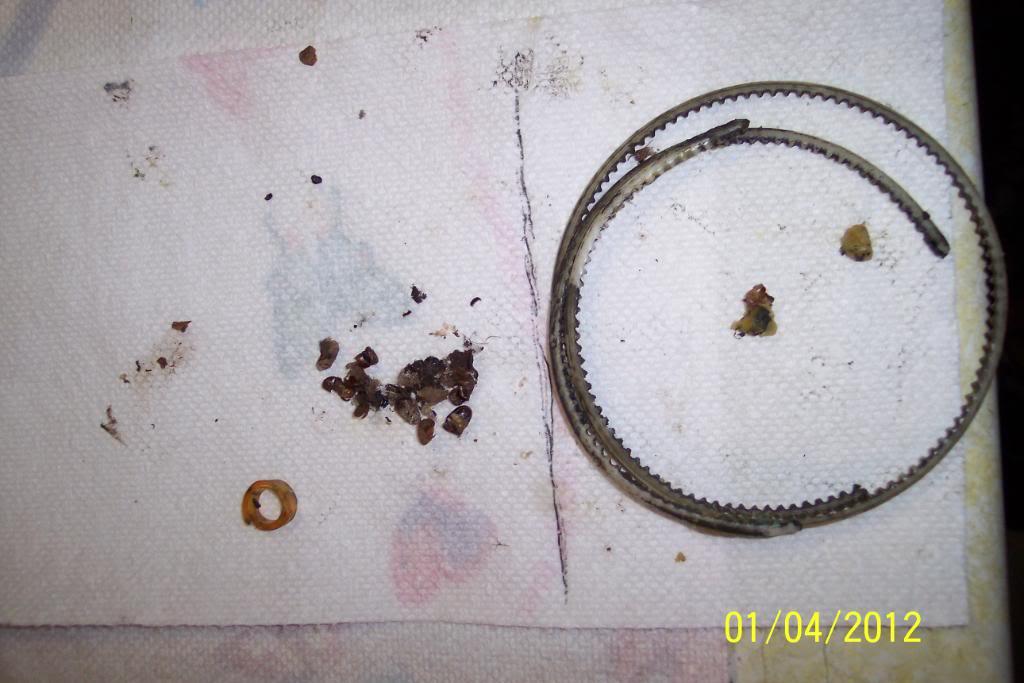
And pic of power antenna motor assemby inside of trunk & now working properly.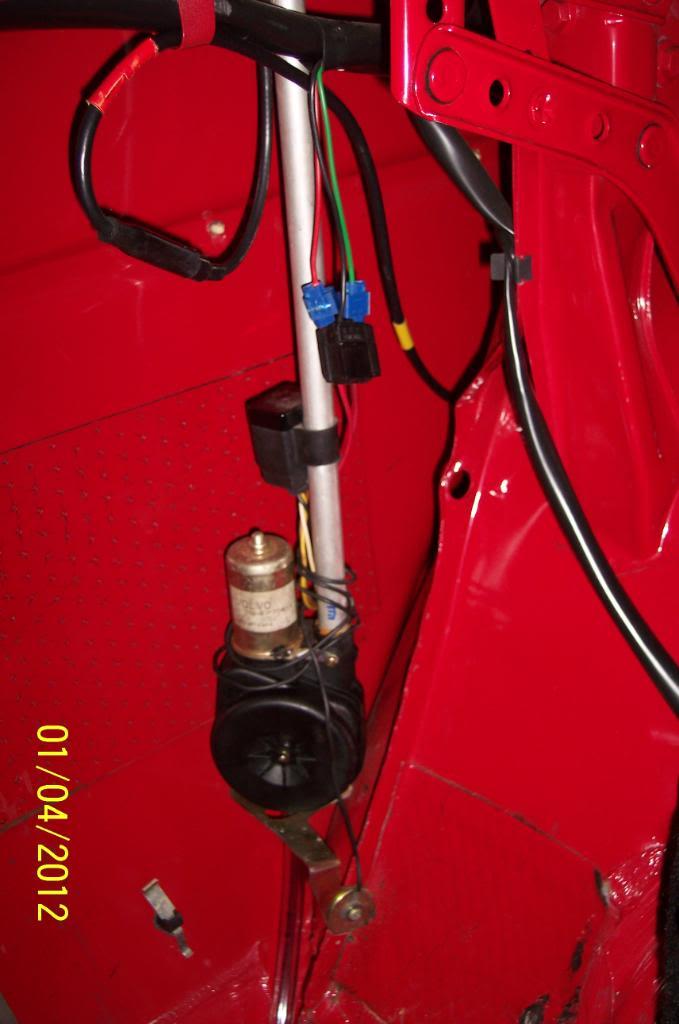
Another pic,better showing the new drain hose...well, you can barely see it as it's new & very clear.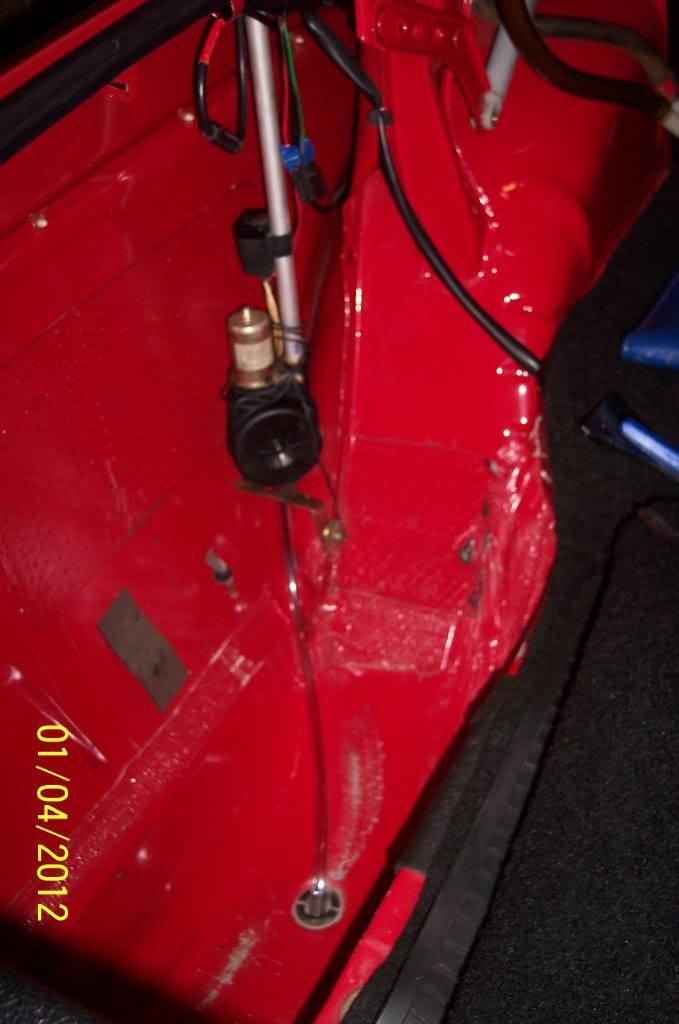
I just finished fastening in a new container for my trunk and then I organized my whole trunk tonight.
Pics below: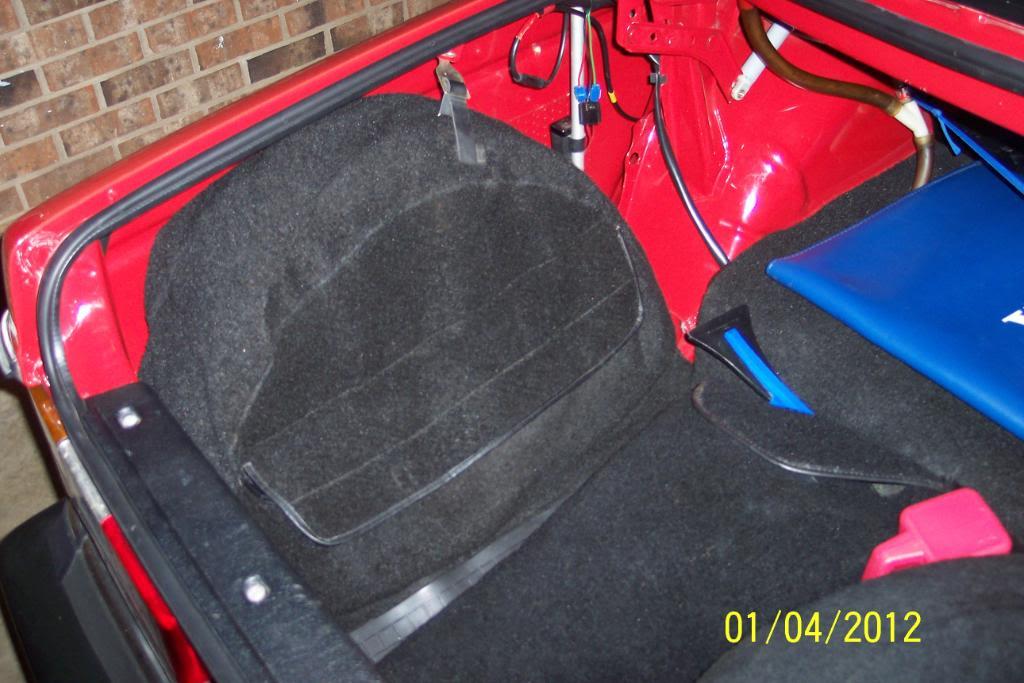
A place to put things too big for the tire cover's pouch....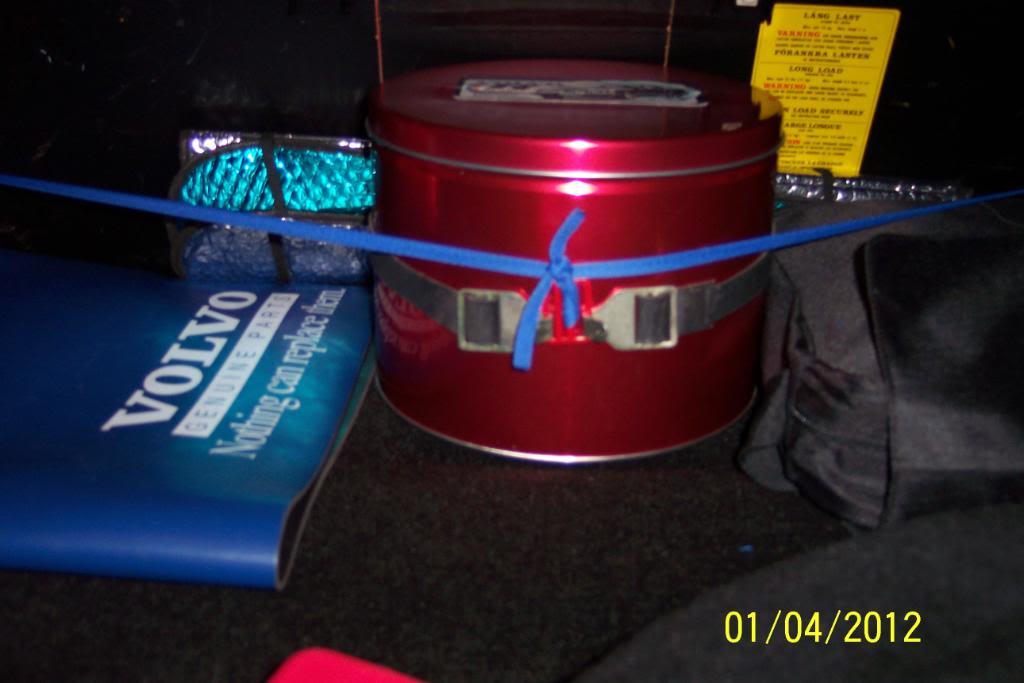
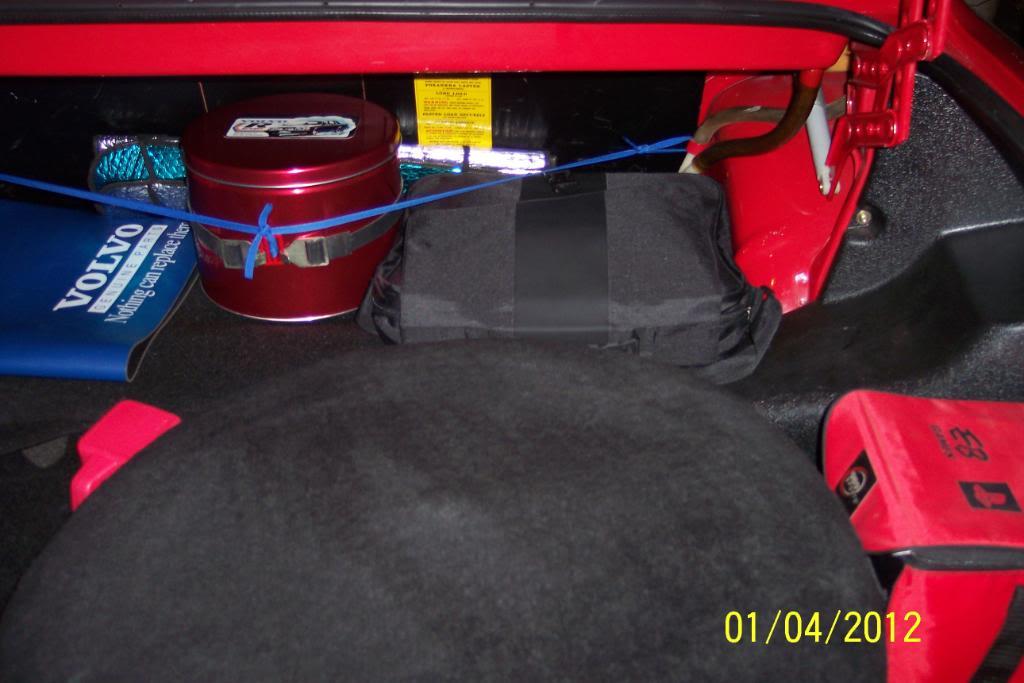
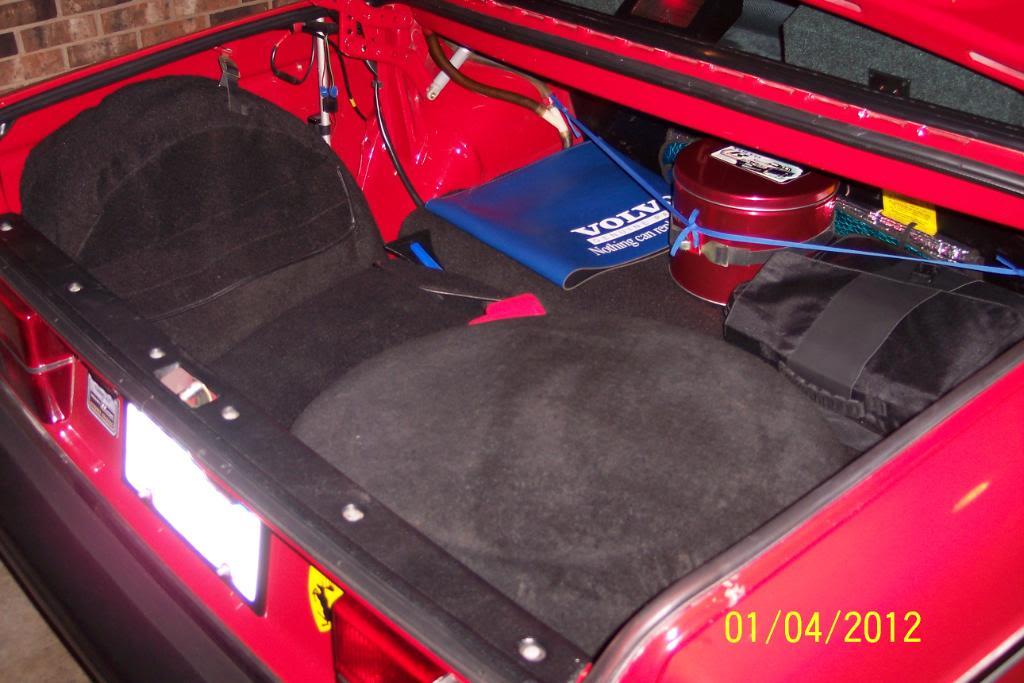
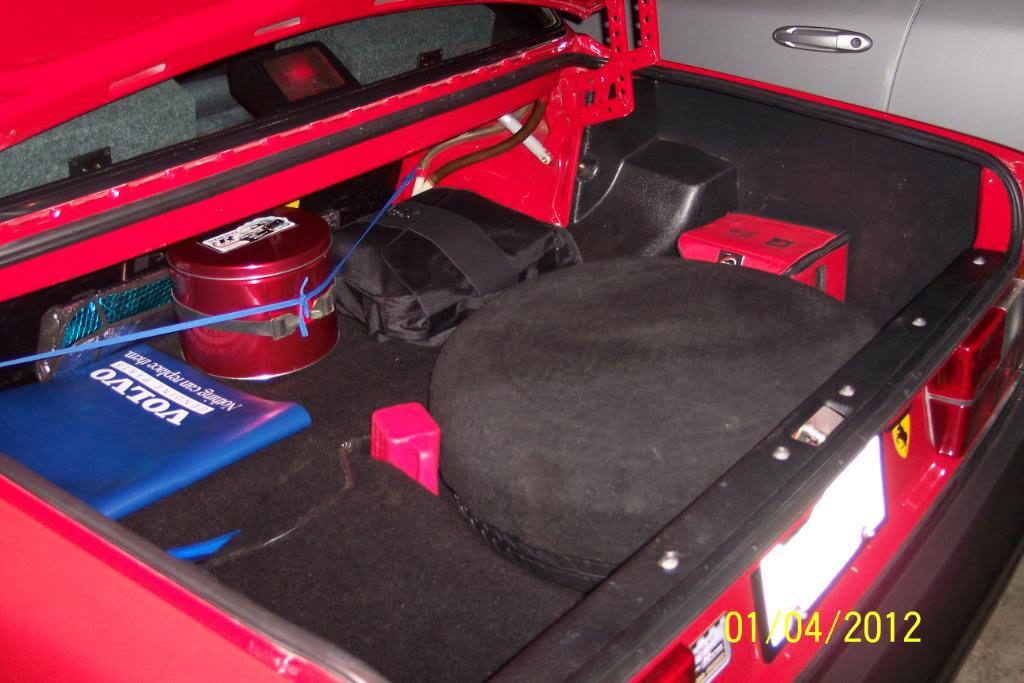
1/10/12
OK, When I installed my Kenwood AM/FM CD Player, I used 6x9 KW 5 way speakers in boxes on package tray, until I investigated how to mount the 6x9 speakers neatly in/on the package tray, like an old school adult would.
The time has come..................
removed the boxes off the tray, pulled the package tray panel/trim piece out. Took a gander at what laid underneath...then vacuumed approximately 15 moths & one stink bug up.
Then re-installed the package tray panel & then installed the rear passenger headrests, marked where the KW 6x9s fit/cleared the best clearing all needed items, onto the package tray panel, with blue Sharpie Pen, using speaker's grilles.
Then used the mtg template that came with them, and marked where the actual cut out needed to be.
Grabbed the old school metal cased Craftsmans power jig saw, a new blade, and a drill & had at the first 6x9 hole, into the package tray panel. Pics below: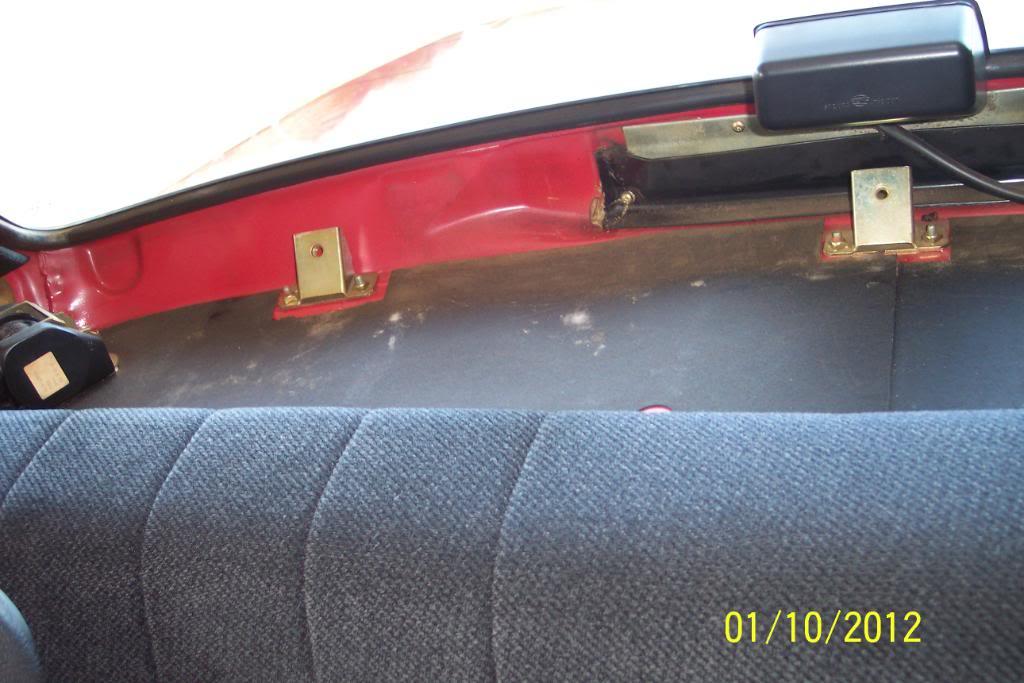
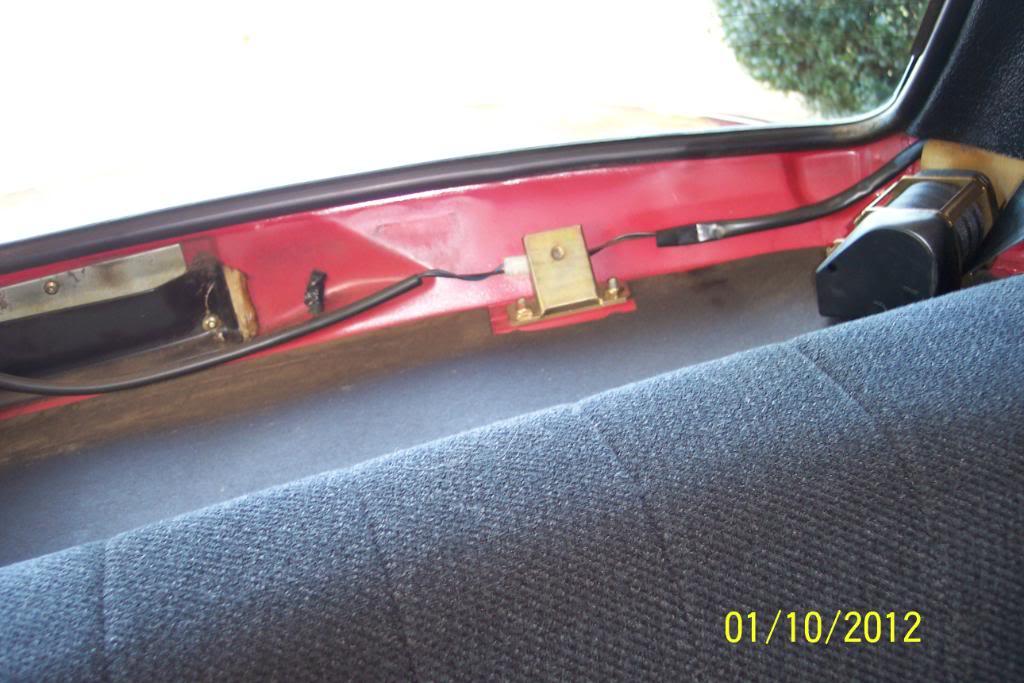
One down, one to go..........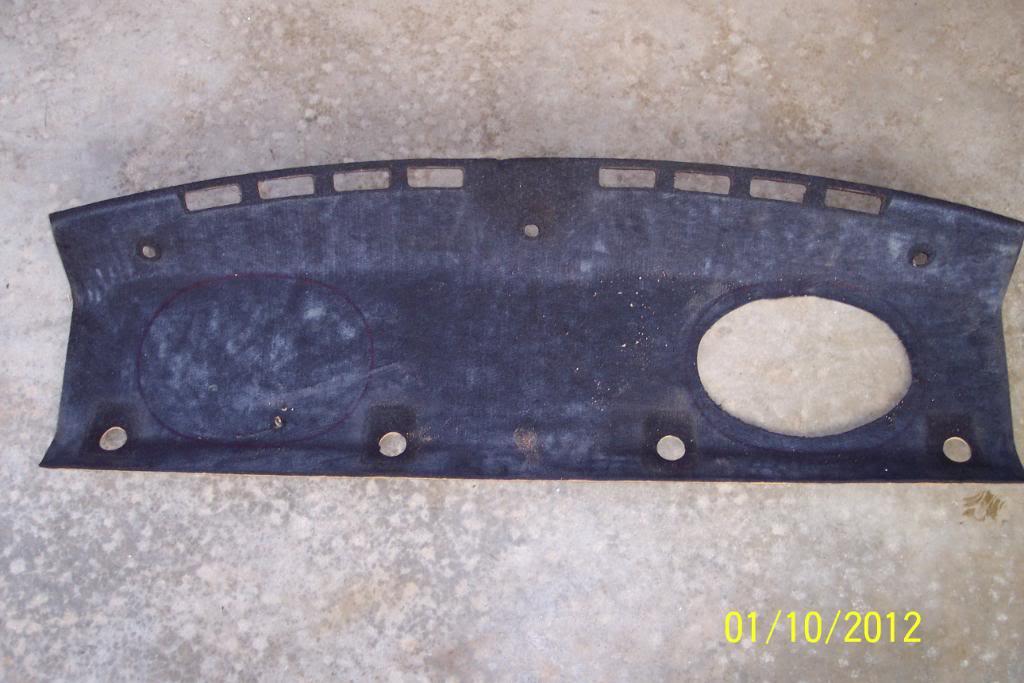
And the speaker fits the hole nicely....not bad for an old redneck biker huh? LOL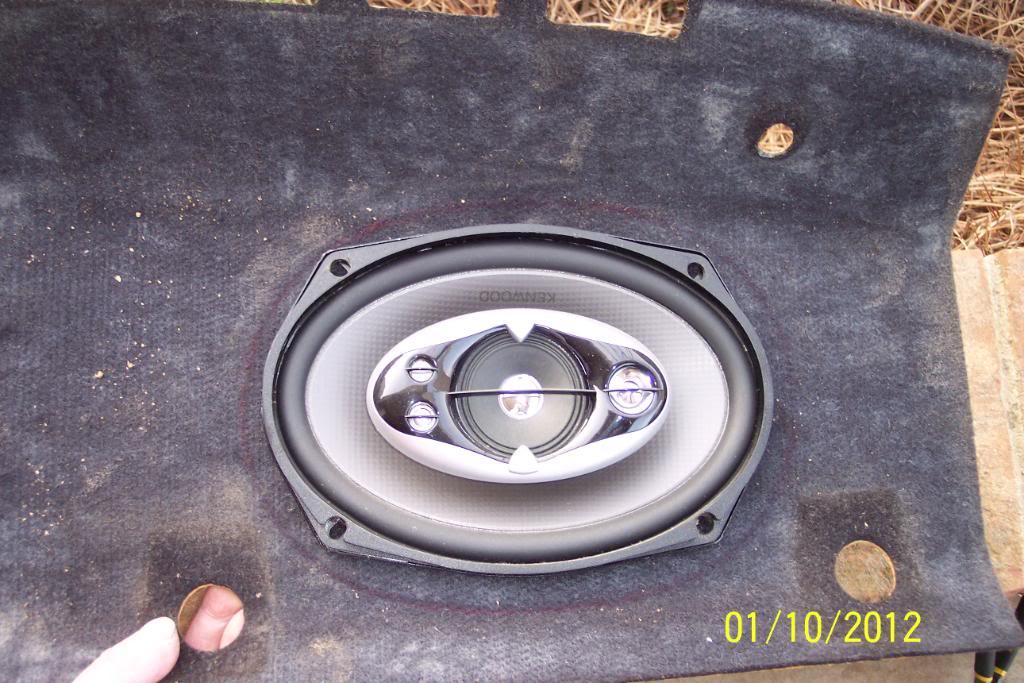
Now to cut other hole & package tray panel, then lay the package tray back on, and mark the the holes in the actual metal package tray panel. Yep, that'll be the "FUN PART"
OK, I cut the second hole in package tray panel, and then re-installed it in the package tray area. I cut the tar paper out in 6x9 fashion, using the holes in the "inplace" package tray panel trim piece.
I then removed the tar paper from the metal ONLY where the holes were cut into the PT panel trimpiece. This marks & translates the hole to be cut, from the Package tray panel trim piece TO where it needs to be cut in the metal, and therefore the hole should be pretty much close to perfect.
I also marked the circumference of the hole with blue Sharpie Pen, for added insurance/visibility.I have been doing this job "in my mind" for over 2 years. Looks like it's paying off now.
Notice how I was lucky enough to "catch" a large portion of the factory speaker hole, and then, small, "1/4 moon" parts of two other small holes. This should make for a lot less actual cutting, with the jig saw, and 3 places in each hole to start the jig saw, if needed.
Pics below:
Passenger side...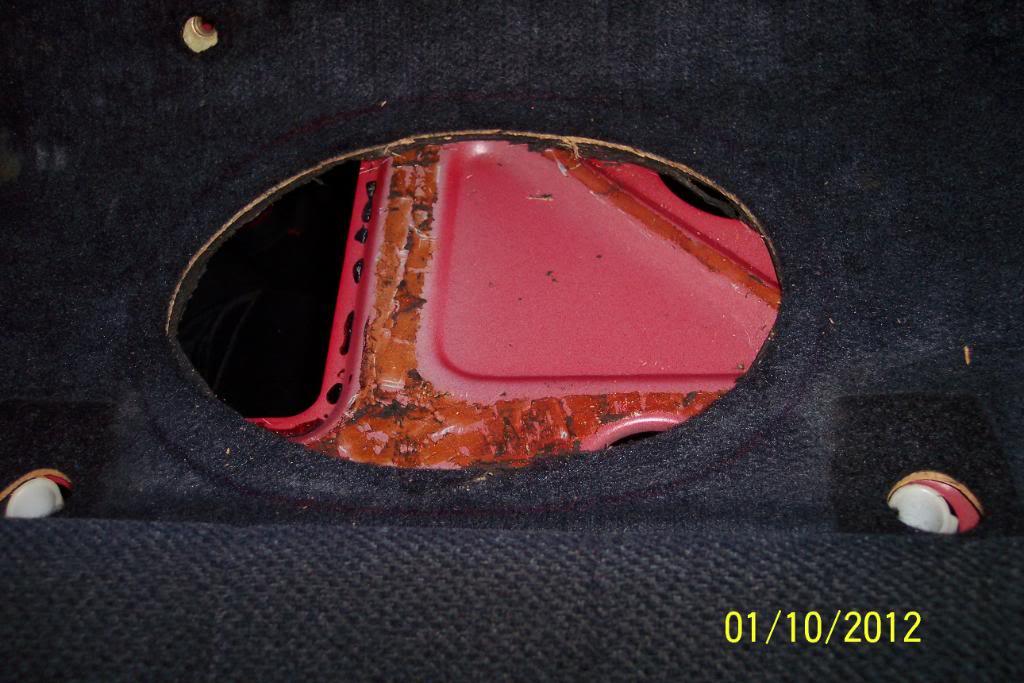
Driver's side...nope, not cut in metal slanted, it's just the way I was holding the camera....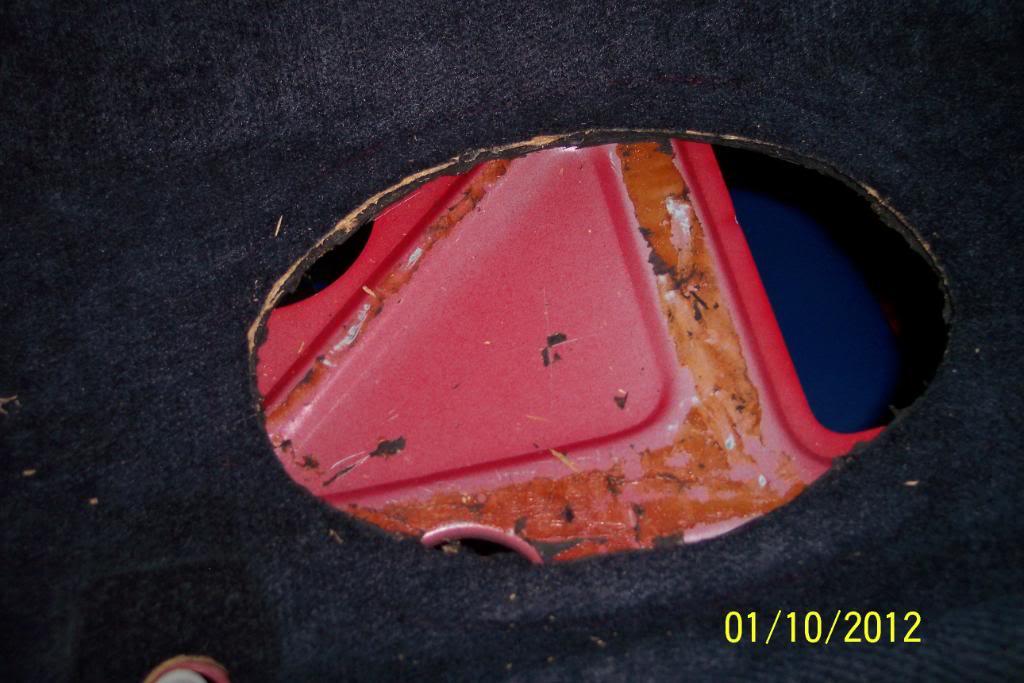
And looking from outside, through the back glass.....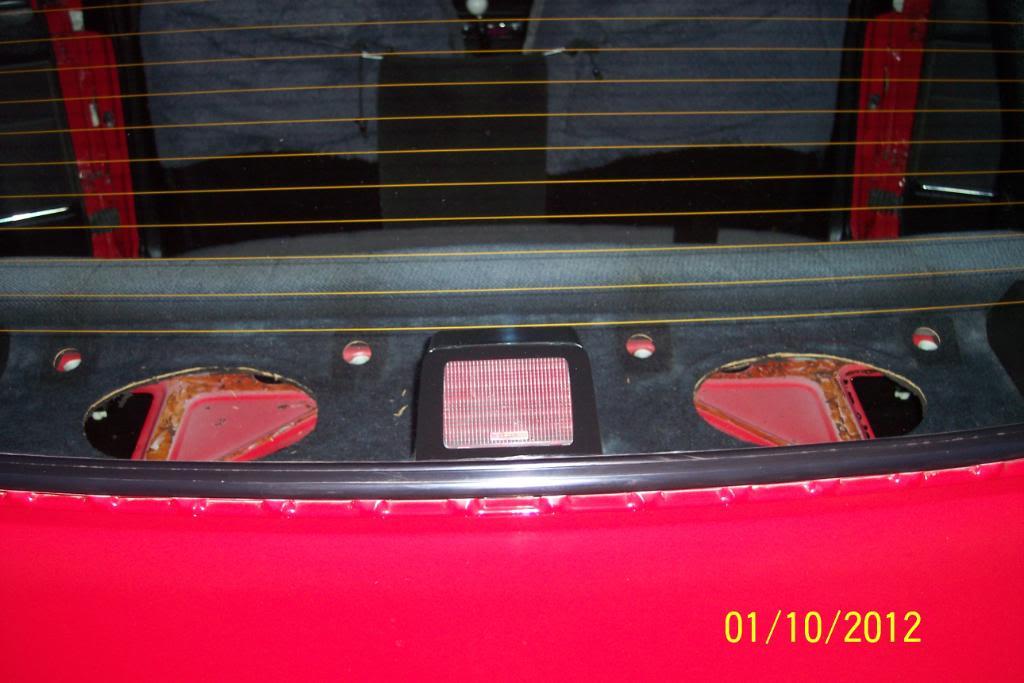
And with the package tray panel trim removed....I'm of to Lowe's to get plenty of jig saw blade, both fine & coarse. I have a feeling I'm going to need a blade or 12
Holes translated well IMO....
I should be able to see those hole markings well enough to follow them well,huh?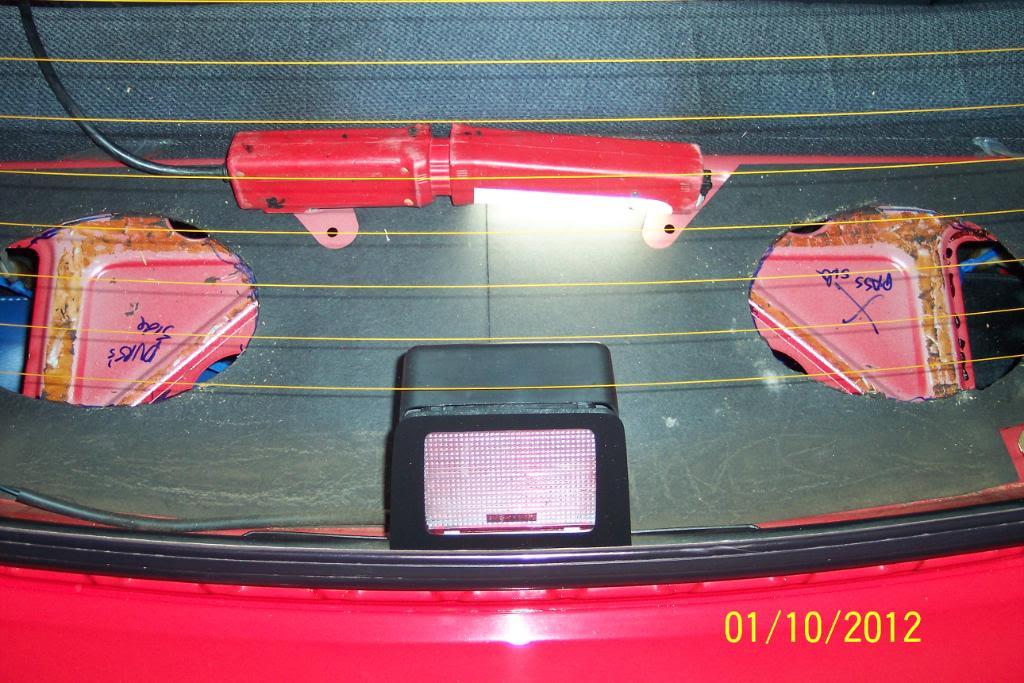
1/11/12
I've had these speakers in the car for a while. But were in "ghetto boxes" on top of package tray. They sounded great in those boxes. Now I'm wondering how good they are going to sound without the boxes, & mounted this way.
I'm going to try to work out a way to mount the boxes from the bottom side/from inside trunk. But unsure if there's room to do it yet. nor have a good method of mounting the boxes, in that fashion yet either.
I'm also going to cover the pressboard package tray trim panel, with indoor/outdoor carpet, as the panel's flocking is faded badly in spots. I did my 80 242 that way & it turned out looking pretty darn good.
Plus the carpet will add a lot of protection from vibration, when the speakers hit hard bass notes. And they'll be doing that a lot. LOL
Stay tuned.....
I've now cut both holes in the metal package tray, and keep in mind they will be covered by the pressboard package tray trim panel piece. Not bad considering I did this at night,under the carport, with my spotlights stand for lighting. $30.00 Skil Jig Saw & Bosch Blades for the WIN!
I've been wanting to do this for @ 3 years now. I've been scared to death the speaker boxes would slide & break the 3rd break light or wear through the "window defrost stripes",now that I have the "high performance suspension" finished. Finally ...Looks like I'm well on my way now...the hardest part is over....
Pic of newly cut 6x9 speaker holes below: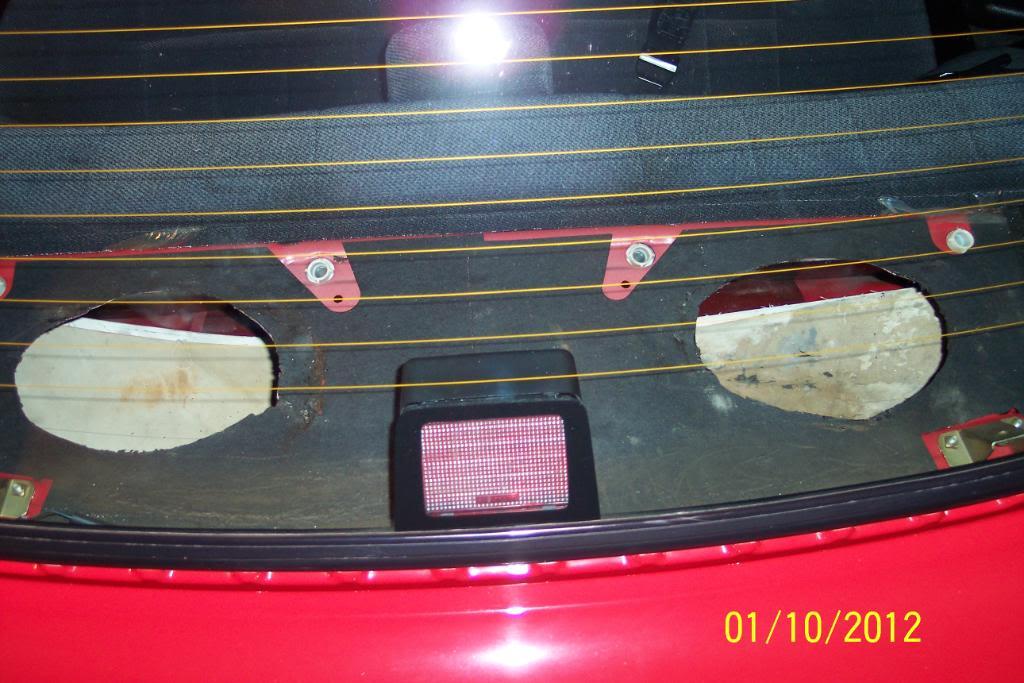
I did a trial fit of 6x9s with the pressboard package tray panel in place,before carpeting the panel. This to make sure everything fits as planned.
IMO, drilling the four speaker mtg screw holes is going to be a tricky PITA. They always are it seems from my previous experiences doing speakers in package tray mounting.
I'm thinking/planning on, using regular threaded machine screws, the correct size, instead of metal screws, with nyloc nuts & lockwashers on the bottom side. And maybe an additional locking nut /Blue Loc Tight too.
Plus I'm going to need some spray can carpet adhesive, to glue down the in/outdoor carpet to the pressboard package tray panel, for when I cover the panel.
It sure looks like another trip to Lowes tomorrow.At least mounting them this way is lighter in weight compared to building a mounting box on top of the package tray panel like other's suggested.
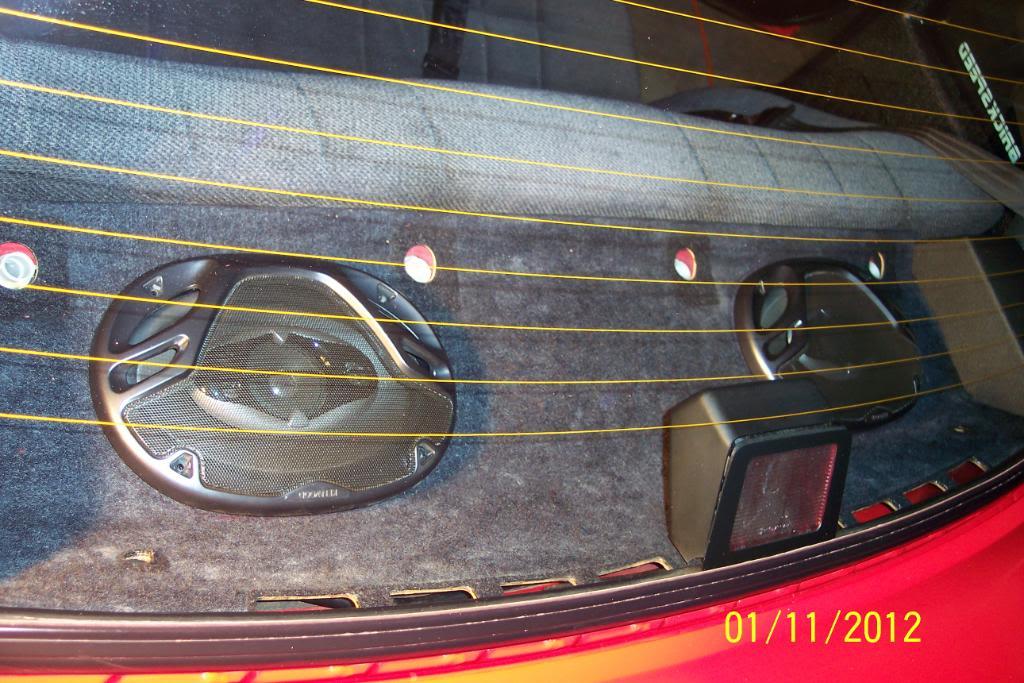
And... here's a couple of preview pics, as to about what it'll look like when finish,only it'll have a much nicer appearance when finished. It's going to have a much neater, more OEM appearance mounted like this, compared to the "ghetto boxes" as some of you call them.
Also, if you'll notice, the rear passenger head rests did the dictating, as to exactly where the 6x9 spkrs had to be mounted.
Between the headrests & OEM holes in metal panel, this was best location for the speakers, as far as where they mounted.
I would have liked to mount each one further "outboard". But I want to keep the option of using the passenger's headrests. So I mounted them thusly.
Plus the headrests will "protect" the speakers from poking fingers, as the grilles have rather large "bass holes" in them. You can get a screwdriver handle in them. LOL
Pics below: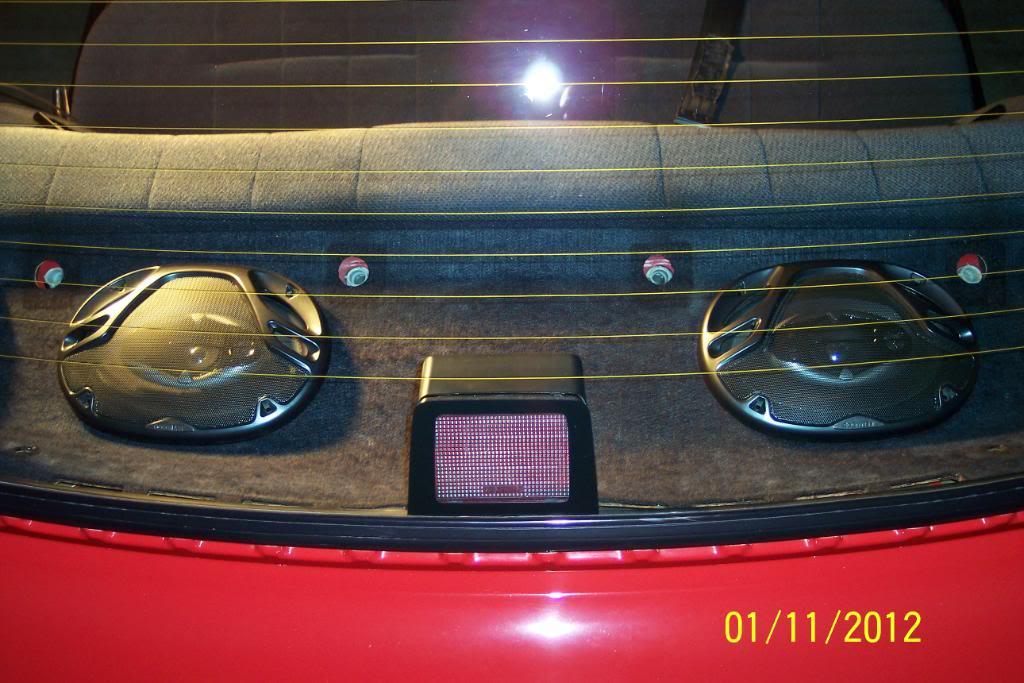
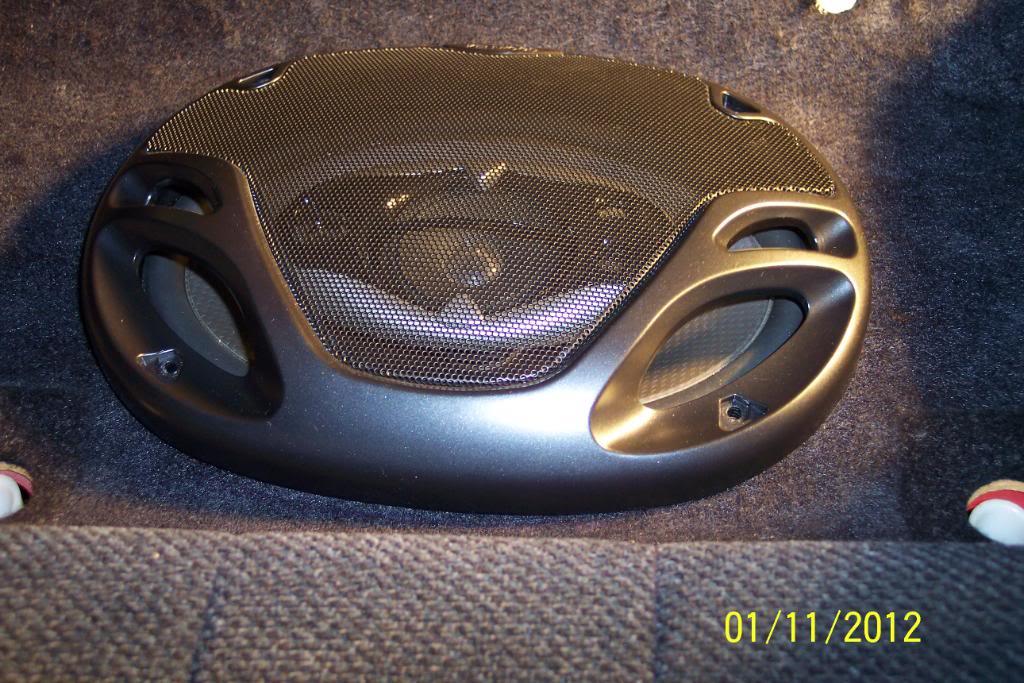
So......... tune in tomorrow, to see what other cool things I have in mind for this 6x9 project.
THIS CONCLUDES TONIGHT'S BROADCAST OF THIS STATION. MAY GOD BLESS AMERICA!!
1/12/12
I've used some very small steel angle iron, with a hole drilled in to it, for the spkrs mtg screws . These "bridge" the "open areas" ,where there's no metal around where I drilled the spkr mtg screw holes ,& into the metal package tray panel.
I'm not sure how this is going to do/sound, or if it'll vibrate/produce resonace, when the spkrs play deep bass notes. But it is what I planned out to do, many months ago.
If it does vibrate some, I might can place some of the tarpaper, left over from cutting the 6x9 spkr holes out, and place it between "bridge's" & panel's metal to "insulate" it from vibration.
Also, I may have to drill from top side & fasten the ends furtherest from the spkr mtg screws to the panel with a screw from the topside, but under the pressbard package tray panel . I think my bridges will work as is, AOK though.
I'm going to wire up the spkrs and see if this'll work AOK. I will just have to 'test it" and see.
I'll try a wide variety of music, like some Ozzy Osbourne tunes, some Eagles Hotel Cali, and anything else with hard bass notes in the music, to be sure.
Hopefully I'll have some positve results in a little while........
Pics of the "bridge braces" spanning the "no metal areas".....I'm hoping this works OK...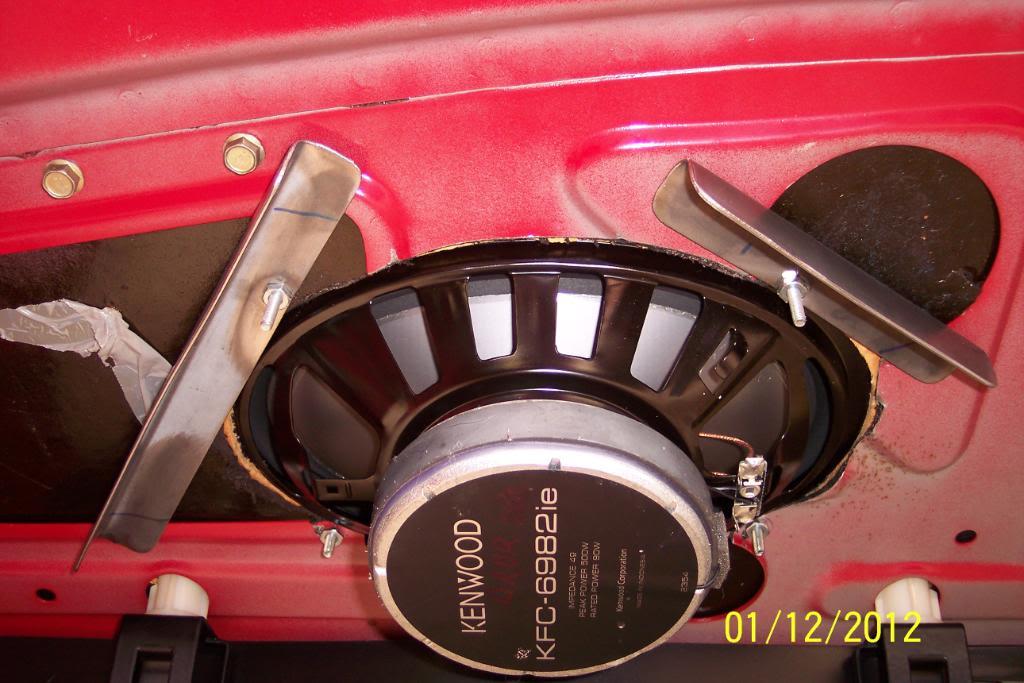
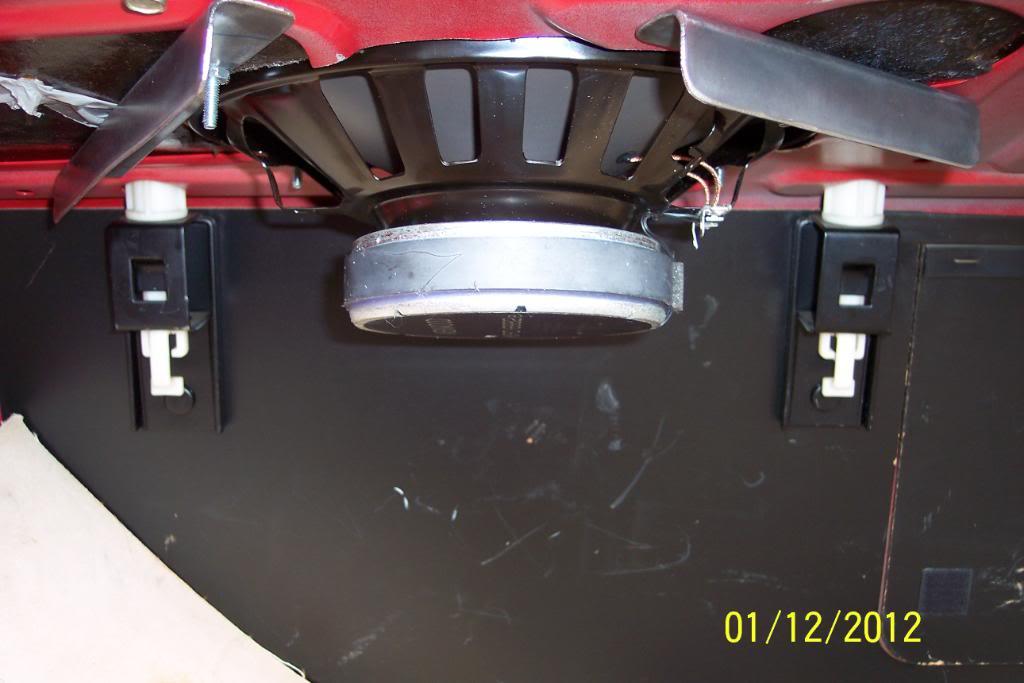
OK Guys! Test Results are IN.
I left the backseat in place, and ran the rear spkr wires outside the car, and to the spkrs by just ,gently & carefully, closing the doors and trunk lid on the wires.
Then after spending @ two hours, listening to 4 Ozzy CDs with killer bass hits in them,, 4 ZZ Top CDs who have always been known for big bass, Eagles, Marshall Tucker Band(which brought back good, fun memories of when I used to go partying with Toy all night long), .................................................. .................................
THE VERDICT IS IN.....
The 'Bridge Braces" work marvelously well.
No weird vibration sounds, no rattles, nor any bad resonance vibrations, even at 29 & 30 volume level with bass & treble EQ set to + 8, which is high as it goes on my KW MP538U Head Unit.
AND, THE 6X9 SPEAKERS DO HAVE MUCH MORE BASS SOUND with the speakers mounted in the package tray without the boxes, than it did with the spkrs mounted in the boxes, and sitting in the car. I wasn't really expecting that.
I thought about this method for some time, but was not 100% sure it'd work as well as I thought it would. Sometimes one just has to try the old "farmer's cut & try" method as Smokey Yunick called it. Well, I "cut & tried", and it works great IMO.
13 Advantages Of My Mod :
1) No extra weight added from custom wood & fiberglass box building.
2) Saved a lot of time & $$ not doing #1
3) Removed 1lb & 5 oz. of metal, pressboard & tarpaper cutting the holes
4) Removed 12lb & 5oz Grand Total, on the whole speaker mod
5) No rear window vision reduction due to spkr mounting now
6) Increased rear vision over what I had with the 6x9 boxes in the car
7) Gained @ 3 times or more, bass sound from the speakers
8 ) Will now have a lot more of an "OEM Volvo appearance"
9) Already had most all the materials I needed. More $$ saved.
10) Looks 200% better now.
And I like it much better this way.
All Win/Win IMO
Now I will remove the pressboard package tray panel, and cover it neatly with indoor/outdoor black carpet, and paint the "Bridge Braces and the 6x9 hole's edges with Red Rustoleum Paint, and then remove the back seat, to route the rear spkr wiring neatly & discreetly.
I'll do these things tonight, and those items should be dry enough to re-install them tomorrow evening. I'll post the total weight that is re-added later on in this build thread.
1/13/12
OK, I removed the speakers, and pressboard package tray panel. Time to recover it, & give it a better appearance.
NOTICE WHICH HOLES ARE USED, AND WHICH ARE NOT, DURING THE REMOVAL PROCESS, BEFORE STARTING THE RE-CARPETING PROCESS !!
Mine has two holes not used, and they were not EVEN cut out in the OEM Volvo carpeting/flocking. I marked them as "Not Needed".
I've done this mod before on the 80 242 I sold.
I bought the black indoor/outdoor carpet for this job,at Lowe's @ 2 years ago, and it's been in my bedroom ever since. I'll be glad to use it & get it out of my way.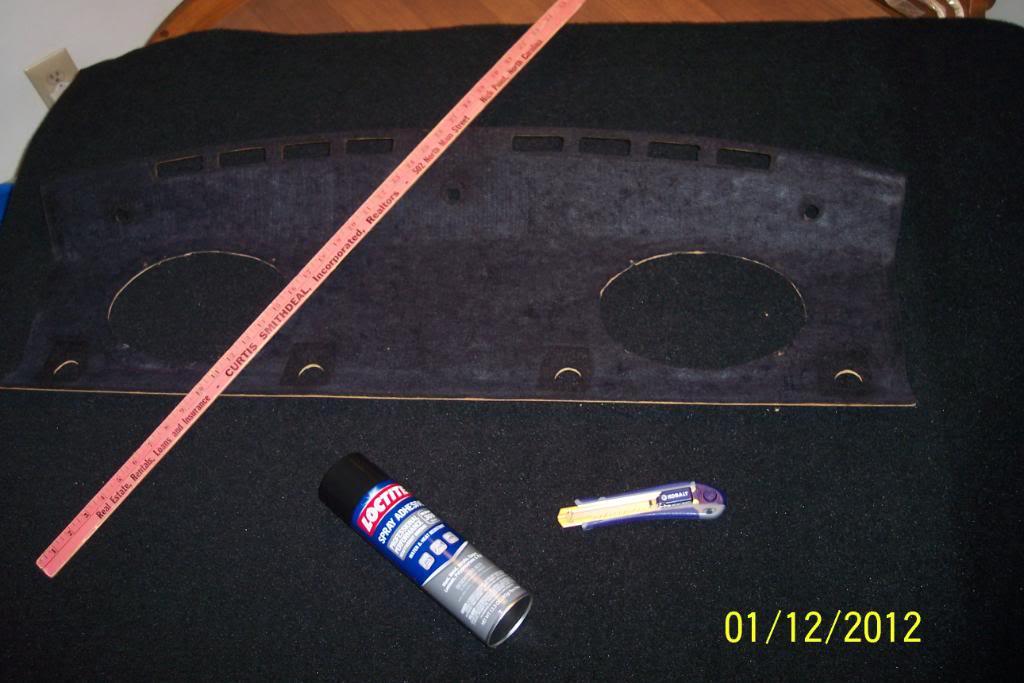
Trimmed the carpet to a little closer fit, and clamped for final fitment trimming.
OK, trimmed out for one of the defrost vents & it's OEM plastic cover insert. Notice I left it a tad long so as to fit slightly under the vent cover. The rubber window seal should hide the outer edge left uncovered. I will repeat this proces on the opposite end.
Also notice the outer circumference of the entire panel has not been completely finished trimming.
That'll happen after I glue it down, and glue drys. No bare/uncovered spots that way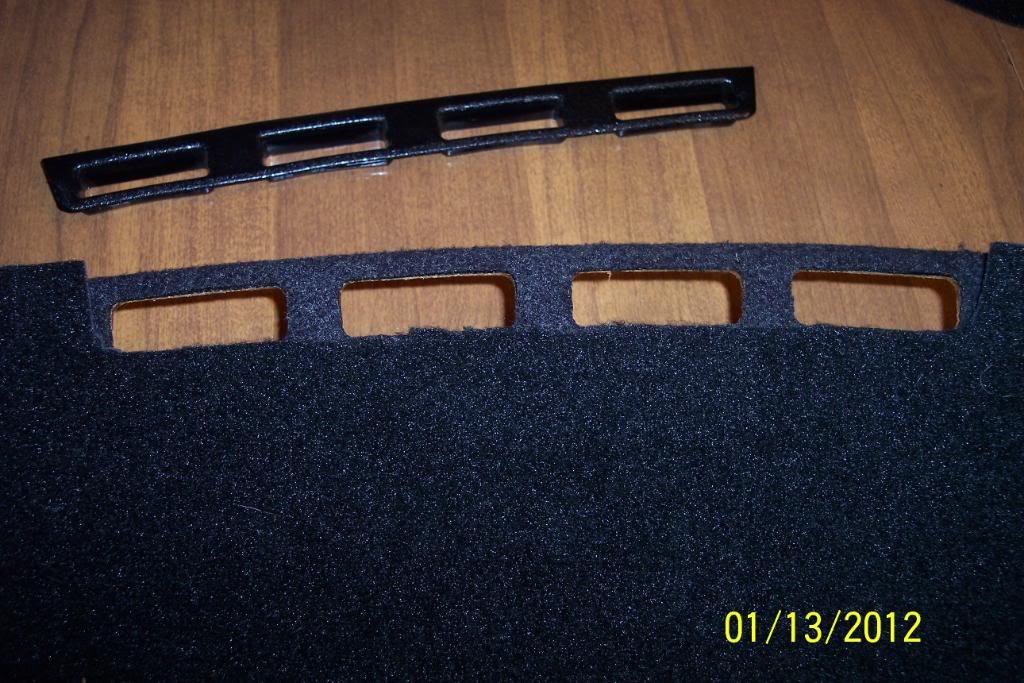

Both are now vents trimmed out...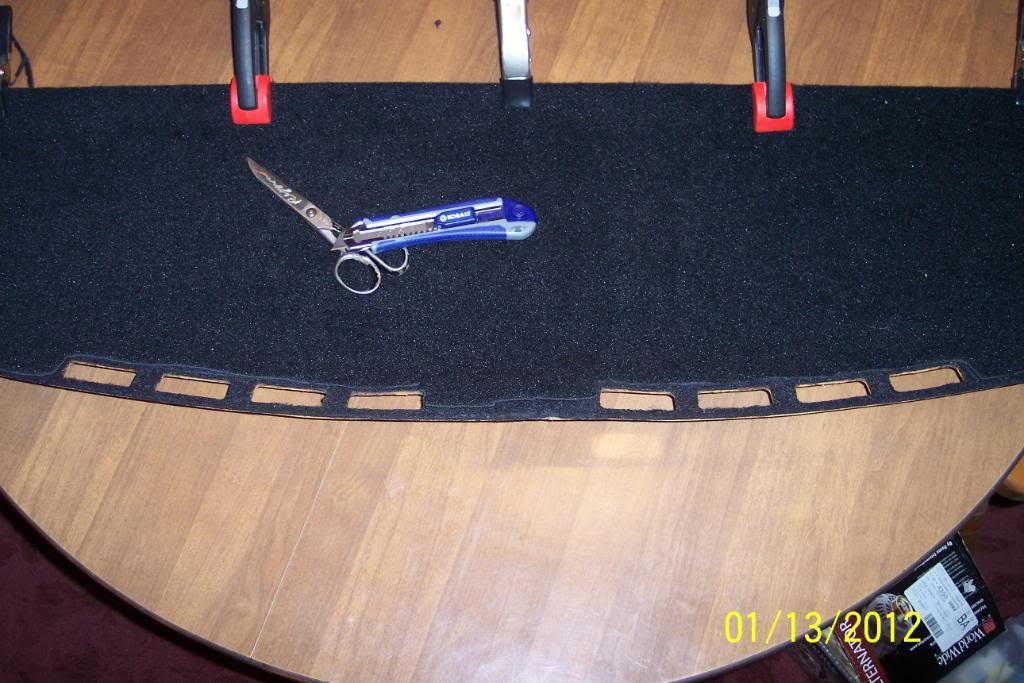
Next step is gluing the carpet down to the pressboard package tray panel..............for the weight curious, carpet weighs @ 13 oz. max.
Now..........I'm gonna use the 'good stuff". Got it at Lowes.
it's for gluing, not a for buzz.............although I'll probably get one using this stuff...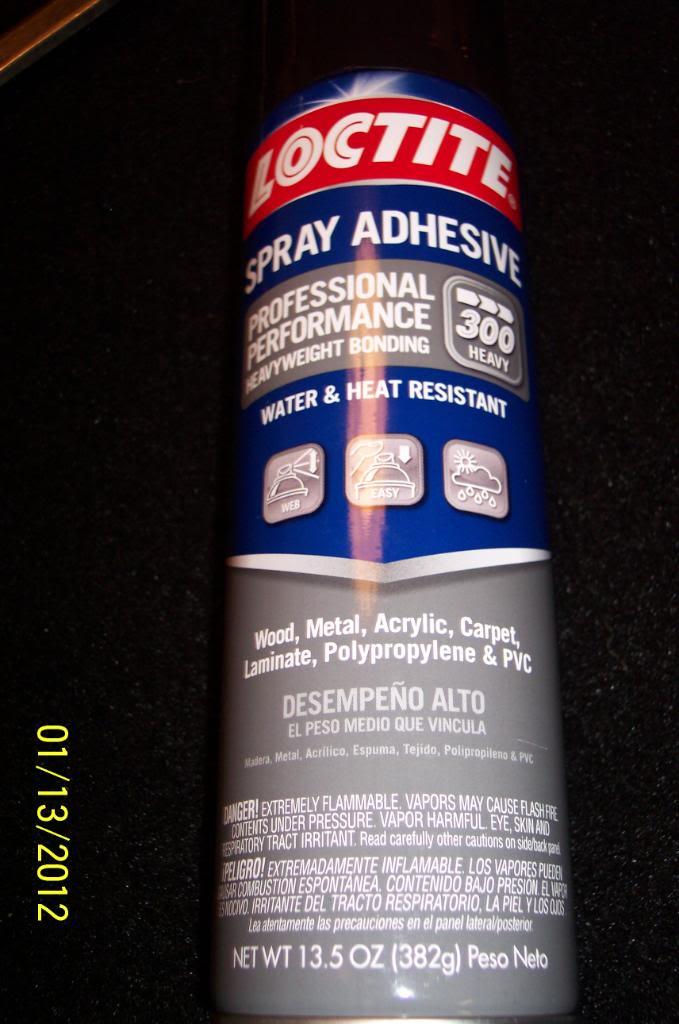
OK, I heated the can of spray glue by running very hot water over it in the sink. This adds some pressure to the can IME. Works with paint too BTW
I then took glue,carpet & panel outside. I left the edge nearest seat back clamped down.
I lifted carpet, and sprayed the hell out of backside of carpet & the topside of the panel with the glue. The LocTite glue sprays out nicely & controllably, and easy to aim, in case you were wondering.
I then smoothed the carpet down, brought it in the house(to see better). Then removed the clamps & placed them on other side.
Then lifted previously clamped side up & sprayed hell out of panel & carpet, & rubbed it down.
I then supported all outside edges of panel/clamps, and placed heavy weight onto the carpet to get carpet down all the way & glued to hold 110% to the panel. WARNING!,Be careful not to let the glue on carpet where holes for spkrs are in panel ,touch your kitchen table.
SAY WHAT?? Throw out my old Hot Rod, Car Craft, Popular Hot Rodding, Hemmings Muscle Machines, and Grassroots MotorSports Magazines AWAY??? NEVER!!!
BTW, I started a sub to Hot Rod Magazine in July of 1970. An issue of Hot Rod cost 75 cents plus tax(4 cents tax in 1970, IIRC)
Grumpy Jenkin's new 1970 Camaro Drag Car was doing a wheelstand on the cover. Yep, that was 42 years ago. I was 12 years of age then.....I've learned a HELLUVA LOT reading them from cover to cover each & every month.
I found the second issue I received, August 1970, the other day cleaning out the upstairs of the garage. Tom "Mongoose" McEwen's 1970 Duster Funny Car is on the cover..my,my... how time flys...
pic below: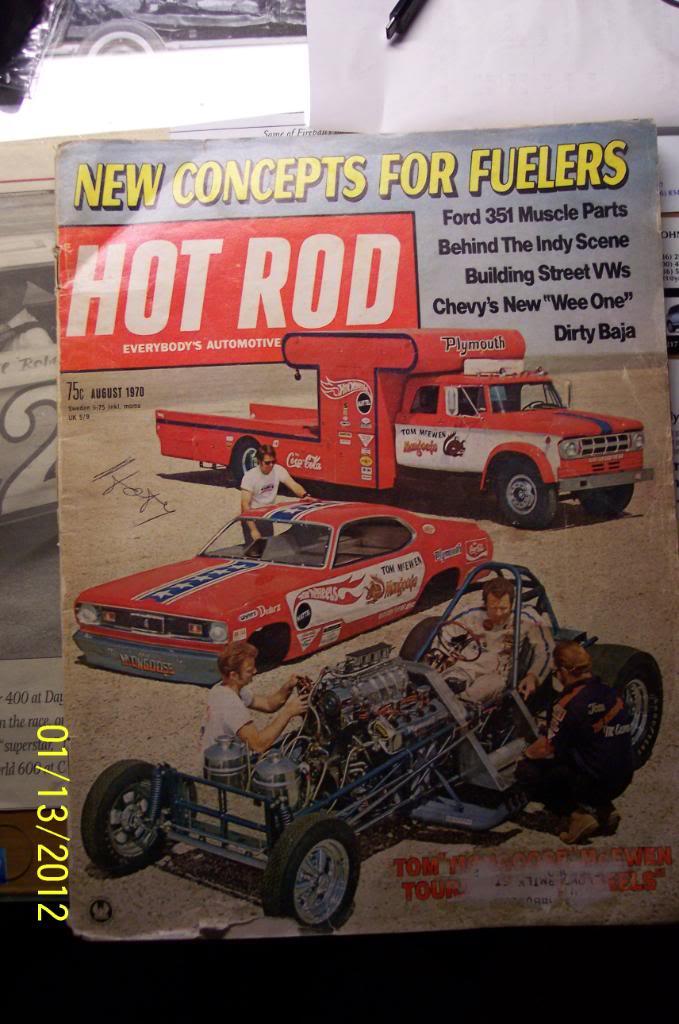
Pic below, of weighted down carpeted package tray pressboard panel.....be careful to support edges and don't overdo it...
Yep, the newly carpeted panel is under there somewhere...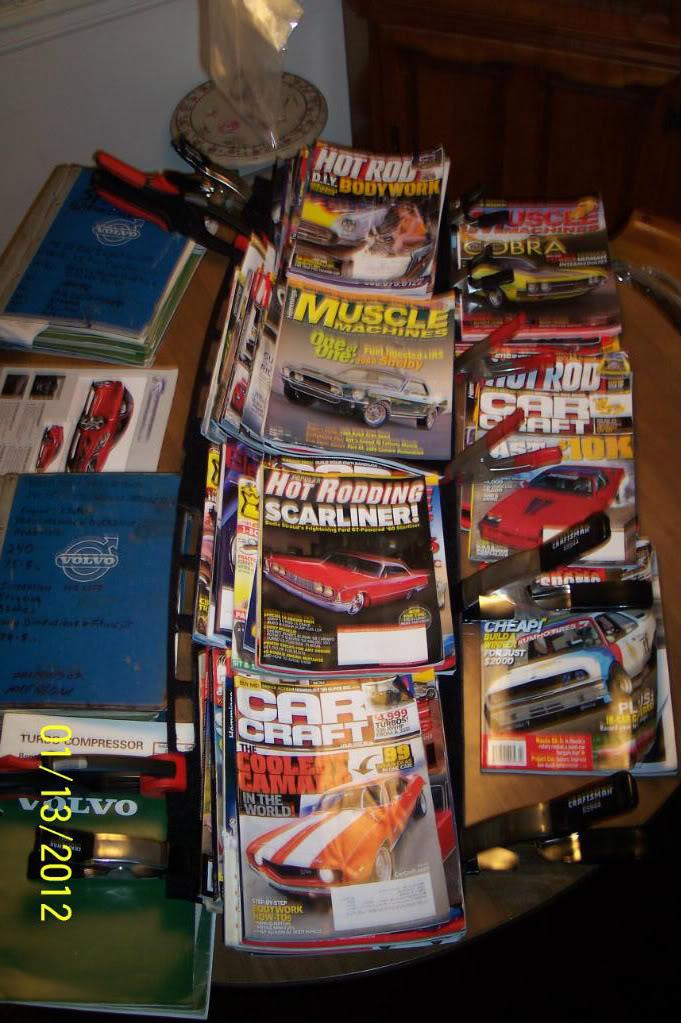
I'll let the carpet ,panel & glue dry overnight. I surely hope it don't stick to the table.
In the meantime, it's time to prep & paint them "Bridge Brackets" with Rustoleum Red....
DONE!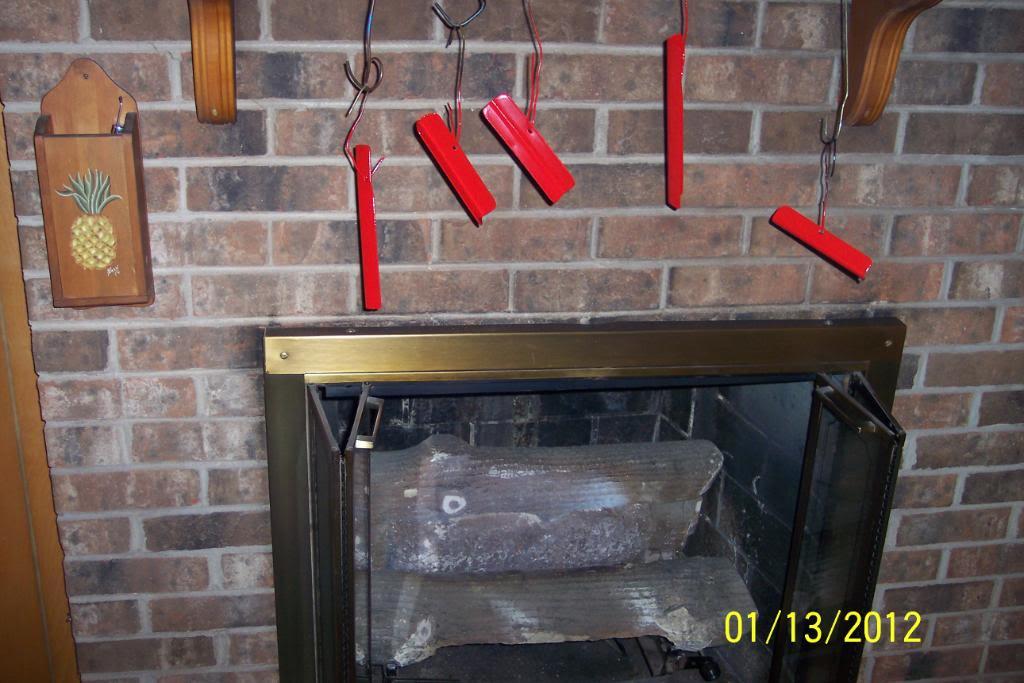
Well, it's 4AM EST/NC time. The glue seems dry enough to start cutting out the holes in the newly carpeted panel. Be sure to do all cutting from the backside, it makes it so much easier to see what you're doing/cutting.
TIP!! Support and gently push the piece you're cutting from the topside towards the bottom, and keep slight tension on it, while cutting the piece out.
This will help keep from pulling the glued carpet away from the panel while cutting.
I used a new Kobalt Razor Knife, with "the snap off as you dull it blade".(one in pic) and I just sorta "sawed up & down" on the carpet & it works really well, & cuts the carpet very smoothly.
BTW the Kobalt Razor Knife also has a "lock screw" on end of knife, so you can lock the blade tightly, so as push or pull the blade on item to be cut, without it sliding in or out like the cheapo plastic razor knives do. I really liked this feature of it.
pic below: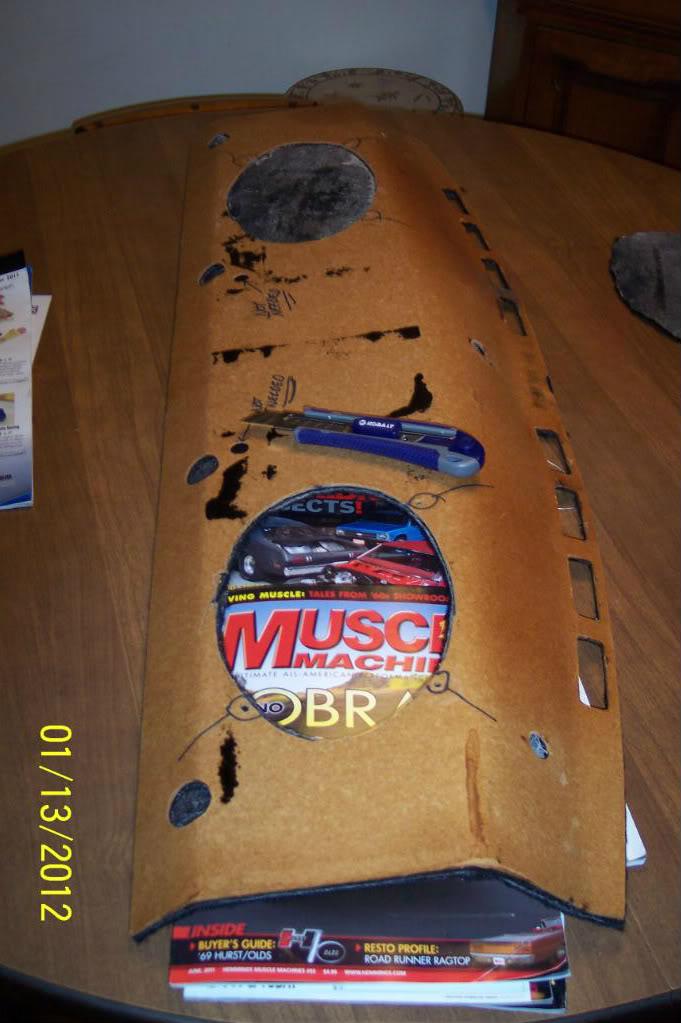
Another "makes it easy tip"....if your razor knife is too wide/large to actually cut the circumference of a small hole, just cut a "crosshairs cut" (an X will do), and the carpet will push in ,around the hole, enough to allow the "push pin retainer" to go through.
In my case, the three(3) smallest holes on the upright portion in the panel,next to the rear glass for the plastic "push pin retainers" required this trick. And if you can stick your pinky finger through the hole, you've aced it. The pin will go through and no bare spot will show.
The four holes towards the front of panel , for the rear passenger headrest stalks, were large enough to cut with my razor knife.
I told you I'd done this before...LOL.
Pic below: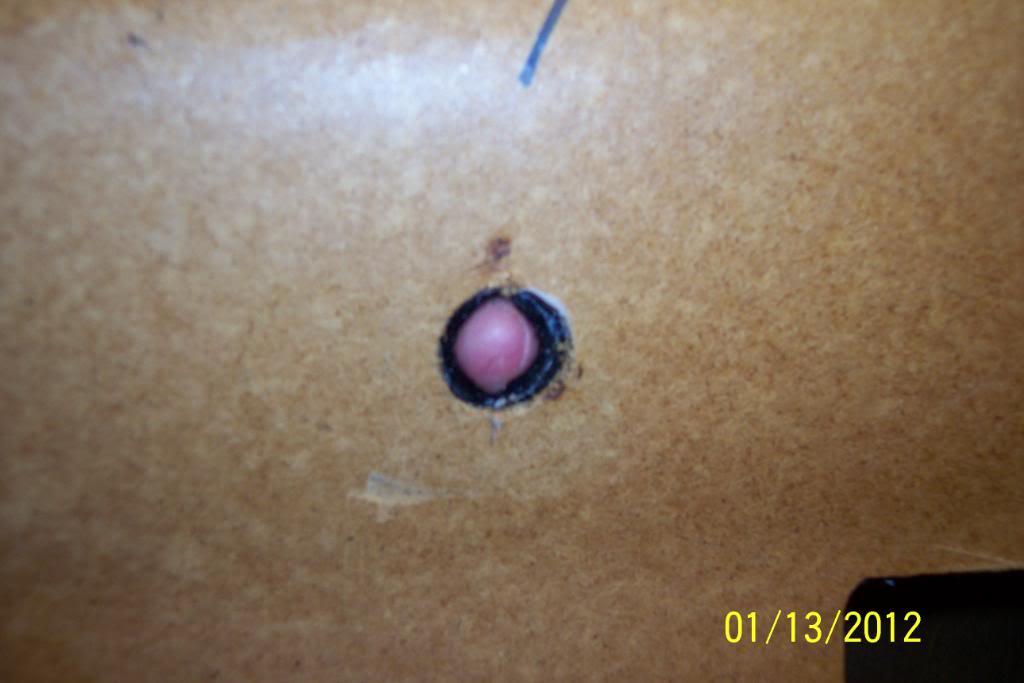
And.. finally..the finished re-covered/carpeted pressboard package tray panel.... Looks a helluva lot better doesn't it?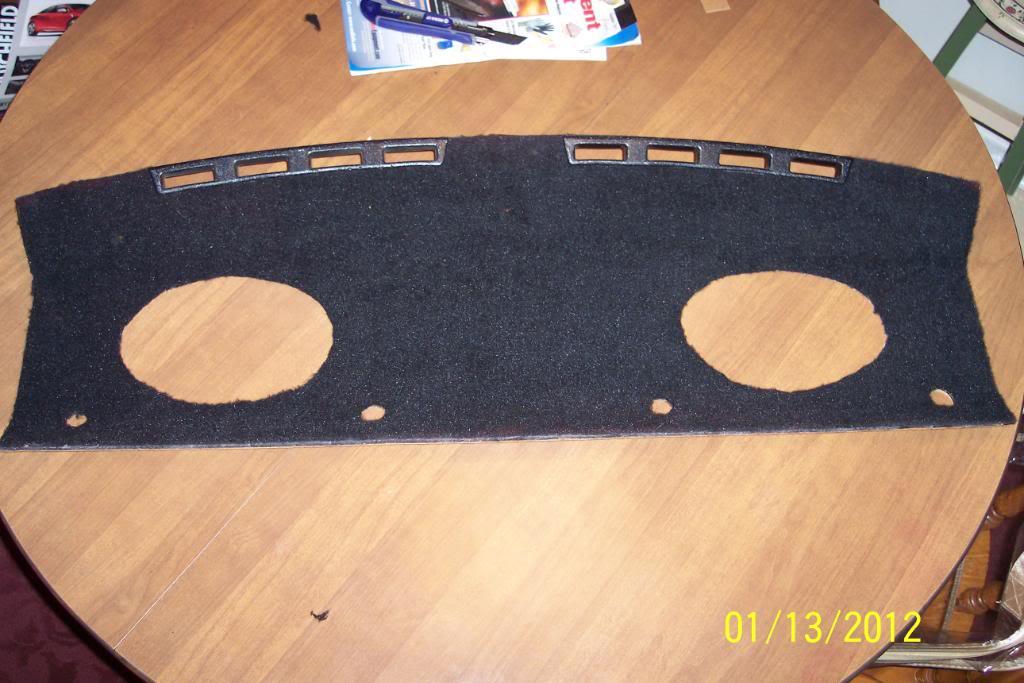
THIS CONCLUDES TONIGHTS BROADCAST OF THIS STATION, MAY GOD BLESS AMERICA AND HER ARMED FORCES PERSONEL..

Nice build!
Posted by Diggymart on 3/30/20 @ 2:45:08 PM