You must be logged in to rate content!
59 minute(s) of a 122 minute read
1-10-2021
Project Death Kart
Compliments of Goofydug @ michiganvw.org
hi hello and welcome to my new rabbit project.
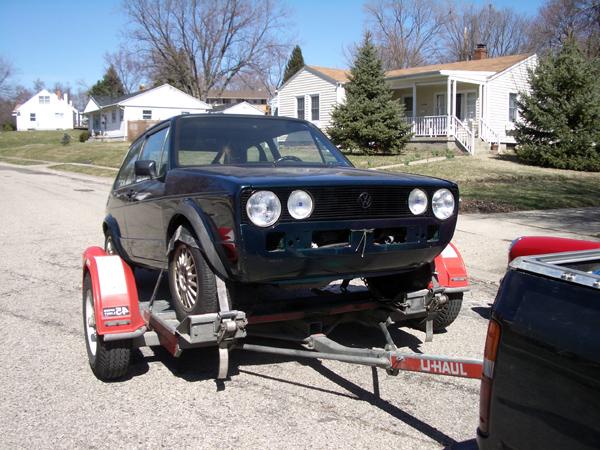
The car is a rust free (southern) 1981 rabbit. I bought it in ohio after its last owner threw in the towel after collecting a bunch of parts for it. Included in the sale was a 16v swap from an '88 scirocco. This includes 1.8l 16v engine, transmission, disc brakes on all corners, wiring, ecu, and a bunch of drivetrain crap (by crap i mean parts I have yet to define). The motor is in the car, and thats about as far as he got. No wiring is hooked up, there is NO interior, etc.
hell yes.
The car also had a quick respray in dark metallic teal. The paint job itself leaves a little to be desired, though it shouldnt look too bad after I take the buffer to it.
You can see in some of the following pictures ALL the extra parts that came with it. When i towed it back from ohio, I had the bed of JohnnyB's truck (thank again john!) loaded up with parts, the rabbit was full of parts, and some even managed to make their way into the cab of the truck (dont worry John, they were clean). The superstar parts include TWO autopower 6 point rollcages, scirocco 1 seats, cabriolet dash, catalytic converter, rare zender side skirts, abd fiberglass front air dam thingie, about 5 ecu's, and a handful of calipers with a few extra disc brakes.
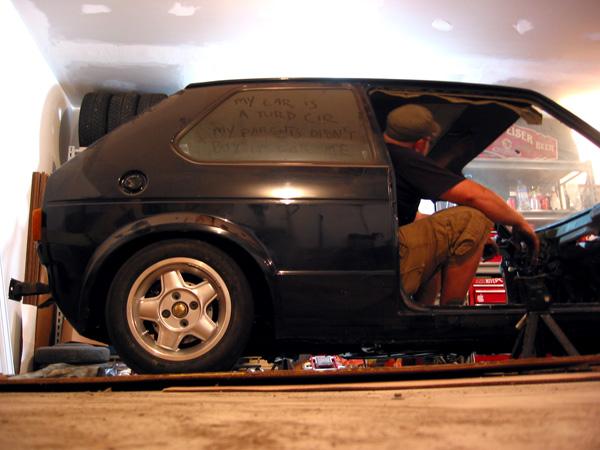
I plan to clean up the car, get it running (important?), drop it like its hot, and learn a ton of shit in the process. I basically know nothing about anything that lies ahead. Anything that I do will either be a result of tons of research, bugging you guys, drinking induced wrenching, or the helpful hands of some great miver friends. If you see me doing something stupid, please kindly suggest a better way to approach the task at hand.
No more words.
On to pictures =)
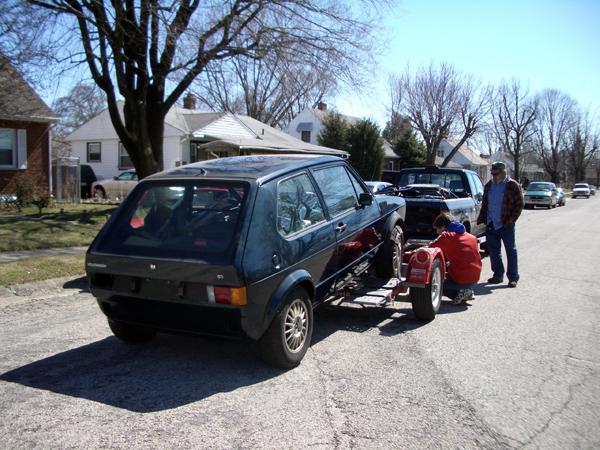
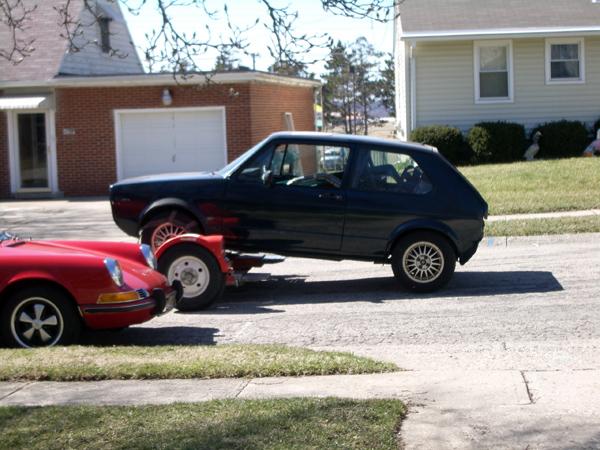
loading the bunny up on the tow dolly

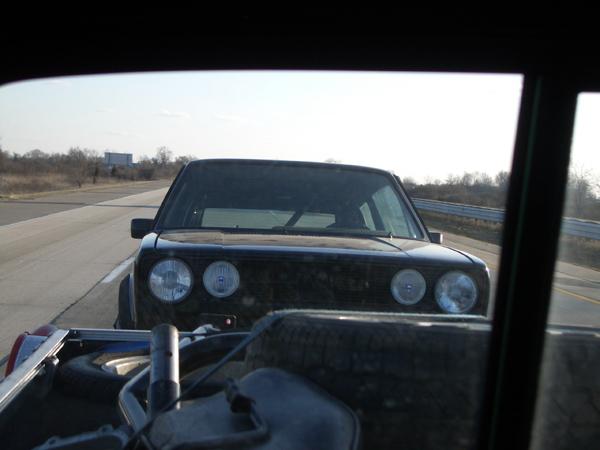
saying 'hi' everytime i looked in the rearview mirror
filling up the truck bed with goodies (extra transmissions, 2.75 sets of wheels, etc)
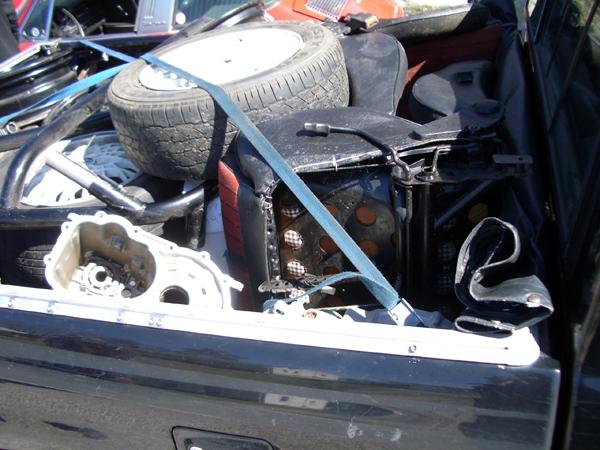
more extra parts (mmmm fiberglass)

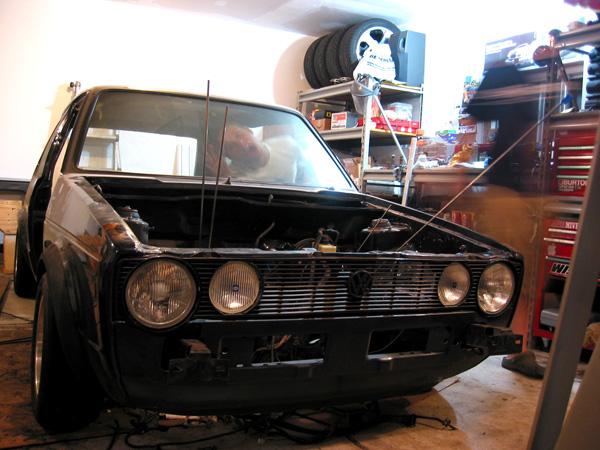
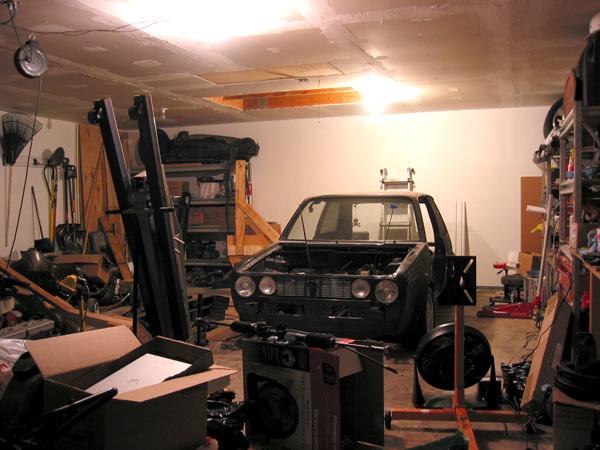
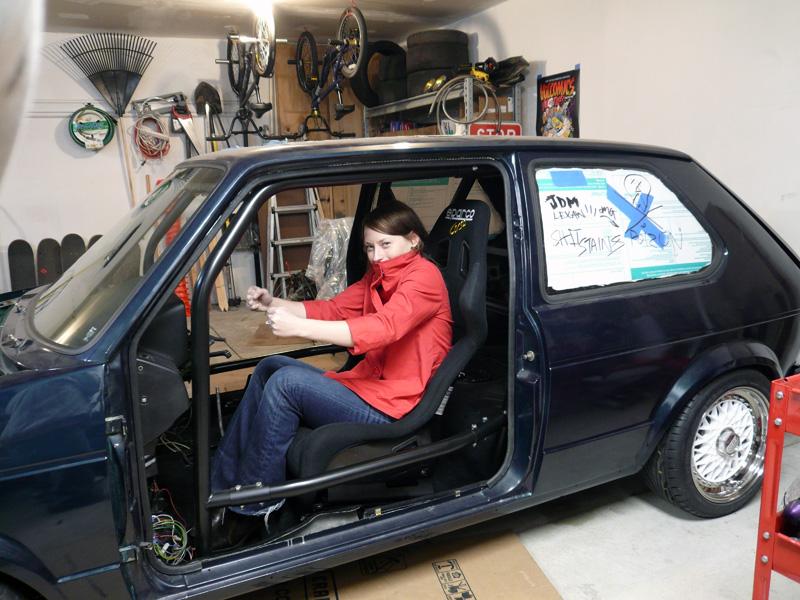
sitting at home in the garage, behind some of the parts. the other parts are to the left on that shelf, and scattered around other areas of the garage as well.
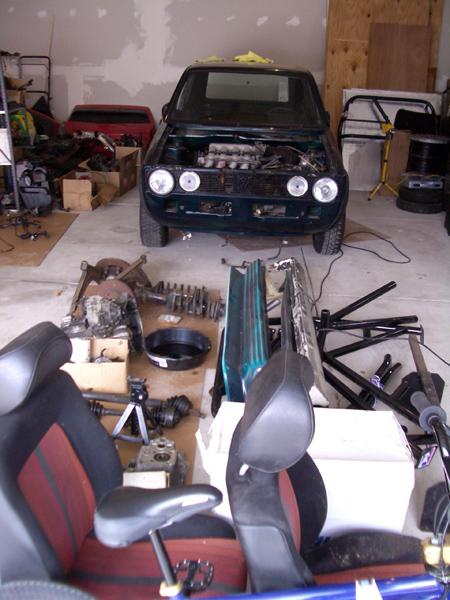
hell yes 16v

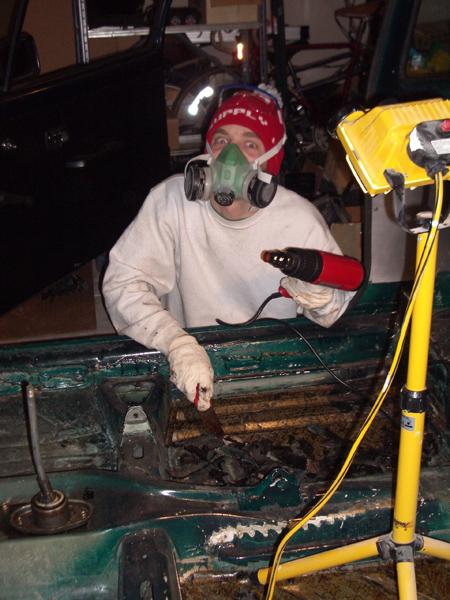
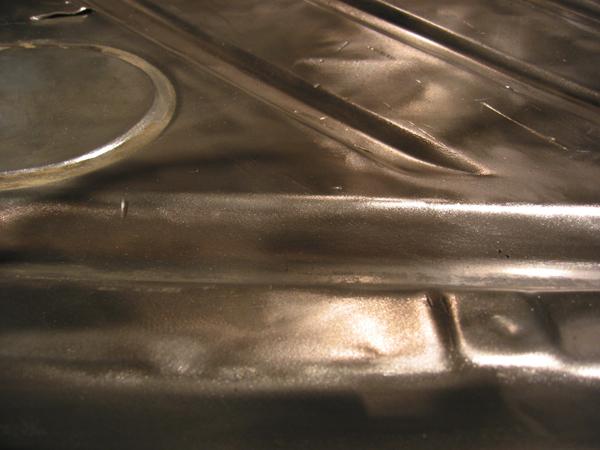
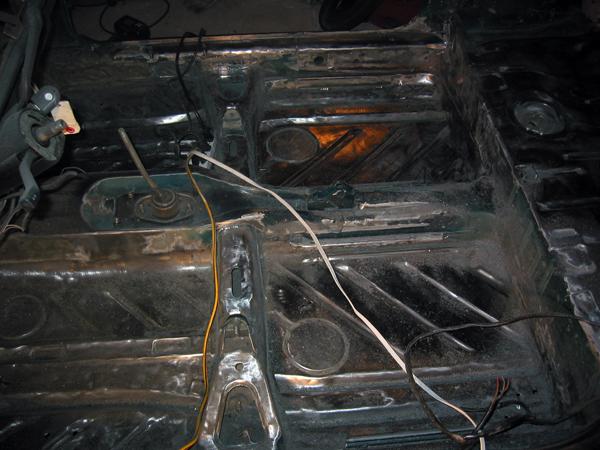
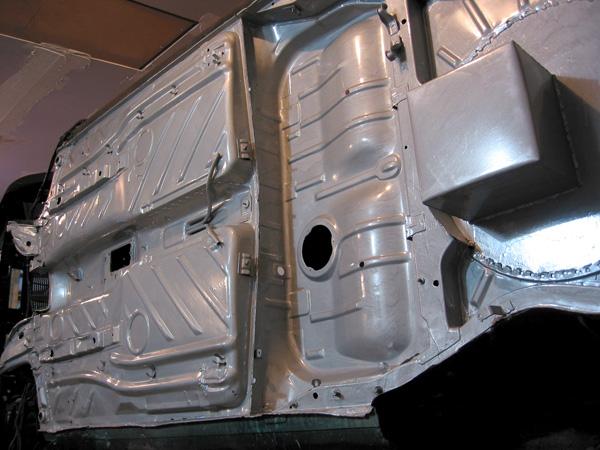
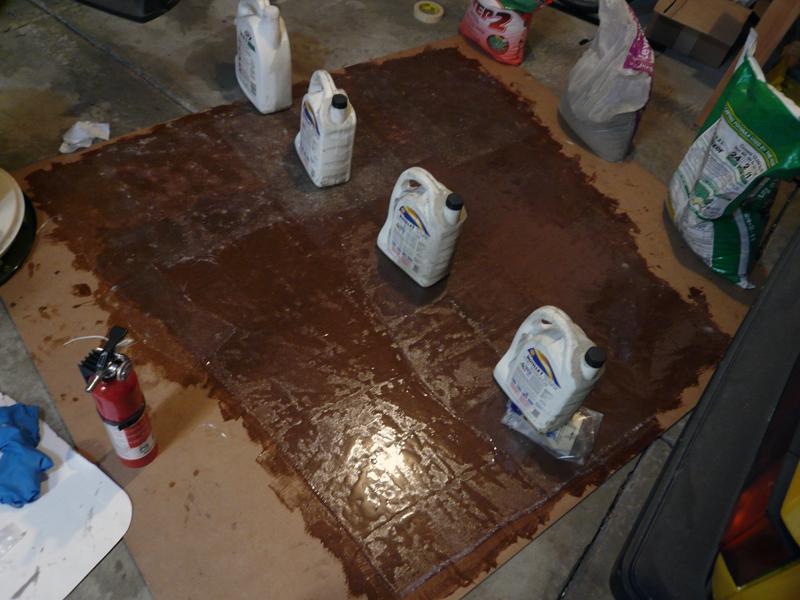
I finally took some initiative yesterday and started working on the floors. They are basically fine. The PO started stripping out the factory sound deading material, so i figured i'd finish, then coat the entire floor of the car from the firewall to the hatch with POR-15 to be clean and safe.
best spent $15 for the heatgun, this thing works wonders when removing the factory nasty tar material
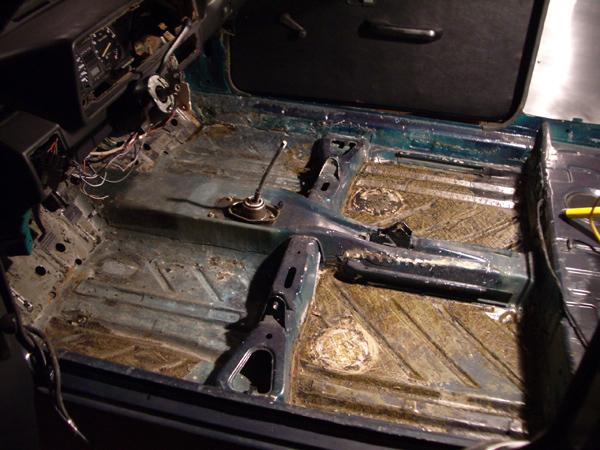
it looks brown and rusty, but its just glue leftovers I still have to clean up. I plan on ordering a kit from POR-15 to clean, treat, and coat my floors. Any input from POR-15 experts is greatly welcomed. I am also going to do the underside of the car, and maybe the wheel wells and the lower part of the engine bay. suggestions?
more to come* ;D
4/5/2006
i swear the UPS guy has a crush on me, he just brings me sweet gifts all the time.
Today he brought me a set of h&r coilovers, used but never driven on (installed but never driven). 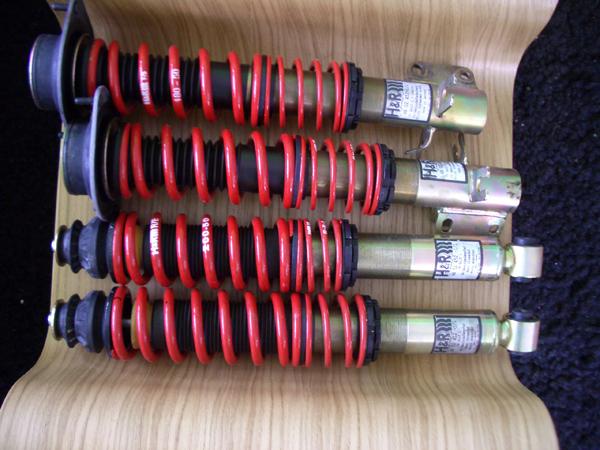
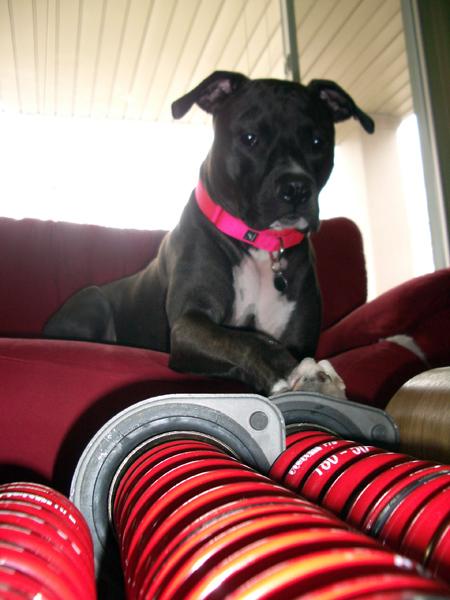
Rufus says "drop it like its hot!"
5/29/2006
more progess, finally...
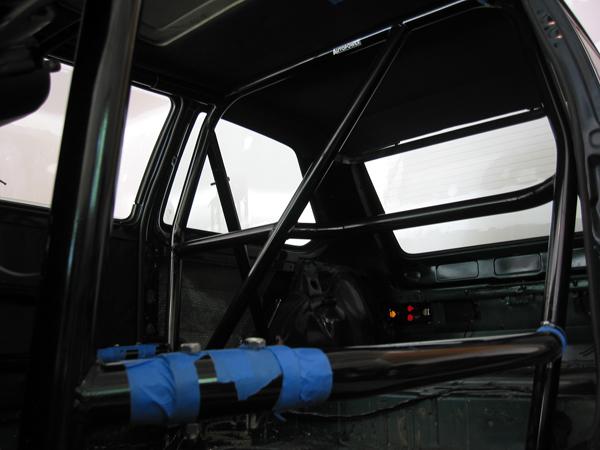
I got the cage fully installed. I wanted to drill all the necessary holes and bolt it in, then take it out so I could por-15 all the holes and seal 'em up. 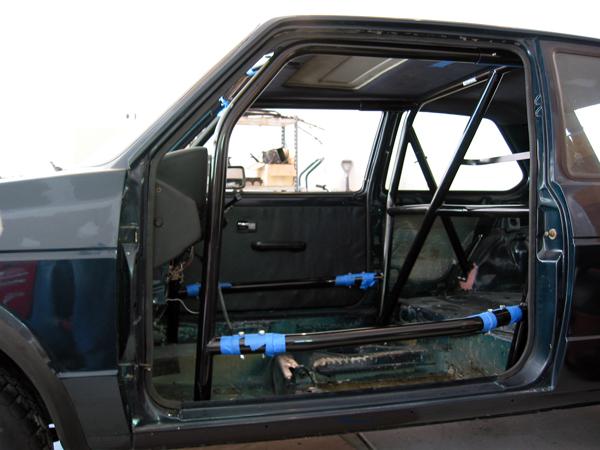
After removing the cage, I continued to strip the floors. I took a wire wheel to it for about an hour tonight, and got one floor panel done. I'm *hoping* the panels where passengers feet go are covered in more shit (thus harder to strip) than the cargo area etc. If not, this is going to take me ~10 hours.
I'm going to clean all this once its all stripped and then por-15 it right away, do you think it's ok until then? (bare metal/rust problems?)
I am also in the process of selling whatever useless organs remain in my body, affording myself some new sweet car parts. Deal!
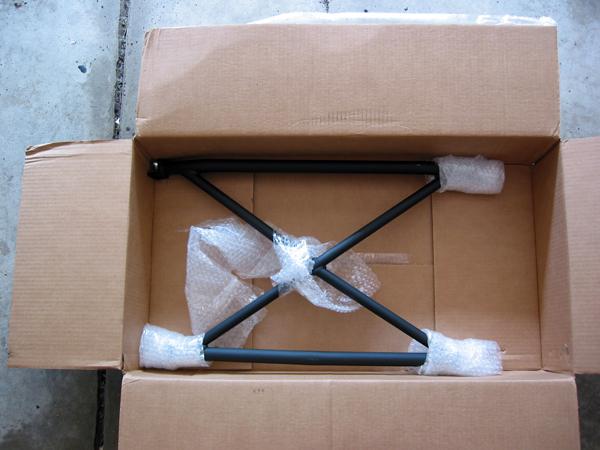
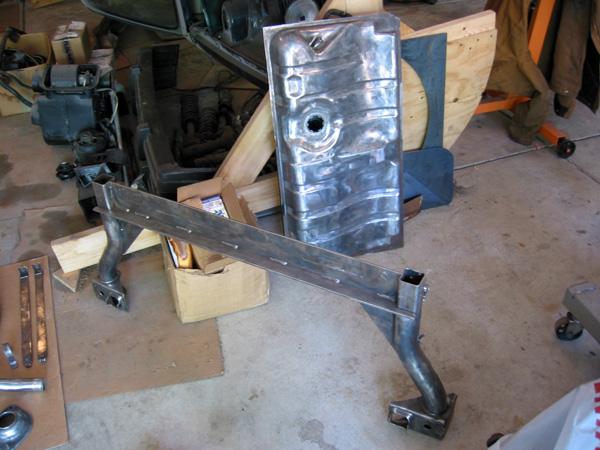
uber pimp 4-point lower subframe (cost: 1 kidney)
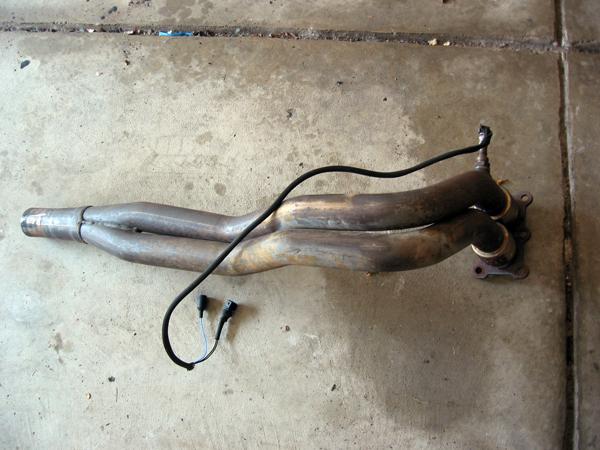
super bad techtonics 16v race downpipe, no cat (cost: both pinky toes)
6/15/2006
update: grinding floors has been slow, but i'm getting better at the aircraft stripper/scraper/grinder combo, and its moving along.
i can't wait to finish the floors so i can get to something a little more fun and 'car-like'.
but with the bad comes the sweet, i've sold my firstborn to nike in thailand, and raised enough money for some badass parts.
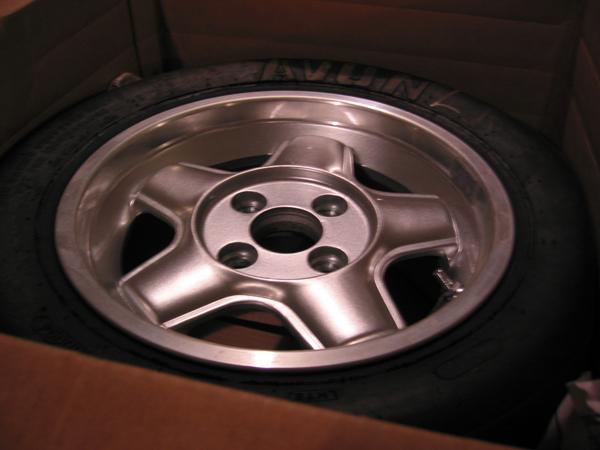
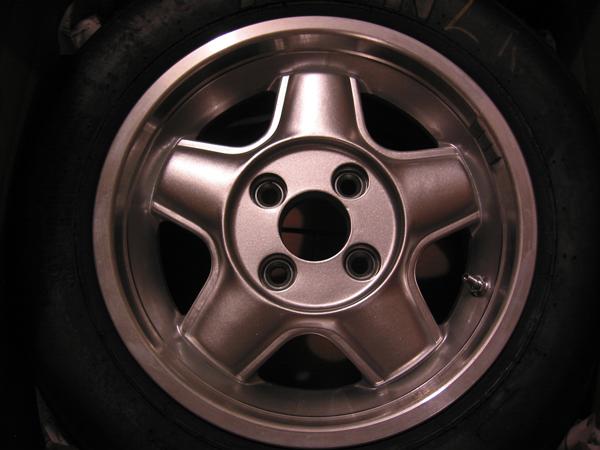
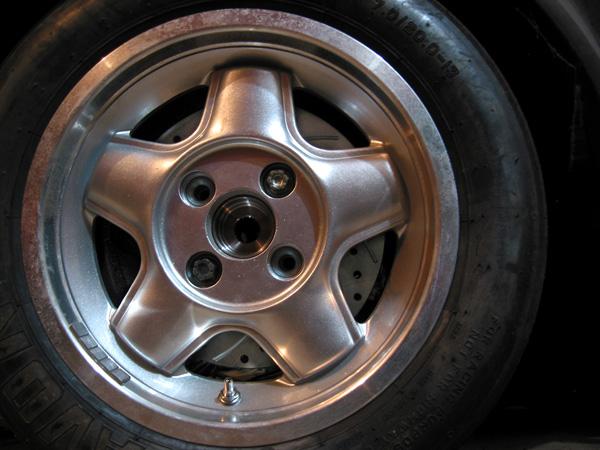
i dunno, but i heard these roll...
13x7 revolution racing wheels, light as hell with slicks. bling.
the following parts were bought from drew, hopefully my rabbit will provide a home half as nice as his.
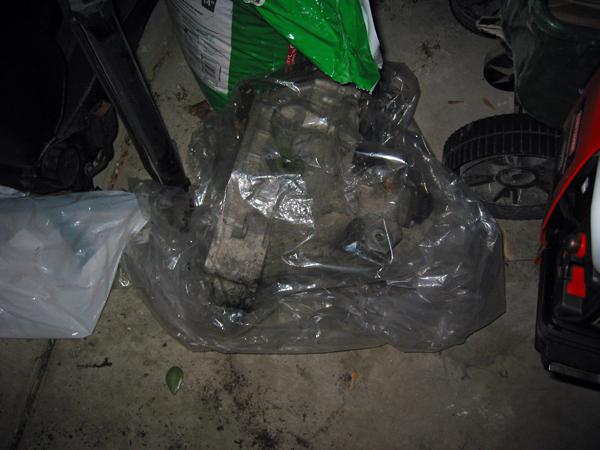
a plastic bag! came free with a rebuilt 020 trans with one of those quaife thingy whatevers in it 
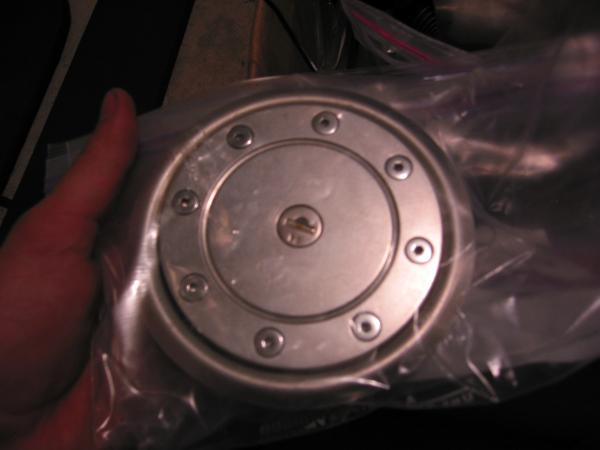
locking aluminum racing gas cap, +10whp
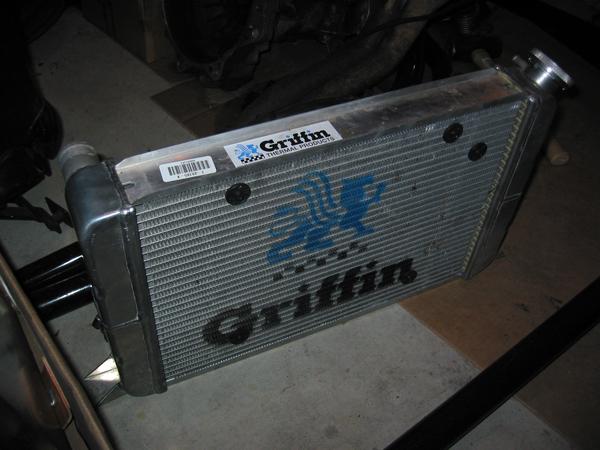
griffin aluminum radiator with fan
in the box is also a pair of harnesses, large duckbill spoiler, trunk relocation battery box with cables, small euro tails (sorry rich, ok not really), neuspeed short shift kit, and hoses for the radiator. thanks again drew.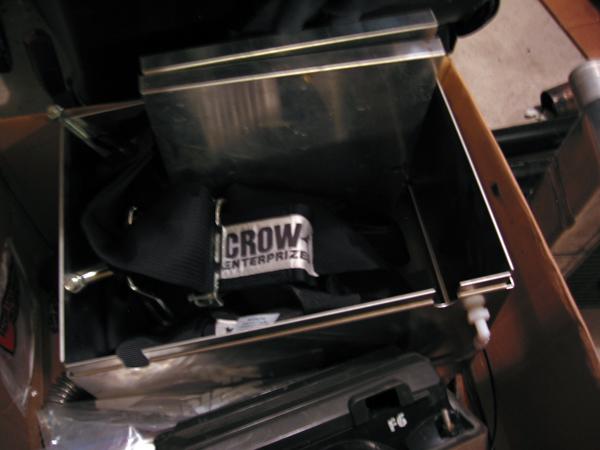
back to grinding...
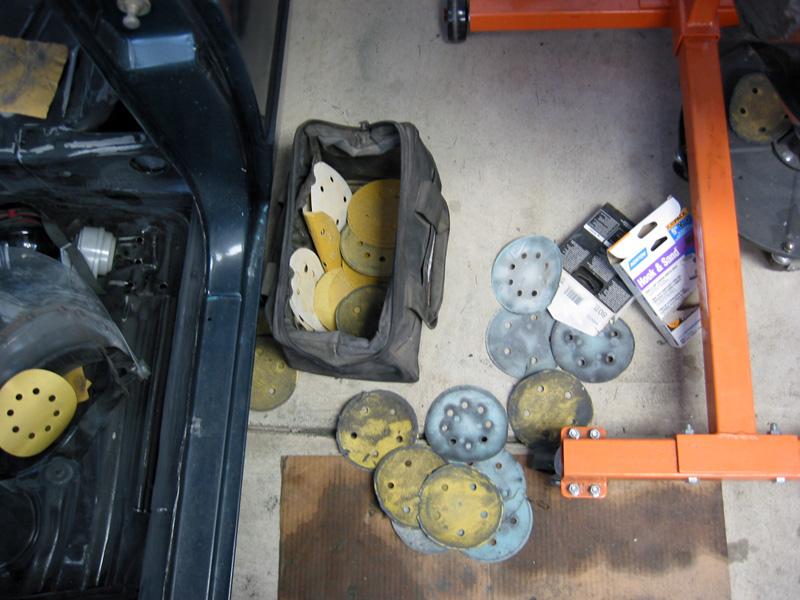
9/18/2006
if i ever were to impart wisdom within this thread, it would be this:
"never strip an entire floorpan with just a 4.5" angle grinder, ever"
I estimate I have about 40 hours or more in stripping the floor. I used a combination of paint stripper and a wire wheel on the grinder. I found if you apply the stripper and let it set for about 20 minutes, wipe up the excess, then immediately use the grinder, it works best. Wear a mask, gloves, long sleeves, respirator, and full face shield too, cause the grinder flings metal wires like a monkey with poo.
stripped:


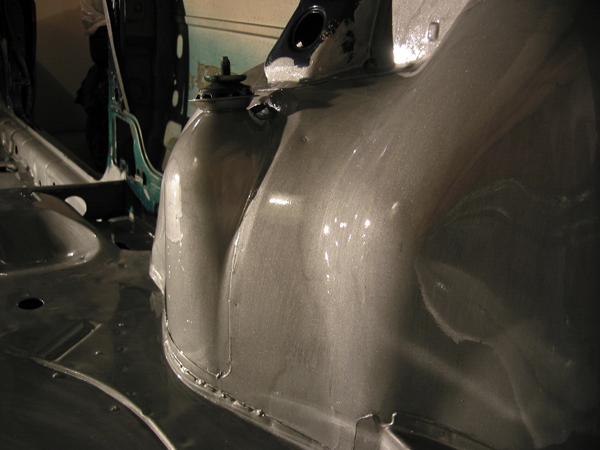
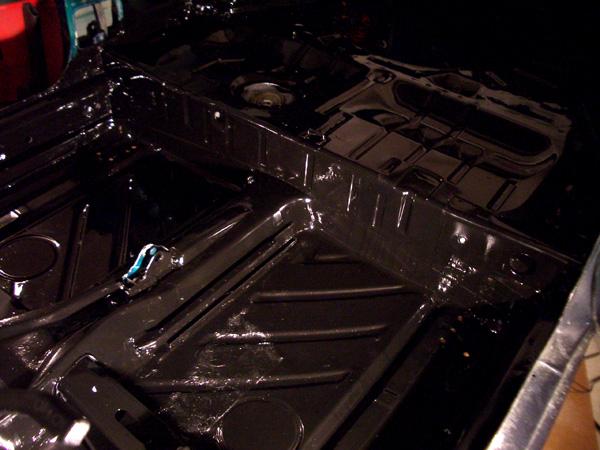
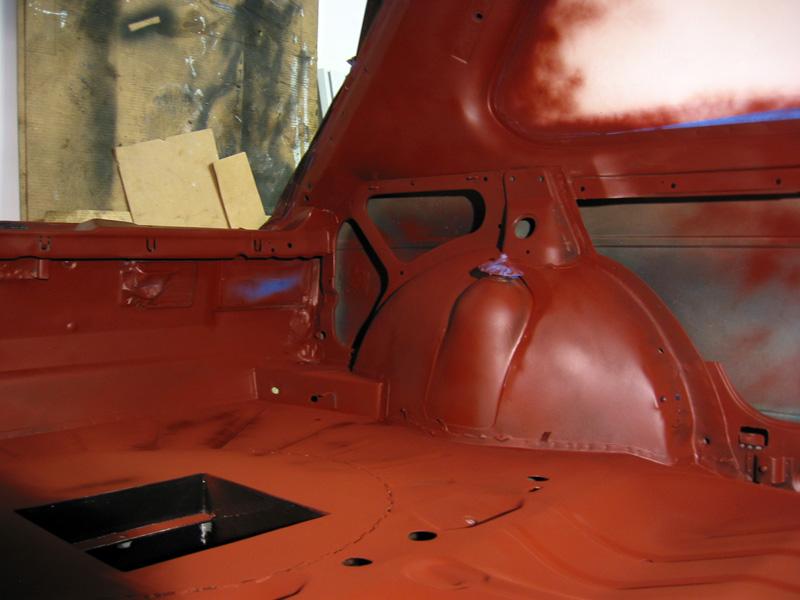
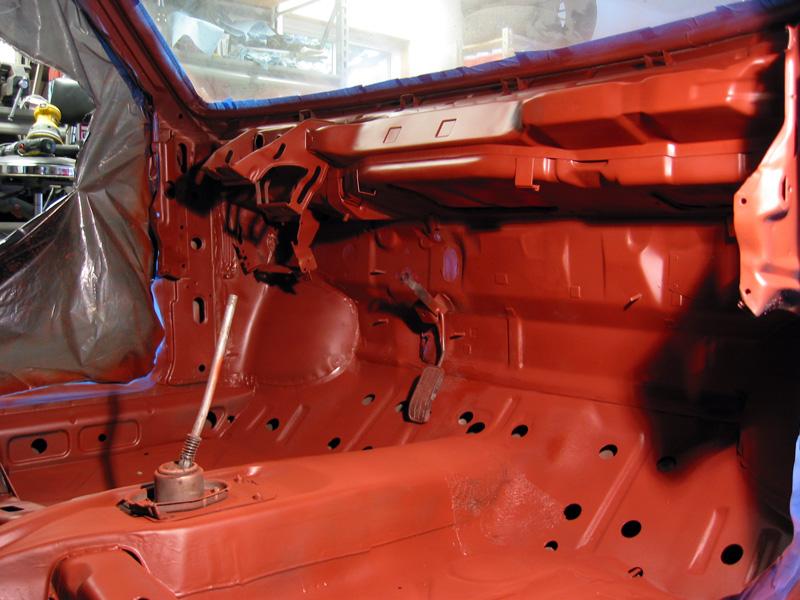
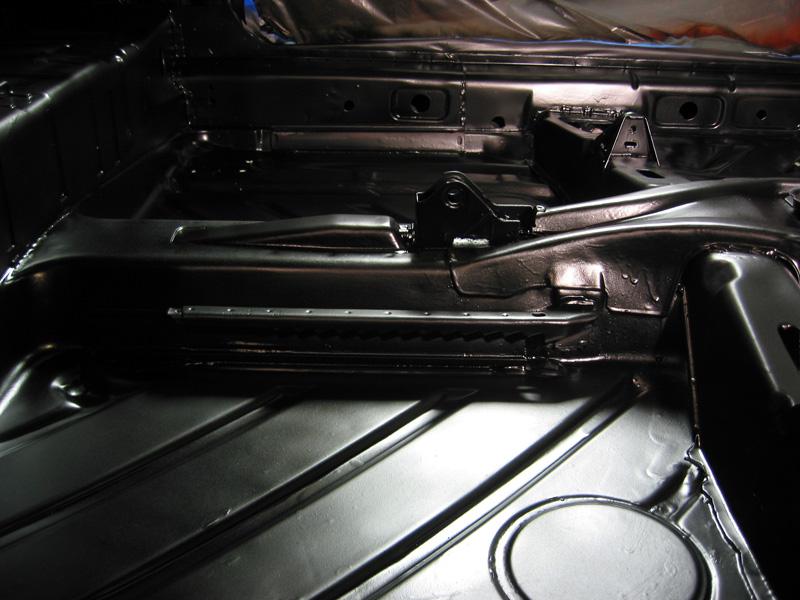
Once it was all stripped I used the POR-15 system to clean, prep, and apply the POR. I highly recommend reading all the instructions a few times, and using all their products. Overall it was a very easy process. I applied it with a nice brush, wearing a respirator too.
Tonight I am going to paint over this with some UV safe POR-15 'chassis coat' black paint/resin. Im doing the entire interior of the car so its all uniform.
POR-15 applied (still a little wet in the pics, it levels itself out nicely as it dries so there are no brush marks)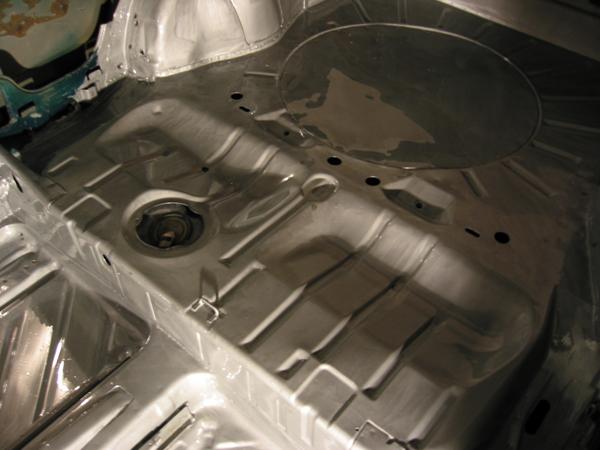


check out this before and after, sweet!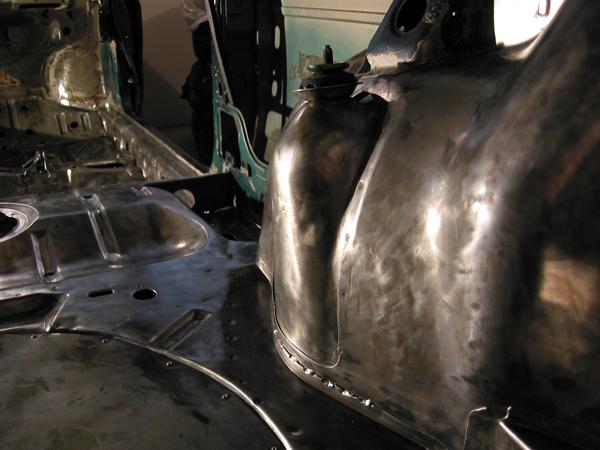
Now, to tackle the underside/suspension/brakes/fuel tank, etc etc etc...
9/19/2006
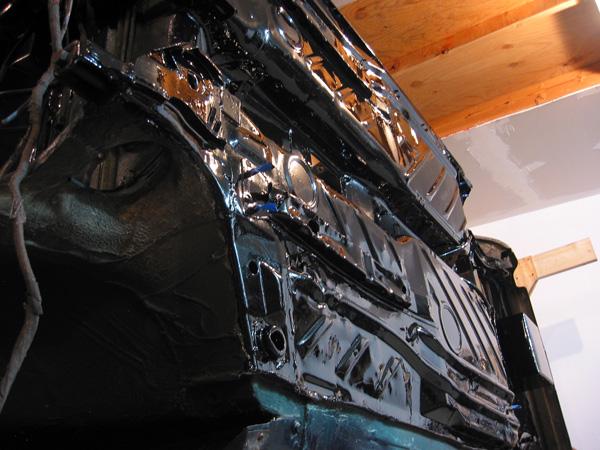
yar, 'chassis black' paint applied.
It looks shinier in these photos than it does once it fully dries, its more of a semi-gloss.
Sorry for the bad lighting.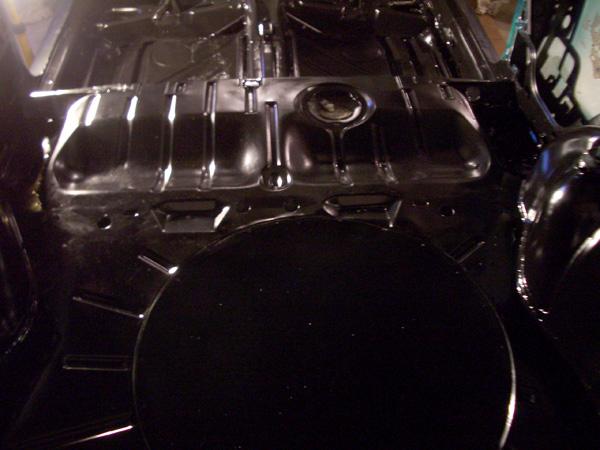
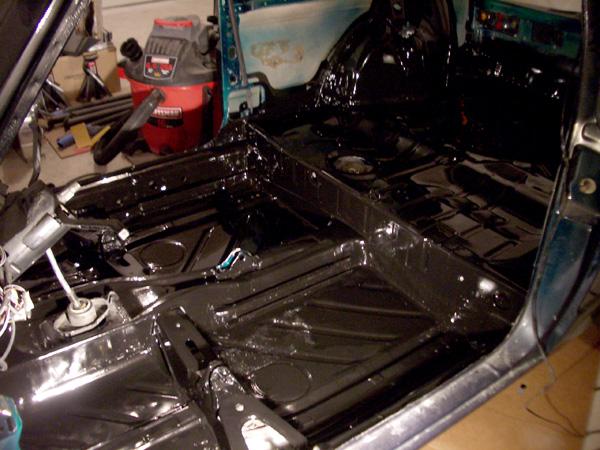
and just a reminder of what it used to look like
1/11/2007
I have been getting bored of the car being so 'normal' and 'sitting on all four wheels', so I made a ghetto wooden car rotisserie.
Last night Mr.Matt and I finished it up and pulled the engine. oh man.
I picked up the hoist from detvw, but forgot to grab a couple essential parts... so we had to use a tow strap to lift the engine.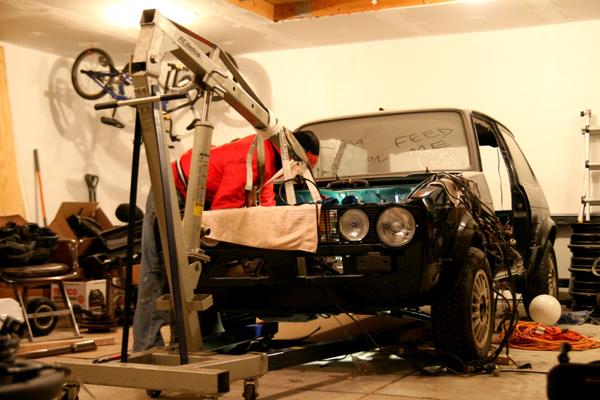
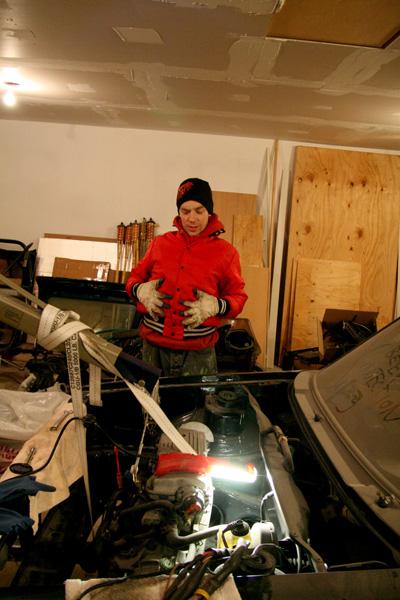
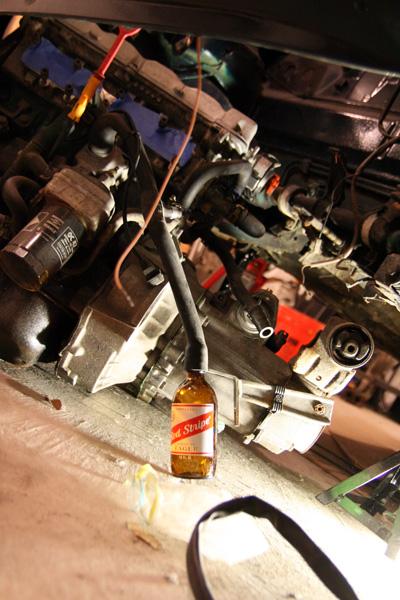
After struggling with a couple transmission mount bolts, we decided to drop the engine/trans out the bottom of the car. It wasn't that hard, especially with a couple red stripes around to help...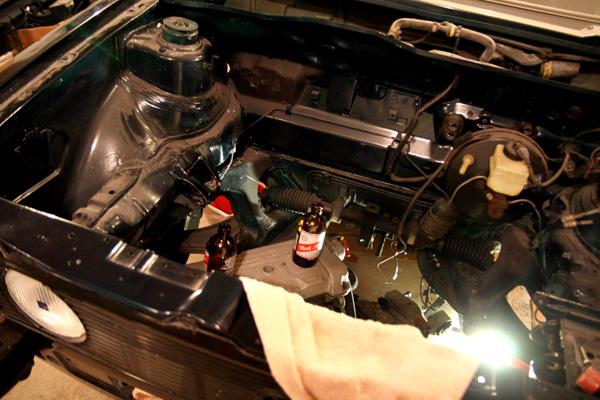
Using some 'schematics' and 'stuff' I found from random sources on the vortex, I built a car rotisserie out of 3/4" plywood, 2x6's, and a buncha screws. The rotisserie attaches to the bumper struts via some 3/8" bolts (which i got in 3", shoulda been 3.5"). I have more pictures and a design in illustrator with parts listed if anyone is interested.
Here it is bolted to the front of the car, I'm taking off the back wheels: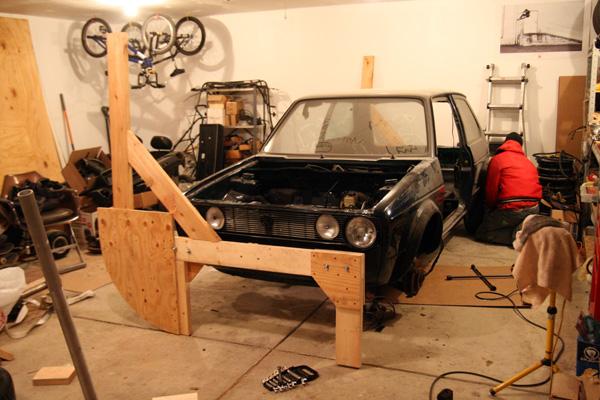
After a few nervous thoughts and some more red stripe, matt and I bolted up the rear rotisserie, and tipped the bitch on it's side: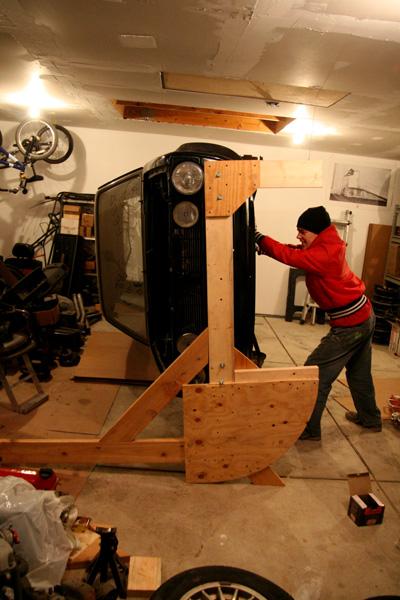
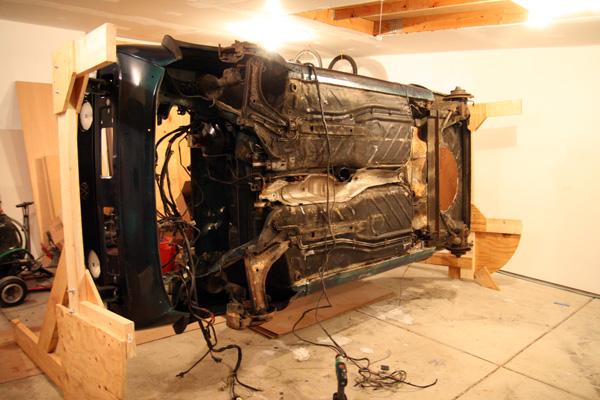
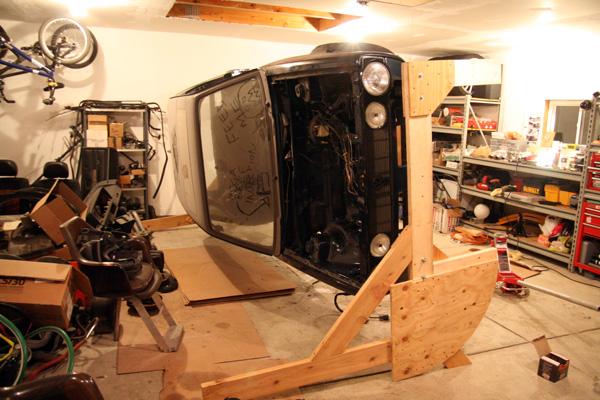
It makes me slightly nervous seeing it tipped like this, but oh well, it's probably ok... ha. Stephanie calls it the 'death rotisserie'.
I'm going to remove everything from the underside of the car, and spot repair anything on the floors that need love.
Big thanks again to Matt for his help, JohnnyB for the truck, and brian for the cherry picker... steph too i guess for putting up with this random shit
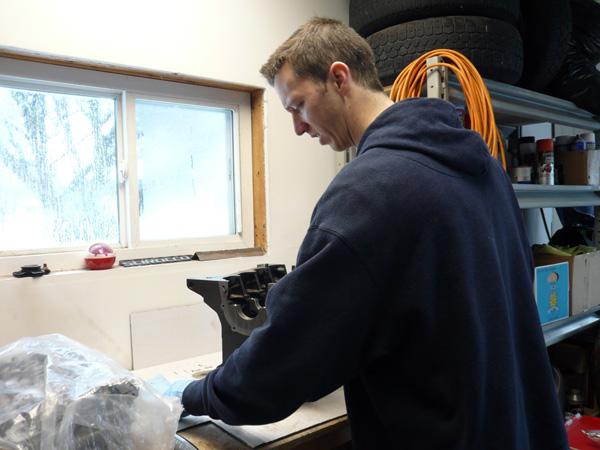
4/17/2007
It has been a while since I've posted an update. I have been keeping busy, mainly planning, gathering parts, and cleaning up existing parts.
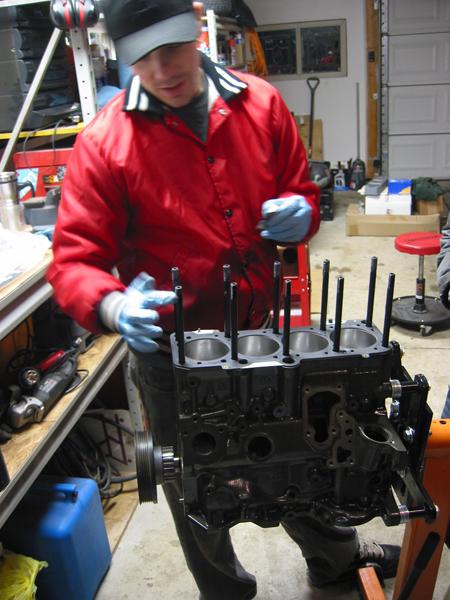
I am picking up an aba block within the next week or so, then taking immediately to the machine shop. It will get cleaned and a few things done to it, most notably getting bored .020 over. I will then be dropping these bad boys in there.
Wiseco forged abf 11:1 pistons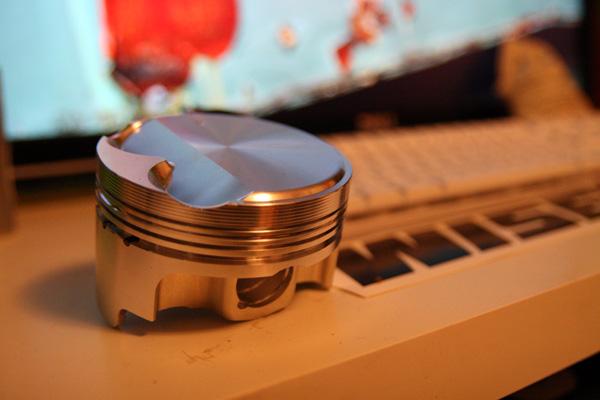
Further engine updates to follow soon.
The majority of my garage time lately has been spent wrangling a wire cup. I've been stripping parts of all sizes, from caliper carriers to steering rack brackets to the entire freaking bottom of the car. Let me just say that the 'death rotisserie' has earned it's keep. 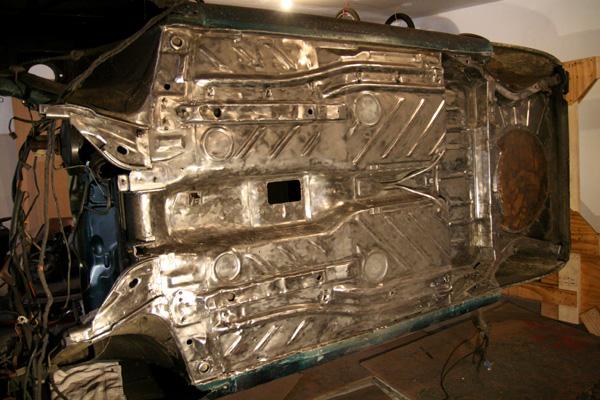
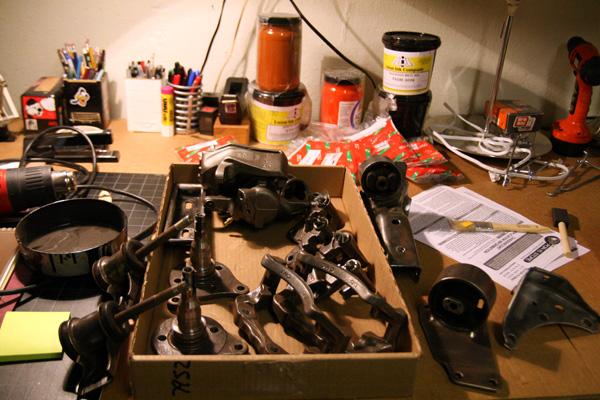
Thanks to matt for his continued help and for taking tonights pictures.
Tonight was sponsored by the letter 'A', pitbulls, and Oberon.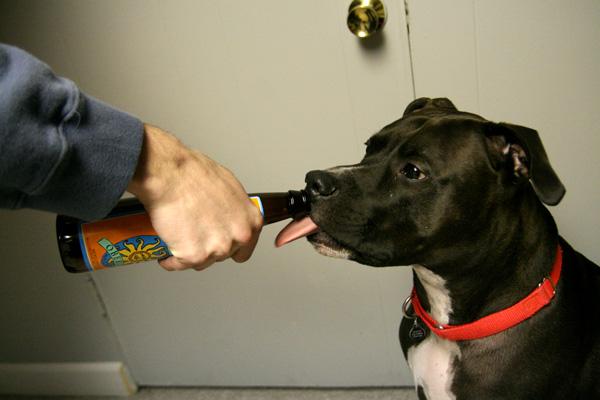
5/29/2007
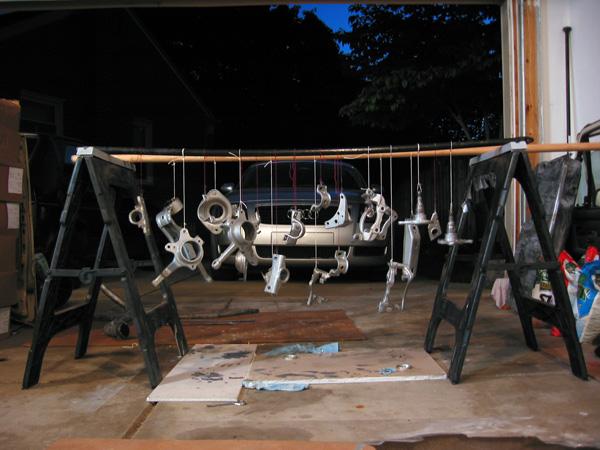
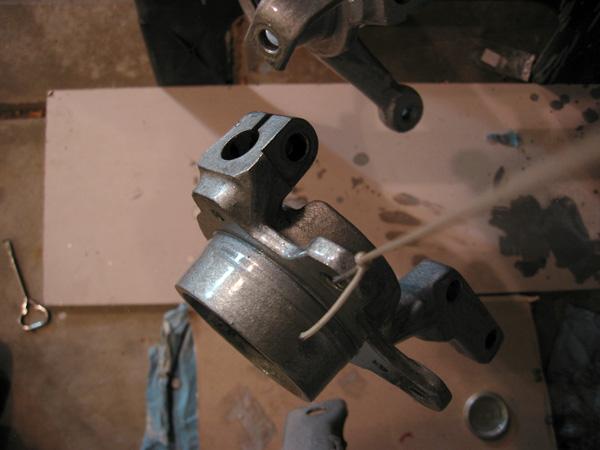
I swear I'm still working on this...
I have been stripping parts, lots of parts. This weekend I finished cleaning up the parts I needed to, and coated them in por-15. I'm fairly happy with how they turned out, a bit 'thick' in places, but not bad.
I'm sanding down minor drips and giving them the final coat with Por-15 Chassis Coat black over lunch today. 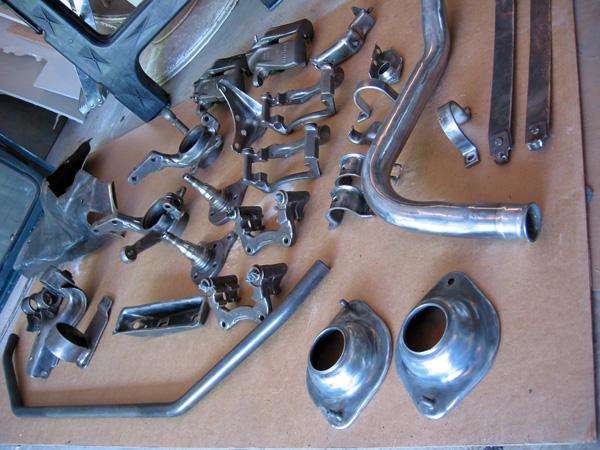
Matt has also been helping me with something else for the back of the car. We've gotta finish welding up a bit back there, then the entire underside of the car is getting the Por treatment.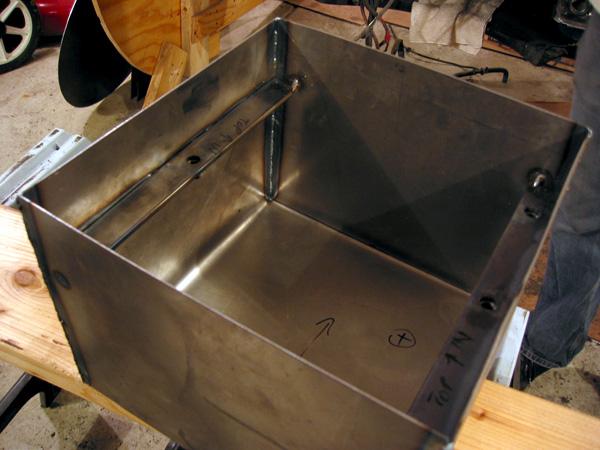
6/17/2007
I swear this is the last Por-15 update you'll have to see (I'm happy too).
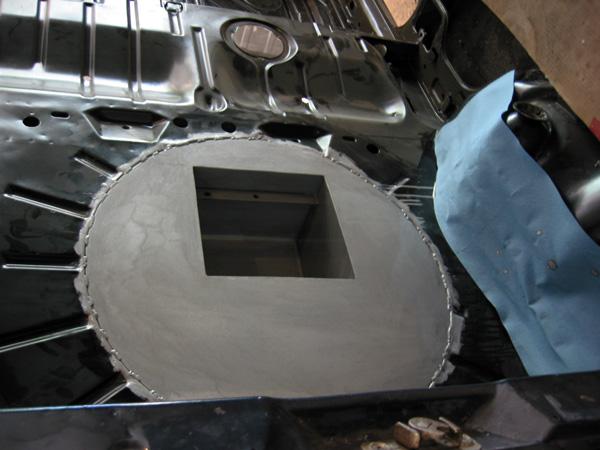
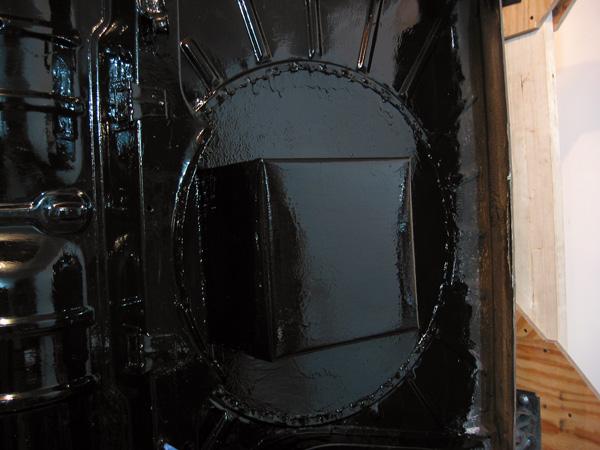
The wonderful Matt (d-bot) helped me weld up a new spare wheel well/supa custom battery box. I'm very happy with the results, and I think it will be a nice small touch to the car. The box appears to be hanging very low, but we measured my beater rabbit, and the box will not hang below the rear beam.
I then did the regular 2 coat silver por-15. This time I used a different topcoat they sell, called Hard Nose. It is a 2-part epoxy-ish type paint that takes 4 days to cure. It's supposed to be impervious to rocks 'n junk, and never chip. It smells like death and supposedly kills babies. I probably should have worn a respirator, but who's to say.
I'm very happy this is finished, I can't wait to start running new fuel/brake lines and reassembling all of my refreshed suspension and brake components.
Thanks again to Matt who is always there to lend a hand and hang out. 

Oh yeah, and most underbody parts will be topcoated in spray rubberized underbody paint. I figured the por-15 will protect them from rust, and the rubberized spray will ward off small rocks.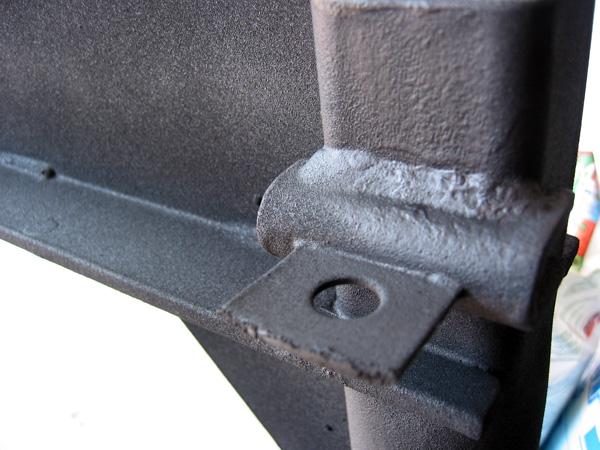
assembly pics are next to come.
8/12/2007
First and foremost I would like to thank Matt, Micah, Victor, and Raven for coming over yesterday and helping me out. They hung out with me all day and we bolted stuff together for about 8.5 hours straight. I can't thank them enough.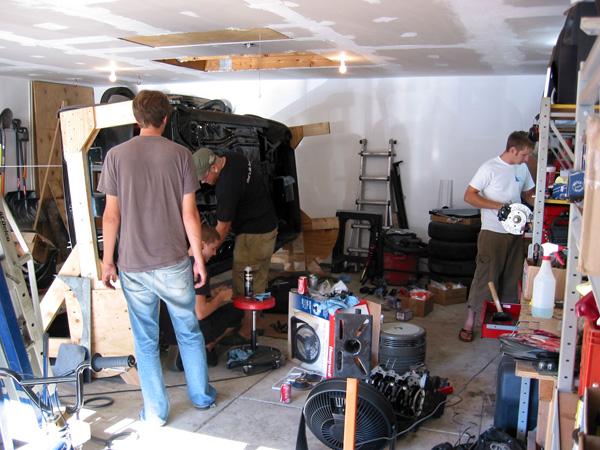
We assembled the trailing arm with brakes (9.4 drilled/slotted brembos) with Hawk HPS pads, Shine 'race' rear sway bar, and refinished 28mm scirocco rear sway bar. All the hardware and bushings were either new OEM or refinished. I need to thank Mike from SEA for helping me out on a very large and tedious OEM parts order, he is THE guy to go to for parts.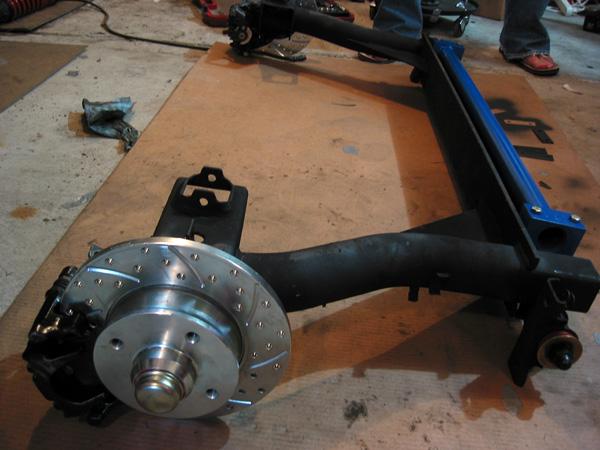
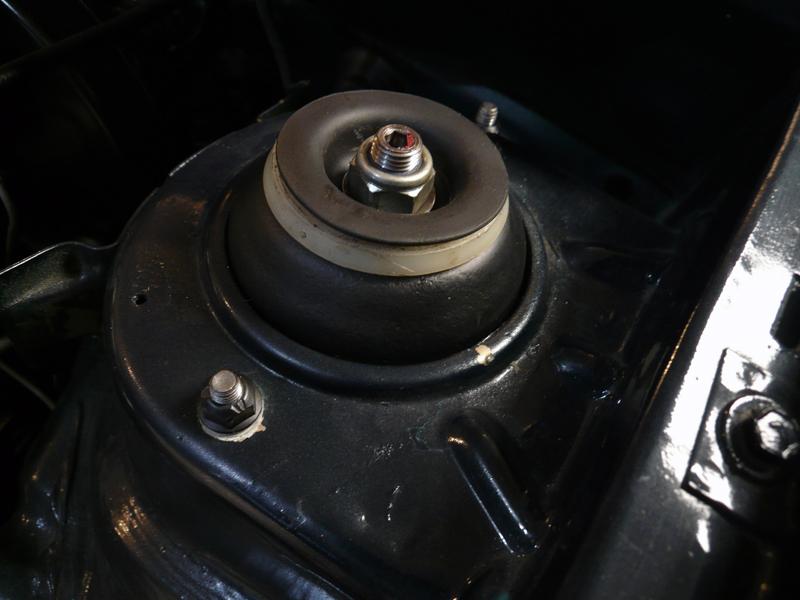
We also bolted together the front suspension, brakes (10.1 drilled/slotted brembos) with Hawk HPS pads, seam welded control arms, new ball joints, and refinished old-style strut top mounts with poly. H&R coils were thrown on front and rear, and cranked down almost all the way for good measure.
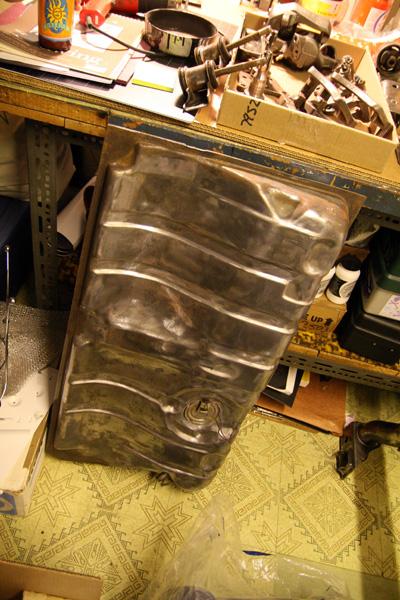
The refinished gas tank was slapped on before we bolted up the trailing arm. I also bent new brake and fuel lines the other week. They are a pain in the ass, even with the proper tools. I bought 304 stainless lines, 3/16 and 5/16. They are badass, but a pain to work with. I will never bend 5/16 SS again. They still need a bit of final fitment work and flaring until they are finished, but the hard work is over with.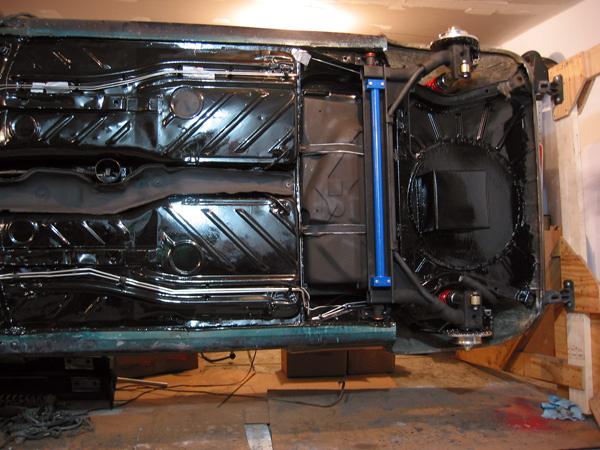
We tipped the car back down very slowly. It went super smooth with the 5 of us muscle-bound 90lb'ers. I think Micah did it all himself, we were just there as support. The uber light wheels were literally tossed to each person and bolted on. The rotisserie was removed and voila! The car is back on all fours, finally.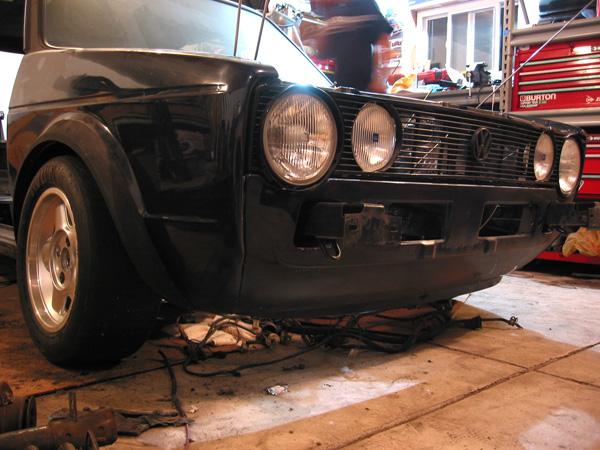
11/28/2007
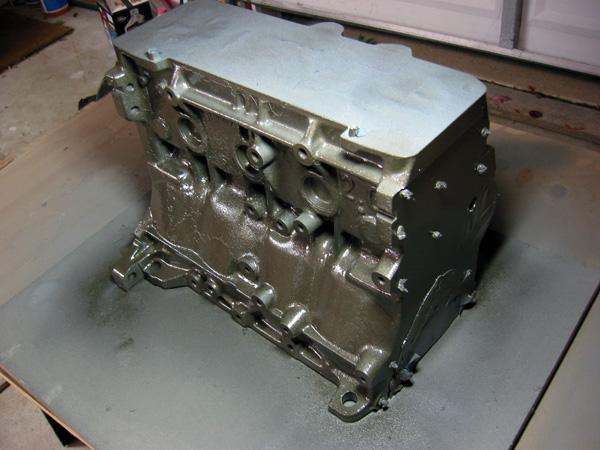
flow
punched out .020 over, line honed, arp headstuds and crank studs, polished crank, balanced, clean, etc etc
1/8/2008
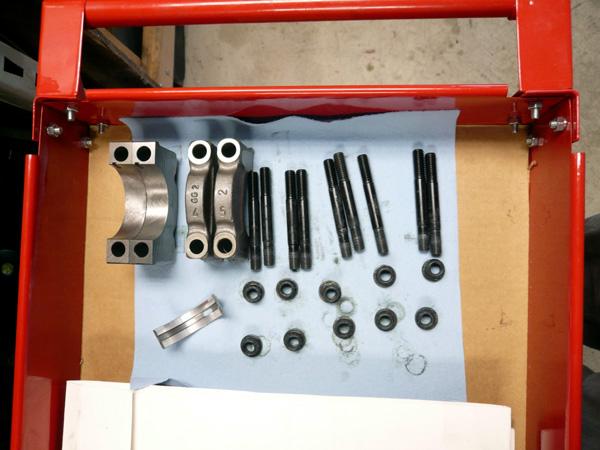
Mr. Geoff (scideraddo or something like that) came over for a couple hours on sunday to help me measure my crank bearing clearance. I had a lot of fun and learned a ton from Geoff. These measurement tools are amazing, the accuracy blows my mind.
Pending thickness, I'm getting the bearings and piston skirts coated at Champion Performance this week. After I get those back we're going to start building the motor!
Just a few pictures to keep you guys happy...

geoff cursing at my OG torque wrench 
2/18/2008
It's amazing how much fun you can have working in the garage with some friends. Matt and Geoff came over yesterday to help build my motor. Let me back up a few steps.
I've been reading a lot of stuff online and in actual books about motor building. I've also been fortunate enough to have all you guys and Matt and Geoff to answer questions and tell me what I'm doing right/wrong.
I dropped off my pistons, main bearings and rod bearings to Champion Performance to get coated in some crazy kevlar stuff they use in race engines. It might be overkill, but it was cheap enough and it gives me piece of mind. Plus it's a sweet matte black and looks badass! Just kidding. Sorta.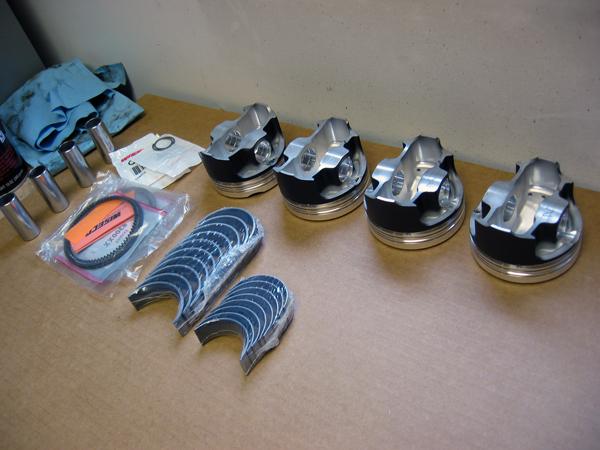
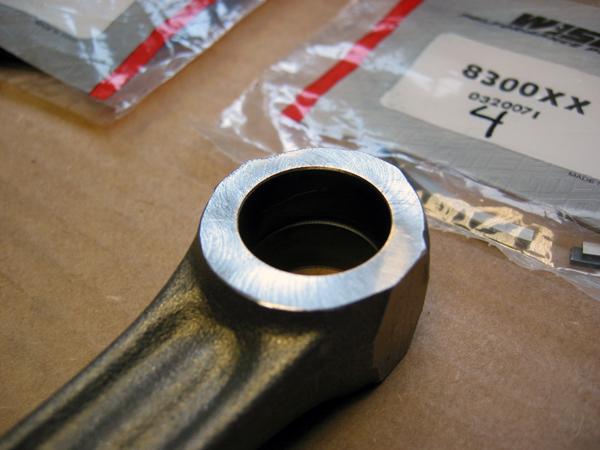
Last week we were working on the motor and tried to put the rod end into the piston. Surprise, it didn't fit! I don't know if wiseco messed up the design or if the ABF rods are slightly narrower, but they were just too chunky to work. Geoff was nice enough to take care of me and mill .0040" off each side of the rod end so they'd fit. Thanks Geoff 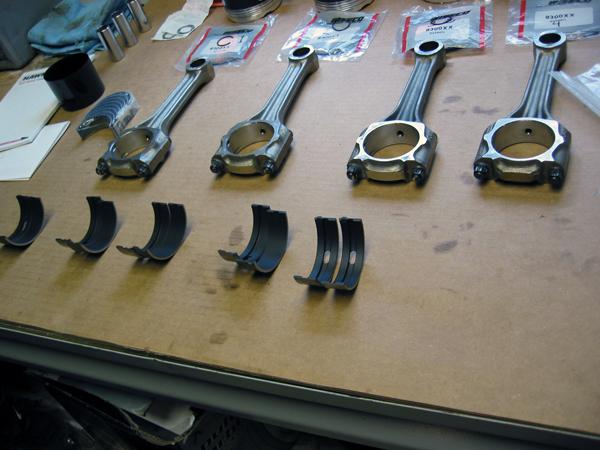
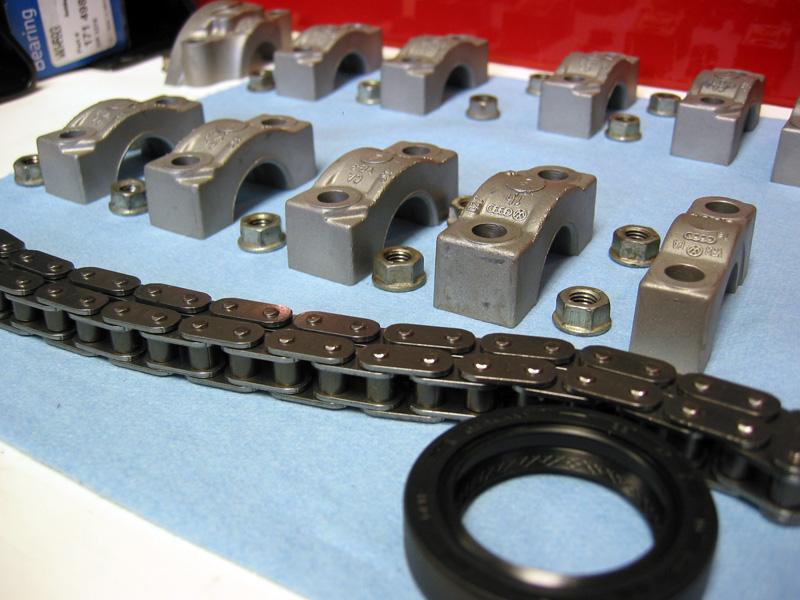
Pretty crank bearings.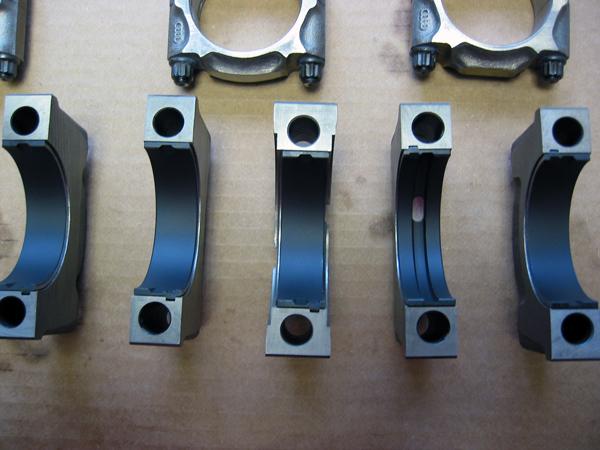
Matt lent his sweet plastic bike tube hammering skills to beat a wrist pin into submission.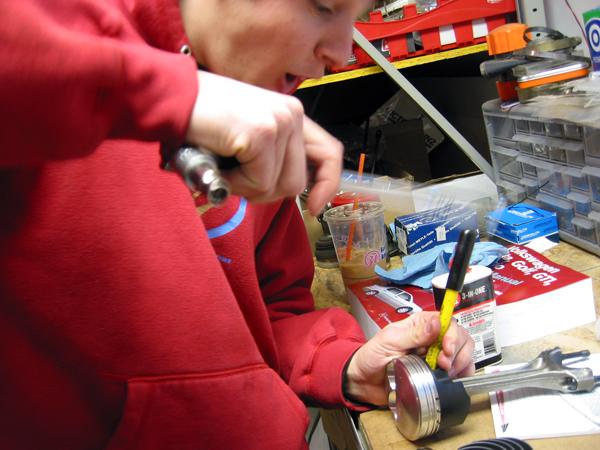
Installing a piston.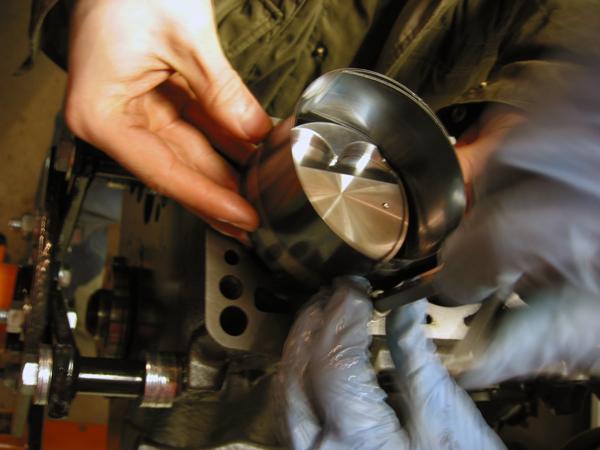
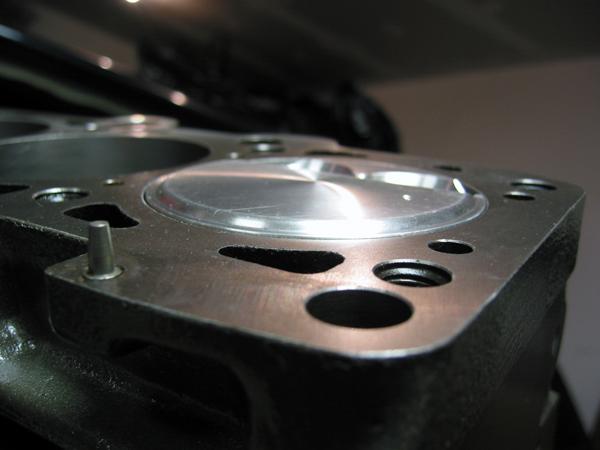
Oh, yeah, it's pretty. Check out the dome on that piston! 11:1 compression ratio, mmmmhmmm.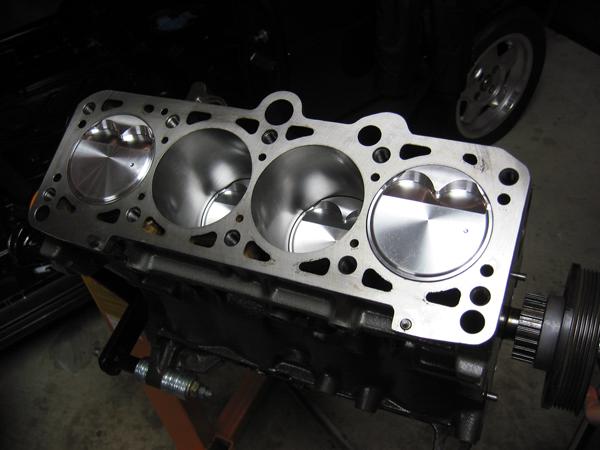
Geoff Rood endorses this motor. Just say yes.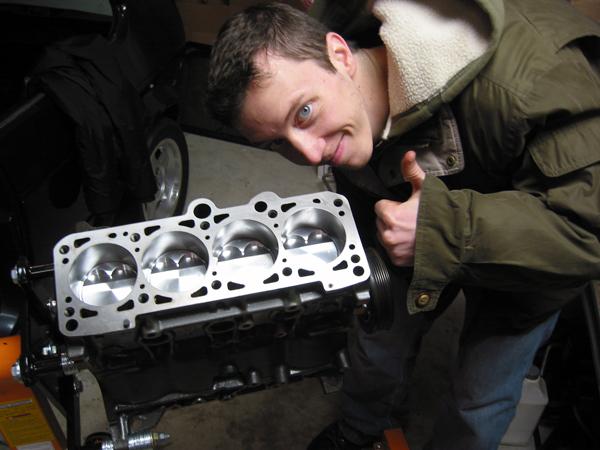
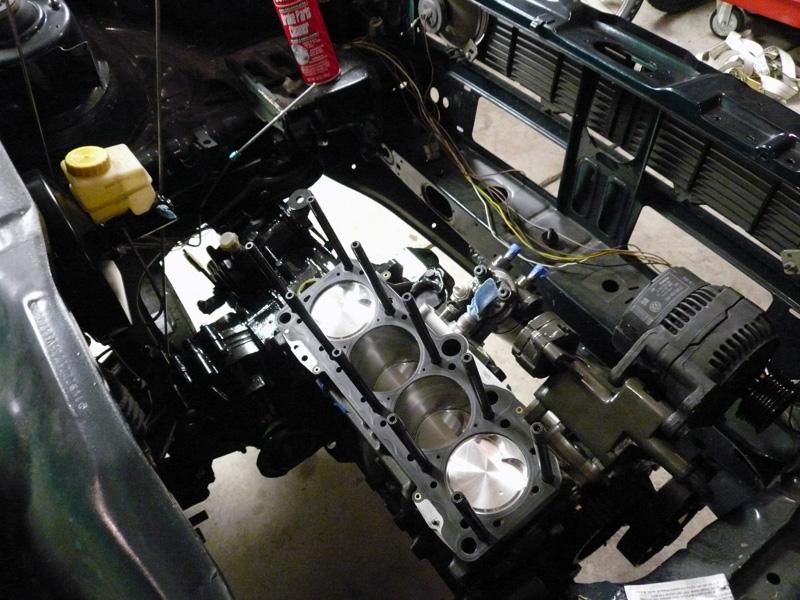
Look at that head, mmmm hot damn it's clean.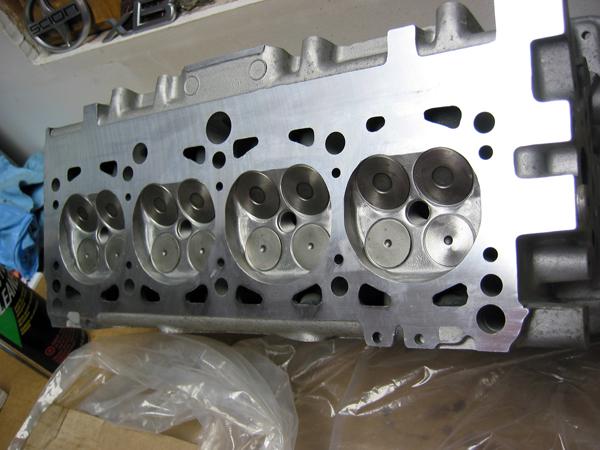

When installing head studs, use a shitload of moly. Caution, do not get moly all over your hands and coat when tipping the motor. Re-apply moly liberally to smudged areas.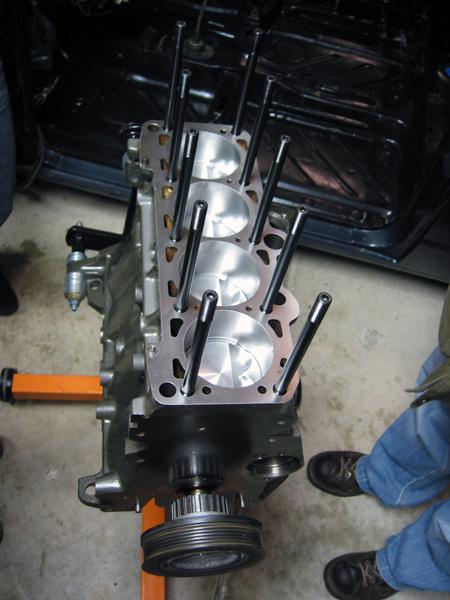
Bam.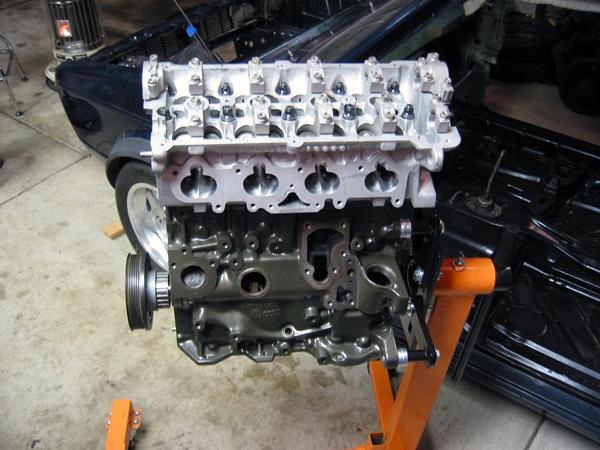
3/4/2008
Oh yeah, here's a small update...
dum dee dum...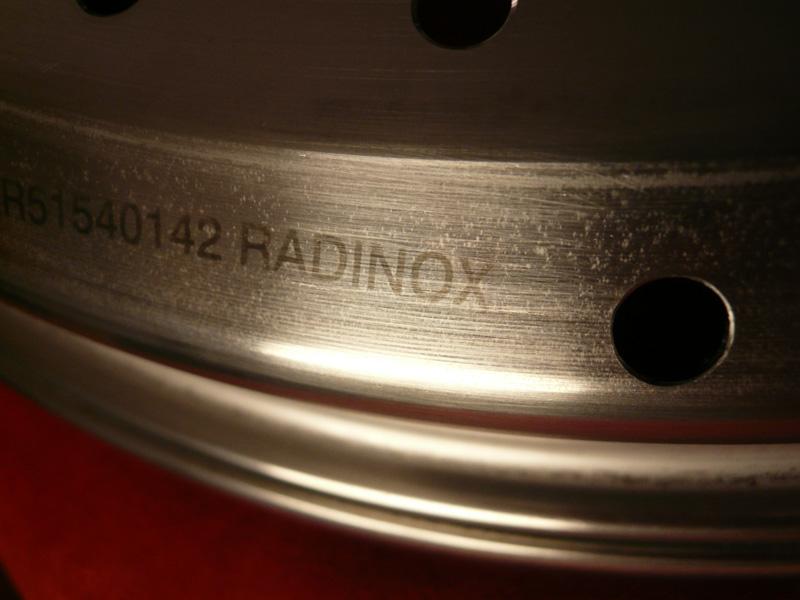
4/12/2008
small update.
I've been working on the motor a lot recently, getting everything bolted up and ready to go. I'm getting there, but I still have a lot to do. This is my first build so I'm taking my time and learning a lot as I go.
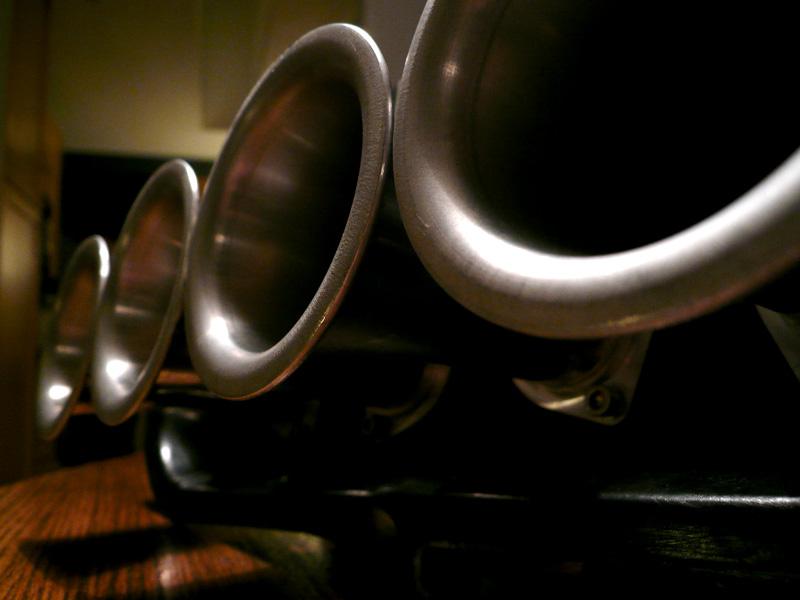
Here is a quick bolt up of the new itb's so I could see how pretty they looked. After this picture was taken I spent about 5 minutes opening and closing the throttle, making car sounds and shaking the motor.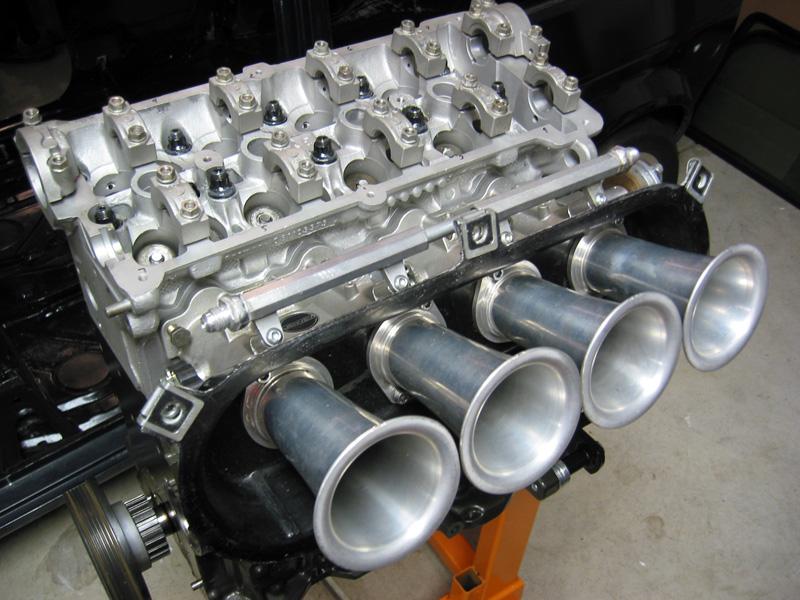
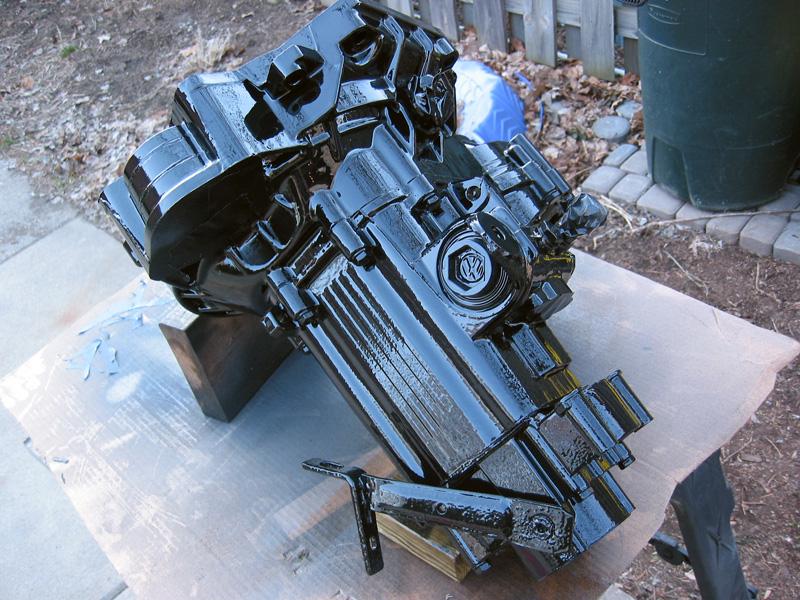
Then last weekend when it was nice out I cleaned up the transmission I got from Drew a long ass time ago and primed/painted/cleared it. It came out pretty nice and will sorta just disappear down in the bay once it's installed.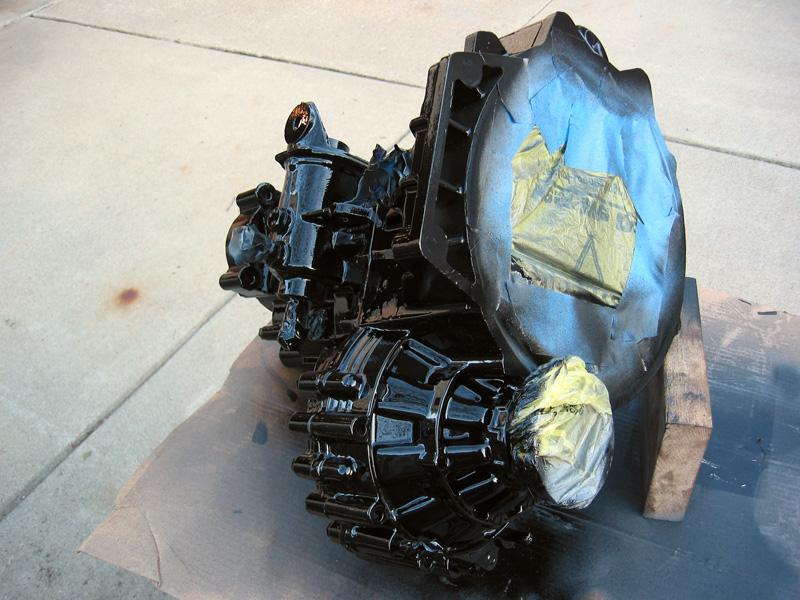
I also cleaned up some shift linkage and painted it.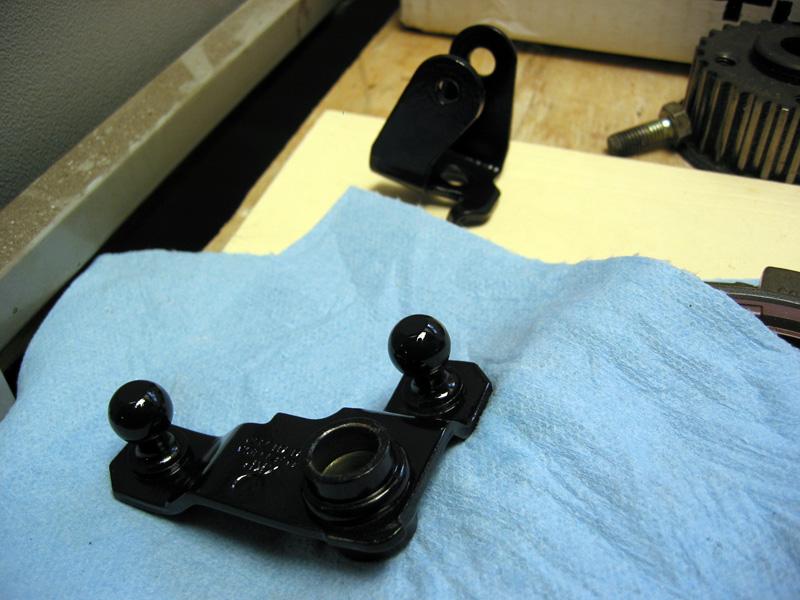
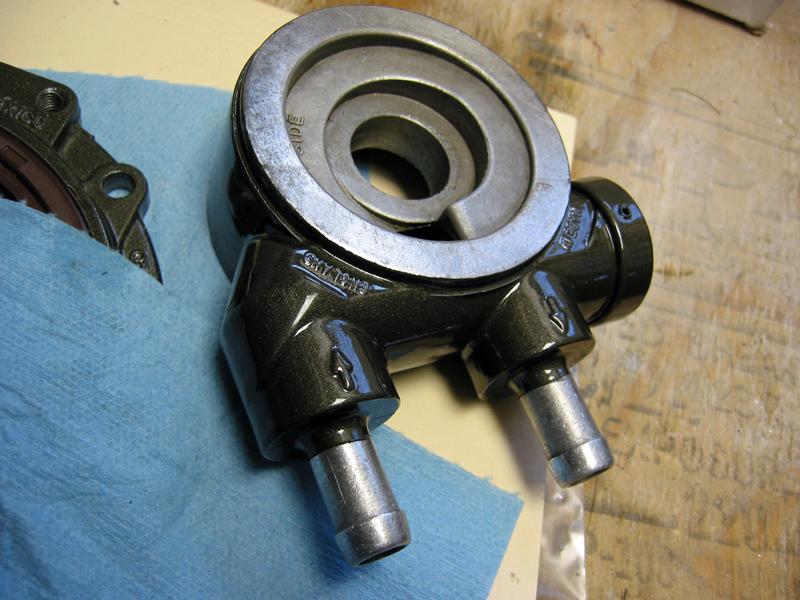
Last night I messed with a nice thermostatic oil cooler plate I got in a trade from Matt. It's from a volvo or jag or something, so it wouldn't bolt right up to my motor. No problem, I had a few minutes and a sawzall; problem solved.
I chopped off a threaded portion of the stock threaded piece.
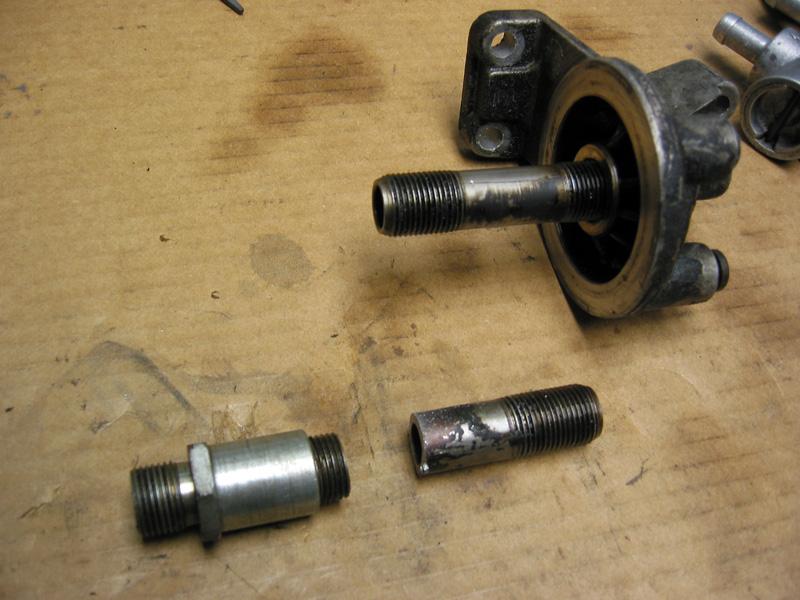
Cleaned up the severed piece and threaded it into the new plate.
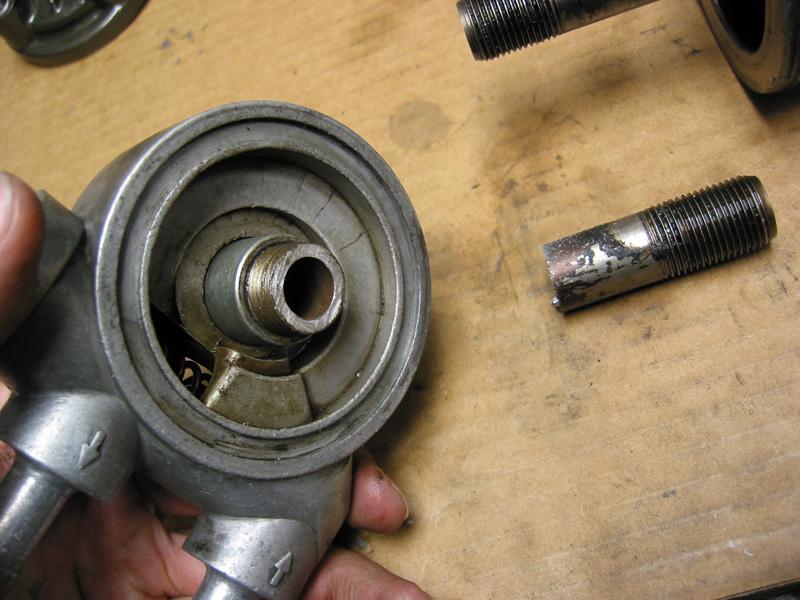
A few minutes later and bam. The new one is on the left next to a nasty OEM version.
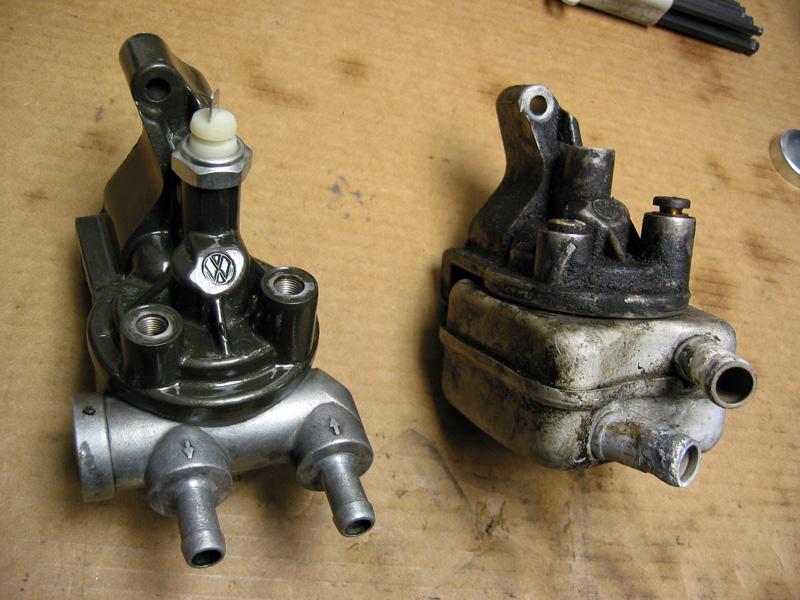
I painted it today, it done sure looks purty.
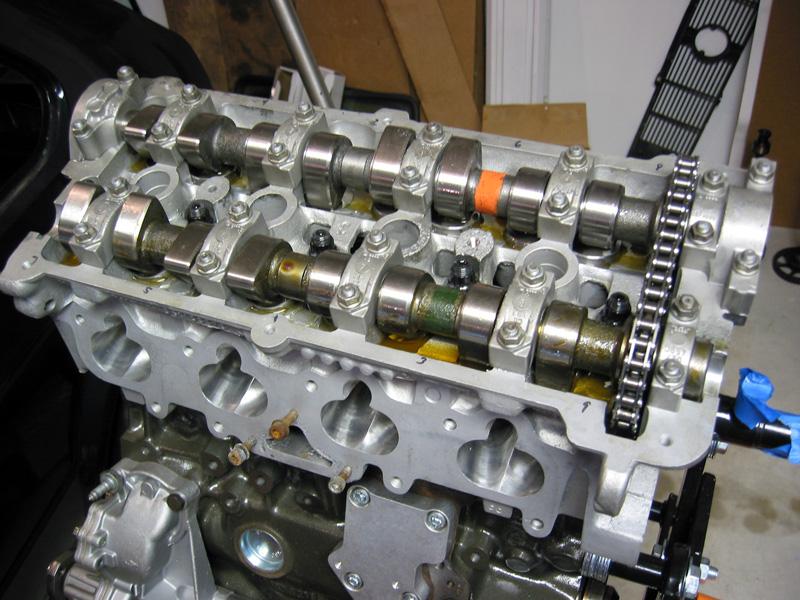
Then I decided to install my new autotech sport cams. Again, this was a first for me so I took my time. I need to get a cam bolt to turn it all over to make sure that: A. the timing is correct, B. Make sure my valves and pistons don't make out. I'm going to take the head off and put some clay above the piston and crank it over a couple times to make sure it's all happy in there.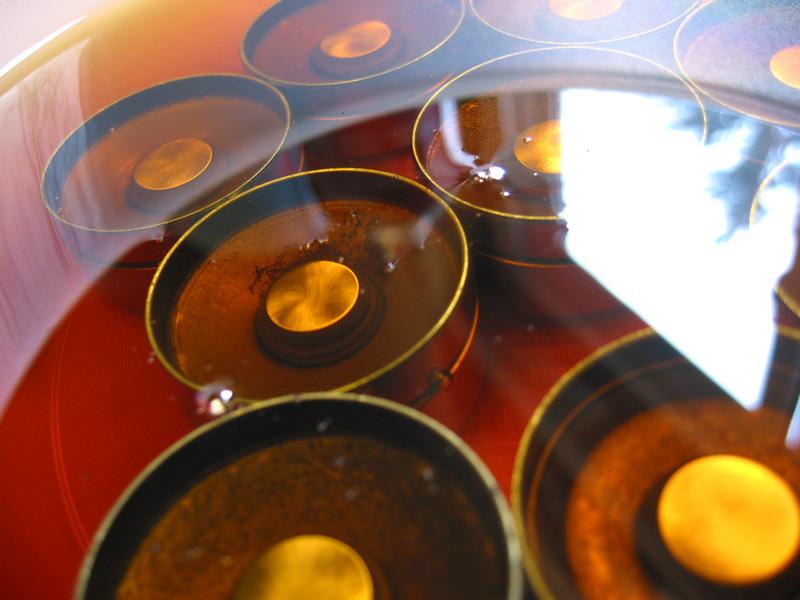
Oh yeah and here is the explanation for the radinox teaser picture from a couple weeks ago.
1.5" new radinox lips. yum.
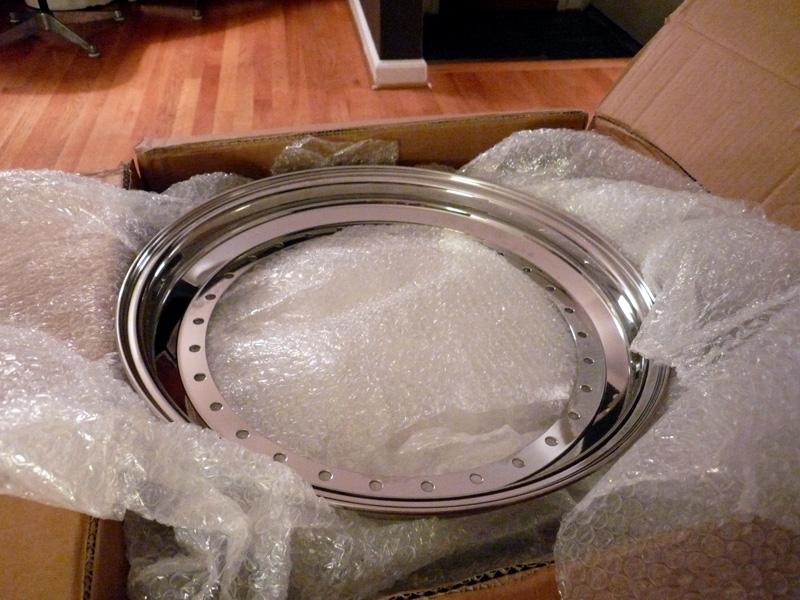
More to come.
5/26/2008
I stripped out the interior and sanded everything down. The por15'd parts were just scuffed up, but I took all the other areas down to primer/metal.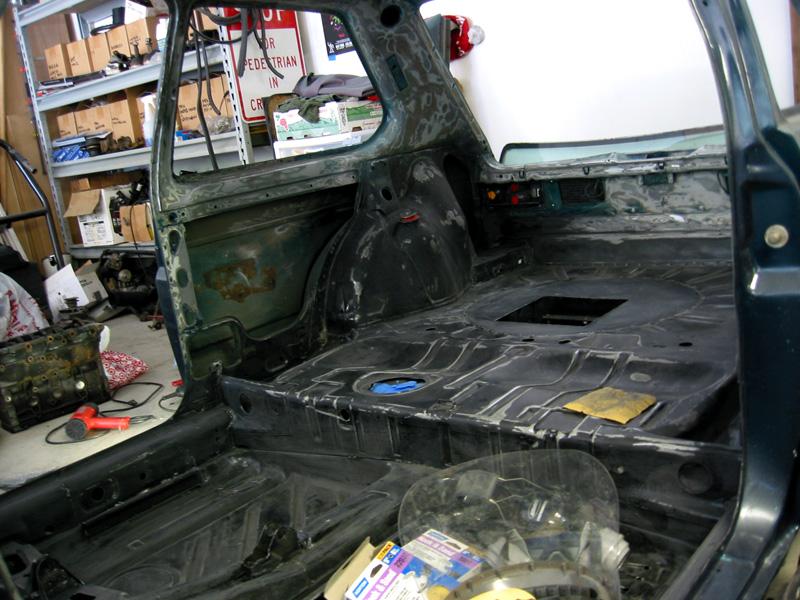
It took a lot of paper.
I cleaned it all up and masked it off.
Ok, if you are going to rattlecan an entire interior, get one of those squeeze grip handles. I have one but couldn't find it, and wore out my damn hands. That shit is hard!
Here is the primed interior, I'm going to cover this in a satin black that i have yet to find. I'll probably do rattlecan again, but if it's easy enough I might do it with a gun.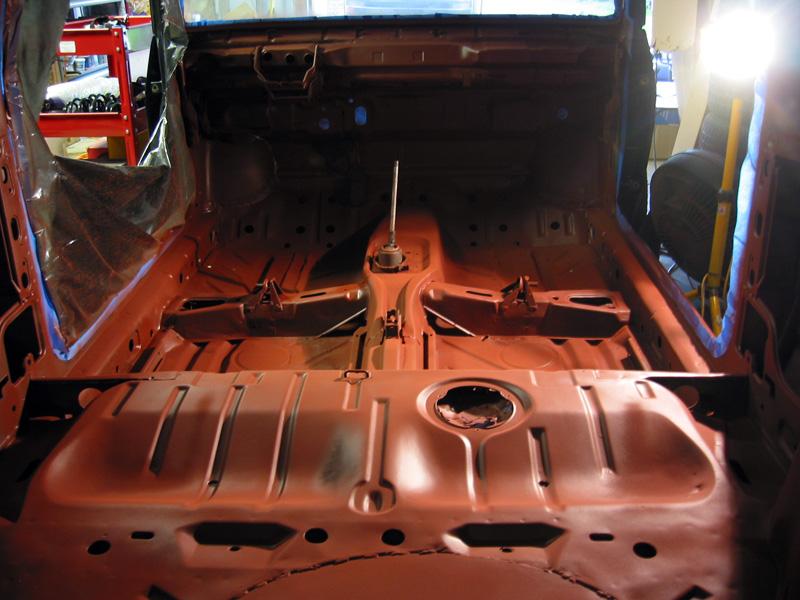
I'm also trying to figure out which megasquirt setup to get, anyone want to help me out? I was looking at DIYautotune and there are just too many damn options. I need to control spark, and I want the newest version of the board. That's all I know.
5/29/2008
i found a nice satin paint at home depot. the old lady crafty shit design on the can turned me off initially, but I looked at the ingredients and it had all the same stuff as the 'professional' paint.
Pictures don't do it justice, I'm very happy with how it turned out.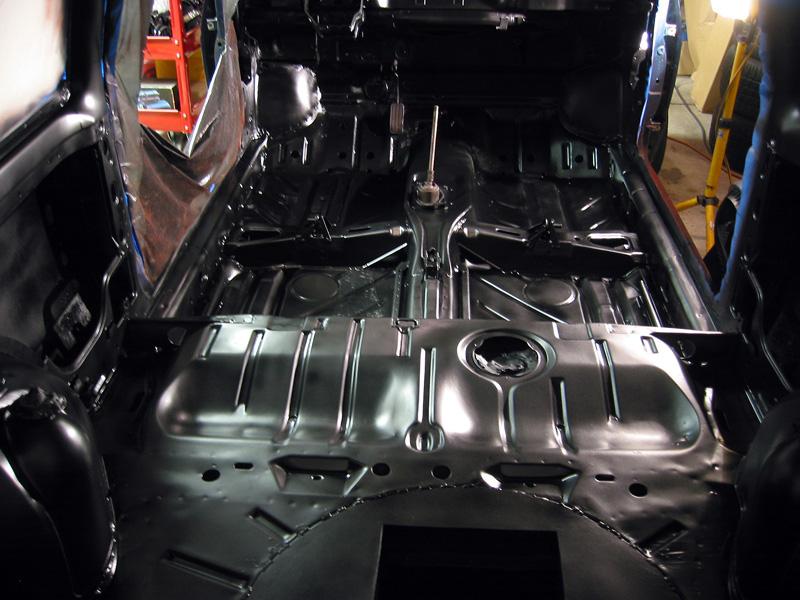
6/2/2008
I did a lot of work this weekend. Saturday was productive up until the end when I felt like burning my headliner.
I spent a couple hours surgically removing the nasty old headliner fabric and foam from the cardboard. I used a razor to get it off, then sanded the board smooth. It came out quite nice. Then I used Spray 80 glue and laid two medium coats on the board and on the alcantara. With some help from matt we put it on the board, it looked great. Then I saw the awesome looking bird crap marks... Some of the glue was too heavy in areas and left horrible splotches in the material. That kinda irritated me, wasting all that time and money. So I went out to eat to take my mind off it, came back and still hated it, so I ripped it off the board. Now the question is:
Do I even use a headliner? I think it looks badass without one. Am I missing anything by not using one?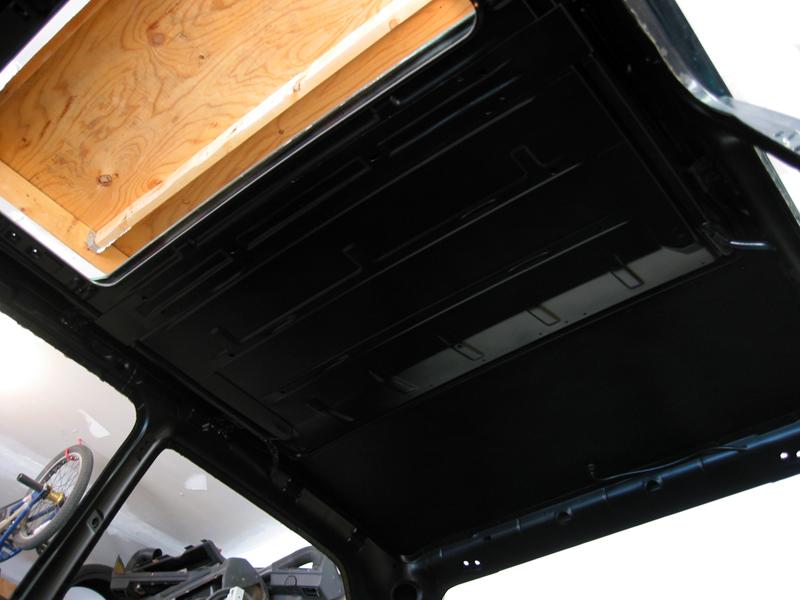
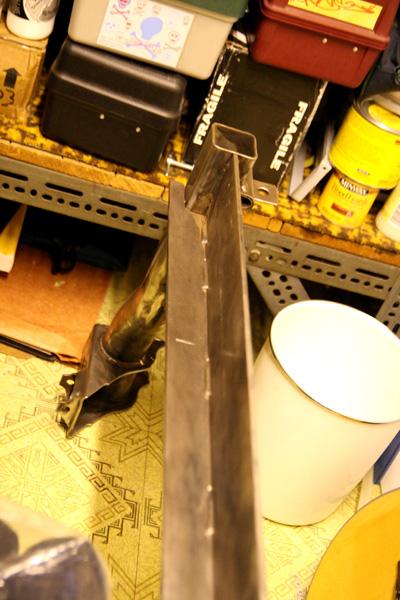
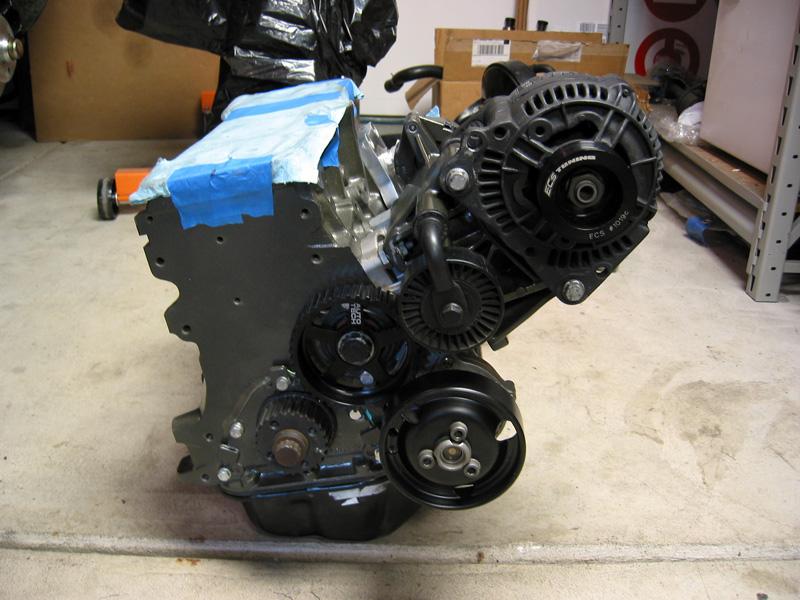
Then I started thinking about my alternator setup. Since I'm using a mk3 aba block I am going to run a serpentine setup. I put the alternator bracked on the block and noticed how huge it was. The bottom half of it is for mounting the ac and power steering crap, both of which I'm not going to have.
Out came Mr.Sawzall.
Chop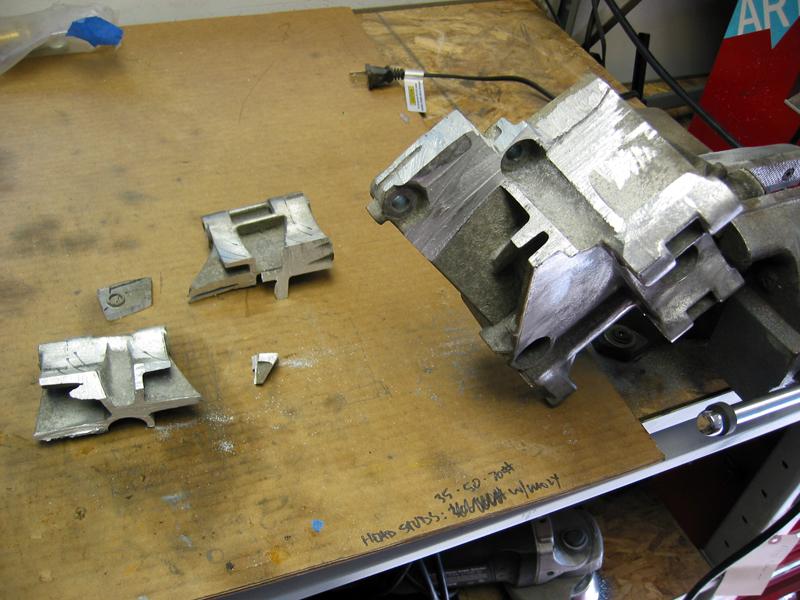
Old vs. New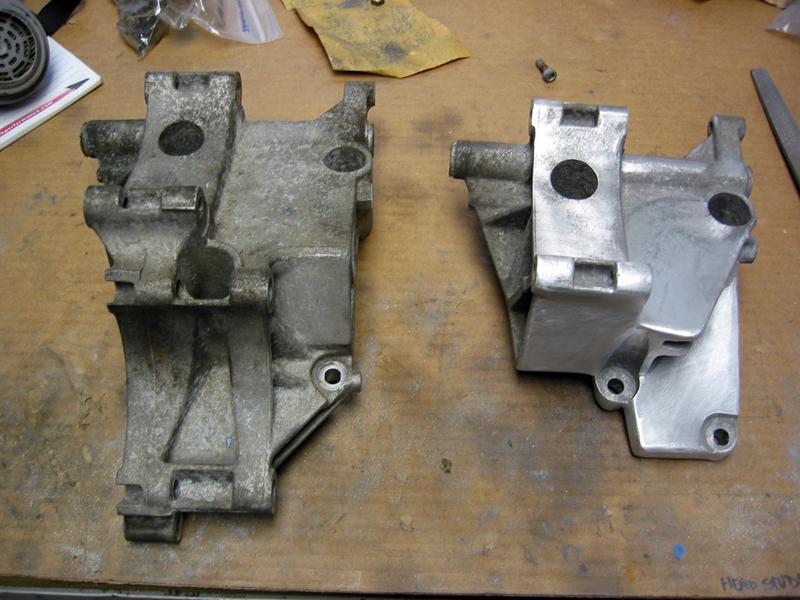

I have to finish smoothing it out a bit, but I'm happy with how it came out.
6/7/2008
After much deliberation I decided to use a headliner.
Then after more deliberation I decided to spend a few bucks more than I originally wanted on some sweet fabric.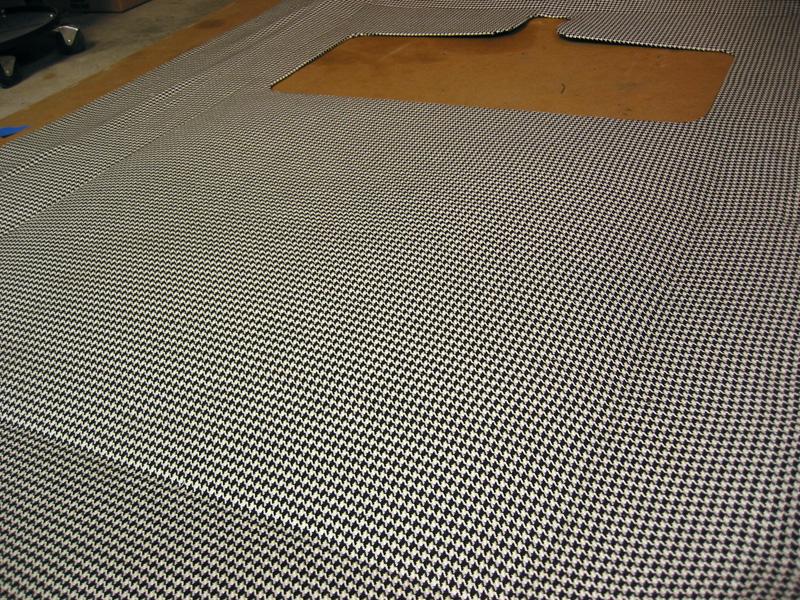
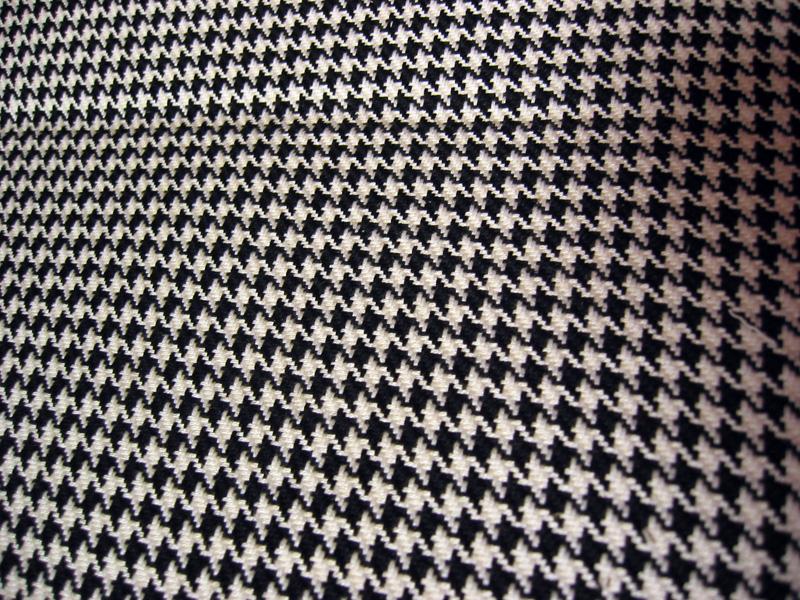
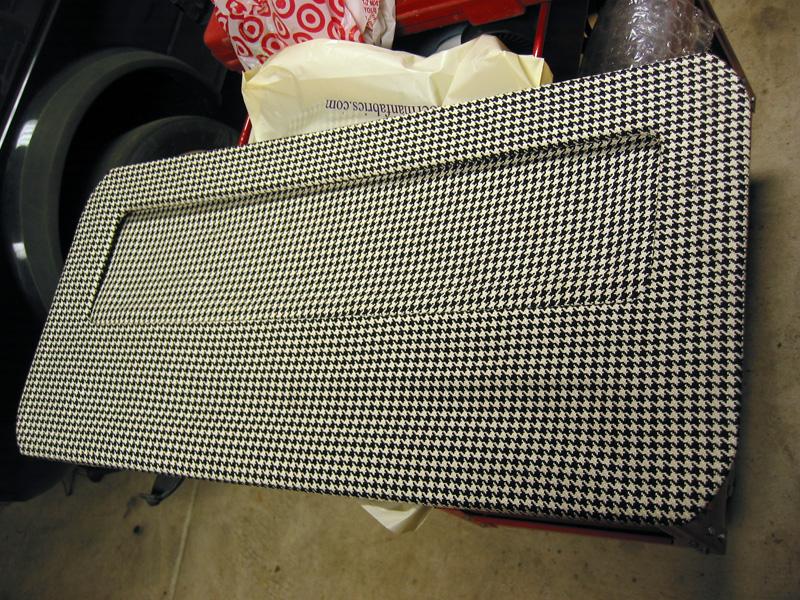
I used Spray 90, it means bidness when it comes to stickiness.
Now I just have to install it without messing it up...
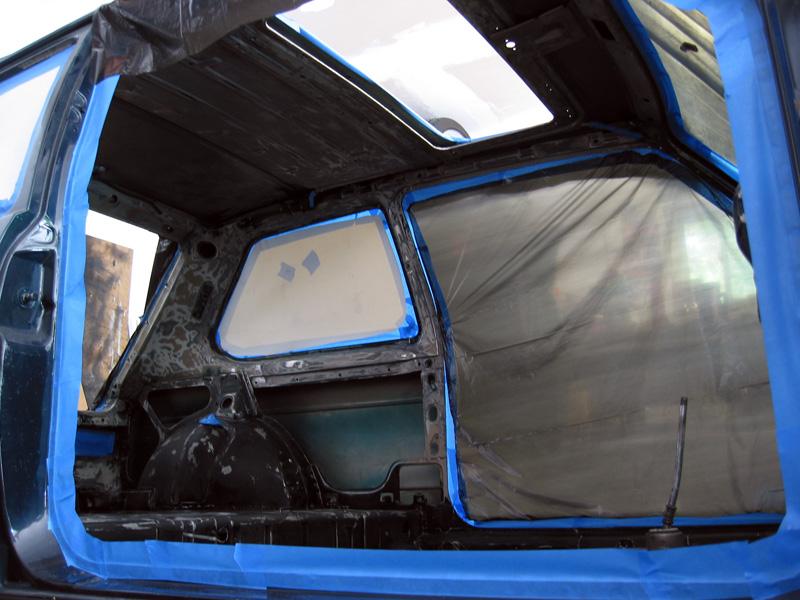
6/10/2008
The headliner is 90% installed. I still have to put in the hatch seal, and also figure out how to fix a little scissor-happy section up front by the windshield. I trimmed a little to much away, kinda bums me out but I'll mend it somehow.
The lighting in these pictures sucks, so it looks a little yellow and crappy. It looks sweet in real life, I swear.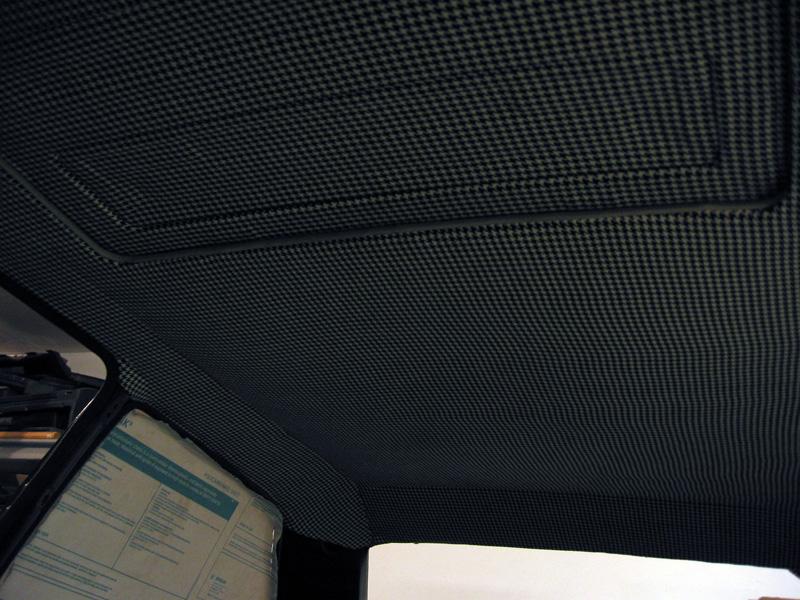
I also managed to install my lexan rear windows. They shave a few pounds, but nothing crazy. I really just installed them 'cause they were a good deal and I wanted to try it out. If they suck I'll put my glass back in. 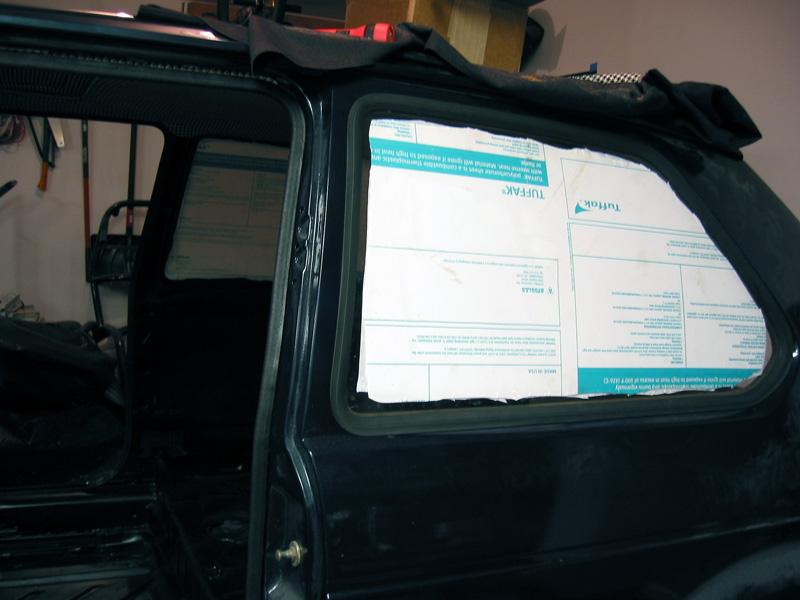
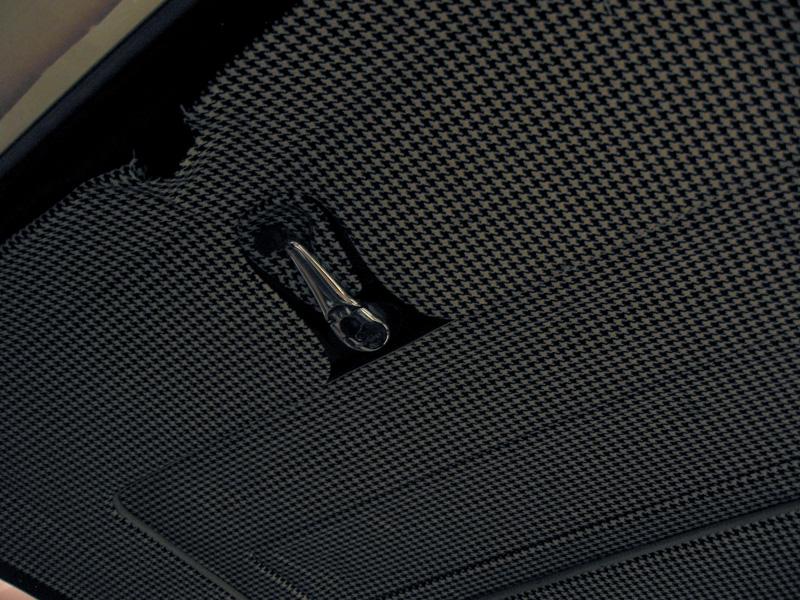
My sunroof was painted gold when I got the car. Although it was kinda cool, I couldn't deal with it so I painted it the same satin black as the interior.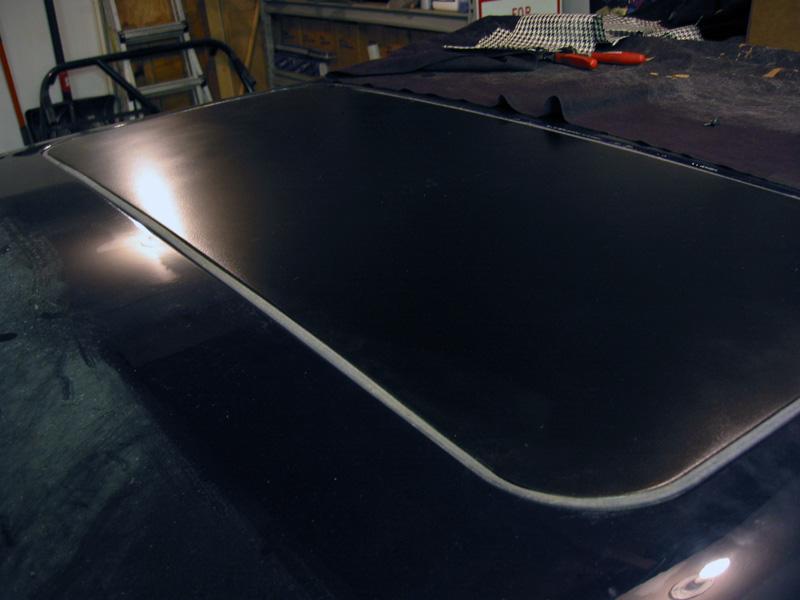
7/19/2008
I've made some decent progress in the past few weeks. This car is like a giant puzzle, I do a lot of research and prep and make slow progress, but then all of a sudden I get to put some of those pieces together and I make giant leaps.
Nice short ratio quaife steering rack with new boots, tie rods and poly bushings.
Matt got busy on welding an AN fitting to my block-off plate to run to my catchcan.
I've been sanding down and painting the cage satin black to match the interior, I'm very happy with the results thus far.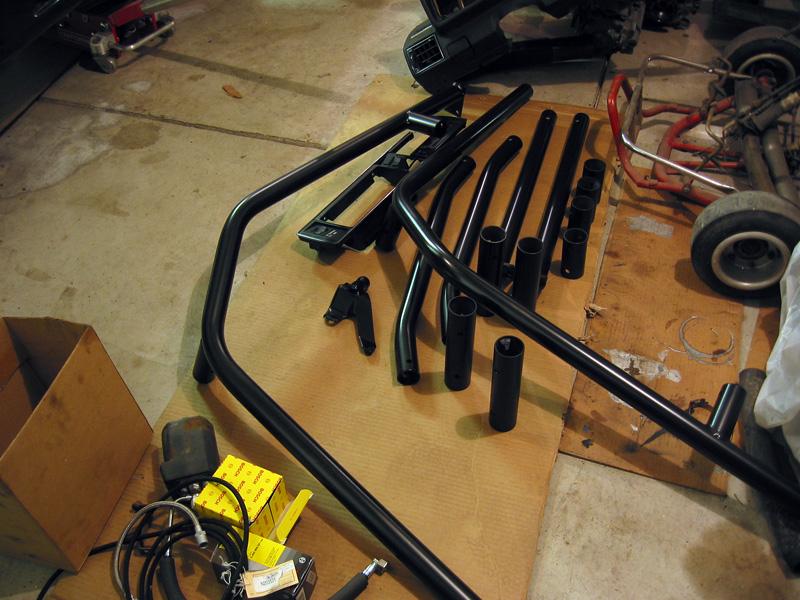
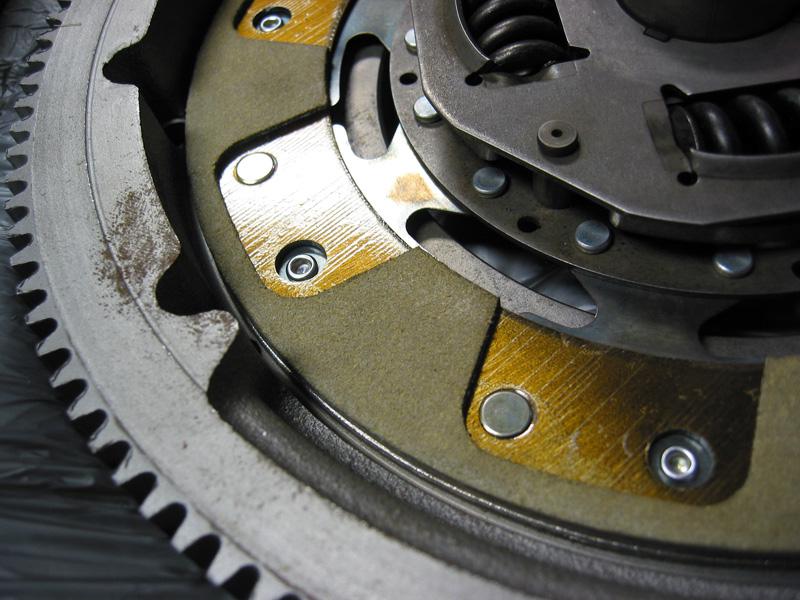
Mmmmm Southbend kevlar clutch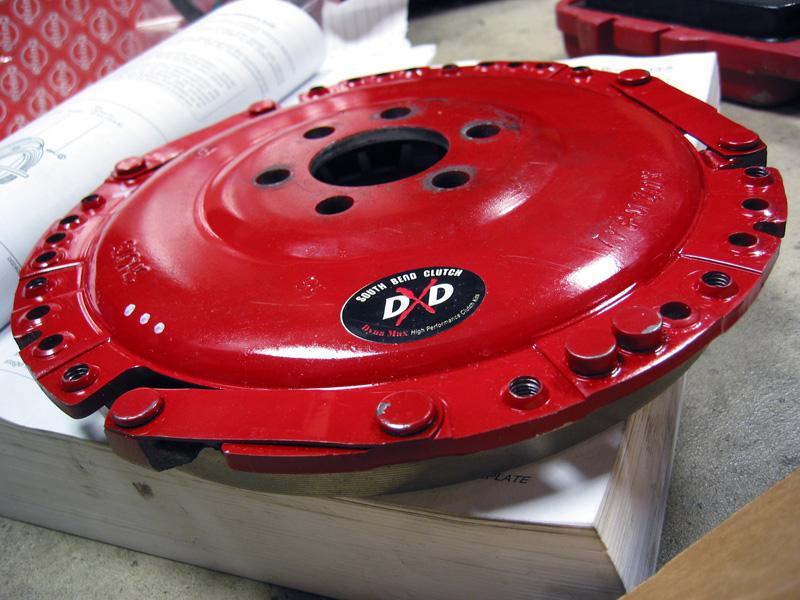
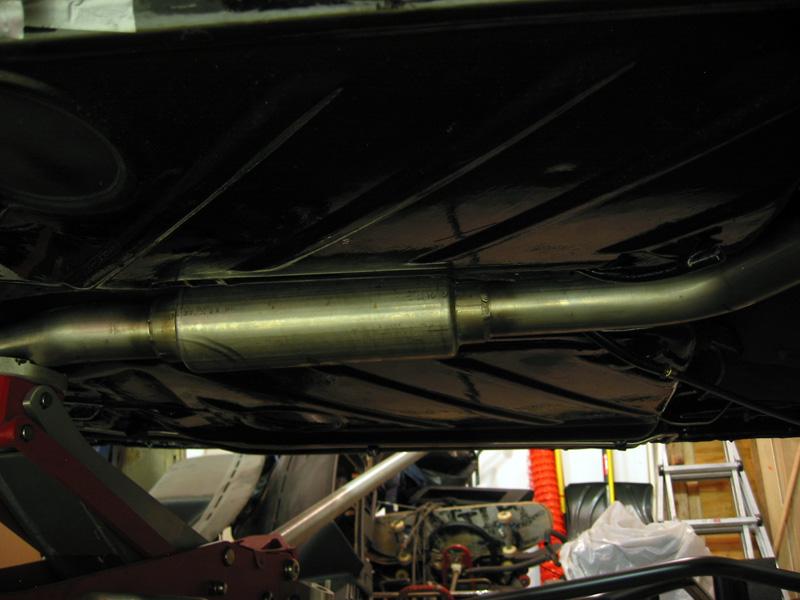
Halfway installed Techtonics SS 2.25" exhaust with a Borla muffler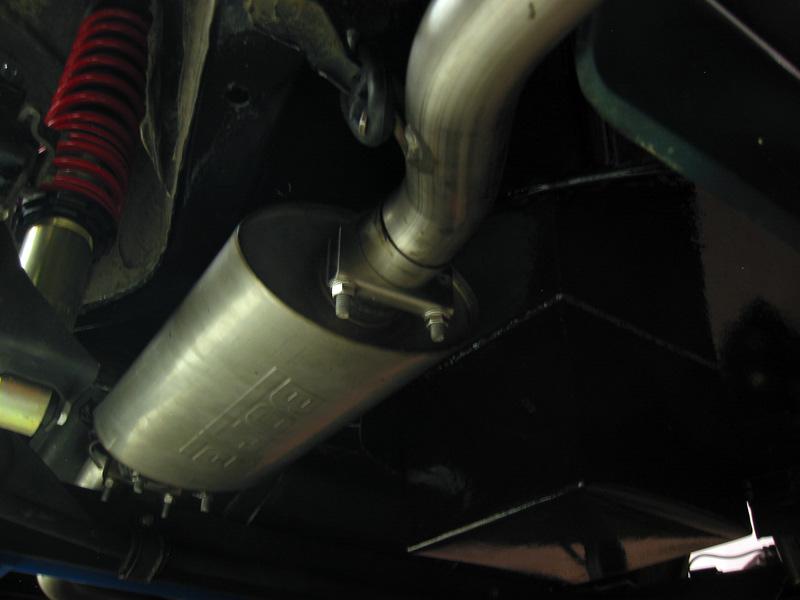
A couple motor beauty shots
We made some great progess last night too, but I have to sort through the pictures. I'll post more tonight/tomorrow.
My fingers are crossed to have this running by Dreamcruise.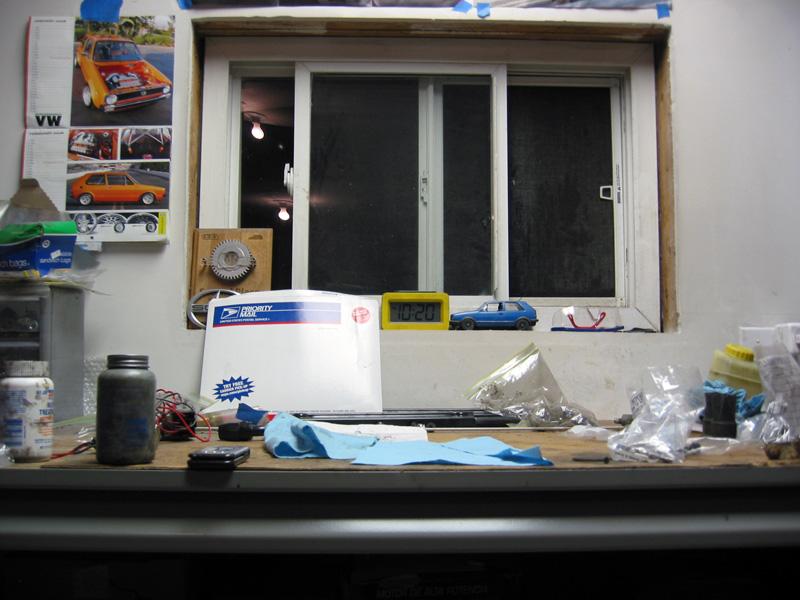
7/22/2008
Major progress! The motor is in the car!
I want to thank Matt again for his continued help on this project, I would be crying in the corner if it weren't for him.
We bolted the transmission up to the motor.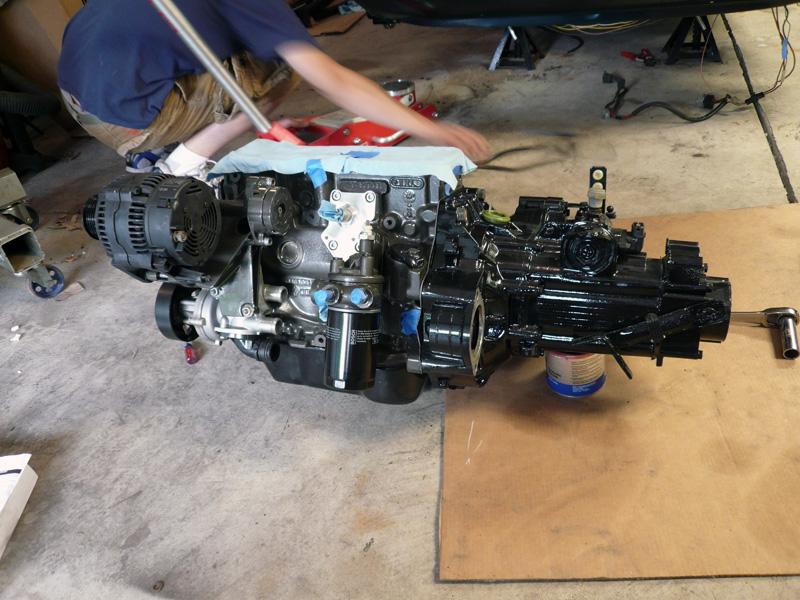
Then put that mess o' parts onto my creeper, crossing our fingers it didnt crush it, then slid it under the car. It's funny too, the alternator was hitting the front core support a bit, so Matt and I lifted the car a few inches by hand while Kelsie slid the creeper under the car. You didn't realize how strong we are, did you?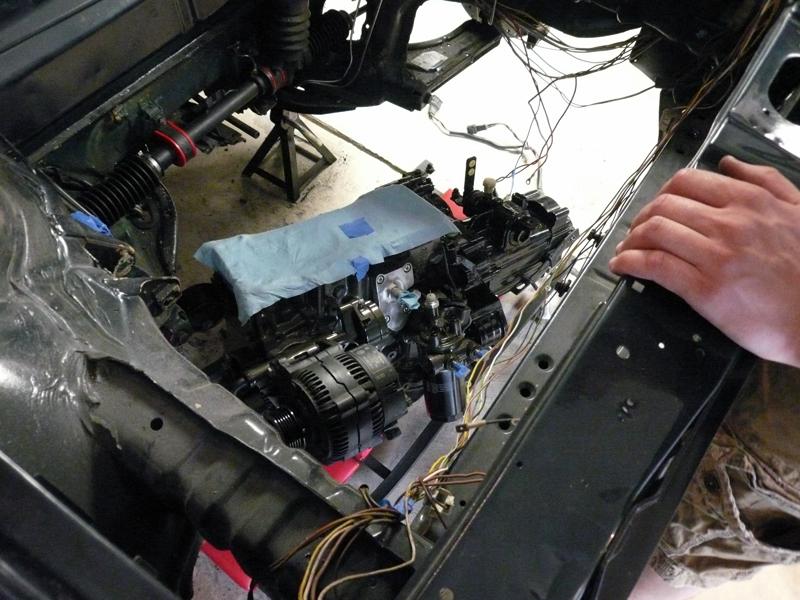
We then ghetto rigged the cherry picker with an airline grade ratcheting strap and hoisted the engine into it's new home.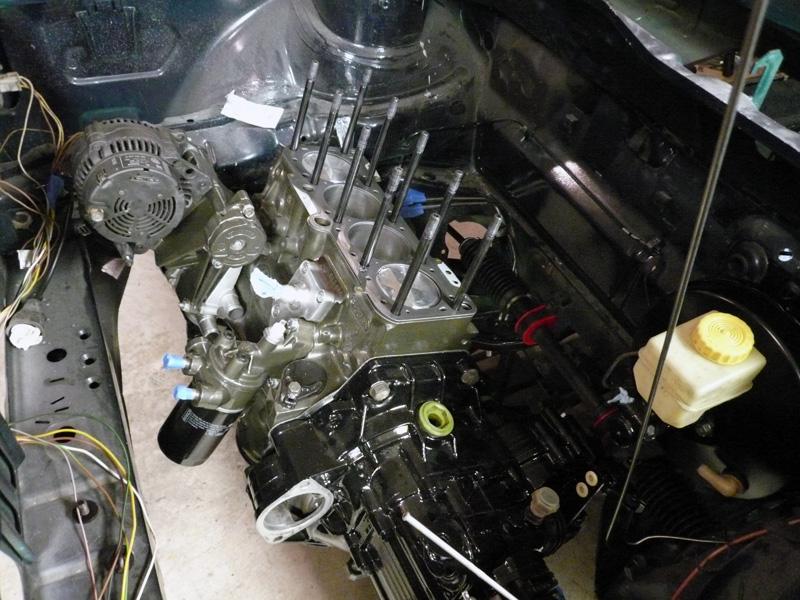
Torqued down the ARP head studs and slapped on the itb's for a test fit.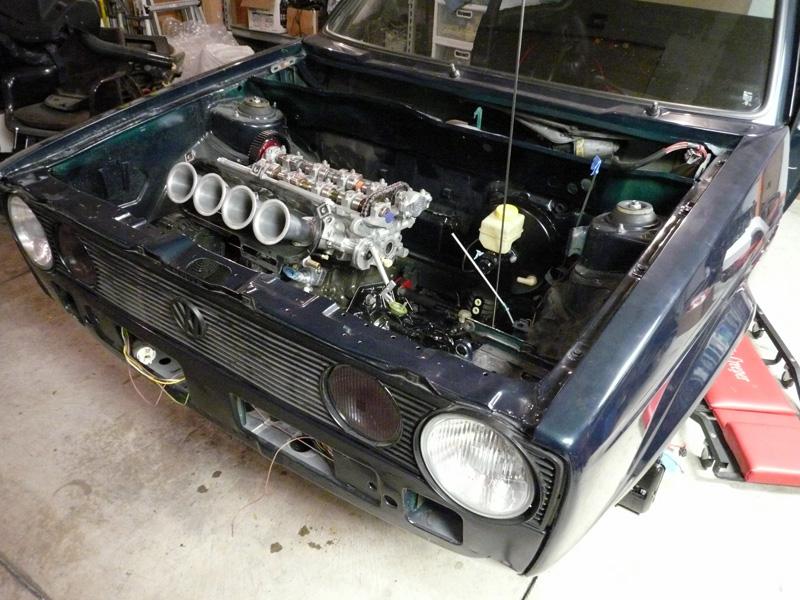
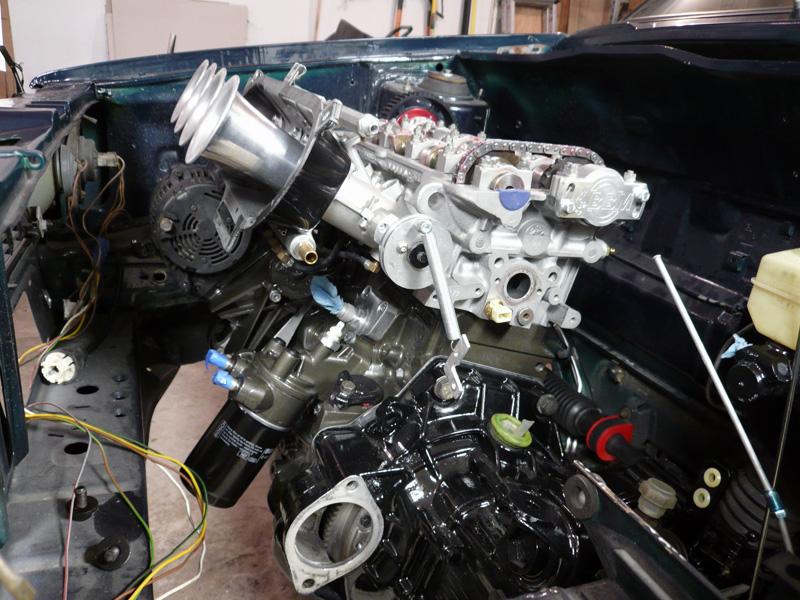
Is there supposed to be a cover here? If there is, does someone have one I can buy off you? 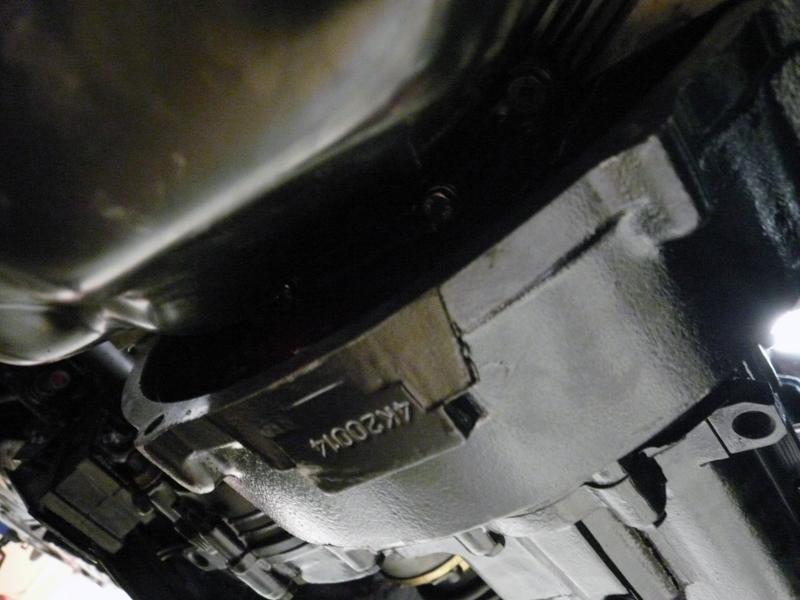
This TT race header is a new design made specifically for this head/block combo. Some of you may remember Joe Zeeuw's beautiful ABF Jetta Coupe. He used the original TT 16v header but had issues with it because of the extra height of the aba bottom end. This newly designed header is taller so I don't need to have Joe's skills to make it fit 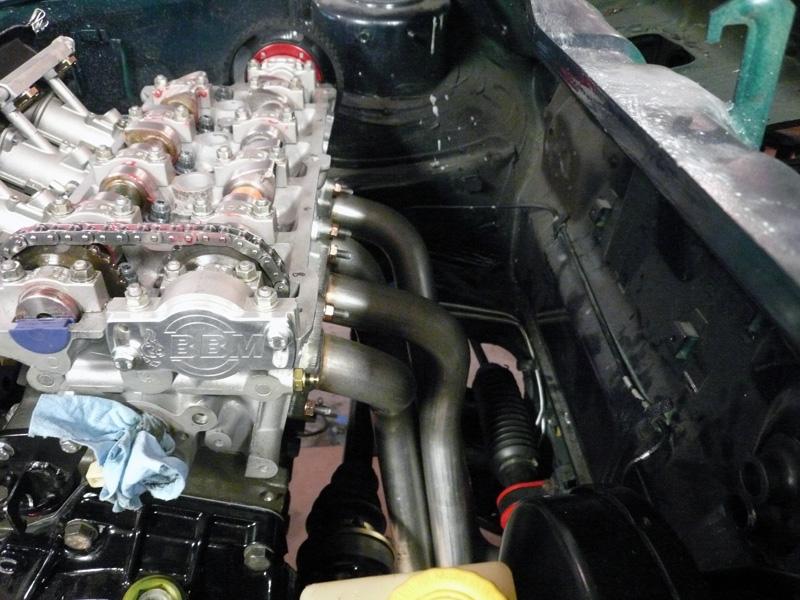
The USRT shift linkage is being worked on now. 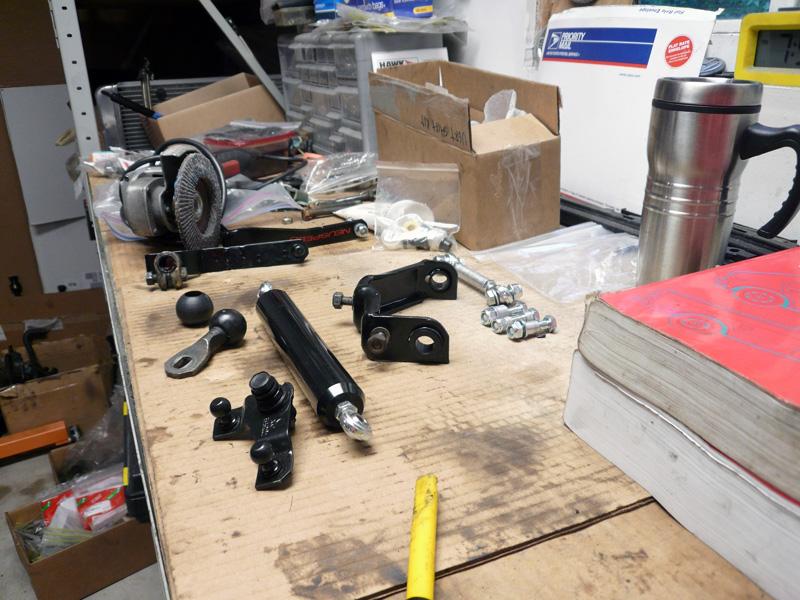
At rest in the garage.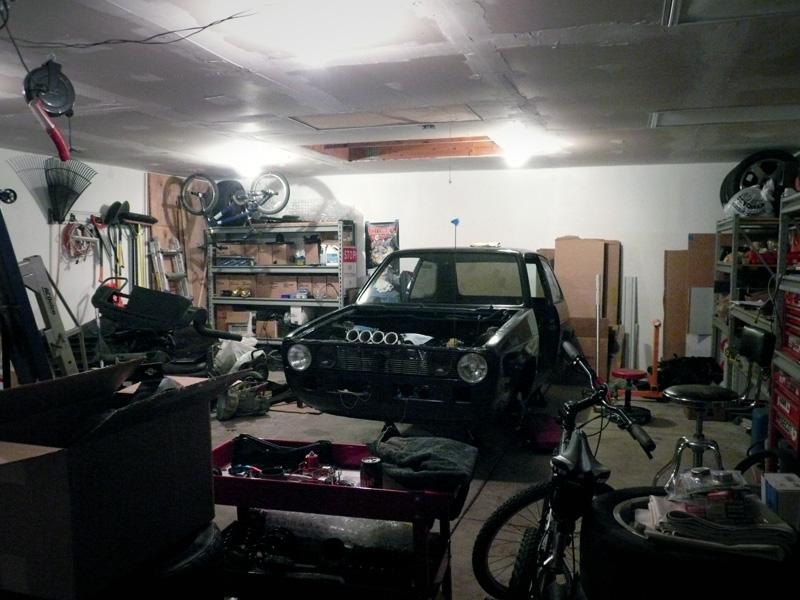
8/4/2008
My arbitrary Dreamcruise deadline is quickly approaching, and I don't think I'm going to make it. It's ok though, I'd rather take a couple more weeks than mess something up in a rush to finish.
I made a nifty little radiator cover/holder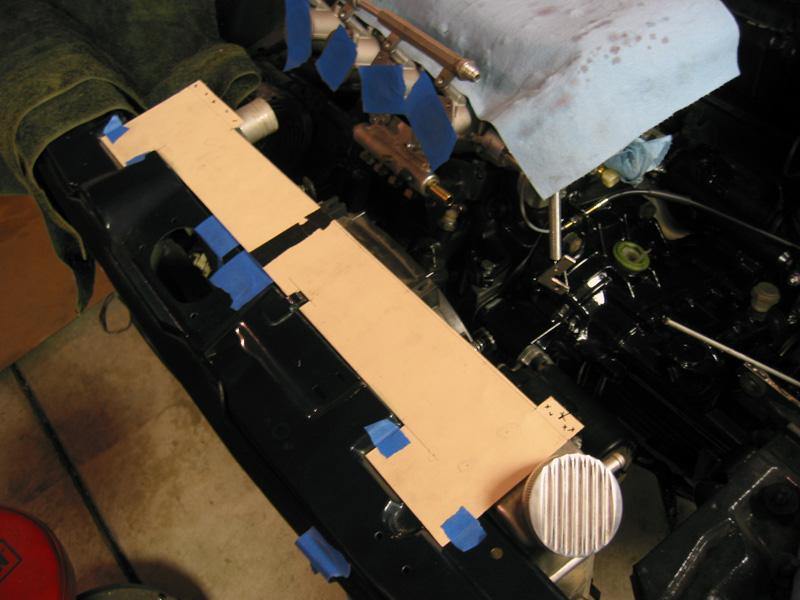
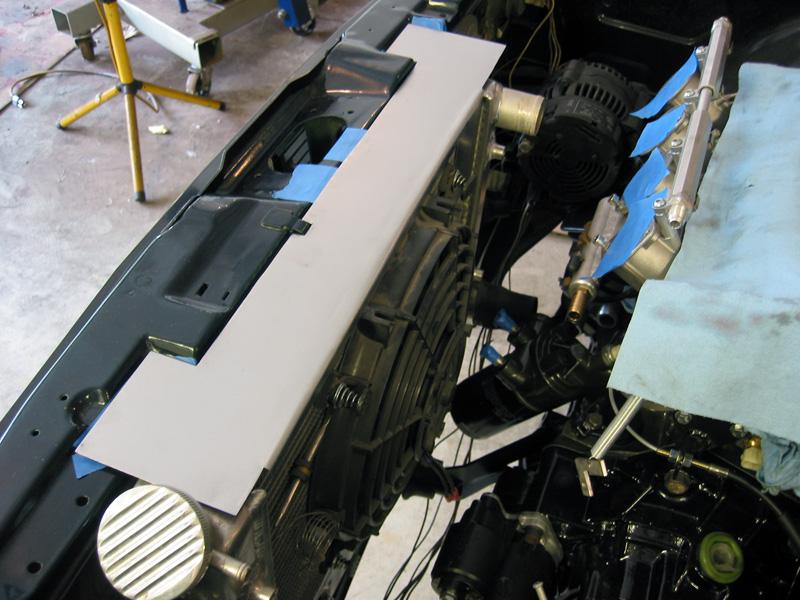
My air horns are a bit too long and my radiator is a little too thick. I can't use my filter box because it will hit the radiator inlet (and the hood won't close). I'm going to use the long air horns for now, and keep this radiator. Over the winter I think I'm going to have to fit one of those fancy CRX radiators and buy some shorter air horns and a new smaller filter box. $$!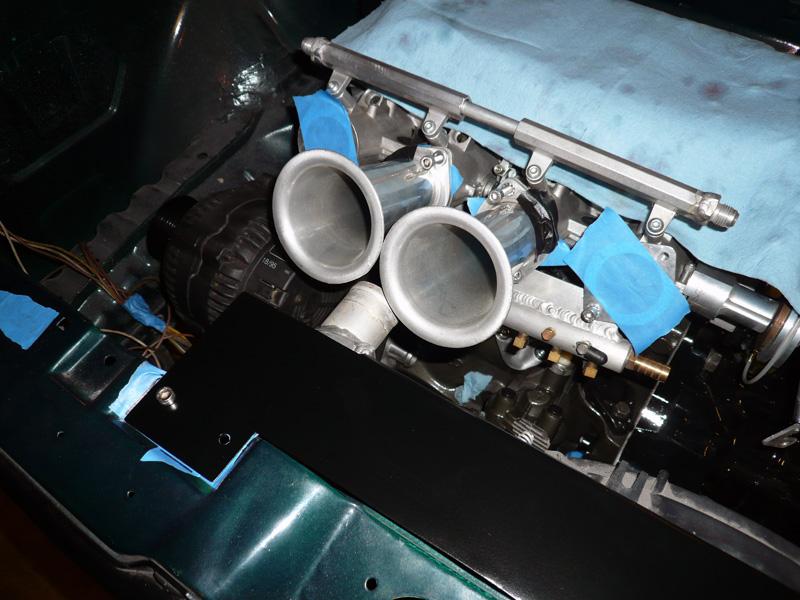
Then I modified my fuel accumulator holder to fit the smaller (read: cheaper) scirocco 16v accumulator.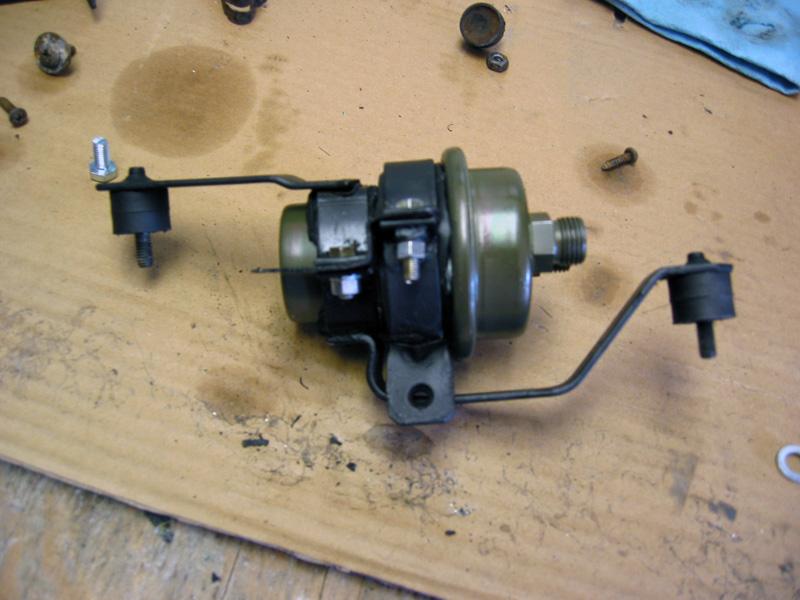
I need the lines that run off both ends of my fuel filter, anyone know any easy way to make these with some braided line?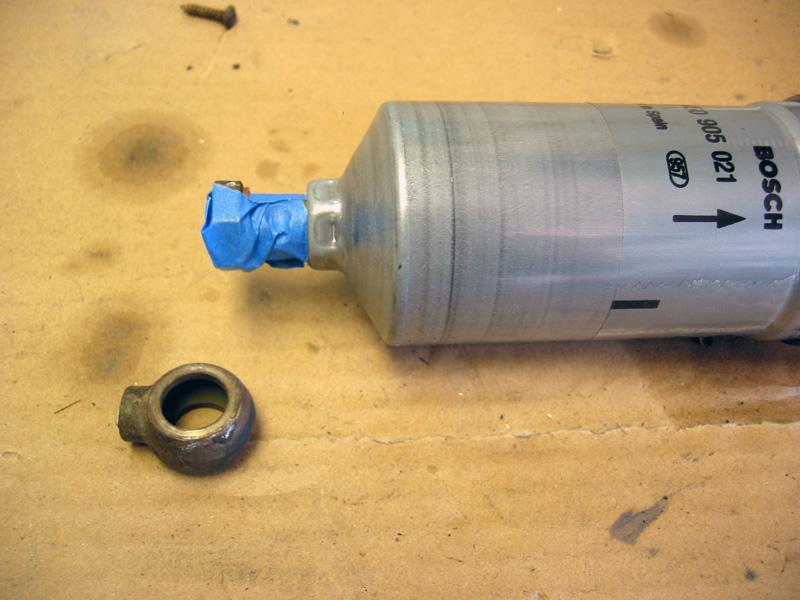
While I was installing my USRT shift kit I realized I was missing a piece. I don't think BFI ever sent it to me either, I've written them about it but they have yet to respond. I really need the long piece with the two heim joints on it, anyone have one sitting around? ha.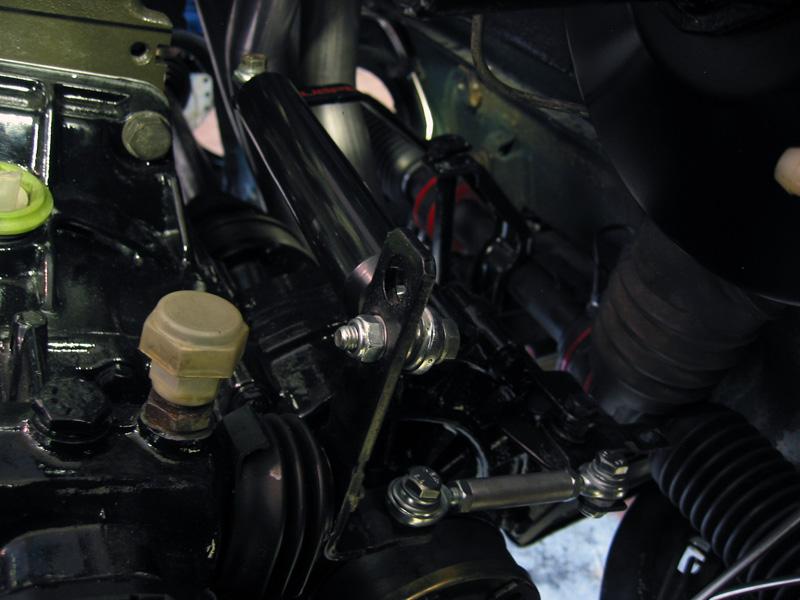
A little trimming was required to fit my seat bases to the rails, a few metal splinters later and voila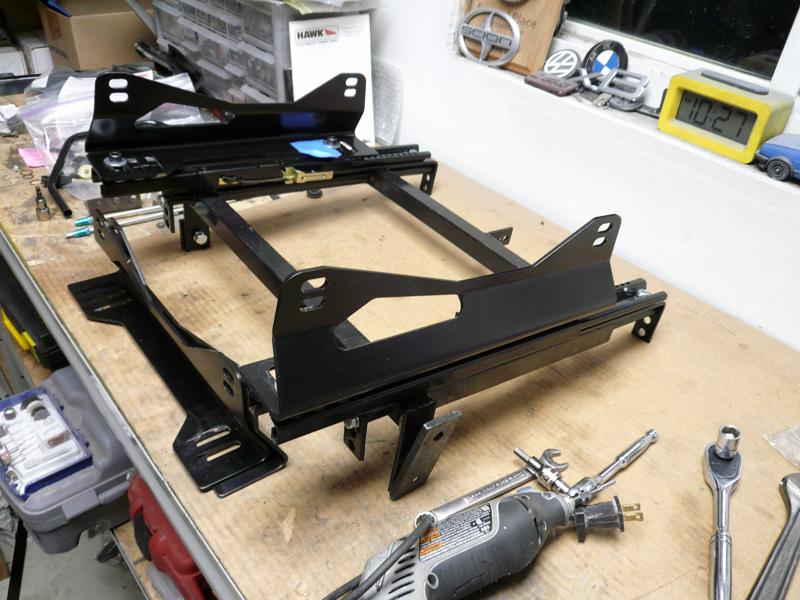
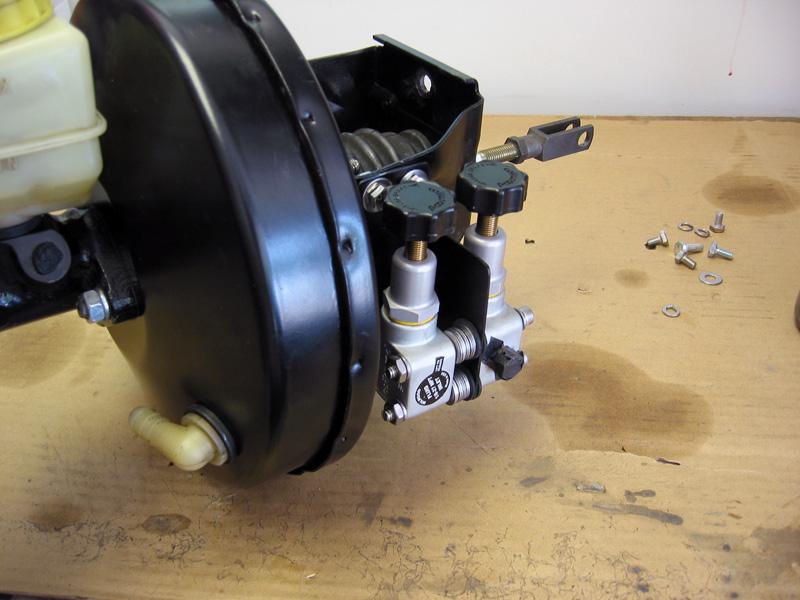
I was having a hell of a time finding another oem scirocco proportioning valve, so I just opted to get some Wilwood adjustables. I needed a clean place to mount them so I cut up some more metal and drilled a few holes...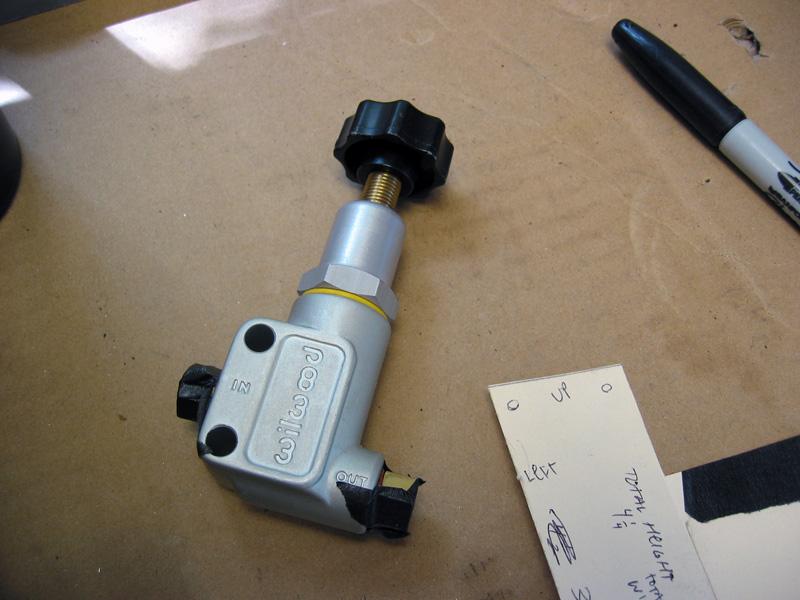
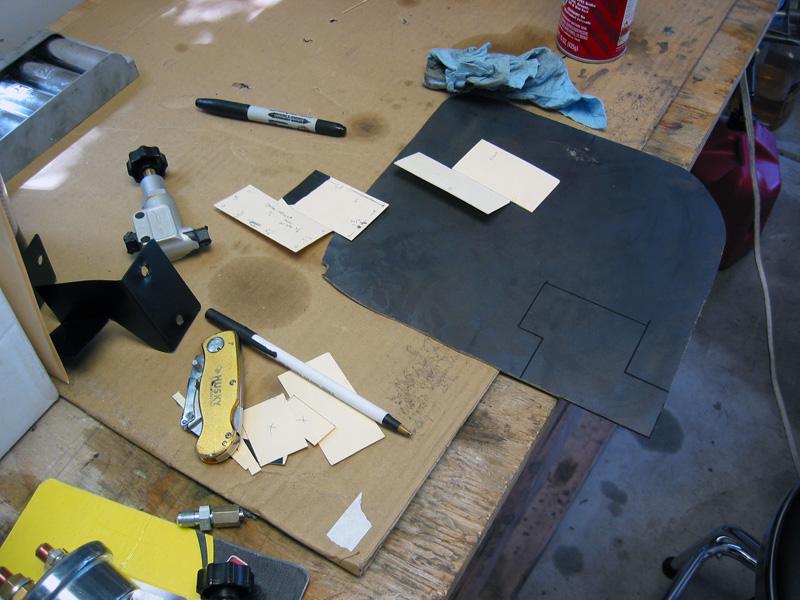
Miles says "wtf"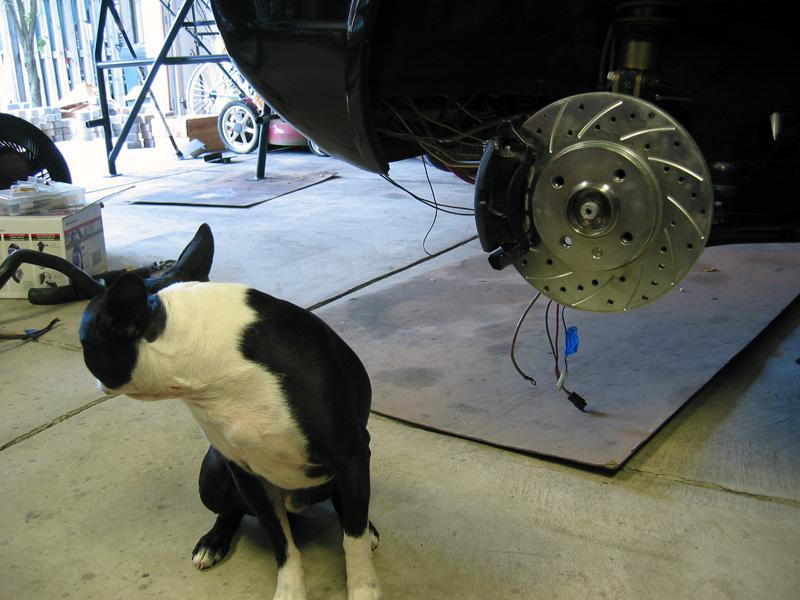
9/26/2008
Here's a partial progress update. More is being done, but not all of it is either fun to show and/or ready to show and/or photographed.
I got the prop valves mounted up.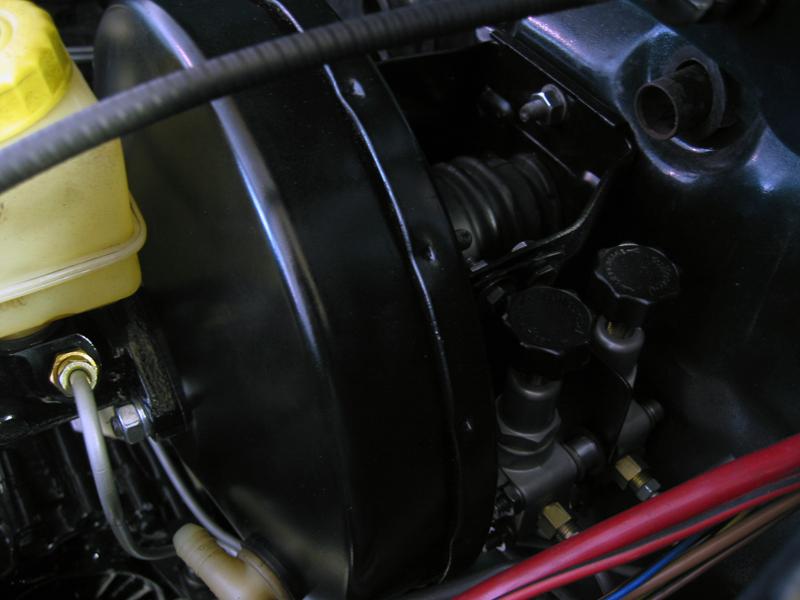
Then I reflared the brake lines to the proper 37º flare, as opposed to my horribly wrong 45º...
(thank you matt for the tool loan)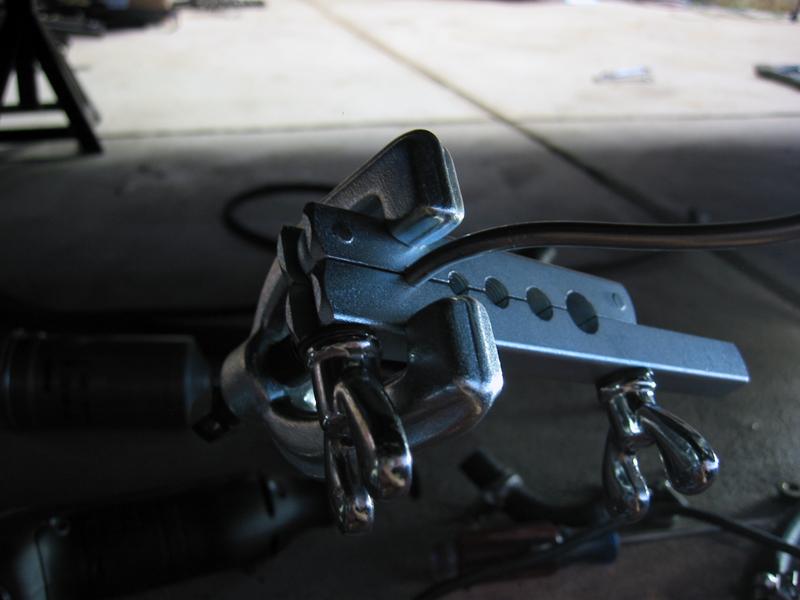
I stayed on the liquids path for a bit and finished up my fueling situation. Instead of junkin' up my bay with the fuel filter I threw it under the car by the fuel accumulator, added some AN lines for the hell of it and called it a day.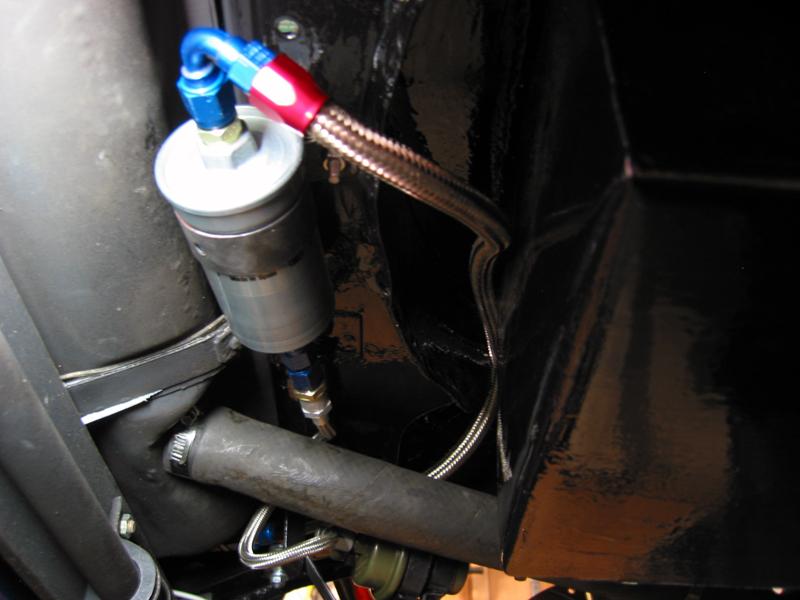
I made all the connections and mounted all the other fueling stuff (pump, accumulator, misc tank hoses) and connected the appropriate lines to the stainless buggers that run up to the engine.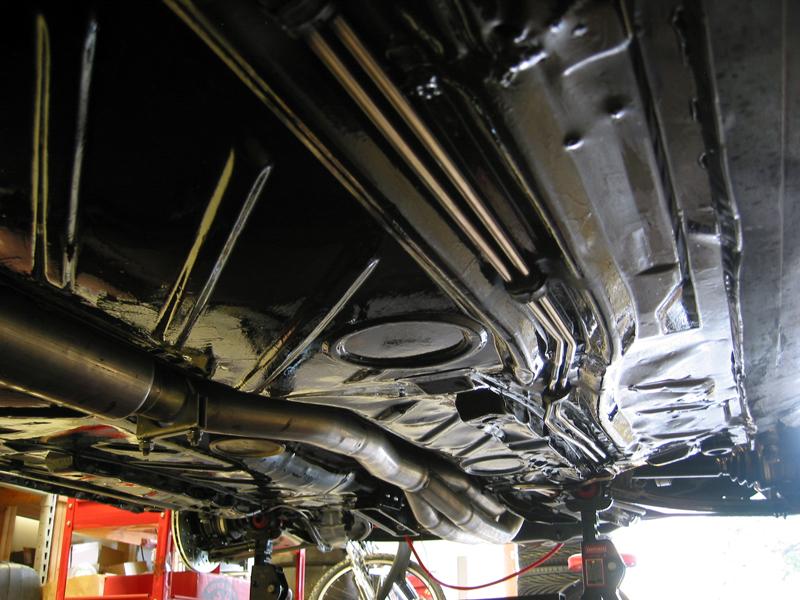
I connected it all to this POS with a shiny new powdercoated valve cover (thanks to 'four by ken')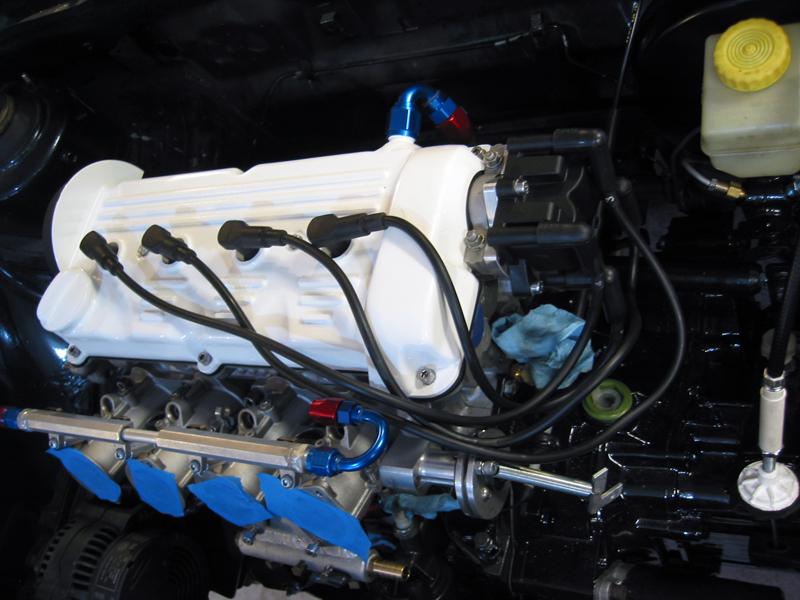
Thanks to Johnny B. I got a sweet external hood latch. Bye-bye cable.
I had to trim the inside of my grill a bit to make it fit, but it looks badass. Thanks again John!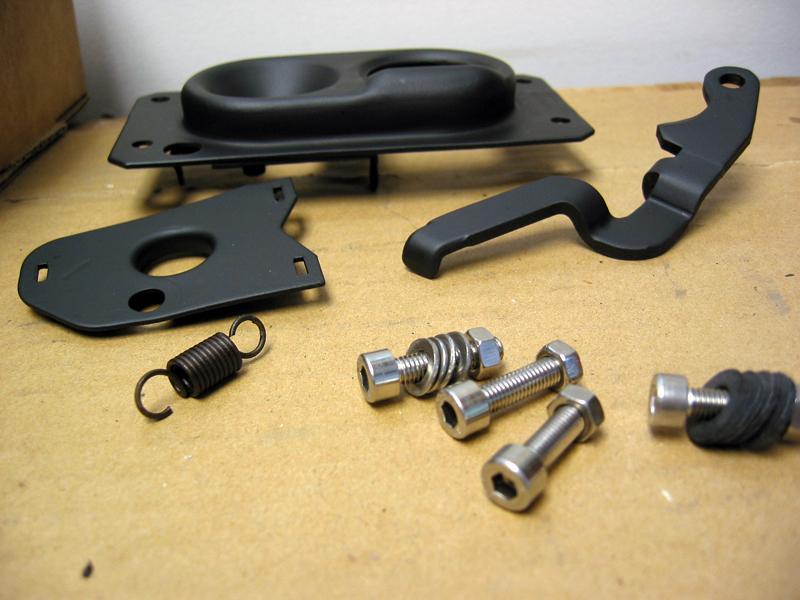
Then I decided to cut up my fingers a bit more, so I cut some more AN lines for this badassmofo catch can that Matt made for me!
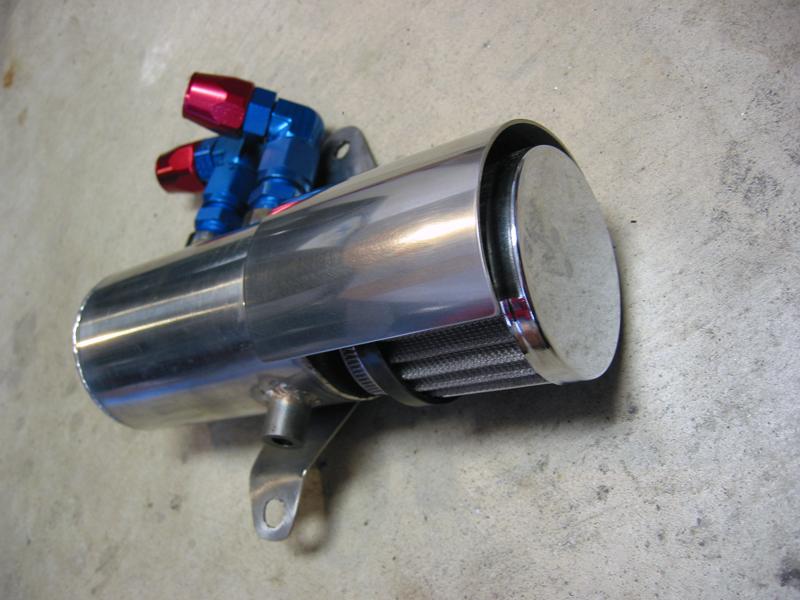
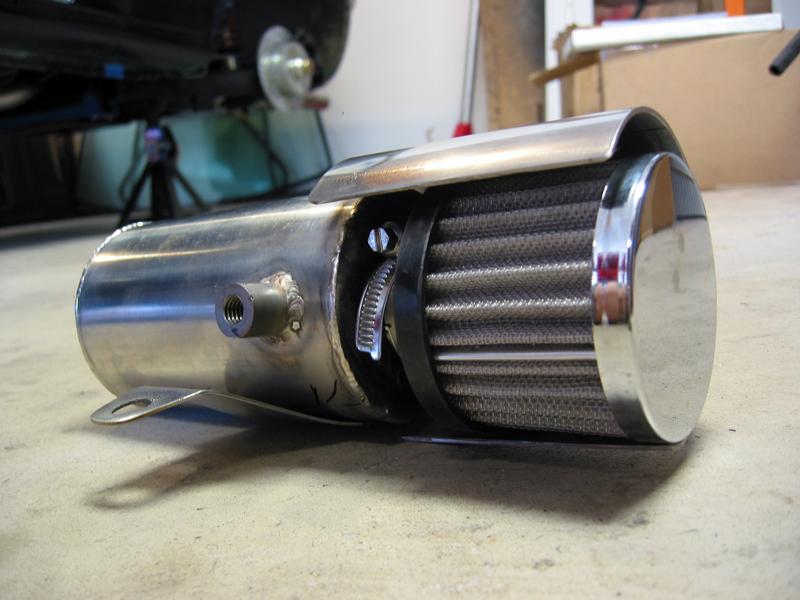
We sneakily hid the can on the back of the motor, tucked right under the headers. It fits great.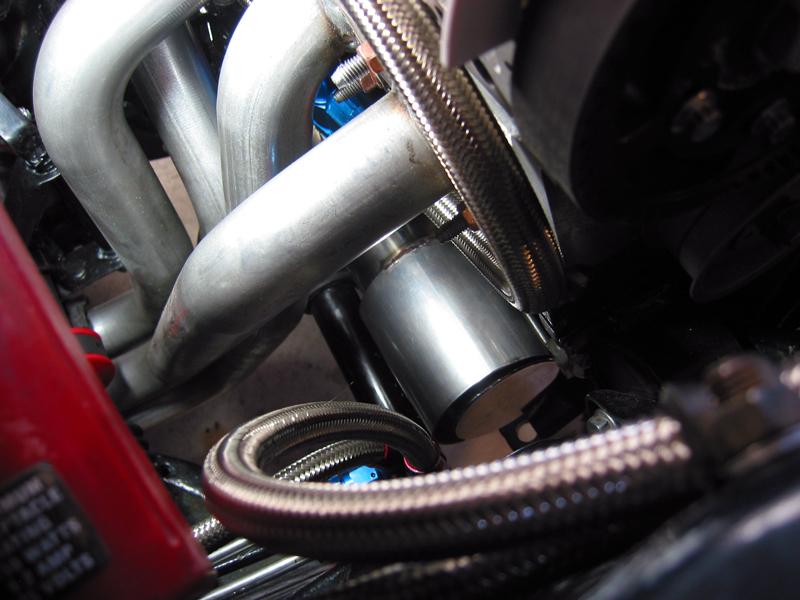

Matt is working his magic with the wiring, I'm bolting together some lame old wheels, battling some radiator hoses, and a bunch of other fun stuff.
Onward.
10/8/2008
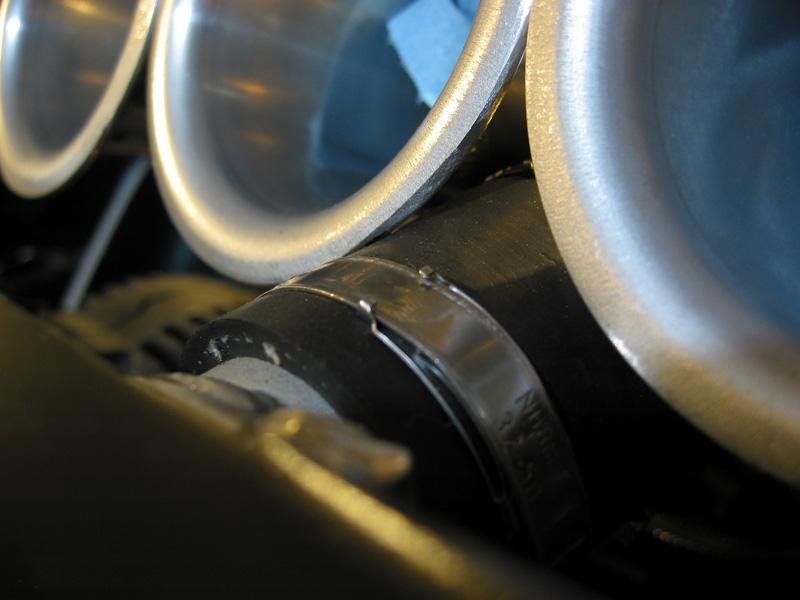
This might sound funny, but one of the biggest issues lately has been finding an upper radiator hose and adapter that fits. I ended up chopping up an oem 16v upper hose and searching around Murrays to find a larger 'sleeve' hose that will adapt it to fit the larger griffin radiator inlet.
It's also a super tight fit, but damn I'm happy with it.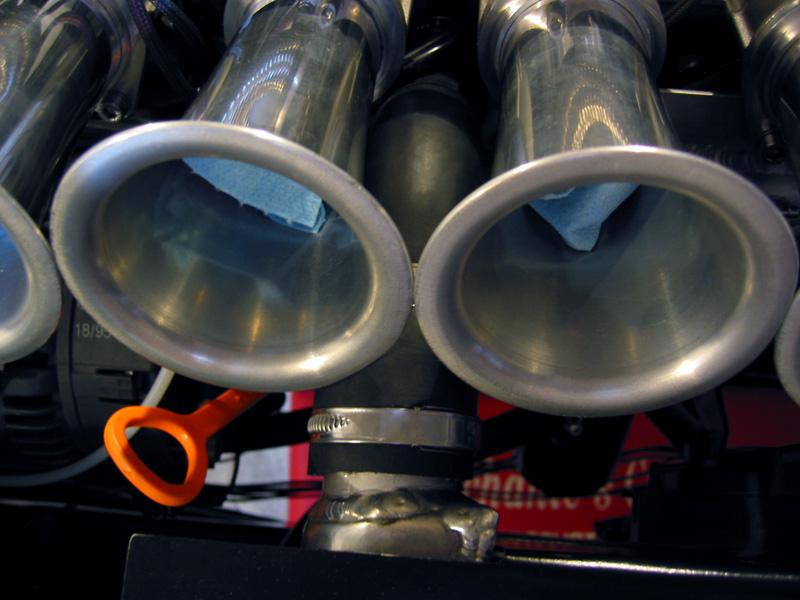
A nice motor shot with all the itb airhorns mounted.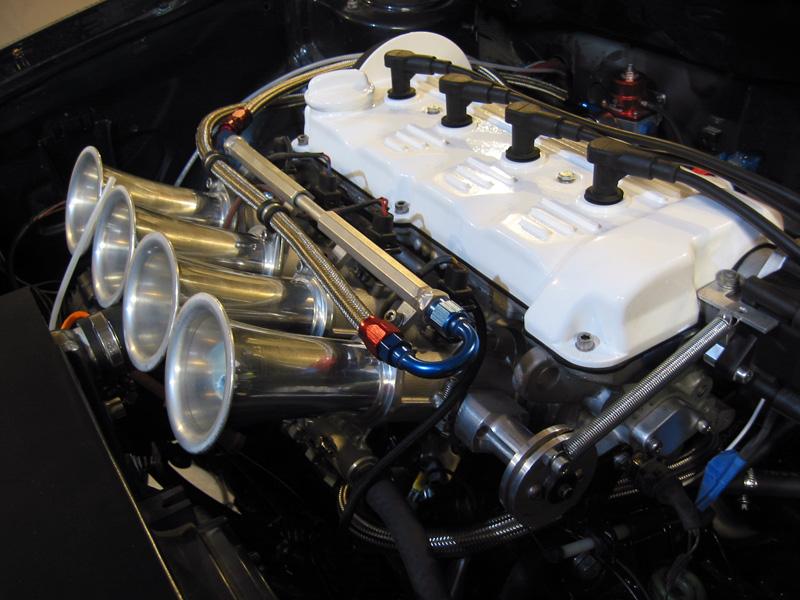
Does this look right to you guys? This is my radiator overflow hose, I was planning on running it out into the street. Do you think much will come out of here? Should I figure out a catch resevoir?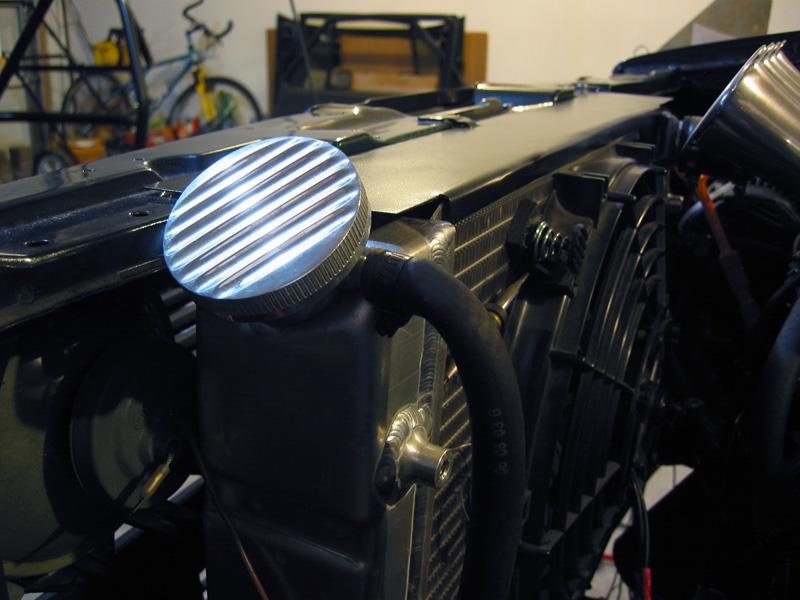
No mo' coolant out of the side of the head.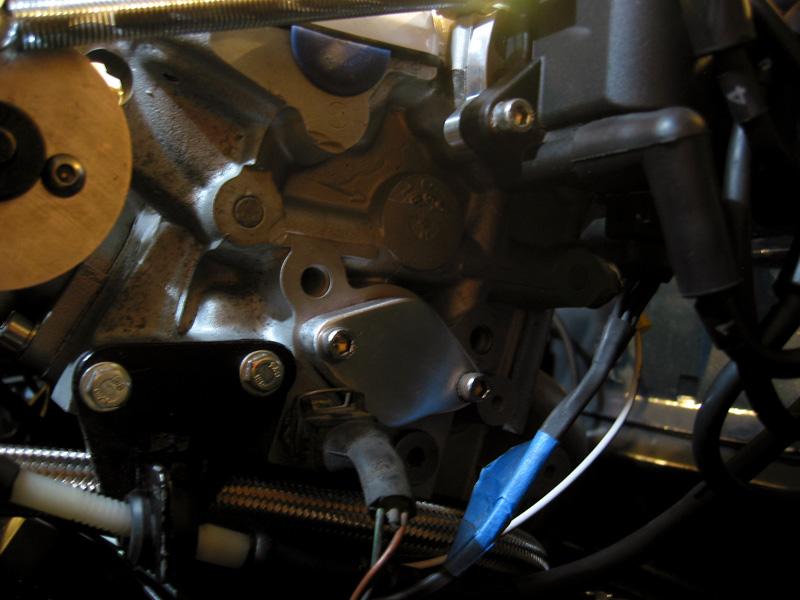
Matt made me a super awesome badass battery tie-down, stainless steel with a sweet stamped 'death kart' imprint!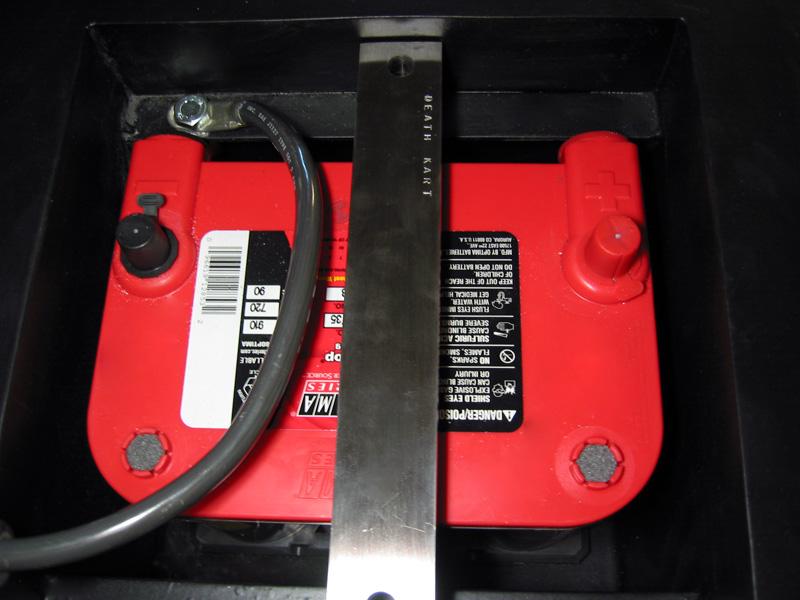
Aeromotive fpr mounted on the firewall.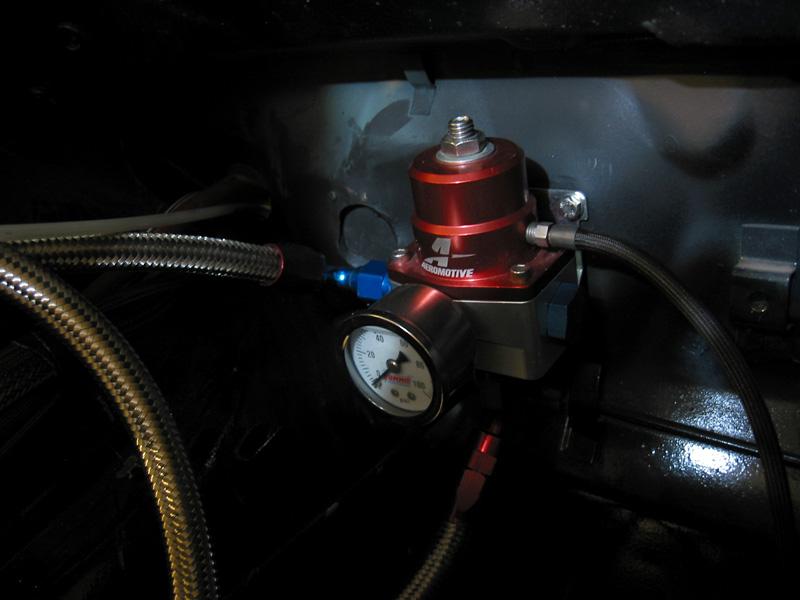
10/16/2008
so we're getting close! but ran into a small (big) problem (suck)
I put gas in it tonight and turned the key to acc, the fuel pump started buzzing and I could hear the fuel coming up to the front and got super excited. Then FSSSHHH, fuel starts squirting out of the fuel rail like a 4 year old in a water park.
The Jenvey fuel rail is not the smartest construction. The rail is made of two pieces joined by a male type pipe in the middle. The fuel rail female sections have o-rings in them, and I'm guessing this is where the leak is coming from.
I'm going to try and replace the o-rings tomorrow, do you have any other recommendations? This rail worked for the last owner, so I'm guessing it's something I did during the install that pissed off the rail.
10/20/2008
Well the car almost made it to chilifest, but it wasn't meant to be. The starter didn't want to start, it said something about 'unfair wages and working conditions'... whatthefackever, we hit it with a mallet and it calmed right down. Oh well, it's to be expected. If everything worked right the first time it'd be boring... right? ...
This doesn't mean I'm giving in to winter though. Eff cold, this car is gonna run before snow falls or else. Progress was made despite the damn starter, sweet euro-loving progress.
Again, I can't thank Matt enough. My garage would be on fire and I'd be driving a civic if it wasn't for his help.
Proof of his skills: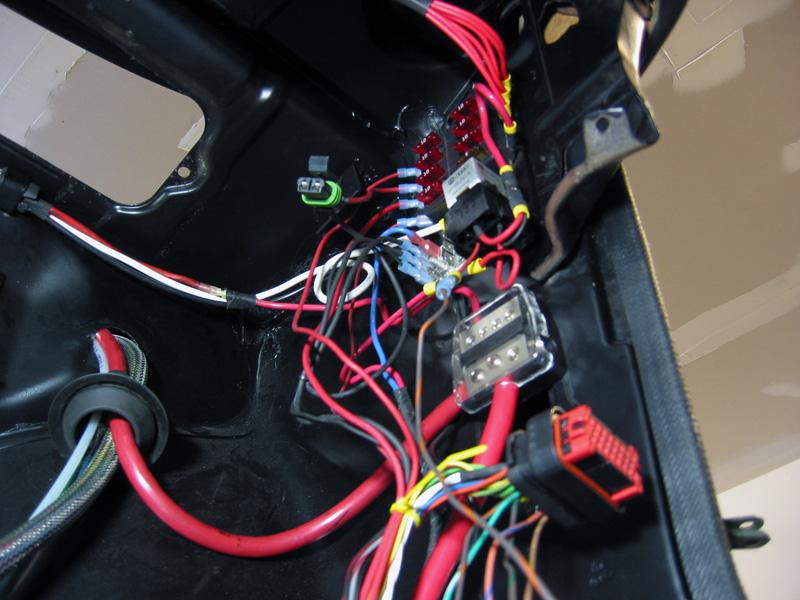
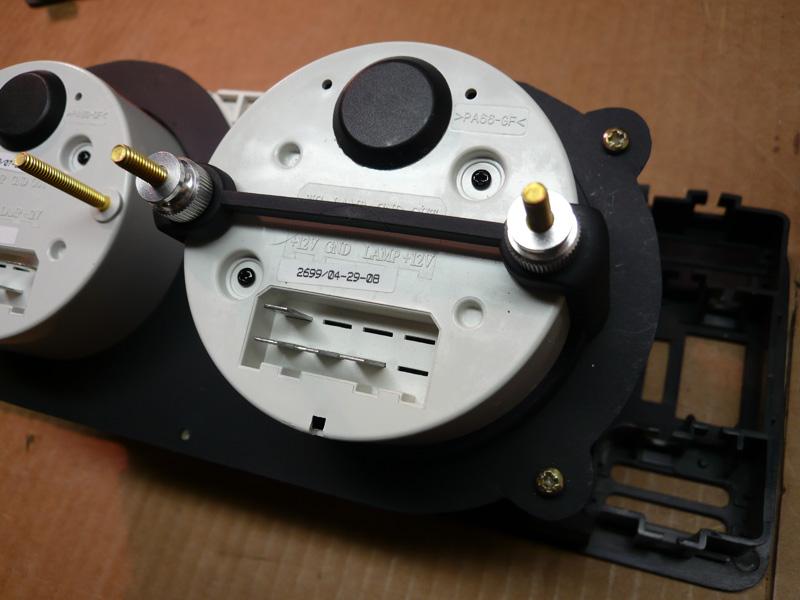
Speaking of awesome friends/mivers, I had a little help getting these gauges from a local supply.
Autometer all black and junk. electronic speedo too, yay.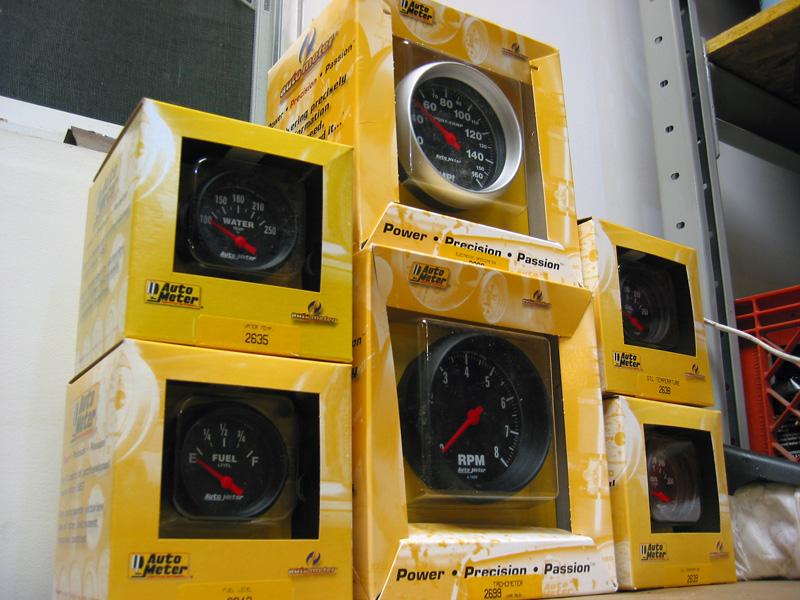
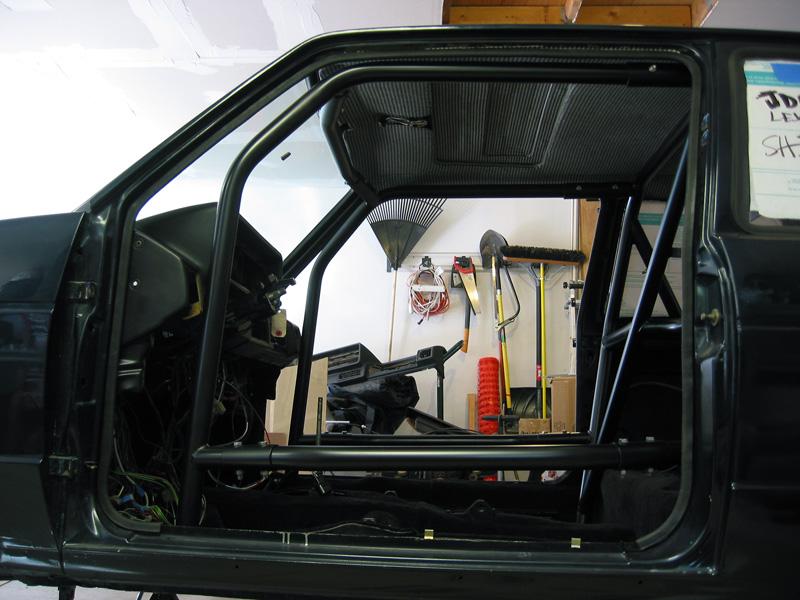
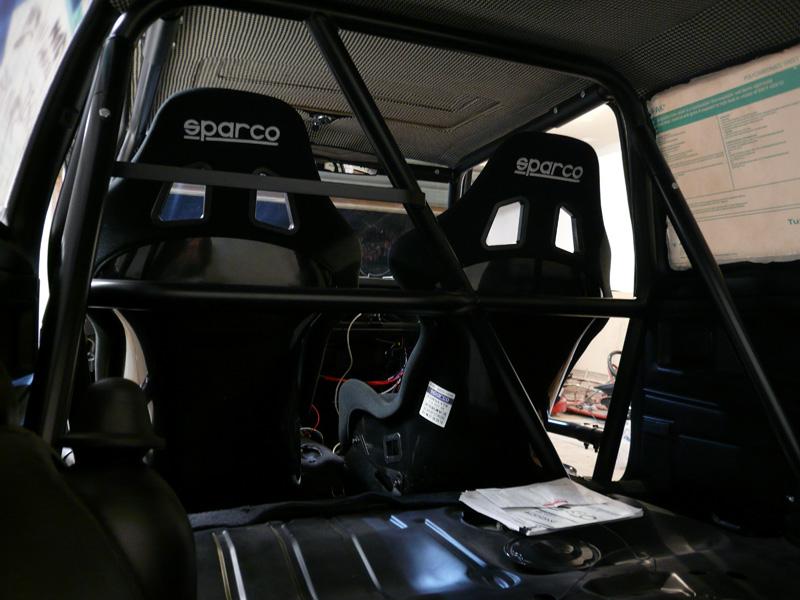
A few swings of the mallet and turns of the wrench later, the cage is installed.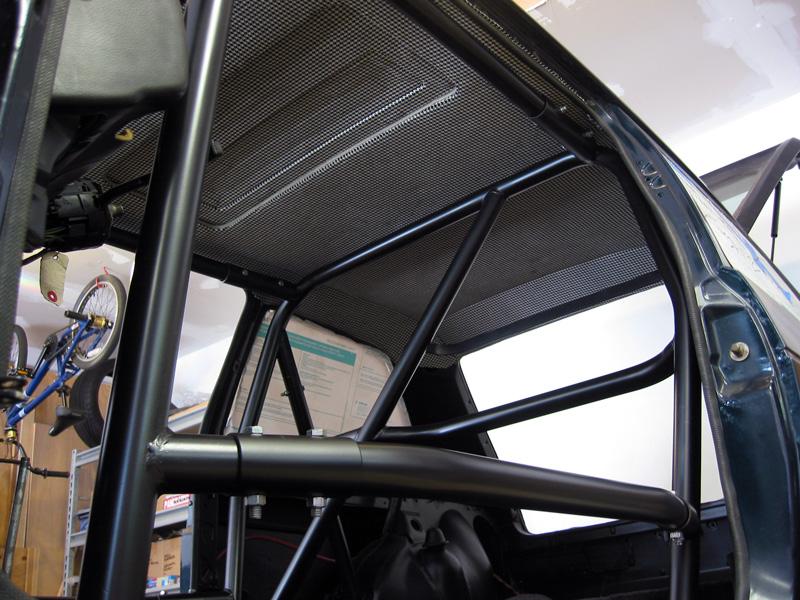
And so I can those damn hooligans ridin' up on my shit I installed a granny mirror. This thing is so fisheyed it makes me look like Rich.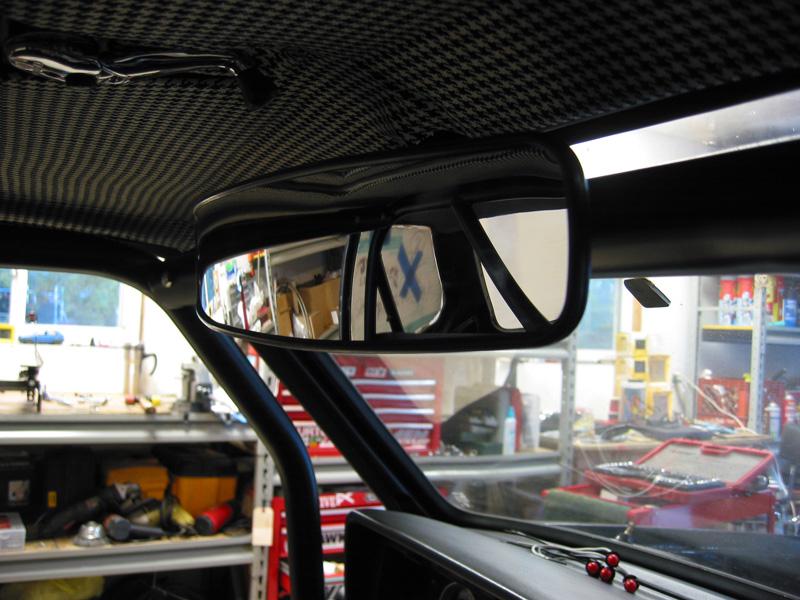
I'm surprised they are allowed to call these bumpers. Silly europeans.
Small metal black euro bumps, woot.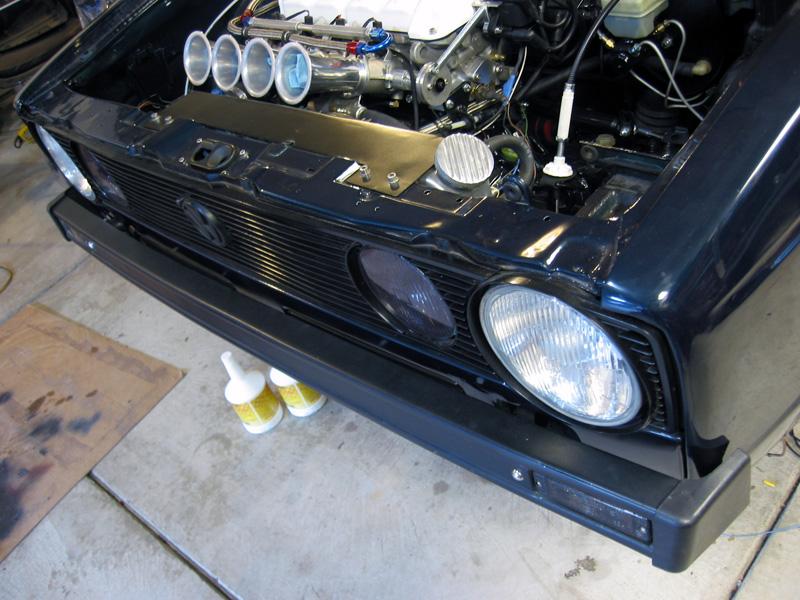
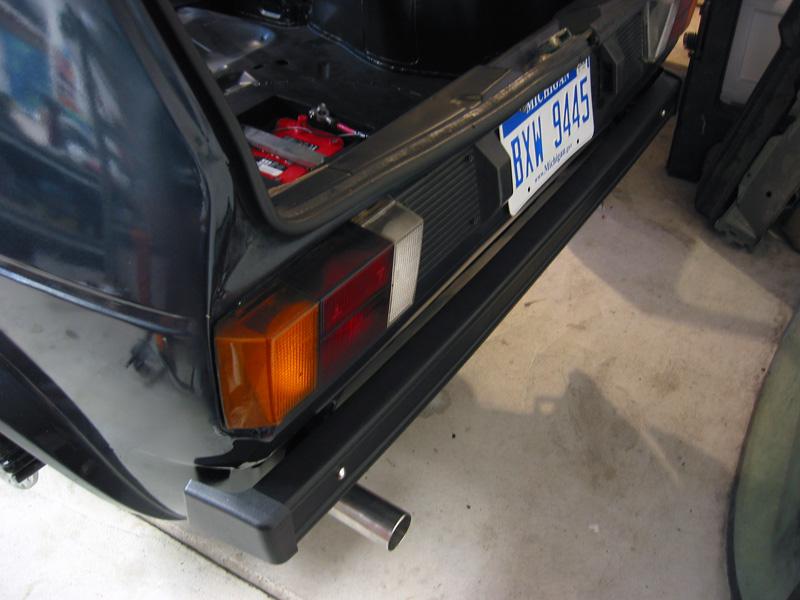
It says Hi.
wtf feet?
wait what?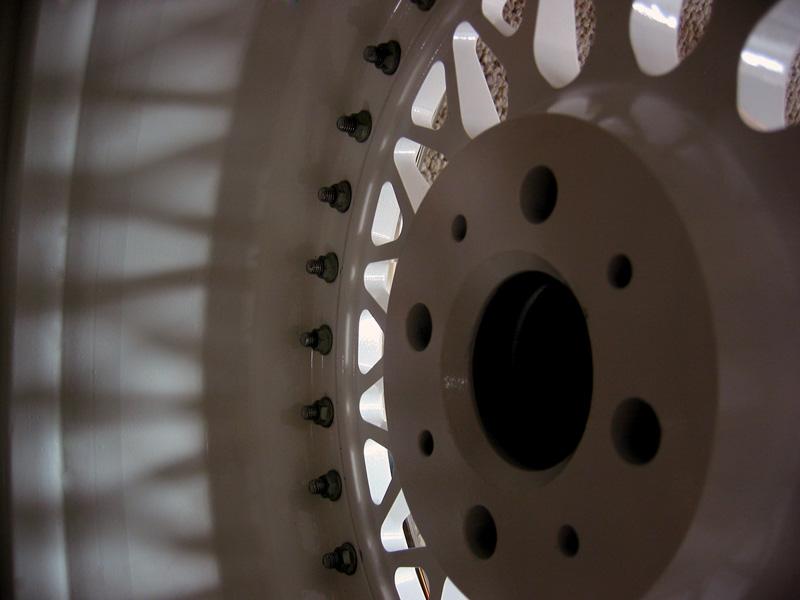
11/2/2008
Ok so it's not running yet, but that doesn't mean I can't still make progress.
While the dang computer crap is being figured out (me crying on the keyboard asking it to just cooperate), I figured I'd cut some shit up and mount some wheels.
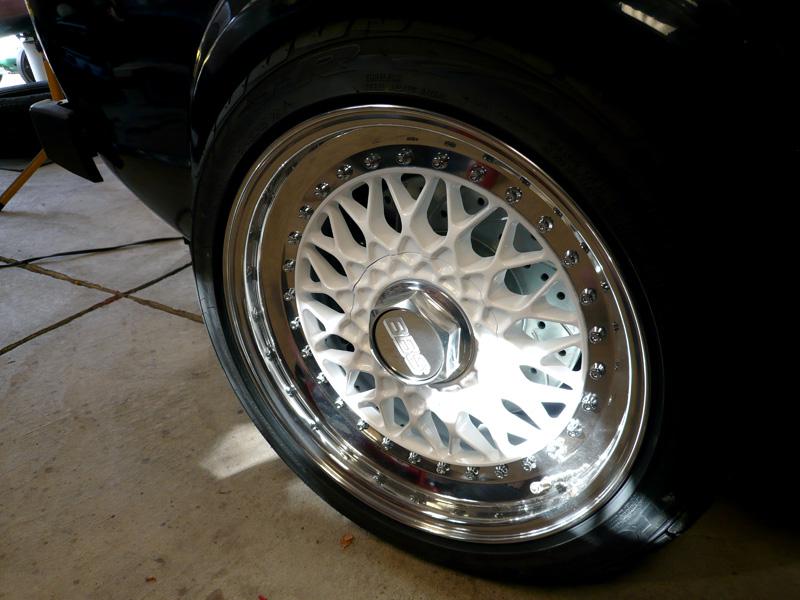
15"x7.5" rs' with radinox lips, new bolts, straightened, then freshly stripped & powdercoated by fourbyken: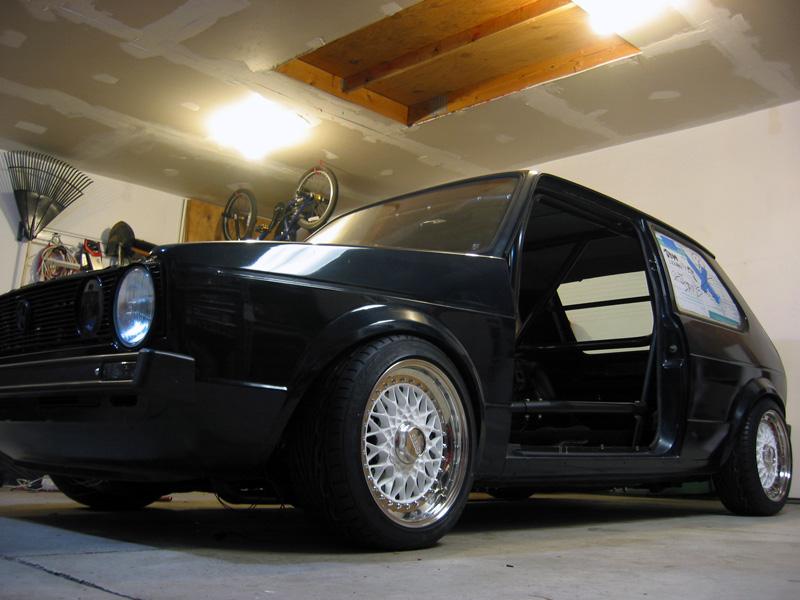
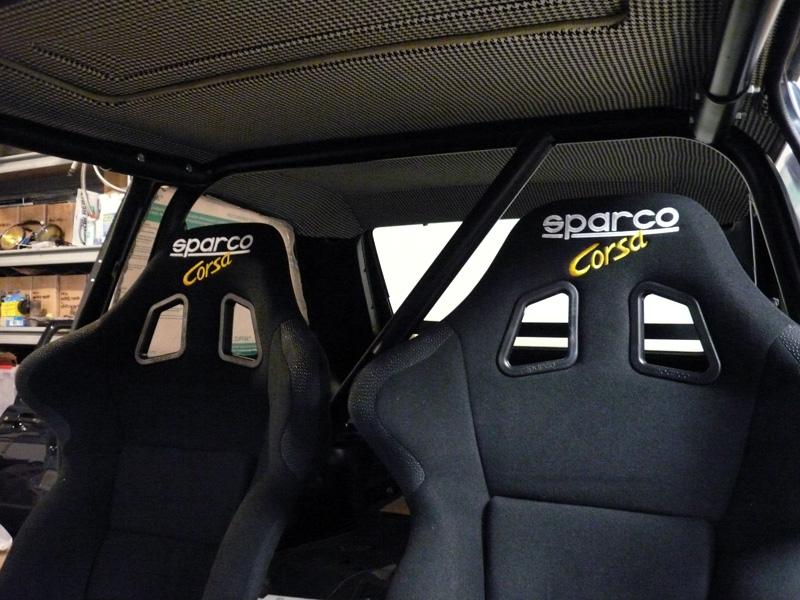
I bolted together all my seat hardware and installed one of my corsa's and it sat way too high for my liking.
Fack that, sawzall time. (ok i said that to sound tough, really I did a lot of looking around online and talked to matt and then measured a bunch of stuff and then trepidaciously cut and drilled it).
The lower hole is the original, the upper hole is my improvisation:
after and before: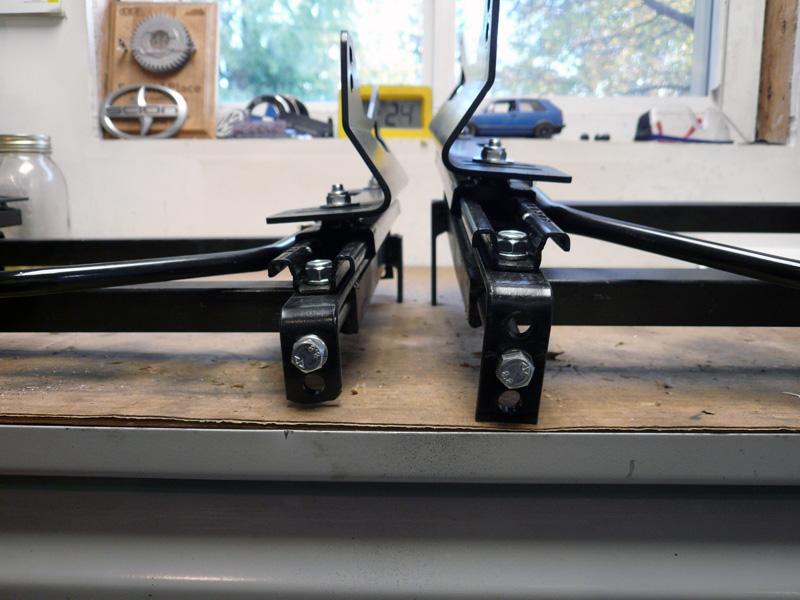
and then:
I've been having some trouble getting my LC-1 to talk to my laptop, does anyone have any experience with this?
3/9/2009
I haven't really touched the car all winter. It was too damn cold and I wasn't gonna eff with it.
But, my basement is warm and I acquired a few parts over the winter that needed some McLovin.
Say hello to my new hot dash, courtesy of Santa Matt!
(Sorry for the crappy cellphone picture)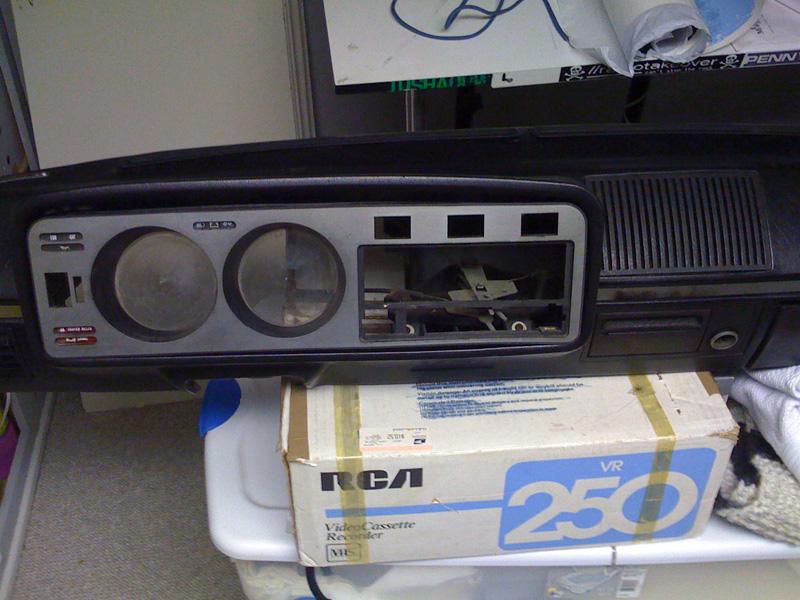
I really liked the way Matt's gauges looked in the rocco, so I'm gonna rip his stylez.
I made a cardboard template then cut it out of thin steel. Primed, painted and bam.
The gauges sit just a little back from the glass so I painted the inside of the cluster so it's dark like my soul.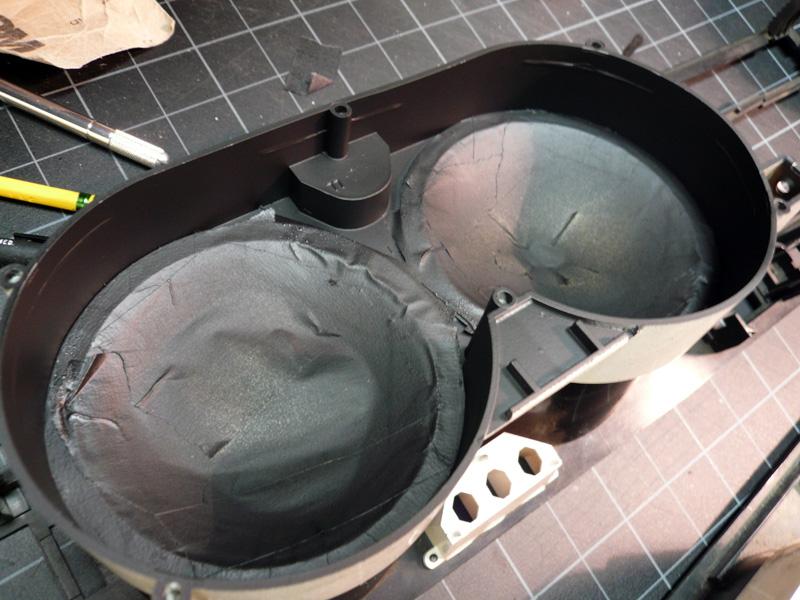
Autometer doesn't sell the speedometer I wanted with a black surround, but all my other gauges have a black surround. I painstakingly masked the gauge face, lightly sanded the bezel and sprayed it flat black. Now it matches the rest of the gauges perfect. 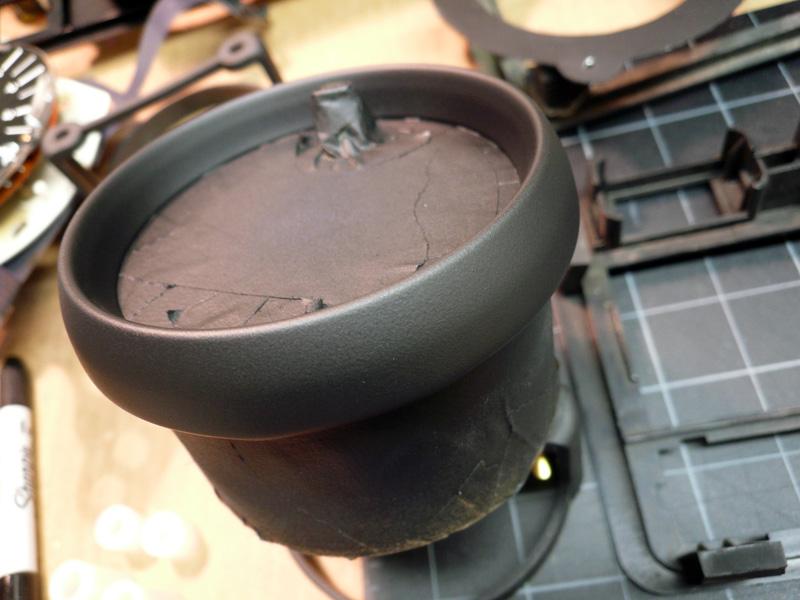
My mini basement workshop
3/15/2009
Small Update:
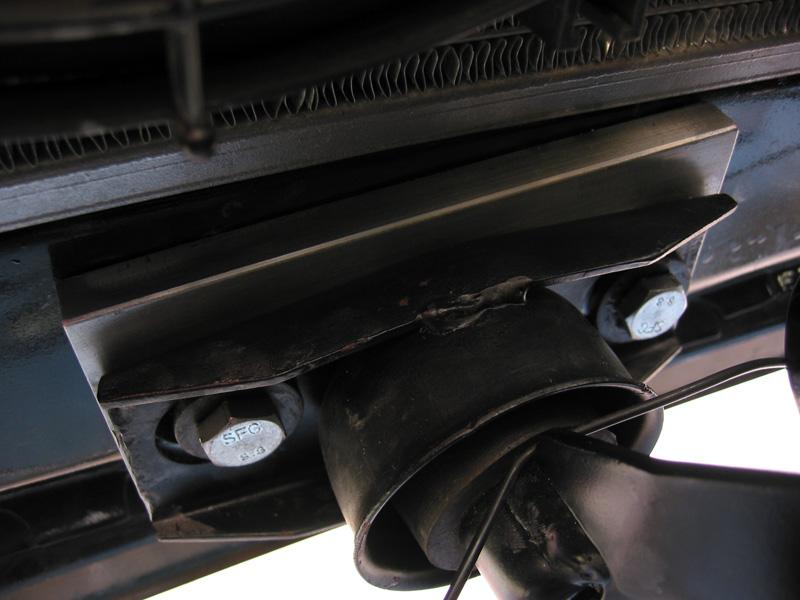
I got a sweet aluminum spacer for my front motor mount. It should stiffen up the front a lot and get rid of the slop and play that the stock setup has. 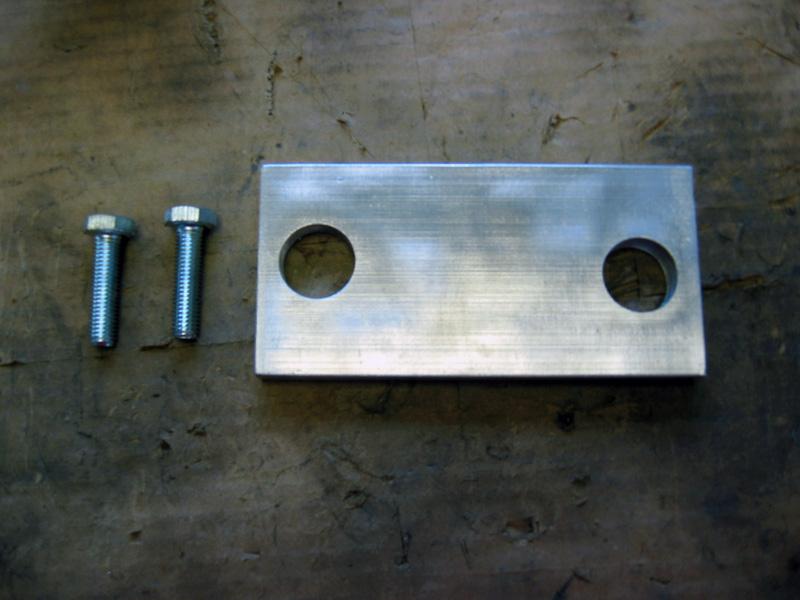
I tore out my cabby dash, pffft eff that thing
BUT now I need to make brackets to fit my sweet early dash. Research tells me to find an old rabbit and cut out the mounts, then weld them into my car. Anyone have an old rabbit I can chop some mounts out of? Bueller?
4/29/2009
HOLY HELL.
We made HUGE progress tonight with the 034 programming. One of the guru's from the 034 boards, Preston, came over and helped out. He was super nice and very skilled with the programming. He redid a lot of the programming, figured out my coilpack was 90º off, figured out some timing, kicked a couple tires and BAM. It idles with a little love from the pedal, much better than is shown in this video, but it's not perfect yet. We're going to calibrate the A/F this weekend, then do some road tuning!
I also have a nice little oil leak from the lower left side of the block. It's either coming from a small freezeplug or one of the gaskets from the plate on the side of the crank. Eh, either way it means some shits gotta come off and get fixed. Oh well, I kind of expected something like this, I'm glad it's not too bad at least.
WOOOOOO!
6/2/2009
The car is almost road worthy, we're tiding up the wiring and assembling a few more things, mainly on the interior.
I've had a rather decent oil leak since the first time the car started. I thought it was coming from the intermediate shaft or the small freeze plug right next to it. So I replace the seal and o-ring on the int shaft and siliconed the shit out of the plug. I started the car up again tonight and it's still leaking, maybe not as bad, and I think from a different spot now. It's very possible (and probable) that I had two leaks before, and I've only fixed one. I think it's coming from the oil pan gasket now, which seems really odd since everything is brand new and torqued to spec.
Could my oil pressure be way too high for some reason, and it's forcing oil out of otherwise fine seals? My oil pressure gauge isn't playing nice either, so it's useless right now. Is there some type of sealant or anything I could use in addition to my oil pan gasket?
I'd really like to figure this out before I take the car out on the road.
Oh and my header is starting to melt my axle boot 'cause it's so close. sweet.
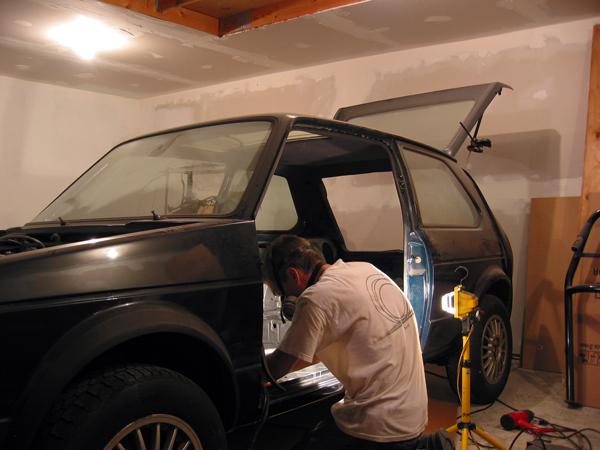
6/7/2009
Matt and I worked on the car for a few hours on thursday night, got some things figured out and buttoned up. Seats are in, harnesses are in, dash is in, gauges now light up again, the fan works, and the wiring just keeps getting cleaner and cleaner!
Brian Johnson came over today and figured out my brake lights and turn signals! It turns out my hazard switch was missing an internal piece (how it got out of there I have no freaking idea, previous owner must have been messing with it). JohnnyB and his amazing parts stash came to the rescue with a NOS hazard switch that actually fits my dash. Boom, I have blinkers and turn signals.
It turns out the brake lights weren't working because of a bad ground. They're wired funny from the factory, I have no idea how Brian figured this out. Actually, I have no idea how he figured either of these things out, but I'm soooo glad he did.
The elusive fuking oil leak... I dropped the pan the other night, cleaned it up and put sealant on both sides of the oil pan gasket. Still leaks. I muttered some angry words and gave it a really dirty look, but it still leaked.
Today I said eff it. I dropped the oil pan again, took out the pump, removed the belts, and with the help of mr.buff Brian we pulled off the damn crank bolt and pulley. The suspected gasket behind the crank plate was fairly soaked with oil, I'm pretty sure this nails it as the culprit! I think my paint job on the block is to blame. I had a small masking mistake underneath the crank plate gasket, and I think it stopped it from getting a good seal. I cleaned the hell out of both surfaces, siliconed both sides of a new gasket and reinstalled it. I'm waiting to get a new crank bolt on monday before I am able to put it all back together again.
I also retapped a few stripped oil pan bolt threads while i was in there, hopefully this will help as well.
It's getting so close!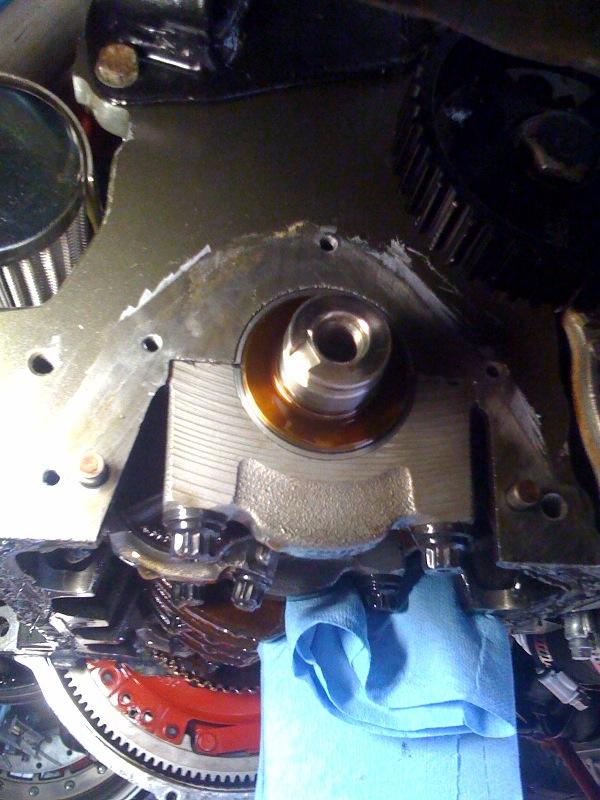
6/10/2009
The oil leak has not gone away.
Either:
A. I suck at diagnosing oil leak origins.
B. I suck at fixing oil leaks.
C. I'm going to burn this car to the ground.
D. All of the above.
I need some serious help on this one. It looks like it might still be coming from around the intermediate shaft area, but I just replace the o-ring and seal AND put sealant in there. I can't tell where else it would be coming from, any ideas?
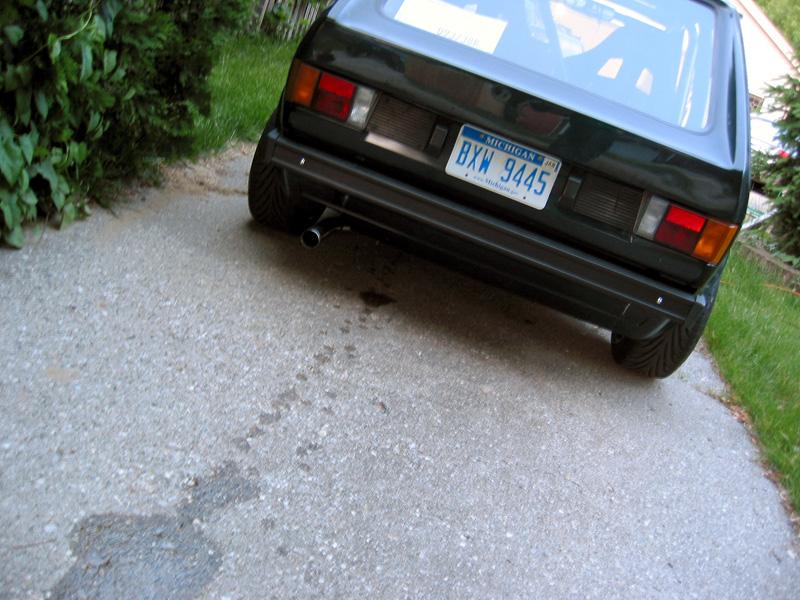
So tonight I said ****it and decided to drive the car up the block anyway. I strapped into the harness and made it about a block and a half before I noticed it was getting hot and the fans weren't coming on. I turned it off, adjusted the fan temp activation, burned my hand on the 200+ degree radiator, and then the car wouldn't start because it was hot and the battery wasn't fully charged. yay. I pushed it back to the house and did some wiring.
Pictures to prove it happened in real life:
oh yeah, here's my new wheels too 
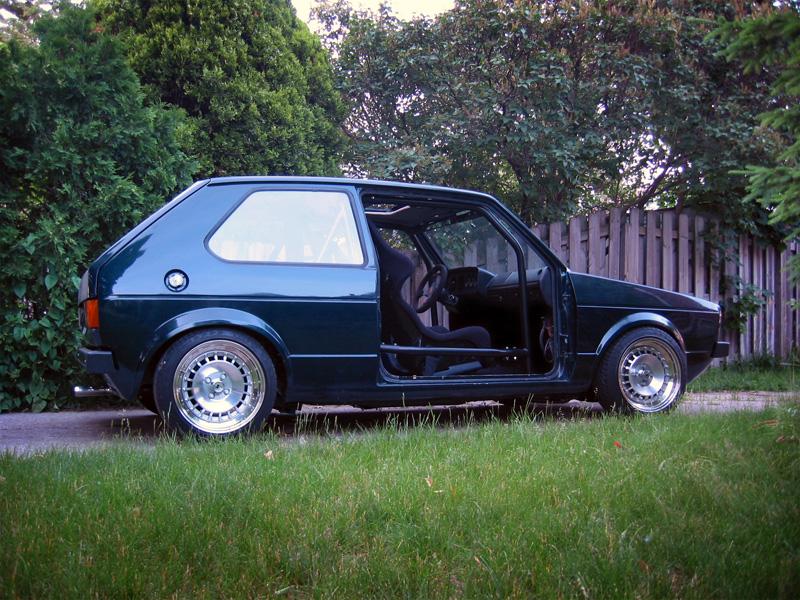
6/11/2009
So, good and bad news.
The good news is I know where the oil leak is coming from.
The bad news is I don't know how to fix it yet.
Joe was correct, the oil galley freeze plug wasn't sealing properly. Luckily I had a new one in my stash, so I popped the old one out (not easy when it's 4 inches from the frame rail), and put a new one in. Steph, being the awesome wife that she is, got Fidel to come over and help out. So he and I put the new plug in and... drip drip drip from the new plug.
The sealing walls around the plug must be messed up, allowing oil to seep through. How do fix this? Should I use a super strong sealant? ...weld in the damn plug? ...thread the hole and put a short stud in there?
Huge thanks to Fidel for being awesome and coming over super late tonight to help out! I can't thank him enough, so if you see him, please thank him for me.
Thanks to Brad too for coming out and lending me his eyes and helping me figure out how to remove the old freeze plug!
It's soooooo close, but still so far away.
6/15/2009
That mother effin oil galley freeze plug was to blame. But lucky for me the MIVE crew is awesome and came together to help me out. Fidel talked to Katherine who used science to figure out the best Loctite product to use, Katherine gave said product to Matt who brought it over to my house and gave me a hand installing it with the tool that Fidel made.
That loctite 680 is some serious stuff. It was already setting up while we finishing the installation. I'm very confident that the plug is in there for good, and that makes me happy.
I want to thank everyone for all the support the build, it means a lot to me. I really want to thank Matt for his constant help and ideas for the past 4 years, I couldn't have done it without him. There were a countless number of you that helped along the way and really pulled through in the last couple weeks for me (Brian, Fidel, Bryan, Geoff, etc). I can't name everyone, but you know who you are and how much I appreciate everything.
BUT, the project is not nearly over and I've already got some things to upgrade and tweak. I haven't figured out a good hood solution yet, but I have some ideas I need to try out. I'm going to be breaking in the motor for the next month or two, then taking the car to a dyno to get a good final tune. After that I need to beat the crap out of the car on the track and enjoy the machine we've built.
Look for more progress in the near future.
2/8/2010
I pulled off the car cover recently and have been updating a few things.
I've done some of this already, the rest is underway:
- Fuel gauge
- New oil temp sender so I have an accurate reading
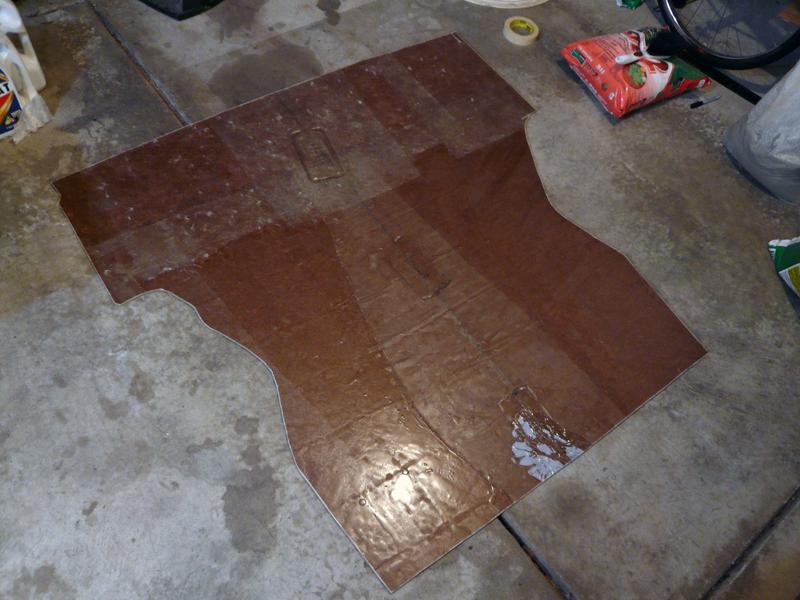
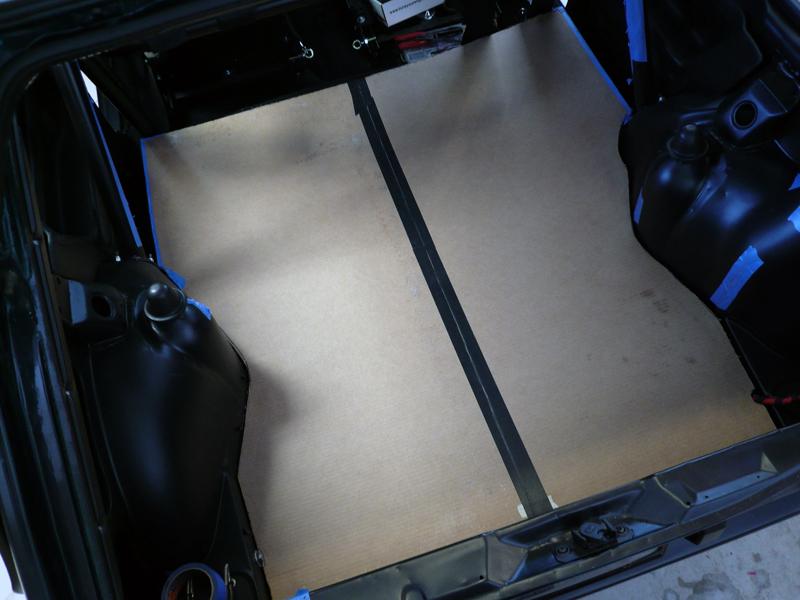
- Carpeted fiberglass rear floor
- New door handles so the passenger doesn't die a fiery death
- Low temp thermostat
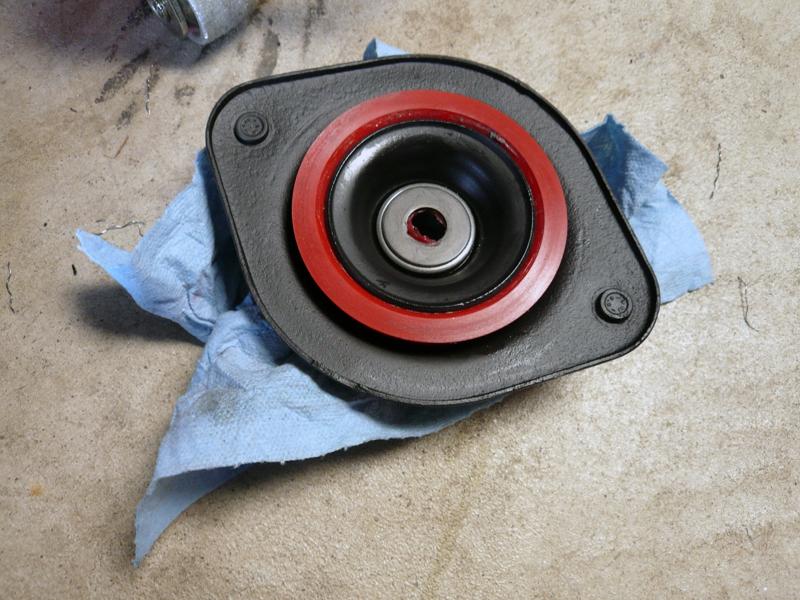
- Rebuilding old-style strut mounts
- Hood?
- Smoked tails
- Wire LC1
- Hook up and calibrate speedometer
- Wire headlight relays
- drl's
- Align saggy doors
- Misc powdercoating
3/8/2010
I'm knockin' stuff off the to-do list.
I got busy making a rear floor. Almost done, I just have to find some good carpet for it and some padding for the underside.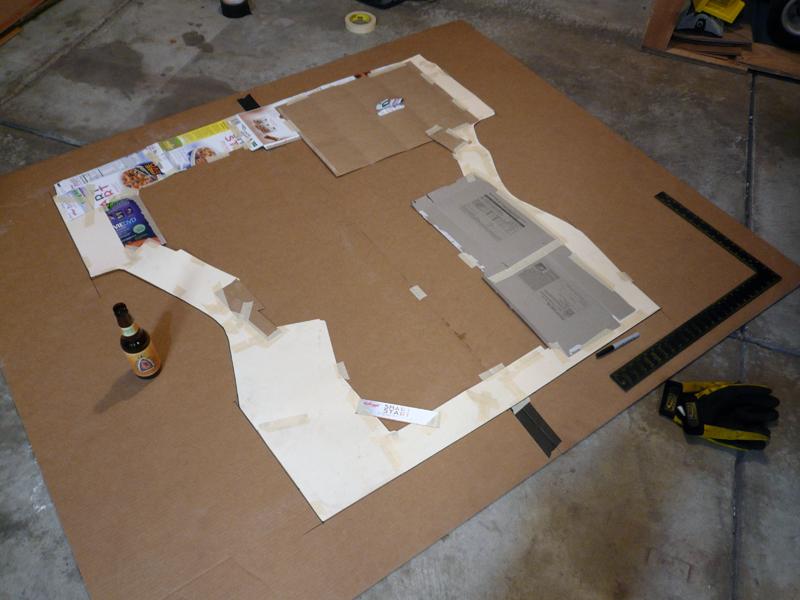
I found a good deal on some new smoked tails on the 'tex. I kinda like em, kinda not sure. I want to get the car in the sunlight so I can see it better. meh?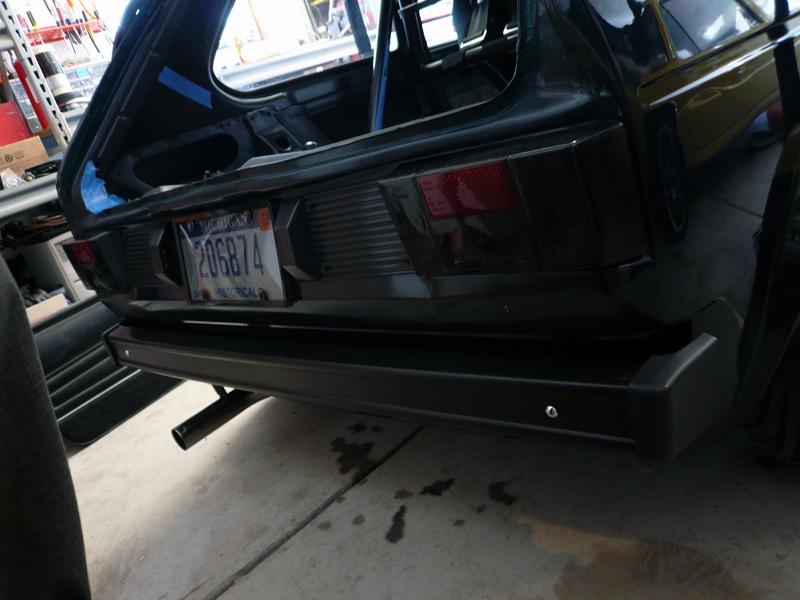
I rebuilt some old-style front strut mounts that I had sitting around. I found new oem bearings online, threw in my poly bushings, and stripped and powdercoated the mounts + bolts.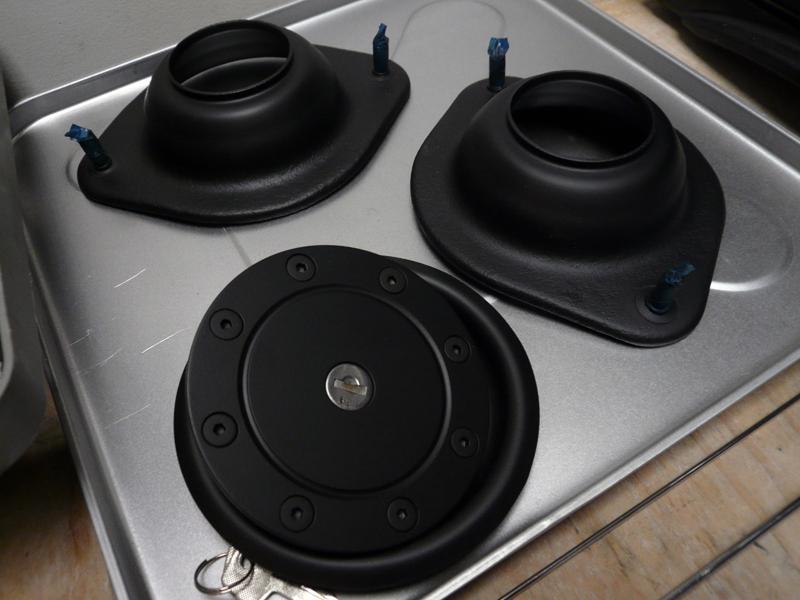
I'm also hoping to put a hood on the car sometime this summer, so I stripped and coated a hoodlatch. Exciting, yes I know.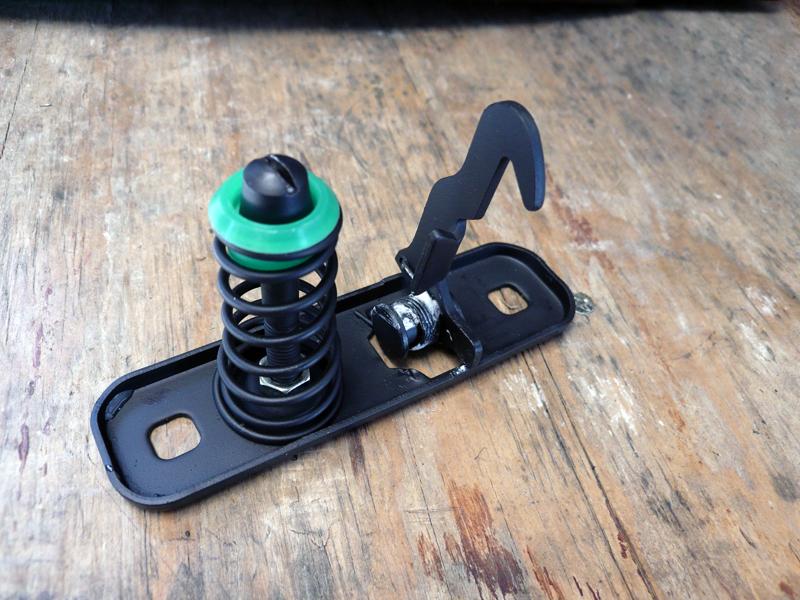
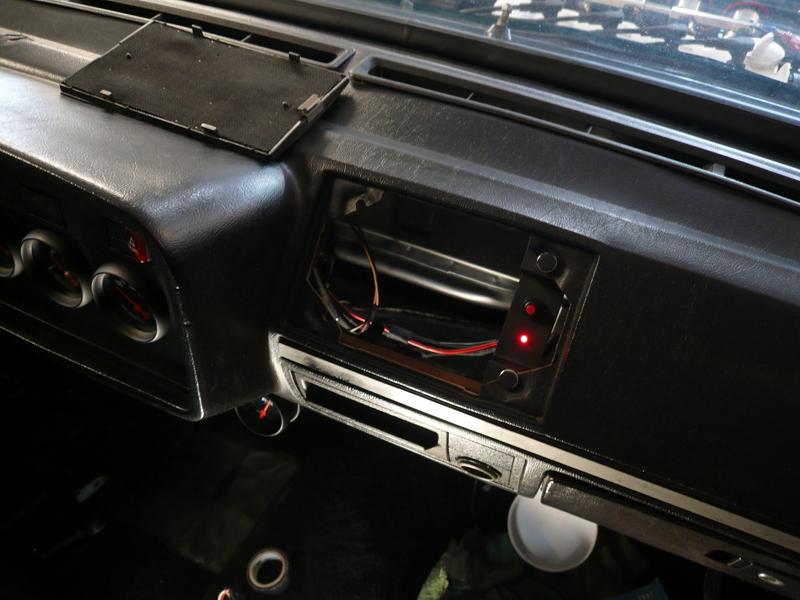
My old LC-1 wasn't working, it wouldn't talk with the laptop. I sent it back and Innovate was nice enough to send me another. I finally got around to wiring it up. It has a reset switch and activity LED, and I didn't want them all ricey and out in the open, so I made a sweet little panel that hides behind the removable speaker vent on the dash. I think it's pretty neat.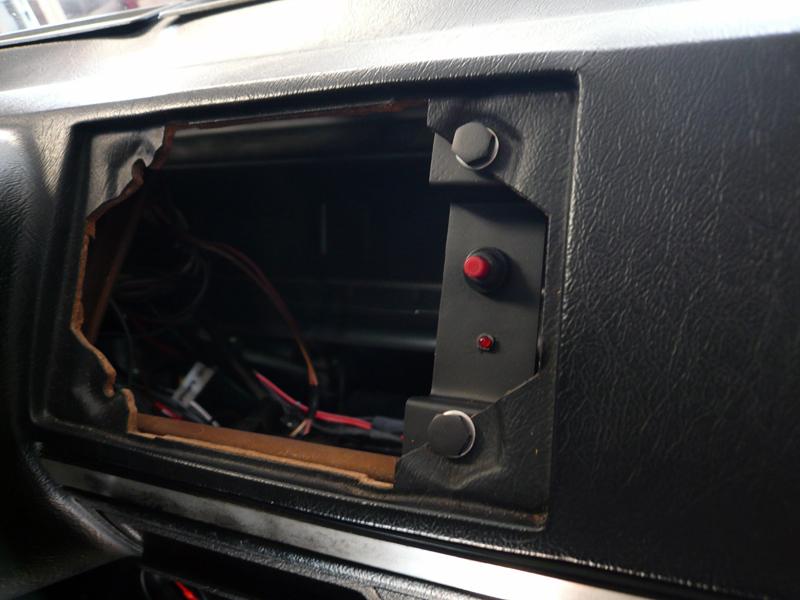
11/22/2011
peace out ITB's
Cool!
Posted by Diggymart on 4/6/20 @ 3:33:02 PM