You must be logged in to rate content!
10 minute(s) of a 278 minute read
1-14-2010
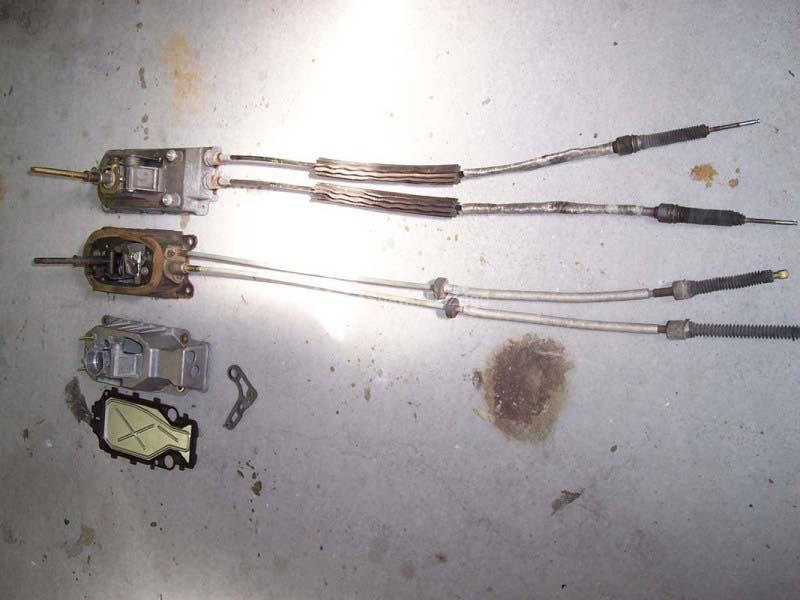
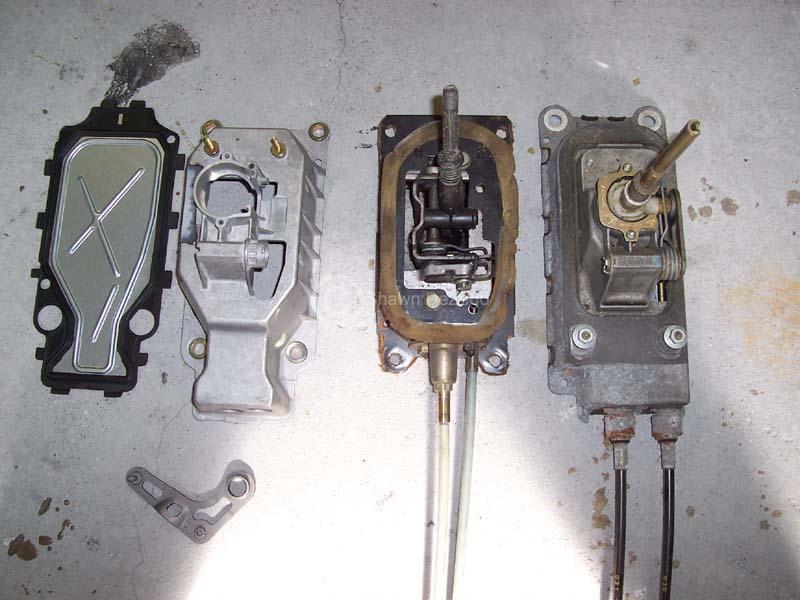
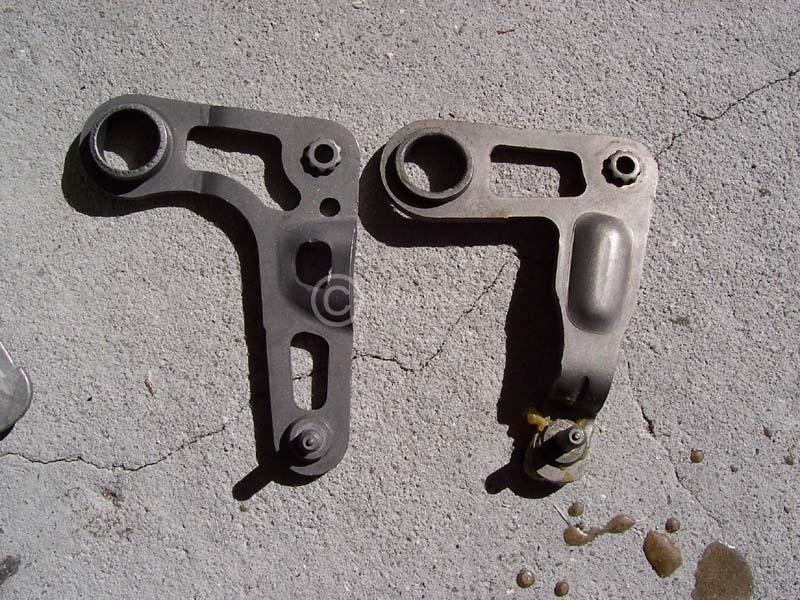
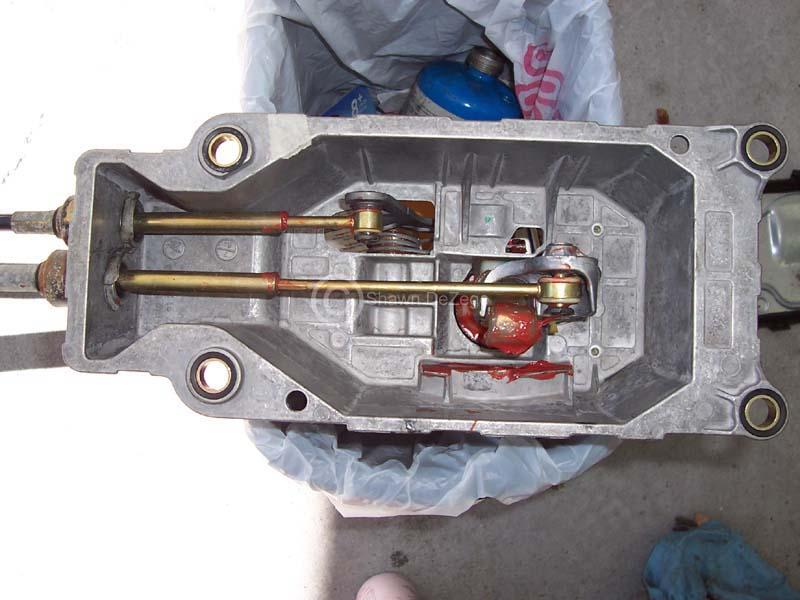
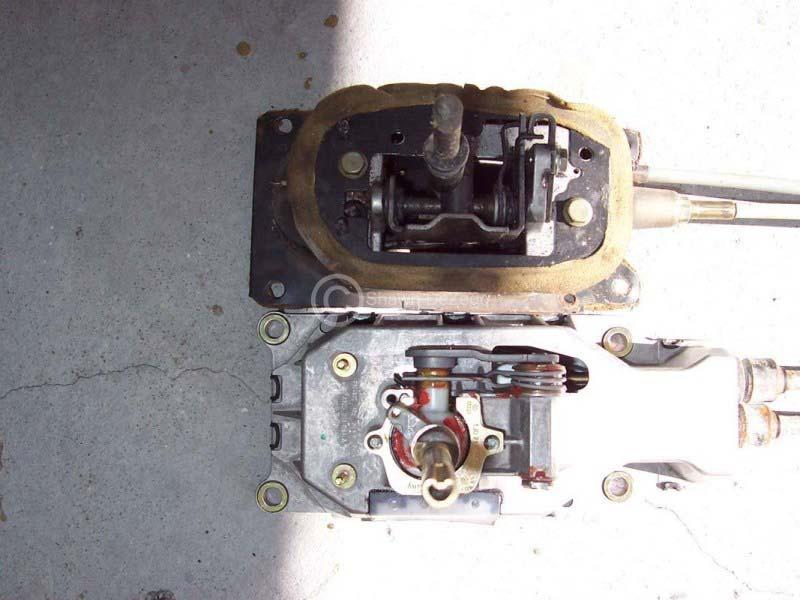
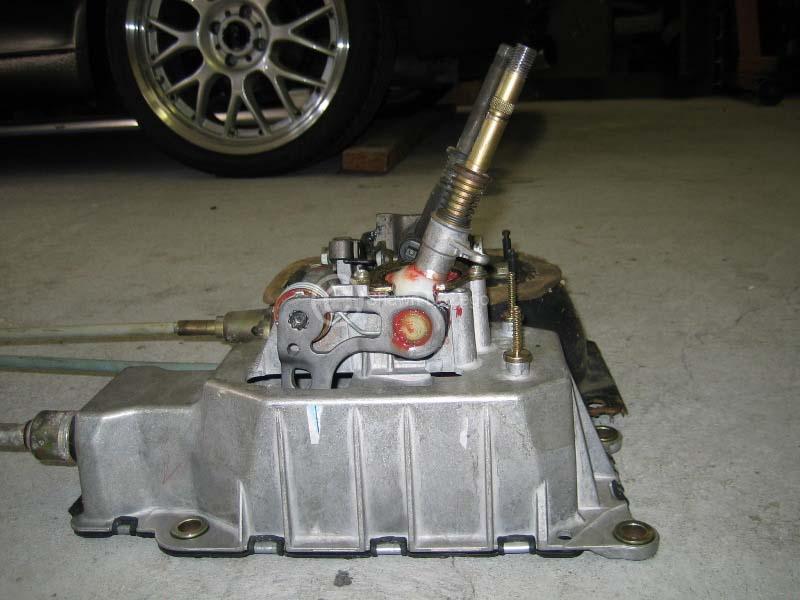
Adding the Euro Shifter information here. For those who are unaware, there is a Euro Lupo that uses the 02m/02j shift mechanism in a box that fits 02a tunnels.
The Following 3 parts are needed to convert.
ETKA shows these to cross ref to:
CA '96-'03 Caddy
LU '99-'03 Lupo / Lupo 3L TDi
LU '04-'06 Lupo / Lupo 3L TDi
PO '95-'00 Polo / Derby
PO '00-'02 Polo / Derby
POC '00-'02 Polo Classic / Variant
I should also give credit to the thread that I first saw them in -> http://forums.vwvortex.com/showthread.php?4306052
Here is is from my research thread ->http://forums.vwvortex.com/showthread.php?4668026/page1
This stuff is well worth the price to have an OEM solution. I am sure we can all fab up the parts and hack up our tunnel to make the 02m box fit in, but I would much rather spend my time on other more valuable areas.
I swapped out the parts this afternoon and it was simple and straightforward.
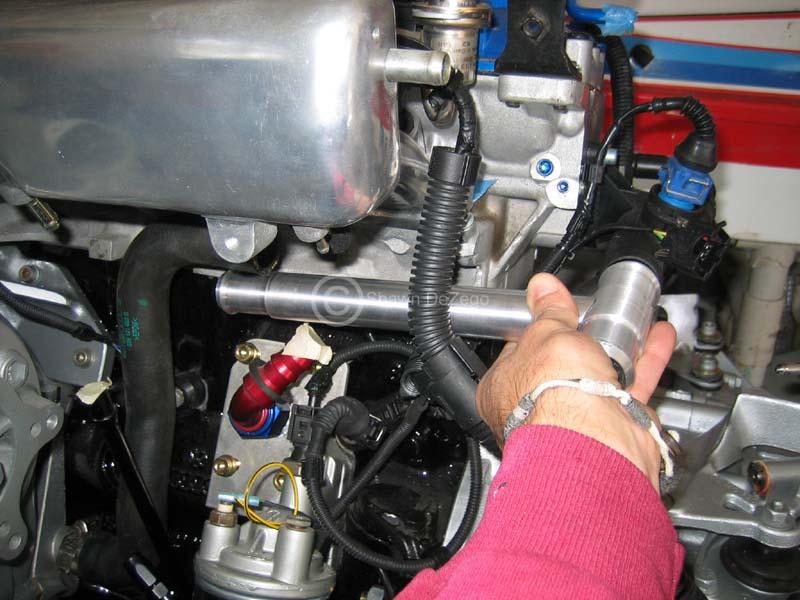
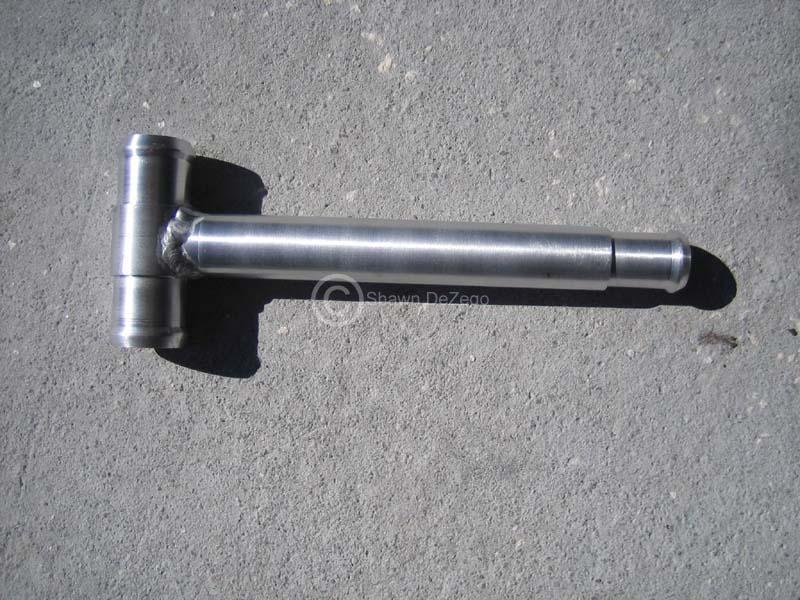
NOTE: The 02m stick is about 2.25" taller than the 02a (even in the new box). So, I cut it off, and put a die for 12x1.5mm threads to use the STD earlier Shift knobs, but you could cut a groove to use the Mk4+.
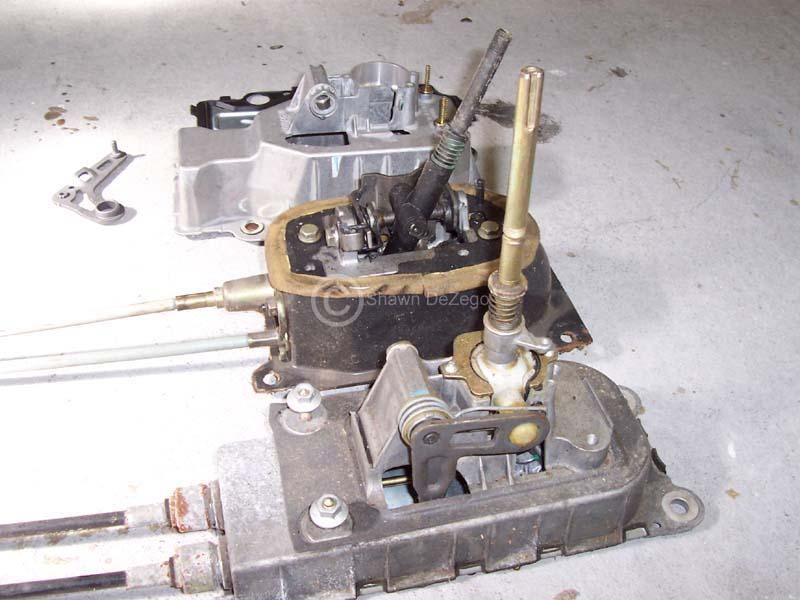
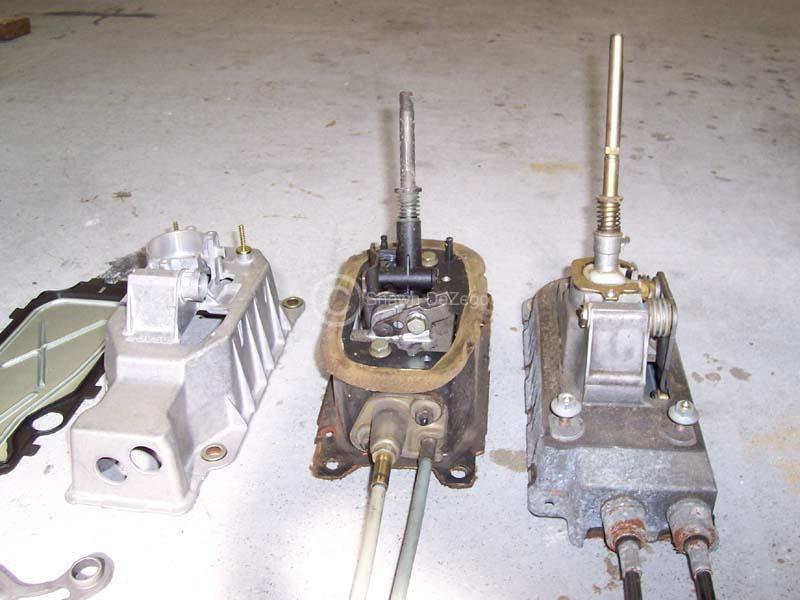
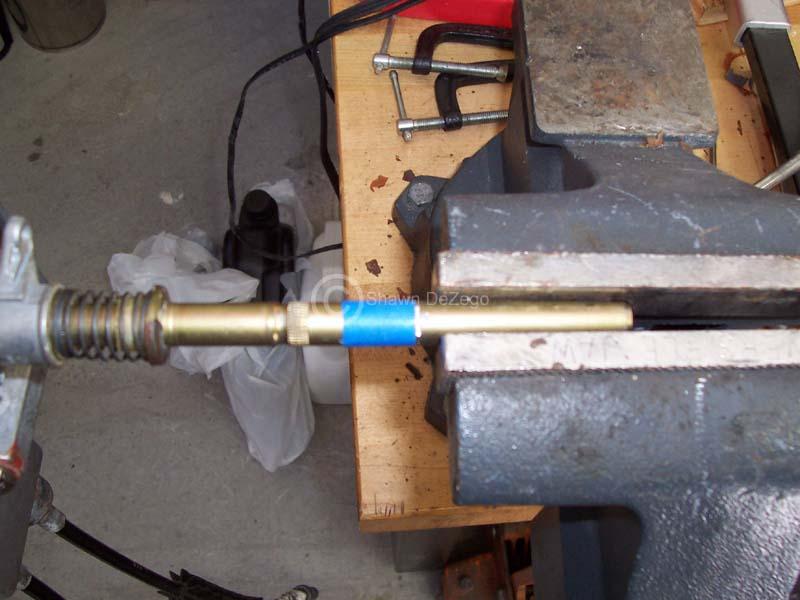
The shaft size it a tad big for the 12x1.5mm Tap, but it can be done. The Threads just don't come out perfect, but it's only holding on a shift knob anyway
January 26, 2010
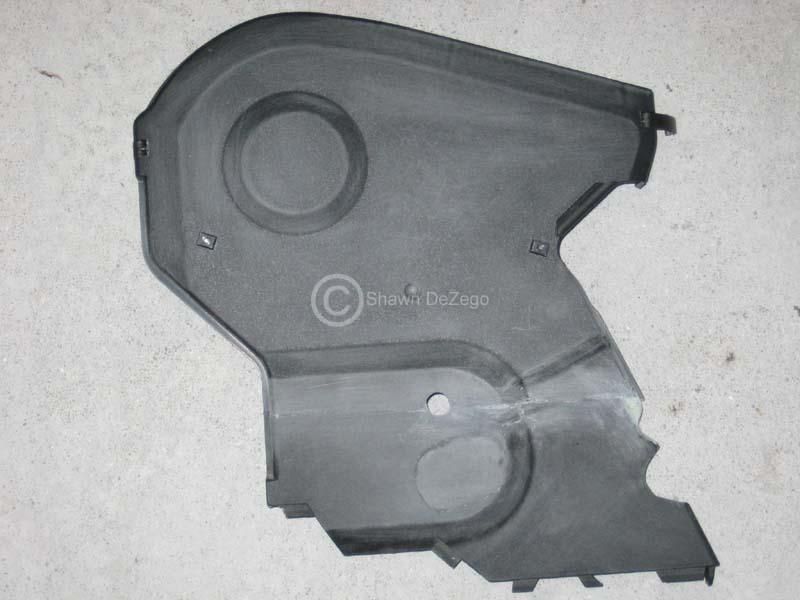
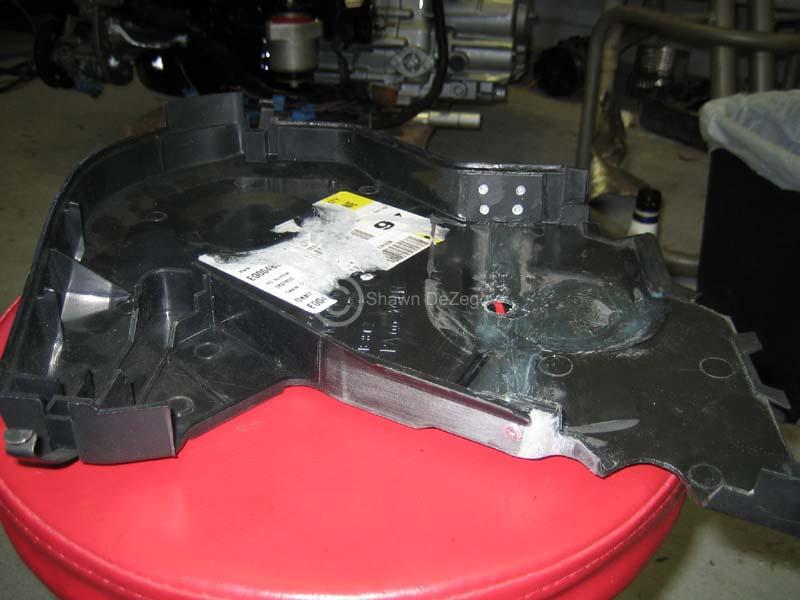
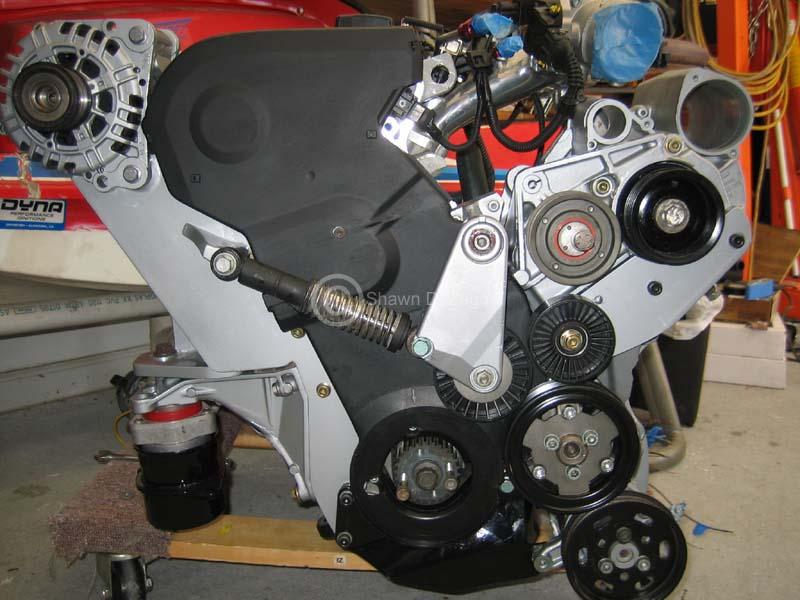
Here is what I have been working on. Coolant Pipes, Timing Cover and misc BS that you never think about doing hybrid stuff until you run into it.
Since the ABA is a tall deck block, there are no Timing covers that work, so I grafted to upper AEBs to account for the 15mm difference. You can see the start above, but I merged them for good today. I also had to remove the bump out to clear the belt going to the rear mount alt.
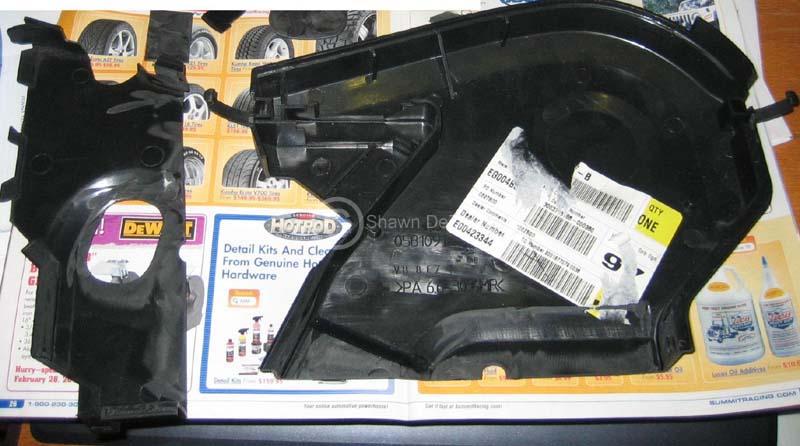
I also threw a few rivets and backer in there for good luck..
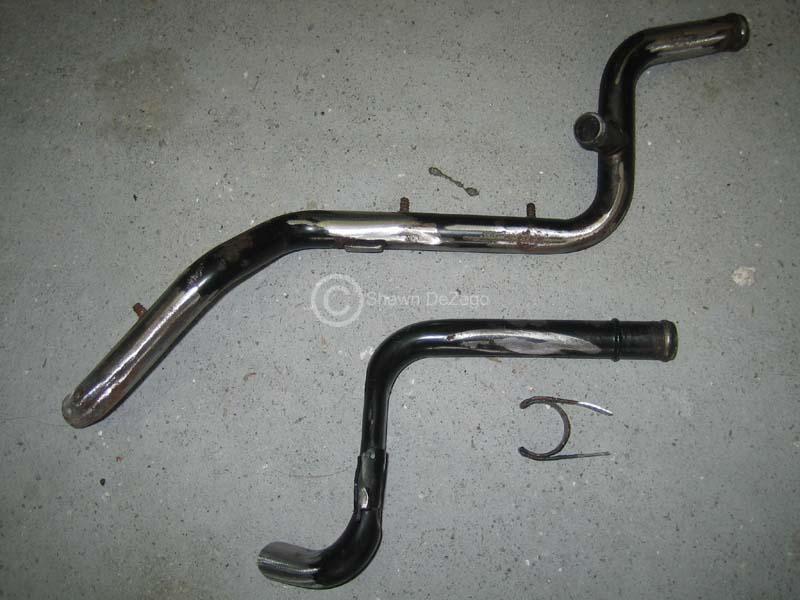
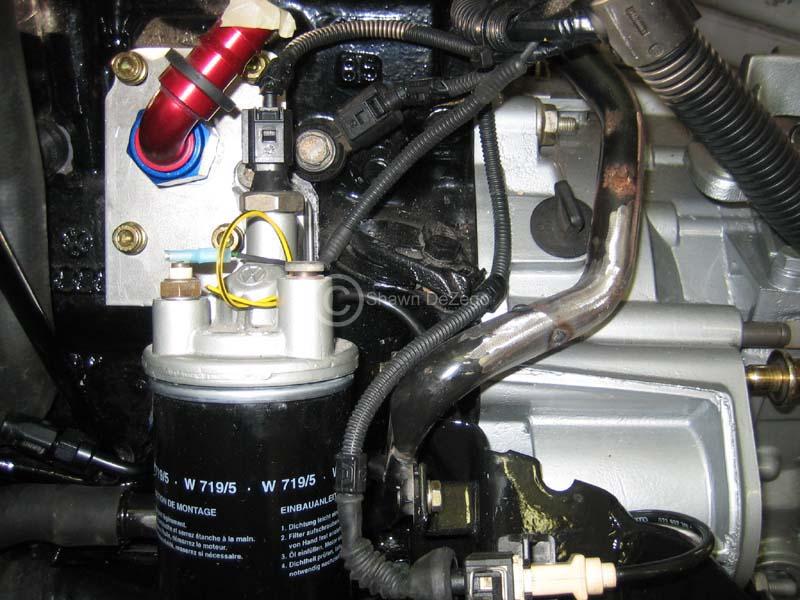
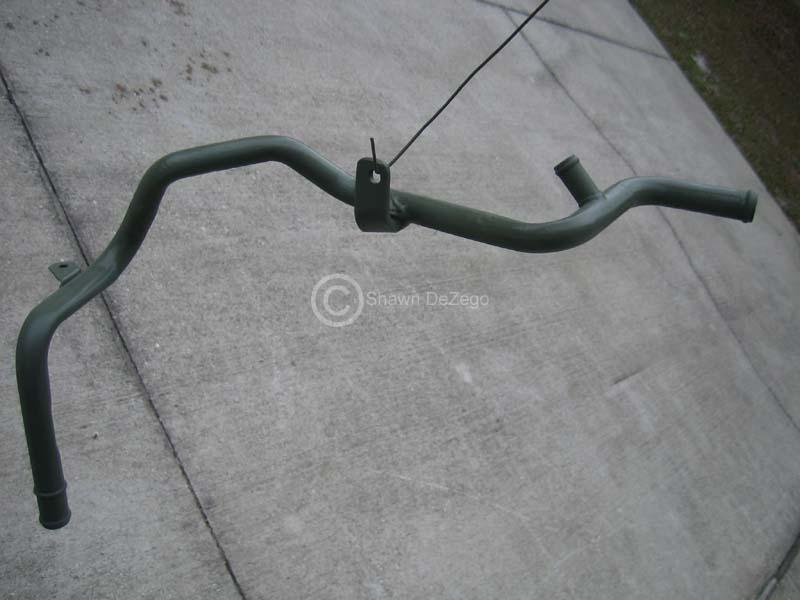
Coolant pipes....
I took the G60 lower and the ABA upper, cut and grafted them to clear the 02m nicely, Also added a brkt to support.
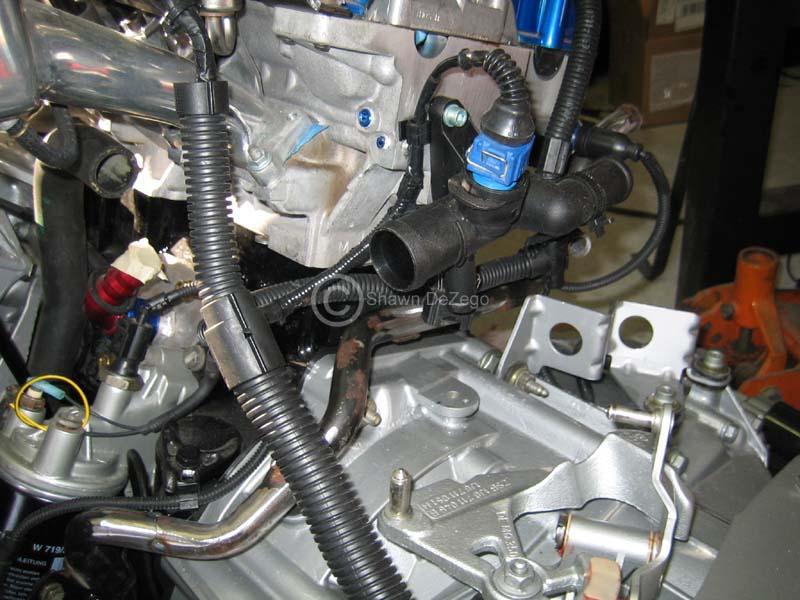
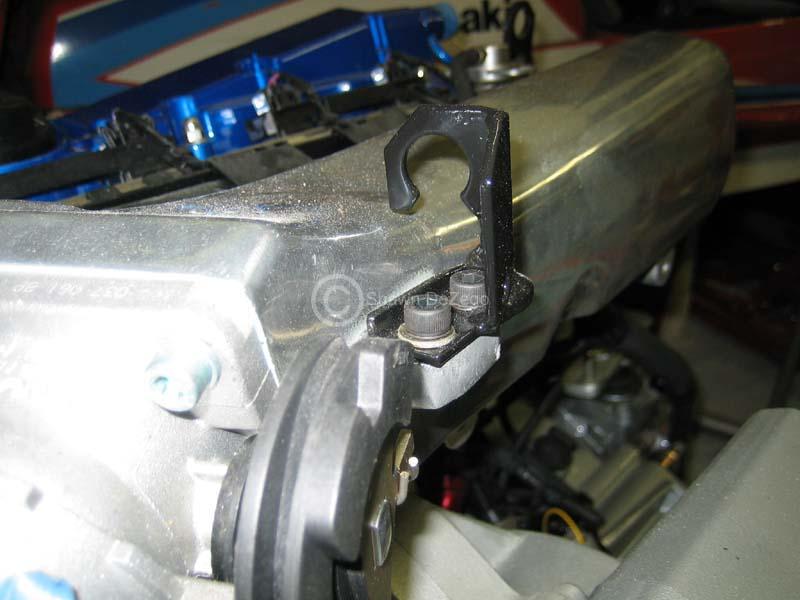
..and the throttle brkt that I needed to make fore the Euro AGU intake for good measure.
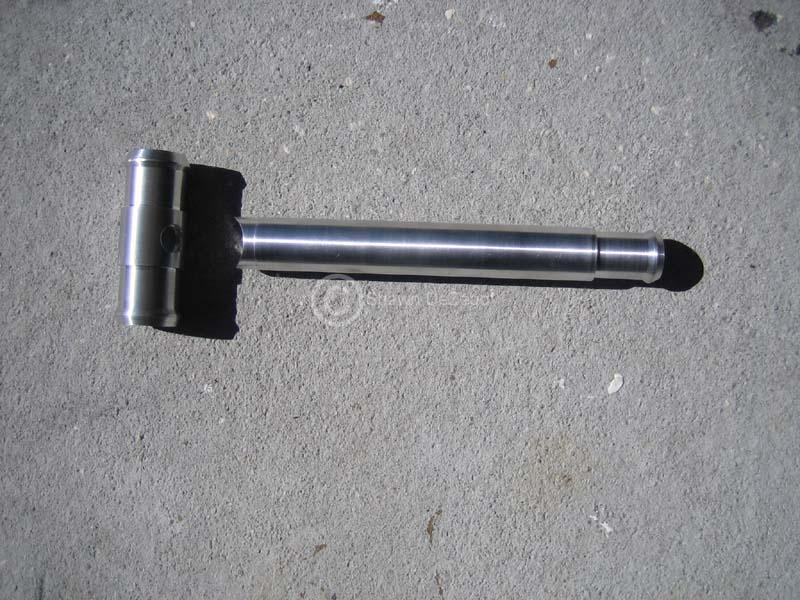
Next off is making up my Flywheel lock to torque the ARP crank bolt to button up the rest of the front of the motor and make a Special T for the Coolant bypass circuit off of the head flange. I bought the AL pipe to do this, but just need to take it up to the lathe.
January 28, 2010
Bypass Coolant pipe. Was able to make it up to the shop and spent some time on the lathe yesterday and welded it up today. I still need to add a support brkt or two.
February 22, 2010
Got quite a bit of stuff done over the last couple of weeks, but I have had a project (not pertaining to this build) that I can not show here
Here are a couple of pic from some more time consuming bs... Oh, If anyone wants to rent my paint booth, LMK
February 23, 2010
Up toward the beginning of the thread, I pictured the Supersprint Mk2/3 16V Header that I bought new for a small fortune. The plan was to reflange it and tweak the pipes (offset between 16v and 20v is only about 1/2 inch).
However, at the time, I completely forgot that the 16v Head's Exhaust face is 90* with the block deck (like the 8v). Whereas, the 20v is on an inward angle of 20* (so 70* with the block deck). So, to use the 16v header and reflange, I would also need to come off the flange first with 20* turns to connect to the header...
I do have another 16v 2L motor, so I may just keep the SS header for that and make my own, but as always time is money.
Another option is that Raceland now makes an exact replica of the SS header for an absurd price of $140, I may consider getting that and then hacking as described above and I won't feel too bad. Their headers are actually an amazing quality for the price and I don't know how they freaking do it... I Guess like everything else, 5 letters C H I N A
1.) Both the Supersprint as well as the Raceland are identical designs since RL copied the SS They are both Twin Y Headers.
2.) I am running the Stock Euro Large port (AGU) intake matched to my ported head. Eventually I will build my own, but that is down the road when I can dyno before and after effects.
3.) Cams are stock initially, but this will go along with #2 above. Gotta get it on the road first, broken in and Base line Dyno'ed
Kyle,
WolfGti originally used the stock Euro N/A AGN 20v Ex mani and Mk3 downpipe. This is really a piss poor manifold, but good in that it is bolt on. He later had Joe build a custom 4into 1 header which came out really really nice.
April 19, 2010
I have made some progress on some odds and ends, but have been real busy with other projects. I just finished remodeling my son's room. 4 day projects turns into 2 solid weeks morning and night ...one thing after another.
Big progress will be happening here real soon.
April 20, 2010
I still have a lot of stuff to do before I will be ready to rip down my running car. My goal is that when I do get ready to swap, it will only be a VERY short down time (week or two).
Things left:
- Rebuild and port spare Charger
- Shorten Axles
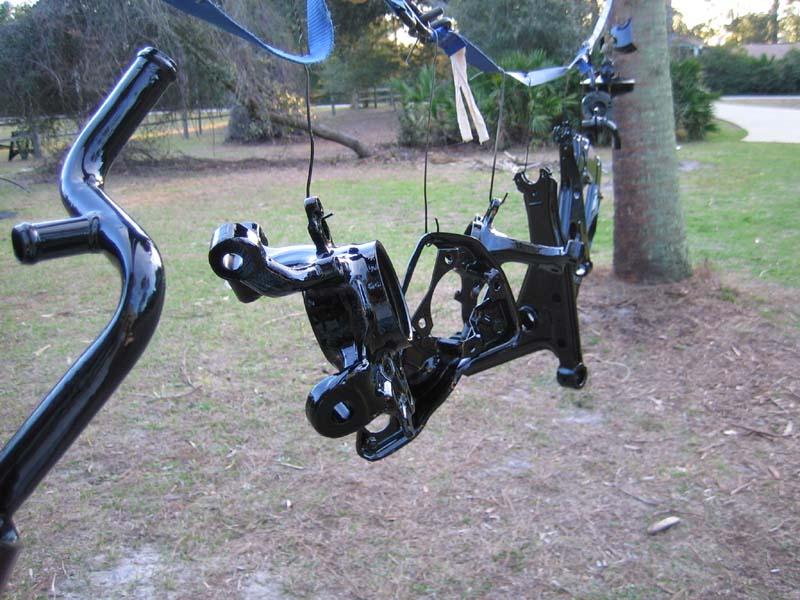
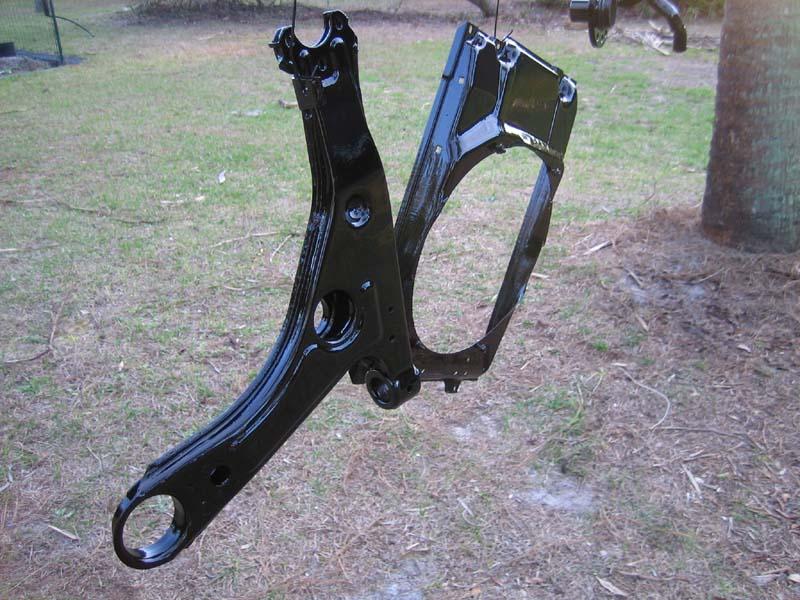
- Powder Coat Subframe, carrier and lower Rad support
- assemble knuckles (re-pack new wheel bearings)
- press in A arm bushings and assemble KFrame
- Finish custom Wiring harnesses and disconnects to Megasquirt
- Make port matched intake mani Gasket and button up
- Clean up and paint Rack
- Fab Block Breather setup and Catch can, etc
- Build Header (probably won't do this ahead of time as I want perfect fitment)
- Rebuild front calipers from 337
- Machine parts for 02m Master Cyl onto Corrado Pedal Assy
- Build SC bypass Circuit (still undecided if this will be mechanical like the G60 or if I will attempt to use something like the APR R1)
- Build IC mounts and Prep and Paint RS Front (although I go back and forth on the RS). I have the precision Core and RS, so I will likely go this route at least initially and then may go A/W and stock front down the road
- Build IC piping
- Work out hybrid A/C lines and possibly Evap Core to clear Rear mount Alternator
- Fab up a lot of stuff (alternator Heat shield and misc stuff)
- Wrap up coolant pipes, lines, etc
- Decide if I will re-spray the bay while the lump is out
- ... I am sure there is a ton I am forgetting ...
Things still left to Buy:
- Front 312mm Rotors/pads
- Front Brake lines for 337 calipers
- 5 Lug wheels for Front (no budget to go crazy so I may just get 2 of the same R1's in 5 lug for now)
- 4 EGT probes
- IC piping
- Brake line for ABS delete
- ... a ton of stuff I am forgetting
Everyone has their sob stories about their lack of time, but mine has been a mile long for the past couple of years and has been plagued by hundreds of other projects taking precedence along with Family obligations. Just know that I am no slacker Also, there is nothing about my swap that is straight forward and there is an immense amount of time in planning, engineering and fabricating details. It doesn't bother me though because I can go out to the garage and rip around in my Corrado and not have to look at it on blocks or something like that.
Also, as you can imagine, this has been a very costly ordeal. I have most of the stuff gathered, but still need to spend quite a bit out of pocket and with the economy being in the toilet, I am hesitant in doing so.
S