You must be logged in to rate content!
93 minute(s) of a 731 minute read
3-2-2023
My 1990 300zx Twin Turbo build
Compliments of megaDan @ vwvortex.com
I meant to do a lot (all) of this last year, but on the way home from visiting Wisconsin for my birthday last May the differential in my GTI decided it didn't want to work anymore all over the interstate in Indiana. The Z got converted to DD duty while I taught myself how to pull a transmission. To make a very long story short it took me three months and I got a Corrado transmission, TDI 5th gears, clutch, LW flywheel, etc, and a heck of a lot of experience.
Now, a year later, the GTI is running 'great' (Or as good as it can for you VW haters. I'm looking at you 91ser...) and I have some money and time. Scratch that, I have a little money and less time. I want this car drivable a week before Memorial Day so I can drive it back to Wisconsin in time for my 2nd marathon and the ultimate frisbee College Nationals in Madison. That gives me a hair over 4 weeks to learn as much as I can about this car and do a lot of work in the process.
Parts list:
-New Top Speed downpipes and testpipes
-Z1 13" front big brake kit + master cylinder brace
-Specialty Z stainless steel brake lines
-Stillen Quad tip exhaust (thats the plan at least)
-Driven Authority top feed fuel rail w/755cc injectors THEY FINALLY SHIPPED!!!
-6AN Stainless Steel fuel lines
-JWT Popcharger
-NGK BKR5E (or whatever the code is) spark plugs. Although now that I think about it I think I need to bump it up a few steps to a 7ish...so theres 60 bucks down the drain.
-Z1 motorsports ECU chip Unless anyone has a better suggestion. I haven't purchased this yet.
-Front bumper maybe
-Non-torn non-power leather seatsmaybe
-Innovative LC1 wideband
...I might be forgetting a few parts...
Job list:
-Clean garage CHECK
-Drop transmission
-Remove pre-cats (tried this once before. failed miserably)
-Pull plenum (scary)
-Test fit new rotors (get 12mm spacers if necessary)
-Do all the necessary deletes when plenum is removed
-Coolant lines
-EGR
-what else?
-Replace all vacuum lines with silicone and clean all connectors
...I'm sure I'll come up with more soon...
I think this build will be pushing the limits of my budget, time, and abilities, but I'm excited as hell to get it started. The only part I'm really worried about are the pre-cats. I tried removing them last fall with the transmission on. I got the easy nuts started, but wasn't able to fully remove anything and gave up after a few days of frustration.
I'm mostly doing this post for myself and the few gearhead friends I've got that wanna see. But you all seem to get a kick out of these kinda write ups so I figured I'd share and document my process.
If anyone has any pointers for anything I'm doing along the way, please feel free to chime in. More preventative maintenance? What do I need? Don't like the way I hold the wrench? Tell me. I'm drinking the wrong beer? Provide me with your favorite. 
Here goes:
Day 1
I was supposed to do this during the winter, but my laziness got the better of me and I didn't feel like doing any work in the cold. This coming from the guy who runs in shorts all winter. Eh.
I hadn't cleaned the garage since I replaced the transmission in the golf, replaced the wheel bearings, replaced the suspension, bushings, and brakes. Since I converted to an MSD coilpack ignition, did my timing chains, got rid of my second transmission, replaced the cooling system, etc. Throughout all of this I never really threw anything away. I accumulated lots of tools, but had no place to store them. All of this CRAP just kinda found its way to the side of my garage and I moved it aside every time it was in my way.
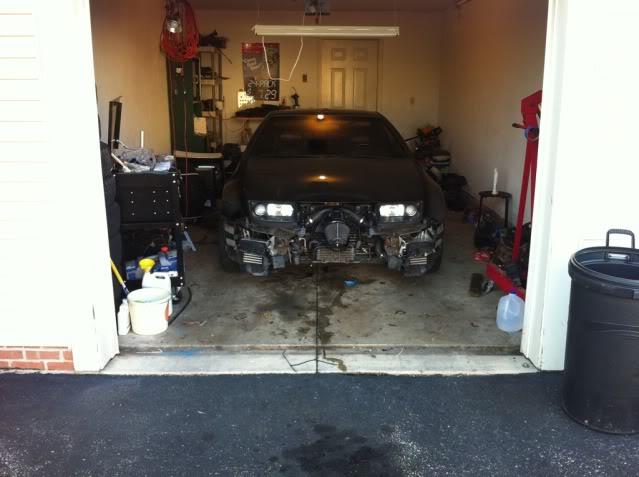
Started like this:
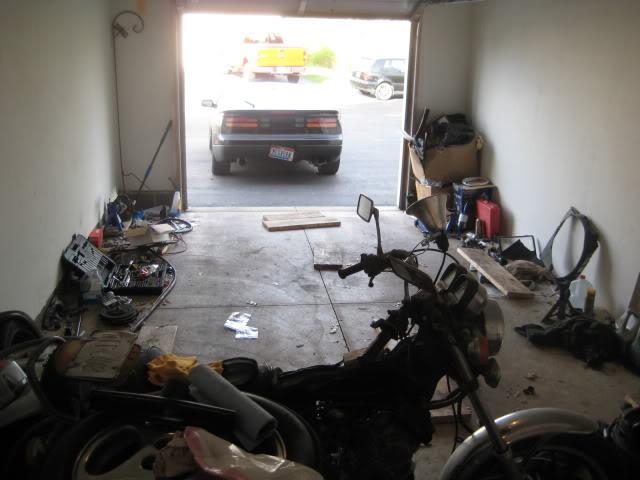
After 2 hours of moving and vacuuming it looked like this:
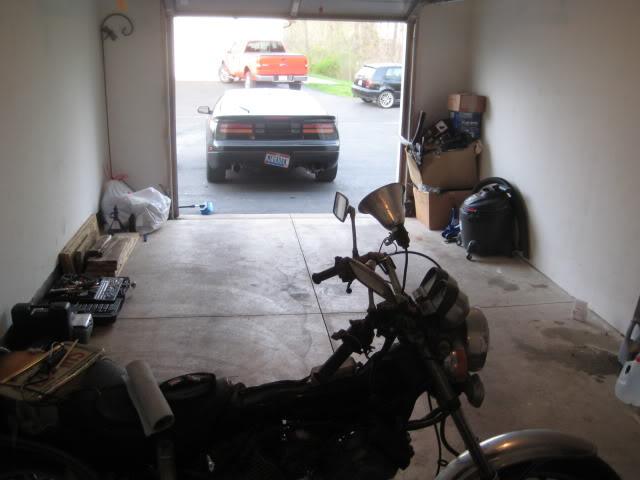
It may not look like much but trust me. There was 3" of leaves, tools, metal shards, screws, nuts, washers, ball joints, tires, beer bottles, tie rods and etc coating the floor of the garage.
And then it was time for dinner, so the only REAL work I got done with the Z today was driving it up on some 2x10's to make raising it up on jack stands a little easier. And I didn't take pictures of the boards, so you'll just have to imagine what wood looks like.
Buuut since this is the Z lounge I'll include the before pictures of my car.

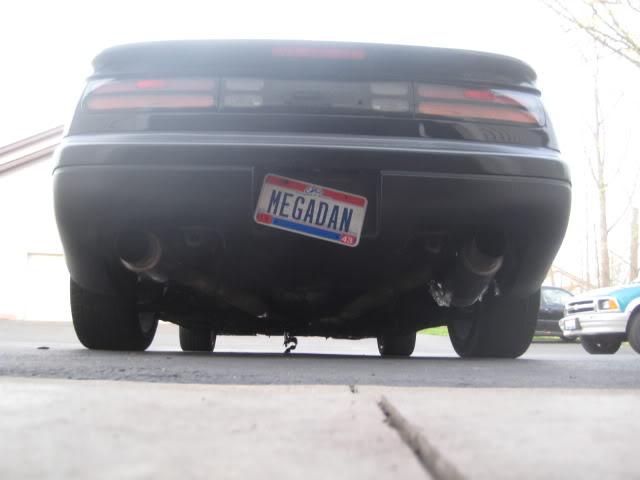
Notice the tape hanging from the exhaust just about everywhere. 3 weeks ago I passed emissions :-) Muffler tape is my hero.
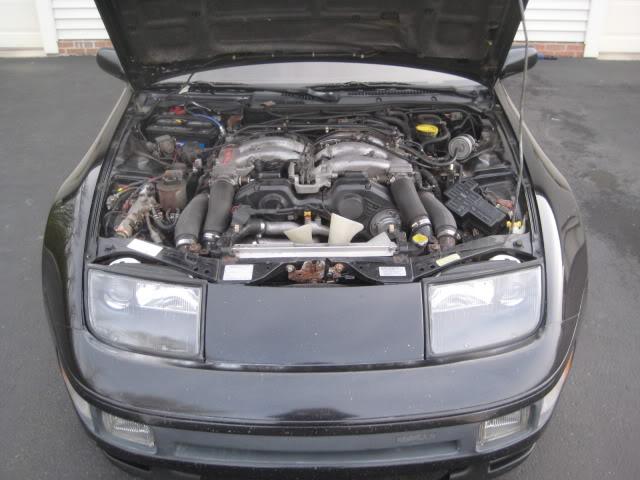
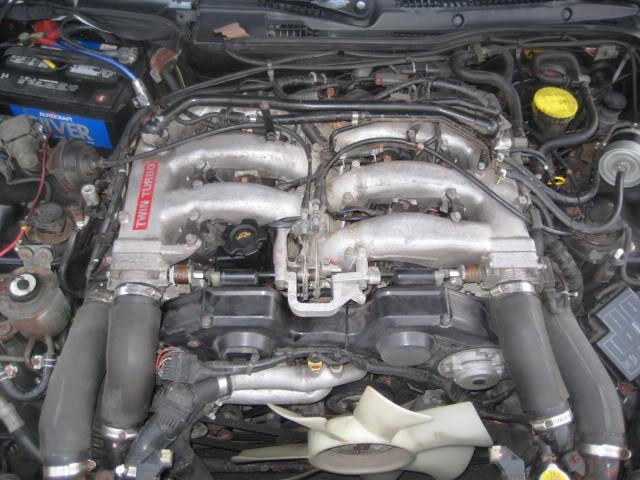
This is the mess I'll be staring at for the next 4 weeks.
Tune in tomorrow for hot Z jacking Spotted Cow drinking action! :burnout:
4/21/2010
Oh right. I typed that all up around midnight when I should have been in bed. I kinda forgot the important information and the reason why I'm doing all this stuff.
Last summer I had an intermittent safety boost (or just 7psi for whatever reason) issue. After ohming 4 injectors and finding 2 out of spec (18 and 22 ohms IIRC), I more or less assumed that was the issue. I had hoped to take care of this last year, but overhauling my GTI took care of my spare cash and free time so it got put on hold. I wasn't nearly brave enough to tackle a job like that on the Z when I had to use it every day.
As soon as I heard about the top feed rail I knew that was what I wanted to use. I originally planned on going with the Nismo 555 injectors because they're pretty common and reasonably priced, and didn't expect to ever need more fueling than that. But after much deliberation it made sense to go with the 755's because they were the same price and if I ever decide to upgrade I am covered. My far far far far far in the future plans wouldn't take me past 500hp, but for the whopping cost of $0 its kind of stupid not to build in that extra buffer.
I am not pulling the engine this time, although depending on how long these turbos last on 15psi, I might end up getting new turbos come winter. I'm looking at either the GT535R or GT600R, everything says go BB so those seem to be my choices.
I don't have the funds to build a full-on race car. I just want a somewhat reliable car that I can enjoy on the weekends and take the occasional 500mi road trip; all while making decent power. I have a lot of fun with the car even at stock HP levels, but if everything else I am adding to the car will set me up for more power I guess another 100-200hp couldn't hurt.
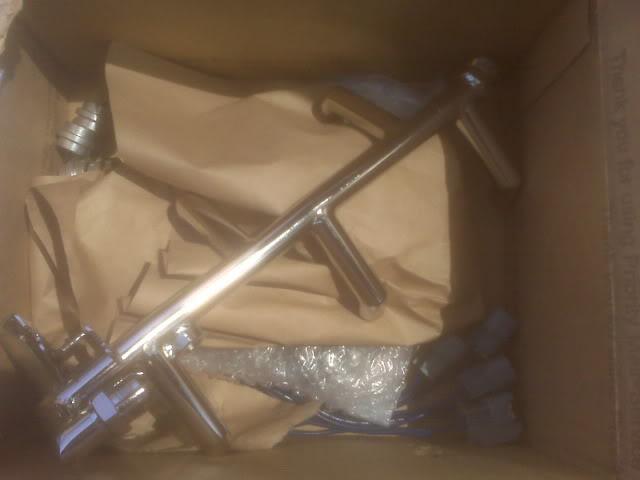
!!!!!!!!!!!!!!
4/22/2010
Todays goal was just to get the car in the air and get the wheels off as I was working with limited time. I got the car about 18" or so off the ground to make exhaust and transmission work easier but I might need to drop it later to make the back of the plenum more accessible. Raising the car took a lot less time than I expected but I realized I forgot to break the lug nuts loose. ****.
$30 Chicago Tools impact gun to the rescue!!! Best automotive purchase I have ever made (aside from my two cars haha), that cheap gun has gotten me out of countless jams. If anyone is debating whether or not its worth the $50 or so sale price....ABSOLUTELY.
I was kinda clueless as to how to tackle the brake lines. I've never done them before and wasn't sure how the stock rubber lines were attached. I've never really looked at them before. Turns out its pretty damn easy. Theres a nut at the end of each hard line. Turn that. Except mine were corroded pretty badly so after stripping the first one I hit them all with PB blaster and used the vice grips. Took about 20 minutes to get all the nuts off completely, except I broke the hard line on the passenger side caliper. It started to get dark so I didn't bother trying to pull the rubber lines out. They seem to be in there pretty good and it'll probably take some problem solving on my part to figure out how to remove them.
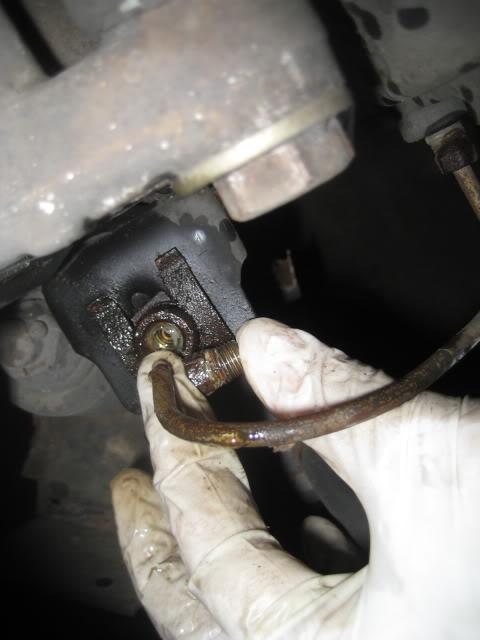
Does this require a new hard line? Or can I reuse that nut thingy if I get the old hose out? I'm pretty sure I'm hosed (witty pun intended), gotta find a new one. I took both calipers off and pulled my 13" brake kit out of storage for a test fit.
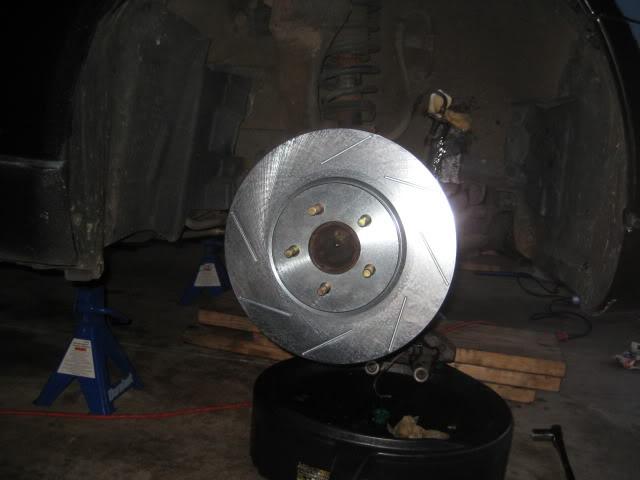
Hell yeah
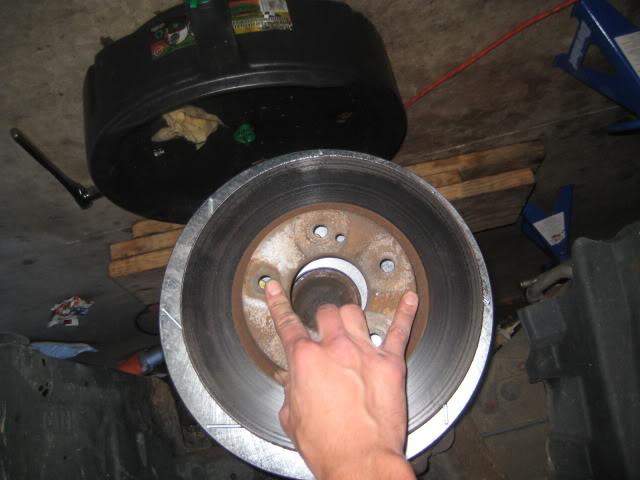
New compared to old. Can't wait!
I am going to have fitment issues with these rotors however. I needed 10mm spacers just to get my wheels to fit, and the caliper relocation bracket moves the caliper out 9mm. I'd rather not have to grind the Nissan off the face of the caliper, but if thats what it takes to get my wheels to fit instead of spending $60+ on custom 12mm spacers I'll do it.
Another very productive day :-) I gotta say, doing this kind of work is a hell of a lot easier when you have all the tools and parts you need before you start the job. Can't wait for tonight
4/22/2010
I wish I had a third hand. Two for the magazine one for...oh. Uhhh. I gotta say. Rear brake lines suck. People do not hype up the difficulty of this nearly enough.
I got the front rubber lines off within 5 minutes. The clips were rusted on pretty good, but my vice grips/channel locks whatever you wanna call them made short work of them.
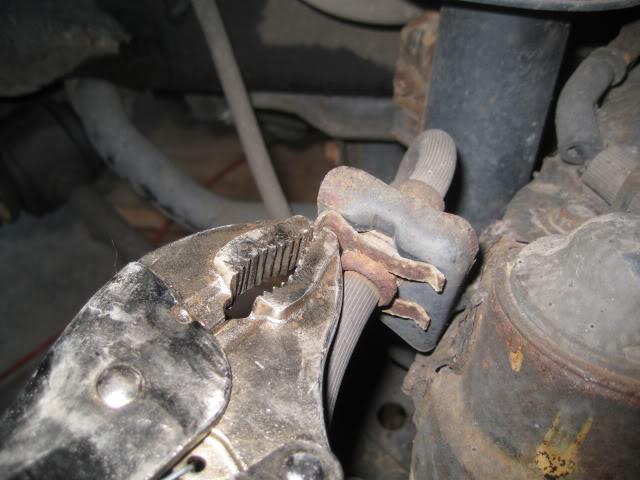
So today was kind of boring...
I got the new lines on up front, except the collars in the middle that are supposed to get clipped onto the strut and steering knuckle don't seem to be adjustable...and they are in the wrong spot. So I could only get one clip on, and its in an awkward position.
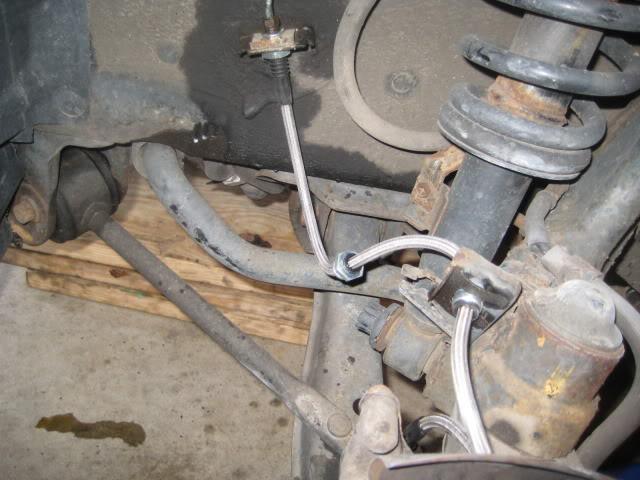
At least its on...I guess
Then.....I made the mistake of trying to get the rear lines off/on. That upper nut is a major pain in the ass. Used my channel locks to break it free, but it took a good 5 minutes to unscrew it, 10 minutes to get the clip off, another 10 minutes to get the clip back on, and 15 minutes to screw it back in place. Not fun at all. Hopefully I learned a few things that will make the last line tomorrow night a little easier.
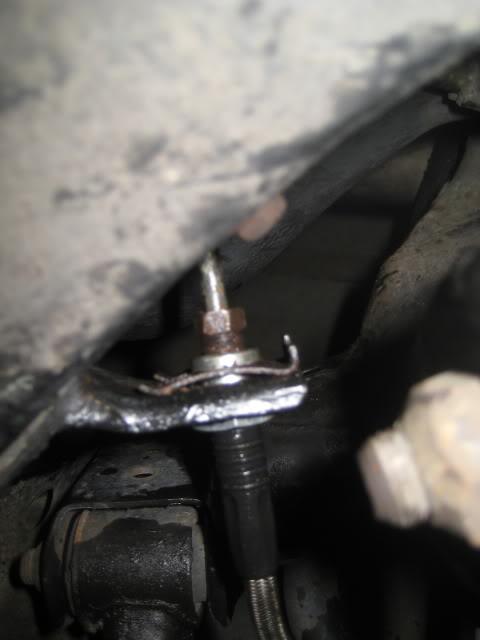
40 minutes later
4/24/2010
No pictures, nothing exciting to report. I had about a half hour to kill between getting home from work and leaving for the maple festival. Instead of relaxing what do I do? Brake lines!
All I had left was the right rear line. 10mm box wrenches do NOT do the job here, don't even bother. Get a good channel lock and clamp down as hard as you can...which won't be very hard because there is no room to work. After a little bit of work I got the channel locks on tight enough to snap the nut loose, and then used a 10mm to work it the rest of the way. The line at the caliper was MUCH easier. I used the lessons I learned yesterday and took care of this line in maybe 20 minutes.
I've got stainless steel lines all the way around. Except for the front hard line I broke at the caliper. I called the dealership up here and they said they needed my vin to order the right part, and then the vin I gave them didn't work so I'll be ordering from courtesy parts it seems. I just hate the idea of paying 8 dollars shipping for a 7 dollar part that weighs 2oz.
Tonight I prep for the transmission drop!
4/25/2010
Today's good fortune from the 5 mile "Sap Run" in Chardon carried over into Z-dom. Got the exhaust off, driveshaft dropped, and got a good start on the plenum.
The exhaust was easy and straightforward. Everything was already broken loose since it went back on just a month ago. Pulled it all down and started to tear it apart to make disposing of it easier.
I did a little research on the driveshaft removal which turned out to be a breeze. 10 minutes total. I didn't have an assistant to work the E-brake for me, and the 4 flange nuts were on too tight for a quick snap loose so I whipped up a little tool for my impact. There isn't enough room to get a ratchet on the nuts, unless you use a wobble joint :-)
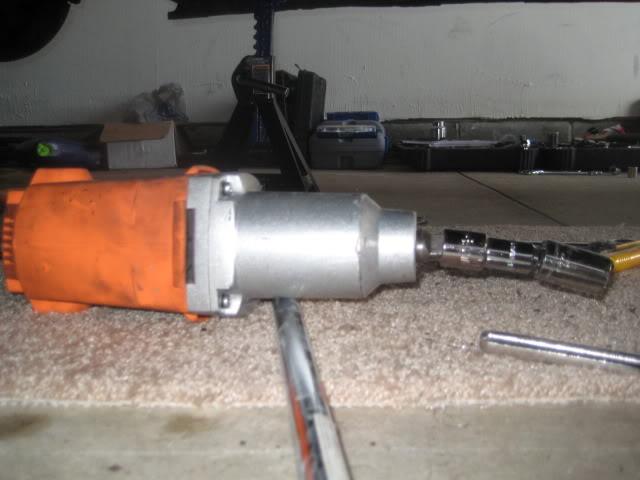
1/2" to 3/8" adapter to 3/8" to 1/2" wobble to 1/2" 17mm socket
Using this I had all 4 nuts off in 30 seconds without needing to use the e-brake. I love that impact almost as much as my Z.
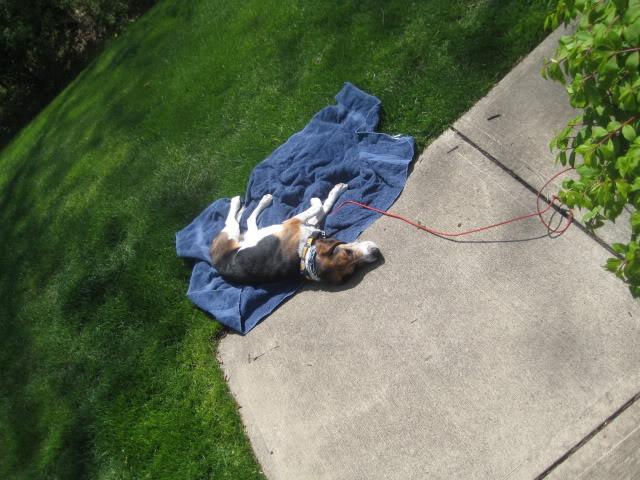
Bagel enjoying the 15 minutes or so of sunshine we got today
I really wasn't sure where to start with the plenum. I purged the fuel system and started pulling fuel lines which was a b***h and a half, until I remembered I'm ditching the current fuel system and rails. So I got to use my exacto knife and make short work of them all. I got the balance tube off, coil packs removed and cleaned, most of the fuel hoses off, and the throttle body intake hoses removed. The outer intake hoses are frozen solid and I really don't know what I'm going to do with those. After fighting with them for 15 minutes or so I decided to call it quits. Not bad for 3-4 hours of work though.
I HATE those intake hoses. Oh right I cleaned up my front hubs as well to get my hubcentric rings to fit for my 13" brake kit. I tried using a stone on the dremel to grind the calipers away but that would have taken hours and far too many stones. I guess I'll have to get them into work somehow and grind them with proper tools. I want my big brakes :-)
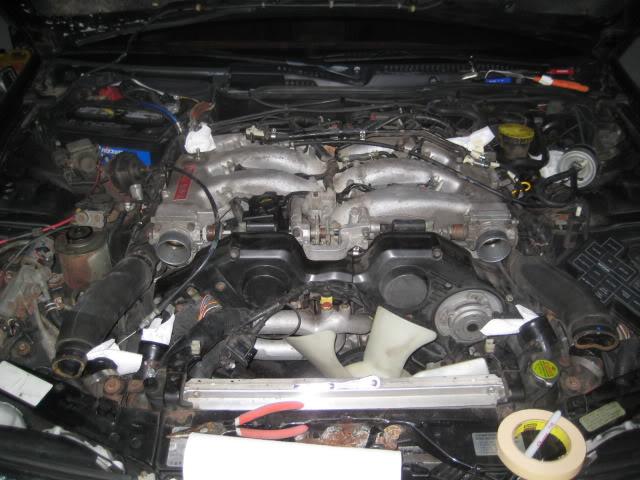
How she sits now
4/28/2010
Spent the last two days prepping the transmission and plenum for removal.
Today mrfixit stopped by to assist with the transmission removal. I was working on cutting the EGR tubes when he showed up, and he found a way to get the EGR tubes unscrewed instead. A few missed coolant hoses later and the plenum was off!!!!!!!!! HELL YEAH!!!!!!!!! What an awesome feeling.
We immediately got under the car and started working on the transmission. All the bolts came off easy and we tried pulling it down. After 20 minutes or so we realized we missed one of the bracket bolts. 60 seconds later the transmission was on the ground. Conquest #2!
It was still pretty early so we started working on the downpipes. I think the PB blaster bath I gave them last fall helped because all the bolts were fairly easy to remove. Pete did pretty much all of the wrenching, which made everything go pretty quickly. The hardest part of the operation was the passenger side turbo heatshield to downpipe bolt. 30 minutes wasted on that bastard. We even got the hard to remove drivers side bolt without any wrench cutting or anything. Three huge achievements in one night. Quite the accomplishment.
Tonight I'll be ordering plenty of silicone vacuum hoses to redo the engine bay, new pcv silicone hoses, and an EGR blockoff kit most likely.
My current wiring harness is pretty brittle and a lot of those little wire connectors broke off. Not concerned about them falling off while driving, and none of the connectors themselves seem to be broken. The car ran fine before except for an injector issue. Is it worth it to spend 400 bucks on a somewhat yet not completely stretched budget on a harness, or should I save that for the next time the plenum comes off? Is it even possible to do with the motor still in the car? It looks entirely possible but I might be missing something.
I'll be gone all weekend playing frisbee in St. Louis, but I know the only thing I'll be able to think about is getting my downpipes on and installing my top feed injectors :-)
Thanks for all the help Pete!!!!!!!!!!!!!!!
Oh I forgot the best part. We checked the compressor side on both turbos; absolutely solid. No shaft play whatsoever. I really hope that means I don't have to worry about those for a few years :-) I wonder how long they'll last at 15 PSI.
5/5/2010
I've put a few days work into this. Actually just last night and today. I felt like **** after my drive home on Sunday so opted out of any Z work Monday night in hopes of feeling better.
Last night I tackled the EGR valve, and managed to get the two mounting bolts off which was much easier than I expected. By removing the right vertical coolant hard line I was able to get both EGR plenum pipes off of the EGR unit itself, but only the drivers side could be fully removed. I tried to get the manifold pipe out but had no luck. I also easily removed the AIV valves from both fenders and the associated vacuum lines. Do I need to cap the 1" or so hose that is attached to the AIV valves in the wheel well? I couldn't figure out where they go to.
Today I stopped at Lowes to pick up a 19mm wrench for the EGR bolts when I realized the wrench would be too long, I got a small adjustable crescent wrench instead which didn't do crap for me. I ended up hitting the manifold with PB blaster (How could I have forgotten that?) and using my large channel locks which gave me just enough force to tweak the nut free. After that it was just busywork getting the nut out completely. With the last few seconds of daylight I pulled the fuel rail and injectors and called it a night.
I put my downpipes on finally, since there is nothing else down there that needs to be done. Aftermarket downpipes free up quite a bit of room, but still aren't a cake walk to install or remove. It will be interesting to see how cramped it is with the transmission back on. It shouldn't really matter though since I'll have no reason to remove the downpipes until these rock solid turbos finally eat it *knock on wood*. After finishing the downpipes I pulled ALLLLL the lines off the bottom of the plenum in preparation for doing all the bypasses. I was hoping to do those tonight but for some reason all autozone had was 1/4" fuel injection hose that they wanted to sell me at $4 a foot. No thanks. Maybe I'll have better luck at NAPA. Why does everyone hate metric so much? I ask for 6mm hose and they look at me like I have lobsters coming out of my ears.
I really really hope I can get some coolant lines tomorrow so I can do all the necessary bypasses and maybe even get the plenum back on tomorrow. Now I've just got to order new PCV hoses since I had to cut some off and wait for ASH to finish his 755cc tune.
And find a place to buy 6mm hose from
And get an EGR blockoff kit
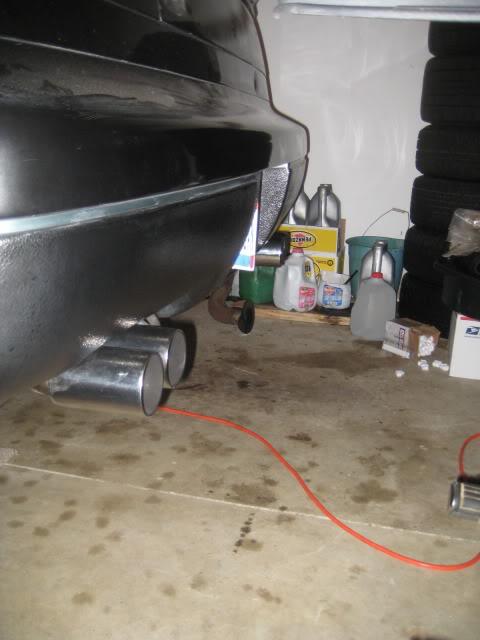
5/20/2010
Got everything reconnected after work today. Wired up the wideband. Went to start the car....and.......no fuel. Fuel pump won't prime with turn of they key to on position. Doesn't help that the battery is dead from sitting.
Got frustrated and gave up. Went back outside an hour later to check for ECU codes, and while spinning the diagnostic screw with the car in the on position all of a sudden I heard the pump prime. Key off. Key back on...nothing. Spun the screw some more...same thing. Unfortunately my jumper pack is nearly dead too but at least I am getting fuel it seems. Will try again tomorrow at lunch.
6/4/2010
I pulled the plenum again and replaced EVERY rubber hose with a silicone hose that I could get to. I ordered new turbo coolant hoses for the next time I do a full tear down. After cleaning off all the old gasket material with a razor and wire wheel and using some permatex grey...my vacuum leaks seem to be totally gone and the car is running great. I think. AFR under boost is low 13's which sounds high. Need to do a little more driving and see whats up; I've only had it out for about 90 minutes total after getting it all going. When I went to start it after a short drive today it wouldn't start for a couple tries...gotta see whats up there.
Some quick pics I took before the rain gets here
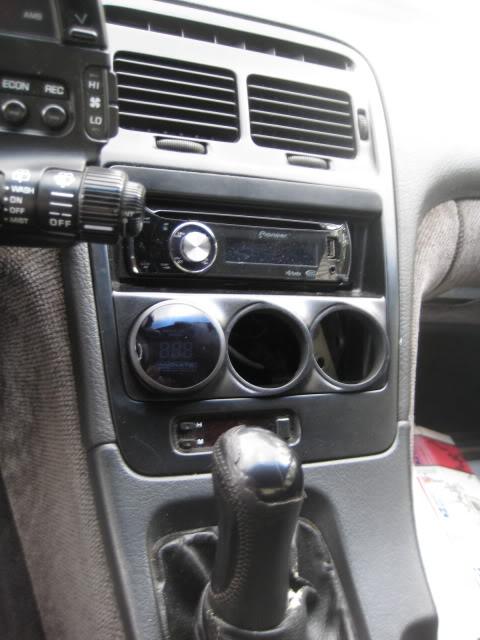
Gauge panel, have prosport boost and fuel pressure gauges waiting to go in
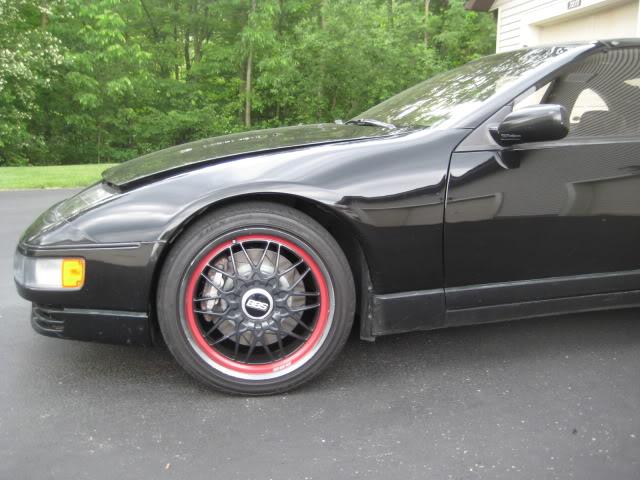
13" brakes up front
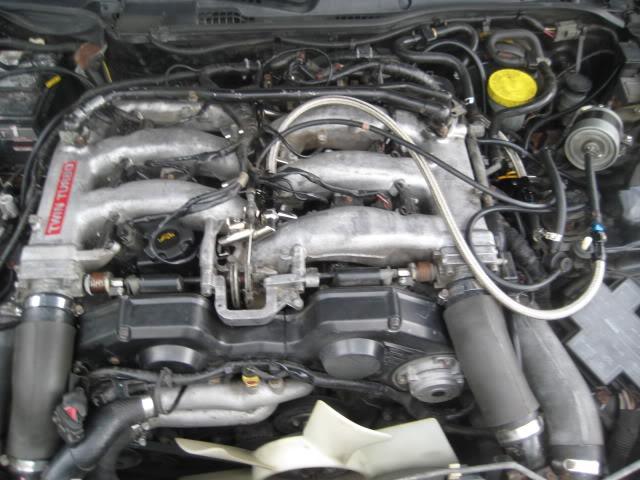
Top feed fuel rail full install
Just the rail
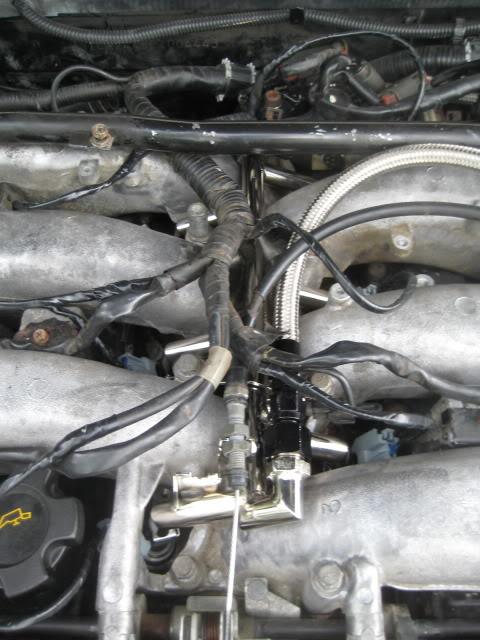
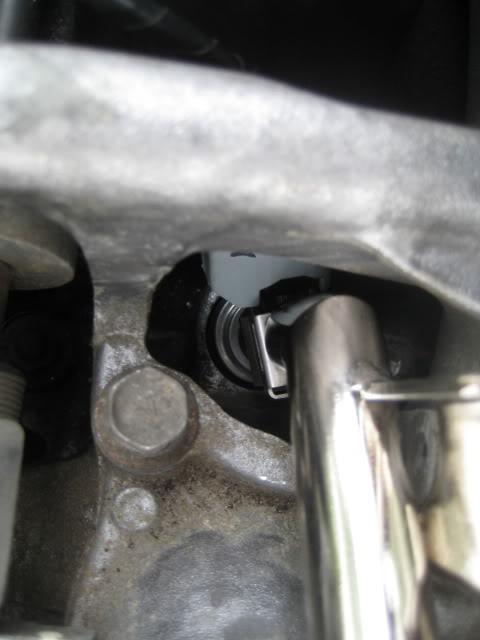
Cyl 1
4/8/2011
Pulled my Z out of storage, picked up my heads, borrowed my buddies engine stand, and got the block up and ready for work. Alot for 2 hours after work.
The build should take place somewhat soon...Now that I have everything back in my possession in my garage I'm starting to lose it. I want this thing done now :-)
Lots of parts waiting to go on...
Block:
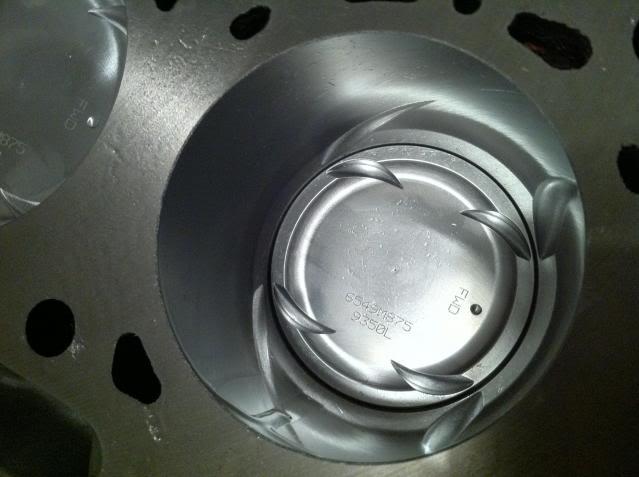
Block cleaned, bored .020 over and decked
Stock TT crank
Reconditioned TT rods with ARP rod bolts
.020" over wiseco pistons
New oil pump
New 120k kit
ARP main studs
ARP head studs
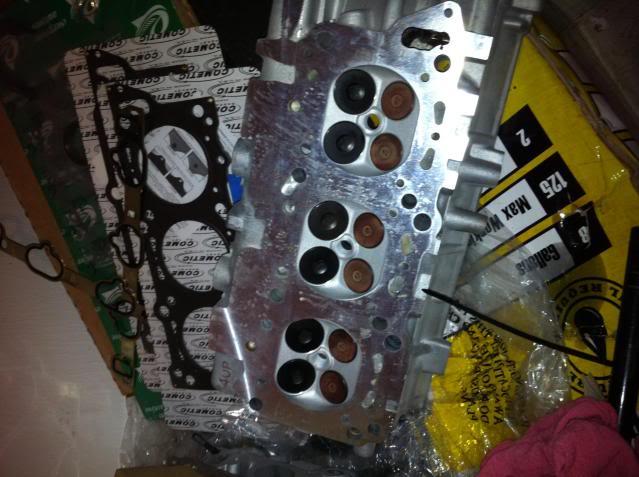
Cometic head gasket
new OEM gasket kit
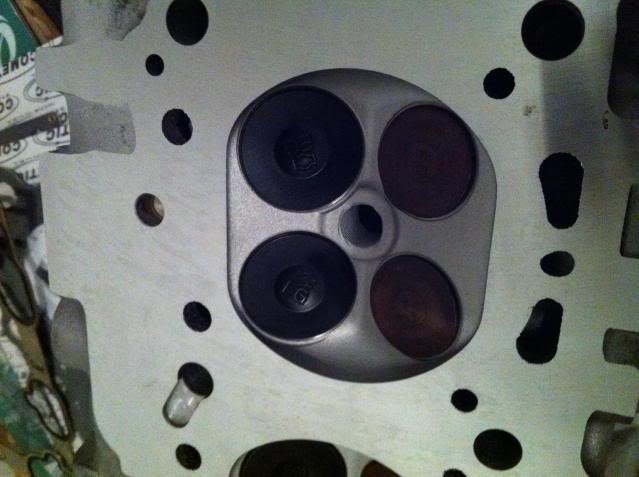
Heads:
Refurbed 40p heads
3 angle valve job
New seals
Reconditioned lifters (by yours truly. thanks ash!)
Accessories:
AMS exhaust manifolds
JWT Sport 500 turbos
New EFI harness
I've never built a longblock before so...I've got my work cut out for me this weekend.
Stay tuned for more pics as progress is made
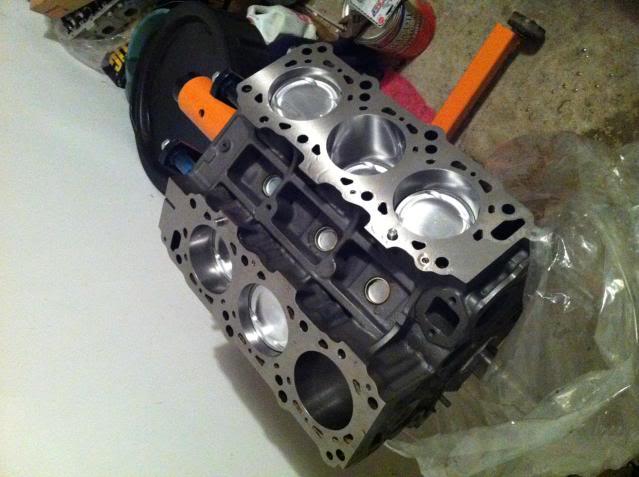
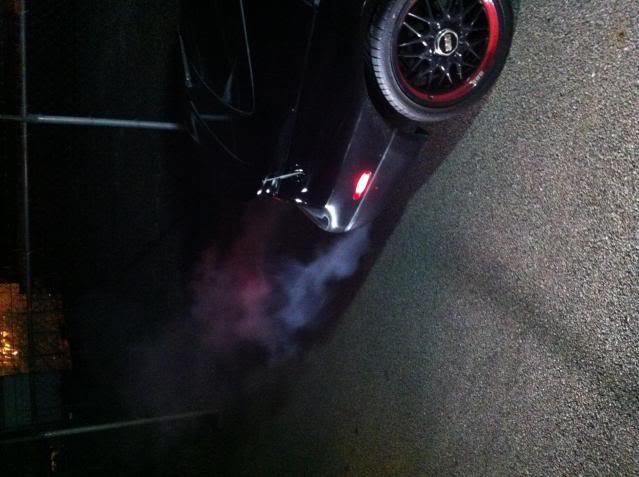
4/13/2011
Work has started again!
It's SOOO nice working in a clean garage! If only I can keep it this way.
Last night I took an hour after work to get everything set up for the weekend. I moved the car to the back of the garage and got it up in the air. It took maybe 15 minutes to drop the exhaust from the downpipes back. It is much easier working with new hardware than 20 year old rusted hardware. Go figure right? I'm impressed with how well the exhaust held up, but was also surprised to find out I had some leaks. I could tell when I installed it that the fitment wasn't quite perfect, but I thought I tweaked it enough to get everything sealed good. I was wrong. The gaskets told the story. Should have taken pictures.
I tried to get my driveshaft off, but I snapped my adapter a while ago so I couldn't use my impact and they weren't budging with my craftsman ratchet. So I gave up.
Unfortunately last night I tweaked my neck while working out sooo I'll probably be working on the top side of the engine this evening. Hurts like hell.
As of right now the plan is to drop the trans before the weekend and pull the engine on saturday. I see no reason why this won't be possible. I've already deleted everything imaginable and I've got a new EFI harness so I don't have to worry too much about labeling.
I'll remember pics tonight.
4/18/2011
Early day on Saturday, the girlfriend and I were up at 7:30 and working on the car by 9 with Pete's help. We got the motor and trans pulled in well under 3 hours. Not bad for my first time. We didn't really have any hangups getting the thing out...we dropped the transmission last winter so that was easy. And the motor wasn't bad either. Nothing too rusty or frozen in place.
By noon we were already breaking down the motor. I'm using the cams and oilpan and a few other pieces for the motor I'm building and the rest I plan on parting out. Another friend stopped by in the afternoon and helped take stuff apart.
On Sunday we started later, and put in 3 hours or so. We got hung up on both turbos. The innermost turbo-exhaust manifold bolt on the drivers side, and the waistgate kept hitting the oil line block on the passenger side preventing the turbo from coming out. We took off almost EVERYTHING from both sides of the motor trying to get these stupid things off. Finally I realized there was a little cotter pin holding the waistgate actuator arm on...I pulled that and the turbo dropped. Ugh. After we removed the water tube on the driver's side I could get a U joint up to the innermost turbo nut and that one came down too. We wasted a LOT of time just trying to get those off. Once we figured it out the rest of the pieces came off much faster. We stopped once I got the oil pan off, it was getting late and we had a lot of stuff to do.
Tonight I'll be stopping by after work to remove the oil pump bolts and pickup tube for my new motor. Initially I had hoped to finish building the motor during the week and put it in next weekend since its a 3-day. Saturday I felt good about that...sunday I figured I would need a few more weeks...now I'm not so sure. I think if I get a couple good nights in I could finish building the block on friday and have it ready to go in on saturday. As long as I can remember where everything goes.
I've discovered I need quite a few new parts I have to order quickly though. Most of the water tubes and oil hard lines I need to replace. They were pretty rusty. I've got stainless steel braided turbo feed lines and new oil return tubes. I guess its just the water lines I need. I was thinking of using fuel injection hose for the water lines on the back of the block, instead of rubber - hard line - rubber - hard line - turbo like its set up now. Does anyone know if that would be a bad idea? I would think it would be less leak prone that way. The plenum water line bypass uses those in other places.
I've also got to replace my clutch and I was hoping someone could help me identify the clutch I've got. After looking at pictures on Z1, I'm almost positive its a Street clutch kit. Seehere and compare with the image below. The shape is exactly the same, the only difference is the color. The pressure plate is still good but I was just hoping to replace the clutch disc.
Any feedback would be much appreciated. Thanks.
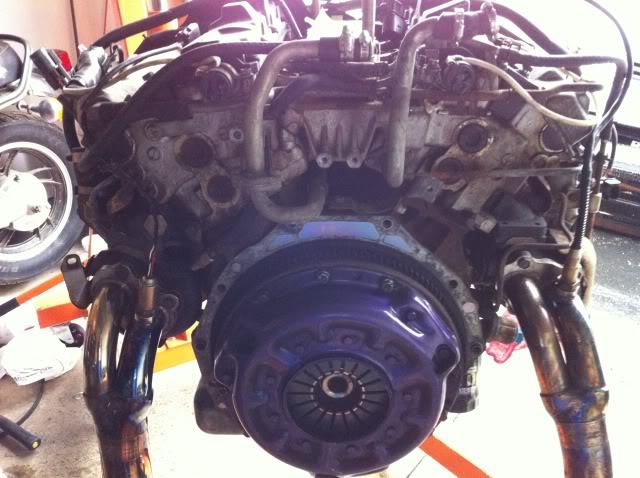
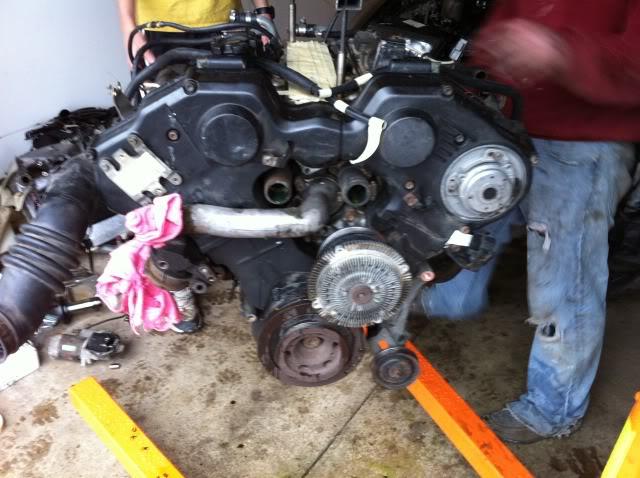
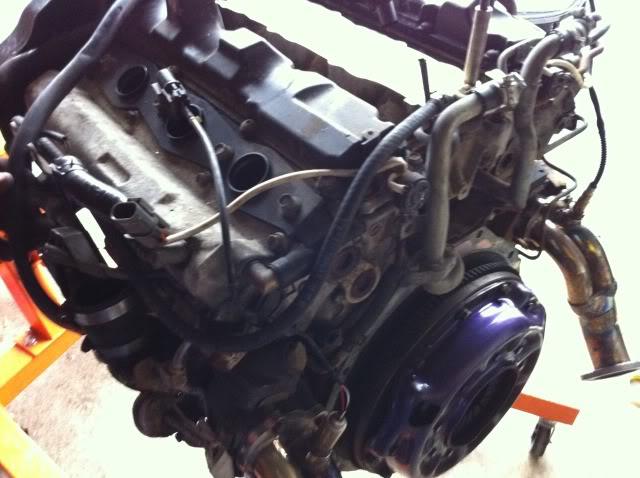
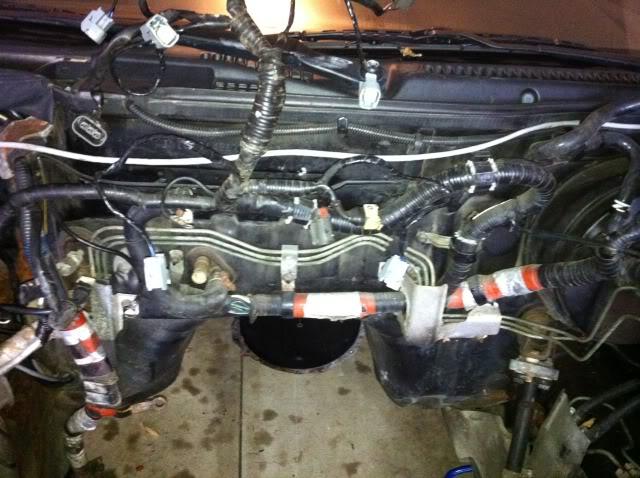
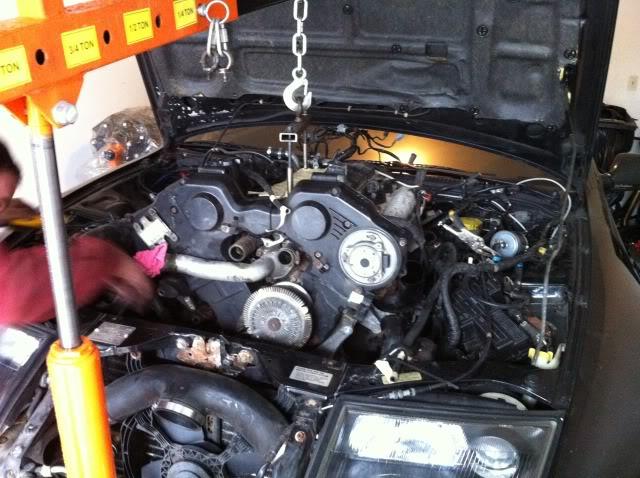
Better pictures of a cleaner motor to be posted later this week :-)
4/24/2011
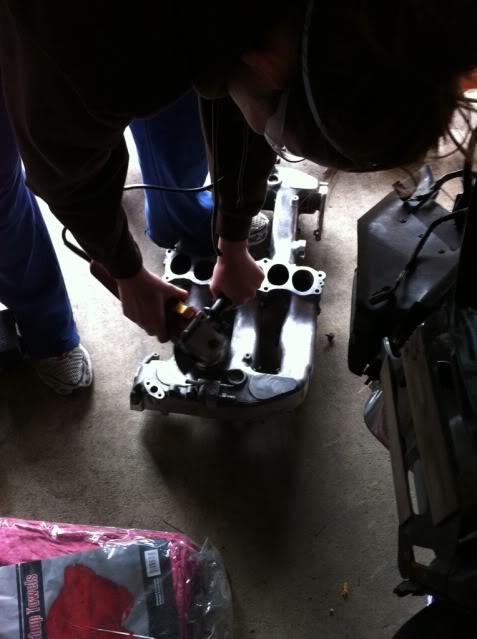
Lots of progress this weekend. Friday was a crappy day, rainy and cold. Didn't get a whole lot done; lots of prep-work for the new motor. My girlfriend Mal took the day off to help and took a wire wheel to the plenum and accessories to clean them up for paint, and we cleaned up the oil pan and other boring work. We probably got some other small stuff done but I can't really think of it.
Saturday Pete stopped by and forced us to get some real work done. We got started bright and early at 9am and we pulled the old motor completely apart so we wouldn't have to look at it anymore.
With Pete's help we didn't really have any hiccups building the heads. They went together pretty easily and we got lucky with our exhaust cam placement (forgot to look for the CAS senor). We had no issues building the heads or putting them onto the motor. In under 5 hours we got the old motor ripped apart completely and the heads assembled and torqued onto the new motor. Pete left a little after 1, and we took a break for lunch and to take the dog to the beach.
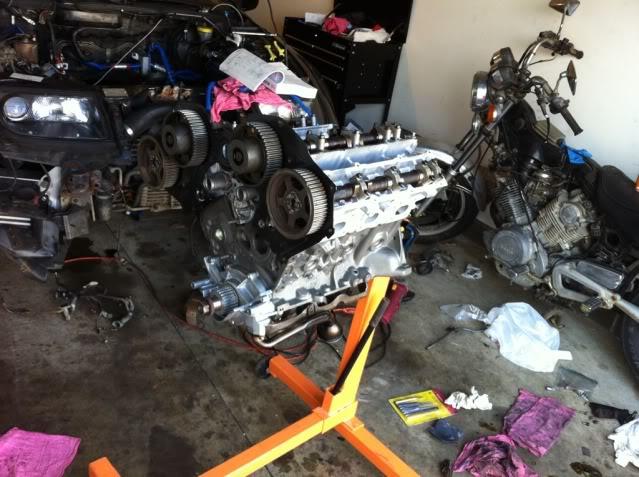
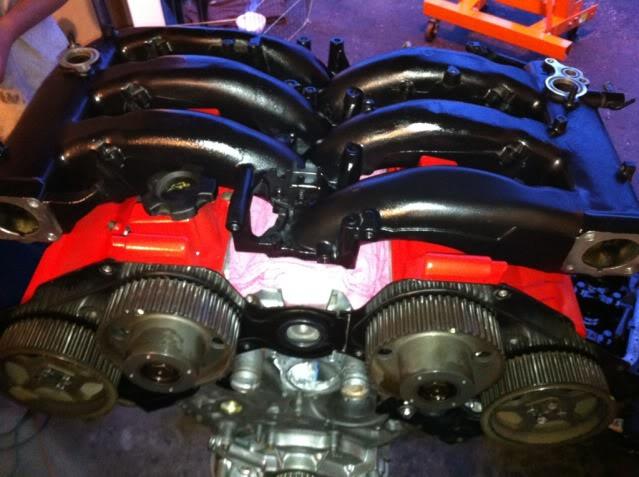
After a short adventure and a trip to Lowes for some clean new replacement bolts, we got the fresh new painted valvecovers installed with brand new gaskets and fresh RTV. We flipped the block over and re-installed the old oilpan and new rear main seal (all freshy cleaned of course) with brand new grade 8.8 hardware. We even had time to take a few pictures to see what everything was going to look like.
We're almost there! Sorta!
Mal cleaning the plenum. Yay for wire wheels!
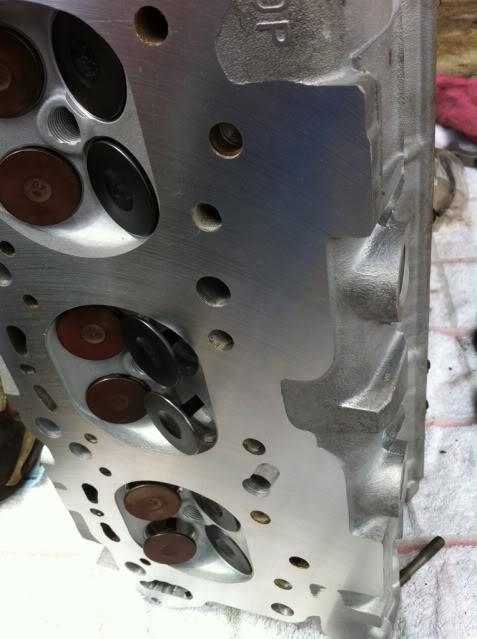
Fresh heads w/ valve job!
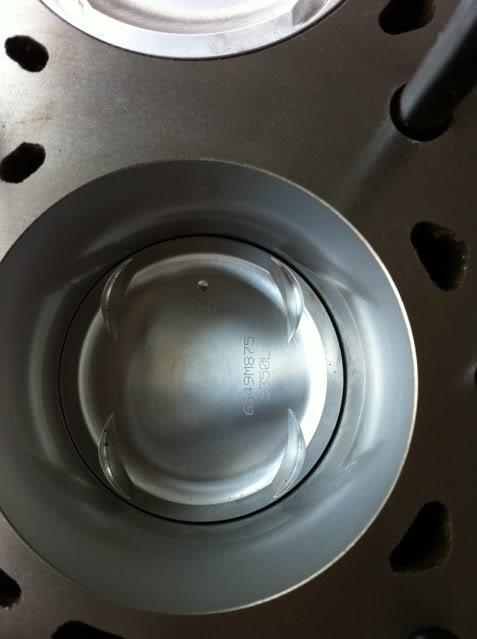
Smooth bore :-)
First head on!
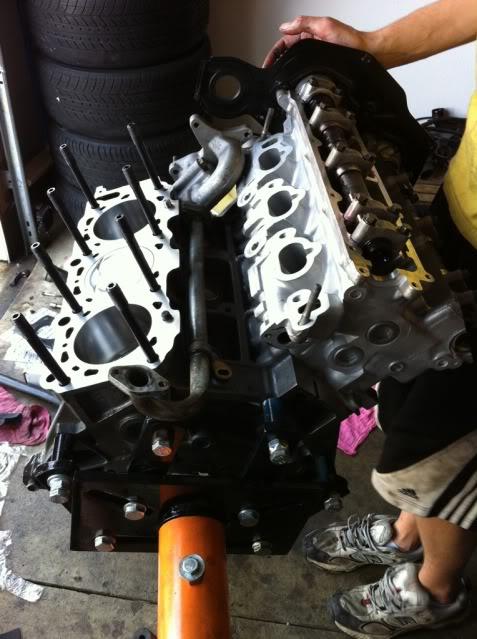
Both heads on:
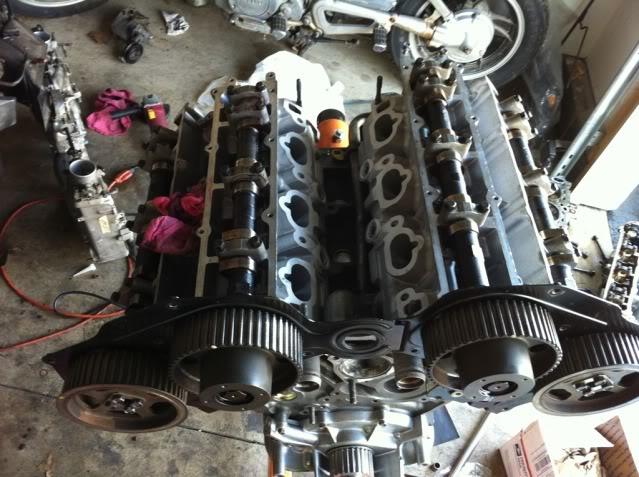
Our work area
Mock up. I think I'm gonna like this color scheme
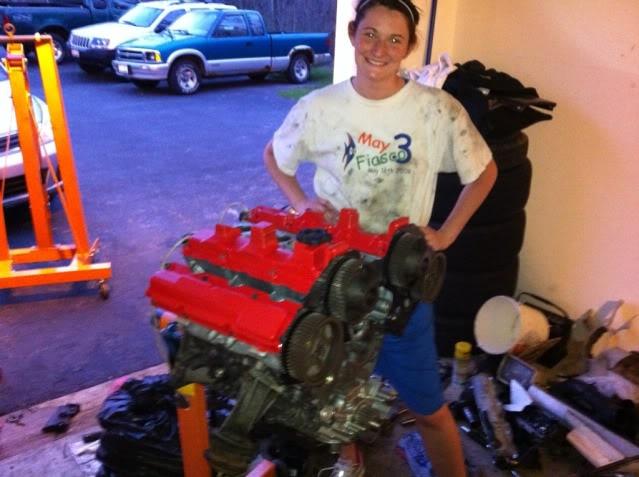
My fantastic assistant/girlfriend (I have to say that shes watching me type this)
5/10/2011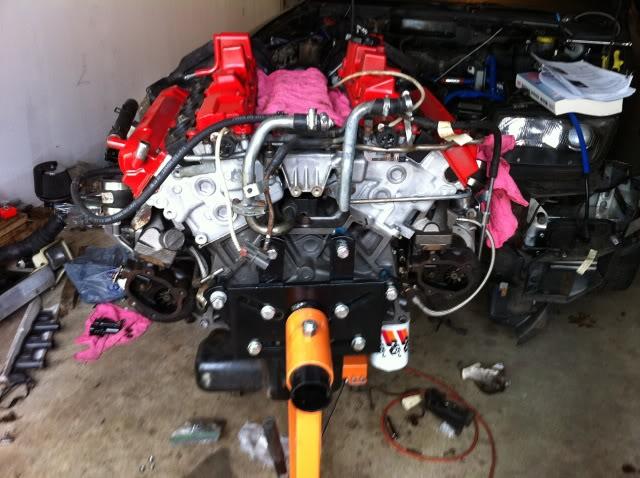
Some good some bad on Saturday.
I was excited to get my timing belt on and finish all of the external work on the motor so it would be ready to drop back in. To make a very long story short, I think the threads on my rameyZ idler studs were messed up. They looked kinda funny before I installed them, but I thought maybe it could just be me. I heard they were hard to install, but...I don't think they were supposed to be this difficult. They chewed up the threads in my block and my lower intake. Now I have to wait for OEM studs to come in and I'll be using a helicoil or some sort of insert to install the OEM studs. What a setback :-/
While I was cursing up a storm on the front of the block, my girlfriend installed my exhaust manifold studs along with the manifolds themselves. She wasn't feeling too hot so I took over and got both turbos and associated hardware on by myself in just about 90 minutes. I ordered stainless steel oil feed lines and didn't find out until I talked to Coz yesterday that the SHORT stainless steel oil feed line replaces the LONG oem line and vice versa for the LONG stainless steel oil feed line. So I have to redo that work tonight and hope I can get the oil lines off with the turbos still installed.
Also, (I should have taken a picture) the oil return tubes don't line up that well with the oil pan. Is that normal? Should I bend them back into place? I mean they're almost 1/2" off. I have a feeling that could cause some nasty oil leaks if I ignore it and just try to stretch the silicone line between the two.
All in all I'm glad the turbos are installed, but I've still got to do all of the timing hardware. The car won't be ready for this weekends road rally. But the most important thing is to make sure everything is done right so I'm not going to kick myself too much. Heater core install is tonight! I haven't had AC or heat since I bought this car. I'm pulling out all the stops! 
5/25/2011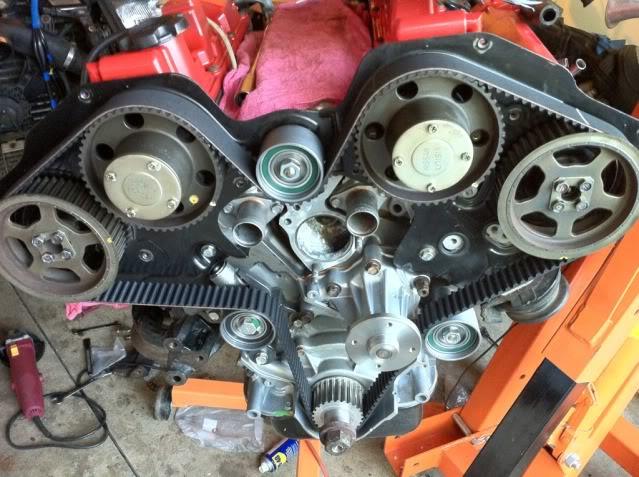
I got to work on the Z for the first time in about a week last night.
I have not had much luck with anything on this motor in the past couple weeks. I stripped the block and my RameyZ idler studs. I heard they were difficult to install, well...they were. Anyone doing this in the future PLEASE be careful. I got replacement OEM studs from Coz @ CZP and spent 80 bucks on 17mm 10x1.5 steel thread inserts, a 14mm drill bit and a 16x2mm tap. Apparently large metric hardware is expensive.
Surprisingly a drill is one of the few tools I do not own, and I don't have much experience tapping holes so I asked one of my friends at work to give me a hand. After waiting a week for all this stuff to get in, he came by after work and we attempted to drill out the block and intake manifold. The 14mm drill bit was too big for his drill, so I ran to home depot and bought myself a Black & Decker hammer drill with a half inch chuck (finally). It turns out that still wasn't big enough so we had to put the project on hold until Friday so he could turn down the base of the drill bit to fit in the chuck. I cannot catch a break. While I waited for him to show up I did manage to pull the drivers turbo to remove the oil lines and swap it with the passenger side.
FOR THOSE INSTALLING STAINLESS STEEL OIL LINES:
The SHORT hose goes on the drivers side
The LONG hose goes on the passengers side.
It's the opposite of the OEM placement. Don't know why, and they would fit much better if it was the opposite (ask me how I know) but...it doesn't work that way.
Friday he came by again and drilled out the holes and tapped them, everything went smoothly. We fit the steel inserts into the threads and they seated perfectly. I left the motor like that to let the locktite set over the weekend.
It was my birthday Sunday and my girlfriend and I spent the weekend all over Cleveland, and then we caught the Indians/Red Sox game Monday night. It was a fantastic distraction from all the stress of getting this thing done.
Last night I installed the idler pulleys and tried to figure out how to run the timing belt. Unfortunately for me, the Gates belt doesn't have an arrow indicating the front of the belt, so I had to do it the wrong way before I figured it out. I was intimidated at first, but there really isn't much to it. Line up the marks on the belt and gears, rotate the gears a couple teeth when necessary. The only hard part was setting the auto-tensioner just right to get the magic 4mm of extension. I spent about 30 minutes spinning the crank and trying to get the tensioner placed just right. All that work took longer than I expected, I didn't finish until 8pm.
I'm much more eager to work on the car now that I don't have any roadblocks holding me up. I just need to fit the front timing covers and the rest of the water pipes and I think I'll be ready to drop this back in. I just wish I had more free time.
6/7/2011
Slow going.
The girlfriend and I spent Memorial Day weekend in Wisconsin, and between getting ready for that and being sick and getting rid of my roommate I haven't had much time to work.
I've been chipping away at the finishing touches of the block for 30 minutes at a time, and got about an hour in last night. All I have left are some accessory brackets and that water pipe I'm waiting for from Coz.
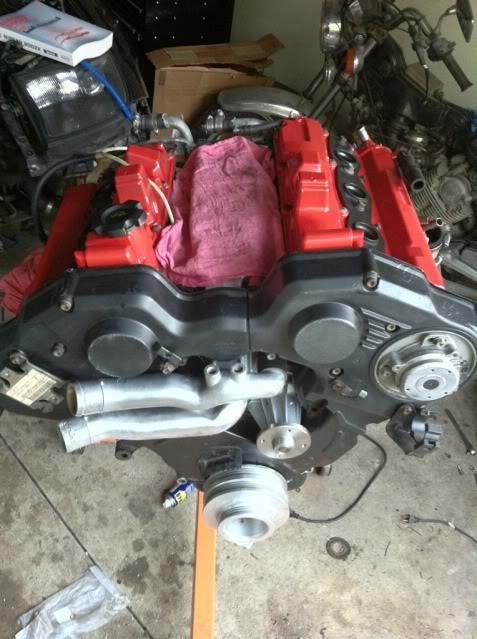
It's starting to look really good. Everything up to this point has been pretty straightforward. No difficulties with anything, just tedious things like polishing my water pipes and finding the woodruff key for my crank.
Downloaded Instagram last night and had a little fun with it.
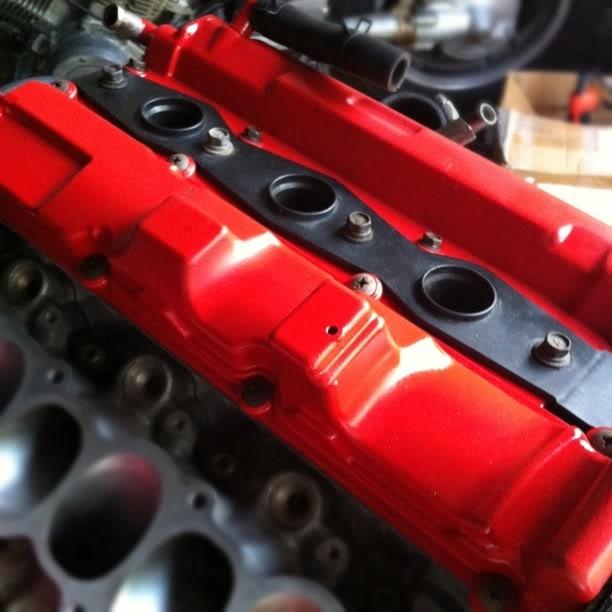
Sadly since I'm reusing a lot of parts from my old motor this is about the only area thats pleasing to look at up close.
I spent some time at Harbor Freight yet again this weekend to pickup a disposable pneumatic saw to help me take care of the heater core lines up under the dash. Tonight's project is swapping the heater core and re-wiring the injector plugs. I'm hoping to put the motor in on Saturday.
Yay
6/8/2011
Finally made some REAL progress last night.
I wish I would have taken more pictures but the workspace was cramped and all I had was my Iphone which was busy pumping out tunes from my Ke$ha Pandora station. Ke$ha and flip-flops while working on the Z. I felt like a real man yesterday.
I bought a cheap pneumatic jigsaw at HF on Saturday, and attempted to use it last night to cut through my heater core hoses. The hoses are tucked too far up there to get at with a dremel. Believe me, I tried. I hooked this thing up to my 8 gallon 2hp compressor (also from HF) and with a full tank it was enough to cut through each hose. I was pretty impressed. Although initially, it took about 10 seconds to get started, I was afraid I'd have to find another tool. It just took a little force and once it dug in it went right through.
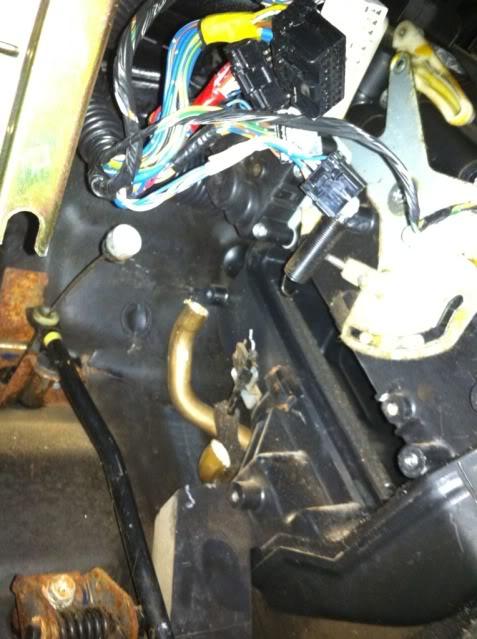
I pulled the old heater core out which just barely fit. This might have been easier pulling the dash out and replacing it the right way (kidding...sort of).
This is what I was left with:
And this was my work area:
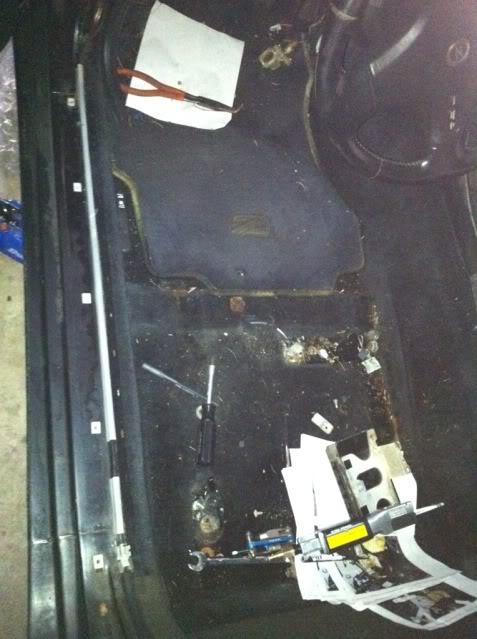
You all know how big the interior of a 2 seater Z is. Now imagine someone 6'4" crawled up under the dash. That's where I was. Not fun. For some reason Nissan left all the edges underneath the dash sharp so my forearms are all scratched up.
My cubicle:
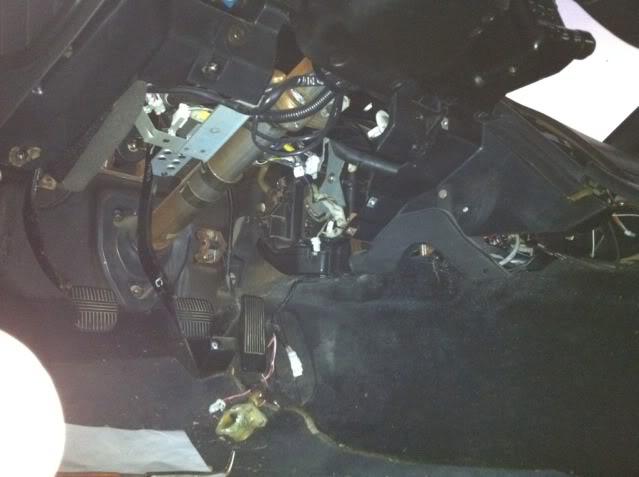
Old heater core vs new heater core:

The old one didn't even look that bad, although one of the plastic adapters for the water pipes looked a little green. I'm guessing (hoping) that's where it was leaking.
I ran across the street to Lowe's (I love being so close) and picked up 1 foot of 5/8" ID heater hose and a few hose clamps. It was 5/8" ID and 1" OD, this was THICK beefy hose. I was (and still am) worried it might not clamp tight enough or leak.
I used the saw to cut the new heater core in the same location as the old one. Unfortunately when I was cutting the old hoses I couldn't make cuts perpendicular to the hose so I had to leave the heater hose a little long to make sure I got a good clamp. But after I got the hoses cut and the new heater core wedged into place everything went pretty smoothly. There is NO room to work up there, I used the shortest screwdrivers I could find and had some good luck finding holes I couldn't see. It's easiest if you take the feed/return hoses off the new heater core before you put it in. I'm pretty sure you HAVE to take the bottom one off or you'll never get it up there.
New heater core in place with bottom hose removed:
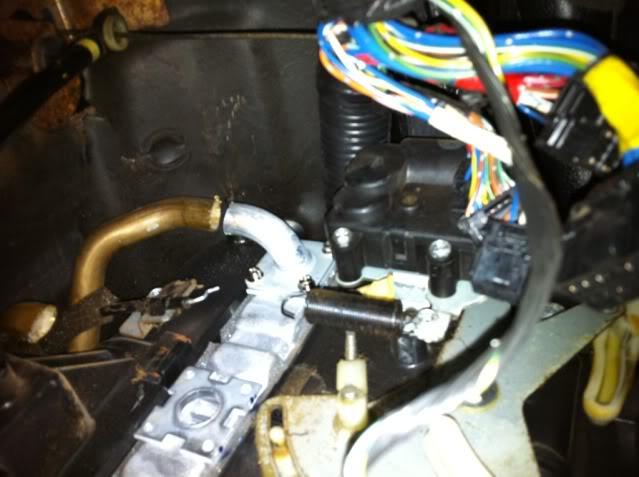
I didn't leave the hoses as rough as they looked. I wormed some emery cloth up there and sanded down all the edges in hopes of preventing future leaks.
I got my hose clamps tightened up as good as I could and called it a night. My girlfriend got home just as I was tightening the last one and didn't feel like putting it all back together just yet. I think I want to run the car before I put all that back in to make sure I don't have any leaks. I gotta say....with the 90+ degree heat we've been having lately, I'm not nearly as excited to have working heat in my car as I was a few weeks ago. But I know come fall it'll be worth it.
Job completed! Mostly...

Now all I have to do is replace the O rings in the AC system and the dryer and the motor goes back in on Saturday! As long as the water pipe gets here in time...
Woo!
6/13/2011
patrikman:
I spent the first 24 years of my life in WI and will always be a Wisconsinite. My goal is to have this thing ready to go for our week long road trip to Madison and Milwaukee for Katy Perry at Summerfest during the week of July 4th. I'm just worried there won't be enough storage space in the hatch to bring back extra Spotted Cow. :-(
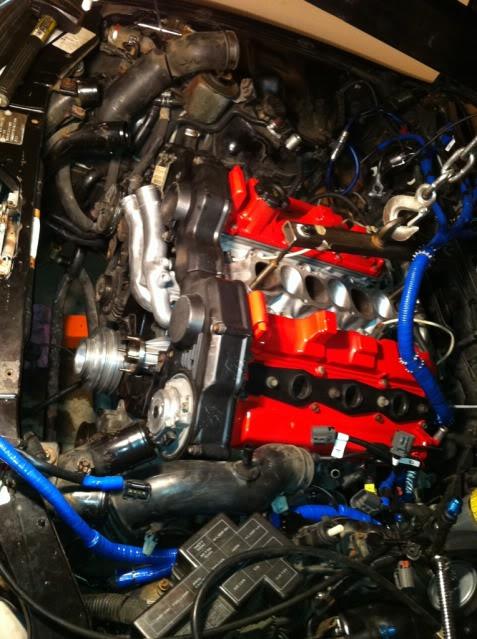
The motor is back in!!!!!!!!! :cheers:
I think I did a little work Friday night but don't remember what. Probably prep work.
Saturday after a late start my girlfriend and I started getting the motor ready to go in. I thought it would be pretty much ready to go, but there were a lot of little things.
Since I put the turbos on the oil return lines were always off by about 1/4" from the ports in the oil pan. After doing a little bit of reading I realized I needed to clock the turbos. This wasn't a big deal, except the drivers side turbo can't be clocked. It can, but it can't be moved in the direction it needs to because the stainless steel oil feed line gets in the way. The passenger side we clocked and it lines up fine. Does anyone think this will be a problem? I've got Z1 silicone oil return lines bridging the gap, but I have a feeling that this is something that will leak eventually. I'm also not really sure what to do about it.
I forgot one of the other big struggles Saturday was getting the AT pilot bushing out and putting a new MT bushing in. I got the AT bushing out by locking my channel locks onto the bushing, and driving a chisel into the gap between that and the crank. After maybe 2-3 minutes it was out. Relatively pain free and I was very proud of myself for coming up with a new method. I had heard that the bushing puller was kind of useless and didn't wanna make a trip for nothing. I didn't realize there was a MT bushing behind the auto one, so I used the same chisel which was about 1mm smaller in diameter than the bushing to cut it in half and pull it out. The whole process took maybe 20 minutes to remove both bushings, but it worked with simple tools I had on hand.
Putting the motor in was the easy part. Getting the accessories lined up...not so much. We worked for about 20 minutes on the power steering pump and couldn't get it in position. We skipped that and got the AC and alternator in place. Unfortunately when we pulled this apart she pulled the accessories off and now doesn't remember how it all went back together (this is why I usually like to do things myself) so it took a while to figure everything out.
I've got the pivot bolt in the alternator, but I'm not sure where the second bolt goes or how it holds tension on the belt. The AC is in place without much issue. Still cant get the power steering pump in place. Anyone have any suggestions? The FSM really isn't any help.
Sadly, everything mentioned above took about 6 hours. We worked until a little after 7pm and called it quits to take the dog on a walk and take Mal out to dinner.
Sunday I put the flywheel on and put new hose clamps on every line and hose I could find. Brand new Z1 oil cooler lines, silicone oil return lines, and silicone water lines for the turbos, and PCV hoses. I sure hope nothing leaks after all this.
As of right now I can't do a whole lot more until I figure out how to get the power steering pump on and until I get my outer water hose on the passenger side from Coz. I still have to put on my new injector connectors but I don't want to do that until the plenum is on so I don't make ANY mistakes. (Feel terrible cutting up a NEW OEM harness).
Things are still on track for getting it started this weekend...as long as that water pipe gets here mid-week sometime. Fingers crossed!
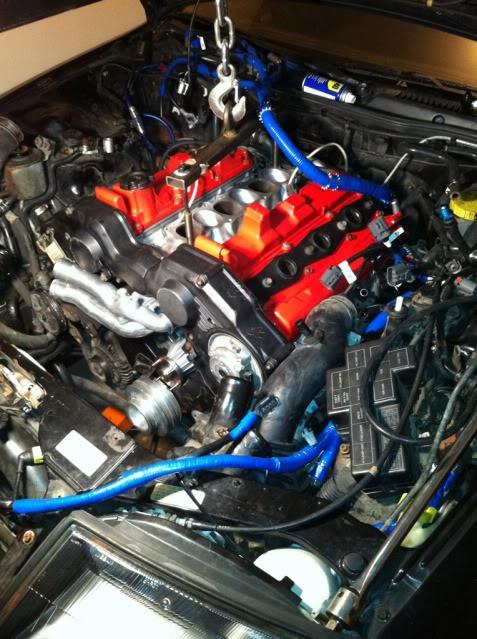
6/15/2011
Sadly no pics today.
I had a little time to kill after work yesterday so I hooked up the accordion pipes on the drivers side and my new silicone PCV hoses and etc. Non eventful. This time it took all of 30 seconds to get the power steering pump in place. I have no idea why it took over an hour to mess with it this weekend and still not figure it out. But I got it in place and the bolt to thread all the way to the back. Woot. After I realized I didn't have the adjustment bolts hooked up (and totally forgot how they went on) I had to go through the FSM page by page until I found a picture of how they should be setup. The FSM is TERRIBLE. How bout an index or something? Jebus.
After finding the pictures and hunting down my alternator bracket, I got those in place and the water pump-alt-crank belt on. I have a UR underdrive crank pulley and HI overdrive water pump pulley. Supposedly the guy who sent me the water pump pulley was sending the correct set of belts...but...I cant find a belt that fits the power steering, everything is way too long. I guess I'll just have to measure with string and see if autozone has something.
The only snag of the evening came when I realized I completely lost my AC adjustment bolt. Does anyone know the specs on that?
I've done just about everything I can do now until that water pipe comes in. I don't wanna take the chance of installing the donwpipes or transmission or even intake hoses in case I have to pull it all off again just to access that hose. Poo.
6/15/2011
Thanks for the compliments. I really didn't think people would enjoy reading about tightening hose clamps and losing my tools so much.
And as far as not being able to take on a project of this size:
Nonsense!
As long as you have access to tools and even a little bit of know-how (you're on TCL, you've probably got an inkling) you can handle something like this. How many engine builds have I done before this? None. How many project cars have I had before this? Zero.
I'm doing all of this in a 1 car garage at my condo. My neighbors think I'm crazy but I think its fun. Yes, its taking me way longer than I anticipated but I'm learning more than I ever imagined.
If you ever have the chance, I highly recommend tackling a project like this. It's one hell of a confidence booster.
6/27/2011
Well....I've done a fair amount in the last week. Not ambitious enough to type it all.
The transmission went up with my girlfriends help on Sunday, but I didn't get the clutch lined up right so I had to do it again on Monday. (Note: Advance has clutch alignment tools for $2) After using the alignment tool the trans slid right on and everything after that was pretty simple as I've done a plenum install with this top feed fuel rail about a dozen times now. I took my time and labeled every connector on the wiring harness using the layout in the back of the FSM. I know what all the sensors ON the engine are, but wasn't sure what was where on the harness (mainly coils connectors and injector connectors). I soldered on new injector connectors for my EV14 top feeds and was nervous about cutting into a brand new harness.
All in all, I've got everything hooked up as far as I can tell (already triple checked) and I built a rig to prime the oil pump (shop vac + filter with a hose) and after cranking I had oil pressure! Woo. Step 1 good.
Step 2 was actually trying to start the car. I worked for a good 9 hours on Saturday starting with finishing the transmission install, getting the exhaust on, getting the plenum put back together, sorting out the wiring harness, installing new connectors, and retracing my vacuum system. After all of this obviously I really wanted it to start, but I had planned on having to sort out some kind of problem.
I guess that made it sting a little less when the car didn't start.
After first couple attempts: Code 11
Checked CAS ground connection and it was iffy so I grounded it straight to the battery.
No more code 11, and it sounded like it almost fired for a second.
I can smell fuel, we checked for spark on 2 cylinders and both were good, I have 60psi of fuel pressure when the pump is primed. And then we gave up. Battery is almost dead too
Things I need to check after work today:
I heard you can just hook an LED up to an unplugged injector connector and the LED will go on when the injector is supposed to fire.
Either that or I gotta pull a lot off to pull the CAS and test it.
I also heard if the CAS isn't working all the plugs fire at the same time, so I have to pull 2 plugs and check them at the same time.
Aside from that I don't know where to go Oh well. One thing at a time. I was REALLY hoping to take the car up to WI for the week. If it doesn't start tonight I can't see that happening.
6/28/2011
Borrowed a timing light from a friend, but before I went to check timing I figured compression would be a better check.
1: 65
2: 70
3: 82
4: 65
5: 70
6: 60
Sooo. I'm thinking its timing. I added oil to cyl 1 and it only went up 5 psi to 70, so likely not ring gap or a build issue. Unless its something in the heads.
But I pulled the front timing covers back off, pulled the plenum, and all the coolant pipes. I'll have to pull the lower timing cover now too, I don't remember that being pleasant. Looks like I'll have to cross my fingers for august now. Ugh.
9/20/2011
Finally pulled the motor back out and took the heads off sunday night. When I set the head down on the ground, a bunch of grit poured out. It seems someone didn't do a good enough job cleaning out the heads after they machined them. I wonder if grit is holding the valves open.
Now I have to hope the shop will correct the problem 6 months later at no cost to me. And hope that it didn't work its way anywhere else. The bores were clean and grit free, for what its worth.
Not happy.
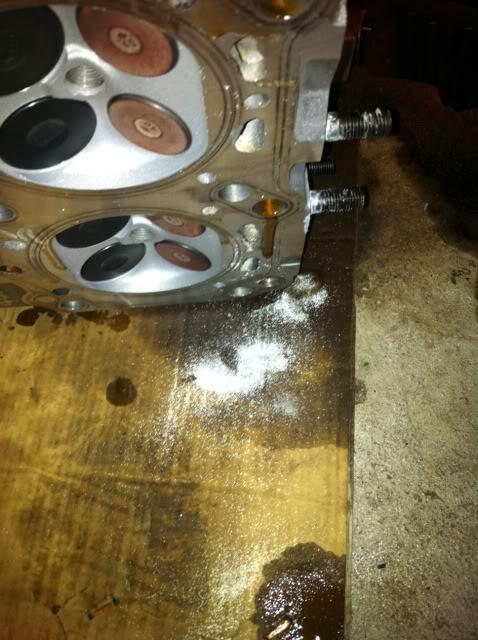
9/20/2011
I just stopped by the shop with receipt (from april) and picture in hand.
I was completely calm and friendly and I think it went a long way. I stated my case and they said they'd take care of it. I'm really surprised.
Might even be able to put it back together by the weekend. yay! (leak check BEFORE assembling the longblock though)
And yeah, I was terrified the bores would be ruined. Surprisingly not. Lucky me?
9/22/2011
So I got a call from the machinist and he said he pulled the heads apart and hand lapped the valves (shouldn't that have been done in the first place?), cleaned everything, and put it back together.
When I got there I used some armor all window cleaner (i had it in the backseat) to spray into the ports and check for leaks. Most of the valves weeped. Some held pretty steady, but 3 or for sprays was gone in about 5 seconds. This seems like too much to me.
I can't find anything difinitive online, but if the heads are assembled with spring pressure on the valves, shouldn't they form a perfect seal to liquid at 0psi?
One of the guys at the counter (not the machinist) said he filled the ports last night to leak check them and they stayed full. Clearly that didn't happen.
A) Should fresh cut and lapped valves leak?
B) Am I getting hosed?
Keep in mind these are my used heads with a supposed 3 angle valve job.
10/5/2011
Just picked up the heads from the shop again. He said they held water overnight, but...he said that last time too. So I wasn't/am not getting my hopes up.
When I got to the car I sprayed some water in them and they held water for ~30 seconds before one valve slowly began to weep. MUCH BETTER. From what I can tell so far at least. Still not getting my hopes up.
I'll put the heads back on tonight and put some air in the cylinders and see how they hold.
Can I get excited now?
1/5/2012
Nope. Put the heads back on the car, when I got the lifters in, they were sitting way too high.
Sent my heads to Z1. They confirmed my suspicions. Federated auto parts in Painesville, OH royally borked my heads. Even after 3 tries. They didn't bother cutting the tips of the valves after the seats were cut, didn't clean out the ports, etc. Z1 took care of everything and painted them for me.
I JUST unpacked them and hope to put them back on the motor tomorrow. I've finally got some room in my garage and I've got the motor sitting on a stand waiting for work. Maybe I'll get to drive the Z this year.
1/23/2012
Alright, should have taken pictures, but since this is my 4th(?) time doing this, I'm sure I've already posted these. Did a leakdown test yesterday and everything was in the green (20-25%) on a ice cold motor. I'll do the same test after I put the cams in.
Yesterday I built my new IKEA workbench, torqued the heads down, and installed all hardware related to both turbos. When I removed them all I took off was the stainless steel oil feed lines and the 4 turbo-exhaust manifold bolts so it was mostly pretty easy to get back on. I had to grind away at the exhaust flange a few mm to make the oil feed line easier to install.
Afterwards I rebuilt and cleaned all my lifters just to be safe since they have been sitting for about a year now. Tonight I'll be installing the cams and hopefully timing the motor.
Trying to get everything ready to go by Friday. The plan is to install the motor this weekend. I just need to figure out how to transport the motor 4+ miles to the car.
3/11/2012
Finally installed the motor! My buddy pat came over this weekend from Chicago and we knocked everything out. A week after I posted my last message my Grandpa was in the hospital so the car was put on hold for a while.
After 2 full days of working on it this weekend, we got to try to start it without any accessories installed. AND IT FIRED UP!!!!!!!! It had a searching idle for about 20 seconds, and then died. No time to check codes or boost leak. We finished 15 minutes before we had to leave for girlfriends birthday dinner.
BUT IT STARTED! Finally!!!!!!!!!!!!!!
3/15/2012
I had a few problems after the initial startup. During the first startup, I neglected to let the wideband warm up, so I didn't get any information from it. Also, I had a pretty bad oil leak (supposedly). And it died after about 15 seconds.
I finished buttoning everything up monday night and tried to start it again, this time with nissan datascan. I learned a few things
A) My wideband is hooked up to the gage, but not to the wiring harness, and I cant find the connecter. I don't remember if it was ever plugged into the harness. I'm not really sure what to do about this one. The oem O2 on the drivers side works fine.
B) I DID have a nasty oil leak. I forgot to tighten the drivers side turbo oil feed for some stupid reason. I was able to remove the AC condensor and the bracket with the motor in the car with minimal effort and tighten it down. No leaks this time.
C) While I was playing around underneath the car I realized I didn't have my boost solenoid hooked up properly, the hard line going to the drivers side throttle body had a vacuum connection wide open which showed on my wideband as a very lean condition. Hopefully that's all I missed. My Z1 boost leak tester broke (THESE THINGS ARE SUPER FRAGILE, kind of pissed about this) so I have to wait until a replacement shows up.
D) The passenger side neck on my OEM radiator has a tiny leak, so I ordered new silicone coolant hoses and a Mishimoto radiator. I was having problems deciding which radiator to buy because I've never had temp problems before (other than too cold) with the OEM rad, but at some point I would like to drive out at Mid-Ohio so I should probably have adequate cooling. Next spring I'll be installing 2.5" intake piping, intercoolers, and TB's and I've heard installation can be a pain/impossible with a larger radiator. I guess I'll find out.
So for right now the car sits and I wait for my radiator before doing anything else.
Oh, almost forgot
E) I can't get the exhaust to line up for the life of me. When the test pipes are LOOSELY fixed to the downpipes, they sorta line up length-wise, but as soon as I bolt them down (in any order) they differ in length by almost .25". I'm totally stumped as to what to do. They fit fine before, but I understand that exhaust location is based on turbo type (sport 500's = OEm housings) and exhaust manifold placement (AMS). Is it possible the mounting of my AMS manis are misshapen and preventing my exhaust from lining up? Should I just bolt the test pipes to the H pipe and hope that holds it?
I've reduced the "damnit not again" problems from 3 down to just the exhaust problem. I'm still pretty optimistic.
3/20/2012
This thread needs an update!
Had some major problems with this car last fall. Rather major problems with the work that was done. Gonna copy and paste posts I made over at 3zc to get everyone up to speed with where I am now. Sadly, few pictures as of late. But I got my girlfriend a Pentax K-x for her birthday so you better believe when this is running there will be PLENTY of pics :-)
Mishimoto radiator and new radiator lines get delivered tomorrow after work. The girlfriend will be out of town this weekend so I'll have all weekend to either button everything up, or take it for a test drive.
Sadly my registration is expired and its still on 'storage' insurace so I need to get both of those items taken care of at lunch today.
I've got a Nistune ECU waiting to go in after I get the motor broken in. Some big name Z tuners are coming to Cincinatti in May and I hope to be able to take the car down there and get a top quality professional tune. I just hope I'm not getting ahead of myself again.
3/20/2012
With all due respect to Dan, a Z32 300ZX is a car I'll never own and ownership I wouldn't wish on my worst enemy. My best friend is the biggest Nissan nut you'll ever run across, and worked as a tech at a Nissan dealership from 2000-2004 (the time these cars were getting out of warranty). A couple of the other tech's had Z32's and I often gave a helping hand working on them. I'd rather re-run vacuum hosing on a TT FD than do just about anything further than basic maintenence on a TT Z32. The TT Z32 is still the most pain in the ass vehicle I've ever worked on. If I remember correctly, the last Z32 I turned a wrench on was to replace a turbo, and it took 4x removing engine and installing engine to get all leaks stopped and everything fitting properly.
With that said, when they are put together, they are damn fun cars. I used to bracket race with Brad Grodi @ ZSolutions. I don't know if he's still in business but back in '07-'08, he was running 700-800whp and driving his Z everyday.
You know....I don't mind having to work on the car. Yes, it really sucks when a fuel line that runs UNDERNEATH the plenum AND throttle body linkage starts leaking like a firehose when you're 30 miles from home....but you sure learn a few things when trying to fix it.
Pretty much the only 2 cars I've spent any real time working on are my 300zxTT and my Golf VR6. Everyone told me that the Golf would be a pain because it was a 6 cyl engine in a bay built for a 4 cyl. I don't see either as a pain to deal with.
I love both of my cars, and the work I have to do is the cost of owning the car. I love EVERYTHING about the 300zx. I love the exterior, how it feels to sit in the driver seat, how the rush of power feels when the turbos kick in (and that was stock power levels before...haha).
The way I see it is if I ever need to work on an 'easy' car...I'll be set. I have learned more than I ever thought in the 3 years I've had the Z. Case in point, I wasn't into cars at all when I started college, but all my friends were complete gearheads, so I absorbed what I saw and heard. My best friend is/was a Nissan freak, and I helped him find his 300zx slicktop. After I got a ride in that car I was hooked. I bought my TT a few years later. He was the one helping me reinstall my new motor last weekend. After we got the motor in we realized that the water pipes that run under the lower plenum and between the heads wasn't bolted down completely (letting RTV cure) and it was sandwitched up against the firewall. We already had the motor and trans installed and in place. (sorry pat) He thought we were hosed and wasn't really sure what to do. I removed a heater core hose, grabbed a 3/8" U joint, a 1/4" wobble joint, 1/4" u joint and 1/4" extension and snaked the fittings onto the bolt head with my fingertips and managed to get all 4 bolts torqued down.
Ask me to do that two years ago? No way would I have figured that out. I guess another way of looking at it is: if you have to do it every day, and don't know anything different....its not bad; its just normal. Plus, when you have all the bypasses and deletes done AND a top feed fuel system, most of the biggest PITA's no longer exist.
3/22/2012
I found my 02 connector last night. But more about that later.
First of all....my new Mishimotor radiator, Z1 silicone coolant pipes, and replacement boost tester showed up from Coz last night!!! And I had to wait until 8pm to play with them. It was 85 degrees in Northeast Ohio....softball comes first.
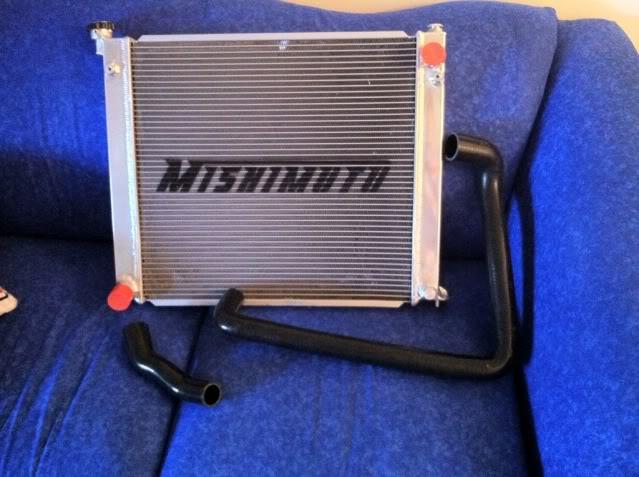
When we got home I installed the radiator which I was afraid of based on all the horror stories I've heard about aftermarket radiator fitment. I left the intake hoses on the passenger side installed throughout, and it took all of 30 seconds to figure it out. I just had to put the driver side of the rad in first, lowering the radiator tab below the metal intercooler pipes. Once I was able to slide it over and down, the whole radiator moved into position. Nothing had to be removed or loosened. Hooray! I'll have to take a picture tonight, the radiator seems to sit pretty high, but the hood does close.
Once I lubed up the silicone hoses they slid right on. I had to trim the radiator side of the upper pipe about .25" to get it to fit, since this rad is so much thicker.
After my rad install I attempted a boost leak check and couldn't build pressure even with the regulator set at 50psi or so on my compressor. Gah! Need to figure that out before I try to start it tonight.
Task number 3: Hook up heater core valve properly. This was a pain in the @$$$$$$$$$$$$$$$$$$$$$$$$ $! I had the heater core installed last fall when I did the bypass, but I never hooked up the spring and cable to the valve. It took me about 30 minutes lying on my back under the pedals to get this thing hooked up. I had to pull the valve back off the heater core, thread the cable through the valve handle, and spin and contort it to get the valve back on the heater core AND back into the rubber bypass hose. There should be pics of this earlier in the thread. Unfortunately I didn't have my phone on me to get any last night.
Last task: Missing 02 sensor plug. For some reason I felt like I had both 02 sensor plugs in the harness despite using a wideband 02 in place of the PS 02 sensor. I had to backtrack my bees nest of wiring behind my 300 degree triple gauge pod and below the radio. I traced all the wires coming out of the firewall from the LC-1 unit, followed all the leads until I found the one that didn't go to the gage or ground/power and found it running back to the firewall. However I couldn't find that wire in the engine bay side. Turns out I spliced it within a few inches of hte firewall grommet. I found the wire spliced to my old 02 sensor connector, which somehow got stuck on top of the turbo. It was COMPLETELY hidden from view. I snaked it out and plugged it into the wiring harness.
At the start of the night I was bummed again because I thougth I had a few problems that were going to take a lot of work and delay this project even more.
Tonight I need to keep hunting down my boost leak (no hints last night, no whistling or anything) and then I can fill up the rad and start it up and hopefully let it idle for 20 minutes to FINALLY break this motor in.
Neighbors may not like me as I have no exhaust. :-)
3/23/2012
Yet another update! You can tell I want to get this done because updates are more frequent.
I had another large group of tasks yesterday. First of all, I got some generic 2.5" test pipe gaskets yesterday at Advance Auto Parts so I could make a bit of an adapter between my test pipes and my H pipe. As I mentioned earlier, for some reason my test pipes were mismatched lengthwise by a little less than .250". They were great last year, but nothing I did would get them flush, so I stacked a few gaskets on the shorter one and bolted everything together. The exhaust has never been a PERFECT fit, it always took a little force to get everything lined up, and this was no exception. But I was comfortable with how it all ended up.
Afterwards I needed to reinstall all the AC piping and etc in the interior, I had never reassembled it after my heater core replacement last year. (Big mistake) I found 5 of the plugs, but couldn't figure out where the last 2 go. And nothing works unless its ALL plugged in (so I am told) and I need to have the climate control working so I can bleed the air out of the cooling system. Once I realized I was missing a large section of the plumbing (I tossed it in the hatch) I saw it had 2 connectors. Figuring out how to install it was a pain in the ass. It only took about 10 minutes, but theres no good way to do it by yourself. It consistes of two plastic...tubes...I guess, which are loosely connected, and they have to be installed at the same time. You have to get them in position while lying on your back, and then with one hand hold them in place, get back up in the drivers seat, and stick a screwdriver through the center console and pry them into place and make sure they fit right. It took a while to figure that out. Again...another pain but got it sorted out.
Lastly I filled the radiator with coolant and tried to start the car yet again. No luck. Still can't build pressure in the intake system and cant hear any source of leaks. Even with my compressor regulator set at 60psi. Unfortunately after ALL of the times I have tried to start it so far, I have forgotten to pull codes every time. Damnit. Anyway, it still failed to run pro
perly. It stumbled quite a bit, seemed to be misfiring, and ran very lean according to the WBO2 (hard to tell, have a bad ground with my gages now).
Last thing I did was start to pull the plenum. Thankfully with my top feed injectors a plenum pull takes all of 10 minutes. Tonight I will be removing all the intake plumbing (that we have touched during this project) and reinstalling EVERYTHING one piece at a time making sure it is all clamped down. I'm sure we missed a hose or something. I hope thats all it is.
Every night the car doesn't start I get discouraged and I'm stressed out. But by the time I stop thinking about it and wake up in the morning I realize I'm really close and its just a little bit more and I'll be there.
I JUST WANT TO BE DONE!!!!!!! Yay. Ugh. Maybe this weekend. Car goes back on insurace today (in case I get everything sorted out and drive it this weekend) and collectors plate paperwork gets filed on Monday.
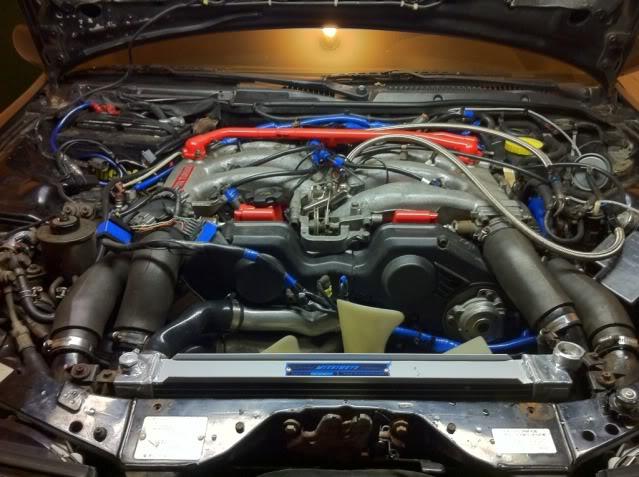
Workspace:
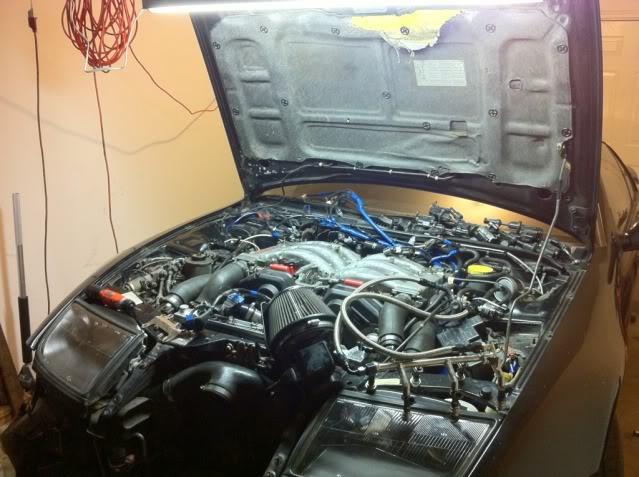
New rad installed. Look how high it looks! Luckliy the hood closes.
3/24/2012
Last night I pulled the plenum again, determined to find whatever could be causing a massive vacuum leak. Sadly, it looks like this was my fault. The passenger side accordion pipe was loose to the turbo inlet. The driver side didn't budge when I pushed on it. While I was in there I rerouted much of the wiring harness and vacuum lines to the boost solenoids. We tossed everything together pretty quickly the first time, so vacuum lines weren't tucked properly and everything was pretty much a cluster. I stuck the solenoids under the battery and BMC, and ran all the vacuum lines under all the intake hoses. Much nicer.
I tightened EVERY clamp from the turbos forward and put everything back together. Luckily with my top feed setup I can do a full teardown and rebuild of the plenum and intake pipes in a little over an hour.
I think we missed a ground on the first attempt because when I started it up it sounded like it was running on 3 cylinders. Code 42, forgot to plug in the fuel temp sensor. Tried again, still 3 cylinders. Code 42 and 21. I swapped PTU's to a spare, and it ran much better. Unfortunately this time cylinder 2 wasn't firing. I swapped coilpacks with no luck.
Gonna run through code 21 diagnostics today after I visually check for spark. SO SO SO close. I do still have a small vacuum leak for some reason, at the back of the motor, I can hear it whistling. The GF is gone for the weekend so I'll be looking for parts on craigslist nearby (shh don't tell her) and trying to troubleshoot these issues. I forgot to get insurance put on the car yesterday, and its raining so I can't do much driving with the Z anyway.
Also I got myself a cheap OBDII bluetooth transmitter which I intend to play with in my Golf today. If anyone has any idea why just one cylinder won't fire with what looks to be a good PTU, I'm all ears.
4/9/2012
I've been avoiding this thread because its been nothing but bad news. But after last night I guess I'm ready for an update.
No spark was caused by a loose PTU connector it seems. That has been sorted out.
The vacuum leak and inability to build pressure with a boost leak test is another story. I put worm gear hose clamps on every hose instead of the nissan OEM clamps to try and stop the leaks. No go, found one of my injector rings leaking. Took care of that, and the leak jumped to the upper plenum gasket, and after that was taken care of.....................it moved to the lower intake manifold gaskets.
More on that in a second. I did manage to get it running decently (it seemed so at least) and I drove it 5 miles down the street to test out everything without power steering. Big mistake. And after I pulled out of the garage I noticed puddles of water under the exhaust, and a small puddle of oil at the rear of the engine where it mates with the trans. I was pretty upset at that point. And to top it off halfway through the drive I noticed the heater core was leaking and there was a loud ticking noise coming from the engine bay AND it was misfiring because of a lean condition. I was pretty upset. This would be the reason for no update in 2+ weeks.
Back to the solutions:
I pulled everything to retorque the head studs, and found a few that were LOOSE. Retightened everything and hoped that was the source of the water out the exhaust. The plenum came on and off about 5x trying to hunt down vacuum leaks.
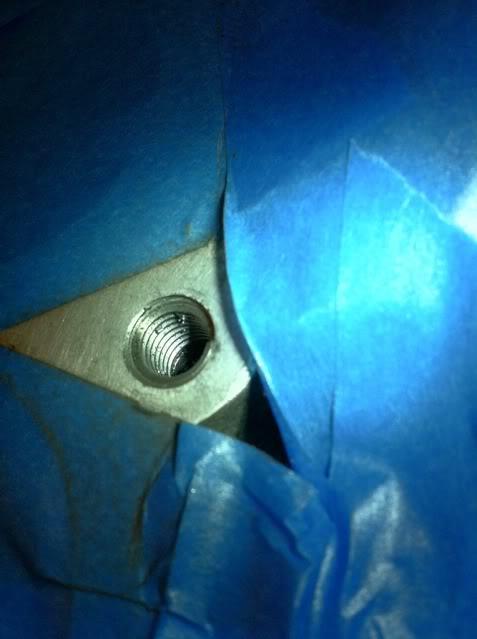
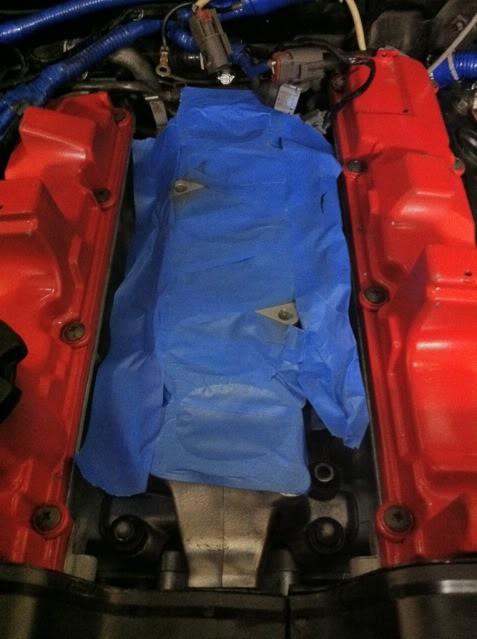
After that I tried eliminating my injector vacuum leaks, but the lower manifold I'm using had two stripped holes in the center (which I didn't notice until the car was practically done). I had to drill them out and helicoil them, which worked fantastically........but didn't help with the leak.
Why the @!#$% did I use the intake manifold gaskets I installed? I had a set of the bronzeish colored metal gaskets with rubber inserts lying around, and I used the ones made out of exhaust gasket material. WHY?! I'll post pictures later.
Sooo I was hoping I could pull the lower plenum without resetting the timing, we had the timing belt clamped and ziptied in place, with people on each gear holding them so they didn't move. It didn't matter, the belt still jumped. Which also didn't matter because I forgot about the rear timing cover on the passenger side which goes around the idler stud on the lower intake manifold.
Lucky me. So as of Thursday night I was in for a weekend of tearing everything down so I could reset the timing. Luckily I had no work Friday so I spent the day in the garage, with the exception of lunch. My girlfriend was stuck working so I delivered some Panera. Mmmm.
I had pretty much everything together by Friday night, I just needed the right size power steering belt to match my crank pulley. It only took 3 trips to autozone to get it right.
After checking everything and checking again, I FINALLLLLY tried to start the car again at about 6pm Sunday. Before the initial crank however, I gave her one last boost leak test. Lower intake manfiold: Sealed. Injectors: Sealed. Upper intake manifold: Sealed. Balance tube: forgot to bolt down. Oops. What I don't get is despite not having any leaks...I still can't build any pressure in the system. The car ran great (minus the 02 sensor issue I've been having. More on that later also), pulled 22mm/hg vacuum at idle and despite a full bottle of soap and water I couldn't find a single leak. I can hear air flowing what sounds like inside the plenum, but no leaks. And nothing out the exhaust according to my ears.
As I said the car ran great, until it reached 167*F. At whichpoint the RH 02 sensor would peg at 1v, then slowly reach stoich, then peg at 1v, and repeat. And while its doing this it would rev higher, and sputter back down, and run real lean when gently cruising. I tested my 02 sensor theory by forcing the ECU to run in closed loop mode (fuel maps only) by unplugging my wideband 02 from the wiring harness (yes I'm using the 1v output from the LC-1). After that it ran MUCH better. Still slightly lean, but not to the point it was misfiring.
No leaks from the heater core, no leaks from the engine bay that I can see, and nothing from the exhaust. I'm starting to feel better. Tonight my Z gets its face back! First time in 13 months. Then its another drive to get me near 50 miles and another oil change. Gotta put 500 miles on this as quicky as possible so I can get it tuned in Cincinatti in May.
In the meantime I need to teach myself Nistune so I can set up my spare ECU and fiddle around to see if I can figure out what's going on with my 02 feedback. I was thinking of getting 2 new OEM sensors and relocating the wideband to see if that helps. I'm kind of stumped at the moment.
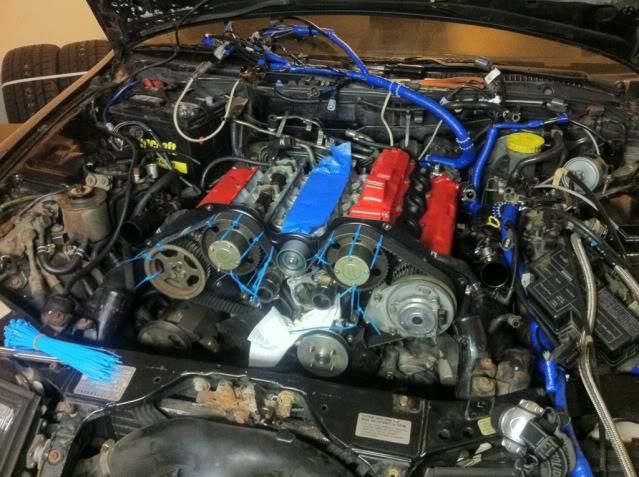
Pics are boring for this post. Shows my retapping setup for the lower intake manifold along with the finished result.
4/18/2012
Small update. Pissed I keep forgetting to upload photos, they're all on my old phone and camera at home. Rule #1, I know 
I've put over 300 miles on it so far. First 300 or so were gentle, no boost, no higher than 3500 RPM, lots of engine braking. I changed the oil at 50 miles, 250ish miles, and I'll probably change it again at 500 or so. Currently using 5w30 conventional, and after about 200 miles the oil seems to thin out and at idle oil pressure drops below where im comfortable with. I was running 15w40 Mobil 1 in the old motor, and I'll probably go back to that after the breakin is fully complete. I need to do some more research on proper oil for new VG30DETT's.
I drove a lot this weekend, and the heater core started leaking again. The hose I used to splice the connections was too short, and as I tightened the clamp, it slid between the connection and just clamped the hose shut. Coolant all over. I fixed it Monday night and I really hope to not have any more problems with it.
Last night I took it out again to check my heater core fix and see if I remembered what boost feels like. I feel like I babied it enough for the first 300 miles, and now it was time to get a little more agressive. I still kept it under 60% throttle, but let boost get up to 5psi and 4500 RPM. Felt great! SMOOOOOOTH power delivery. Although it does smell a bit 'burny' after I boost which concerns me. I'm not gonna worry until I drive it a little more and maybe switch to a heavier oil.
Oh right, this weekend I filled up for the first time since November of 2010 (ouch). 15.7mpg! Not as good as I was hoping for, but this involved lots of idling and a pretty massive fuel leak after I pulled the motor (clamp on the fuel line let go and fuel siphoned out for hours).
I'm really hoping to see low to mid 20's after I get this tuned properly.
Next update will include pictures, I promise.
4/19/2012
Thanks for all the positive comments guys. Its definitely been trying at times, especially dealing with all the stuff that has gone bad which I took for granted *cough* headwork *cough*.
The work itself is pretty easy, although my definition of 'easy' is probably skewed based on the two cars I own. It just comes down to a little basic knowledge, a factory service manual, some DIY guides on the internet, and tools. I bet I've spent less than $500 bucks on tools for everything I've done here (engine hoist and stand are borrowed). It all started with a 200 some piece Craftsman set I got for xmas a few years ago.
Don't let the apparent scale of the work deter you. As long as you have some free time, a space in your garage, and a few extra dollars, you can tackle just about any project. Hell, I work 45-50 hours a week, marathon train on the weekends, play softball, ultimate frisbee, and have a (awesome supportive) girlfriend, and I've still got time to repair both my cars 
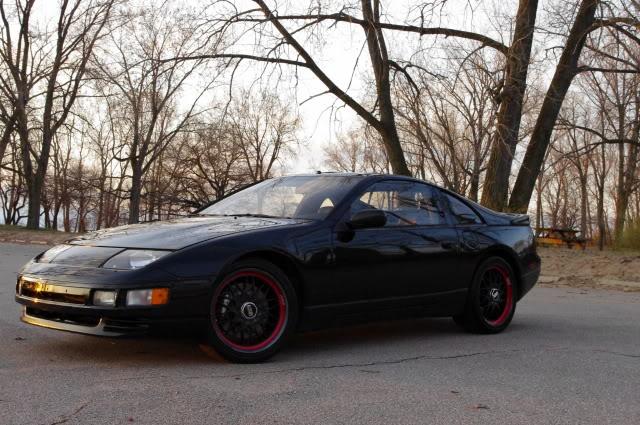
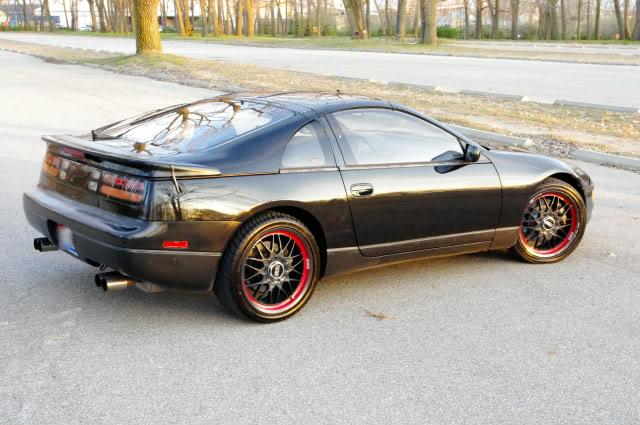
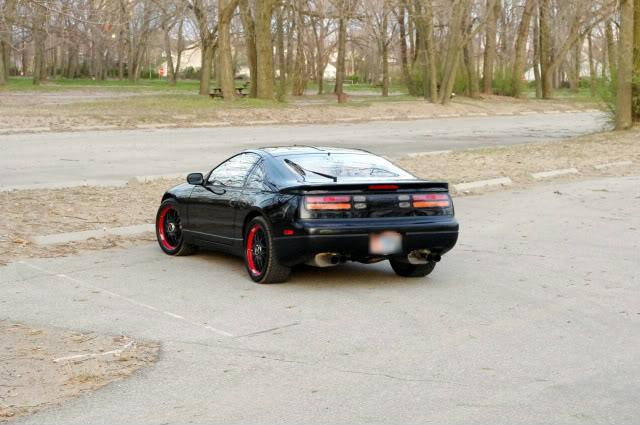
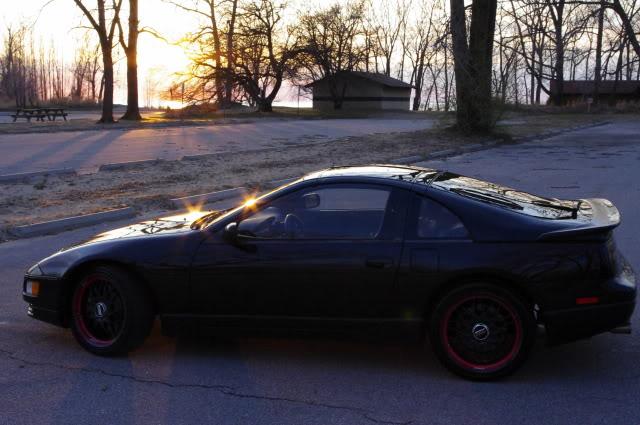
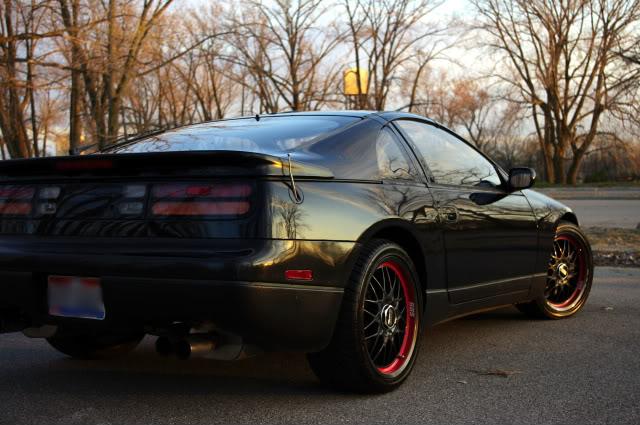
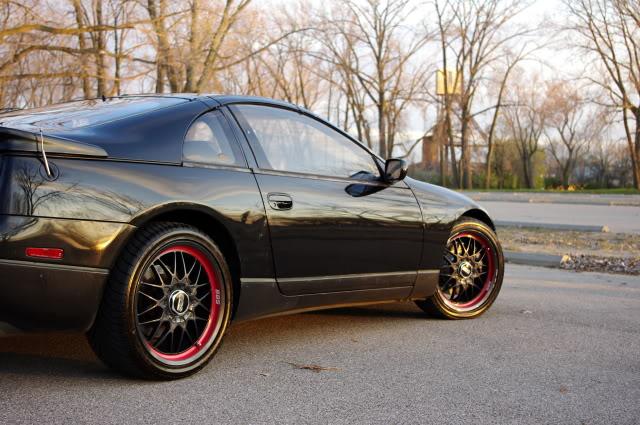
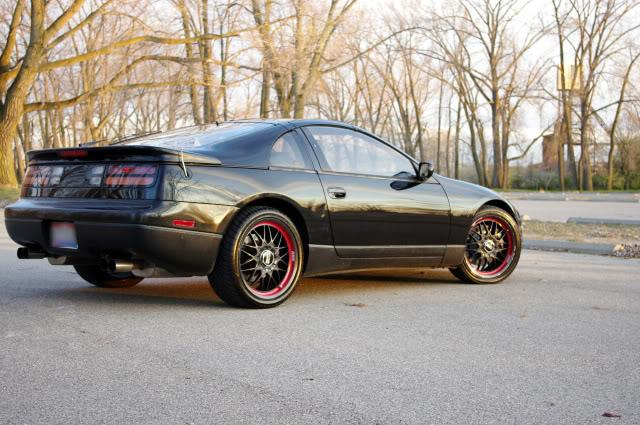
As promised, here are some pics I took last week with our new DSLR. Still learning; and its been a few weeks since I had used it so I forgot most everything I read. Unfortunately no shots of the interior or the engine bay; they're still a work in progress while I sort out these little issues. The exterior looks pretty good though for an original 23 year old car.
4/19/2012
I took the (very) long way home from work today. Approximately 60 miles through the hills in Northeast Ohio (okay that doesn't sound very pleasant, but the Kirtland Hills/Chardon area has some really nice scenery) in 70 degree weather with he tops off and windows down. Days like today, even if I'm still babying it, make EVERYTHING worth it. Its an absolute dream to drive. Even with the minor annoyances.
50 miles into my drive I pulled up to a stoplight and it was misfiring at idle and at 18-19 AFR.


After I babied it home I found a vacuum cap had popped off.  and
and  At least it was nothing major. Put a new one on with RTV this time.
.................................................. ......................................
There were more than a few occasions when I didn't wanna deal with the car, which is partly why I put it back into storage in the fall instead of trying to finish it up. Especially when its just myself doing the work. But the turning point was my buddy Pat coming to help for a weekend. Just getting the motor to fire was BIG motivation; even if it required more 'redo' work afterwards.
AND...now that I've done it this many times...its not as much of a hassle. If it wasn't for all the coolant in the system and not wanting to make a mess, I could probably do a timing belt job in 3 hours now. Shutoff to restart.
If you're on the fence..go get one now. Before they're ALL molested. Its not that bad :-)
5/20/2012
Been a while since I've posted.
I think I've gotten nearly everything sorted out with the car, except for the tune. The car runs good, but there is a funky lean spike right around 2k rpms that I think is killing my torque output.
Yesterday a couple friends and I drove down to Canton for a dyno day benefit. It was a chassis dyno (more info when I get the graphs).
Buddy with a SN95 cobra put down 250hp with just pullies.
284whp and 270 torque for my Z with stock wastegate pressure (12psi). Kinda disappointed. I think a lot of it comes down to the tune. (ashspec chip currently) I really wish I could have been ready for the Specialty Z tune day in Cincinnati. I should get the graphs tomorrow, but now I need to learn how to use my Nistune ECU and software.
DYNO:
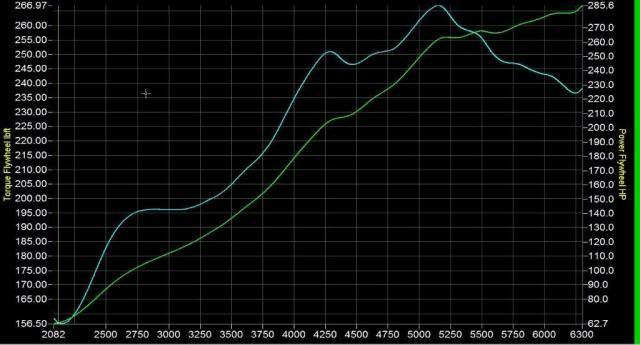
To be fair, I found out on the ride home that I popped off two vacuum caps and a fuel line. I hope that was the reason for the crappy showing.
6/13/2012
I thought I had a RMS leak, turns out I never retightened the oil pan bolts after installing it with RTV orange initially. To get to all of the bolts I had to remove the transmission brackets on the driver's side and loosen the bracket on the passenger's side. Since then I haven't seen a drop of oil from the back of the motor.
I installed a Greddy Profec B Spec 2 boost controller that I found on the forum last week now that my motor is broken in. It feels good to get up to 15 psi again!
I got an auto NA nistune ecu for a steal a while back, and 91ser came down from Chicagoland again to help adjust the tune. I've been running an Ash tune set up for my 755cc top feed injectors, but after installing the sport 500 turbos and AMS exhaust manifolds I've had a lean spot at part throttle that I wanted to get rid of. After doing a fair amount of reading we learned how to copy the maps from my TT ecu onto my netbook, and transfered them onto the nistune ECU. We went for a drive but were unable to see the effects of our changes. I think we were running into issues with the gear map, so the gear and knock maps were disabled and things really took off from there.
We pulled some fuel out at the top end (shot for 11.5-12.0) and added some down low (shooting for 14.7 low load) and the car runs SOOO much better. We filled up after about 1/2 tank of highway driving, 1/4 tank of accelleration runs, and 1/4 tank of cruising. 19.996 mpg!!!! Typically I've only seen 20 on 100% highway tanks. I can't wait to see what this current tank gets me. I'm going to need to modify some other rich spots down low, and I want to try and lean out very low load areas some more to improve fuel economy (after doing some more reading on how to tune). I just can't believe how much of an improvement we saw with only a few hours spent in the car.
6/27/2012
MPG Update:
Last weekend I gave the girlfriend a VERY brief overview of how to use nistune, but with her help dialed in the tune on the freeway in 5th from 55-75. AFR at part throttle is almost dead on 14.6-14.8. After filling up on that tank I got 21.9mpg. 75% freeway/country roads, 10% commuting 3.5 miles and back to work a few days, and 15% with the old tune. Looking better!
I'd like to know how some people are getting 25+ on the freeway. My goal is 22-23mpg on the highway so its not too painful on the wallet for long trips.
Check me out on fuelly.com for MPG updates.
Also took delivery of a second MAF, Selin Translator, and oil sandwich plate this weekend. The plan is to take a long weekend over 4th of July to see Cake at Summerfest, help my buddy finish up the V8 install in his slicktop, and install a DOOLZ (dual intake) on my Z. Should be good for quicker throttle response and about 20-30HP. Oil sandwich plate is for oil temp/pressure gages whenever I get a carPC installed. Hopefully this winters project.
7/12/2012
First off, I know I need more photos. Just took a 1500 mile road trip and only got one crappy cell phone pic of the Z. Probably because it was dirty most of the time
Second. 22.9mpg for the road trip. Averaged 22.5, saw best tank of 22.9. I am quite pleased with this, I'm making more power and getting better fuel economy than the last trip I took 2 years ago. I'd still love to break the 23mpg mark. Those numbers are from sitting at 75-80 much of the time with a few spirited runs in between. Wisconsin has some great roads to drive.
Third! Picked up a Z1 Doolz from my friend in Chicago on my way back. Installed it yesterday in about 30 minutes. (I'll snag pics at lunch) The full setup is, Z1 doolz, silicone couplers, AIP maf (wanted OEM but the guy I bought it didn't state that it was aftermarket) and dual JWT popchargers (only one has a flower pot mod at the moment), and selin translator set to ADD. I've got a few observations.
1: Driveability is MUCH better. Previously in 5th gear below 1800rpms or so the car would bog down and shudder if i gave it throttle. I really had to be in 4th until 40+mph to drive the car smoothly. Not the case any more, 5th gear is usable down to almost 35mph. This should help fuel economy pretty significantly as most of the roads around here are 35 (boo).
2: This is completely subjective, but the car seems to drive much smoother. This is both good and bad.
3: At 15psi power doesn't seem to come on in as much of a RUSH as it did before. This makes the car feel slower. I've only driven with this setup for about an hour, so these observations may change. I did a log last night with nistune and saw TP load hit a new high of 73 (previous TPload max was about 63) so it seems to be making more power. It just doesn't feel that way. I REALLY need to completely redo my tune, but I'm not sure I have the skills for that. I've got a rescaled map created, but I'm afraid to use it. My current TP load scale maxes out at about 44. I'm monitoring everything very closely while driving, but something tells me its not a good idea to have the ECU interpolate that far beyond the chart.
4: Despite having my ballasts mounted at the outer edges of the engine bay and the selin right in the middle, I still get LOTS of interference. When I tried to pull away at the gas station I killed it because it was running so poorly. It didn't occur to me until the second try that the problem I was seeing was because of the HID's. When I turned the headlights off the car ran great. I need to read up on how people are correcting this.
7/16/2012
We were 5 miles from home after 4 hours and 150 miles of driving all day Saturday when the car died at a fairly busy intersection. Barely managed to get it through the intersection and into a driveway.
Could not connect to the ECU with consult
Code 55 - All OK
Aux fan running with key in accessory position
Car would barely idle (VERY rich) and would die with any throttle.
CEL was on.
If I let the car sit for 3 minutes, the fan would not turn on at the turn of the key, but as soon as I gave it throttle it would start with the above symptoms again.
Called AAA and was home within 30 minutes. I had planned on swapping ECU's in the morning on Sunday because everything I read suggested a bad EPROM or bad ECU (Current ECU has a nistune board). Some others suggested bad MAF, which almost makes sense because I'm running a dual maf setup (1 oem 1 AIP) with a selin translator but that doesn't explain why I couldn't connect to the ECU.
Sunday I started up the car and drove around the development with no problems. ??? Now I have to drive around wondering when this will happen again.
I've got a spare ECU and spare single intake ready to swap over in the car in case this happens again. Has anyone else encountered this problem before? Is it possible to have this caused by a bad maf when running the selin? I would think that if one maf is bad (and set to ADD) it would be reading to LITTLE airflow and be running lean. Has anyone ever had a bad nistune board?
8/6/2012
Well its happened twice more now. ECU dies after long drives. Swapping to my chipped TT ecu will allow the car to run fine indefinitely. If I drop the nistune ECU back in the next day it'll work fine again. A brief visual inspection of the ecu innards didn't reveal any problems.
Not really sure what route to take. I'm assuming/hoping its the ECU and not the nistune board that is bad. I guess my next option is to find a cheap working NA ecu and swap the nistune board over.
8/27/2012
I got in on the initial offering of the Royalty Performance 13" rear brake group buy, and they were delivered about two weeks ago. However my golf was still up on jackstands with my troublesome steering rack replacement so I couldn't install them.
I finally was able to tackle this job on Friday with the help of my girlfriend before I took her out to dinner :-) In total, it probably took us an hour to install these, wheels off to wheels on (including the time it took to learn how to adjust the parking brake). Very VERY simple install. I did have some problems with the heat shield rubbing against the backside of the rotor which I had to spend 5 minutes adjusting on Saturday, but nothing major. Unfortunately I haven't had a chance to really test them with any simulated panic stops yet.
I definitely like the look though. It makes the fronts look smaller, but I like having 13" all around. They look much better under my 18" wheels.
Crappy photo on the way into work:
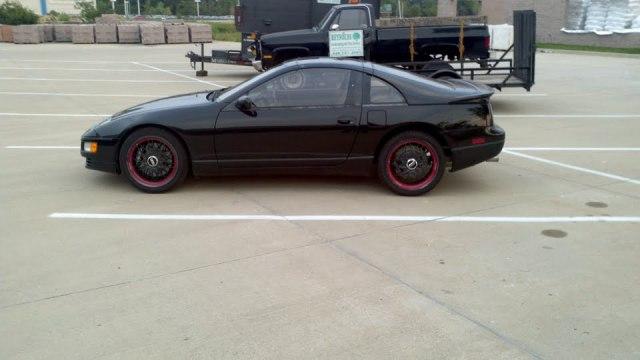
I've got this winter's projects pretty much lined up.
I've got a 2.5" intercooler piping kit waiting to install, still need to purchase larger intercoolers with 2.5" inlets. I'll have my OEM throttle bodies bored out and the plenum matched to account for the larger piping. Dyno tests have proven almost +100 low end tq with this upgrade alone. Combined with my slightly larger than stock turbos, lag should be almost nonexistent with a monster torque curve.
The seats (and probably interior) will get recovered in charcoal leather, along with a new shift boot and ebrake to go with the red stitched shift knob my girlfriend got me for Christmas last year.
I plan on moving away from my triple 52mm gauge setup and switching to a double din bezel with a car PC running datascan/nistune. This way I can still monitor oil pressure/temperature/everything else with the sandwich adapter I'll be installing and I won't have to clutter the interior with more gauges.
Finally, I'll be cleaning up the engine bay and powder coating the plenum and balance tube and valve covers to get rid of the cruddy old aluminum look I've got going on. I really should have done this last winter, but I was too focused on getting it to run after my first ever engine build.
That will pretty much cover me for performance upgrades. The suspension is still pretty firm, I don't plan on altering that until my bushings start to go. Its a toss-up between that and paint as my next major modification, probably 2+ years down the road. I'm hoping that this winters round of upgrades are all I will need and I can drive it for a few seasons without sinking any more money into it. I've been planning on all of these for the last year, and I don't have anything else I need to do, and I struggle to find upgrades I want to do.
10/6/2012
I've been trying to find a local dyno day for a while now, with no luck. So I finally got around to calling Bigshot Dyno down in Stow. I live in a city of 51k people and 100k within 5 miles, and I have to drive almost an hour to the closest dyno. Boo.
Anywho, I did my first dyno this spring with a chip tune and 12psi and put down a measly 290ish hp. Since then I got Nistune and using ZERO tuning experience dialed in the chip tune on the street and turned up the boost to 15psi. I also installed a doolz intake and selin translator.
I've got a set of Ash Massives V3 and 2.5" intake piping on the way for install this winter and I wanted to get another baseline prior to that mod, and a comparison from where I was at this spring.
Runs on a DynoJet reporting STD Horsepower.
Run 1 broke up a little so we didn't log it.
Runs 2 and 3 were nearly identical, within 1hp and 1tq at 15psi.
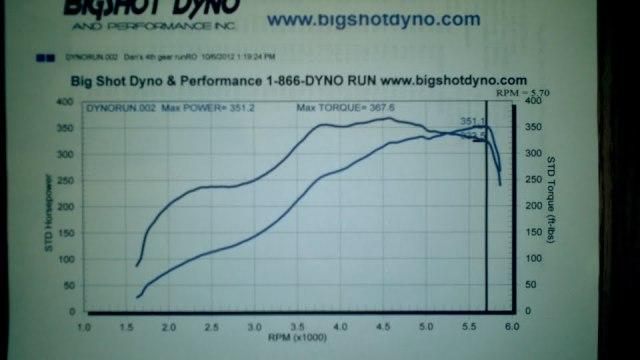
Run 4 I turned the boost controller back down to 12psi to get a comparison to this spring (plus the dual intake and tune)
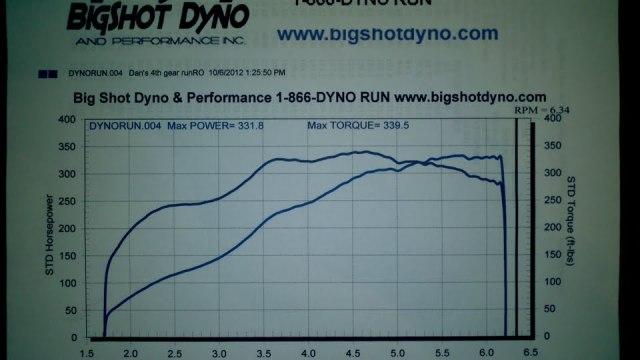
15psi- 351whp and 367tq!!!!!!
12psi-331whp and 339tq!!
VERY pleased with these results. My goal of 450whp should be attainable with 17psi and breather mods!
The standard Z32 ECU has a main board, and a daughterboard that lies parallel about .75" away on the other side of the casing. The two are connected with a 1" wide ribbon cable. Nistune replaces the standard aftermarket EPROM chip with yet another daughterboard in between the two, right where the ribbon cable is.
I dissected the ECU looking for loose or bad solder joints, but everything looked good, the only thing that was suspicious was the ribbon cable squished between the 3 ECU boards, and the ribbon cable was up against the backside of the Nistune board, which had many exposed pointed leads. I put some insulating material in these locations and haven't had a hiccup since.
10/12/2012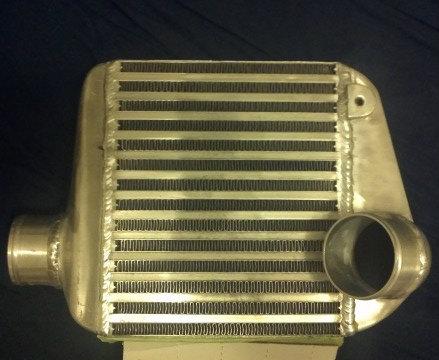
Ashspec Massives V3 intercoolers delivered. Over twice the size of my current intercoolers, and these have a 2.5" inlet/outlet to mate up with my waiting 2.5" intercooler piping.
Won't get to install them until late winter/early spring. 

