You must be logged in to rate content!
12 minute(s) of a 731 minute read
8-27-2020
I appreciate the positive words. I know that if I don't keep some part of the project within arms reach, it will be easy to get discouraged and not put time into it; and then that snowballs into forgetting where I was and the hurdle of getting started again gets taller and taller. Each time I leave the garage I either add something to the to-do list, or pick my next task and make sure I have all the tools/supplies needed to get it done.
As I dabble in metrology at work, I have ready access to pretty precise measuring equipment.....for the most part. I grabbed a steel parallel and verified it was flat to within .002" on a surface plate. Factory spec on head flatness is .002", so I used the steel parallel and a .002" across all mating head surfaces and the .002" wouldn't pass.
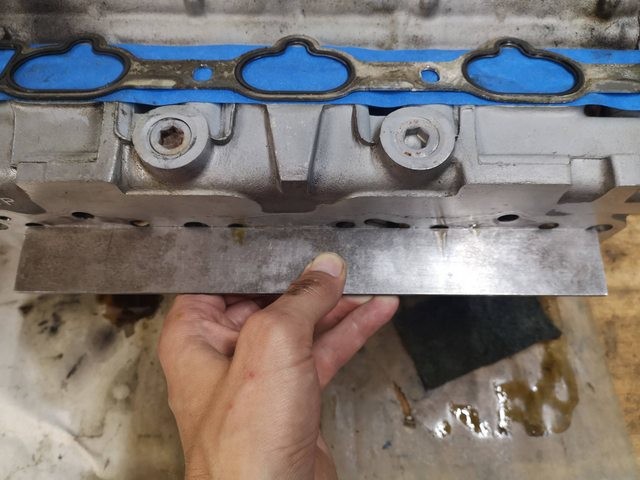
Looks flat to me!
The smallest feeler gage I have is a .0015" which barely started in a few places but didn't pass through. As far as I'm concerned the heads are flat. Good news #3.
The other hangup I had regarding reusing my heads vs getting another set refurbished is the fact that my block was decked .007" and the total allowance for material removal is .011" (pretty sure on this) so I'm almost guaranteed to need thicker headgaskets if any headwork is done. It's my understanding that metal headgaskets are not tolerant to any mating surface variation or contaminants, they're more expensive, and the Cometic gaskets I use don't have a fire ring (Tomei does, but at 3x the cost). If at all possible I'd like to go back to OEM after reading all the successes people have had with them, but that's not an option at this stage in the game.
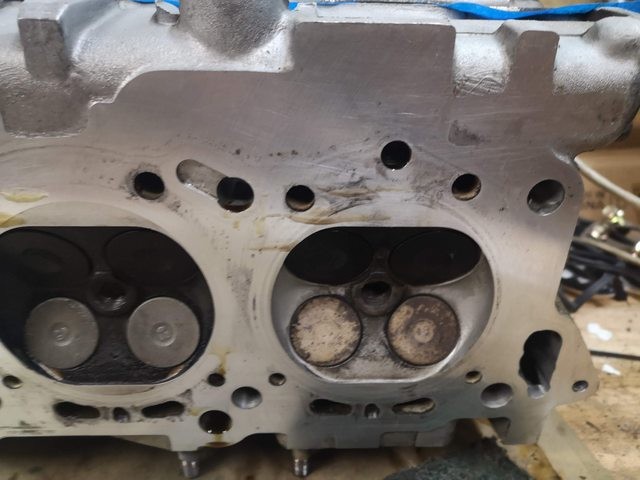
The mating surface looks much better than I expected it to.
Thanks to all the issues I had getting these heads refurbished in the first place, I know I had installed these gaskets a few times. I didn't discover until after the fact that they're really not supposed to be clamped more than 3 times. I was probably at or above that limit; so I feel (marginally) better about using a new set assuming they're installed correctly the first time.
I took a close look at the headgaskets and saw the nitrile coating eroded on both sides.
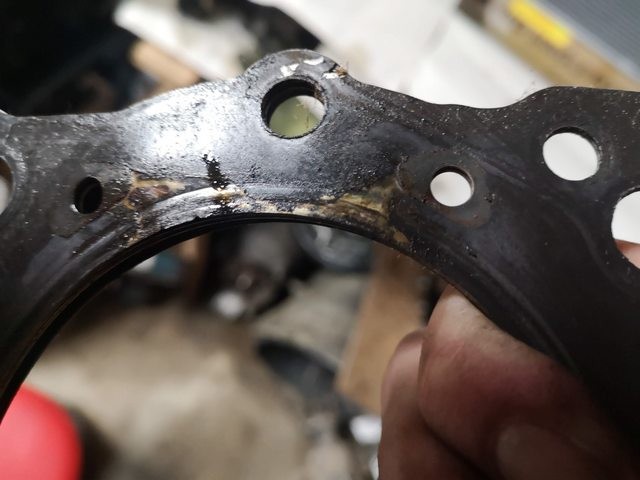
Head side I believe. I don't know if the failure of the nitrile coating caused coolant loss and ultimate failure, or vice versa
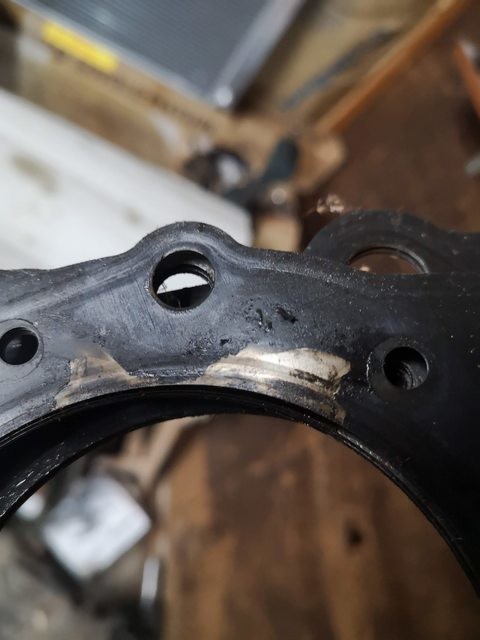 Block side
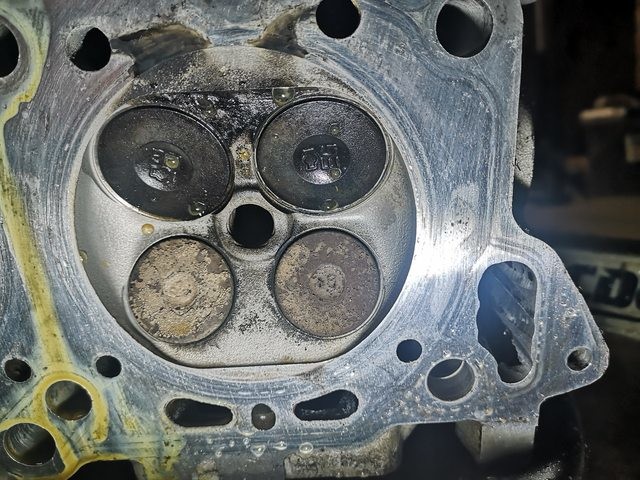 This is what the head looked like as soon as I removed it
All of the above work had really been done in my first week or so while I frantically tried to source a replacement set of cams (and heads if possible). I'm STILL waiting to hear back from some a vendor that is generally held in high regard after a phone call and multiple emails. Given the fact that I don't have what I need to proceed, I found plenty of other things to put on the to-do list.
1. Replace headlight mount
The vertical adjust on my PS headlight was stripped, and I assumed that contributed to the 'wobbliness' of the headlight. It vibrated pretty good at speed. The guy I bought my replacement transmission from (I just realized I didn't cover that. I found a mid-mileage transmission in Michigan a few weeks back and went out at 5am on a Sunday morning to pick it up in the rebuilt Volvo. Road trip! Given the occasional grind I see from my 170k mile transmission; I've been on the hunt for a spare for some time now) also had headlight mounts so I brought those home with me too. I removed the headlight (easy when the bumper is off. Just about impossible when it isn't) removed the headlight from the mount, and promptly realized the source of the vibration wasn't the stripped adjuster, but was the fact that someone in a previous life had removed the rear headlight mount nuts, so it was pivoting on the front nuts. Ugh. Oh well.
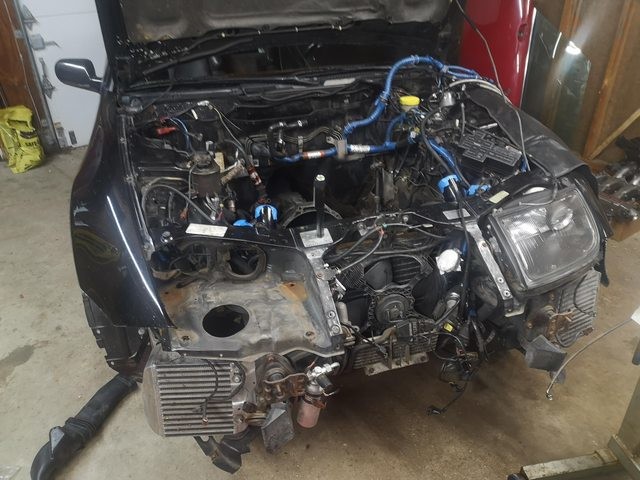
And now as I post this picture I realize I should have hit it with some rust remover/epoxy paint. Ugh.
2. Replaced stripped starter boss
The threaded copper boss on the starter motor stripped when I removed it. Crud. I'm assuming a new starter is in order. I haven't done anything with this yet.
3. Find a place to store all this junk
When we moved into the house the previous owner had shelves all over the place and even used one as a door stop (wut?). I removed most of them and tossed them in a corner out of the way. I had a eureka moment after the motor came out and reinstalled some of the shelves in an appropriate location. I just gave myself another 20 square feet or so of parts storage for free. Woo.
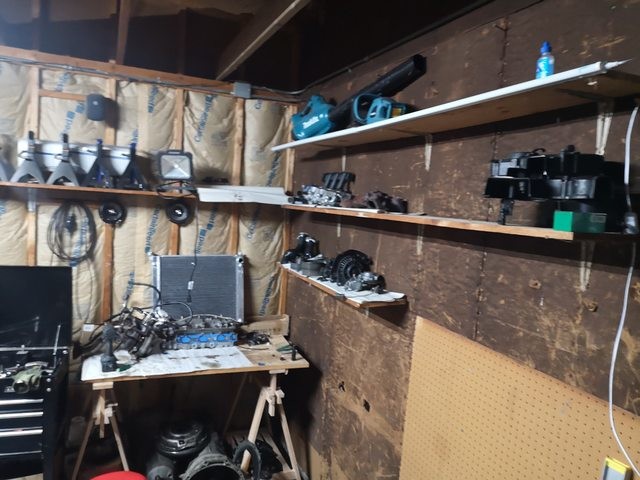
I've got the Z, the engine, all its pieces, 2 spare transmissions, all my tools and a spare set of wheels in a 1 car garage, and have plenty of room to work.
4. Re-wrap my engine harness
This is definitely purely cosmetic and not really a value-add activity, but I DO derive enjoyment from having a clean car and love showing it at cars & coffee and the blue wrap has always bugged me. You don't have to scroll up too far to see how out of place the blue is with the red and black scheme I've been going for. I tried to find high temp electrical tape and didn't have much success and somehow stumbled upon self sealing silicone tape. It was apparently developed to provide pipe/hose repair; you pull it tight and wrap it around (with overlap) whatever you want to repair and it bonds to itself within a few seconds, and apparently permanently in 24 hours but uses no adhesive so leaves no residue. It withstands up to 500F, 8000 volts, is waterproof, and remains plyable down to -60F. How have I never heard of this!?
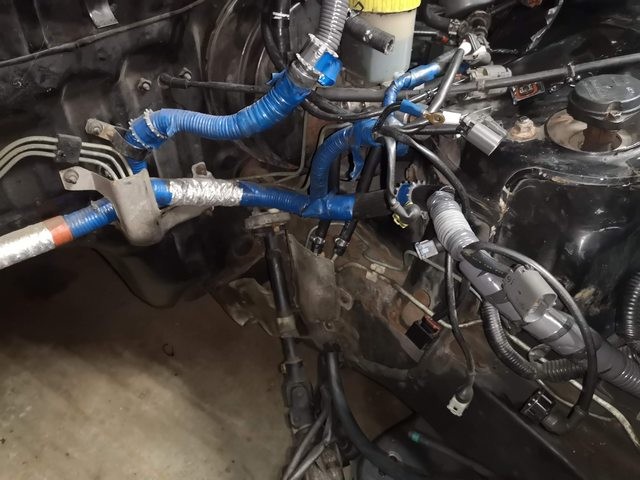
Blue on its way out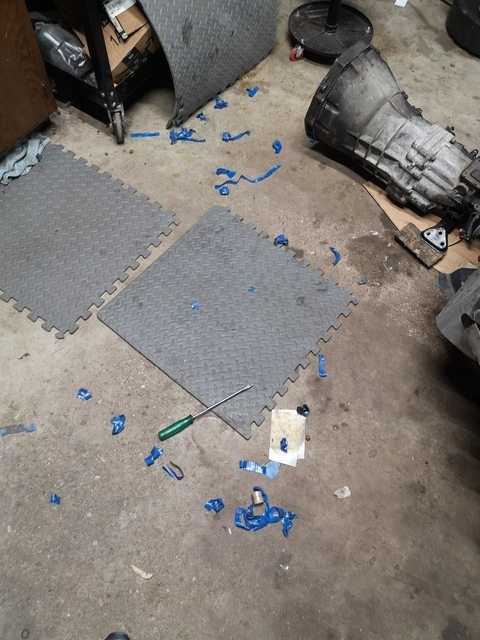
This is probably half of what I removed. I think it was just blue electrical tape so it was a sticky nightmare.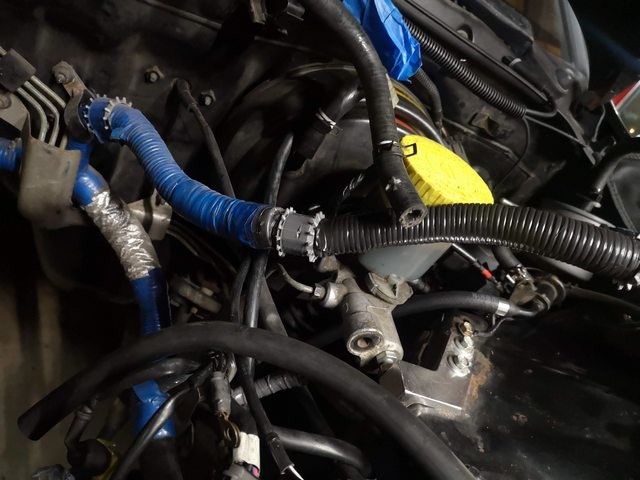 Here you can see the blue on the left, and the silicone wrap on the right. I think it looks soooo much better and won't show dirt/grease nearly as easily
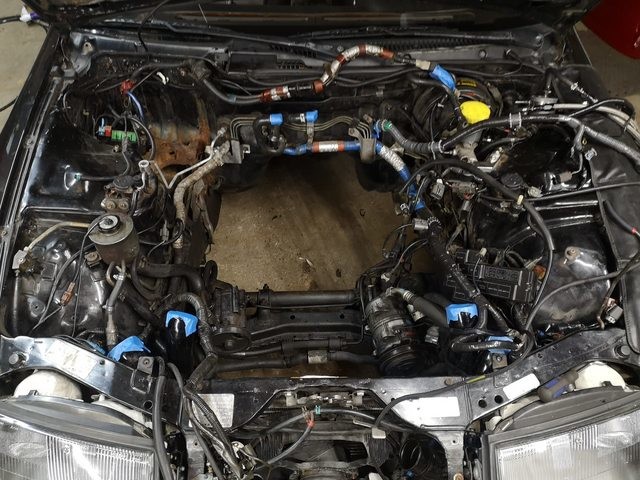
I wish I would have done a better job of getting a 'before' photo. This is after removing 75% of the blue tape.
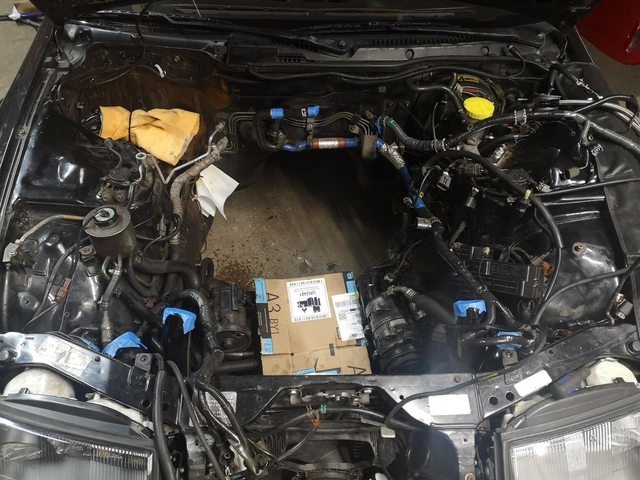
This is after completing the wrap job. I elected to leave the blue back at the firewall as it overlaps the foil protectant used near the exhaust. It's not visible whatsoever when the engine is in.
I've been fortunate to get two evenings (45 minutes each, yay!) in the garage this week. I was able to both start and finish the wrap job, as well as work on more cosmetic activities.
5. Delete secondary clutch bleeder
I have no idea why (some say it acts as a clutch fluid cooler); but Nissan chose to have two bleed points for the clutch slave cylinder. You can see it directly to the left of the power steering reservoir in the bay shot above. I purchased a M10x1 union to install in place of the T fitting; unfortunately the nuts were seized pretty good. I've got a healthy coating of PB blaster on them and I'll give it another go this weekend.
6. Repaint the valve covers and balance tube the right way
When we did the engine the first time, my wife (girlfriend at the time) did a killer job of paint removal/prep on the valve covers. Unfortunately I don't think we:
A) used primer
B) used epoxy
C) used clear coat
The paint looks okay, but its dull, dirty, and chipping. I spent a few hours with paint thinner and a rag and removed all the grease and tried to remove all the loose paint. I'm trying to get 75% of the results with 10% of the effort; so I skipped the wire wheel and sand paper to remove 100% of the paint. I'll choose my battles thank you very much! I might have chosen wrong here....after I applied the primer it did a great job of finding paint that wouldn't come off with some elbow grease. It wasn't terrible, but not quite the level of quality I had hoped. Oh well. I carried on and gave the valve covers and balance tube 2 light coats and one medium coat of epoxy primer, red gloss epoxy, and epoxy clear; which is supposed to be good to 500F. It turned out pretty good....but definitely not a professional job. I do think it will stand the test of time and look good from 5 feet away so hopefully I'll be pleased when they're installed. I forgot to grab pics so I'll have to share those later.
7. Relocate as much as possible
I'm trying to declutter the engine bay and do a very mild tuck job (I hope that's the right term for this...). I've already relocated the PTU to the nose panel and I'll be deleting the slave bleeder. I briefly toyed with the idea of moving the main fuse box to the nose panel also, but I don't feel the urge to extend 21 old and critical wires; nor is that area well protected from the elements. The main box will stay as-is.
HOWEVER
There is a small fuse box next to the battery that isn't really noticeable, but can easily be relocated to the passenger side wheel well. I did that Wednesday and it was pretty easy. Yep, that will add some frustration if I ever need to replace one of the 30A fuses, but they've made it 170k miles so far. I'm not to worried. Yes. I'm tempting fate. Be ready to say I told him so.
I'm hoping that the room I'm gaining by cleaning up the battery area can be used to relocate the cruise control pump and actuator to a less conspicuous area either adjacent to, or below the battery. I'll start toying with that soon.
I'd really like to move the power steering pump reservoir, but there isn't a good spot to put it without creating issues; so I'm going to drain it and get it powdercoated to at least help clean up that area.
Probably lastly, I bought 2 cans of GUNK Foaming Degreaser and I'm going to hit the engine bay this weekend with a toothbrush and brass brush and try to remove 30 years of buildup. Most of the improvement won't be noticed as it's on the bottom half of the engine bay, but it's another one of those things thats always kind of bugged me and its pretty easy to "while-I'm-in-there" it.
8. Head repair
More on this later. I plan on going to Menards tomorrow afternoon to pick up some polishing items. Hopefully I'll be reporting back with good news.
That just about brings everyone up to speed. It's been a busy month. I need to order parts ASAP so I can get re-assembling.
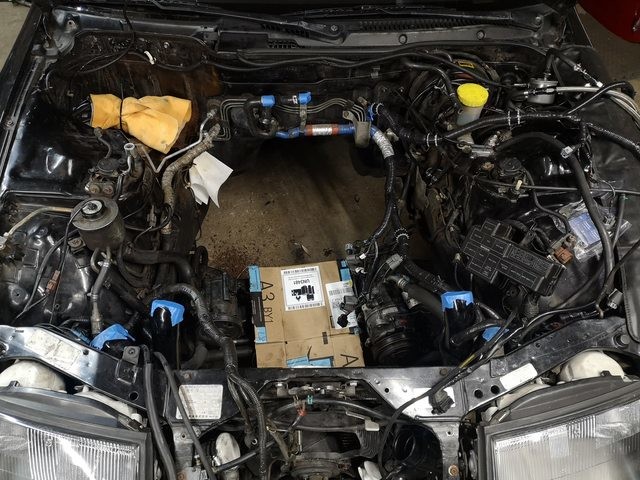
Forgot the third image in squence. These 3 bay shots are before/during/after 2 consecutive nights work. Not MUCH different, but this shows the completion of the harness wrap. Also not readily visible is the work I did on the transmission harness and removing all the toasted wrap adn tape and replacing it with silicone.