You must be logged in to rate content!
6 minute(s) of a 758 minute read
11-4-2012
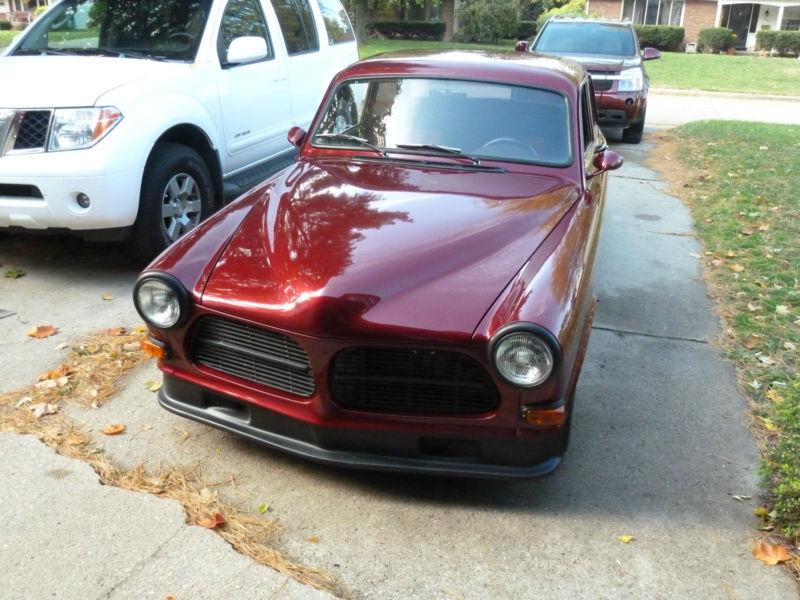
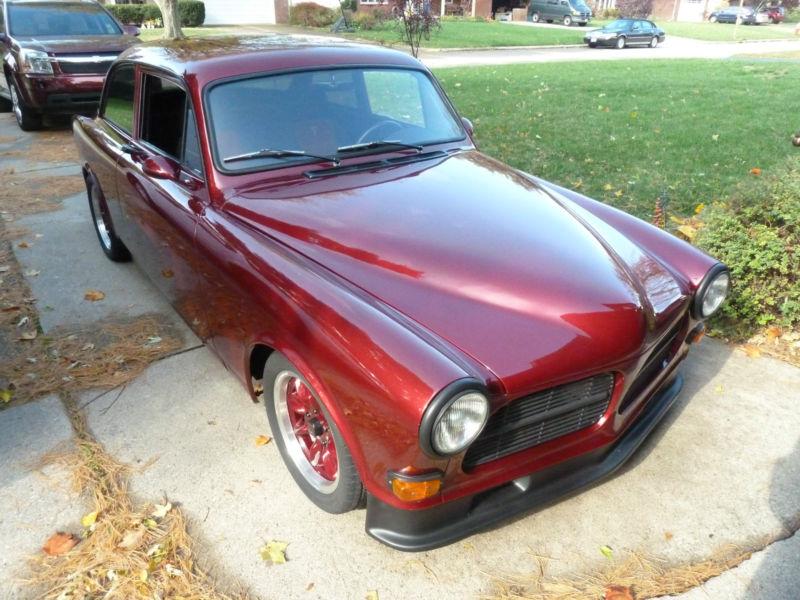
I have been doing alot of thinking about what to do with the front of the car for an air dam/splitter, and havent really come up with a solution as of yet.. I know that IPD has had an air dam out there for quite awhile, and personally I dont think it is very attractive at all, because it removes the front bumper totally..
The question I have is this, Has anyone tried to use the IPD air dam, with the bumper? I know you would have to do some trimming, and even find a new mounting position, but I do think it is doable. I dont want to actually add it to the bulk of the bumper itself, because that would put things back to the stubby appearance, so I want it mounted rearward of the bumper, which should be a much better appearance..
I really think this air dam could look great, if it was mounted correctly and still used the factory bumper, and have this only to compliment and fill out the bottom of the front end. Most of your modern cars all have some sort of small plastic air dam/splitters now, and they are mounted underneath the bumper, but reward of it.. From all the examples of this air dam mounted I have seen, it seems that you have to trade on incompleteness with the front end, so I would think someone has to have made the attempt to have both the factory bumper and the IPD air dam.
I went ahead and ordered an air dam like you see pictured below, so I will have to wait for it to come in so I can see if it will work like I think it could, but I wonder if anyone has any pictures of how they may have run the factory bumper with it?
11/9/2012
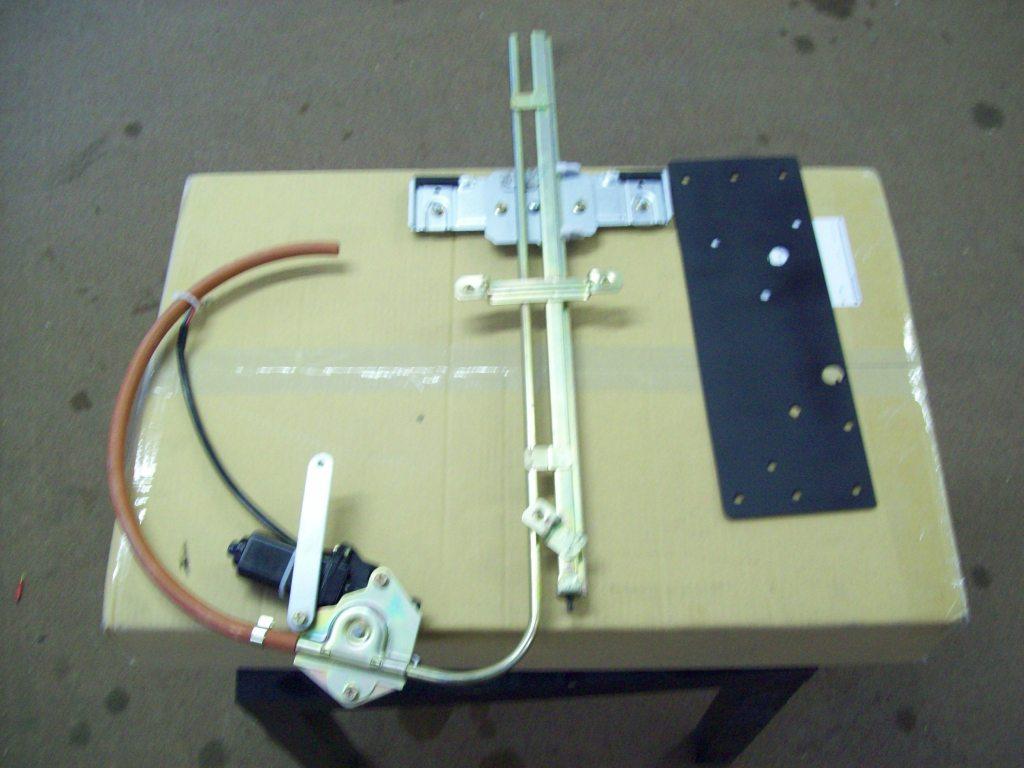
Here are the preliminary pictures of the Power Window Conversion, and I will be posting some pictures of the One Piece Door Glass Conversion also, but that will come just a bit later.. I am waiting on the tempered side glasses to make it in, along with the new channel and belt line weatherstrips to make it in.. The one piece glass conversion is a very easy converion, along with the Power Window Regulator Conversion..
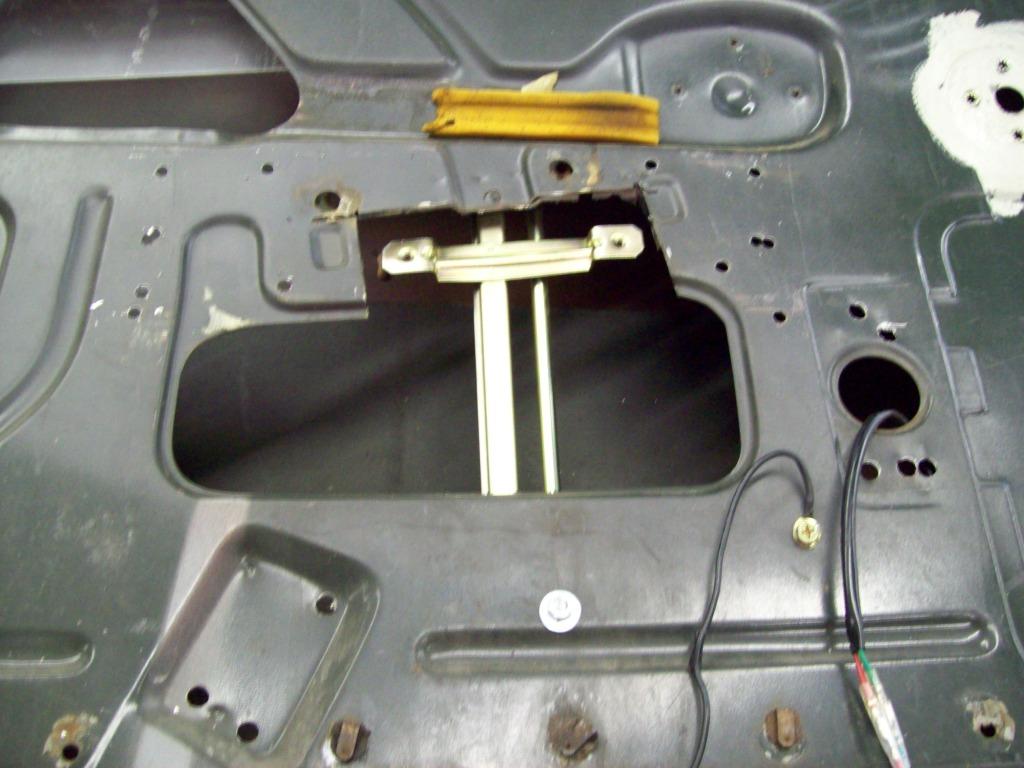
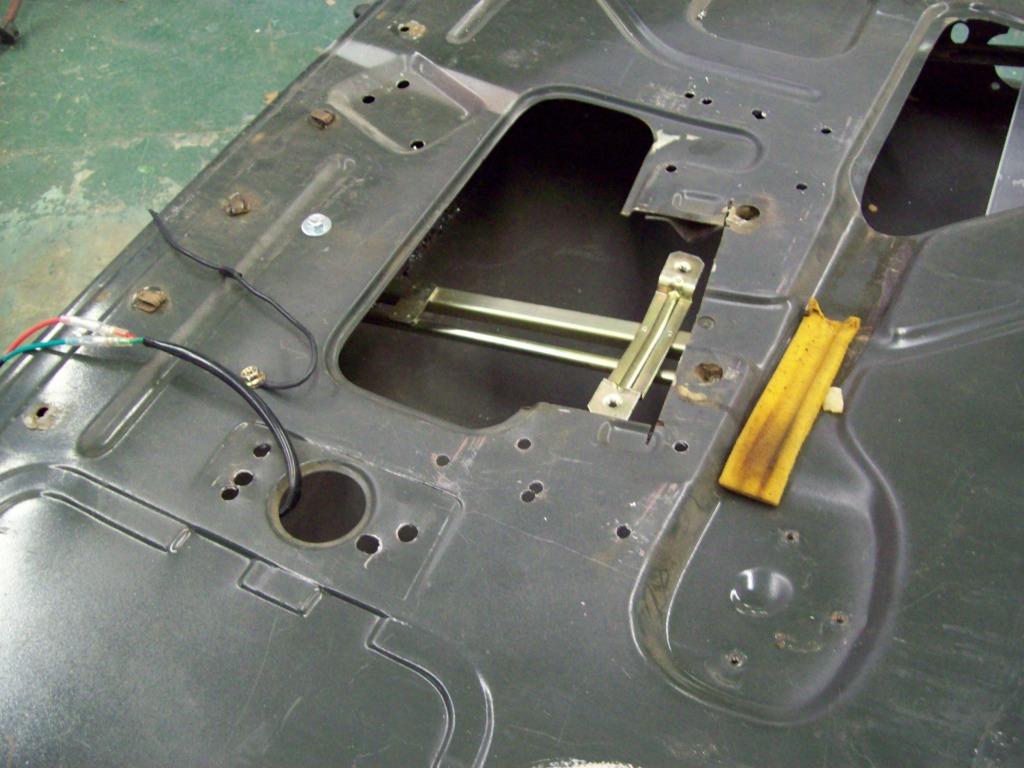
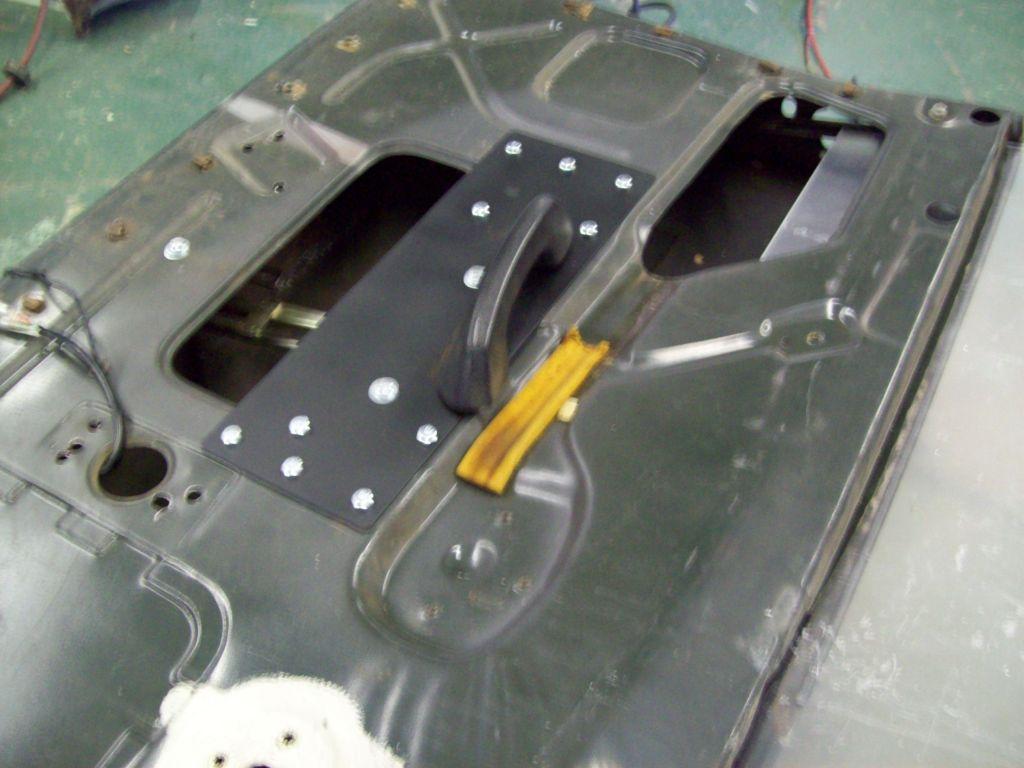
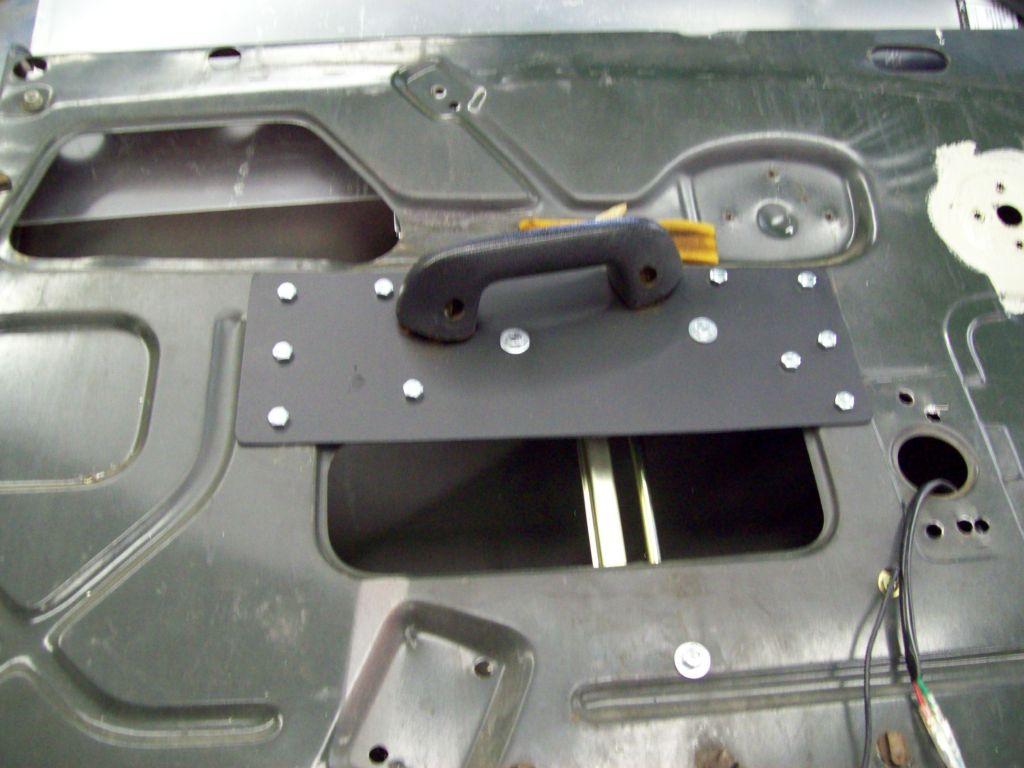
Here are some pics of the power window regulator assembly that I have chosen, because it will fit into the factory inside door opening, and also offers alot of glass support and stabilizing during operation
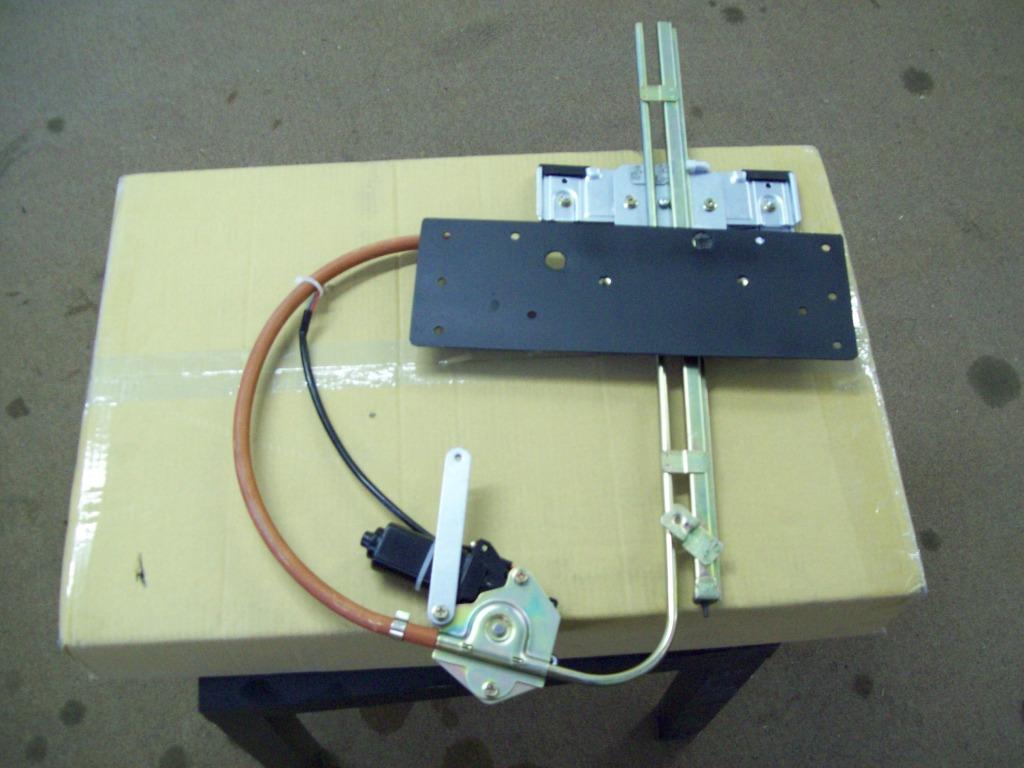
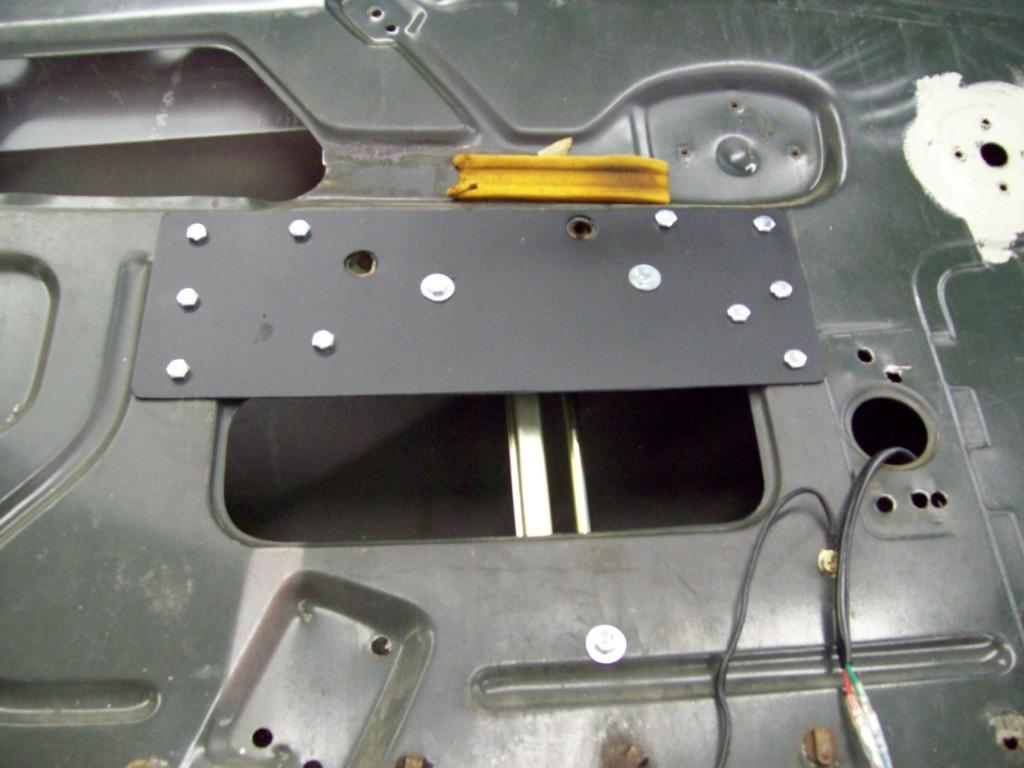
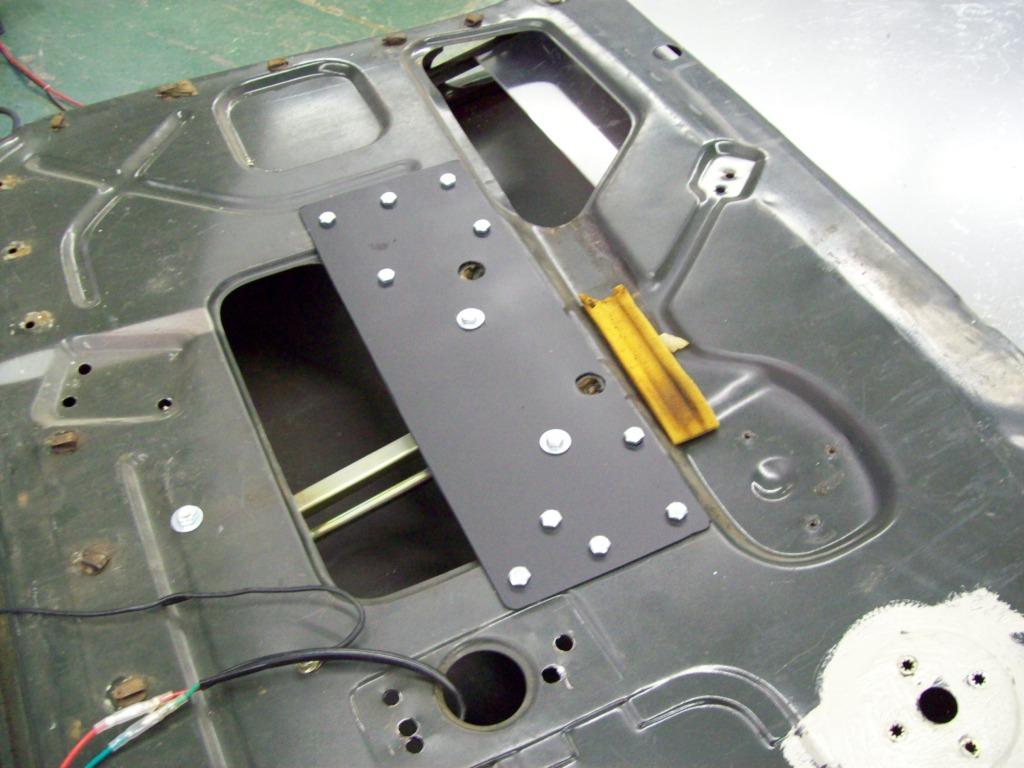
Here is the cut necessary to make the regulator work out to be in the right postion and run angle.. It is a very simple cut, and the supplied regulator mount plate/brace will work as a template for the new brace holes, because it used key reference points on the door to position itself for drilling.
As you can see the original arm rest mounting is not affected, and this new plate actually addes additional rigidity where the arm rest mounts.. The power regulator kit can be used with the original glass and vent window for the guys that like the OEM look.. We will also have a power window switch that actually converts your window crank handle into the power window switches, and works just by bumping the handle up or down.. I am not a big fan of the typical rocker style power window switches and mounting that typically comes with this type of conversion, but our supplied rocker switches are actually compact and pretty nice looking.
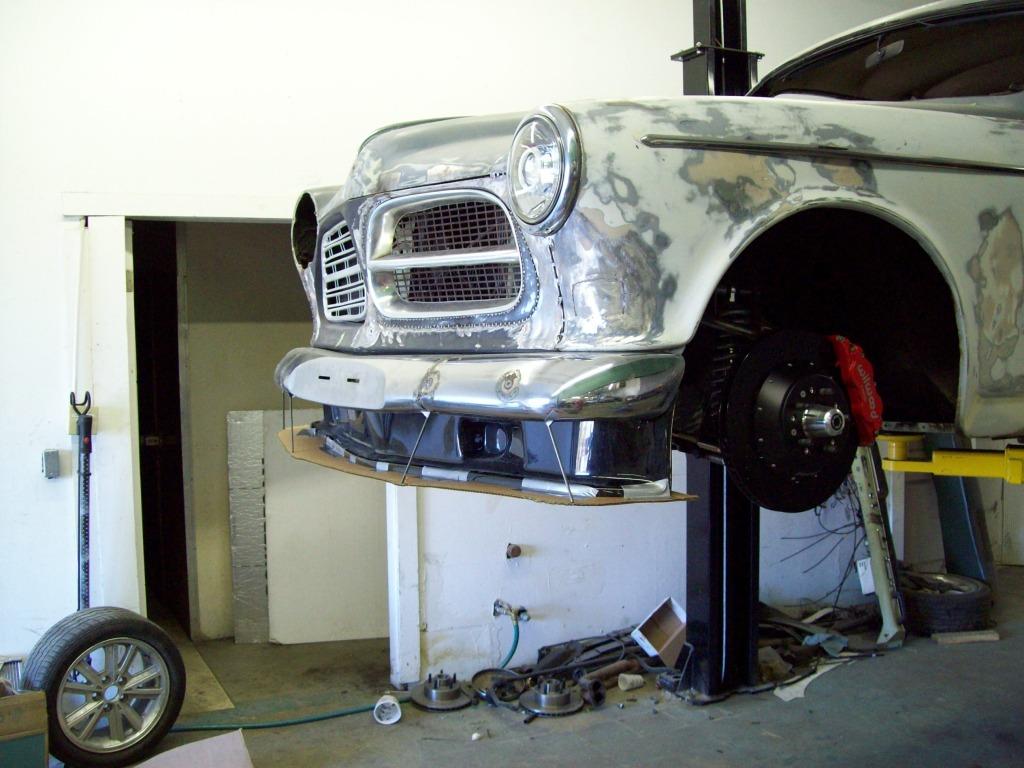
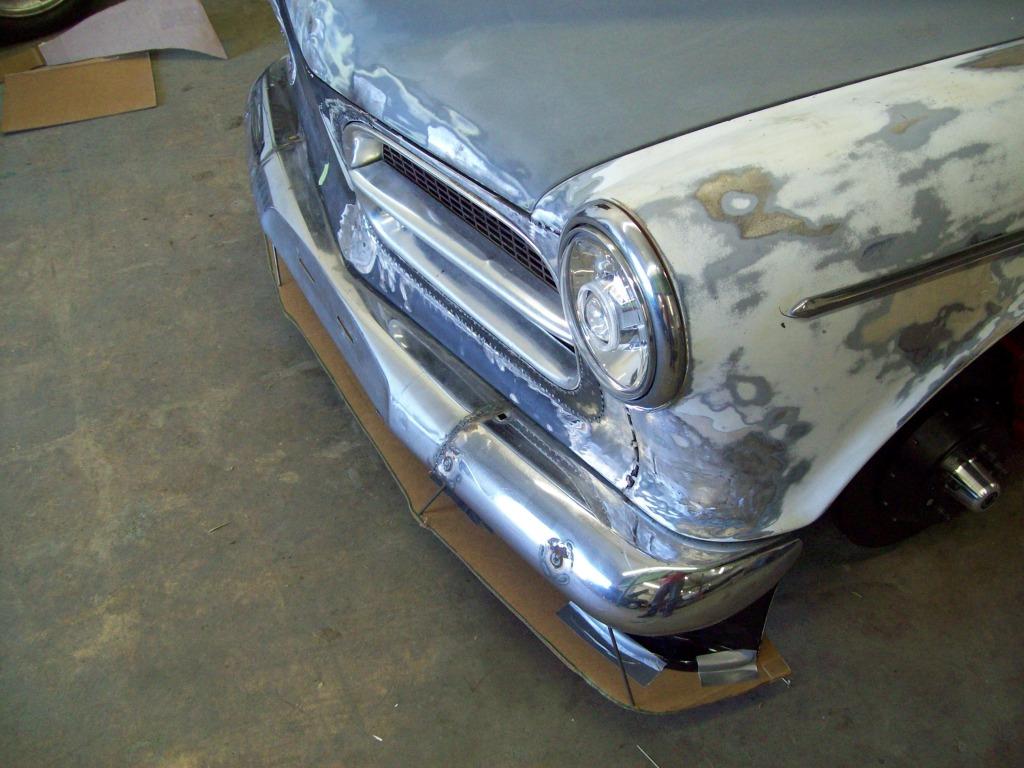
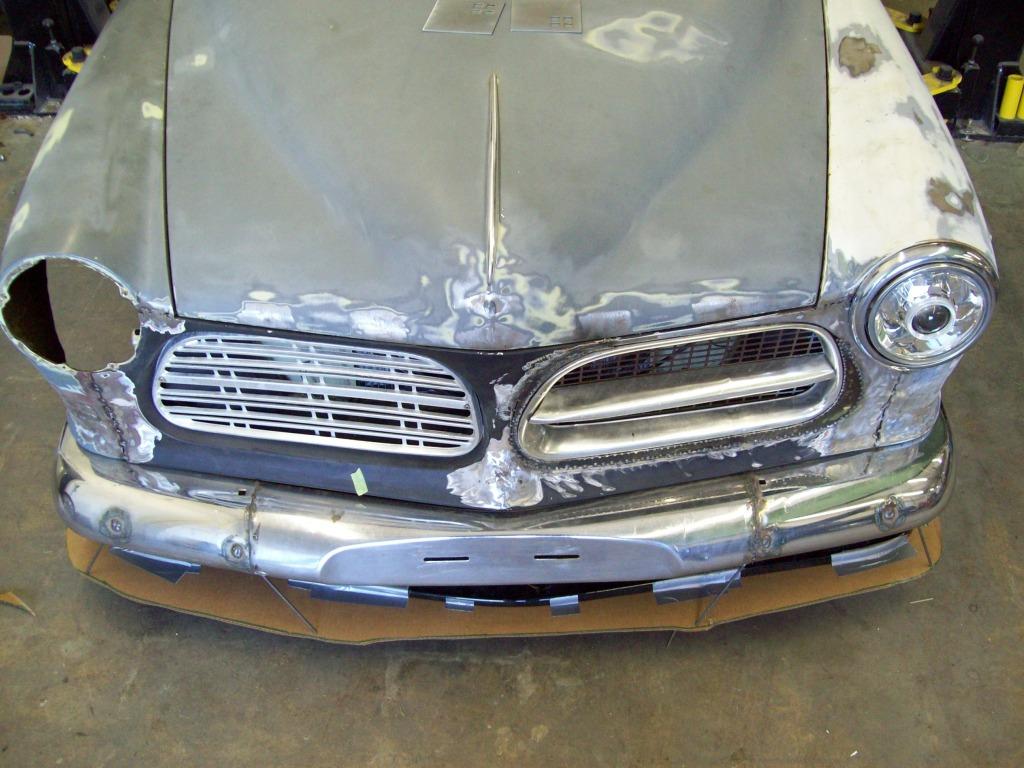
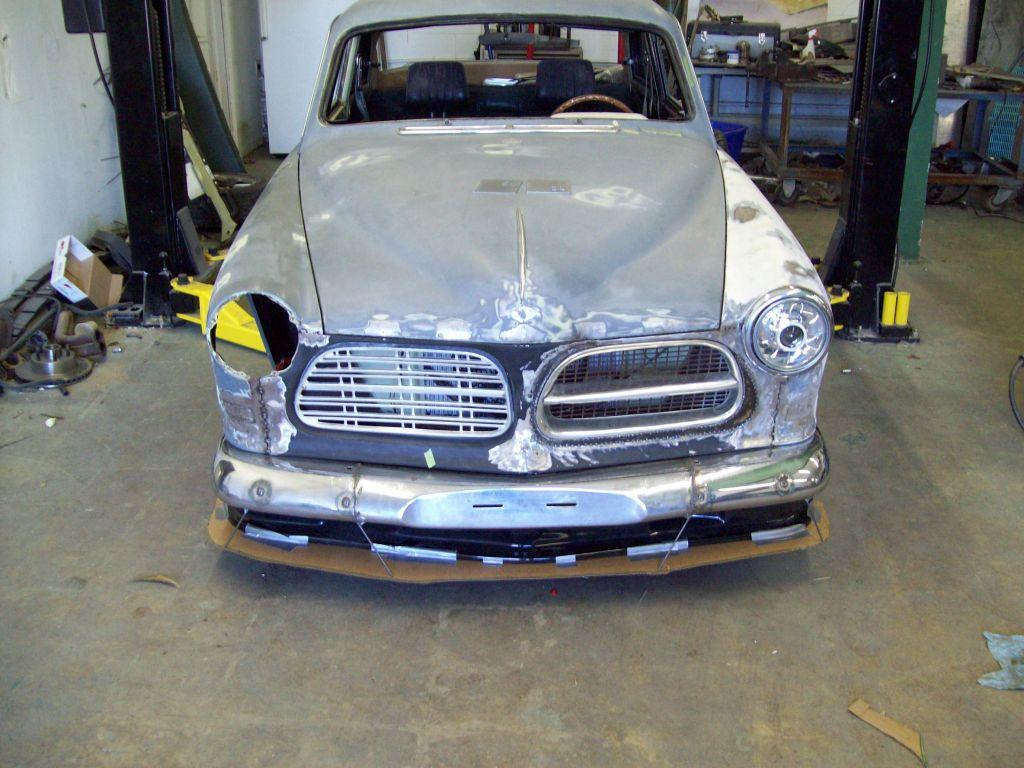
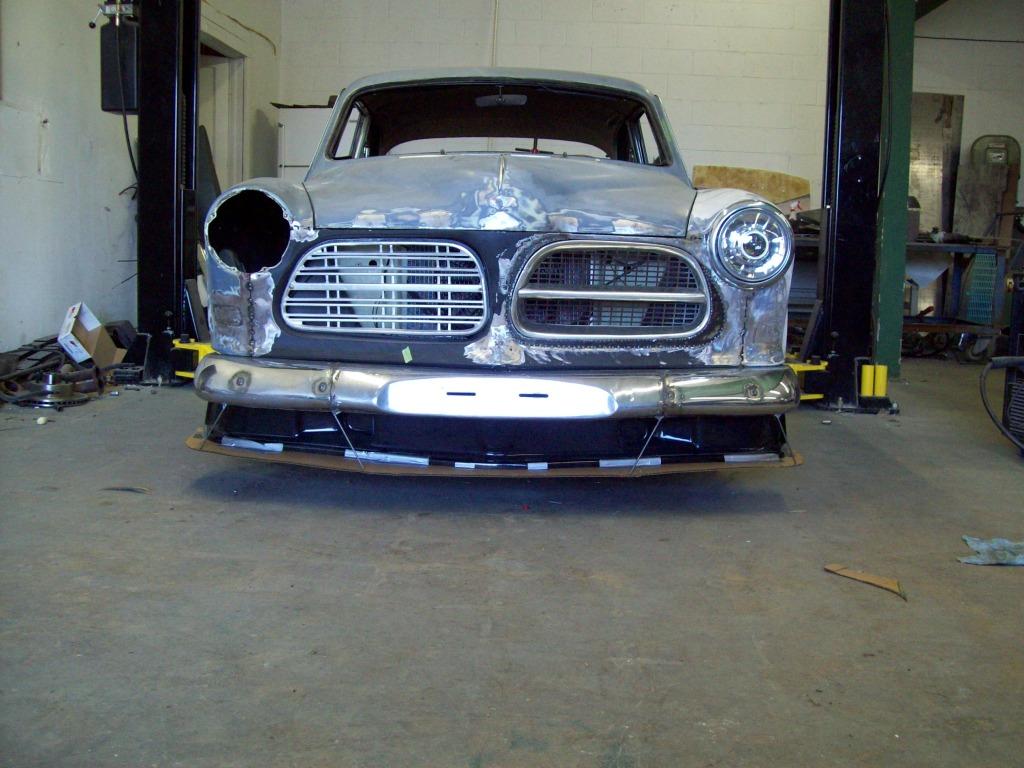
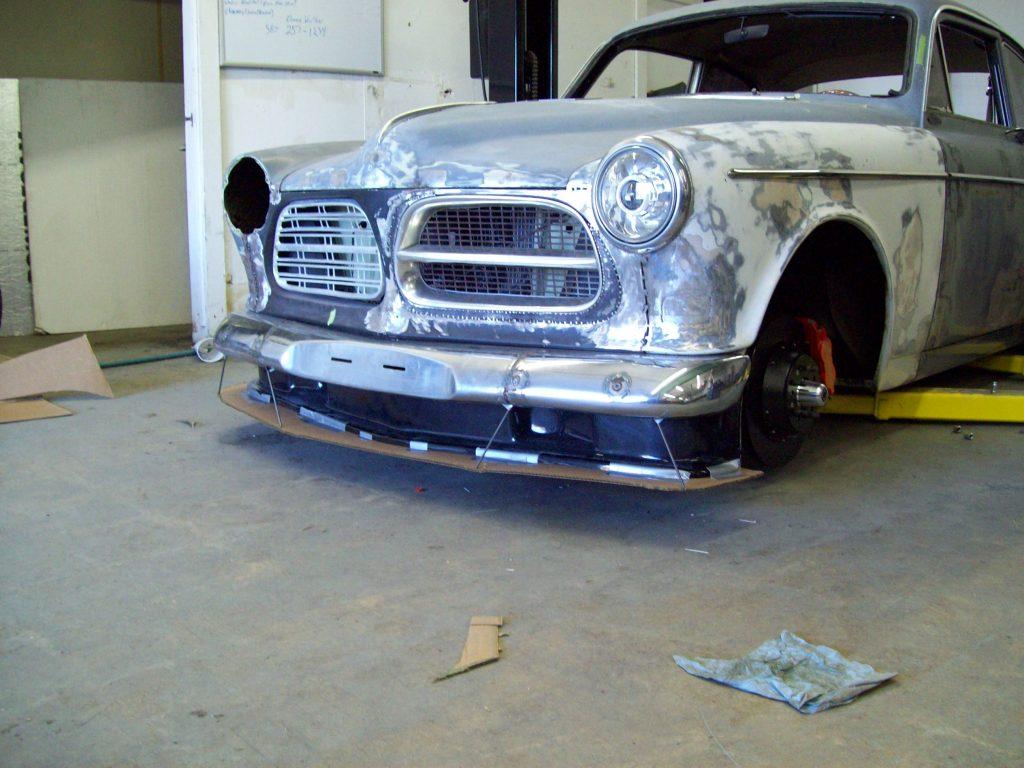
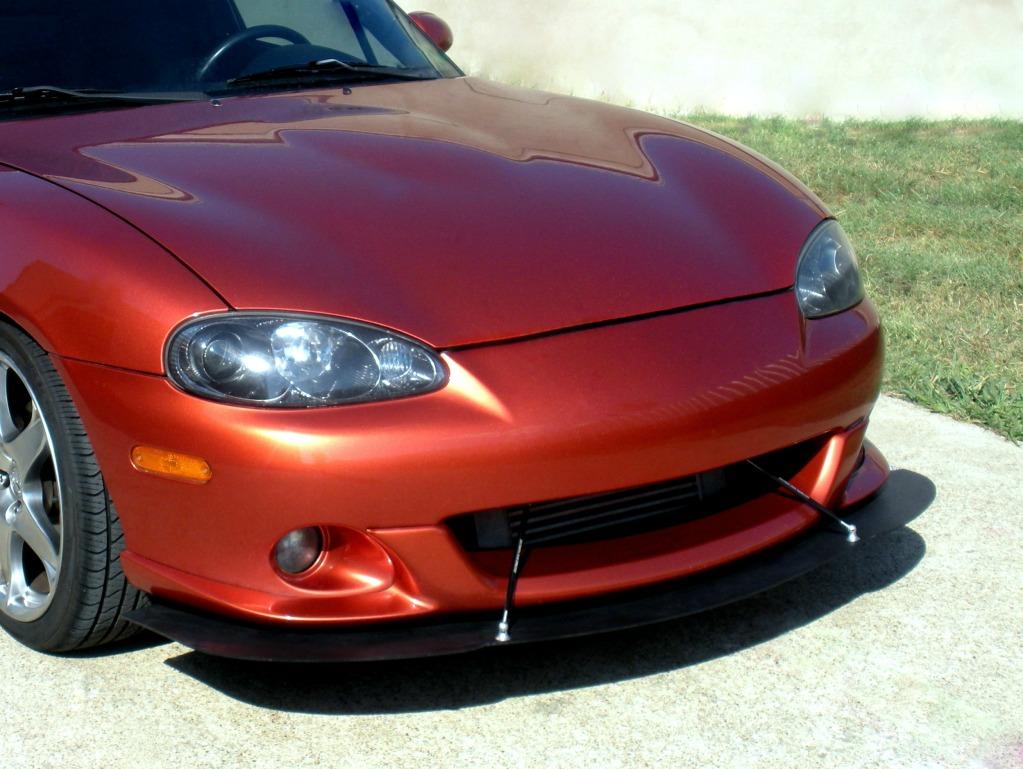
I have an idea to modify and brace the IPD air dam, so it would be more of an adjustable splitter.. I am thinking that I will be able to bring it up and behind the bumper a bit, and have the adjustable splitter wing at the bottom of the air dam.. It would have the turn buckle style adjusters, and would extend forward enough to outline the shape of the front bumper.. I hope that make sense, because that is what I have in my head.. LOL
It would be something like these rough pictures below, with more of the finished look of the turn buckles on the last picture.. I will have to cut out the holes that are in the IPD air dam, and put them on the opposite side, so they will be the proper direction to function and brake coolers. I am am not sure on the 2 or 4 adjuster setup, but this will give you an idea of the direction I had in mind to the IPD alterations.
Keep in mind that these pictures are just rough cuts, because I like to get a Cardboard and duct tape look, before I waste too much time fabricating something that I will just throw away.. I dont have the actual height of the air dam set, because I cant do all that until the wheels make it in, so I can set it up for the proper ride height.. I am expecting that it will be less bulky, because it will have to be brought up a bit more into the bumper/body.
Nice details!
Posted by Diggymart on 7/15/19 @ 1:21:16 PM