You must be logged in to rate content!
10 minute(s) of a 270 minute read
6-15-2009
Thanks for the comments guys. I will definitely let you know once I get the beast running and what car shows I'll attend so you can come check it out if you're in the Houston area.
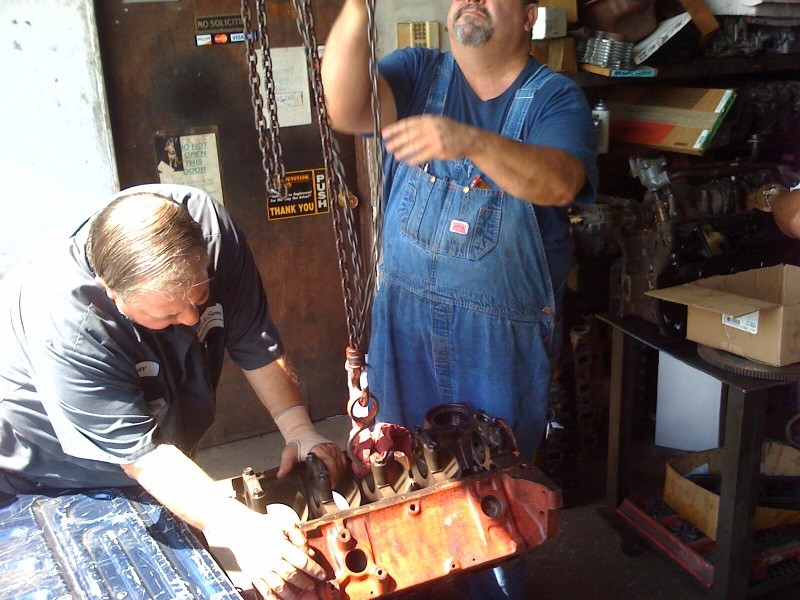
Progress this month has been a little slow. I've been waiting for some funding to come in so I can take my block and rotating assembly to the machine shop. Good news, the funding came in and I'll be taking everything to the machine shop. Now I just got to get a couple friends help me load the block into my truck. Also, hopefully, I'll be getting my transmission from my Dad. He hasn't dug it out of the garage cause it's been pretty hot here in the Houston area.
So I should have some engine and tranny progress coming soon. I'm sure I'll have some questions along the way.
Last but not least, I've figured out how I will mount my radiator in the back and will be making the mount / support soon. Maybe even start on it tonight since I've finally got some free time.
6-22-2009
Dropped the block off for hot tanking, magna flux, honing, rods resized and ARP 383 bolts install, decking to 9.020 and balancing of the rotating assembly.
Will be done Friday, if nothing comes up, and will start putting it together this weekend. Hopefully...
6-23-2009
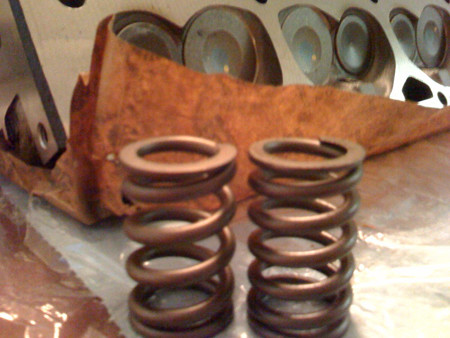
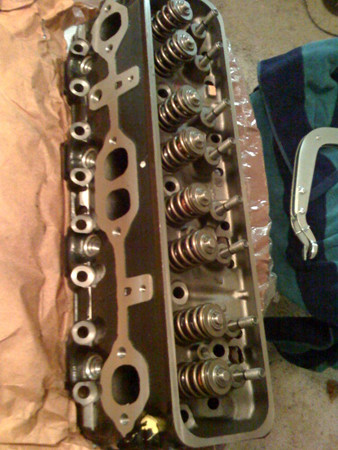
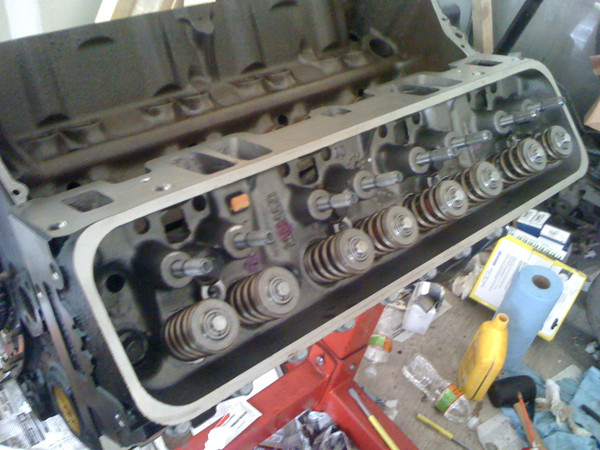
Had a chance to upgrade the springs on my vortec heads last night.
Removed the inner dampers (too much seat pressure).
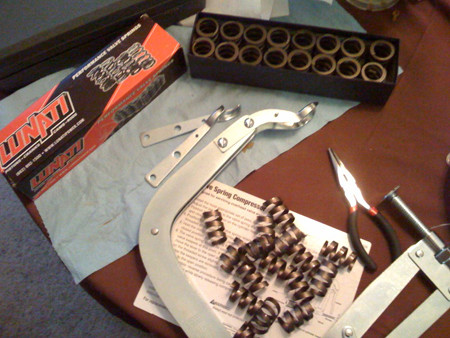
The stock spring (right) compared to the beefy upgrade spring (left) which are Lunati.
Good ole spring compressor. Compress, remove keepers, decompress, remove retainer, spring, install need spring, the retainer, compress, install keepers with even spacers between gaps, and decompress.
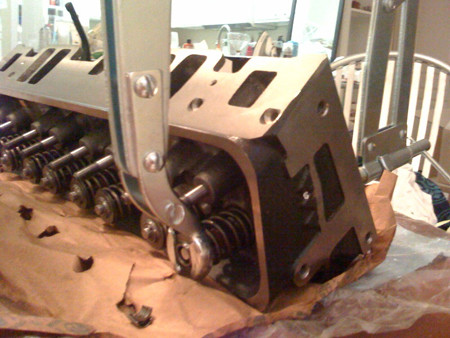
Heads ready to rock!
7-6-2009
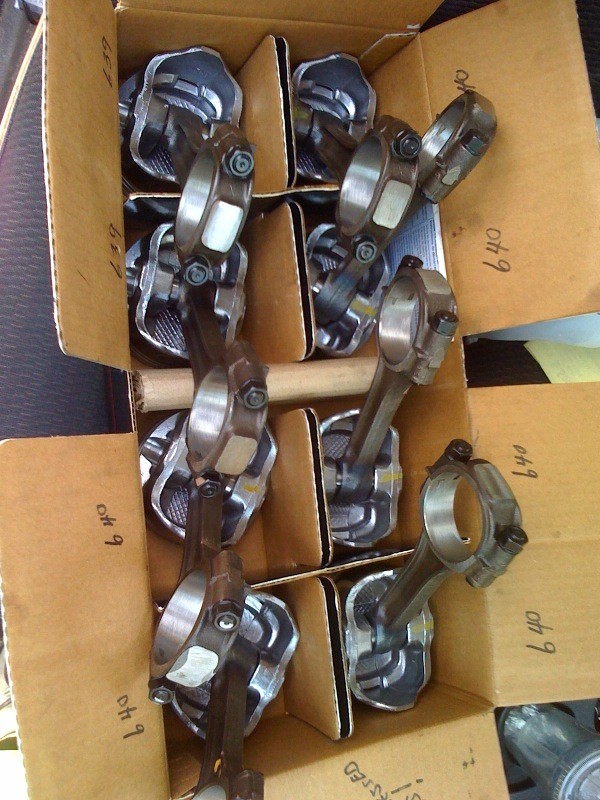
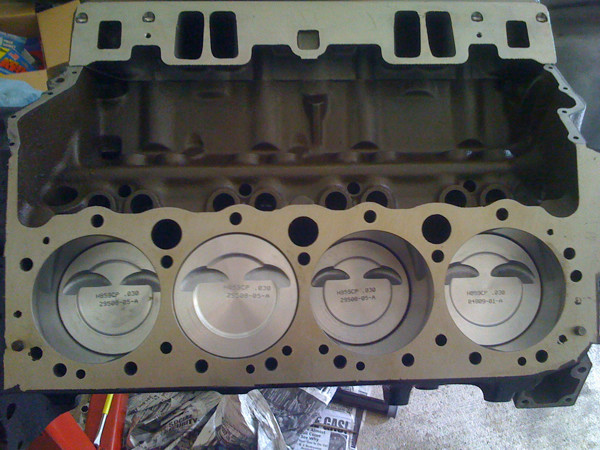
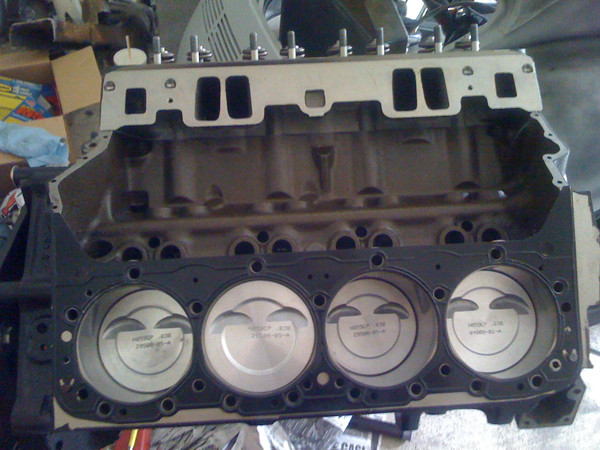
Finally, got my engine block and rotating assembly back from the machine shop. Had it hot tanked, magnafluxed, decks set to 9.020, hone, new pistons pressed, 383 ARP rod bolts pressed in, rods resized, and the rotating assembly balanced. Total cost was $590. Looks like they did a great job.

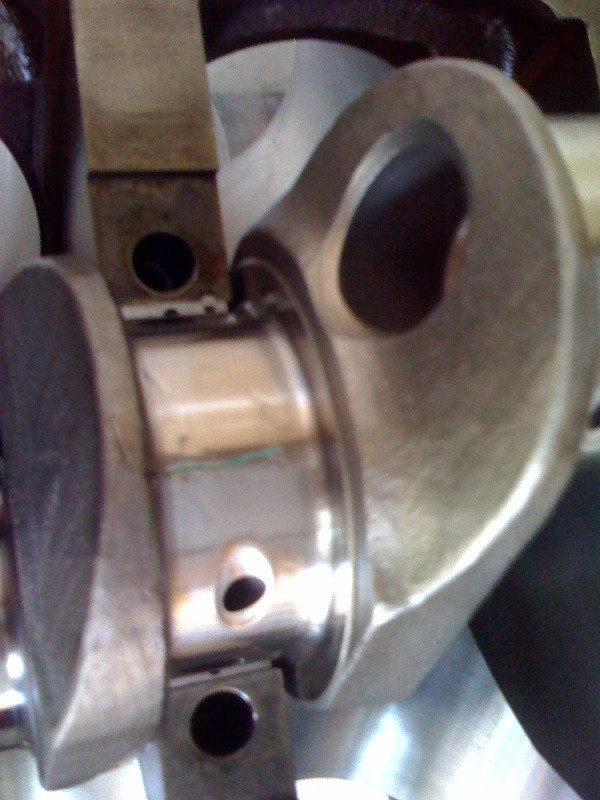
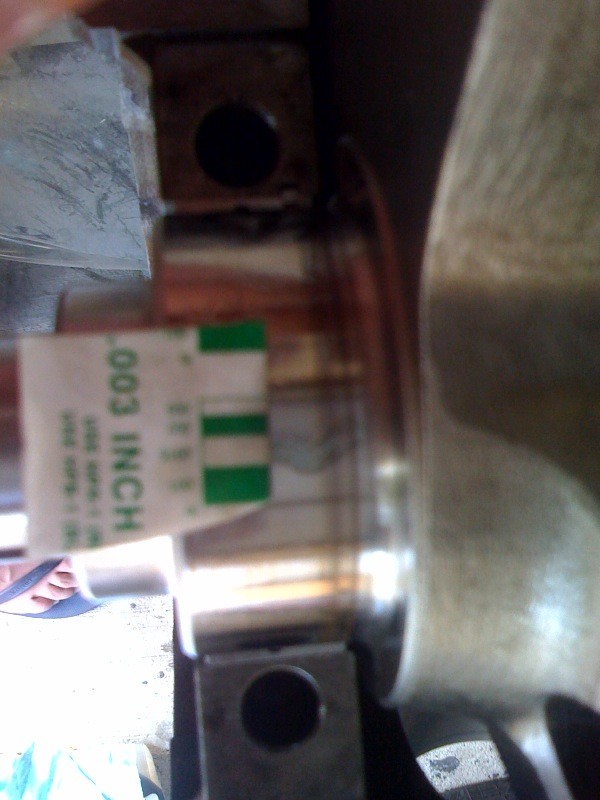
I started the pre-assembly process. I had enough time to plastigage the main bearings and I'm working on plastigaging the rod bearings. So far the mains have come out to a hair under .002 clearance. Once I get all the rod bearings checked I'll then clearance the block for the larger stroke crank and check cam clearance. So far it looks the rods are clearing just fine. I'll check with a feeler gauge to make sure I have at least .050 clearance.
More later...
7-24-2009
Quick update...
I got all my parts back from the machine shop, again. I had them check to make sure I didn't knock any of big rod ends out of round by using the brass hammer. They checked out fine. I had to order a new piston because one got away from me and hit the ground. :o So it then didn't want to go back into the bore smoothly. Seems it was out of round. I had the new piston pressed on the rod. I also managed to buger up the rod journal during pre-assembly because the rod caps were hard to get off. So I had it polish and it pretty much got rid of the scratch. Last but not least, the machine shop figured out why I couldn't get the #3&4 pistons on the rod journals. I had the wrong bearings. Apparently you have to have narrowed bearings because of the extra fillet machined on the journals that give it extra strength. I wasn't too upset I had to buy another set of bearings because I now have some Clevite 77 high performance mains / rod bearings now rather than the cheap Summit bearings.  This thing is now going from a cheap project to an expensive one. LOL!
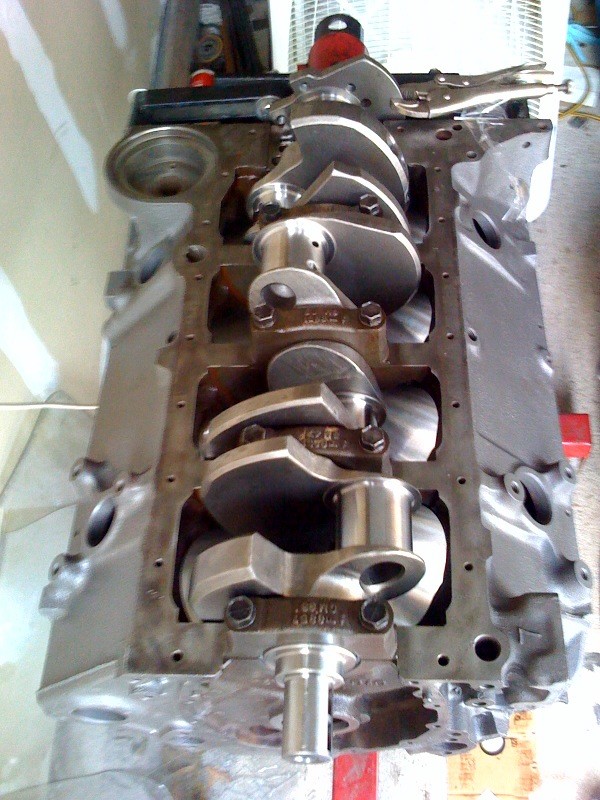
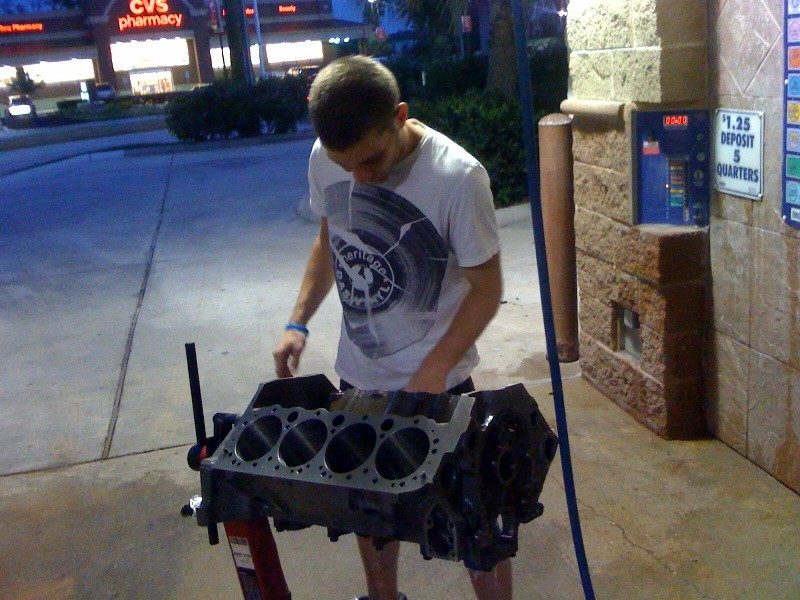
So all those problems were taken care of. This past week I took the engine block to the car wash to give it a good bath. I wanted to make sure I got it super clean just to be sure there's no left over metal in the block from machining. I had some help from my fiancé's brother.
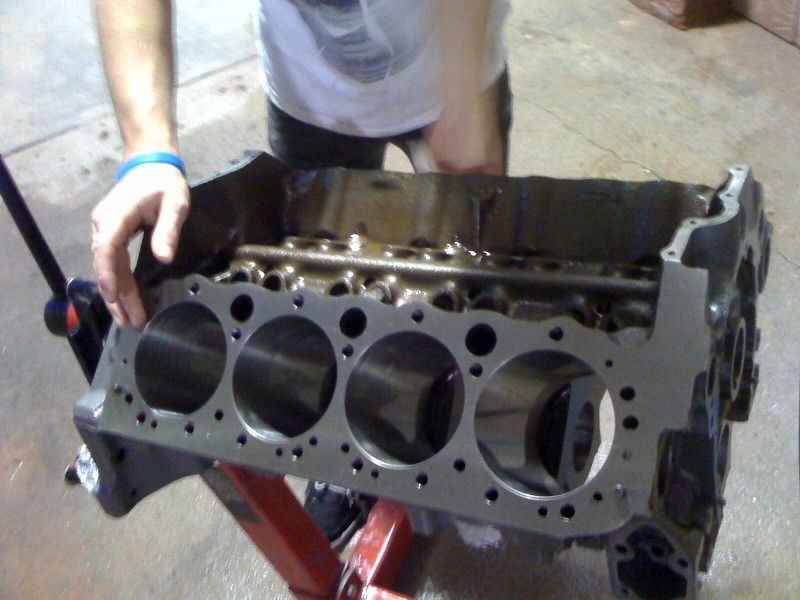
Austin wiping the bores down, after hosing it with a can of WD-40, giving it the "paper towel test". I cleaned the block with an engine cleaning brush kit.
When I got the block back from the machine shop I had them leave it bare. No plugs, cam bearings, nothing, because I wanted to install everything myself so I can learn. Months ago I bought a cheap cam tool from summit (summit brand tool). So I gave installing the bearings a try. Well, I managed to ruin a set of bearings and had to remove them because I was using the tool wrong, I think? To remove one of the stubborn bearings I had to put a screw driver through the oil hole and bang out the bearing that way which bent the bearing into itself. Needless to say, I got some bearing shavings in the block. So I had to the load the block back up for another wash. I then had to buy a new set of bearings, which is fine cause I bought a better brand / set (I had a summit bearing set), and I then modified the cam tool. It worked a lot better and thought it should've came the way I made it work. ;D I'll take some pics and show you the mods.
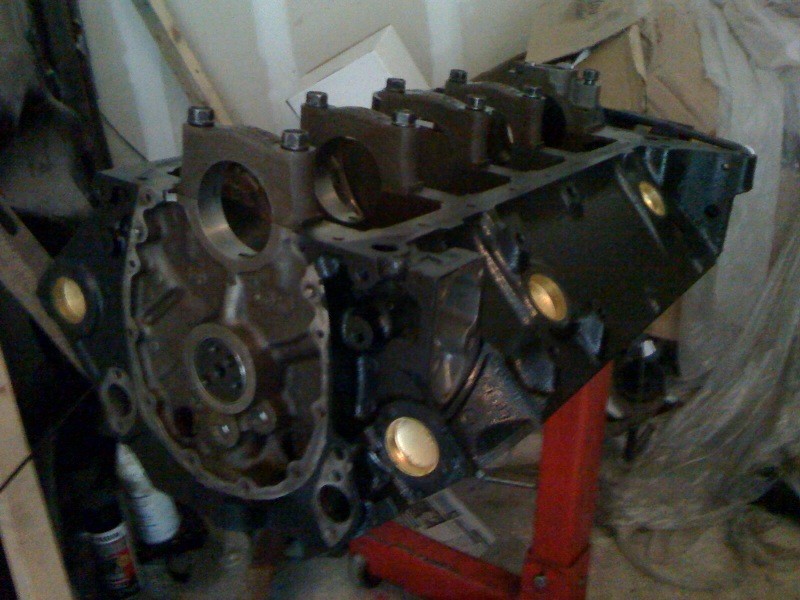
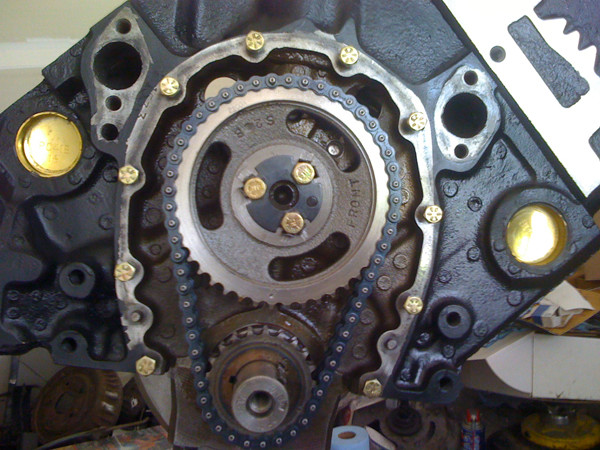
Any who, cam bearings are in, I masked off the engine and painted the block black, knocked in the freeze plugs, and trial fitted the cam. So far everything is going smoothly, for now. ;D
This weekend I'm going to try and have the short block assembled and sealed up. Just like the machinist told me, "You might accidentally get this thing together after all!"
8-4-2009
Here we go. Here's some pictures of the build.
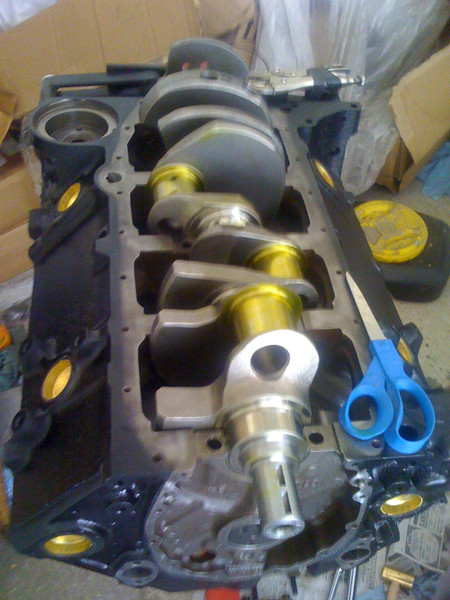
Here's what the crank looked like when I got it back from getting it polished after I boogered up the crank (small scratch). When I got to the machine shop I thought, "Wow, what kind of crank is that with the gold journals?" Haha.
I wish I would've take a few more pictures while we were building, but I was so into the build the last thing on my mind was taking pictures. The day flew by fast.

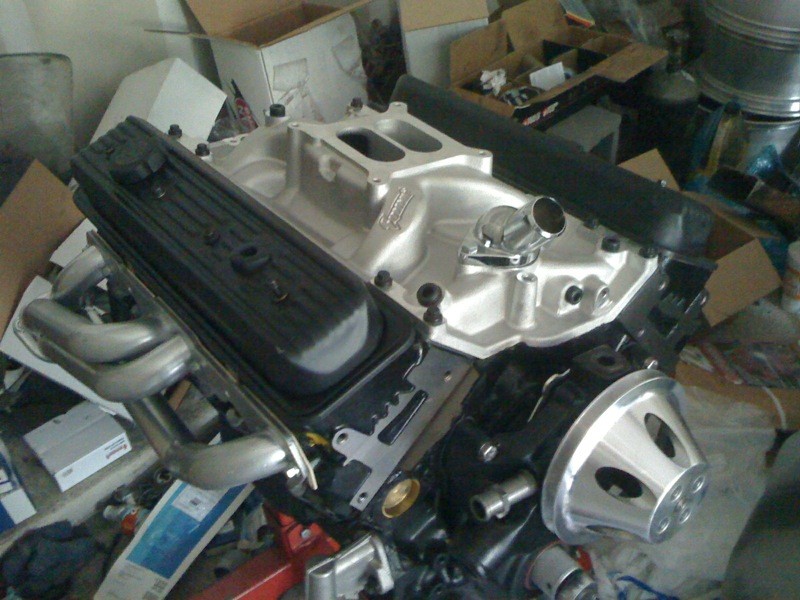
This last picture the intake, valve covers, carb, and air cleaner are all just sitting there. I was anxious to see how it would look.
I'm going to work on it some more throughout the week and I'll hopefully have it finished by the weekend. Putting an engine together takes much longer than I thought.
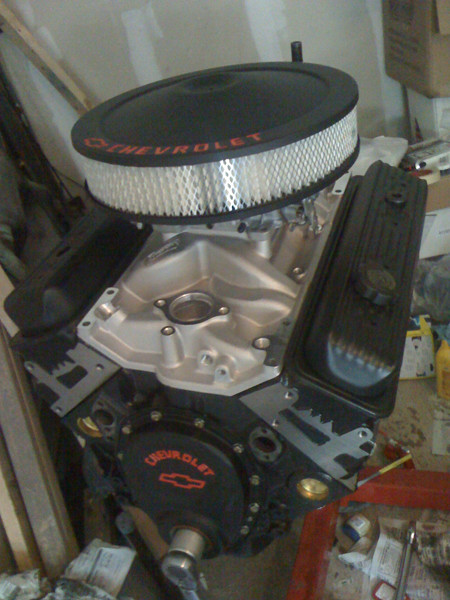
8-10-2009
Just about finished. All that's left to do is add the cam break in oil suppliment and Rotella T oil, prime the oil system, install the distributor, install carb / air cleaner, press on the damper, install lower pulley, and setup the alternator.
The plan is to get these things done during this week.
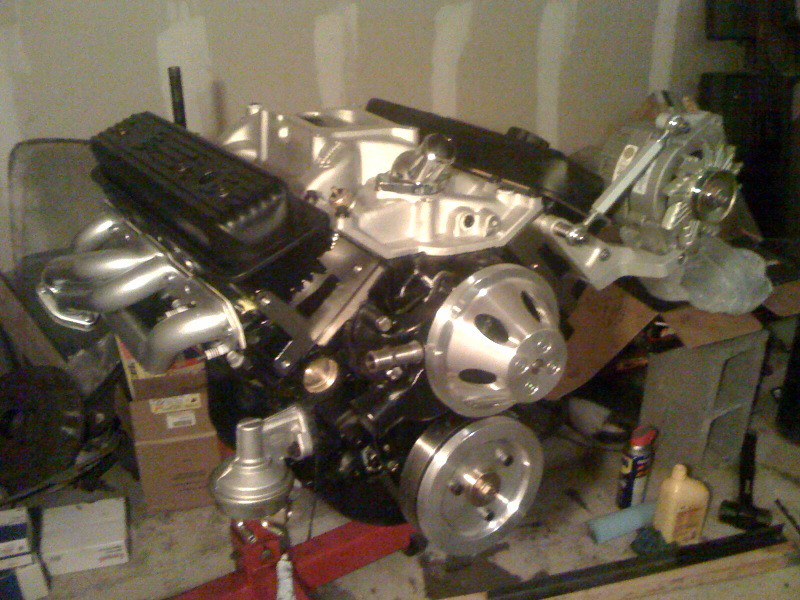
8-20-2009
Almost there. I'm so close to finishing I can here it start. This past weekend I moved into my new house so I really didn't have too much time to work on it. Also, part of the hold up is I'm having to search for a 7/16-20 4" grade 8 bolt to hold on the harmonic damper, also so I can rotate the engine while priming it and so I can set the #1 piston to TDC so I can drop in dizzy and set the initial timing . Other than that it's about 98% complete.
This weekend, hopefully Saturday, I'm going to drop the engine in the bug for the first time. Mainly cause I have to get it out of the complex by the end of the month. So my goal is to get it home this weekend which is right down the street. I've installed the motor mounts and frame pads, not pictured, and the engine is just about ready to be dropped in.
Impressive!
Posted by Diggymart on 4/27/20 @ 2:40:48 PM