You must be logged in to rate content!
13 minute(s) of a 270 minute read
5-4-2009
Alright, alright...(in my best Matthew Maconha voice) Progress.
Sandblasted the diff cover inside / out and the shock / u-bolt mount.
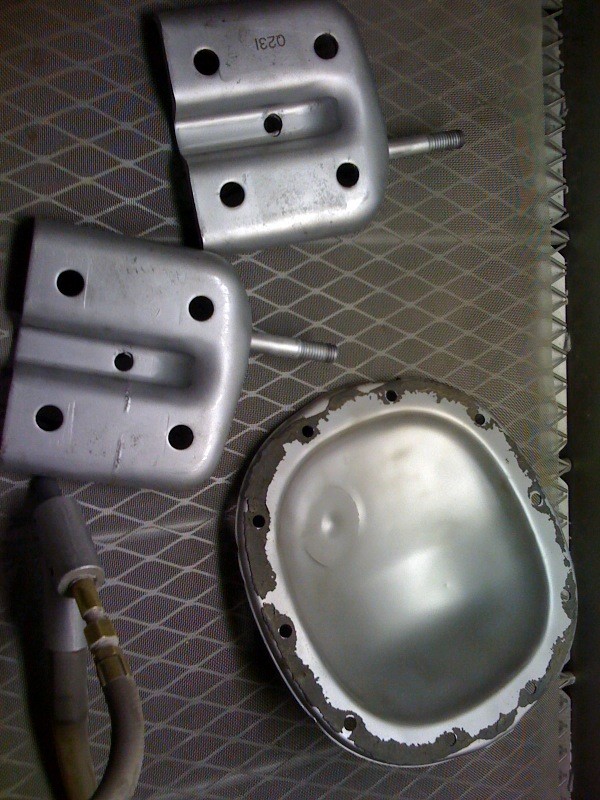
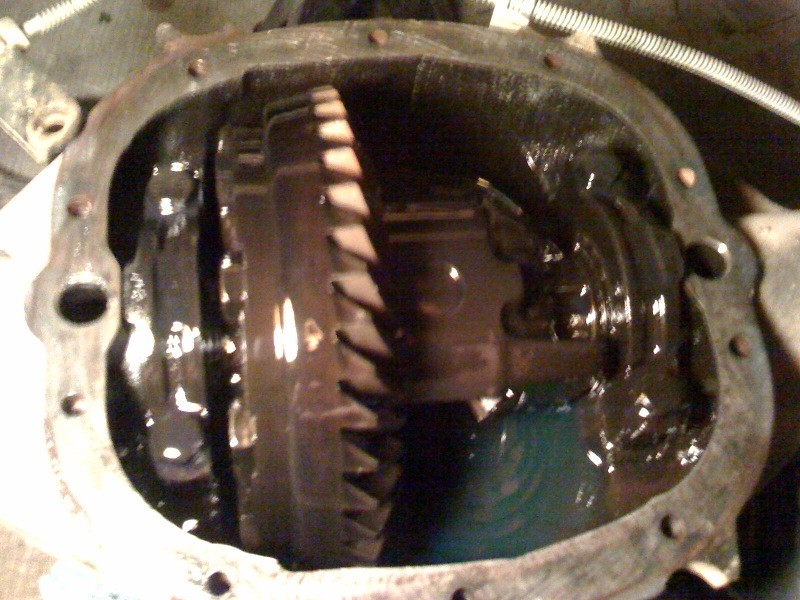
Drained the gear oil, which didn't look too bad, and added the new stuff after scraping away all the old gasket, on the diff cover and matting surface, with a gasket scraper.
I sand blasted the diff cover at work. Here it is installed. I used some of edelbrock's gasket sealer on both mating surfaces to ensure it seals up nicely.
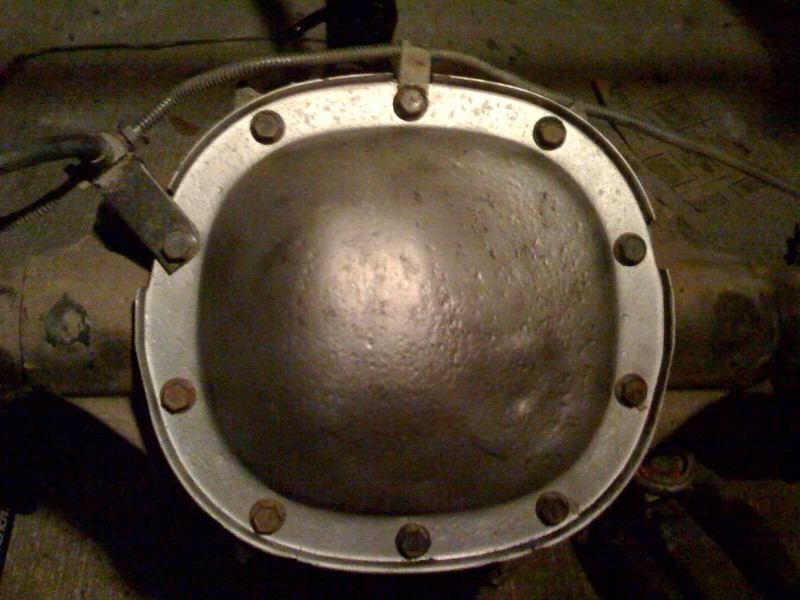
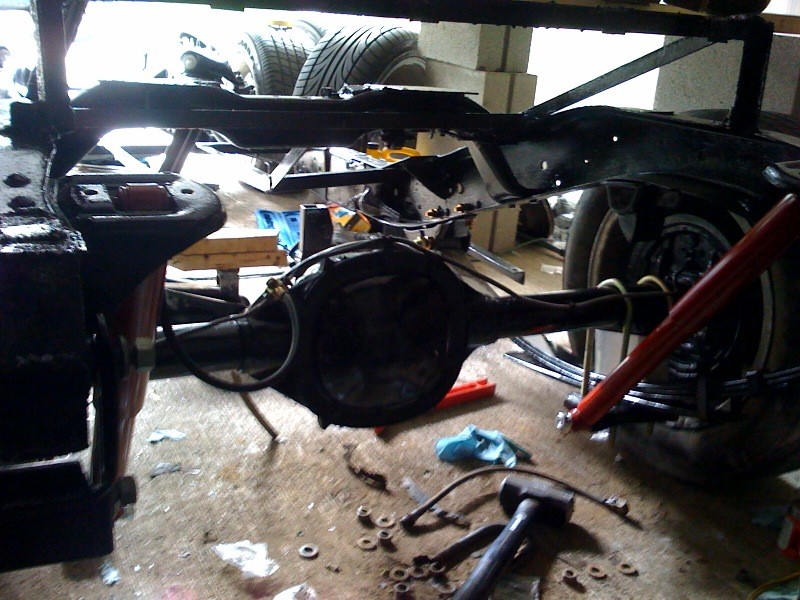
Here the rear is after a good wire brushing and painting with some Master Series. It came out decent even though there still was some build up I couldn't remove. Seals still must be good cause there was no leakage after it staying like that for days.

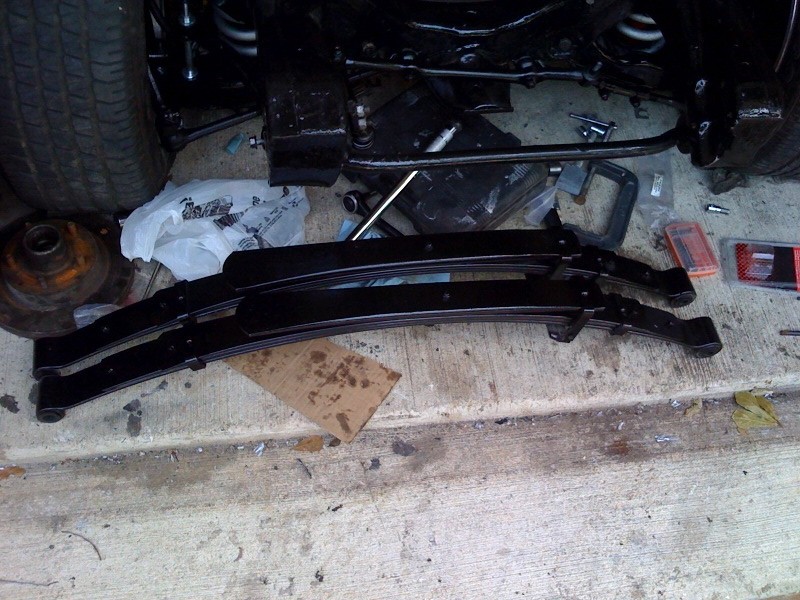
Painted the shock mounts, leaf springs, and shackles.
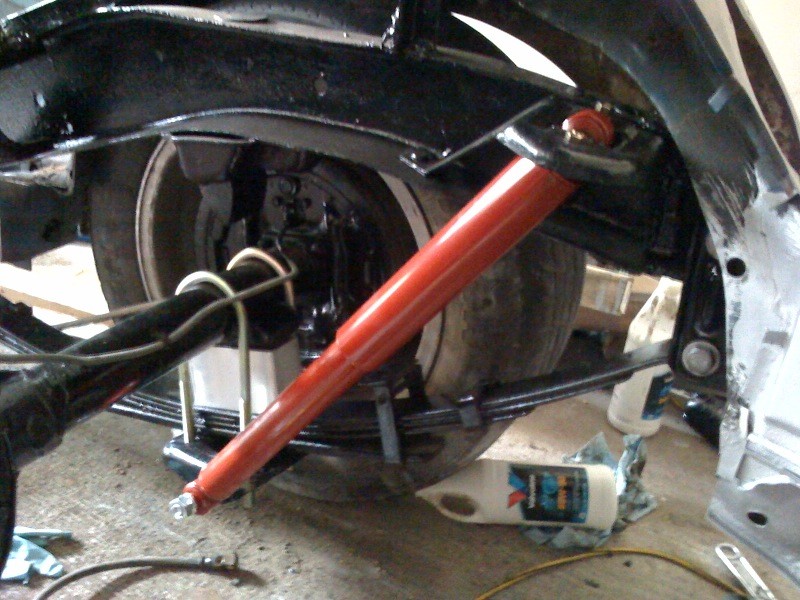
Here's a picture of the completed rear. Well, minus the shock tower bolts which I later added. Everything is hand tight for now cause the rear will need washers or something to make up for the extra space left by the .5" narrower leaf springs. Once the body is secured and I have the 18"s on I'll do a final setup of the rear diff.
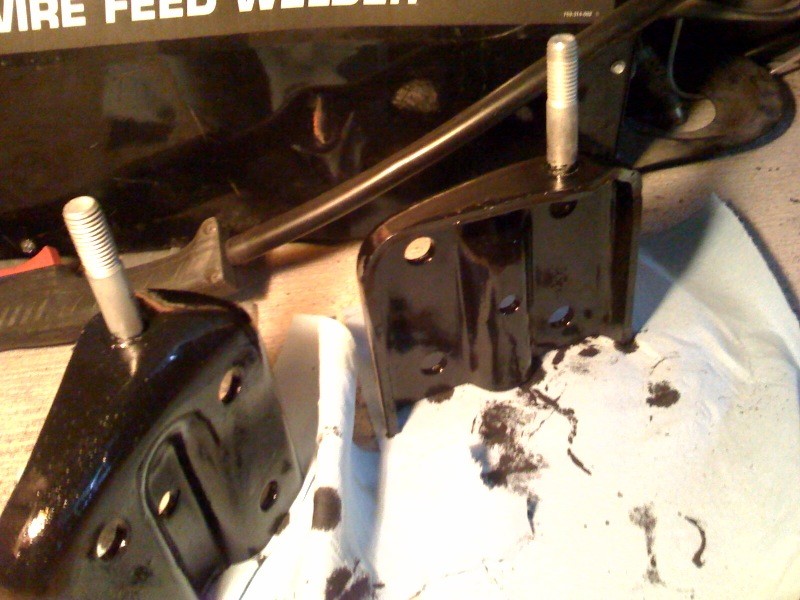
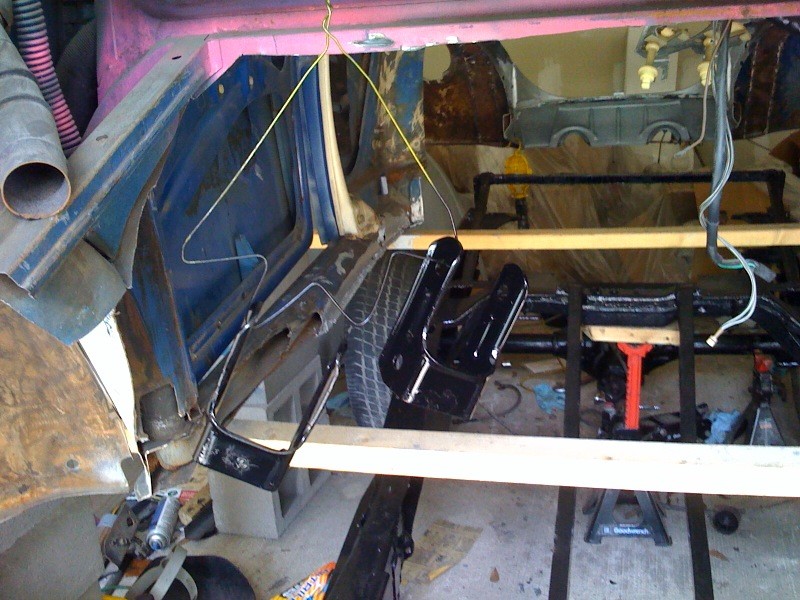
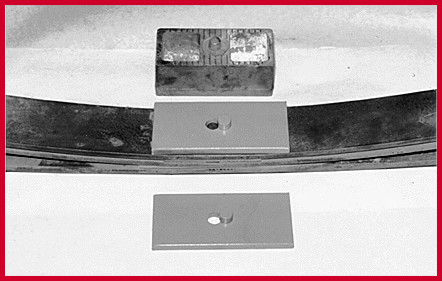
I had decide that I would move the front leaf mounts forward and move the rear back on the leaf springs to make up for it. I did this to help keep the shackles away from the fenders. They were an inch away from the fenders with the way it was previously setup. Well, that didn't work out so well. Here's the front mount moved forward 2". I drilled 1/2" holes to secure the mounts and drill an over size hole so I could mount the Isuzu leafs. The 3/4" were not cheap. They look manly though.
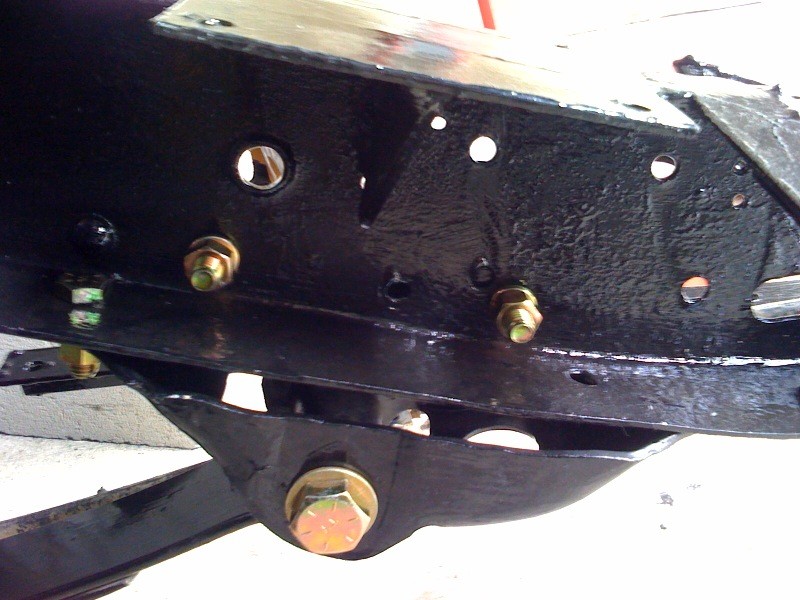
You can see that the is now further away from the inner fender. The problem I ran into is moving the rear diff back 2" started having a weird effect cause I'm moving further up the arch of the spring. I planed to secure the rear by making something similar to these.
Maybe I'll try just an inch instead of 2". Or perhaps I'll make some shackles so that they're not so close to the fenders.
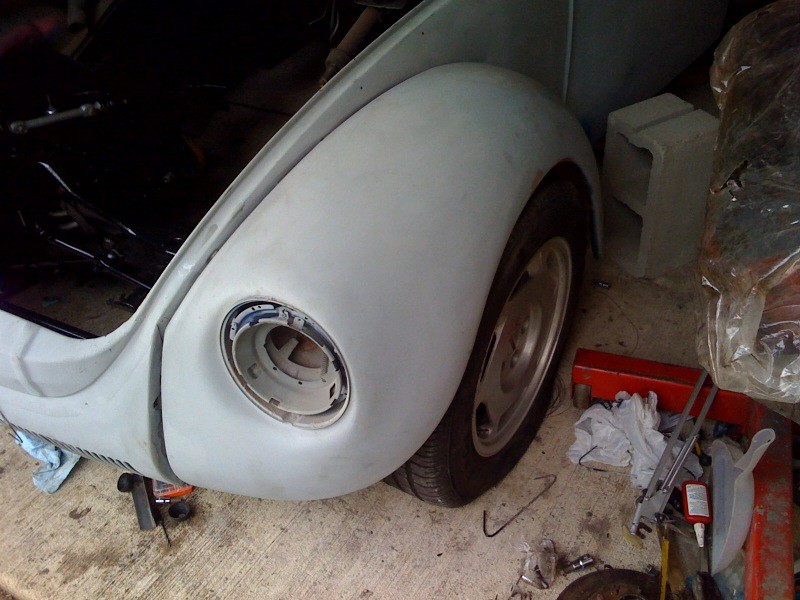
Here you see the rear it reassembled with and the body it back on. I tried rolling the chassis out so I could take pictures of it 95% finished and so I can clean up my garage but it was bumping into the boards that support the body. So I figured I'd put the body back on. It's been sitting up on them blocks a little to long for comfort. ;D That and I wanted to see the new stance with the 2" lowering spindles and the 3" block in back.

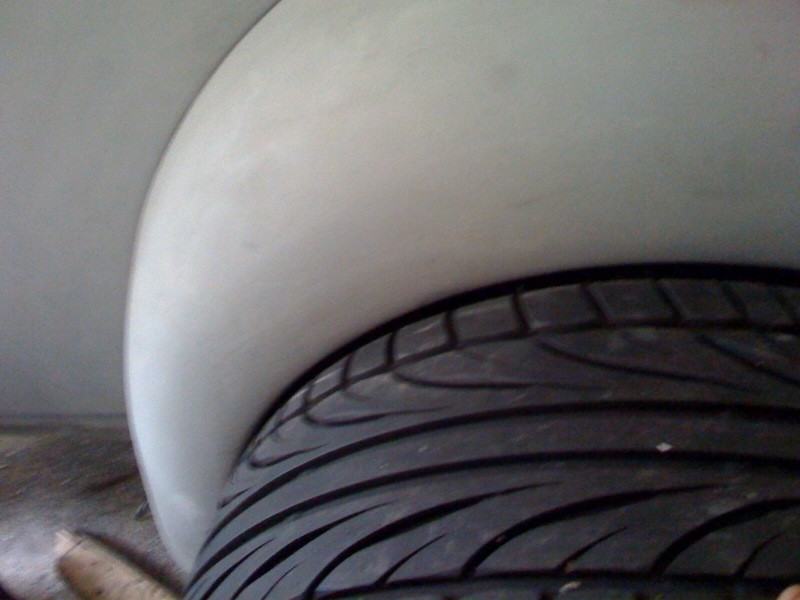
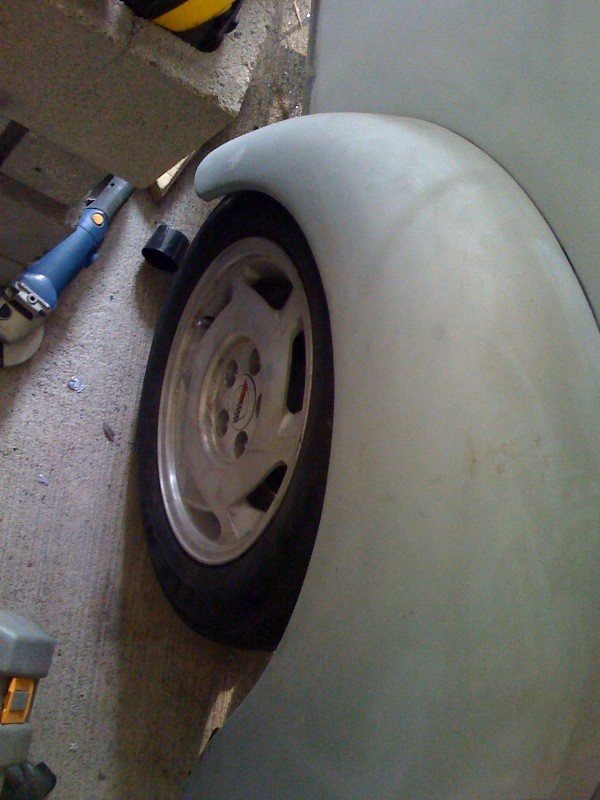
From this angle you can see how the 18" wheels will be very close to the wheel leaving very little of a gap, which is what I wanted. The tires will tuck into the fenders. I was just wanting to see how things looked.
These are going to look nice. I'll have them on next progress post.

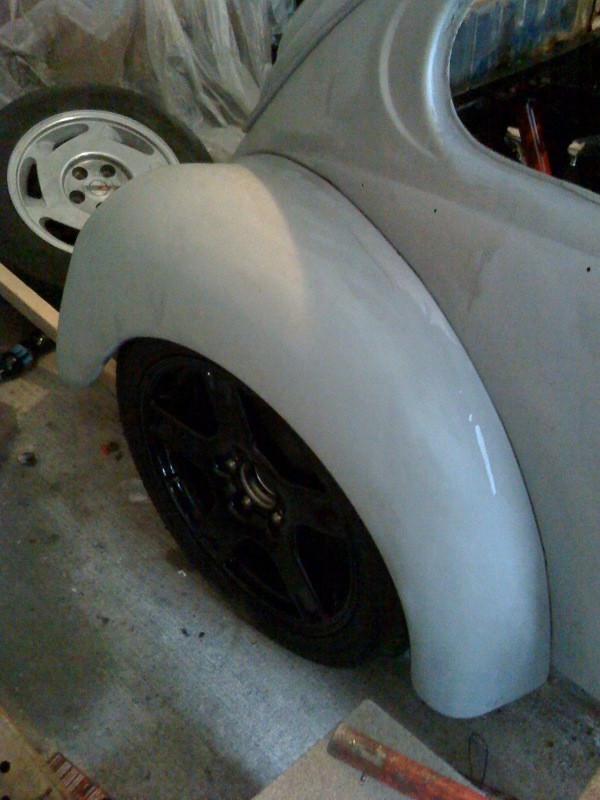
She sits fairly low. Even though a only did a 2/3 drop it seems almost slammed when I stand next to it. I'm really loving the stance and I'm sure it'll go down another 1-1.5" once everything is in and settles.
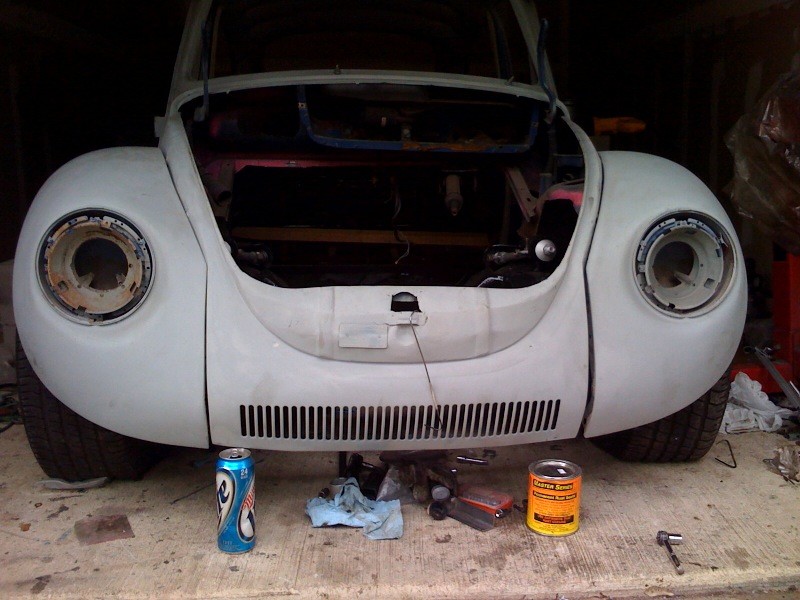
The front end aligned up nicely. The passenger wheel was 2" further inside the fender and make the car look off. Now, they're even and have the same wheel gap.
Here's the problem I was running into. The arch of the leaf spring combined with the lowering blocks pushed the wheels forward. I can move the axle back that would just amplify the effect.
I'll get her sitting right again. Next time. If it ain't one thing it's another.
5-7-2009
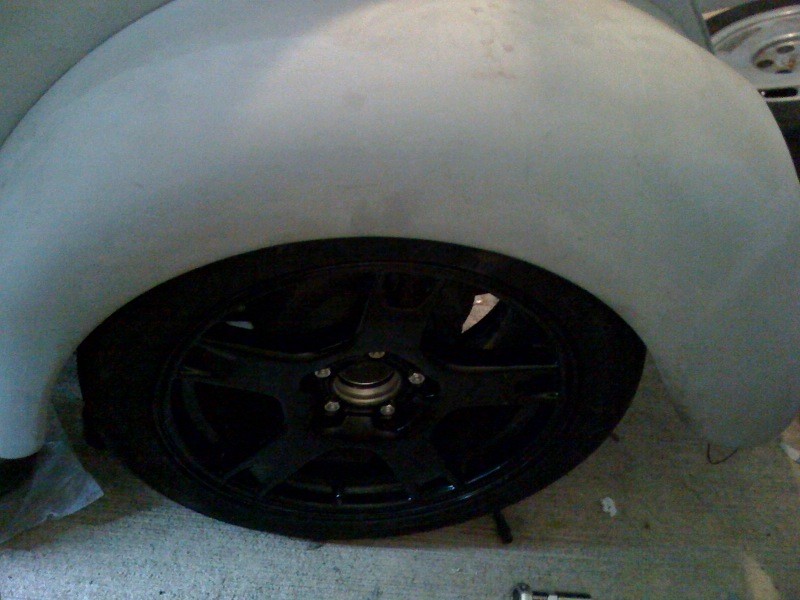
Well, I got the rear mocked up and hand tightened. The wheels fit nicely and look cool. I've got a bout 1/2" on each side from the fender hitting the side wall. I'm sure I could get more by slightly opening the bottom of the body since it's not permanently mounted just yet.
Today when I get home from work I'm going to roll the chassis out and get some pictures. Then clean up the garage and organize my engine parts and tools so I can start build the motor. Finally.
5-11-2009
A little bit of Bad and Good News...kinda. Lemonade out of lemons.
So I started taking the short block apart this weekend. I got far enough that I noticed some play in the #1 piston rod. I knew right away what it was and I didn't even bother to check cause I trusted the guy I traded motors with. Lesson learned.
The BAD:
So the rod bearings spun on the #1 and #2 rod journals. It seems as though the engine wasn't ran long which is good cause there's minimal wear. The crank looks like it'll clean up with a .020 or .030 grind.
To get the 355 rotating assembly back to spec it'll take grinding and polishing the crank, having the assembly balanced, and either new connecting rods or machining to get them back to spec. After all those costs it'll probably be cheaper just to get a new rotating assembly balanced and ready to drop in from the manufacturer.
The Good...
I'm thinking about just bumping up my motor to a 383 ci. The cost of new parts and or machine work will be well within the range of a new 383 bottom end balanced.
I've also been looking into just getting new set of Speed Pro dished 4.030" hypereutectic pistons with a 1.425" wrist pin height, a new 3.75" Eagle internal balance crankshaft, and buying two replacement connecting rods. I found a whole set of 8 for $20 (stock set). I'll just upgrade the connecting rod bolts to APR. Then have the whole assembly balanced. I already have new piston rings bearings, flexplate and damper that'll fit an internal balance 383 crank. The cost will be less as well.
I did the math and with 12cc dish pistons, the .015 shim head gasket, 64cc heads, and a .021 deck height I'll be right at 10.27:1 CR. Which will be fine with the vortec heads cause you can get away with .5 more CR and still run pump gas.
I've got some thinking to do, more saving and selling of parts. So the building of my engine has been put on hold for another month at least until I save the cash and have decided which direction to go.
I should pick up about another 40-50 hp and tq though so that's good.
5-14-2009
Well, some good news. I ordered an Eagle Specialty Products internal balance stroker crankshaft for my 350.
http://store.summitracing.com/partde...P-10350375057I
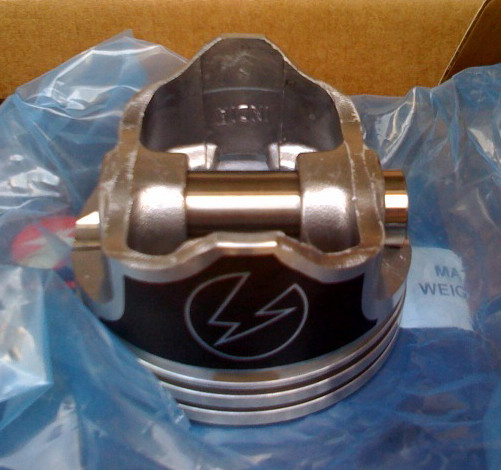
And I bought some (383) Speed Pro dish pistons.
http://store.summitracing.com/partde...t=STL-H859CP30
Both parts will work well with my stock 5.7" rods. So I'll save some $$$ there. Coolest part is I did some shopping around and found the crank for $231 here...
https://www.horsepowerparts.com/inde...oduct_id=21684
and a set of 8 pistons here...
http://www.kmjent.com/cart/product.p...9&bestseller=Y
...I called summit up and said, "I'd like to buy these parts (I listed stock #s and he gave me the pricing) but I found them cheaper here (I then gave him the website URLs)". They beat their competitors prices by $1 for each product. Summit has a beat-a-price guarantee so I thought I'd see if it was baloney. It wasn't. I got the parts for $407 with shipping. At Summit's pricing it would've been $522 total with shipping. So I saved over $100 smackers.
So I have all my parts, or they're being shipped, and the motor can go together soon. That is after hot tanking, decking, and balancing. I might not have the assembly balanced if the bob weight of my pistons, pins, rings, bearings, cap screws and rods are fairly close to the neutral bob weight of 1825 +/- 2% from Eagle. Maybe balancing will be cheap enough if I give the machine shop the bob weight and they only have to balance the crank? We'll see...
5-18-2009
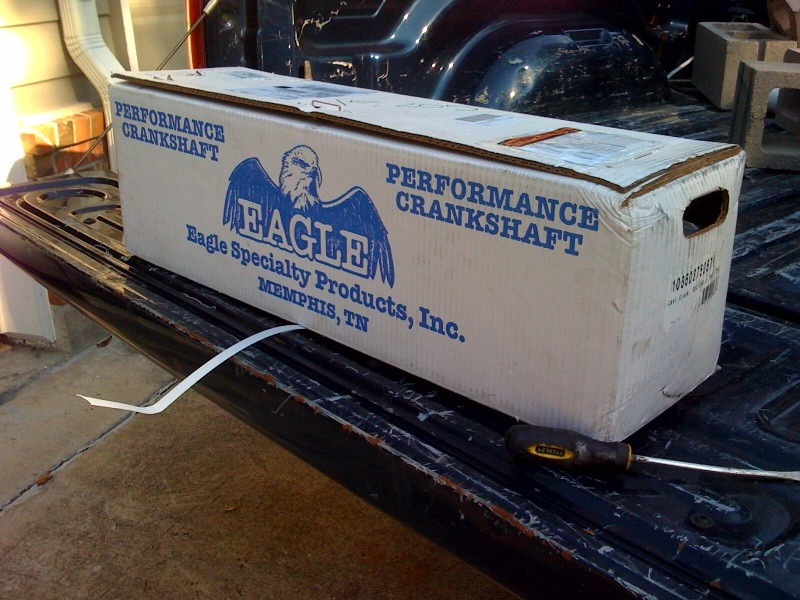
Received my new pistons and crankshaft for the 383 build. I have to send the crank back though cause there's a scratch on the one of the rod journals from shipping. It's from one of the shipping staples poking up into the box. You would think it's from the box the luxury treatment. LOL, look at that box. Oh well...
Match set is always good.
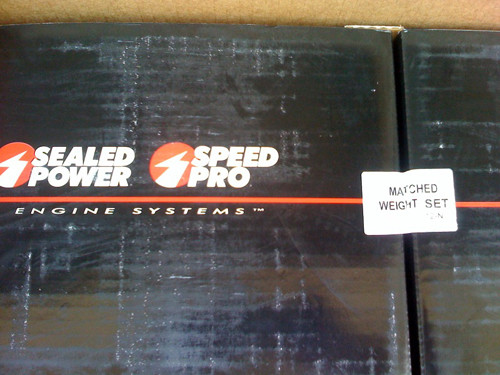
Made in India, that's good too right? LOL...

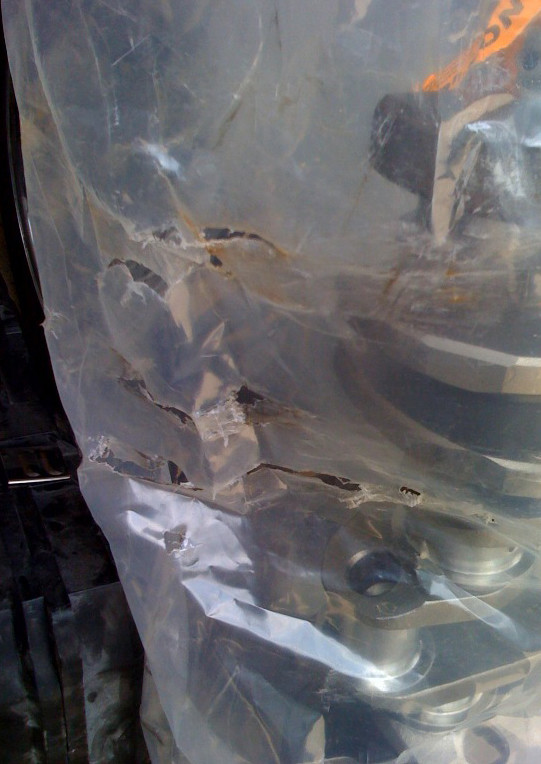
This is exactly how I received it...great job UPS and FedEx!!!
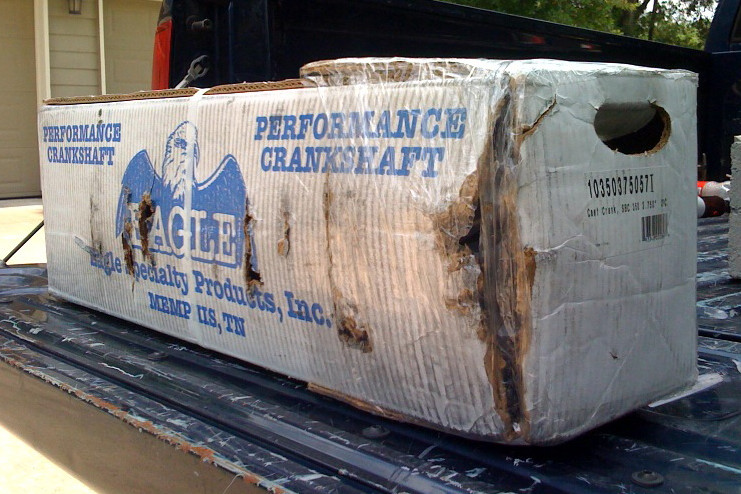
It looked OK. There was a little rust on of of the bob weights, but then I found an unacceptable scratch...back it goes.
A plastic bag of this weight really shouldn't have tears in it like it does. Wouldn't you think?
5-21-2009
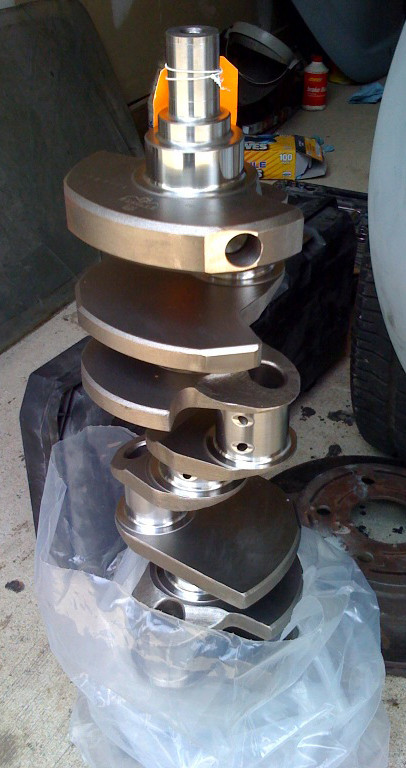
The replacement 3.75" crank came in and it was in much better shape.

5-29-2009
Update...
I started disassembling the engine. I plan to even remove the freeze plugs, oil gallery plugs and cam bearings myself as well as install them to cut down on costs and to get some experience doing so.
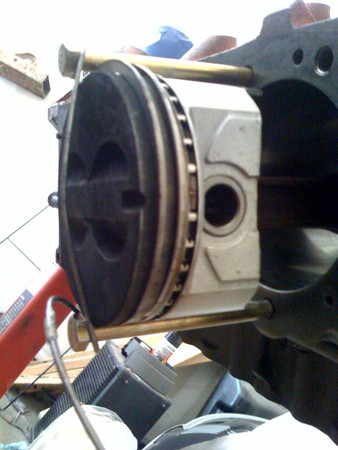
Used some bolts and an arc welding rod (with the flux coating knocked off) to catch the piston.
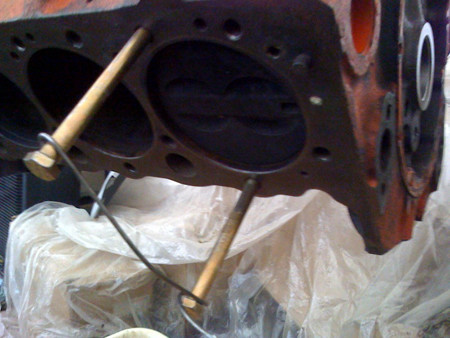
And some fuel hose press on the rod bolts to protect the cylinder walls.
Works pretty nice. I don't have to worry about them falling on the floor without help. These will be up for sale. They're forged 4.030.
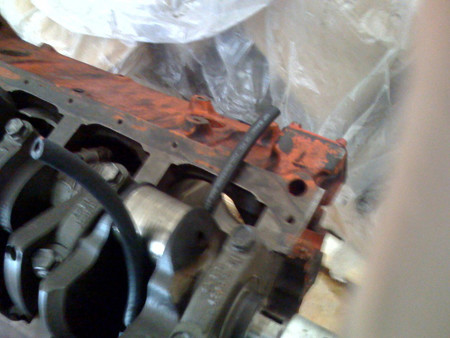
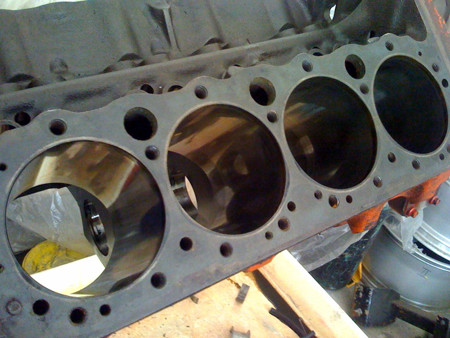
Cylinder bores are pretty much flawless by looking. No scratches or groves worn in from the pistons. Hone marks are still visible.
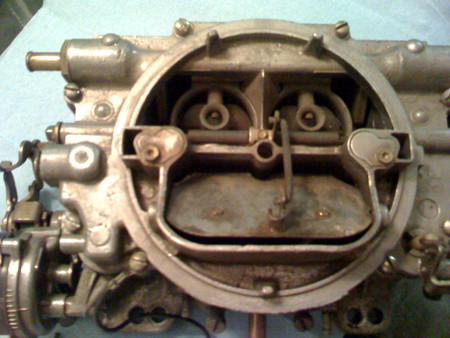
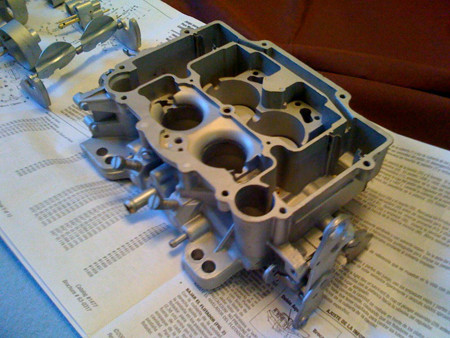
I rebuilt the carb. Here it is before.
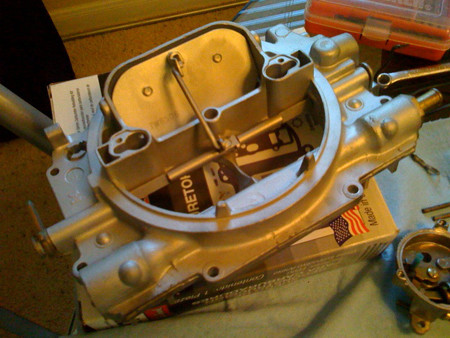
Disassembled.
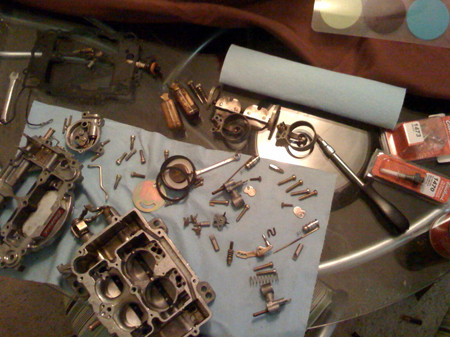
I sandblast the body and other parts that didn't have any jets. Cleaned it with a can of carb cleaner. Then I scrubbed it with warm water and light soap. Then blew the water out with compressed air and used a blow drier to completely dry it out before reassembly.
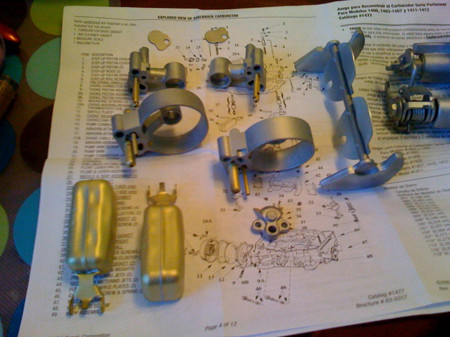
Cleaned up parts...
Cleaned up parts...the floats look really nice and new. ;D
And the rebuilt car. All new gaskets, seals, pump, linkage kit added, etc. Ready to rock!
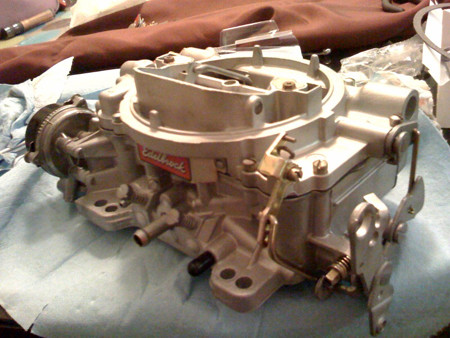
Impressive!
Posted by Diggymart on 4/27/20 @ 2:40:48 PM