You must be logged in to rate content!
8 minute(s) of a 224 minute read
8-2-2009
.....in the garage finishing the front suspension mock-up.
First order of business was to get the SKF racing hubs prepared. For starters, the studs are too long. Since I'm using wheel adapters the studs need to be shortened to match the thickness of the adapters (1.063") plus the thickness of the front brake rotors (.300").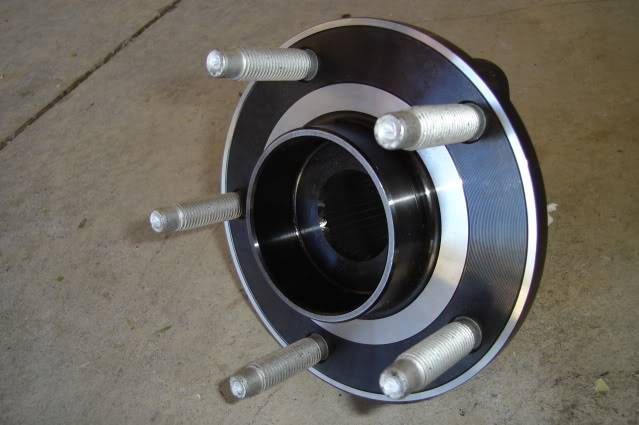
I ended up grinding about .400" off the ends of the studs.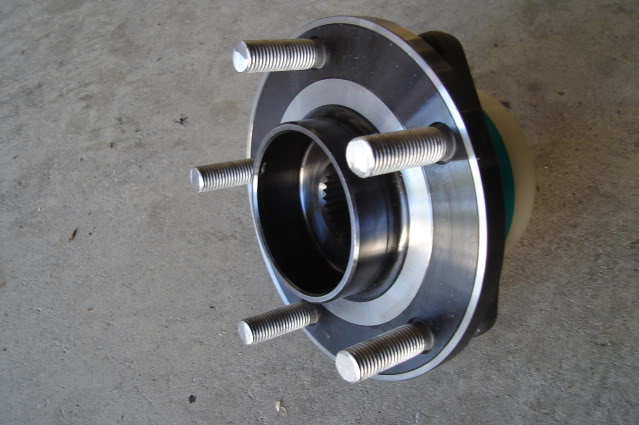
The AFX spindles use two bolts and one stud to mount the hubs. The hubs were designed to use 3 bolts so all three holes are threaded. In order to use the one bottom mounting stud on the AFX spindle I had to drill out the threads in one of the holes with a 1/2" drill bit.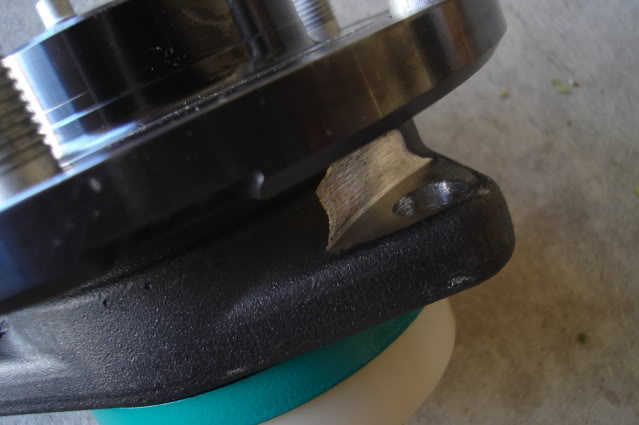
I had to use a die grinder with a cutting wheel to make some clearance for the nut to turn and to provide a flat area for it to tighten down onto.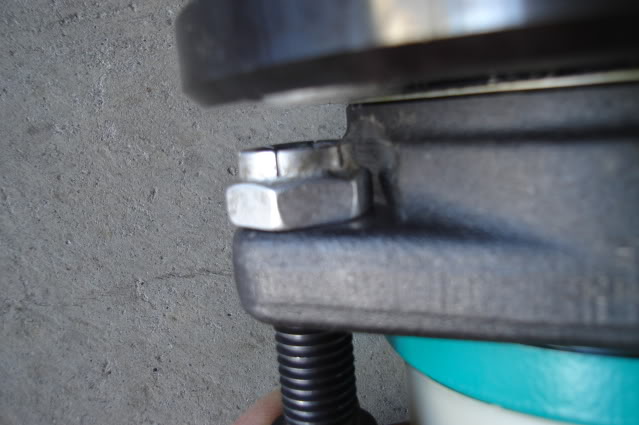
After having a lot of fun hacking on my new hubs they're now bolted in place.
New 14" rotor and wheel adapter mounted up to the hub. The adapter solves two problems, converting the front bolt pattern from 5 on 4.75" (5 on 120.65mm) to 5 on 120mm and effectively reducing the backspacing on the wheel to 5.507" from 6.57". I had to grind about .060" off the ends of the lug nuts holding the adapter in place for clearance.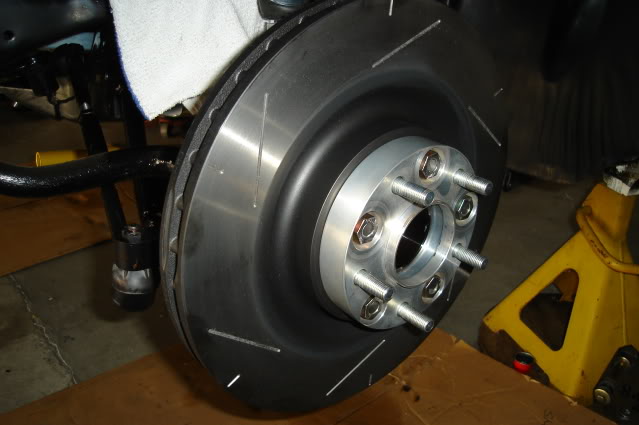
Bolted the wheel in place. No brake calipers yet, not enough time today with all the drilling and grinding going on.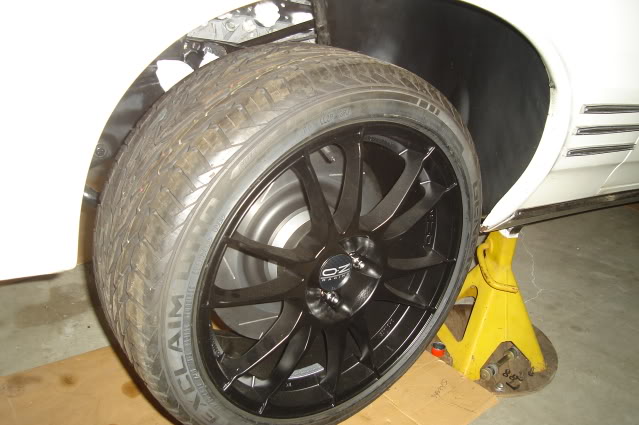
Looks like there's plenty of clearance between the upper A-arm and the inside of the rim with the wheel turned all the way to the left, the clearance here will increase with the car's full weight on the suspension.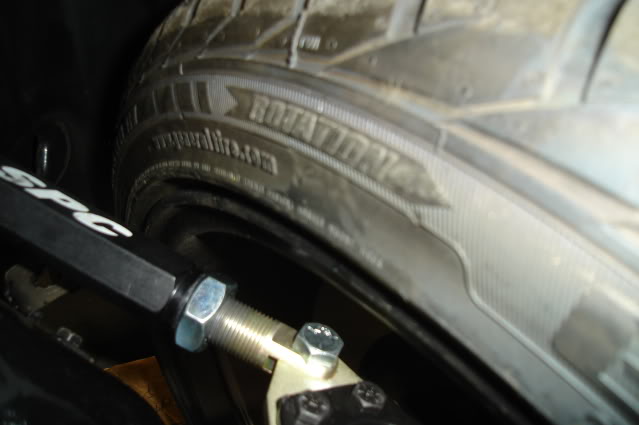
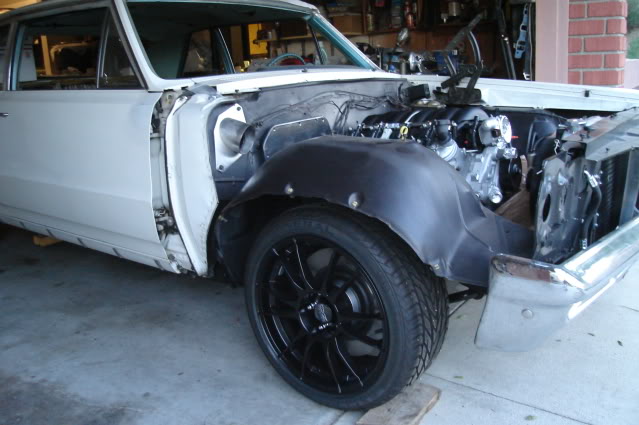
Set the car on the ground to see how it looks. I'm pretty happy with the ride height considering the amount of weight that still needs to be put back in the car. No seats, front or rear glass, most of the exhaust system out, no belt-driven accessories on the engine, no fluids in the engine or trans, no A/C compressor and no hood or right front fender.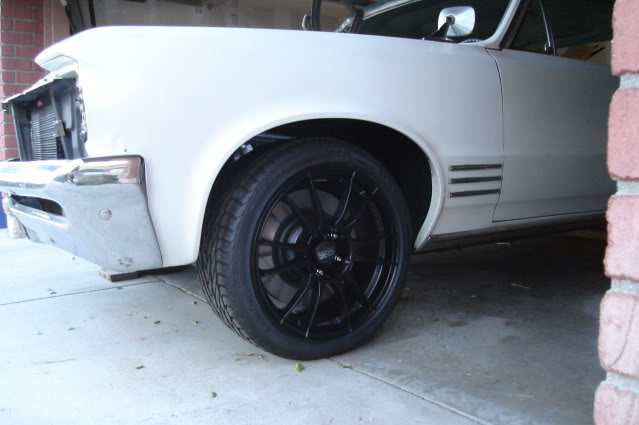
The AFX spindles have 1" of drop built in, combined with the 1" drop from the SPC lower control arms it's looking like I won't need to trim the front springs.
I reached my goal of getting the car sitting back down on the ground on all 4 wheels this weekend.
I'm stoked.
8-4-2009
.....just thought I'd post a couple more pics taken on Sunday evening.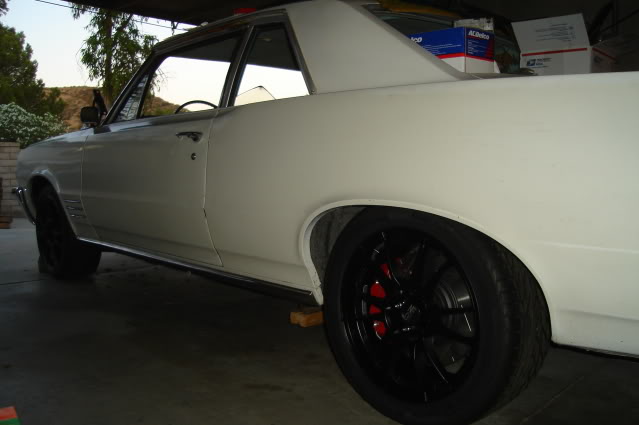
8-5-2009
Thanks. Once the car has been completed it will sit lower, there are still a lot of things that have not been installed.
Quoted from my post above: The adapter solves two problems, converting the front bolt pattern from 5 on 4.75" (5 on 120.65mm) to 5 on 120mm and effectively reducing the backspacing on the wheel to 5.507" from 6.57".
I wanted all 4 wheels to be the same in case I wanted to run the same size tires all around and rotate them (pretty much unheard of on this site), plus there are limited backspacing choices for this particular wheel brand and style.
I actually have 5 of these 18X9" wheels so I can keep a full-size spare in the trunk, no other type of spare wheel will clear the big Z06 calipers. My spare is a 245/45-18, same width as my front 245/40s and the same height as my 275/40s so I don't burn up the posi if I need to use the spare on the rear. Someday I might just run 245/45s all around.
Nice thing about the A-body cars, they have a huge trunk that easily swallows up a big spare tire.

8-9-2009
.....somewhat unfamiliar territory as it's time for me to start installing the wiring harness and controller.
The engine harness part of it is pretty straight-forward, just match up the connectors and plug them in. Figuring out the best place to mount the bulky ECM is a bit of a challenge, there's pretty much no room under the dash for it with the A/C unit and ducting hoses taking up most of the space on the passenger side.
I laid out the harness inside the car to start becoming familiar with it. Everything shown here on the passenger side floor will be on the inside of the firewall. Included is the ECM, pedal harness for the electronic throttle control, fuel pump relay, cruise control wiring, and four 20-amp fuses and power up wires.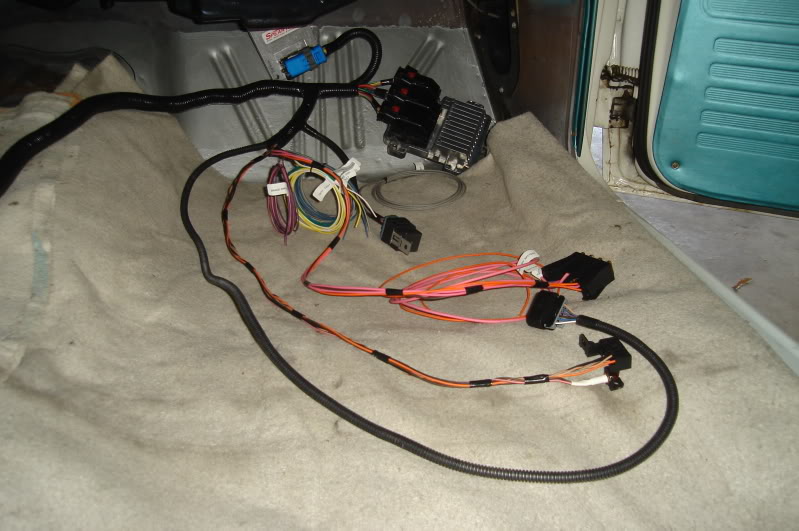
Here on the driver's side the engine harness is laid out. All of the wiring and connectors shown here will have to pass through a 2-1/8" hole in the firewall. Finding a good place to cut that hole is my first task.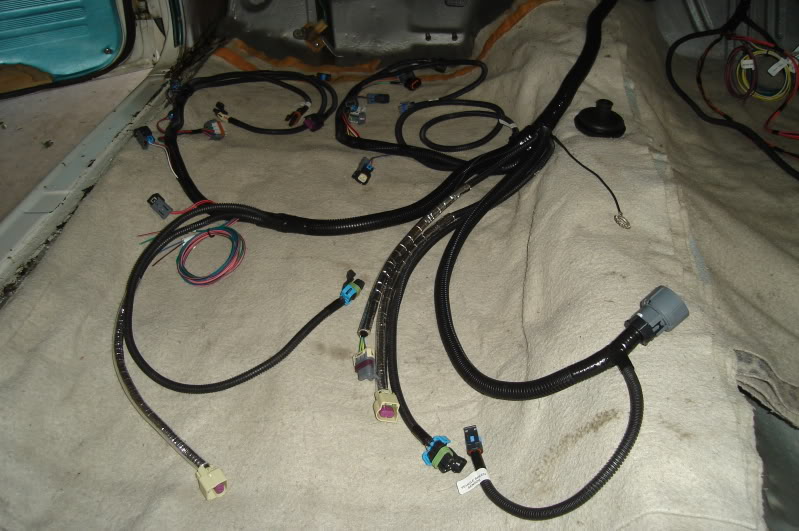
After taking the harness to the engine side of the firewall and plugging it into most of the connectors on the engine and transmission I was able to figure out a good place to run the harness through the firewall. The hole where the throttle cable used to reside looks pretty much ideal.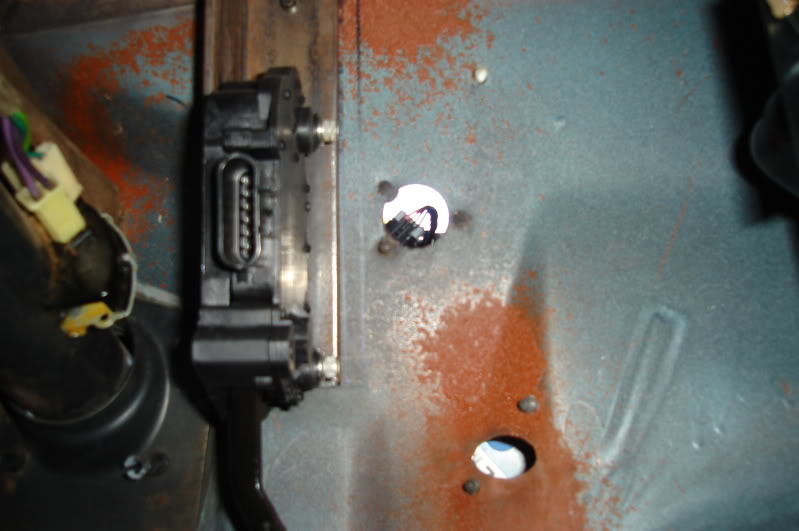
After marking the outline of the 2-1/8" hole using a piece of 2-1/8" O.D. exhaust tubing (2" pipe expanded for a slip fit over 2" pipe) I drilled a series of small holes just inside the line.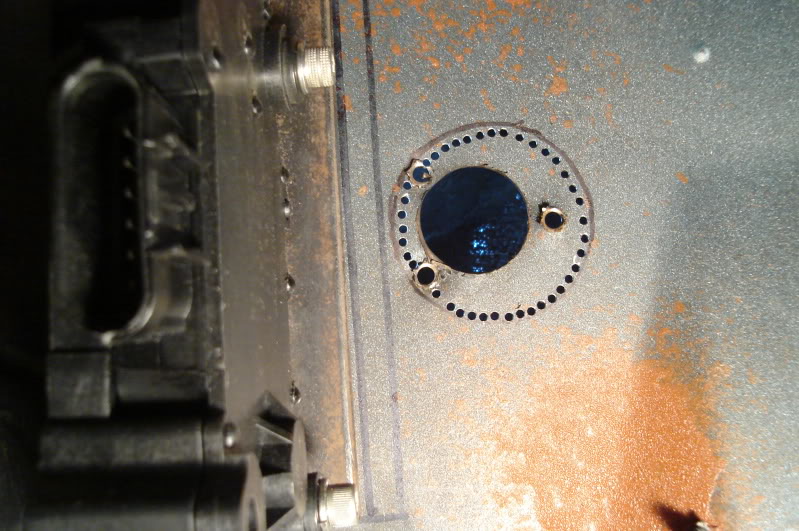
A sharp chisel was used to make quick work of the material that was left between the holes, a half-round file finishes off the edges.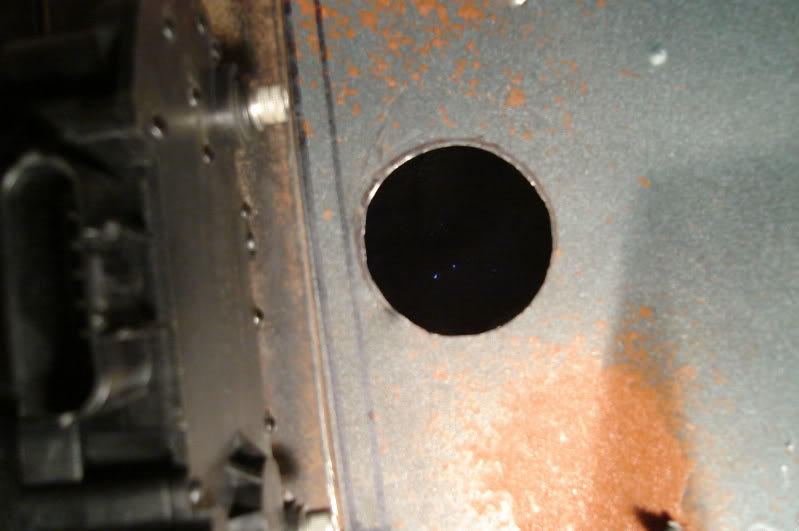
My next dilemma, how to go about getting the harness through this grommet and properly sealing the grommet to both the firewall and harness.
Clearly the harness can't fiit through the grommet without cutting the I.D. of the grommet. The big harness junction shown here would take about a 1" hole stretched out to 1.5" at the very minimum to pass it through the grommet, the grommet only has a 5/8" hole in it.
What to do? Cut the hole a little bigger and try work the entire engine side of the harness through the grommet, or slice it down one side and just slip it over the main cable bundle. Even if I slice it the 5/8" hole still won't be big enough for the 15/16" diameter main cable bundle to pass through.
Any opinions or personal experiences would be much appreciated.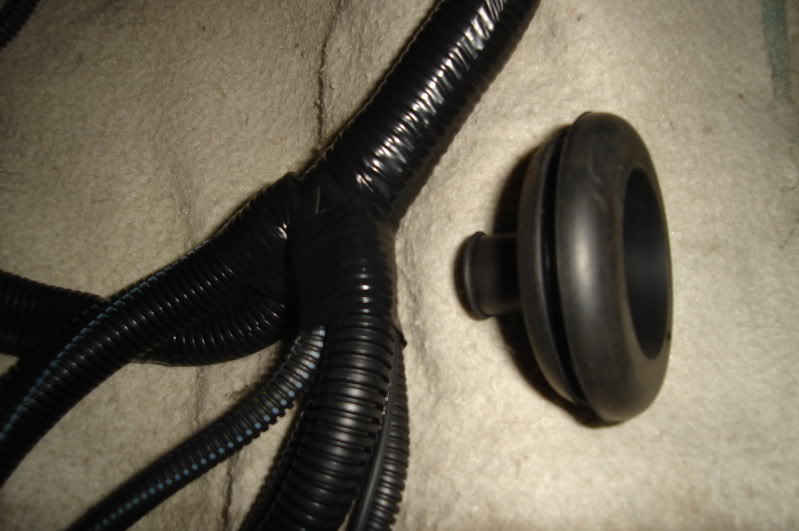
Made a little more progress this weekend, thanks for looking!
The Tempest!
Posted by Diggymart on 3/26/21 @ 3:09:22 PM