You must be logged in to rate content!
10 minute(s) of a 224 minute read
6-19-2009
.....with Yukon Performance 3.42 gears has been custom-built for the Tempest by Jim Mitschke of JD Race & Restoration in Richfield Ohio (1 330 990 8155) and is now almost ready to ship.
I chose Jim Mitschke (monzaz on Performance Years) to build this rear end because I thought that his small shop that specializes in Muscle Car differentials would pay more attention to detail and build it like it was his own. I have seen Jim advertising and selling quite a few rear ends on PY over the past few years with many satisfied customers so I figured I would contact him.
I wanted the '71 -'72 Buick 8.5" rear mainly for its strength and for the tapered bearing bolt-in axles, not to mention it's a direct bolt-in on any '64 -'72 GM A-body. I asked Jim to modify the spring perches so I could use the earlier '64 -'66 springs that bolt onto the perch with a clamp plate. A pair of poly bushings will be pressed into the upper control arm mounts on the housing.
Upgrades include a new Eaton 30-spline clutch-type posi (replacing the stock 28-spline unit) that's known for its durability and long-wearing clutch packs. A new set of Moser 30-spline axles were added as well, not only for the added strength but it was the easiest way to get the 5 on 120mm bolt pattern I need to run my BMW-spec aftermarket 18X9" wheels. The axles will come with M12X1.5 studs that are about 1.75" to 2" long to better accomodate the C6 Z06 rotors that are .280" thick at the hub.
These are just a couple of the many pics that Jim sent me during the build, this unit will be shipped out to me next week. Thanks for the great communication, pics and fine customer service Jim!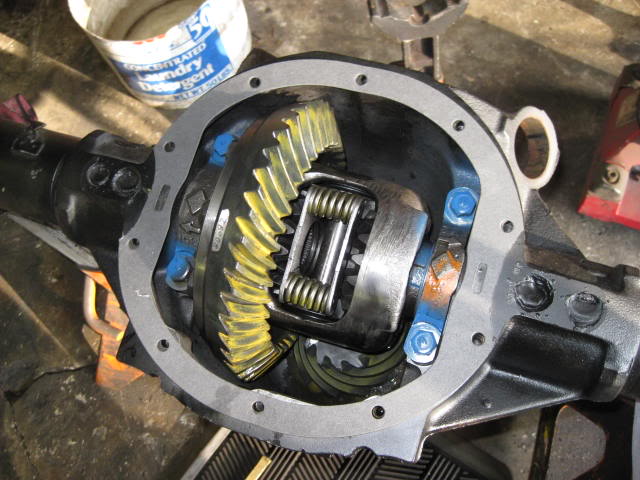
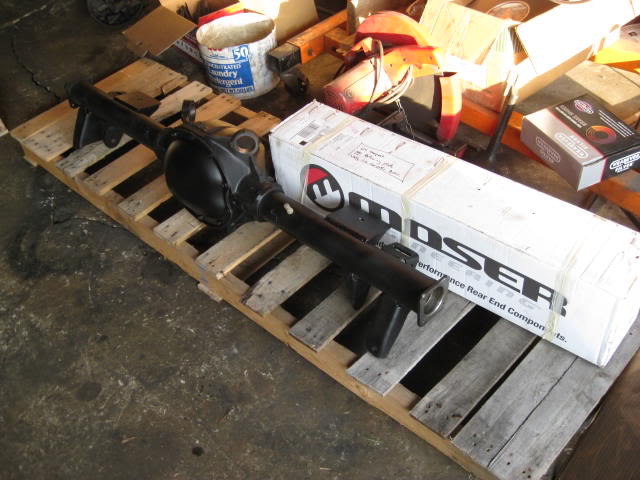
This rearend is the last big expense on the Tempest build. I'll be able to take the Tempest to the dragstrip once or twice without fear of shelling the diff, and do a little bit of 'spirited' driving when I want to.
I'll still have to spend a couple of grand before it's all done on a new headliner, windshield, radiator hoses, serpentine belt, tranny dipstick tube, wiring, and all of the little things that nickle and dime you to death.
Coming along.
6-20-2009
.....so I can move forward on fitting up the trans, so this morning I spent some time modifying my old floor jack. I had a couple of pieces of 12" X 12" X .200" plate that were already the perfect size and thickness to do the job.
First I drilled and tapped a couple of holes 3/8-16 coarse thread in the jack base and then drilled the bottom plate to match and bolted it down. Next I drilled and tapped another 3/8-16 hole in the center front of the bottom plate so I could use a jacking screw to change the angle of the top plate as needed. A couple of 1/2-13 bolts and nuts are loosely attached at the rear corners so the plates can hinge, some 1/2" clearance holes were already drilled in all 4 corners of the plates.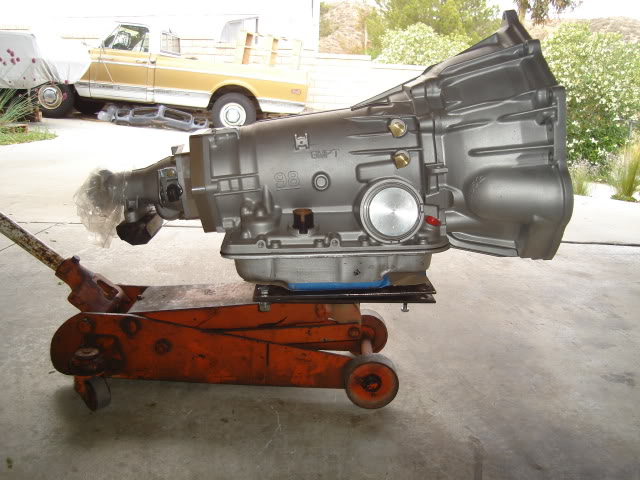
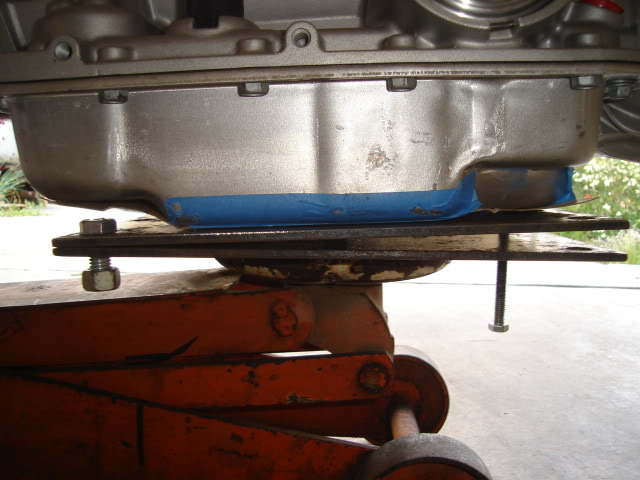
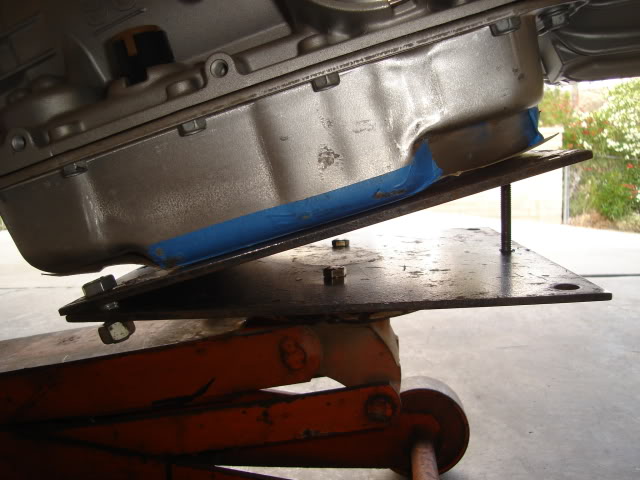
Nothing fancy but it's plenty stable and will do the job. The cost was right in my budget, zero dollars.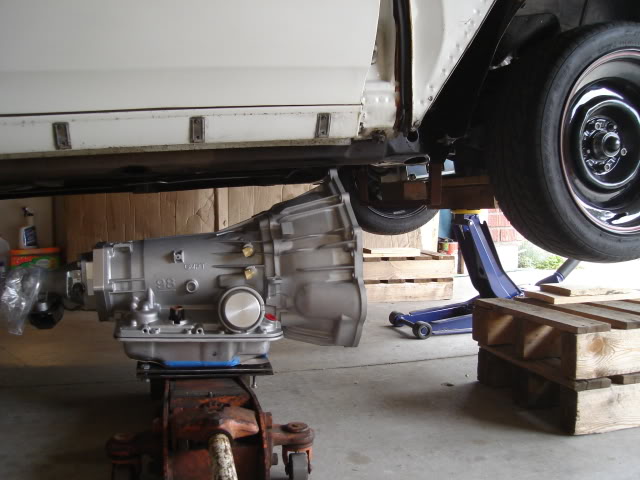
Now to grab my big 2-1/2 pound hammer and have at it.
6-21-2009
.....gently massaging the trans tunnel.
Nothing gentle about it, I'm pretty beat from laying on my back underneath the car swinging that big hammer. There was quite a bit of clearancing needed, I probably had the trans in and out about 15 times before I had the clearance I needed. The trans jack made this difficult job much easier to take on.
Driver's side, checking where to start hammering.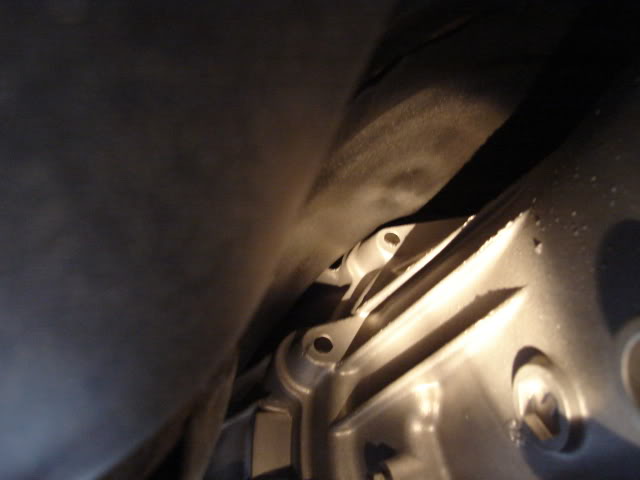
Driver's side, after a lot of hammering sessions. Note how much higher the trans now tucks up into the tunnel. There are spots where there is less than 1/4 inch of clearance, both in the areas I clearanced up front and further back over the top of the trans where I didn't need to do any work.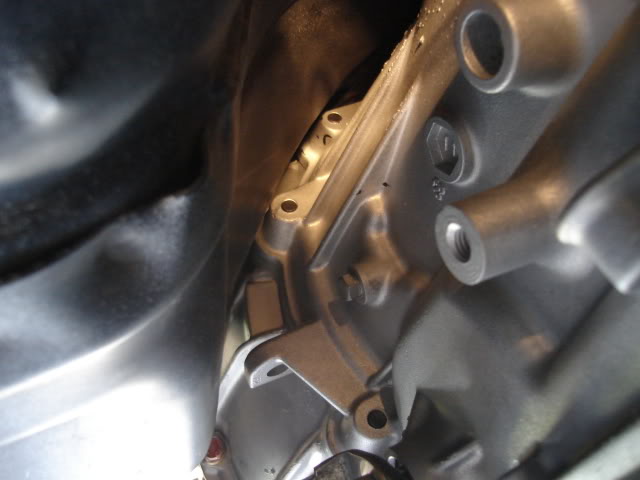
Passenger side before any tunnel mods, the trans cooler line fittings will come close by the time I get further into this. The 90-degree fittings were and absolute must.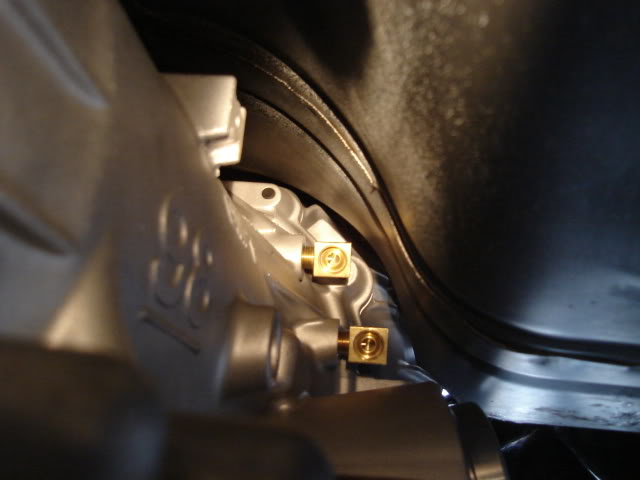
Passenger side again, after the onslaught. Note again how much higher the trans tucks into the tunnel. I also ended up hammering for clearance above the cooler fittings and took the corner off the top one with a file.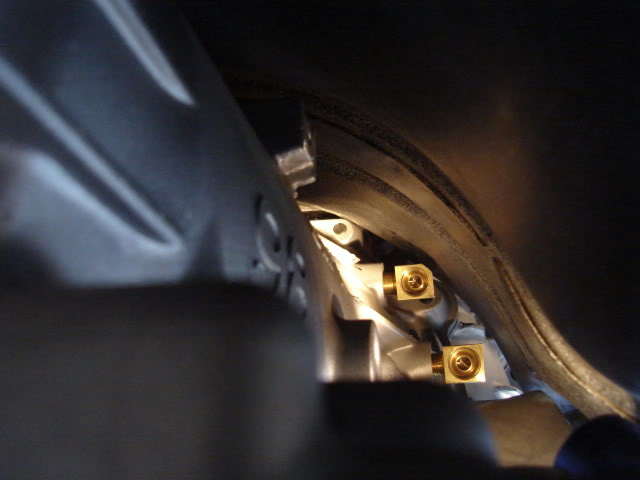
Banged in the floor pan by about an inch to make clearance here, I'll have to do some patching to repair the thin rusted metal that cracked.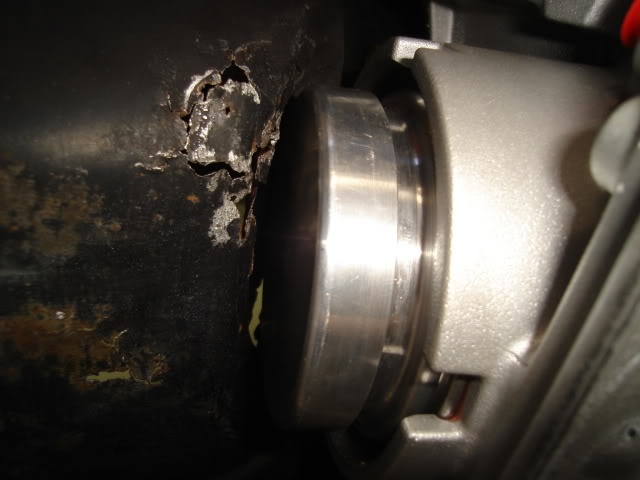
A look inside on the passenger side, I drew a line with a black Sharpie to better show the area that was modified.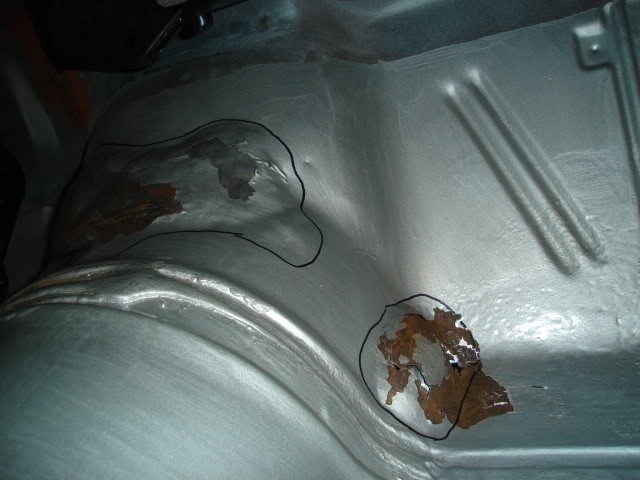
Driver's side, more work was needed on this side due to the less open shape of the tunnel.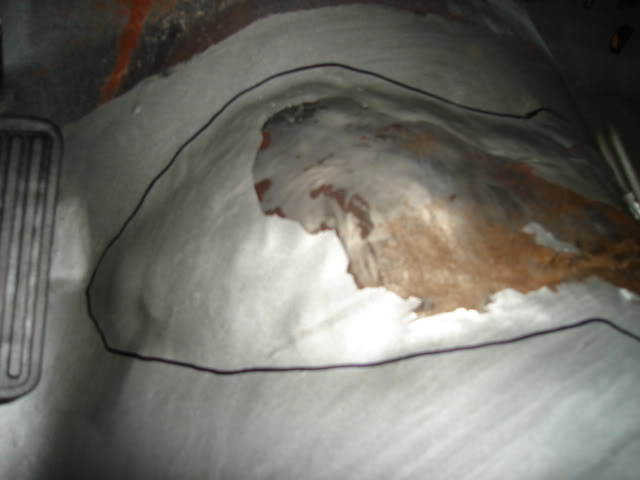
It was more work than I had expected, but the trans sits up nice and high where it belongs and my modified stock crossmember will work perfectly.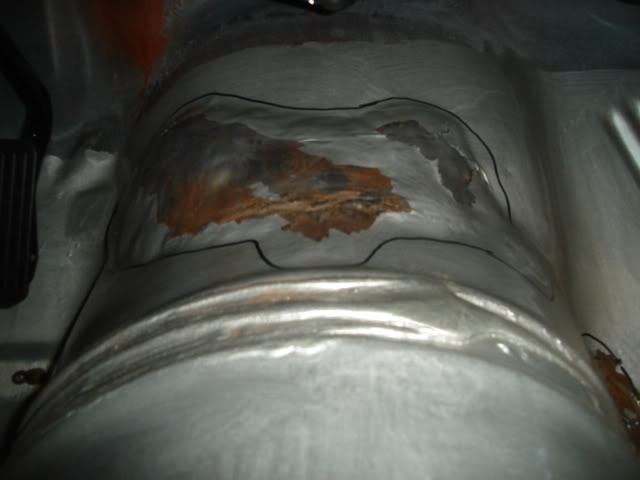
Passenger side head clearance to firewall with the trans in place. In order to mate the trans up to the engine I have to let the engine tilt back on the mounts until the bolt on the back of the head comes to within about 1/4" to 3/8" of the firewall.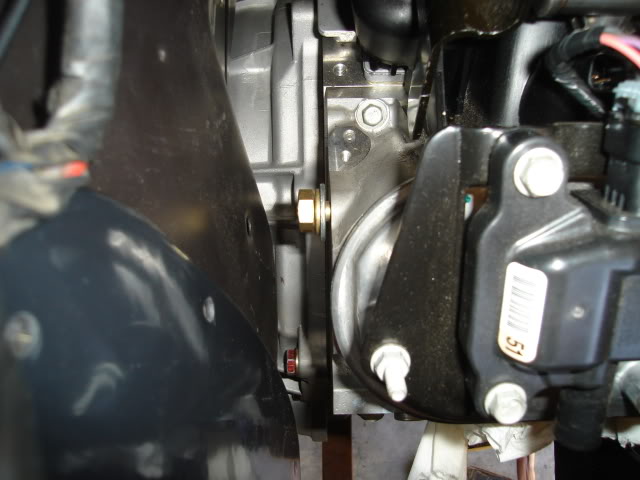
Driver's side head to firewall clearance.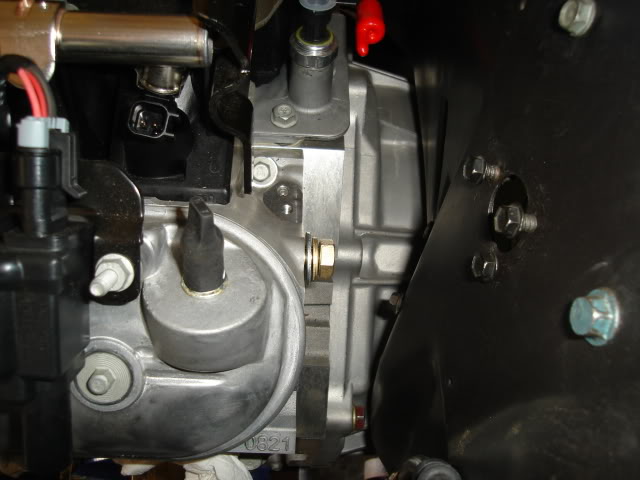
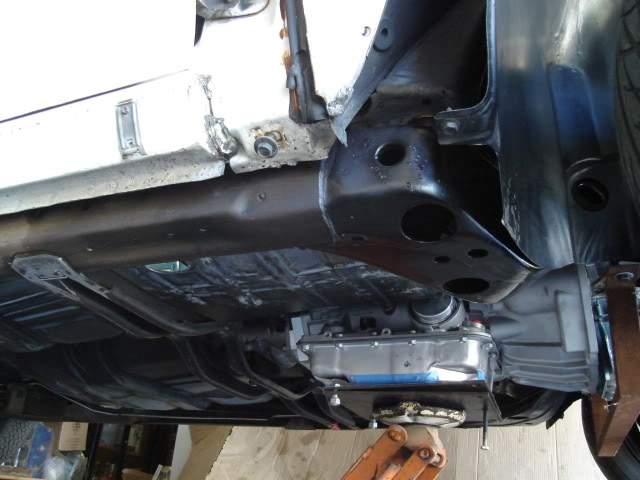
Fitted up the passenger side header from underneath the car. I had to remove my temporary engine support crossmember to get it in there, still a tight squeeze. I also found that I'll need to install my new lower control arms before the headers go in, there's no way to remove the rear control arm bolt with the header in place at least on this side. I made a quick attempt at putting in the driver's side header, but it looks like the steering shaft needs to come out first (this is mentioned in the brief installation instructions from Edelbrock).
I accomplished one of the bigger tasks this weekend, the trans now fits and my crossmember modification won't need anymore tweaks. After I get the crossmember welded I'll fabricate a couple of 3/16" thick reinforcement plates to bolt underneath the tips where the crossmember attaches to the frame.
Happy Father's Day!
6-22-2009
It was lowered a bit in the rear already. I cut 3/4s of a coil off of some new regular-ride rear springs when I first rebuilt the suspension when the Tri-Power 455 went in. Has a set of H-O Racing front springs in it now.
I have a new set of Global West S-60 rear springs in it now and the free height of those springs were almost exactly the same as my old ones. I'll probably keep the H-O front springs and trim them as needed, the lighter LS3 engine will raise the car up of course.
I figure this car will end up somewhere around 2 to 3" lower than stock, probably closer to 2". Low enough to look good and enhance handling, but still high enough that I'm not dragging my headers on every speedbump. The Edelbrock swap headers tuck up pretty tight, so that gives me some hope of getting it to sit lower.
.....between the tierod ends and the oil pan.
I've seen this same issue come up on a lot of LSX swaps into A-body GM cars, but with the many different engine mounting methods and oil pans in use it seems to be worse on some cars than others.
I removed the zerk fittings at the inside end of the tierod ends next to the pan to get a little more travel and to prevent the zerks from punching a hole in the pan. I can only turn the steering wheel about 1-7/8 turns, it used to go about 2-1/4 turns (Lee Engineering 12.7:1 power box) before the engine swap.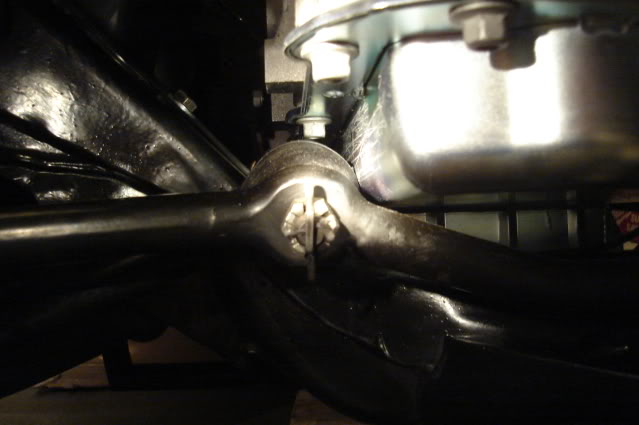
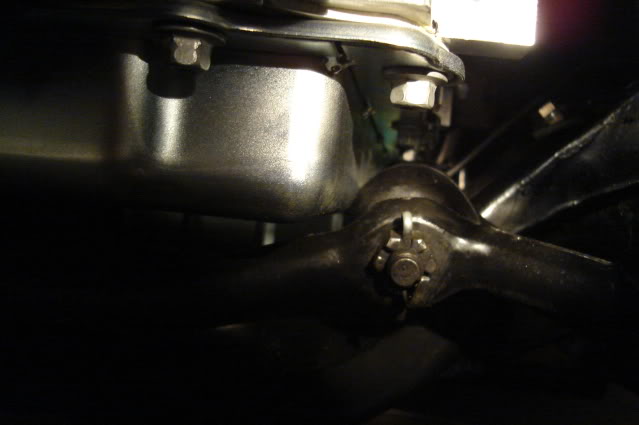
Do I need to replace the centerlink, pitman arm and idler arm with Chevy, Buick or Olds pieces to drop the centerlink and tierod ends down (if any of those parts will do that) and gain some more clearance here? Any helpful input would be appreciated.
The Tempest!
Posted by Diggymart on 3/26/21 @ 3:09:22 PM