You must be logged in to rate content!
48 minute(s) of a 148 minute read
1-8-2021
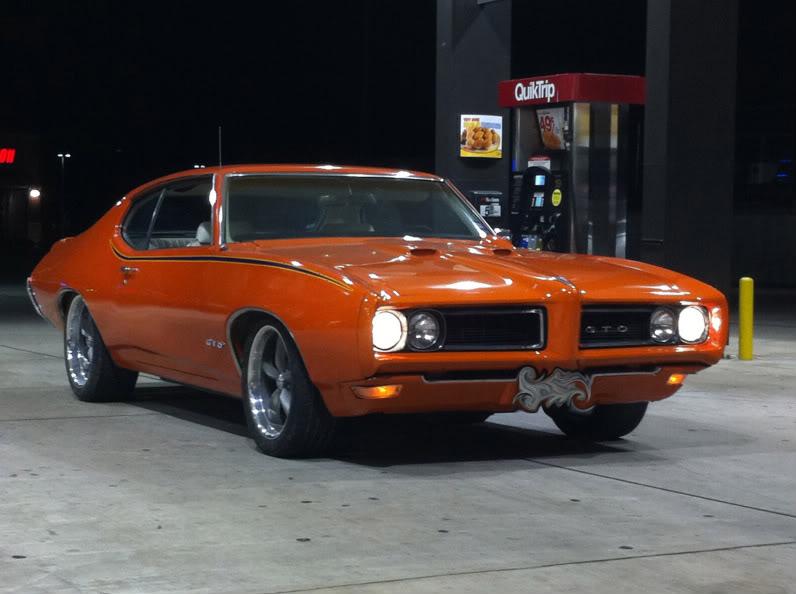
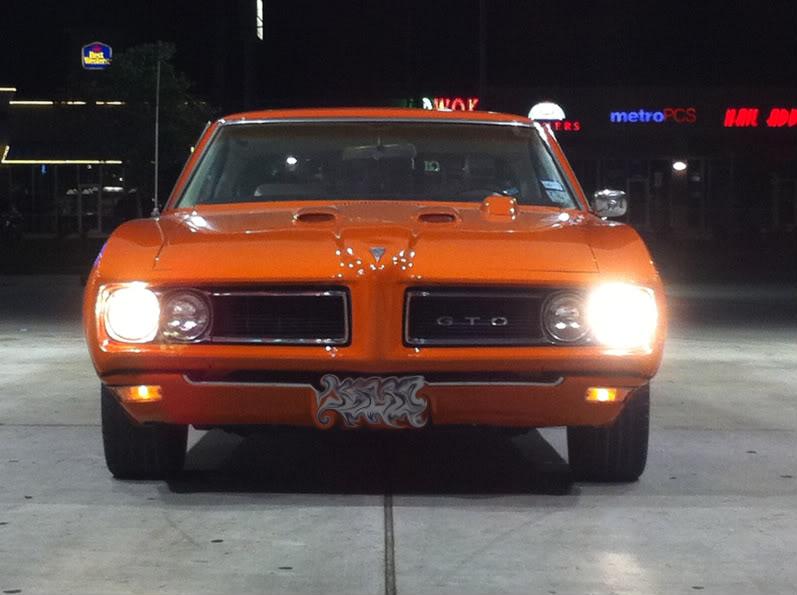
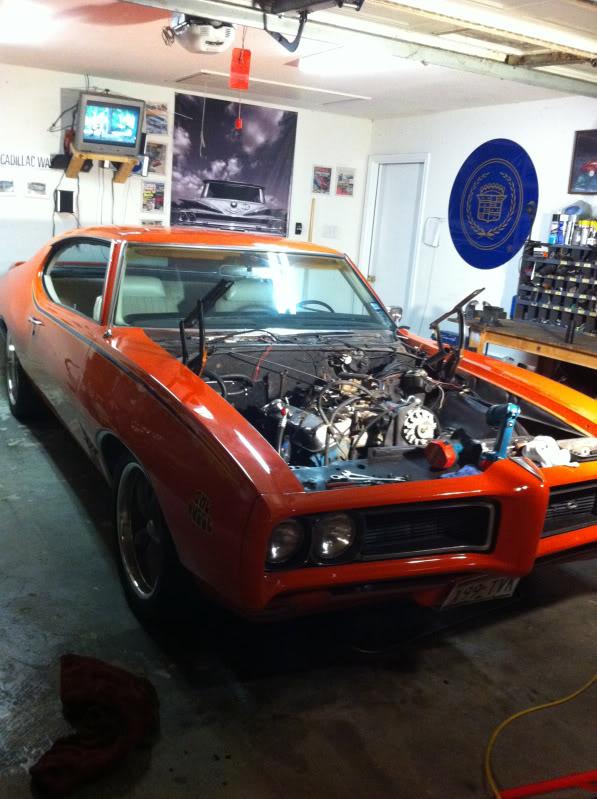
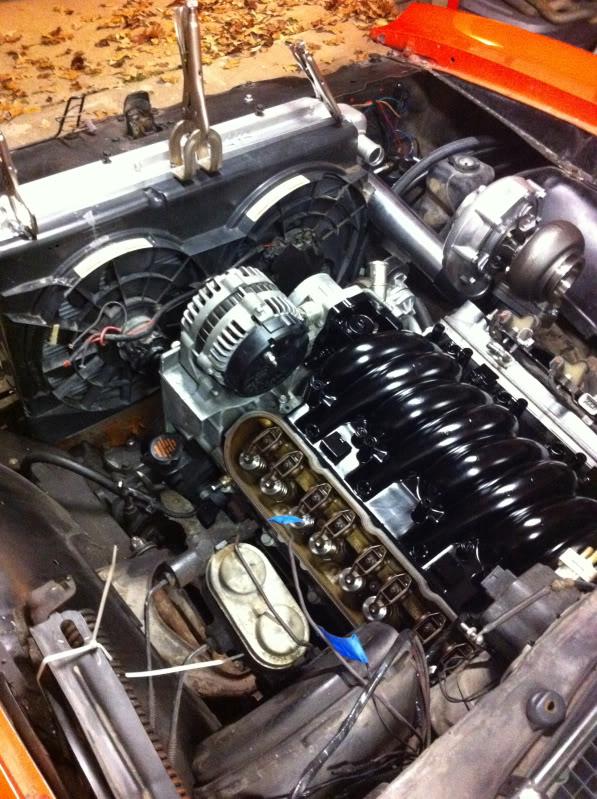
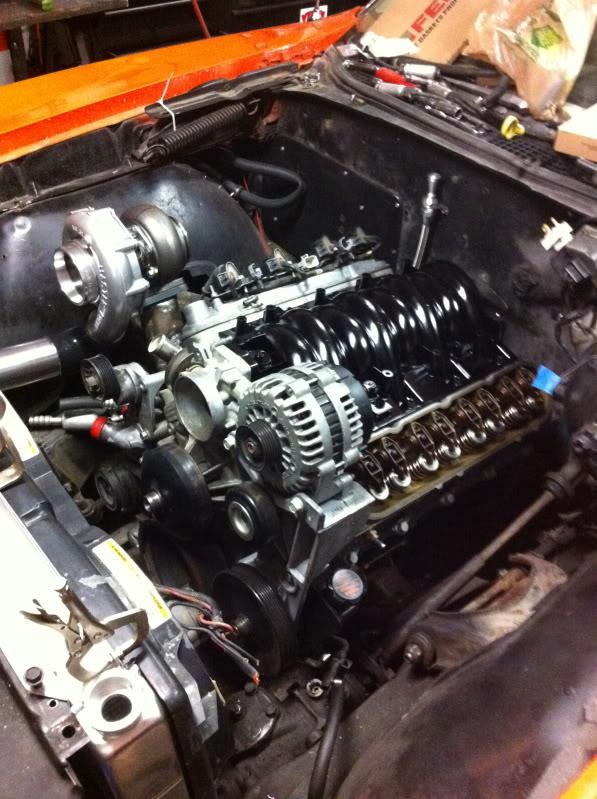
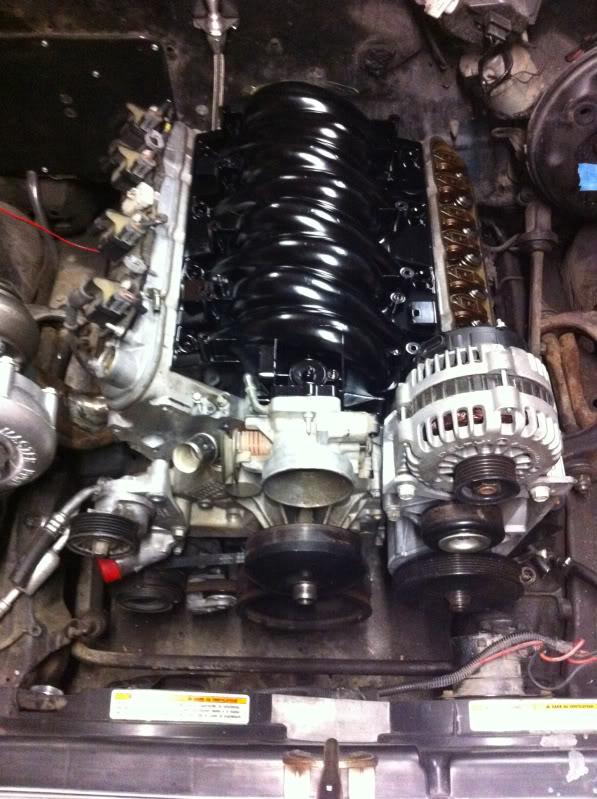
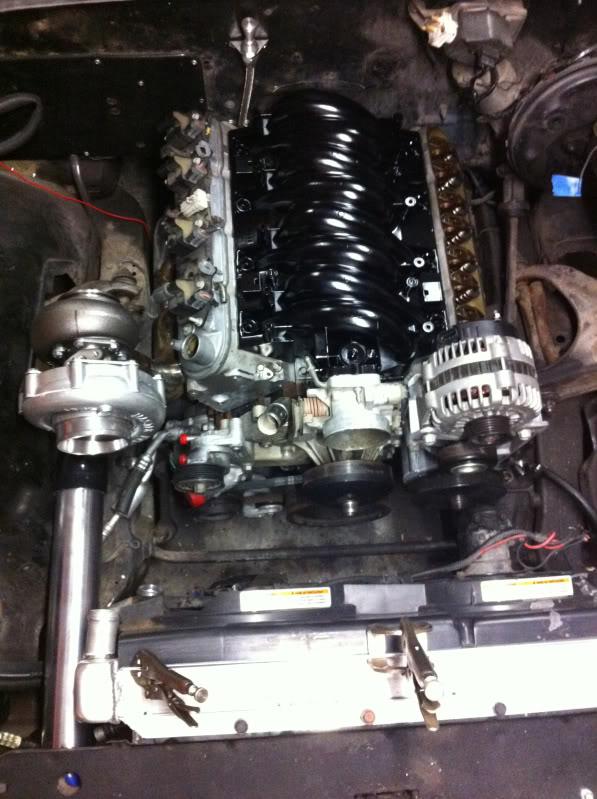
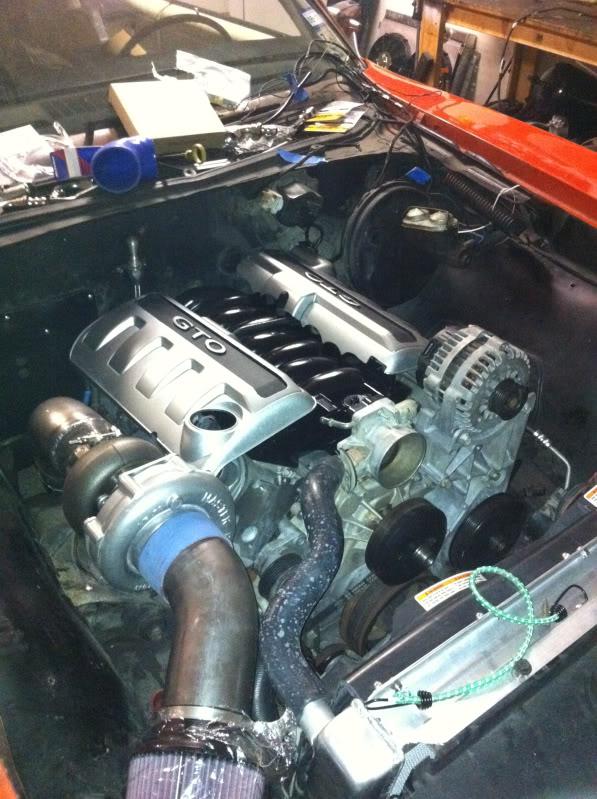
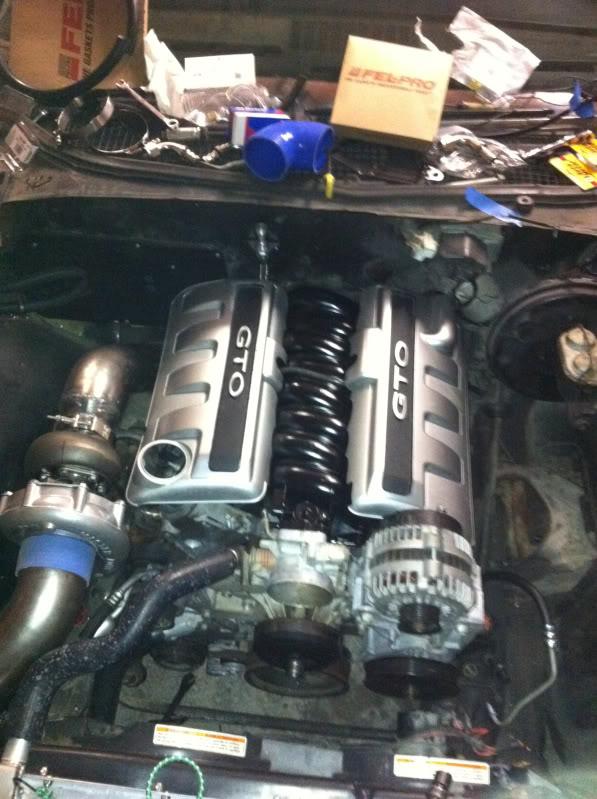
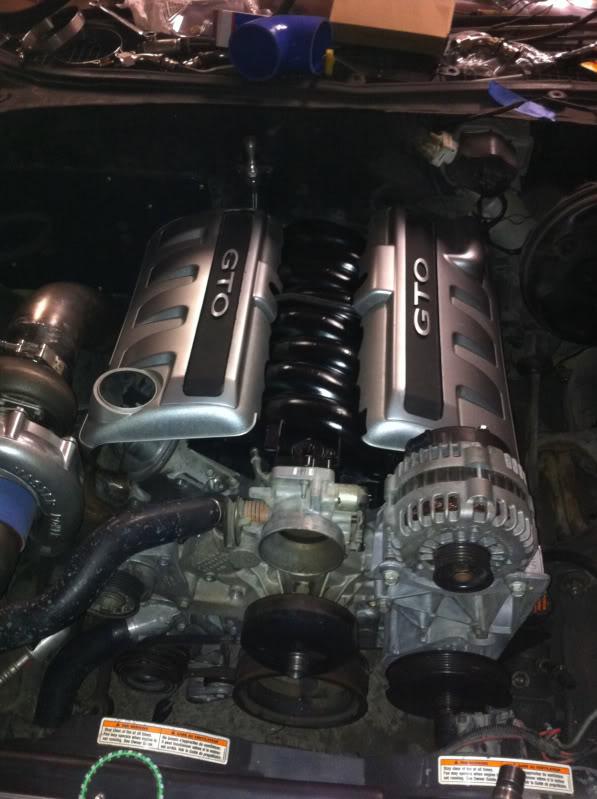
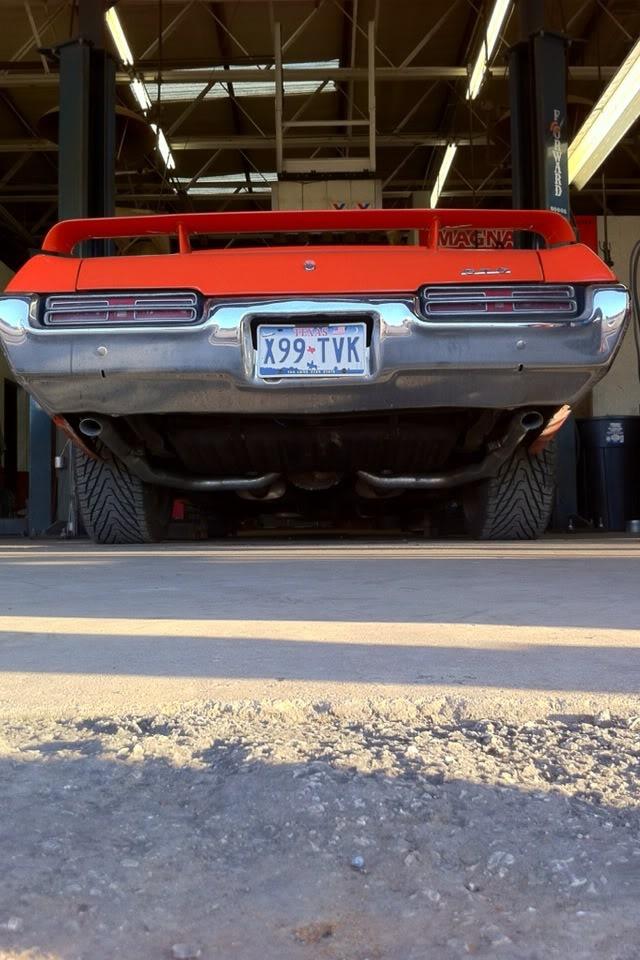
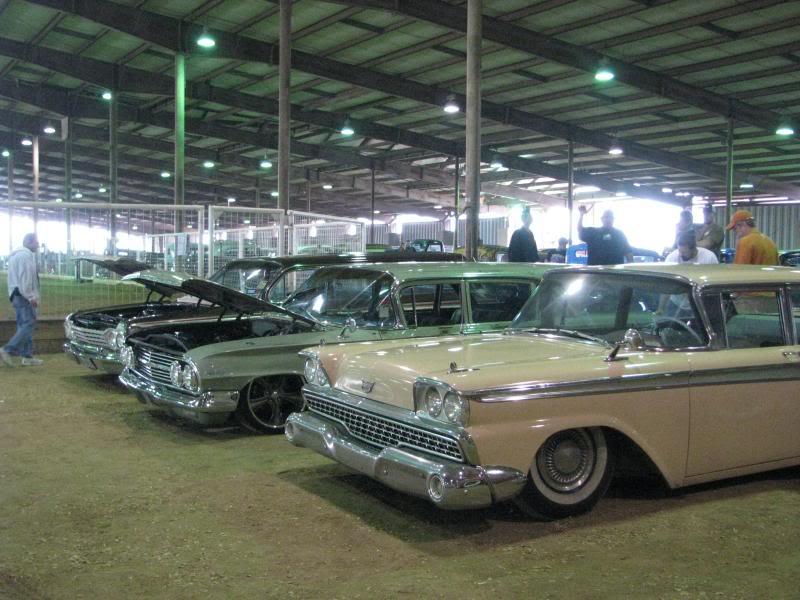
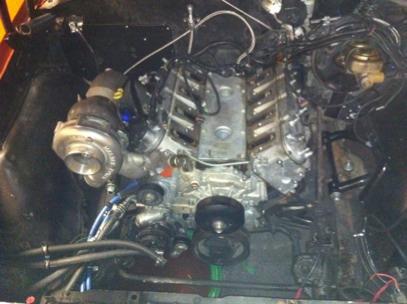
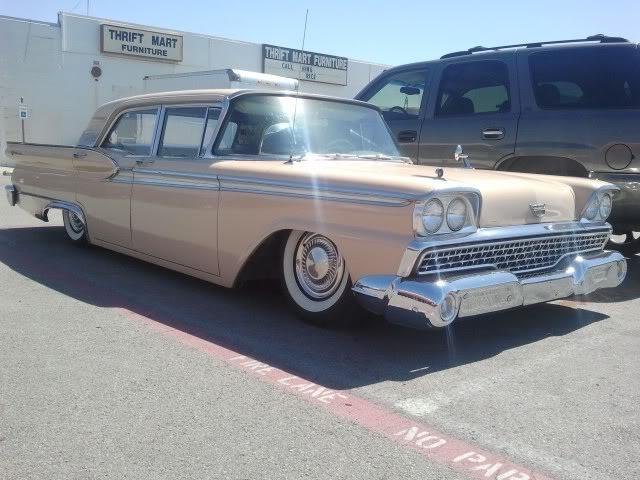
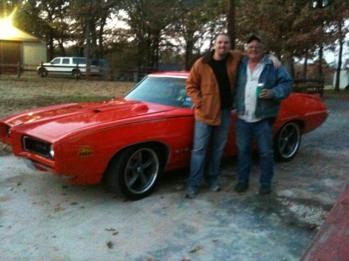
1969 GTO Judge Clone LQ4 turbo 4L60e
Compliments of 2165 Turbo Rail @ www.ls1tech.com
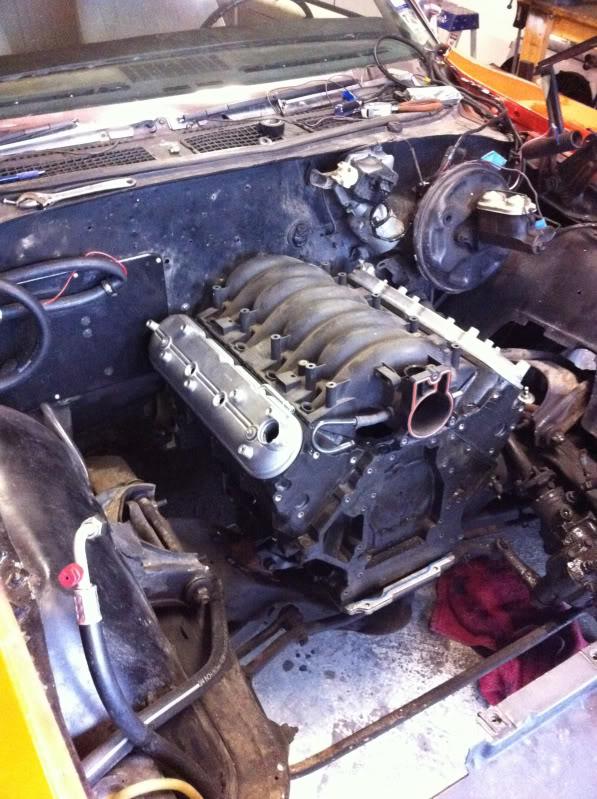
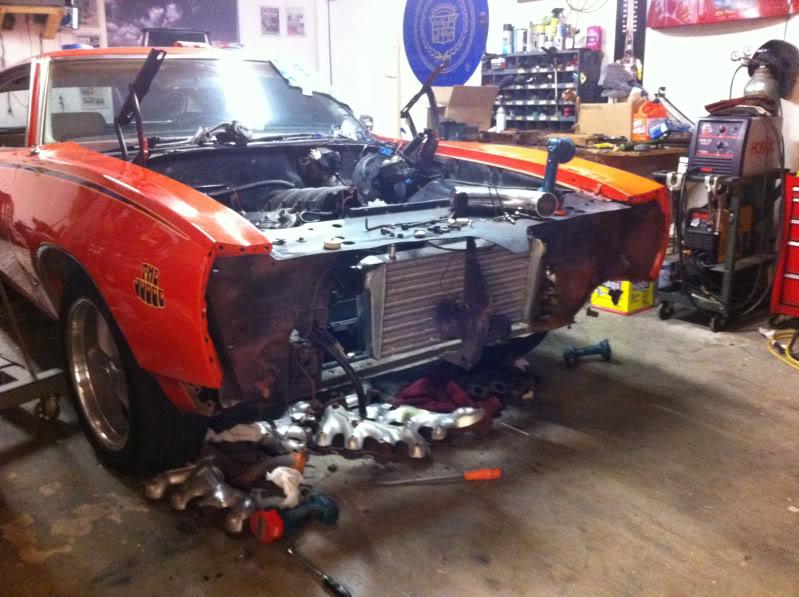
we started this a couple weeks ago so I guess its time to start posting some pics and info about it. This is my dad's car
its a Judge clone that someone built 10-12 years ago. It had a 400 with a turbo 350 and a 7.5 rear end with 2.73 gears
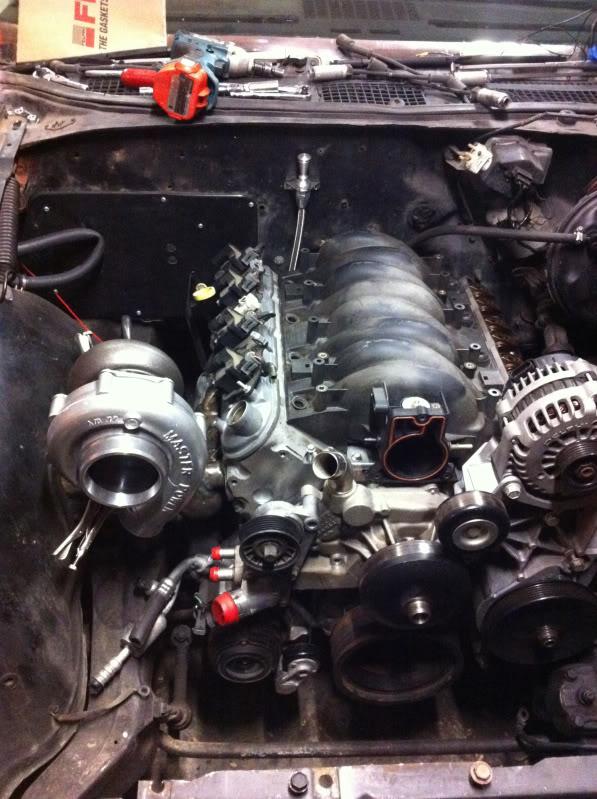
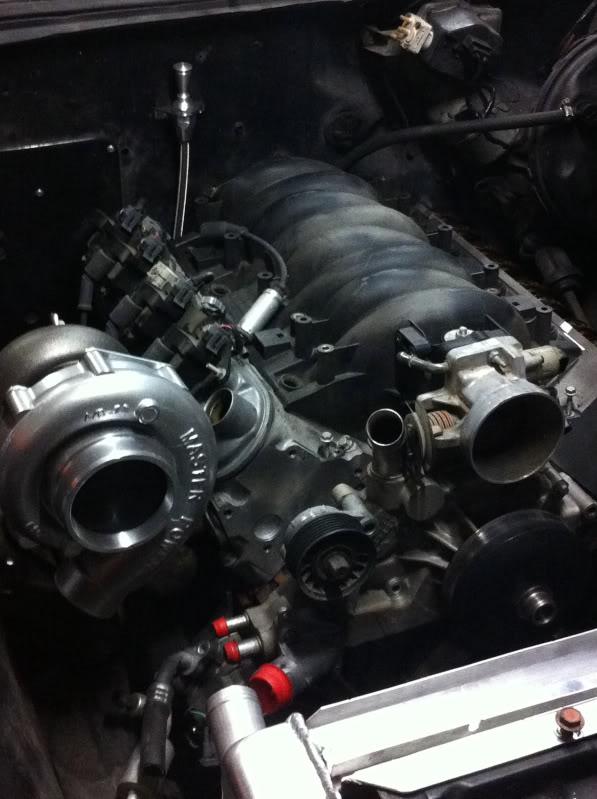
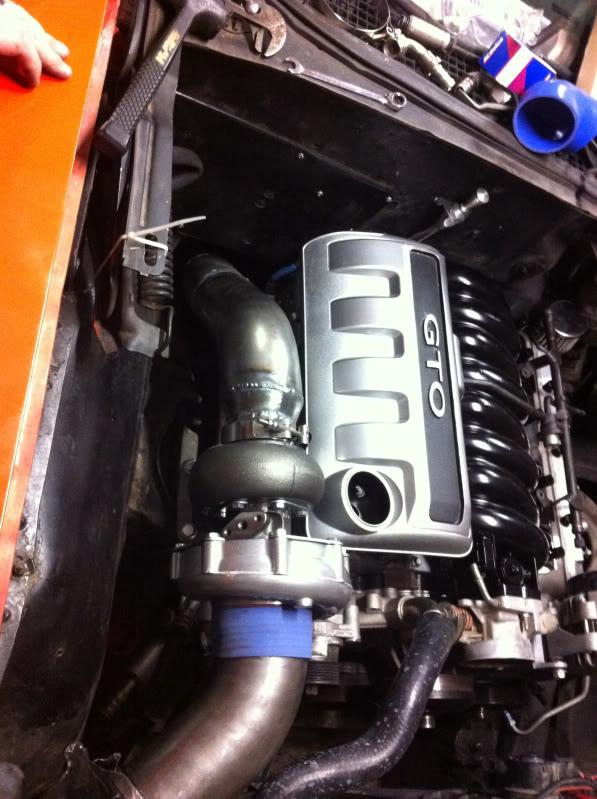
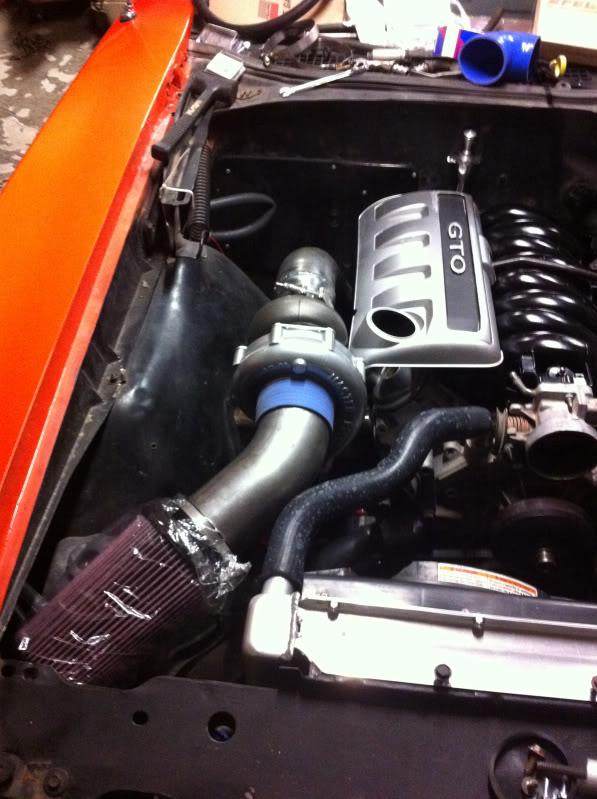
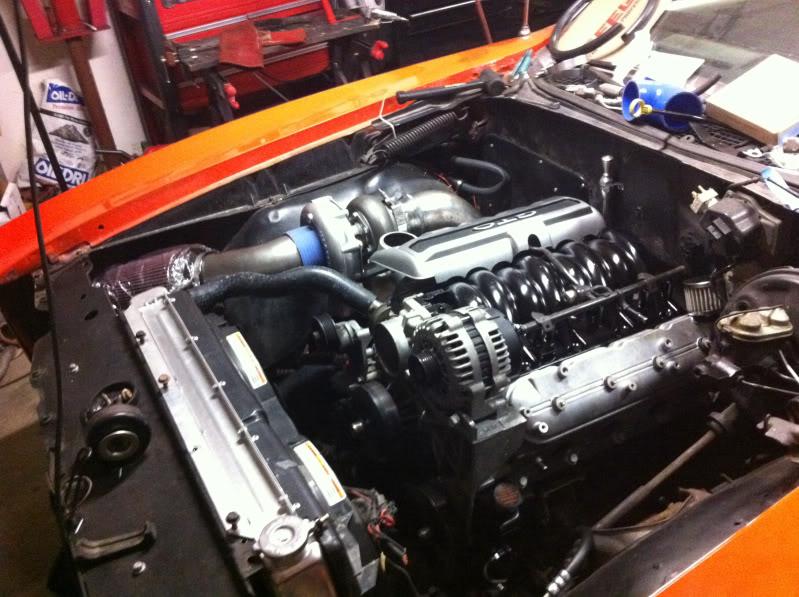
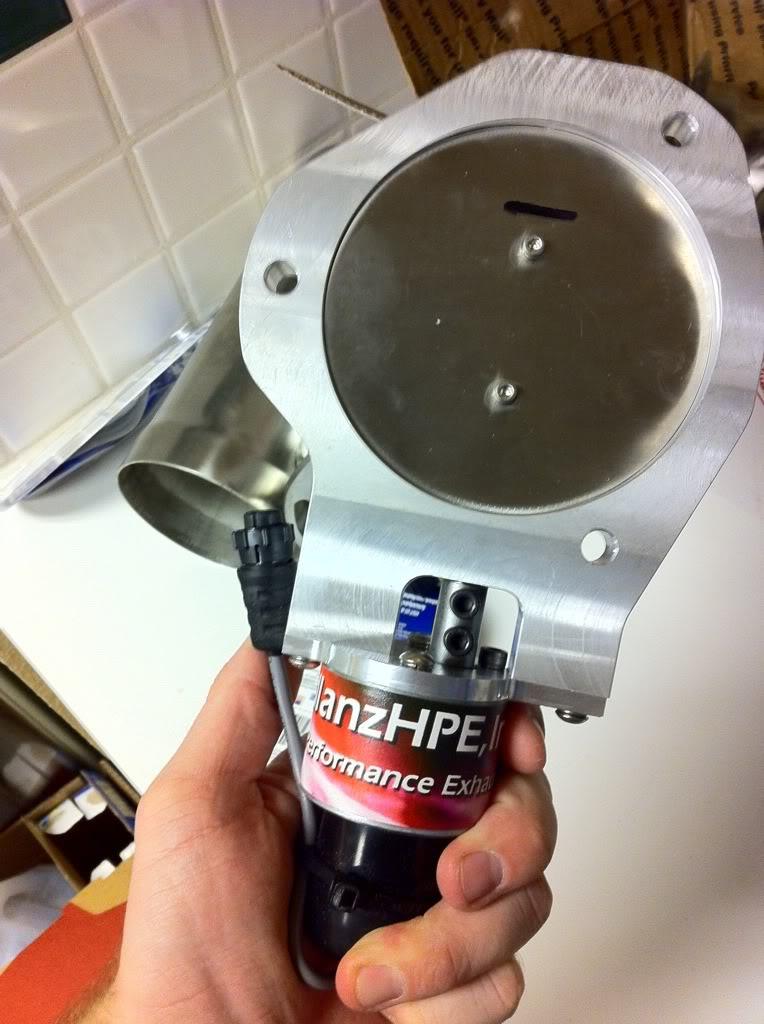
we are putting a LQ4 motor with a T76 turbo in it (coping my friends wagon, 94LS1Bird, the green 1960 Parkwood wagon)
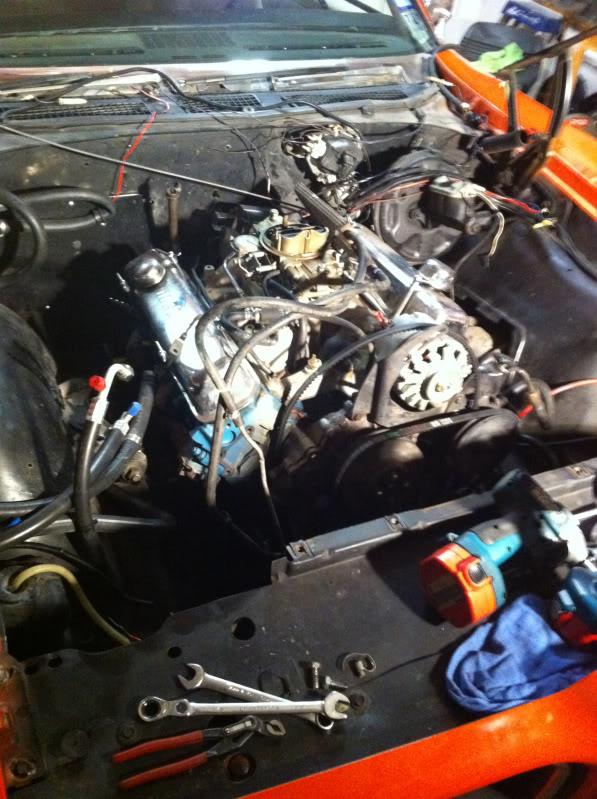
I'm using the COMP CAMS PART NUMBER #54-480-11

COMP CAMS 5/16" HI-TECH PUSHRODS 7.400" LENGTH #7955-16
Patriot Gold springs
Yank SS3200 converter
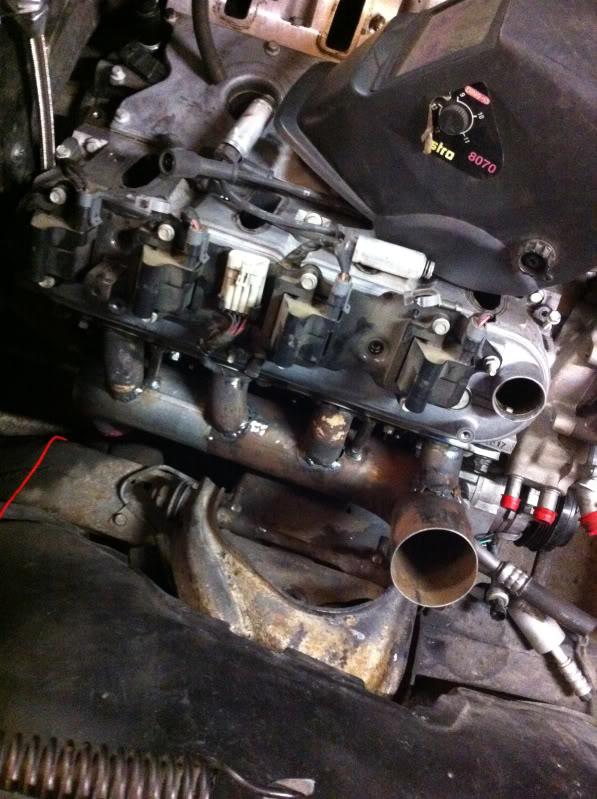
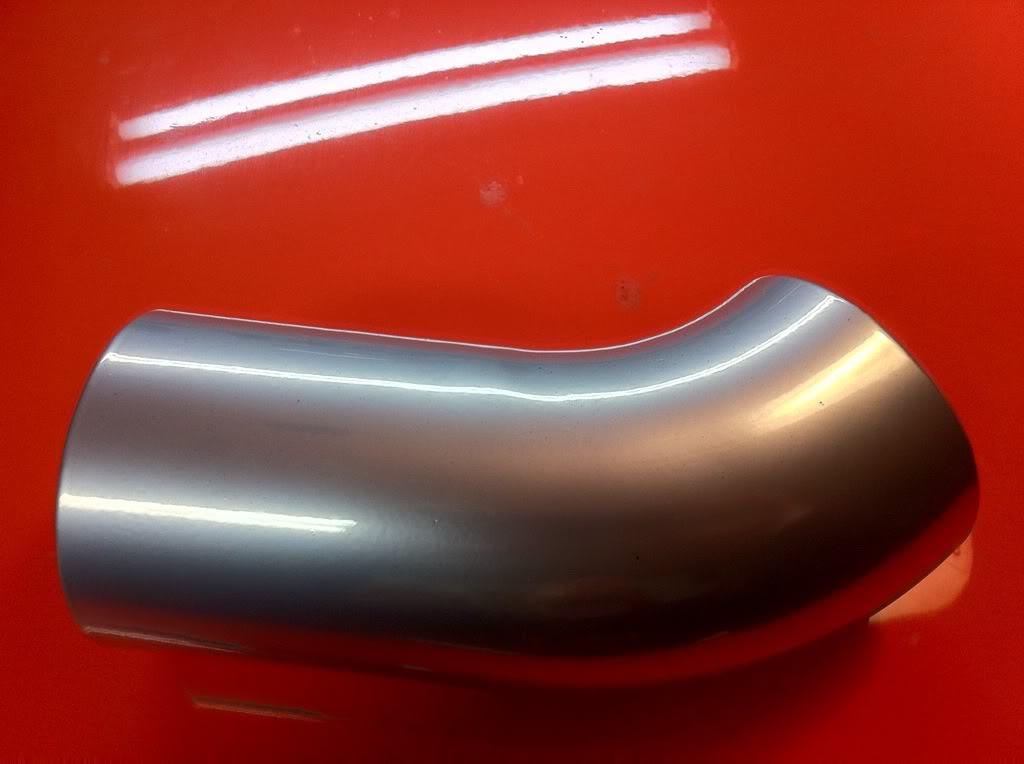
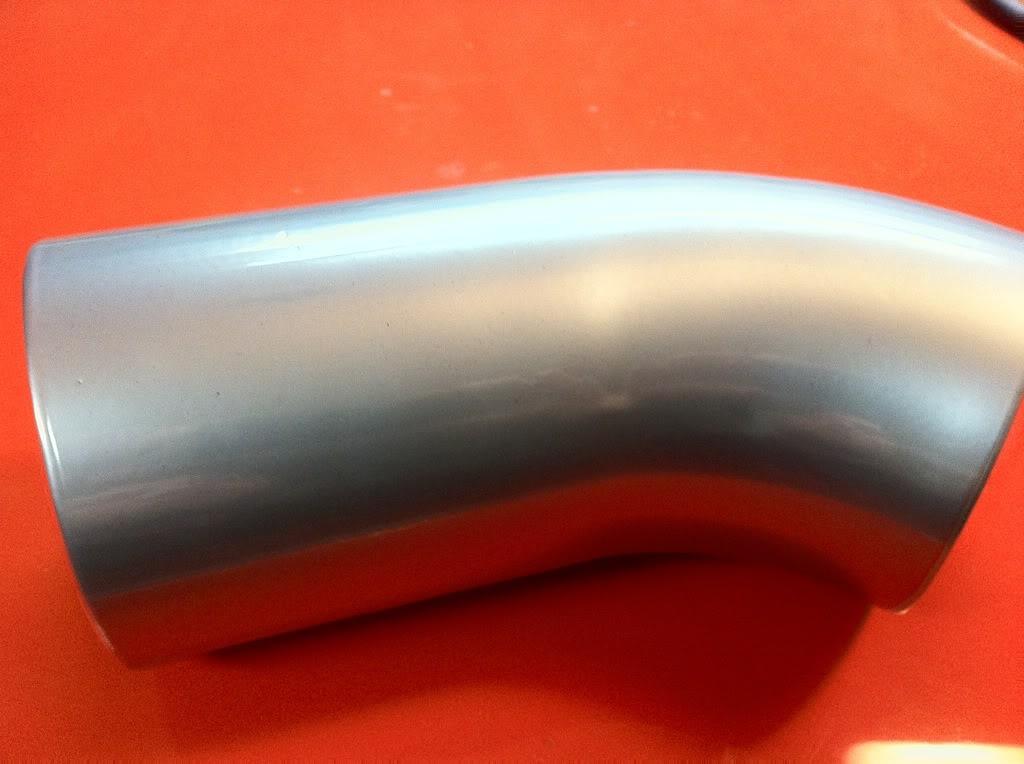
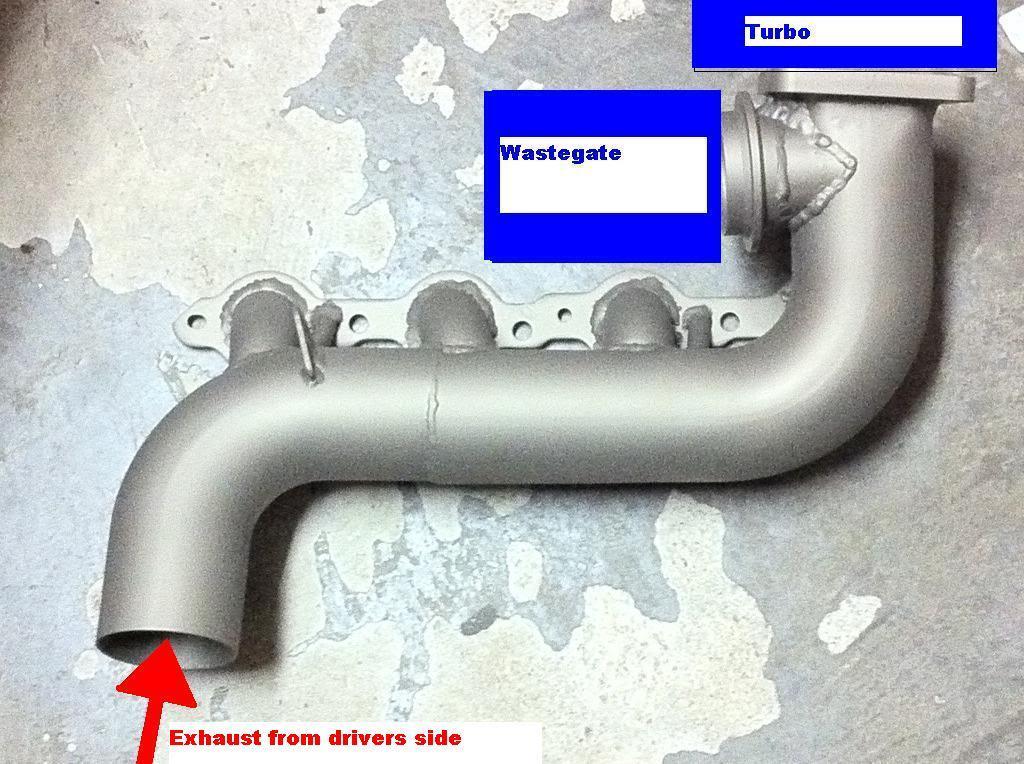
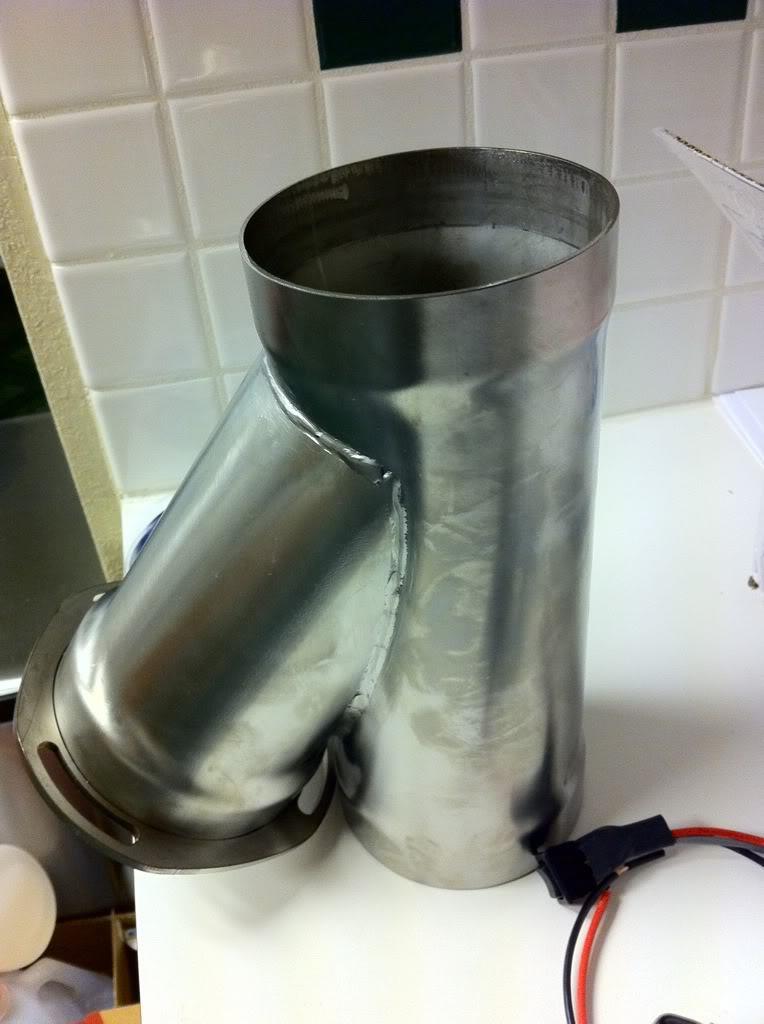
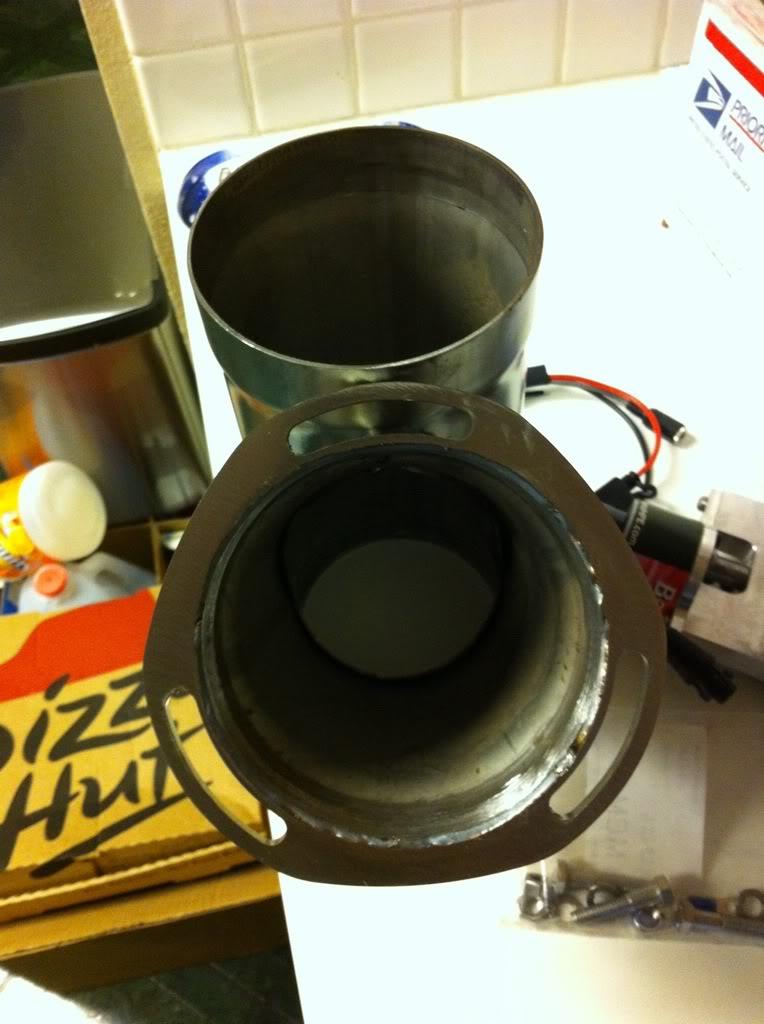
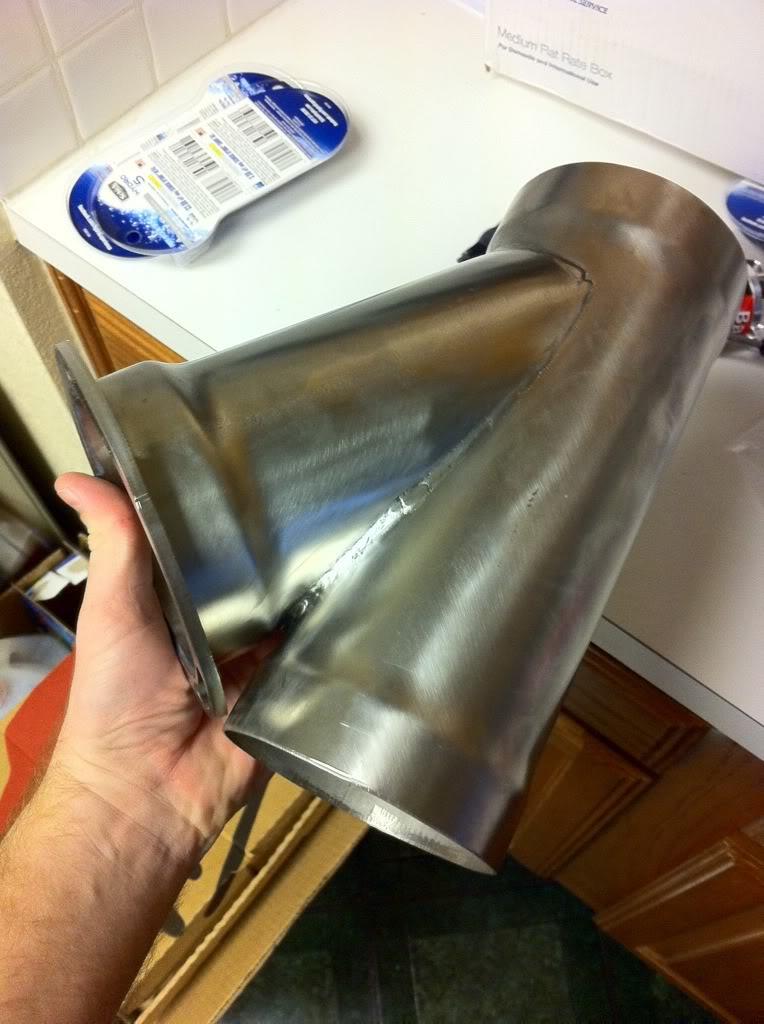
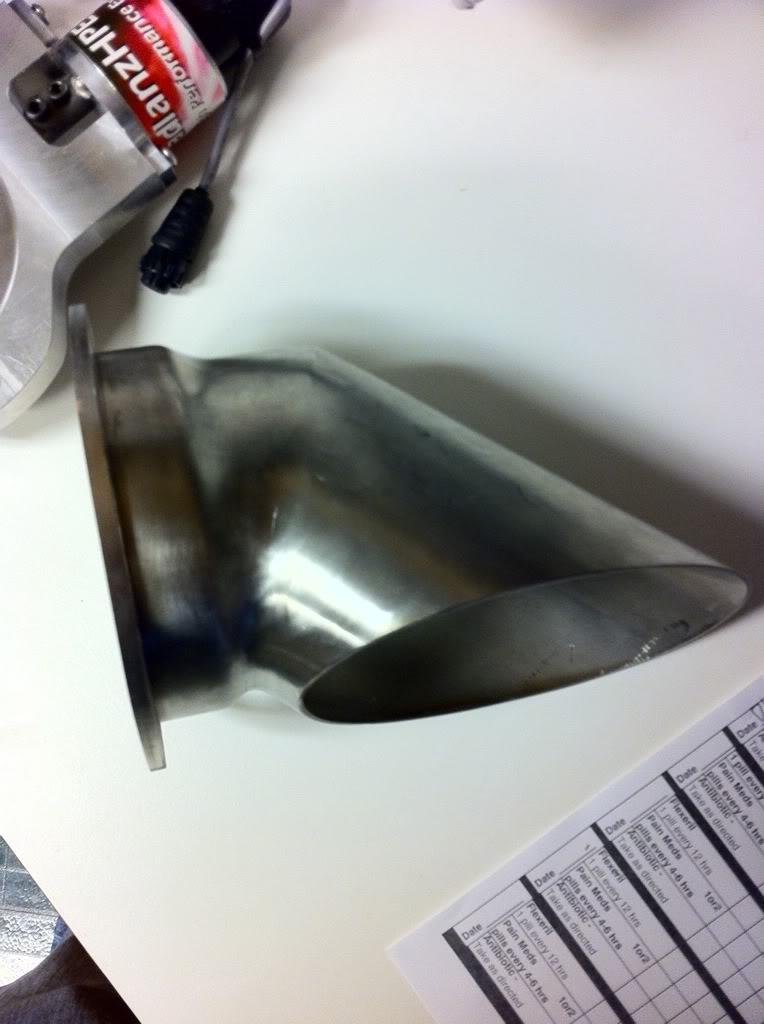
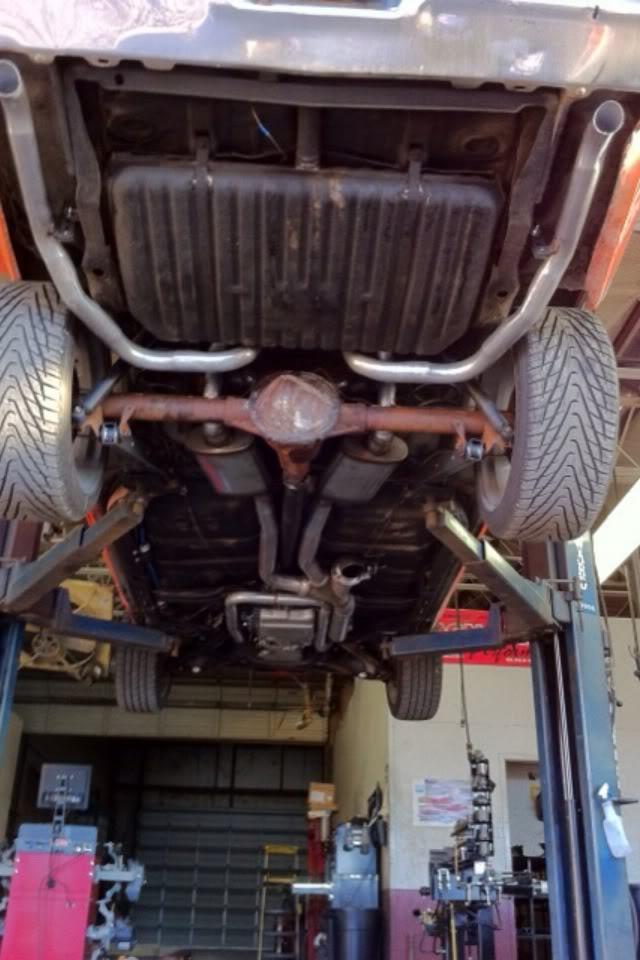
custom built 3" log manifold on the pass side and a stock f-body manifold on the drivers side with a 2.5" pipe connecting the two
for now I'm going to put in a 10 bolt with 3.32 Posi now has a built 9" with 3.50 and true trac
F-body Oil pan
Walbro 255 fuel pump now has Bosch 044
Aeromotive 100 micron prefilter
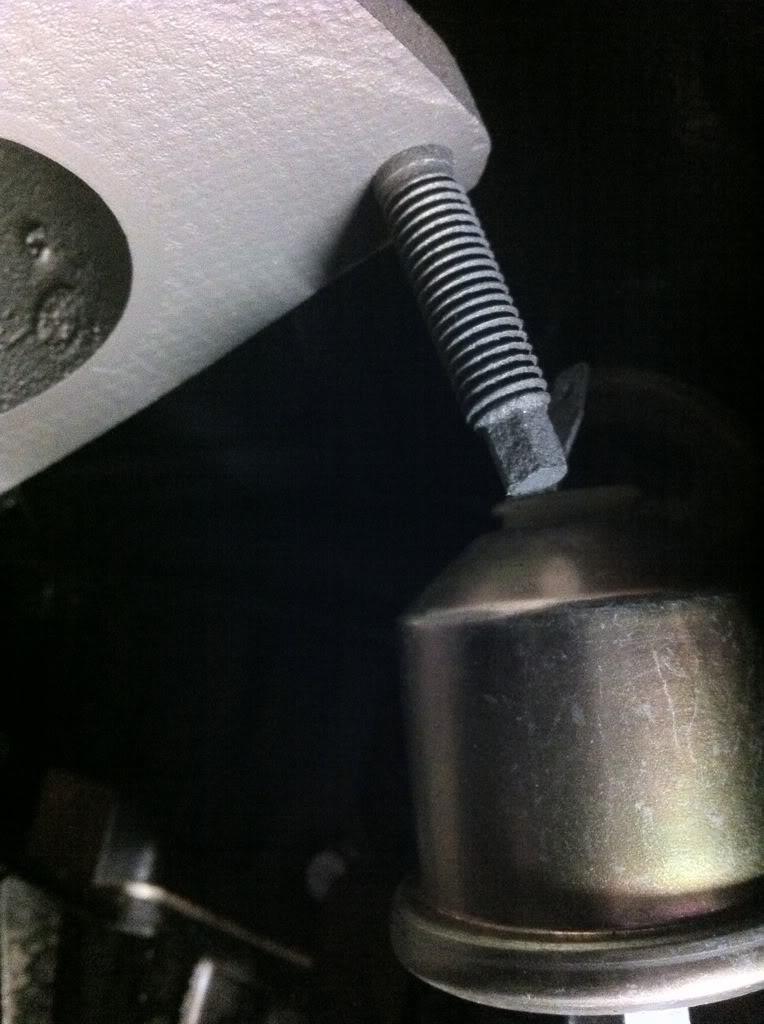
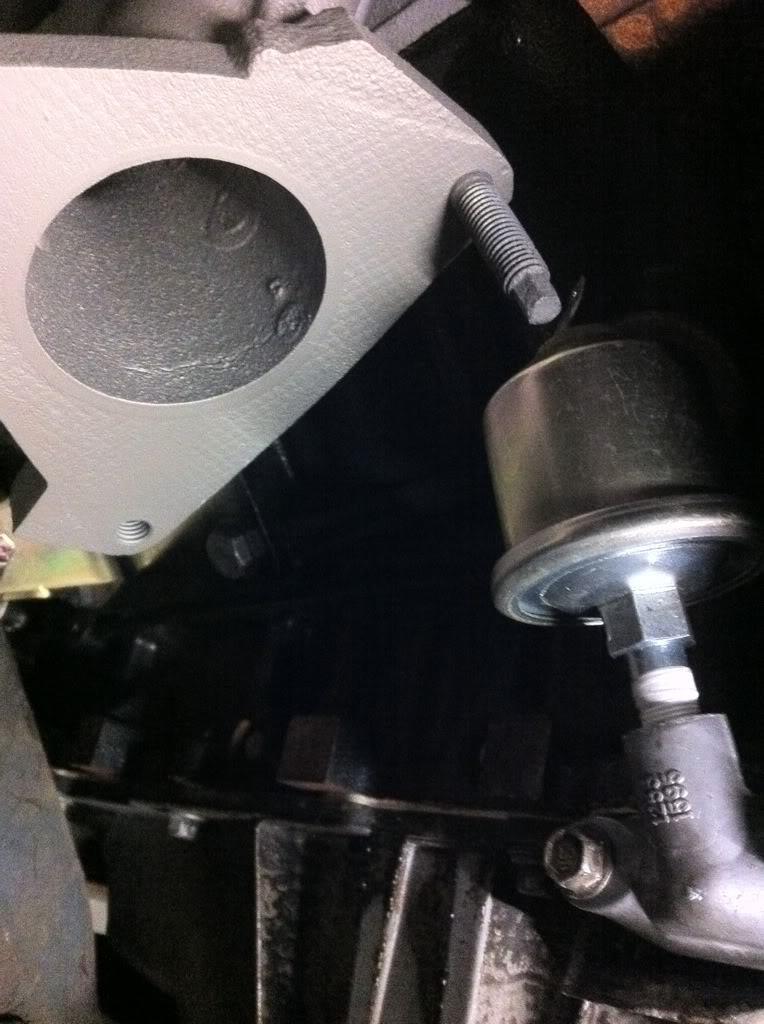
stock filter/regulator from an 02 vette
solid motor mounts
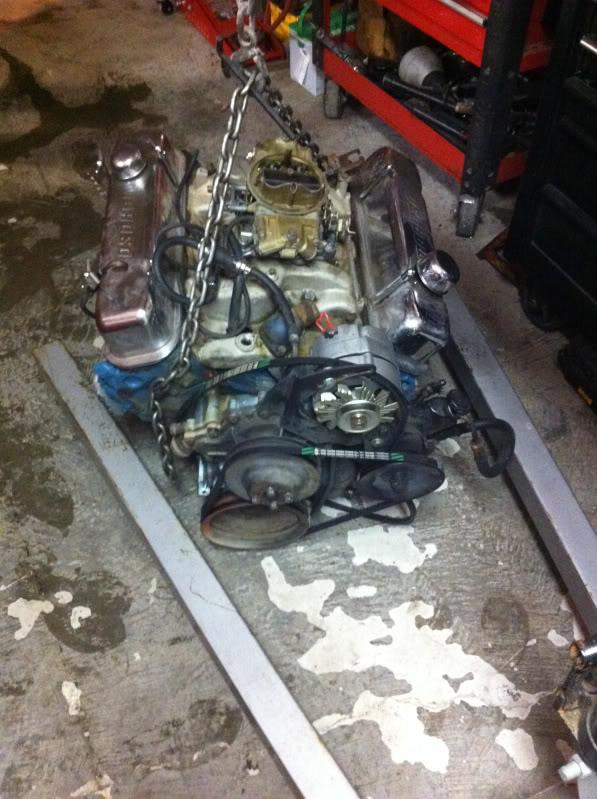
here are some pics
11/27/2010
we used a buddies mock up foam block and tranny (the only want to go)
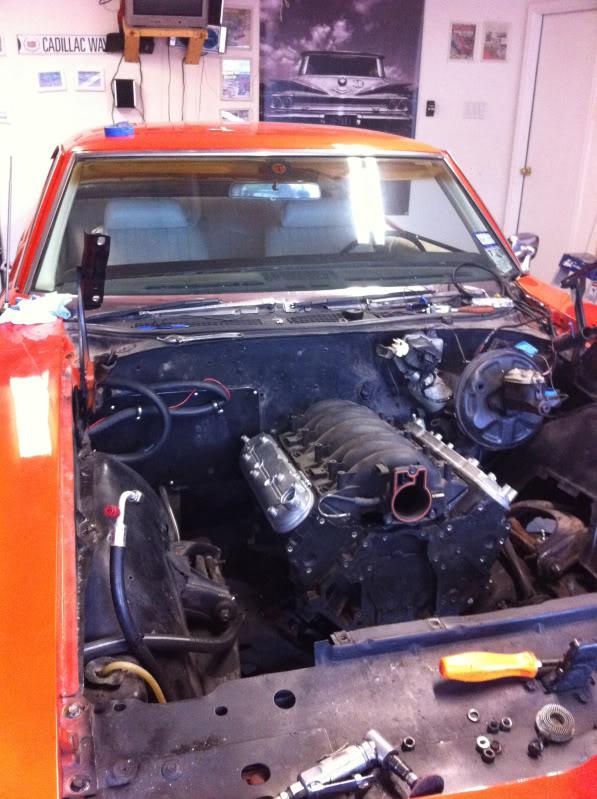
had to make sure the AC would work in its stock location 
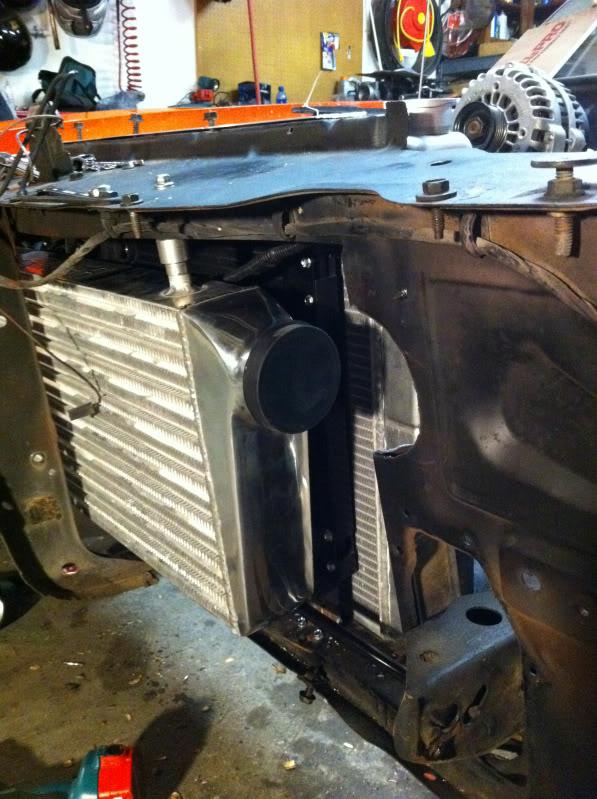
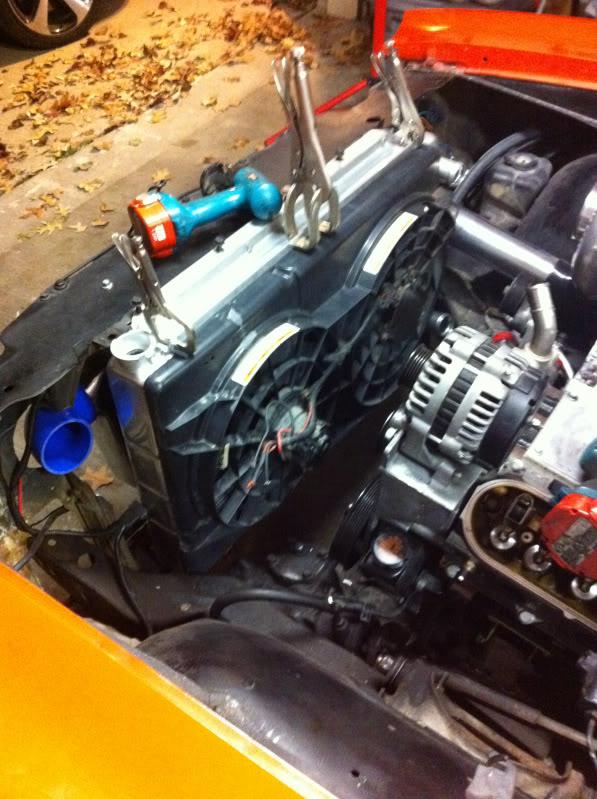
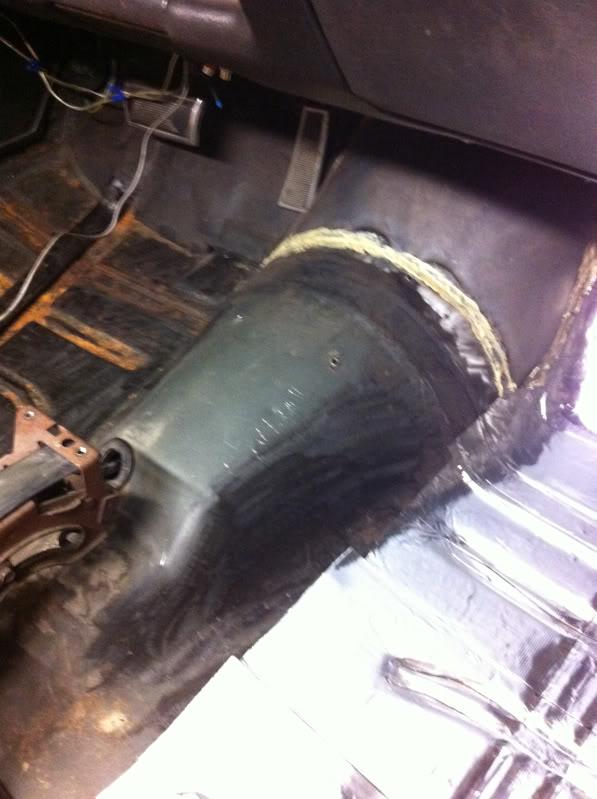
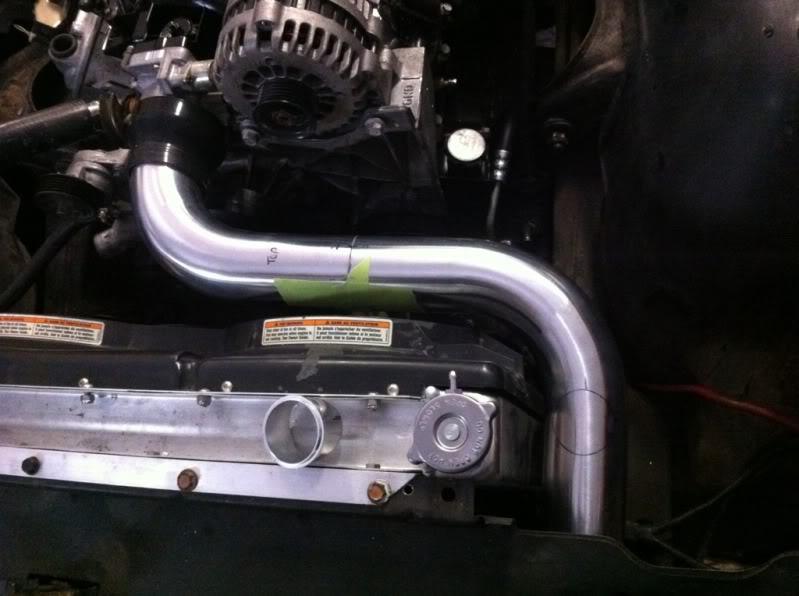
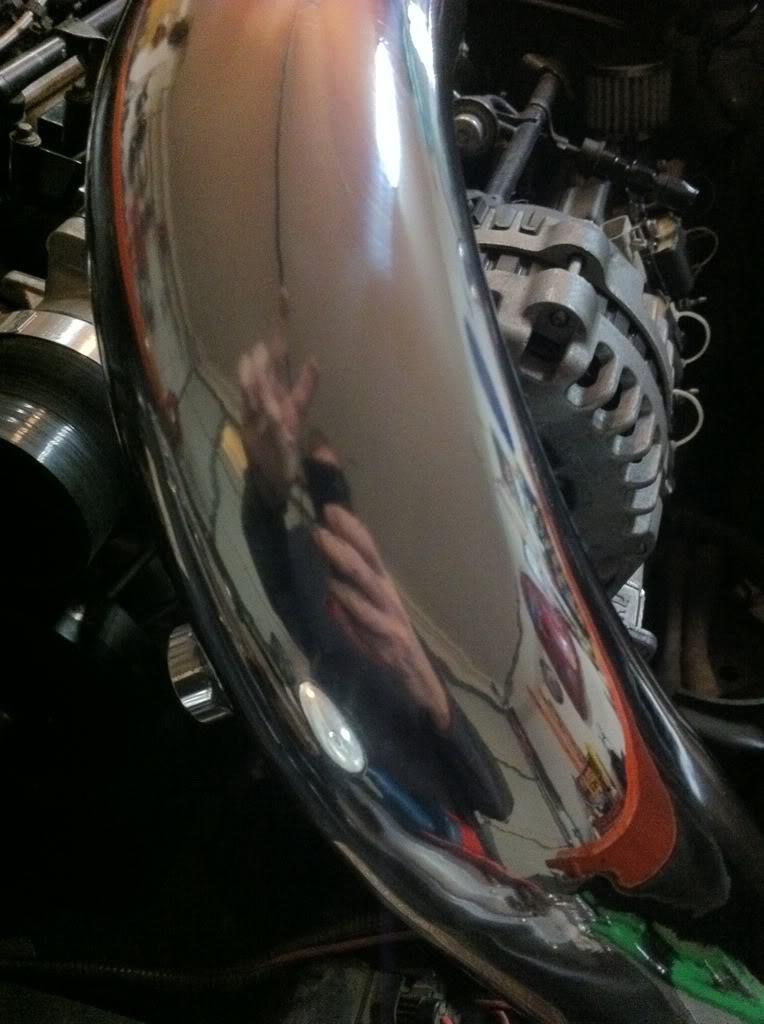
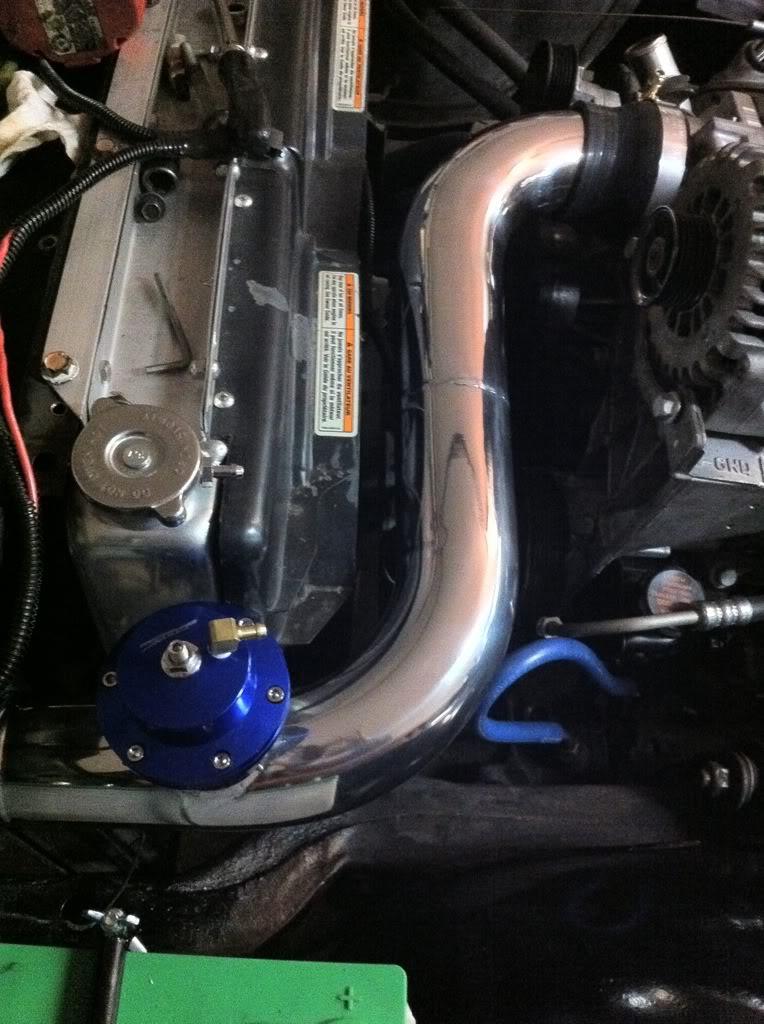
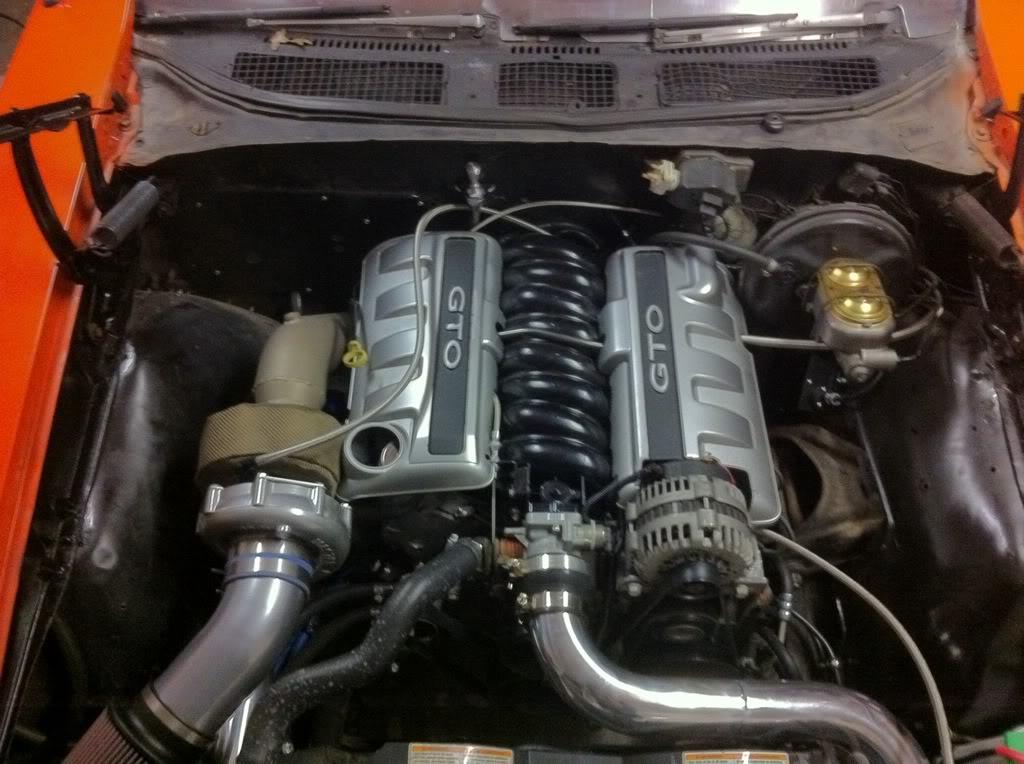
getting the intercooler in place
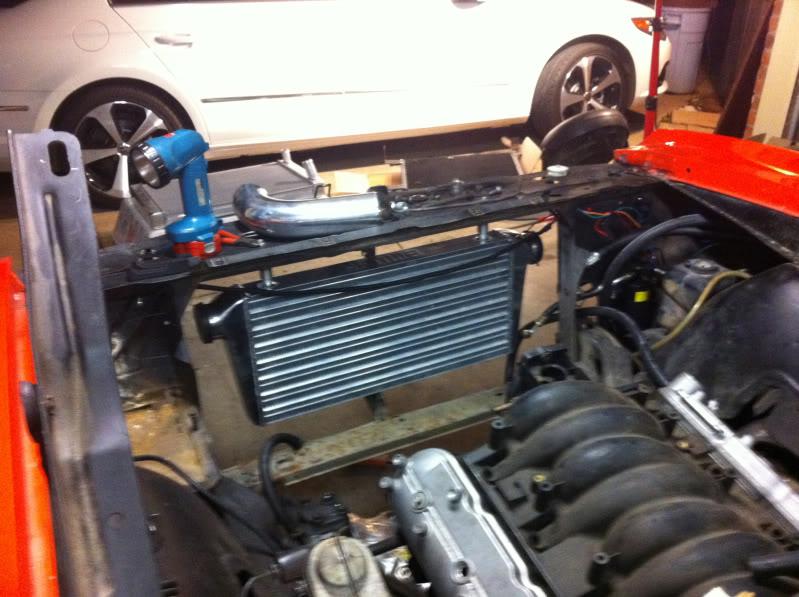
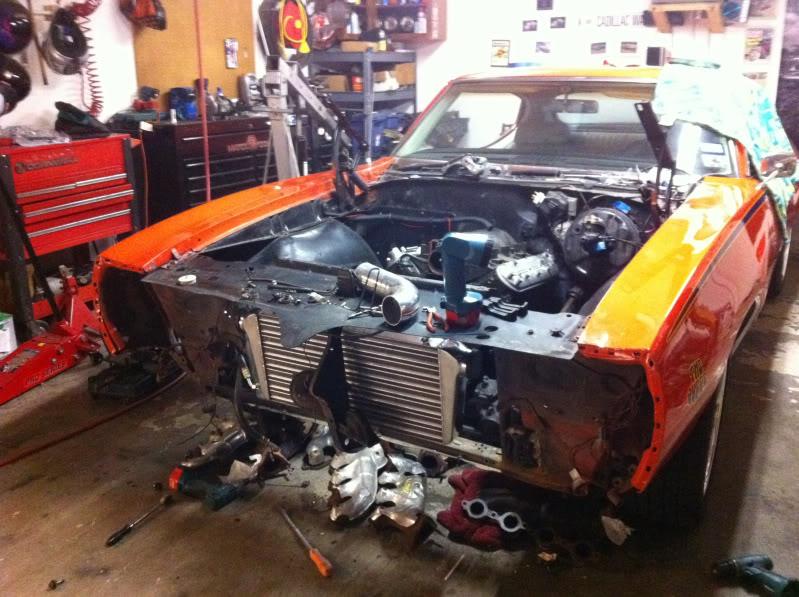
welded in a bar to bolt the bottom of the inter cooler to
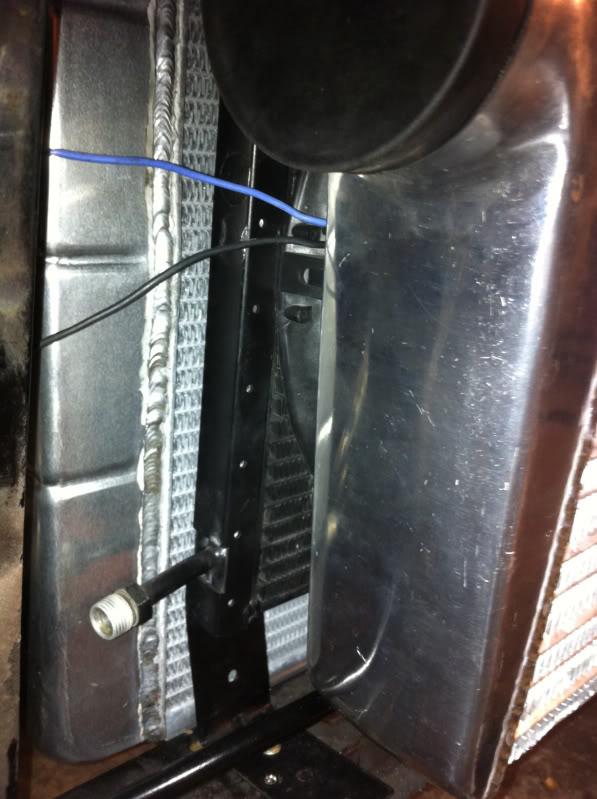
ignore the core support not being bolted to the frame. its since been fixed
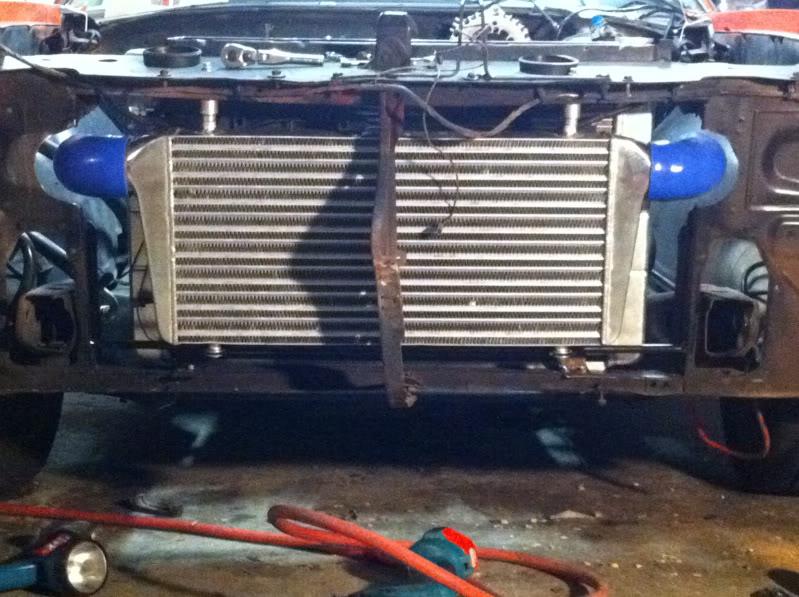
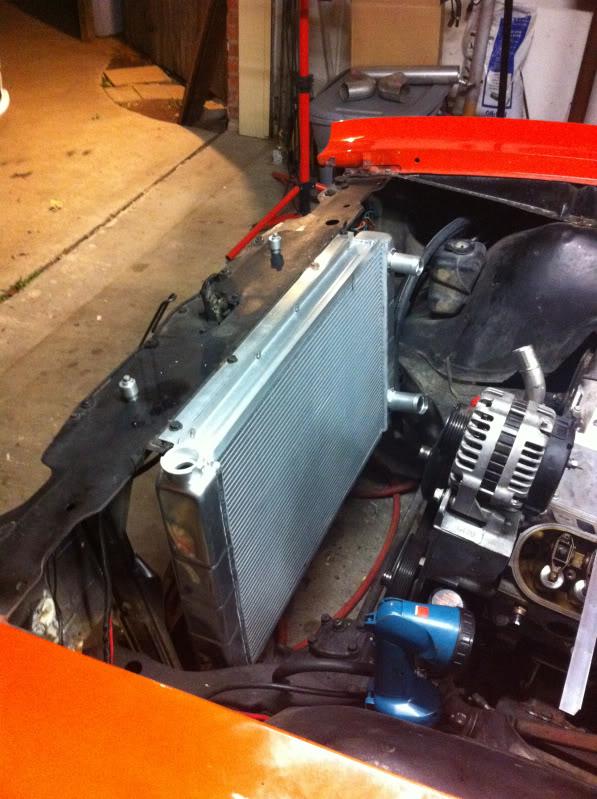
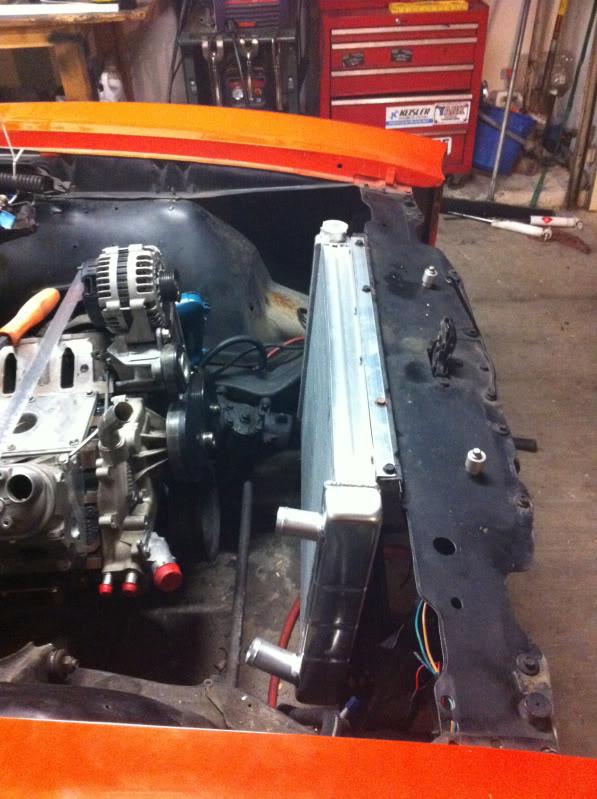
new dual pass radiator
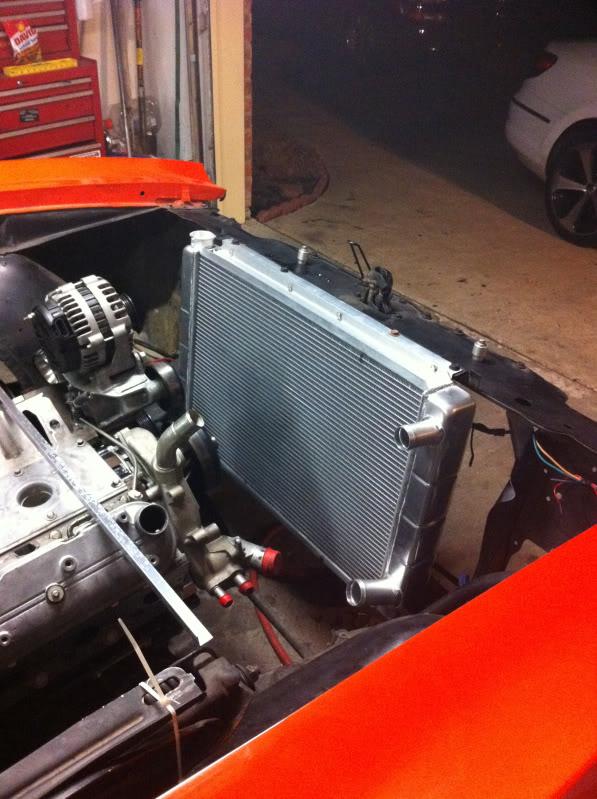
in with acc on and log tacked together
condenser mounted between the inter cooler and radiator
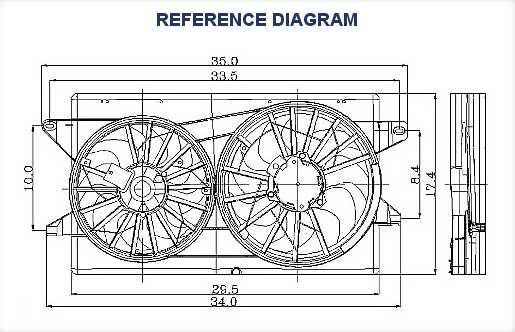
Windstar van fans
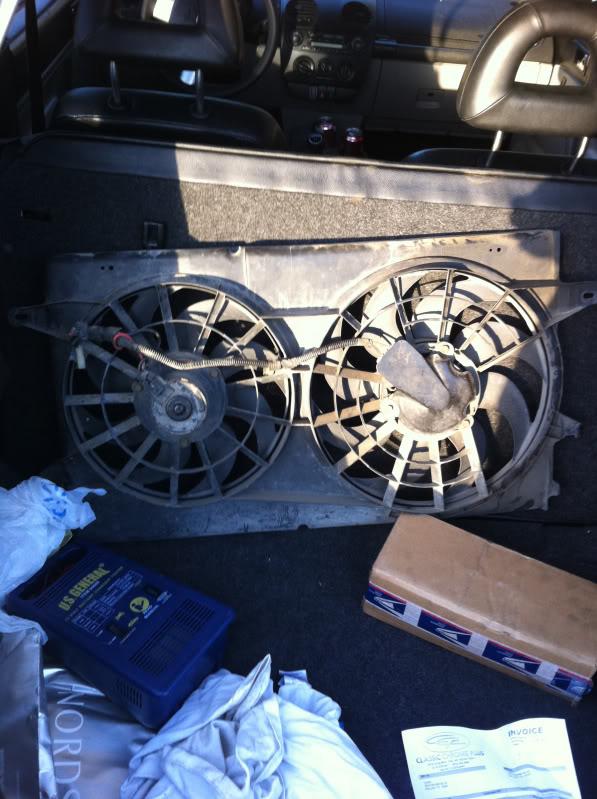
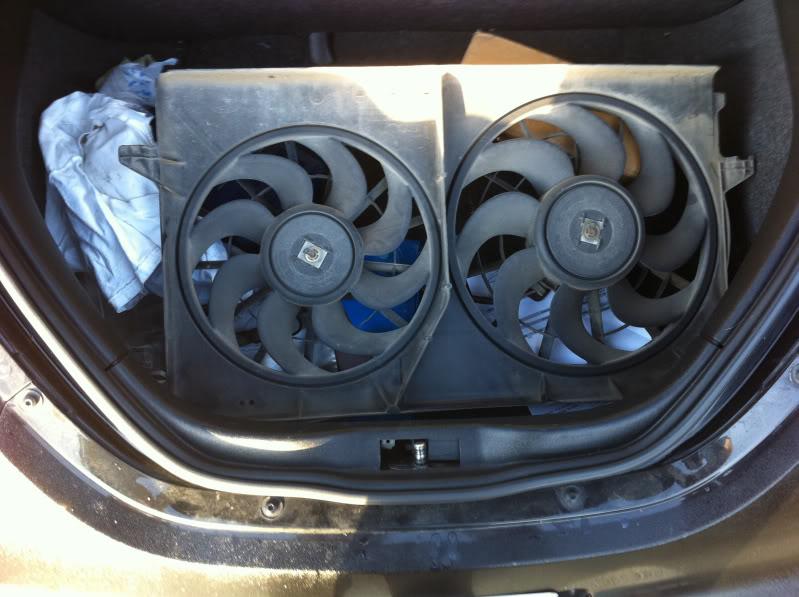
did a little trimming on the fans
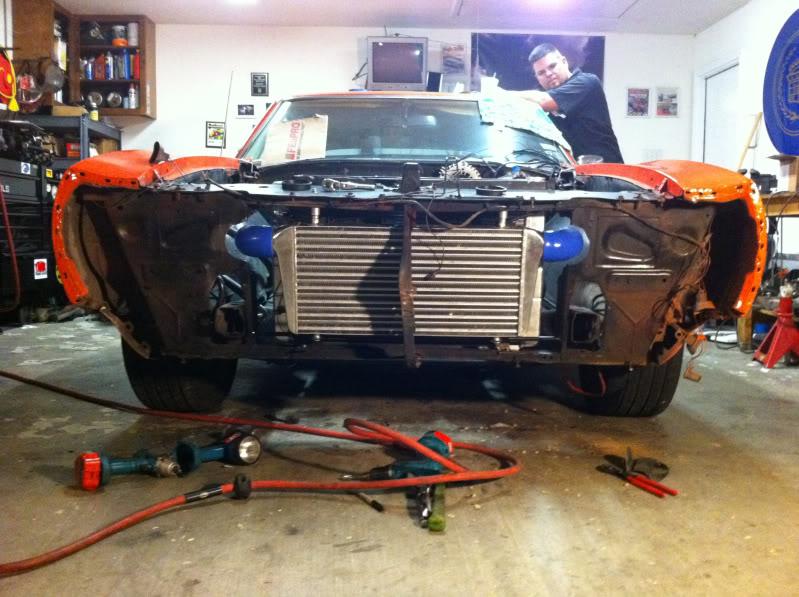
had to cut the floor a little to get everything lined up the way we wanted
my 5 day old daughter helping out by holding the 100 micron prefilter

11/28/2010
The fans are from a Ford Windstar van (mine are the 1995-1999 style)
this was posted by ChuckD71 a couple weeks ago.
2000 Ford Windstar Fan Assembly
left fan: 340ml= 13.3inches
right fan: 390ml=15.3inches
left fan: 60.3cmm=2129.193cfm
right fan: 64.4cmm=2273.964cfm
this was rated at 1935 RPMS
4403.157 cfm total......
1995-1998
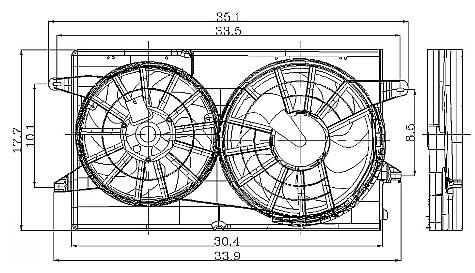
1999-2003
The radiator is from ebay $179.99 plus $20 for shipping
http://cgi.ebay.com/ebaymotors/ws/eB...TQ:MOTORS:1123
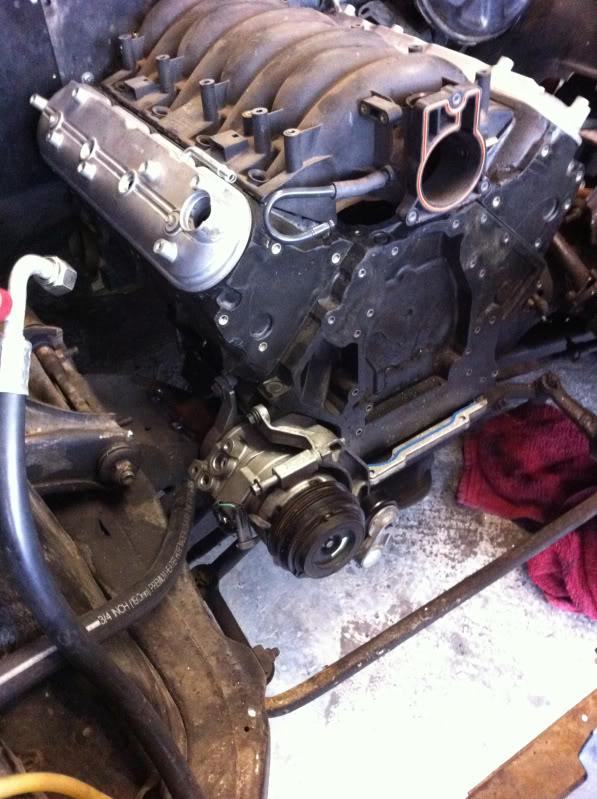
yes I'm using an aftermarket AC system (Classic Air) The AC compressor is a regular AC compressor, but not exactly sure what it came off of, 94LS1Bird (John) had it laying around at his house.
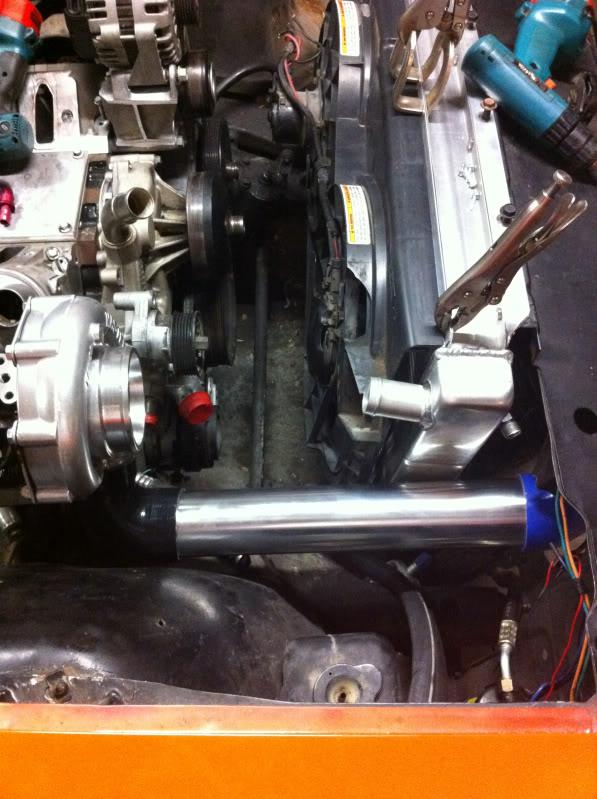
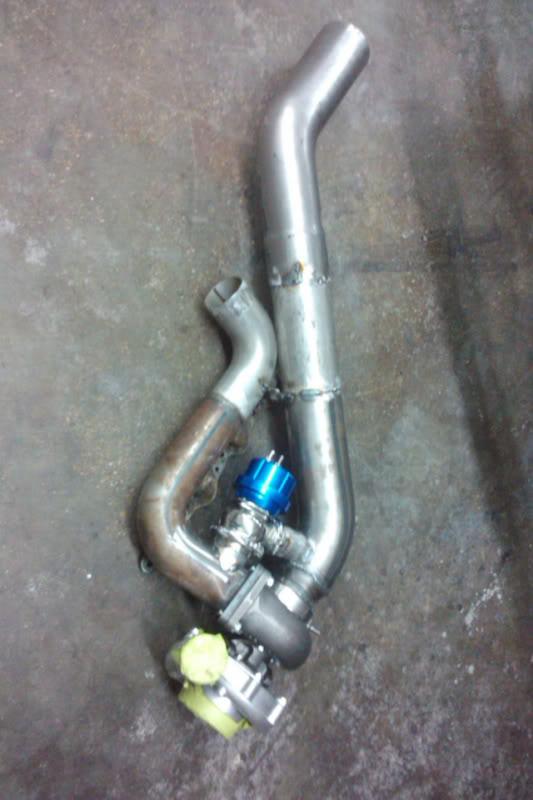
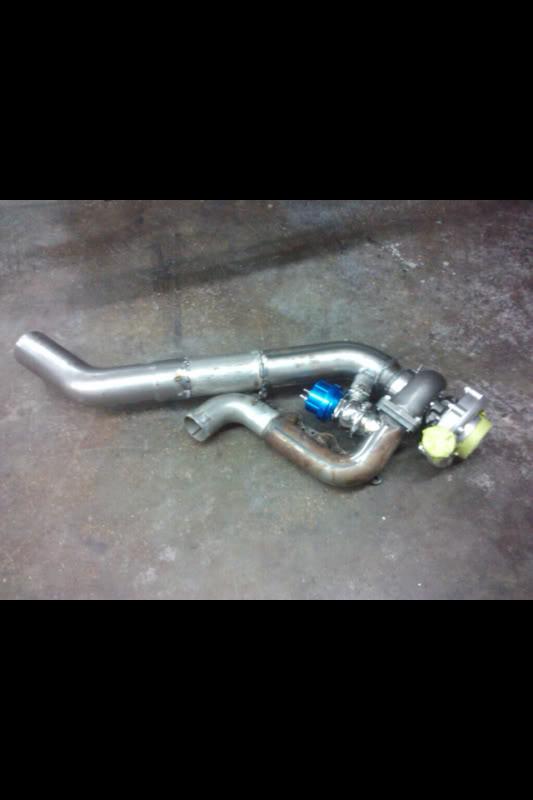
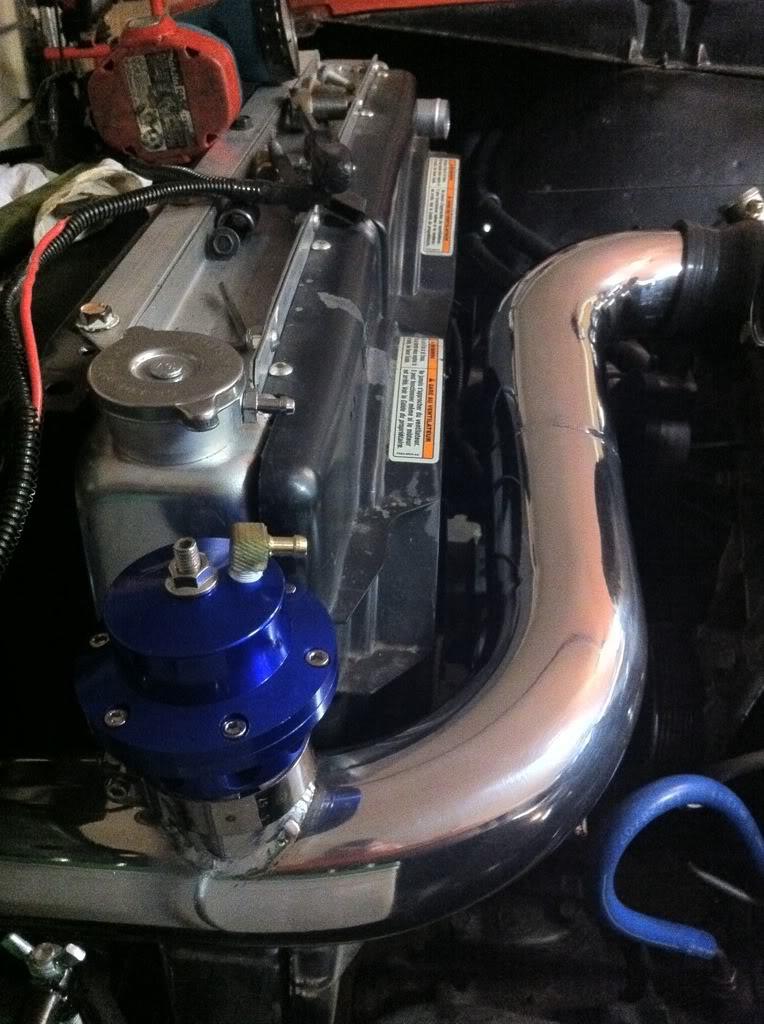
tonight we got the 4" down pipe built, 4" filter to turbo pipe cut, and tranny cooler mounted and barked at the hole the rest of the time.
it looks like there is TONS of room but its starting to get a little tight on the hot side. The 3" log and the 4" down pipe along with the waste gate is proving to be a snug fit.
12/5/2010
these aren't the best pics of it and this is before I had it all tig welded
12/6/2010
we haven't worked on the car in a few days but we are going to tomorrow night. the down pipe and waste gate have all been welded up, just need to pick it up tomorrow.
I should have move pics posted up tomorrow night.
I'm getting excited now because its all starting to LOOK like we are getting things done.
12/11/2010
worked on it a little today.
got the IC pipe mocked up from the IC to the TB and figured out where the air temp sensor bung and the blow over valve need to go

****EDIT***
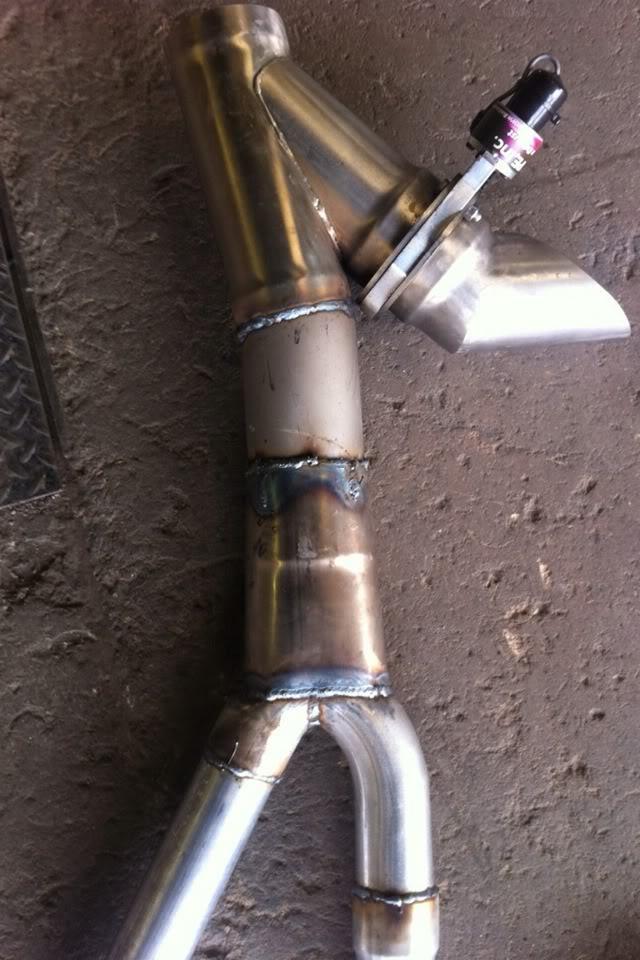
the exhaust changed.... you can see it on page 6 post number 106*****
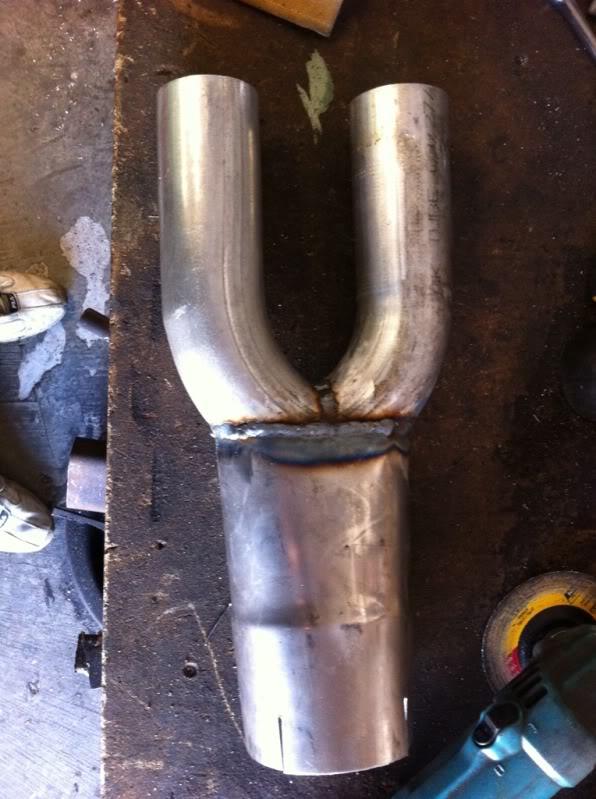
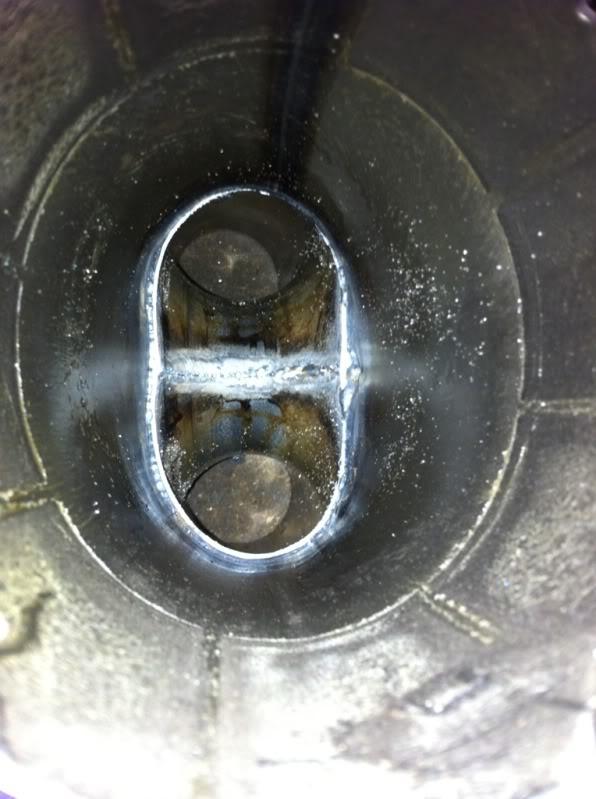
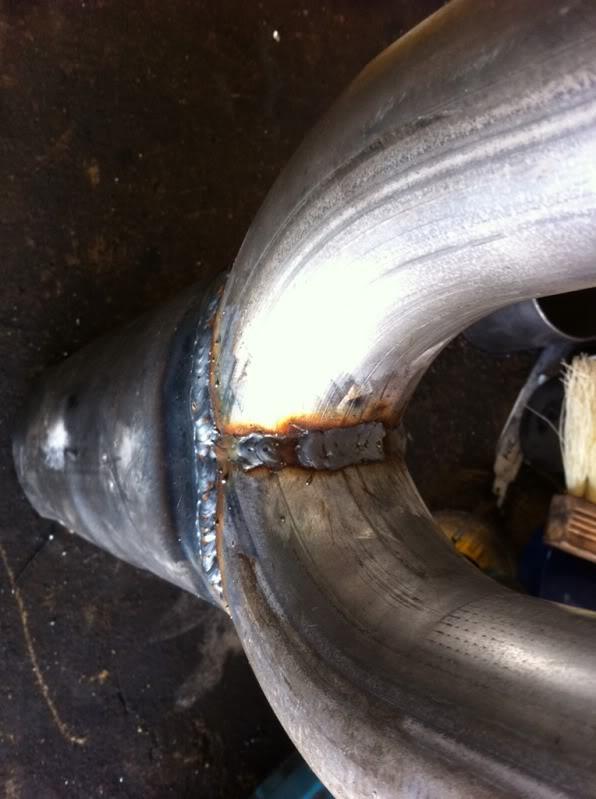
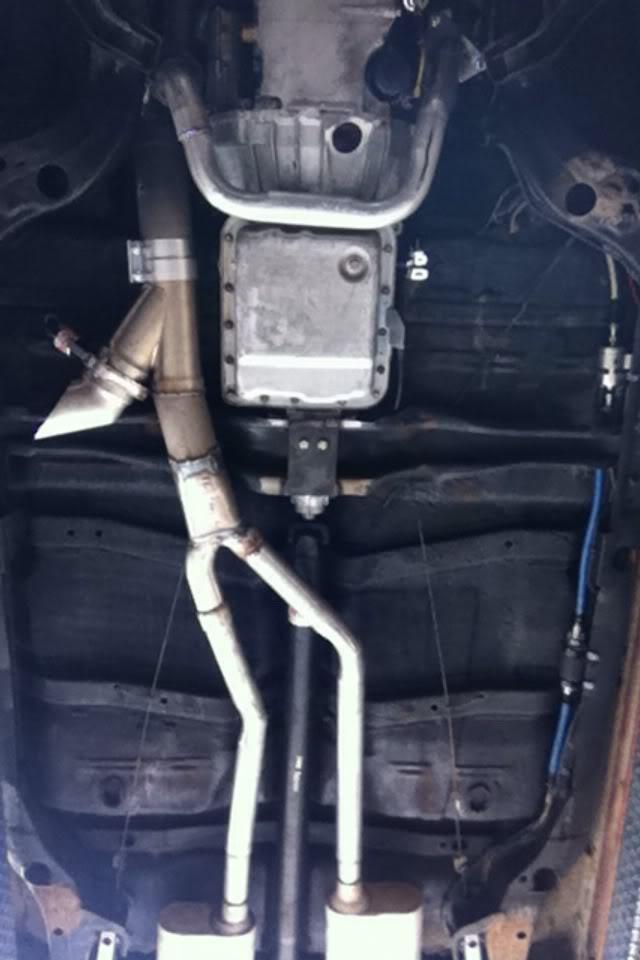
I'm going to put a 4" electric cut out on the car and when its closed I'm going to have the exhaust run through the dual mufflers out the back of the car. So today we made the 4" to two 2.5" pipes by ovaling the 4" on one end. Then we took a few inches out of the middle of a 2.5" U bend. Then welded the two U bend pieces back together and marked where we needed to cut the "new" U bend so that we could weld it to the oval 4"
needs blown out but you get the point
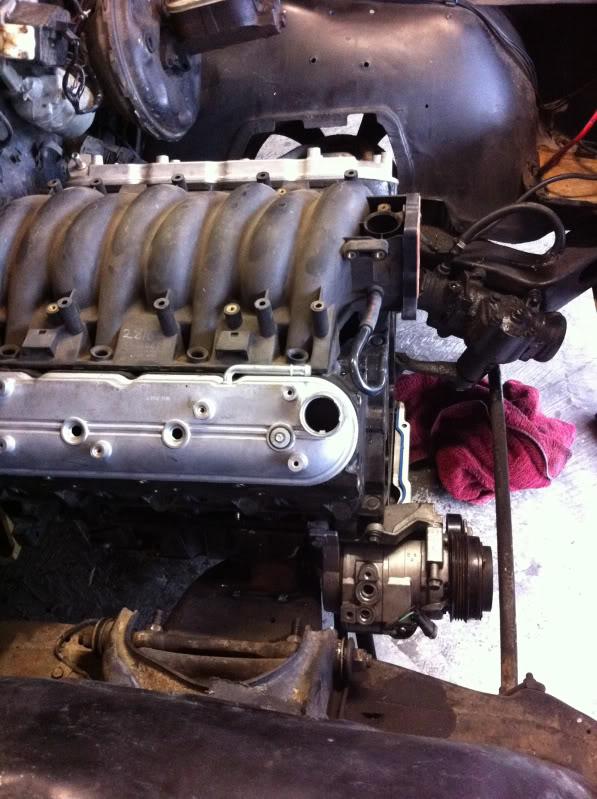
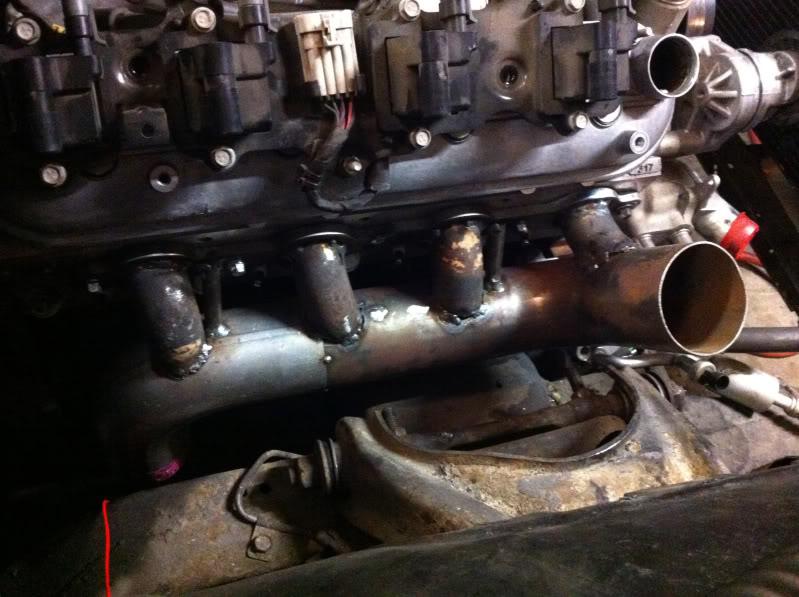
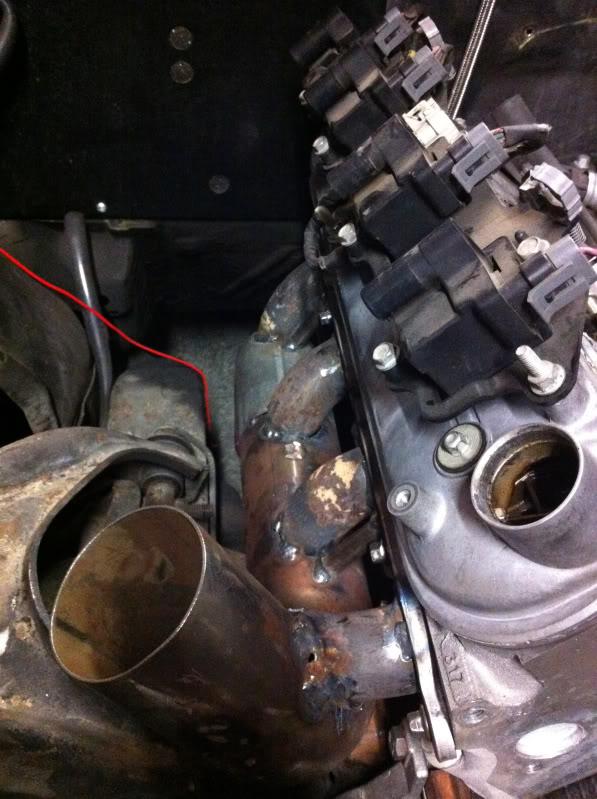
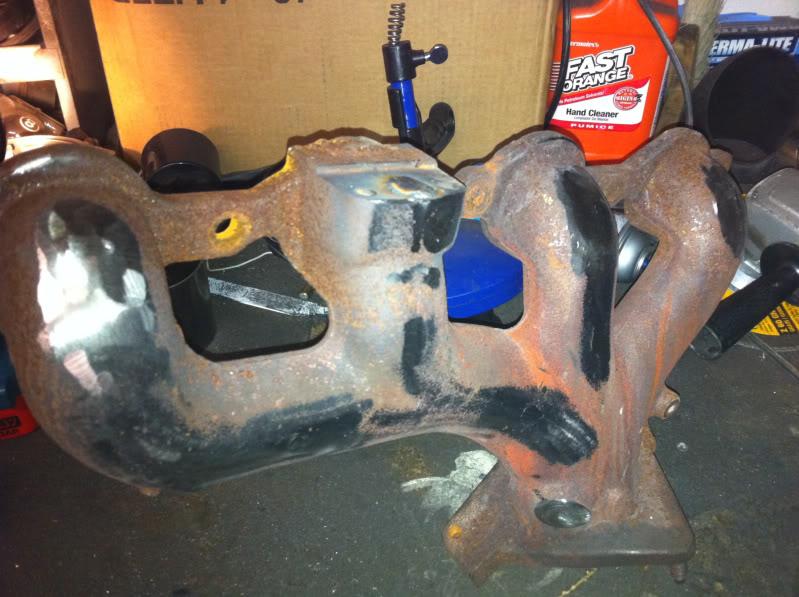
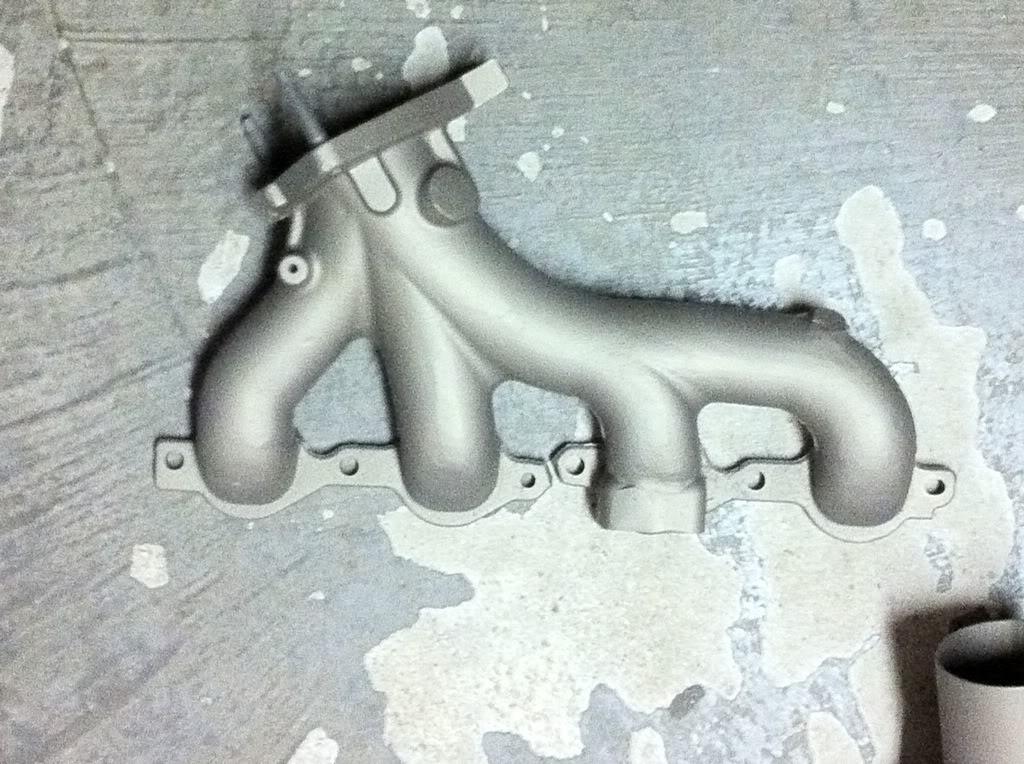
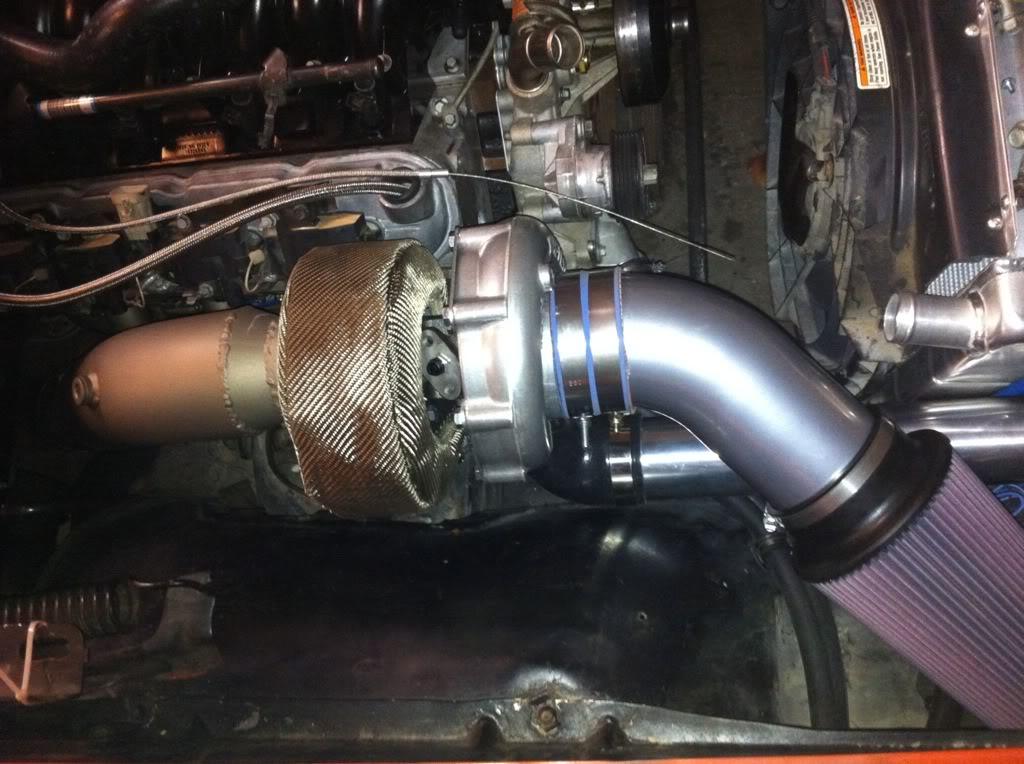
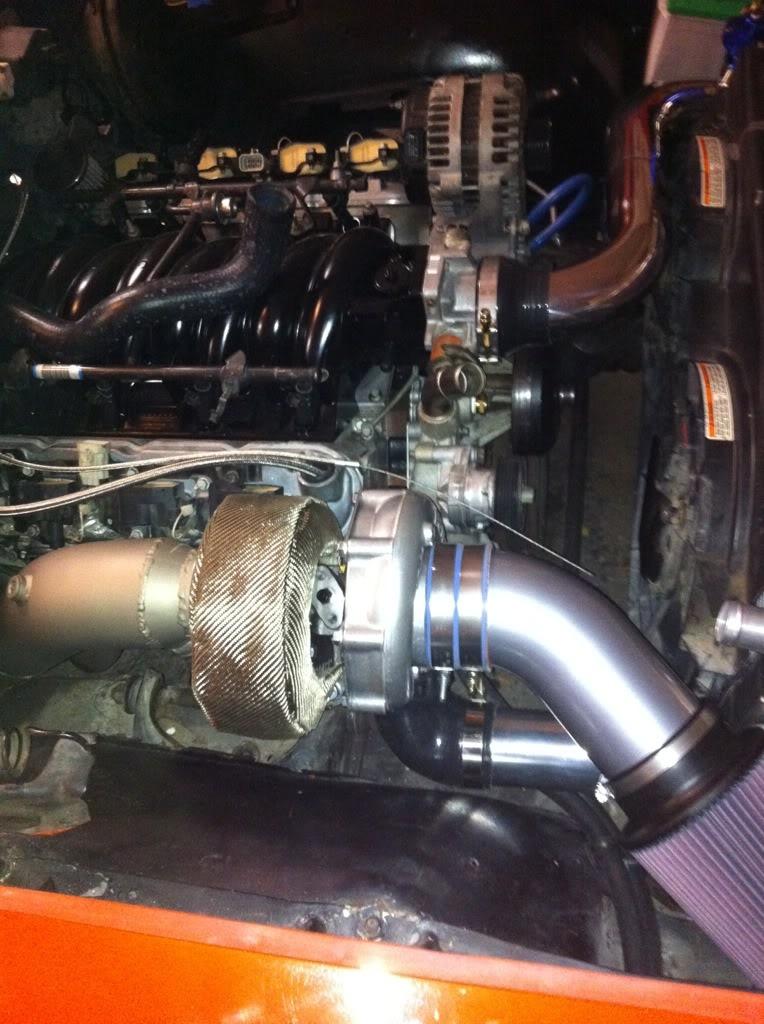
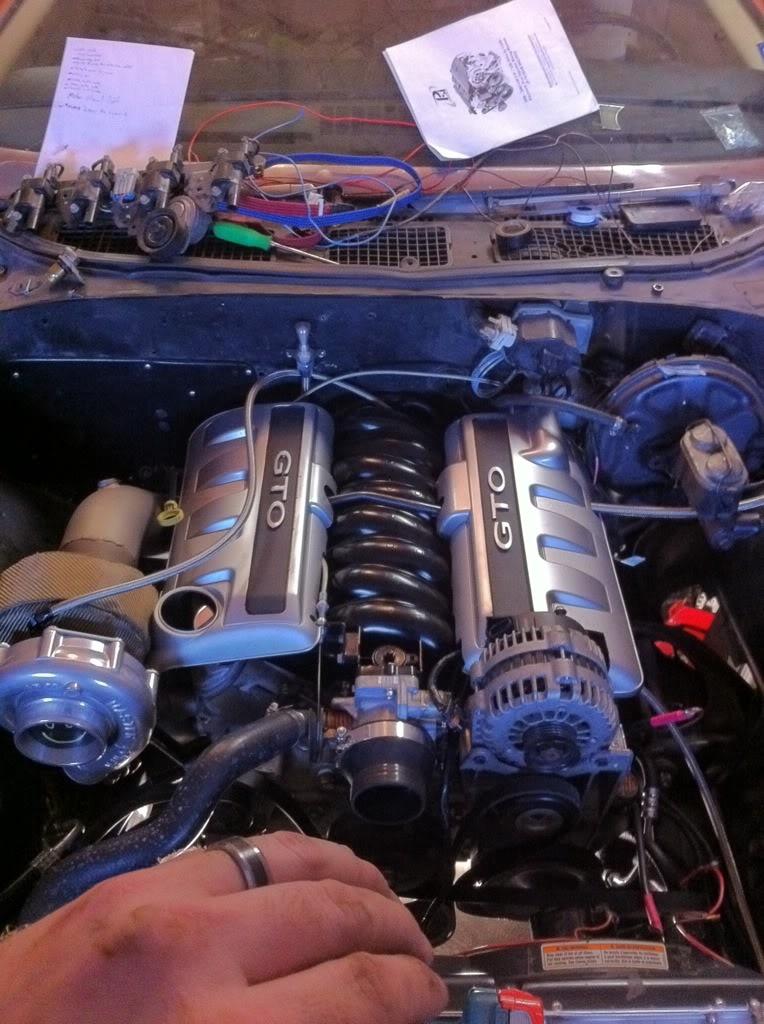
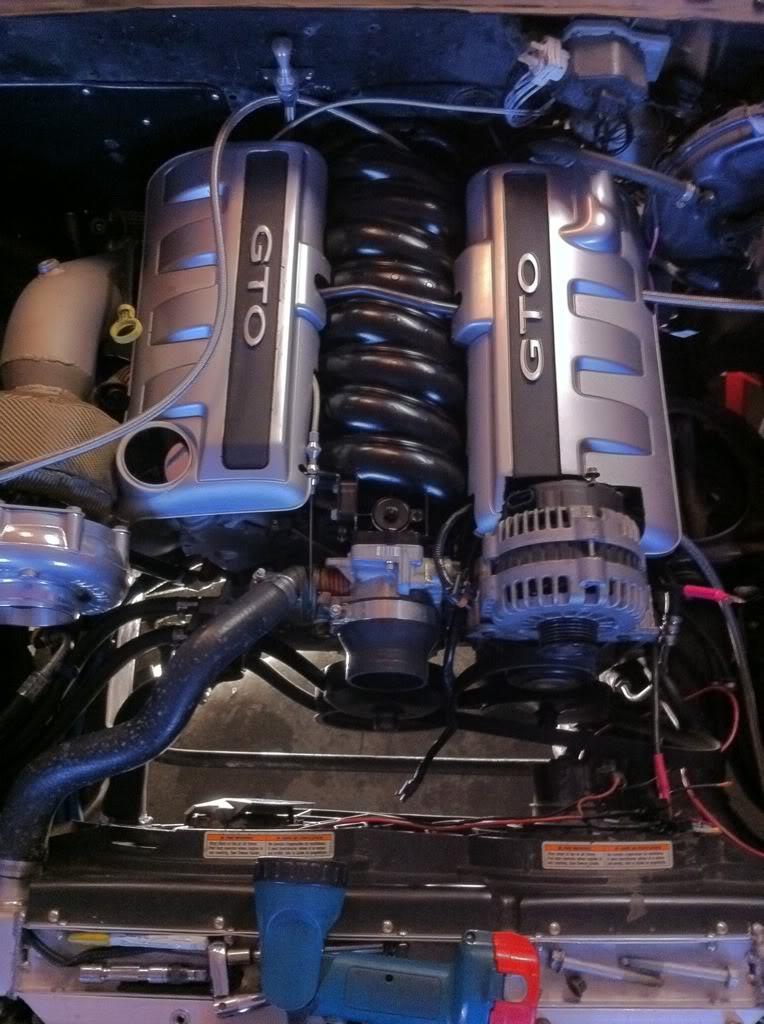
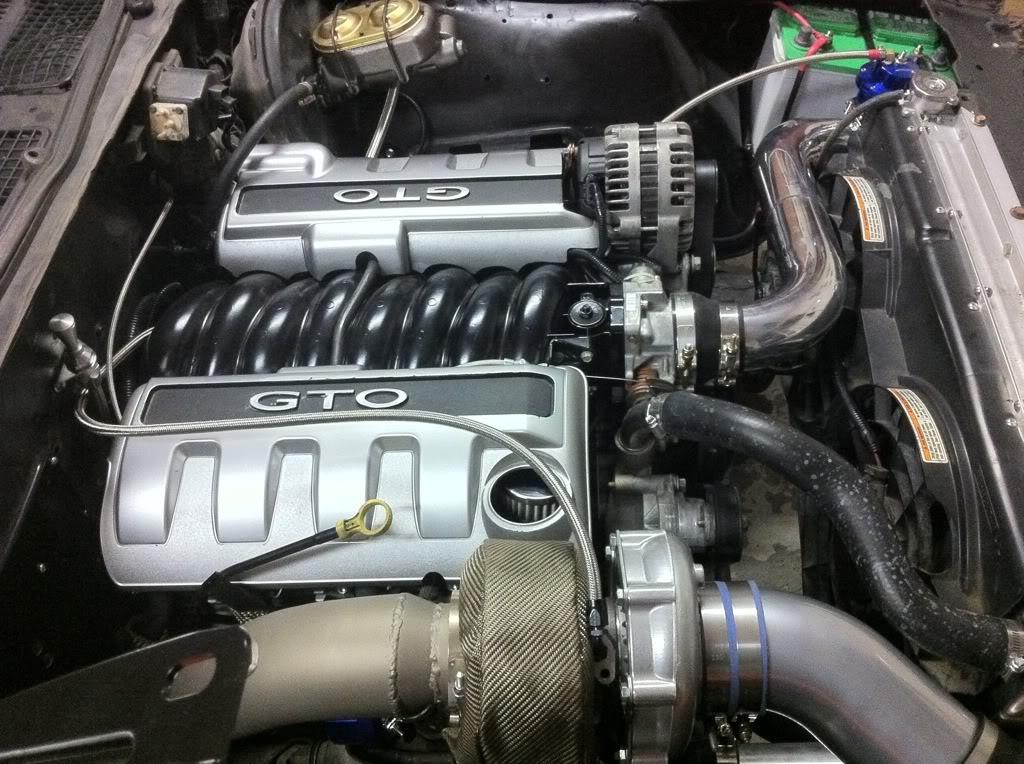
I am using an F body manifold on the drivers side and all of the house side is going to be ceramic coated so I cleaned it up a little bit by cutting off the heat shield mount points. we also welded up the O@ hole and the heat riser hole
*all of the hot side is at the ceramic coaters right now. I decided to go with a Pewter coating..
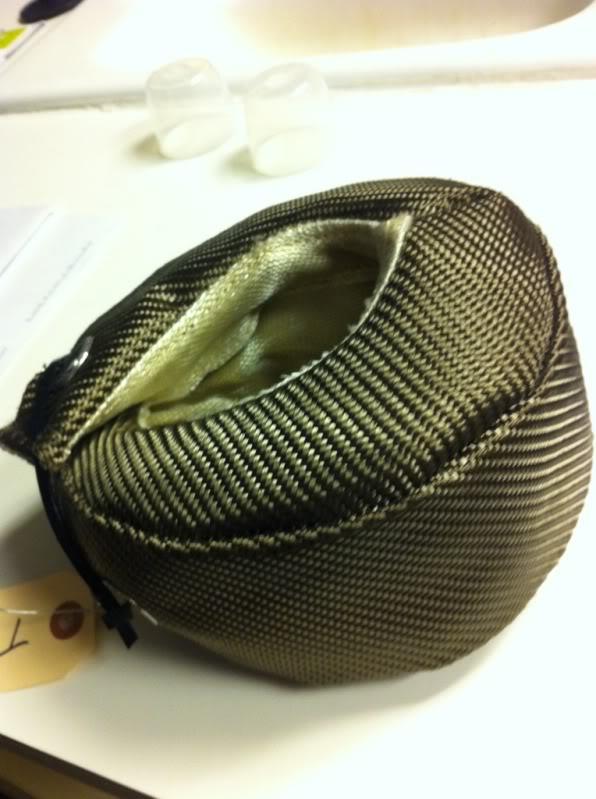
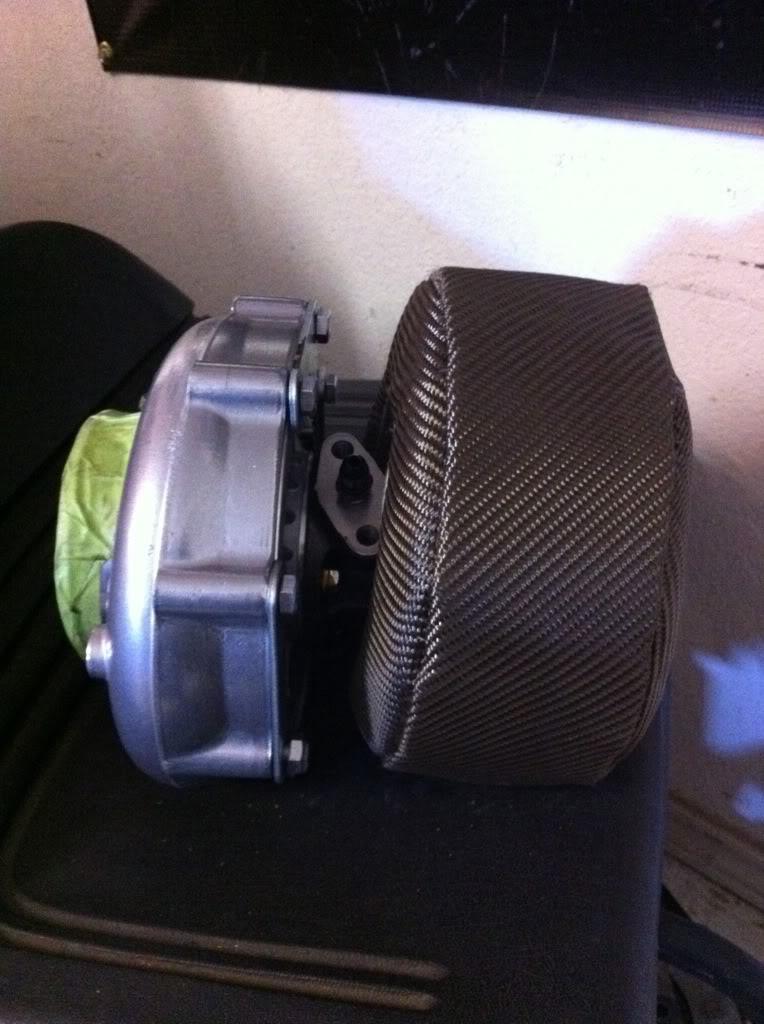
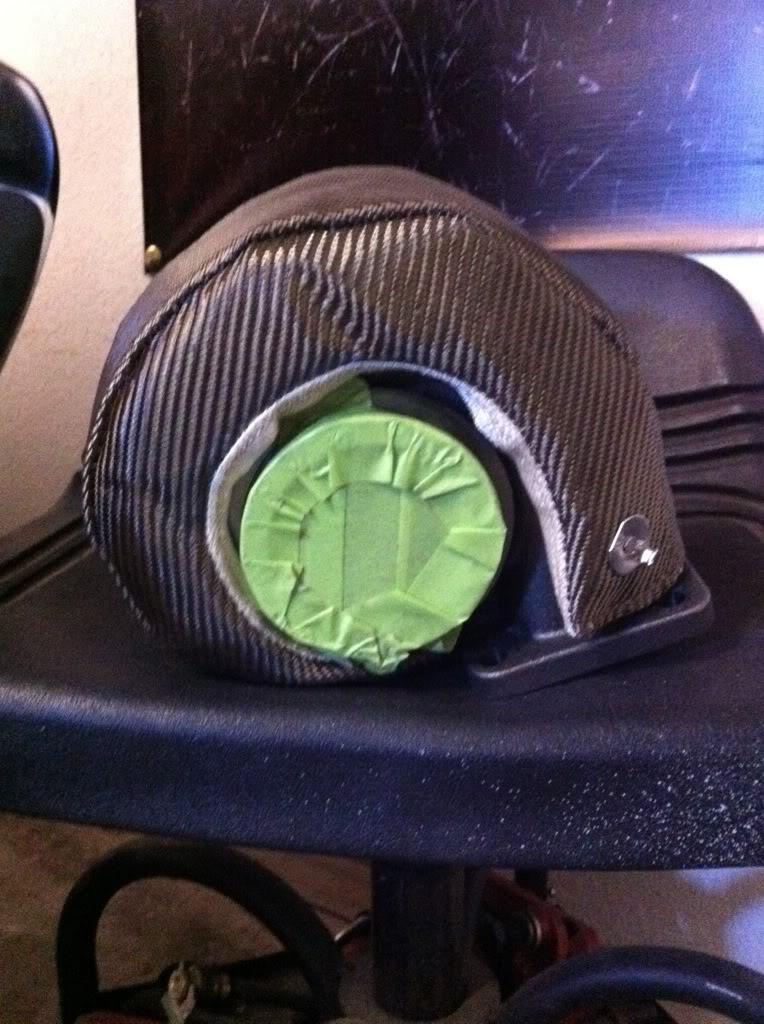
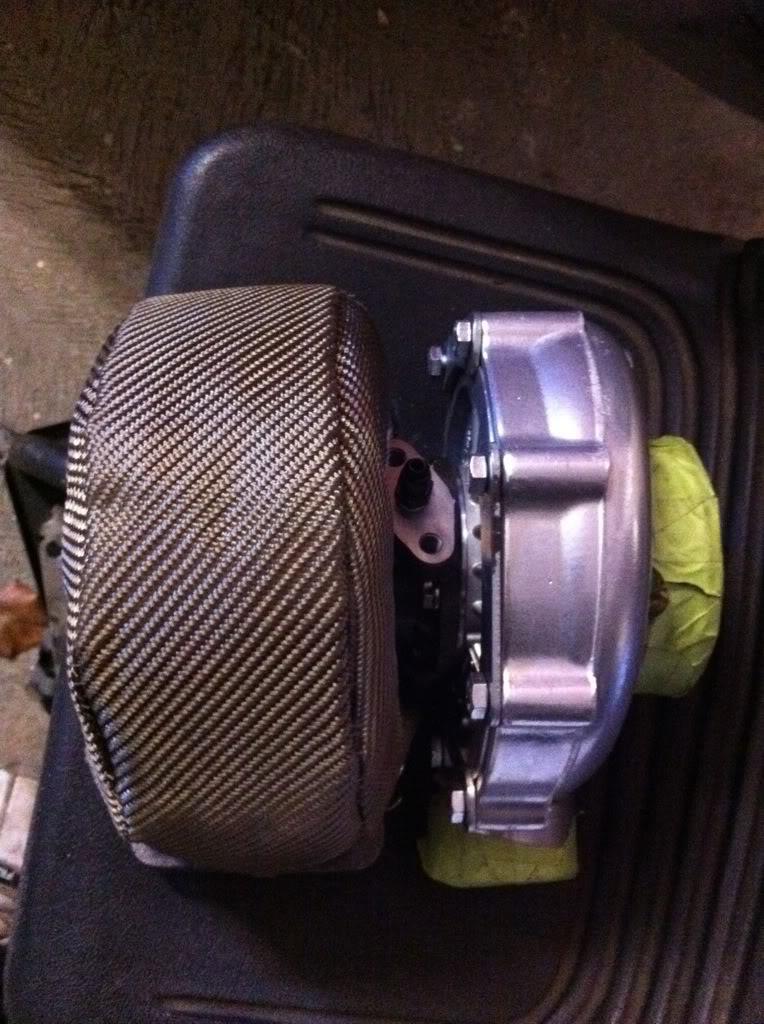
I got my turbo blanket and plug wire heat guards

12/12/2010
couple more pics of the blanket on my turbo
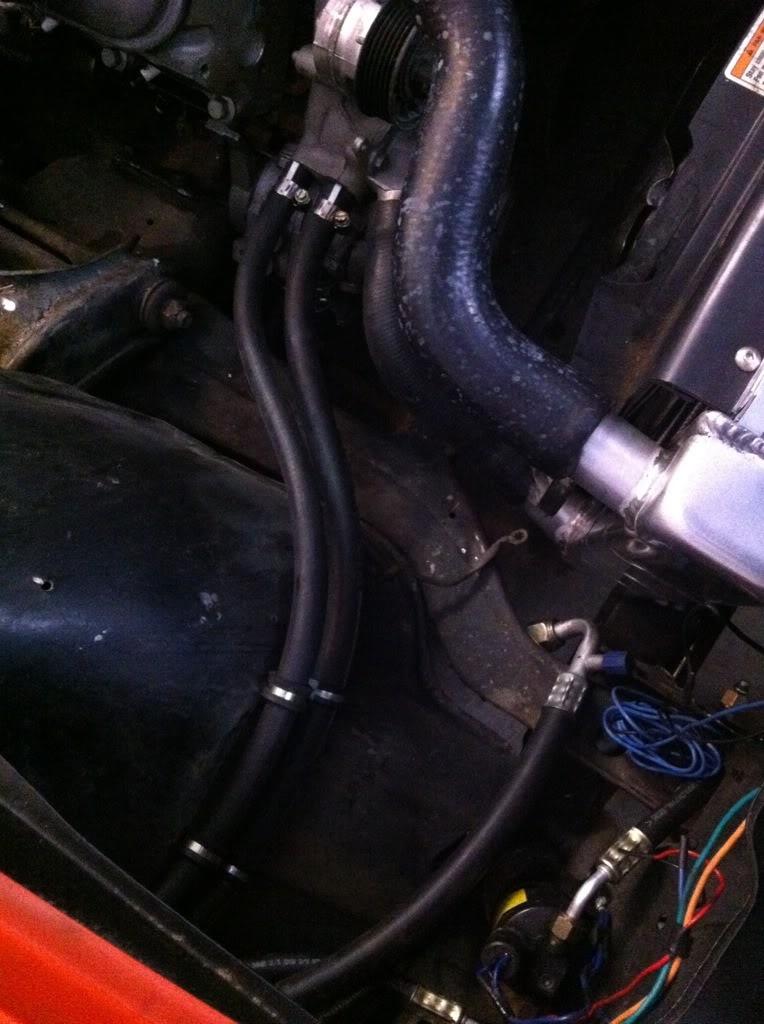
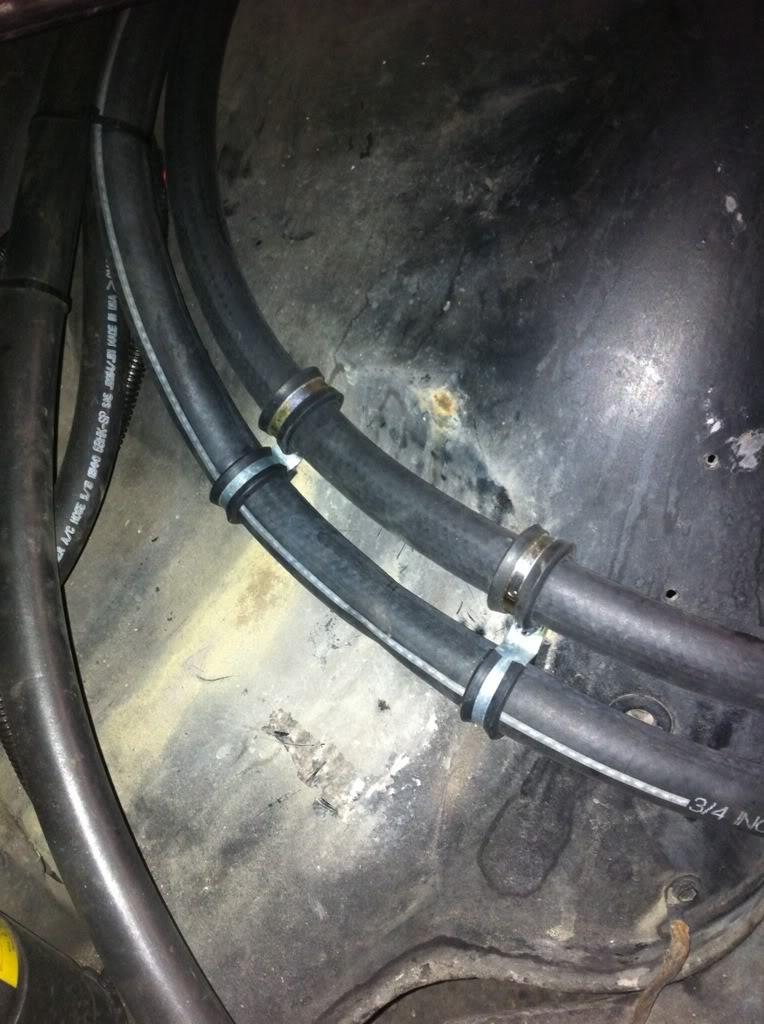
couple of pics of the heater hoses (yea I know, I need to clean the inner fenders)
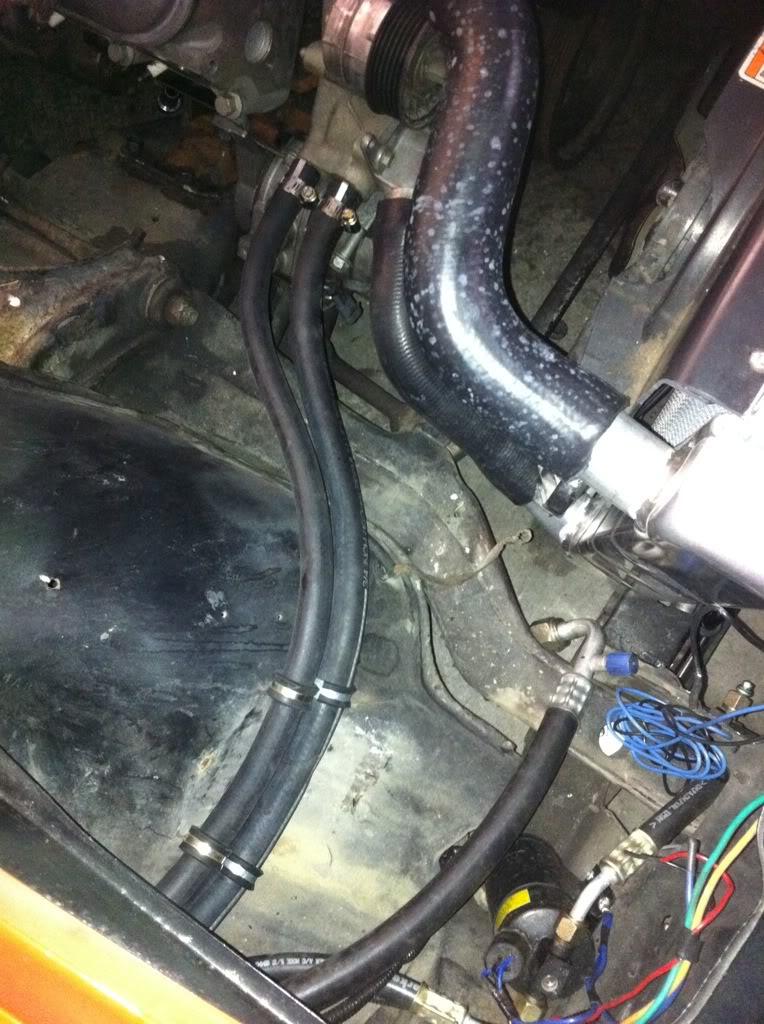
I used the tall solid motor mounts to make sure I had plenty of clearance between the oil pan and cross member. I probably could have gotten away with not cutting the floor but I didn't want to have an annoying tap tap tap on the floors
all of the guys that I run around with use basically stock 4L60e with a corvette servo and have held up well. One of the guys has one that is bone stock with the servo and its fine so far. Then another guy has one with just the servo and a shift kit.
I decided to save the cash right now and go ahead with just the servo and transgo shift kit. when it goes kaboom I will go ahead and get it built.
same with my rear end... right now its a stock 7.5 with 2.73 gears.. I found a 8.2 with 3.32 and posi for $300 so I bought it to get me going and when if blows I'll upgrade.. but I knew that the 7.5 with 2.73 was going to either blow or hurt the tranny because of the high gears
***EDIT*** the 8.2 broke the first weekend.. we took the car to the track and the broke in the parking lot on the way to the staging lanes  SOOOO i ordered a built 9" don't have to worry about that anymore
12/13/2010
***EDIT*** the spacer was perfect but the bolt was too long, i'm not sure if they just sent me the wrong bolt or what but either way it didn't work
I just saw this on a thread by -TheBandit- and decided I'd order the same for my conversion
From Misumi USA (www.misumiusa.com), the spacer is PN KNCLM10-30-20 and cost $5.70. It is nickel plated steel, 10mm ID, 30MM OD and 20MM length. The bolt is PN CB10-160 and cost $2.40. It is M10x160mm length. Total $8.10.

12/16/2010
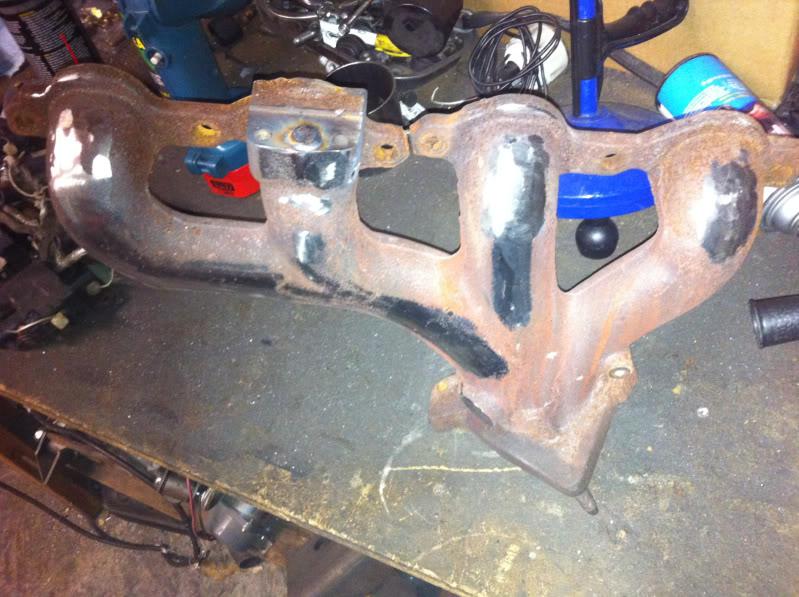
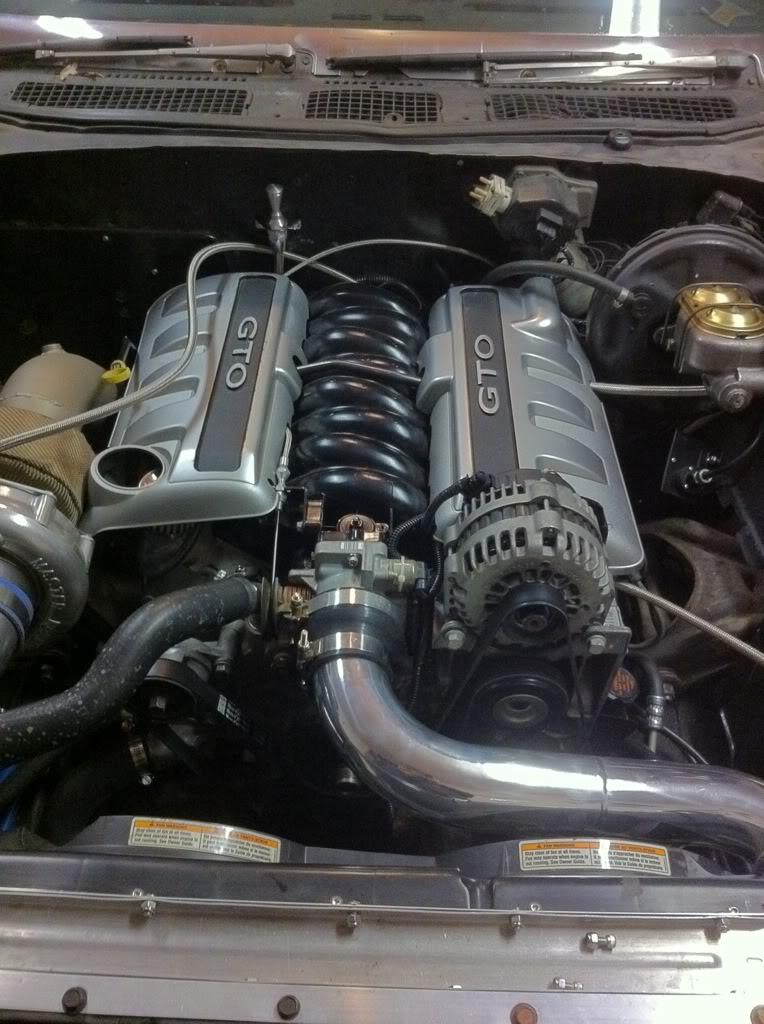
Got the hot side back from Burleson Powder Coating today.. (Thanks Eric!)
I went with Pewter coating

I also had Eric do the pipe that goes from the turbo to the filter
I also had the IC pipe polished by a friend in Irving.
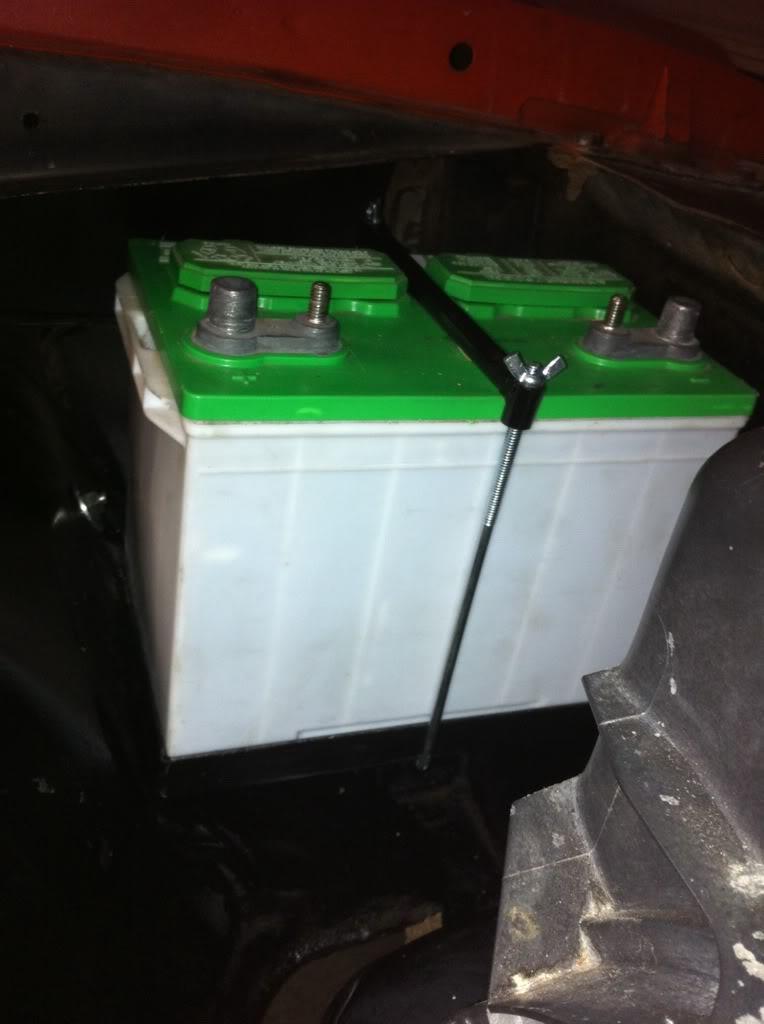
not sure whats up with this pic but there is no paint on the battery... my only guess is that its because the pic is from my iphone 4 in HD mode with takes 3 pics and blends them together... weird!
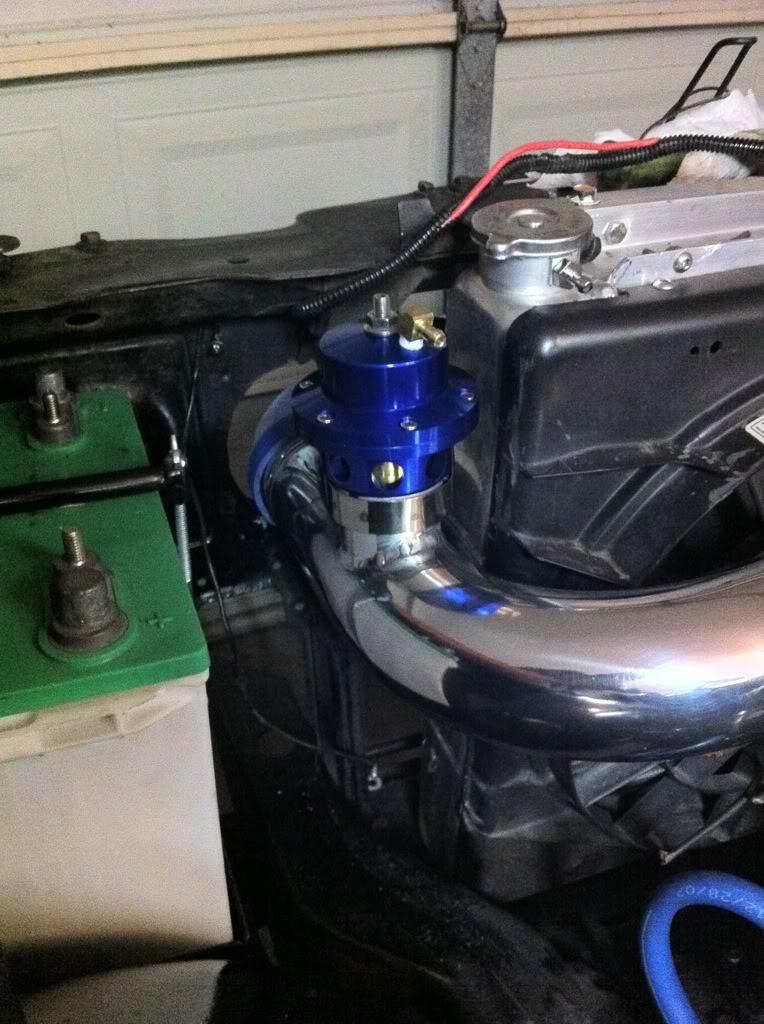
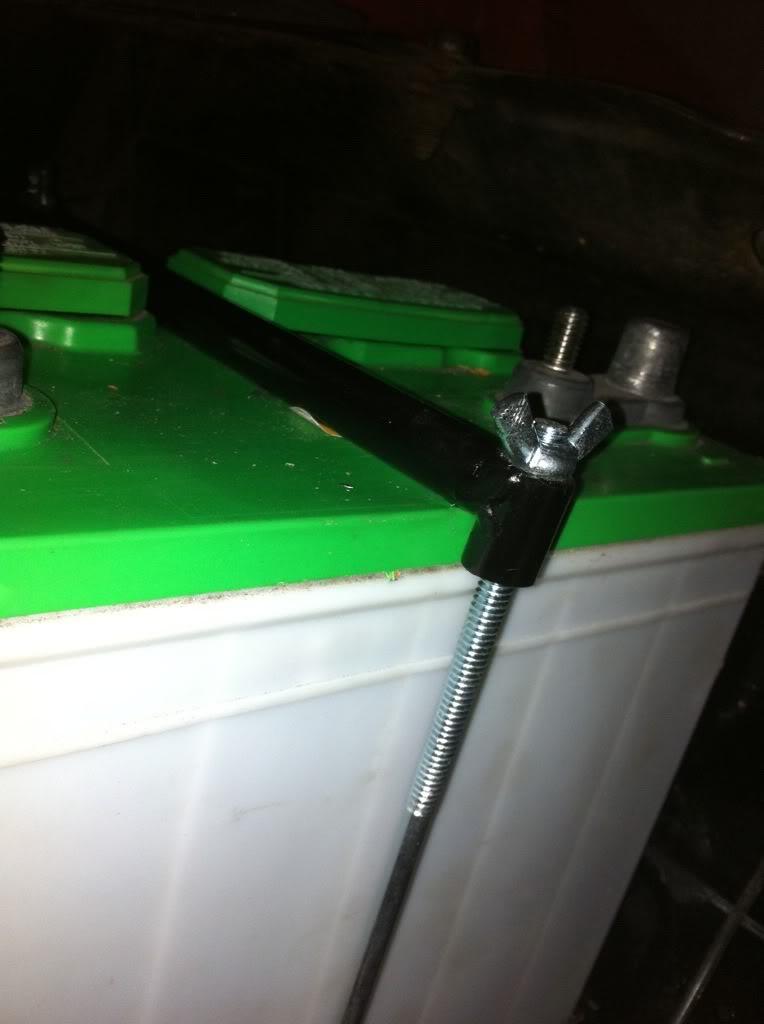
got the battery mounted and secured
12/17/2010
got a little more done tonight
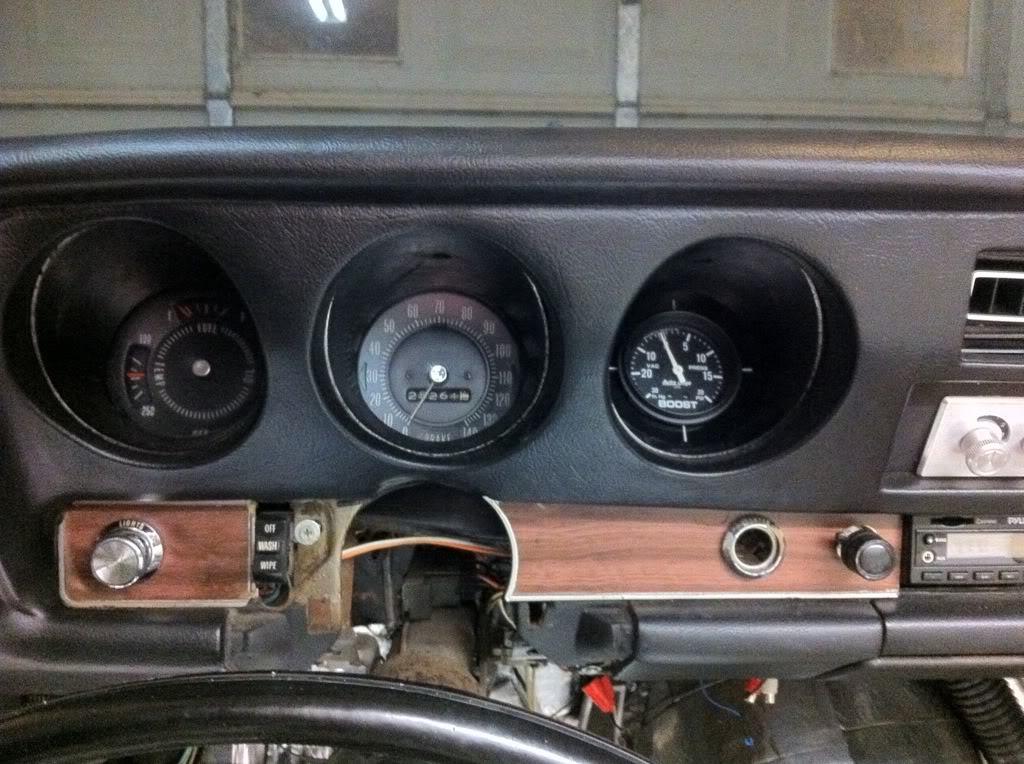
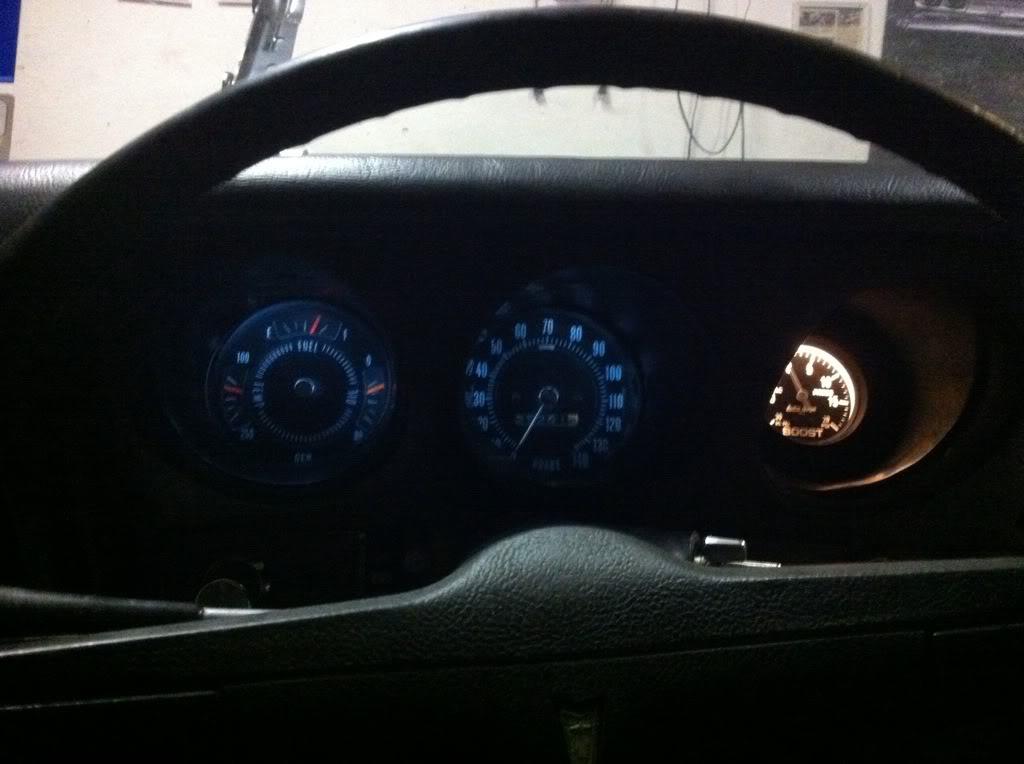
here is the boost gauge that I decided to go with because it matches my rally gauges pretty well
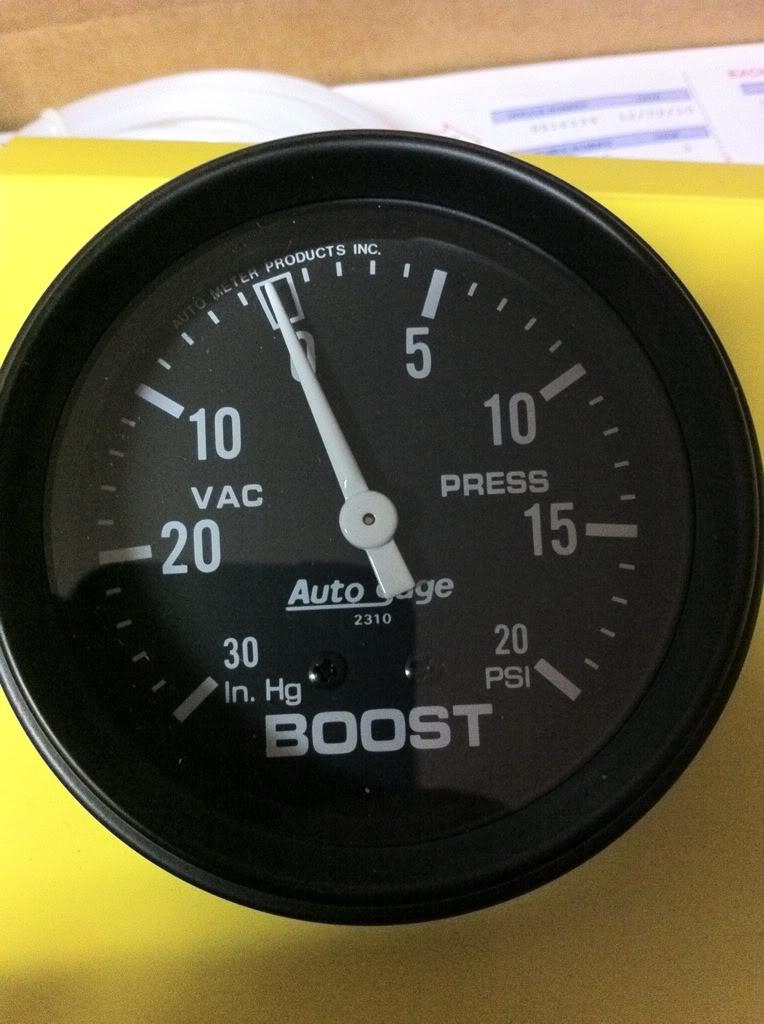
I'm going to put the boost gauge in the far right gauge pod, I think some of the GTOs had clocks there but mine doesn't so its the perfect spot.
12/18/2010
the drivers side goes under the car and then up to the bottom of the pass side log manifold
12/23/2010
I got a few toys in the mail today
4" Stainless Steel cut out
12/26/2010
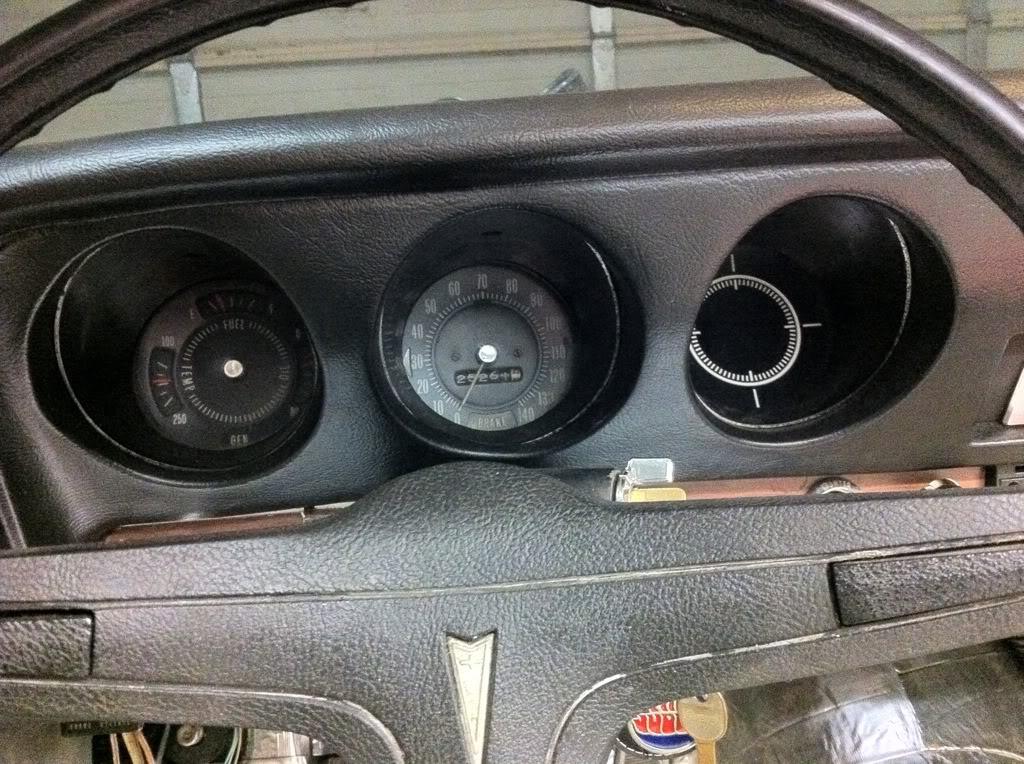
well I got a few little things done tonight. I took the gauge cluster apart because it needed a new circuit board on the back (its one of those laminated type) while I had it out I went ahead and took it all apart and cleaned everything. It looks WAY better. I think I am going to order a new clear plastic lens because its scratched up a little bit but not bad
this is the old circuit board
the pod on the far right is a blank in this car, some cars had a clock. I used this pod for the 2 5/8 boost gauge. I think it turned out pretty nice. It is the closest gauge I could find to match the stock gauges.

I did some other little stuff that isn't very interesting so I didn't take pics.. hopefully tomorrow night a lot more will get done.
1/7/2011
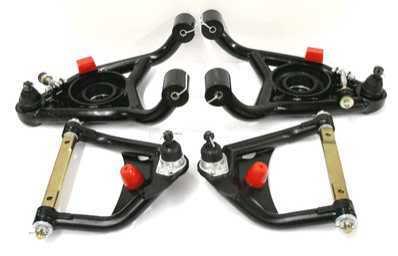
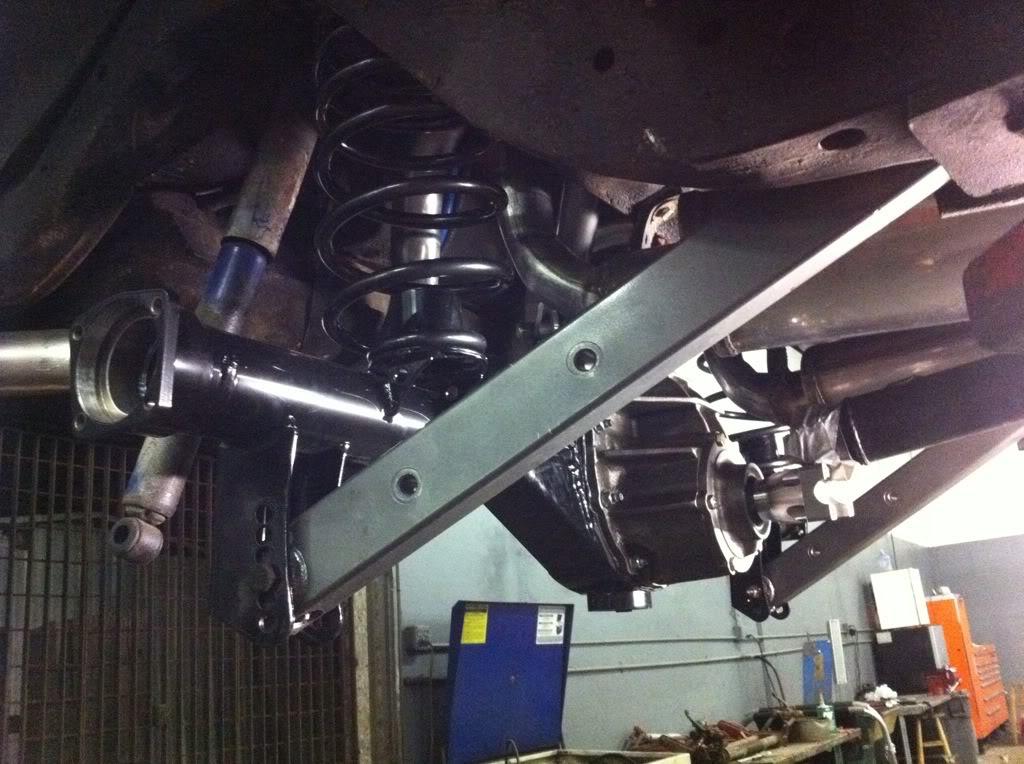
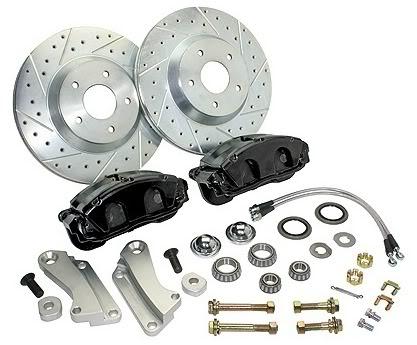
Slowly but surely. We keep taking nights off. Like the last three! We are making progress though. I ordered a 13" big brake kit and some new upper and lower control arms for the new rear end.
I also ordered the box from Abbott that makes your speedo work ( has a motor that reads the computer pulses and turns a mech cable).
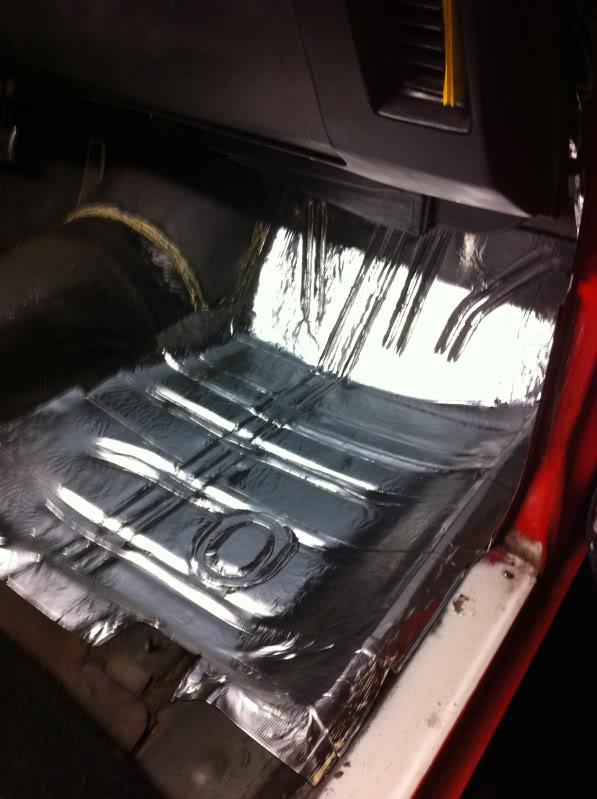
The new carpet is ready to go in.
I am going to finish "dyno-matimg" the floor tomorrow
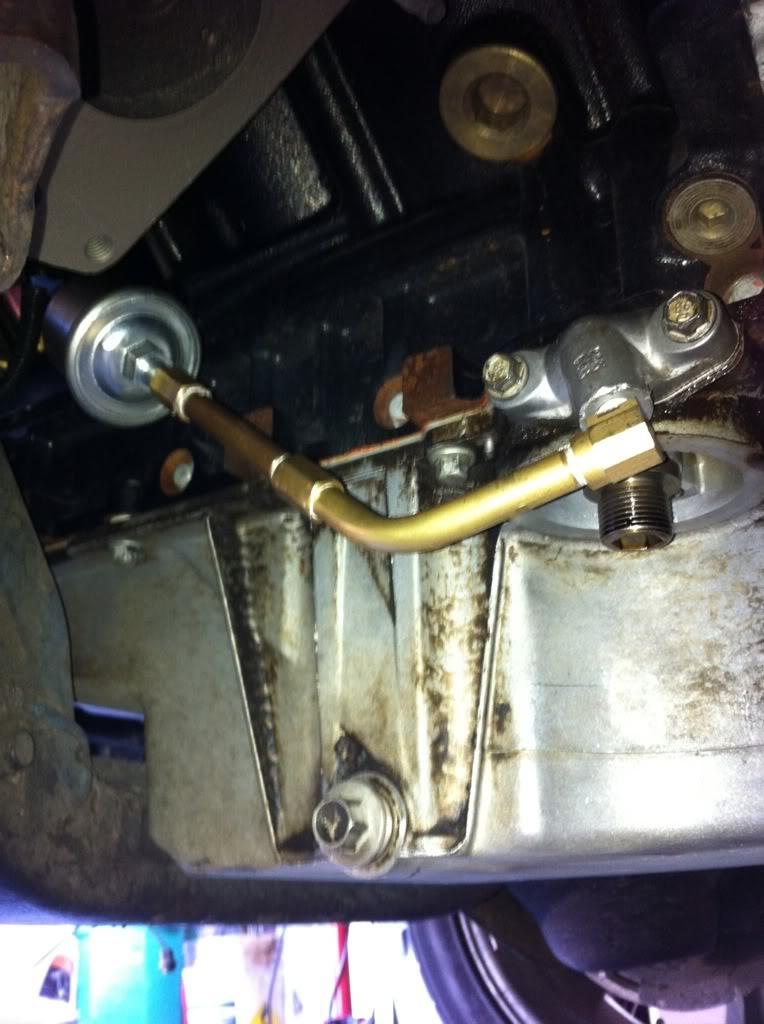
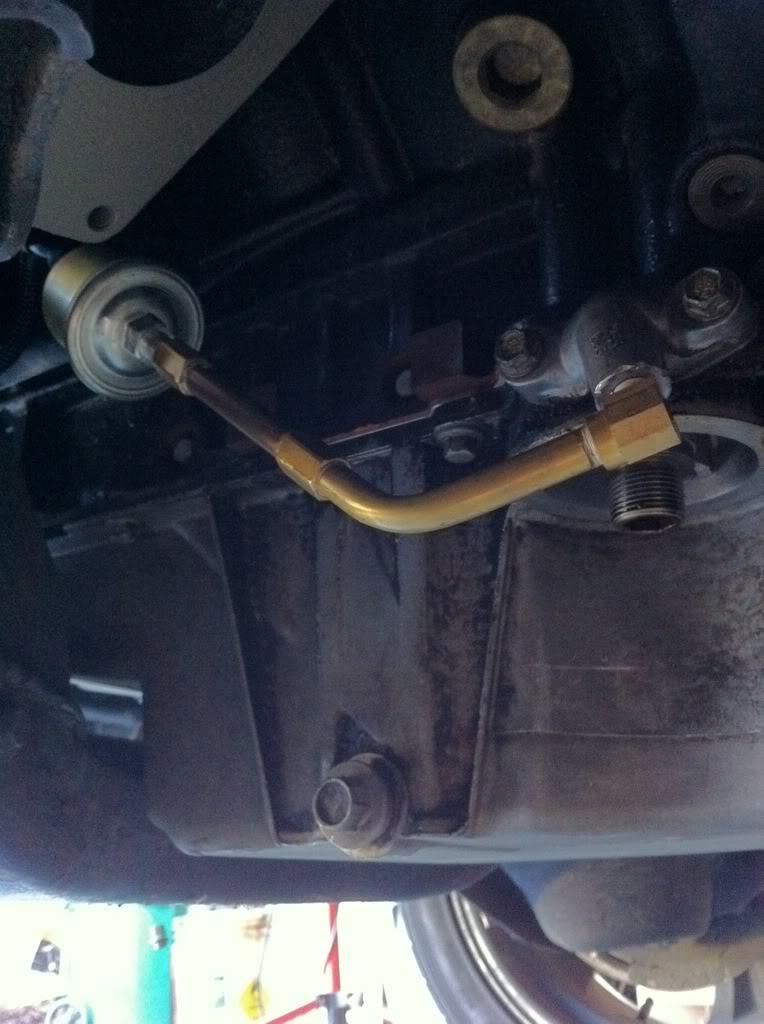
We STILL haven't touched the fuel system under the car yet. And need to swap rear ends out when the control arms get here. The harness is in just needs a couple wires connected under the dash hooked up
I'm sure there's more that I'm forgetting
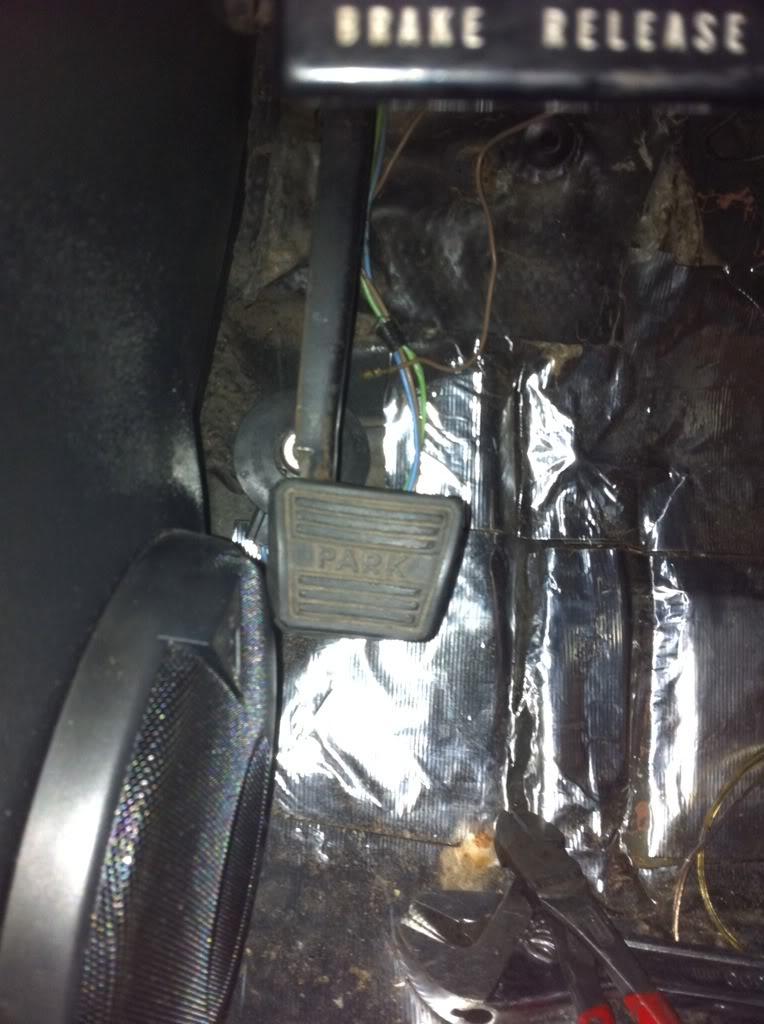
installed the new kick panels with speakers and of course the e-brake pedal hits BAD.. so I knocked the pad off and moved it all the way toward the middle of the car as far as it would go and then welded it back on the pedal arm. It looks crooked in this pic but its not... its still close to the speaker but doesn't hit now
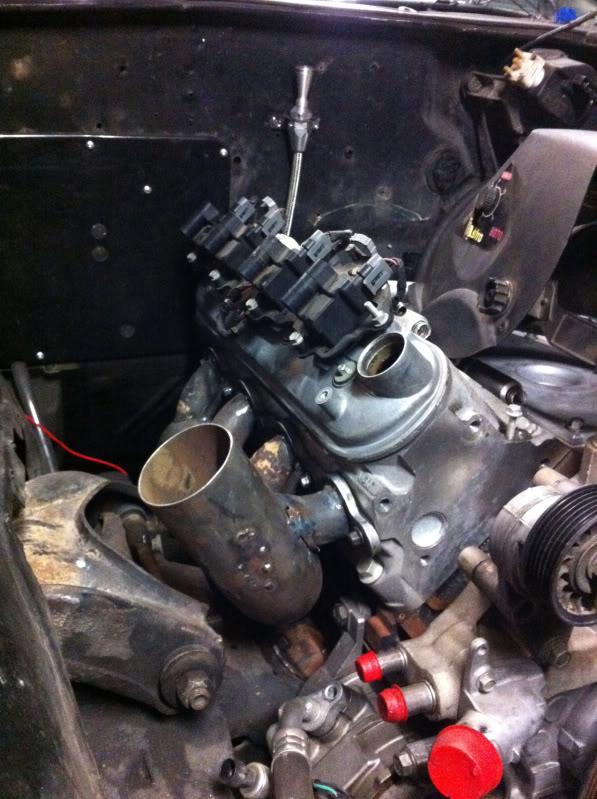
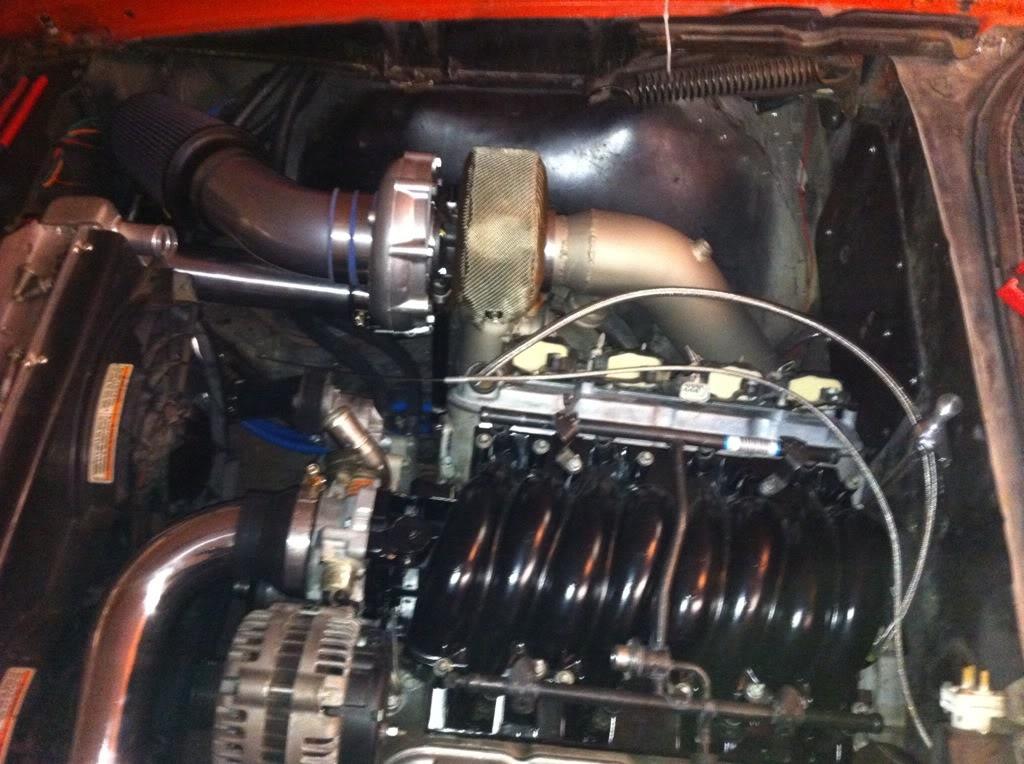
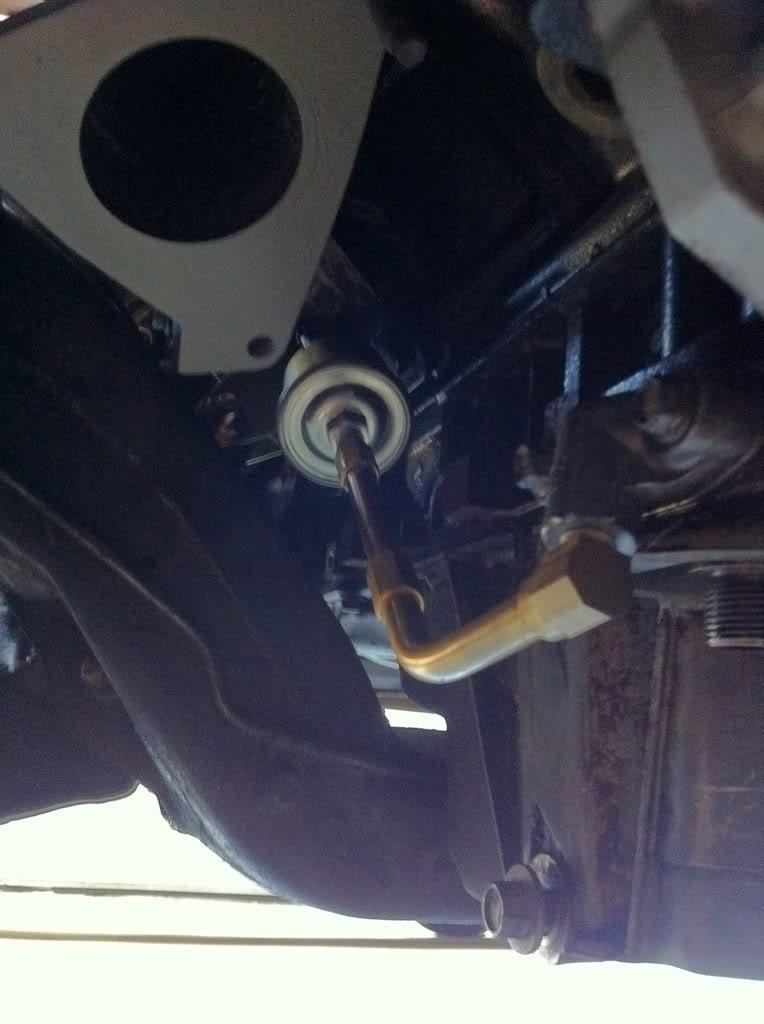
put the drivers side manifold on to discover that the oil pressure sending unit lines up just perfect with one of the bolts in the manifold. So I had to do a little fabricating and made an extension to move the sending unit toward the front of the car on the other side of the manifold but of course I didn't get pics after I was done
***EDIT***
here is what I ended up doing to fix this issue.. its not the prettiest but no one will ever see it
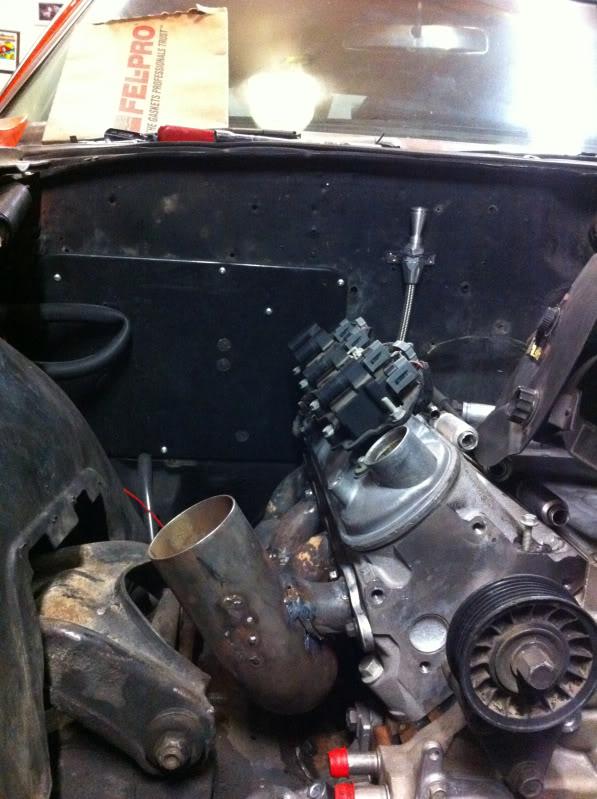
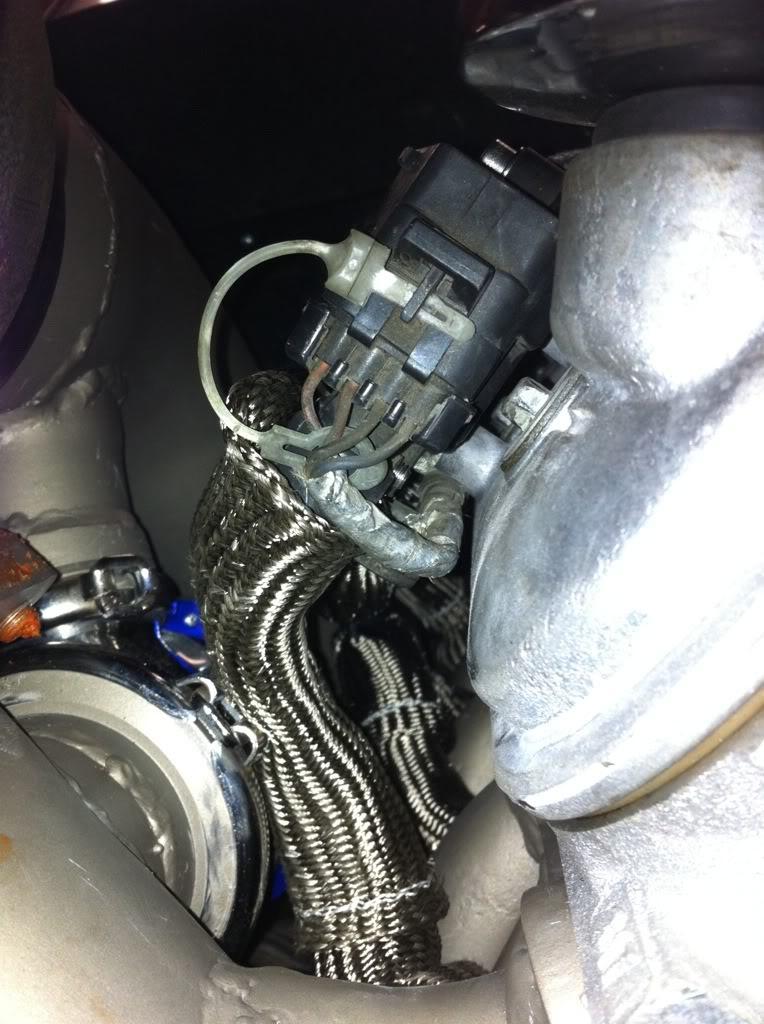
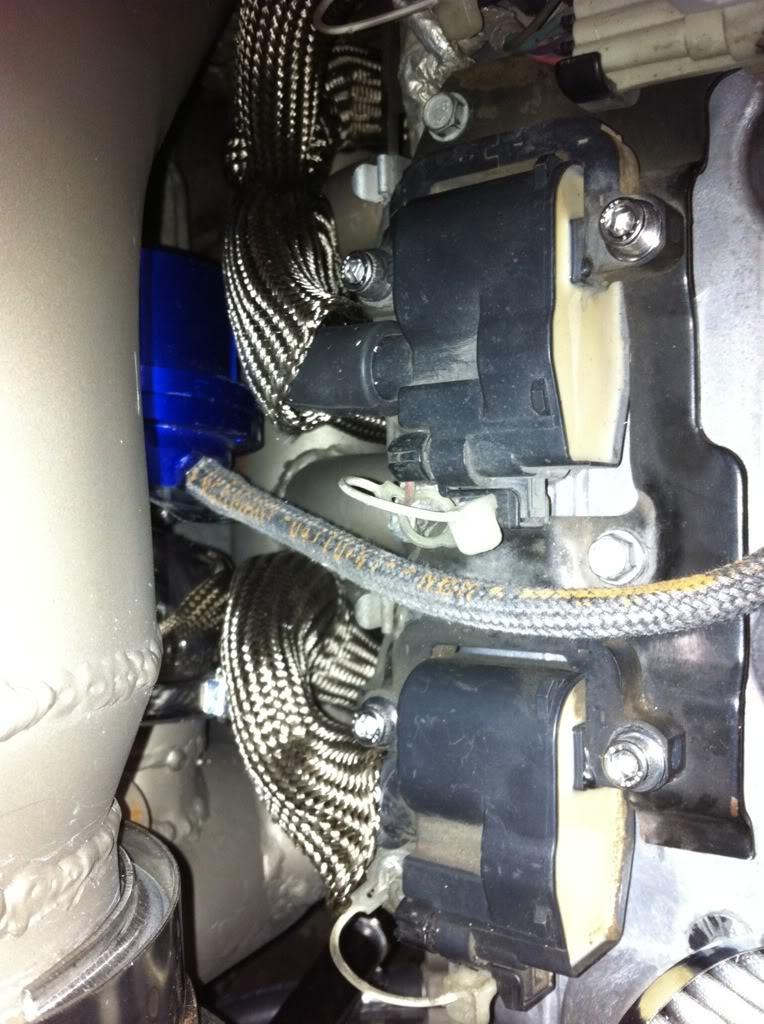
the wires were a little close to ... EVERYTHING... on the pass. side with the turbo set up. I had ordered 8 of the lava plug wire boots but ended up using 2 on each of the pass. side wires so that the wires are 100% covered from the head all the way to the coils
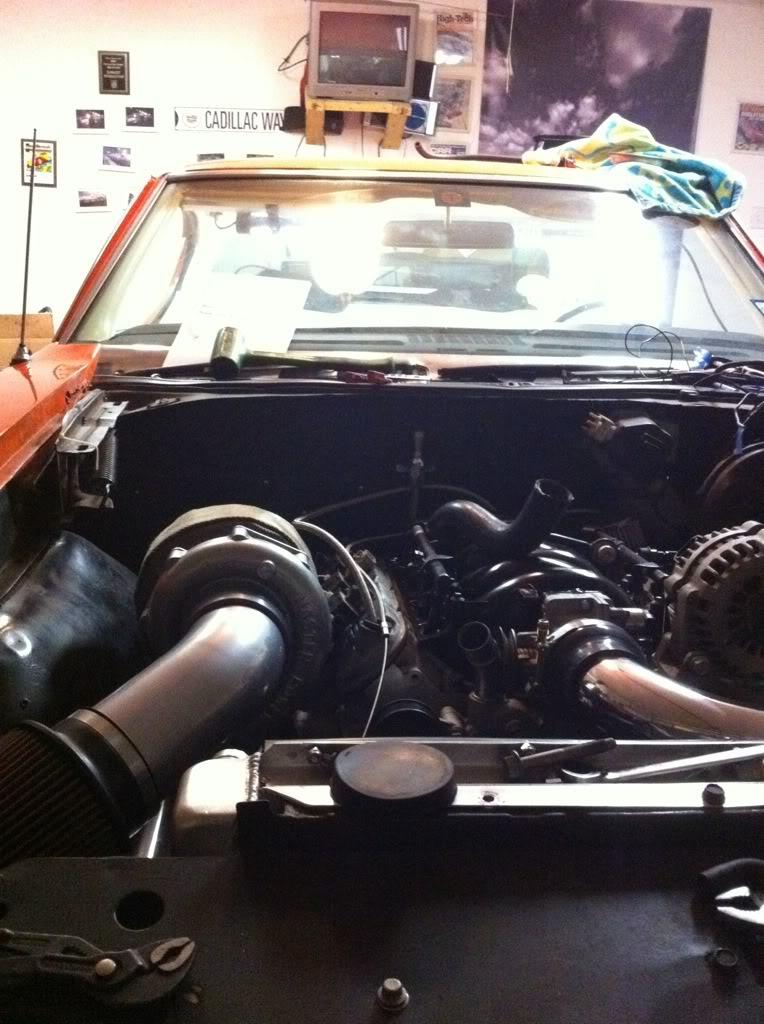
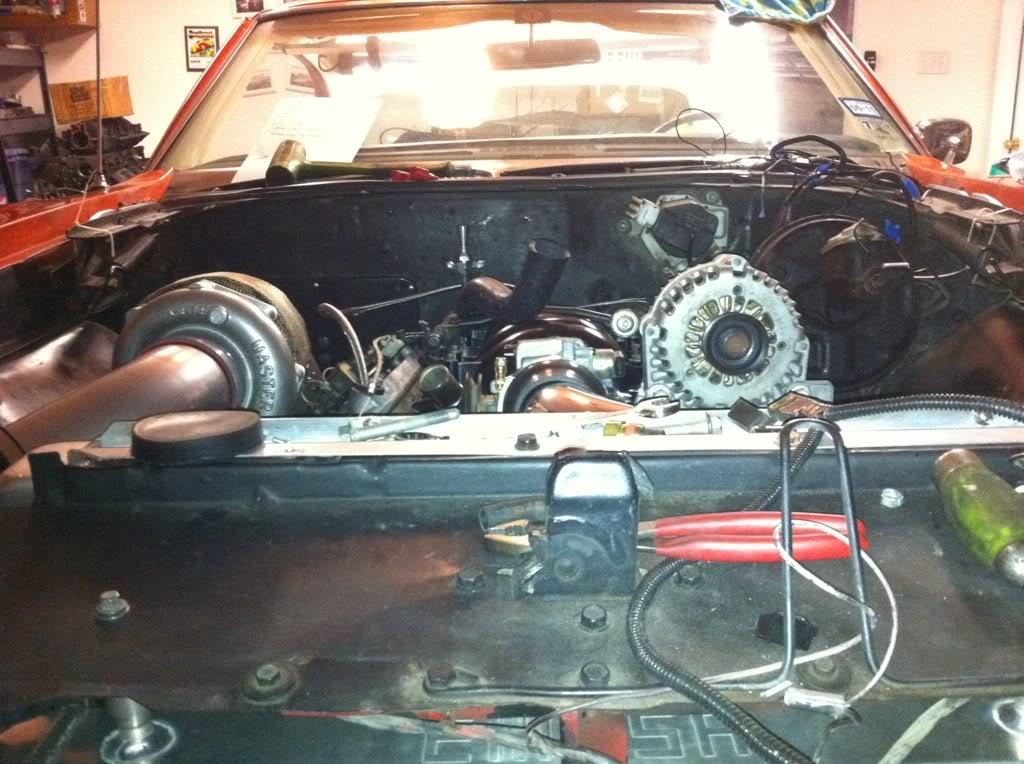
This pic is from the front of the motor
this is from the top


1/10/2011
we got a little more done tonight. We got the old rear end out. Then started putting in the fuel system. we just need to put the 90* fitting on the pre-filter to the tank and wire up the pump and it'll be done finally.
Then we will start putting the other rear end in. Today I bought the Wolfe upper control arm bushings
I also got the rear control arms

and I ordered some tubular upper and lower control arms for the front
1/15/2011
update time... the rear end is up in the car with the new control arms and Wolfe spherical bushings. We pressed in the new longer studs in the axles and will be putting in new bearings and seals then putting the axles in tomorrow.
got the front upper and lowers in the mail today and they look like really good quality so we will see hey they hold up.
the 13" brake kit should be here this week
The fuel system is all done
we have to wire the fans and then the harness is all done except hooking up some wires under the dash
I worked on the GTO covers today... they will work for now but i'll probably get another set and trim them up a little better
1/16/2011
http://s75.photobucket.com/albums/i2...t=932e1772.mp4
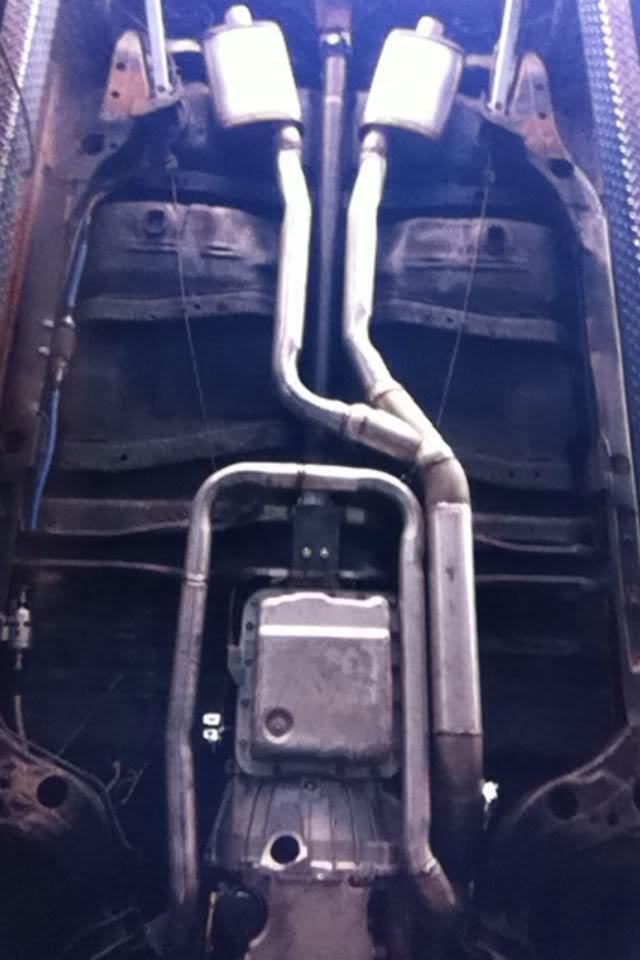
its a little tight on the turbo side with all the exhaust stuff and the oil drain line and tranny cooler lines but we got it all in and it looks clean and should be safe too
I have a list of stuff to get done tomorrow so that Tuesday I can take it to get the exhaust all done.
right now there is no cross over pipe going from the drivers manifold to the pass side log so there is a shop close to John's house that we are going to take it to.
after that we'll need to put the front nose, the hood and stuff like that back on.
since its been apart I also bought carpet so I need to finish "dyno-matting" the floor and lay in the new carpet and bolt the seats back down.
I went ahead and bought a new set of stock springs for the front and gota set of 2" lowered spindles so it will still be lowered... but done right instead of cut springs.
the 13" brake kit should be here this week so we are going to hold off on the front suspension and brakes until after the car is drving.. that way I can bring it home and finish up the detail stuff here instead of being gone all night every night (need to keep the family happy too)
i'm VERY pleased with it so far.. CAN NOT WAIT to drive it
1/17/2011
got some more done tonight but not as much as I had planned because I bought 8' of fuel line for the return line that rusted out last night because that is what the guy had left on the spool. I figured that was plenty..... I was wrong.. I needed about 10 ft! So John is going to pick up more tomorrow when he is exchanging the master cyl thatI picked up today but it was the wrong one so I could do the brake stuff that I wanted tonight
then the U-Joint bolts the I picked up today are the wrong ones... again... so we have to get that worked out tomorrow too (If anyone knows what I need that would be a HUGE help its 8.2 rear end)
I was able to get the axles in and fluid in the rear end, all the cold side is mounted hopefully for the last time, boost gauge is hooked up, BOV is hooked up... a few other little things
I was going to try to get it to the exhaust shop tomorrow but the guy I'm going to take it to closes at 6 and I just can't get there in time so I scheduled it for 9am on Saturday
1/21/2011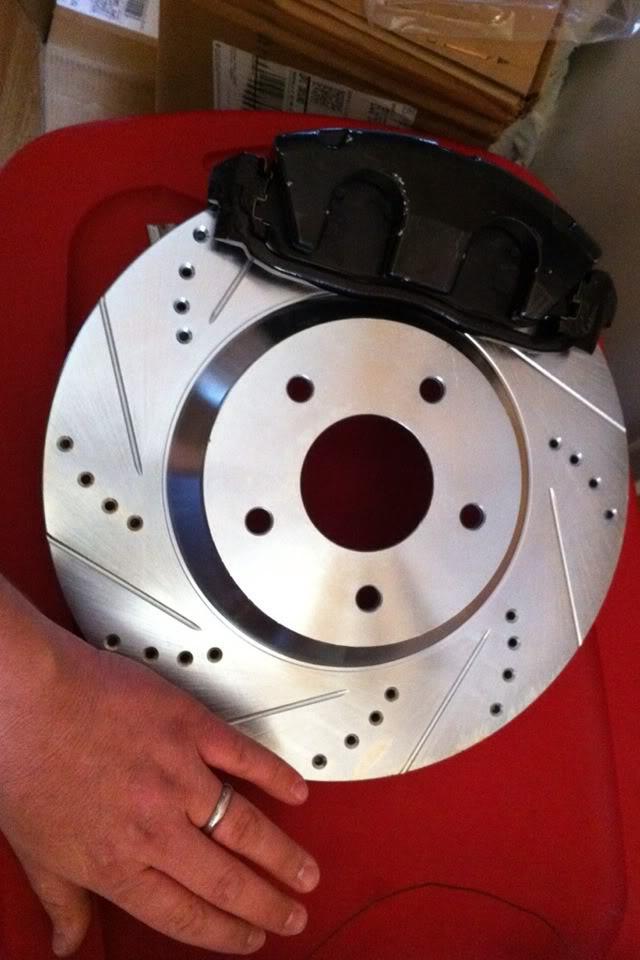
1/22/2011
First time on the road. Headed to the exhaust shop to have the cross over pipe built and the cutout stuff installed
1/23/2011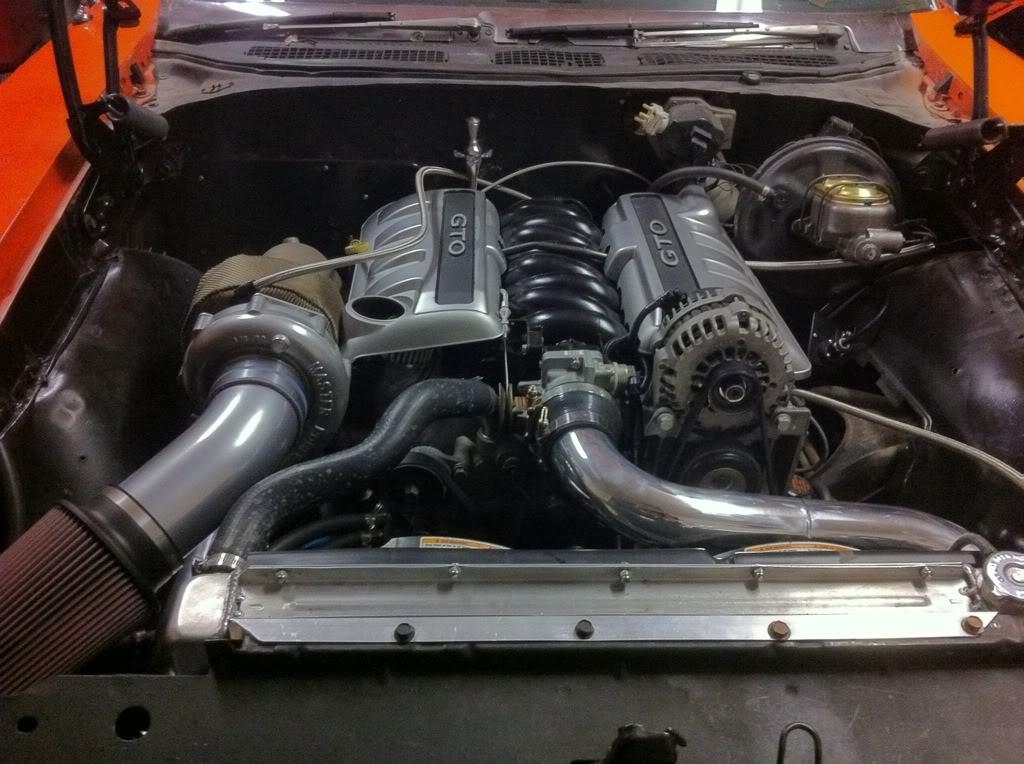
I bought some LED's to put in the dash so the lights would be brighter but I"m not happy with the results. I wanted WHITE lights.. not blue(ish)
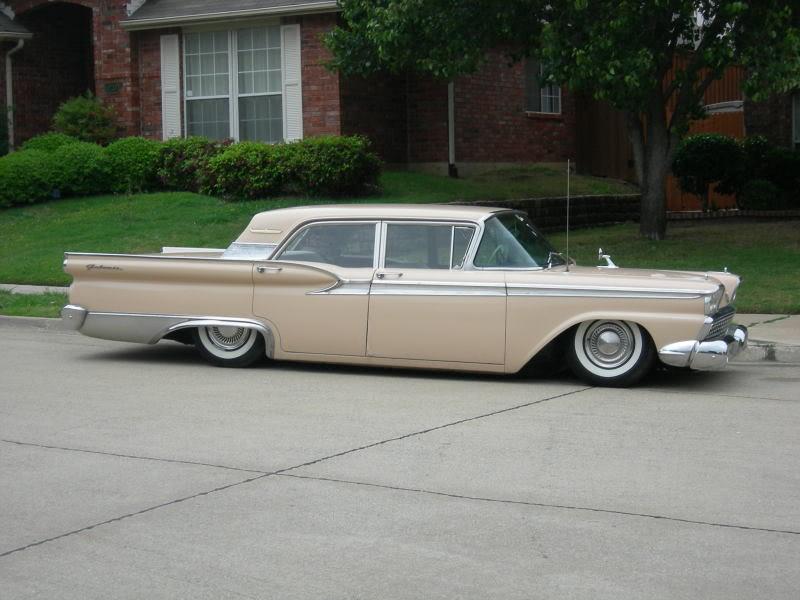
t's finally done. ( except the front control arms, spindles , springs and 13" disc brakes That stuff will be done before the cruise in Feb
Put the new carpet in today too and notice the shifter display. Looks like Ot came factory with a 4 speed auto
The tuner has it right now getting the exhaust redone because the cut out was Wayyyyyyyy low. But I should have it back tonight
1/27/2011
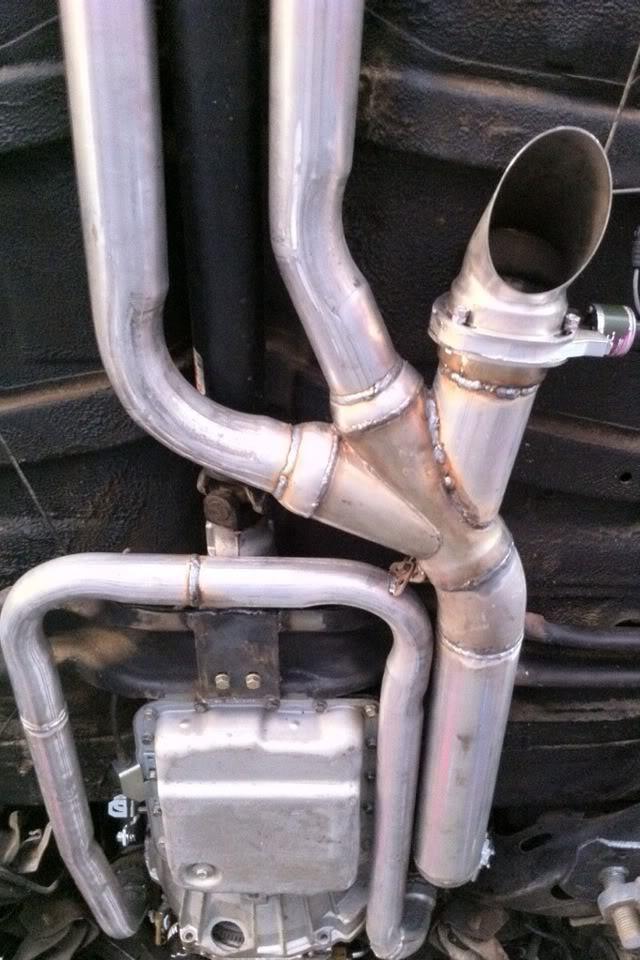
ok so a couple days ago I took the Judge to get the exhaust done at a shop close to John's house... when i picked it up I noticed that the cut out was WAY too low. I asked him to fix it but he said he was too busy and I could bring it back this week.
Well I didn't want to take off work to do it and he doesn't work late. so Sam took it to OrangeChevyII (on DFWMustangs.com) today.. MAN.. I should have gone to him first! he cut off everything that the other guy put on because it just wasn't good enough. so here are a couple pics of the exhaust before and after
BEFORE
notice the cut out is pointed forward and to the side (scooping air into the exhaust)
AFTER
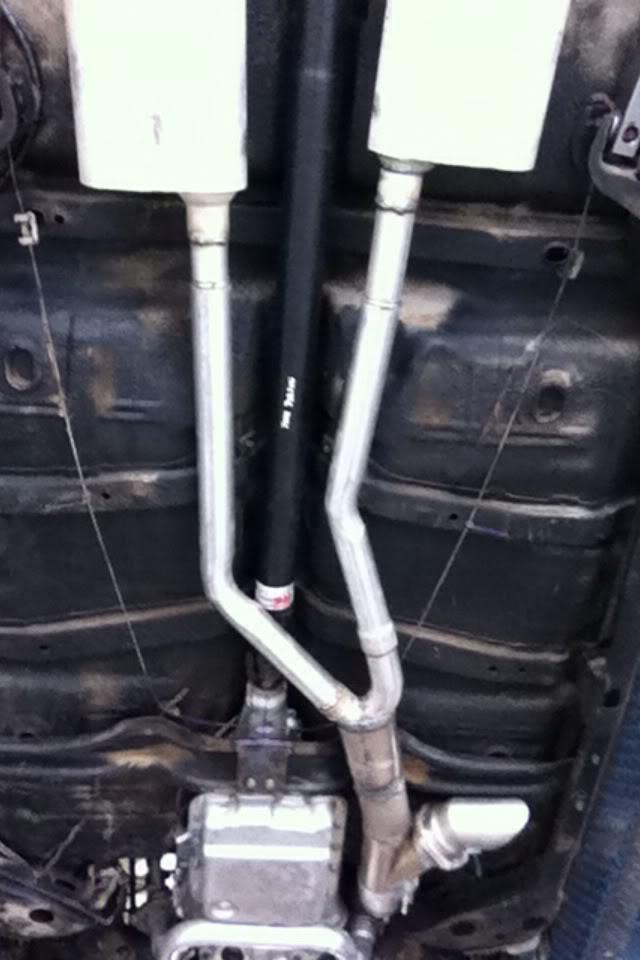
now here is what OrangeChevyII put together for me... I haven't seen it in person yet.. but I'm SUPER happy with what I see! thanks again man
and I hope your happy that you got to cut out those flowmaster copies haha
before the cut out and tail pipes where built
with the cut out
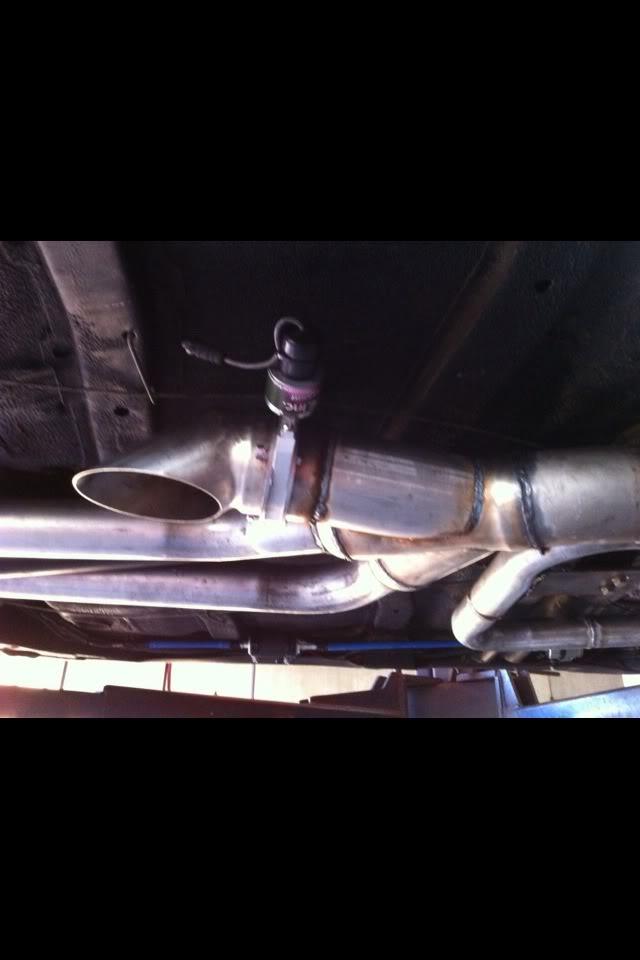
tailpipes
ignore the rust ass looking rear end
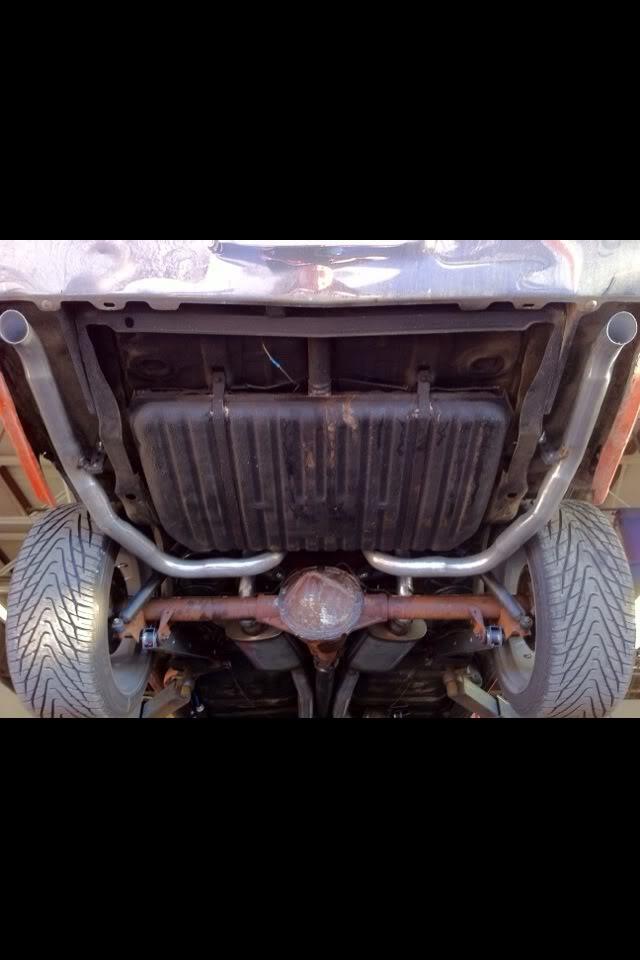
ground clearance is much better now too


Boost is at 8 lbs right now I think ( only drove it while Sam tuned it and he's had the car the last couple days since) It's going to be dyno'd today if everything works out right
1/28/2011
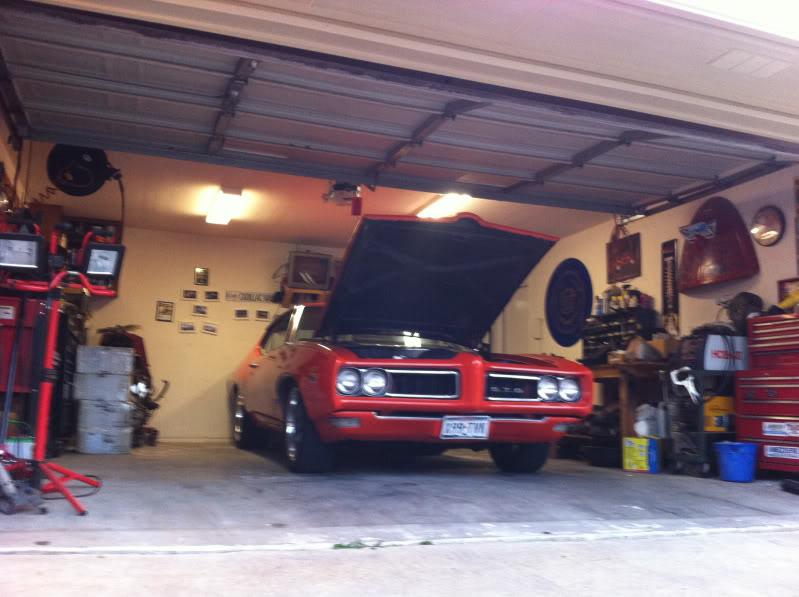
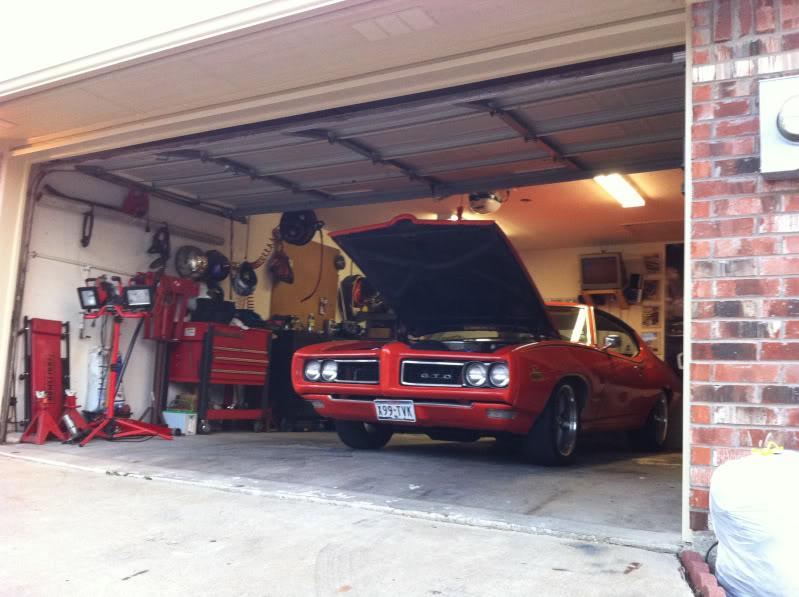
this is my dads car so if the car gets sold.. I"ll be the one buying it we took it out after the dyno today.. and WOW... it had a miss under a load so it only made 400 the first pull. we figured it out and made a few more pulls... ended up at 535 hp and 558 tq not too bad for a truck motor (LQ4)
1/29/2011
Oh and I just broke it. Rear end broke
Prob going to hold off on the 9" for now just because I don't want to dumb another 2 grand on it right now. I'm going to get this one rebuilt for a lot less. Now if we have this prob again. I'll deff be doing a 9"
***EDIT***
went ahead and bought a 9" keep reading for info
1/30/2011
yea I bought it thinking it was an 8.5 but either the guy honestly didn't know.. or lied about it..I'm the forgiving kind of guy so I'm going to assume he just didn't know since I didn't when I bought it. but it was an upgrade to my 7.5 non posi 2.73 rear end the car had
I'm leaning toward the 9" I'm just having trouble convincing myself to pull the trigger and spend that much money.. I have spent so much more money then I planned on this project already.. and I still have the tubular upper and lower control arms for the front, the 13" disc brakes, new springs, and spindles that aren't even on the car yet haha
surely someone has the hook up on 9" rear ends
I just talked to Bryden (sp?) at quickperformance.com and I tell you what.. he is top notch! we talked for about 20 mins going over what I have and what I should get from him.
I think I'm going to end up getting a 9" with GM ends so I can use my existing drum brakes (for now) this will save me about 200 because its 300 off for the brakes but cost about 100 to have the GM ends...
Then we talked about going to a nodular center section to it would be stronger. Then we started talking about the posi and I think I'm going to go with the detroit locker so I don't ever have to worry about the clutches in the posi unit.
I probably would have left the normal posi in it but since he was so cool and helpful I think i'll go ahead and spend the little bit of extra cash with them to get it all built up.
he said with this set up I'd have no issues ever more then likely
oh and I'll probably have the rear end be about an inch wider then normal because right now I have 1/4 spacers and the tires still need to go out about another 1/4 inch
and the price would be pretty much what I would have spent with him if I would have just bought the ebay unit I posted.
2/1/2011
well I did it.....
I just placed my order for a new 9" from Quick Performance
I don't remember everything but what I know is:
NEW housing with GM housing ends so I can use my existing brakes
31 spline axles
Detroit TrueTrac posi (after research this was my best bet for street and strip)
3.50 gears
Nodular 3rd member
1350 yoke
oil fill and drain plugs with jack pad
adjustable lower control arm mount
I know there is more but he was reading it so fast I didn't catch the rest!
now its hurry up and wait for it to get here... its a brand new rear end so its going to be bare... now I have to decide if I want to spend a little extra and get it powder coated or if I should just paint it
2/9/2011
I decided to go ahead and take it to get powder coated tomorrow. There is a local place that if I drop it off at 8am they will have it done for me by 5p!!! Quick turnaround!
2/10/2011
I got home tonight to find ONE eibach spring for the rear... I started looking at the box and it says 1 of 1. So I get on Summit's site and sure enough they are 81.99 EACH... to add to that I paid for 2nd day shipping... on the 4th! so it took a week (weather) I called tonight and they waived all shipping cost except for $17 because I want it here Saturday.. so I'm happy.
who the hell orders ONE spring!?
2/11/2011
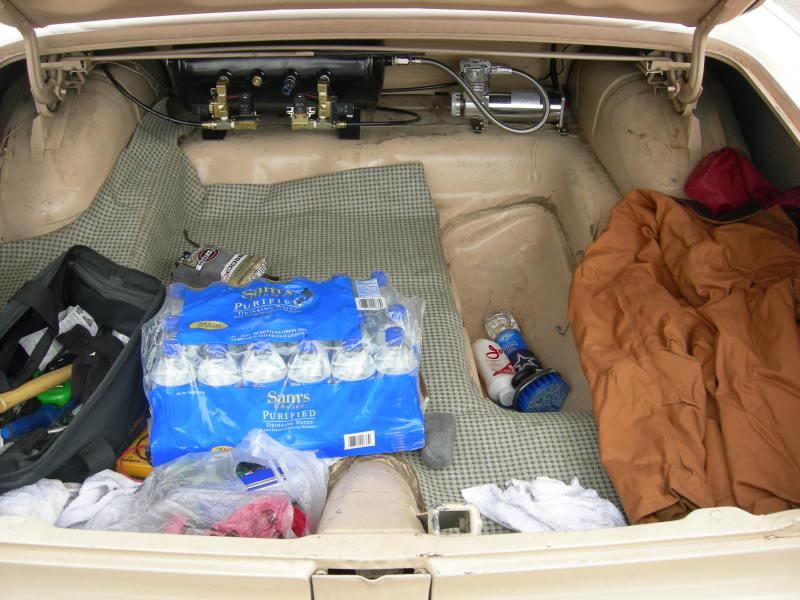
I will tell you this. I put airride on my 4 door 59 Galaxie and it road like a Cadillac. I loved it Sooner or later the judge may get bags but that will have to be after I ge it from my dad because he would doe if I bagged it while it's still his haha

12/17/2011
Got the car put bak together and as I pulled out on the street the car shifted I to 2nd and popped. Then I lost drive. dumI can put it in 1st and take off and manually shift it even went on the highway fine in OD but won't take off in D. dum We assume that when the rear end broke it must have taken a part of the tranny out. dumWe are thinking maybe the sprag but we aren't tranny guys so looks like we will be pulling the tranny soon too see what happendum
12/20/2011
we are pulling the transmission tomorrow
this weekend all I did was get the tach working and wired up the electric cut out.
I put the cut out switch in the glove box
2/25/2011
Put in the new bad ass rear end. Pulled out of the shop and BANG. Tranny popped. Pulled it apart to find that the sprig broke. While we were I there we saw that the guy that supposedly installed my transgo hd2 kit didn't do anything at all. So I upgraded a bunch of stuff. The tranny is back together and ready to be bolted back in the car. Jut have to find the time
3/8/2011
OK... so its been a while since I've updated this thread because nothing GOOD has happen lately...
so we know the tranny broke when the rear end did.. and we know that the original tranny guy didn't install the shift kit (which he finally gave me $200 back)
so a friend of mine that isn't a transmission guy, but has rebuilt several and knows a lot about what to do to make them last, said he would help me out. Since we were going to be in the tranny to replace the sprag there are other week points of these 4L60e's so he suggested going ahead and upgrading those while we were there.
I bought a new sun shell, case saver, another transgo HD2 shift kit, forward clutches and steels, torlon check balls, new double cage sprag, aluminum 1-2 accumulator piston, seals, 3-4 z-pak, hardened rings for the pump, a transgo no yo yo kit (to help the pump when in higher RPMs, and he also had me get some other valve things but can't remember right now what they are for
so we put it all together and put it in the car. I took it for a test drive and it ran and shifted great. We went back to the shop to let John drive it and the first time it shifted into 3rd it slipped.. but the 1 and 2 gears were still fine. he brought it back and we called it a night.
pulled it the next night to find that the new z-pak was toasted... so the next day we went with a different set up and put in the 3-4 clutch stack like a 4l65e has (8 or 9 clutches instead of just 6 like the 4l60e)
put the tranny in and first time it shifted into 3rd it slipped so went straight back to the shop and pulled the tranny out again and pulled the pump out because it was making some noise and we figure it HAS to be something pressure related.
The pump did show some signs of wear so we went to a buddy's house and got another pump that was apart. We cleaned it up and put it back together. put the tranny back together and put it back in the car (twice in one night we did a shallow rebuild and install)
backed out of the shop and put it in D and 1 and 2nd both slipped. So I went straight to the bay door and we put the car up for the night (this was 3:30am this morning)
SO... now I don't know what I want to do next...I really thinking I should just buy a built 4l60e and see what I can get out of mine seeing how it has all these good upgraded parts.
UGH.. the life of a hot rod I guess, but I HAVE to get this thing going because Good Guys is in 10 days!
any suggestions?
oh but the good news is that we can pull the tranny in about 20 mins.. I guess thats good... sucks that we have to be that good at it though haha
3/16/2011
Just got the trans back tonight. I'll be putting it in tomorrow. Hopefully everything goes well and I'll be at Good Guys Friday - Sunday
3/18/2011
IT'S ALIVE... got the tranny in and new front springs and its good to go for Good Guys Fri-Sun... nothing like waiting until the last minute
http://s75.photobucket.com/albums/i2...t=14014606.mp4
3/28/2011
the car is still up and running and doing good.
Dad drove it this weekend and he liked it a lot!
I had the AC lines made today and just finished putting all the AC stuff on the car.
Tomorrow we are going to put the new 3rd member in John's car and then Wednesday we are going to charge the AC in the GTO
Then Thursday we are off to Austin for the Lone Star Round up
Dad and I took a little road trip this weekend and put about 450 miles on it and everything was great and got good gas mileage too
I spoke too soon. dumDyno disaster todaydum
3/31/2011
It's back together and we did about a 30 mile drive and seems normal Tomorrow the exhaust will be fixed and then it will be easier to tell. Right now it's a 4" down pipe that's wide open and loud as hell
4/16/2011
this is the third pass 7.44 @ 95.87 leaving at about 2k rpm on cheap cheap cheap street tires
Reaction .4340
60 FT 1.8474
330 FT 4.8920
1/8 ET 7.4428
1/8 MPH 95.87
4/25/2011
took it to the track last weekend..
best was a 7.44 @ 95.87 leaving at about 2k rpm
Reaction .4340
60 FT 1.8474
330 FT 4.8920
1/8 ET 7.4428
1/8 MPH 95.87


see if ya'll can tell me what happens at the end of this vid
*its hard to tell but the car hits 3rd and then goes sideways WOW
5/18/2011
I bought a sway bar this weekend an just took it to the powder coated today. I'm hoping that will help with some ofthe off the line issues.
7/27/2011
Coming back apart 7/27/11 dum
Rod bearing is the thought we shall see
9/23/2011
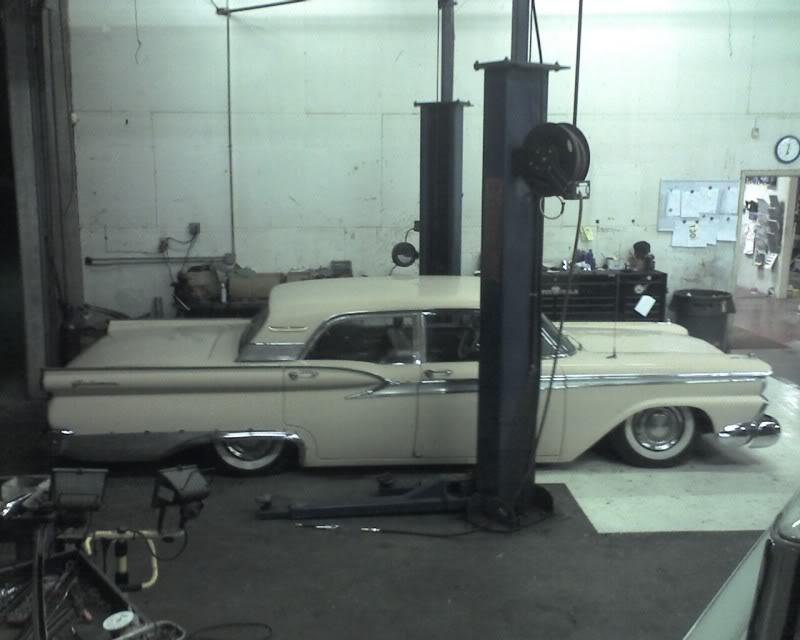
Update is. It's sitting exactly as shown inthy last pick. It's been so damn hot I haven't wanted to work on it. Now that it's cooled down I'm getting the itch to work on it though ao shouldn't be too much long before the motor is out. I'm about 2hrs from pulling it. Just need to start working on it first
9/29/2011
I'm prob going to put in a different cam while I have it apart for bearings and maybe add a support bracket for the turbo and clean up the engine bay while it's apart Other then that it's all going to be the same and hopefully it will be back on the road soon
10/24/2011
still not much progress. John is supposed to come over this week to help me get it out and see how bad the damage is. Once the motor is rebuilt I promise I won't take as long to put it back together
11/11/2011
UPDATE: Finally got my lazy ass out in the garage and pulled the motor out and got the crank out. i saved the motor when I shut it down at the slightest sound of ticking. the number 1 rod bearing did not spin but it did haev a little of the bearing stuck to the crank.
I took it to the machine shop yesterday and they think they can get the bearing pieces off and polish the crank (not turn it) and I shoudl be good to go.
dad called yesterday and said he would love to drive the car the week of his birthday 12/12 guess i need to get this thing back together.
I also got that 1959 Galaxie back a couple weeks ago and it MIGHT be getting a litte 4.8 love this winter just so I have a FI reliable fun car to drive around
12/10/2011
IT LIVES
my dad's birthday is the 12th and he has been telling me for more then a month that it sure would be nice to be able to drive the car the week of his birthday. I keep telling im I know it would but I just haven't been able to mess with it. He was here just a couple weeks ago and saw it torn completely apart so he has NO idea that its done.
the people at the lake are having a surprise birthday party for him tonight so I'm going to pull up in the GTO
soooo if you know my dad (some of you do from his Matco route) don't tell him!
Just gave dad the car back and he was thrilled. We went for a drive and he was smiling ear to ear the whole time
( these are all people from DFWMustangs.net)
Thanks again Cobraman (Jeremy), Splat (John) and BlueCoupeRedVert (Doug) I wouldn't have had a chance at this thing being done if you guys hadn't helped me put the motor back in Wednesday night
And of course thanks to JOHN for helping be do every damn thing every time I work on anything
( shitty pic taken at dusk with an iPhone 3g)
1/11/2012
I have 2" dropped spindles, tubular control arms and stock height Eibachs in front with
control arms
http://www.ebay.com/itm/NEW-64-72-Ch...item58851a0d14
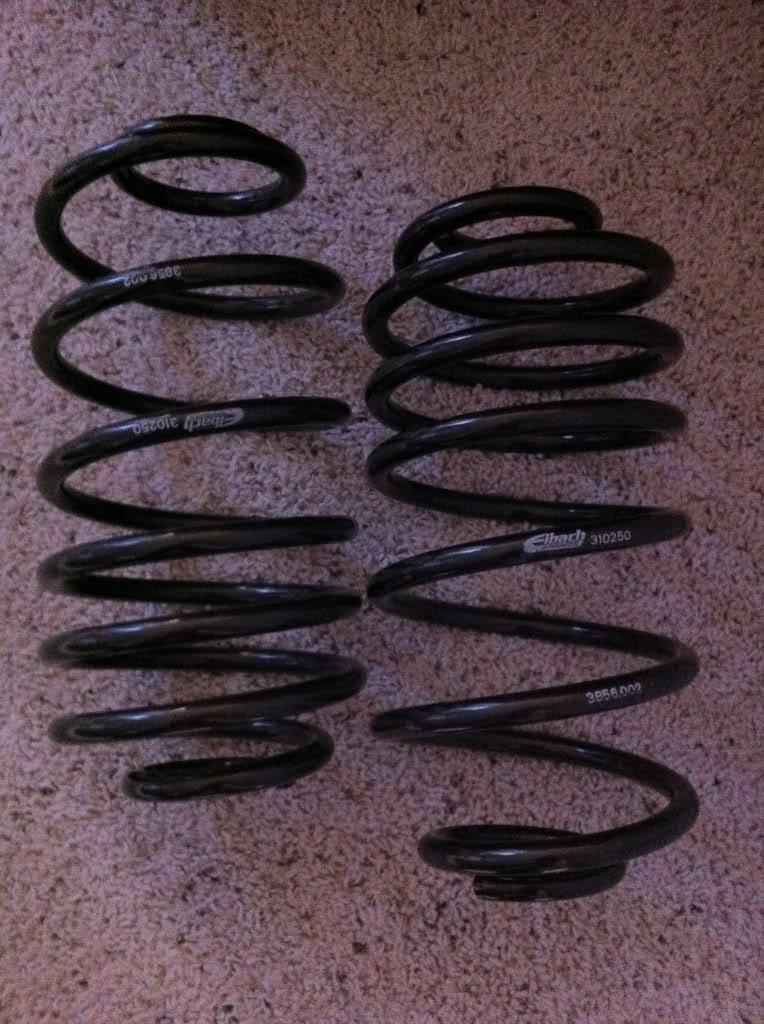
rear has lowered Eibach 310250 springs but I don't remember the part number with aftermarket upper and lower control arms *edit... found a pic of the rear springs
wolfe spherical uppers
18" front wheels with 245/45/18 tires
20" rear wheels with 275/40/20 tires
I don't remember the back spacing
oh and the 13" brakes
http://www.ebay.com/itm/1967-1972-66...item415d3980f1
1/24/2012
**** UPDATE..... Its broke AGAIN!.... I jumped on it on the highway last night and when it went to down shift it didn't grab any gear and hit the rev limiter and I got out of it and coasted to a stopping place I have no working gears so we are thinking pump or converter but I didn't hear anything at all so I won't really know till I pull it out AGAIN!
blah
2/20/2012
Ya I know I should have gone with an 80 but thought I could get away with the 60. And I know I should go to an 80 but that would mean a new yank converter and redoing the floor
Haven't done anything to the GRO lately. We have been working on my buddy's new garage/shop to get it ready to build the next project. It's a lot easier to build a car in a well prepared garage with a lift
2/28/2012
pulled the tranny last night and the snout of the convert is broke at the pump end.. so it needs at least a pump and converter fixed

OUCH... Yank just told me $350 plus shipping... Sarge at Performance Converters of Texas in Kennedale told me about $150 but couldn't say for sure until its opened up
4/10/2012
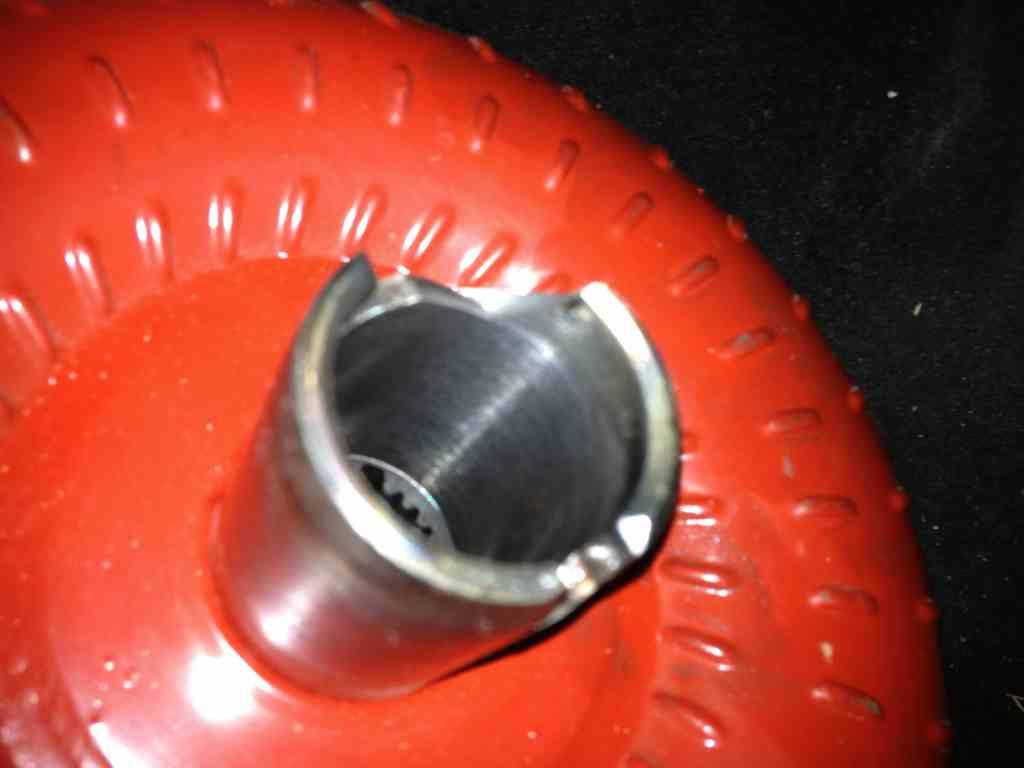
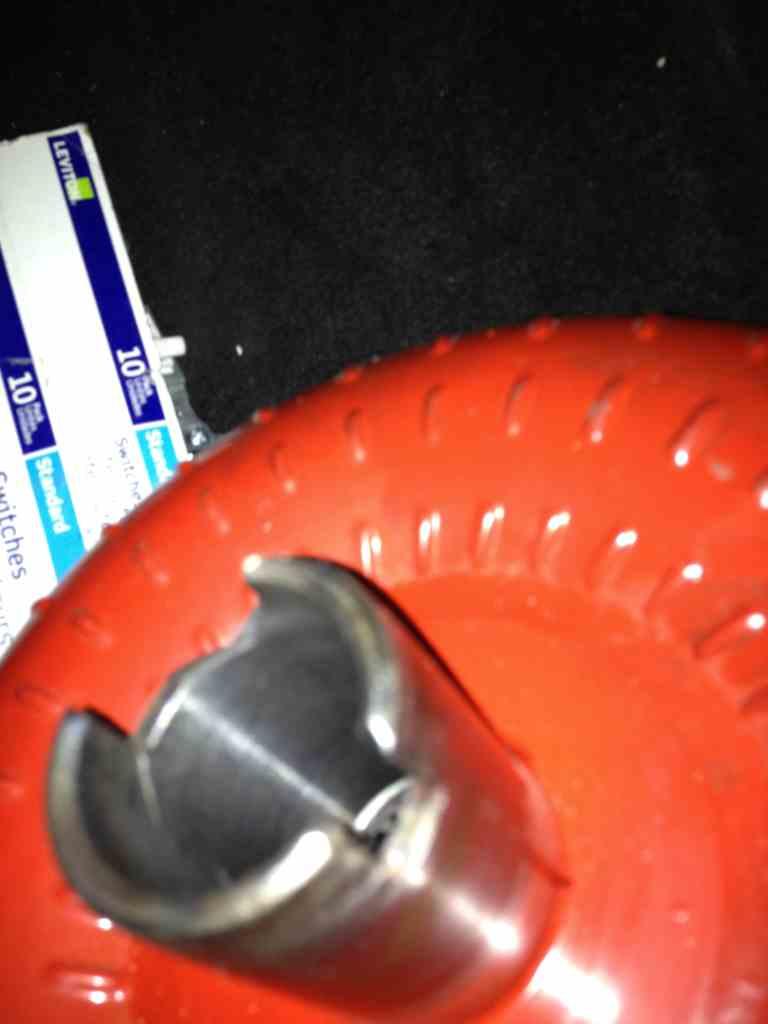
next up, hydroboost for right at $100
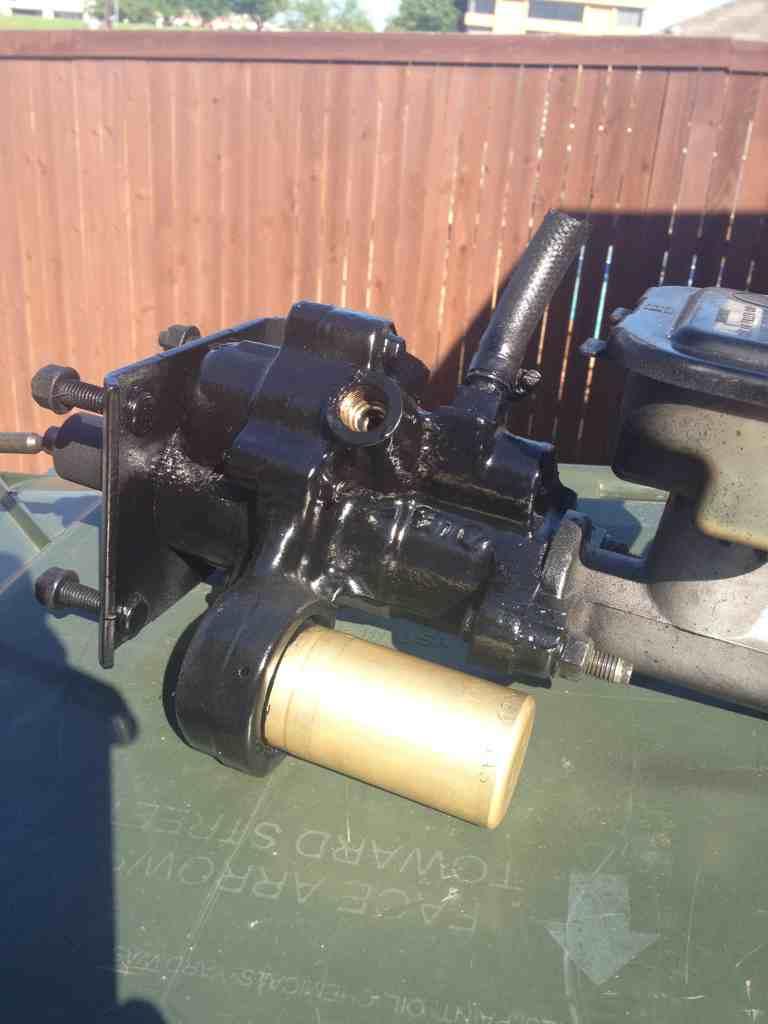
Hydroboost setup is done. Best money spent in a long time. (bad quality pics and dirty sorry)
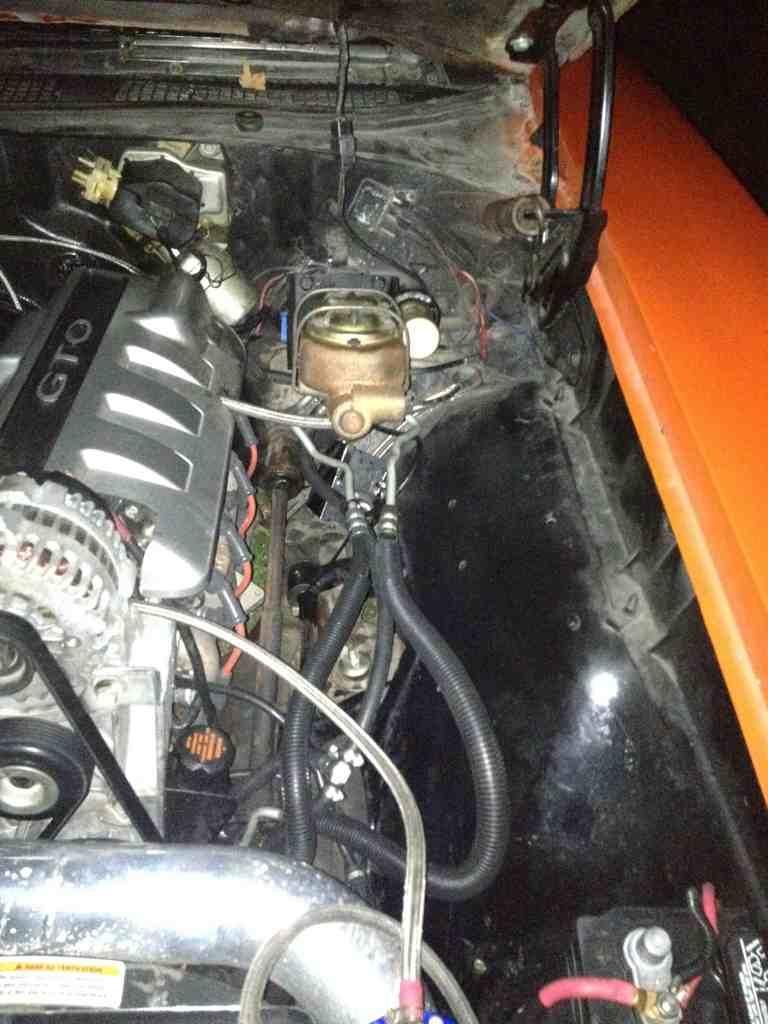
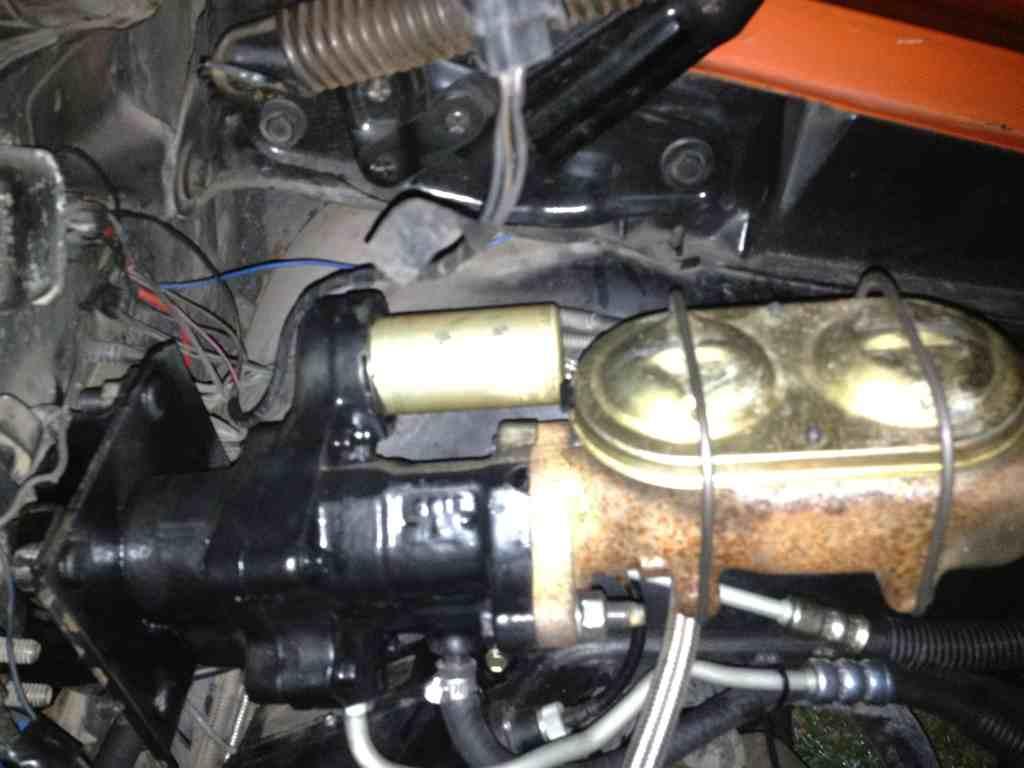
astro van hydroboost with MC (which I didn't use) $32 from Pick-N-Pull
factory Hydroboost lines from an '02 Avalanche $22 and $30
mr gasket shock extenders part number 1290 $11
(you cut the eye off of the hydroboost and then slide the shock extender over it and well it. This has the same threaded shaft as a factory A body brake booster so you can use your factory brake pedal adapter.
I seperated the vacuum booster fromt he angled mounts and bolted the mount back onto the wall and then bolted the hydroboost to the mount... you could probably drill new holes int he firewall and mount the hydroboost flat on it but I didn'tw ant to do that.
Muscle ????
Posted by Diggymart on 10/2/19 @ 2:15:08 PM