You must be logged in to rate content!
6 minute(s) of a 286 minute read
7-10-2011
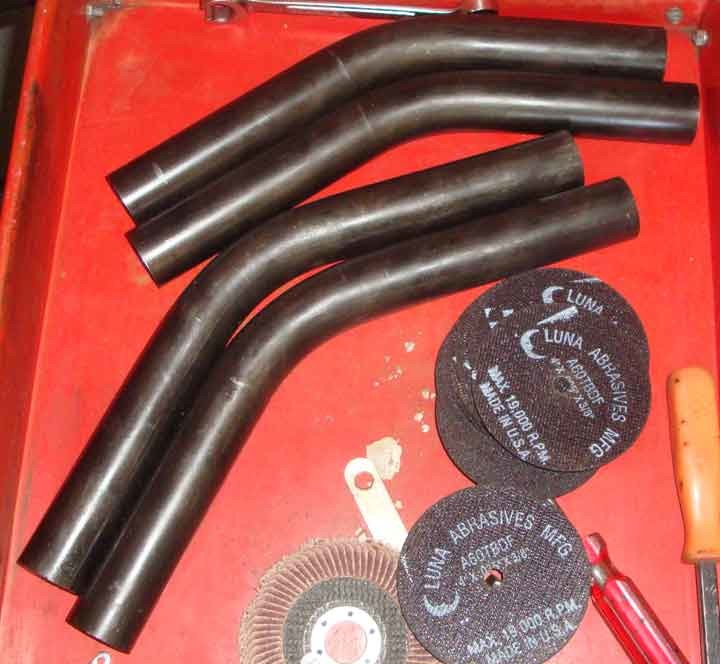
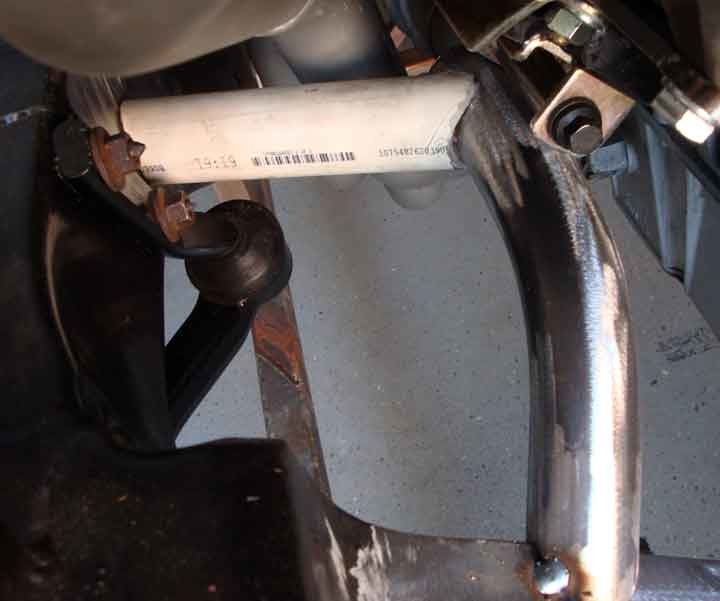
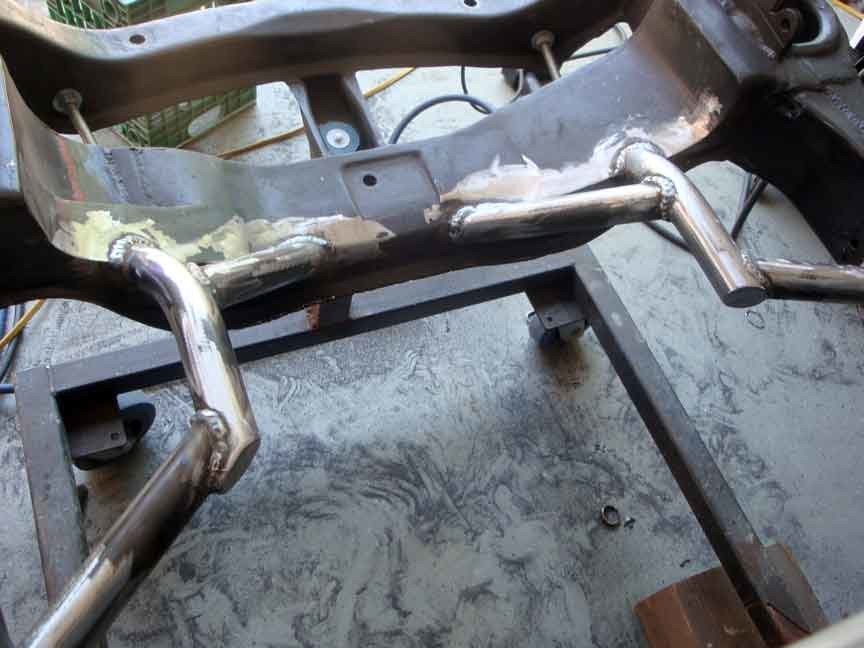
I was able to get a little work done this weekend on the driver inner wheel well mini tub project. First- I got the tubes for my motor mounts back from the pipe shop that bent them. Since there was a price minimum, I had them bend a couple extra just in case. 2 are bent at 37º and the other 2 are at 45º. Even with that I still over paid. Time to buy my own pipe bender... I'll start that project after I receive my pipe notcher from the Eastwood co.
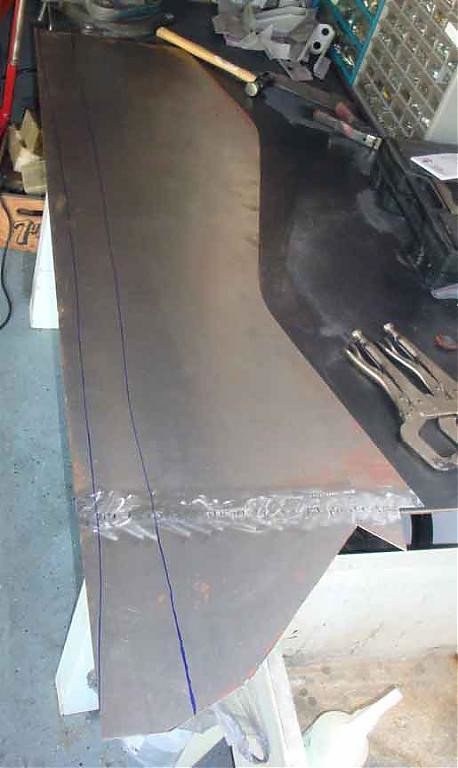
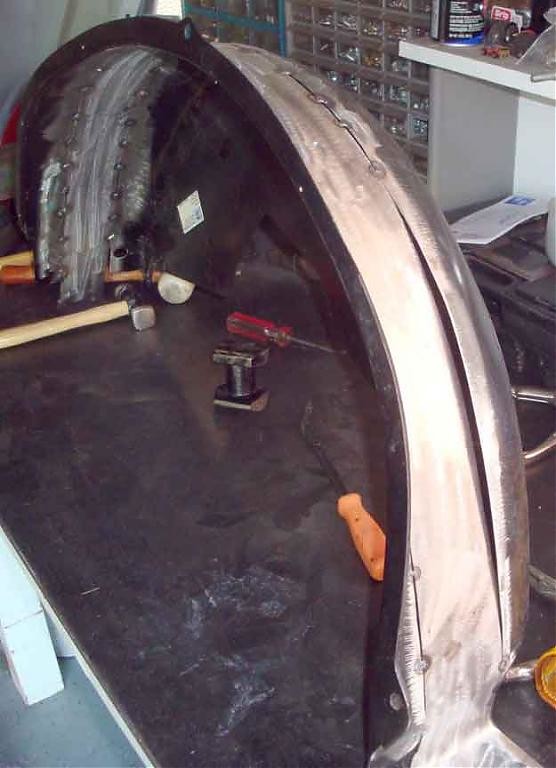
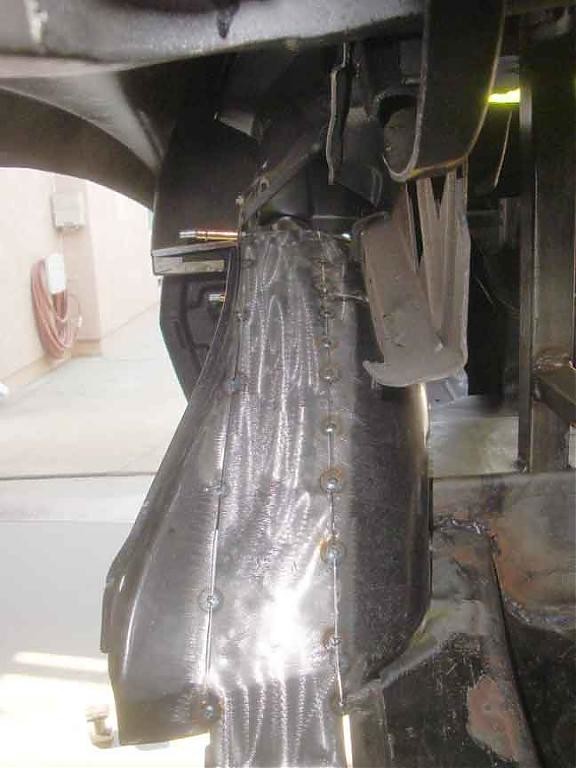
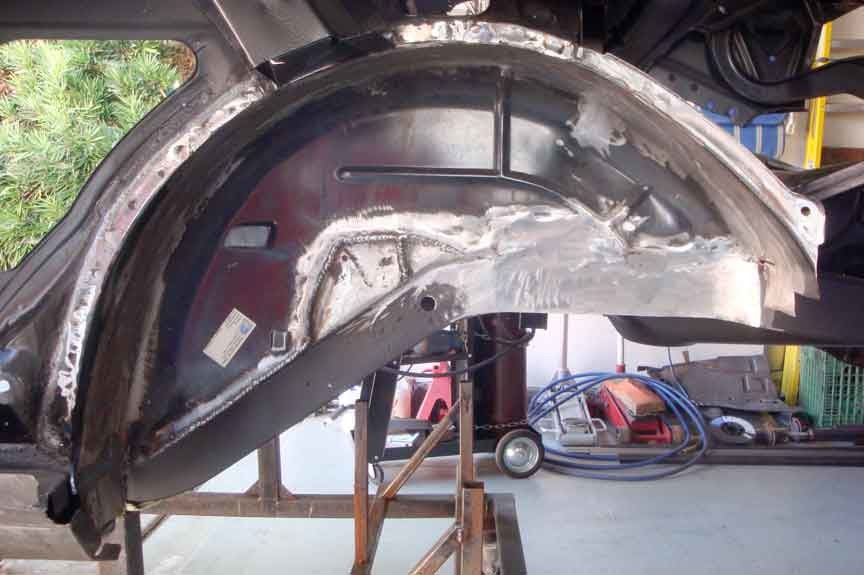
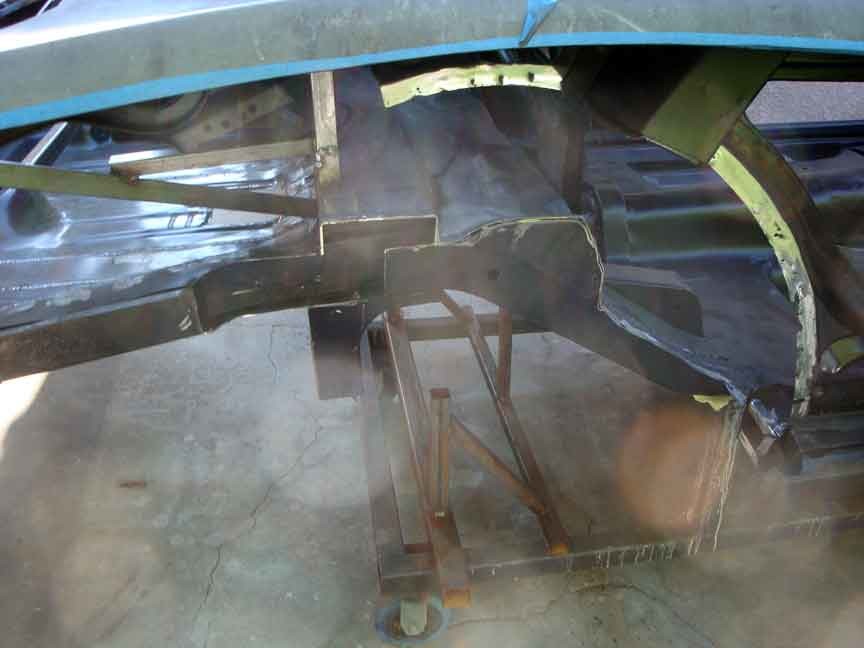
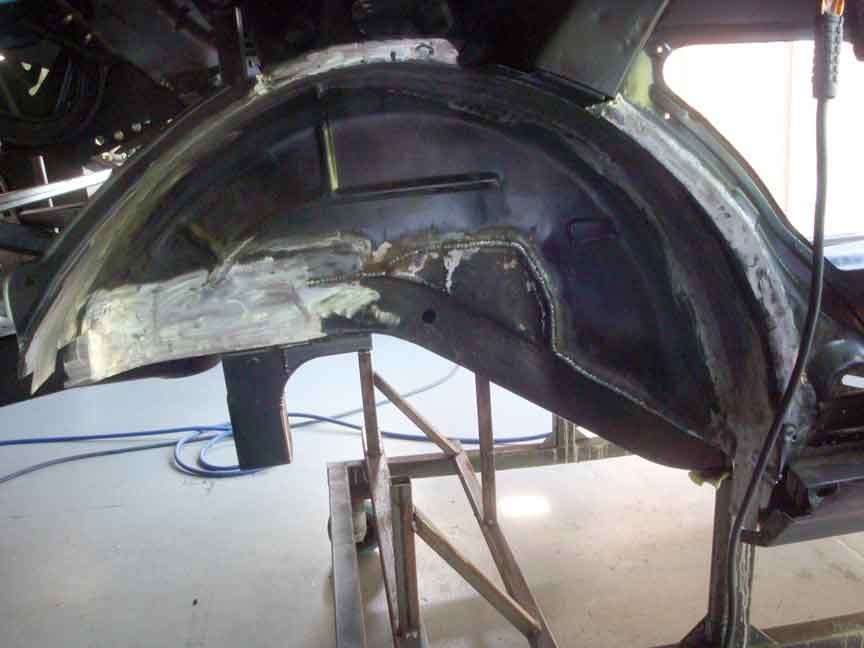
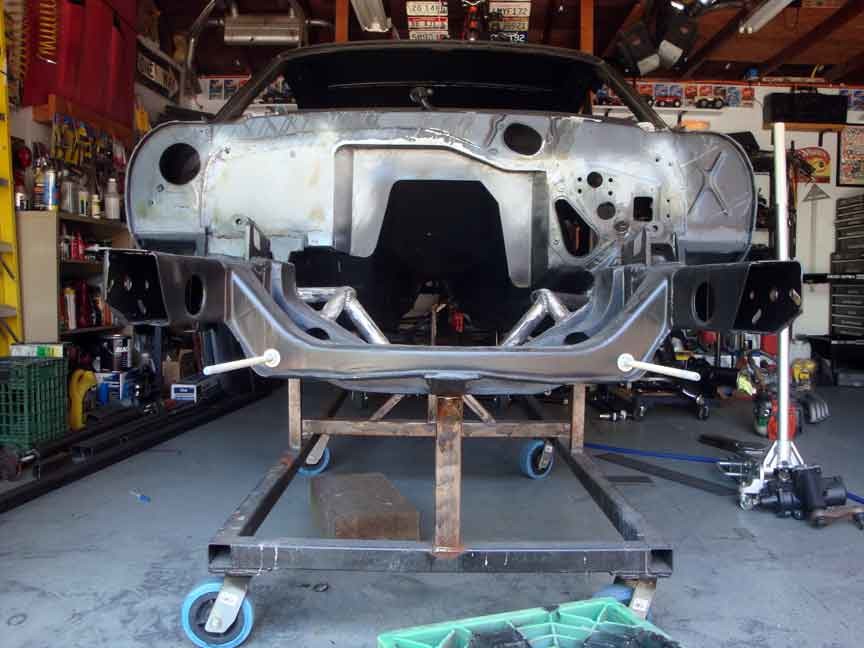
So I was able to weld up the strip of metal I cut to fit the inner wheel well and have it roughly welded in place. It fit pretty well. I had only one area that bubbled out on me and a quick slice to the side fixed that. I still need to go over some areas and then do some trimming on the inside, but all in all I'm very happy with the result. I also made a frame rail piece that follows the contour of the mini tub- wow, it was amazing how much that strengthened up the back end of this car. It's been in pieces for so long I have forgotten what a solid car feels like. Every time I'd roll it in and out of the garage it would shake and rattle like jello, and it's finally doing less and less. A good feeling of accomplishment...
Next weekend is our wedding anniversary so I won't be working on the car.

7-24-2011
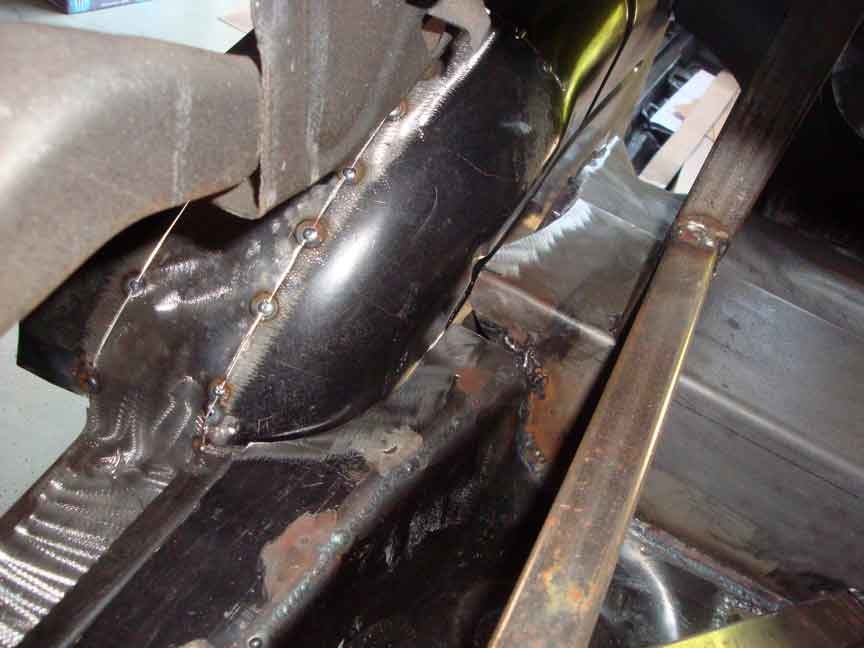
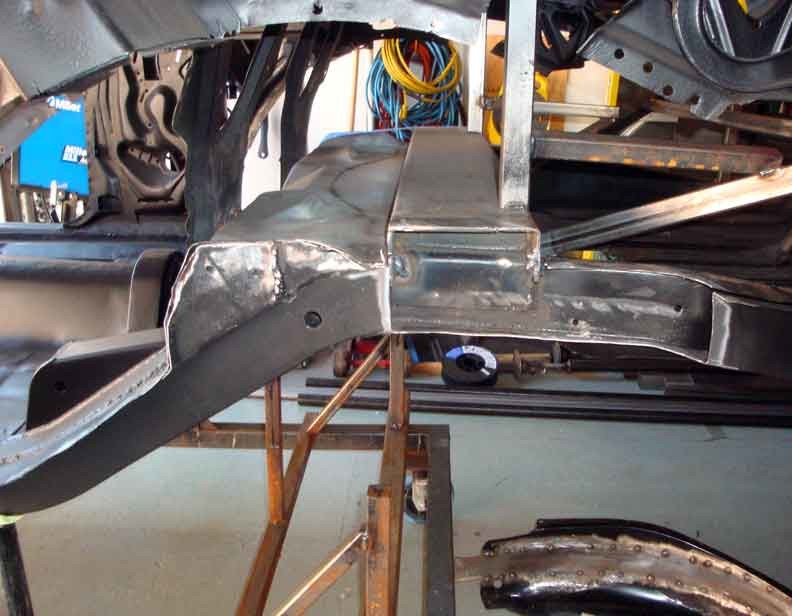
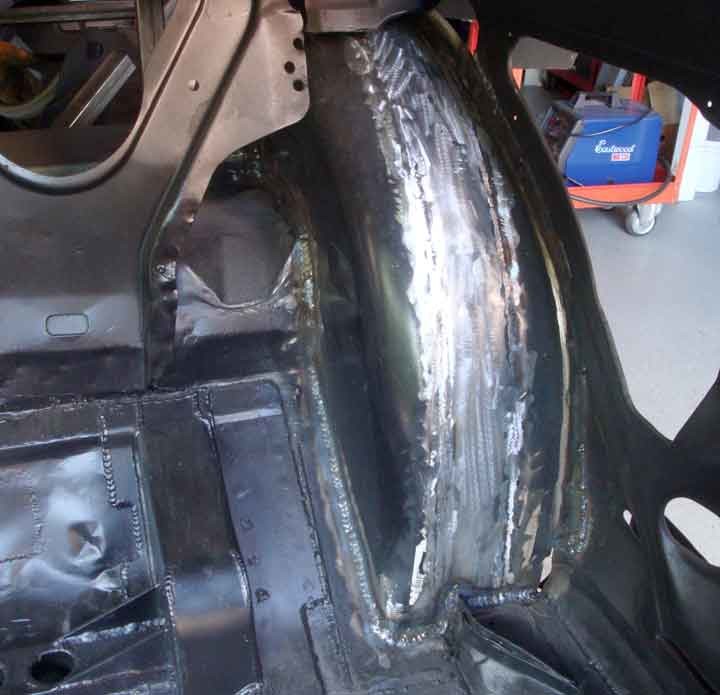
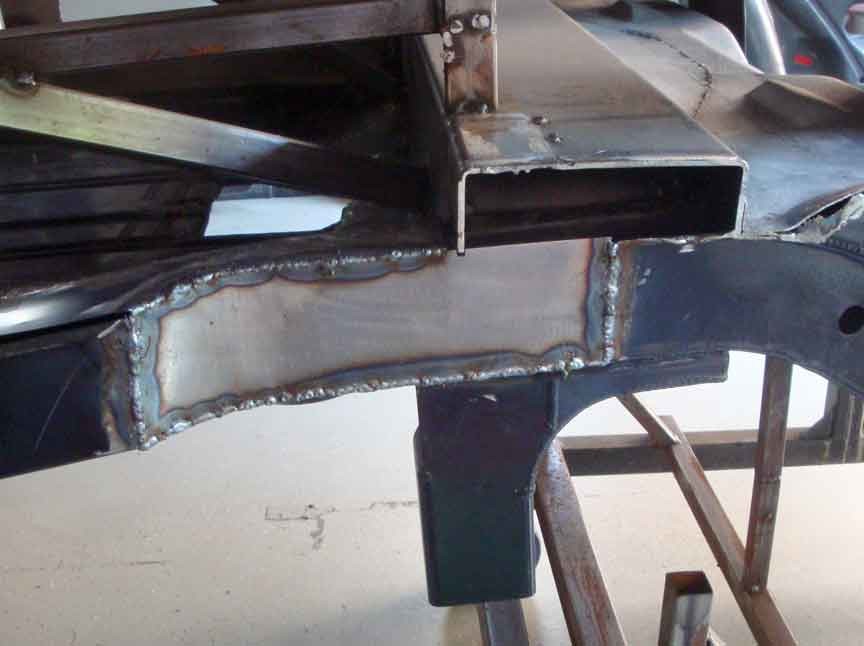
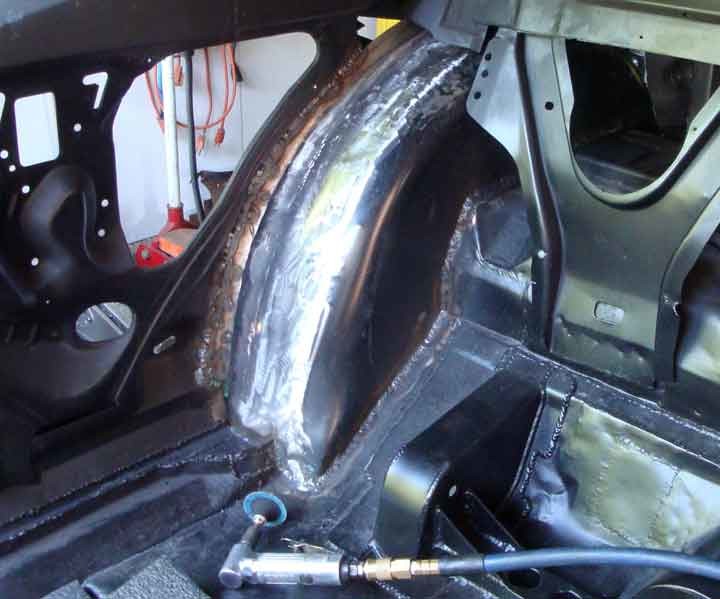
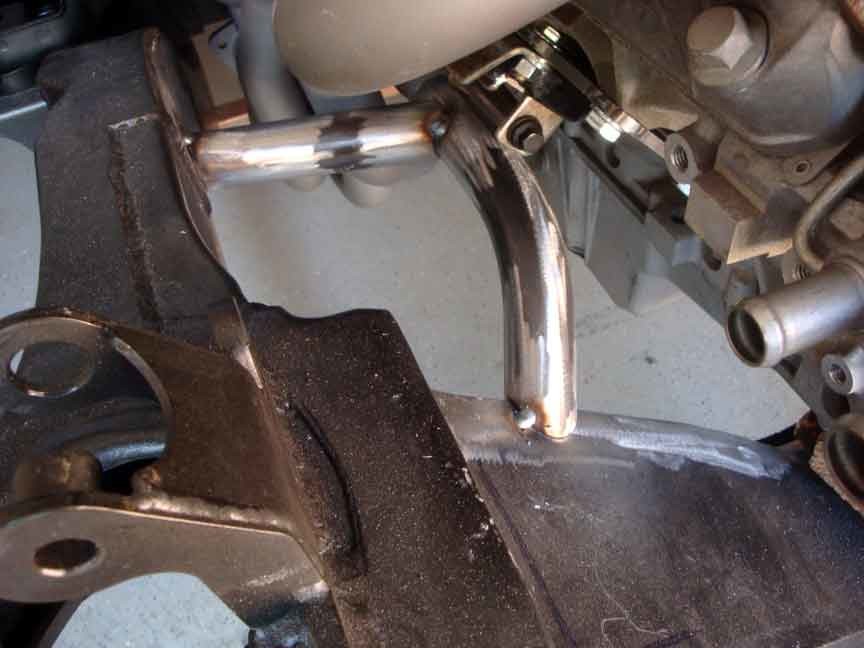
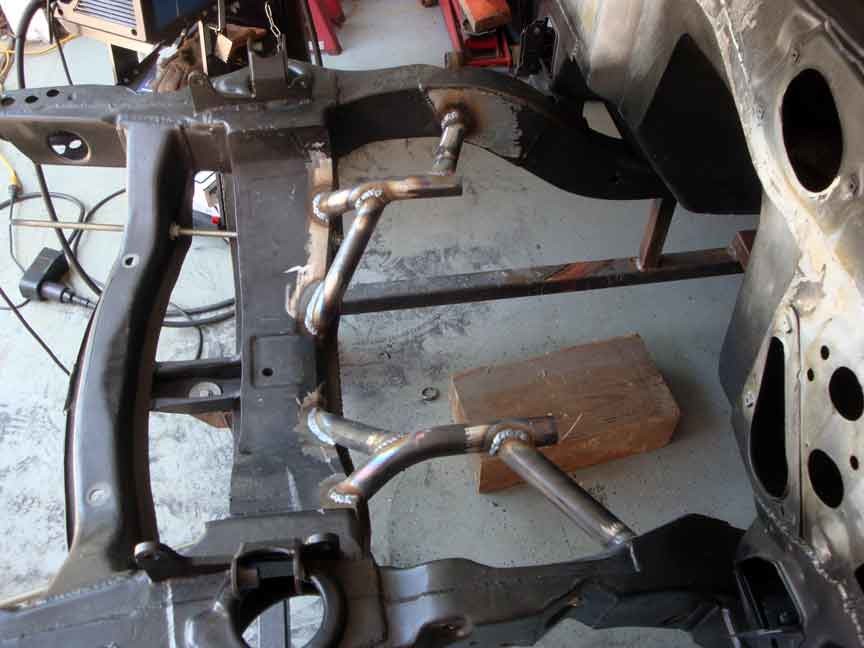
This weekend I was able to resume on the car. I was able to finish up welding the driver side inner wheel well and I started the passenger side. I ran out of welding gas today so I was not able to finish welding it. I'll have to do that next weekend. I used the remainder of the day today to start cutting the tubes to make my engine mounts. I had to shim the body dolly and then shim the engine to get it centered and level, but the lesson I learned today was that I should have located the car in the garage farther so I could shut my garage door without disturbing it. I didn't- so I will have to do all that again next weekend.
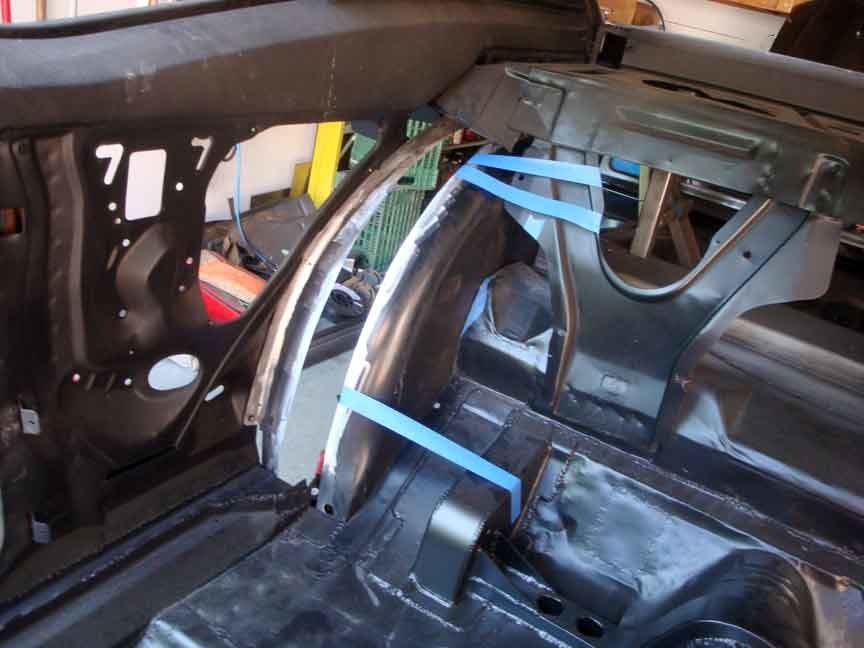
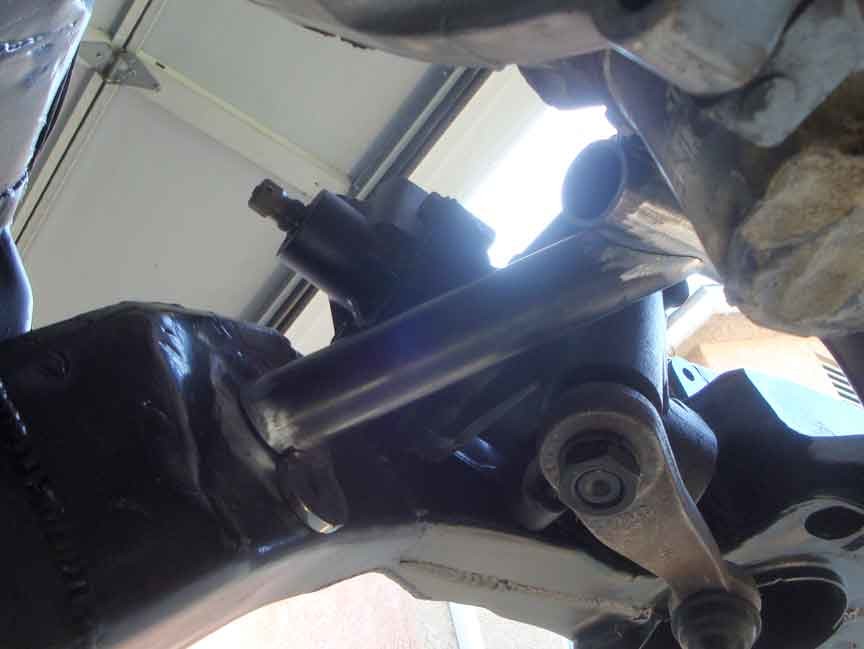
The last pic I took shows a gap from the tubing to the dr side frame rail. When I position the tube correctly, that gap goes away. It was the only pic I had in this view...

8-1-2011
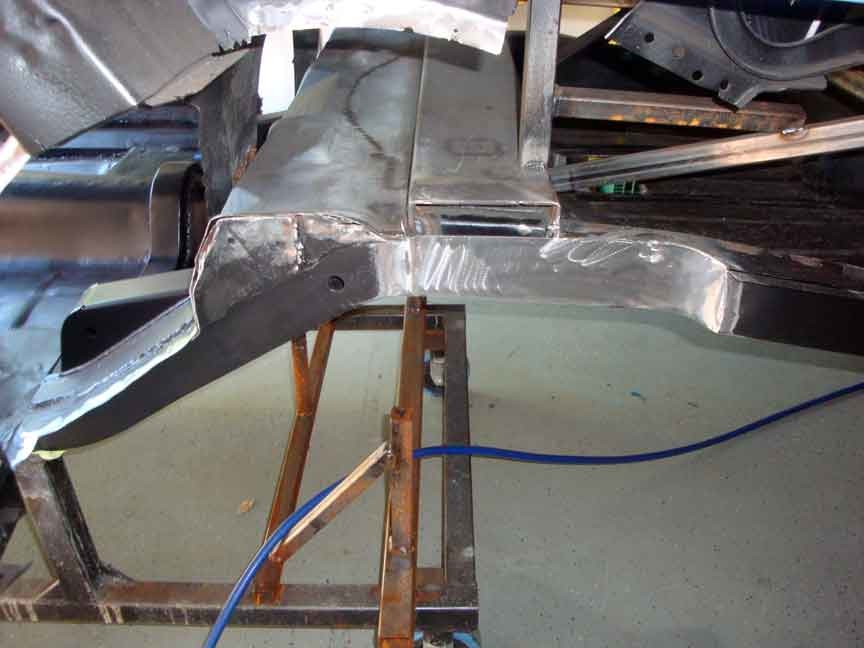
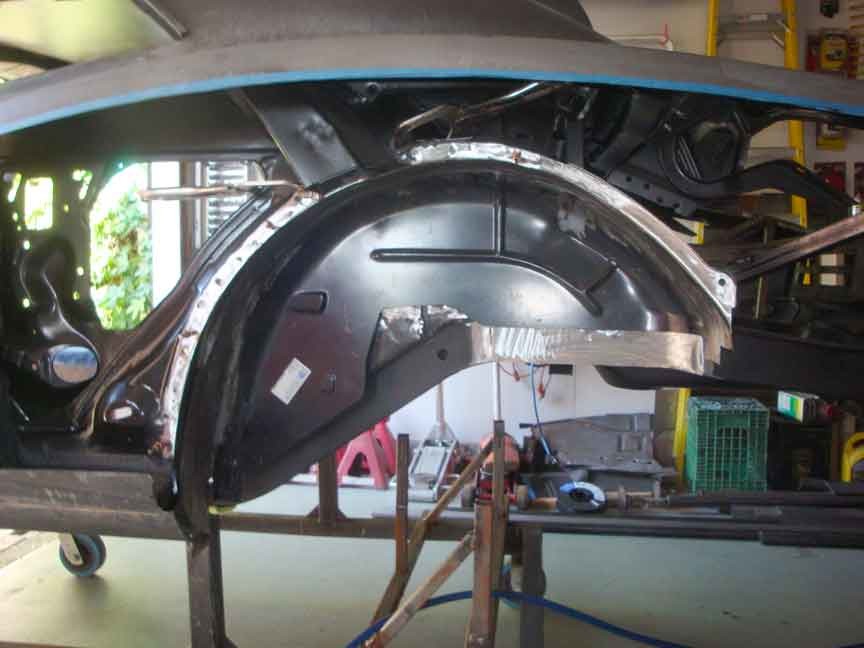
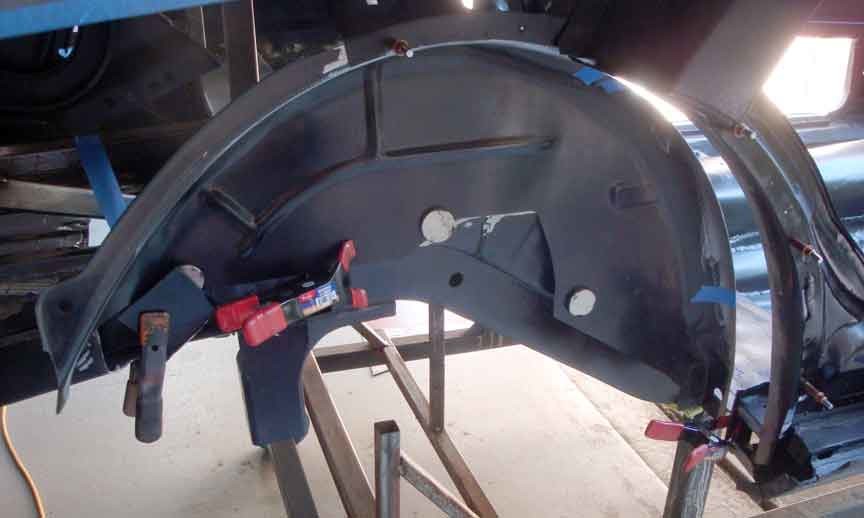
This past Friday and Sat I worked on my car. I was able to finish up the passenger side inner fender and get some progress on my engine mounts.
I was able to use my new Eastwood tubing notcher and it worked quite well. Of course, it makes a big mess as I'm using a lot of oil to keep the blade cool.
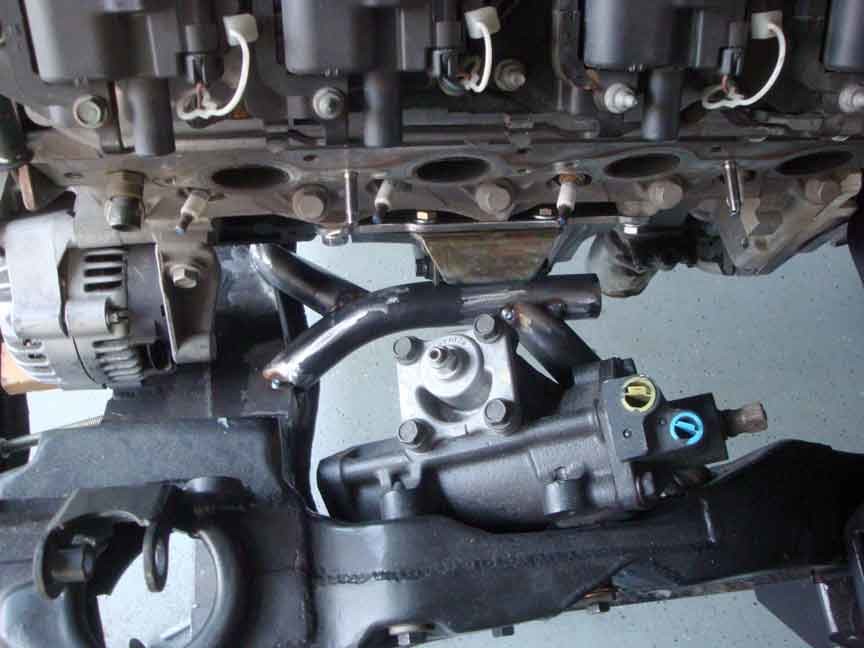
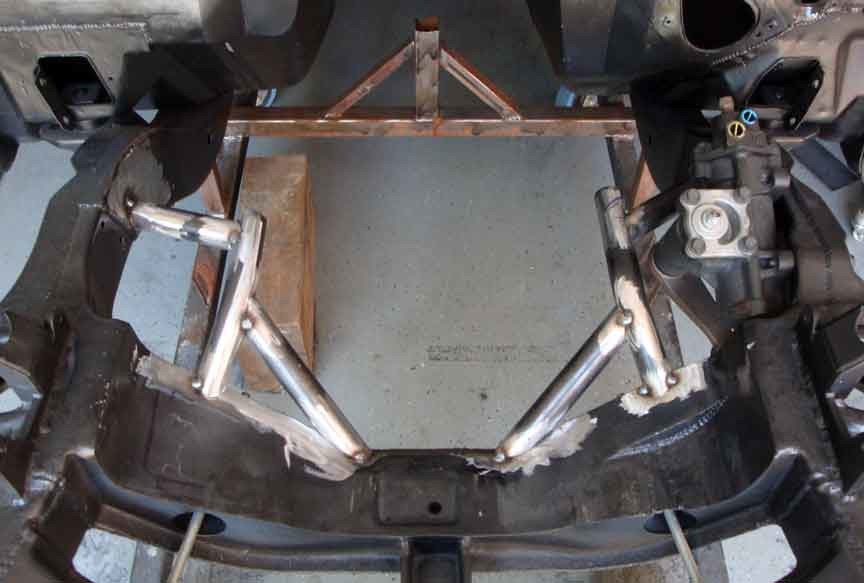
It took a lot of grinding, test fitting, grinding more, etc. to get them to fit. I first welded them with that "worm bead" and it looked more like gummy worms, so I went over them with spot welding for a cleaner look. I also made some gussets for added strength. Now all I need to do is make the plates that connect to the tube I'll use to trap the engine mount bolts.
What's funny is the pvc tubing I used still fit. I guess I made them accurate, or consistent, to my mock ups...
I also need to make a little more trimming for the engine before it goes back in.

Wow excellent!
Posted by Diggymart on 9/23/19 @ 1:21:32 PM