You must be logged in to rate content!
11 minute(s) of a 377 minute read
10-6-2010
I got my track rods back now, they have had 50mm taken ot of their length and 50mm added threads, this would not have been possible on my original rack as the track rods did not have any meat on them past the threads, so if your thinking of doing this then you will need to check. The track rods require turning down to the correct diameter for the 1/2"UNF die. They obviously need splitting from the rack to be able to do this, something that doesnt appear possible if the rack is still in place.
The main problem I foresee from here is where the column meets the splined part of the rack, on the old one the splined bit had a depression all the way round for the fixing bolt, the new rack only allows the bolt to be fixed in one angle on the slpines and as the splines are hardened steel you cant exactly go maching them with normal maching equipment. The problem lies in that the column is made of a hex bar which only allows 60deg of movement in any one turn so lining up with the rack could prove to be a nightmare - I will let you know........
I have two sets of spacers, 30mm and 45mm, you can guarantee that it'll be 25 or 55 but we need to start somewhere. SO fingers crossed on the weekend I will be getting the rack back together and putting it on the car. Its been a bit hairy driving the car over the past few weekends as there has only been hand tight bolts holding everything together. so its been tickover in first gear everywhere - which hasnt been far - garage to trailer and vice versa really.
The new brackets for the anti-roll bar are currently being machined for me - cheers Steve... made from billet, they should really do the job very well.
Defo looks like the alternator bracket is going to be milled, pity as its now not going to have the curves that I had re-drawn into the design thinking it would be wire eroded. I guess it'll never really be seen anyway so theres no real need for curves. ho hum.......
10-7-2010
We could probably make the effort and get some nice curves in it, however in the interest of getting it done swiftly and at little cost I think straight lines will do, this project has truly broken the bank so anyhting I get done now needs to be at minimum cost.
Roll on the weekend so I can put it all back together........
Here's a rendering of what the bracket is to look like(minus fixing holes):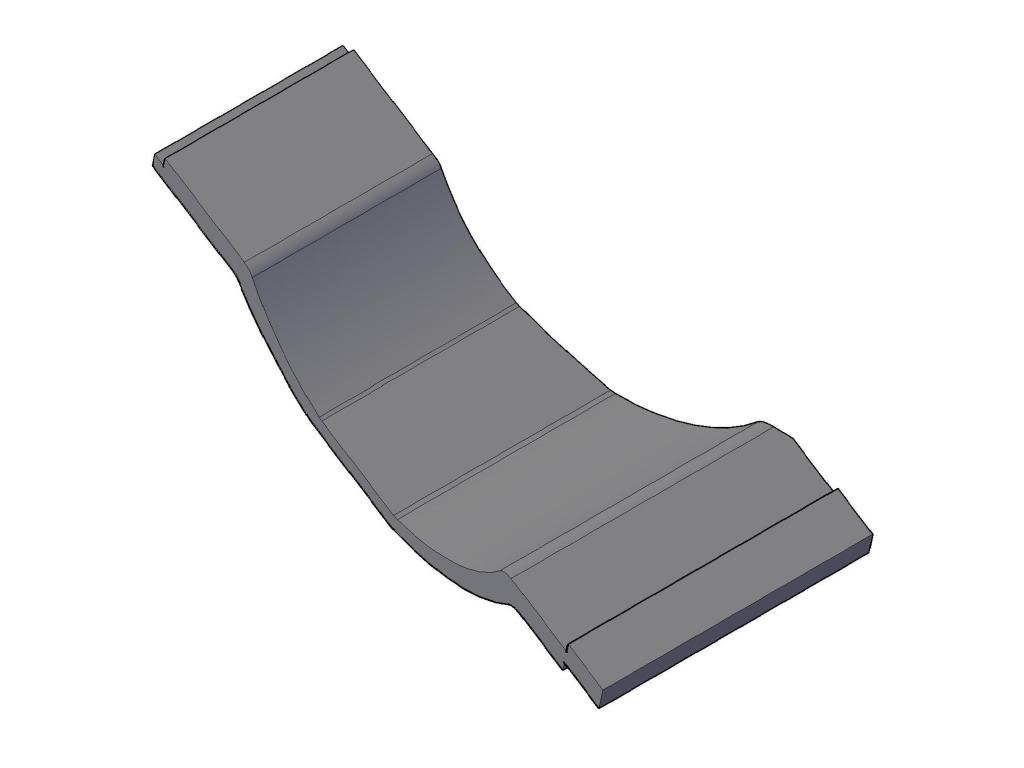
10-11-2010
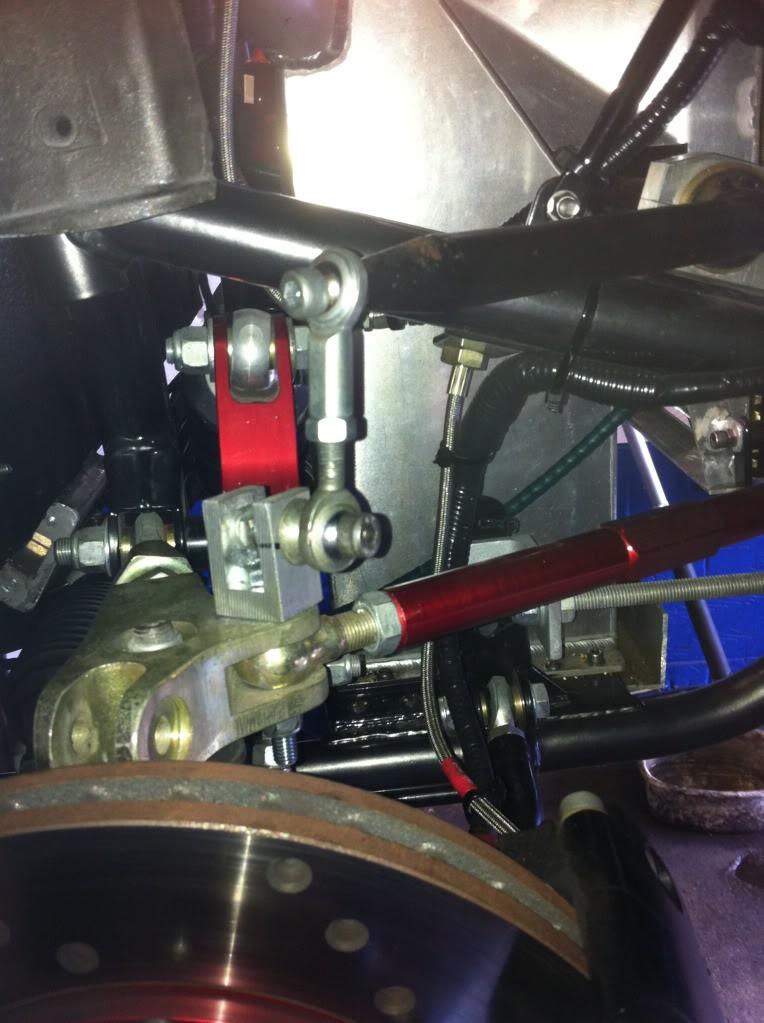
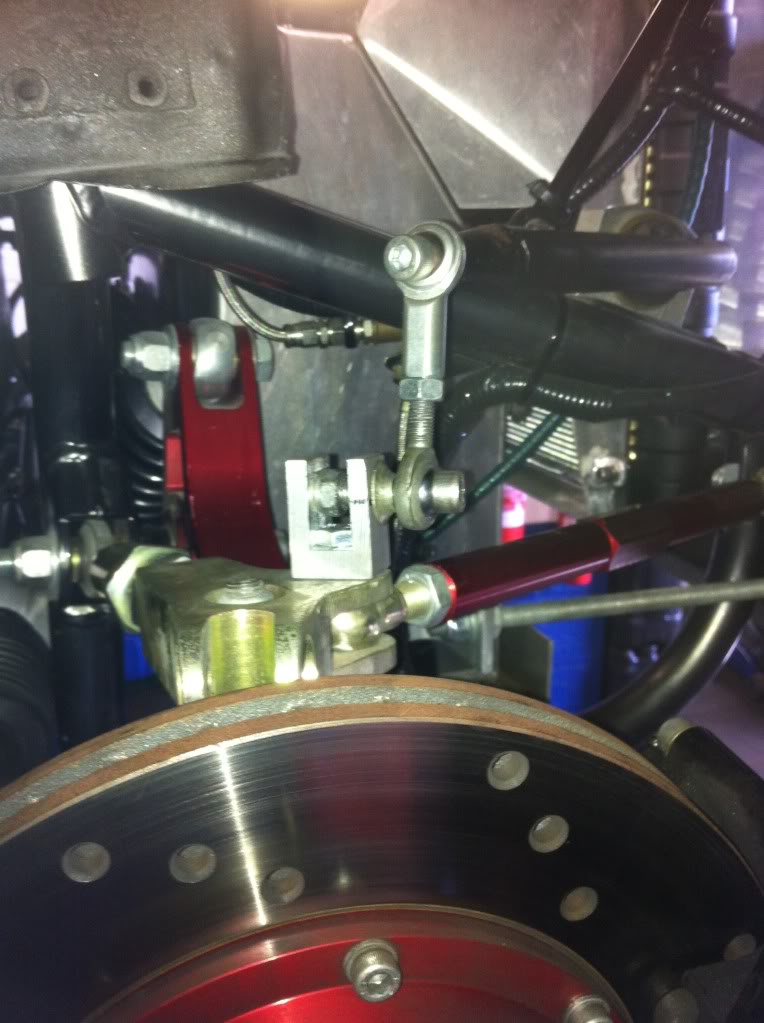
NEW STEERING RACK + BUMP STEER ALLEVIATION - ROUND 2
SUCCESS - I got my new rack fitted on the weekend with all my shiny new bits as well and I have to say it has improved the feel of the car by a huge amount. although I have to report that my rack is not self centring due to it being too stiff, now I have read the Haynes manual I have to get at it again to remove some preload shims, bit of a pain in the ar5e but not the end of the world. It makes you concentrate even harder driving it when it doesnt self centre - I love a challenge. On the plus side the wheels no longer rub on the wells due to the restricted movement in the sportspack rack.
I am still considering putting a kit together but need to look into it a bit further now I have the information from my build.
So anyhoo, I got a couple of snaps of the kit in place on the weekend and here they are: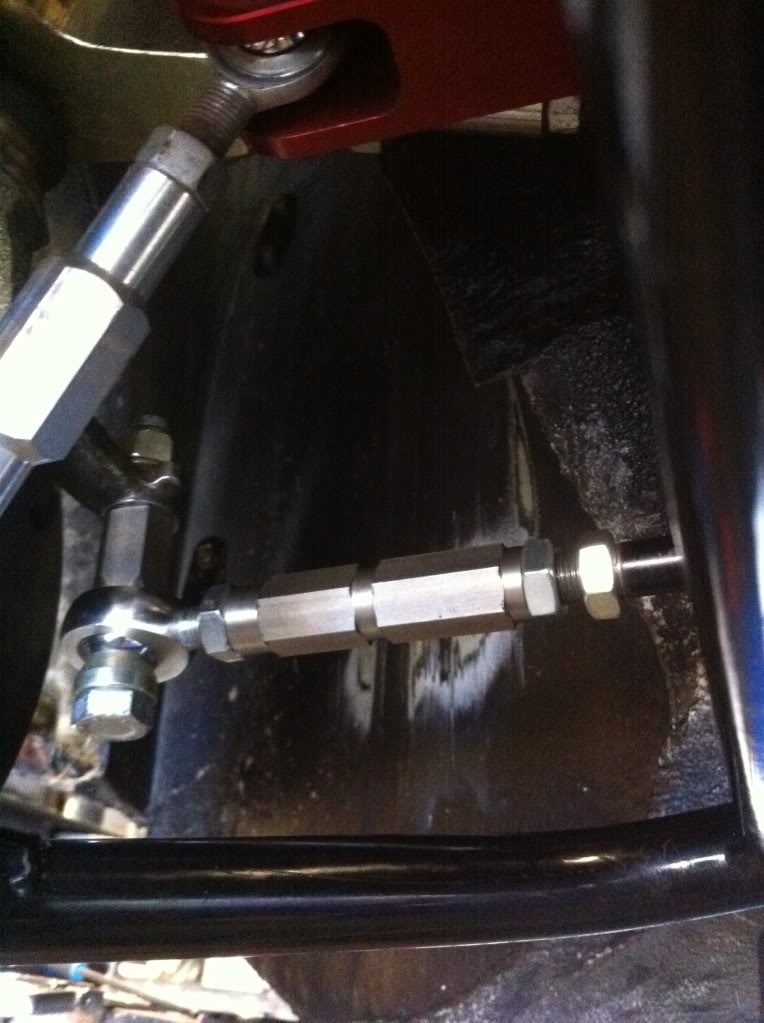
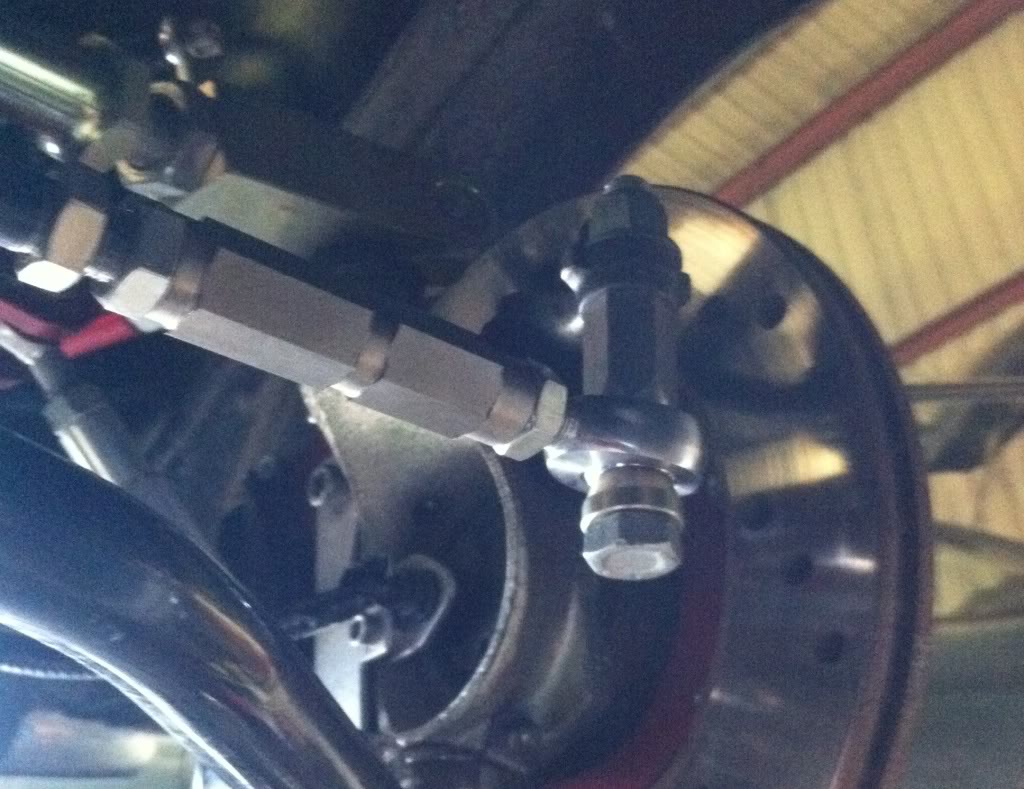
Anti Roll Bar Pick Ups
This week when I took the O/S front wheel off I was really surprised to find the original ARB pick up completely snapped, now I know I said they were rubbish before but I didnt think they were going to snap at the point that it did - right across the horizontal bolt hole (see picture later on). the surprise was more for the fact that last week it hadnt snapped and this week it was yet all I did was drive about 100metres ticking over in first, guess it was the final straw.
Fortunately my good mate Stevie G had milled up some new ones to my design which I promptly fitted on saturday.
When I removed the old pick ups I though I had best check the ARB to see if it was rotating freely, guess what? Yer thats right it was pretty much solid and I could literally put all of my weight on it before it would move (and thats quite a lot of weight) and it would only move with a yank. So ARB bushes apart, lubricated and back together, hey presto the front ARB now rotates.
The thinking behind the new pick ups was to spread the load over the two sides and the gulley in the middle is exactly 13mm to hold the bolt hex captive when tightening, I have to say it worked a treat. The upright of the pick up furthest away from the rose joint is threaded allowing the nut in the middle to lock off against the pick up so as not to cause pinching of the two uprights when tightening the bolt that supports the rose joint.
So again I got a few snaps along the way, the first is of the failed unit supplied with the car and the following two are of the new billet piece: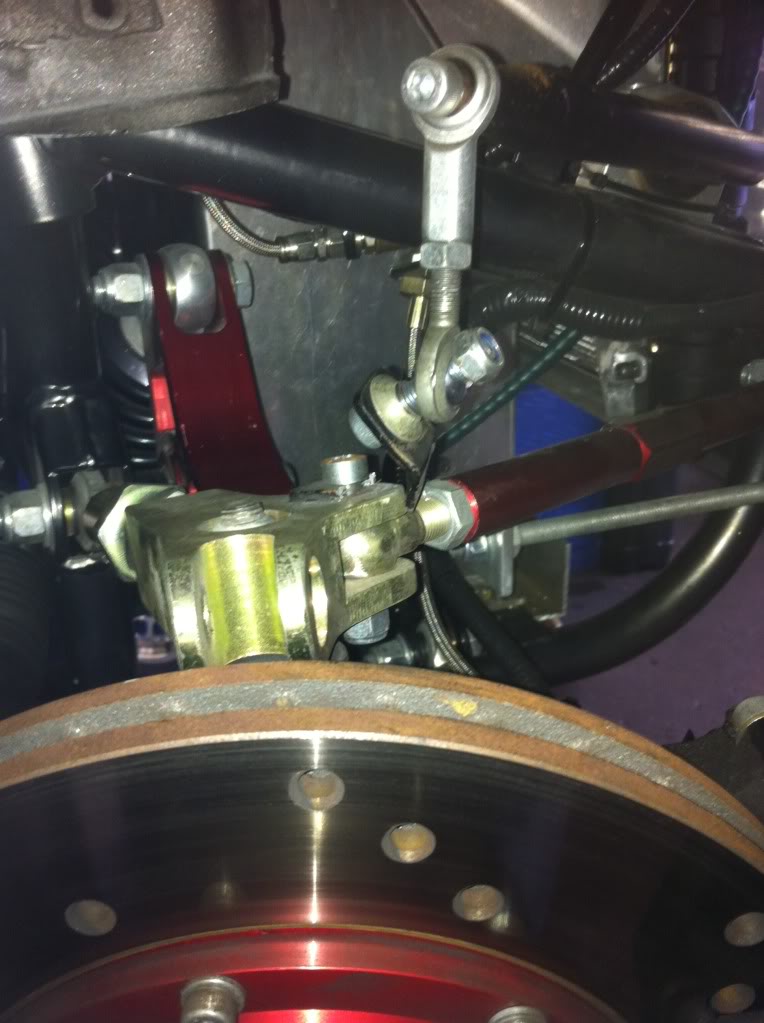
10-25-2010
Yesterday I decided to go out for a run with two of my mates (they were on sportsbikes so I didnt have to wait around for anyone). As my photoshoot for Miniworld is coming up soon I was going to leave it in the garage but damn it was nice yesterday so I had to go..
With the photoshoot in mind I hadnt yet done any timings for the car and as my SPA speedo gauge allows me to do whatever timings I want I thought I would give it ago. So I found a nice flat and fairly smooth bit of road (private road of course  ) and then first I set up for my 0-60, then 0-100 and then 40-60 as these are the most talked about numbers. I hasten to add at this point I have my speedo calibrated to within 1mph of my GPS speed camera locator so its pretty frickin accurate.
The Results:
0-60 = 3.4 seconds
0-100 = 8.0 seconds
40-60 = 1.6 seconds
I only had three or four attempts at the standing starts and the 40-60 is just from one run and needs a few more runs to see if I can get it down with different gear selection. The standing starts were done taking off in first, minimal slip, no wheel spin, drop it and go. I reckon I can get both times down with practice and a clutch I didnt care too much about, still there not bad for an amateuer......
Car is now off the raod for a cleaning session ready for the photoshoot, so keep em peeled for the article in Miniworld sometime in the future.....
11-17-2010
Cheers
Yer I am also pretty sure I can get the 0-60 down but need to practice, like I said in a previous post lower profile tyres are gonna help as well when I come to change mine for the 225/45 R13 R888's.
I have been doing some research on gearing and I reckon I can get to 100mph in third which should shave a load of time off. I got my gear ratios from HERE (K-Series, RSX Type S K20A2 is the gearing) and then put my tyre and wheel info into HERE. For everyones info that cant be arsed to go back through the build diary the rears are 205/60 R13 and the final drive is 3.9.
The gearspeed program only goes up to 8000rpm but working it out I should get exactly 100.12 mph @ 8800rpm so next time I am out on that same bit of private road I will try resetting my maximum recalls (SPA speedo records maximum revs and speed all the time so if you set a new high speed it will then be available next time you press the button for max recall) getting it into third and seeing what the max recall is when I stop. if it comes in at 100 mph like it should then I will re-try for the 0-100.
I am waiting for the next dry weekend to try and get some footage of the car in action and hope to be adding to the lonely video I have on You Tube curently.... keep em peeled.......
11-22-2010
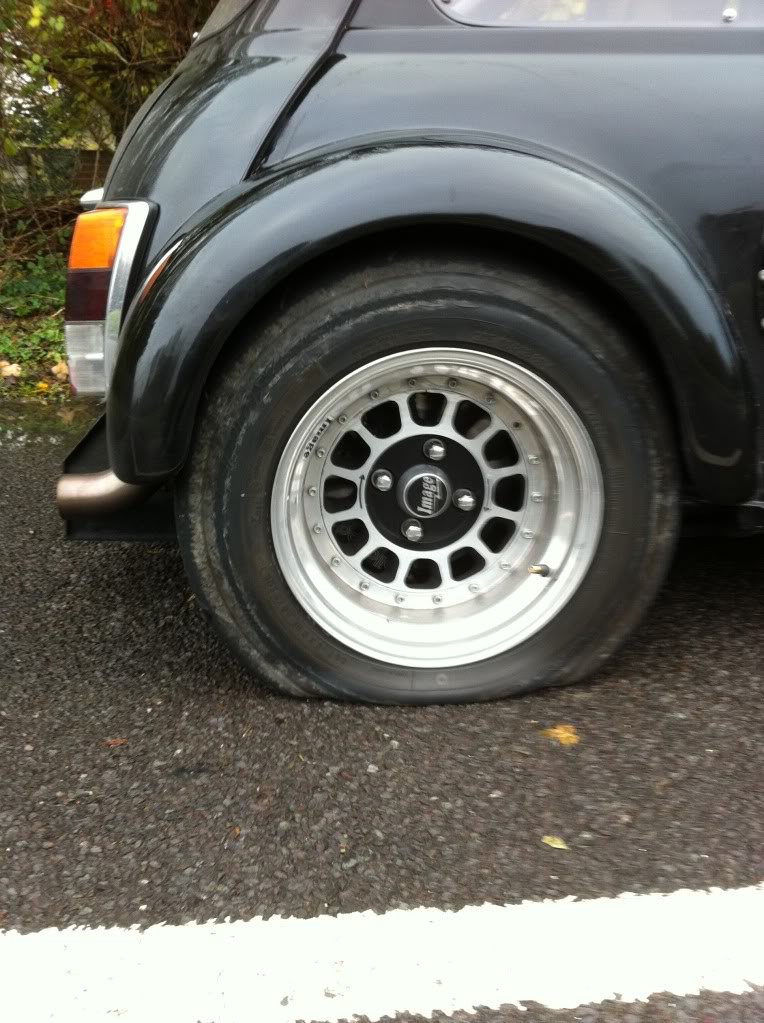
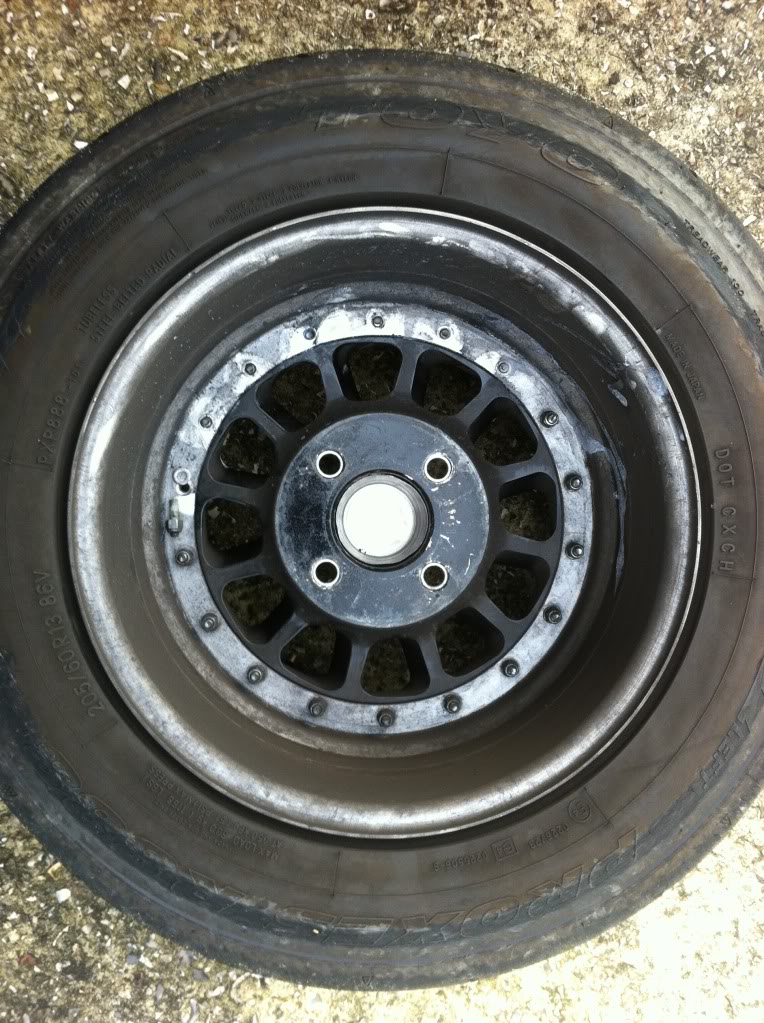
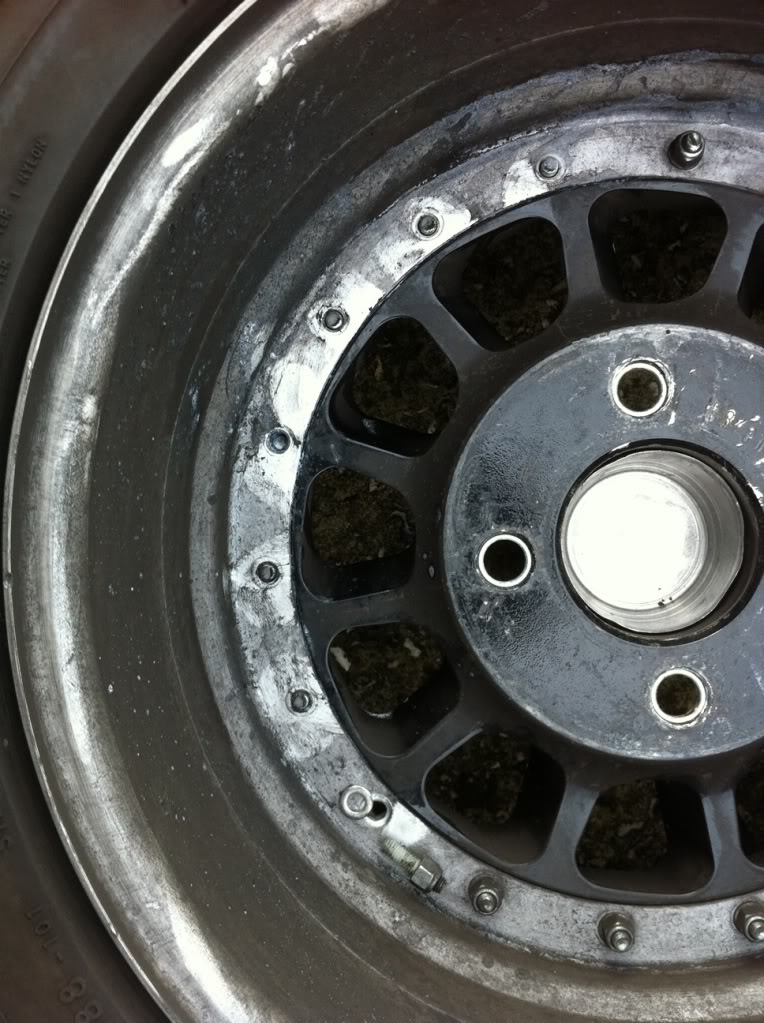
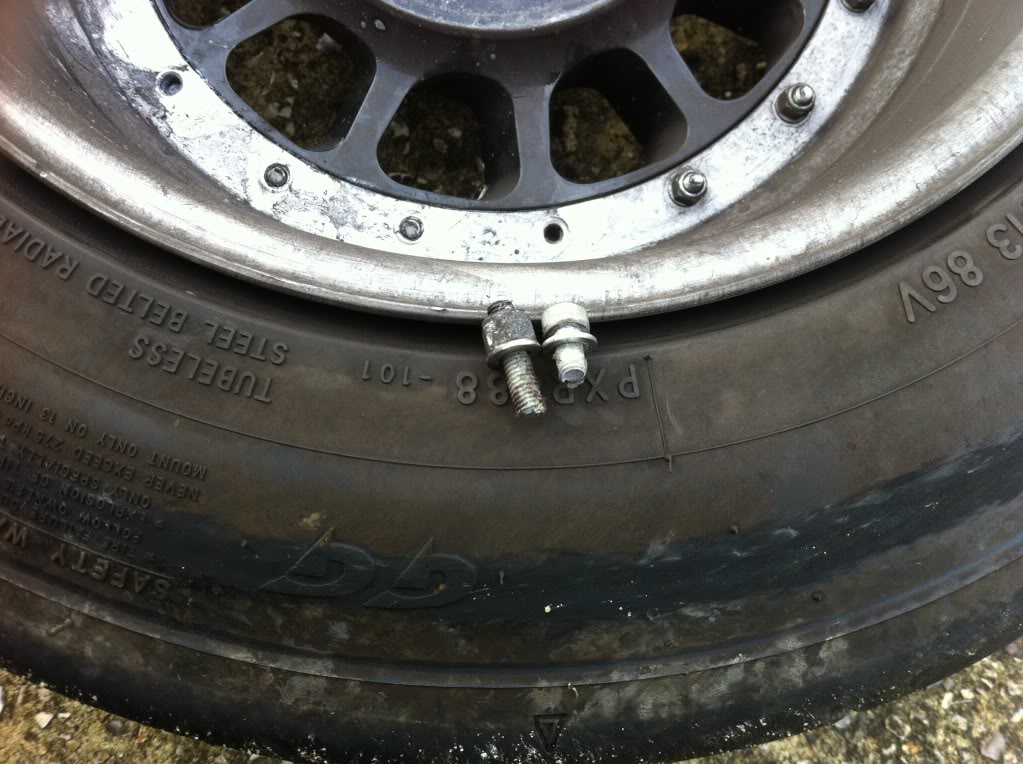
WHEEL FAILURE:
So my run of good luck with the car came to an abrupt end with a POP and a HISSSS from the rear O/S tyre on the weekend, with what at first glance looked like a regular puncture. Fortunately I was only doing about 50mph round a long sweeping bend (hardly any lateral g-force) and was able to bring it to a controlled stop.
I friend was passing and collected me, we went and bought some tyre wled with a view to it getting me home, but two cans of that didnt work, Del then went off and got a bottle of nitrogen at 50bar and we tried pumping it up with that, the tyre went up and then straight back down again, at this point we noticed the tyre weld solution coming out the centre of the rims as they meet the centre wheel part.
I took a closer look and found one of the twenty bolts that hold the wheels together to be loose, so I gave it a jiggle and it come out in my hand, I then put my fingers through the wheel to check the nut side of the bolt to find that 7 of the bolts had snapped. These aren't monkey metal bolts either, they are 12.9 High tensile bolts.
Anyhoo, I have loaded some pictures below for you'all to have a look, I have emailed Image Wheels with the photos and await a reply, I will keep you posted on that.
So here are a few snaps, firslty of the car with the flat, one of the wheel on the car and the rest of the back of the wheel: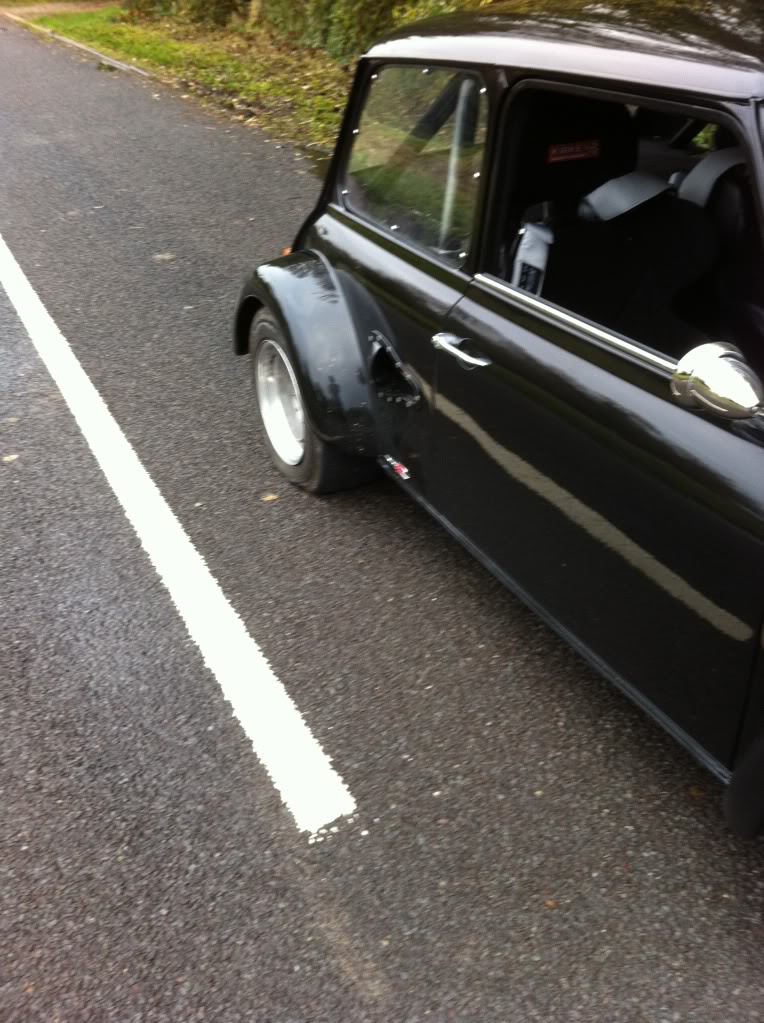
PLEASING..............................
Wow this is amazing build!
Posted by Diggymart on 2/3/20 @ 4:10:14 AM