You must be logged in to rate content!
3 minute(s) of a 377 minute read
8-26-2009
Switches on Centre Console:
So it has taken ages to get this far with the wiring, I can honestly say I did not expect it to take so long but it has been an experience of which will stand me in good stead if I decide to do another project in a couple of years.
I am not going to go into too much detail yet as to the specifics of the switches, I will however say that all the switches you see on the centre console are all the switches in the car, other than main/dip, horn and indicators, I will reveal that little beauty nearer completion as I dont want anyone copying it before mine is finished.
The raised tunnel has been a real blessing when it comes to the wiring, it may have meant that I have had to extend a few of the original loom wires but it was worth it and the link from the front of the tunnel to the front firewall is invaluable, you can get all your wiring and brake lines through it and get your handbrake in there to boot (advisable to make a plate up to sit between the handbrake mech's and the wiring - will get a picture when I take the cover of next)
So here are a couple of snaps of the centre console with switches and LED warning lights.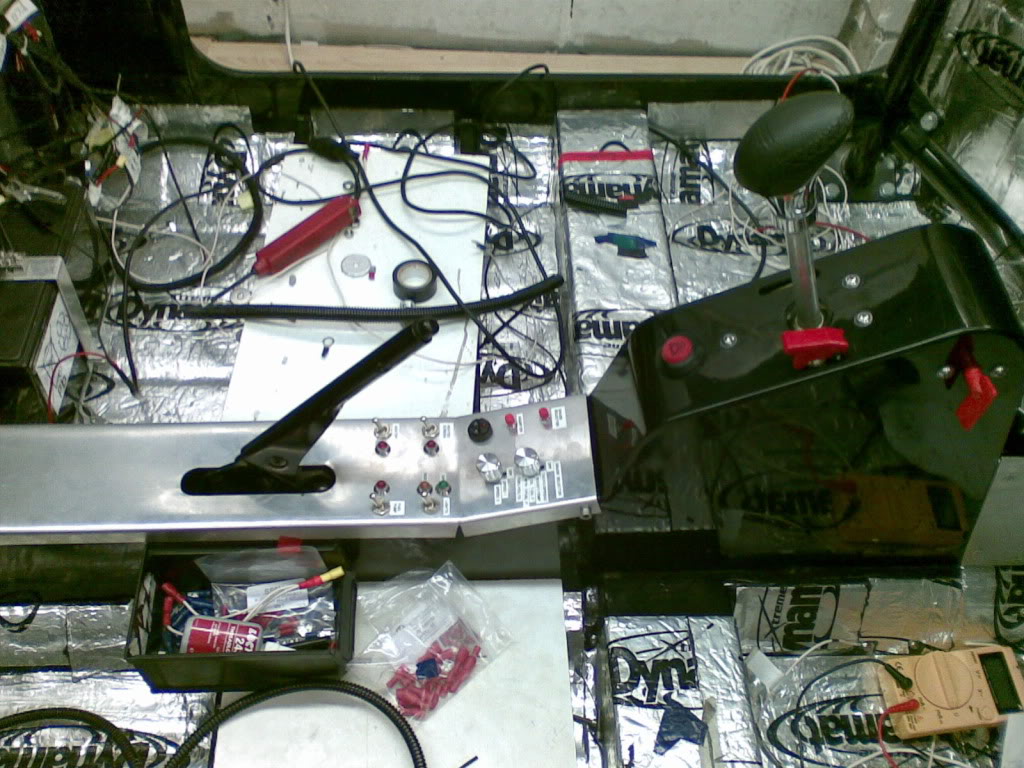
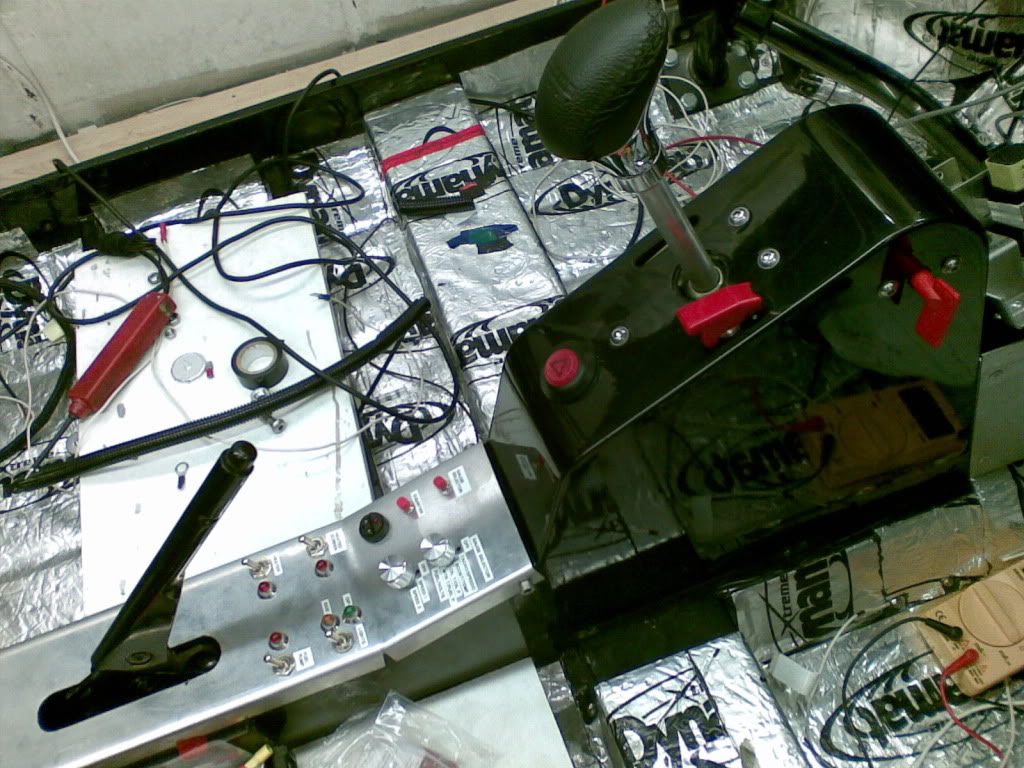
Those that noticed the different gear knob and are thinking of replacing theirs, beware - the gear lever has an OD of approx 15.8mm and the gear knob had and ID around 14. If your going to use and Non Z's knob make sure you are able to machine the knob before you waste your money, fortunately this one was cast ali so wasnt too bad and my mate Stevie G had a 16mm reem which worked a treat.
9-2-2009
The Trailer:
Thought I would post a picture of the trailer as it is being built, its made specifically for the mini, more importantly its made specifically for a Z's mini as it has a single axle far enough back to counteract the weight being at the rear of the car. Its got a workbench at the front end (the end closest in the picture), just enough room for a set of wheels and some tools, its high enough to stand in and has its own leisure battery to run the interior lights and exterior work lights which double up as reverse lights. We currently have the skin drilled and ready to go back on, however the frame needs cleaning then priming then painting, the bottom is getting undersealed. I should have some more pictures of it soon, unfortunately when working on it on the weekend I managed to drill the end off my finger (using the teeth of the chuck - I was holding something whils my brother was drilling - he couldnt stop laughing). Anyways - here it is: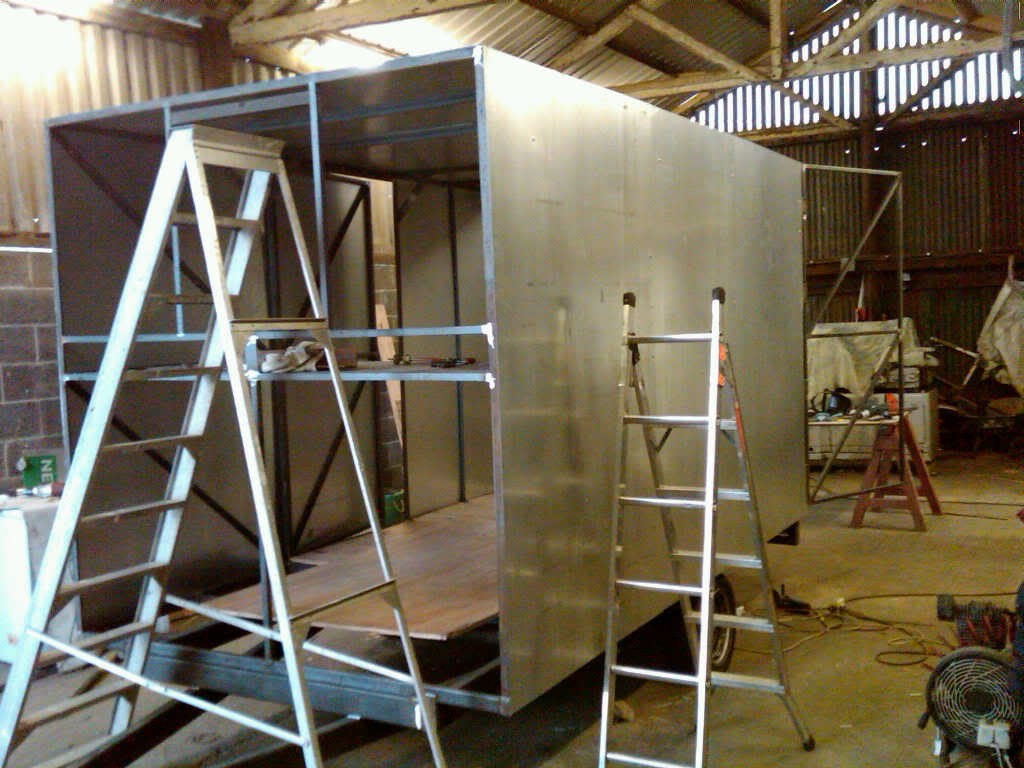
Wow this is amazing build!
Posted by Diggymart on 2/3/20 @ 4:10:14 AM