You must be logged in to rate content!
234 minute(s) of a 569 minute read
1-18-2007
My RX7/Rotary projects... formerly My Blk base build up..
Compliments of Herblenny @ www.rx7club.com
1-18-2007
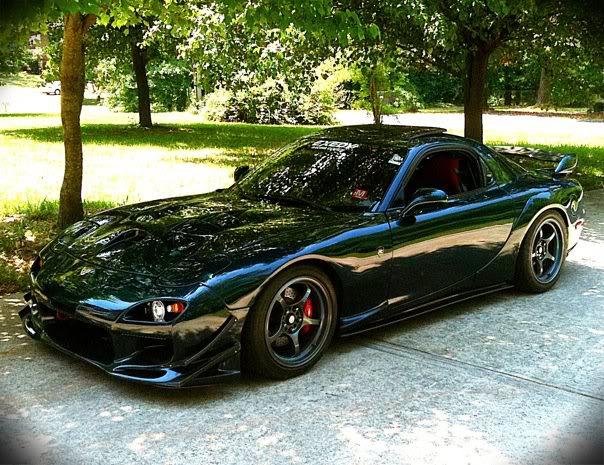
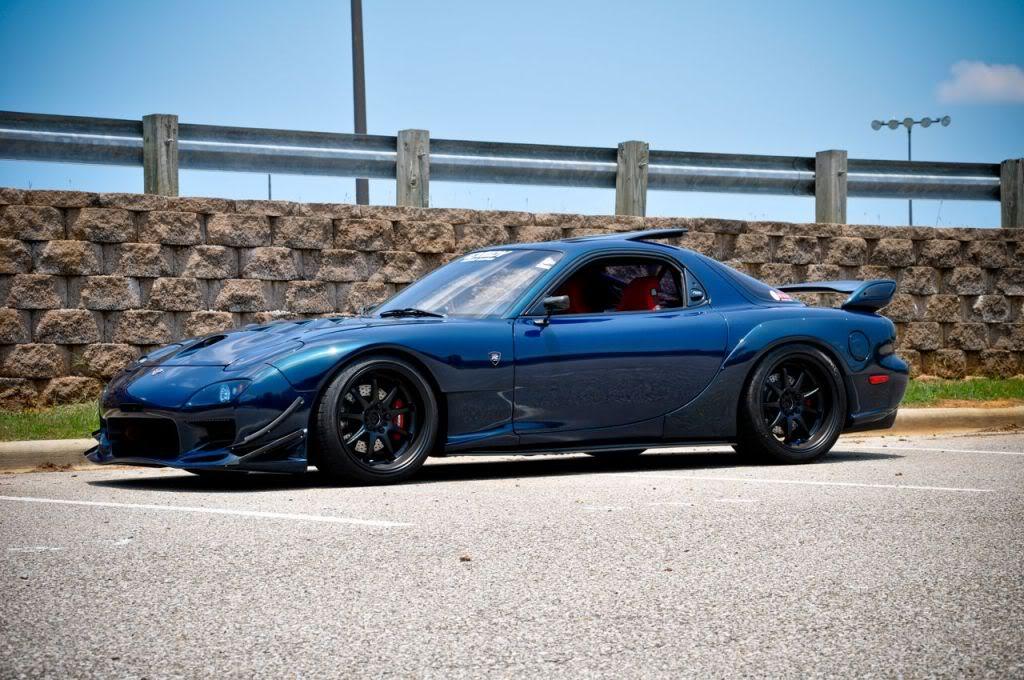
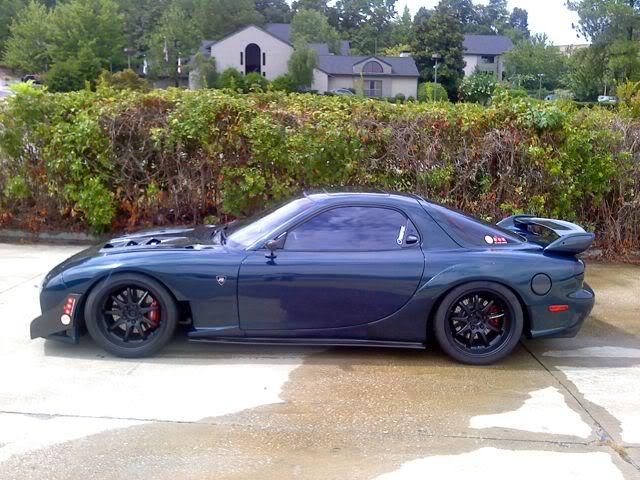
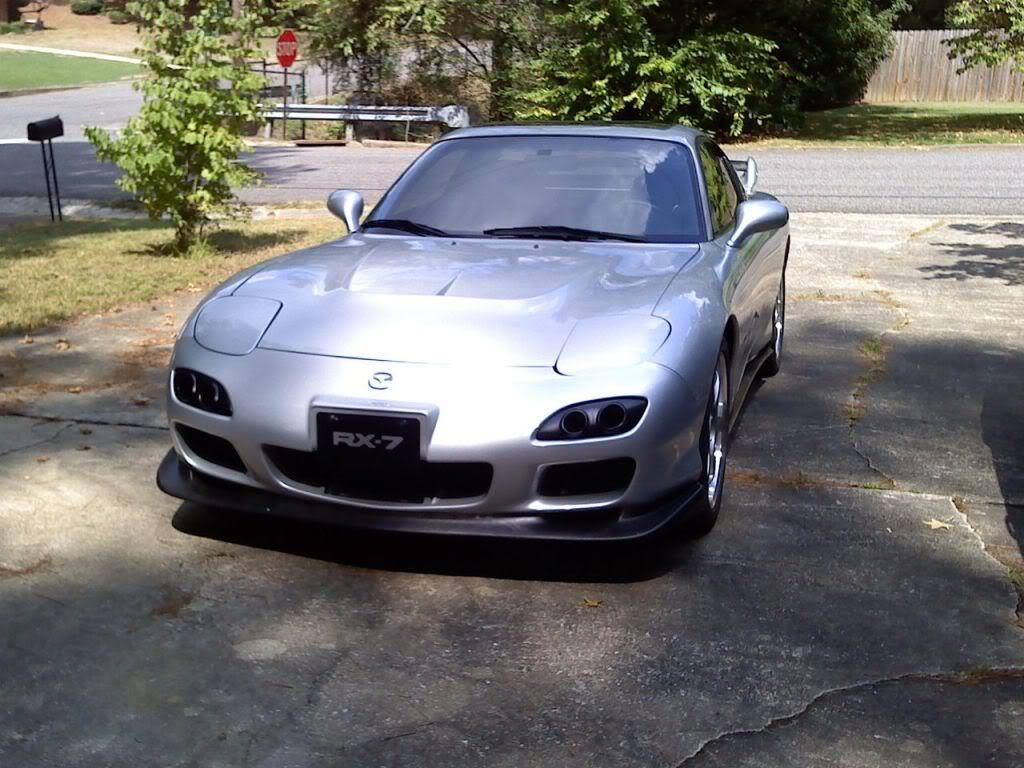
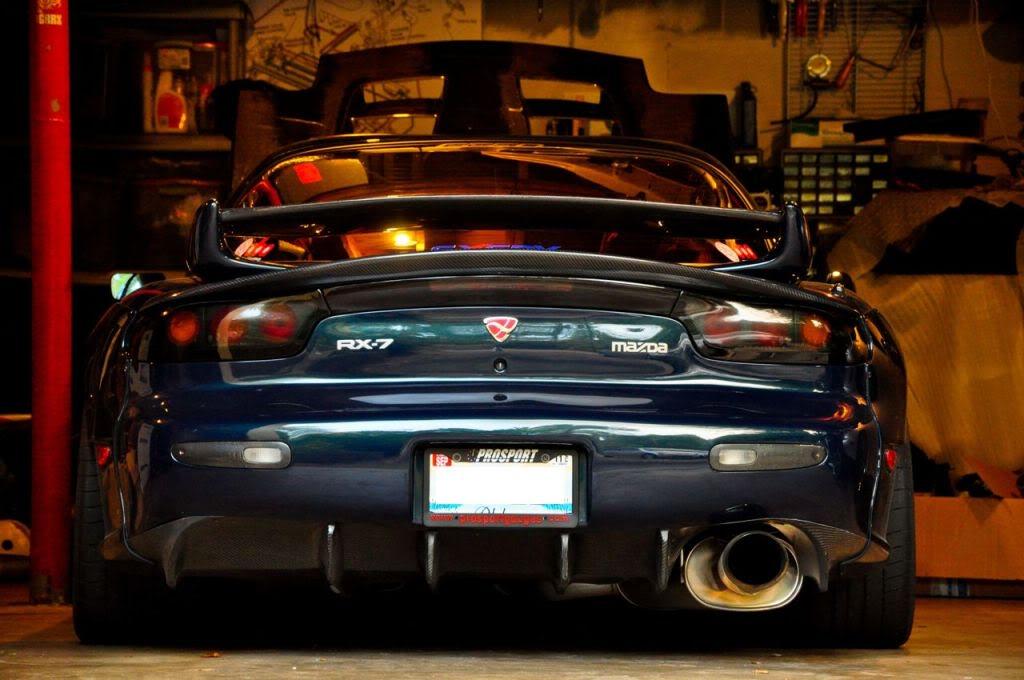
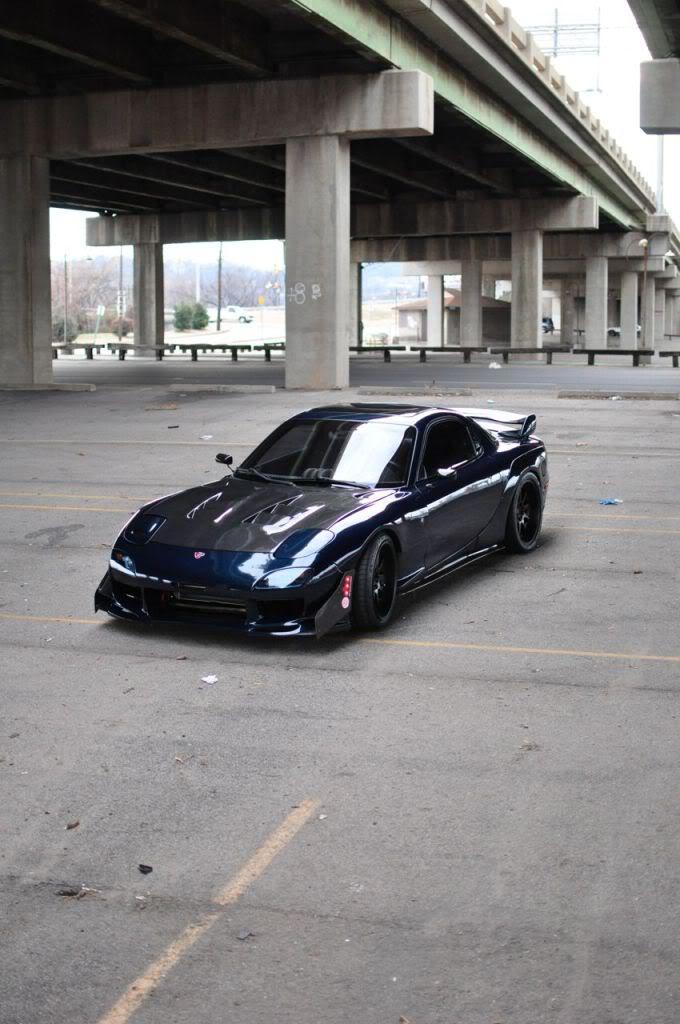
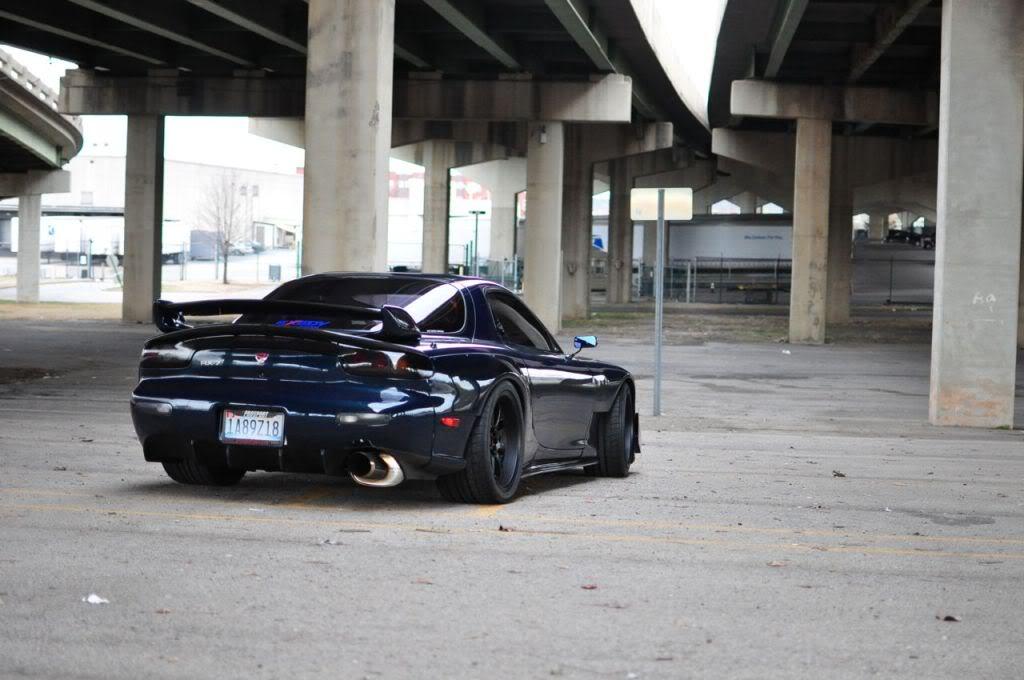
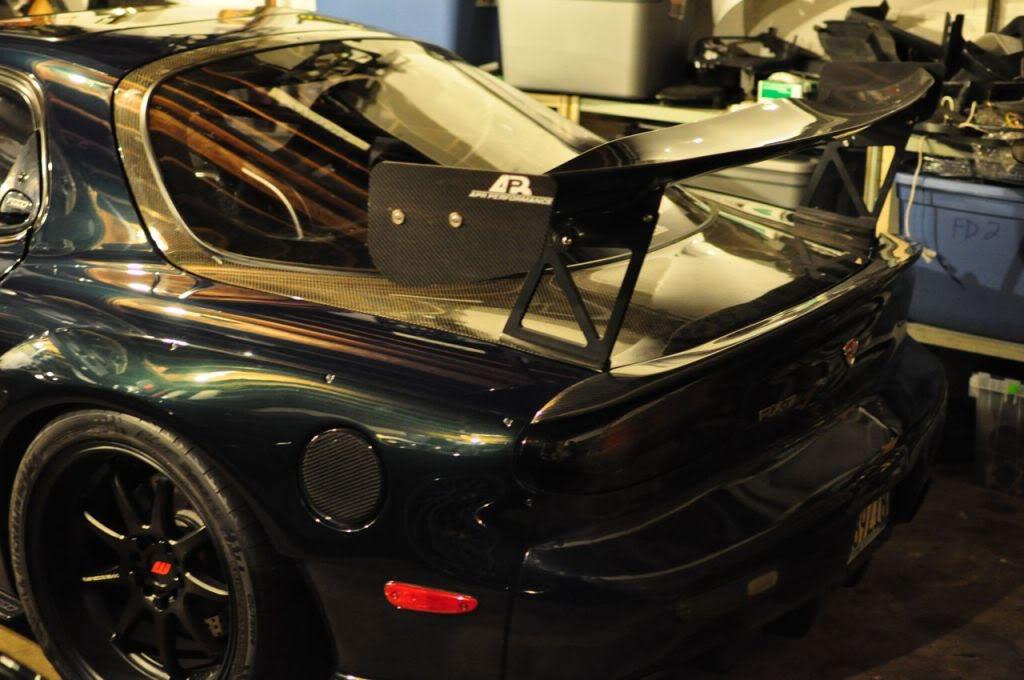
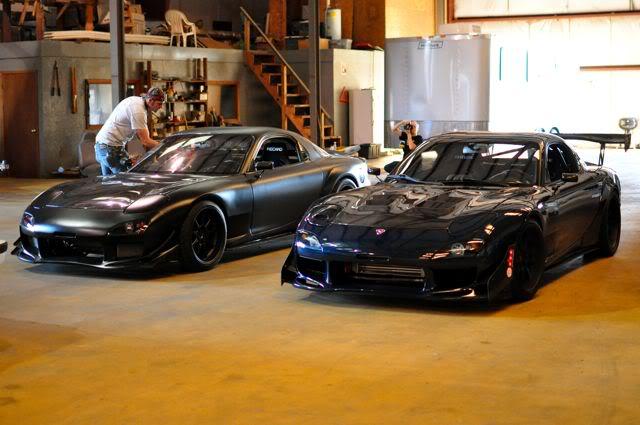
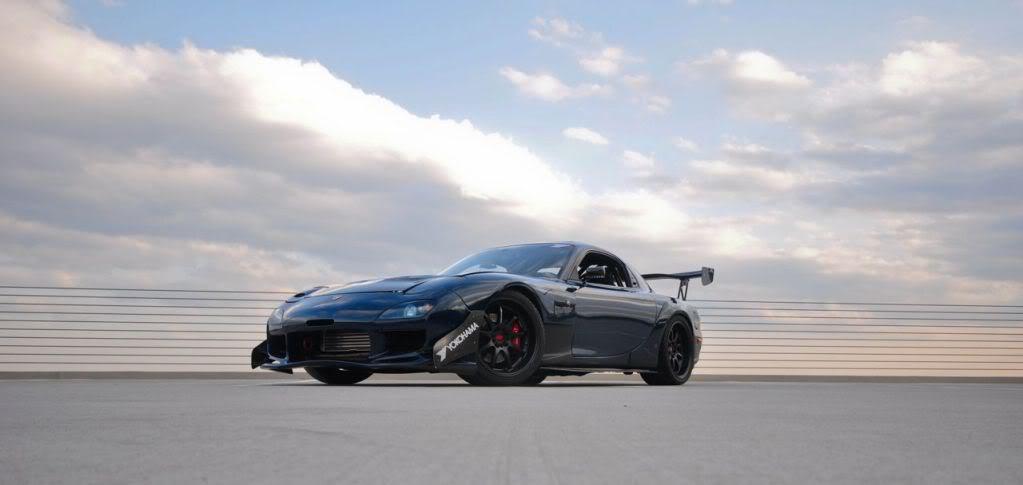
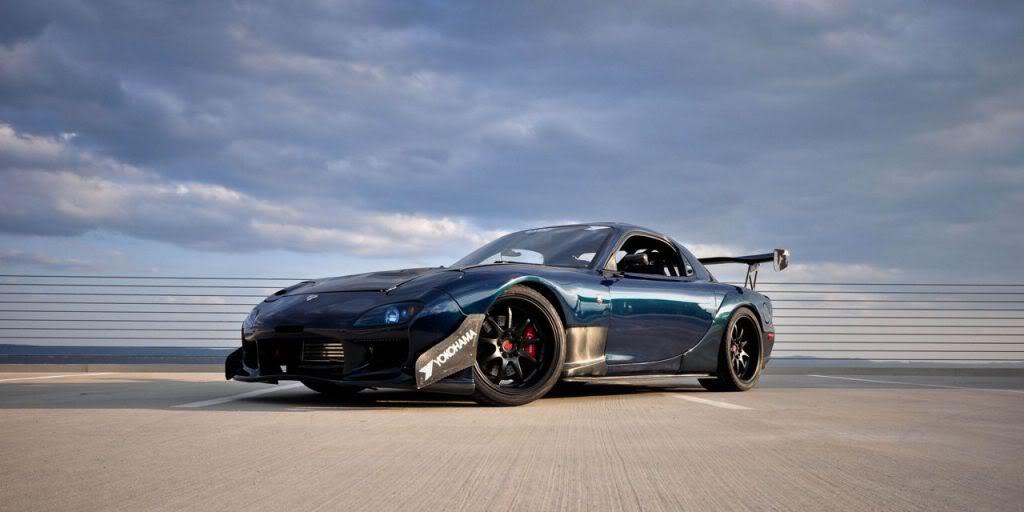
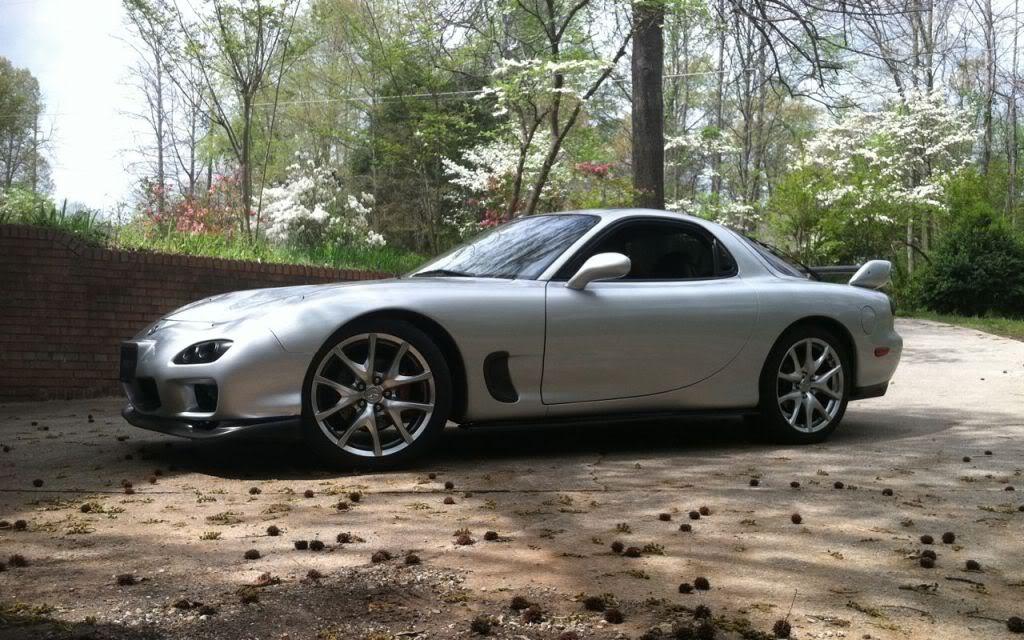
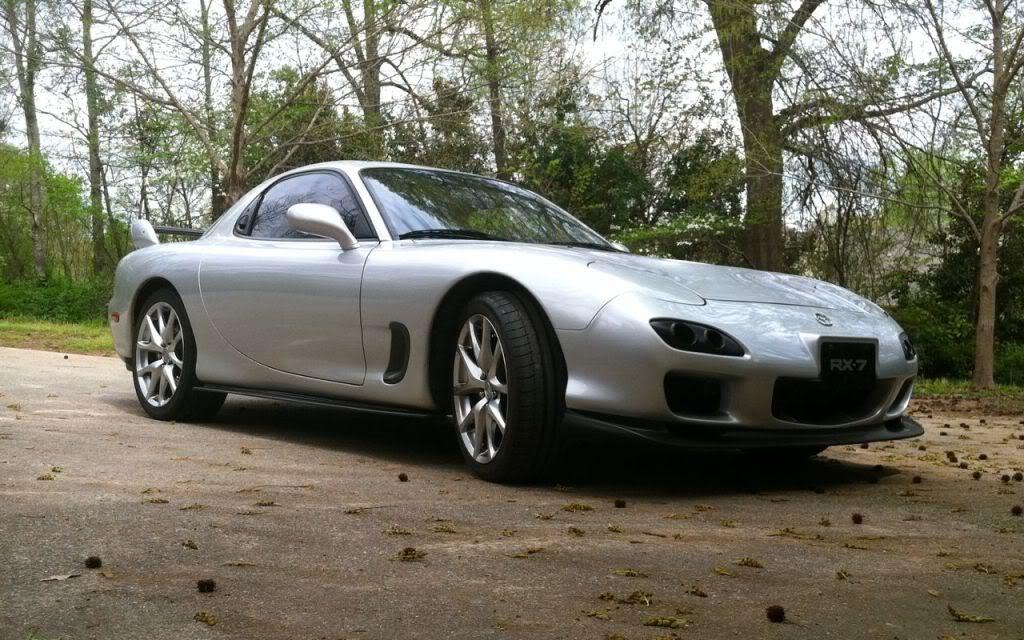
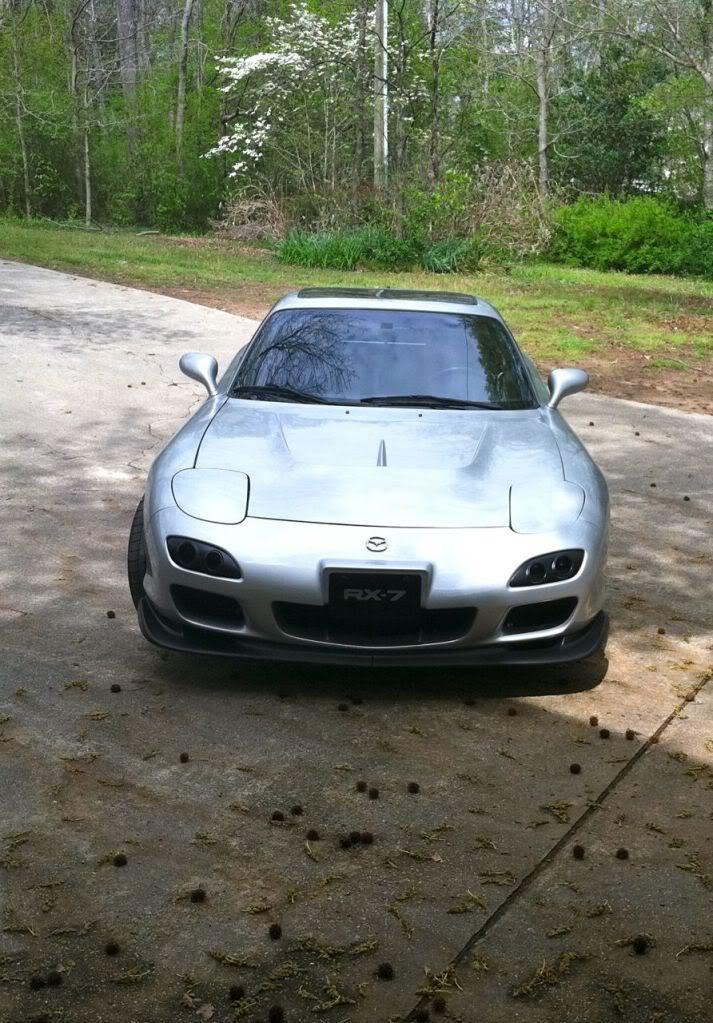
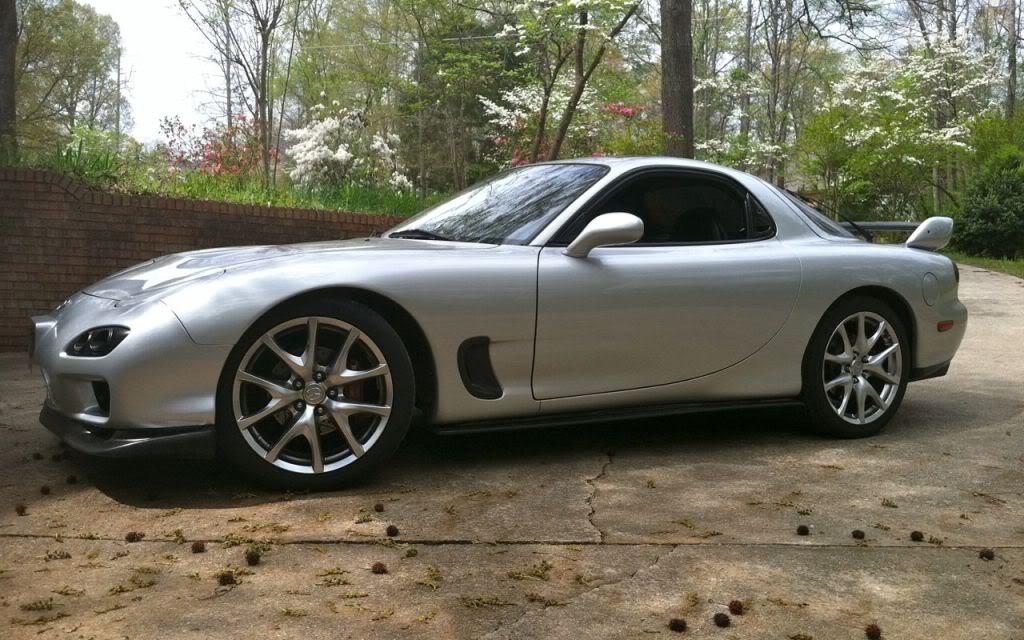
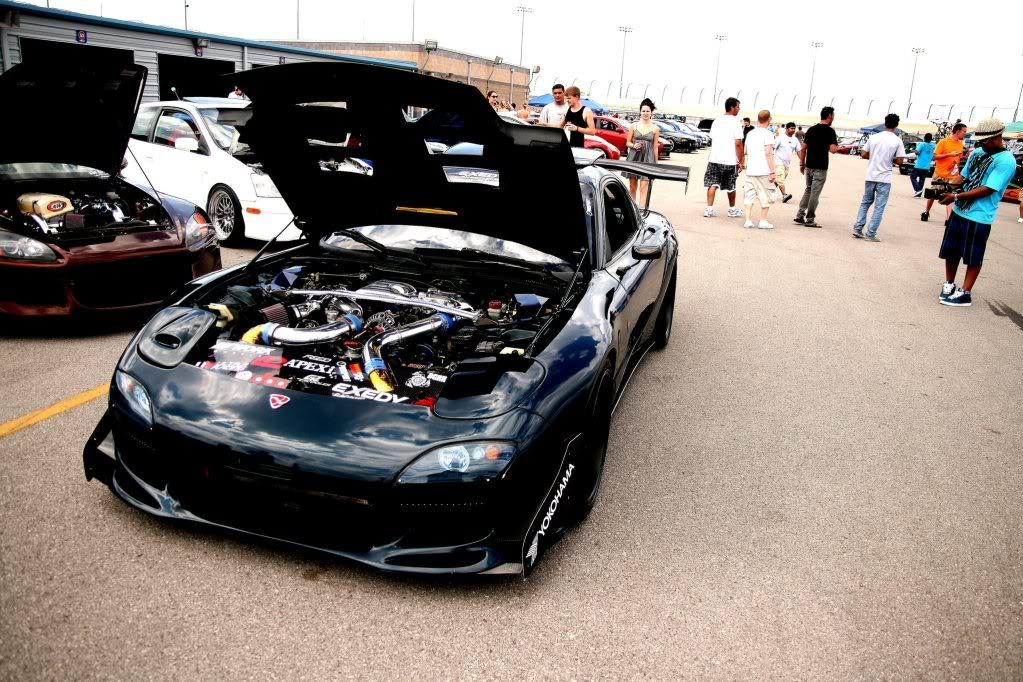
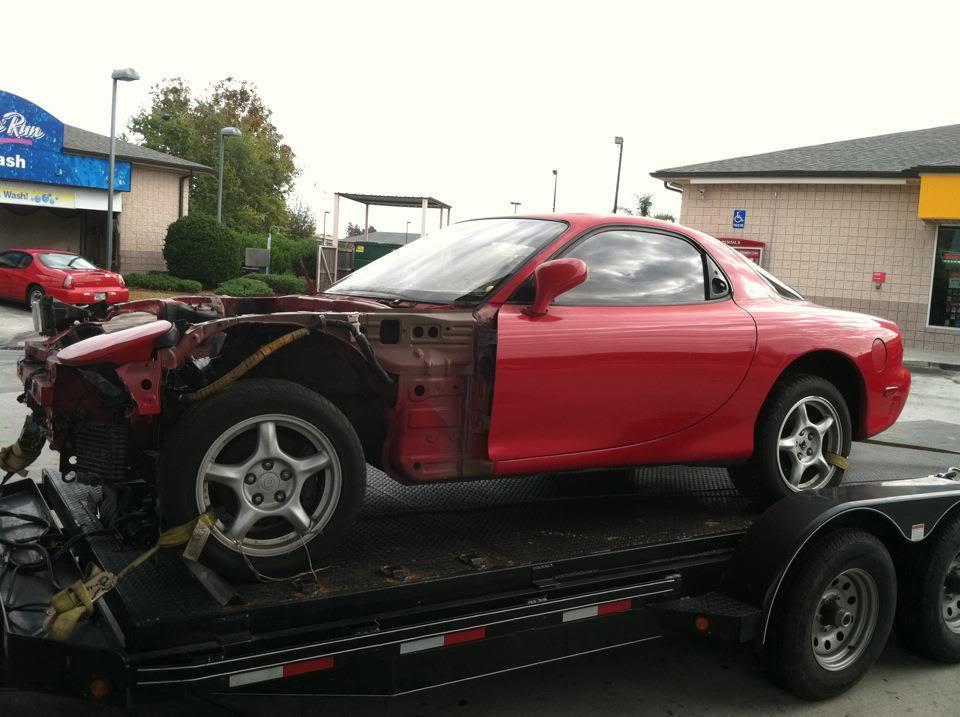
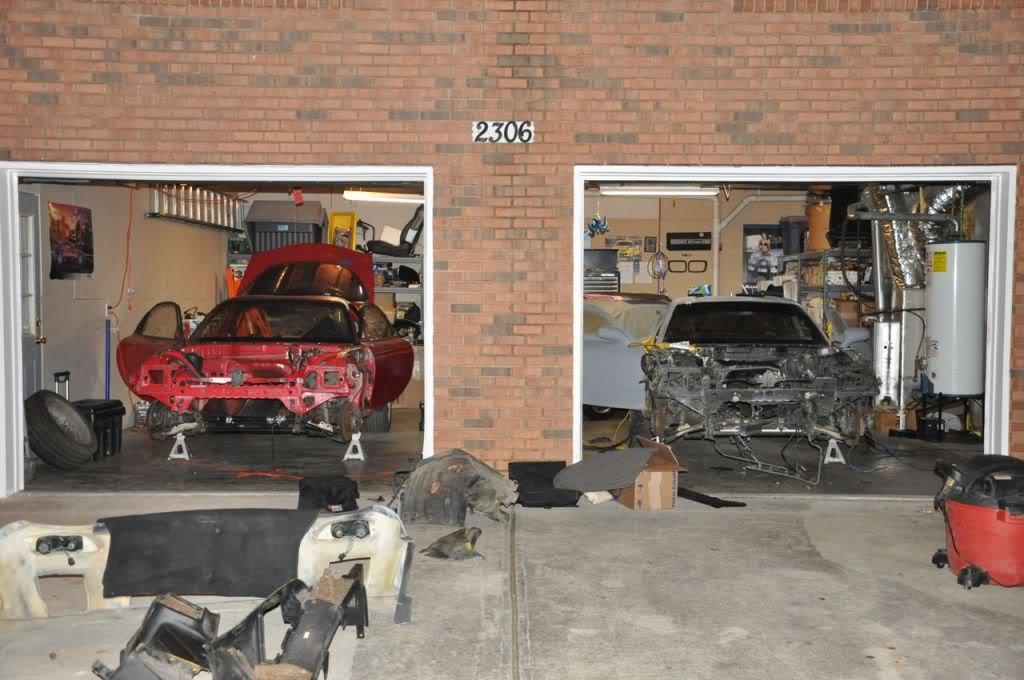
Well, I thought I share and show off my latest (2+ year) project!
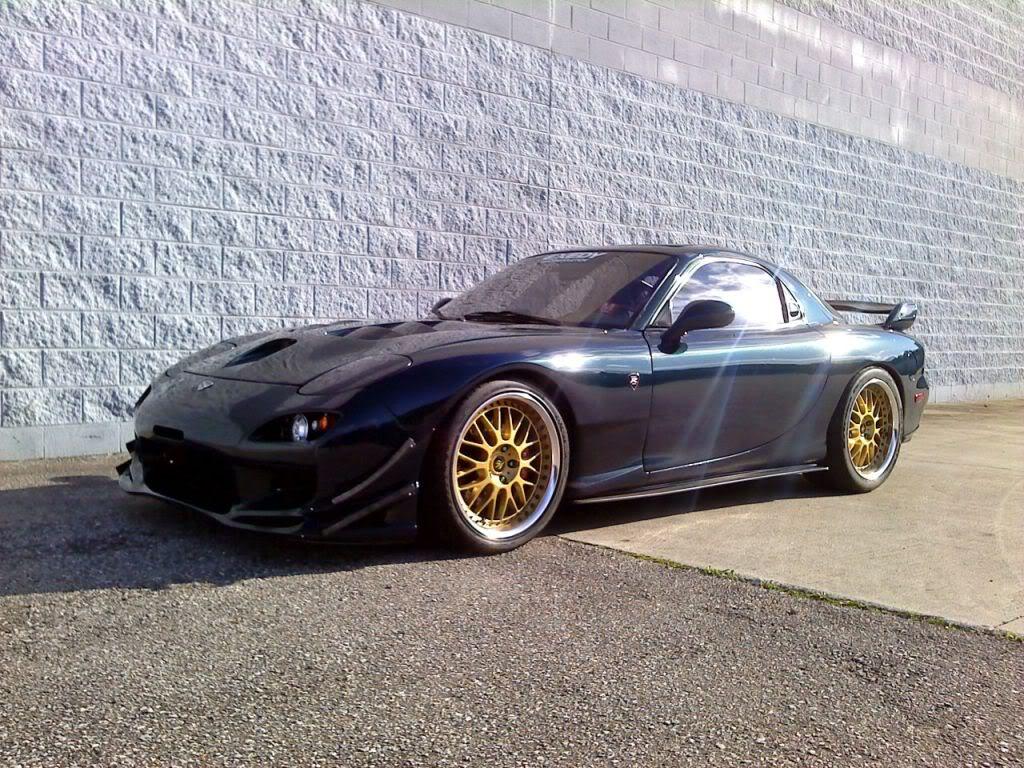
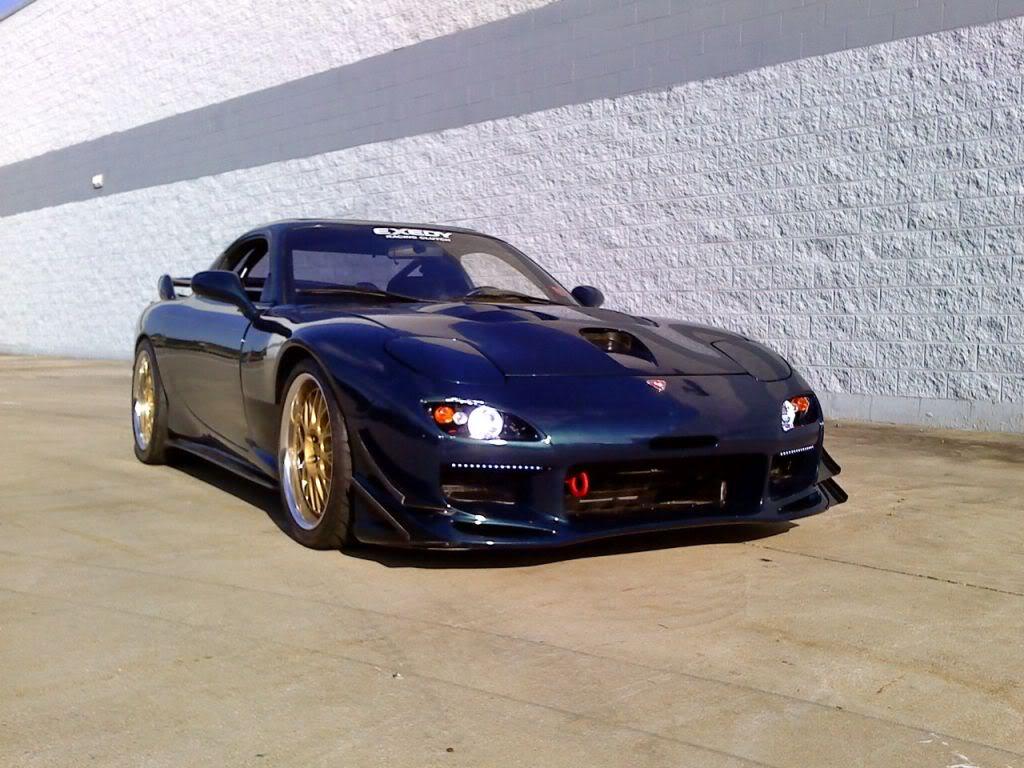
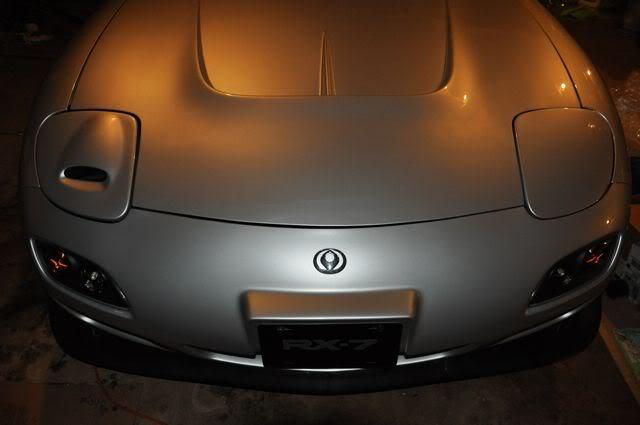
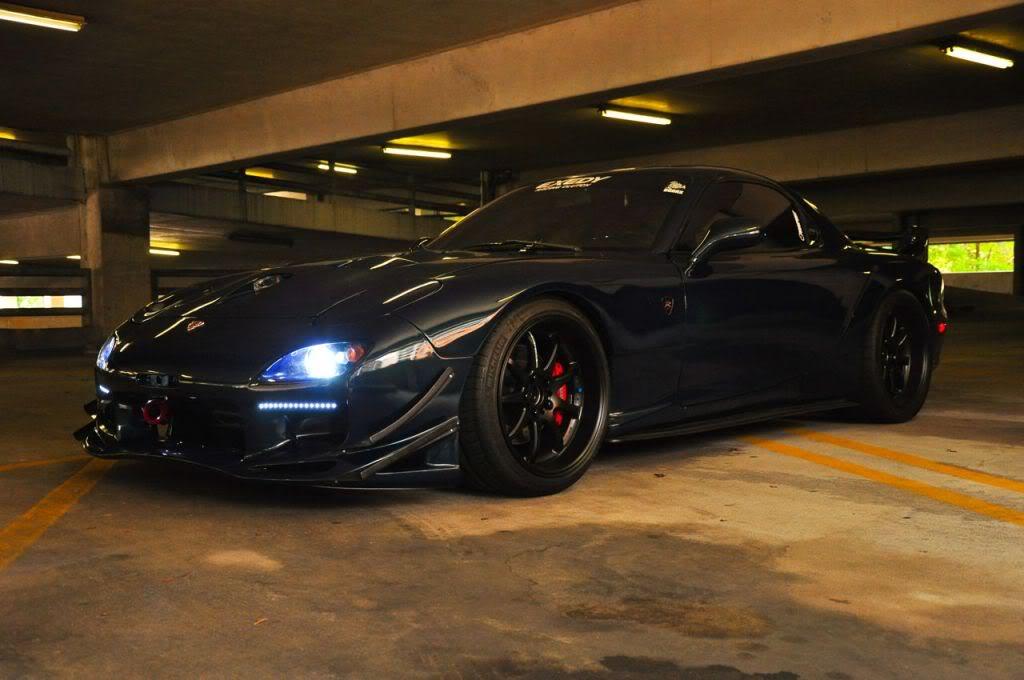
It used to look like this...


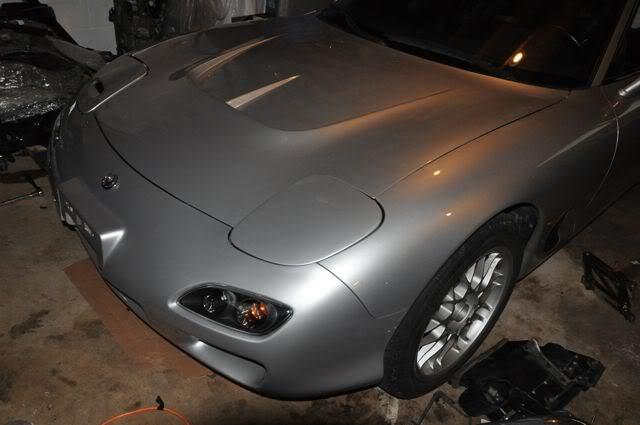
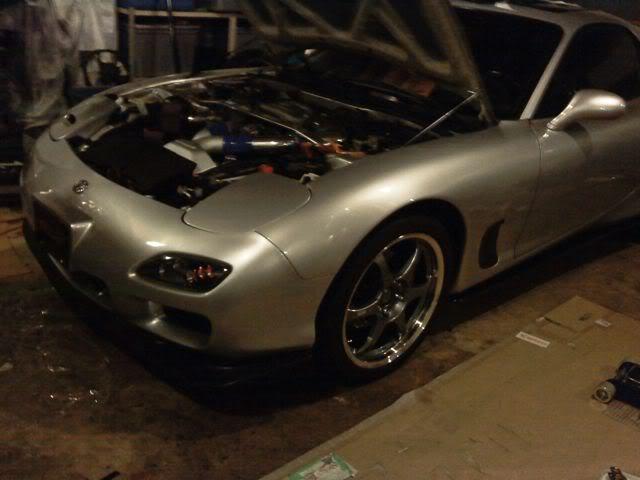
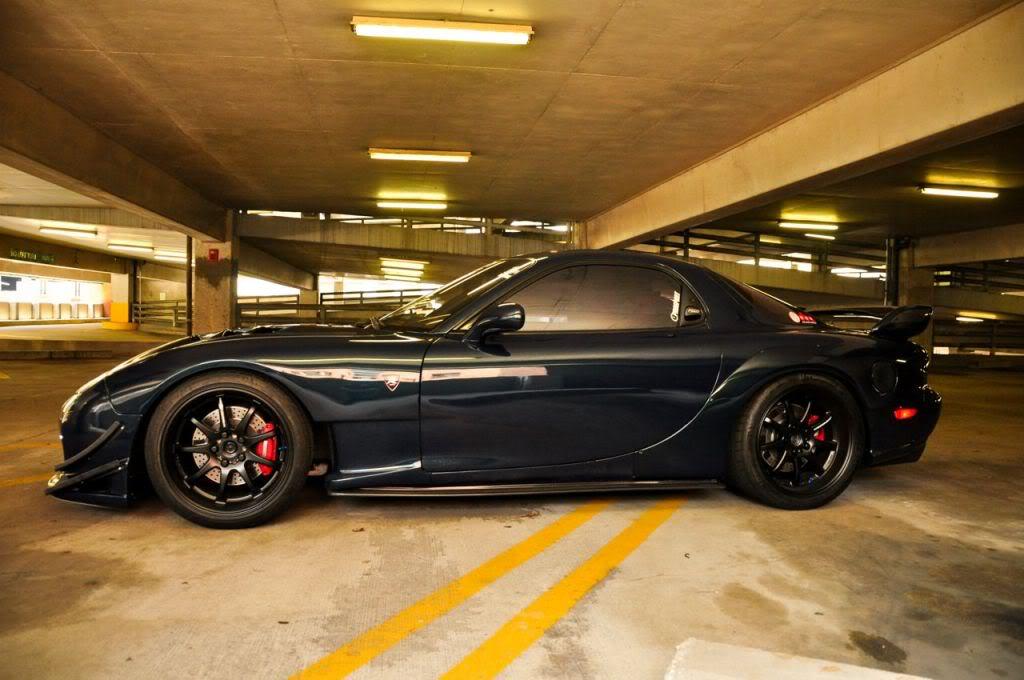
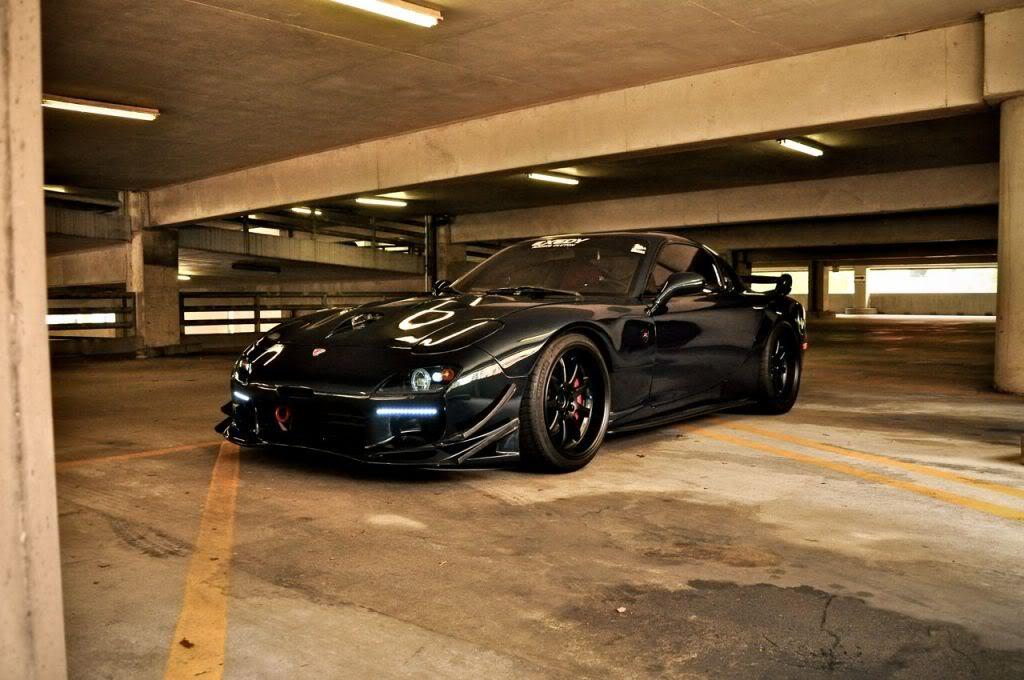
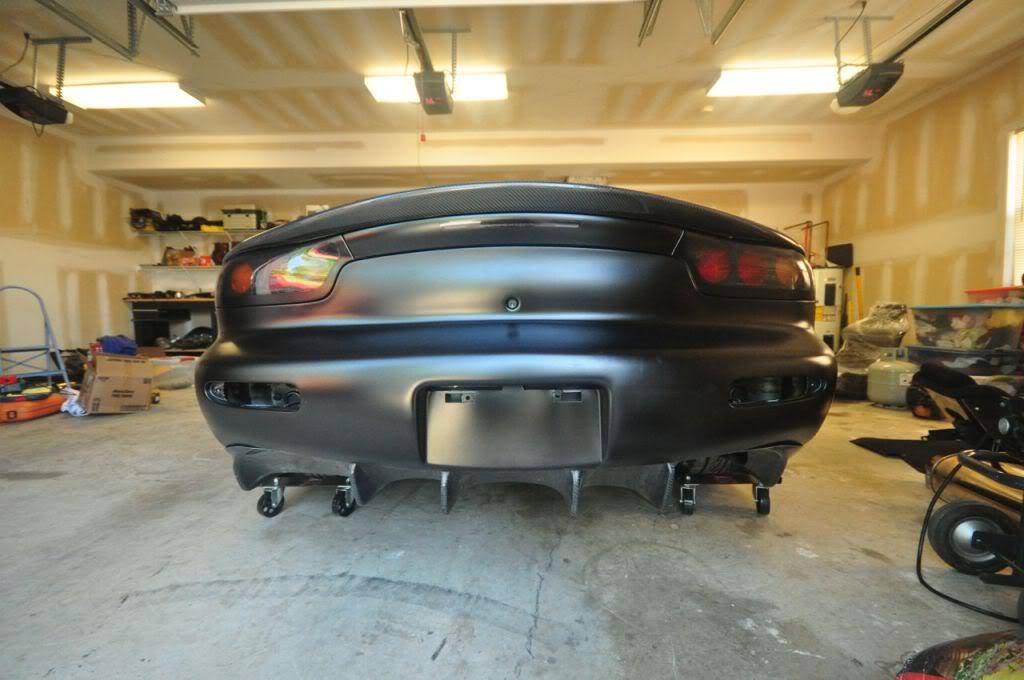
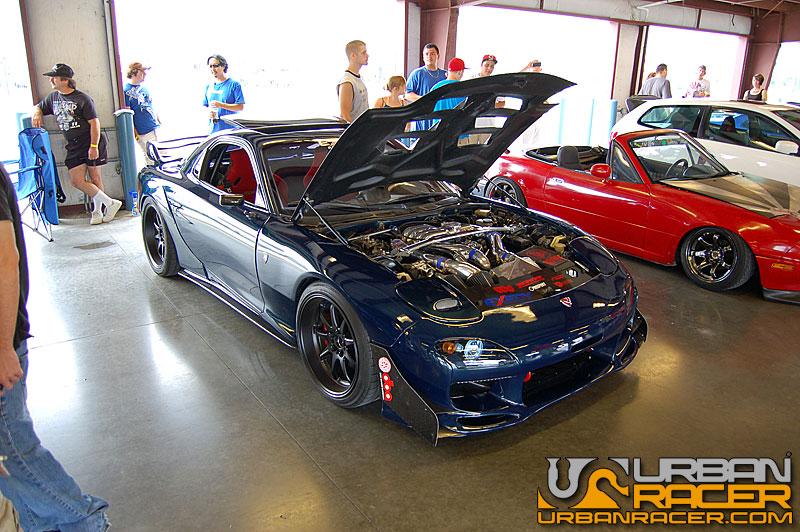
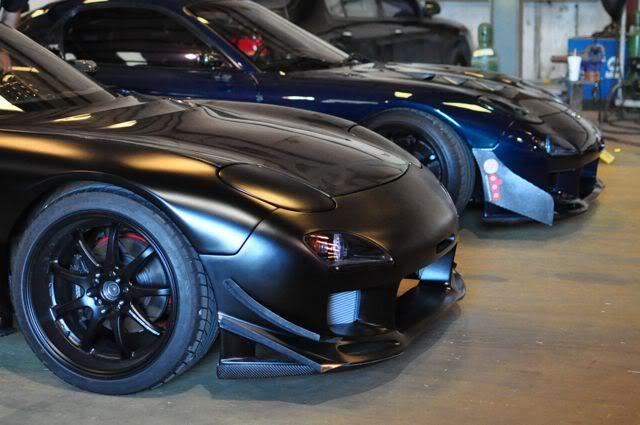
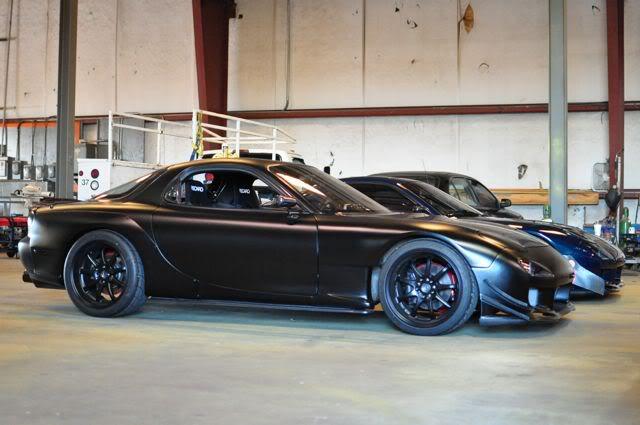
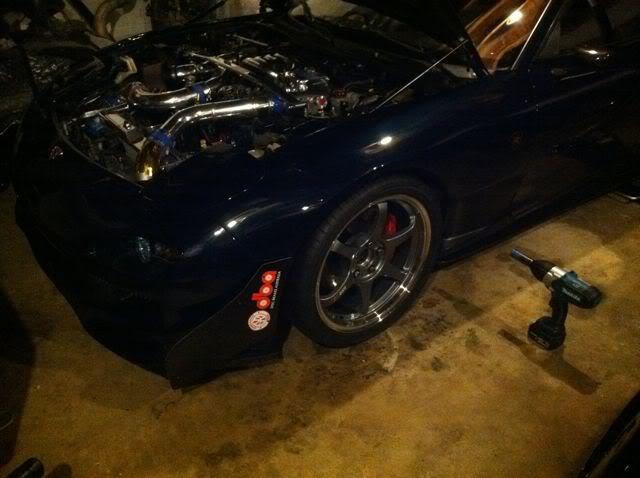
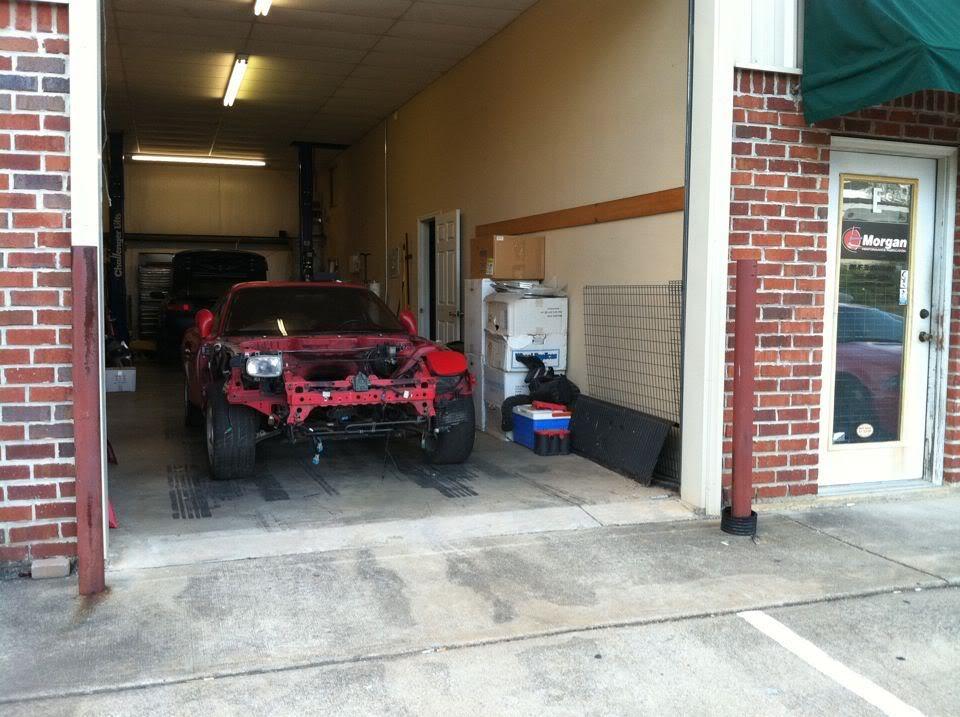
Now it looks like this in my garage...


Now adding slowly parts like this and cleaning up some old parts...


More crap I took off the car...


All new bushings and other new crap!

Some of the parts I need to install...
This is just a small quantity of stuff ![]()


I might if... LOL!
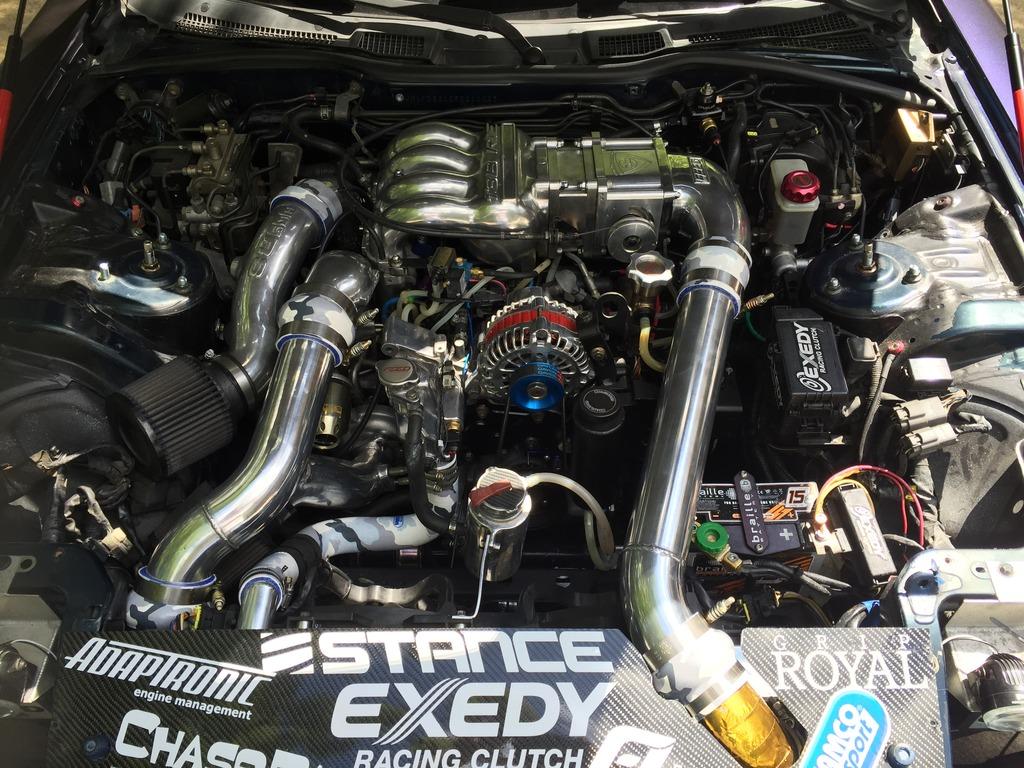
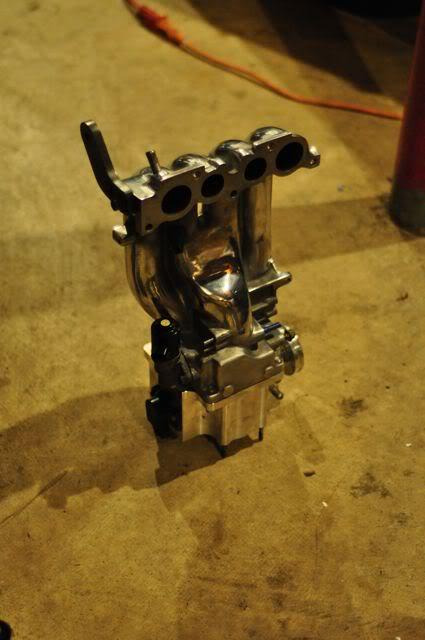
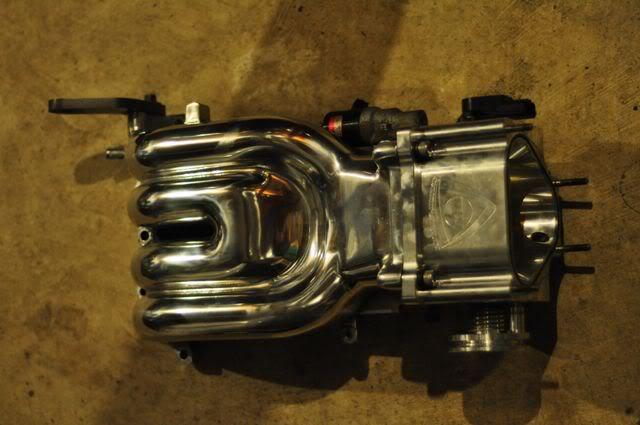
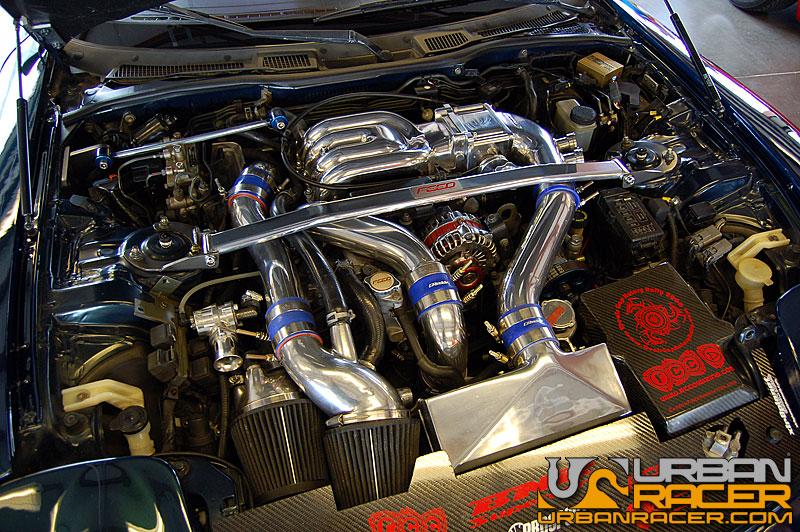
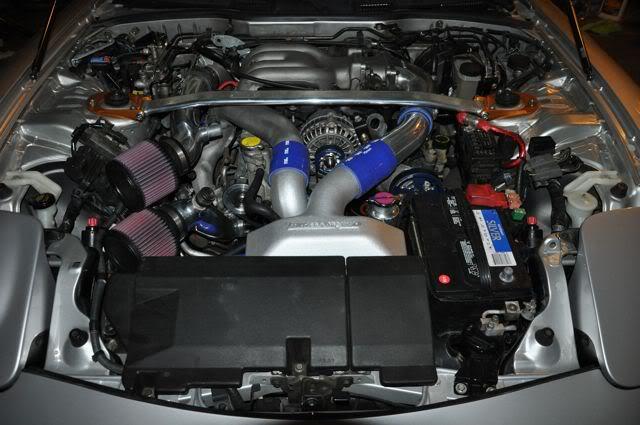
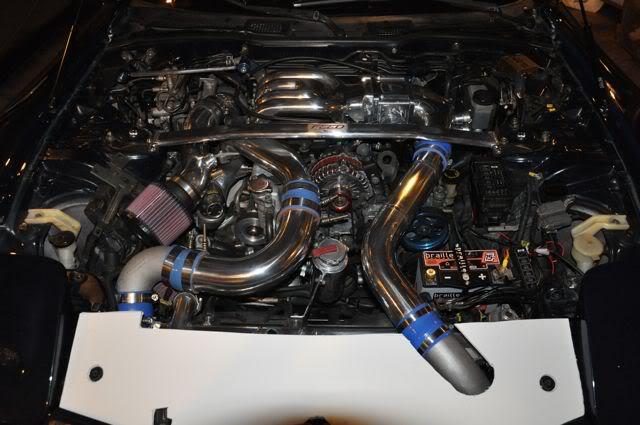
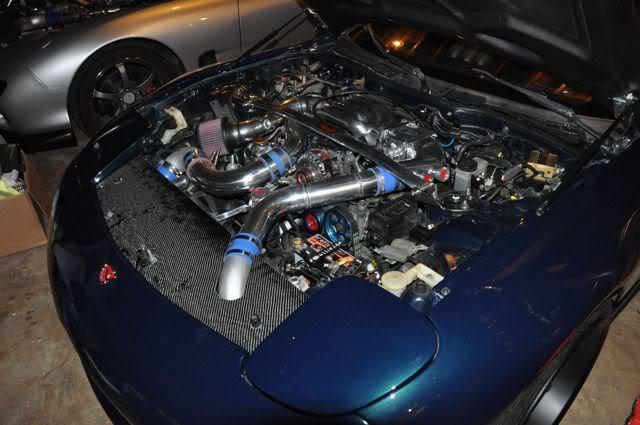
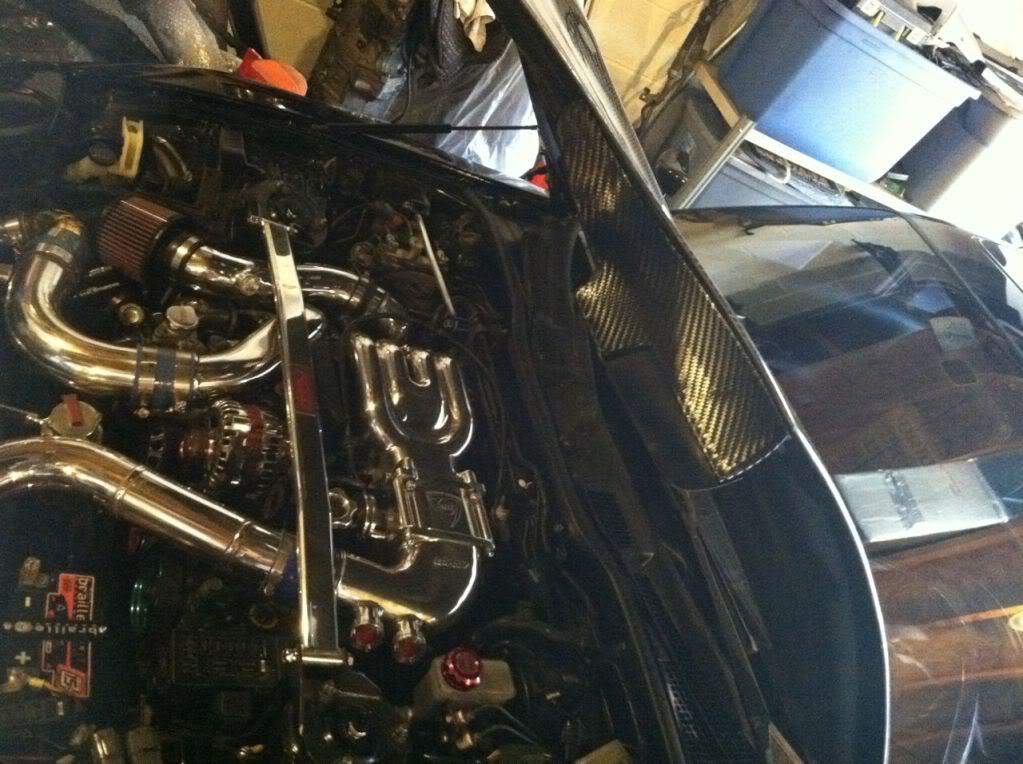
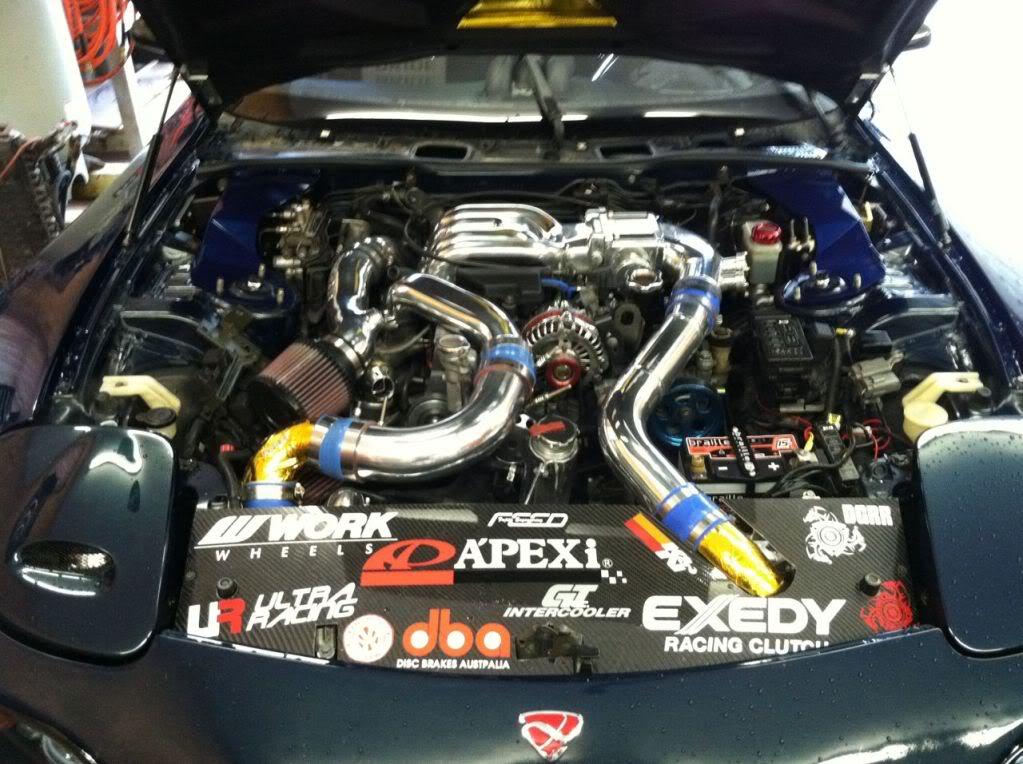
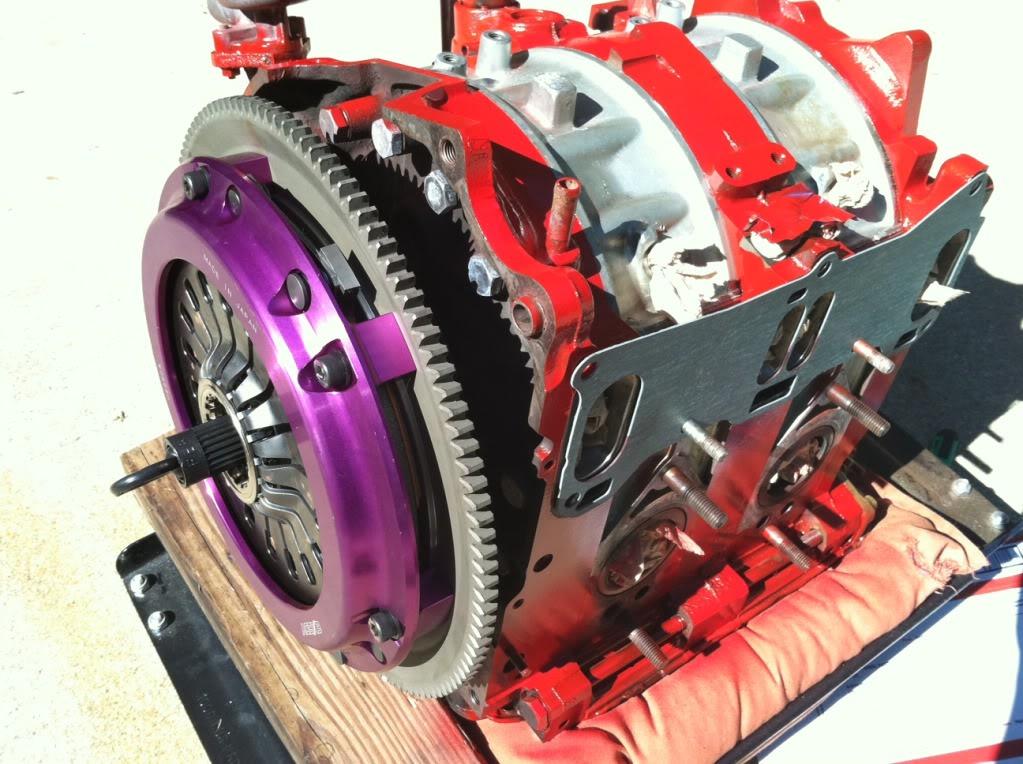
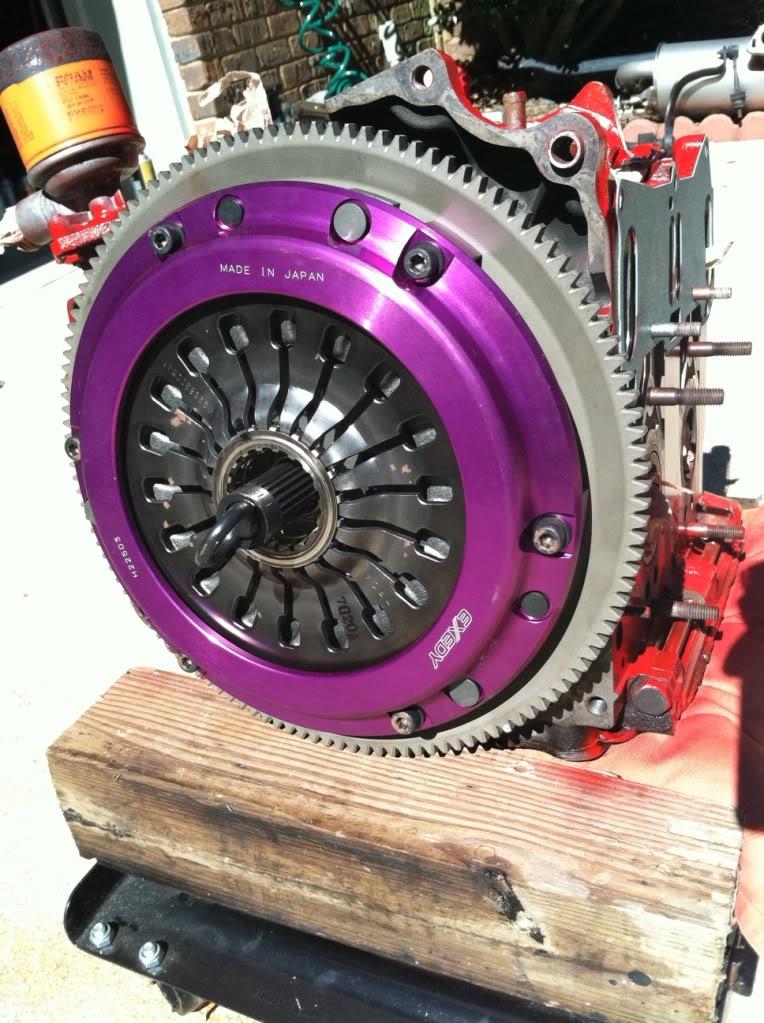
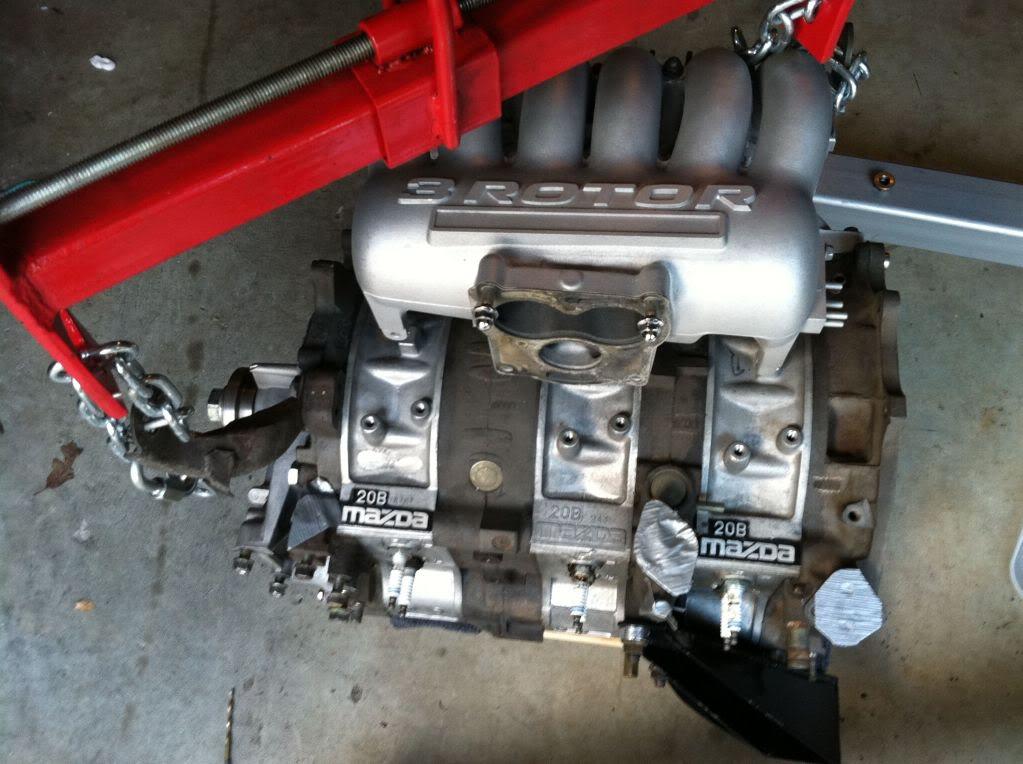
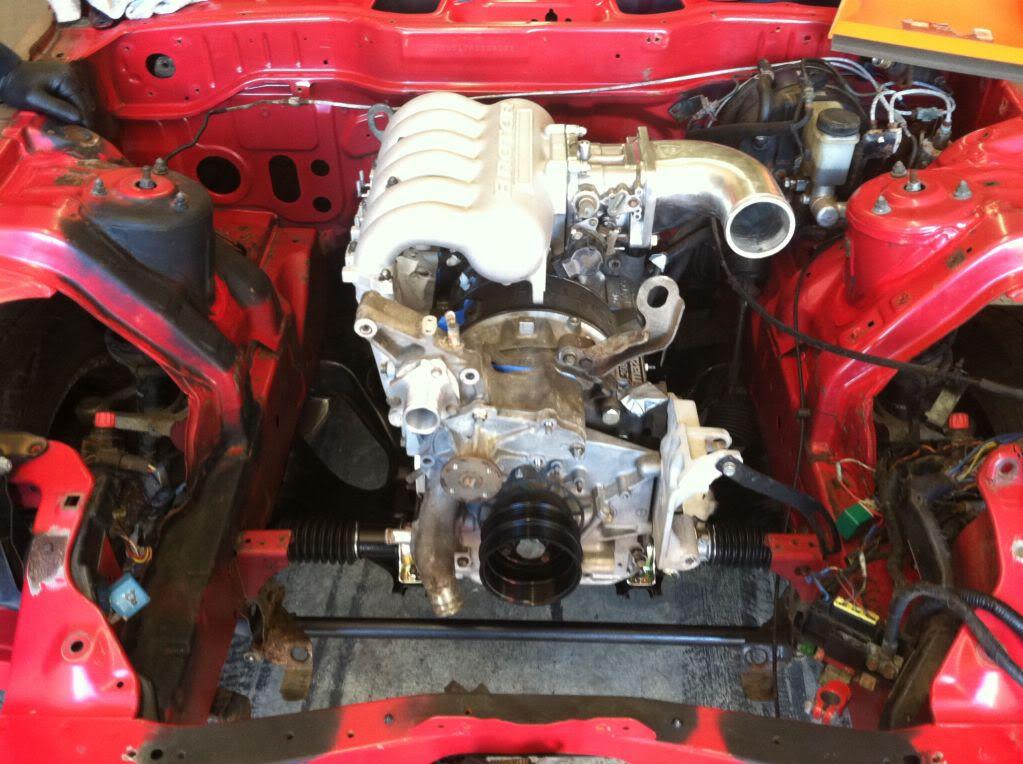
And my newly large street ported, Garfinkle polished, BNR stage 3, efini-y, Sohn OMP attatched, RZ tranny, Spec stage 3 clutch, RB 9lb Flywheel, 1200/850 inj, rewired engine....

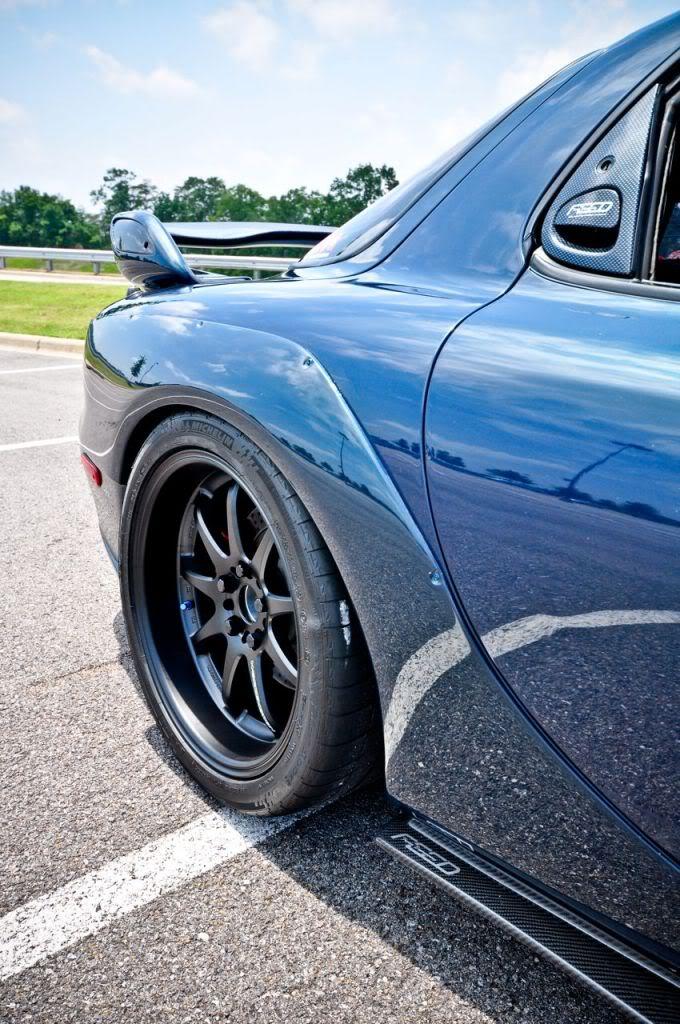
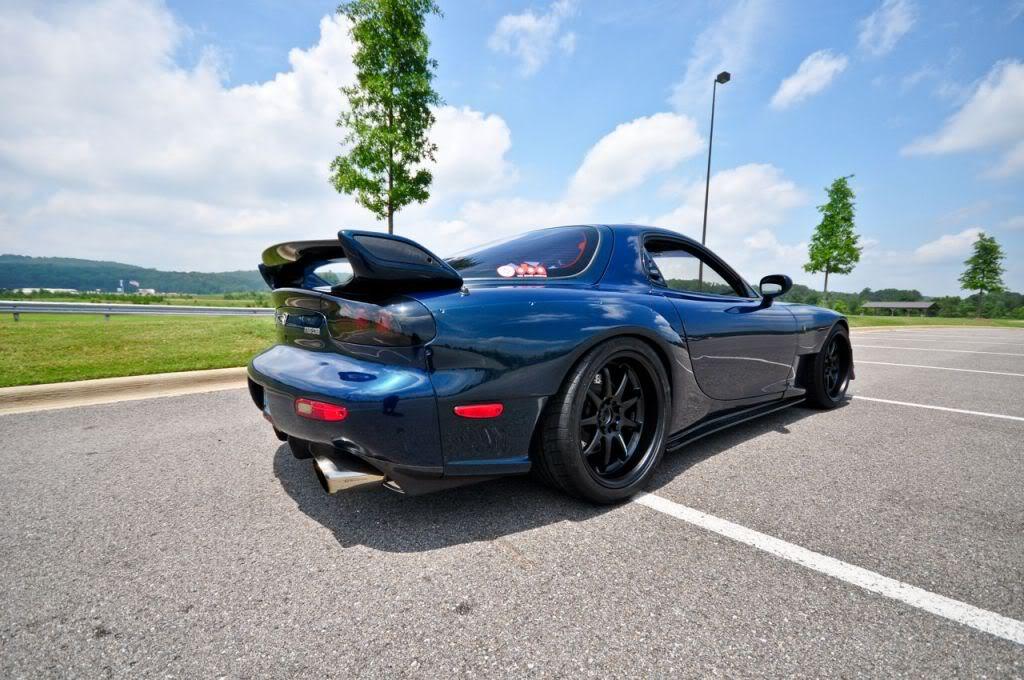
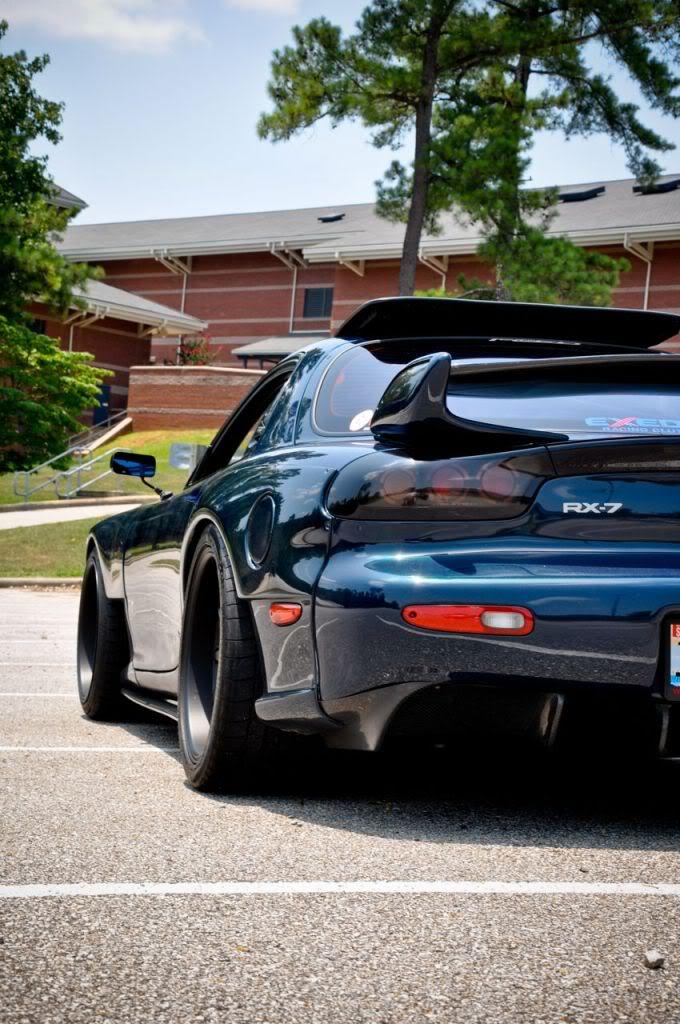
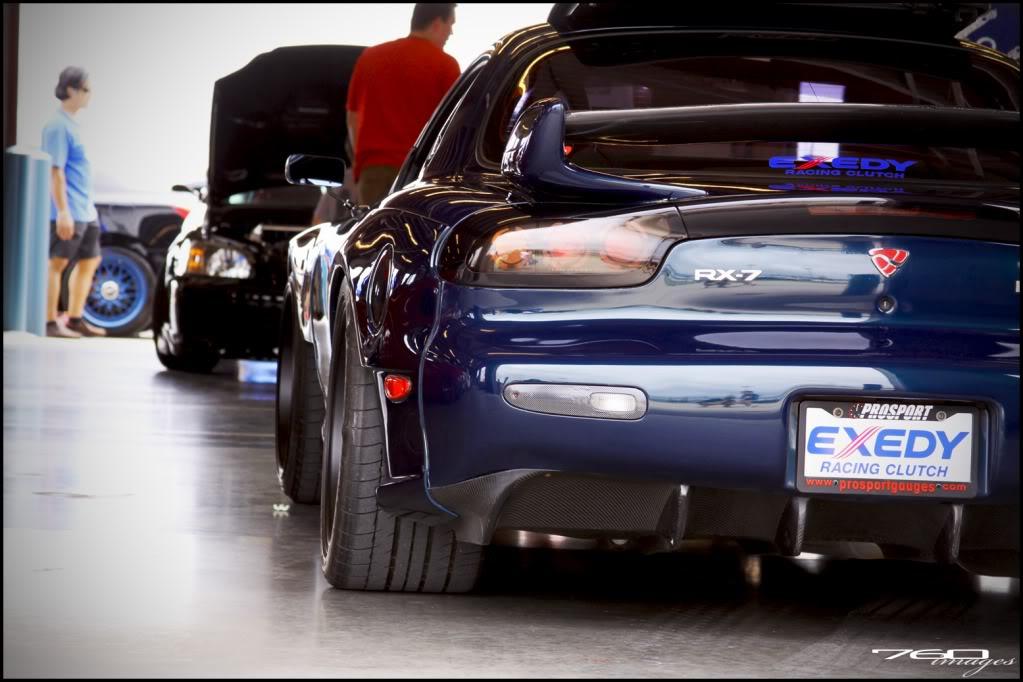
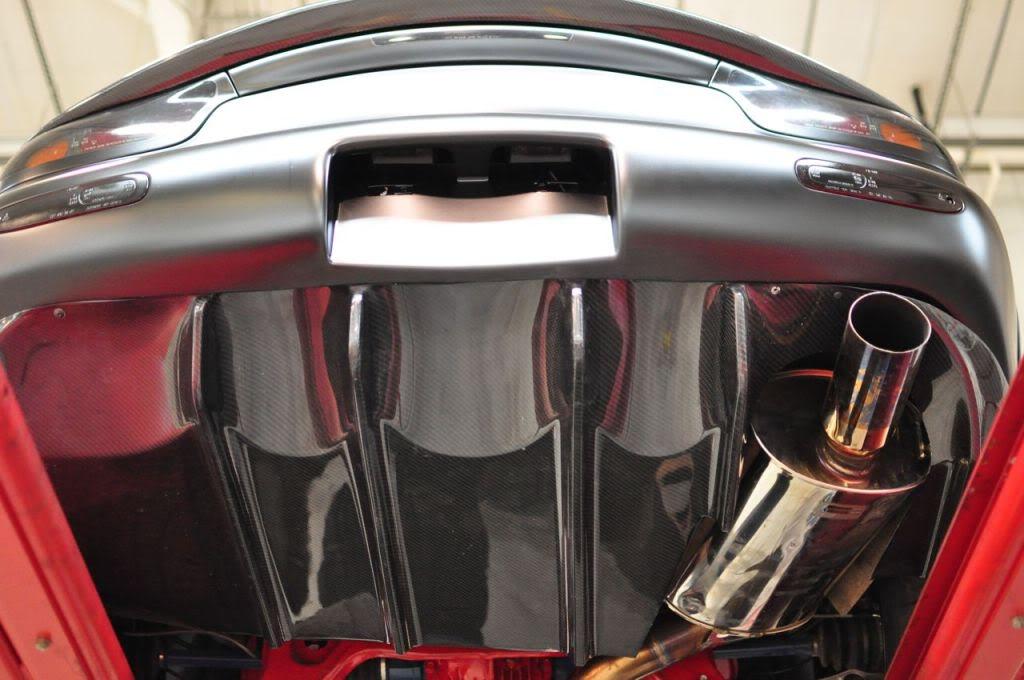
Rear diffusers are from Shineauto... And the ones I have aren't CF>.. but I'll be laying CF on top and bottom of the FG... to match my car![]()
More crap that needs to go on...


Cleaned and painted parts...

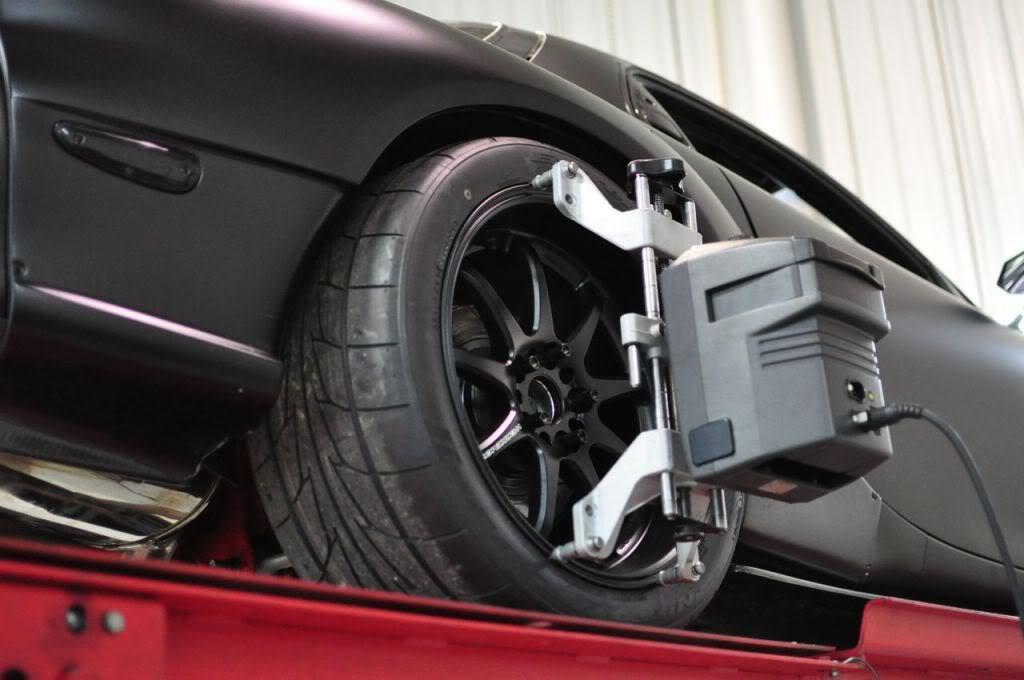
I'll be running SSR comps, 18x10.5 +43 all around

Cleaned and painted Drive shaft.

My excessive number of handles.. CF'd, Feed, Clean OEM, etc.. and no, I'm not selling them.. LOL!

Garfinkle polished alternator covers.

I guess I'll keep posting pics of what I need to put on... hehe.. At the end, this car's going to be un-driveable..

Cleaned and painted engine mounts..

cleaned misc. parts

Some stuff I need to put on my MB FD.

Well,... Thats a good question.. I was hoping that it was done a year ago.... but I been waiting on parts and such.. and my laziness got me.
I'm now shooting for DGRR 2007.. But I highly doubt that.
And after everything is put on and running, I'll run the car for few months and put this thing on..

1-22-2007
And the former Rotorhead..
Well, since AgentSpeed reminded me of something..
Does anyone run tow hooks with Greddy FMIC or any fmic??
I Like these Feed tow hooks? but not sure if it will work with my greddy fmic.

1-27-2007
LOL! I do have quite abit of spare parts.. But I think fritz flynn has more! I went over there and.. WOW! What I have is a joke compare to Fritz.
Opps.. CF plate.. I'll try to work on that..
Here is my new project.. I cleaned up the paint today, fixed the gas door, and replaced the driver's door handle. I'm going to take off the engine maybe in 2 weeks and see if I could get it running by mid march.

Tomorrow, I'm going to install my cleaned up rear sub and diff. I'll post some pics after its done.
1-28-2007
Here are some pics of my rear suspensions and the diff..
I should thank Chris (SPICcnmGT) for coming by my house and giving me a hand.. Thanks Chris!


1-29-2007
I test mounted my SSRs and found out my trailing arm needs to be re-mounted... Its damn close to my 18x10.5 rim.. Also with coils, it gave me about 10mm more spacing between the lip of the wheel and the strut. Before I could barely fit my index finger, now I could put it thru. With less camber, I think I should be able to run 295s or 305s. Currently its 275/35/18s.


1-31-2007
Travis,
If I was closer, I might consider your offer![]()
Clint,
I don't think the car will be ready by DGRR.. I was working on the car today and found out my sway bar mounts are bad (the part where it attatches to the frame rail). I think my sways are also bad.. More money I have to spend.. Damn!!
Anyone know of a good aftermarket replacement? I know there was a GB on a machined ones.. but I missed it!
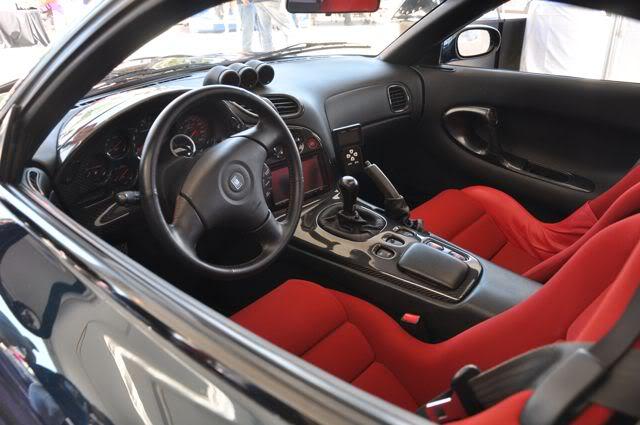
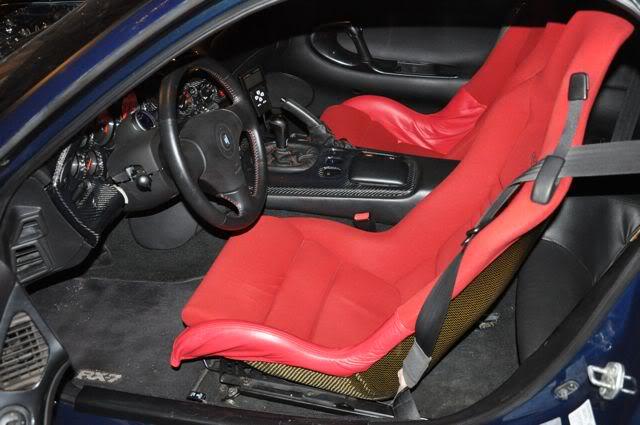
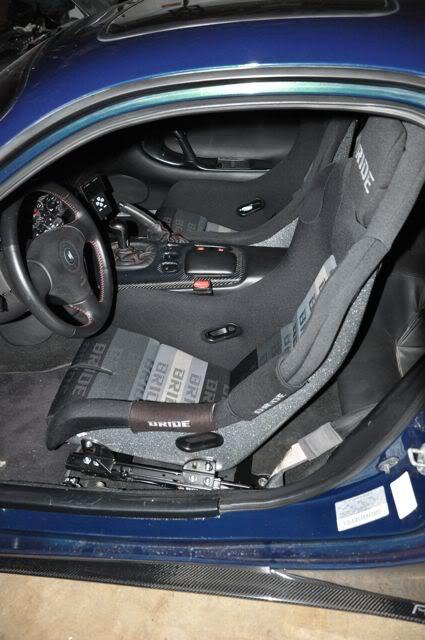
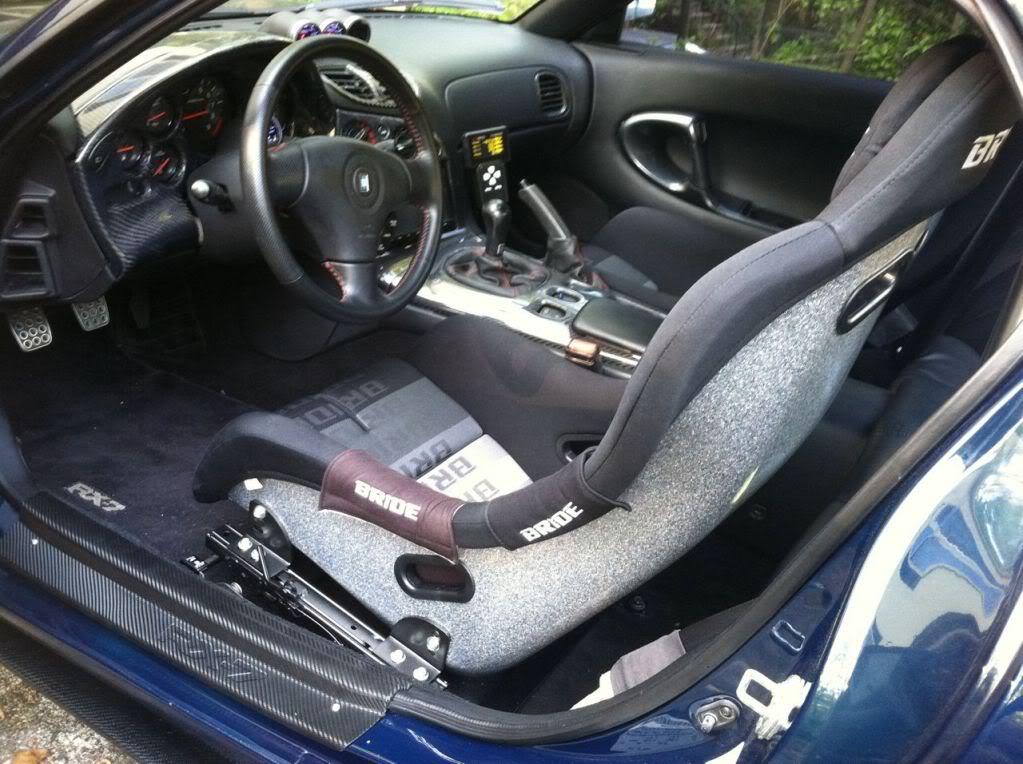
I also had a chance to remove my Recaros from the MB and going to put it in the Blk FD.
Here are some pics.. Not that anyone care... LOL!
In the MB FD

replaced by R1 seats

Out of the car


Rear end almost done.. I lost the 2 clips that hold the brake pads so I could put my rear brakes... and now I'm delayed.. They are $5/ea from the dealer for small metal clips.. INSANE!!

2-4-2007
Alright..
I tried to see if tow hook coould be mounted... So i put my IC on and Front bumper
Here is the area I'm thinking about adding (oil cooler opening, as FMIC completely fills up the front opening).

I think I could use the stock tow hook area to the rail and Just bend the metal to clear the bumper... Only concern I have is how it will all play with my upgraded Oil coolers. I think If I bend it near the bumper, It should be fine.


I thought about just making or buying a straight tow hook and cut the bumper.. But because its so close to the edge of the curveture of the opening, I might have to make the opening large.. and also not much material will be left by the opening.. I don't know if I make sense..

I know... That idea did concern me... as if the tow hook straightens out when pulling my car, it will F*ck up the bumper and just beats the purpose of making one of these...
Until I saw that Feed ones are bent like what I want to do. (pic provided by Agentspeed)

I agree. I'm not sure how the coolers will fit. I'm going to check that later on... I don't remember where I put them (still in the box somewhere.).

I think some of you are bit more cautious than I... If I get into a situation where the car is buried where I need to lift its entire weight with the tow hook, then i say it might not work.. and at that point, I say **** with the bumper and get the damn car out!
But most cases, we're only talking about few hundred pounds of force to pull the car.. I think bent 1/4 steel should hold its shape well over 1000+ lbs before loosing its shape.. But who knows.. But if you look at feed tow hook, there is no gusset(s) in place. I've seen in person, Agentspeed's tow hook before he installed it and sold his car, and there wasnt one.
2-5-2007
Thanks for the pics...
This one helps me the most! I'll re-measure and see where exactly the tow hooks will pass when I have it straight. If its like this one, it might pass it at the flattest point on the feed bumper.


They sure did cut he sh*t out of it!
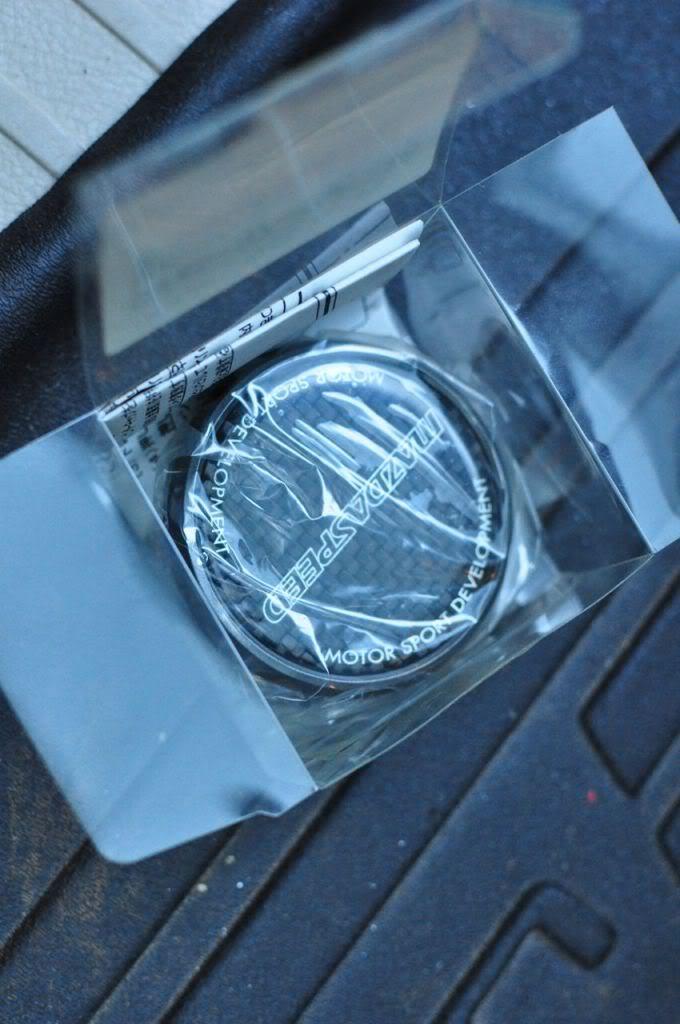
Guess what I recieved today!

2-6-2007
Hmm.. I guess except this one.. 3 rotor though.. Damn! So, why I wonder?? So you haven't seen any tuners in japan that uses any custom intake manifold?

But looks to be NA.
LOL! Almost ha?
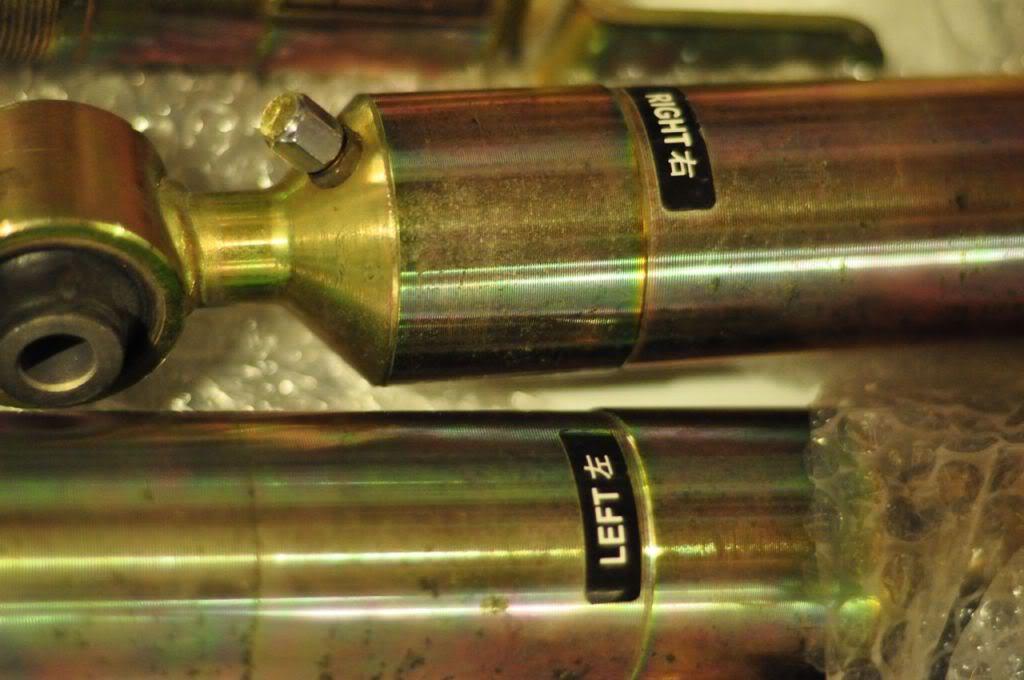
Here are some pics of my sway bar end links and its replacement (red my old ones, blk new used replacements).


as you could see Right red one is fine, the blk right one is slightly bent... Left Red one is bad and Blk left one is good.. I guess these things bent pretty easily also..
2-7-2007
My engine builder is going for N/A 3 rotor also... with carbs. Should be interesting.. He's going to put it in his 3rd gen (both which he bought from me).
I know, the end link thing kind of bothered me a little. I didn't think i was driving that car that HARD! LOL! I guess next best thing would be to go with Tri point Sways... But that might be bit too much for me.
2-8-2007
Ghost,
I started to tear it down after my coolant seal went out (2004). I already had a spare engine built just in case and thought I could drop it in in 2 weeks (ask SPOautos.. he still laughs about it). But that two weeks turned in to over 2 years. But another thing that kind of hindered me was that a local AL rotary guy was selling his MB FD and I decided to buy it. It ran great and now I had an FD to drive around..
Regarding the caliper letterings... Well, First set, I did it using a small sand paper and sanding it down.. These new sets, I used a dremel with rotating sand paper. I had much better control and I think it turned out better... But the surface is rougher but looks better.. Thought about using a finer grid and eventually to polish, but I said F*ck it!.. Don't know how long it will last though.
2-12-2007
I been wanting to respond to chinaman's post about the Mazdatrix end links for $74.

I might have to get a set! Thanks Chinaman!
2-15-2007
I just saw that FEED also makes the swaybar mounts.. ($175pair)

Looks very similar to the "SUPERNOW" ones.. lol!
2-26-2007
couple of new parts I recieved today..
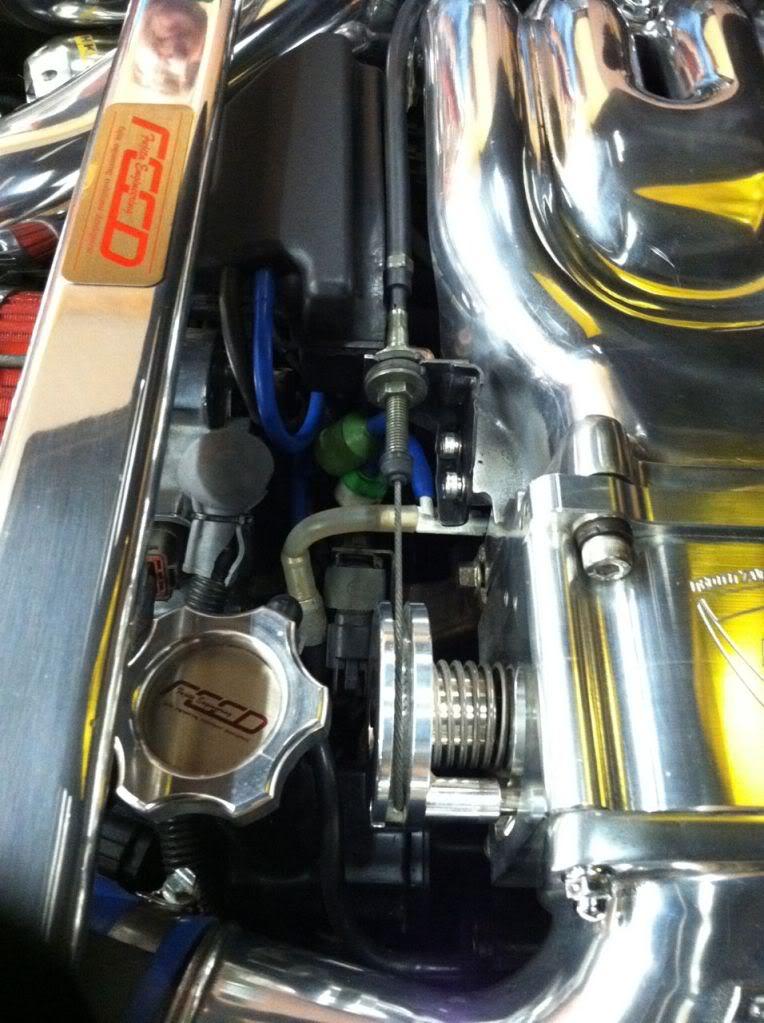
From ReSpeed oil filler neck.
Test fit the Feed oil cap

Test fit with rotor oil cap by www.Rotary13B1.com

3-1-2007
LOL! Thats for sure!
Here is something I got today in the mail..
Feed Head light cover from Japan... One thing I didnt know is that the real Feed one isn't Fiber glass... ITs PLASTIC!! It even has a film of clear plastic over it. I Never knew...

3-9-2007

I just got some more goodies..
Racing Beat Sway bar from RX7store.net!
Jason from www.RX7Store.net was able to get the Racing Beat Sways slightly cheaper than Racing Beat. Racing Beat themselves have also told me to get it from someone else..
Im assuming these?

and not the Feed or the other brand that looks just like the feeds?
He doesn't have a website (I think he's trying to build one)
But here is is info:
David Breslau
RX7club Forum SN: WidefootRacing
Great guy and I'll be installing them hopefully this weekend.
3-22-2007
I recieved this about a weekago.. Been too lazy to install few things on the car..

I think one hook should be plenty for pulling the car on to the tow truck.... as most of the time you need to do so because of mechanical failure or because of a flat.. 2700lb cars aren't that hard to push or to roll...
Only time I see this hook not being enough will be when your car went off the cliff and needed to lift up the car completely off the ground by the hook(s).. But if your car is in the kind of situation, I don't think it really matters how you get it out or where the chains are attatched to.... as your car will be most likely be,.. totally fucked up at that point.
5-9-2007
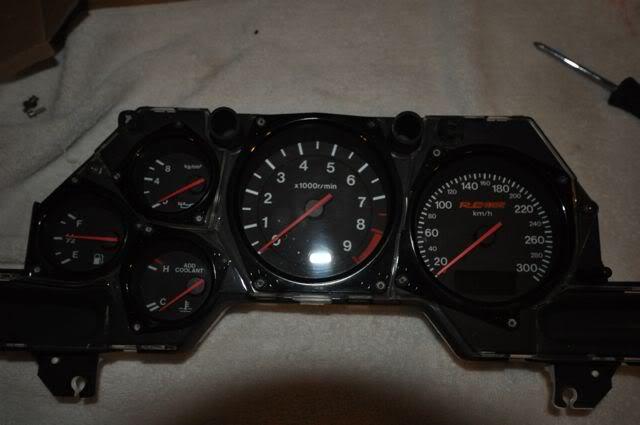
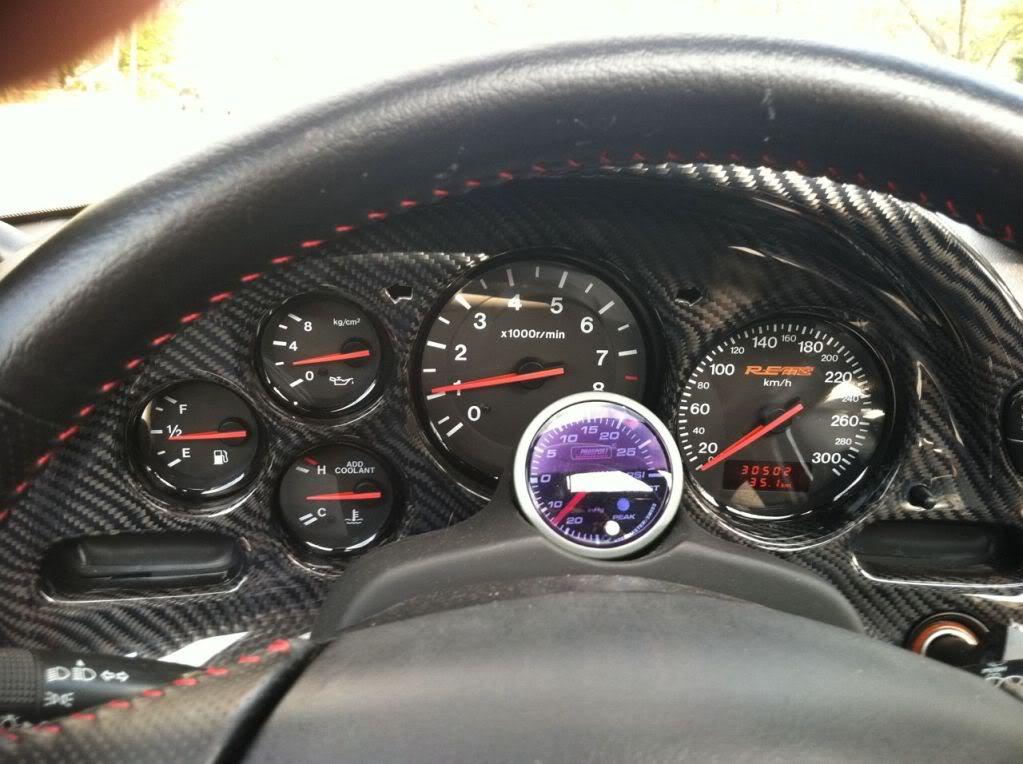
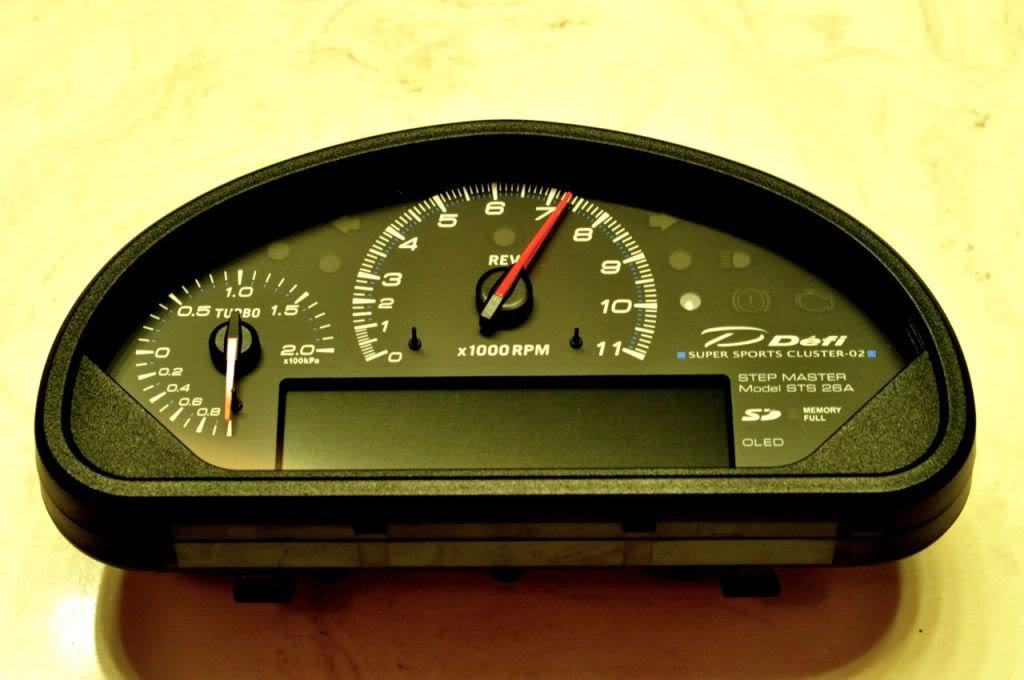
My new cluster thats going into the car...


I hear ya Rich! This and that BBK, my account is on flames. But I figure how often do I run across one of these?? And since I have the seats, I figure I should go all the way..
And I got these for the Feed Fenders (which I'll be getting it painted in a month or so)....


5-10-2007
Thanks Doc!
Glad you came out to the DGRR.. and your car is quite amazing also! I'm hoping to come up to Huntsville and hang out with you in near future. Hopefully the Blk FD will come out the way I'm planning and hope it will make pretty decent amounts of power (and eventually, get the 20Bs built and put in) I just wished I had more time.... But also glad I have the MB to drive around in...
Here is a picture of SPOautos driving my car at the Dragon... One handed and on the cell phone ![]()


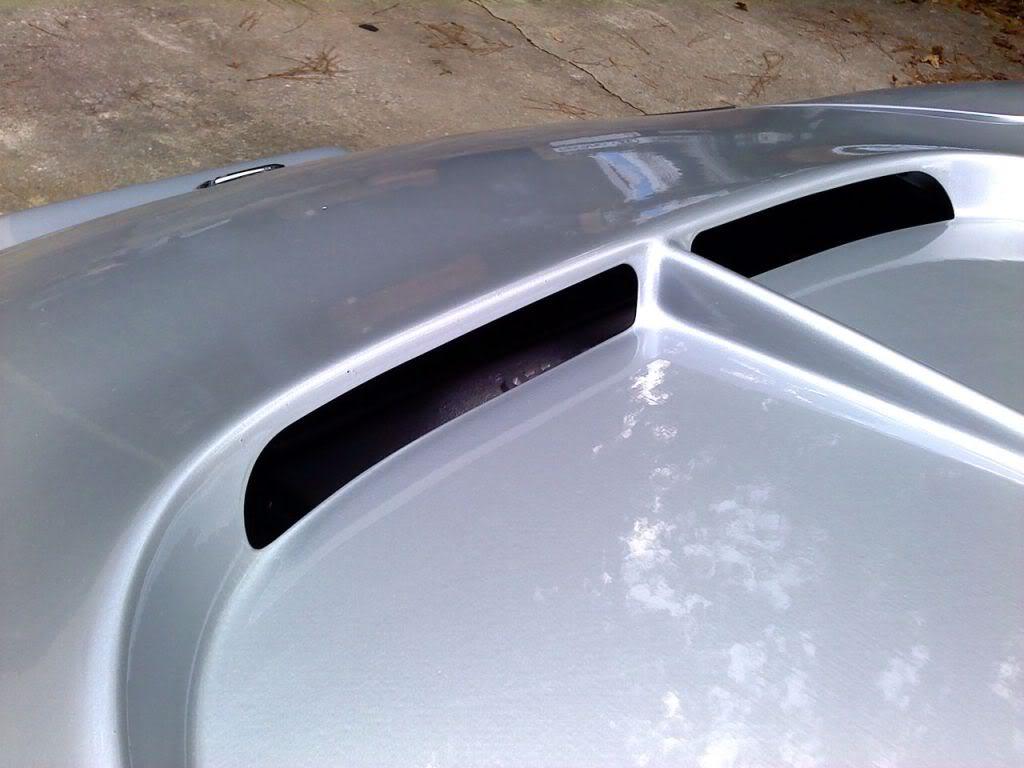
David, I agree with weaklink.. Feed vented hood is pretty tame..
Here are couple of pics.... three..


PS> Did you get your 20B back from Gotham?? Who did it all turn out??
5-22-2007
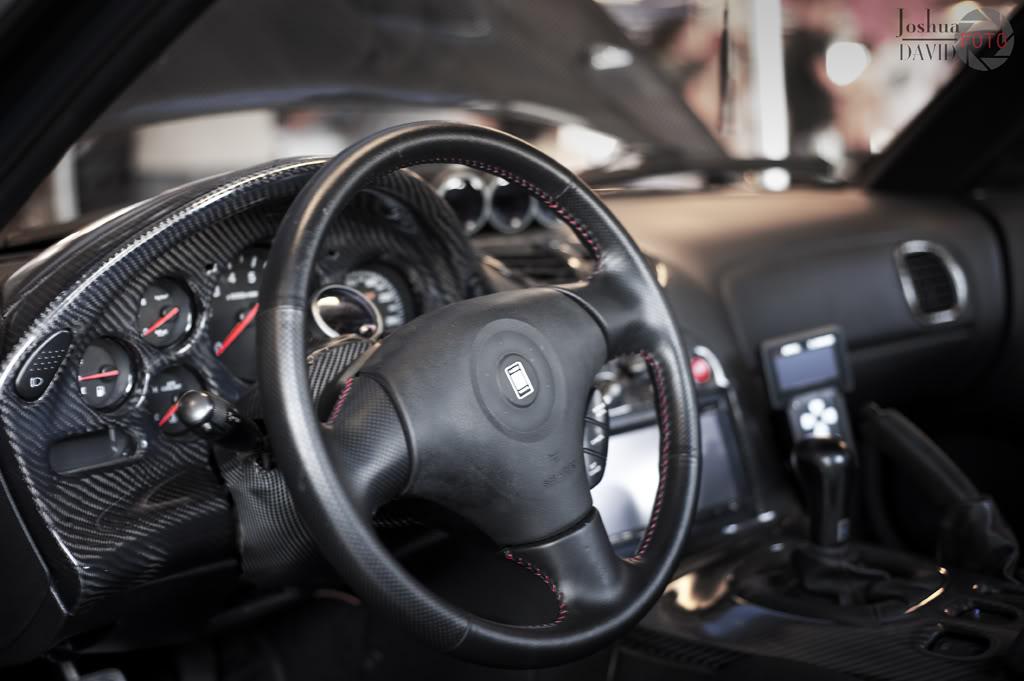
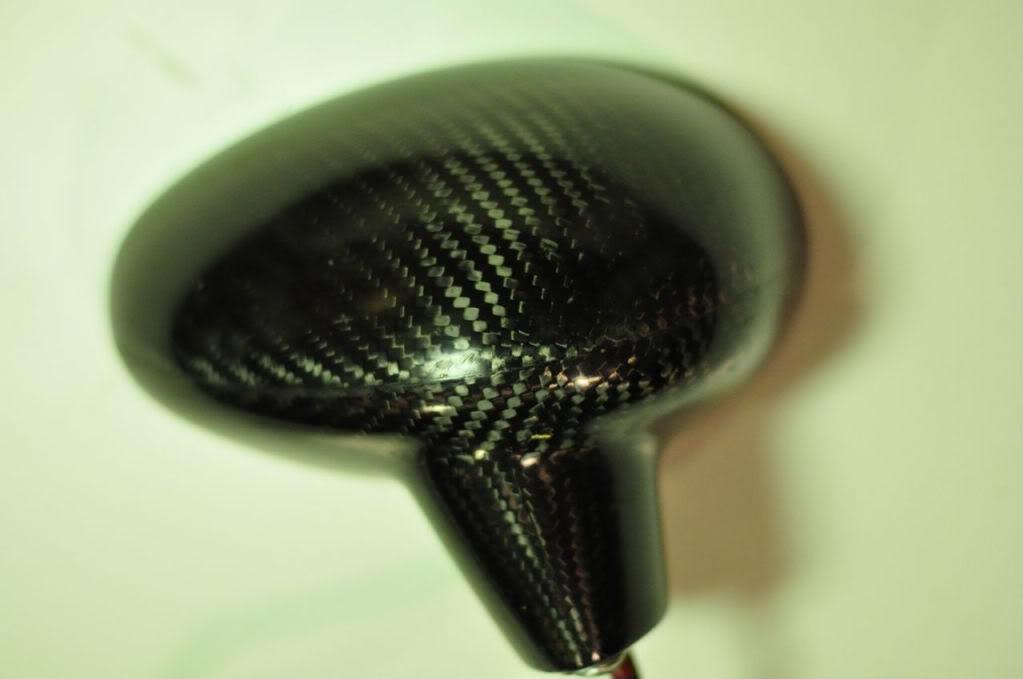
My new steering wheel..

6-12-2007
David,
He started the install on this thread
Need some guidance installing infill G4 carputer into the FD
Finally I'm getting my *** in gear and putting my engine together.. Hopefully it will be in the car before Chuck Westbrook come to Bham(Chuck Westbrook PFC tuning class in Bham, AL 7/21 and 7/22/2007)...

7-22-2007
Quick Update..
Finally received my RB BBK.

12-3-2007
Its been awhile since I updated this thread..
well, Finally I got my diffuser I wanted it!!! Yeah! Thanks Ken! And I've decided on few changes, so I'm taking my engine back to my builder...


12-4-2007
Just have to wait a bit..
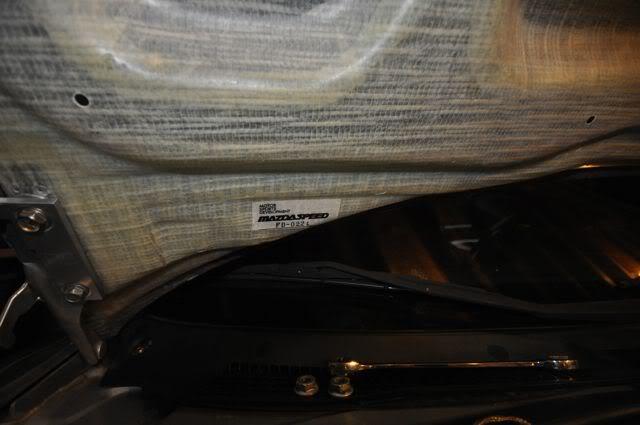
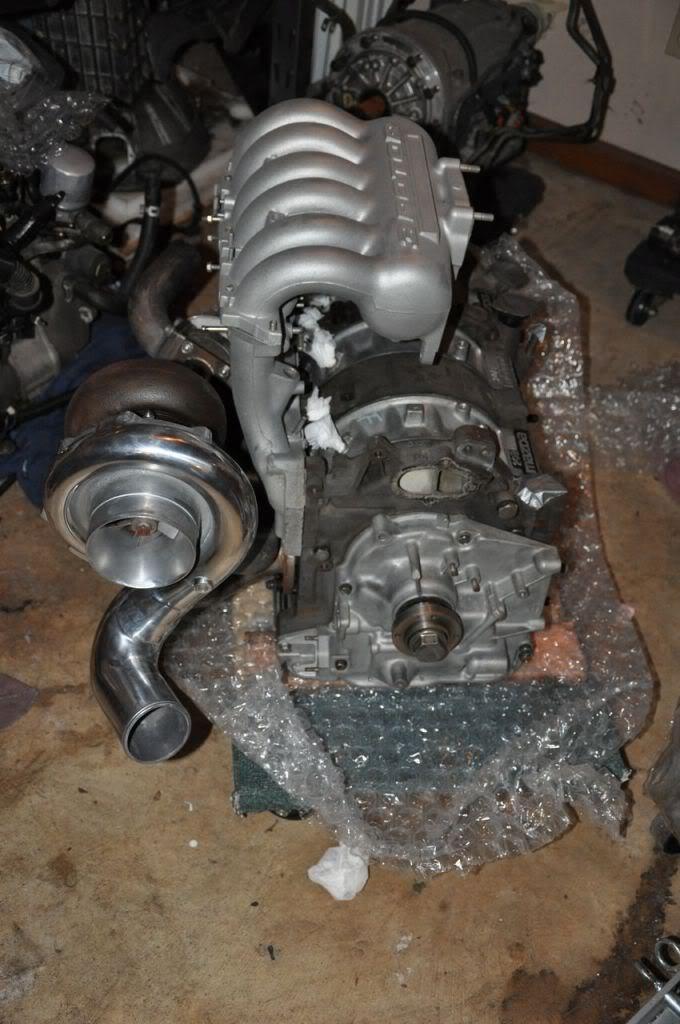
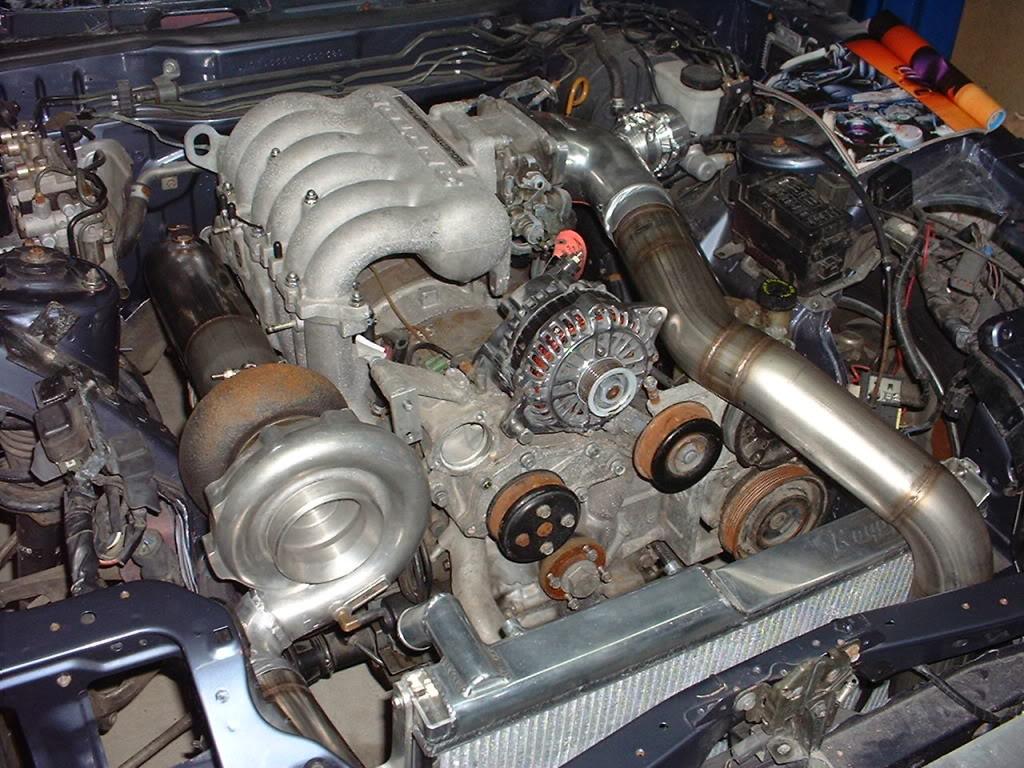
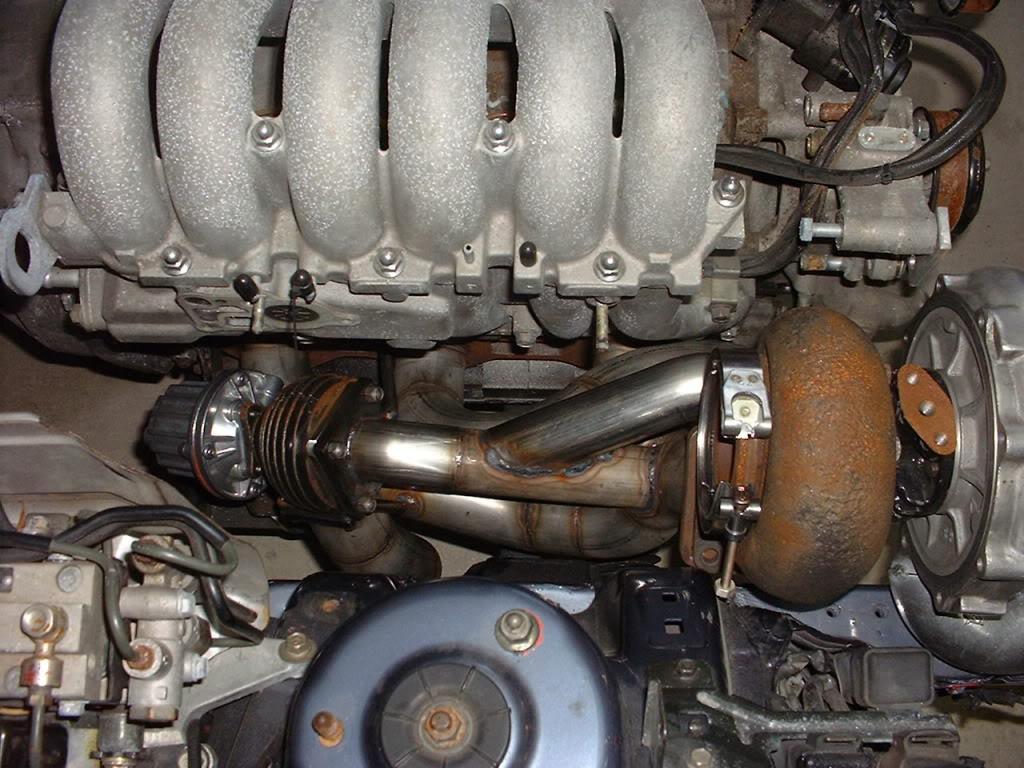
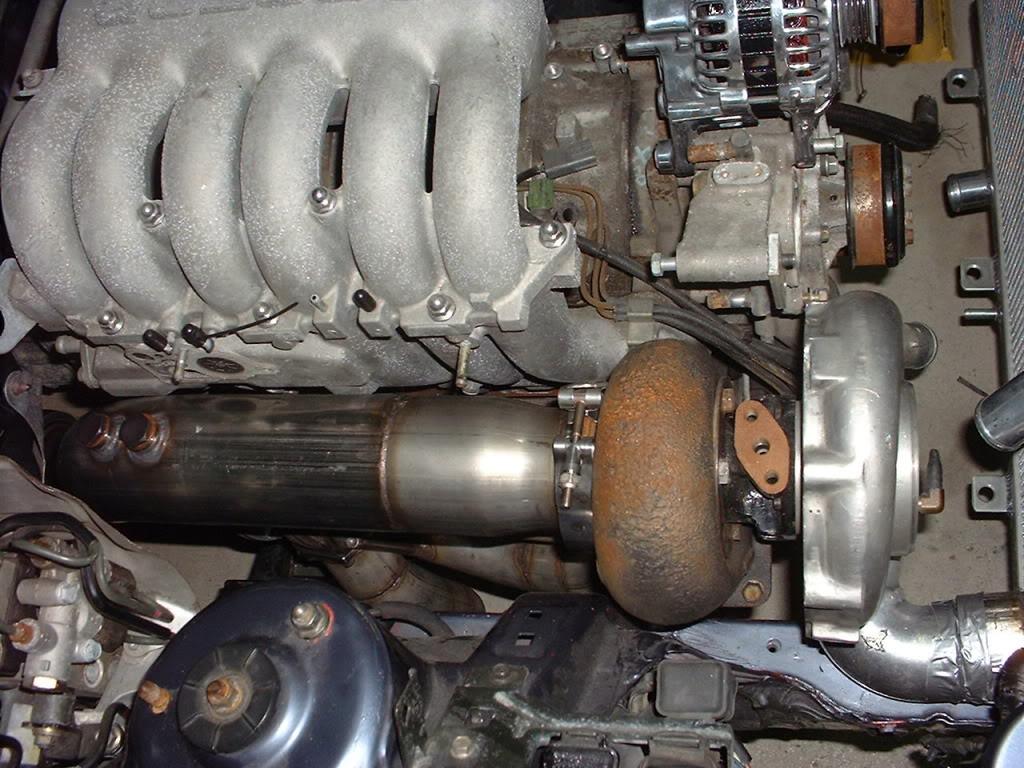
But to give you a hint, I took these pics because i'm going in a different route.. I'm tearing all the polished goodies and taking the engine back to my builder... In next 2-3 weeks, back to something little different..
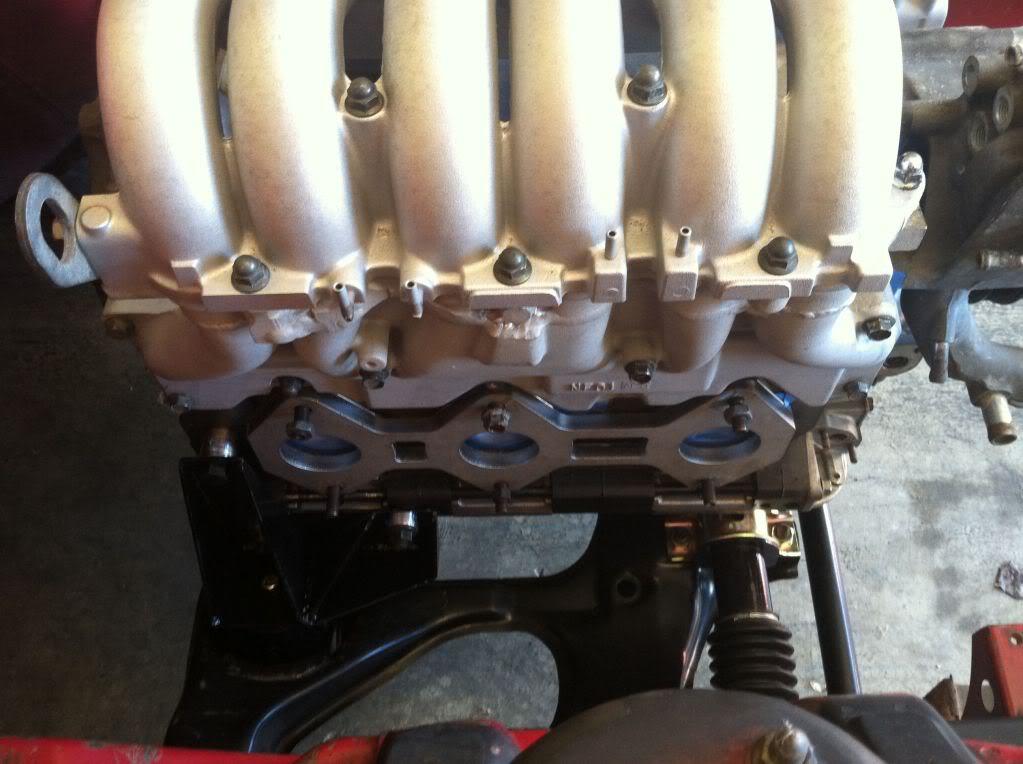
Here are pics of my engine before tearing it all apart![]()


12-21-2007
LOL! I'll work on that next![]()
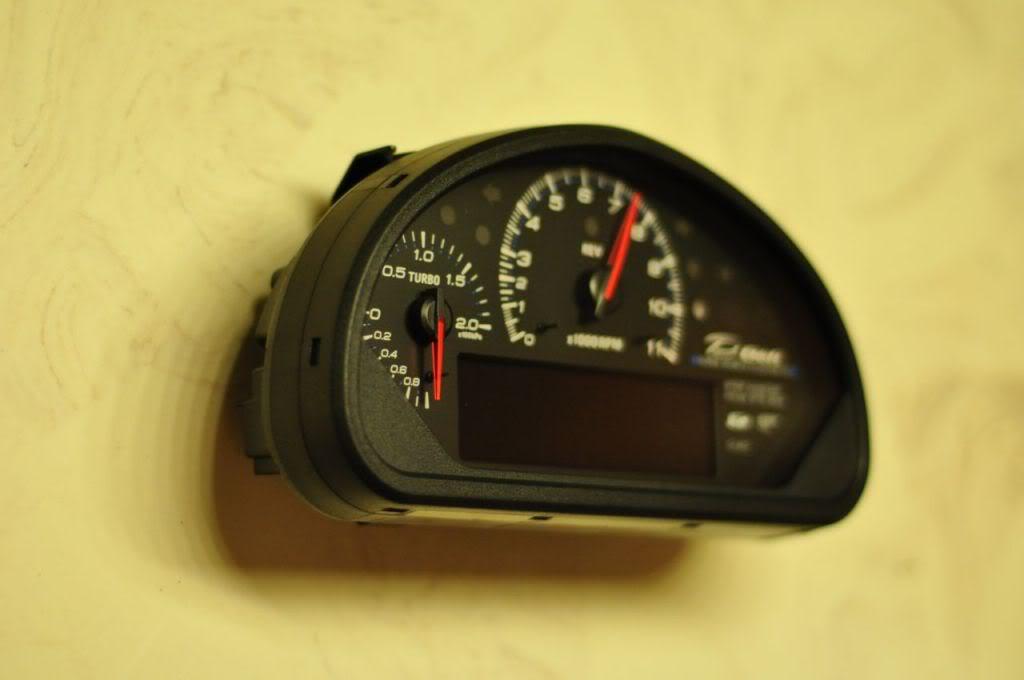
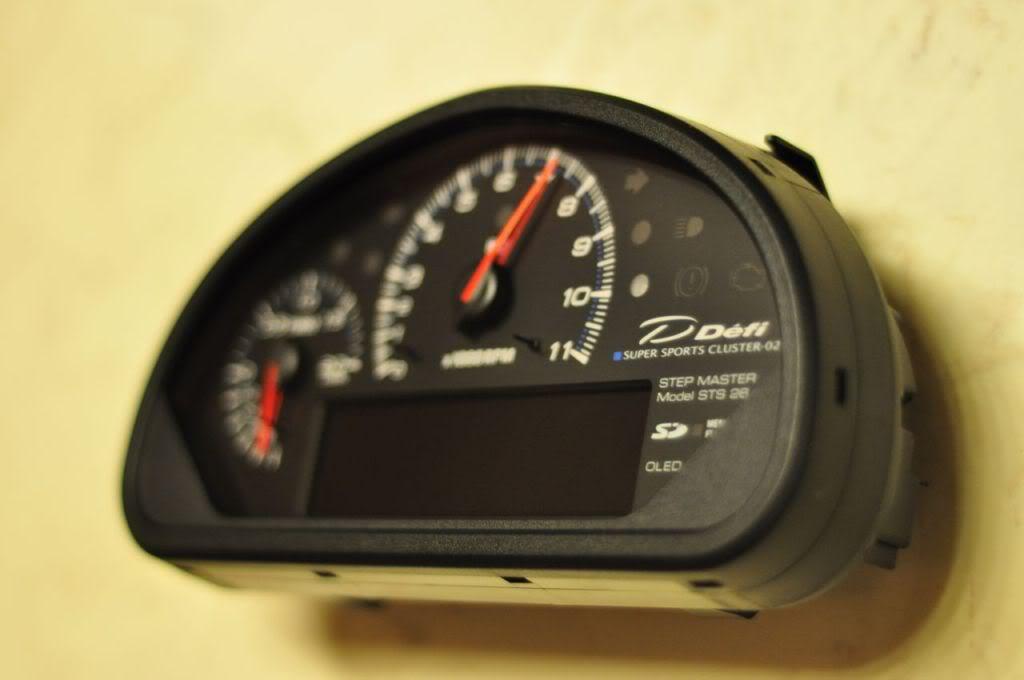
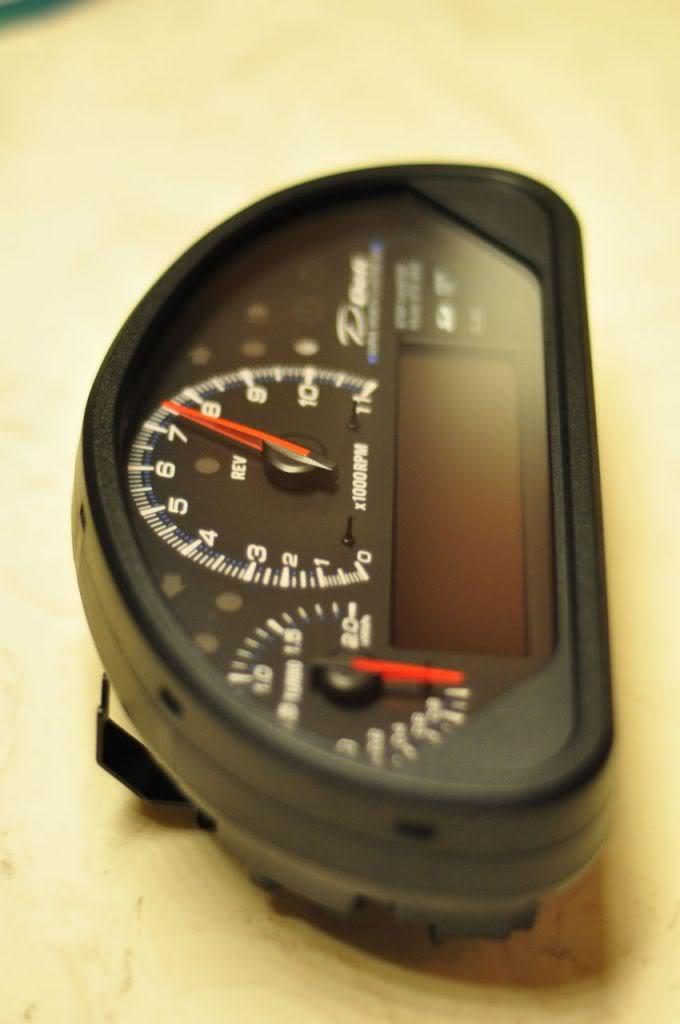
Here is a pic of my new gauges... I always like these Defi BFs.. Now I just need to order Fuel Pressure gauge from Jason (RX7store.net) and I'm done with gauges.. By the way, I didn't know these pods are going up in price![]()

My goal now is to get the car finished and show it at DGRR 2008 (Deals Gap Rotary Rally 2008 ![]() )
)
Also, I'm now thinking I should just stick with 94 plastic finish instead of CF ing the interior plastics.. What you guys think?? CF or 94??
1-26-2010
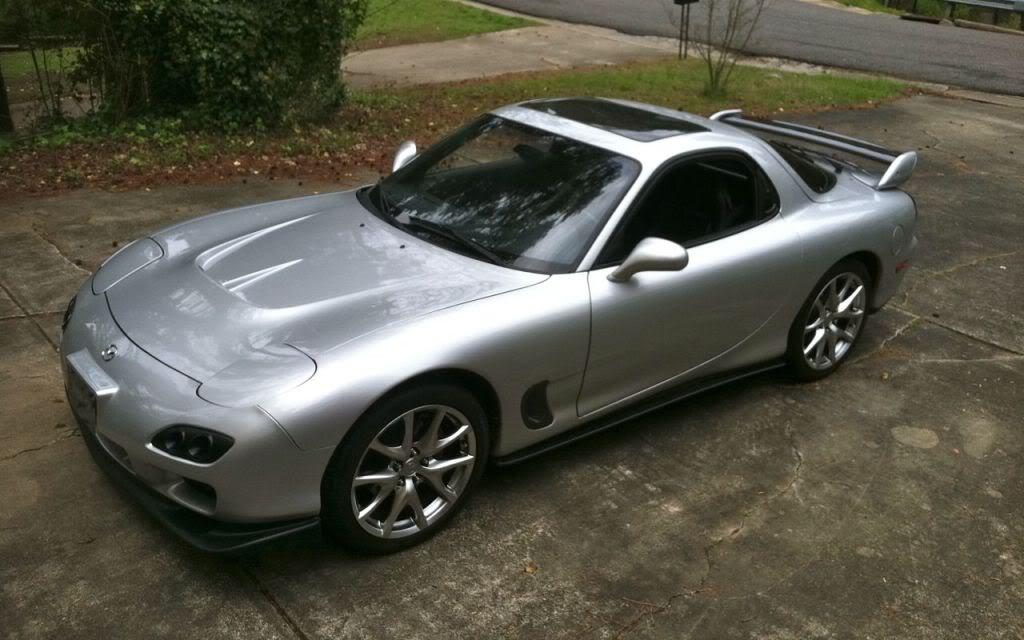
It was sitting in my garage and a local guy was looking for a blk on blk.. I was helping him locate one and just decided to sell it as a shell. Its was hard as this was my 1st FD (out of 7 or so). Also my MB FD is pretty built up and I wanted something bit more stock... and thats where the SSM came by.... 32K original mile and original inside and original paint... both are like new condition.
I recently acquired some rare MS parts for the SSM FD...
Like these:


My goal is to get this car all OEM upgrades... and build up the MB FD.
I'm shooting for B-Spec FD

Except with CF Feed sides and CF RE rear diffuser. I already have the MS lip and spoiler deck... and the CF hood (but non-R-spec hood).
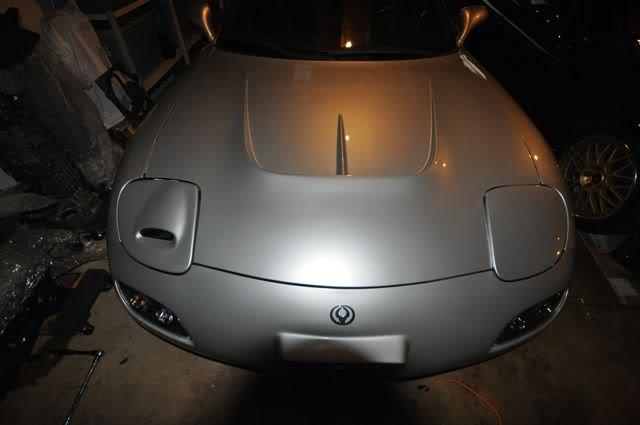
I did think about R-spec.. but I like the 99 front and I already had one.. I'm going to talk to a painter about color matching this friday (Goolsby - one of the top painter in SE).
1-31-2010
Installed my SSM OEM 99 wing.. Luckily the paint is very close match from newer 99 and 94. I also put in the CF 99 insert (like MS).


Next is pulling out the BNRs and putting in 99 280HP twins..
2-3-2010
So, This is the look I'm going for on the SSM FD.

Minus the MS wheels.. Plus RE carbon rear diffuser, Feed carbon sides, Feed carbon door handles, and my replication of R-spec signals (Just can't find these damn signal lights).
Interior will be my rendering of MS LHD plastics, Spirit R seats, 99+ Steering wheel, and few little updates.
I should be done with this by DGRRX.
I'll also update this thread as I go.
2-4-2010
B/c I already have the new stage 3s ![]()
SSM I'm wanting to do bit more stockish..
I just put this in the SSM FD..

2-5-2010
LOL! I know ![]()
But I have to say, my pride and joy is this,


Thanks to Charlie who first let me know about about this, I drove over 1000 miles to pick this up (Thanks Marco for going with me to pick this bad boy). Probably only brand new MS hood in the country (maybe in the world??).
2-17-2010
David,
I've decided to use it on the MB FD. With Help of Rotarypolo (Marco), I did some work on the MB FD..
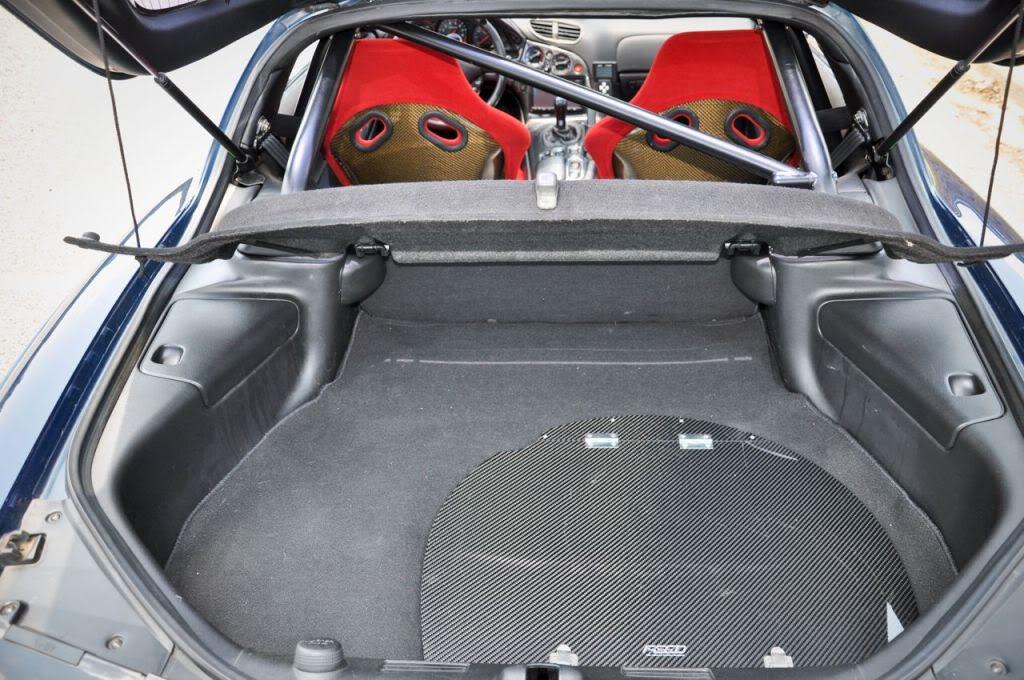
First the Tan carpet out and Black carpet in ![]()


Next installing the Feed trunk piece..
Without carpet

With rear carpet

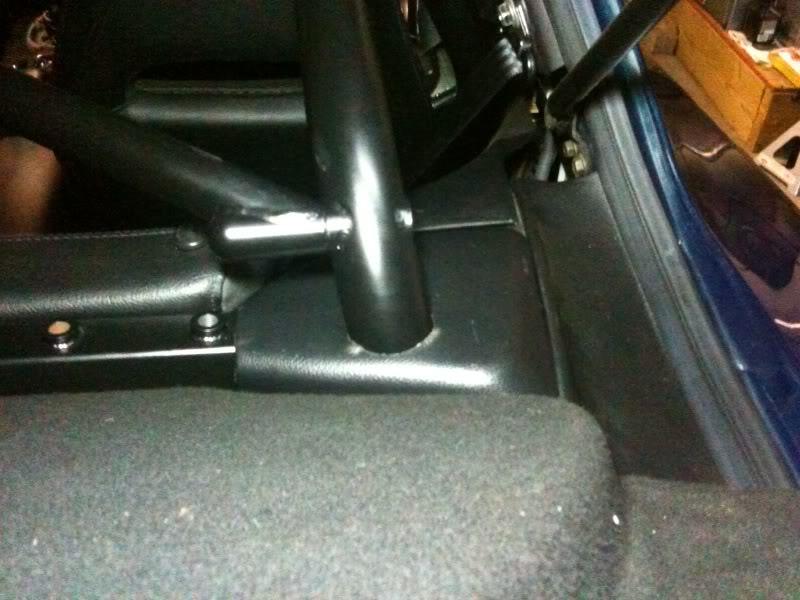
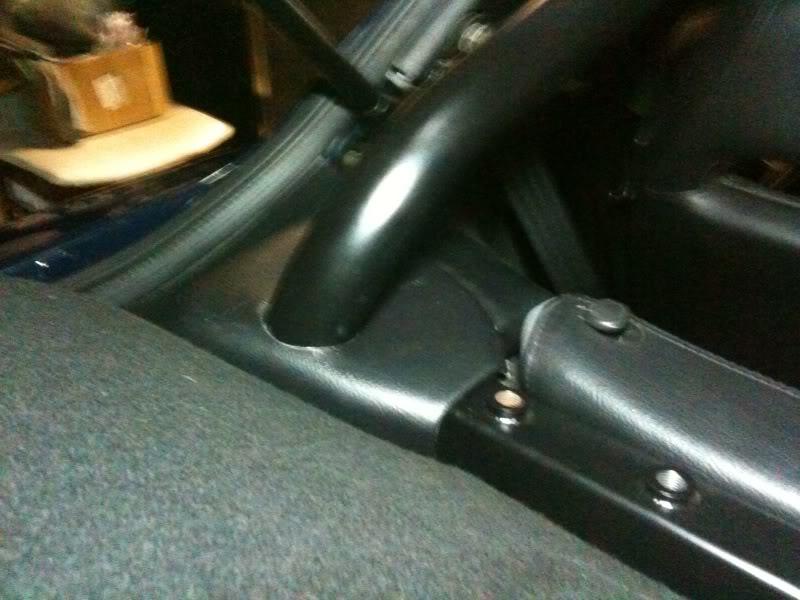
We've also put the RaceShop rollbar that I had sitting in my house for the past 4 years and mocked it up... Unfortunately, I'll be also doing complete suspension change and didn't want to bolt it up until that was done. But fitment was pretty good and quality was top notch.
HEre is us opening up the rollbar..

The Free Race Shop Tshirt I got... sitting inside the package for the past 4 years ![]()

2-18-2010
Back seat in with black carpet..

Oh, it looks so much better! And Yes, I know these are useless.. Pretty much everything in my car are useless ![]()
2-19-2010
So, here is my plan.. Put my 13B-RE motor w/Aviation seals with BNR twins seq. ran with 99 newer harness with black box, into the SSM with newer RZ tranny.

MB FD will get built 20B, touched up intake with exhaust sleeve replaced with 13B-REW, with Turbonetic T76BB mounted on inconel manifold... deciding on the ECU. And waiting on some parts from Logan.


2-22-2010
David, I would like to drive your car at DGRR if that's possible... as I'm currently open to what ECU to use and such.
I did have Haltech E11v2 and sold it when I heard a rumor about the new Haltech.. But I'm not really sure about the units... But I might go with that as its pretty reasonable and there are some good Haltec tuners out there.
But hwnd recently told me AEM will work with 20B. I'm going to do some search on this and might go with AEM.
I'm also going to get David Garfinkle to make oil pan brace for the 20B. Maybe make it bit thicker than usual to give bit more structural stability of the engine. You might also consider this as longer 20B, more torque/power, the engine needs bit more structural bracing. I think his oil pan brace does both sealing and making the engine bit more structurally sound. I'm going to get him to make 2... and with GROOVES ![]()
2-28-2010
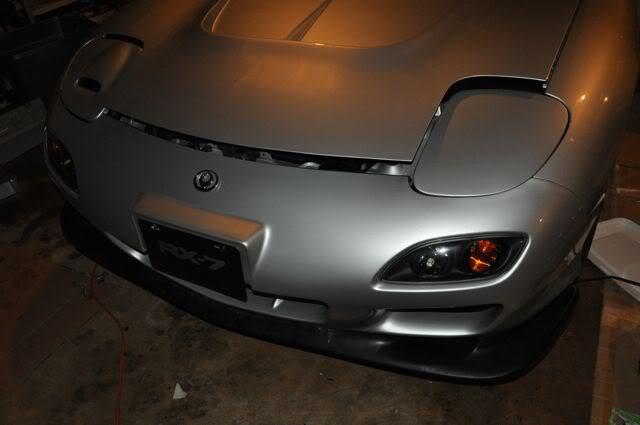
Update on my SSM FD...
My painted 99 front.

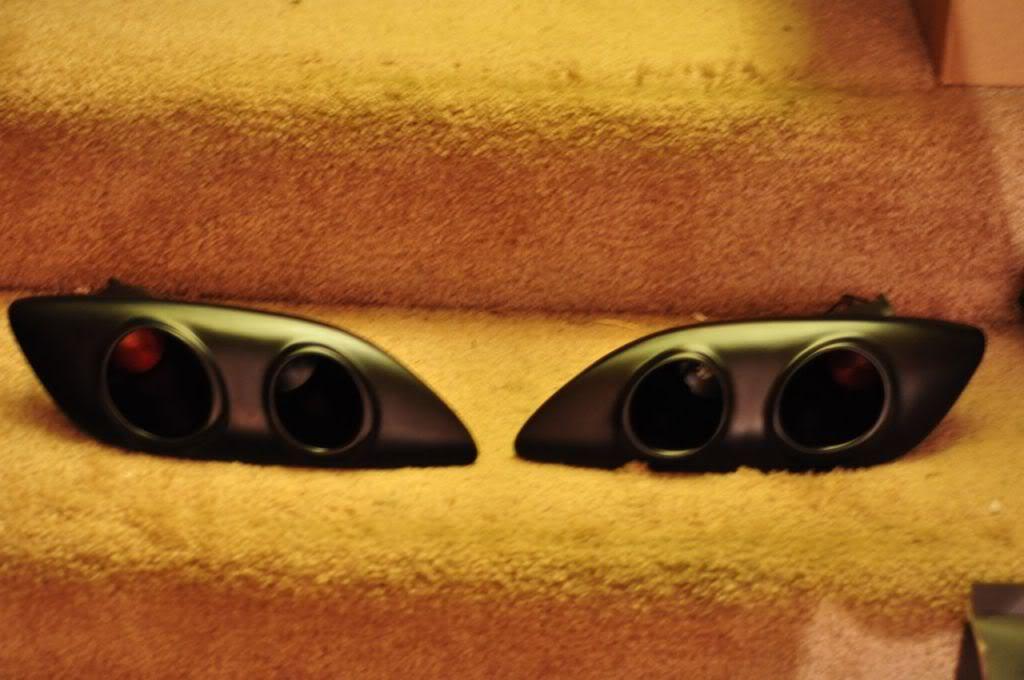
Painted head light covers..

Getting few other things painted and waiting on few other things....
3-13-2010
Just picked up my MS CF hood from the painter. Turned out pretty nice ![]()

3-24-2010
Update:
I'm starting to put things together over past few days..
MB FD - Putting in the HID head light kit by SportTuner.com I'll post pics of this kit later. I'm also putting in the Feed signal light kit with HIDs installed also.
SSM FD - Took the stock bumper off, cleaned everything, and getting ready to put the stock head lights back on, the 99 bumper on, and the MS hood. I'm hoping all will be done by this sunday.
Far as quality of the kit, it looks great... But I didn't get to work on the MB.
I did however did some work on the SSM... Put the stock lights on (minus a bracket and couple of screws).

And with 99 rebar and lights on..

Here is the kit I received from SportTuner.com
Quality looks pretty good..


3-25-2010
My progress as of today..
I've now installed the FEED signal lights with HIDs. They are pretty bright!! I'm finishing up the wiring with stock plug ins for them and after that, I'll be tackling the SportTuner lights. I should have all put together by end of this weekend.... unless the little one comes before than.
On SSM, I'm waiting on couple of missing parts for the stock head light assembly. I should have the parts in by end of this weekend.. Hopefully.
3-27-2010
Here is my progress for today..
I've finally installed the FEED signal with HIDs and also the Sport Tuner head lights.. both took some time placing the HID ballasts and getting the wires all straight. Anyhow, here are some pics.


Here are some comparison pics between my Acura TL HIDs and the projector style Sport Tuner HIDs.
My TL

Sport Tuner HID projects on the FD

Different exposure

Also, I finally installed the 99 bumper on the SSM FD.

And found the brackets and bolts for the head lights.. Just finished the driver's side only.. I'll finish it tomorrow.

2-19-2010
So, here is my plan.. Put my 13B-RE motor w/Aviation seals with BNR twins seq. ran with 99 newer harness with black box, into the SSM with newer RZ tranny.

MB FD will get built 20B, touched up intake with exhaust sleeve replaced with 13B-REW, with Turbonetic T76BB mounted on inconel manifold... deciding on the ECU. And waiting on some parts from Logan.


2-28-2010
Update on my SSM FD...
My painted 99 front.

Painted head light covers..

Getting few other things painted and waiting on few other things....
3-13-2010
Just picked up my MS CF hood from the painter. Turned out pretty nice ![]()

3-24-2010
Update:
I'm starting to put things together over past few days..
MB FD - Putting in the HID head light kit by SportTuner.com I'll post pics of this kit later. I'm also putting in the Feed signal light kit with HIDs installed also.
SSM FD - Took the stock bumper off, cleaned everything, and getting ready to put the stock head lights back on, the 99 bumper on, and the MS hood. I'm hoping all will be done by this sunday.
Far as quality of the kit, it looks great... But I didn't get to work on the MB.
I did however did some work on the SSM... Put the stock lights on (minus a bracket and couple of screws).

And with 99 rebar and lights on..

Here is the kit I received from SportTuner.com
Quality looks pretty good..


3-25-2010
My progress as of today..
I've now installed the FEED signal lights with HIDs. They are pretty bright!! I'm finishing up the wiring with stock plug ins for them and after that, I'll be tackling the SportTuner lights. I should have all put together by end of this weekend.... unless the little one comes before than.
On SSM, I'm waiting on couple of missing parts for the stock head light assembly. I should have the parts in by end of this weekend.. Hopefully.
3-27-2010
Here is my progress for today..
I've finally installed the FEED signal with HIDs and also the Sport Tuner head lights.. both took some time placing the HID ballasts and getting the wires all straight. Anyhow, here are some pics.


Here are some comparison pics between my Acura TL HIDs and the projector style Sport Tuner HIDs.
My TL

Sport Tuner HID projects on the FD

Different exposure

Also, I finally installed the 99 bumper on the SSM FD.

And found the brackets and bolts for the head lights.. Just finished the driver's side only.. I'll finish it tomorrow.

3-28-2010
Glad you talked to the owner. He is very knowledgeable guy and I'm happy with the result so far (still need to take it for a ride).
Anyhow, I just took the FD out for a spin and took some pics of the FEED HIDs. I wired them so that I could turned them on without turning on the head lights. They so bright I can't take pics at night.. Here are some crappy cell phone pics..
David, I think you'll be proud of me... I'm following your foot step ![]()
**For those haters of these LEDs.. My wife hates them too ![]() But I like it
But I like it ![]() Also, they are not noticeable when not on which is a ++**
Also, they are not noticeable when not on which is a ++**
4-6-2010
Friend of mine showed up and gave me a hand on installing the MS hood on the SSM.. here are several pics.
Fitment is good but I need to adjust the headlight covers..
4-9-2010
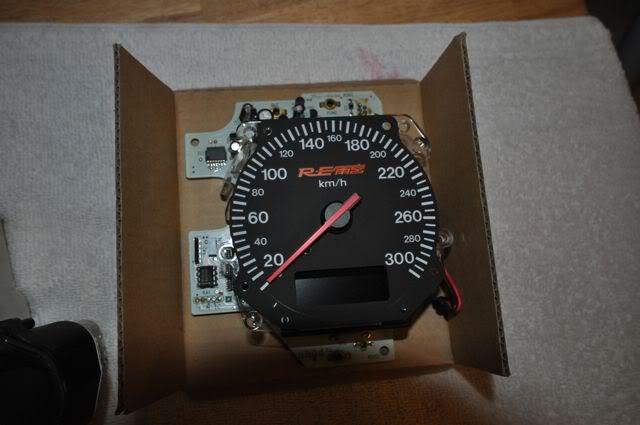
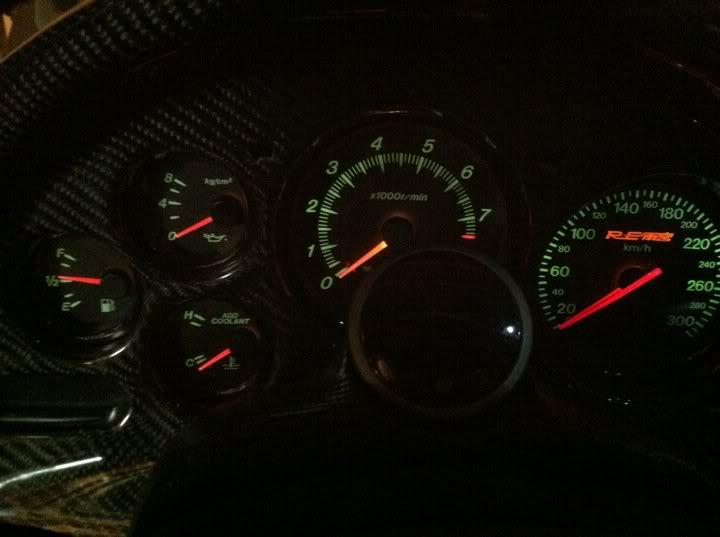
I'm now starting to put my interior for my MB FD... I swapped out the speedo with RE-A Speedo..
RE-A Speedo
Comparison with stock
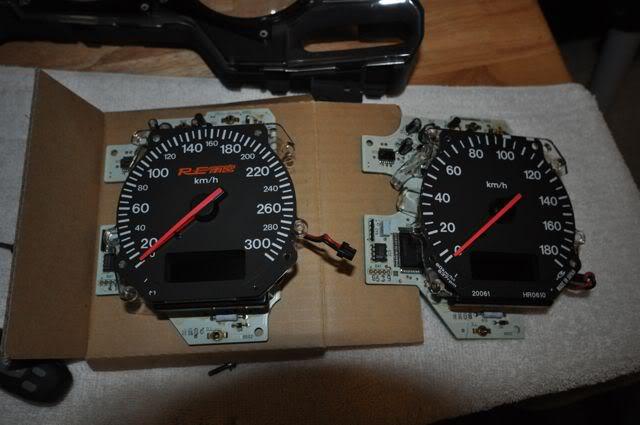
With new RE-A
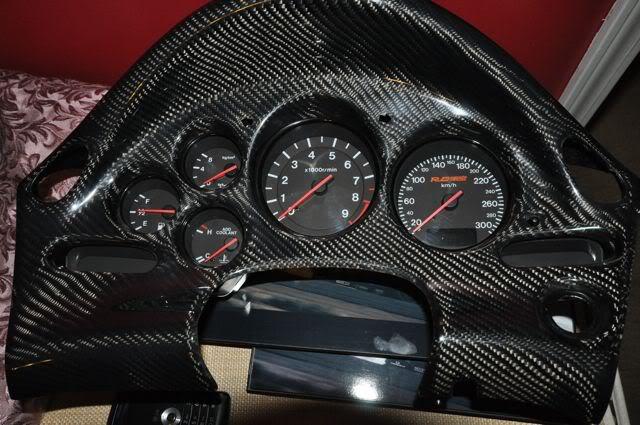
With CF cluster surround from JKL Engineering
4-24-2010
Well, quick update.. Raceshop Rollbar is almost complete.. Only thing left is to bolt it down to the ground..
My car is in ATL and good friend Marco Lau put the rear strut tower covers on for me.
Also my Carbon Interior from JKL..

5-2-2010
Did some work on the SSM FD today...
Put the FEED CF sides on
99 Front, brake ducts, lip, etc..
Mazdaspeed SMIC, Mazdaspeed AST, HKS intake with KNs, Mazdaspeed Strutbrace, etc.


And everything closed up ![]()
I also put the RE carbon Street diffuser on.. but needs to tweak a little later on.
5-4-2010
yeah, those are carbon vents... I'm debating about going back to stock.. just too lazy!
Put the SSRs on and also 99 tail lights..
5-6-2010
Update on my MB FD...
rear Feed flares were put on my Chris Allen of ATL.
5-9-2010
Thanks!
Here are few pictures from this weekend's event.
5-19-2010
Update...
Well, I'm currently working on couple of things..
1. I'm working with DBA Australia to bring RS/RZ/Spirit-R Rotors made in 2 piece, their special paw design for USA market.
2. I'm also trying to use their 5000 series rotors with my Alcon BBK. Only thing I have to do is get a rotor hat made for it. This would be great as DBA rotors are cheaper and better designed.
If any of you have Greddy/Alcon BBK and need new rotors, PM me.
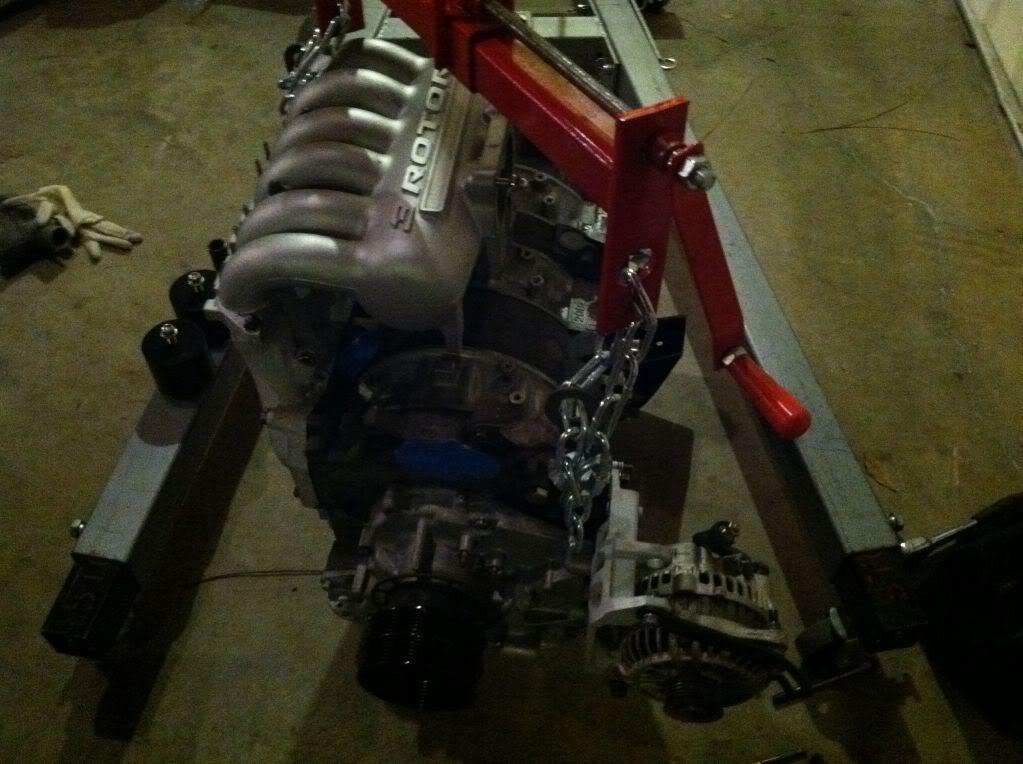
And finally, after a bit of a wait, my last bits for mounting the 3 Rotor on to FD subframe stuff from Defined Autoworks is in the mail. I'll post that stuff here also... Or join me on my facebook page for all the pics and updates ![]()
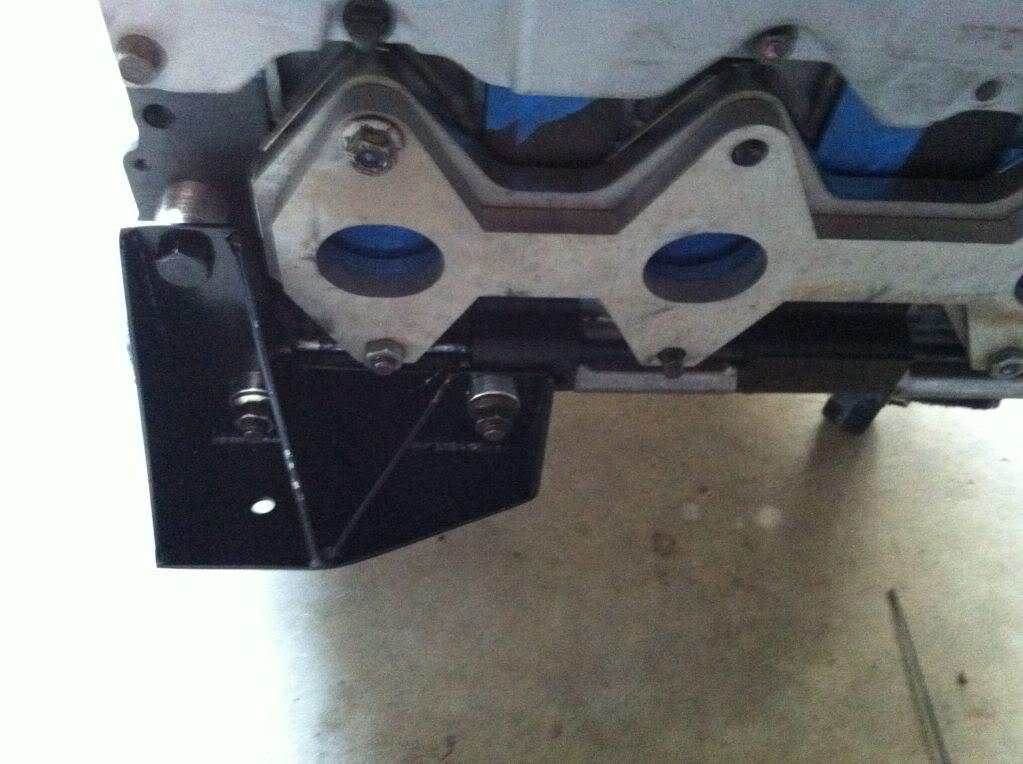
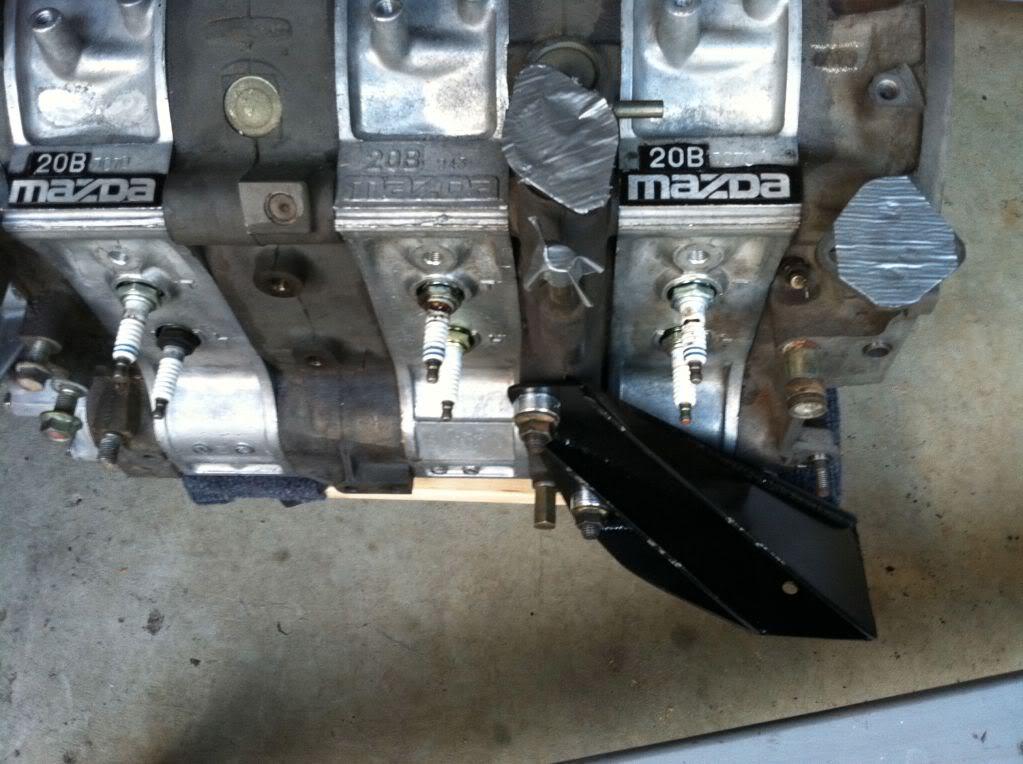
Just got my Defined Autowork 20B stuff..
Alternator relocation kit
Lowered LIM
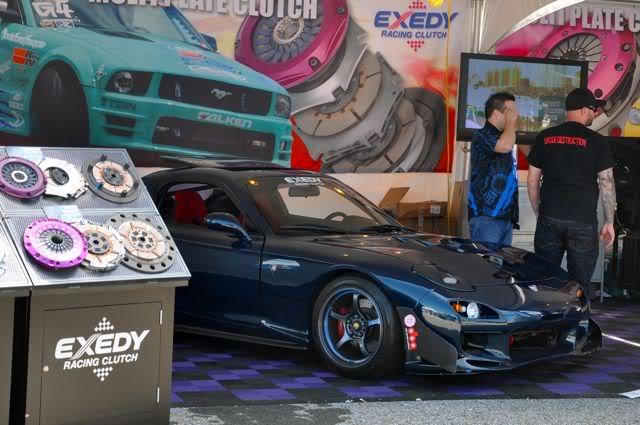
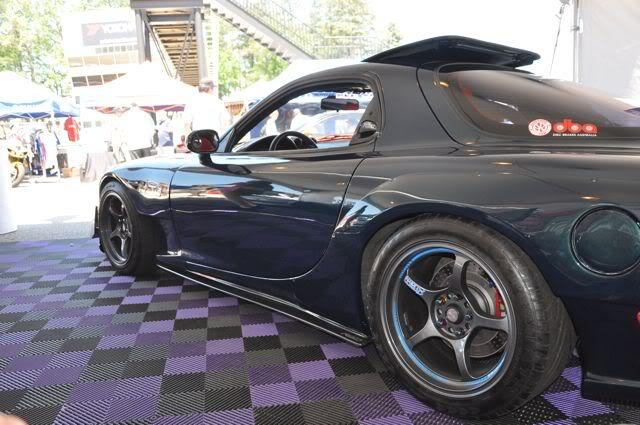
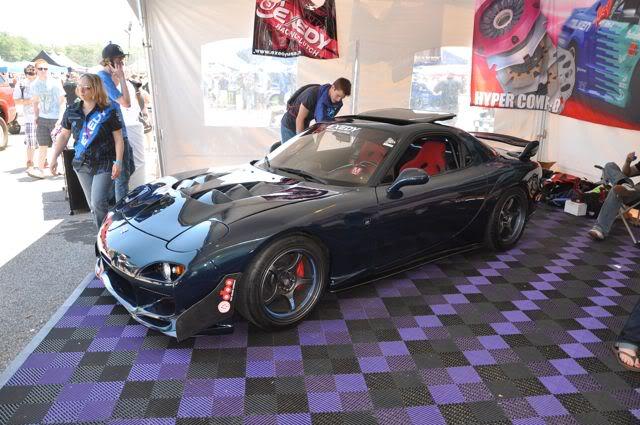
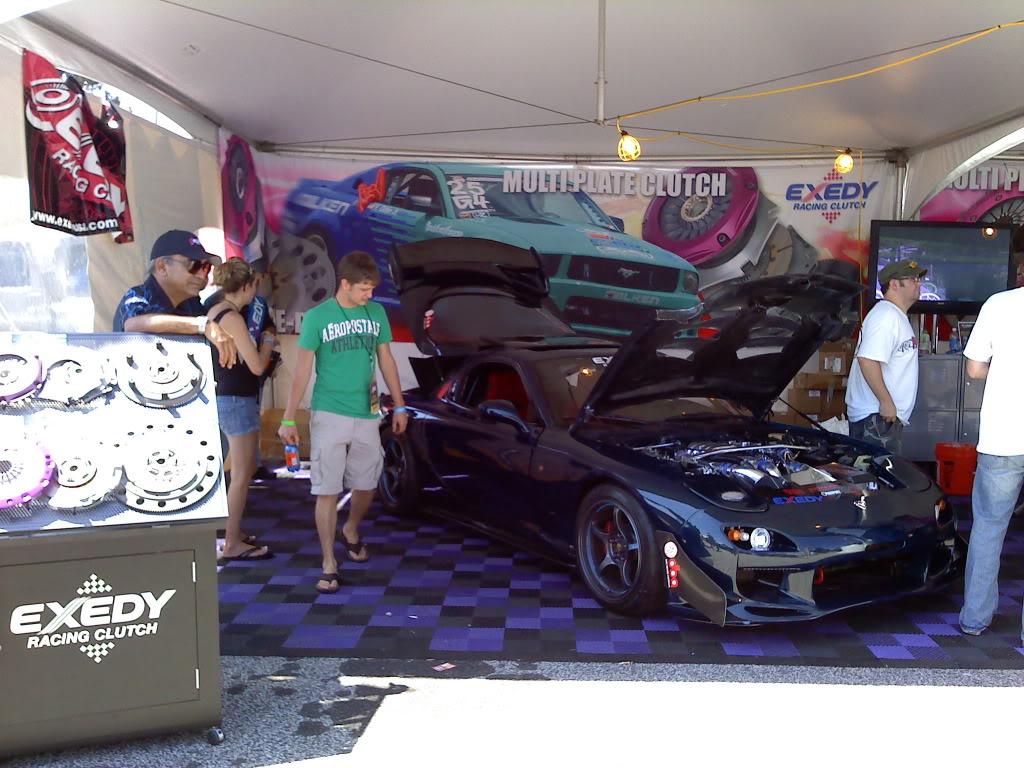
And my MB under Exedy Clutch booth.
LOL! Thanks for reminding me ![]()
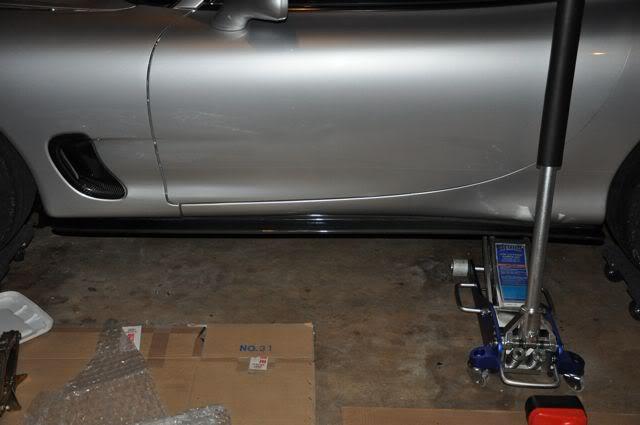
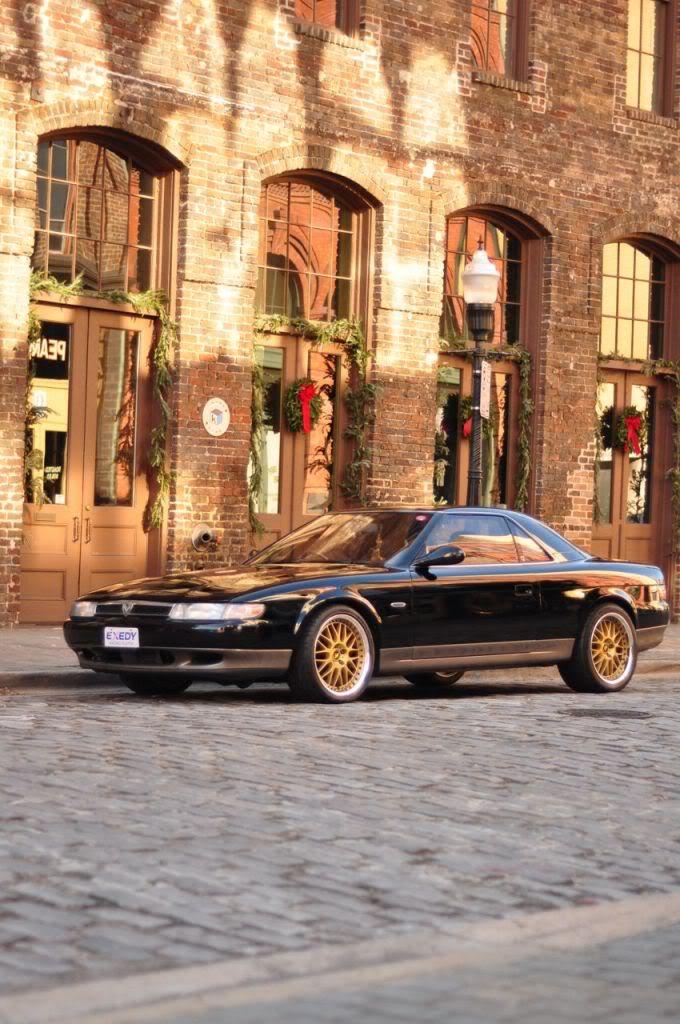
Well, Since my MB is out of the state, I've decided to go picked up the Cosmo so I could clean it up a bit and such...
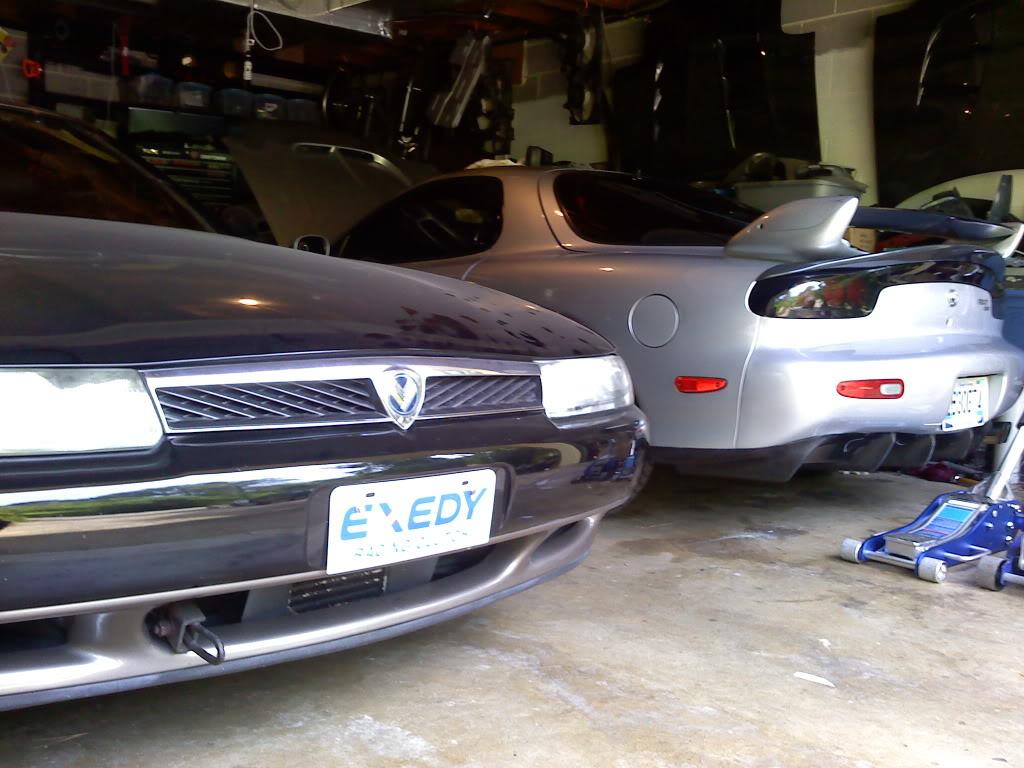
As you could see, its dusty ![]()
5-24-2010
LOL! strange questions on this forum... its Harbor Freight jack. Its pretty light.. but not super light, like some I've seen... Only if my garage ceiling was 6 inches taller, I would of gotten a lift instead.
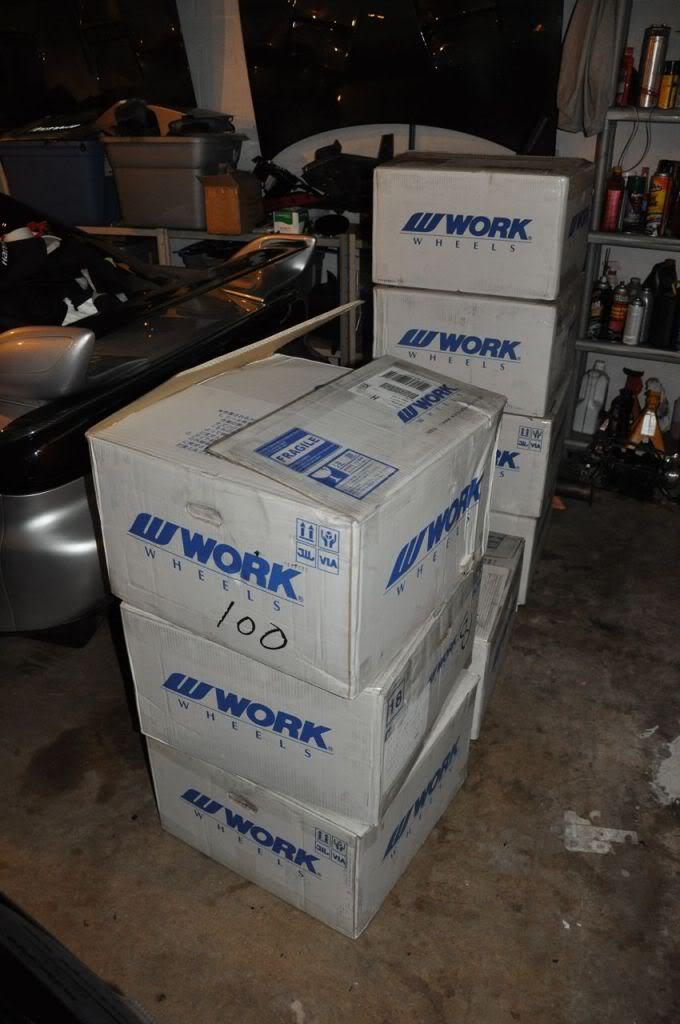
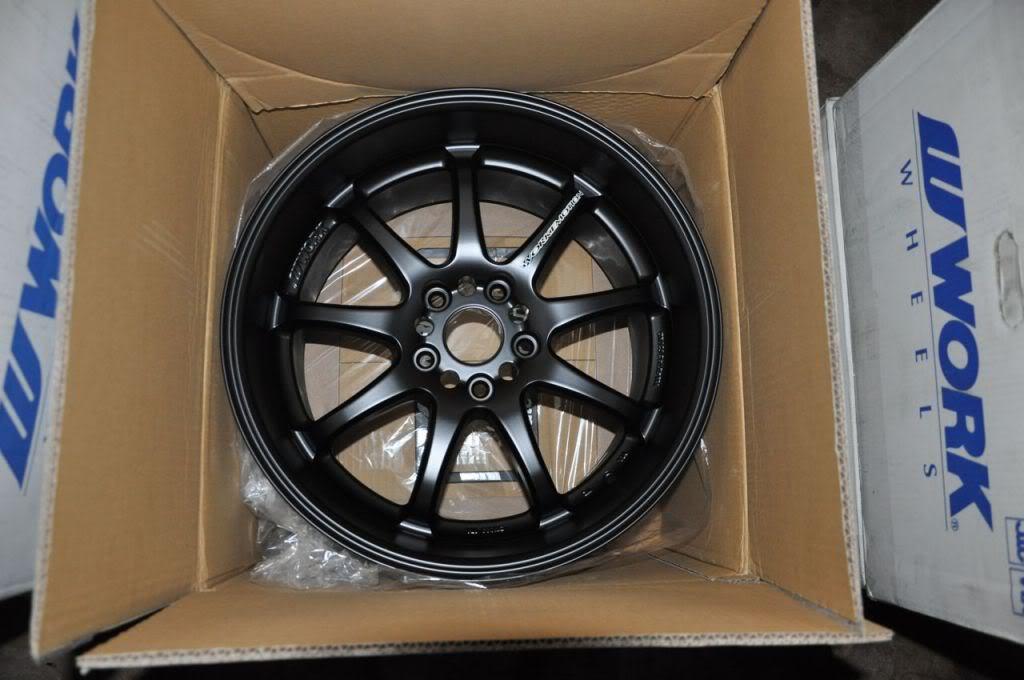
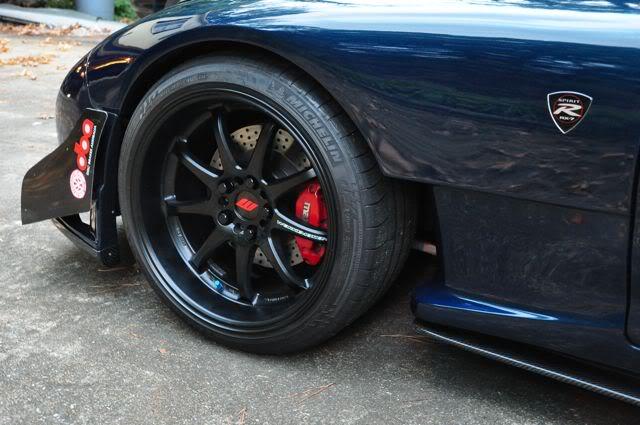
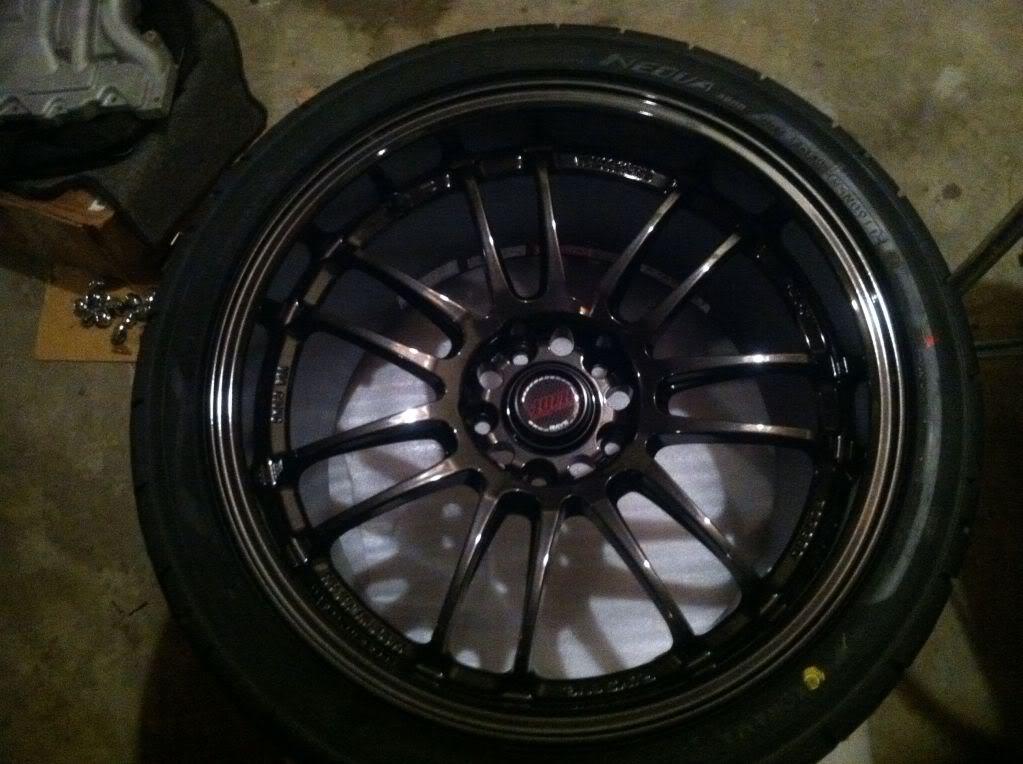
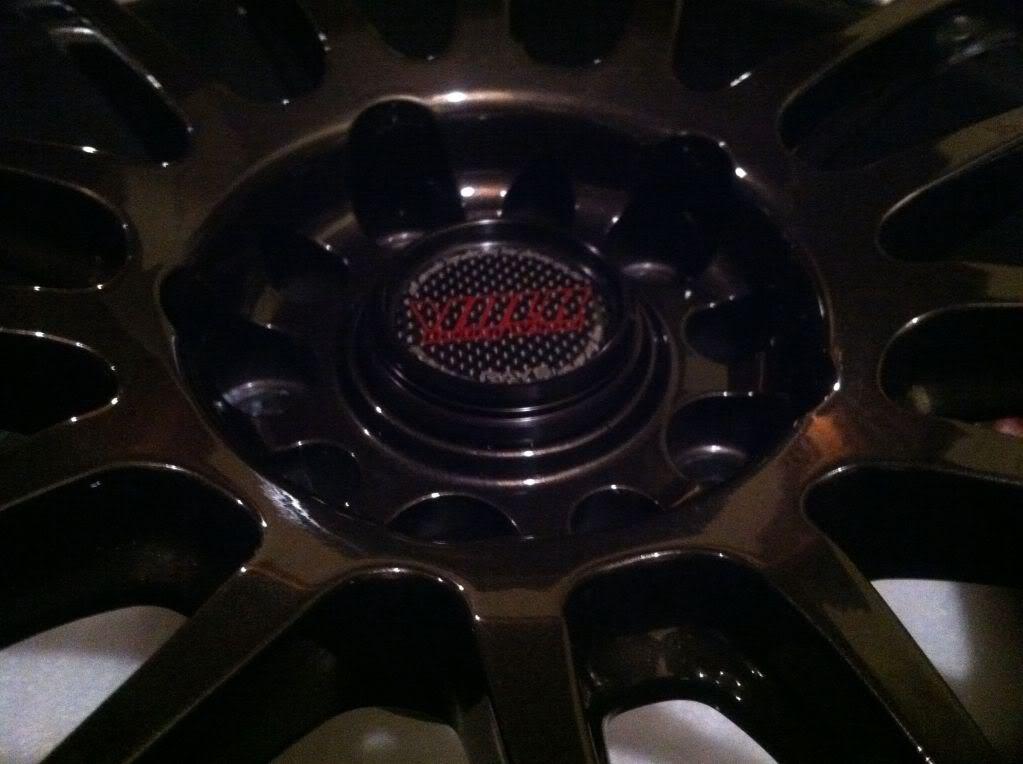
Anyhow, My new wheels came in on friday..
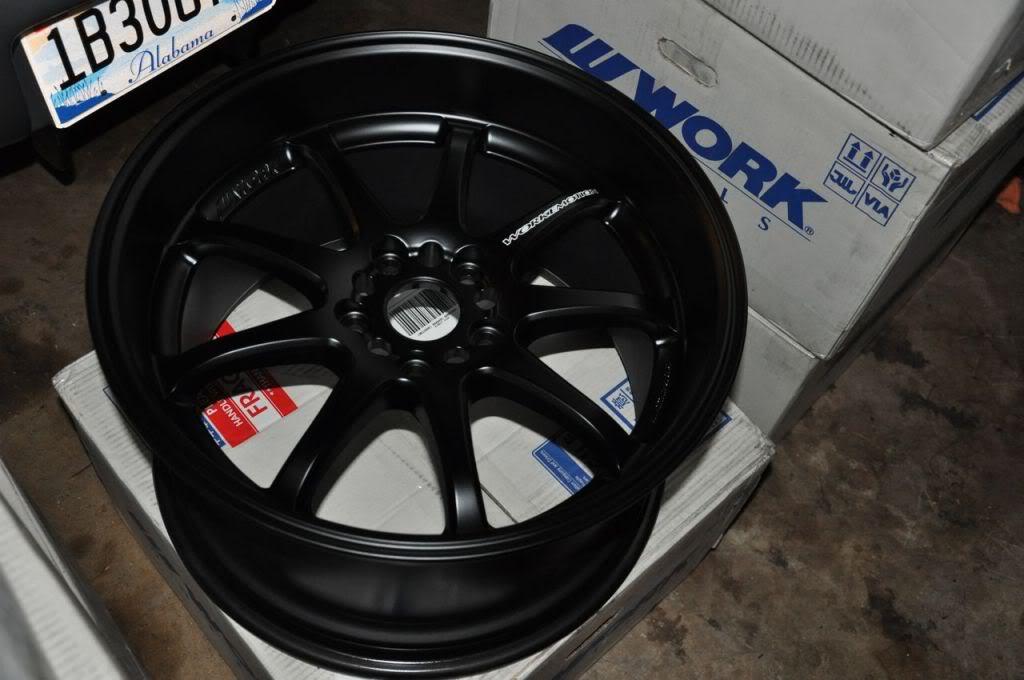

6-2-2010
Preview of my new wheels and tires.. WORK XD9s and Michelin PS2s
6-6-2010
Update..
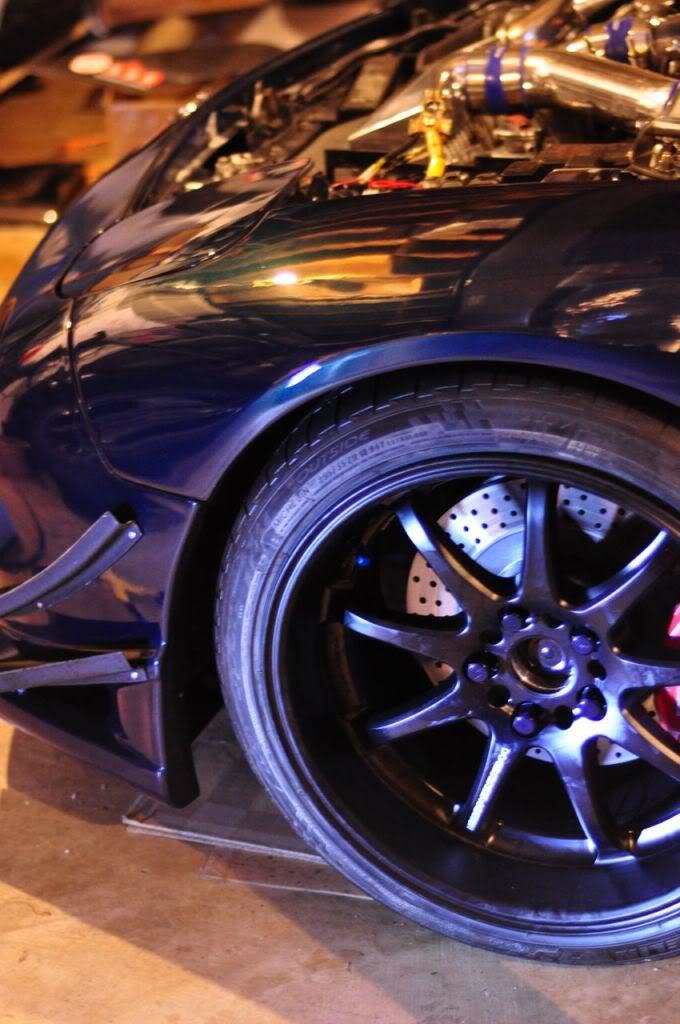
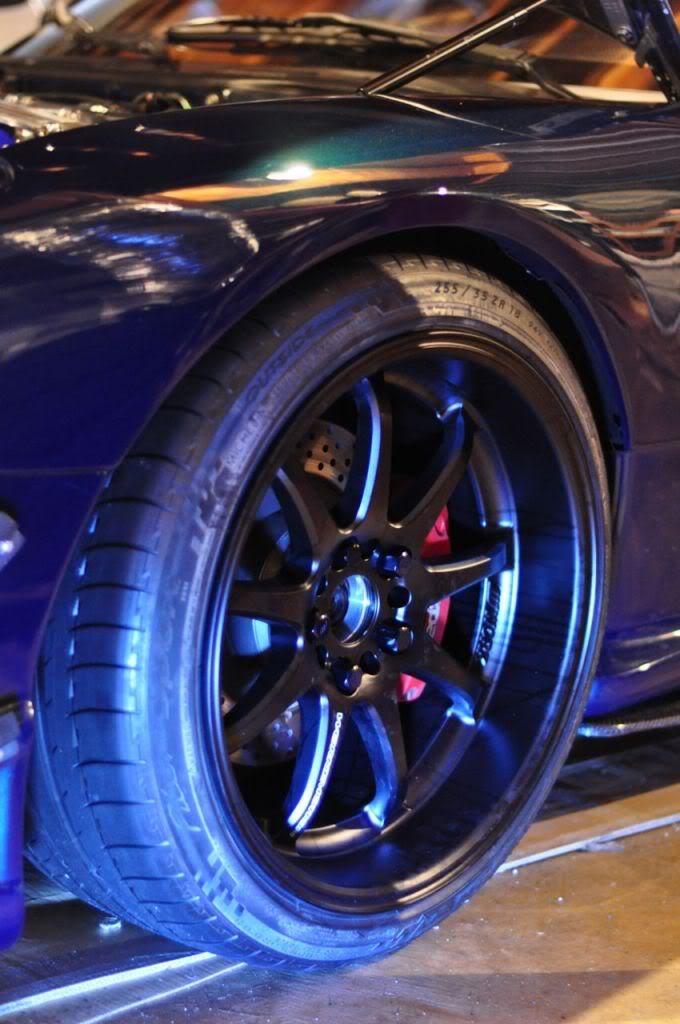
Tires are on the wheels and are 'kind' of mounted on the car. I'm using cheapo spacers to bring the wheel out in the front the clear the RZ calipers... I went out for a drive and it drove like crap because of the cheapo spacers.. I'm waiting on my 15mm spacers to get in sometime next week.
Here is how it fits with 7.6mm front and 20mm rear spacers.
Front - 255/35/18 Michelin PS2
Rear - 295/30/18 Michelin PS2
How it sits in different angles.
6-10-2010
LOL! Don't forget John, I live in Alabama ![]()
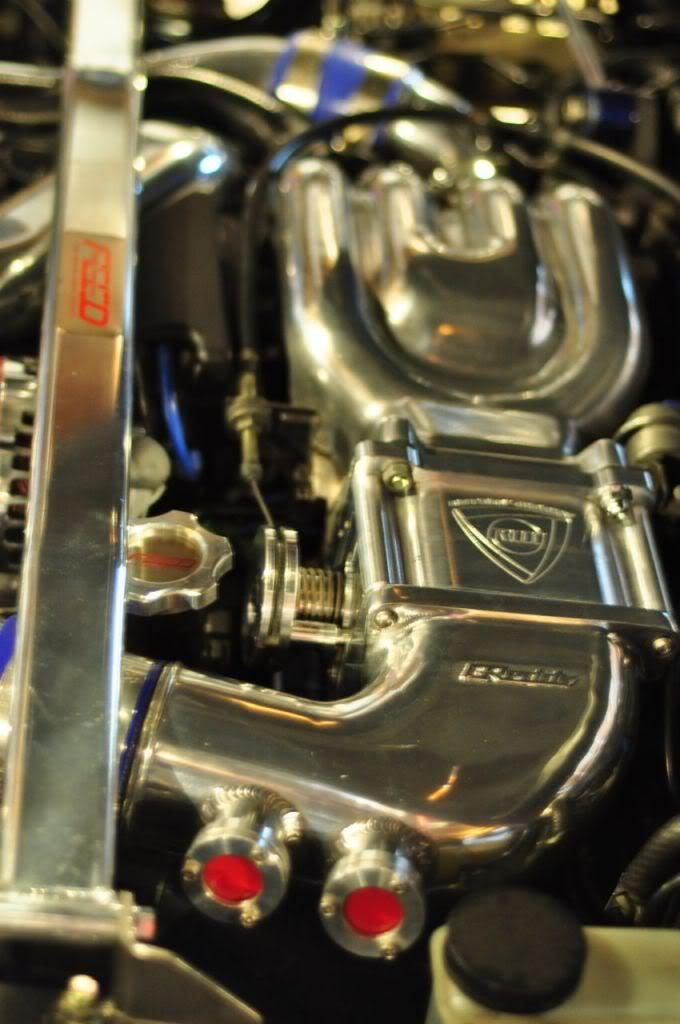
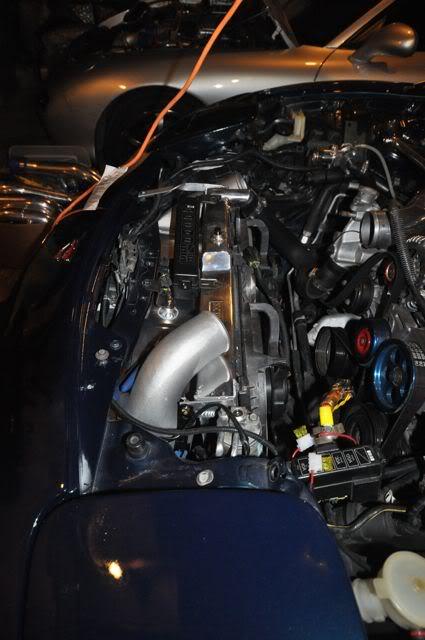
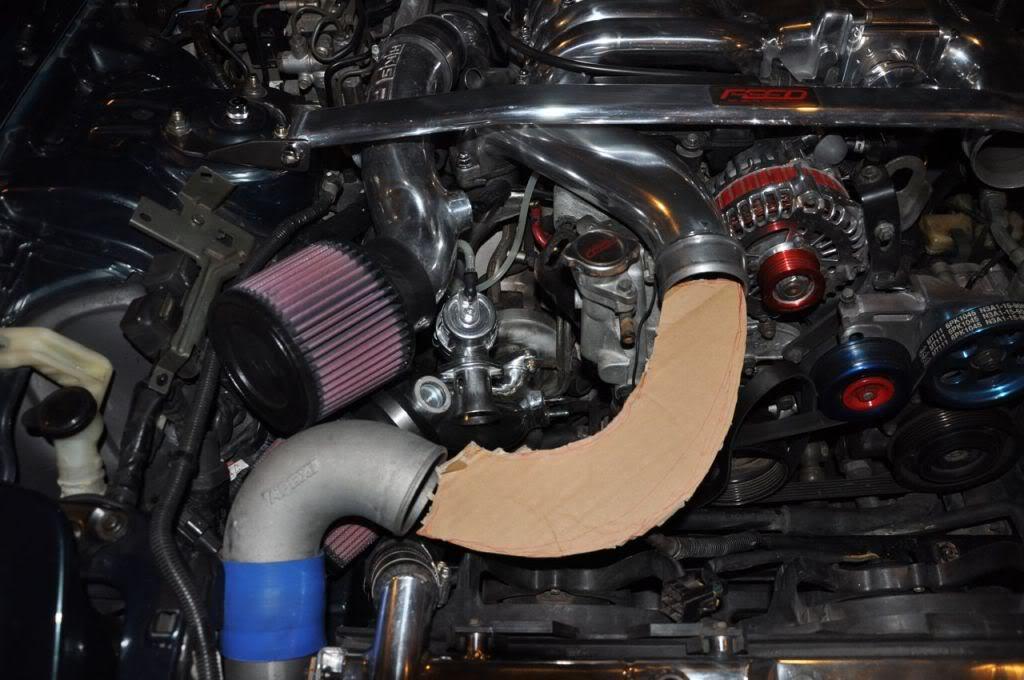
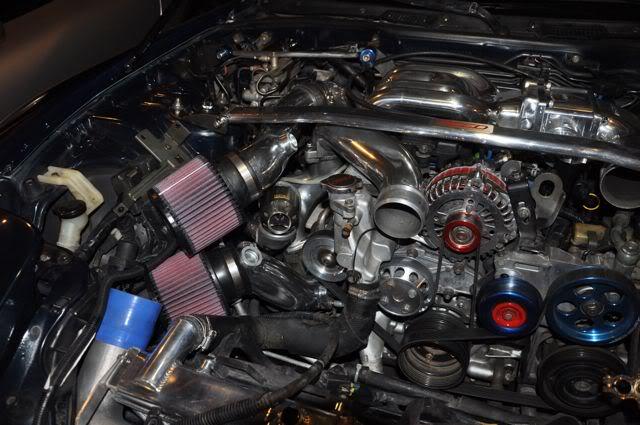
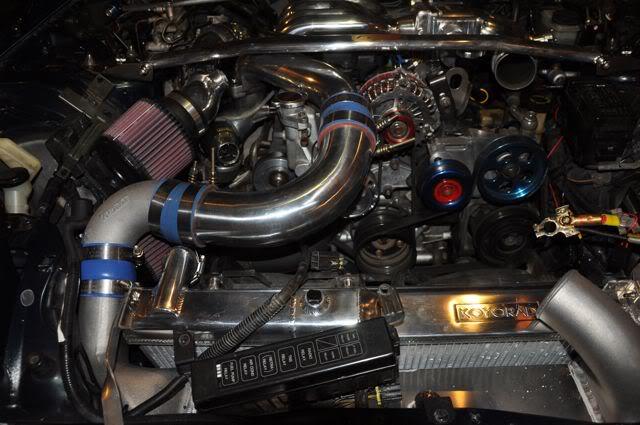
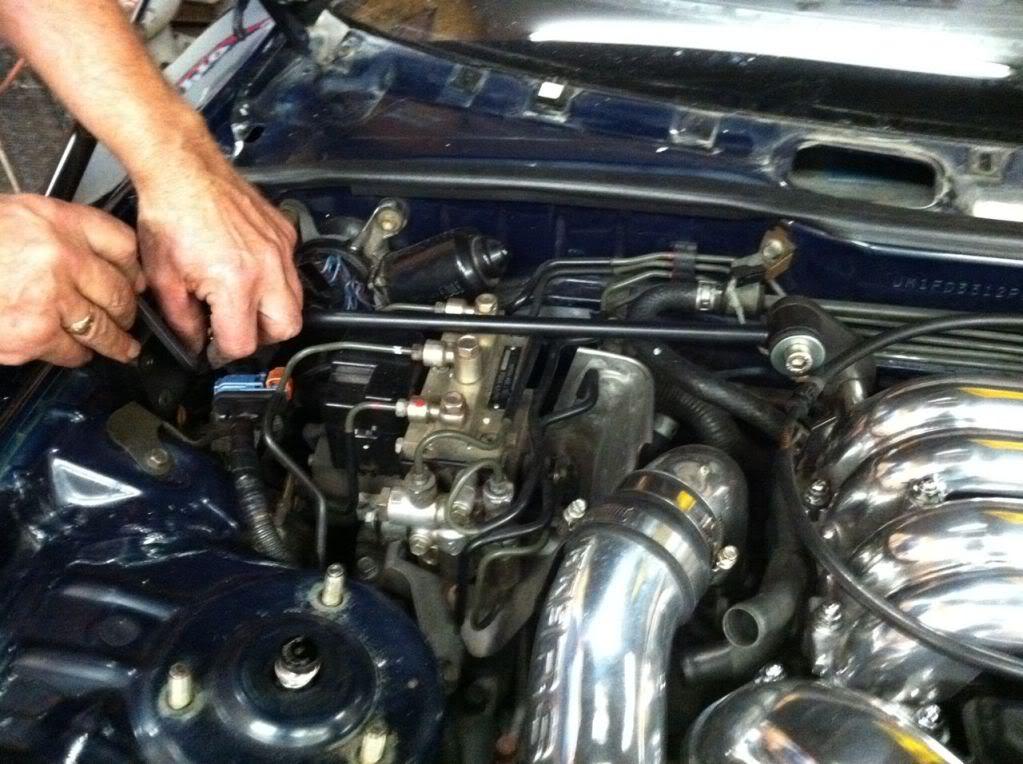
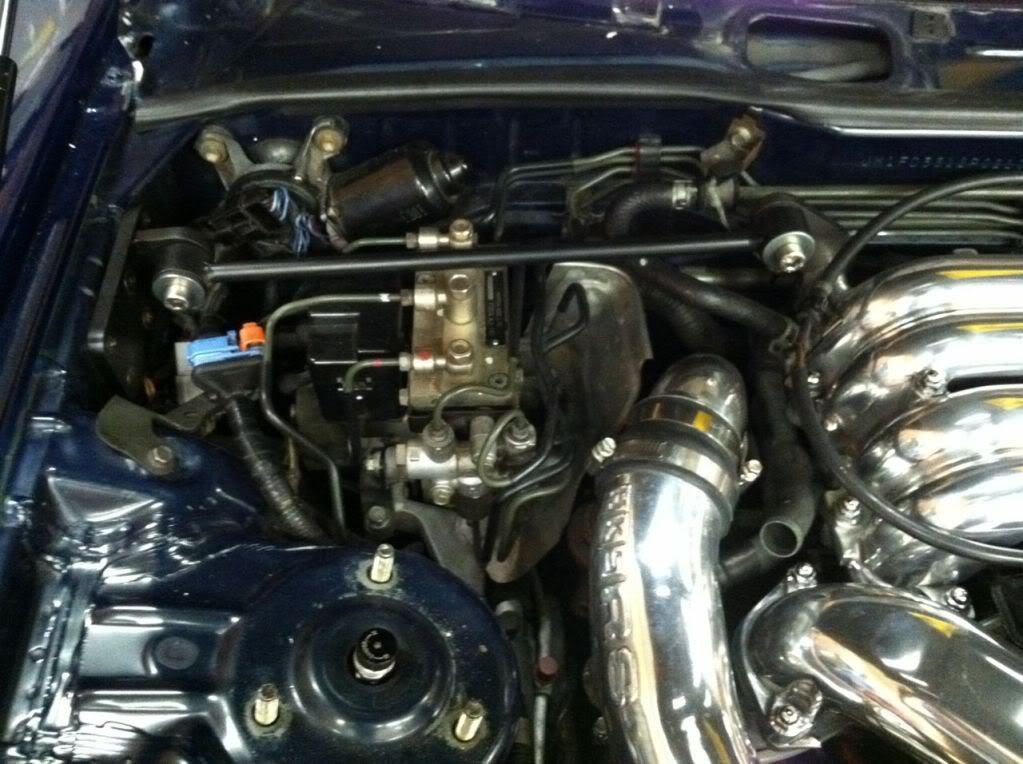
To add, here is my new TB... I'm actually re-doing this set up as we speak. I'll post more detail pics of this this weekend.
6-14-2010
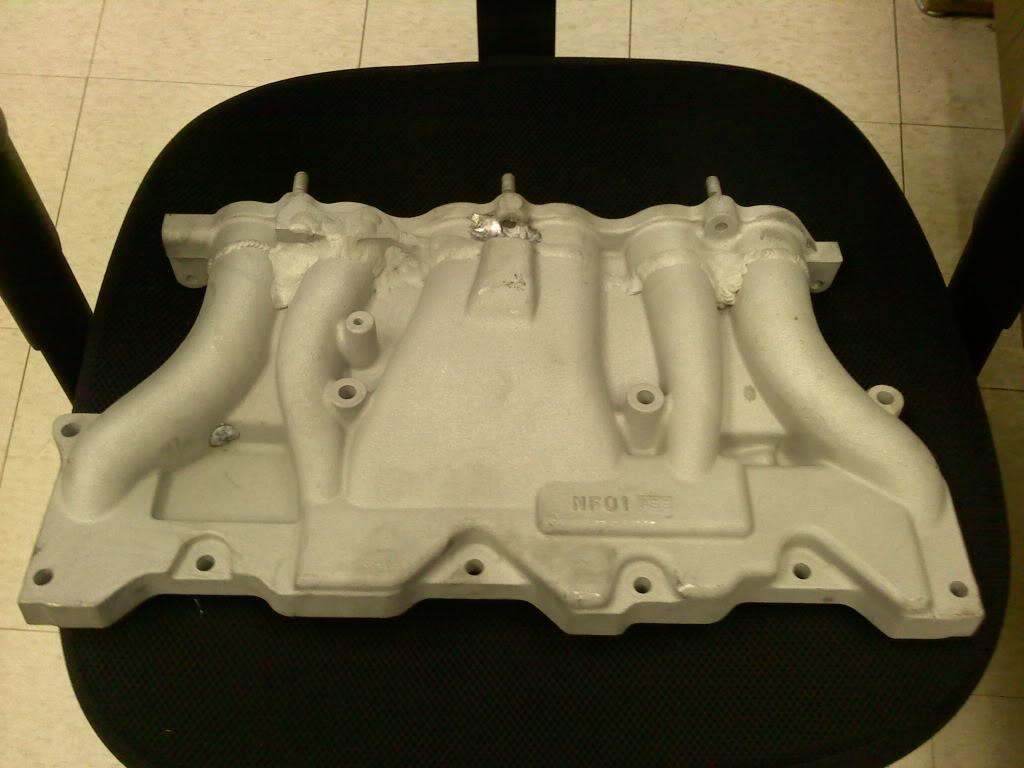
Here is my updated UIM...
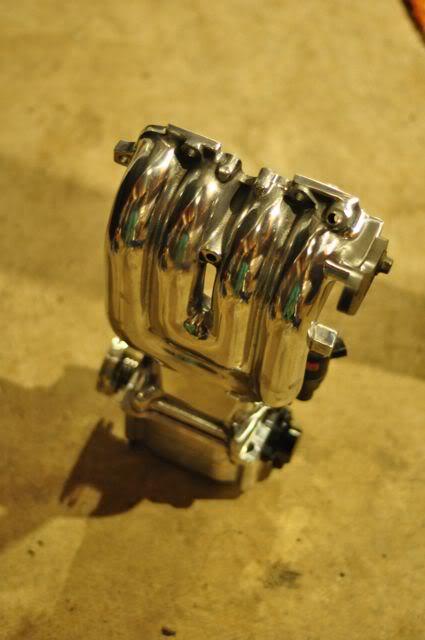
UIM I had for about 5 years... Garfinkle did his magic polishing, welding, opening up the inside, etc... I never used it because I was waiting on my larger ported stock TB... which I never got.
But since I have the Rotary Work TB, I thought I use it instead of the stock one I had on.
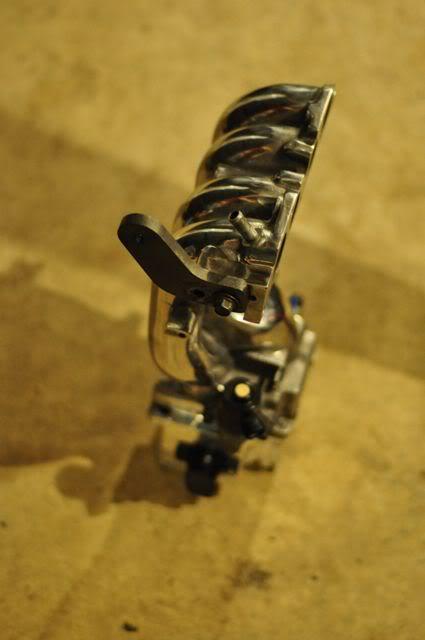
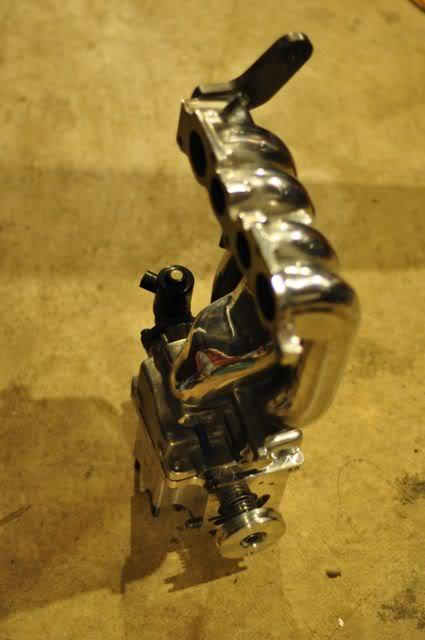
All the un necessary nipples are cut and welded... for cleaner look.
All the emission junk have been taken off..
and hole was cut on the top for uniqueness...
6-20-2010
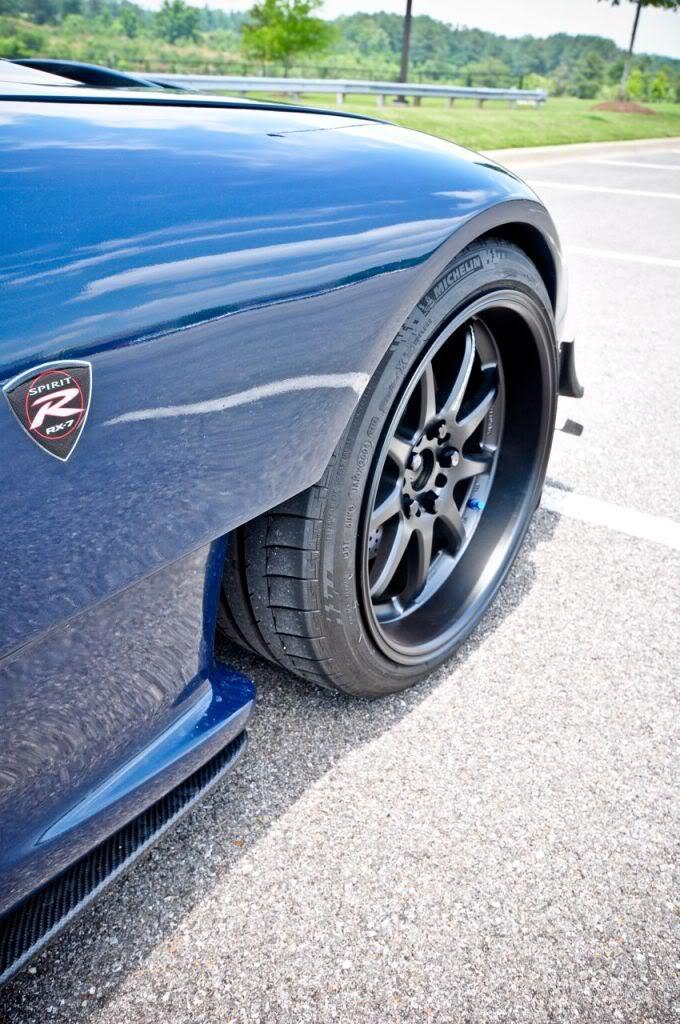
Alright.. For father's day, I had to go in to work for couple hours.. And thought I take the FD and test out the new TB and the wheel w/ 15mm front spacers.
RW TB - I did noticed a slight low end bog. But it was pretty slight. But the rev through seem bit faster.. it could be just my imagination though.
Wheels - I just love how they look on my MB. I have slight rub on the passenger side after 15mm spacer.. I'm going to find out where its hitting and try to fix it. But the stance is perfect!
Drivability with these wheels seem pretty good. I was coming back home and this M3 got behind me and started to follow.. I'm running about 10lbs of boost and through the twisty downtown hill side, the car felt great. Maybe bit better on turns... again, it could be my imagination as I been driving my daily TL and haven't driven the FD in about 2 weeks.
Here is another pic with my riced out LED lights on ![]()
And....
with the HID FEED signal lights and the LED wanna B lights..
Yes!! I admit, I'm a ricer at heart.. But at least I admit and also trying to build a classy FD (My SSM) ![]()
6-22-2010
Thanks everyone! Glad not everyone hates the LEDs..
Now my dilemma...
What side mirrors to go with..
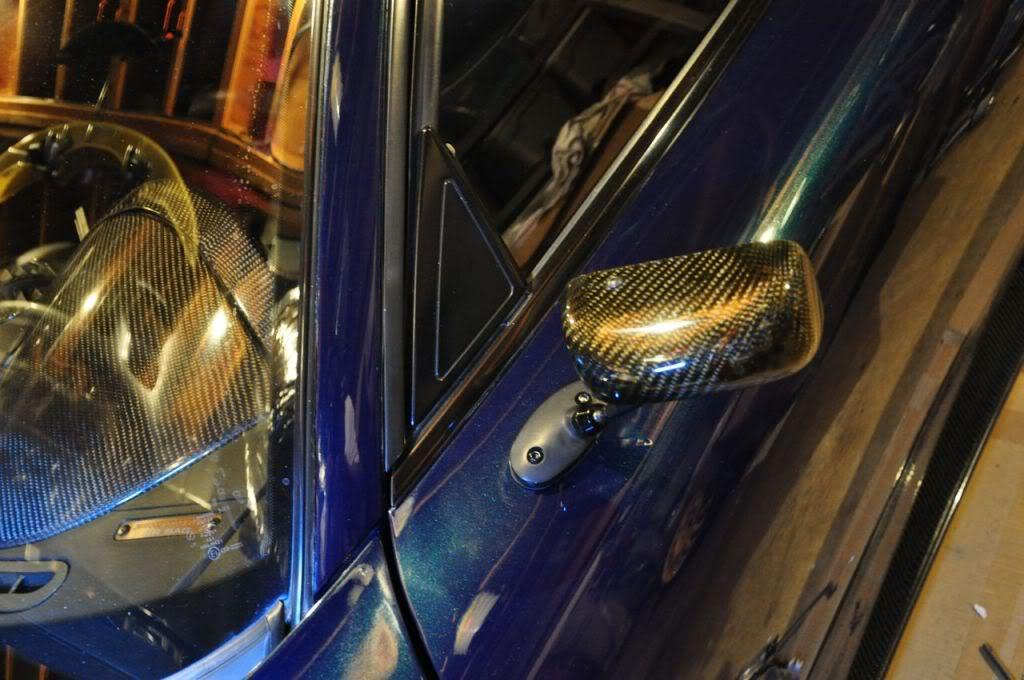
I just bought a set of APR mirrors.. If I put them on.. it would look kind of like RE-Mamamia's car.. well pretty much identical ![]()
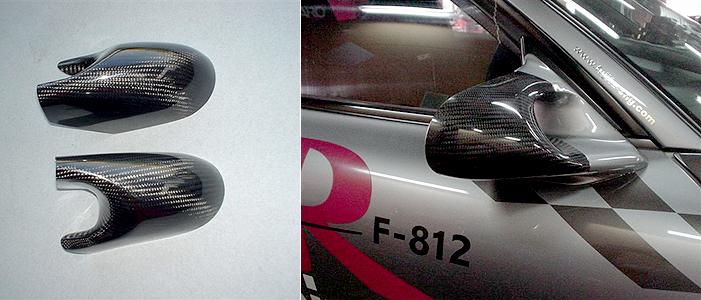
or go with Feed Ganador mirrors with FEED CF cover (which I have but lost one of the bottom base..
Or sell all these mirrors and get the Craft Square mirrors...
Decisions...
6-23-2010
I have the blue tin Ganador's... with FEED CF cover.
6-26-2010
LOL!.. I'm no baller ![]()
Anyhow...
Here are some of my recently acquired items for the SSM.. and the MB.
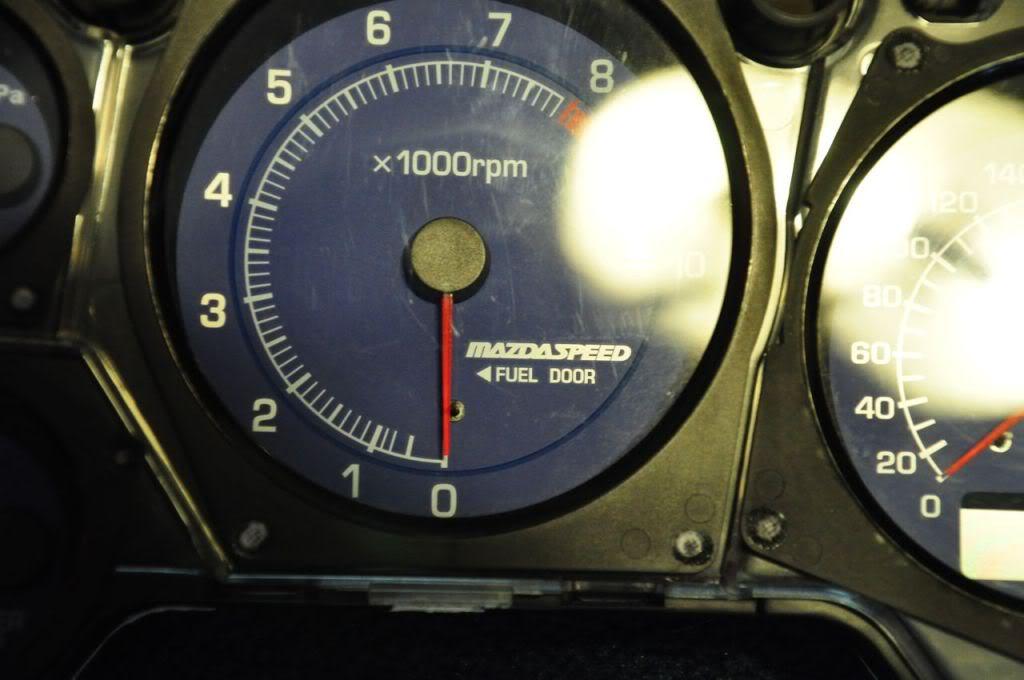
New Blue MS Cluster.

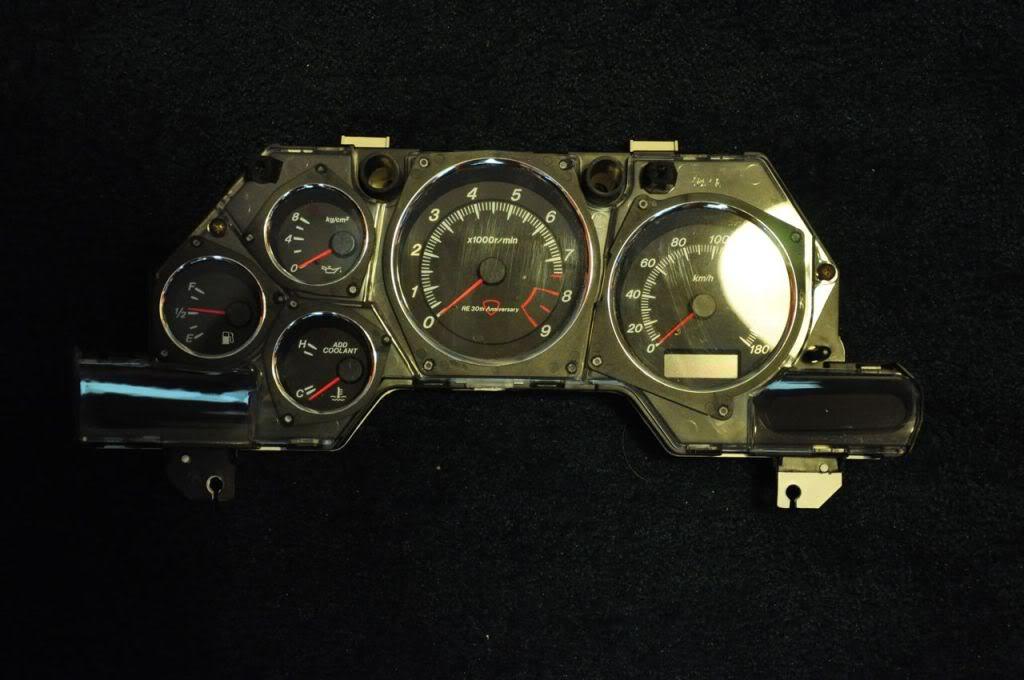
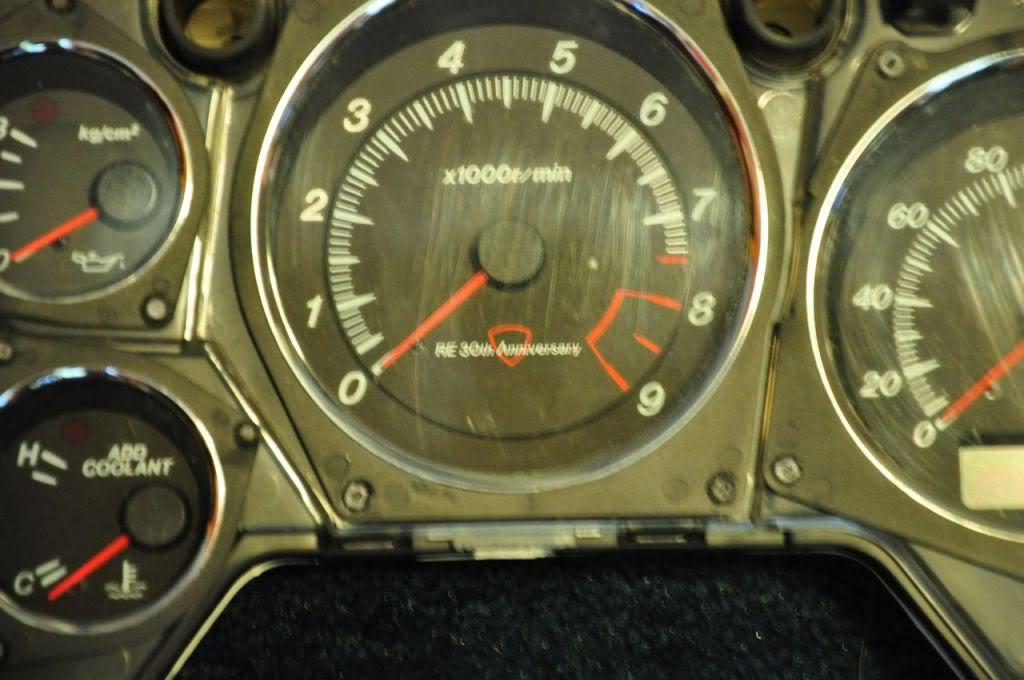
And Super rare 30th anniversary cluster.
And a sneak peek of my old Blk FD..
6-27-2010
Put the APR mirrors on the car...
6-30-2010
I should post about my thoughts on these mirrors..
Quality I give 7.5 out of 10. Functionality and Visibility, I give 6 out of 10. Install, I give 9 out of 10.. except adjusting them 3 out of 10. Its quite difficult to adjust as I have to get out of the car and such. Also, once its tighten down, its quite hard to move them and when you tighten them down, you could move the adjusted mirror and have to re adjust.
The driver's side mirror where initially would move with one finger after tightening it down. After examining the mirror, found out that the top bolt on the mirror housing was bit too long. Because of it, it wasnt going to hold the mirror in place. I had to grind down about 1/8 inch and helped out quite a bit. But overall, Not sure how well its going to hold up in a long run. But for me I bought this thing to try it out and see how it looks. Also, it will be garaged and not left outside.
i might still go back to stock or with Ganador mirrors in the long run..
7-1-2010
Shoot...
I just searched through the DGRRX pictures and realized about Papsmagu's craftsquare mirrors..
Damn, those are pretty nice! I wished I had realized it when I was up there ![]()
here are few pics I've found of his mirrors/car..
7-3-2010
It was a beautiful day today and took the car out to meet up with some classic car guys for donut and coffee... Afterwards, I took some updated pics with the new mirrors.. I actually like this mirror a LOT!! I thought it would be bit too small for the car but I think its just a right size.
Issues... At about 110MPH, I could see the mirror started to vibrate. I've tighten down the driver side but it vibrated bit more than my liking... I'm going to try to figure some way to tighten down the mirror bit more.
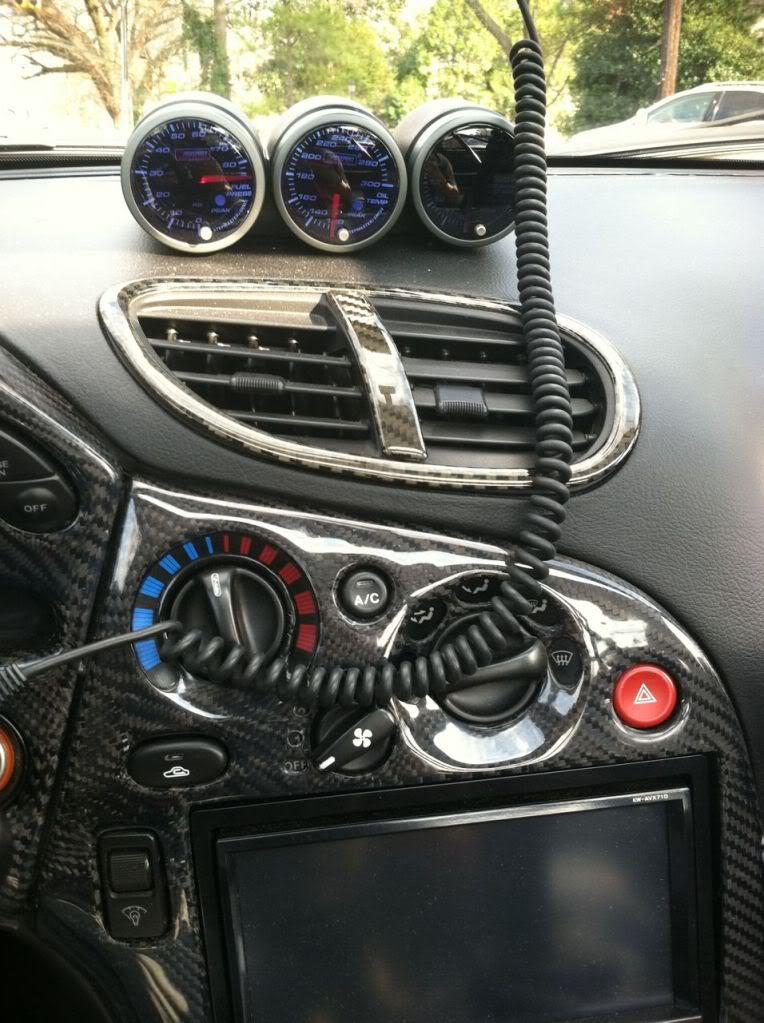
And my interior with Prosport gauges and their center speaker pod.
7-4-2010
Thanks David for that pic. That really shows how the mirrors look.
Simon, You car is Awesome!! One of my favorite FD's!
That being said, I have few more pics from yesterday ![]()
And My interior shot from the back of the car.. Its little dirty back there ![]()
Thanks Everyone for the kind words..
Here are couple of more ![]()
7-18-2010
Picture of my car from this weekend... at Import Alliance meet in Nashville.
I didn't take this pic... but I like it as the car shines really nice ![]()
7-21-2010
Thanks for the kind words guys..
I'll be doing few more things to the MB but I need to also work on my SSM. I'm going to put my recent add on and take some pics over the weekend.... hopefully some of you guys will appreciate the new look.
Anyhow, Here is another pic of the MB FD from IA 2010.
7-22-2010
After waiting, I finally got something for the SSM FD ![]()
7-23-2010
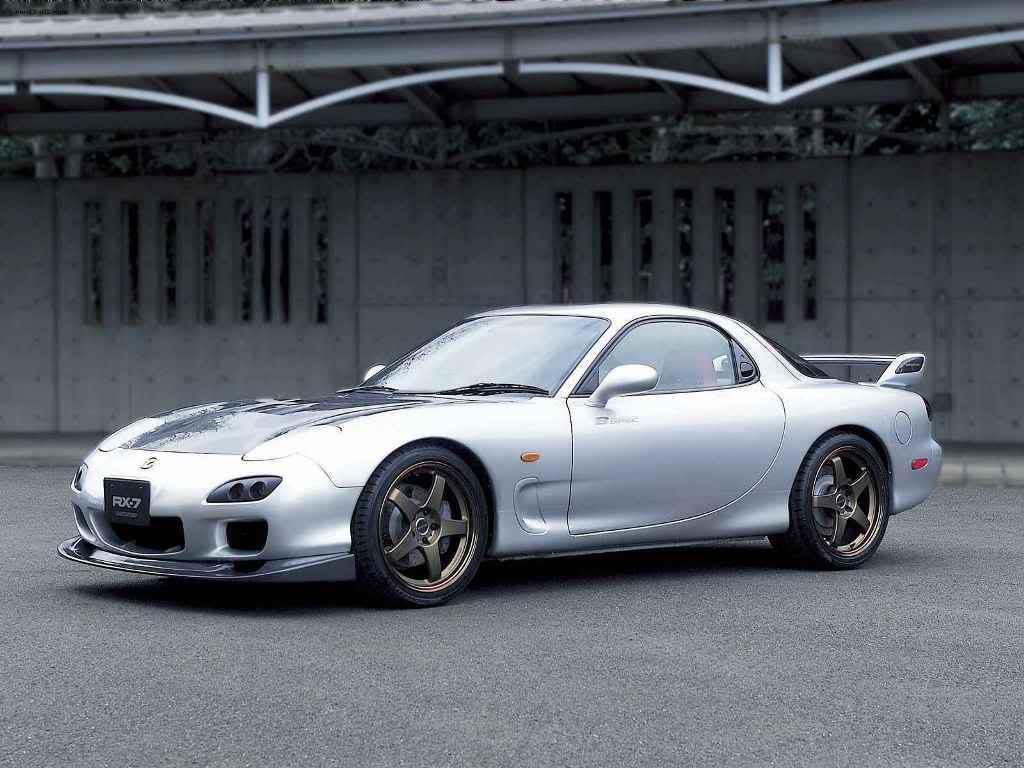
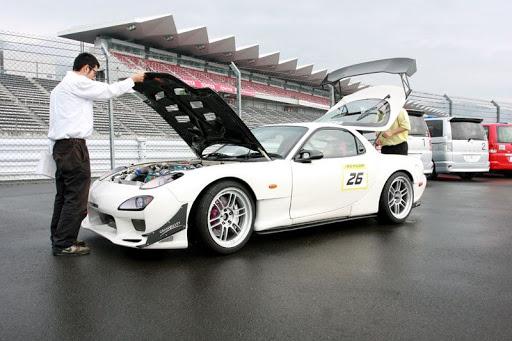
I am trying to get the car to look very similar to this B-Spec RX7... with some rare Mazda/Mazdaspeed parts inside and out... I'm getting pretty close to getting all the parts I need.. Now just getting off my *** and put some of these parts in... including some unique stuff in the engine bay (I'll post details to it later... but I been planning it for about 6 months) which will also include all mazda stuff ![]()
7-27-2010
Thanks John!! I didn't know I made it on there ![]()
Also, here are some pro took of mine on flicker.. They are pretty bad ***!!

I really want the rolling shot!!
7-30-2010
DGRR Fall event is a no go... I'm just too swamped with stuff.
SSM FD, I need to pull the engine out and going to put my RZ tranny and built 13B RE engine with 99 twins. When I do that, I'm also going to put all the rare MS junk on it, including the super rare CF intake.. Also, I have things worked out where I'm going to used the 99+ black box to run the twins and such. But that's going to be a while because, I have no time ![]()
MB FD, I'm going to start putting the 3 rotor on an FD subframe and start getting things ready for a swap. I'm currently talking with people about going Haltech or AEM. Also, while I'm doing that, the car will get a new face lift and more of a show show paint job.. Mainly get rid of all the waviness on the body including getting rid of the bottom rock chip finish on the door. Hopefully the car will go in the shop in couple of months.
Cosmo, I'm also going to take it in for a perfect black paint job and more updated electronics in the car. I'm a huge McIntosh audio guy and have been collecting those for about 5-6 years. I'm either going to put that in the Cosmo or get a new Navi system. But most likely just go with Mac headunit, amps, etc on the cosmo as I think it matches the 90s awesomeness ![]() I just wished I had more time...
I just wished I had more time...
8-14-2010
The Greddy SMIC, Custom IC duct, hard pipings, M's/ Blitz Intakes, and the CF cooling panel are forsale as a package. I'm asking $1500 for all... But most likely its spoken for. But if you are interested, let me know and I'll let you know if the deal falls through.
UPDATE:
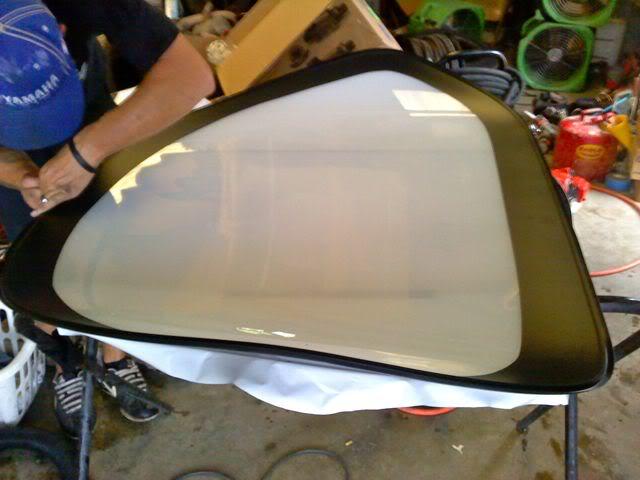
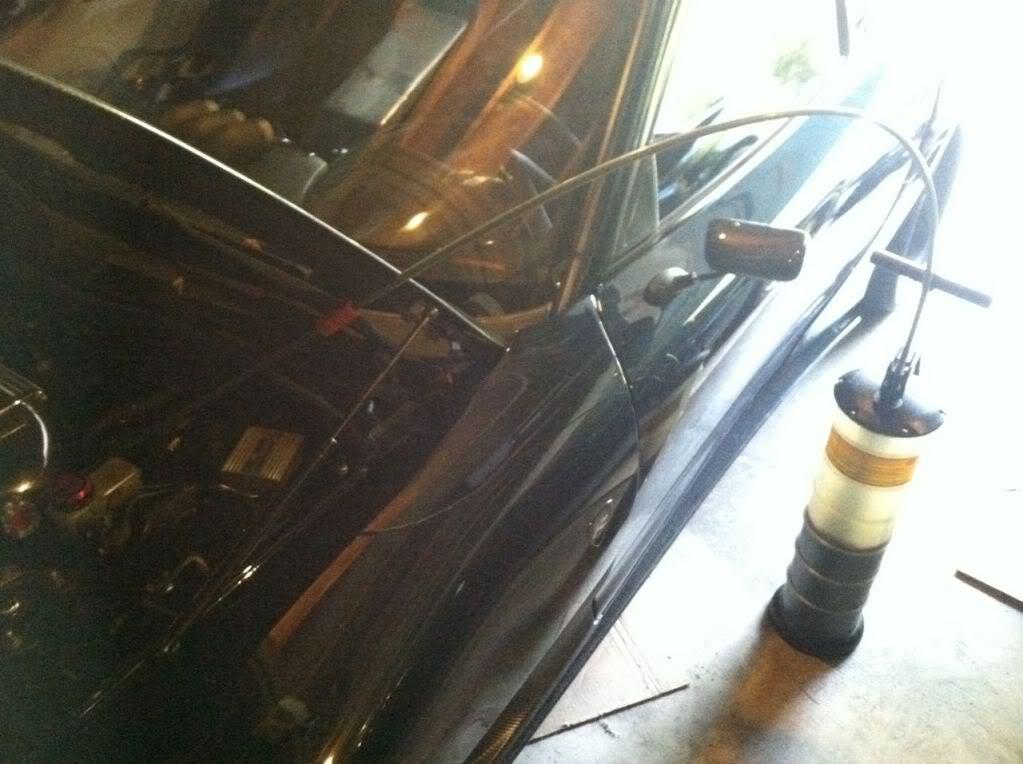
With help of a good friend Leo, I made an appointment to swap out my 15+ year old windshield. Windshield was in decent condition but I hated the 90's style tint on the top and wanted to have a clean, well visible windshield.
A local guy name Brian who does many show/performance cars removed and installed the new window for a very reasonable price.
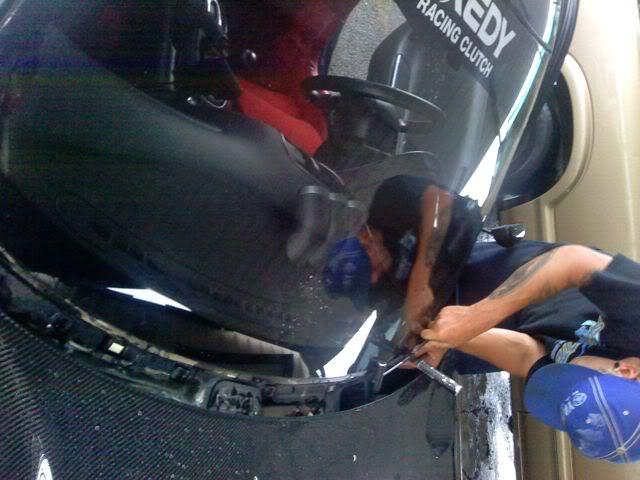
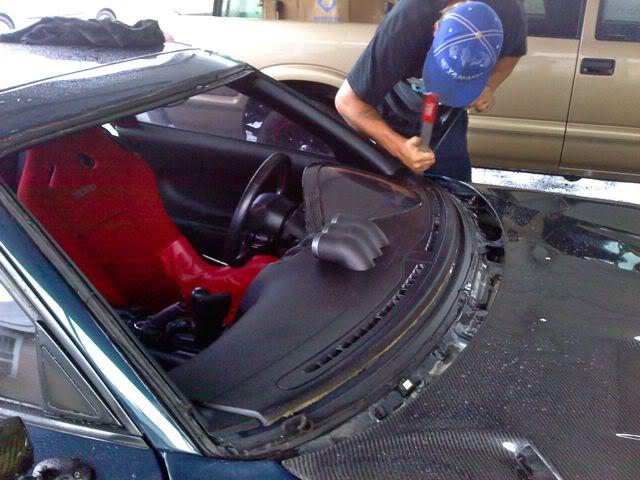
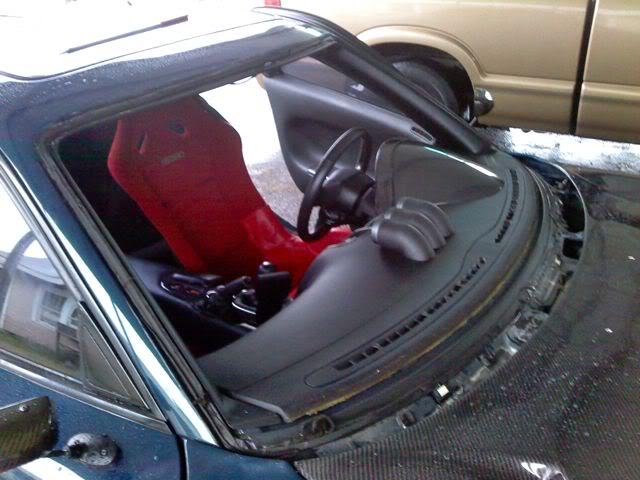

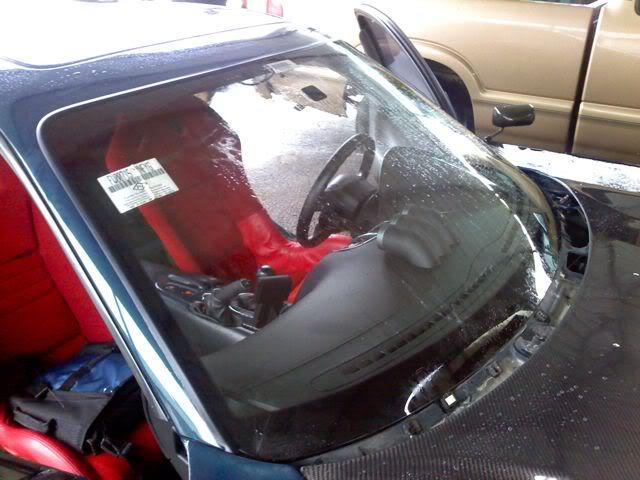
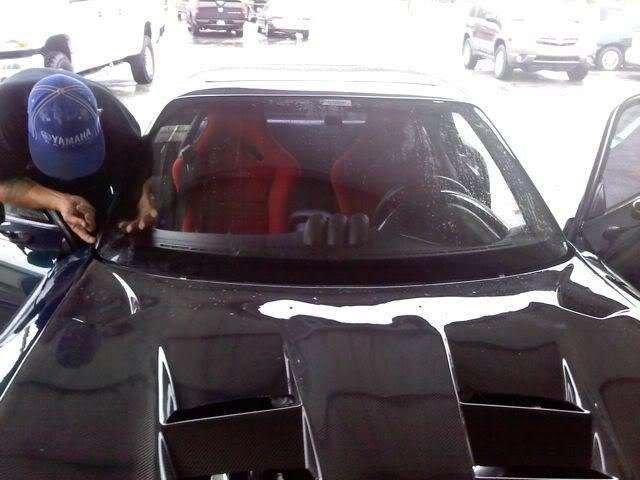
Bad thing was that it was pouring rain all morning and I had to drive the FD 30 mins to get to the shop. But all went well and made a huge difference on visibility. Also, my weather strips needed to be replaced and this made my car look newer.
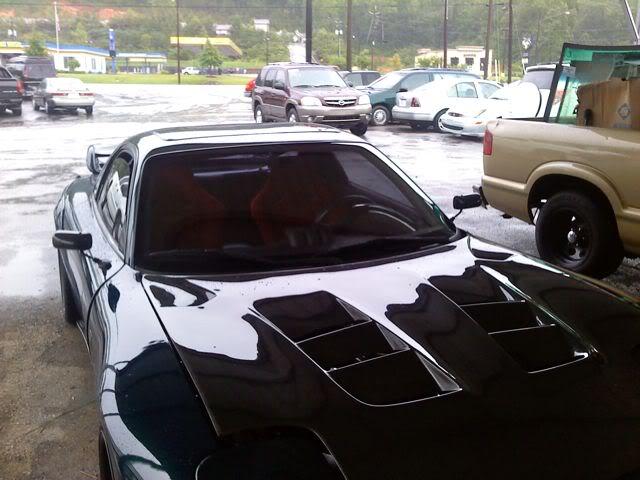
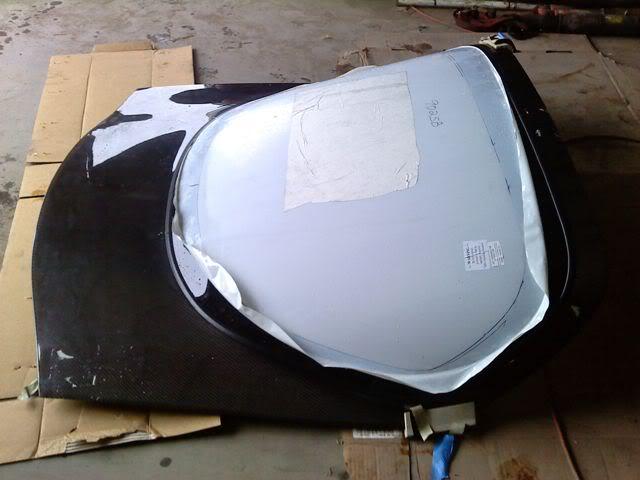
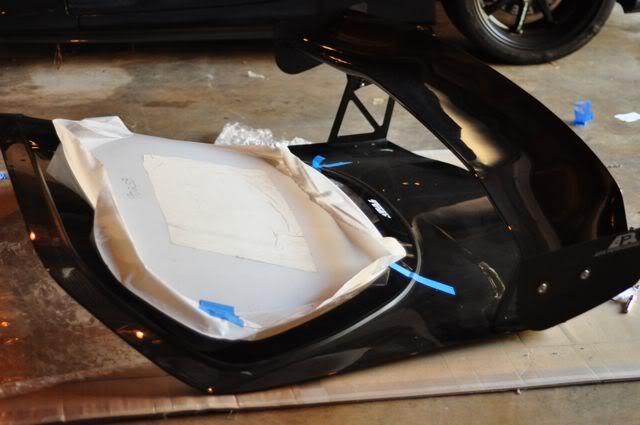
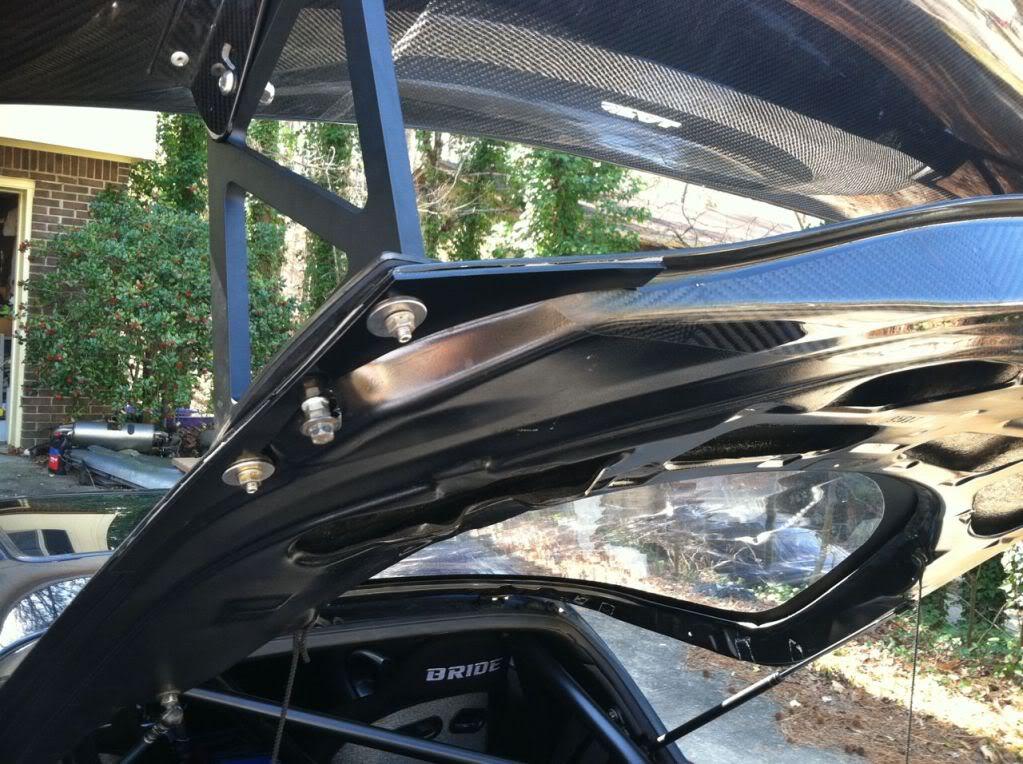
Since I was getting this done, I also got him to do my CF hatch with Lexan window. Again, he took his time and did an awesome job. FAL recommend not to use any trim but we decided to see how it looked with the trim and looked great. So, we lined it up and sealed it.
Someone also asked me before about how the car looks with FEED lights and the LED.. So, here are couple of pics.
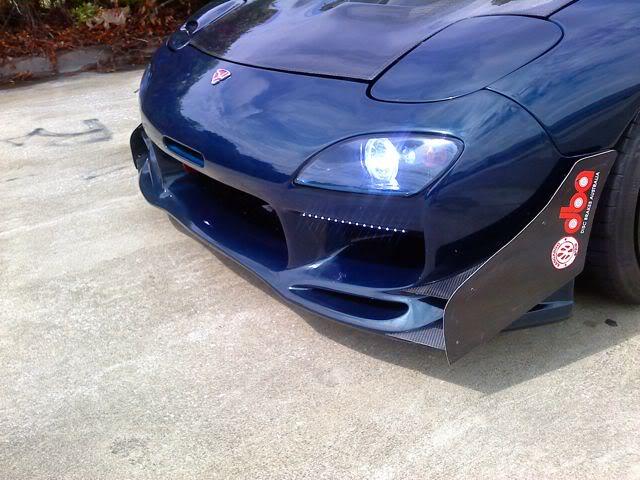
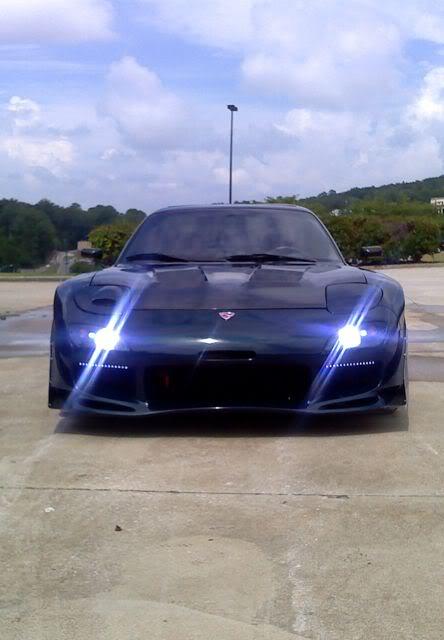
Sorry.. I didn't bring my SLR..
And finally, I got the theorie's LED ring tail lights... Here are some pics of the rear with his lights.
Car is filthy as I just drove over an hour in the rain... But MAN, did I enjoy driving this thing...
9-9-2010
Its been about a month since I've updated this thread..
Well, I've now gotten rid of my Greddy SMIC, Blitz and M's intake, and few other things and getting ready to put a new IC and Intake.
Also, I've recently got these parts that I'll be installing hopefully in next couple of months.. pending time.
DBA 5000 rotors with custom rotor hats by E&J Autoworks... It was pretty expensive custom hats but fitment on the rotor is right on.
New seats...

And new mirror that would go on with new front end ![]()
I would like to thank the person who sold me this.. you know who you are ![]()

9-11-2010
Update...
Well, I have now collected most of the wing that came on FDs.

Also, I decided to take the SSM FD out for a spin.. Its coming along... few things I need to install, take out, etc..
9-12-2010
Thanks!
I have to give credit to Chris Allen my painter in ATL, GA. He's a great paint and body guy. Color match was VERY good.
Here is a better pic of the hood and the fitment (I need to adjust the head lights.. didn't have much time).
I have to change out the front lip with CF lip, lower the car, put different wheels, and going to do something unique with the engine.
I'm getting the engine build in next couple of months and going to be unique in set up... its still going to be all Unique mazda parts ![]()
10-15-2010
^^Thanks! Glad to hear my Build thread has gotten you motivated..
Update: I had one day to work on my car last weekend... I took the old set up and put the Apexi GT spec FMIC on. Problem was that it was made for a single turbo and I was missing this piece (in Red Box).
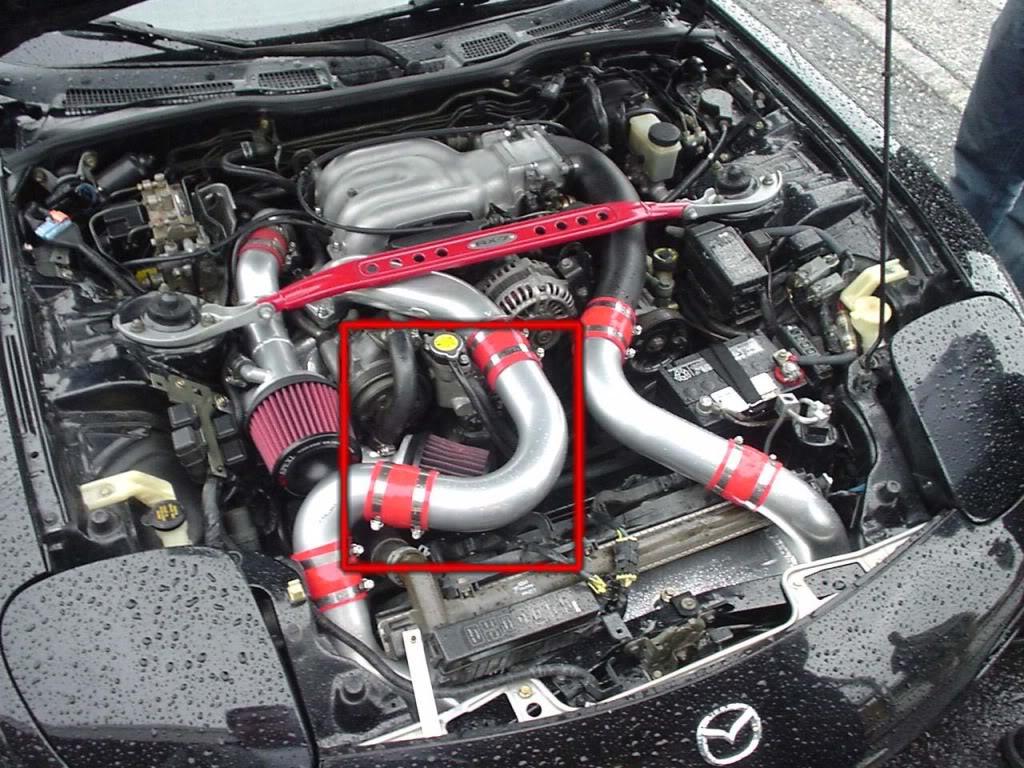
I have all the pipings except for that piece and waiting to hear back from couple of people to see if they are willing to get rid of it. If not, Bryan from BNR Supercars (www.bnrsupercars.com) is willing to help me and fab me one.
I'm also installing a Koyo N flow with 2 x stock 4 blade fans. Since SMIC is no longer being used 2 x 4 blades should work well pulling air to my rad. I'm also going to change up the intake and use my HKS intakes on the SSM FD.
I'm also waiting on a new engine to arrive for the SSM FD. I think some of you will like what I'll be doing to that car ![]()
Update from Tonight..
Man!! The Apexi FMIC and Koyo rad doesn't fit well with complete AC unit!!!
Koyo is too thick so none of the radiator related brackets that came with Apexi unit does not work.
I'm about to rip out my AC on my MB FD... decision, decision... I don't need AC anyhow and I'll be ripping it out when I do the 20B swap.. Should I rip it out now??
Or keep using the Mazdaspeed rad or find a stock radiator.
10-16-2010
LOL! I like V8s too ![]() Maybe someday I'll pick one up with a V8.
Maybe someday I'll pick one up with a V8.
Here are few pictures from today..
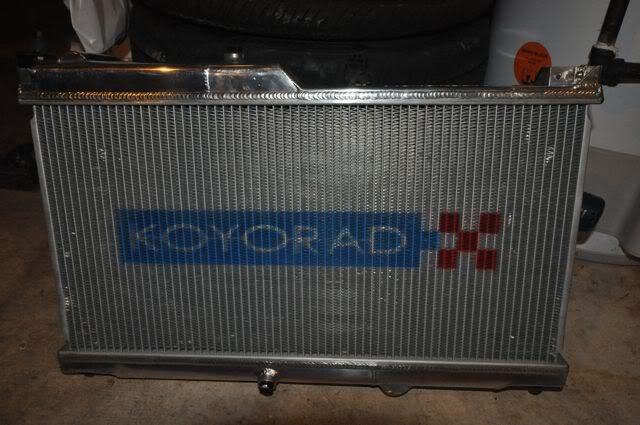
My Koyo Rad with 2 x 4 blade fans... I need to extend the wires.
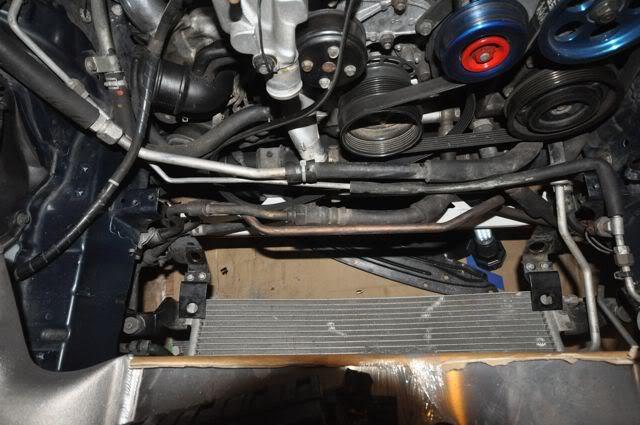
Using Greddy FMIC radiator mounting points vs. using Apexi radiator brackets.
Rad installed!
Tomorrow, going to install the HKS intakes, make mounting bracket for the AST, cut the battery tray for a new Braile battery, tension pulley kit, and hopefully find a missing Apexi FMIC pipe ![]()
10-29-2010
Latest update..
Well, some progress have been made..
I've taken off all the secondary pipes off of the HKS RS intake pipes and blocked them off. Test fitted on to the turbos and everything seems ok, except my old Blitz BOV was in the way. I've now decided to use the HKS BOV Seq. that I found.. but the bracket thats for the FD is actually for the older 93-95 y-pipe and not for the new 99+ y-pipe. Now I have to again make another bracket so I could mount it properly.
I also removed the airpump and installed the Tweakit Racing tension pulley kit. But it requires a new belt which I lost (somewhere in the garage). I just order one and going to go pick it up from the local parts store.
And finally, I've mocked the IC piping and Bryan @ BNRSupercar is going to fab me one tomorrow afternoon.. Hopefully, I get to drive it this weekend ![]()
Got the HKS BOV adjusted, HKS intake installed, and Tweakit pulley and new belt installed.
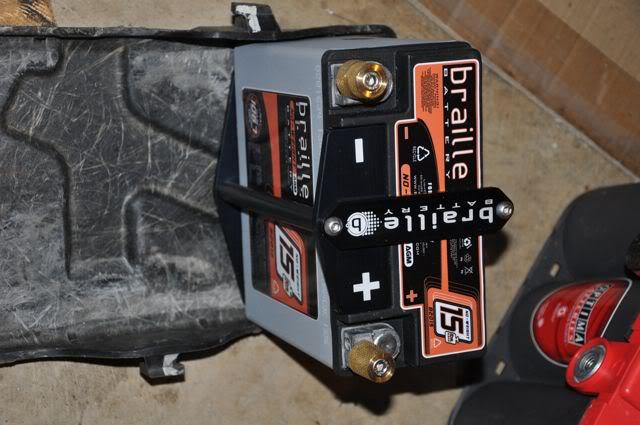
And because of the new Apexi FMIC, I now have to go with smaller battery. Luckily my Braile battery came in today!
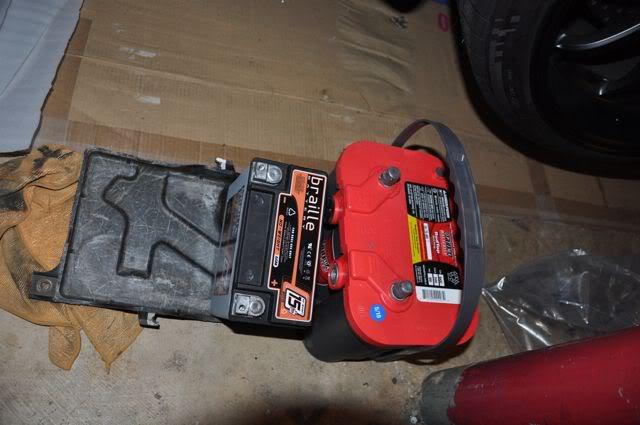
I have to do some cutting of the stock tray, but the B2015 Braile fits really nicely in the corner of the stock tray. But I'm also waiting on the Braile vertical mount to come in.
10-20-2010
Thanks David!
I hope it works out.. So far, all the measurement fits so I think it will work out fine.
I ended up buying their normal 15lb battery (B2015) and the vertical mount kit.
Here is a picture of test fitting on to stock battery tray..
And Thanks to Bryan from BNR, I was able to get the piping made from the y to the intercooler.
I'm getting close to finishing the set up.. Hopefully crank it on saturday.
10-21-2010
I think KKMpunkrock2011 answered the question to this... Efini Y-pipe is different from 93-95 US ver. FD's and the top tube is bolted and made out of aluminum. I could take it off, cut it, clock it, etc.. but that's even more work than to just fab up a tube. Also, personally (I'm sure some will disagree) but being straighter might make 'some' difference, but to me, I'm not pushing nor in a competitive race to make any difference to me.. And if I was in that situation, I would of put in my 20B, a big single, and make more power.. But I'm neither of that person. When my 3 rotor goes in, I'm just looking for reasonable power (500-600RWHP).
Anyhow, I got home early and did some more work to the car...

Cut the stock battery tray, mounted the Braille vertical mounting kit, mounted the battery, installed all the radiator hoses, fab'd a simple AST mount and mounted the AST... Now, I'm going to test for any coolant leaks, put the undertray back on, extend the radiator fan connectors, and get BNR to make me another IC piping.
10-24-2010
Update...
Well, I got everything in and did some warm up and shut down to check to make sure nothing was leaking and hitting the car. So far, everything seems fine ![]()
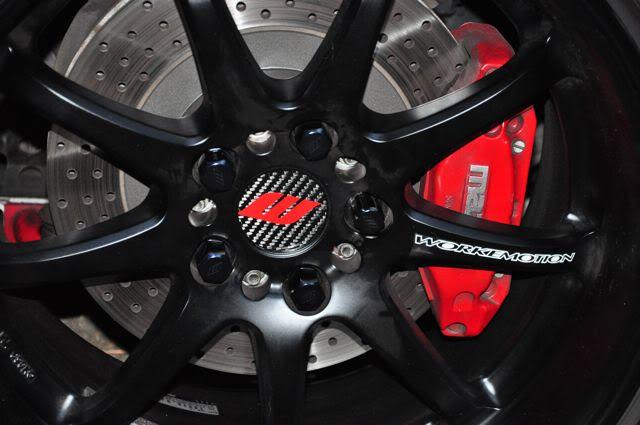
I also decided to make some carbon fiber center caps for the wheels... I hate seeing the hub ![]()
10-26-2010
Thanks Kyle! I appreciate the compliment!
SSM - well, I'm getting the engine built as we speak.. I'll take pics as I build up the car. In some ways SSM will be more rare than the MB.
Anyhow, I would like to do a poll to see what you guys like better...
With or without the carbon lip rear spoiler.. I'm leaning towards putting it on as I now have bits here and there carbon.. Also, its not too flashy and sometimes I don't even notice it..
Please post your thoughts.
Without

With
^^True.. I do have all sorts of crap on this car ![]()
Like the canards, Auto Exe wing, CF fuel door, etc... Damn, I'm a ricer ![]()

Mike, no offense taken.
If you see the history of my ownership of these cars, I initially had this car as basic 99 spec'd out FD (and going to build the black FD to go crazy with). But now black FD is gone and have replaced with a mint 94 SSM, I've decided to go bit wild with MB vs. keeping it simple (not fun to have 2 FD's all 99'd out). I guess this is my rice side and the SSM will be more of 'purist' with all unique OEM and Mazdaspeed parts in unique set up (which I'll share as I build it).
That being said, I do agree and I've kept simple over the years with 99 stuff vs. crazy bumpers. I had 99 bumper since 2001 (one of the first few in US) and I had the real FEED type 2R bumper since 2004ish. And I will be replacing the FEED with something else shortly ![]()
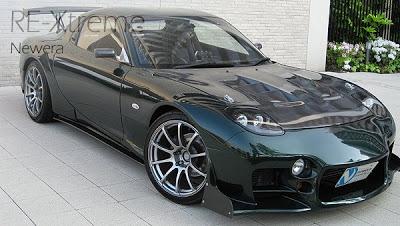
RE-A N1 2002 with CF undersweep.
10-27-2010
Today's Update...
I went over to BNR Supercars during my extended lunch break. I had some old pipings that i kept and he used it and fab'd up my last IC piping. turned out pretty good and he did a fantastic job putting together without having the car there (just using a sketch I did).
Here is the engine bay as of now..
The white board is a mock up I'm doing to make a cooling plate.... or to cover up the mess ![]()
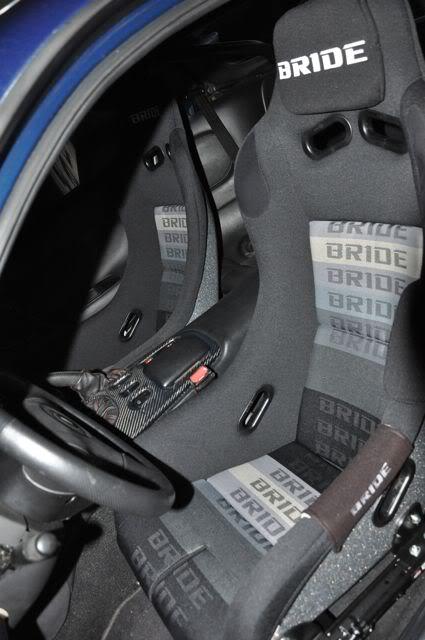
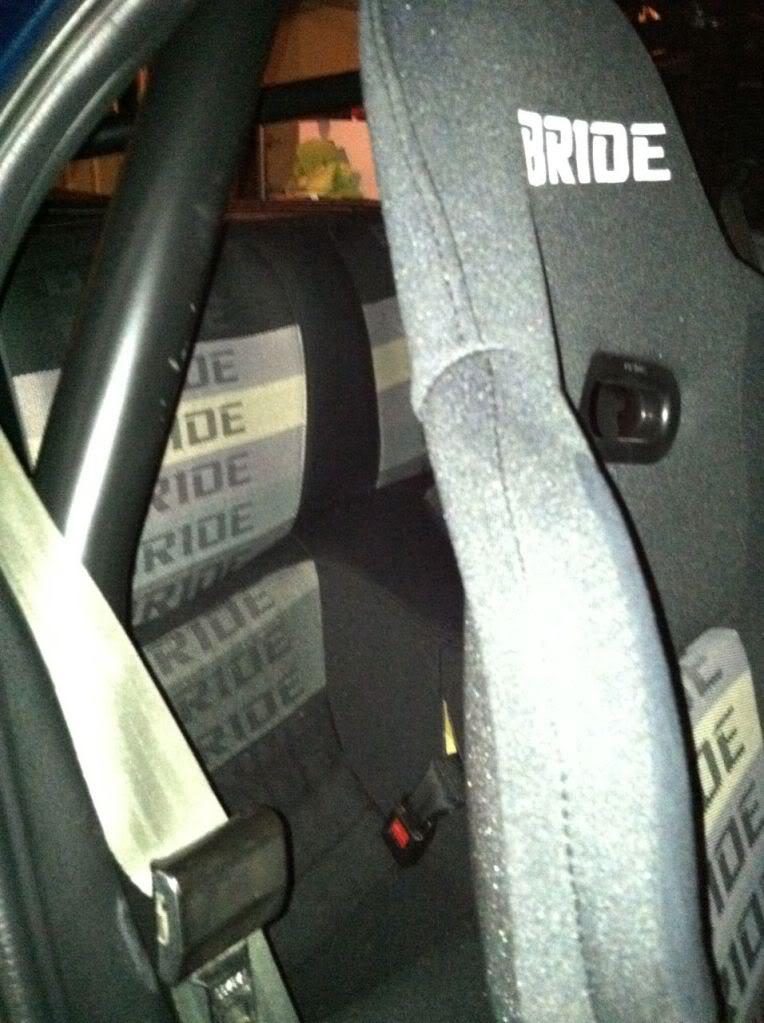
I also test fitted my new Bride seat.
Before:
After:
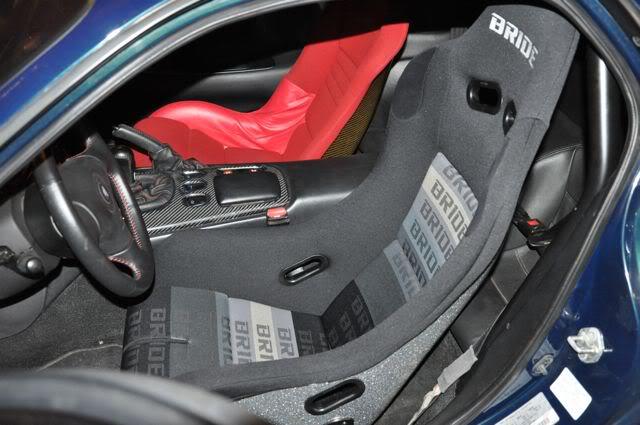
Man these things are made for skinny people. I lost few pounds and its very snug.
Going in and out of this thing is a contortion itself.
Well, So far, I worked on the car every day for the past 10 days ![]()
Only thing I have now is make the CF cooling plate and figure something about the brake ducts for the FEED bumper...
10-28-2010
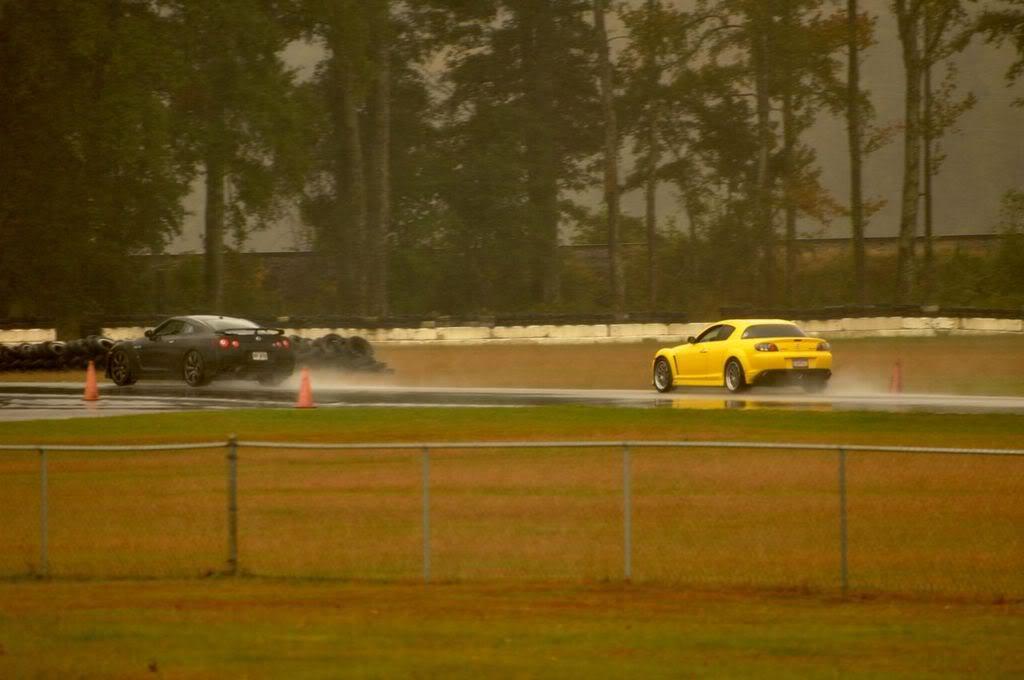
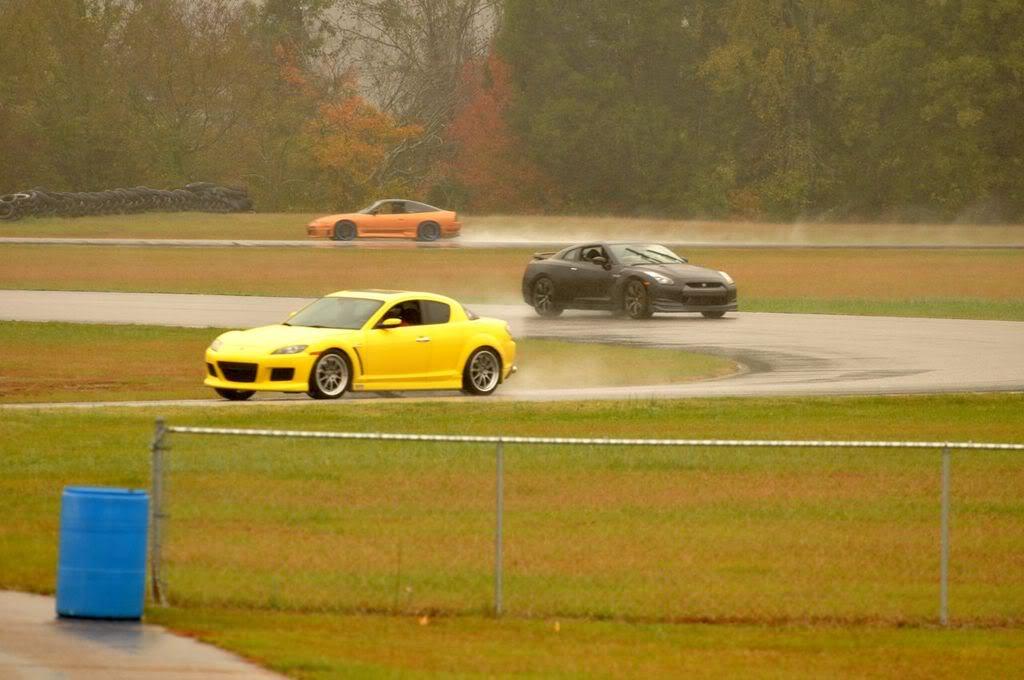
I agree with both of you on the GTR.. Its a no brainer 'super car'. Out of the box, it could do track days and set fast times or it will just cruise as a daily. But in someways, what's the fun of being a car enthusiast if you can't do much to the car (unless you are made out of money) and a car that drives by itself?? I did a track day with these things couple of years ago and the way it drives, it amazed me. Guy who was in front of me never did track day before and when he lost control at one of the corner, the car went side ways, and the car corrected itself and took off!! Hence I want it as a daily ![]() But for track, I rather drive something that's pretty bare without all the electronic help.. Also, car that I could go in stages... I think that's what I love about FD's... the infinite potential set ups.
But for track, I rather drive something that's pretty bare without all the electronic help.. Also, car that I could go in stages... I think that's what I love about FD's... the infinite potential set ups.
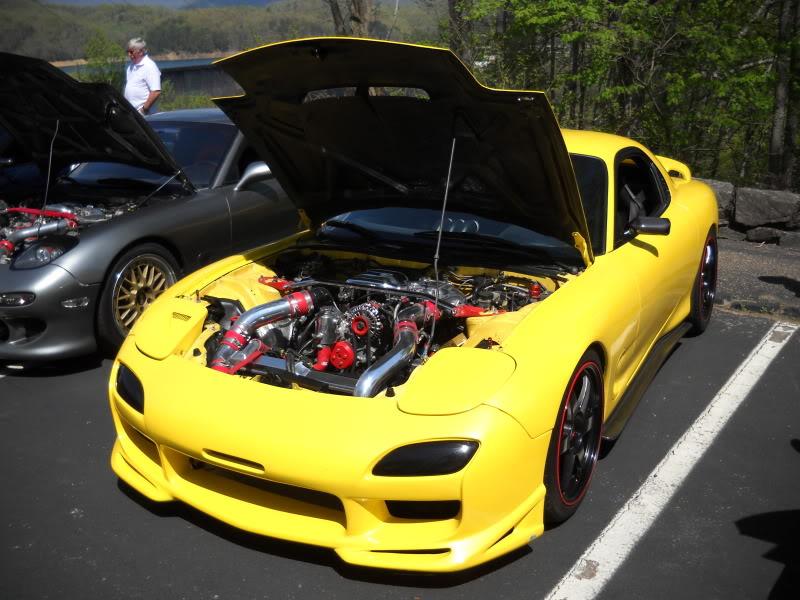
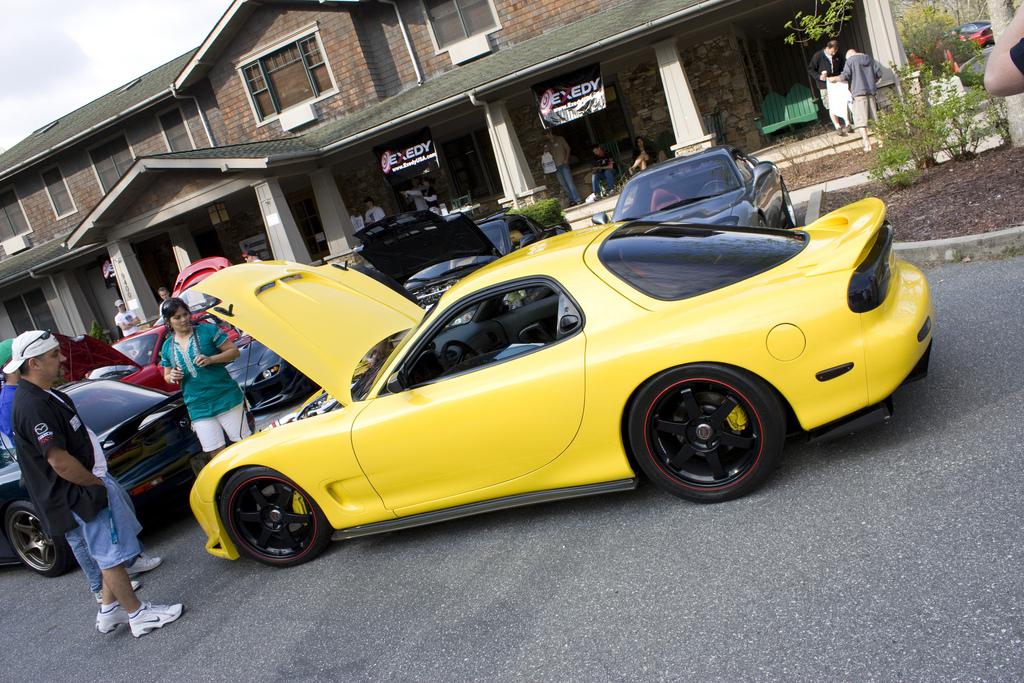
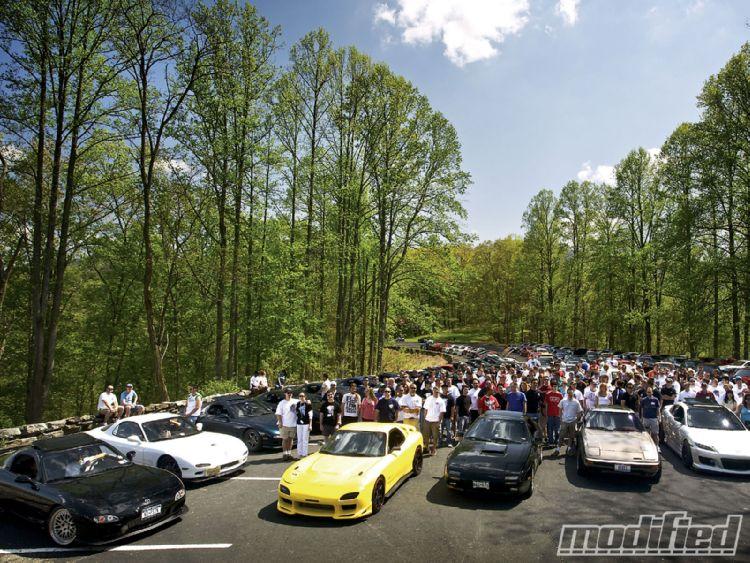
Anyhow, I posted these pics before but here are some pics of me with the GTRs (I'm in the Yellow 8).


10-29-2010
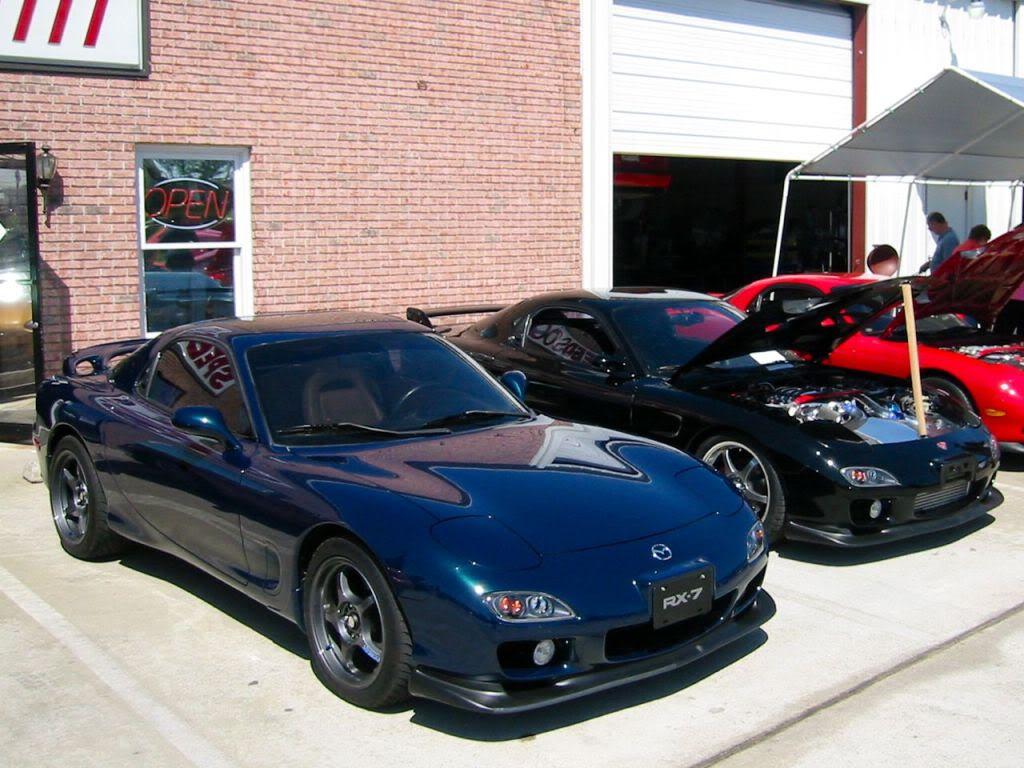
Found an old picture of my MB and BLK FD when both were running at the same time (2003).
10-31-2010
I would take that Enzo FXX any day over any of my FD ![]() Sorry, its an FXX.
Sorry, its an FXX.
Anyhow, Here is an update from past couple of days..
Finally fab'd up the cooling panel and put the other Bride seat... Unfortunately I didn't have spare seat belt buckle so no passenger can ride with me ![]()
CF Cooling panel (need some work but over all I thought I did pretty good job ![]()

Bride EXAS III
11-7-2010
Update..
Well, I came back from SEMA and went to a car show today in Montgomery.
Car ran fantastic!! On the way down (about 80+ miles) I made multiple pulls to up to 160+ MPH and car ran great. Water temp stayed at 83-86C (most of the time 84C) and intake was very good also. I am very happy with the Apexi FMIC and Koyo N flow rad.
Now, I'm going to do some suspension stuff over the next 2-3 months and will update this thread as I go... not that anyone cares..
11-8-2010
One more thing..
Deals Gap Rotary Rally (DGRR) 2010 (DGRRX) was published on Modified Magazine and now its available to read via their website.
http://www.modified.com/events/modp-...lly/index.html
Here are some photos from the coverage..
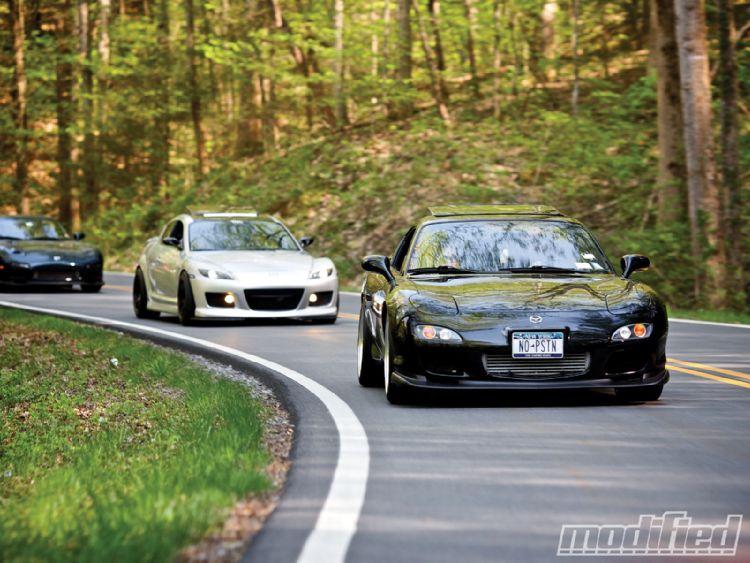
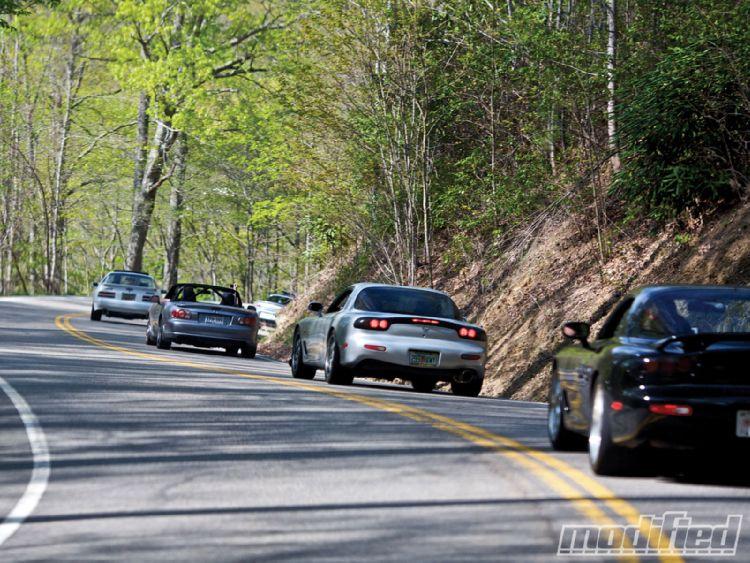
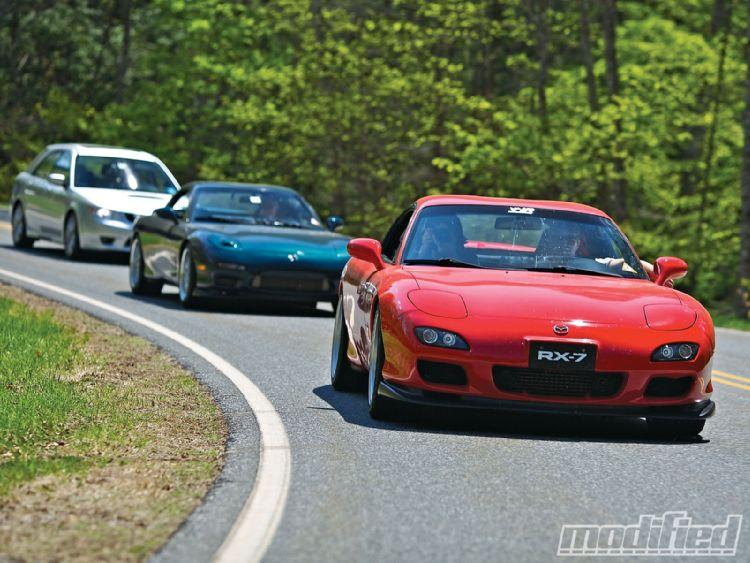
And my car
11-9-2010
LOL! Next year, Wal-Mart old/fat/lazy people scooter for me.
This is going to me me next year at SEMA..

Yes, I'm going to be that lazy and even use it to goto Vegas Buffet with it ![]()
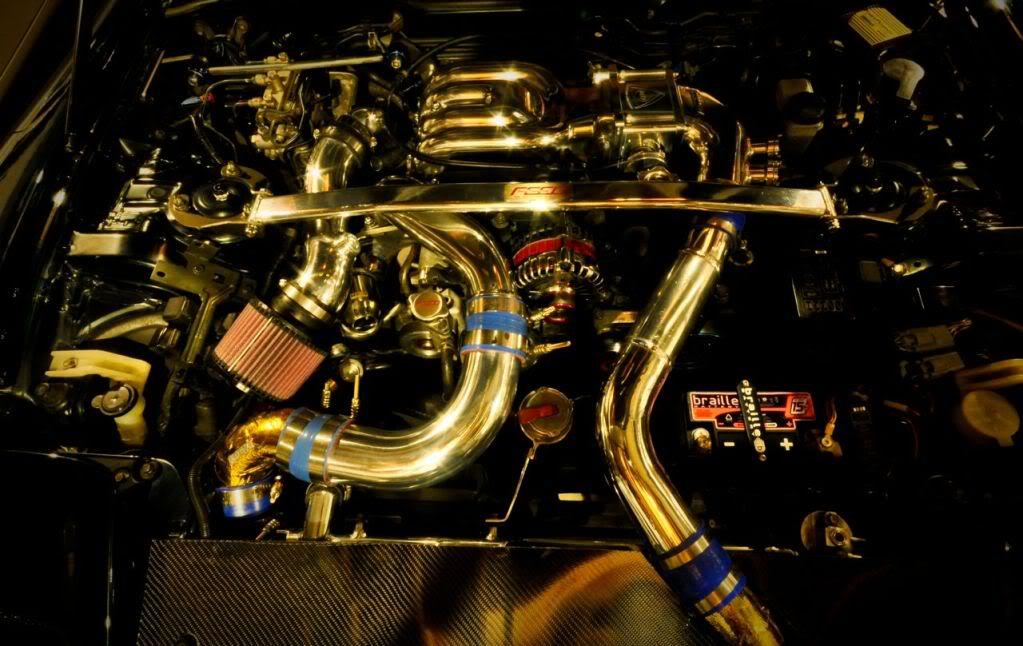
Engine bay pic from tonight..
11-12-2010
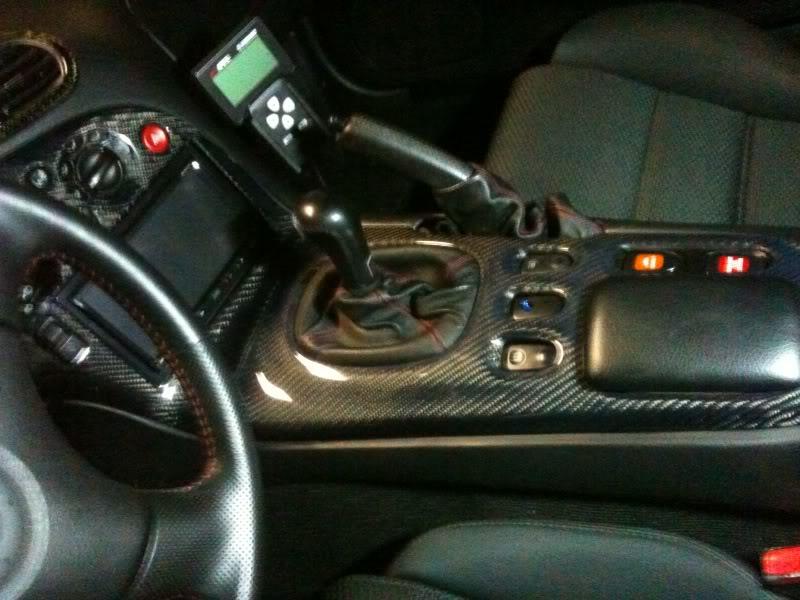
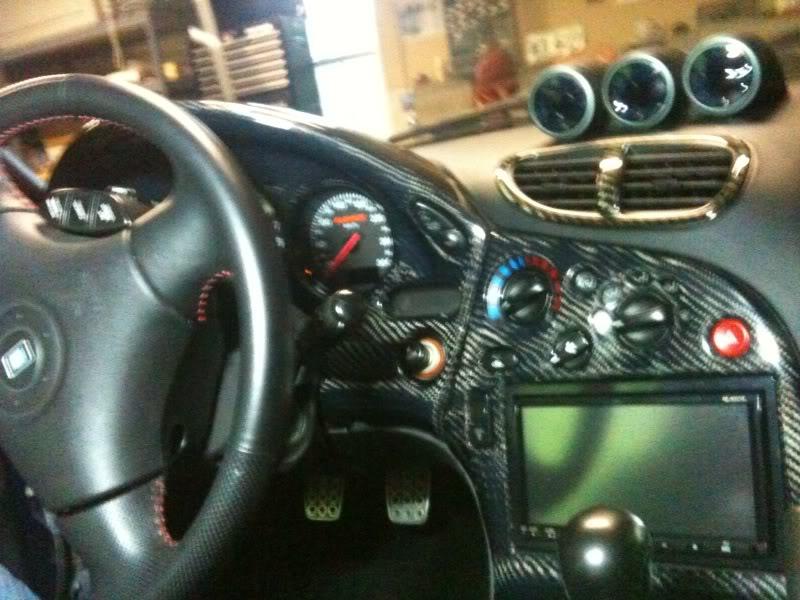
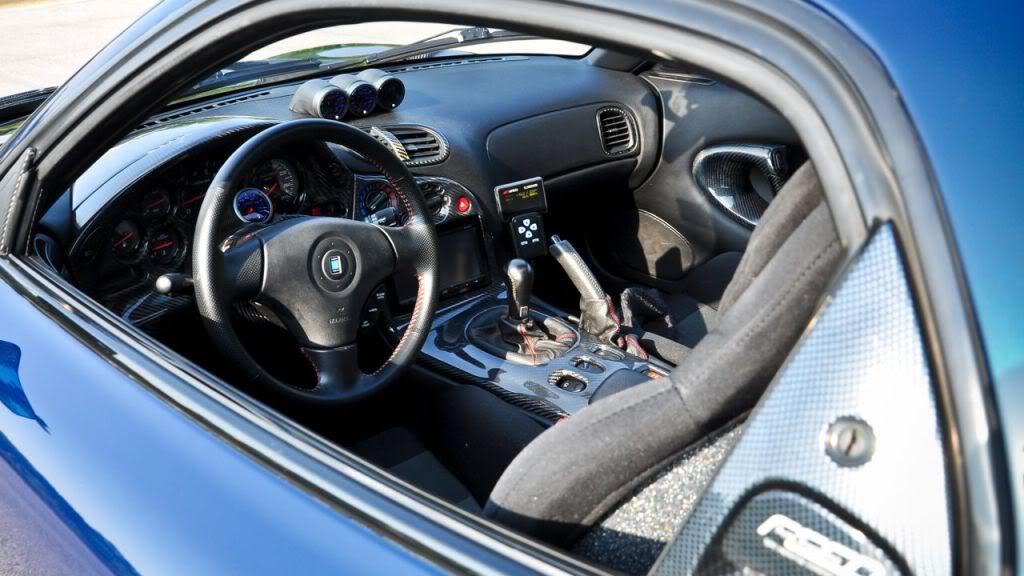
My interior pic - with updated PFC commander and few little stuff. By the way, now I can see the commander during the day!
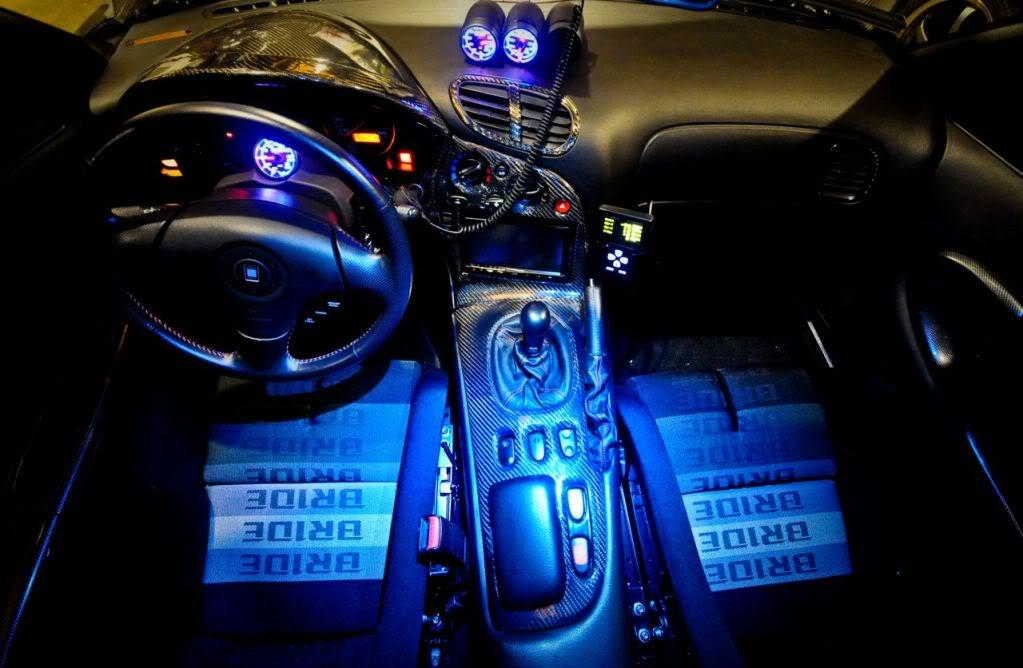
John, I'm sorry.. but at least you know I'm getting good use out of that RE-A speedo.
My next plan when I get off my *** is to install this RE-A speedo to the matching green lid to more rare cluster... Mazda RE 30th Anniversary Cluster..

I'm not looking forward to taking the cluster out...
11-13-2010
Sometimes, this is what I do..
Just stand in front of the car staring at it and think about things I need to do.... or polish stuff for no good reason because it relaxes me...
12-11-2010
Are you sure about this??
I thought these lit up green... as I've seen it before purchasing..
12-19-2010
Update...
I haven't driven the Cosmo in awhile so I picked it up few days ago, detailed the car, swapped out the wheels, and drove around town and snapped some pics.
12-29-2010
Today, I got my FEED stuff from Jonathan @ www.GorillaRE.com
1-2-2011
Gordon, PM replied.
Well, I had some time today and messed around with my CF hatch and APR GT300 wing.
Here are some pics.
CF hatch with FAL lexan
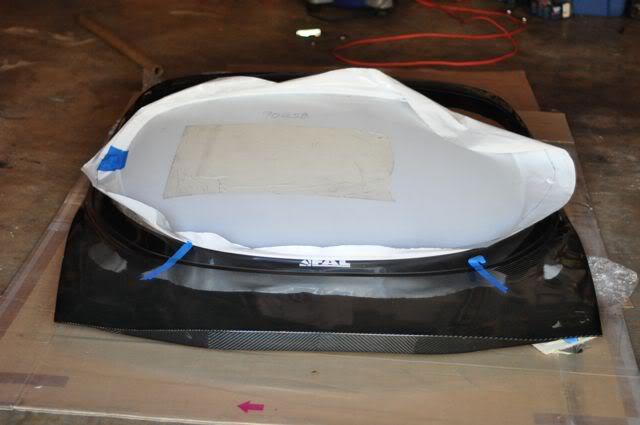
APR GT300 CF wing
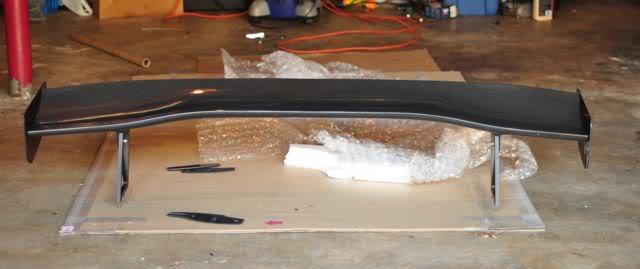
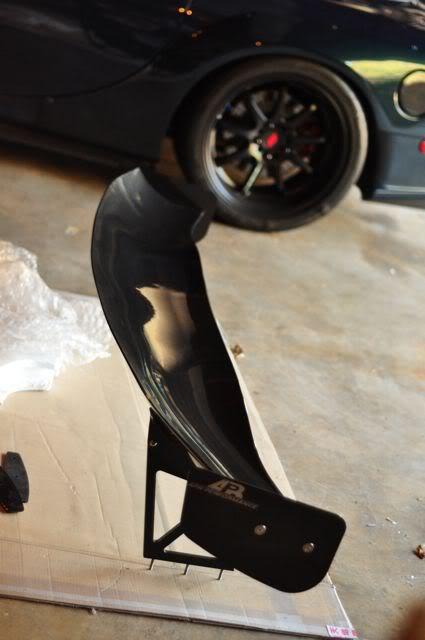
Testing
Mounted on the hatch.
1-8-2011
Hi David,
What I used was a press like this
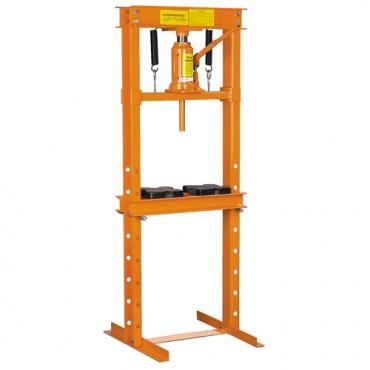
and I actually had Mazda bearing tools that match the size of the bushing that I used to press them out (I bought out all Mazda Dealership specialty tools... 800+lbs of it). But you could also use different size sockets that matches the size to push them out.
yeah.. I have the delrins. They do squeak... but at this point, my whole entire car squeaks. I've heard good things about SuprPro bushings but I don't have a first hand experience.
Also, where are you getting the MS bushings? MazdaComp?
dlarson101, I'm running Ichiba V2 but I recently ordered some FIC 10mms. They are all hub centric, bolts on, and studs out from the spacers. These tends to be bit better and safer than running longer studs. But I prefer not to use spacers if I don't have to (Just using them for my baller wheels ![]() )
)
1-9-2011
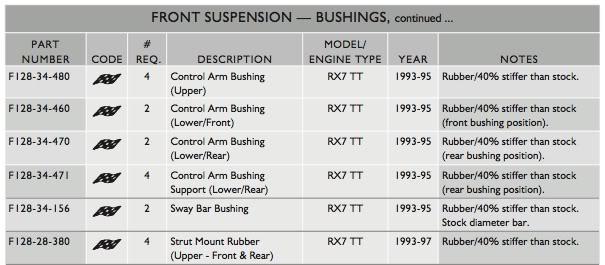
David,
I don't know if Ray can order them... and also not sure if Mazdacomp still carries these (as I've heard almost all mazdaspeed goodies are discontinued).
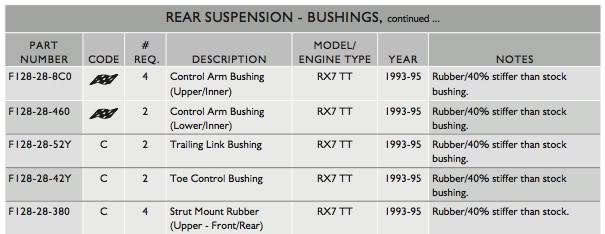
Anyhow, here is the info I have from old Mazdacomp catalog. Hope this helps... I also have the catalog number from Japanese MS catalog.
Front
Rear
Also, FYI... Last week I had a chance to drive a stock suspension 93 VR touring in mint condition with less than 23K miles... And I have to say, that car drove fantastic on the road. I guess I also never realized how nice touring FDs were and how fun stock FD's can be. That being said, I think if you can't find MS ones, I would replace them with OEM.
1-13-2011
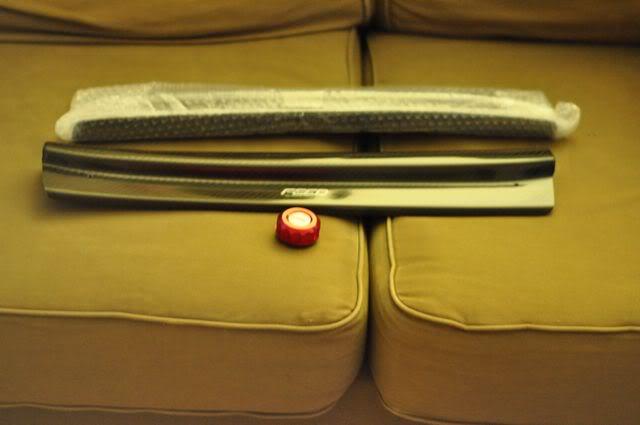
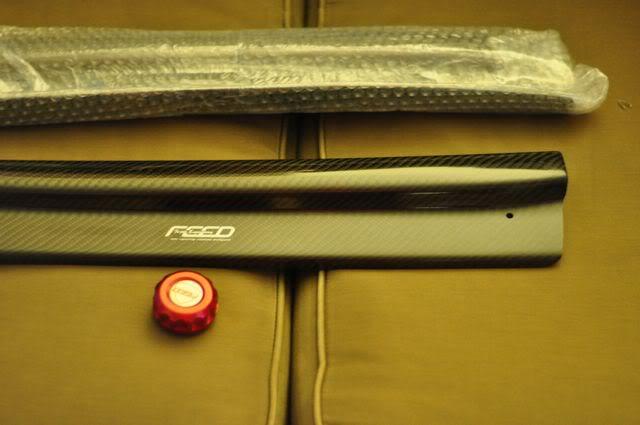
Got another FEED goodies.. one day I'll put this on just to say I have most of FEED goodies ![]()
1-14-2011

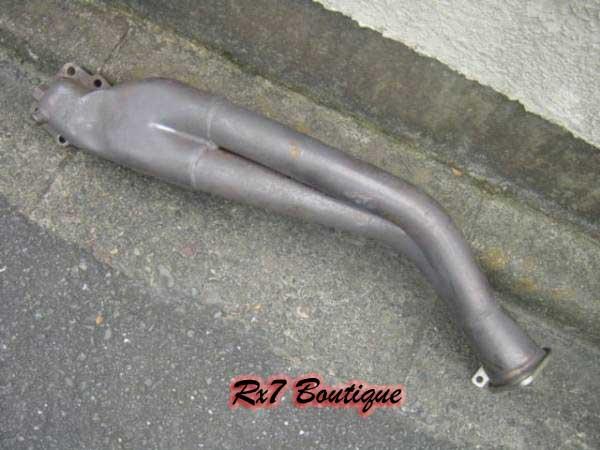
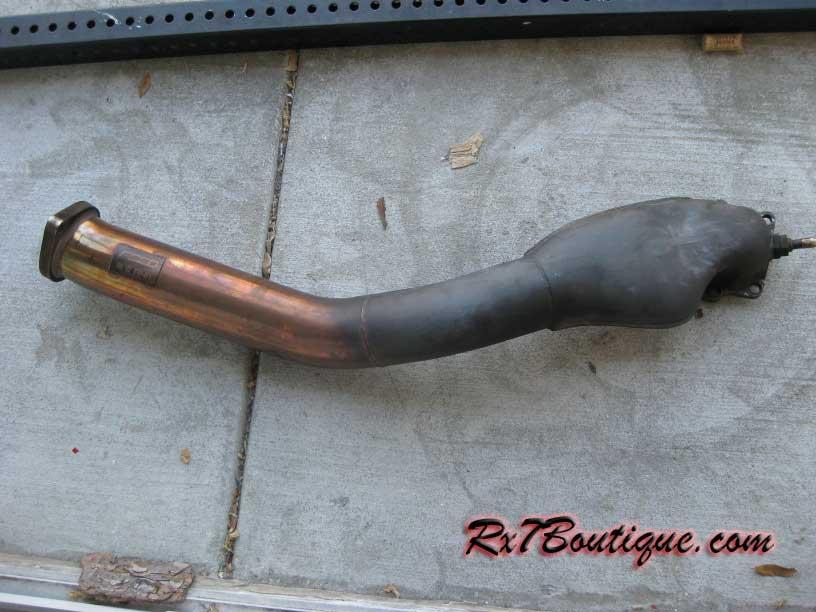
From Brian's site (www.rx7boutique.com)..
Its very similar to Mazdaspeed version (I wouldn't be surprised if KS made it for Mazda). Brian, if you are reading this and you do run across the MS DP, let me know ![]()
MS version..

Gordon, my stuffs are nothing compare to what you've done to your car.. All my junk are just bolt ons... One day though... I would like to get some nice custom works done like yours.
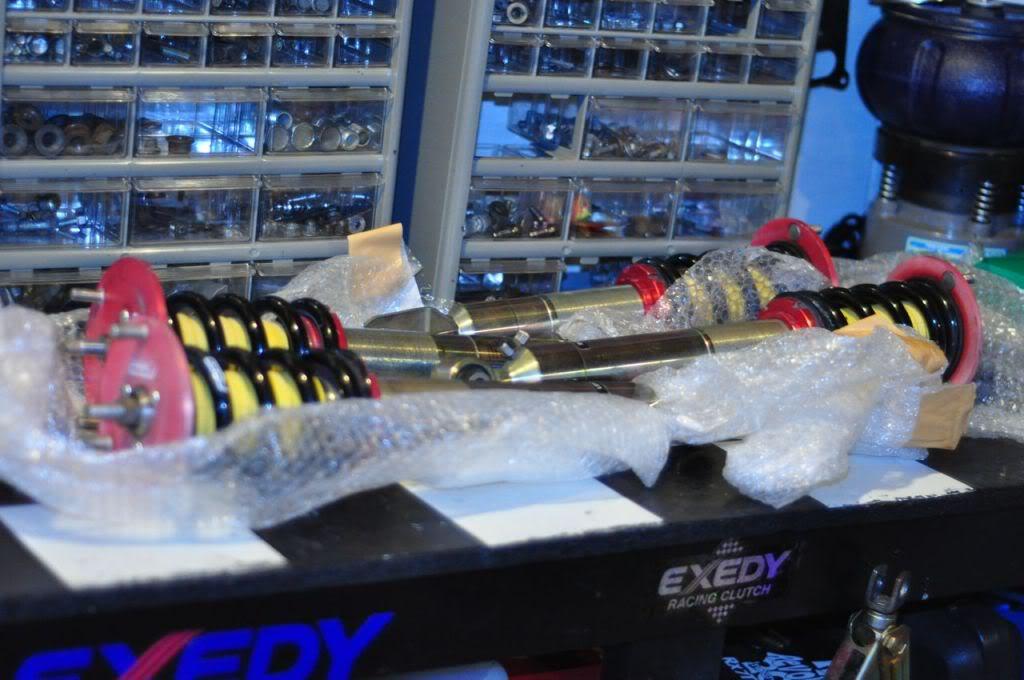
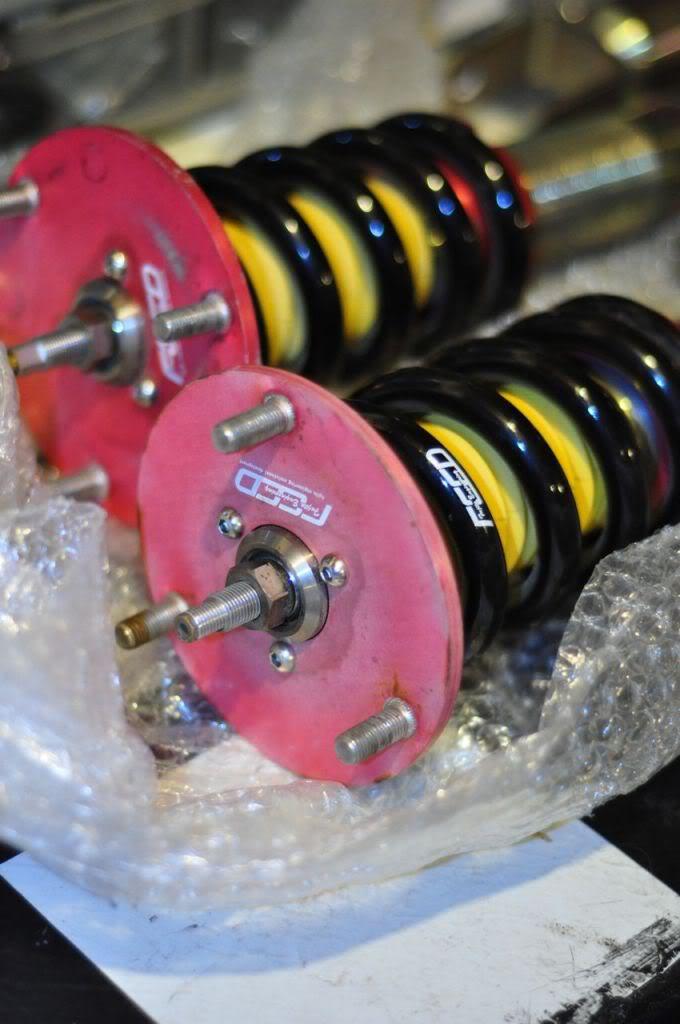
Anyhow, more FEED junk I've gotten.. and need to install (maybe this weekend)..
FEED Coilovers
FEED Fender Brace

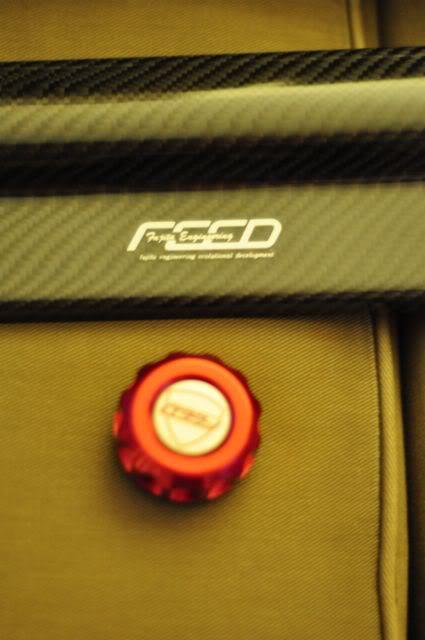
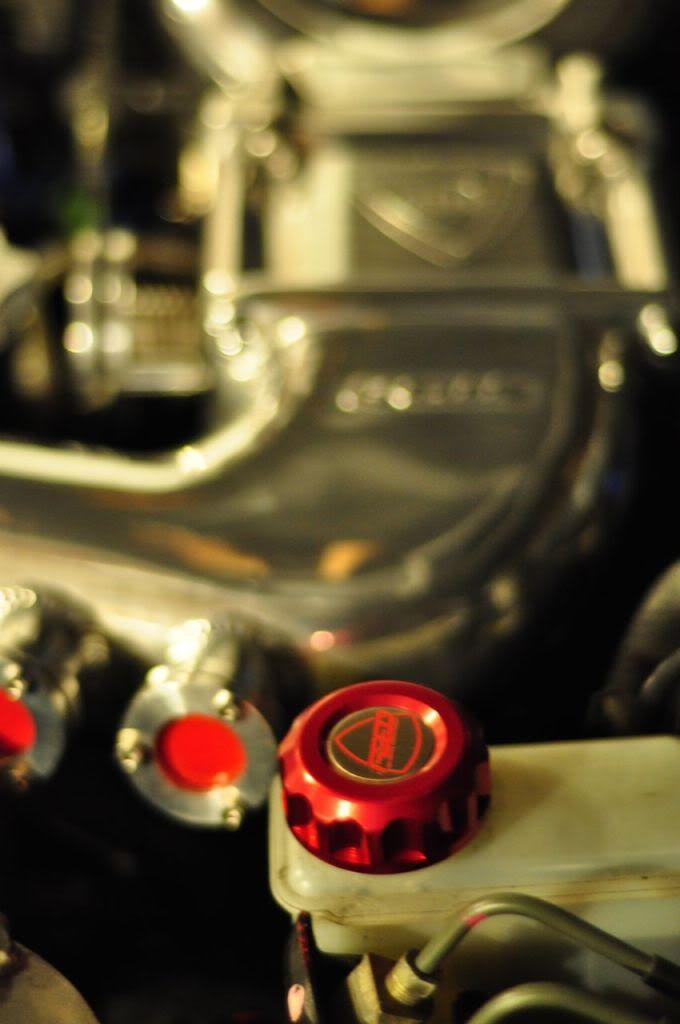
And FEED brake reservoir cap
1-23-2011
Never heard of powerflex.... Thanks for that info..
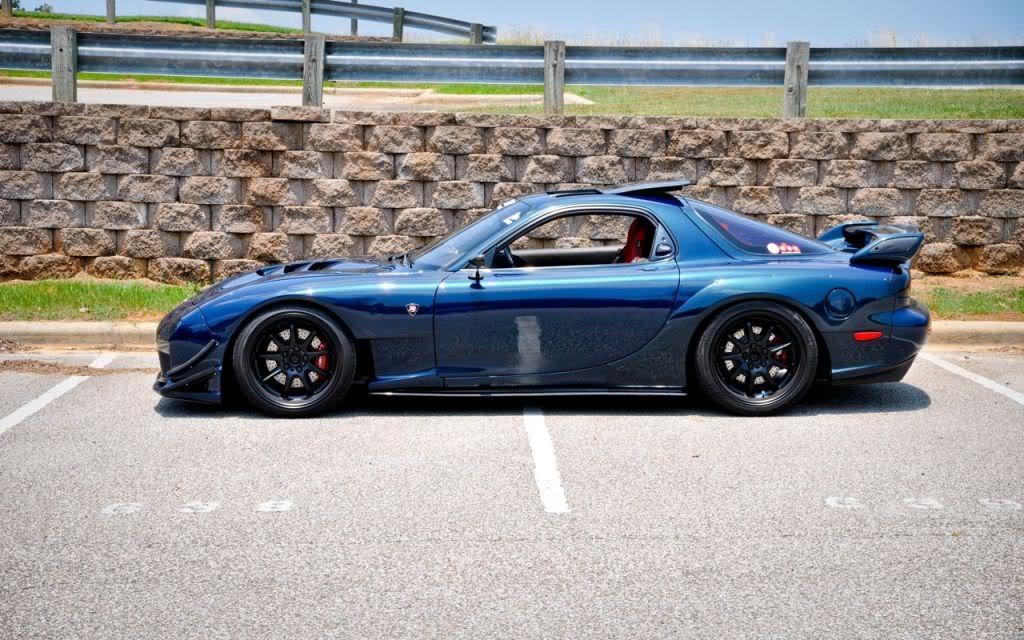
Well, I took the car out to work and snapped some pics before I get some stuff done..
1-24-2011
^^ No problem David ![]()
I have no problem with any conversation that goes on here ![]()
Anyhow, here is my First Blk FD, which I sold and help build with the new owner. He got it running and got an alignment today.


1-25-2011
Hey Gordon, I'm not 100% on the finish. Its a single stage satin paint.
Car had to be painted 2x as first time, the paint didn't seem even. It had different shade to it. So, it was sprayed again as a whole car. Giving more evenness to the paint.
I've heard this is quite common on flat paint.
I've also talked to one of the best painter here in AL. He has done several SEMA show cars and he does 2 stage flat. Flat/Satin look coming from the clear coat.
The problem with flat black single or 2 stage is that if you scratch it, you have to repaint... and scratches will show up VERY easily. Also, you can't wax, buff, use silicone base cleaning product, use spray type tire shine... as any of the gets on, it will shine.
In few months, I'll have someone new to show on the MB... I been thinking few other options and going to try something different on the MB.
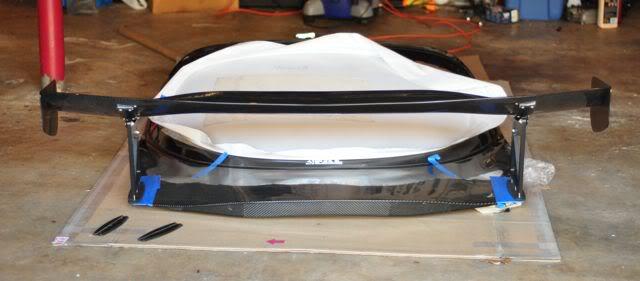
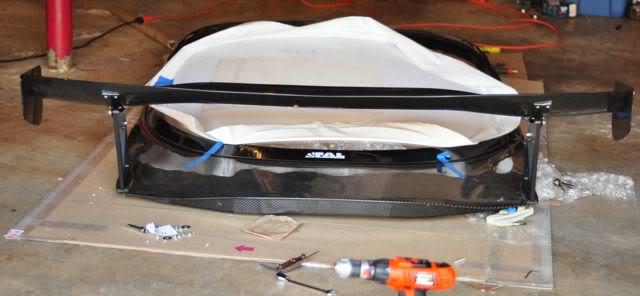
Anyhow, Yesterday was a productive day in automobile hobby.. With help with the new owner of my old FD, I installed my 'Riced' out Big *** wing ![]()
1-29-2011
I been working on the wing to make sure its not going to rip the CF wing off at decent high speed.. I made a template, started to cut, then realized my aluminum sheet was too thin. Its now being re-cut using 1/8 inch thick AL plate.. we'll see how that will work.. But mean while I adjusted one of the bolt and seems to reduce some load of the wing on to the body of the car.. Took the car out for a drive and seems the car is more stable (top speed today only to 110MPH).
Anyhow, I drove the Steve Kan tuning here in Bham...
Here are few pics..
My FD with another FD with same wing and mirrors.. except his was all out track addition ![]()
My Old black FD showed up to the tuning session...
First time running together since 2003
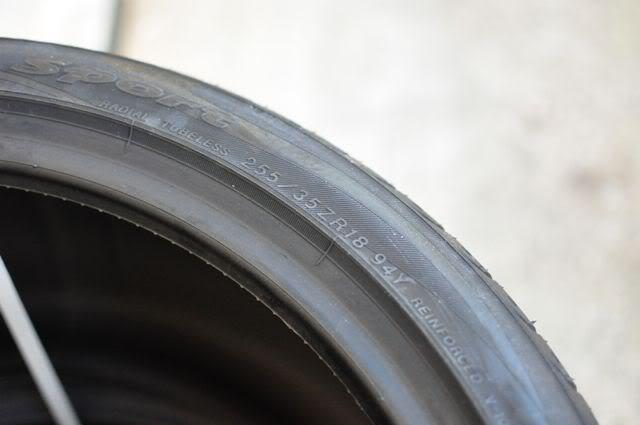
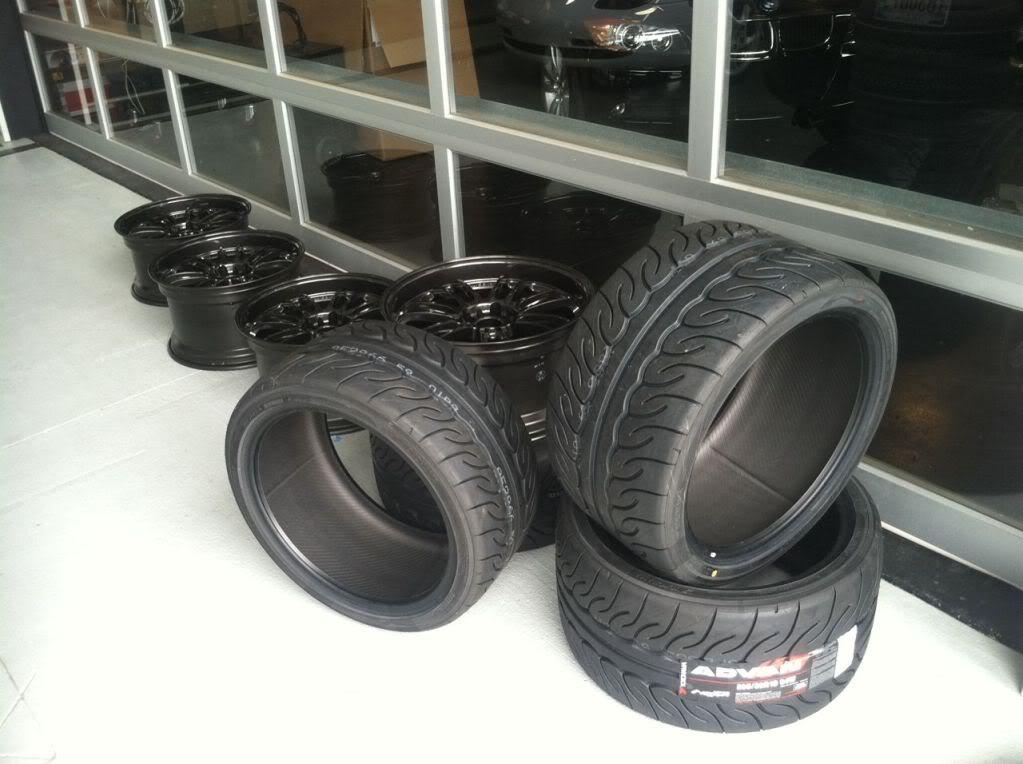
Also, my tires came from Yokohama Tires... Since I mainly do street, I got the ADVAN Sport tires..
295/30/18 rear
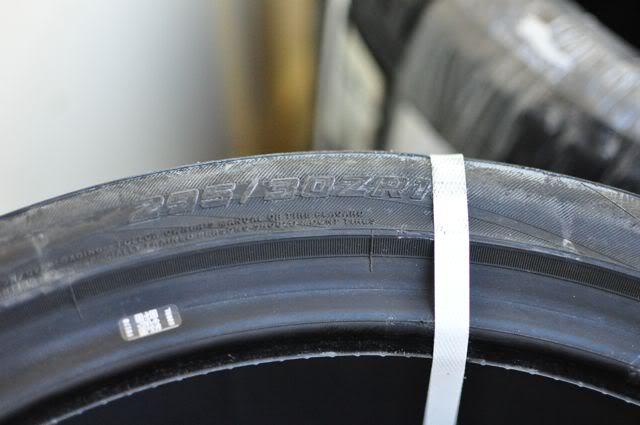
255/35/18 Front
2-1-2011
Update for my SSM FD..
Well, I've been deciding on the wheels for the SSM FD. I wanted to stick with OEM and decided to try out the RX8 40th Anniversary wheels.

2-14-2011
Well Gordon.. Here is my option about this..
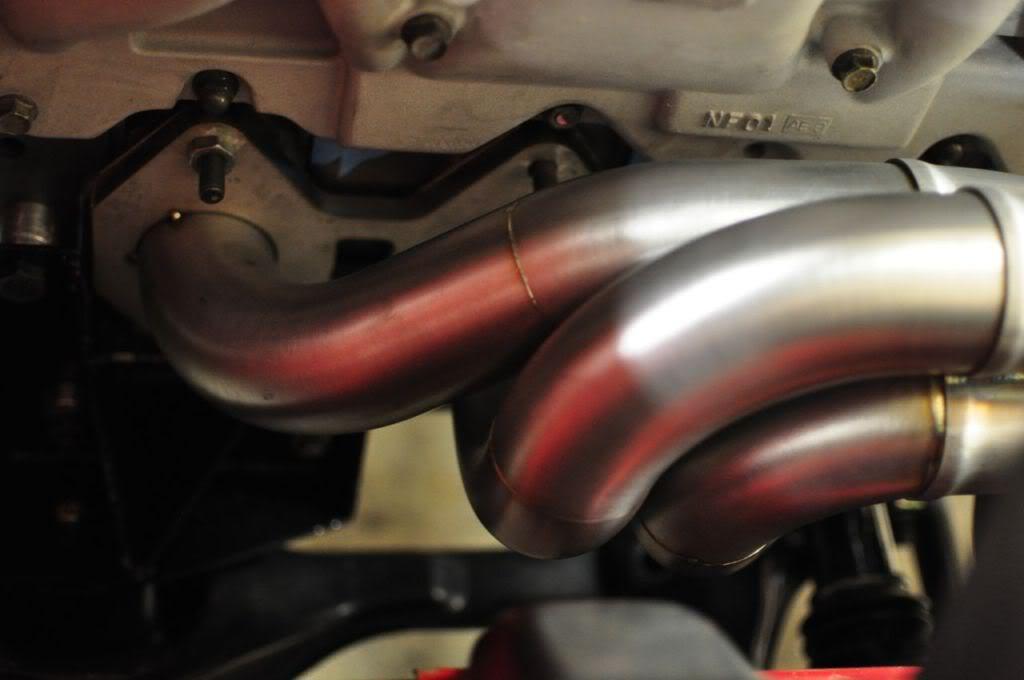
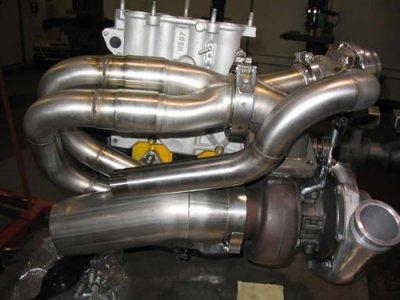
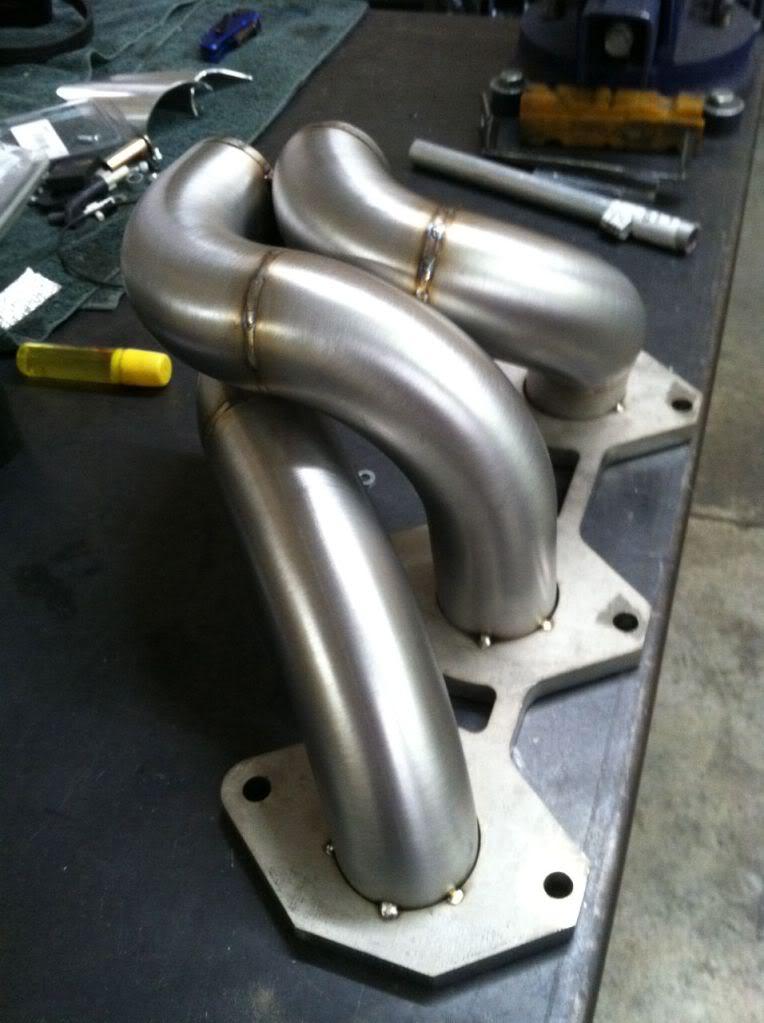
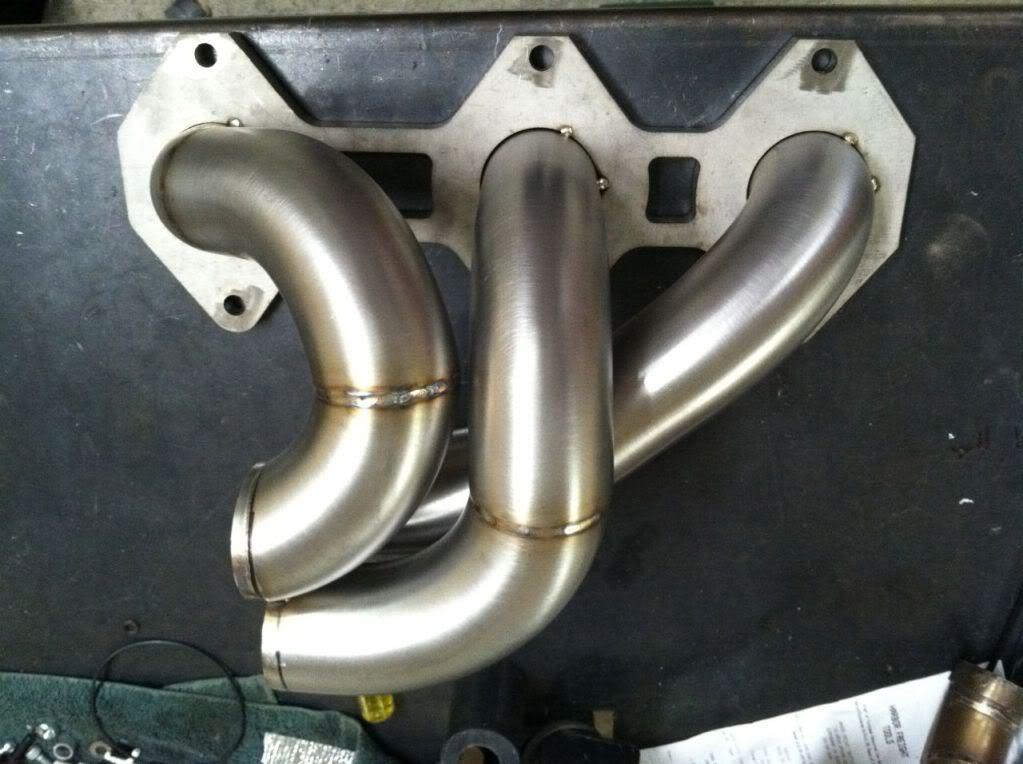
The JDM downpipe with two pipes looks to have bigger volume chamber just after exiting of turbo manifold.
picture comparison from earlier pics I posted..
Knightsport ( dual 60mm pipes)
MS/AutoEXE (dual 52mm pipes)
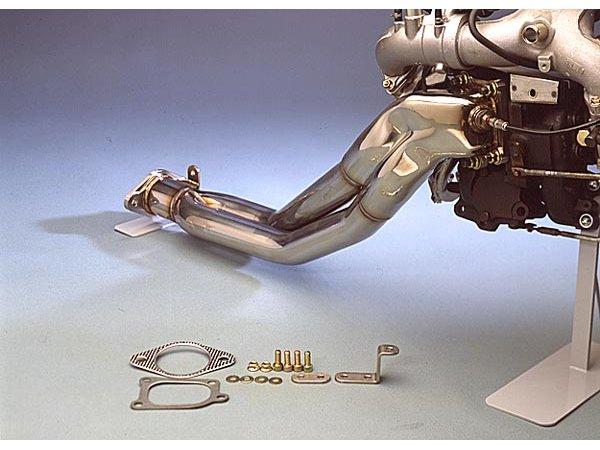
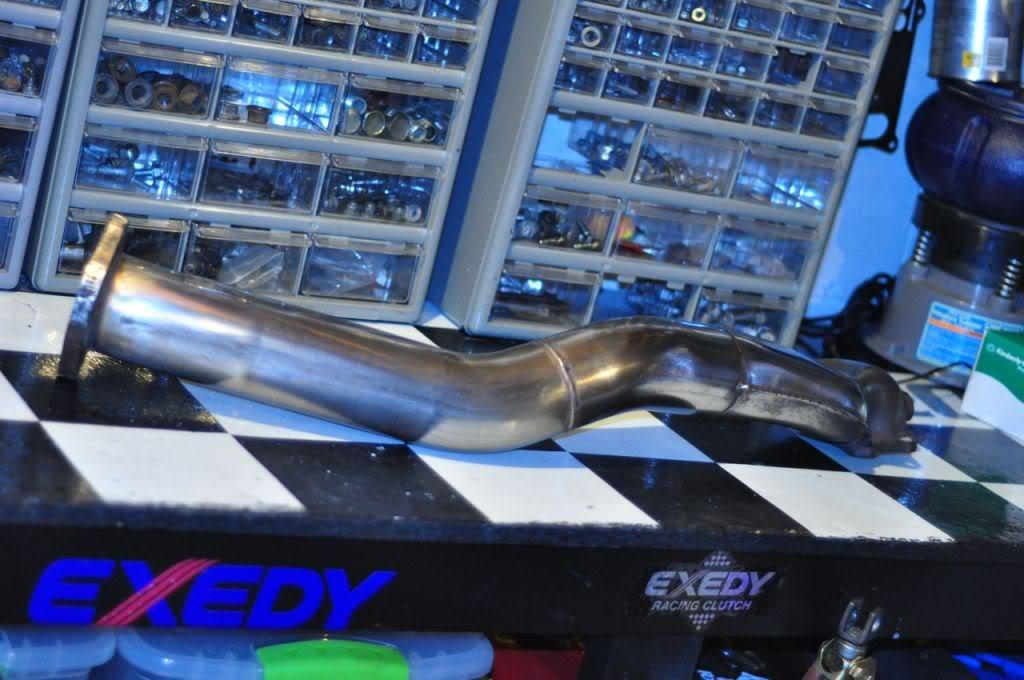
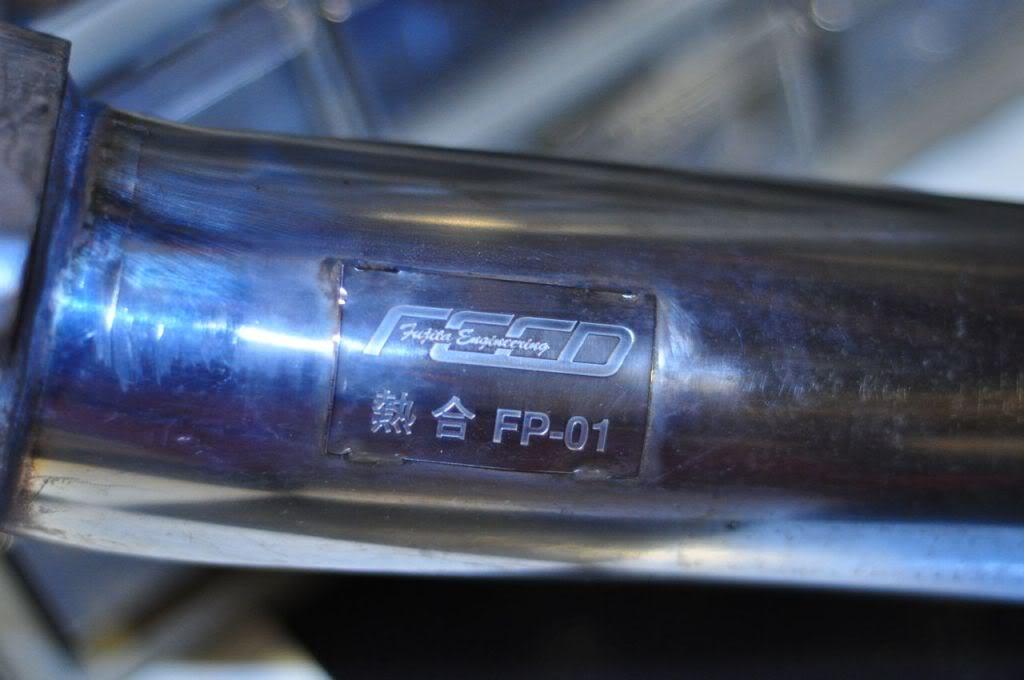
Feed (single 80mm)
Also,
Here are my calculations regarding US 3 in DP vs. JDP dual 60mm DP (knightsport) and dual 52mm (MS and Autoexe).
3 inch = 76.2mm (US)
area of the opening = 456mm2
Single 80mm (FEED)
area of opening = 503mm2
2 x 60mm DP (KS)
area of both openings = 565mm2
2 x 52mm DP (MS/AUTOEXE)
area of both openings = 424 mm2
2-27-2011
I haven't updated this thread in awhile...
What I been doing for the past few weeks, when I had few mins free....
This pic is of the brace I made for the APR wing. Its made of 1/8 inch Aluminum plate.
Took the car out for some testing and seems to do pretty well.

Little cosmetic treatment for the FEED fenders and flares.. Helps from rock chips ![]()
I hated not having these on the hood... So, made it match and installed it.
Interior shots...
2-28-2011
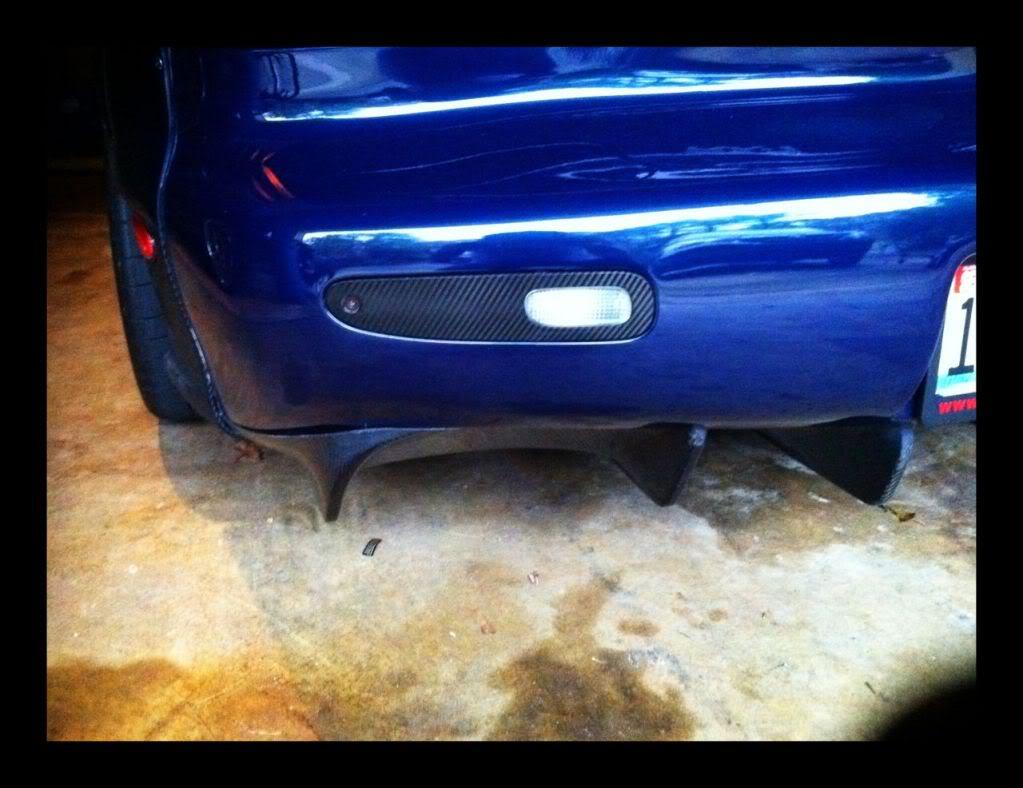
My bumper lights..
3-11-2011
moosejaw is right.. It came in on some of the later clusters... I been mix matching some of them (I have like 10 of various clusters.. from super low US clusters, JDMs, US FDs (93s and 94s), Spirit R, 30th anni, etc.
Gordon, Only one I could easily find is this pic

Mine has the imitation cover (I also have the older cover from FEED) and the black one has the newer FEED signal covers. Newer one does not have the black trim.. its just clear.
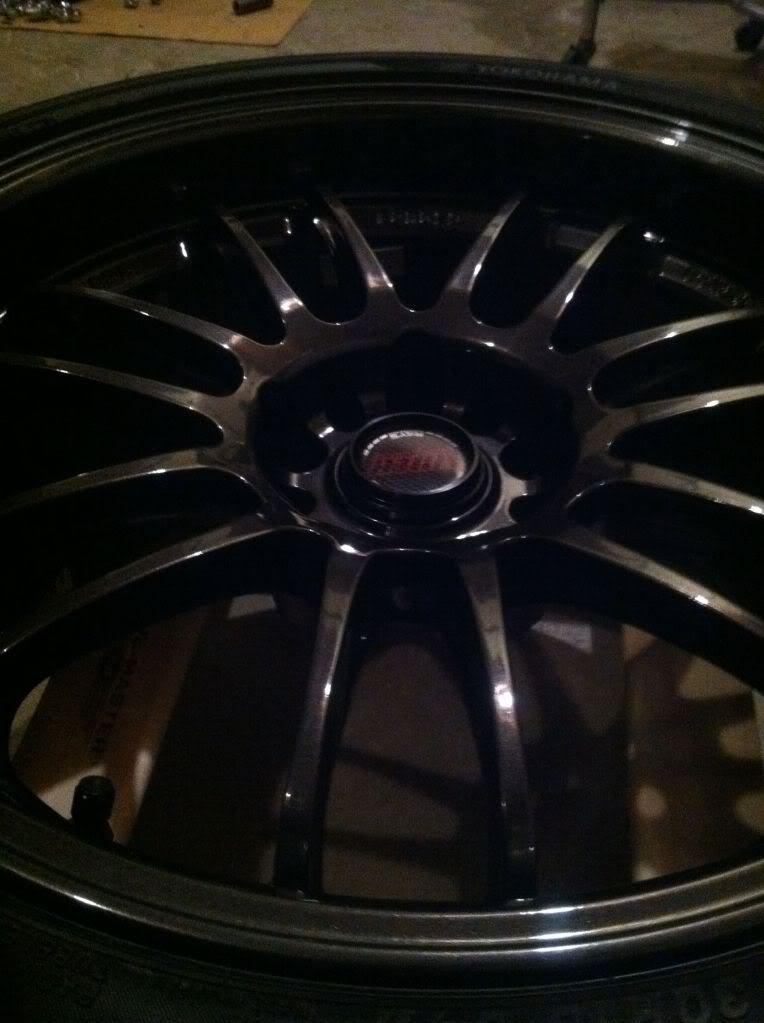
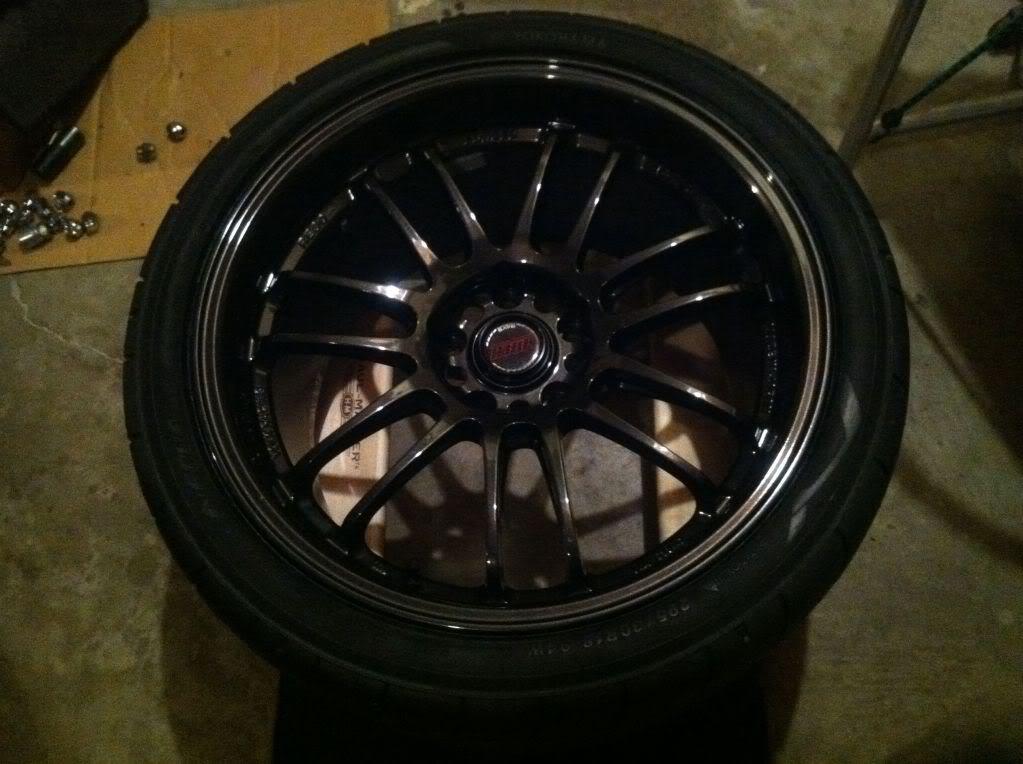
Only other update I have is, today, I got some new tires put on the MB FD. I had some bubbles on the PS2 295s and put some Advan Sports. I'm also going to correct the offset a little by going 10mm FIC's new hub centric studded spacers up front and go 15mm Ichiba hub centric studded for the rear (was 15 front and 20mm back). PS. this is all for show.. I prefer not to use spacers. If I was going to track or something, I would use my SSRs. Here is the pic of the car with SSR comps.. my favorite wheels of ALL time ![]()
3-18-2011
I hear ya Adam... I'm just to lazy and been sick for the past several days..
Anyhow, I had a rare chance to drive the FD to work during working days.. so I took a picture ![]()
Another pic from today..
3-24-2011
Update on my Rotary cars...
First the SSM FD...
I finally got the tires mounted and balanced.. I'm going to go pick up the car and try to mount these.
MB FD.. I had a photo shoot with a local photographer and I had a chance to snap few pics while the car was set up..
Here are couple of pictures I snapped..
3-25-2011
Another photo..
4-1-2011
Update on my SSM..
Picked up my SSM and installed the new RX8 40th anniversary wheels..
Couple of new info about these wheels... the hub centric is same as FD. I know the older RX8 had different hubs (bigger).
The car needs lowering to look better.. which will happen later on this month.
4-12-2011
Update...
Not much has been going on.. I've had a chance to install the FEED coilovers on the FD.. which was a pain in the butt because I had to remove the roll bar.
I also installed the new door sills on the car..
And change the oil using my nifty pump.. I had this thing for about 10 years and its worth every penny! Changing oil every 500-1000 miles is an ease ![]() Yes, I change my oil that often..
Yes, I change my oil that often..
5-24-2011
Well, Not much to report since last time...
DGRR 2011 happened between last update and this time (which I didn't get to drive my FD as I got really sick).
This past weekend, I won best Mazda at an event.
And picture of my car got on the Yokohama Site..
Here are some recent pics of the car..

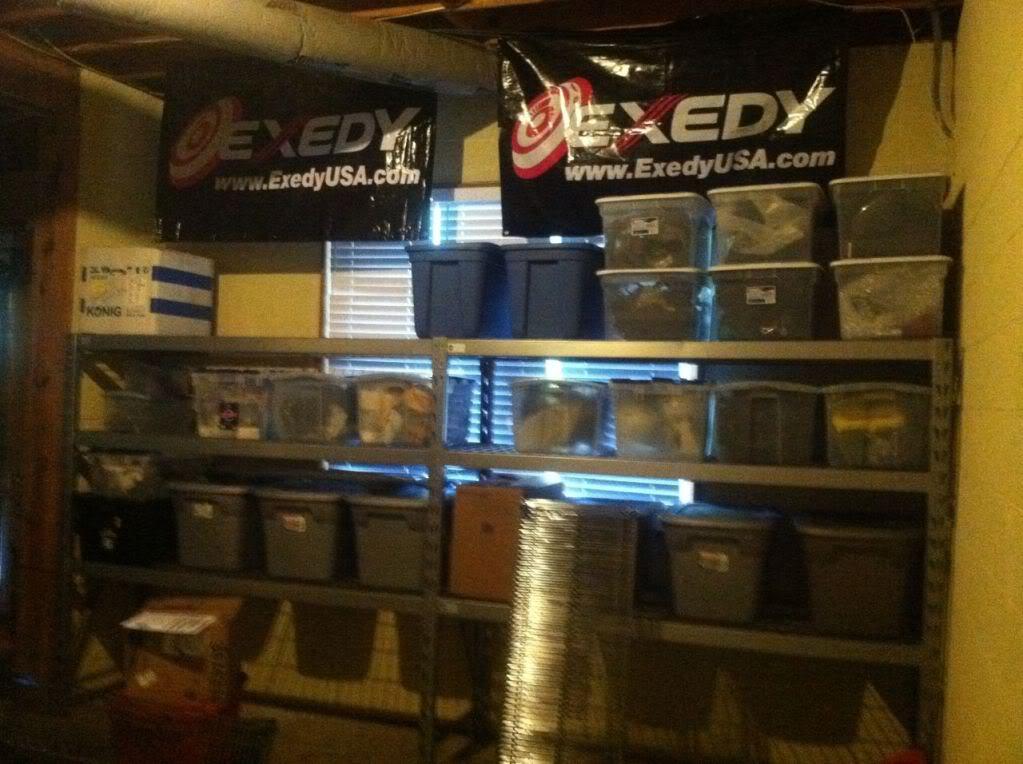
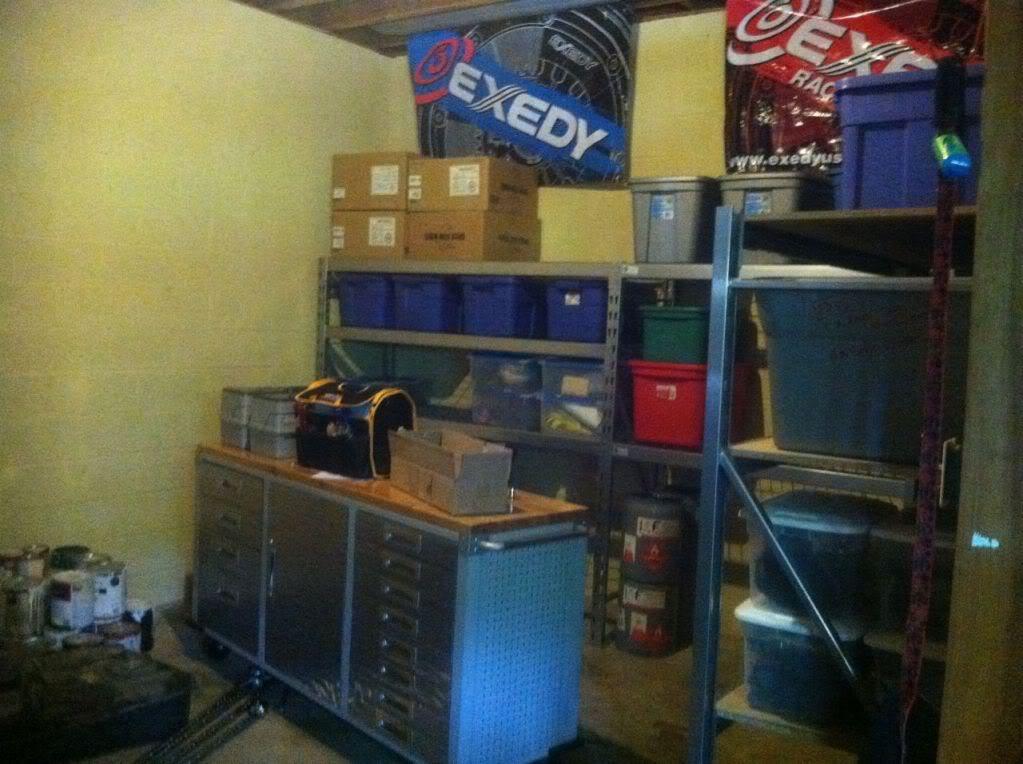
And I'm in a process of moving into a new house.. Here is a picture of one of the garage bay.. Much more room than my last place..

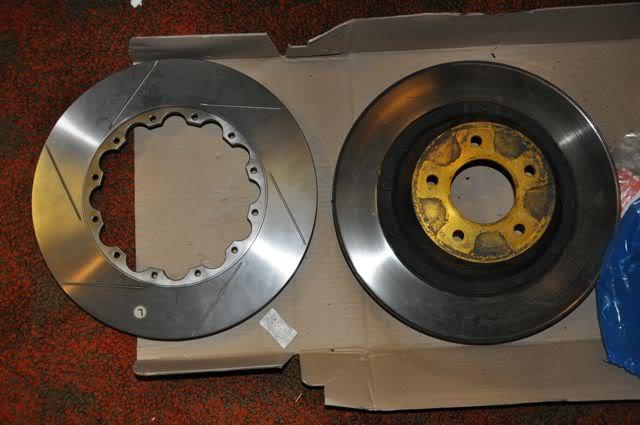
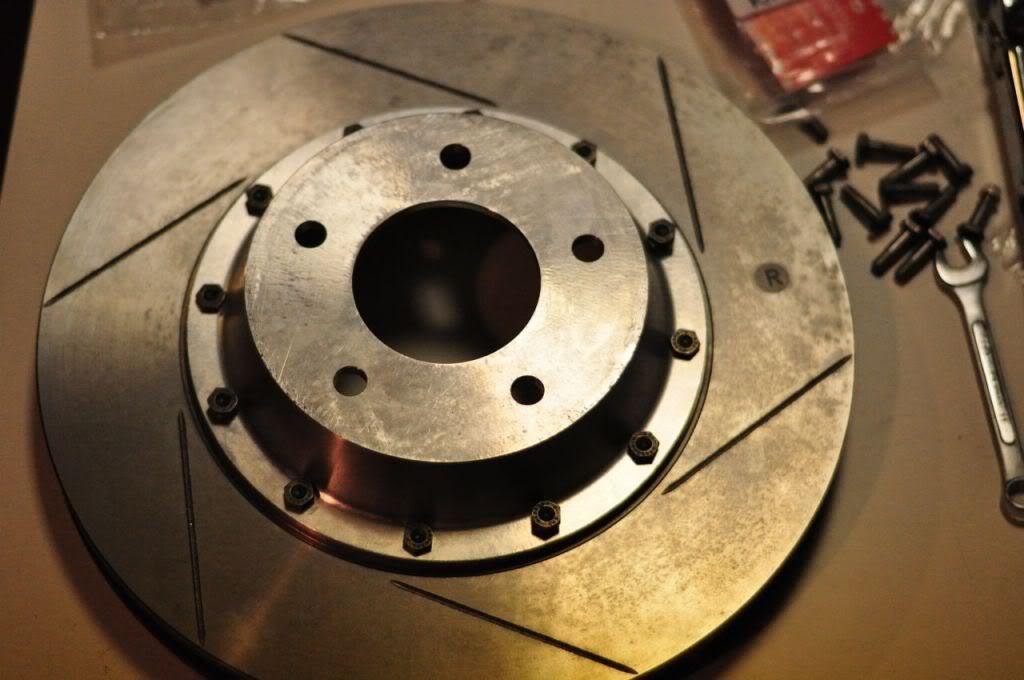
This morning, I got my rear brakes that I been wanting to try out for few years (Thanks Mike!)
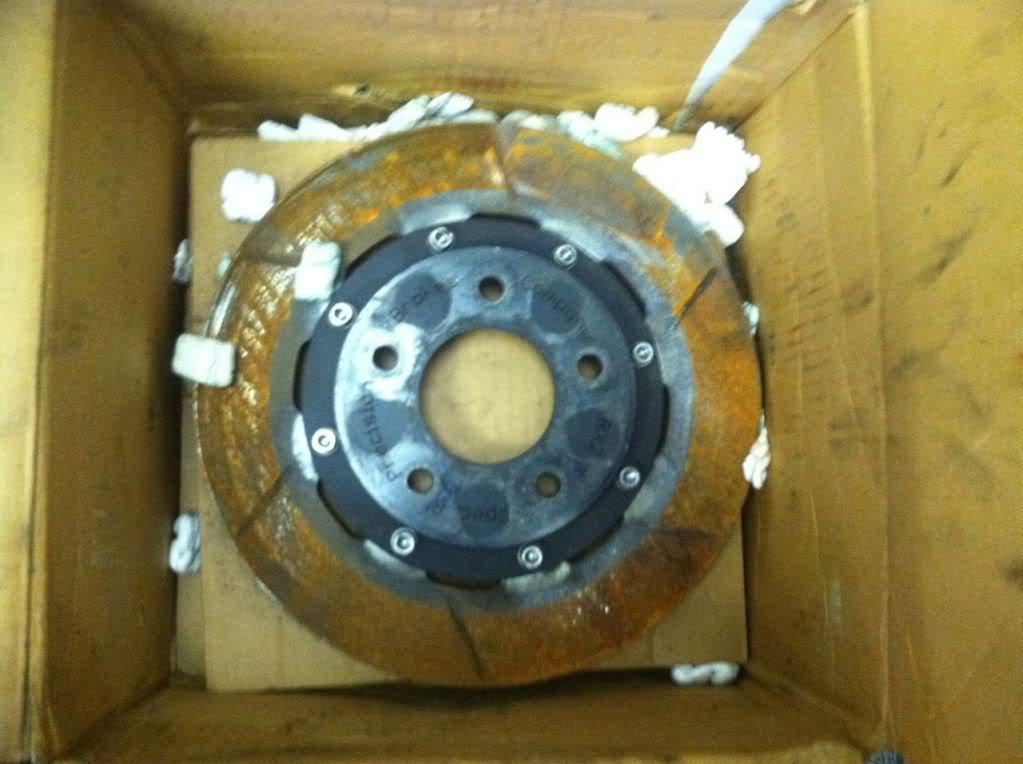
Precision Brakes
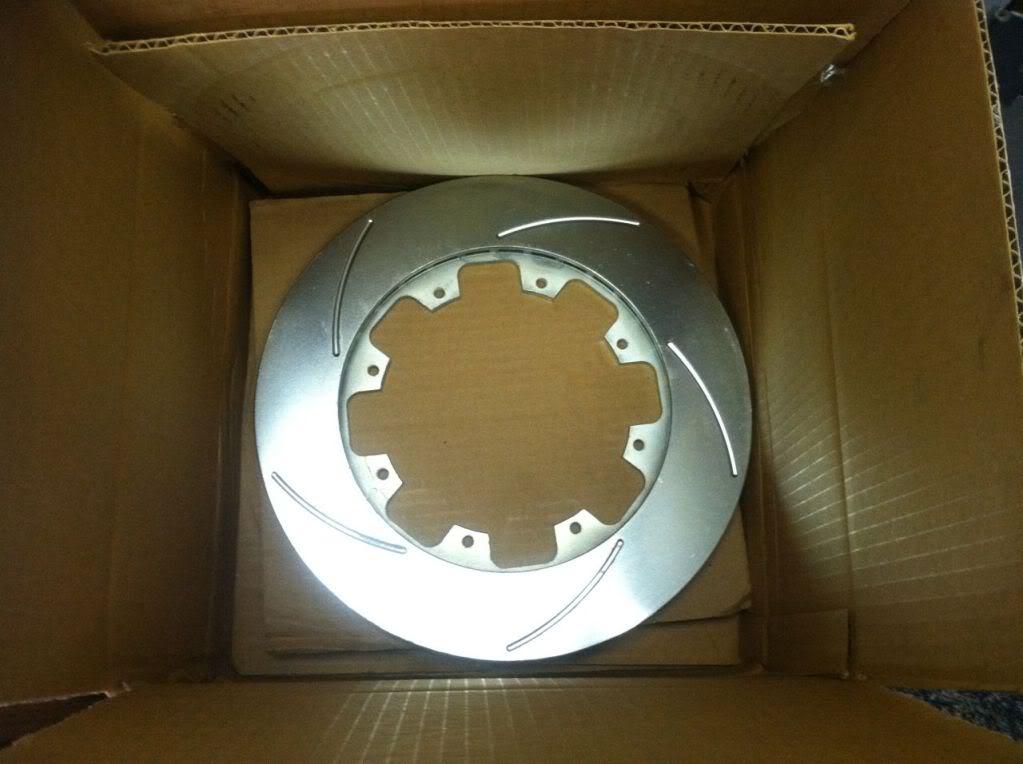
Replacement rotor rings.
I have older Greddy/Alcon front BBK with custom DBA rotors and hats.. Going to use the PB rears with that set up. If that doesn't work, then I also have Racing Brake BBK.
The old RZ/Spirit R set up will go on the SSM FD.
LOL! its actually has room for 2 car and there is another side to it.
I think total space I have (including storage rooms) is about 1200-1500 sq. ft.
My plan right now is to finish moving all my stuff... as of now, I'm 40-50% moved (its been 3 weeks already). I need to get some new lights (several over hang lights for detailing the car) and sometime this summer, 4 post lift.
I thought about re doing the floor before moving in, but since it will most likely get damaged during the move and such, I decided to not spend that money and do something else with it... ie, new work bench and tools.
5-27-2011
Update...
Well, Past couple of days I had a chance to buy an unique 1974 Celica with a rotary. I actually decide to buy it (with permission from the wife), but it all crumble to sh*t when I went there to pick it up... The seller was trying to sell something that wasn't on his name.
Anyhow, good thing is that my car got featured in RE-Xtreme
http://rextreme.blogspot.com/2011/05...lues.html#more
Great site for us FD owners...
5-31-2011
Update...
I tried to move during the Mem. Day weekend and because of the heat, I couldn't complete move..
But I did get my shelves and work table put together..
One side..
Otherside
I also ordered a new set of wheels.. should get to me in next couple of weeks.
6-17-2011
Update..
Few things to update...
1. I got my wheels!!! I been wanting a set of wheels that will fit well under the MB FD and been eyeing on the Volk RE30s for about 2 years. After searching for the right color, size, offset, I found a set, ordered them, and they are here!!
2. RE30s I wanted to use them for some track days when the weather gets cooler and I'm done moving into the house.. Ive talked to Rich and few others and decided to get a set of Yokohama Advan AD08 s. They came in yesterday..

I took the wheels and tires to the best tire/wheel mounting shop in AL. They have the newest Corgi machines that does not touch and balanced by putting load on the wheel. They also use very special weights to balance them. Definitely worth the money!!! Not that its much more than other place I used to take them to.
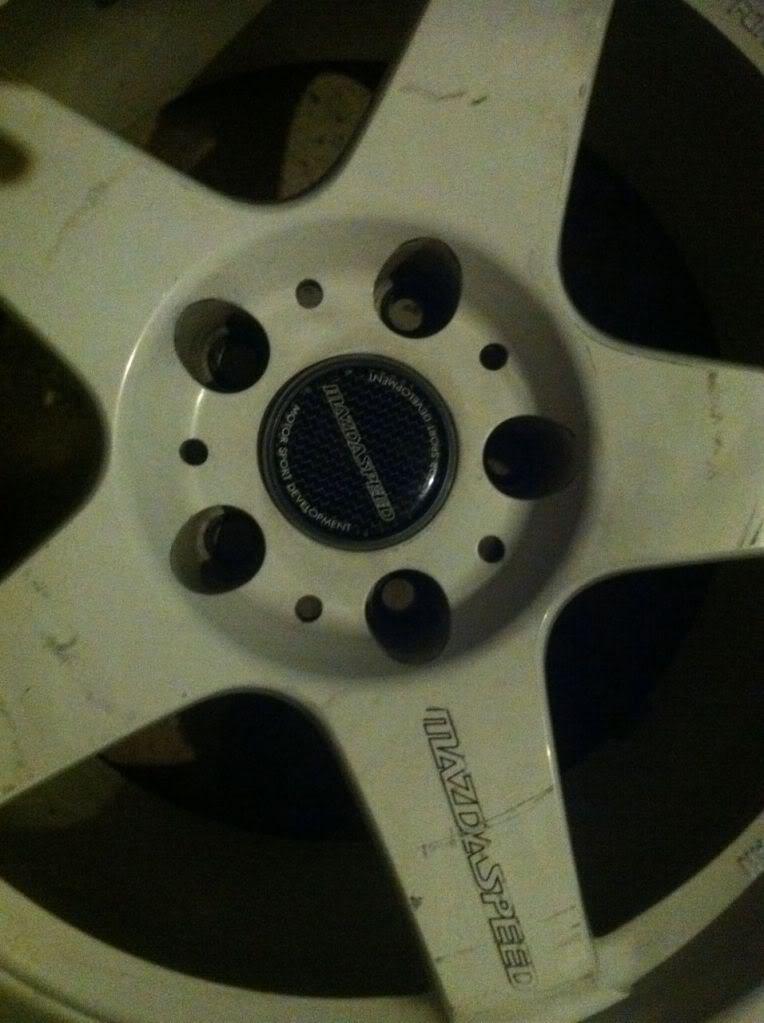
3. Now As some of you know, I been also collecting rare MS parts for the SSM FD. I wanted to have semi rare Mazda/Mazdaspeed goodies on that car. Recently, I wanted to use OE wheels and bought a 40th anniversary RX8 wheels.. But when put on, I wasn't super happy with the looks.. So, I continued to look for the wheels I been trying to find.. which are MS-01S made specifically for the FD. I'm not really big on 18s on this FDs so 17s were the ones I really wanted..
Anyhow, after over 2 maybe 3 years of search, I finally found a set!!

Not a big fan of whites but these are the ones came off of an R spec FD. White on SSM doesn't go well so I'm going to re finish them in MS bronze..
These wheels will now complete the exterior and I'm still waiting on my new engine to arrive. After that, hopefully I'll be moved into my new house and will start installing parts.. Will keep updating this thread.. Not that people care..
6-18-2011
Bronze might go better. I'm waiting on the powder coat guy to test out the bronze.. I should know about powder coating sometime next week.
Update:
I had a chance to get the tires mounted on the RE30..
Here are the spec, just in case someone asks me:
Custom color RE30, Diamond Black, limited edition center cap, size: 18x9.5 +22 and 18x10.5 +25.
Tire spec: 255/35/18 and 295/30/18 Yokohama Advan AD08s
6-20-2011
MS-01S caps got in... Now just need to refinish the wheels..
6-30-2011
Well, its all pending wheel size, offset, etc... I think I might of touched on this topic on this thread (or somewhere on this forum)...
Here is the thing.. FD's are very adjustable... Stock susupension, you could adjust your camber so you could 'tuck' in your wheels if you wanted to.
I'm not really into getting super low offset wheels to do this.. but you can.
That being said, with my FEED body, my recent purchase of Volk RE30s should work great without any issues.
Wheel spec: 18x9.5 +22 and 18x10.5 +25.
Tire spec: 255/35/18 and 295/30/18 Yokohama Advan AD08s
I'm sure you could go wider tires up front (285/30/18s), but my experience running wide fronts on the street has been interesting.. The car tends to wonder pending shape of the road. Driving requires bit more attention and just gives the car bid different feel... I'm sure with adjustment to your alignment might fix this issue, but for me, with my current alignment, I felt better with narrower tires.
I also have fitted 305 on the back with my SSR comps and no fitment issues. You just have to decide what look/feel of the you are going for. At my current size, I feel confident driving at my measly low 300 rwhp. Car feels very responsive and handling so far has been superb. Also, Tire choices will make a difference.. Going from PS2 to Advan Sport made a difference and I went exact same size tires.
7-7-2011
My SSRs are 18x10.5 +43. I could barely fit my index finger between the stock struts and the tires. But with coilovers you tend to have bit more room.
My RE30s are 18x10.5 +25, And if you cut the inner lip on the rear flares, I think you should be able to run 335s without an issue. As 18x10.5 +25 will give almost 20mm more inner space and the lip is about 10mm.
Out of curiosity, what is your goal??
Now my update..
I've finally moved everything out of my old garage and into the new.. Now, I'm starting to get things organized and start working on the cars.
I been meeting with the local powder coating guy to get a good bronze powder coat to refinish the MS-01S wheels. After looking at 30 or so different shade of Bronze, I've found one that I really like. Wheels will be stripped and coated within couple of weeks.
I also go my RX-7 Magazines from Japan. Thanks to one of the forum member..
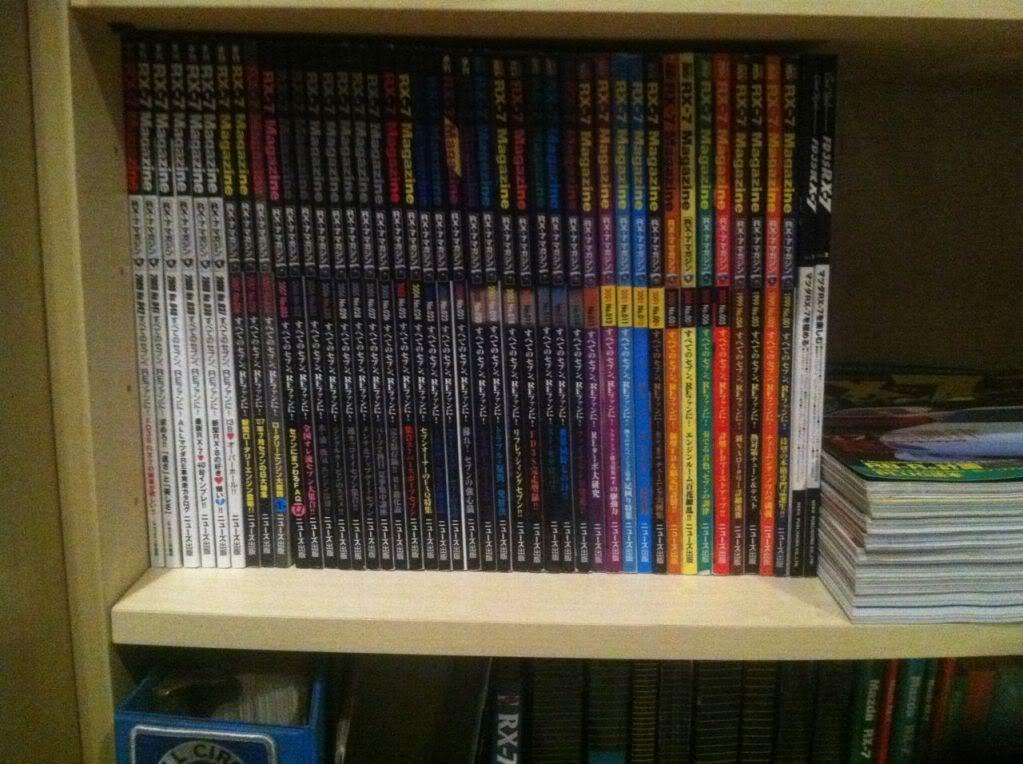
Now I have a complete collection of these and going to start looking through to gain some knowledge on RX7 parts ![]()
And finally, my Halon fire extinguisher for the house....
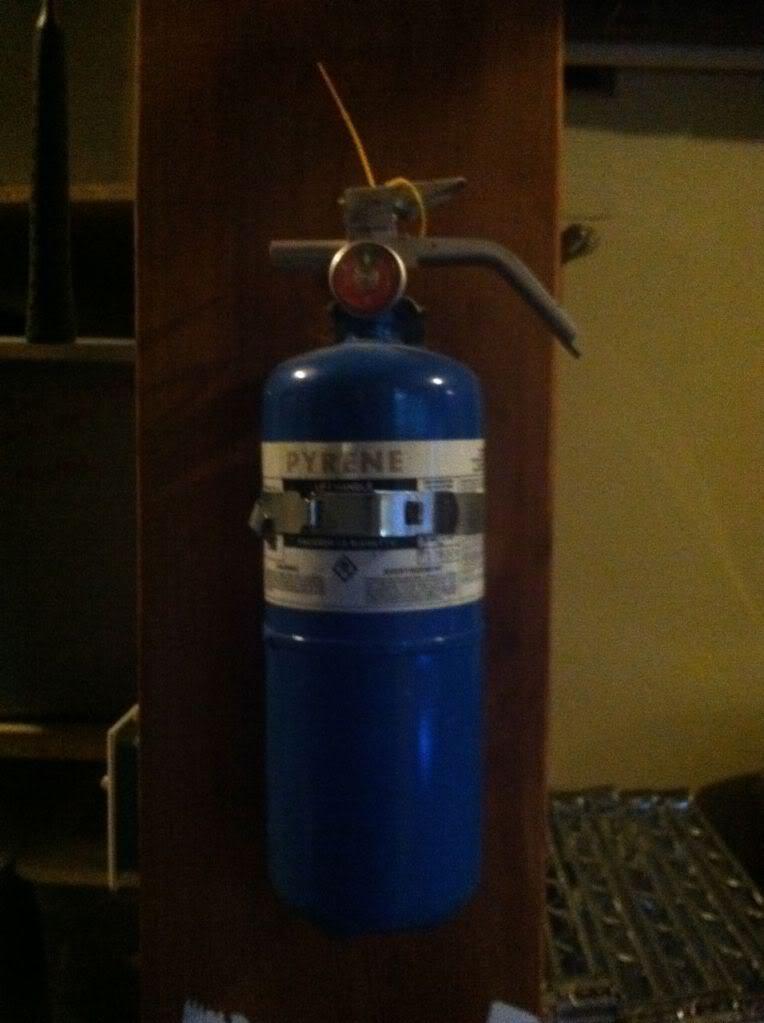
I hope I never have to use this..
I have PZero and they are super light for its size... Not that I'm an expert in tires.. but my trial and error lead me to believe its not about the size but what brand/model tires you use. I'm guessing since you said you have a goal in mind, its more for performance?? If so, I would pick a brand/model as it might perform better than size range you are looking for.
I went from PS2 on my FD (been a huge fan of PS2s in the past) and when I tried Advan Sports, same size made a noticeable difference. Now, I have Advan AD08s in same size and going to see how that will feel.
7-14-2011
Zhe, If you get the offset right and maximize the width, I think you could definitely put 335 under Feed rear flares. I mean, I put 305 on 10.5s and that offset wheel leaves me good bit of space.
Anyhow, here is my latest update..
1. My paint and body guy in ATL, GA now flaked on me and became VERY unreliable. Because of that, I'm in the process of picking up all my parts and now searching for a new guy in Bham.. I've contacted couple of guys to see if they are interested in taking on my car.
2. I finally got the black Bride fabric from Bride USA. My upholstery guy finished the rear seats and I installed them last night.. He did a fantastic job and if any of you AL guys are looking for a upholstery guy, take your stuff to Luis Perez at Mobile Car Upholstery in Pelham, AL. He was very reasonable and did a fantastic job!
Here are couple of pics of the rear seats..
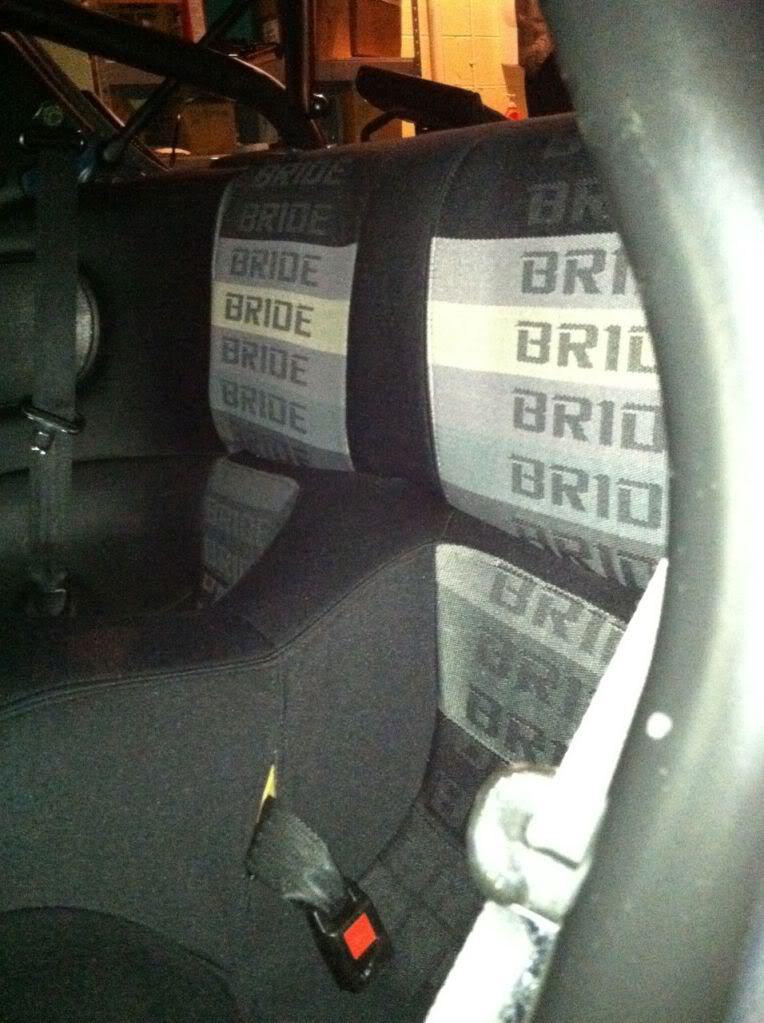
Sorry for the bad pic.. its was taken via my phone.
3. Found the Bronze powder coat I like and my powder coating guy is ordering it. I'm hoping to get the wheels to him sometime next week.
7-18-2011
Those magazines are discontinued as of I think 2 years now.
Update...
I went to Import Alliance over the weekend and met some cool FD owners.
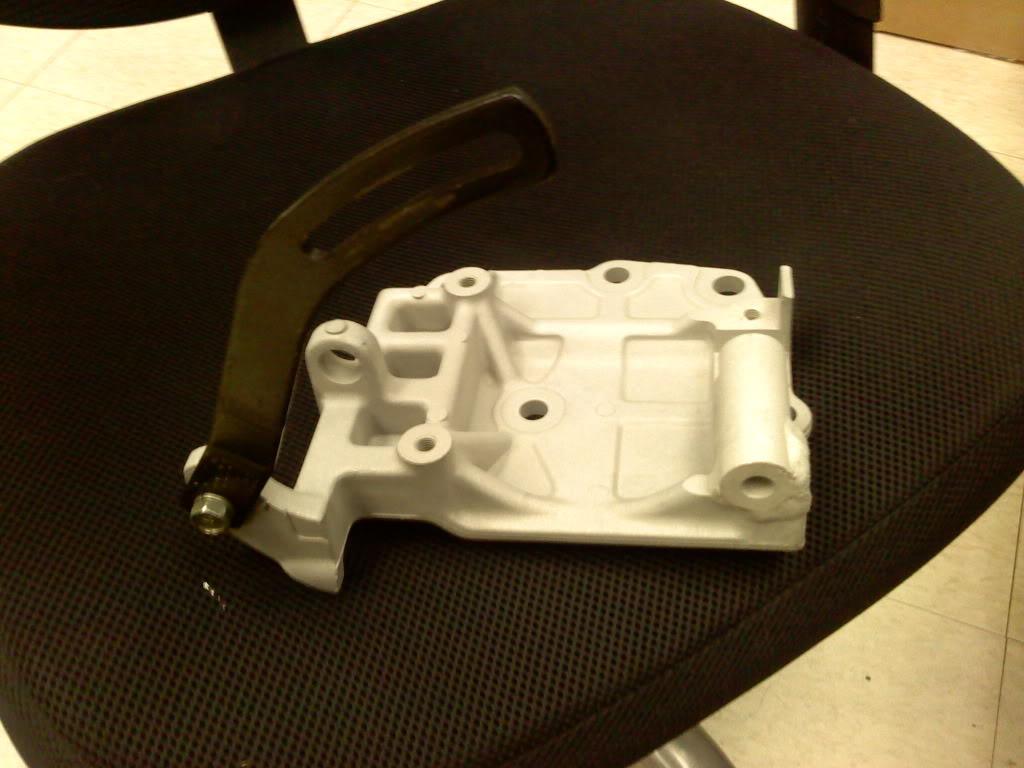
But before the event, I went over to see David Garfinkle and got my engine torque brace re-done so I can install my new brace system (which I think its more for looks).
Here are some pics..
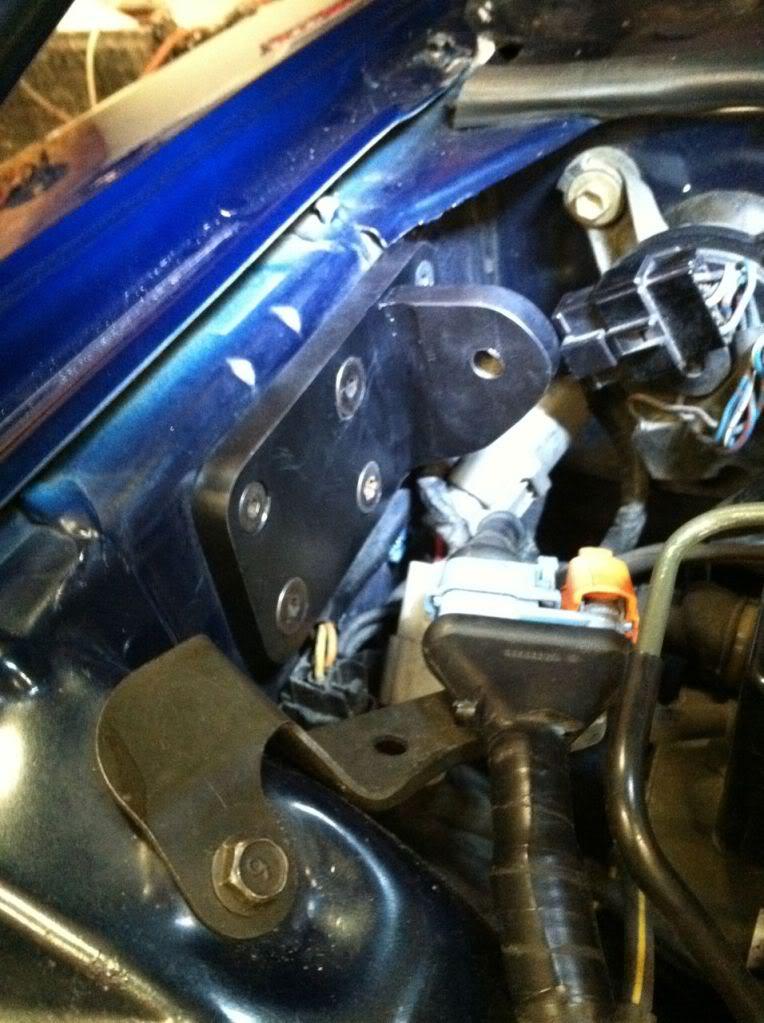
New mounting bracket, which is lowered to clear the brace
New extended rod
New rod installed
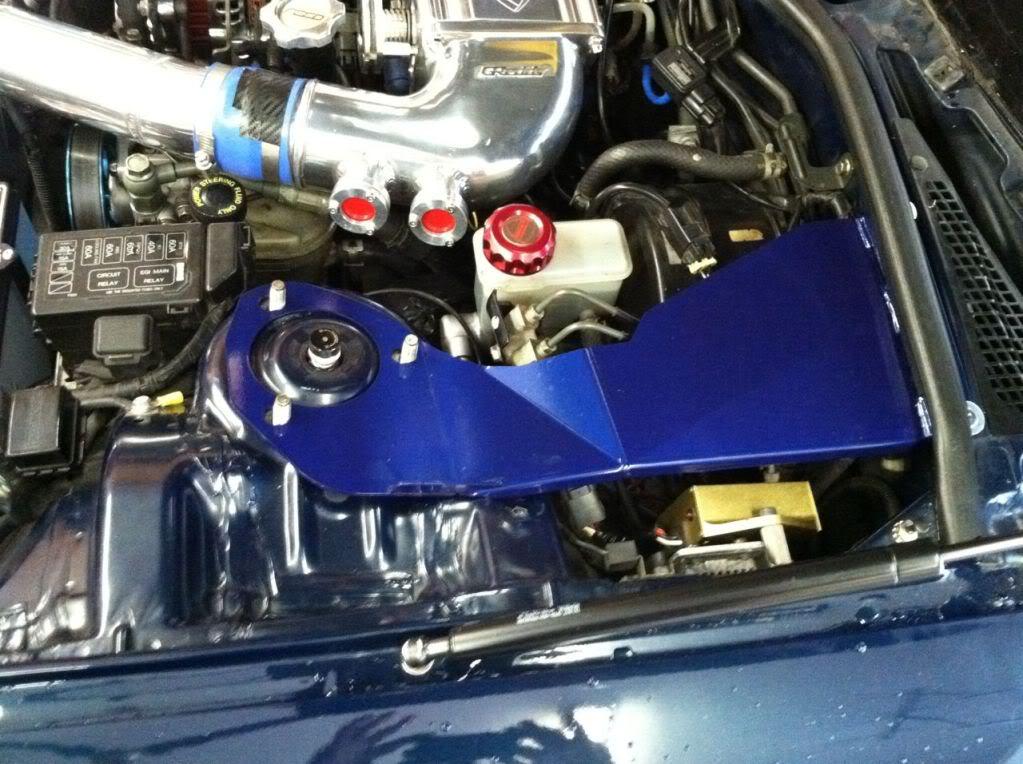
driver side brace... I took out the cruise control and relocated my twin power.
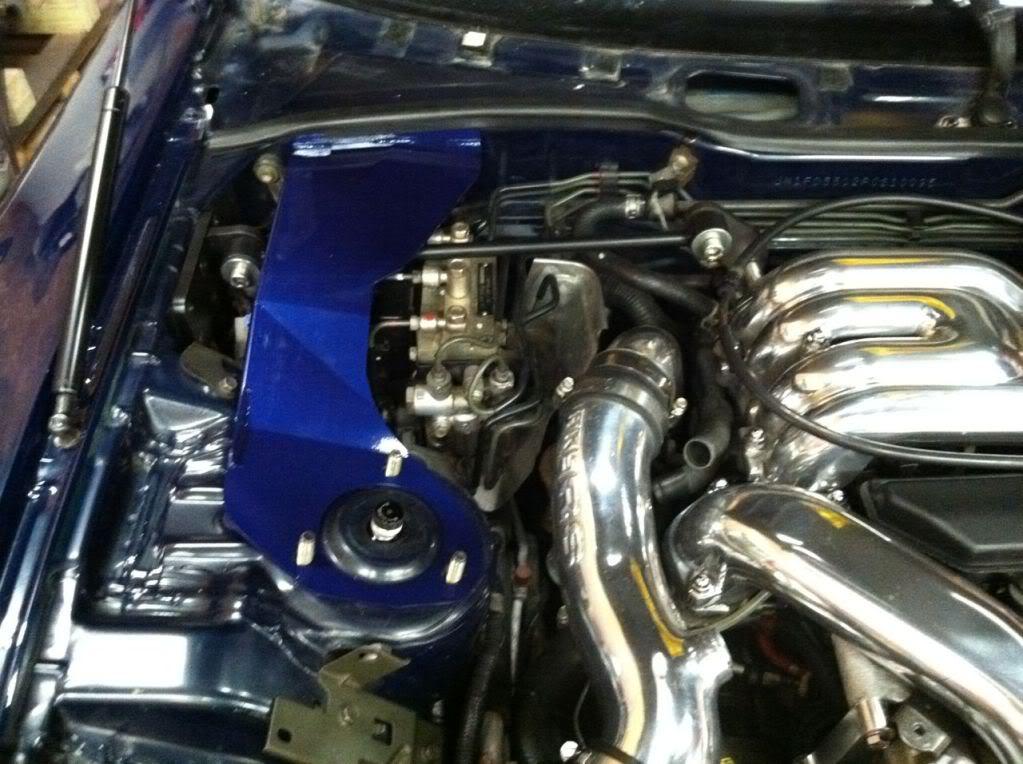
Fits perfect!!
Before strut brace

Finished!
And my throttle cable was sticking a bit with the 90mm Rotary Works TB so Garfinkle shortened the cable and modified the cable bracket. Works great now..
By the way, Garfinkle's Engine Torque brace is a must for any FD owner. If you want one, he can be reached via email: [email protected]
7-18-2011
Couple of pics I found via FB...
7-19-2011
Thank you! You should of came by and said hello... or did you?
Here are few more pics I've found....
Interior (but looking for some good pics of the back).
Rolling shot from a caravan I was in..
Me driving around with one of the former RX owner..
7-26-2011
Couple of more pics from the IA..
These are taken during my break down.. I had to disconnect the starter and push start the car as starter was constantly spinning..
When I got home, I troubleshoot the car and found that oil or some liquid was making contact between POS cable to the starter and starter solenoid harness..
Also, I had a chance to get something SUPER rare.. It should be coming in tomorrow..
8-1-2011
Update..
I decided to swap out my RE-A speedo and put it into a new more rare cluster..
So, I swapped it into the 30th anniversary cluster..

Another reason for doing this is because 30th anniversary lights up in green ![]()
8-2-2011
Are you talking about this one ![]()
Well, I'm keeping the other mirror with the door.. and going to use these and getting my new doors welded..
I also recently picked up this RARE piece for my FD...
8-3-2011
I'm sorry man.. didn't mean to.. But I'll say this, this thing hurt my pocket really bad.
Few more pics of the unit..
9-1-2011
I decided to swap out my other gauges with the new Prosport Gauges, the EVO series..
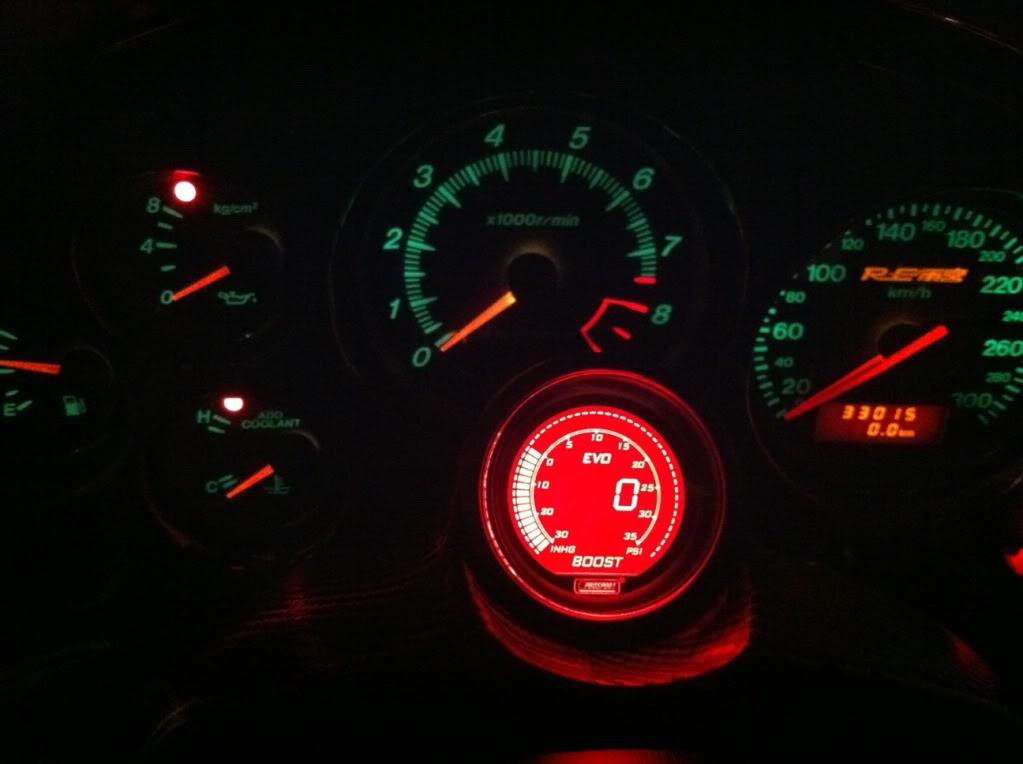
I kind of like the digital read out.
10-7-2011
Sweet!!!
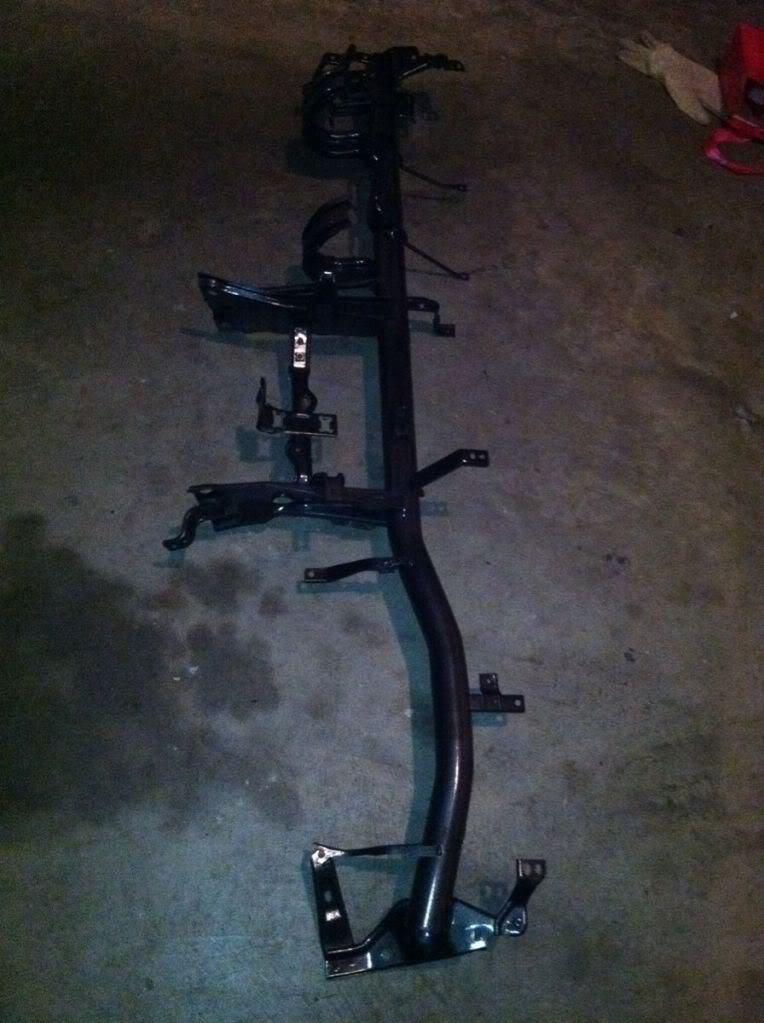
Well, looks like I'll be picking up the shell after SEMA.. I'm currently talking with the local fabricator (MPFab.com) about building a V mount set up and a new method of latching the hood.
Once I get the car, I'm going to spend the next month working out the wiring to get all the ABS/PS/AC/Heater/SRS/Radio, etc taken off and simplify the engine bay and inside.
I'm planning to just run the Defi DSSC to monitor all and that's it (no extra gauges).
This will be the last FD I'm going to build in my life...
10-17-2011
Finally got my engine from my builder over the weekend..

Ported 13B-REW block for 13B-RE LIM.. This is going in my silver FD with RZ tranny and new 99 twins.
I also picked up my MS-01S wheels from the powder coating guy. Will post pics of the wheels when I get them on the car.
11-1-2011
Update on my MS-01S wheels..
Tires are mounted, balanced, and decals put on!
New caps ![]()
11-13-2011
Thanks for the link!!
Well, here is an update...
After SEMA, I went to New Orleans and picked up my new project FD.
And after bring it back, I brought it to my friend/fabricator's shop, Morgan Performance Fabrications (www.MPFab.com).
Car will stay here for couple of months for some custom Vmount, manifold, etc made...
11-17-2011
Over the week, I been prepping the 20B for a test drop in in the new shell so the fabricator can make the V mount, turbo manifold (ditching my old one), and other things.
Anyhow, Here are some pics of the engine with Defined Autoworks mounting kit.
More pics later on today as the engine will is going in in 3 hours.
Just trying to finally build my 3 rotor that I been wanting to build for like 7 years.. Now, I'm getting motivated and have a purpose to build it.
It will be more track inspired car and hopefully I'll do some track events and let my friends son do some time trials with it (he was a former enduro cart champ).
Anyhow, this morning, I had a chance to test fit the motor in the new shell...
There are some issues with the TB elbow and few other things.. The fabricator, Walker Morgan from www.MPFab.com is going to fix all the issues and build me an amazing V mount set up!!
12-16-2011
I guess I should update this thread a bit...
Here is what I been doing since...
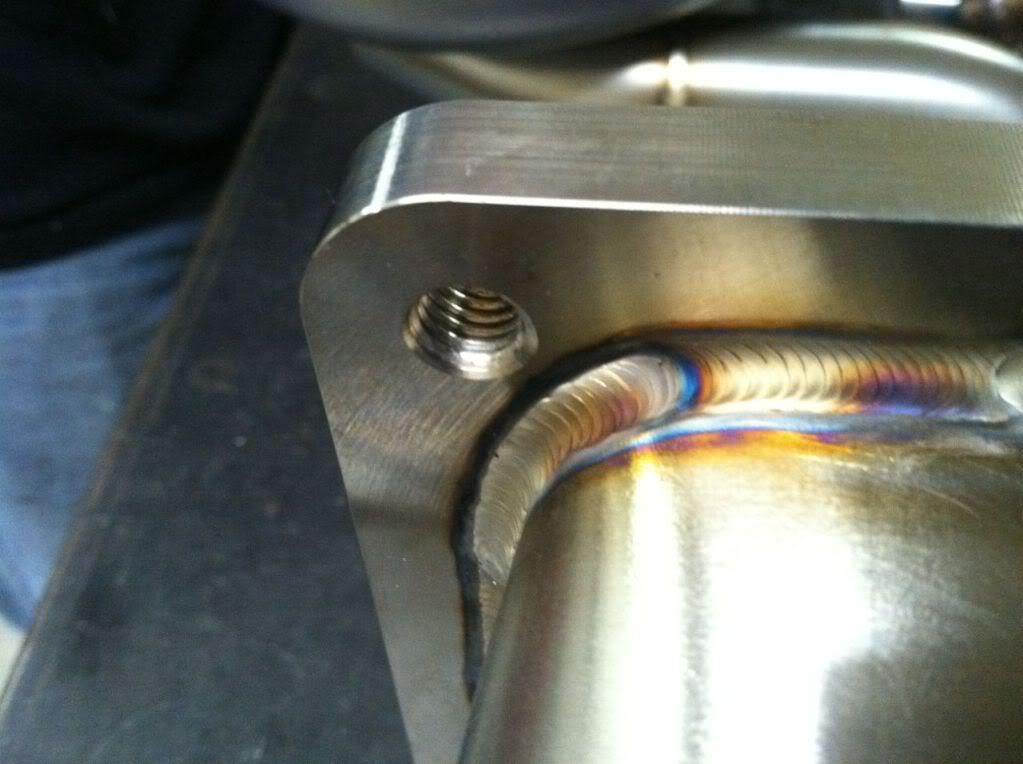
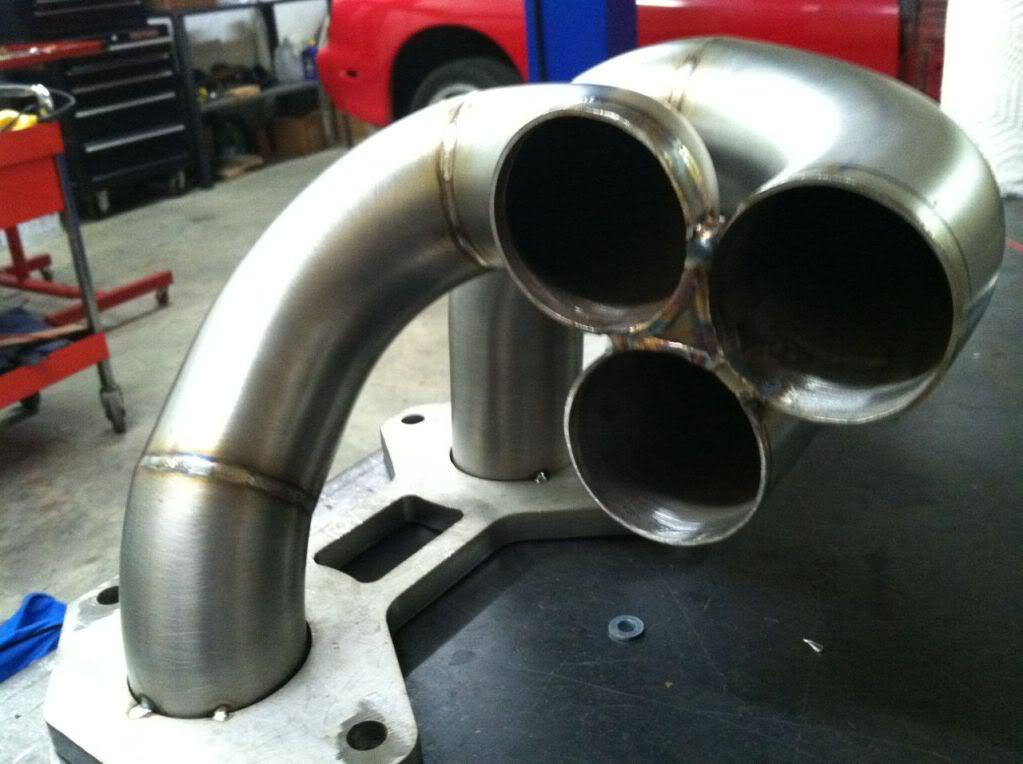
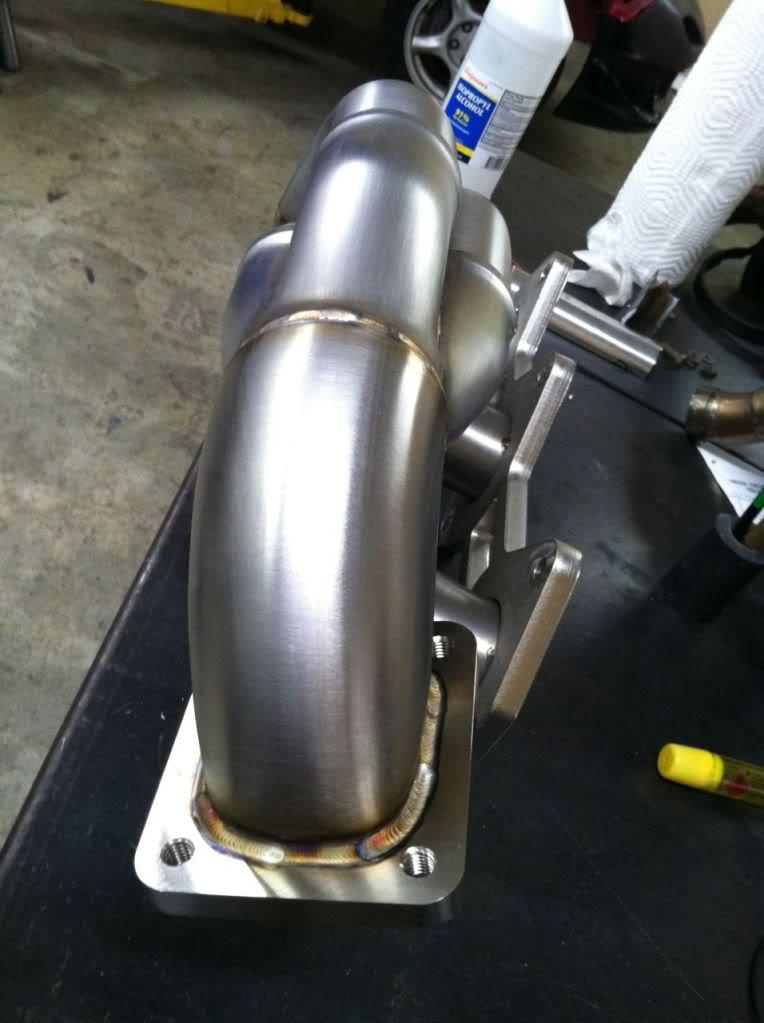
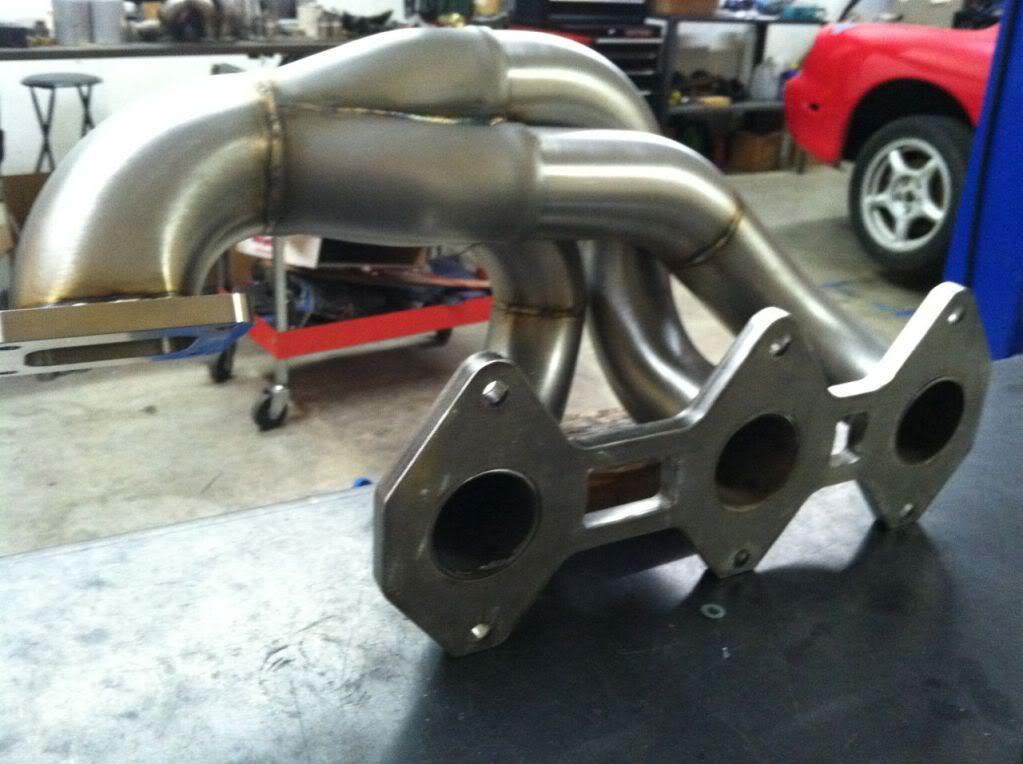
December 6th, 2011 I got a call from my fabricator and he said he checked on the pricing for the Stainless 321 and going to order some for the new manifold set up. This means, my old SS 321 manifold with Racing Beat header flange is for sale!!! If you are interested let me know ![]()
Here are pics of my old flange set up!
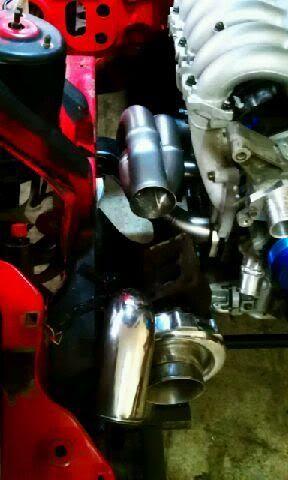
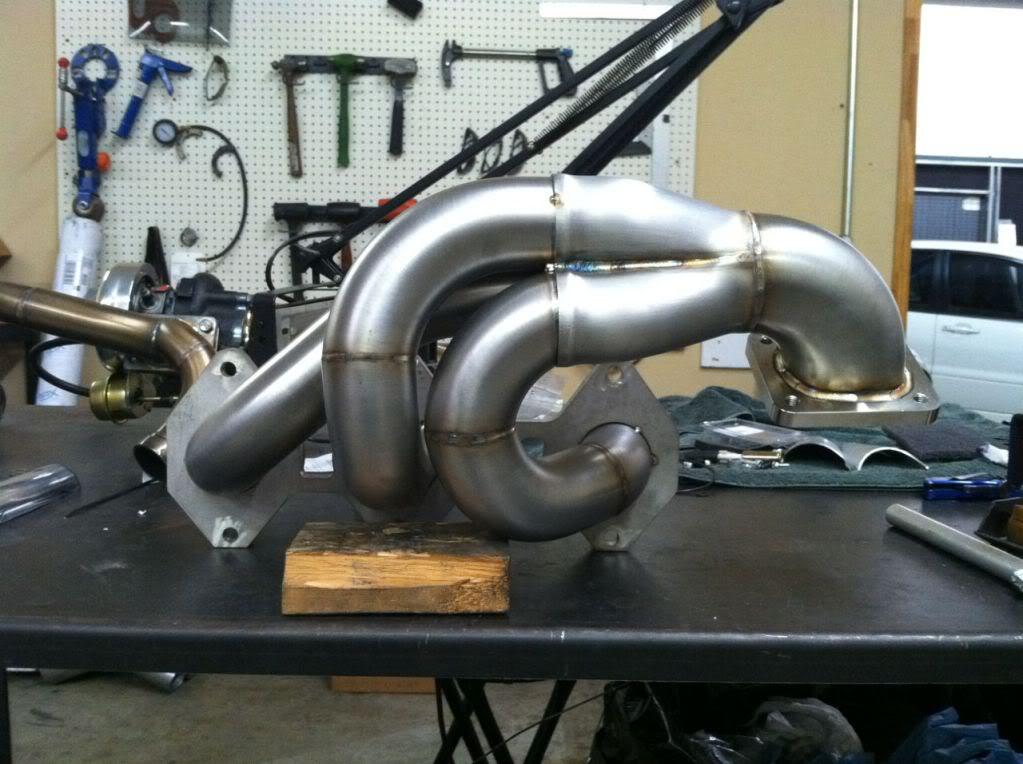
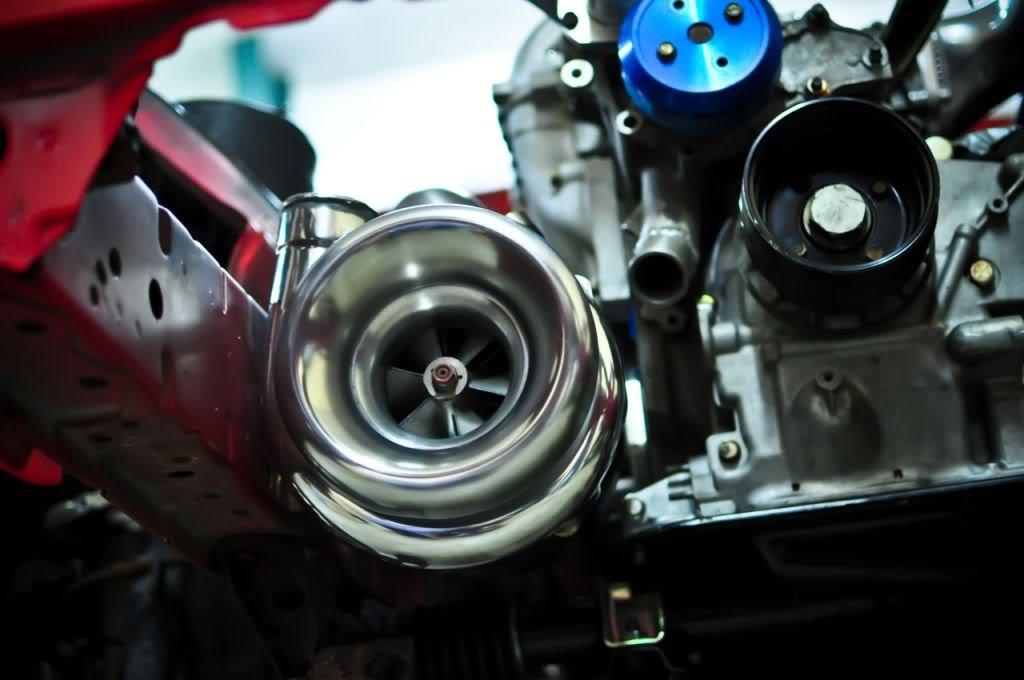
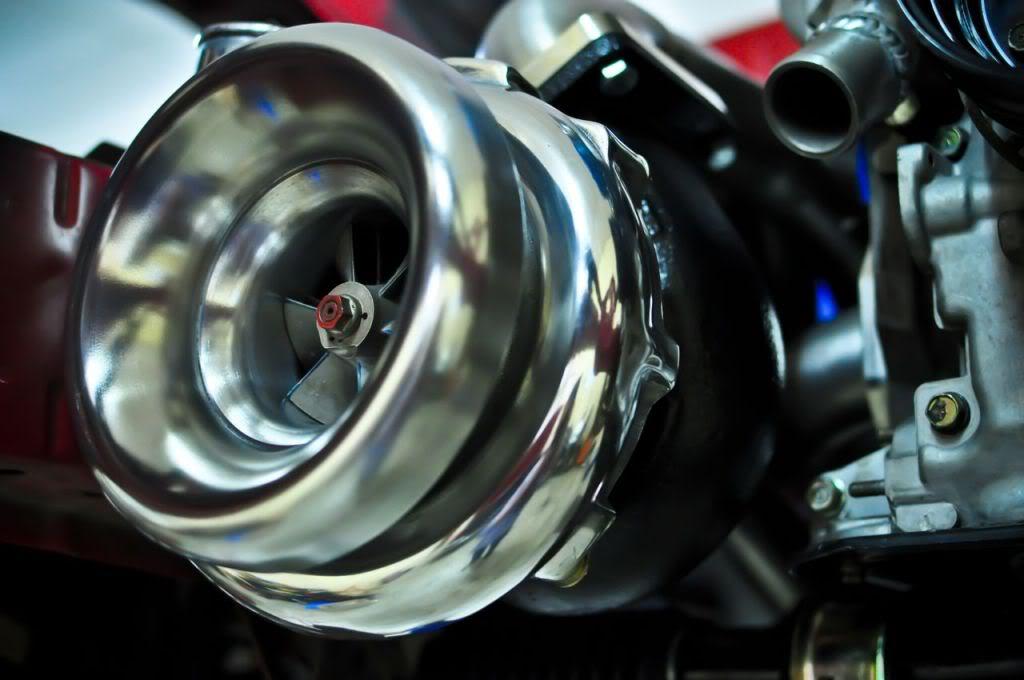
Here are the pics and placement of the turbo.. Turbonetic T76.
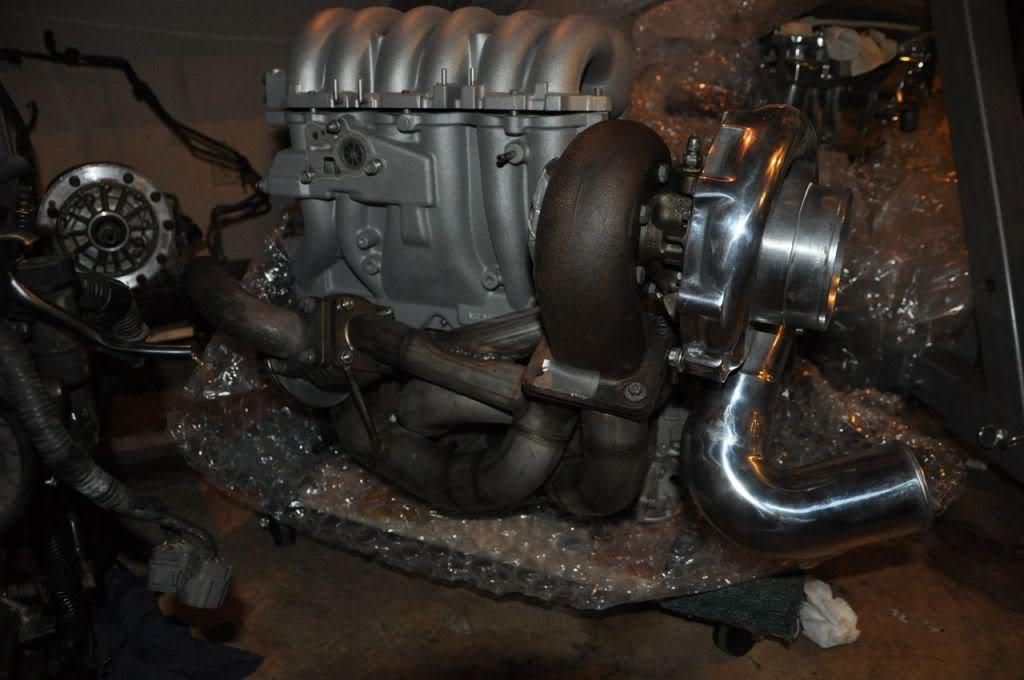
In the car with Hinson 20B /Pettit Subframe with this manifold with Garret T76 with T3 flange.

December 8th, 2011 - My fabricator/friend Walker Morgan has explain to me how he was going to build the new 20B manifold. We've decided to use bit more expensive, 321 Stainless for the new manifold. I'm excited to see how its going to turn out!! Until then, I need to start working on the wiring for the car..
Here is a translated DSSC wiring diagram... Only one in the WORLD!!! ![]()

December 13, 2011 - I didn't get much accomplished over the weekend... Kid, wife, holiday season, plus my old house that i'm trying to get rid of is sucking all my spare time I have.
Yesterday, I finally ordered my new wheels for this car from WORK Wheels.
I'll most likely use these on the street and my RAYS/VOLK RE30s on the track.
WORK CR Ultimate is their newest Emotion Series that are much lighter and stronger than previous CR series. I'm super excited to get them and now they are available in 10.5 width.
12-22-2011
I highly doubt this thing will make it to DGRR.... I'm also waiting on few things so it might take longer than expected.
Anyhow, more update ![]()
December 16th, 2011 - I've received some sneak peek pictures of the turbo manifold yesterday. Walker Morgan from www.MPFab.com did an excellent job.
Here are few pics from the pics he sent me!
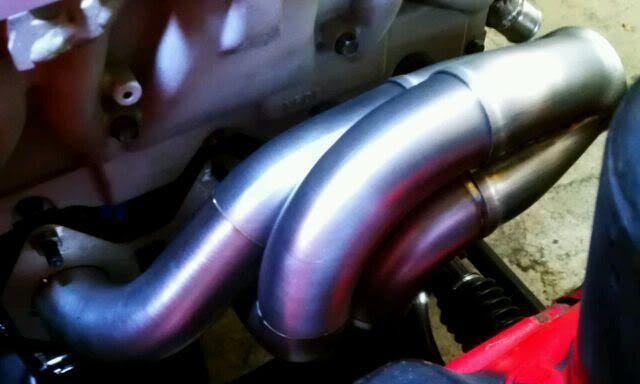
Its made with Stainless 321, which Walker did his magic on them to look like this... Not sure if many of you seen how 321 comes form suppliers, but they looked horrible.
I'm heading over to the shop on monday to take some high res pictures with my dslr and also bring him the mid pipe and catback for him to test fit to make the DP.
Those of you who haven't heard of MPFab.com, he has worked on several exhaust systems for high end SEMA cars and custom hot rods. He also developed turbo kids for bikes and other sport compact cars.
For more information about them, go visit: www.MPFab.com
December 19th, 2011 - I went by MPFab.com this morning to drop off my titanium catback and a midpipe so, he can start working on the turbo placement and DP. I also had a chance to take a look at Walker's handy work. Man was I impress with his fabrication skills ![]()
Here are some better pics I've taken.
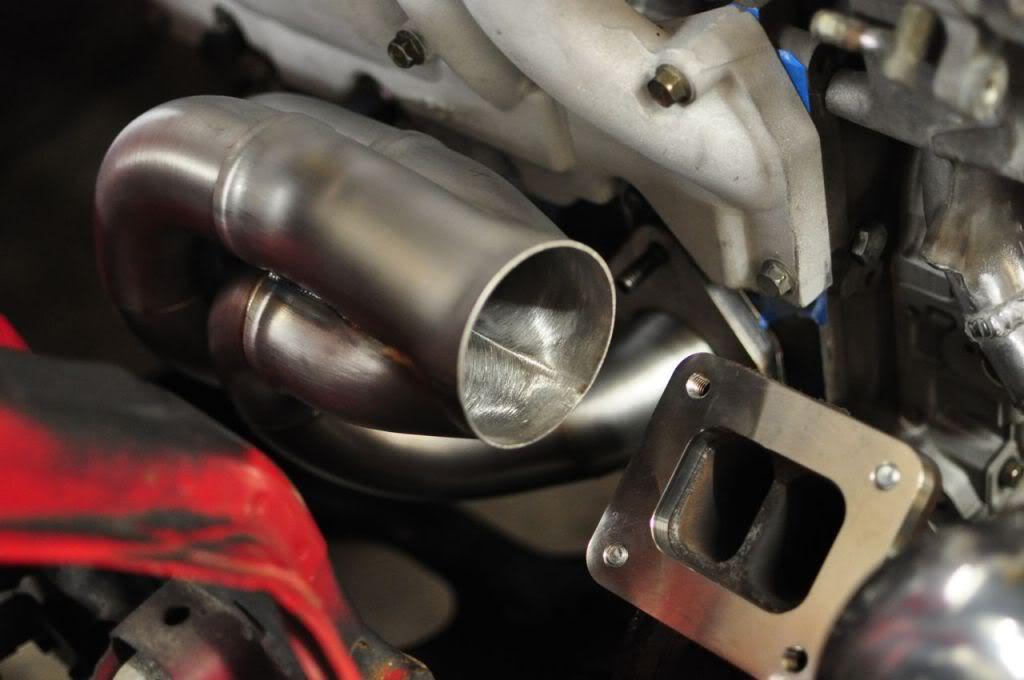
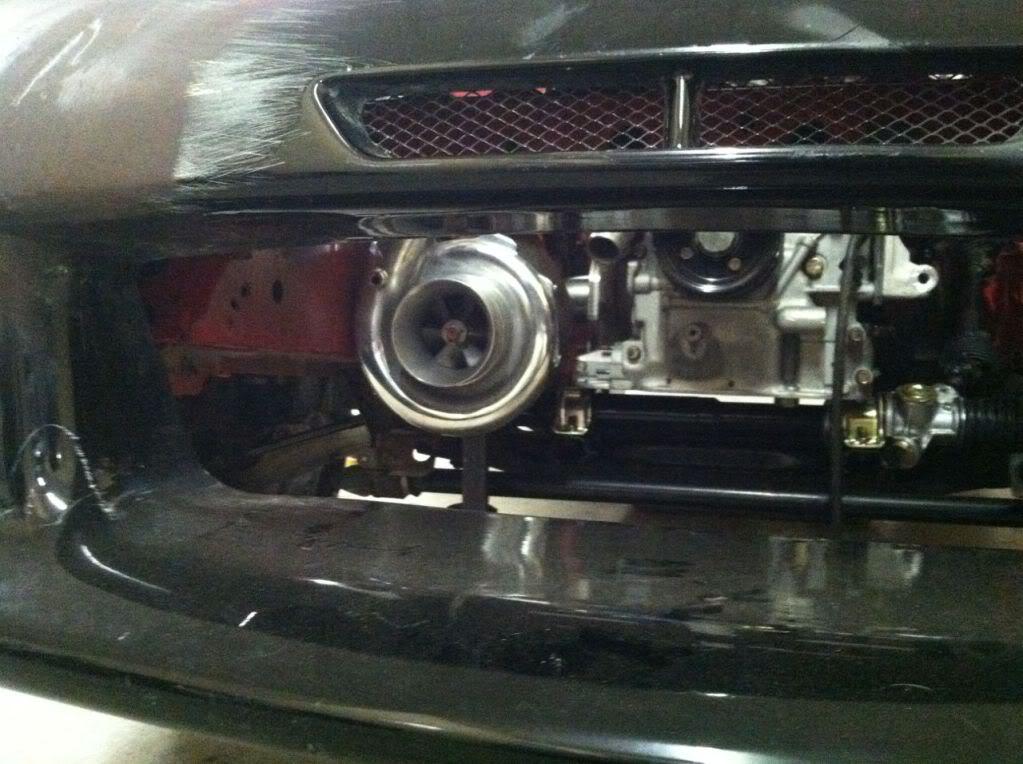
I have yet to see bottom mount turbo set up on a rotary and I'm excited to see how all is going to turn out!
12-23-2011
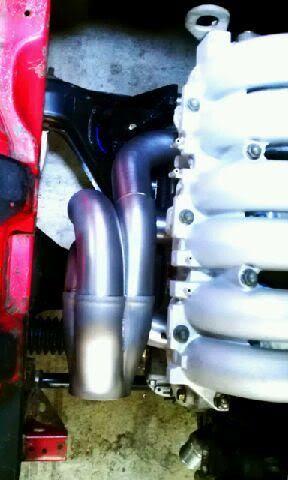
I realized I should of said not on a 20B. One of the main reason for us going bottom mount is to utilize the higher mounting of 20B (to clear FD steering rack) and put the turbo weight more down at the bottom vs. already higher 20B. Not sure if we would of done bottom mount if 20B was in similar location of where REW sits in an FD.
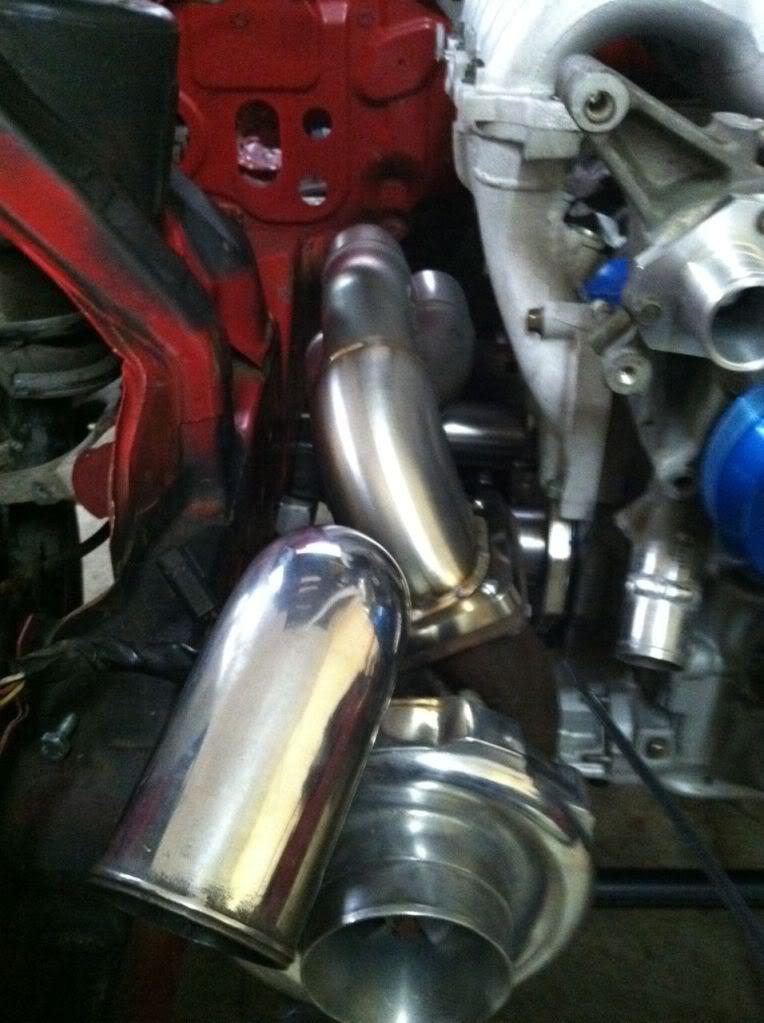
Here is a picture of the Twin Turbo bottom mount set up.
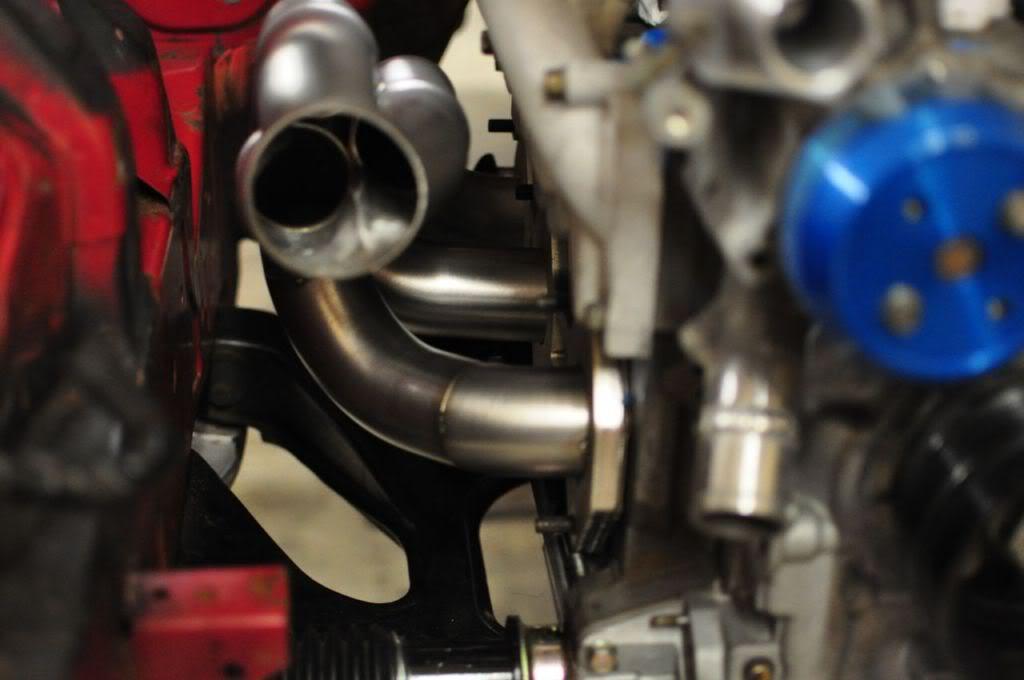
See below for what the 20B manifold my friend Walker made..
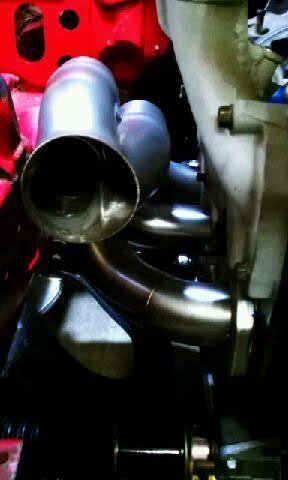
December 22nd, 2011 - I went over to MPFab to check out the manifold progress and lend a hand if needed (not that I can do much). We also wanted to test fit the turbo and get some measurements and clearance.. But in order to finish everything up, I need to get the new steering rack.
Anyhow, here are some Walker Morgan's handy work (www.MPFab.com)

12-27-2011
December 26th, 2011 - After a full day at work, I decided to take the dash apart and get it ready to get it recovered by my interior guy tomorrow..
Here are some pics of the stripped dash..
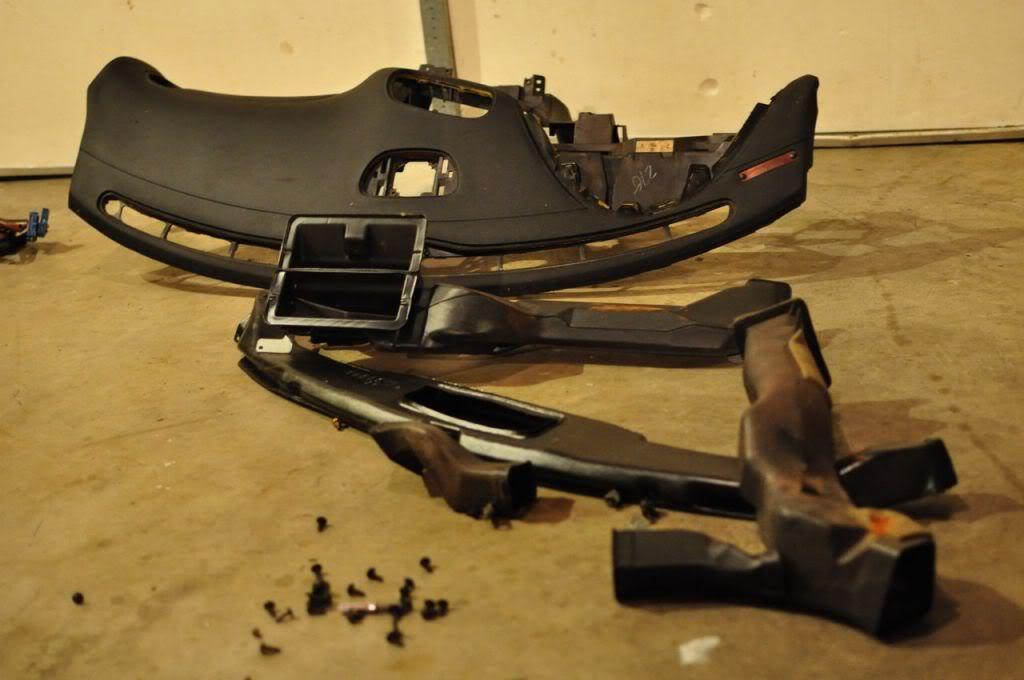
re-enforcement bar and wires..
I'm also re doing the center tunnel and door panels.. Should take about a month..
12-30-2011
Thanks guys! Hope all turns out ok..
Anyhow....
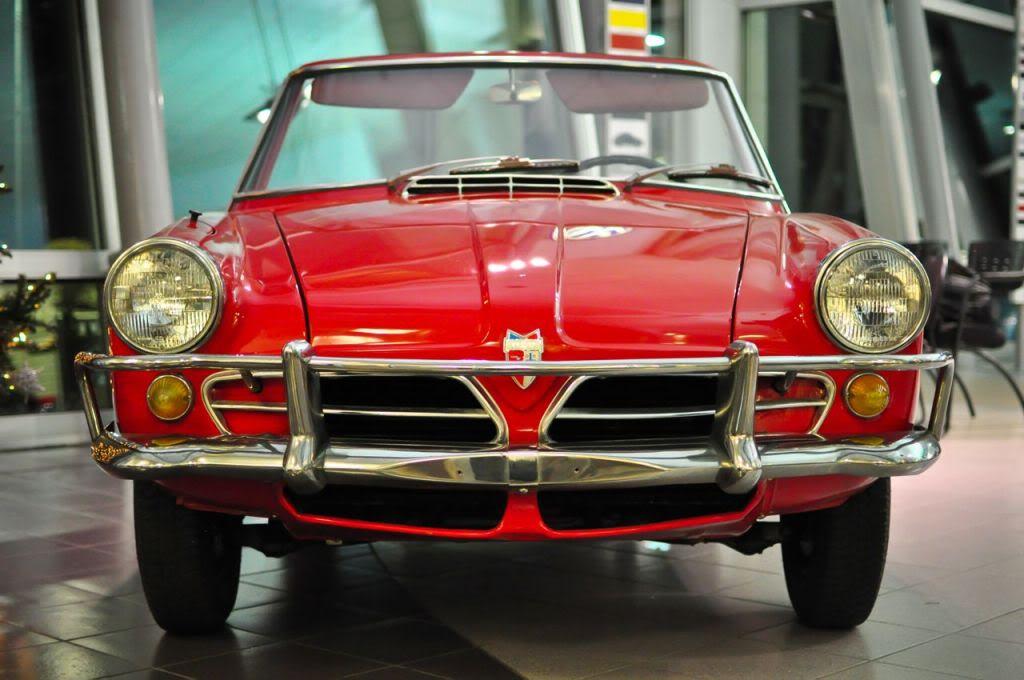
December 30th, 2011 - Not much update on the car... but in a rotary related thing, I had a chance to go see some rare historical rotary cars in Nashville, TN.
Thanks to Founder/Director of Lane Motor Museum, I had a chance to see, hear, and touch some historical and super rare rotary cars.
Here are some pics from my private tour.
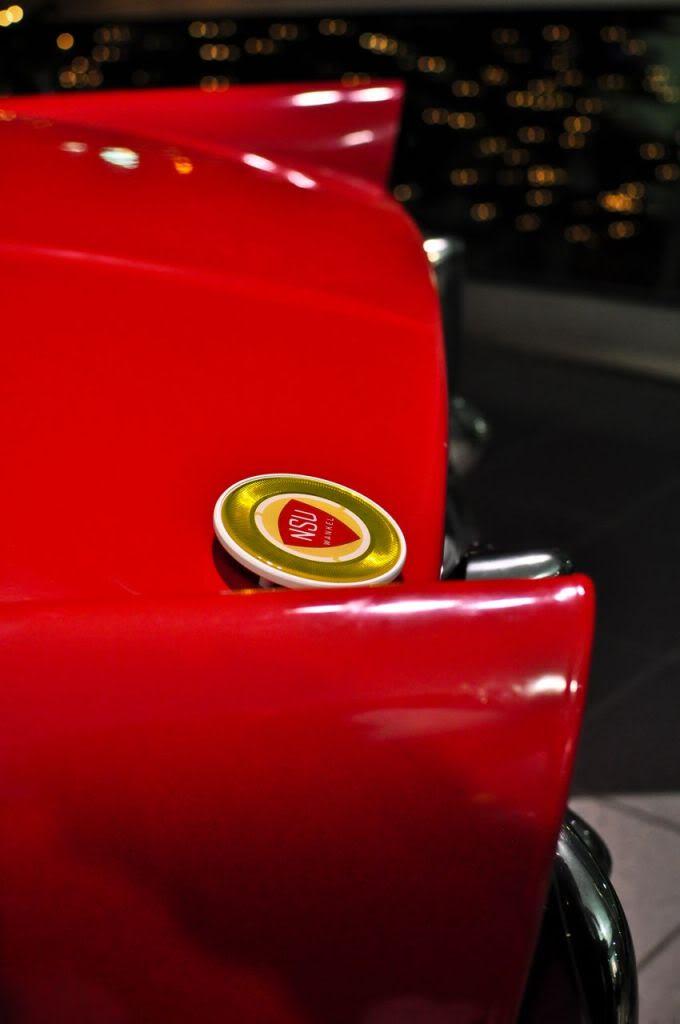
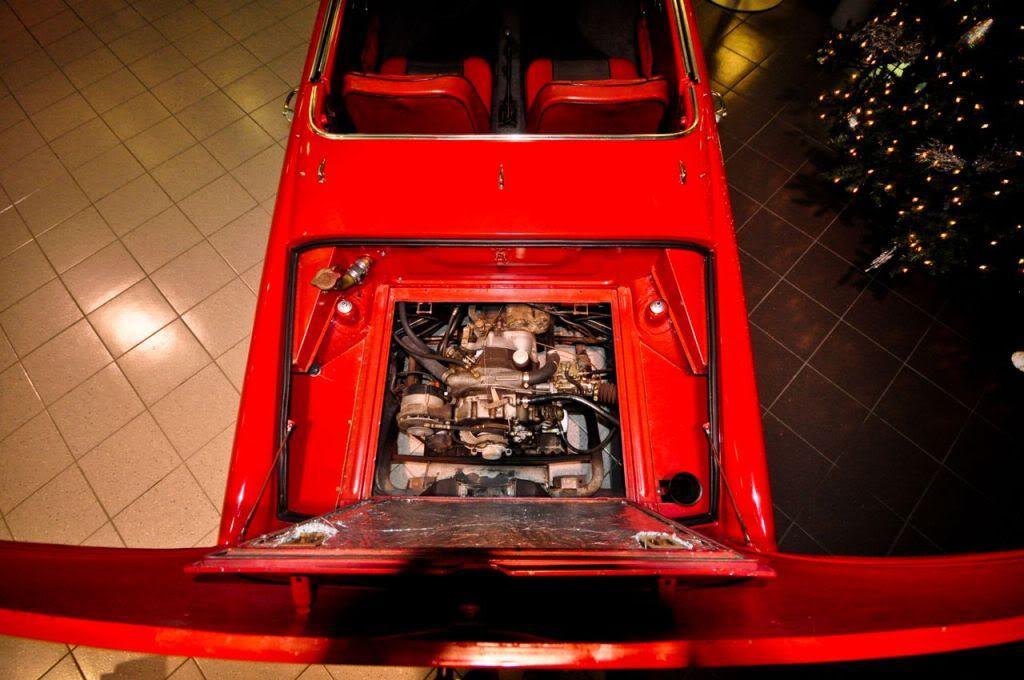
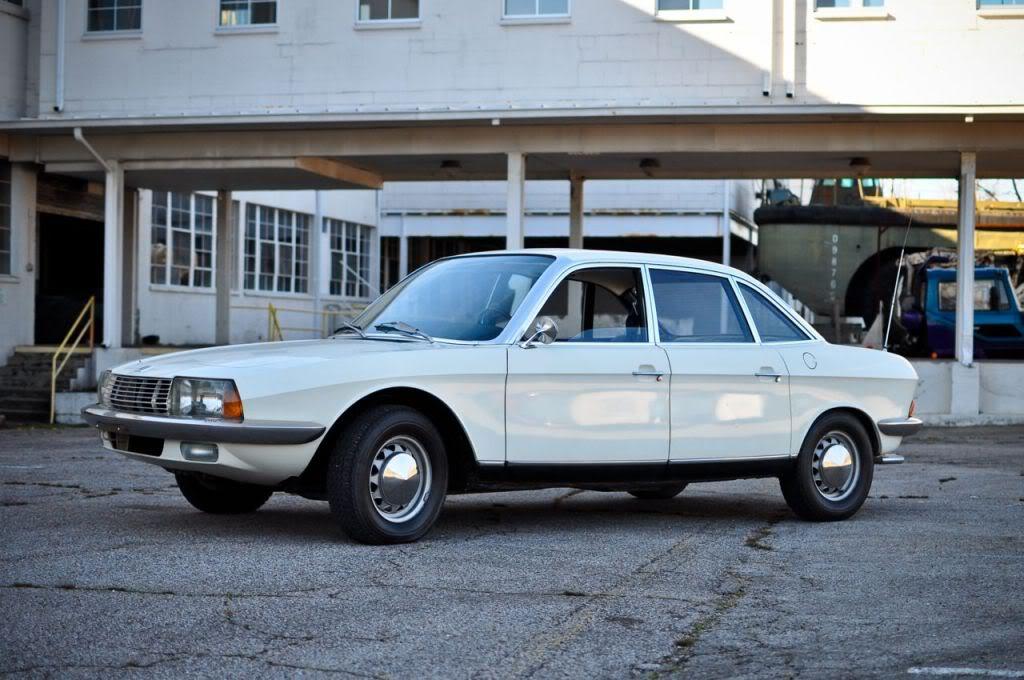
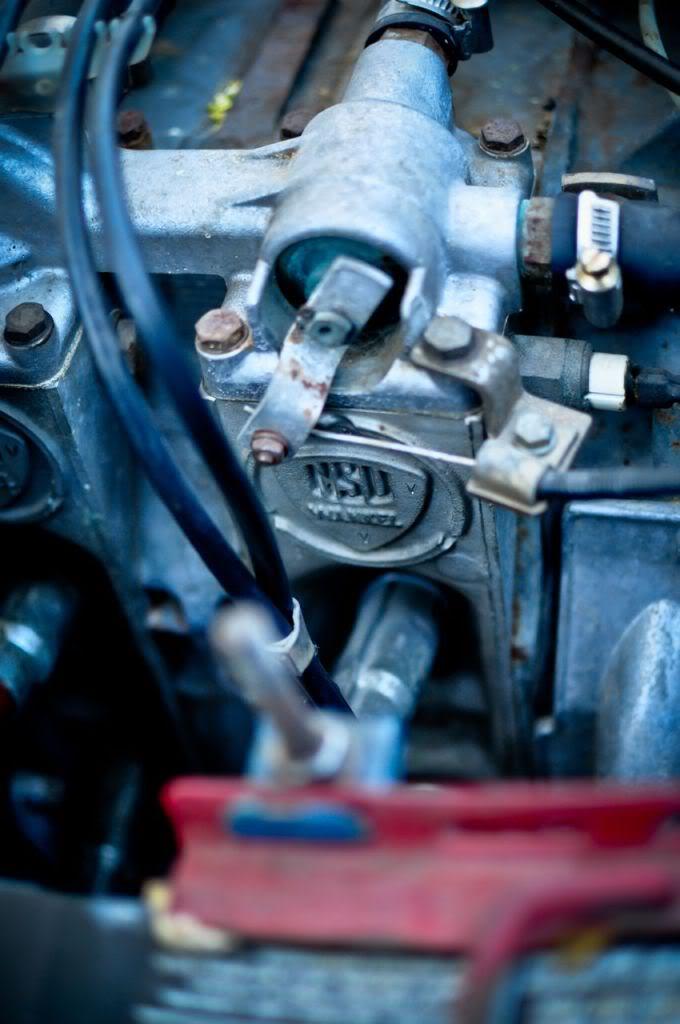
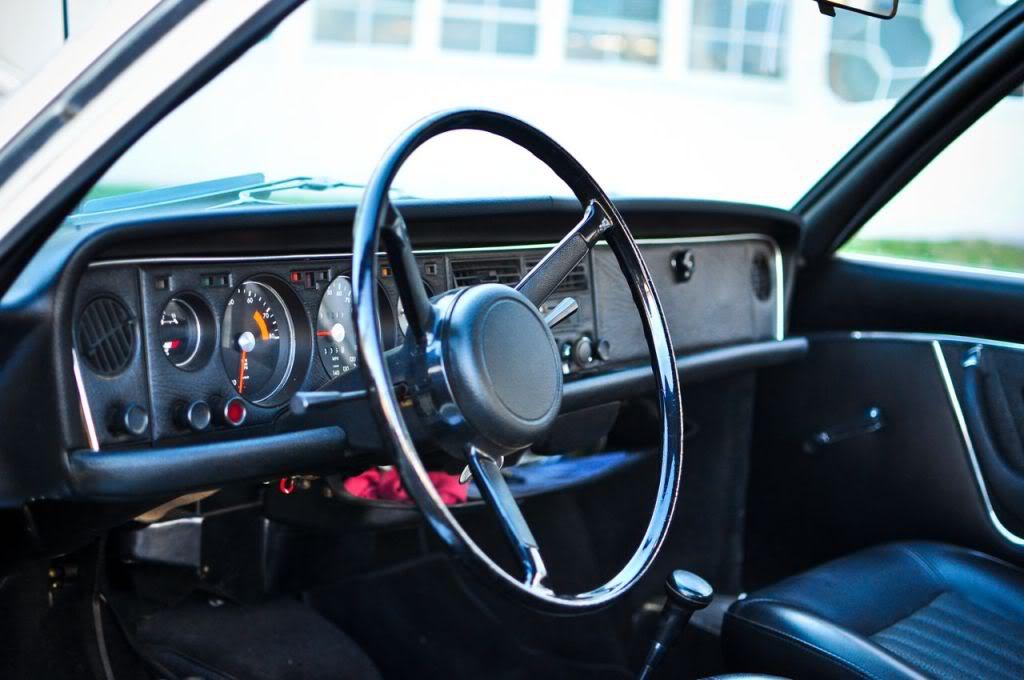
1967 NSU Spider - This is the first production rotary car with single rotor, rear mounted engine.
Another Rare NSU Ro-80 - A Birotor sedan
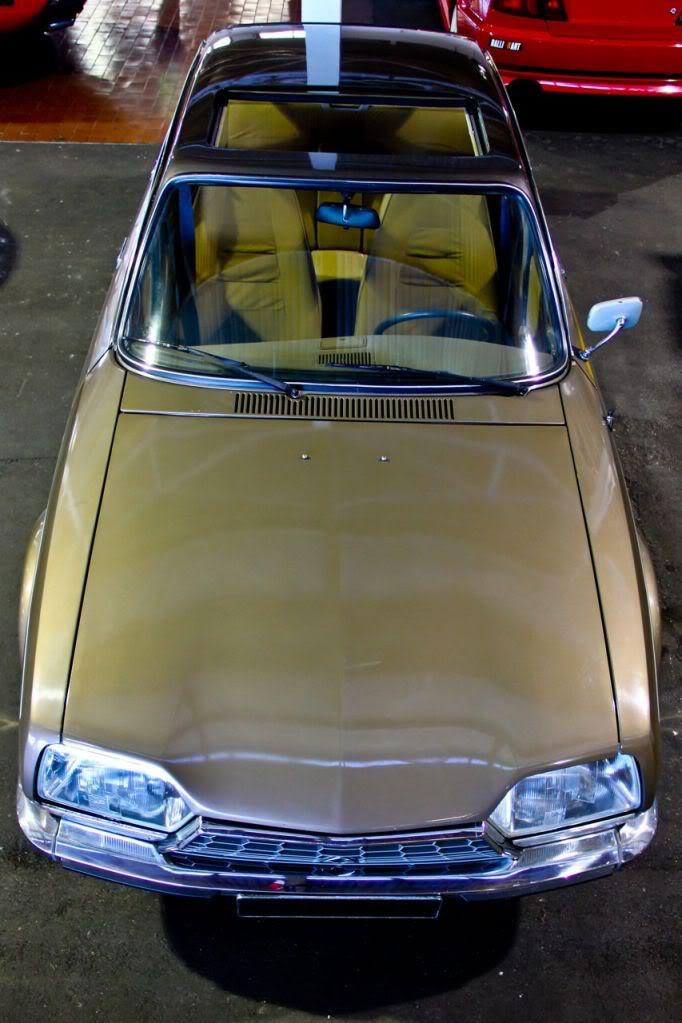
Citroen GS Birotor - I knew about the NSU, but did not know about this Citroen vehicle.

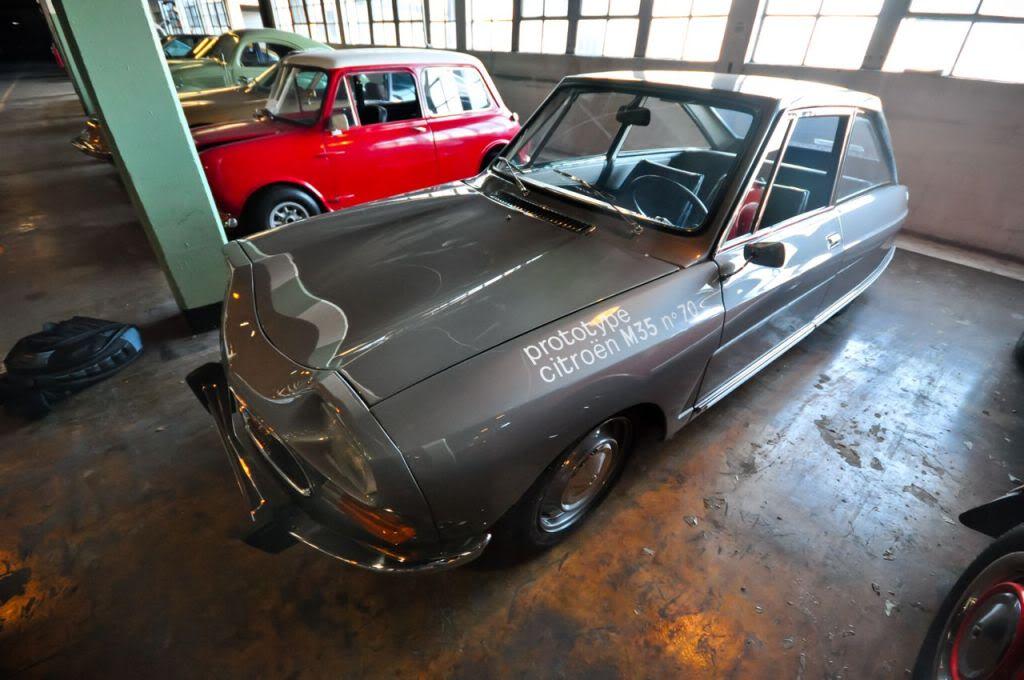
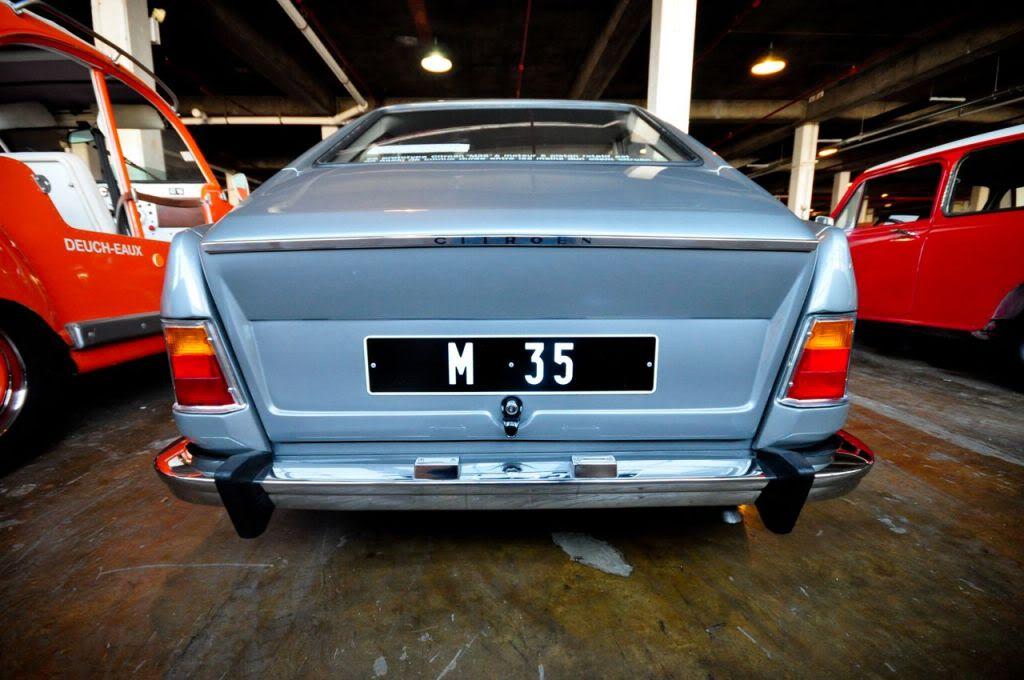
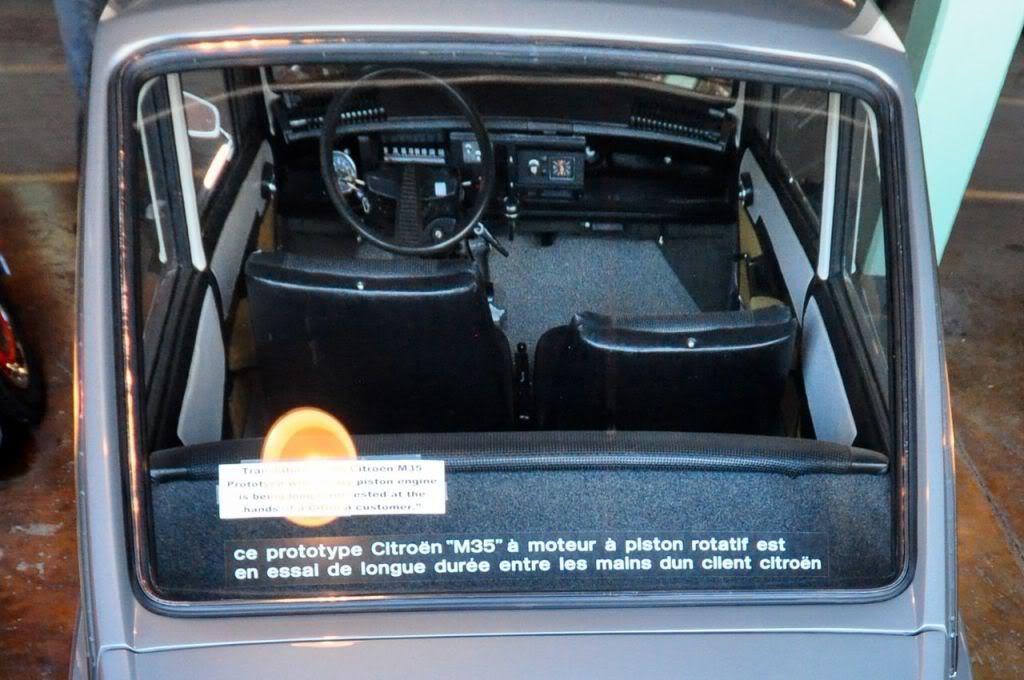
And finally a super rare Citroen M35 Prototype single rotor vehicle... This is the only one in USA.

1-4-2012
January 4th, 2012 - Happy New Year!!!
Well, not much have been done to the car as I was busy at work... Also, I'm about to trade this shell for an R1 shell without the sunroof. Hoping to do that this weekend.
Anyhow, the little time I had, I stripped out the dash and refinished the rusty metal dash frame.
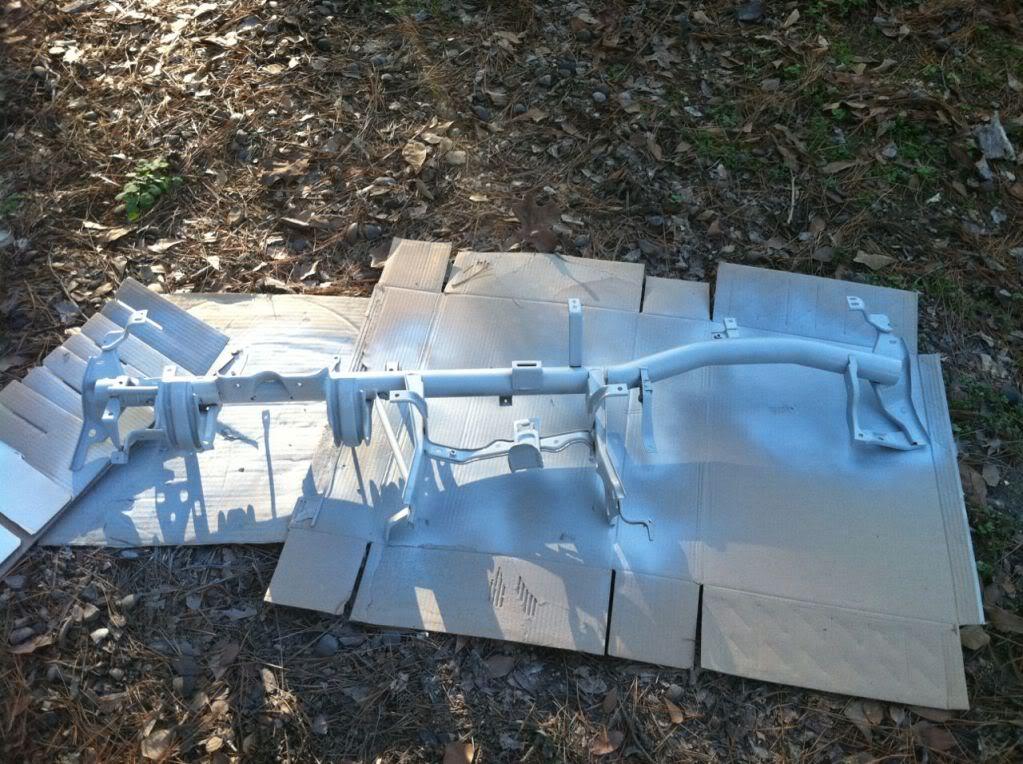
I sanded it down to bare metal, treated with rust inhibitor, and primed it.
I then sprayed with gloss black then quick shot of gunmetal and clear the whole thing.. Shouldn't rust again ![]()
I'm heading to my fabricator's shop (www.MPFab.com) to pull the engine out and get it ready for this weekend's shell swap.
1-6-2012
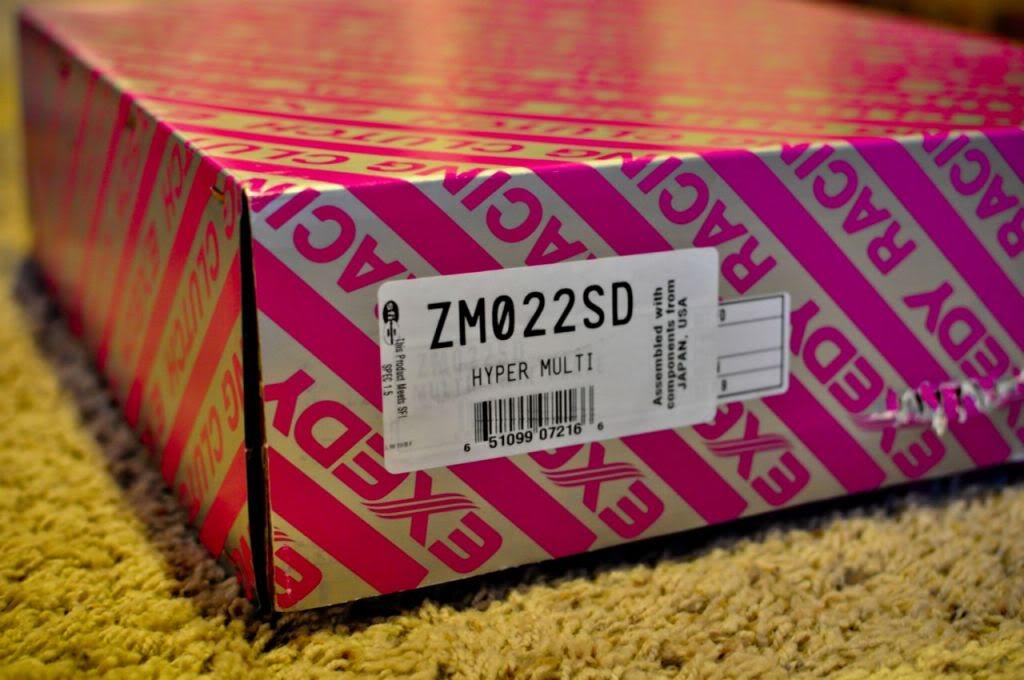
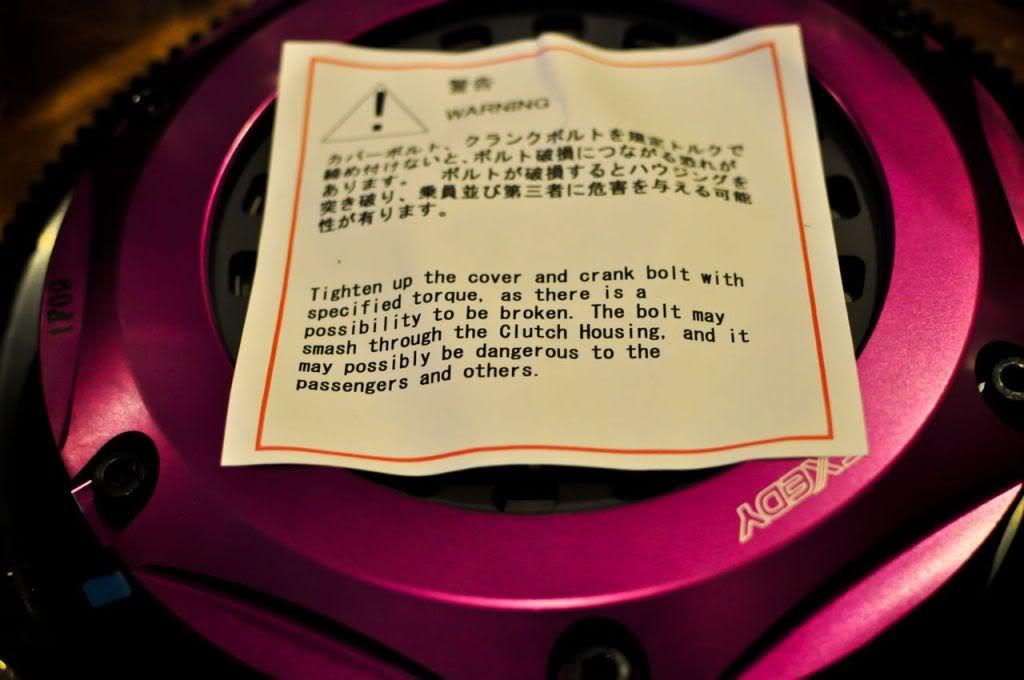
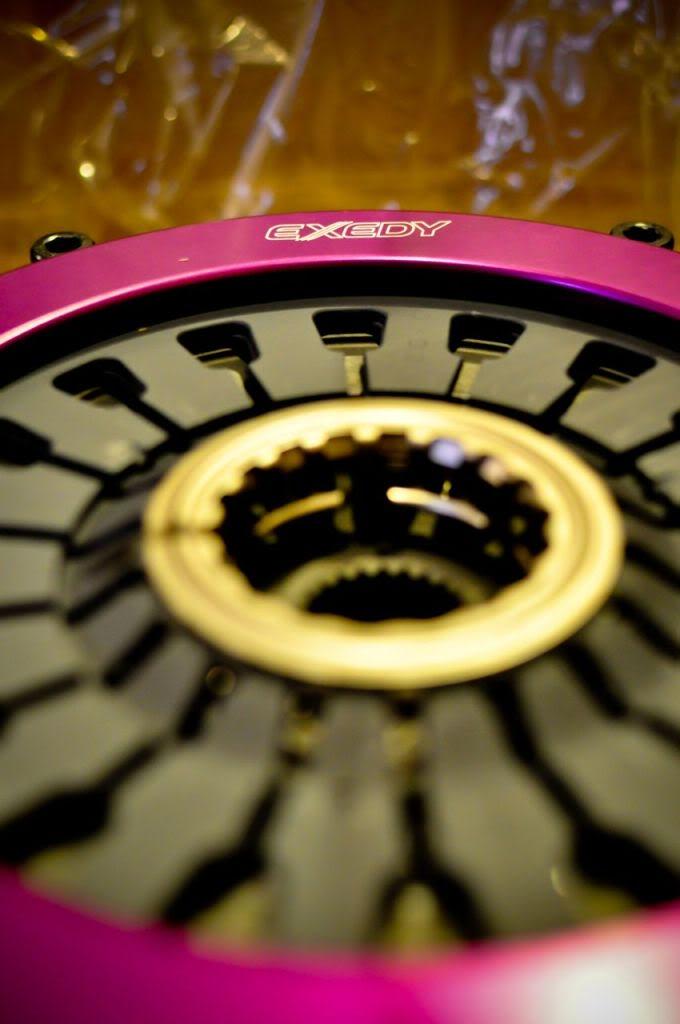
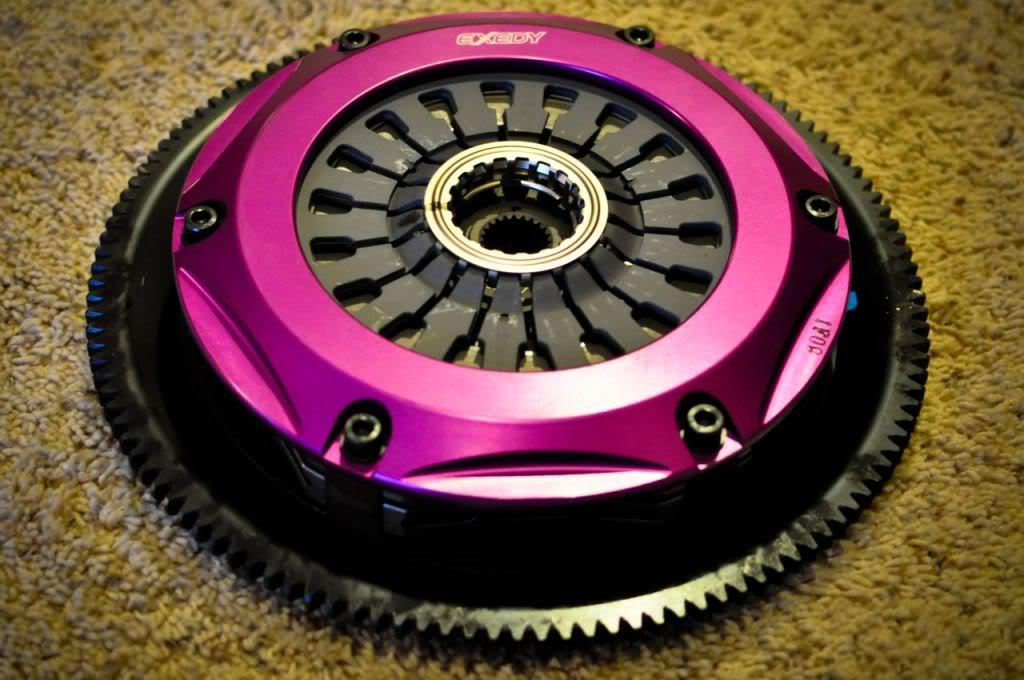
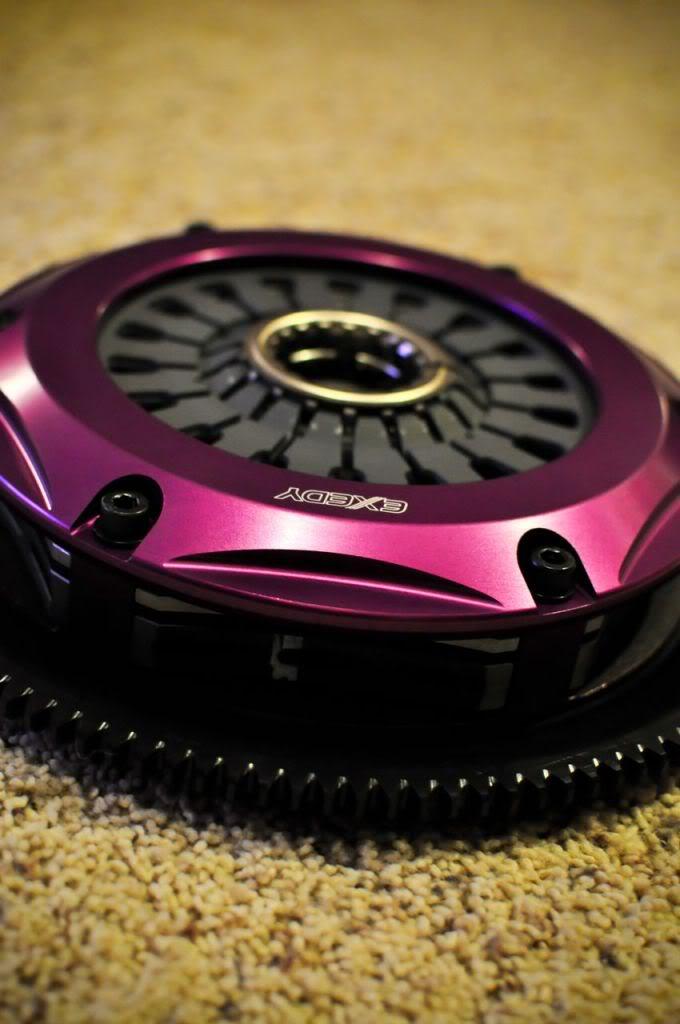
January 5th, 2012 - My clutch for the 20B came in today from my favorite clutch company, EXEDY CLUTCH!! Here are few pics ![]()
1-10-2012
LOL! Sounds good!
More Updates....
January 10th, 2012 - Well, I would of made an earlier update but I had to put 14 hour day at work yesterday and didn't have much time to tell you all what happened to my trip.
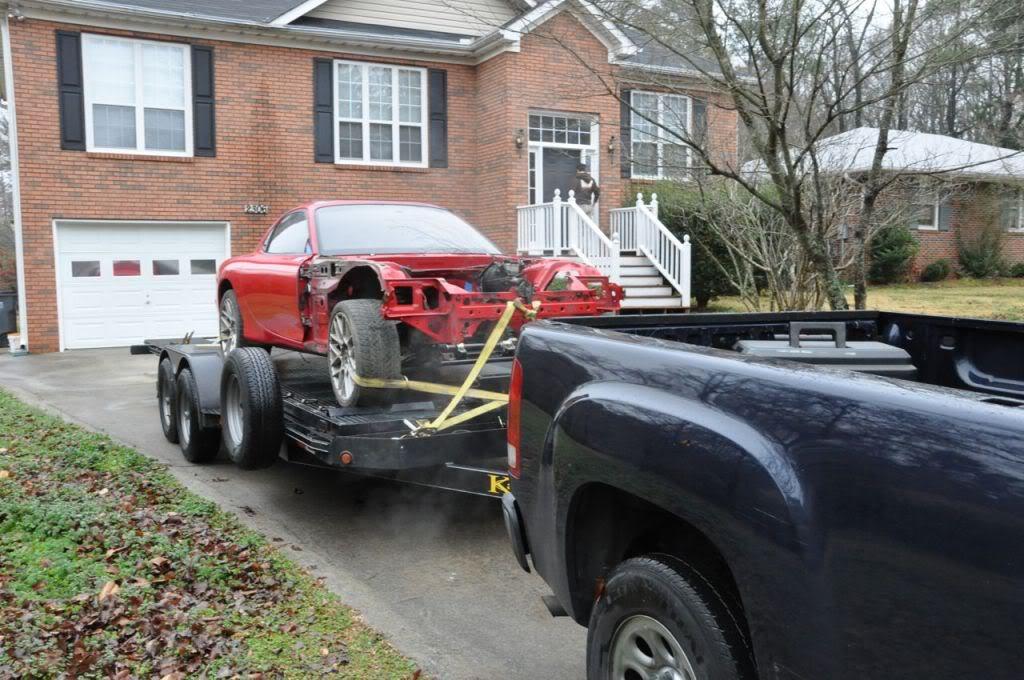
Well, last week I was running around town trying to get my shell ready for a swap with an R1 shell (without sunroof) that a friend of mine had in GA. So, I had to pull the 20B out, get the hatch from my friend's shop (which I was going to paint it and put on my MB FD), find a trailer, and a friend to help me tow it. Because my fabricator does not come in on saturday, I also had to go there day early to pull the car out so I can load it day after.
Saturday morning (Jan. 7th) - We loaded up the car and got to my friend's place in GA. We started taking stuff off of his car and started to transfer to my shell.
During this process, the car smelled really bad and we found some crazy stuff. Like dead mouse ![]()
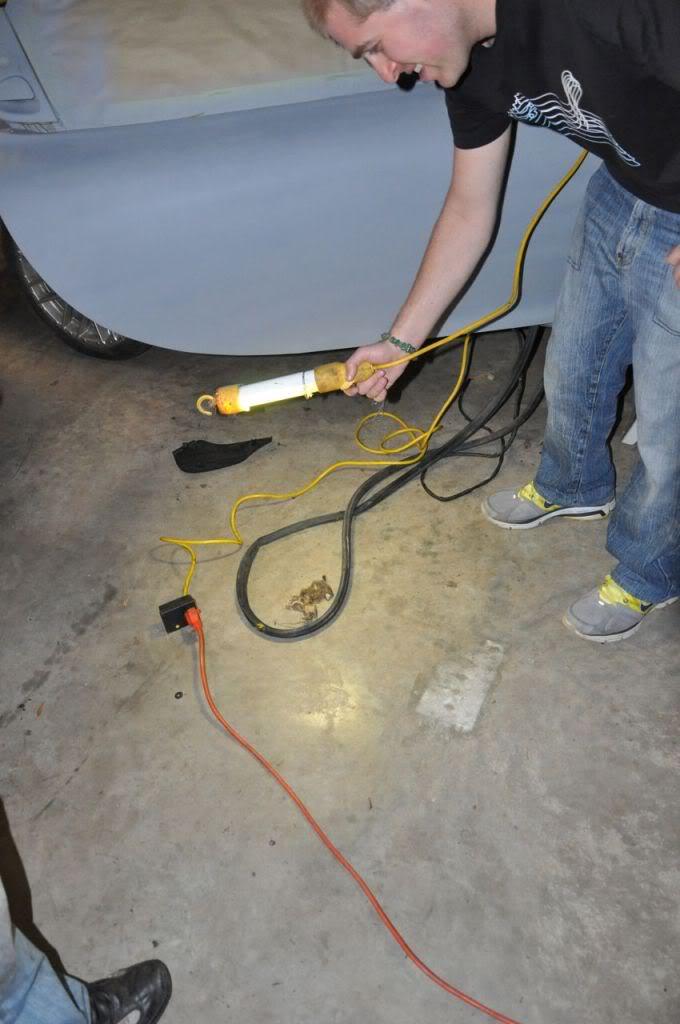
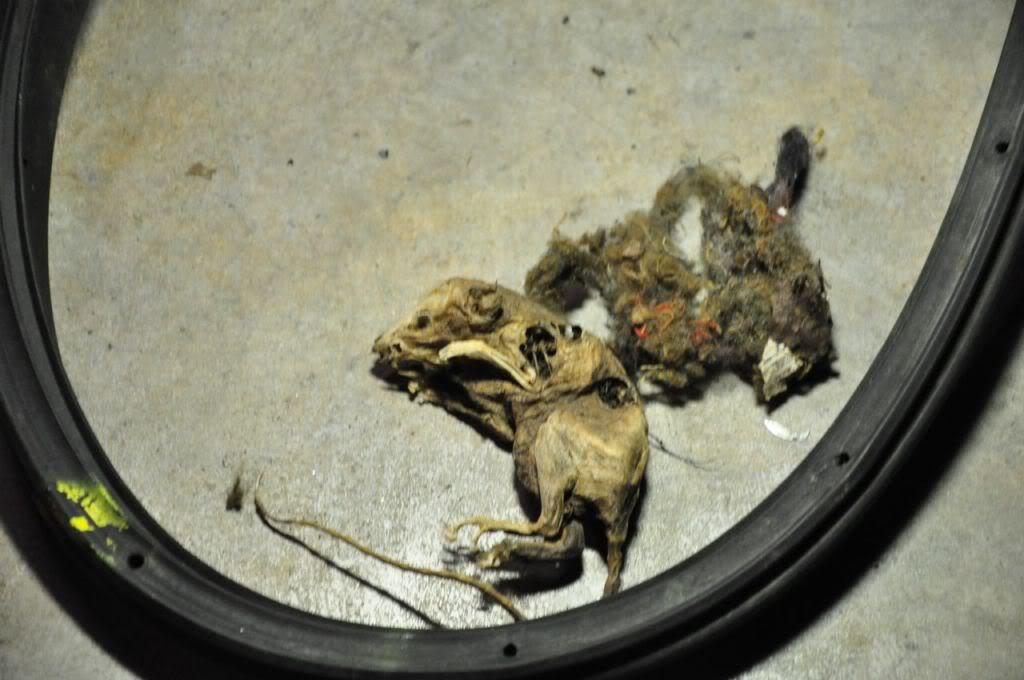
I guess the car was sitting outside for awhile and a mouse made a nice home out of this RX-7.
Since I was going to strip this car to bare metal, I didn't really care about the smell or the dead mouse.... but I did care about what I found next, a bent frame that lead to bent head light assembly mounting points. This is a bad sign as when headlights are mounted and pop ups go up and down, the geometry is messed up so the lights might not line up. At this point, I was quite upset.. Just because I asked my friend to check the car as he knew the car was in an accident before. Also because my car was on hold for 2-3 weeks as my fabricator couldn't cut anything on the shell because of this swap. And I wasted my weekend, other people's time, etc just because my friend didn't take 10 mins to check over the car carefully and to see where the accident was. But he's a friend and he feels bad and going to help me out later so I cant be mad at him.
Anyhow, we loaded the car back up and drove it back to my fabricator.
Hopefully, I'll have more fabrication updates later this week!
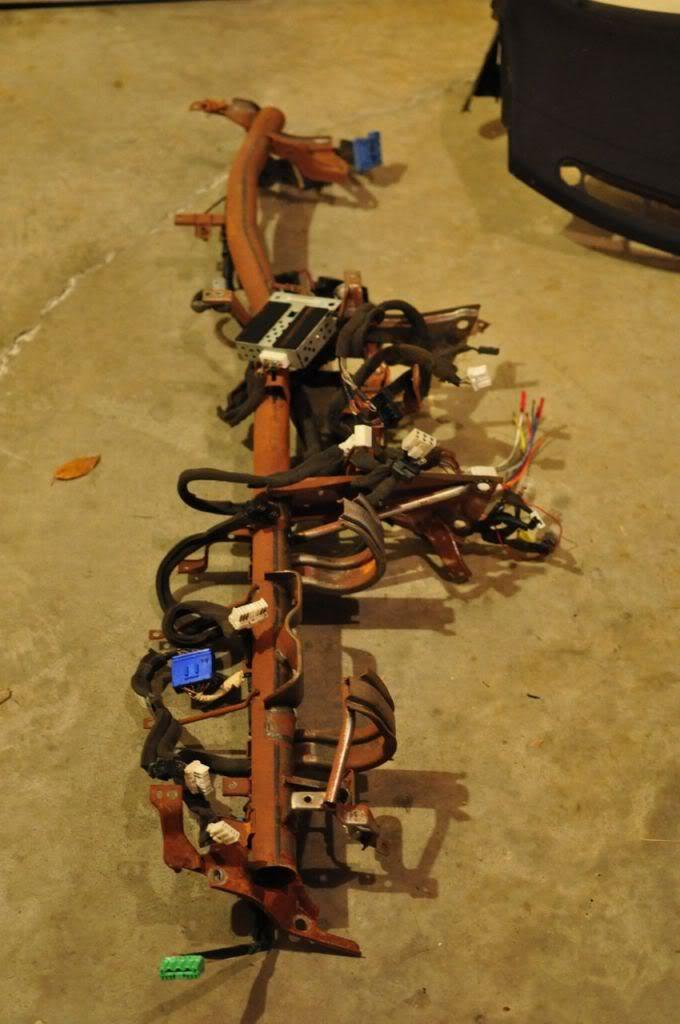
Today, I had lunch with the owner of Chase Bays..
If you don't know about Chase Bays, you will soon.. They are currently working to build me an FD specific Mil Spec replacement harness for my MB 13B-REW (They are currently building harnesses for many other makes and models and also renovating their company headquarter).
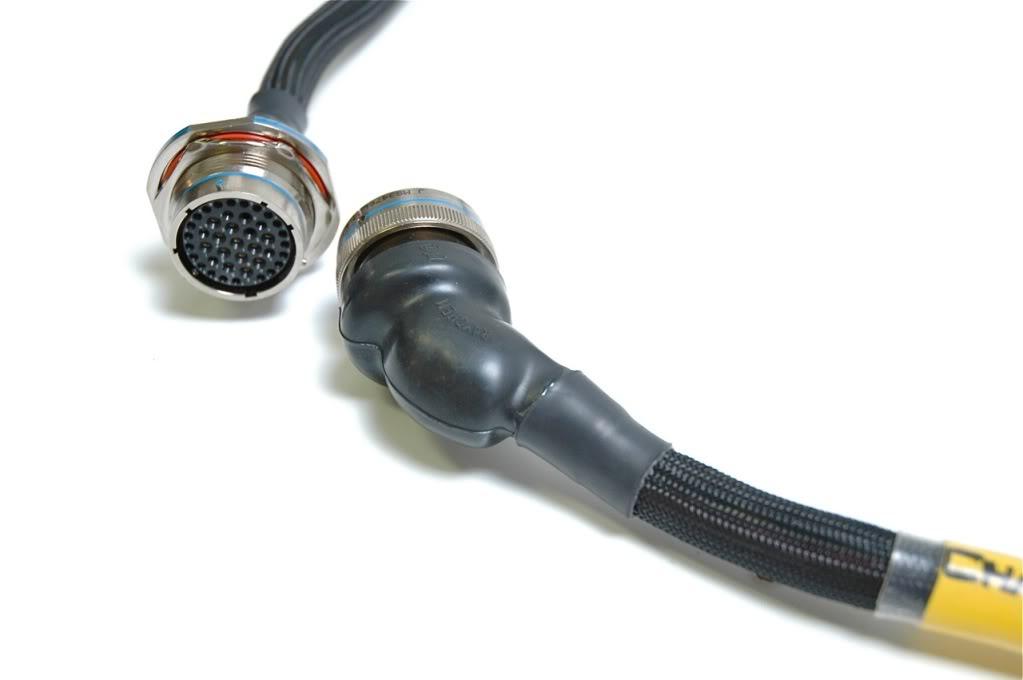
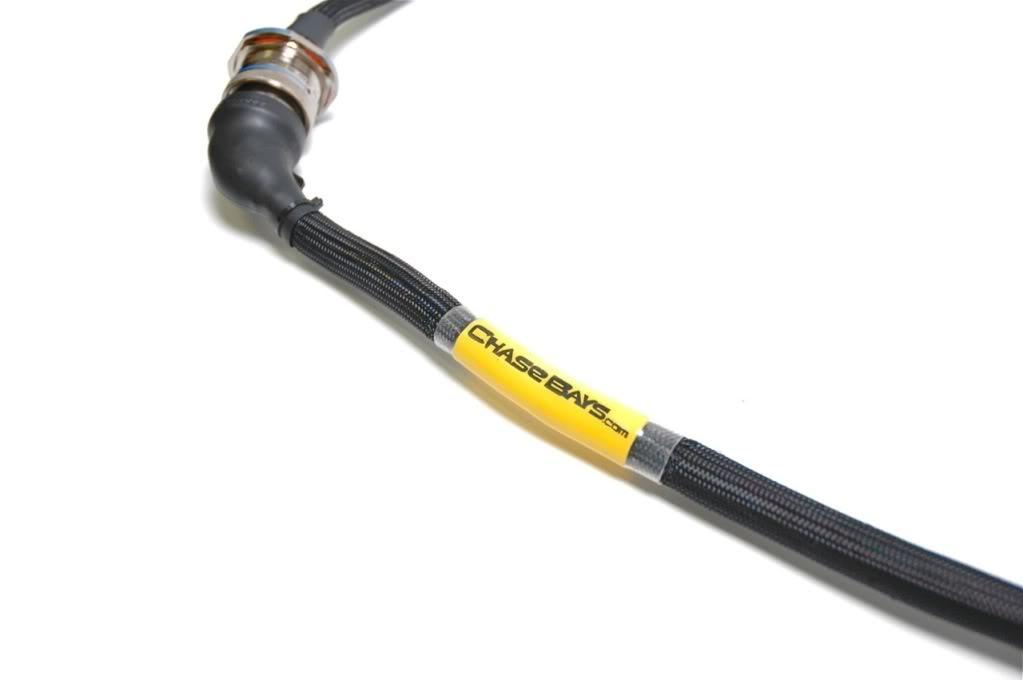
We talked about today regarding what type of harnesses and looks like he is going to provide 4 different lines for people with different budget and such! I'll post more info later on...
1-17-2012
My new wheels came in ![]()
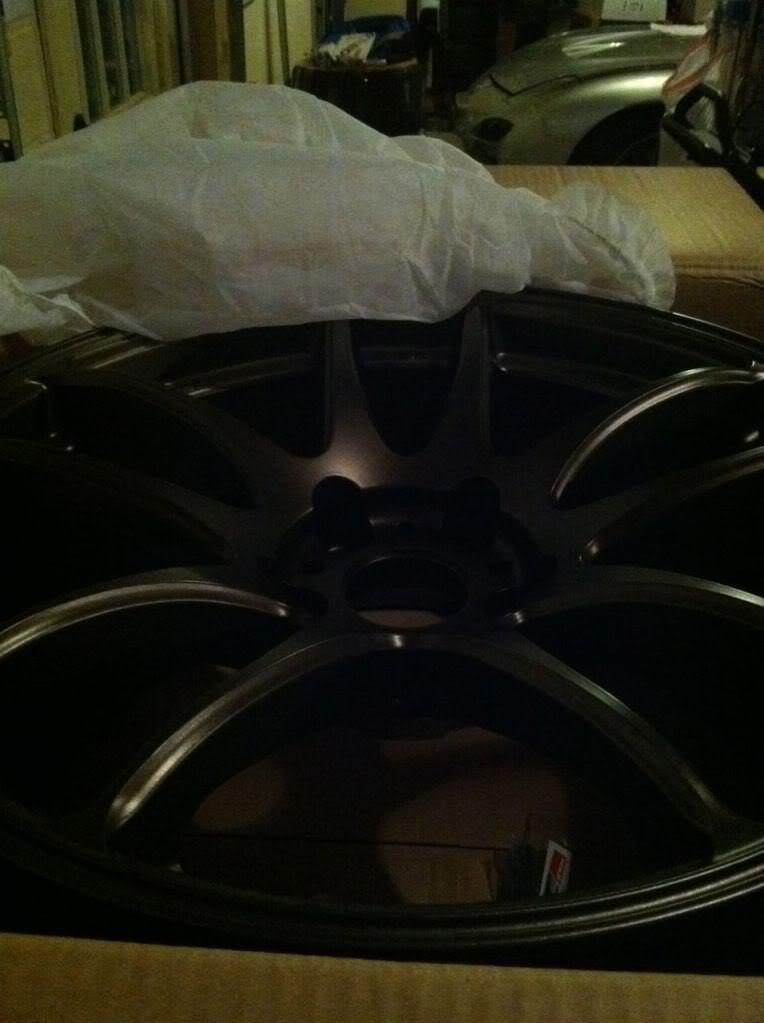
1-19-2012
I went with the following..
18x9.5 +30 and 18x10.5 +23

I'm putting them on a wide body (FEED).
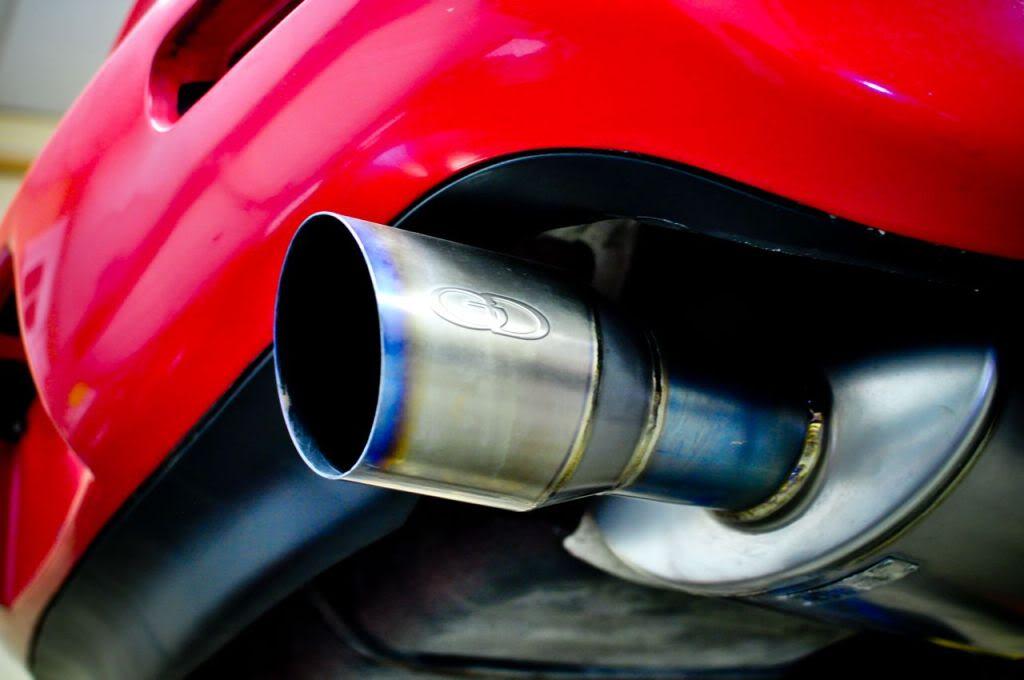
January 19th, 2012 - Few pics of the update...
Interior.. took the dash out and put just the rebar to hold the steering column in place..

Also installed my Ti Catback
And my MB FD was featured in S3 Mag and they are using one of the photo of my car on their website..

I have a ton of photos of the new set up tomorrow...
1-20-2012
I can't wait to hear this thing run!! But still about 6 months til I'll hear it.... its going to be a beautiful or aweful day ![]()
more update....
January 20th, 2012 - Update from my fabricator's work. Walker Morgan from www.MPFab.com did an awesome job on these parts.
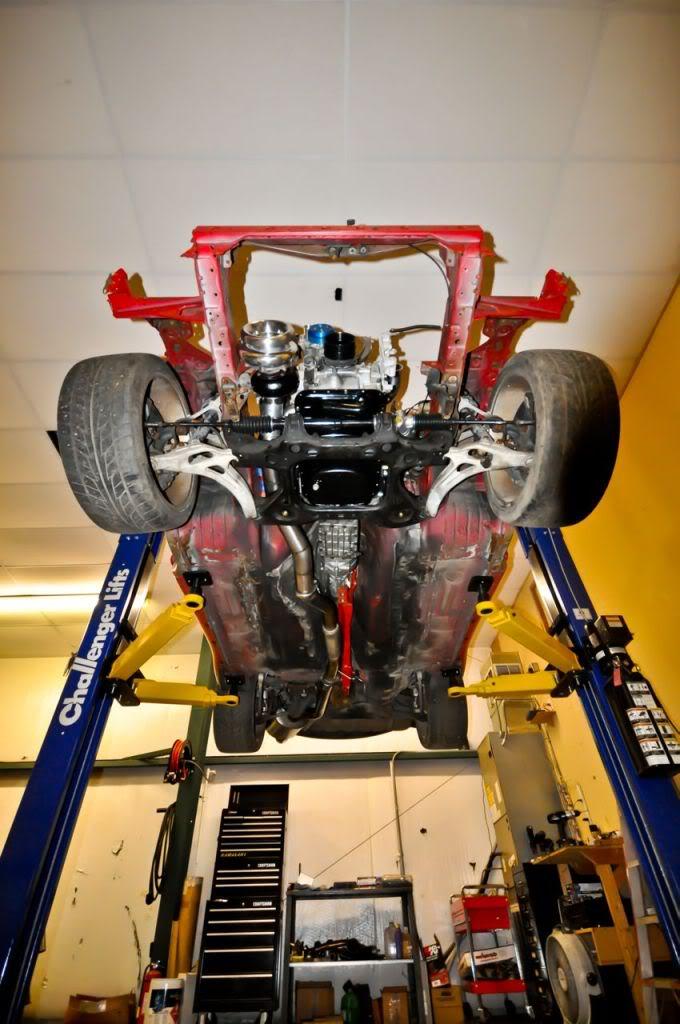
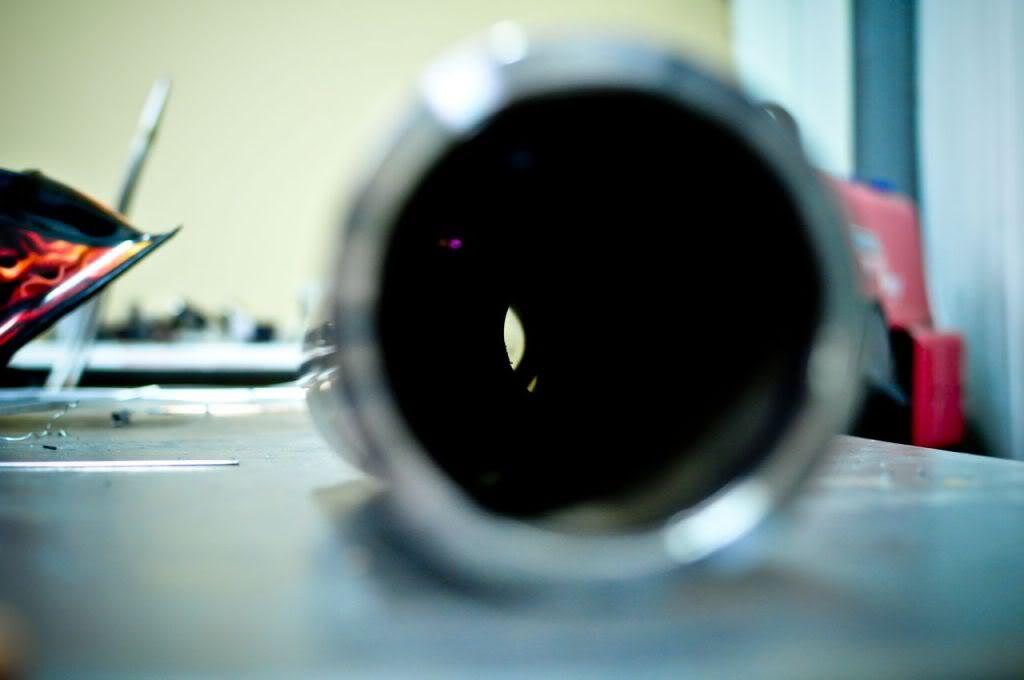
Downpipe ![]()
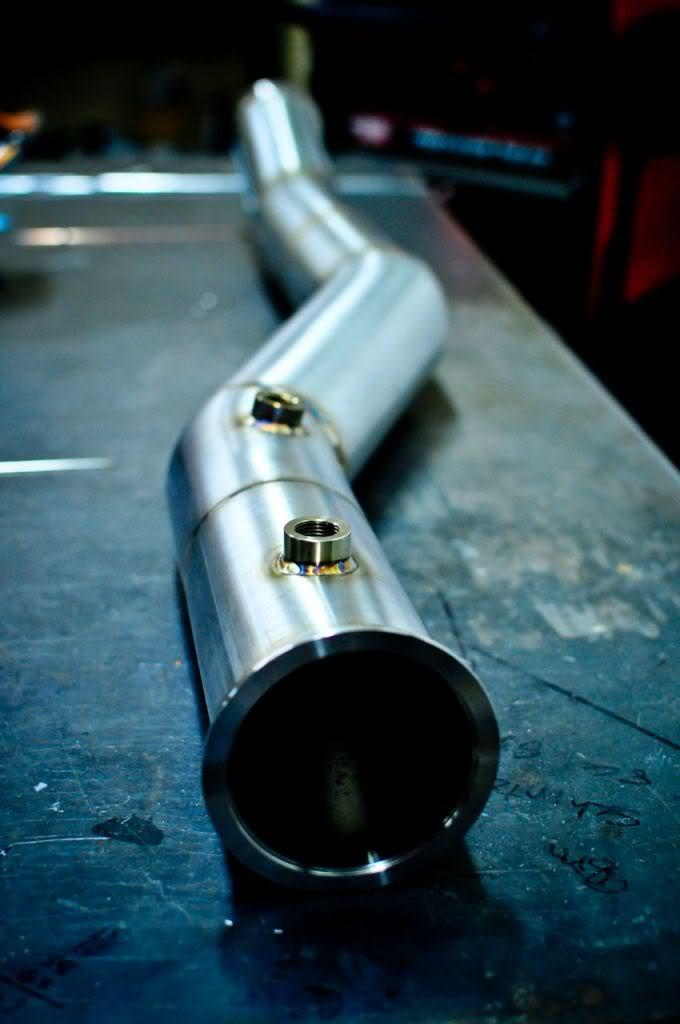
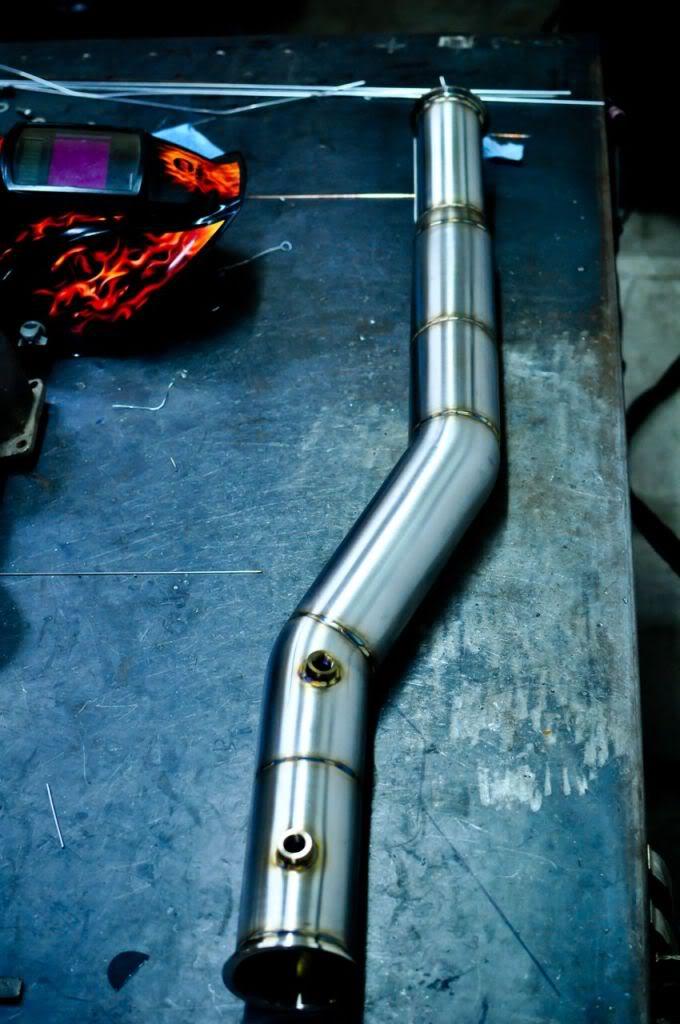
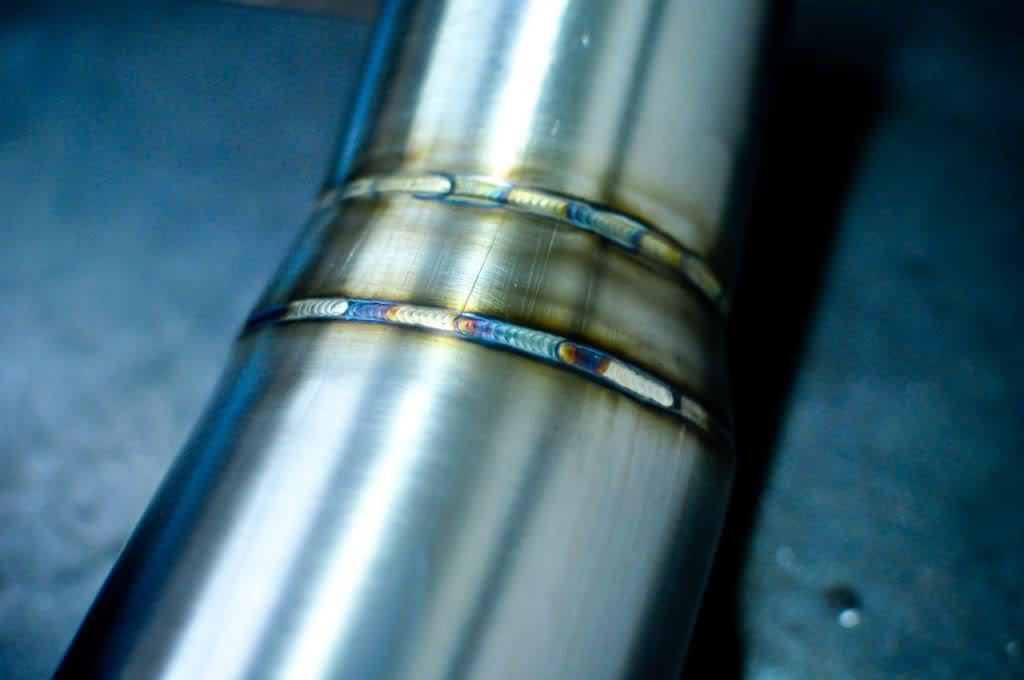
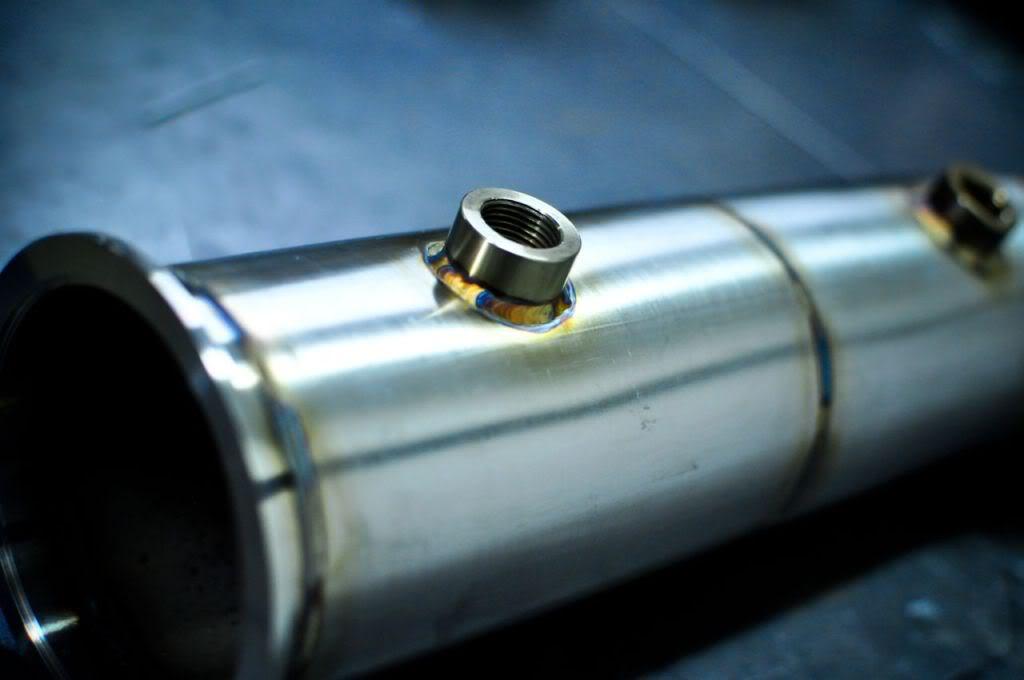
Inside the DP.. you could almost see through..
1-23-2012
Thank you! Hope at the end, I don't have any issues putting it back together.. Hehe..
More Update...
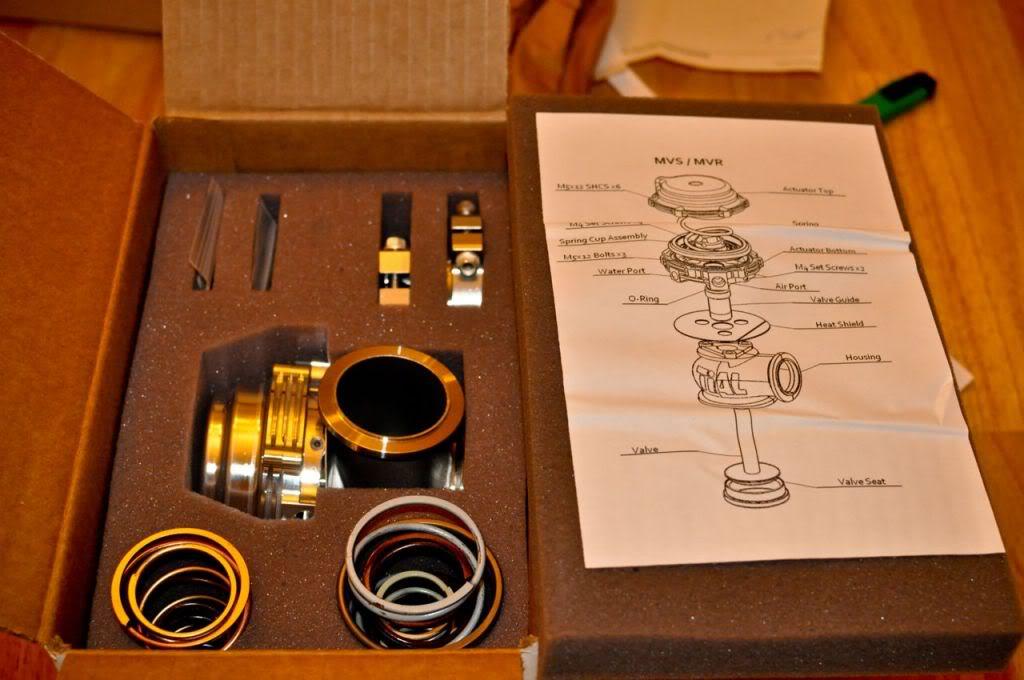
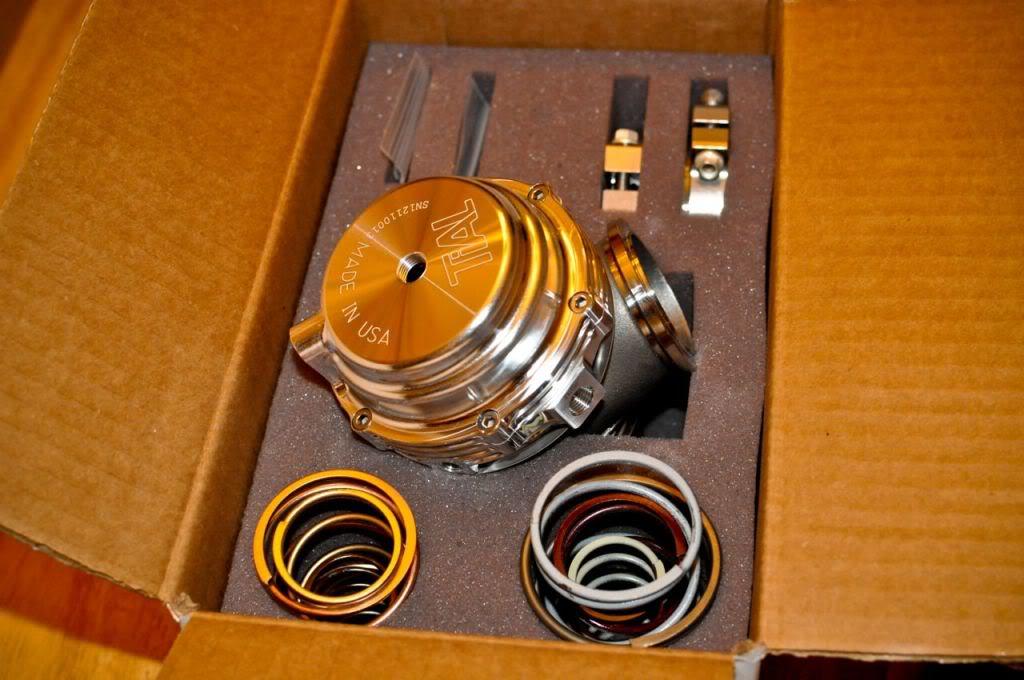
January 22nd, 2012 - I've ordered a new wastegate from a friend from the past who owns www.znperformance.com
Gave me a great deal the Tial 44mm MVR wastegate!
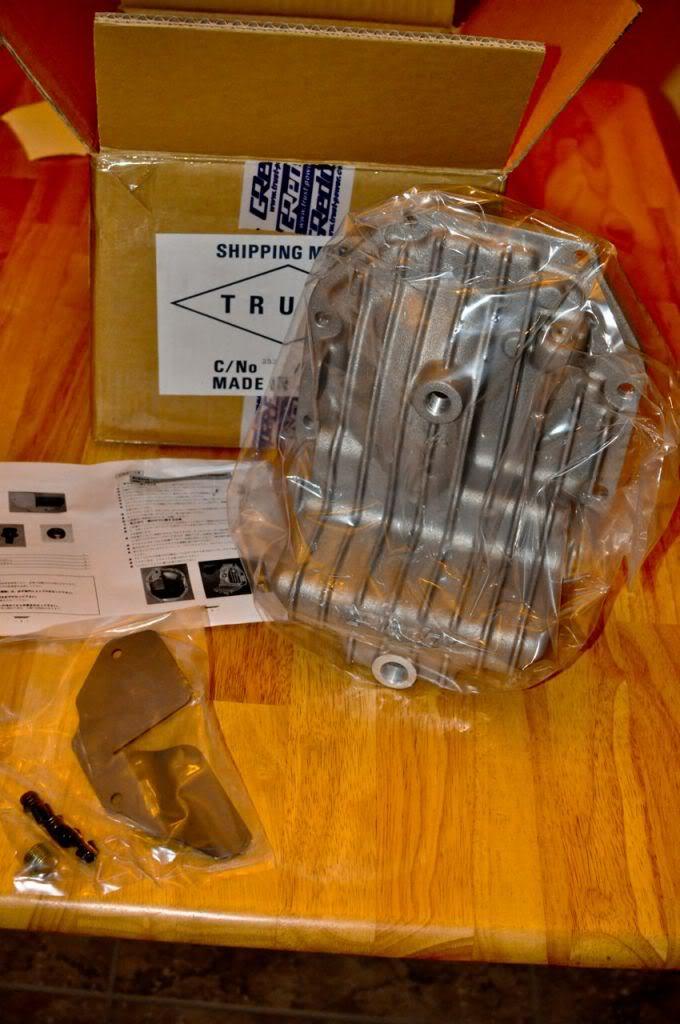
While I was at it, I also ordered one of these from ZNPerformance..
1-27-2012
January 27th, 2012 - Not much update... I got my new tires the other day and just dropped them off this morning to get them mounted. There is only one place in Bham, AL that I would let people touch new wheels... and only because they have the right machine to do so... Corgi Artiglio Master and Hunter load balancer. This shop also uses special weight for your wheels.. expensive, but worth it!
Wheel Spec: The New WORK CR Ultimate 18x9.5 Front and 18x10.5 Rear
Tire Spec: Toyo Tires, R888 - Front 255/35, Rear 295/30
2-3-2012
February 3rd, 2012 - Few things happened since last update...
Toyo R888s are mounted on the new wheels and now back at the house.
20b stainless flange is machined flat and ready.
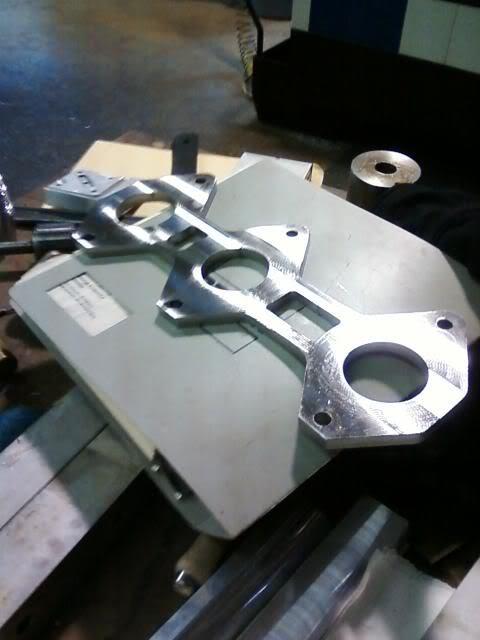
All the exterior plastics have been pulled and fenders are on for test fitting.

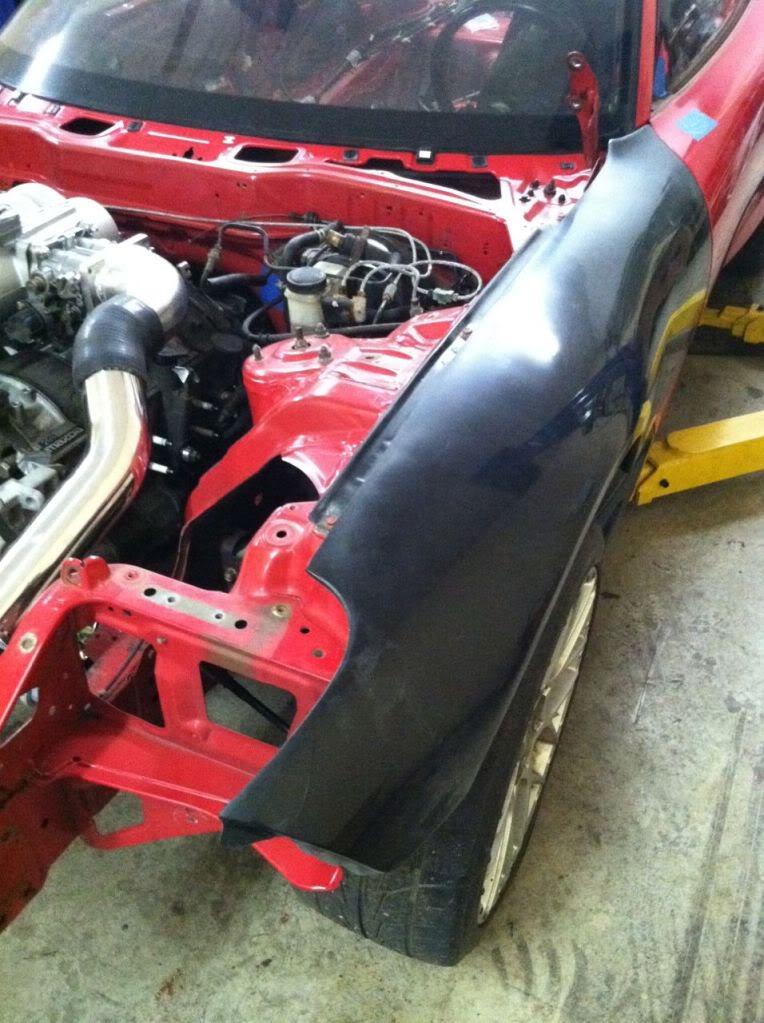
and testing out the bumper..
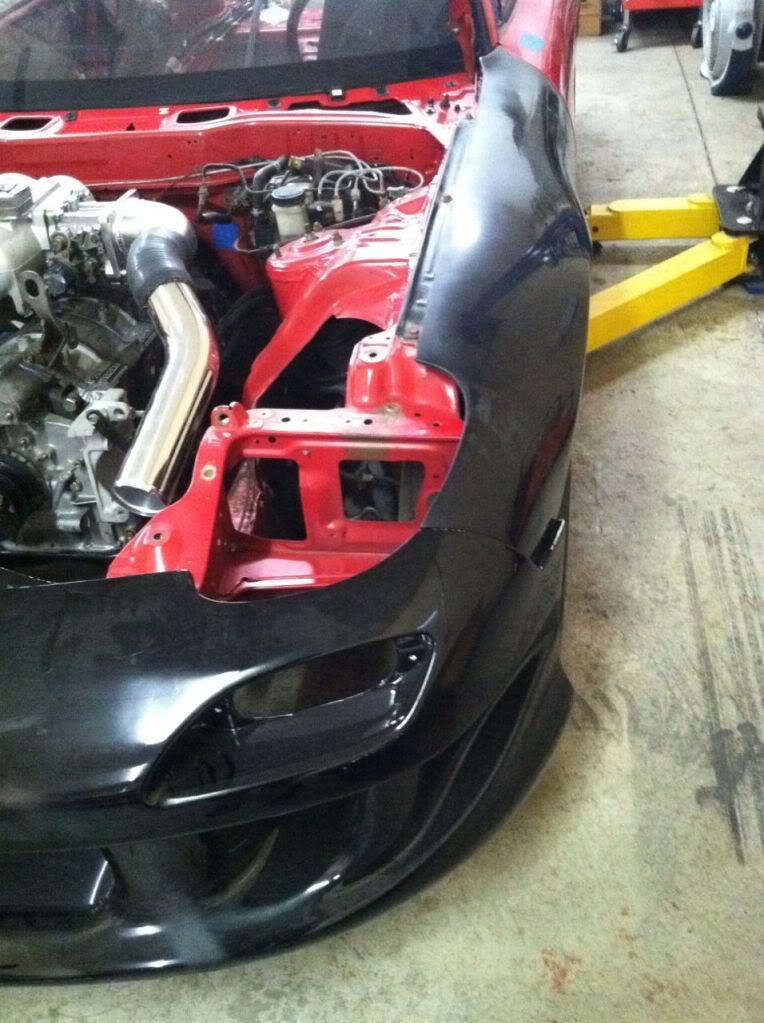
2-12-2012
Fenders are from Shine.. but not the bumper..
More update... well, not really...
February 12th, 2012 - Not much update as I been spending my spare time trying to get my old house in order and put it back on the market. Some idiot kicked down my door to the garage and I had to get that fixed and been painting the interior to update the house a bit... This housing market is killing me and I need to sell this so I can dump it in to this project.
Anyhow, Only car thing I did since last update...
Put these Mazda posters I had (for about 7 years) in my garage..

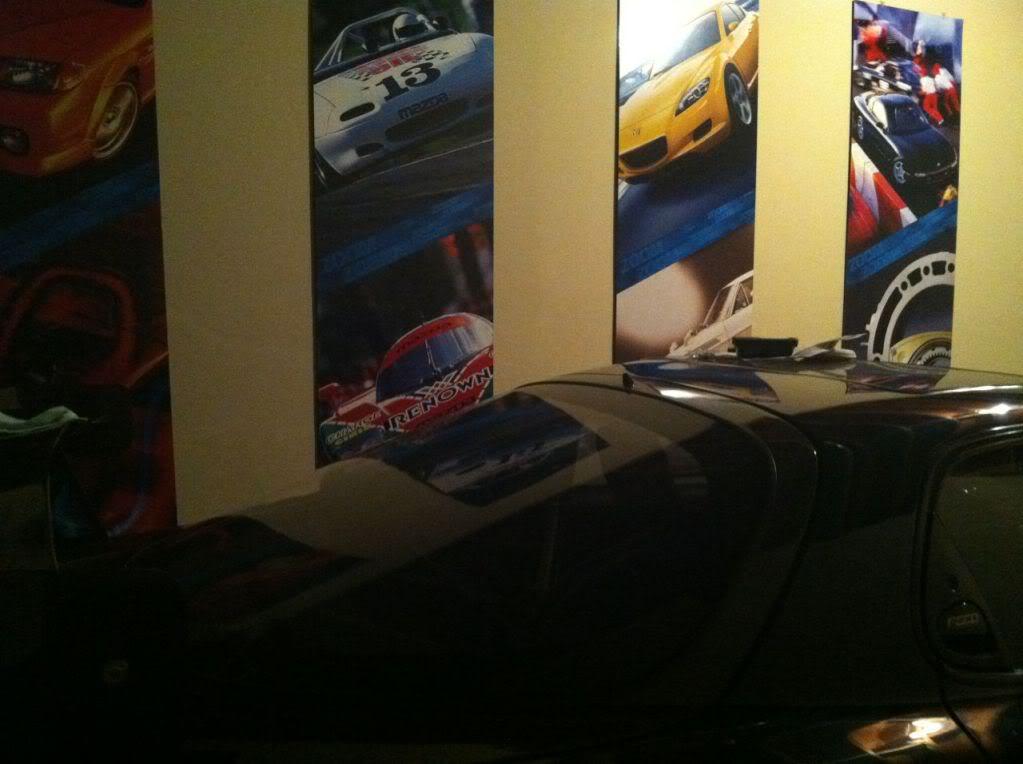
And got my spoilerless hatch painted MB and mounted (pics later).
Well, couple of reasons.. one, I don't like the AD fenders... they are similar but something about them that I don't like. Two, if for some reason I destroy the fenders, they are much easier to source because of shine.
quick update... I went wingless with the MB FD.. simpler and I'm wanting to start driving this thing everywhere. Taking the Bride seats out and putting the stock base seats back in... more to come about the MB FD in next couple of months.
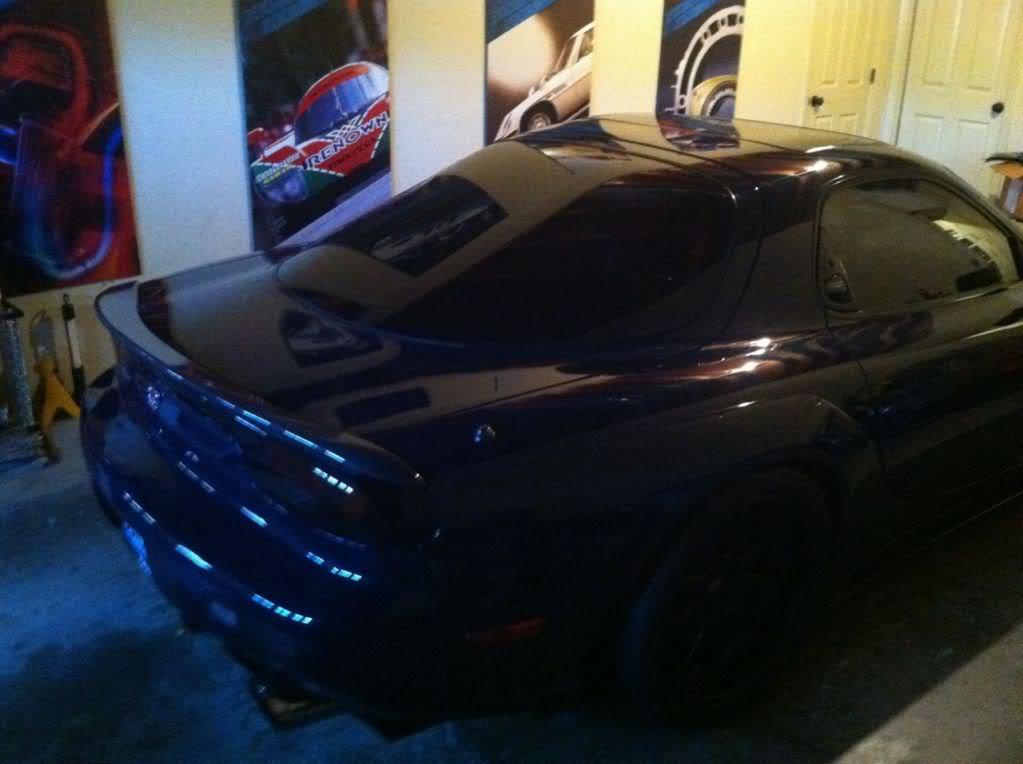
2-26-2012
Thanks Rich.. I don't think not to many individual will have those posters.. Maybe less than 10??
February 26th, 2012 - I've bandaid fixed my ignition issue on my MB FD and drove around town today. Also, thought I snap some recent pics with the new hatch and the cleaner look.

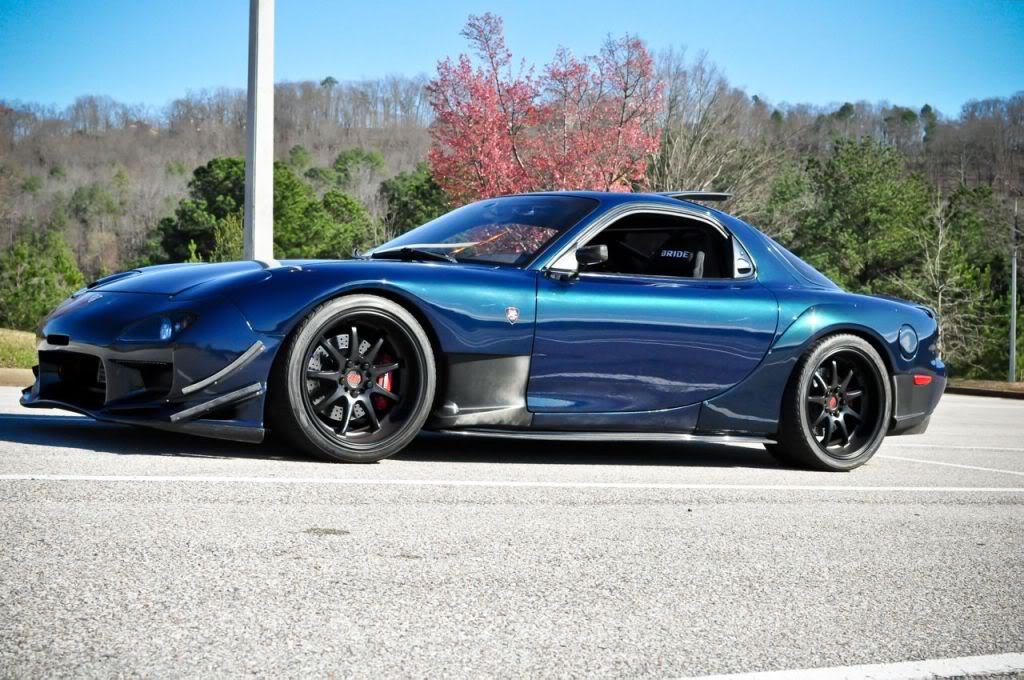
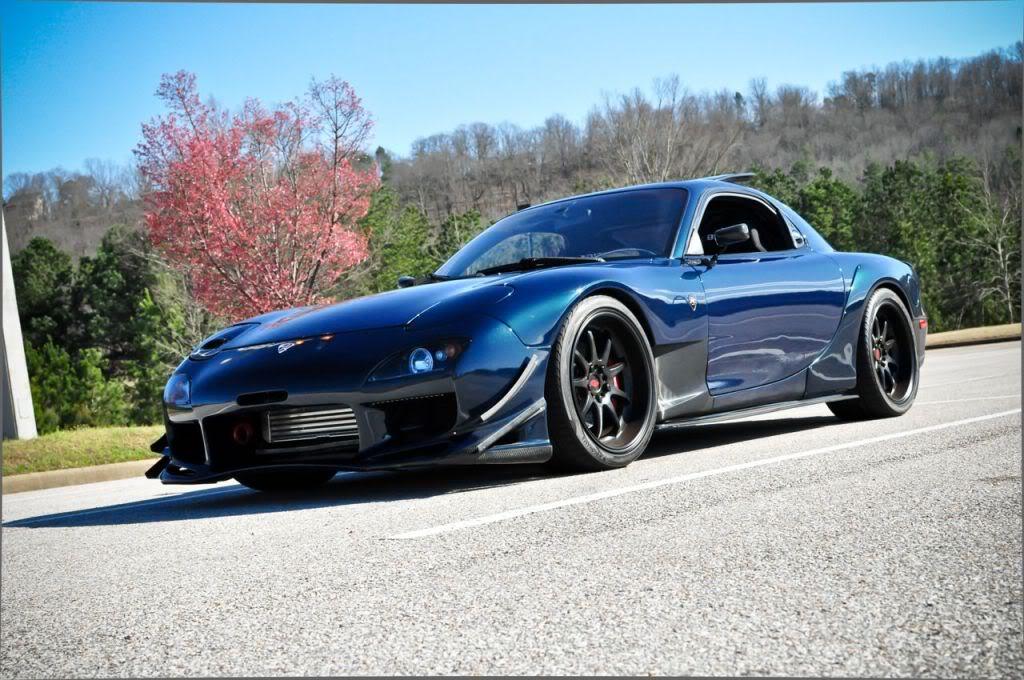
2-29-2012
Thanks man! Just for you, on the Leap Year day when I'm working for the man for FREE, one more pic ![]()

3-27-2012
Changing up a bit... and busy with life..
Preview of what I been doing at home for DGRR 2012..
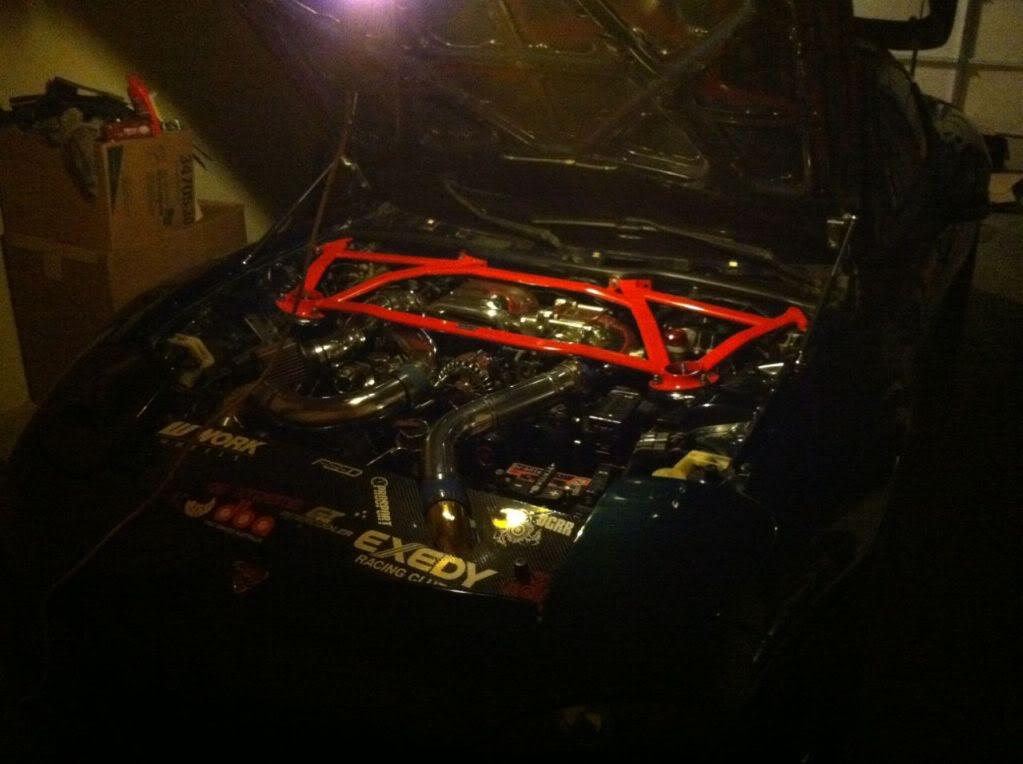
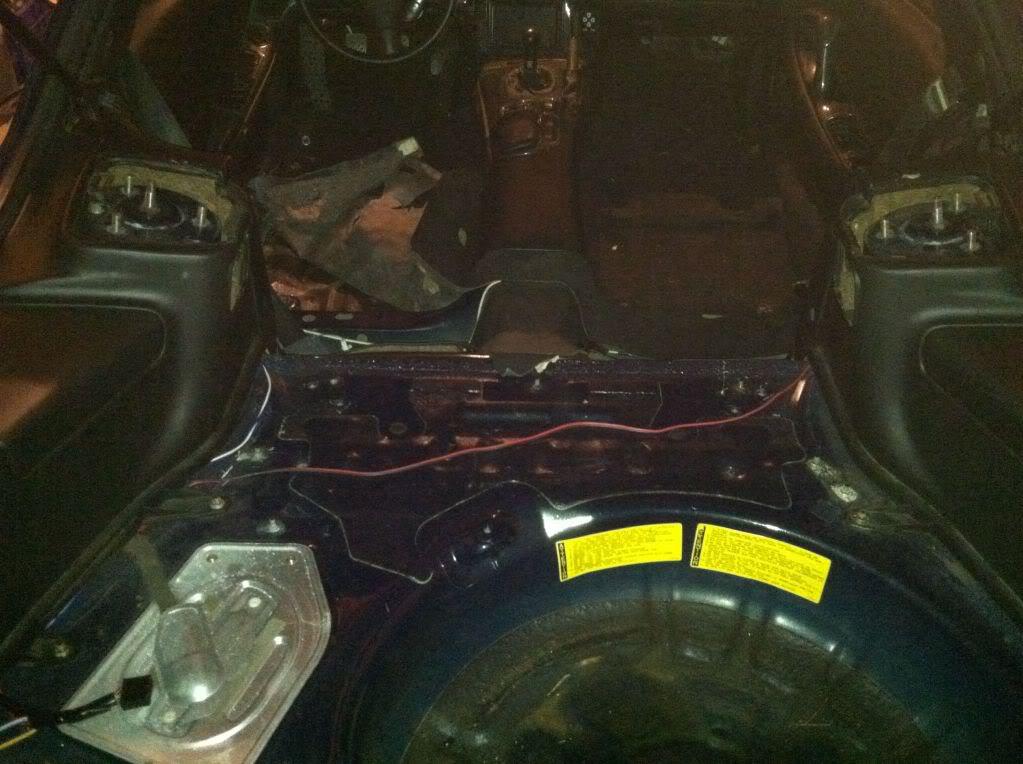
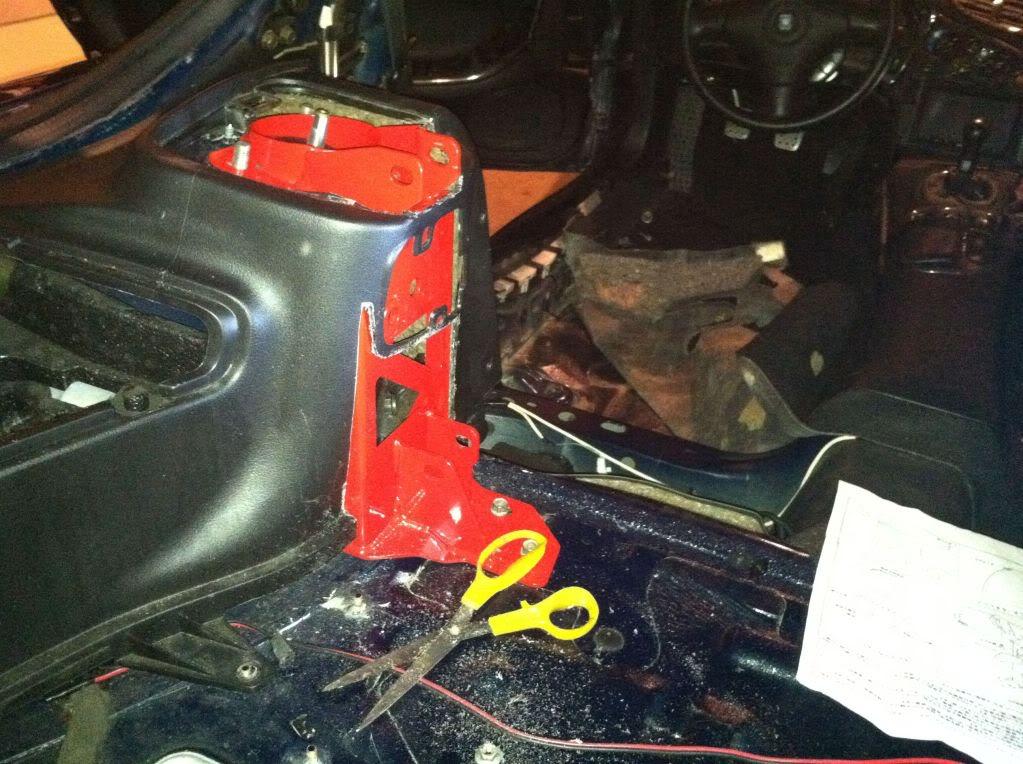
I've also made a carbon license plate for the SSM 99 bumper... Finally!
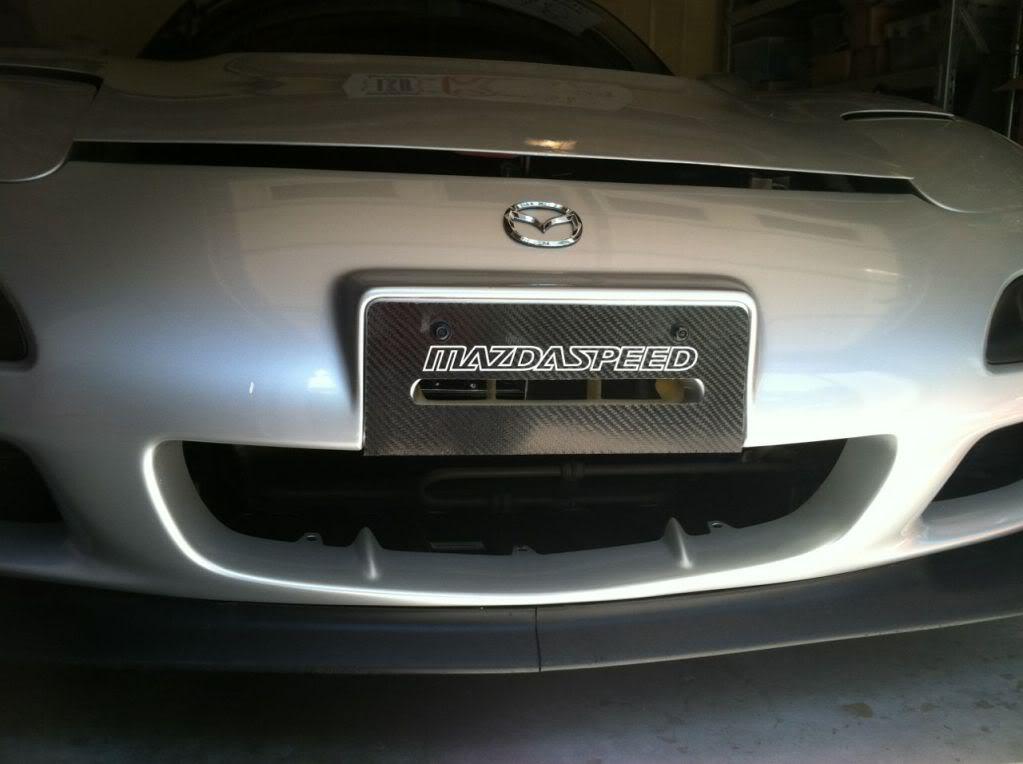
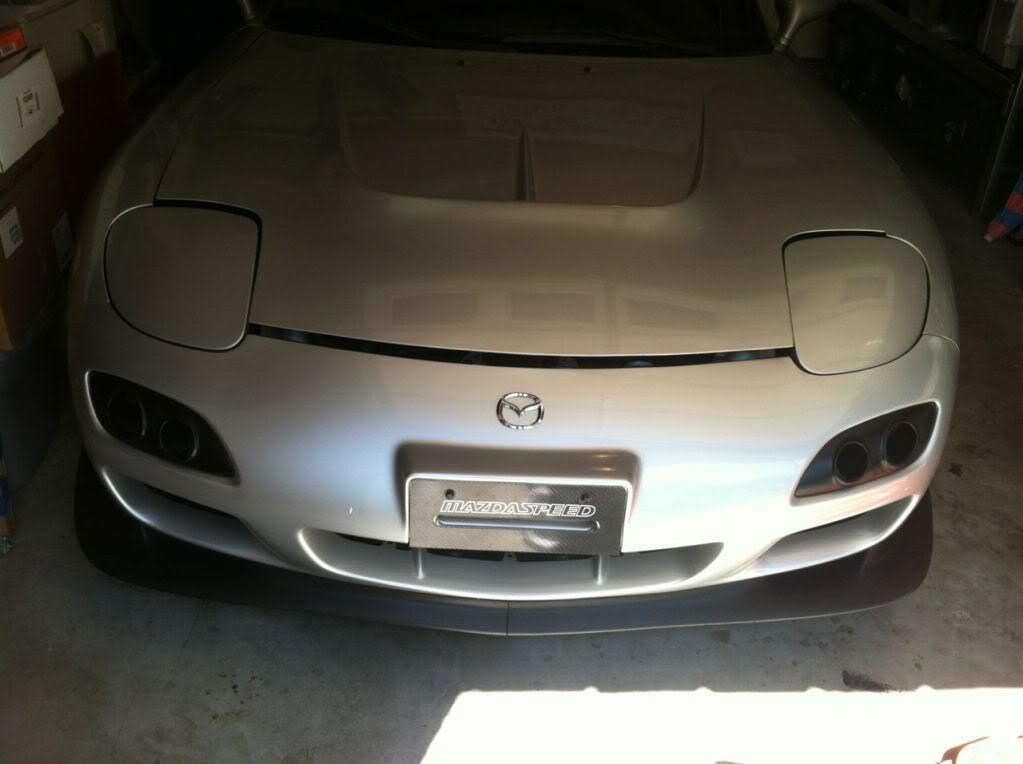
4-1-2012
Update...
Finished the back of the MB FD...
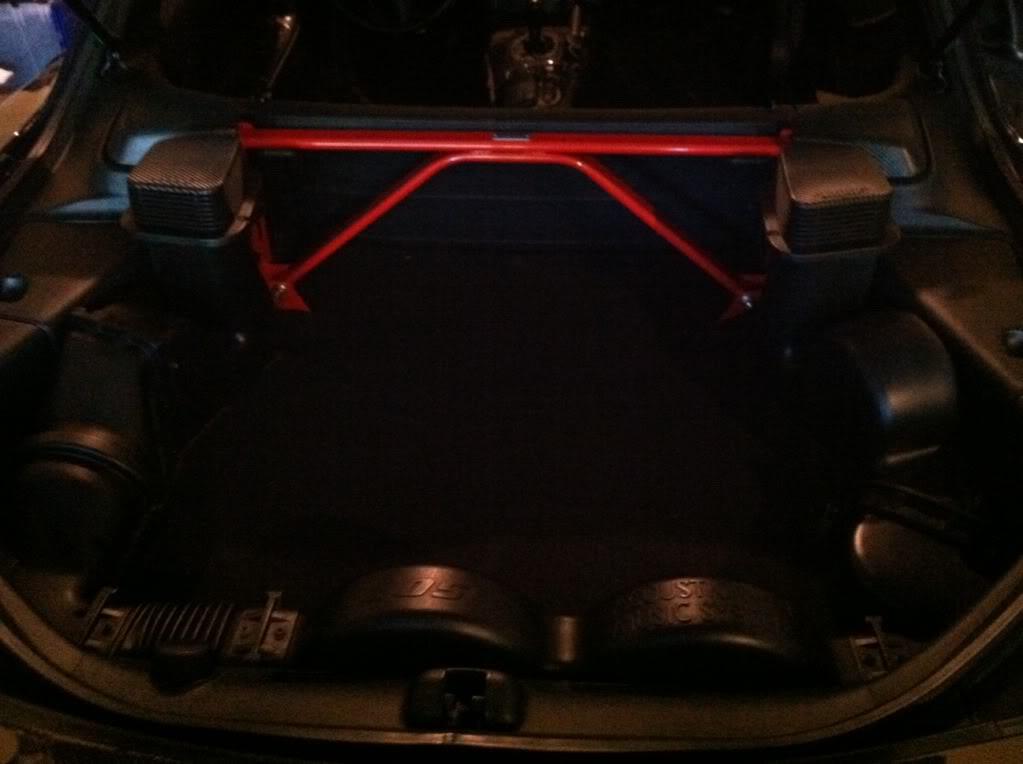
4-4-2012
LOL! Not quite but thank you!
Update..
Yesterday, I took off from work early and decided to change out my Tanabe catback with the new RE-Amemiya dual dolphin tip catback.. But because of this little thing (see below), a normal 30-45 min catback change out took 4 hours.
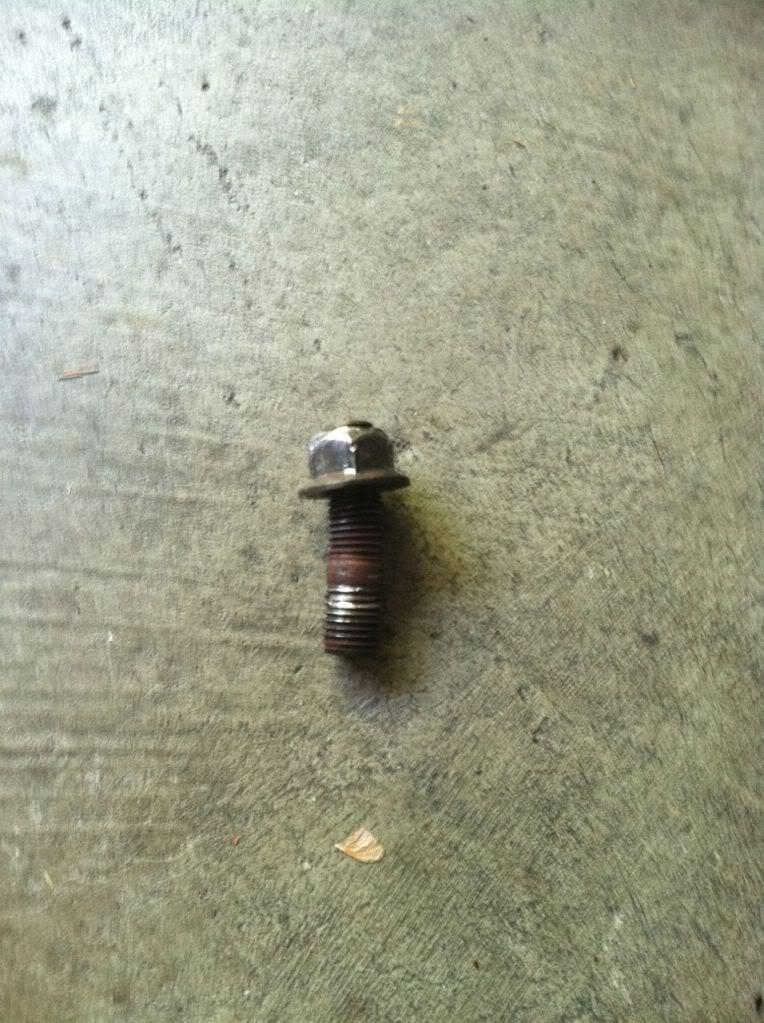
I had to take the cat out along with the catback, without a lift.. Pain in the ***!
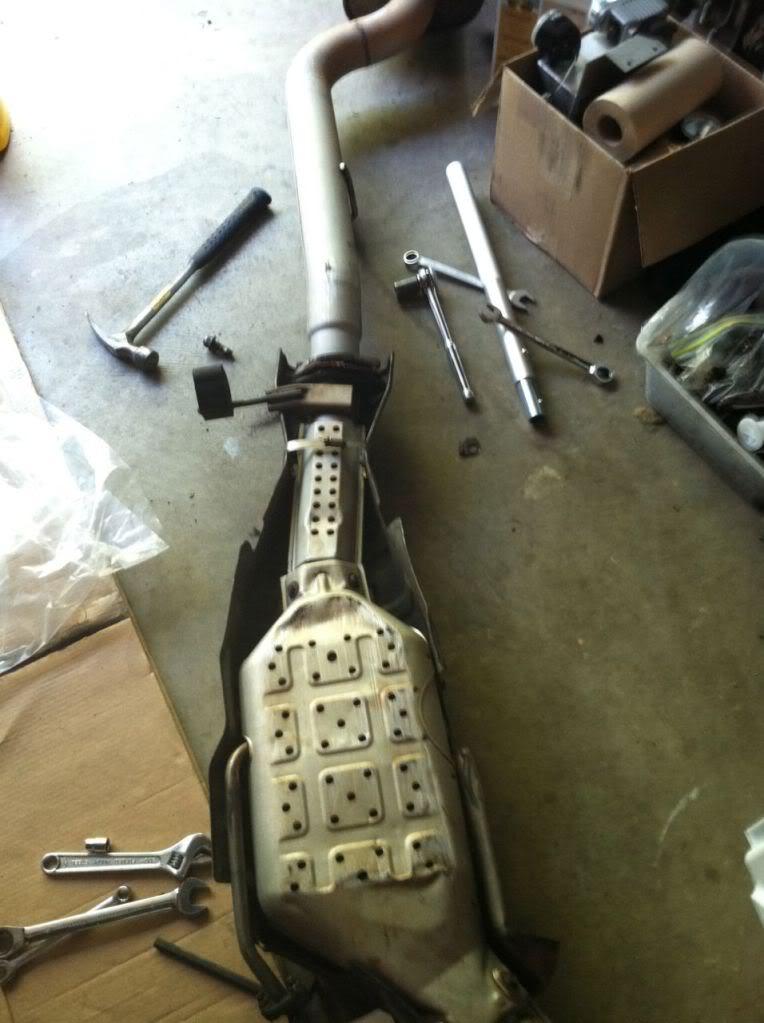
No exhaust,..
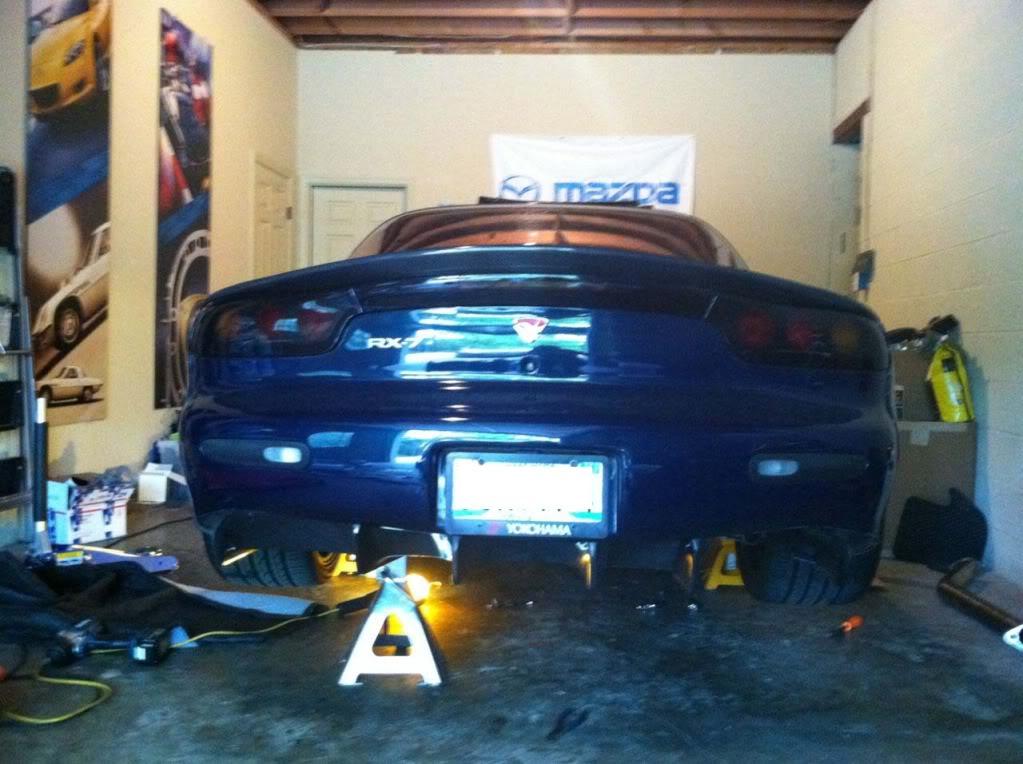
Its kind of hard to see, but with new midpipe and new catback. I hope its not going to sound like ***.
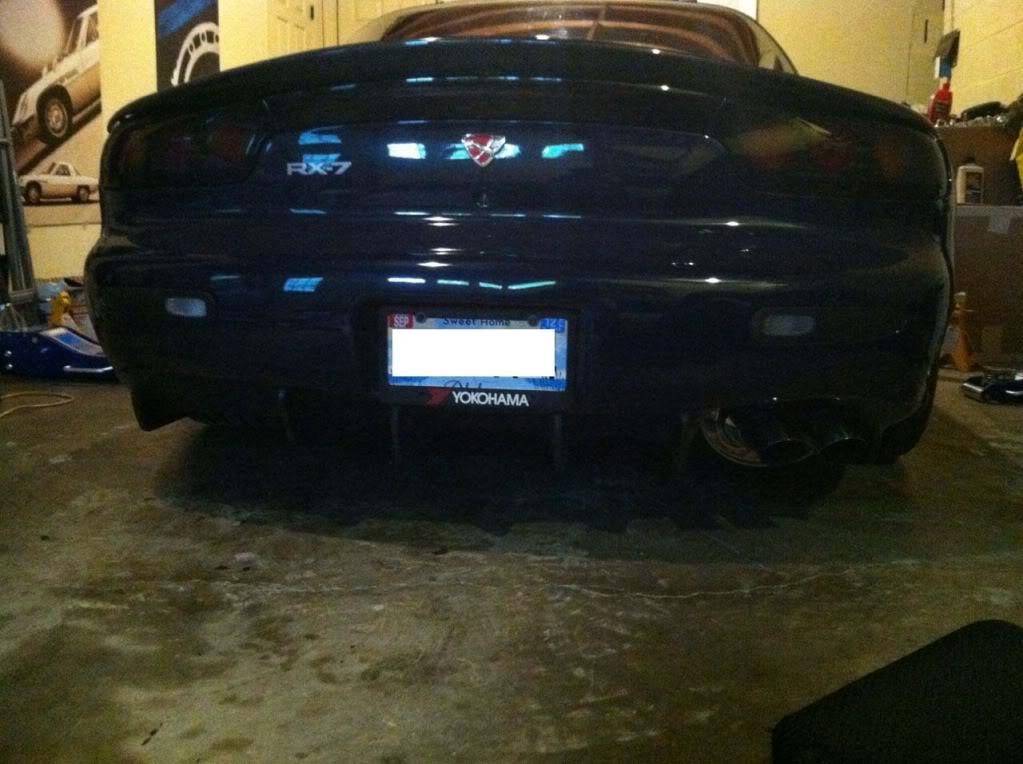
4-9-2012
April 9th, 2012 - Update on the build.. Walker Morgan from www.MPFab.com is doing great job on this build!!
Here are the pics ![]()

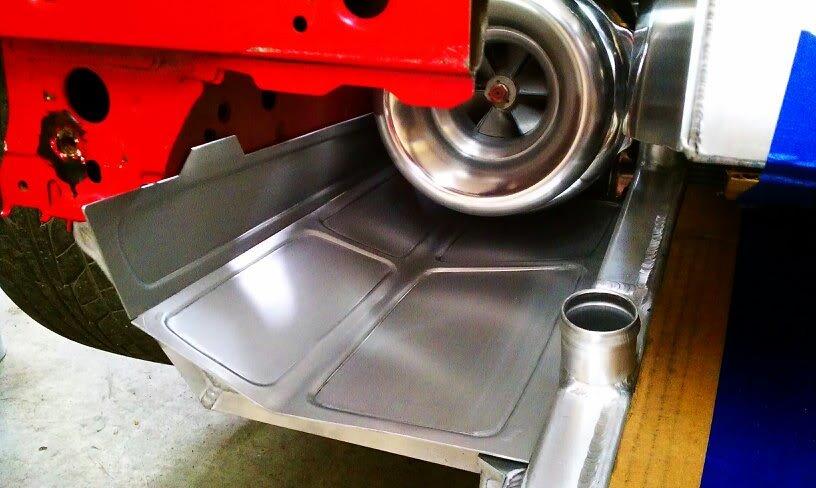
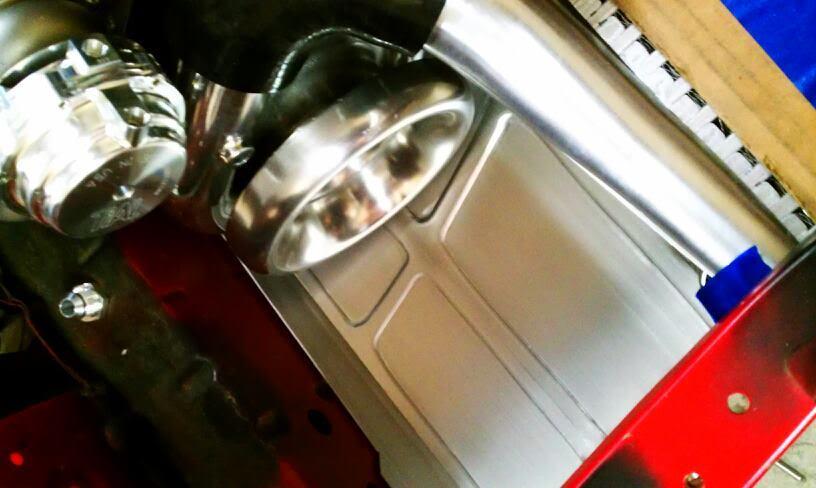
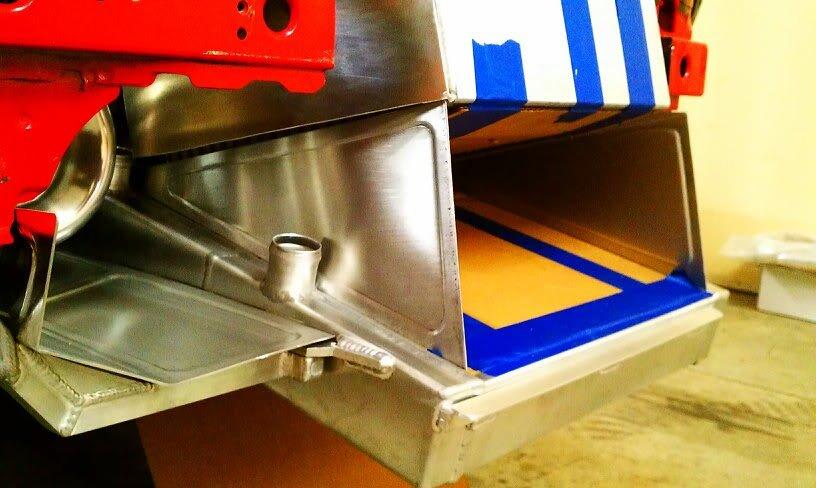
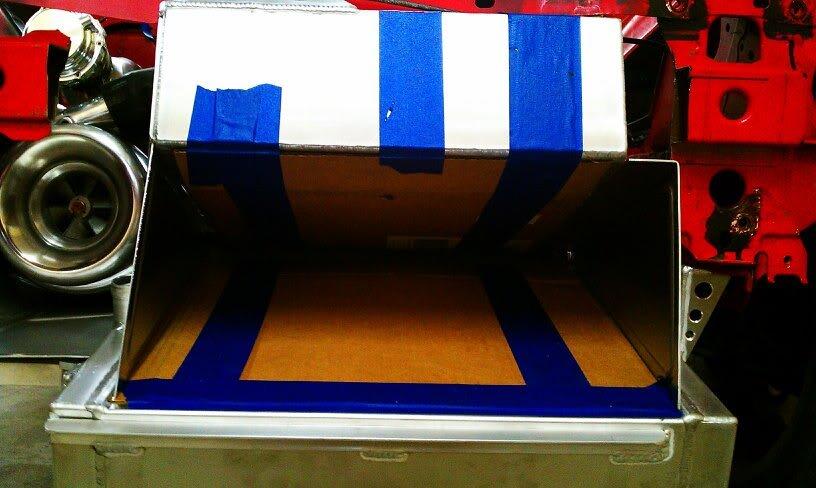

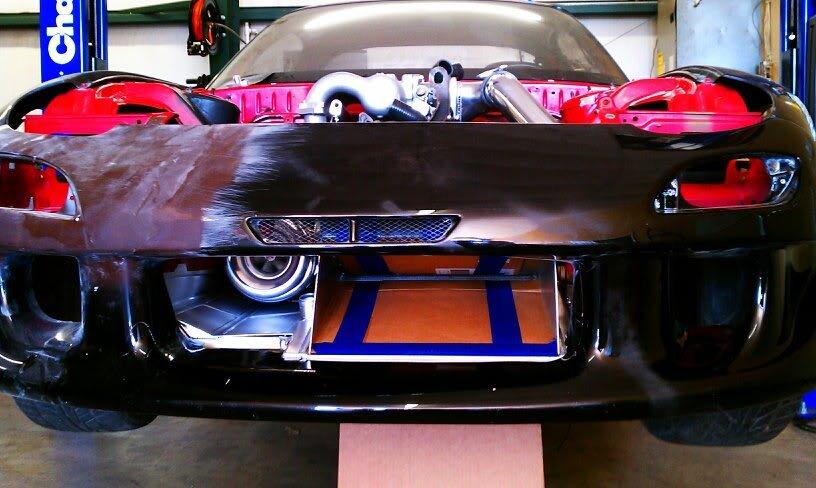
6-21-2012
OK... Well, I'm going to start updating this thread a bit more regularly since I'm starting to wind down.
To start, My event, DGRR 2012 Happened in Mid April and I was concentrating on that..
We had a great turn out and I think many rotary guys had great time. More information about this event, goto: www.DealsGapRotaryRally.com
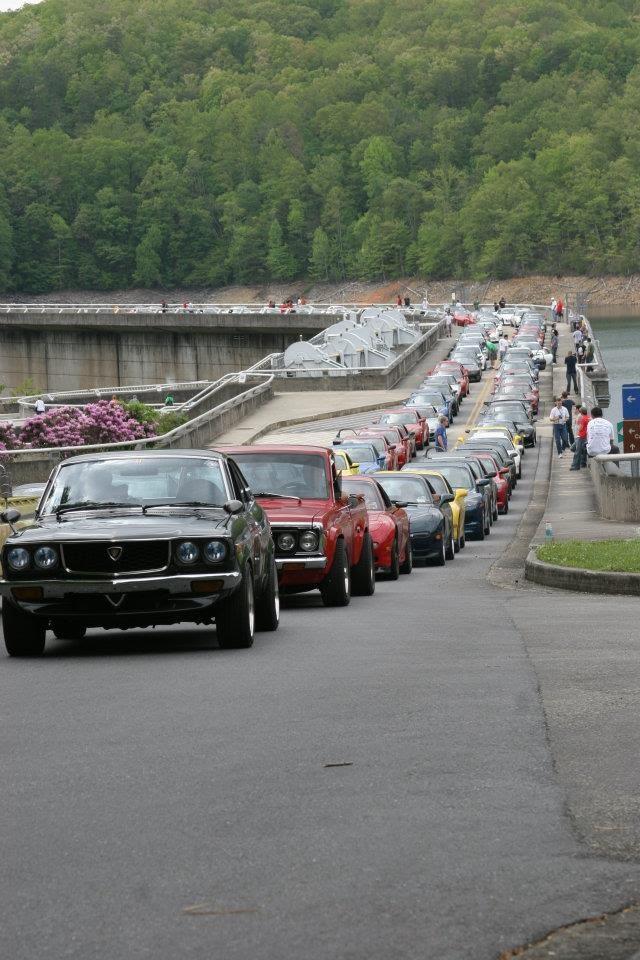
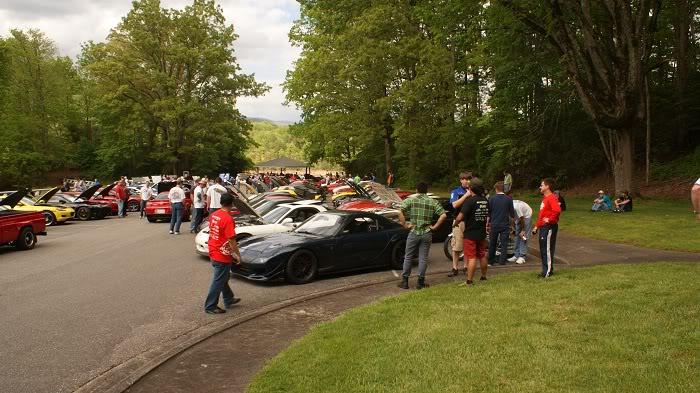
I also got pulled over by TN LEO.. but did finally got to drive on the Dragon (been 4 years).
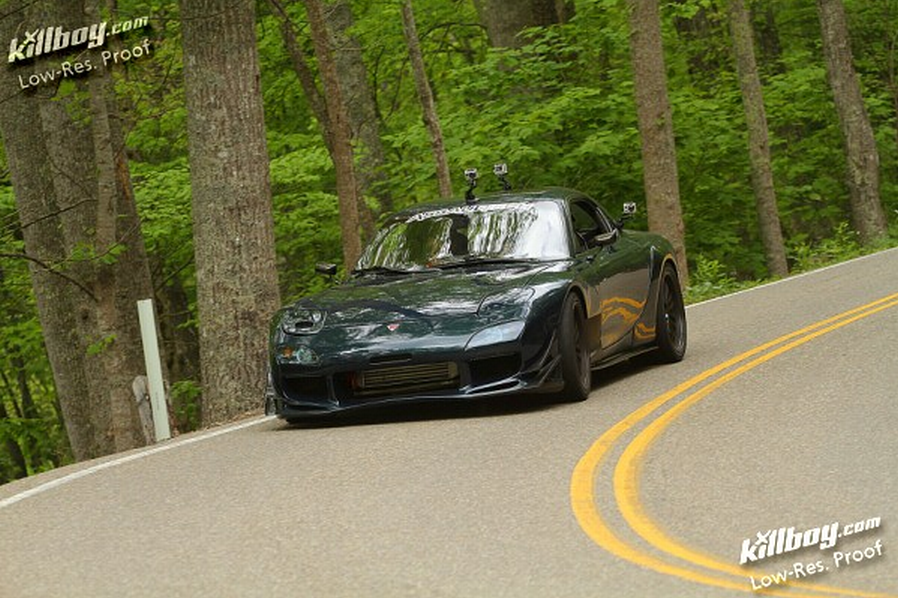
The unfortunate part was I blew two PowerFC's the very last day when I was about to roll back home. Luckily help of rotary friends and DGRR sponsors, I was able to limp back home vs. tow truck.
Here are the list of DGRR 2012 sponsors. Please support these vendors who support my event.

6-24-2012
More update to catch up til NOW.
More pics of my car from DGRR 2012...
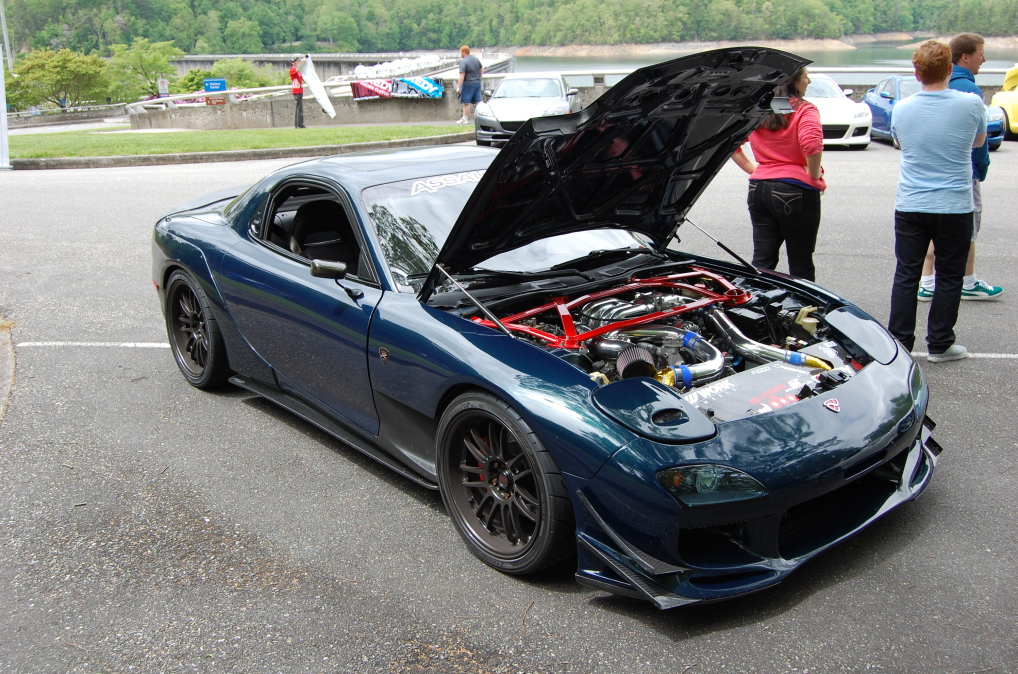
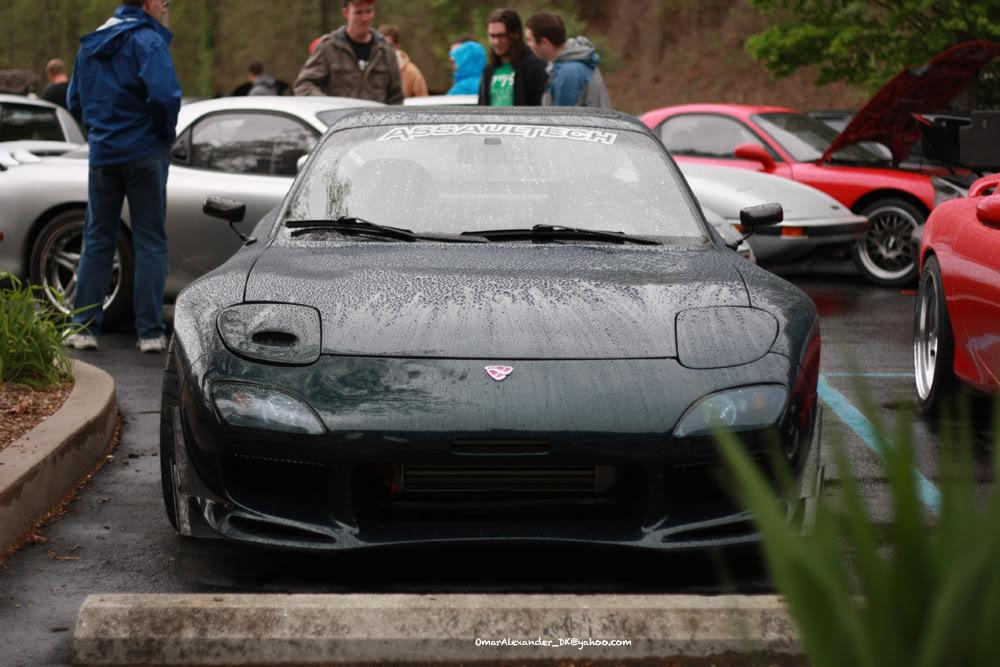
Me on the Dragon at DGRR 2012
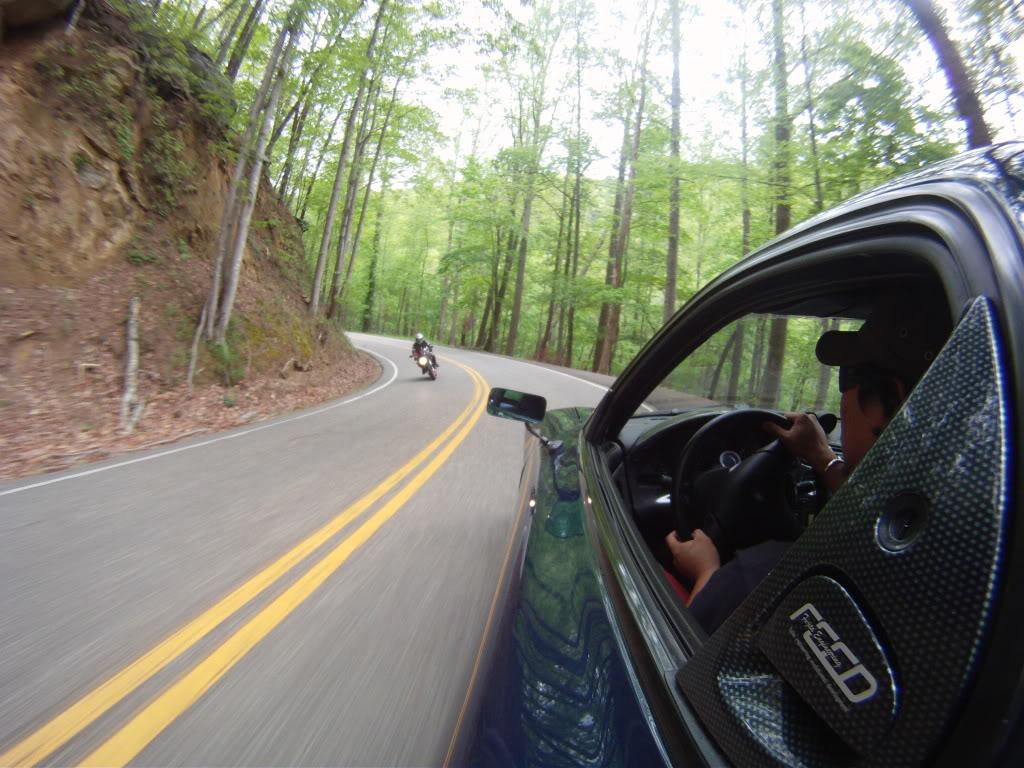
Then I showed my MB FD at the Formula Drift under Exedy Clutch tent.
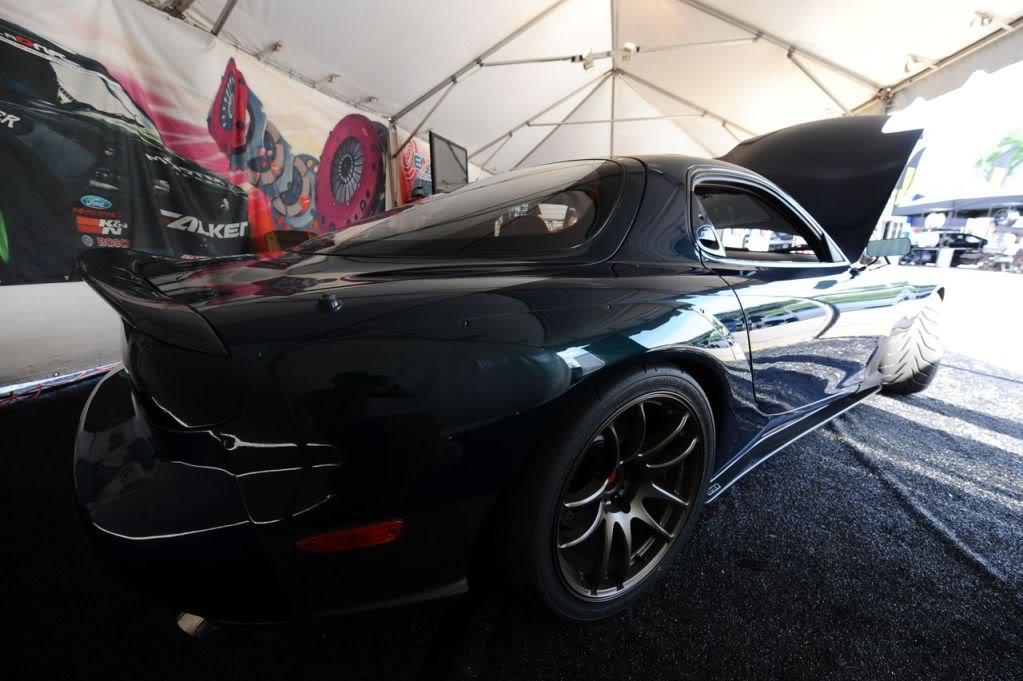
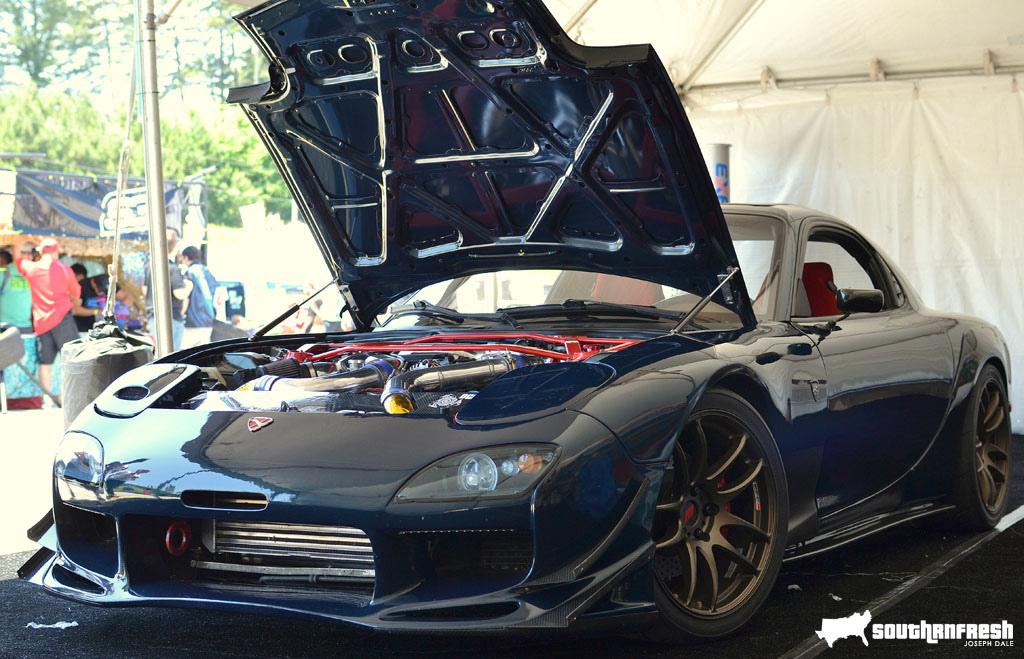
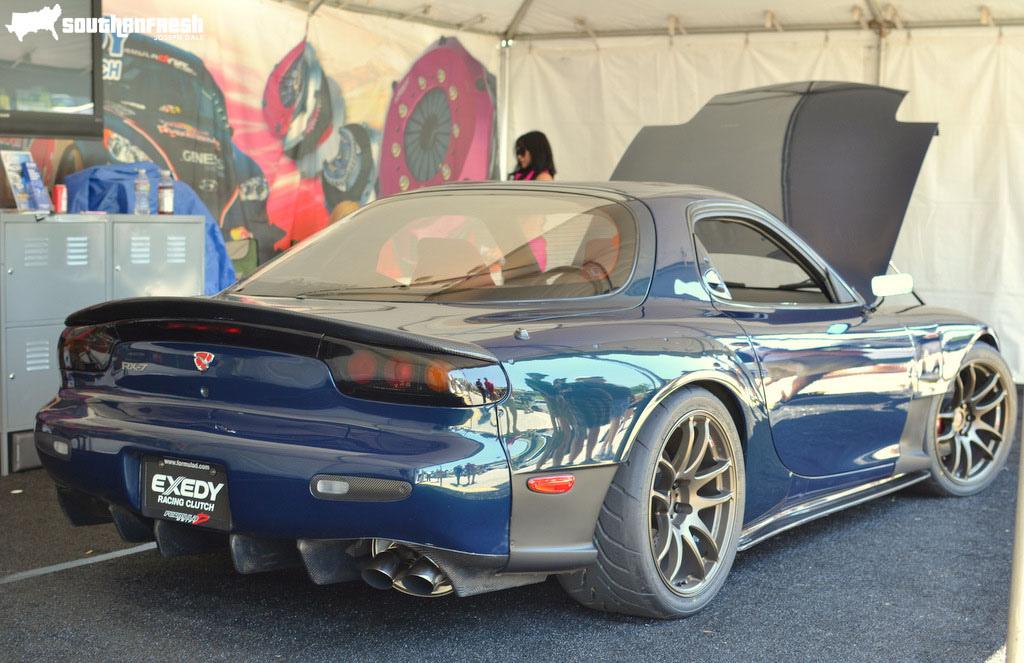
And little update on the project car..
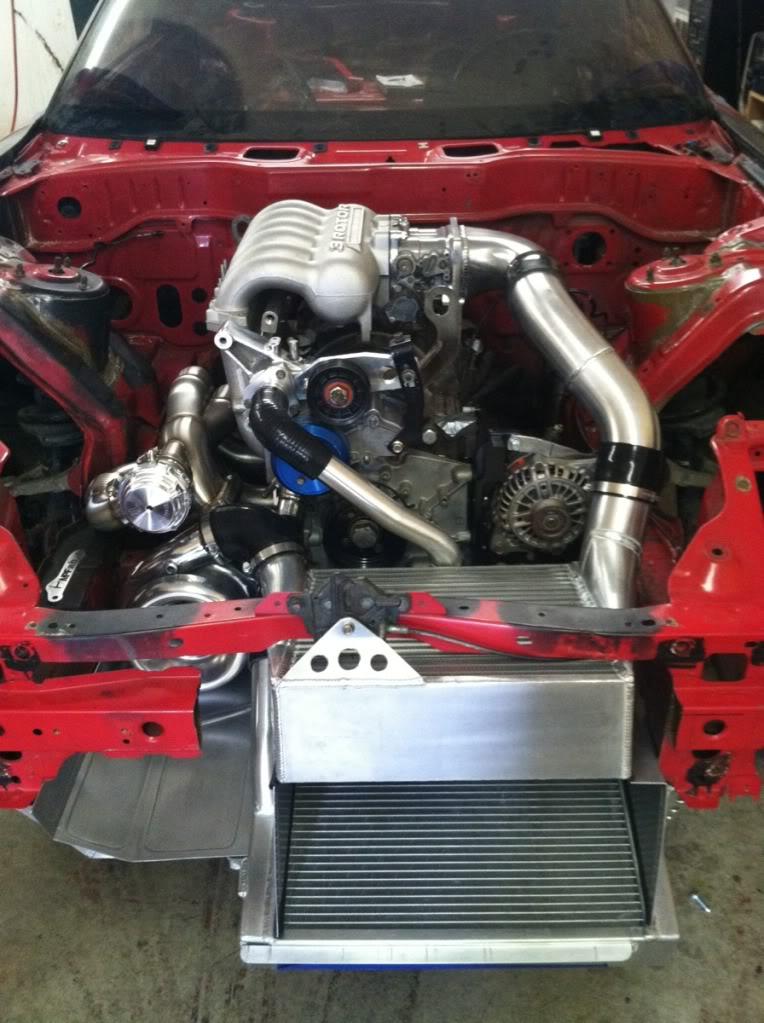
Waiting on few things..
6-28-2012
Update..
Things that I would do for rotary cars... Again, this isn't quite related to this build but related to my 20B Cosmo and what I would do for some of the rarest parts in the country.
I've followed this front clip for over 2 years.
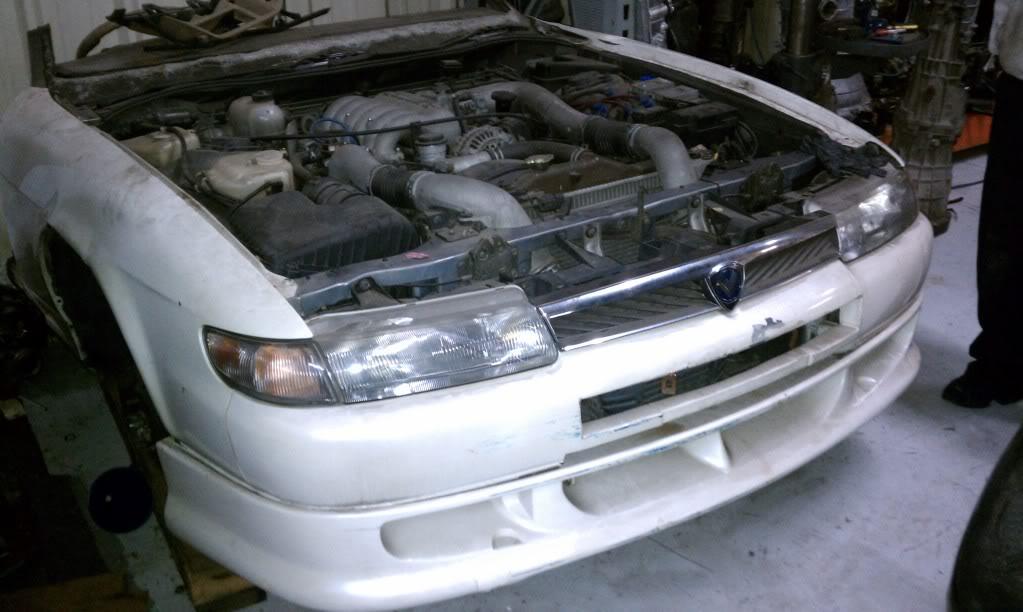
It was owned by a friend Drew in ATL, GA and I found out about it just as him and his business partner was going separate ways. Due to separation, car was in a limbo and I was unable to purchase the parts. Couple of parts I wanted are, RE-A steering column pod and the RE-A bumper add on and the bumper.
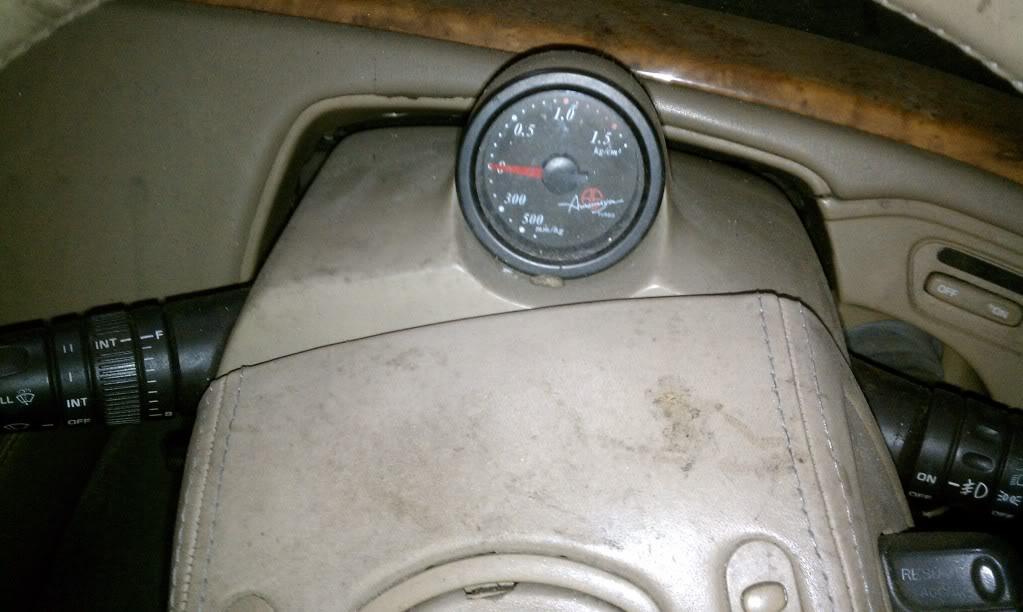
After the Drew sold his half off, the front clip ended up going to his old partner... when I asked to purchase these parts, the new owner refused to sell to me the 2 parts and wanted me to purchase the entire clip. After refusing, he tells me he will never sell it to me. About 2 years later (last month), friend of mine gave me a lead and located the new owner of the clip. New owner ended up being a guy in florida whom I bought 2 x 3 rotors about 7-8 years ago. What a small world!!
I ended up driving from Bham, AL to Fruitland, FL to finally pick up the parts I been waiting over 2 years!
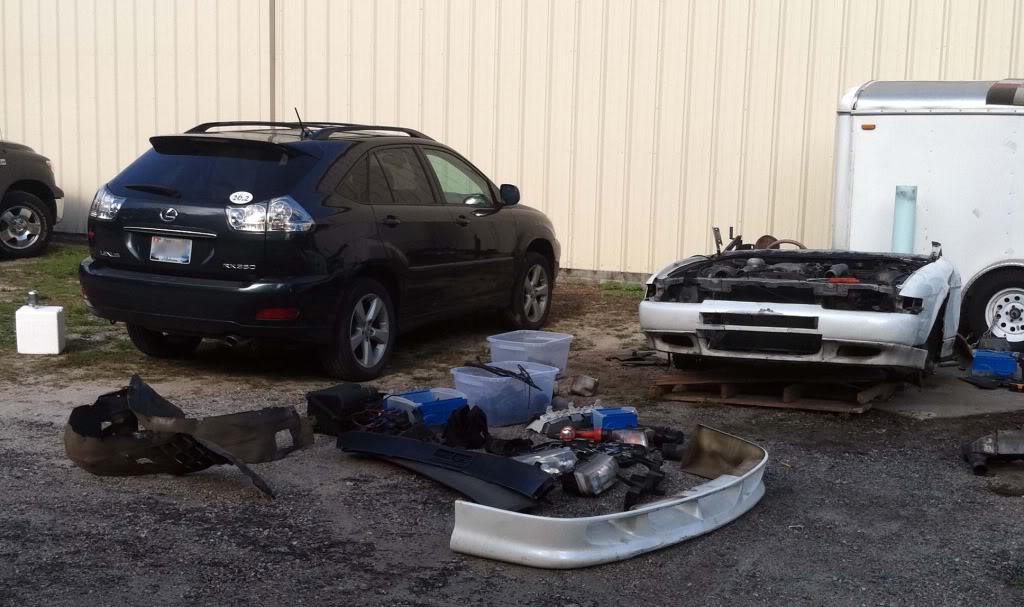
Loaded up the SUV and came back to Bham... all in 48 hour trip ![]()
This was my 2nd 20B clip I stripped..
Here is the first one that I stripped.
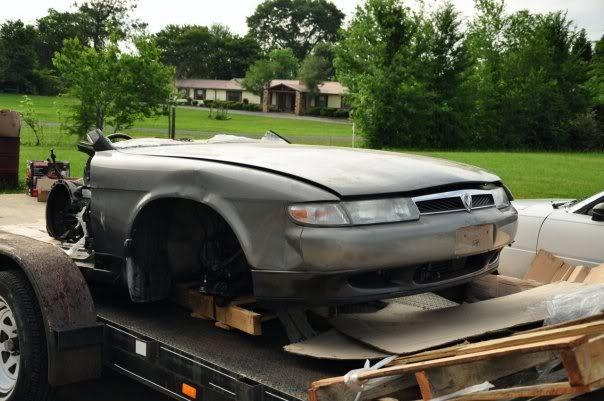
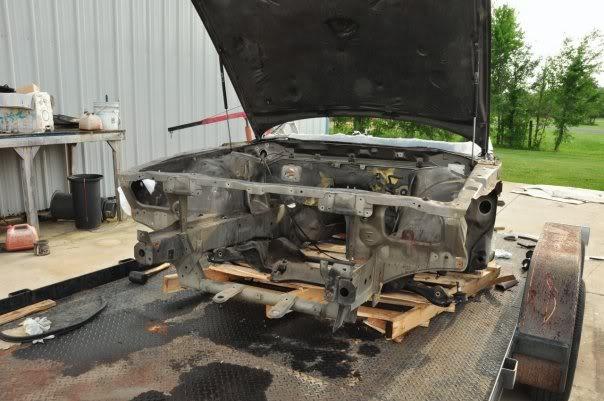
After this 3 rotor project is done, I'll be using the new front bumper and the extra hood I have and re paint the cosmo.
6-29-2012
COOL! Glad to hear that.
Other cool things I got from the Cosmo Front clip from Florida are:
MS air filter in good shape
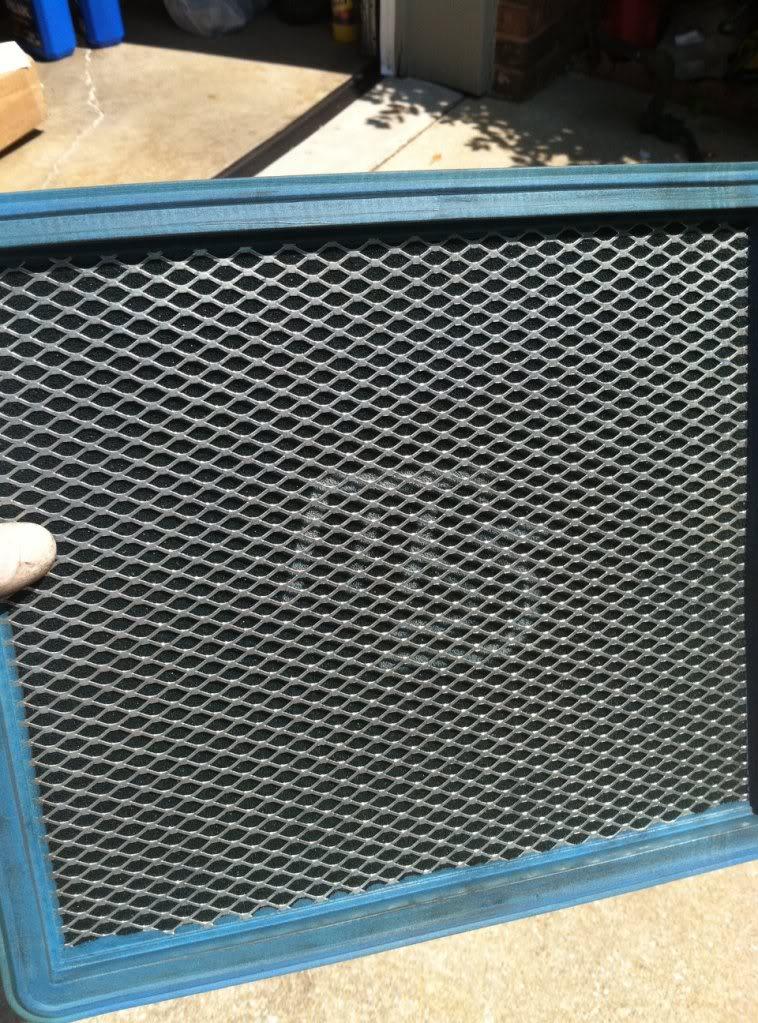
RE-Amemiya Plug wires in excellent condition
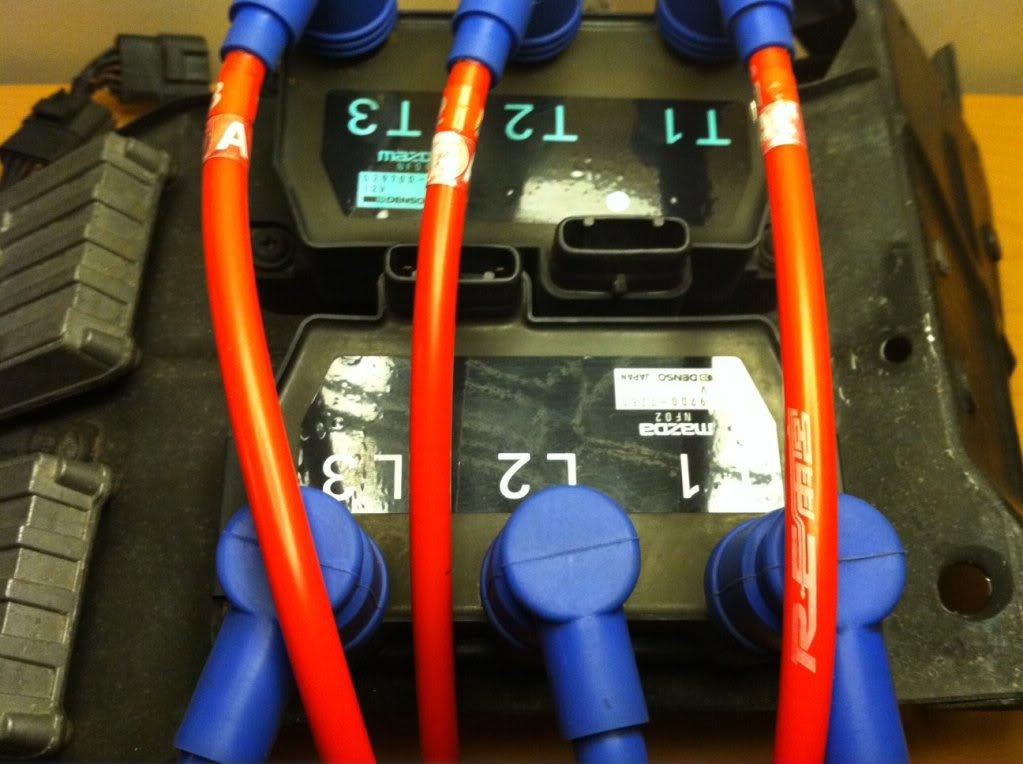
and the RE-Amemiya Steering column pod and boost gauge. I actually contacted RE-A 2-3 years ago about getting this unit but they said they stop production and was not going to make it.
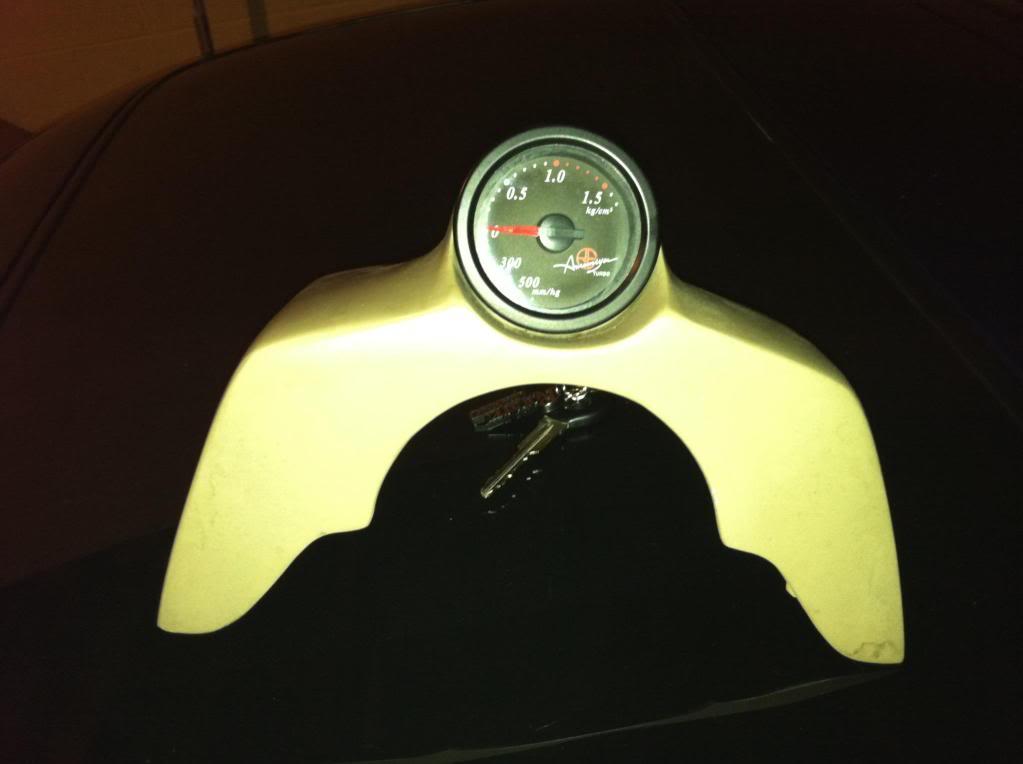
And my Cosmo as it sits today... Pulled it out of my garage to do some electrical stuff done for the house.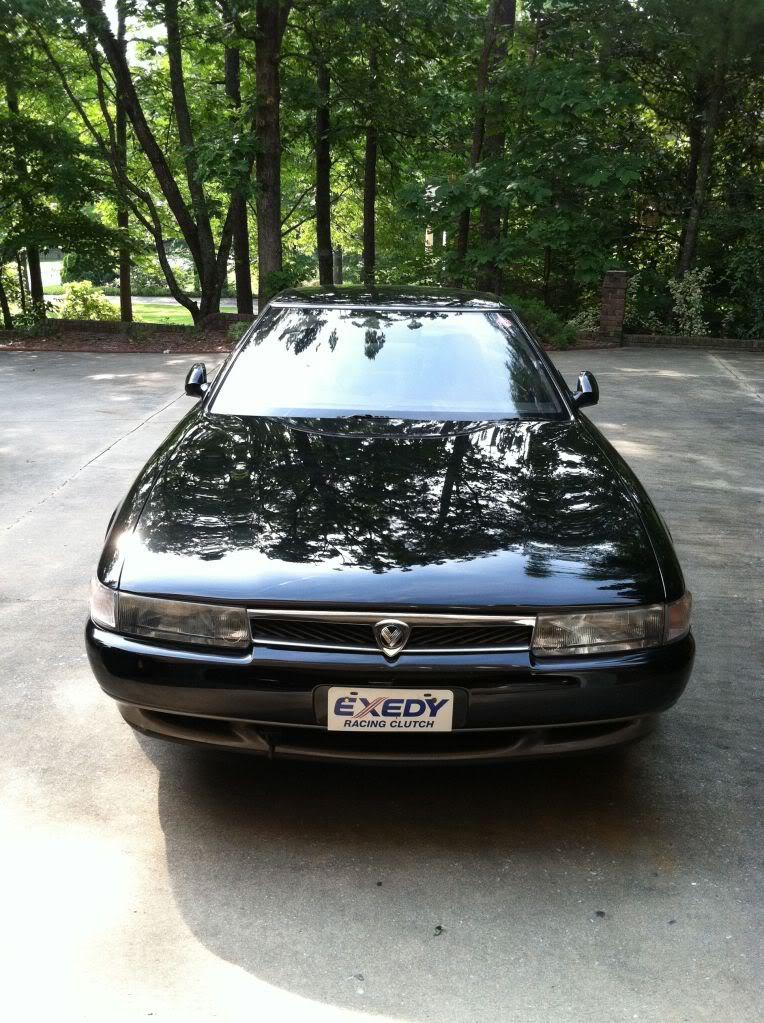
7-10-2012
I'll try to take some and post it here later...
July 9th, 2012 - Finally some update... Here are some sneak preview pics of what the car will kind of look like exterior wise.
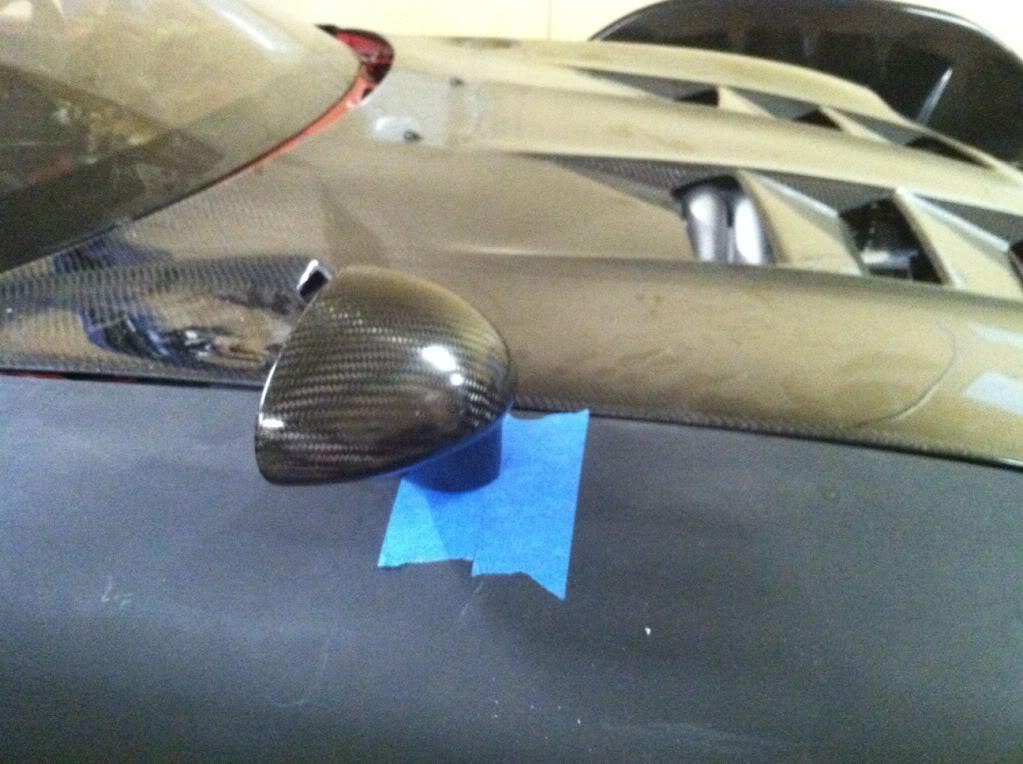
RE-Amemiya Carbon Fiber Fender mirrors
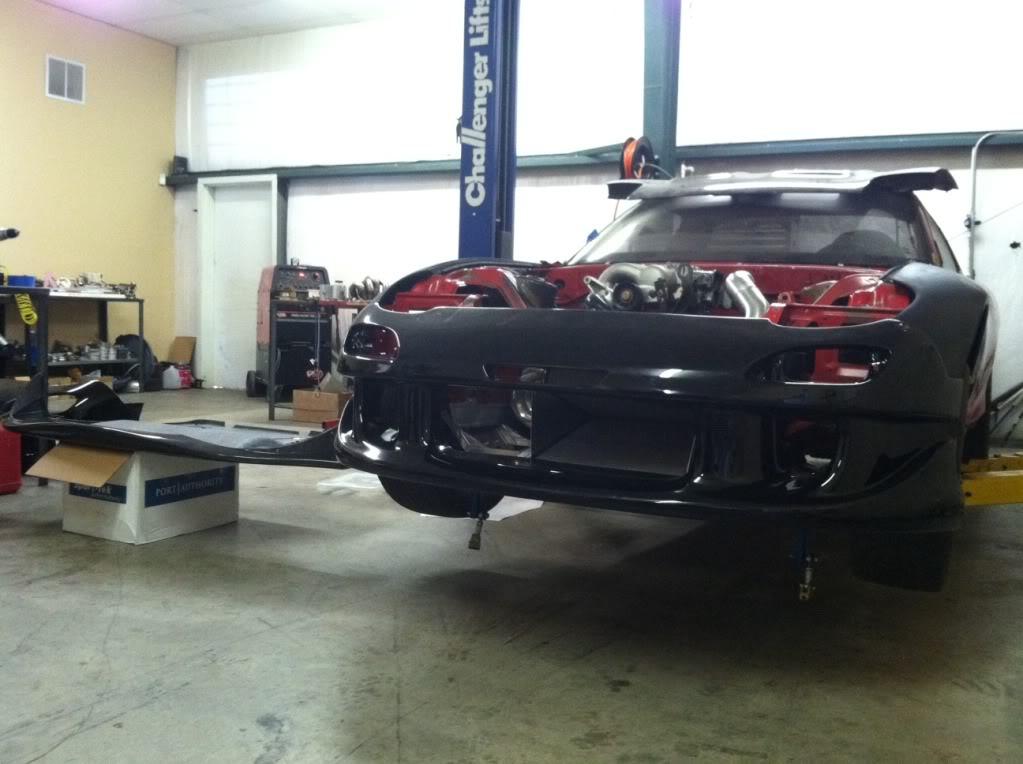
I had to ditch my last bumper because it was messed up by my old body shop. Luckily a friend in New Orleans helped me and sold me his personal bumper.
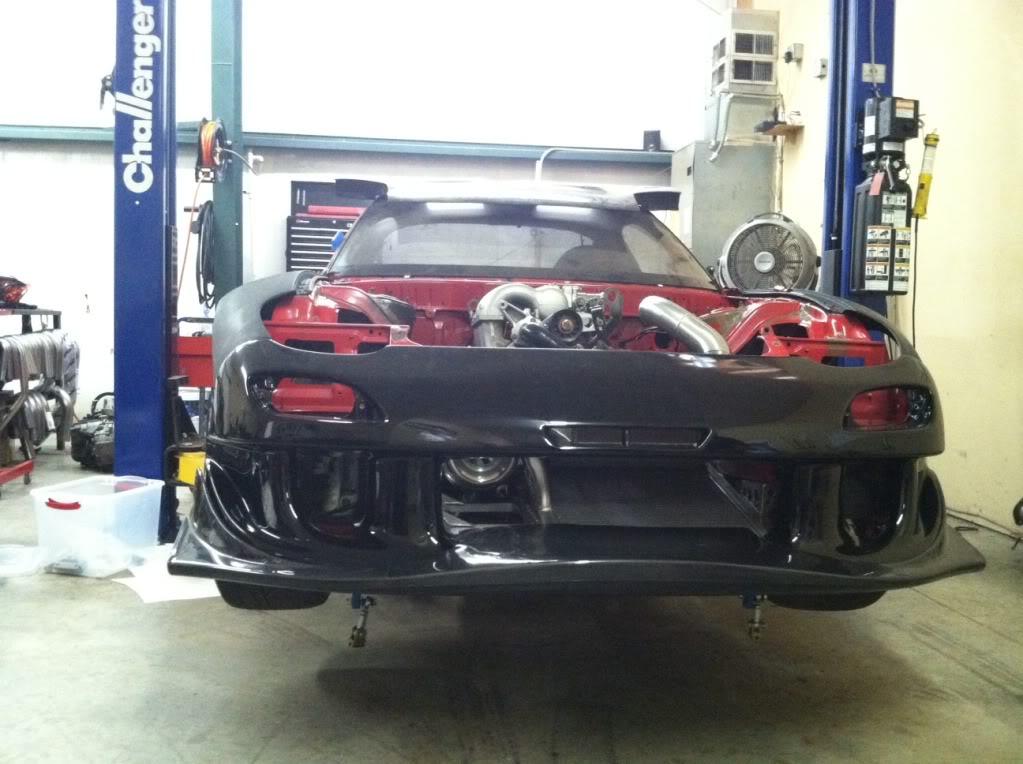
With the carbon RE-Amemiya N1 undersweep on the bumper. This is just a test fit and getting the car ready for the paint and body in a week or so.
More updates coming friday.
7-13-2012
July 13th, 2012 - Today's Update for the week.
Well, to start, I've got my rare red Mazdaspeed seats from Japan. I've seen the white and black ones (I have one of the black) before but never seen one in red. I have a fellow rotary guy in Japan who helped me get these seats and just got them cleaned and reconditioned to near mint condition.
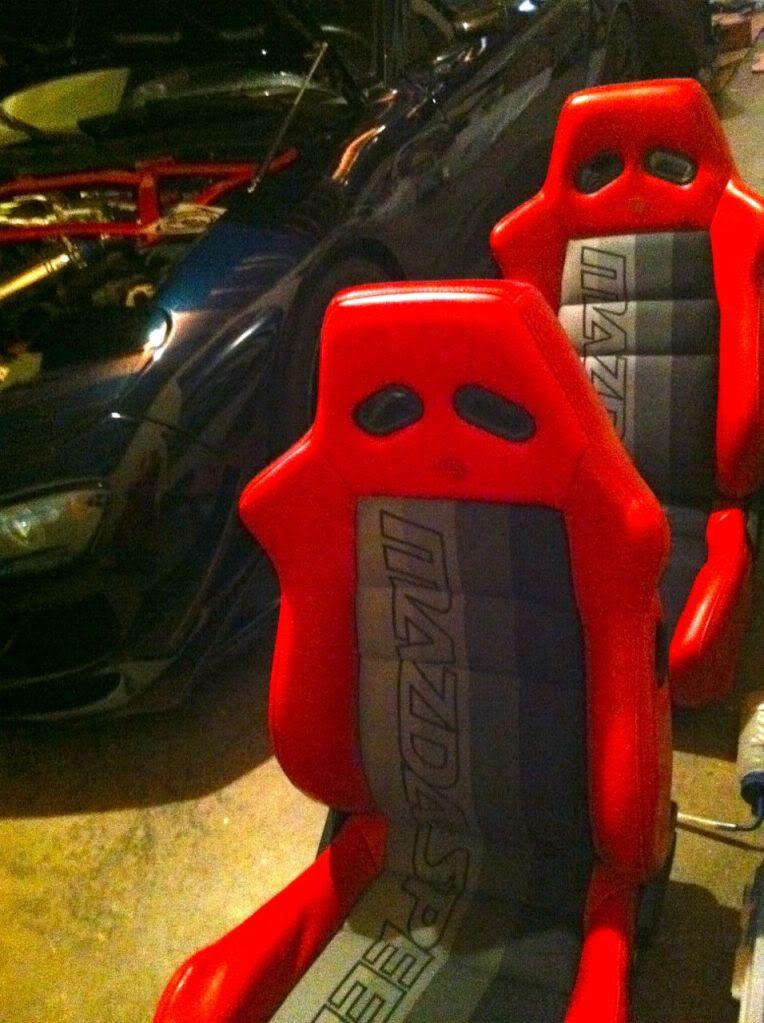
Also Walker Morgan from Morgan Performance Fabrication have installed my new Tial MV-R wastegate and the new BOV. As you can tell, the new theme is silver and black ![]()
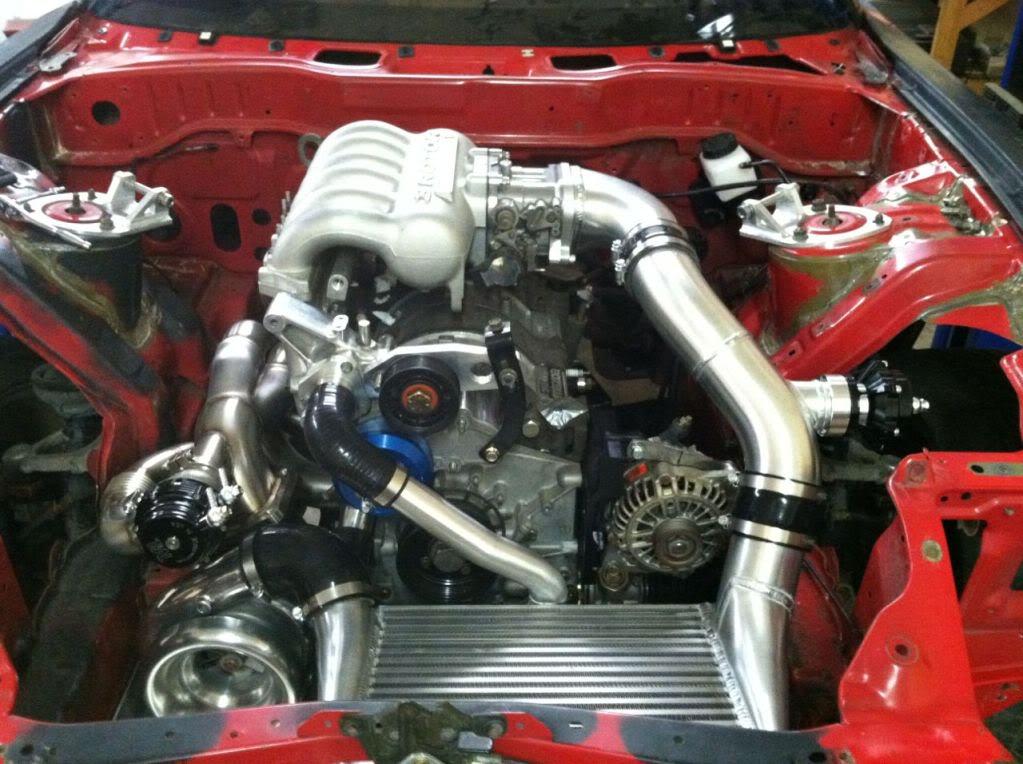
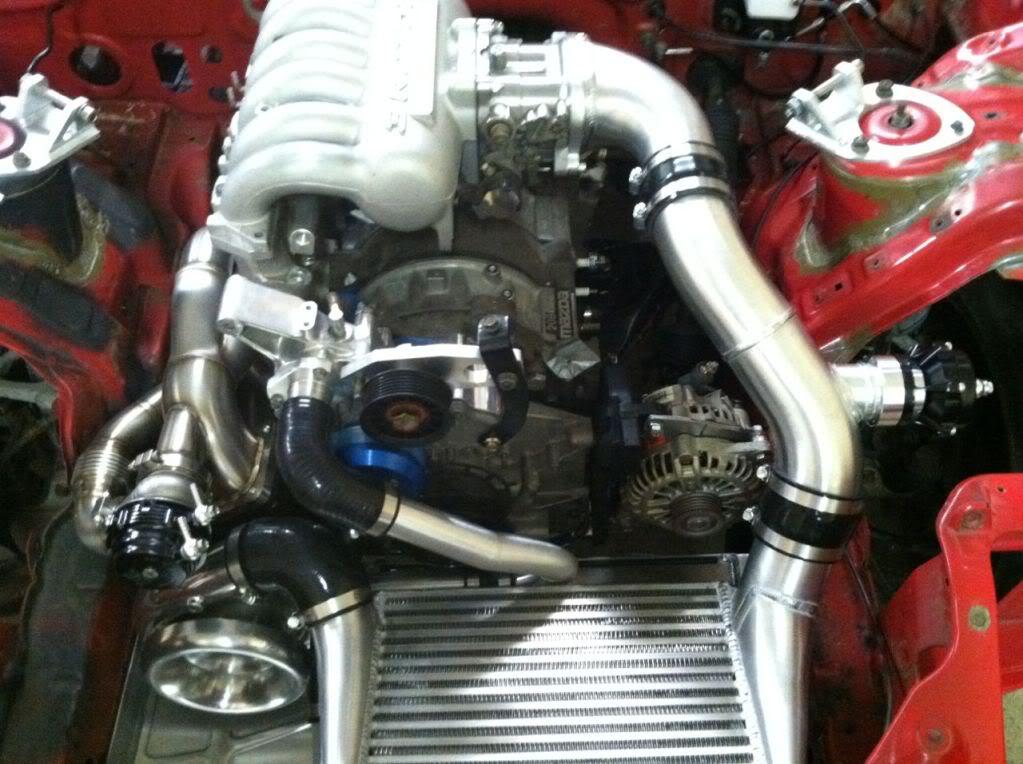
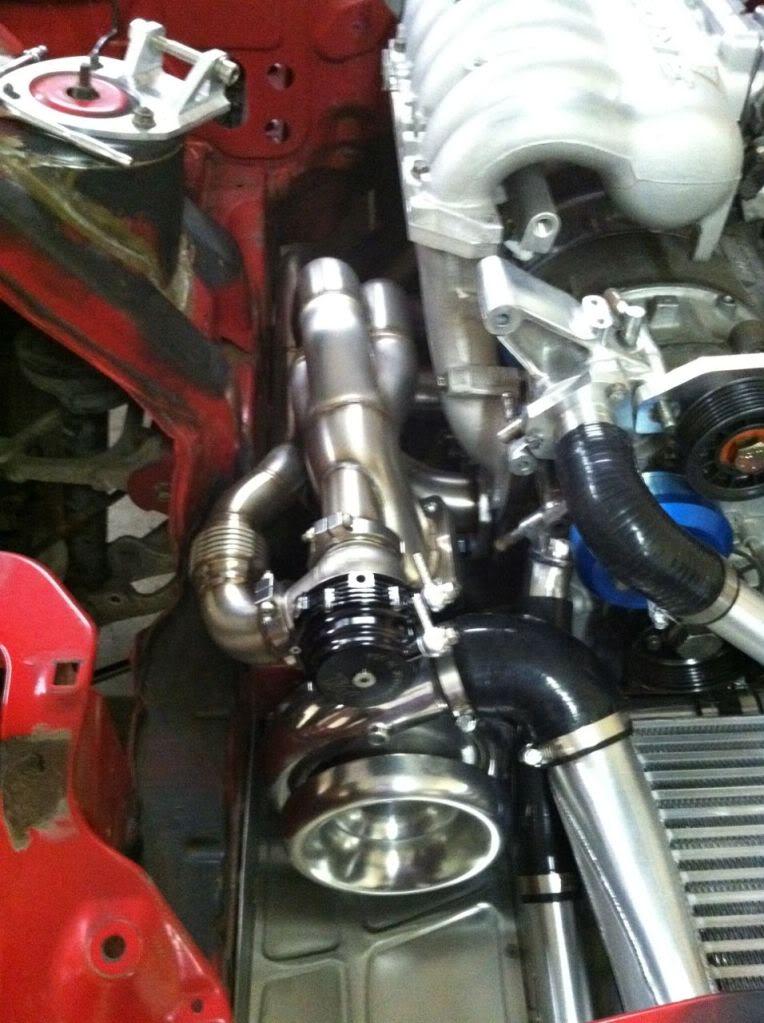
And finally after many many many months of wait, phone calls, etc etc. I finally got my new manual brake system (just a test fit).
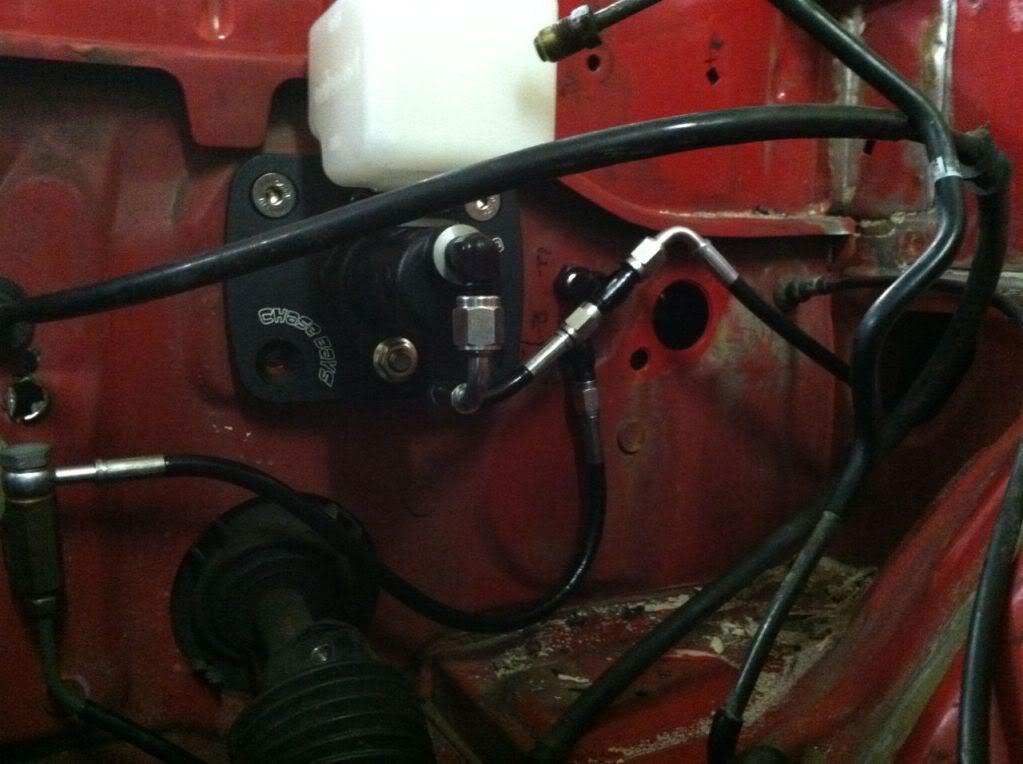
Next week is the tear down, and the shell and all the body pieces goes to Paint and Body @ Goolsby Customs (Goolsby Customs - Custom cars and collision). Jonathan Goolsby is one of the top painters in the country who won last year's SEMA GM Design award!! Can not wait to see what he will do with this car. Will post more details as car now goes in to the final stretch!!
7-19-2012
July 19th, 2012 - MPfab.com / Walker Morgan has been finishing up the engine bay so we can't send the car to the paint and body.
Here are few more pics of the progress..
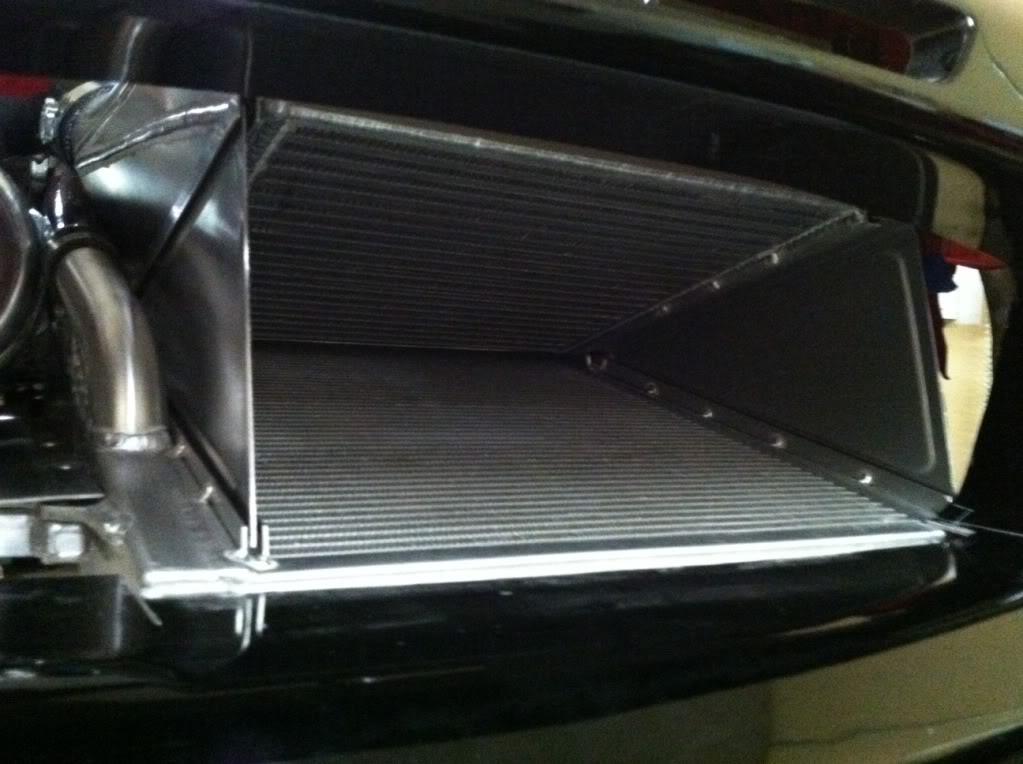
New side panels on rails ![]()
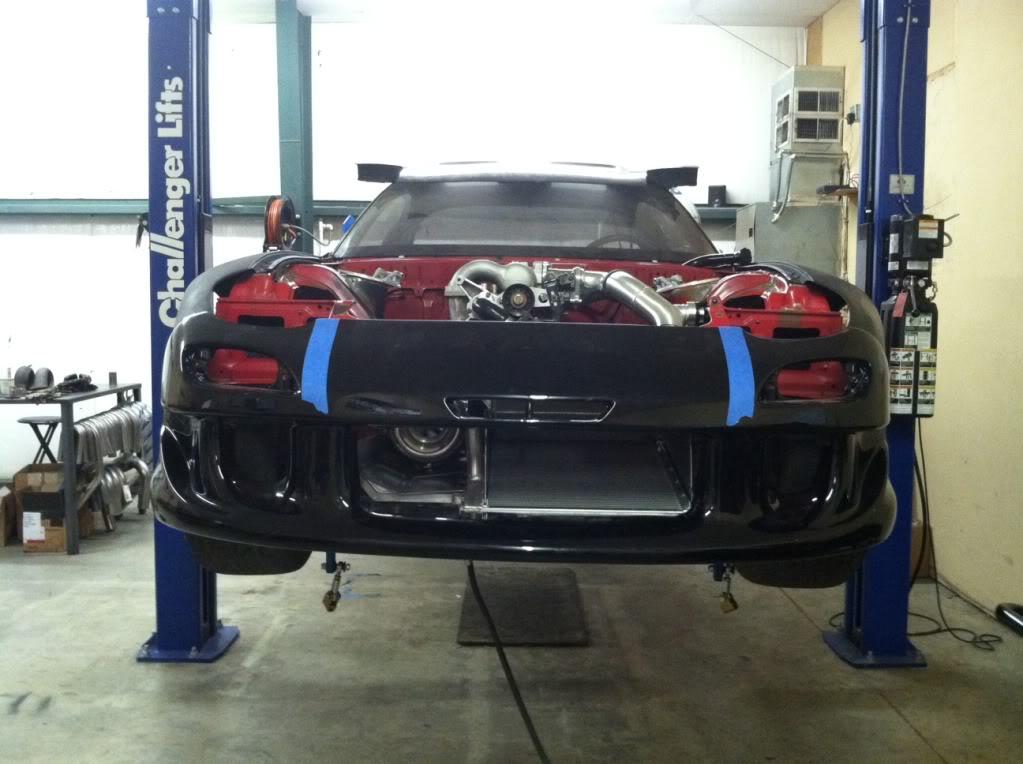
I was trimming the bumper most of the afternoon.. making sure it fits perfect.
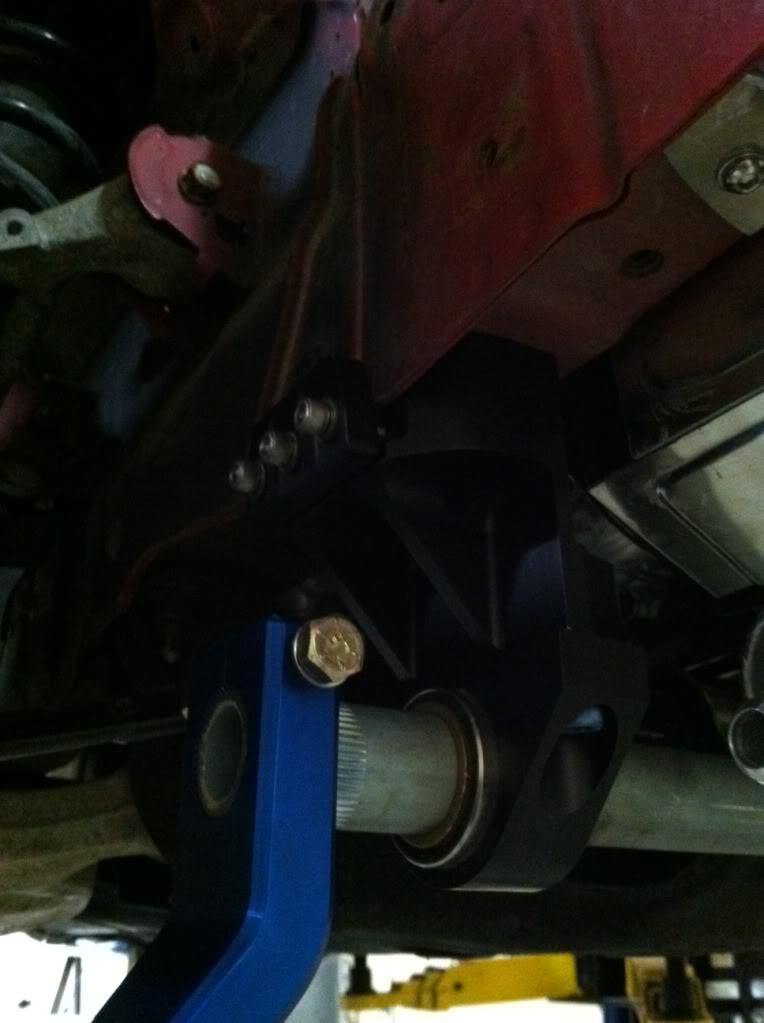
Pic of my heavy duty sway bar mount and sway bar ![]()
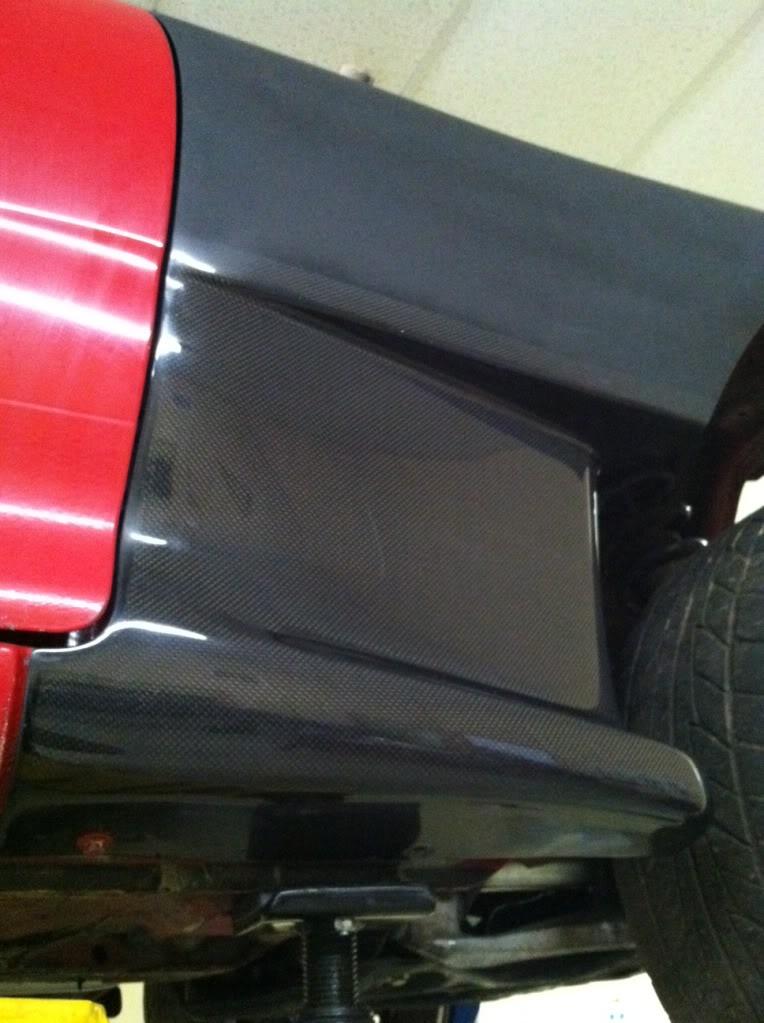
One off fenders by Shine Auto ![]() Thanks to the owner Ken, he made me a one off FEED fenders for this build. I been two toning like this on my other FD and decided to continue on..
Thanks to the owner Ken, he made me a one off FEED fenders for this build. I been two toning like this on my other FD and decided to continue on..
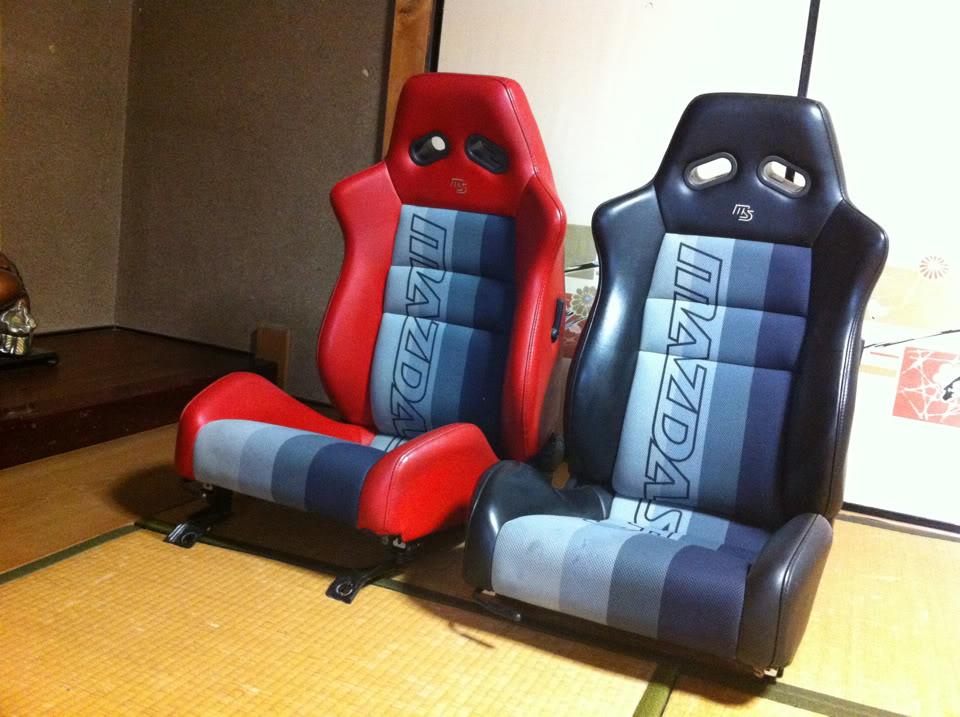
Finally, MS seats... waiting to be shipped from Japan!!! Can't wait to get them!
7-23-2012
July 23rd, 2012 - Update!
Well, I'm getting ready to start putting things together and getting stuff out of the boxes and checking to be sure I got everything for the last min assembly..
Here are some of the stuff I've gotten..
Stance USA - Pro Comp 3 Coilovers (Pro Comp 3)
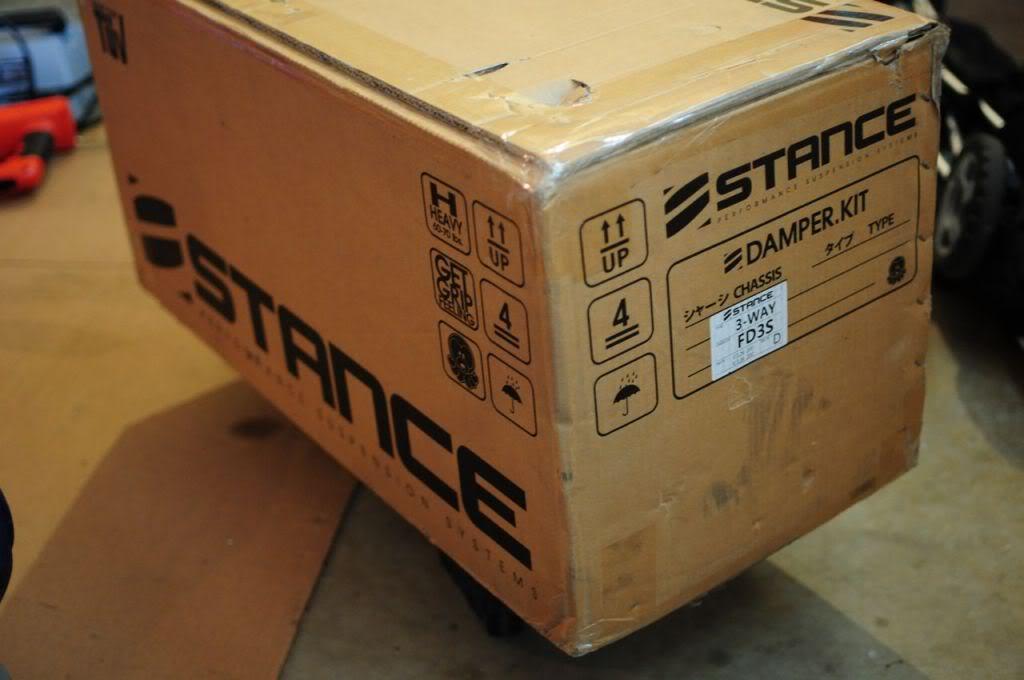
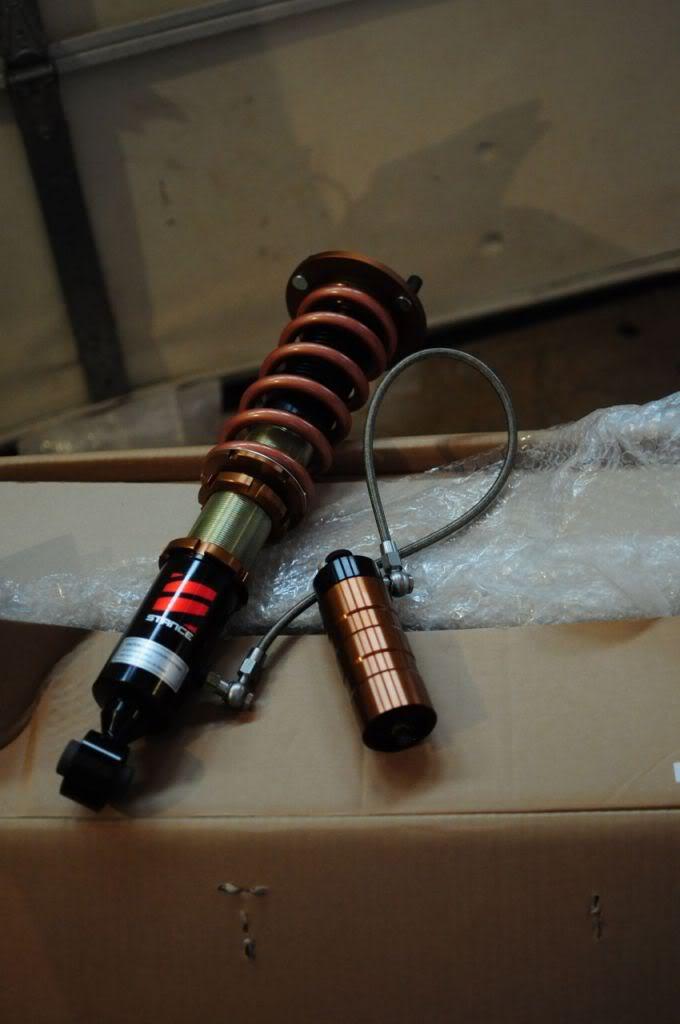
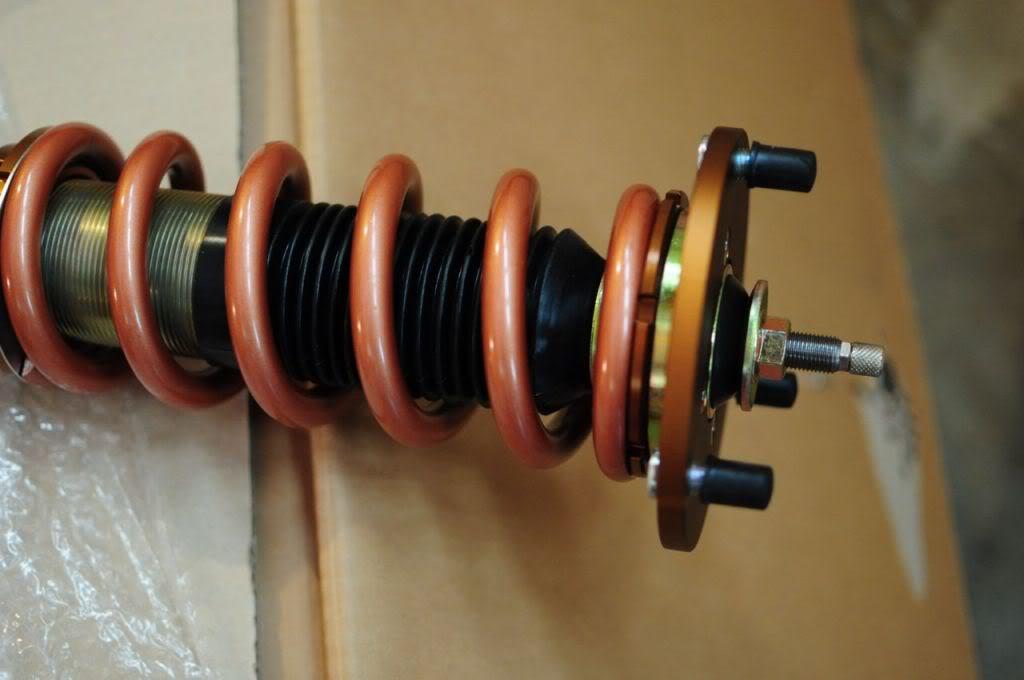
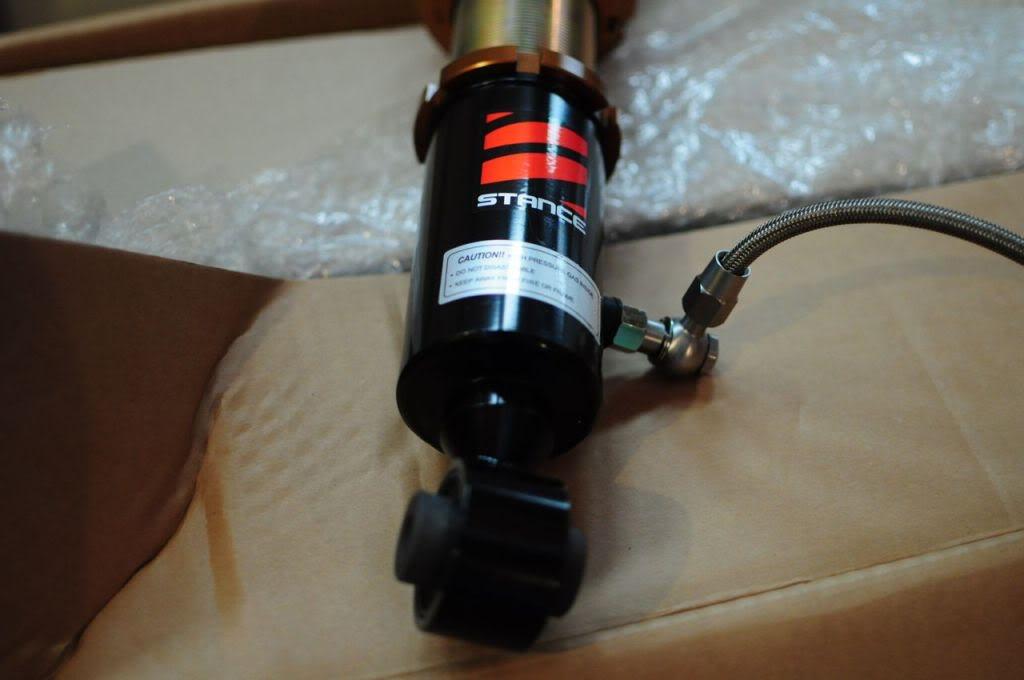
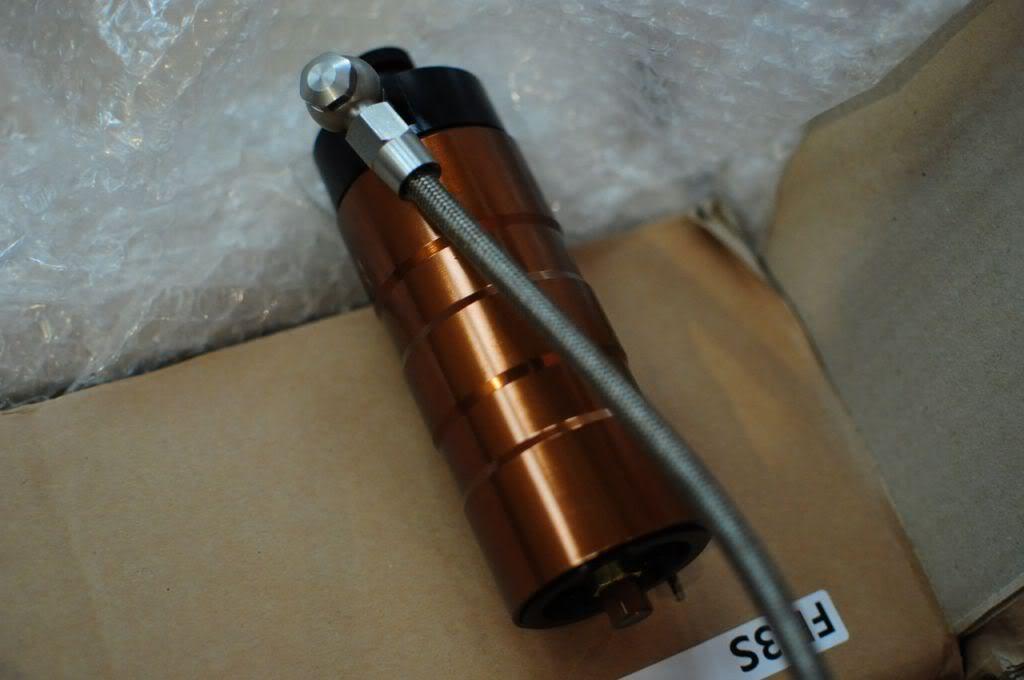
My reason for picking this unit is: great price, great customer support from Stance USA.. and I've heard great things about their products from racers and street drivers.
Product looks to have great craftsmanship and quality. I can't wait to install them.
7-25-2012
July 24th, 2012 Update..
Car is about to leave MPFab and we are finalizing few things. Here are some pics..
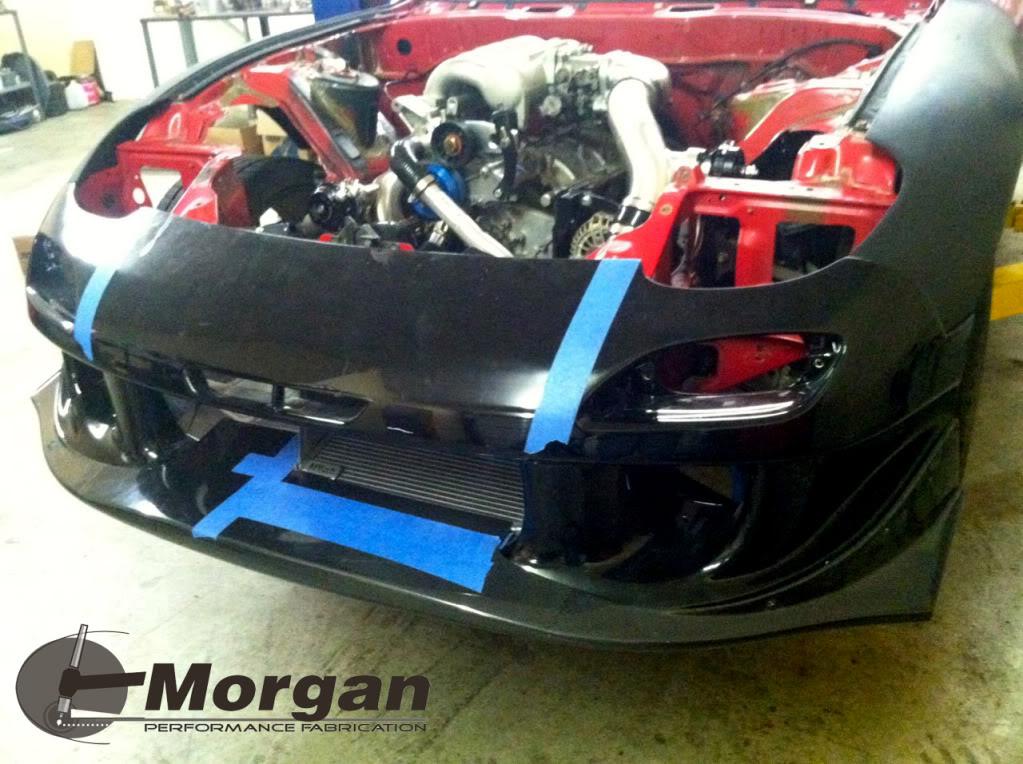
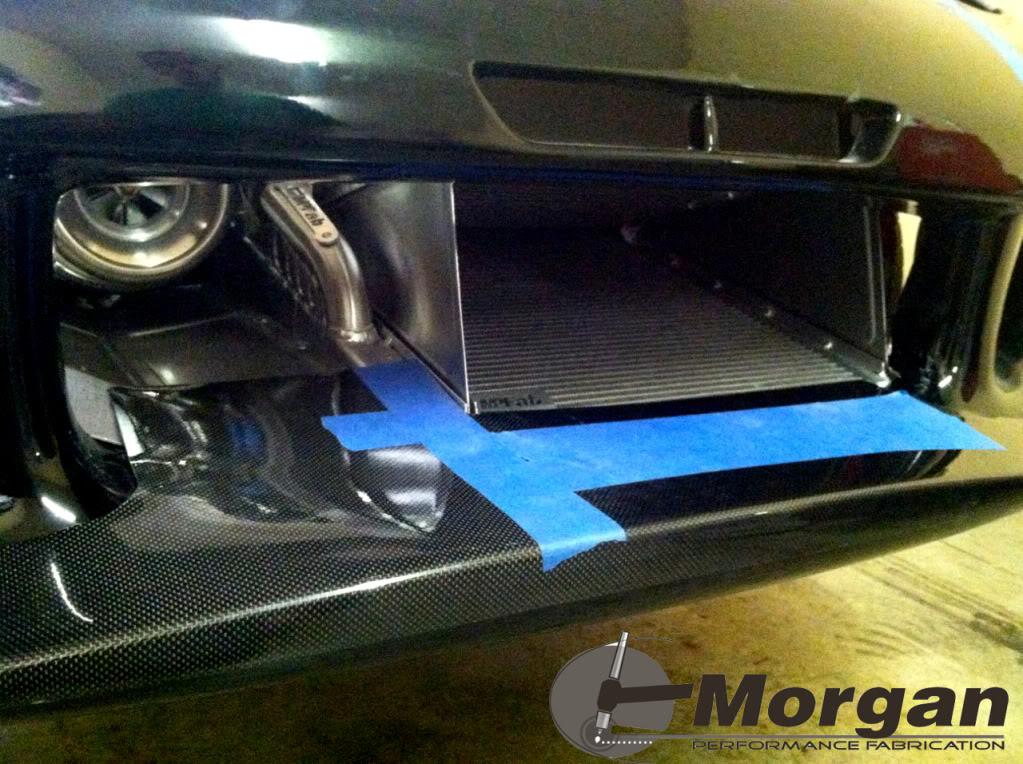
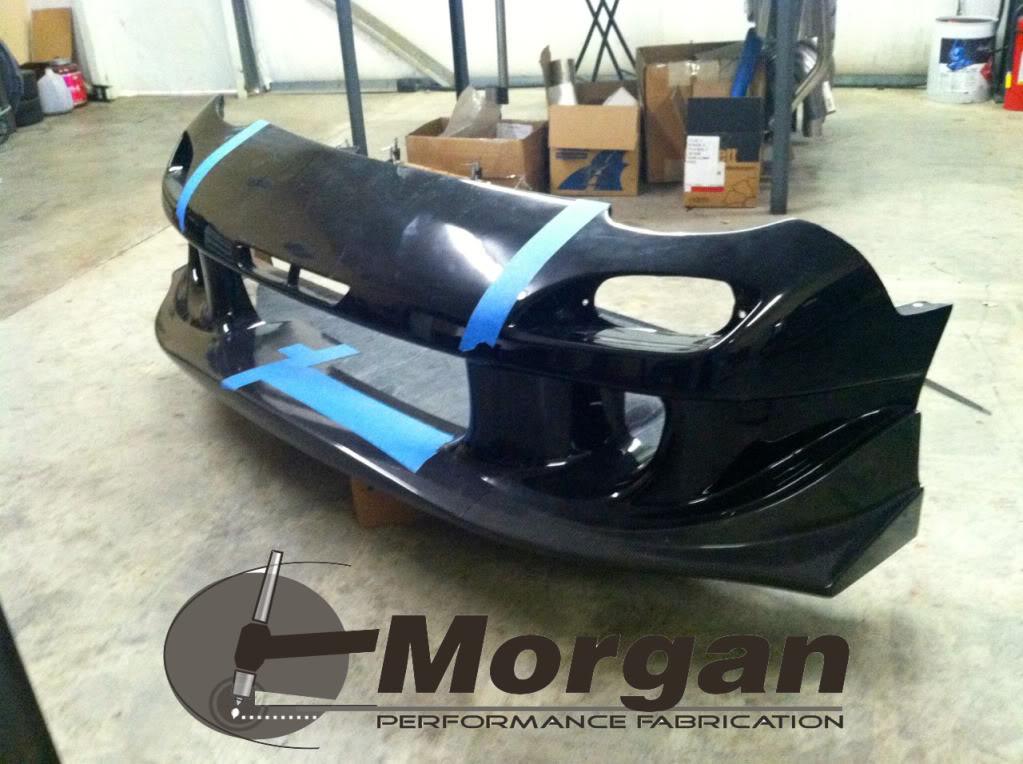
We started to tear it down..

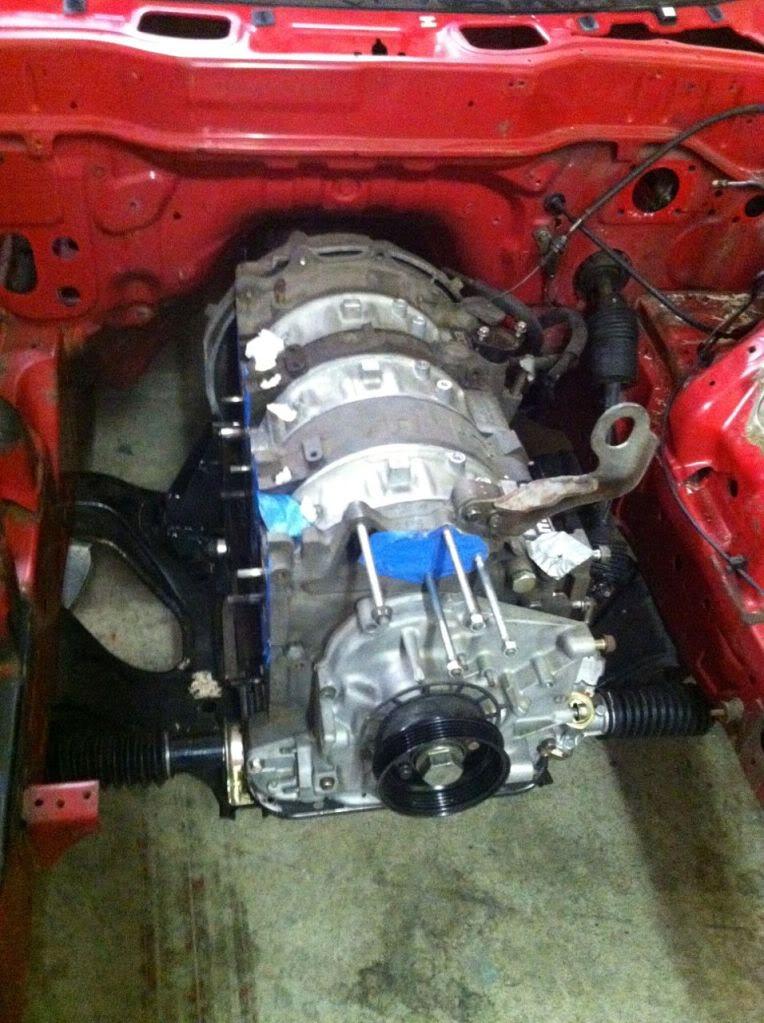
and
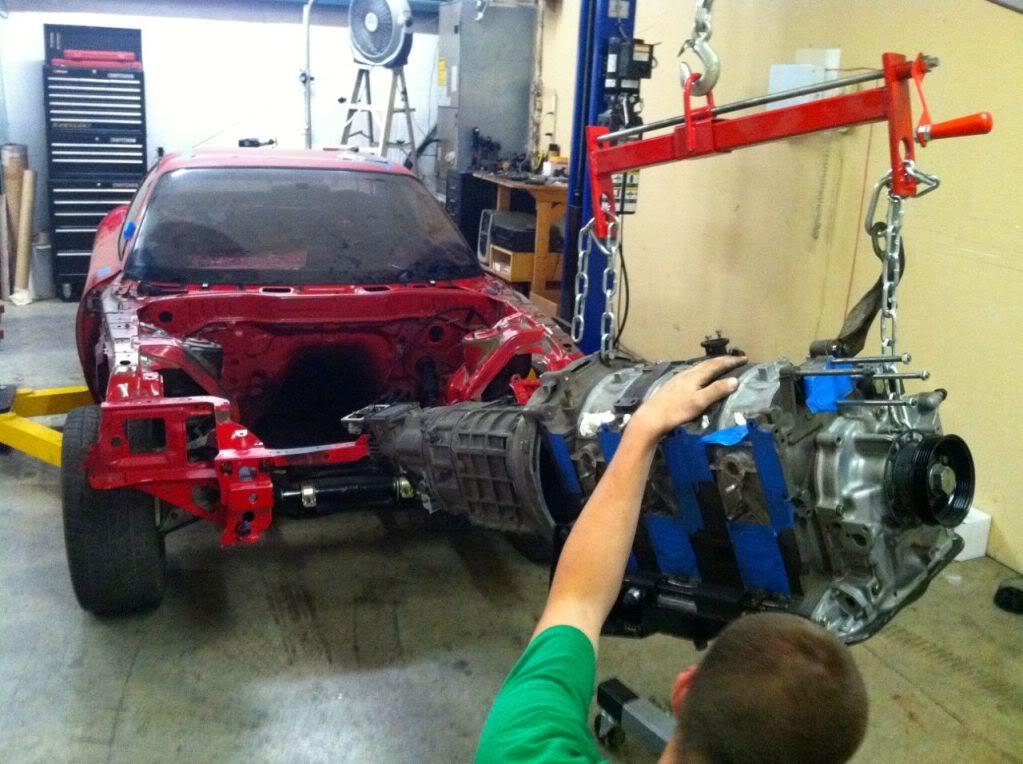
everything out!
7-27-2012
July 26th, 2012 - Everything has been taken off and the car is now at Jonathan Goolsby's, 'Goolsby Customs' (Goolsby Customs - Custom cars and collision).
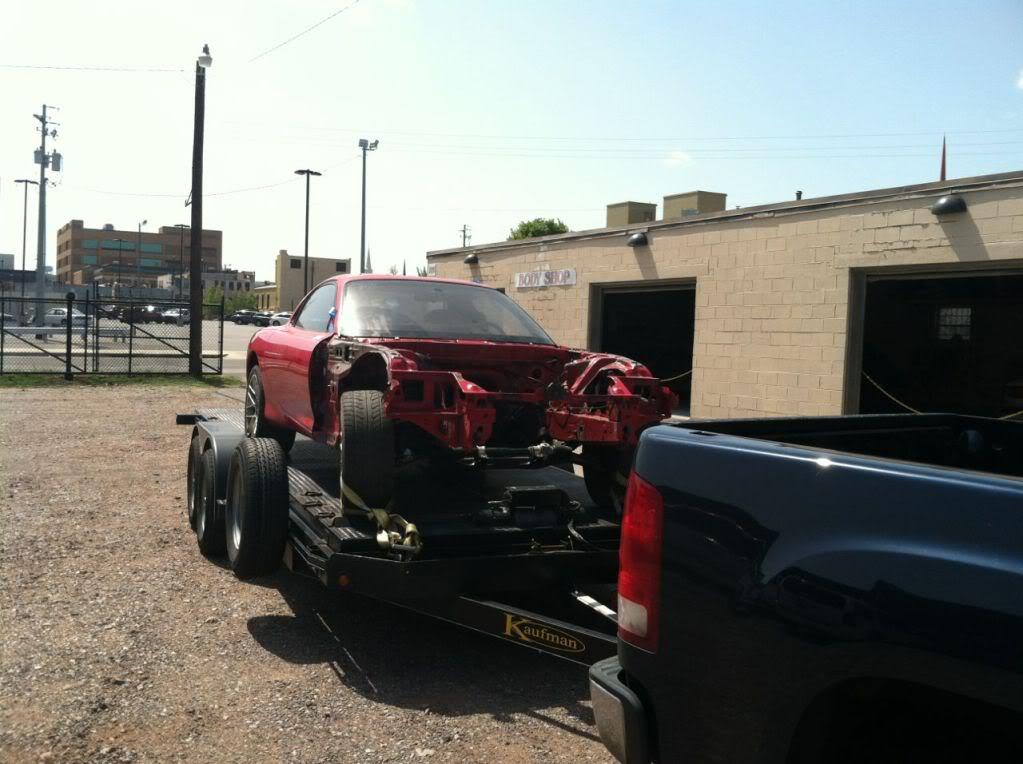
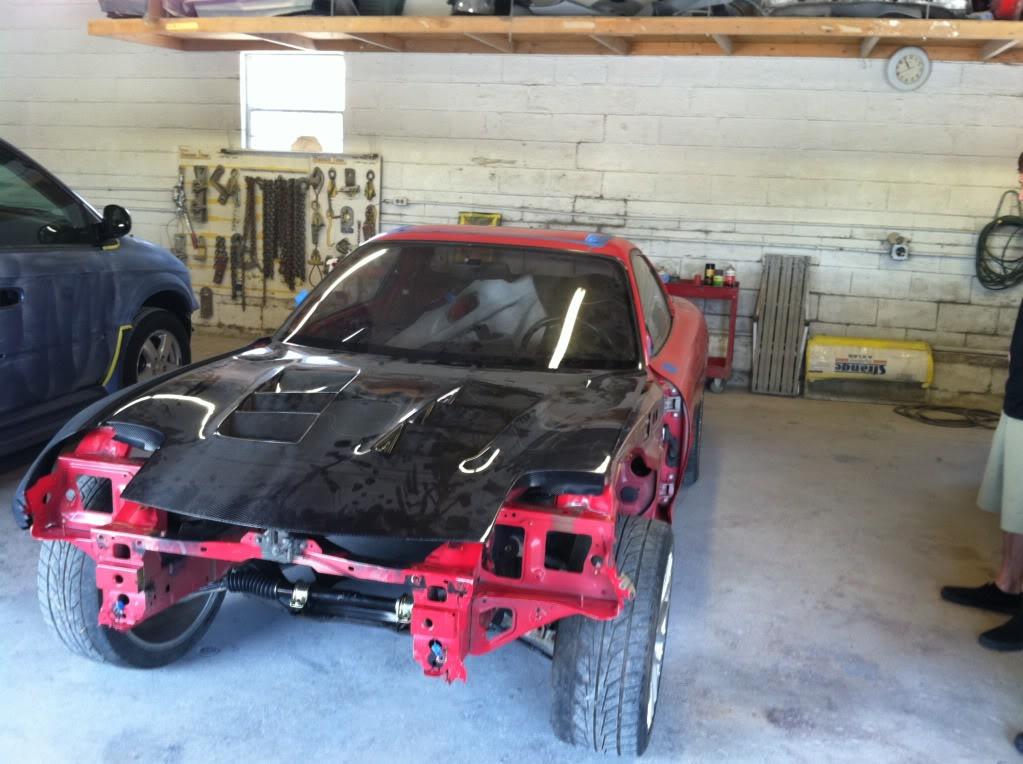
There, car will be painted using latest BASF water based paint. Can't wait to see what Mr. Goolsby will do with this car!!
7-31-2012
July 31st, 2012 - Over the weekend, I had a chance to pick up a unique parts for this car... One of them being this, FEED GT II R wing.
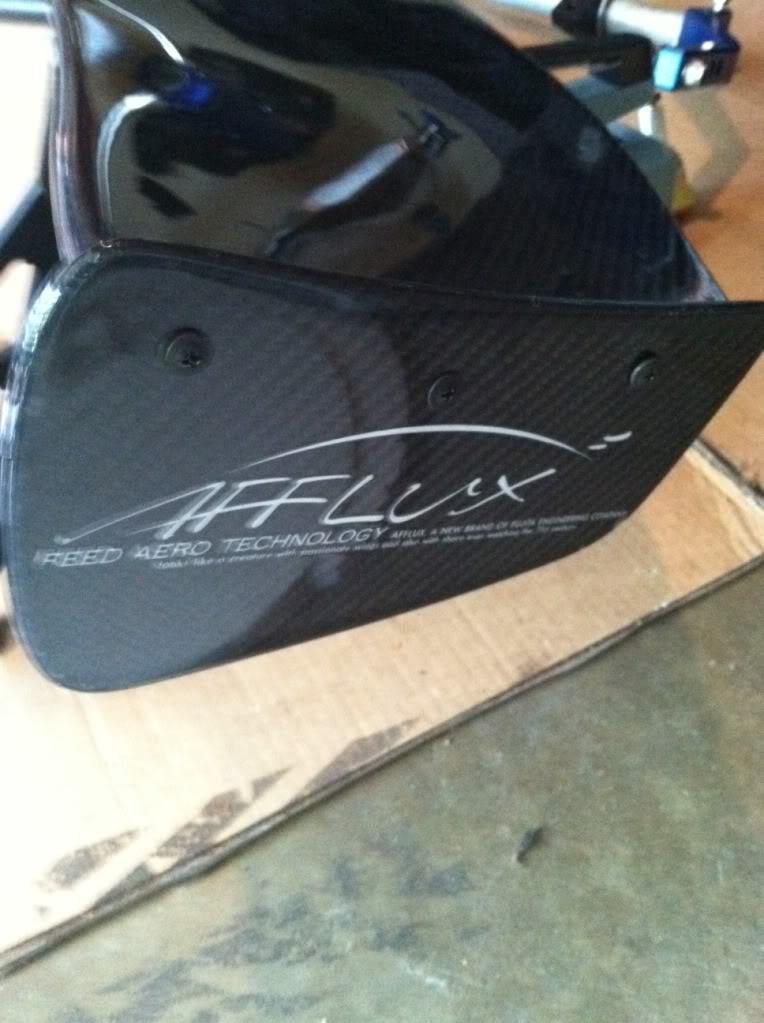
And yesterday I had a meeting with Mr. Goolsby at Goolsby Customs - Custom cars and collision about how the car is going to be built... and brought bunch of carbon parts ![]()
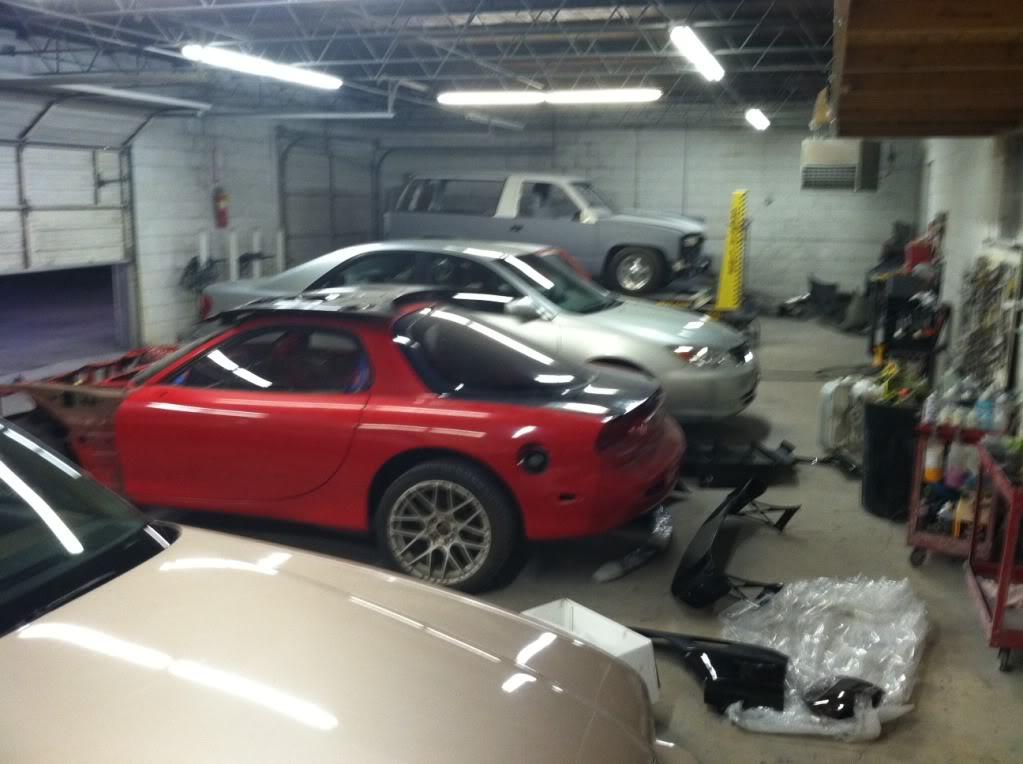
8-6-2012
I've seen some of BASF paint at SEMA and they are much better paint with much deeper look. I'm sure Goolsby Customs - Custom cars and collision will do a great job as they are one of the top shop in the nation.
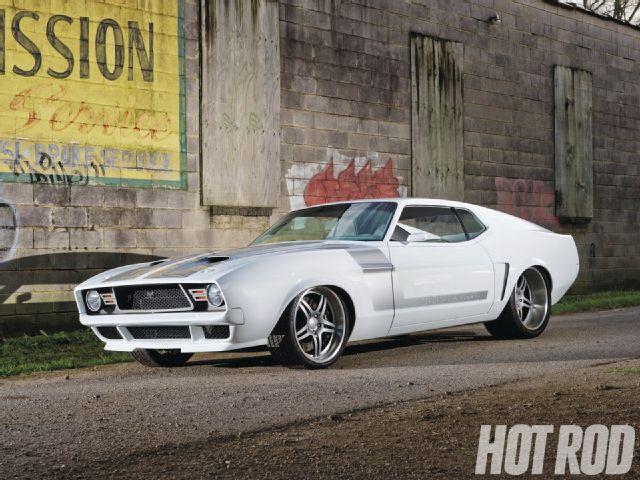
Here is one of their project car from last year.. in Hot Rod mag ![]()
Goolsby Customs 1971 to 1973 Mustang - Pegasus - Hot Rod Magazine
And I believe they are in contingency of winning the Hot Rod of the year with their new ride.
8-6-2012
Aug 6th, 2012 - Update from past 7-8 days...
Well, On my way to pick up some goodies for this project and my MB, I stopped off last weekend at the Import Alliance in Charlotte, NC. There, I saw this yellow FD with K swap.
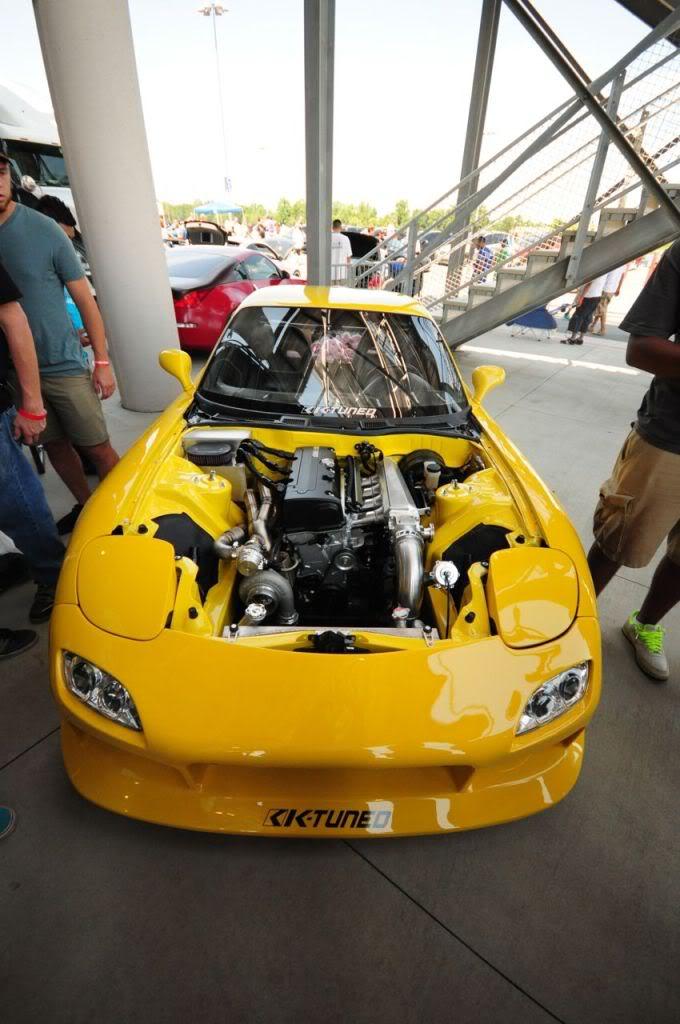
Up on closer inspection, the turbo set up seemed very similar to my 20B project. See if you can compare..
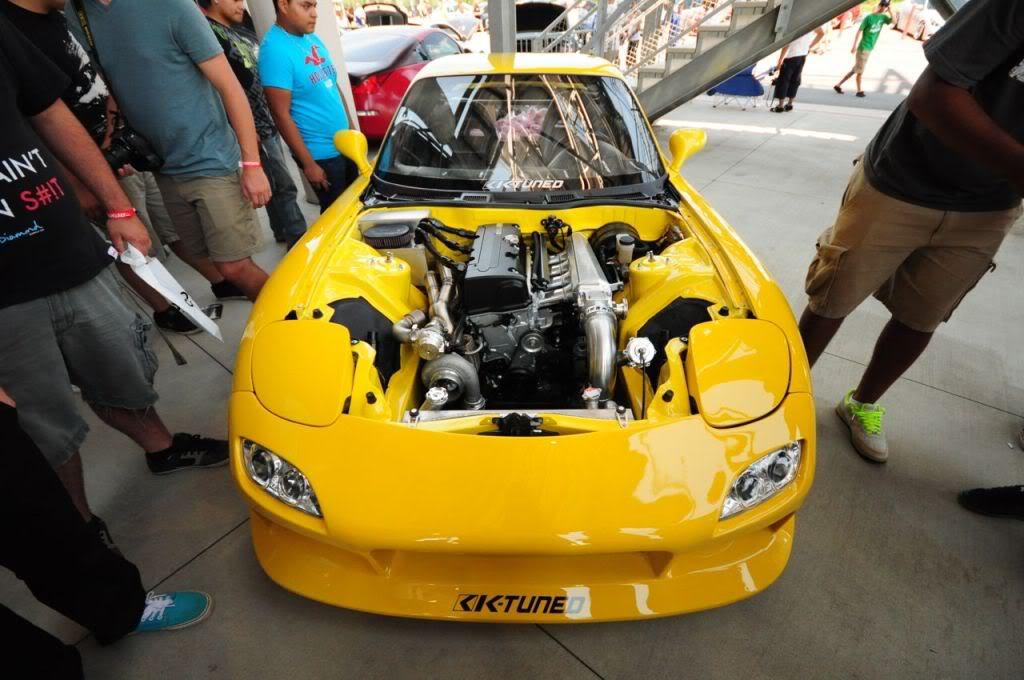
I did talked to the owner and they did a great job putting this car together in less than 3 months. Its definitely different... but not sure if this is something I consider a 'better' option to 13B or LSx. I was told it should make mid 400whp using GT35R. That's about what you would get from 13B. Also, unlike 13B, K seems to sit much higher. That's definitely not an advantage over 13B.
After my trip to IA, I headed to Charlottesville, VA to pick up some goodies!!
Some of the back roads were amazing up there (not as cool as Deals Gap ![]() ).
).
Here is a photo taken inside the 4 Runner, on our way up.

Picked up my goodies from one of FD fanatic, Fritz Flynn... here are his collection of VR FDs. I've also been to his 'warehouse' and I'm sure he has few more FD's sitting around there.
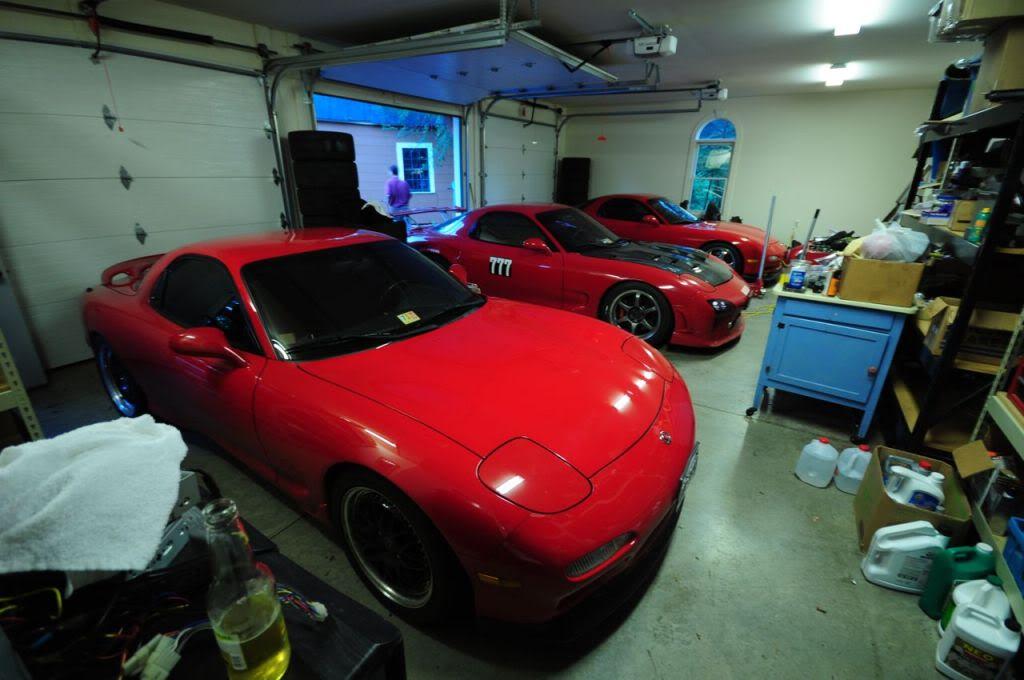
After my 1300 mile trip, I took 3 days off/worked and made other trip up to Louisville, KY to visit Chris Ludwig from lms-efi.com .
Chris is working on my Haltech PS2K harness and also using mil-spec connector for all the Haltech and Defi Super Sport Cluster (DSSC) stuff.

This week, I'll be beautifying my short and long block and ordering some goodies ![]()
8-15-2012
Aug 14th, 2012 - Today, I finished up the engine by touching up few spots, and decided to paint the UIM, LIM, and install the Exedy Clutch.
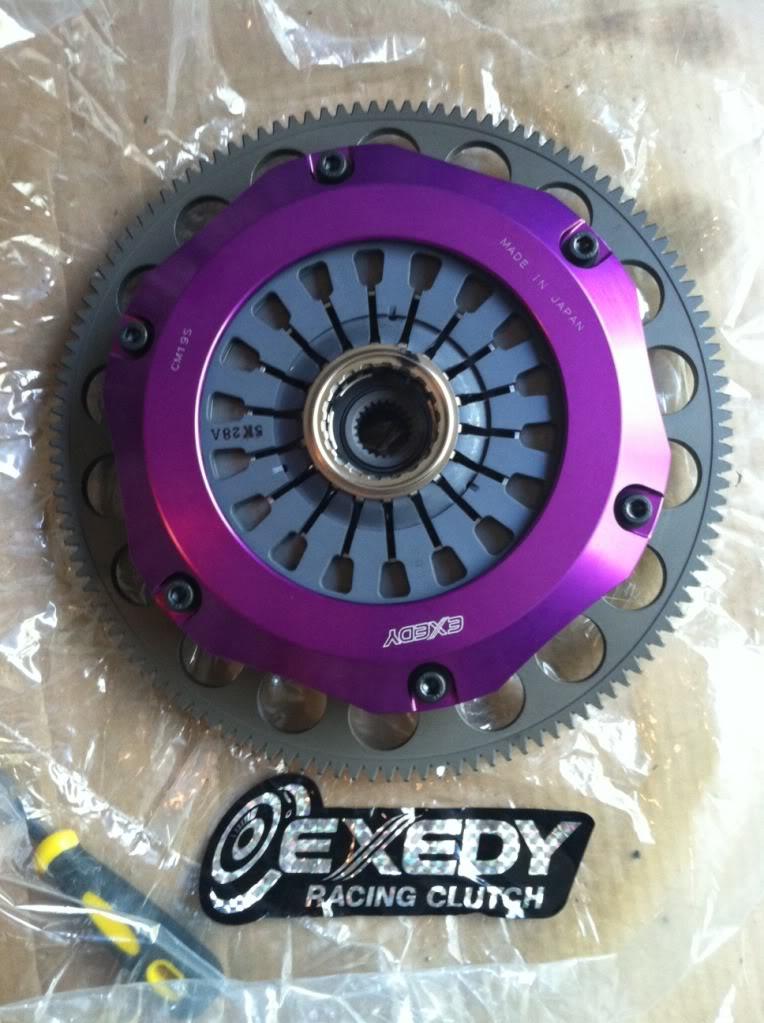
Lightened twin disc Exedy Clutch - Front side
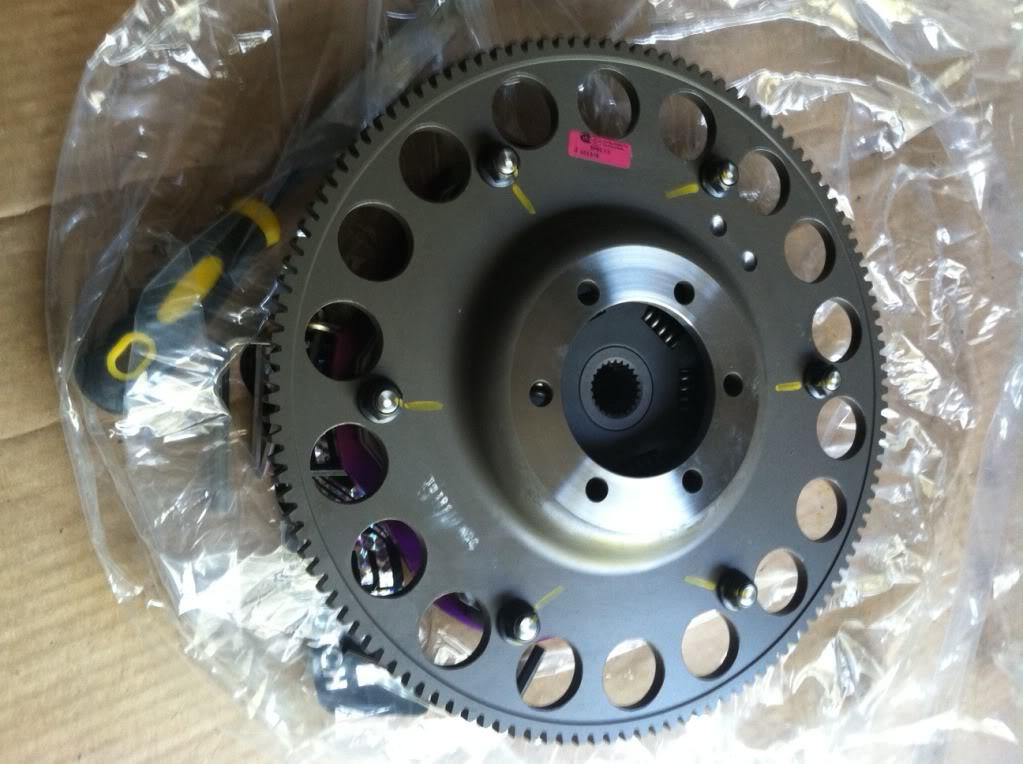
Back side
I also installed all new plugs
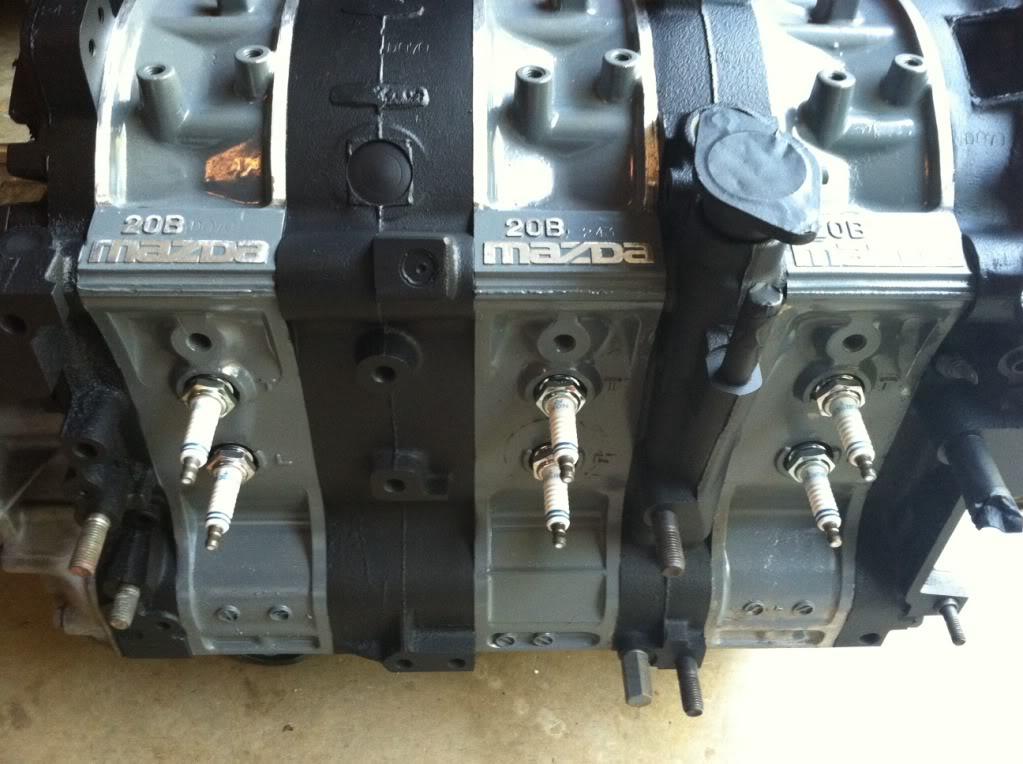
repainted the inside of the back.. and clean up counter weight.
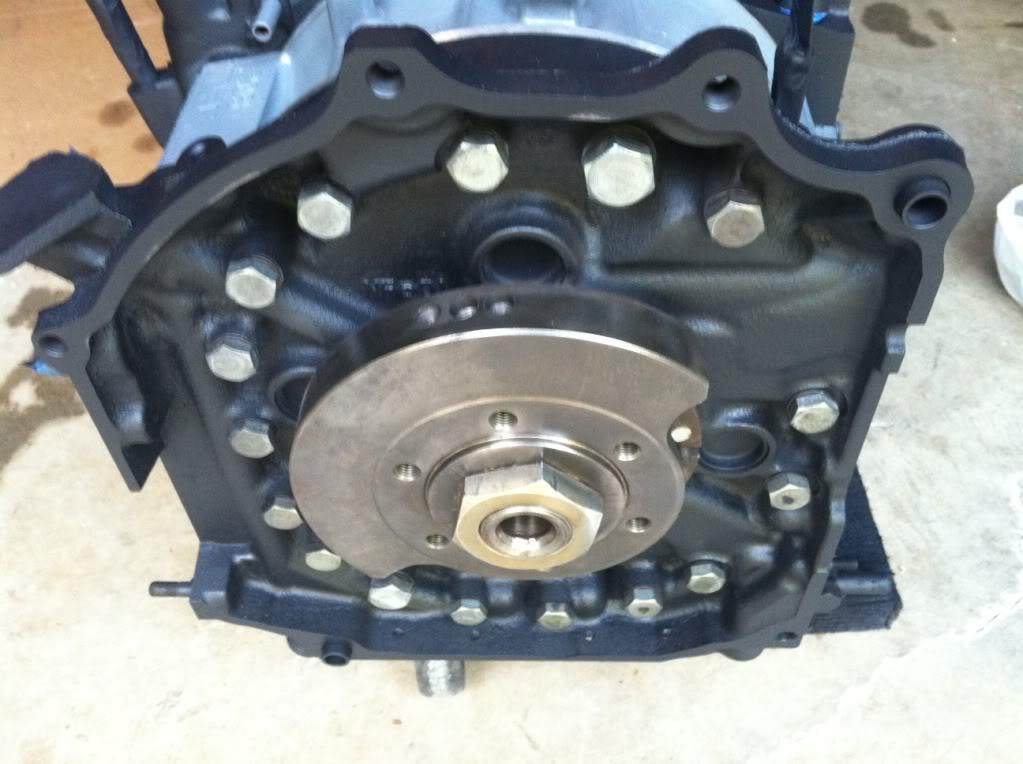
flywheel torqued on.
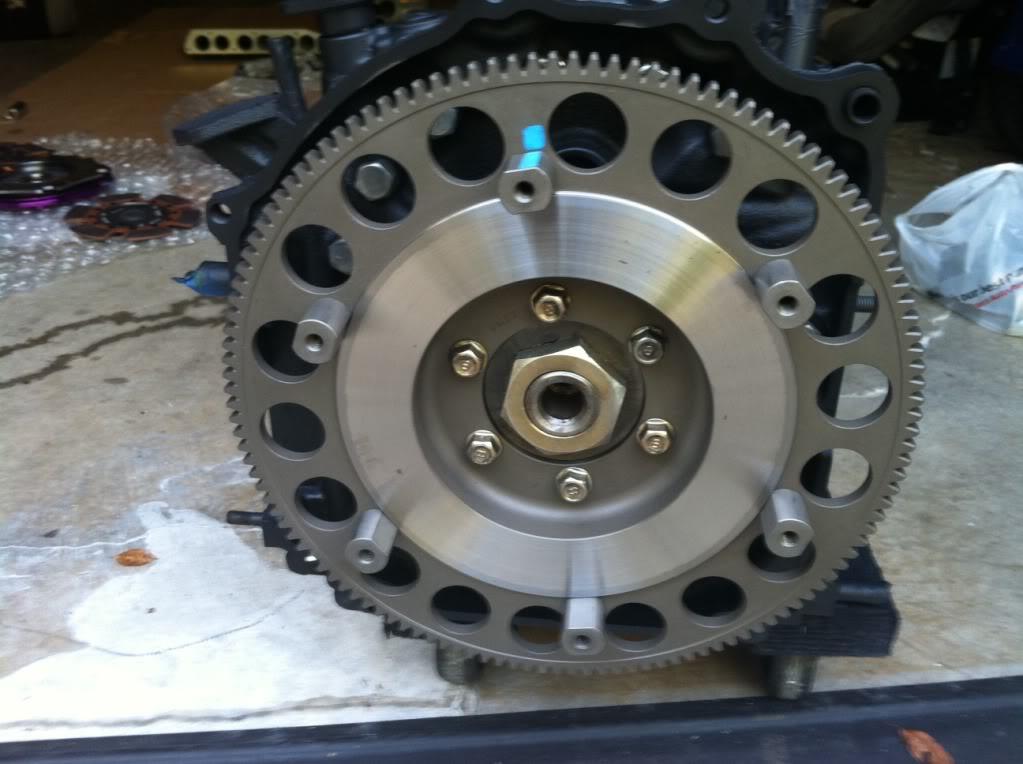
Discs in..
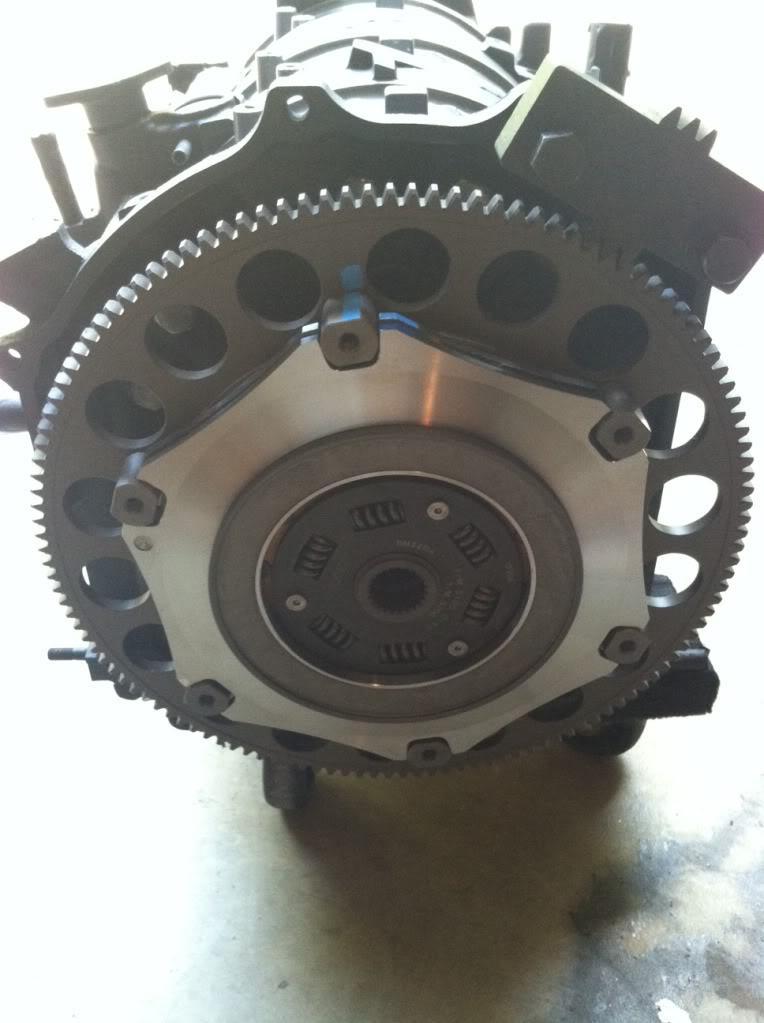
And now, its on ![]()
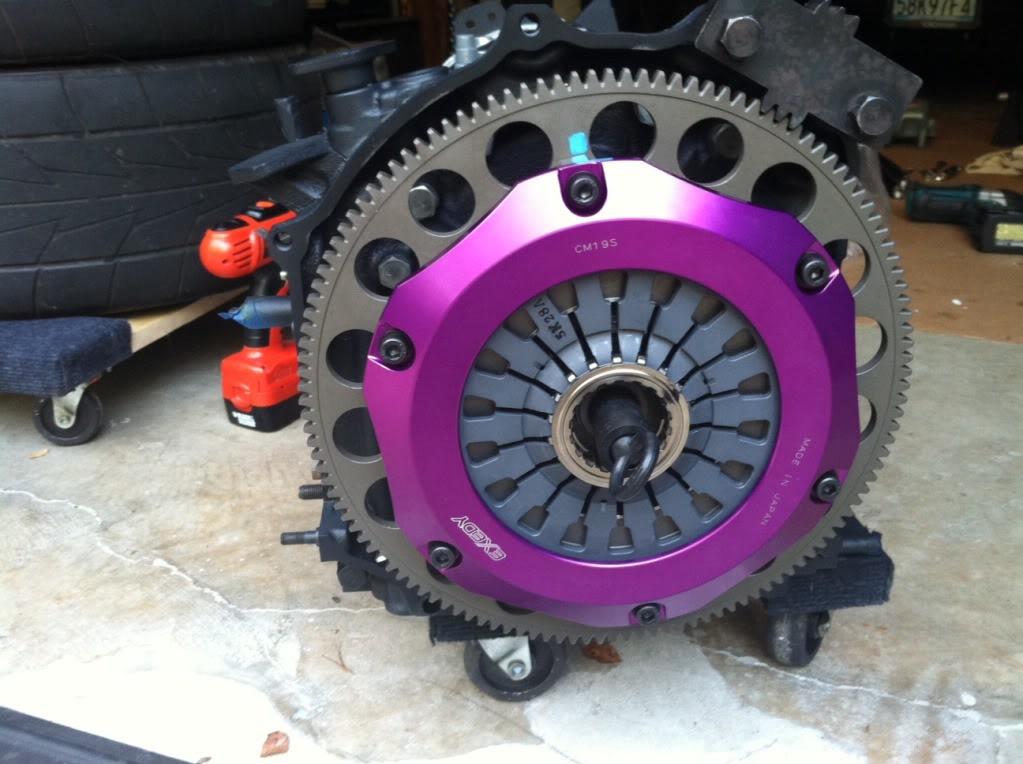
Aug. 5th, 2012 - This morning I decided to finish what I started yesterday... UIM and LIM.
To start, I took some of the cast marking off by filing them off.

After about 1-2 hours of this, I taped it up and sprayed with the same gray I been using, with high temp clear. I initially thought about doing wrinkle red, but after painting the short block, I think it might be bit off.
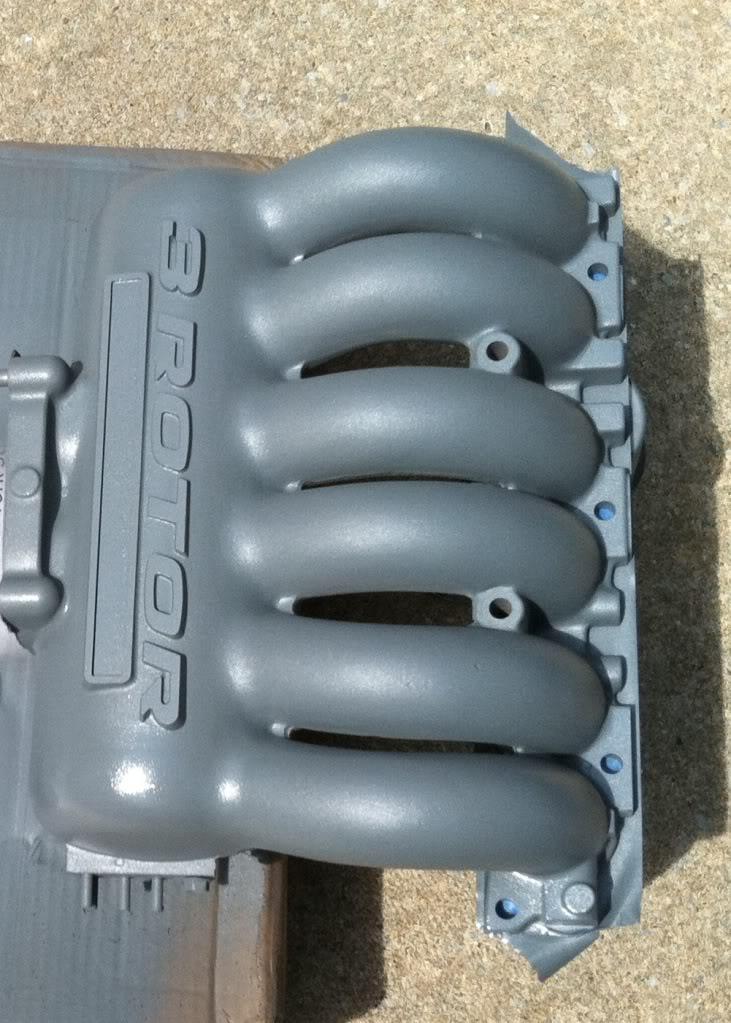
I let it cure over night and using a file, I took the clear and paint for the machined look, "3 ROTOR".
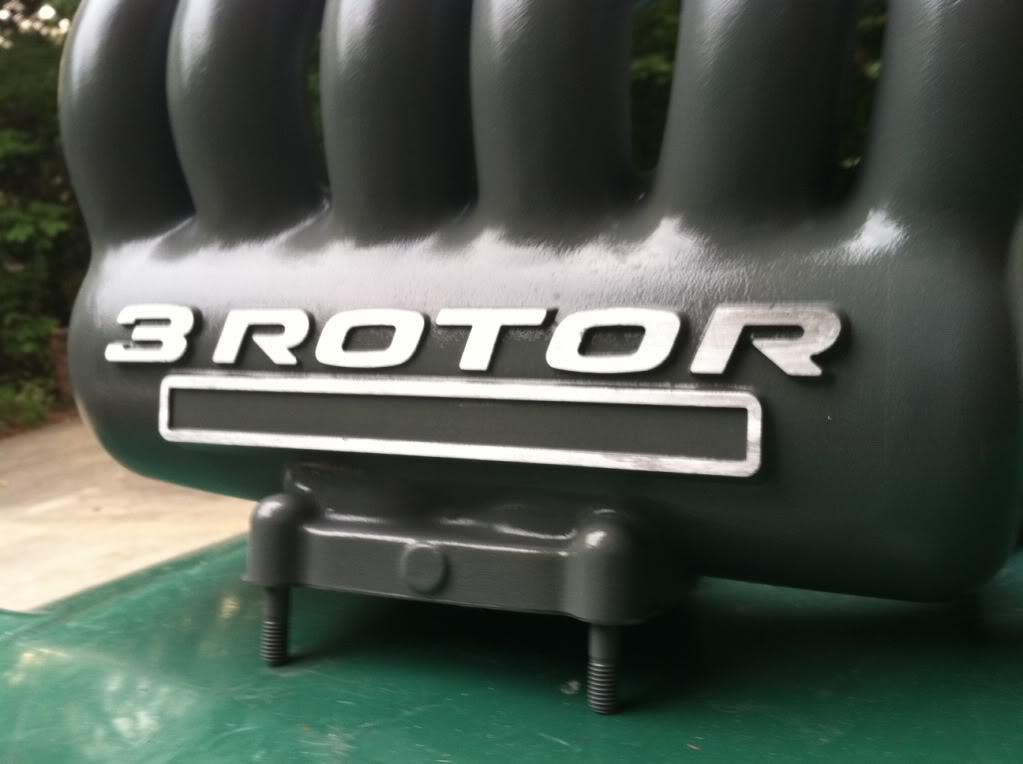
And to tie in the exterior of the car, I took one of the carbon fiber panel I had and made an insert. This took bit of time as I didn't have the right tools and used some sand paper and file to make the rectangle.
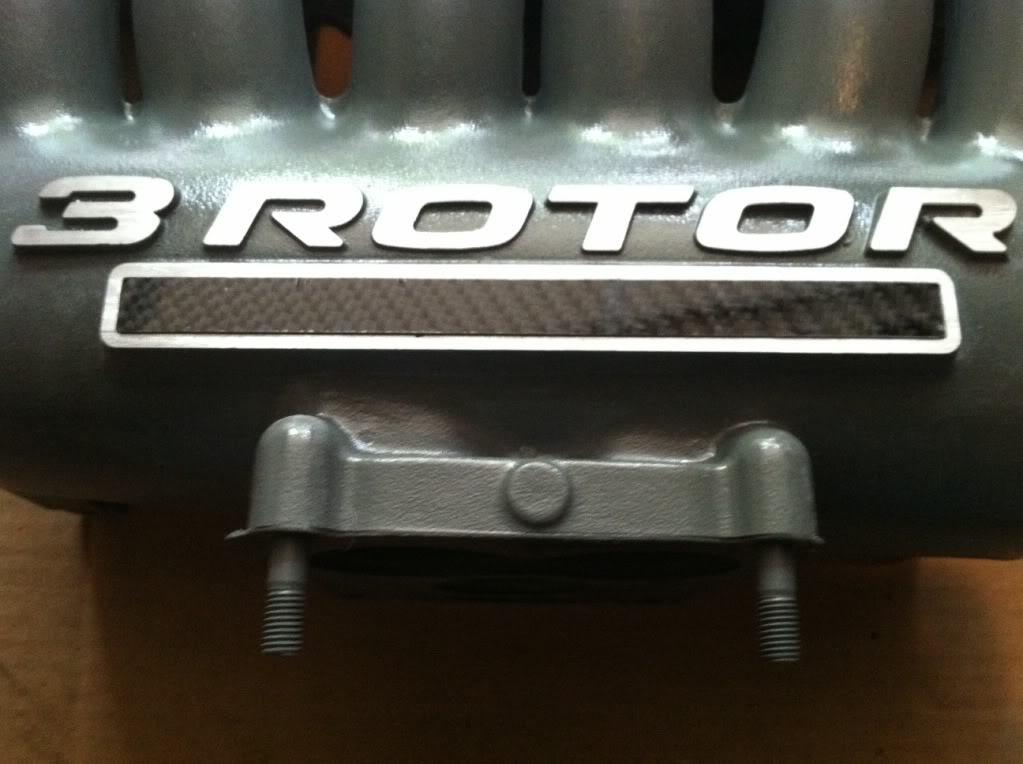
Next is TB and some of the accessories to match everything.. So, more pics in next couple of days.
8-17-2012
Aug. 17th, 2012 Update.... Some body related updates.
Goolsby Customs (Goolsby Customs - Custom cars and collision) did quite an update since I brought the car to them about 2 weeks ago.. They have now install most of the panels and lining them up.
Here some pics..
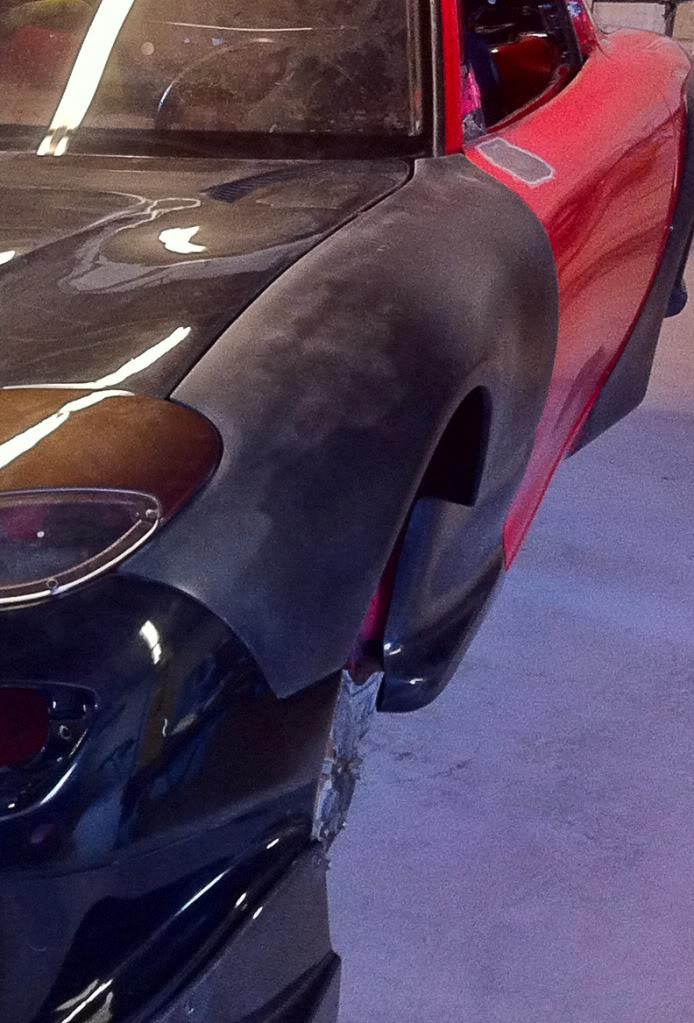
fender, lights, and bumper
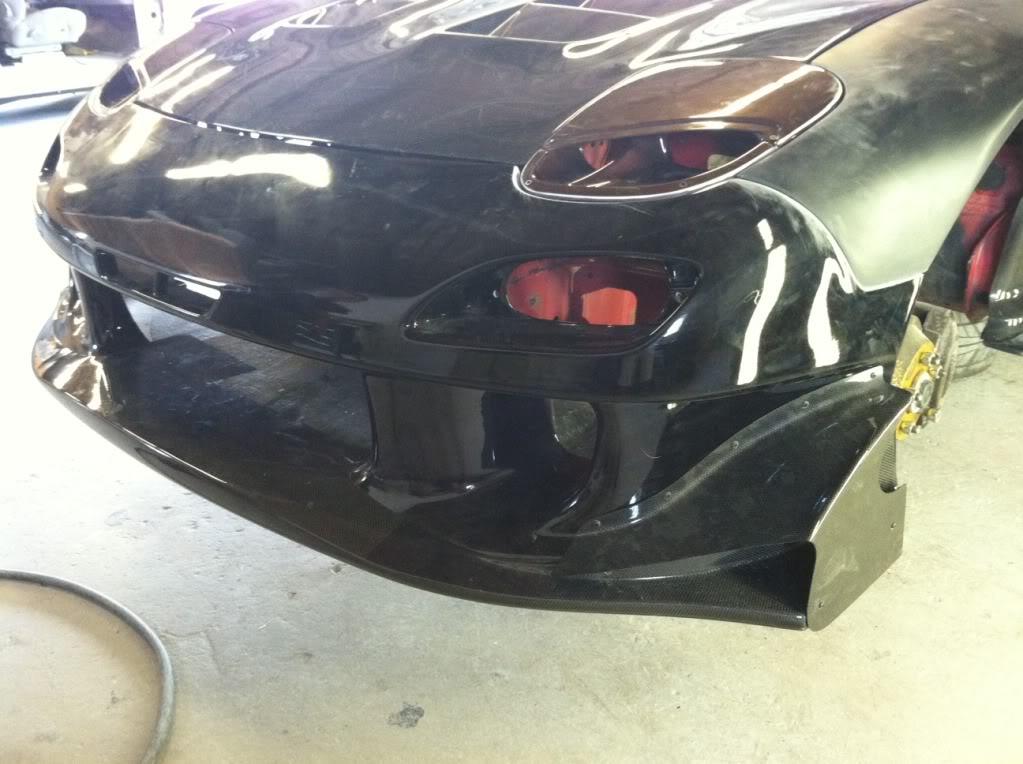
Front bumper, lights, canards, and undersweep
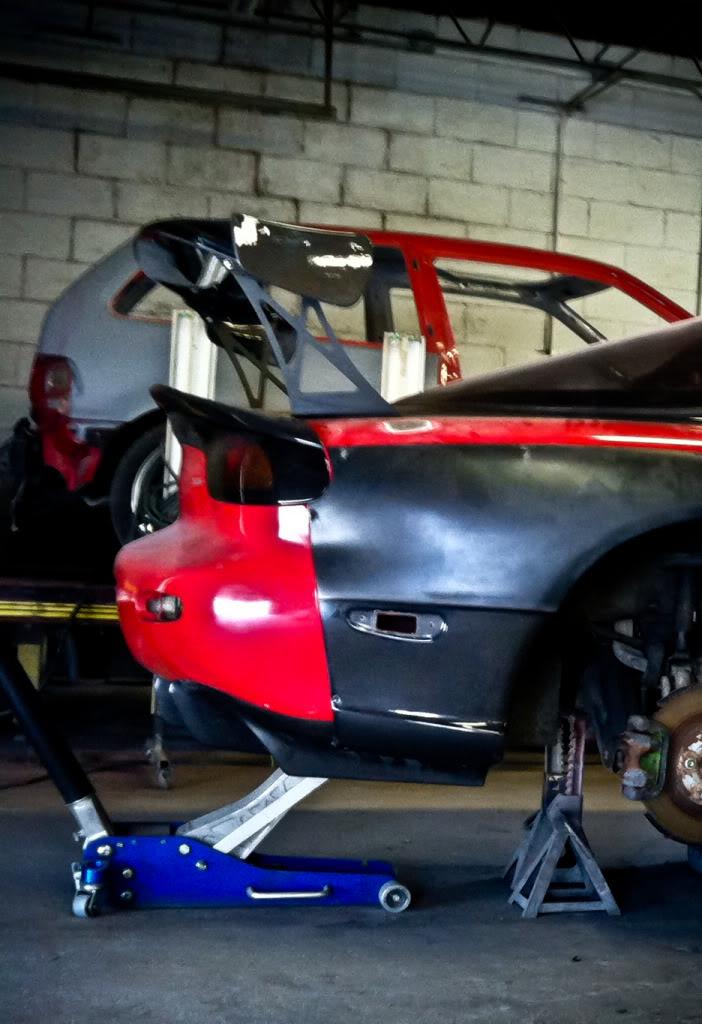
FEED wing, lip spoiler, etc
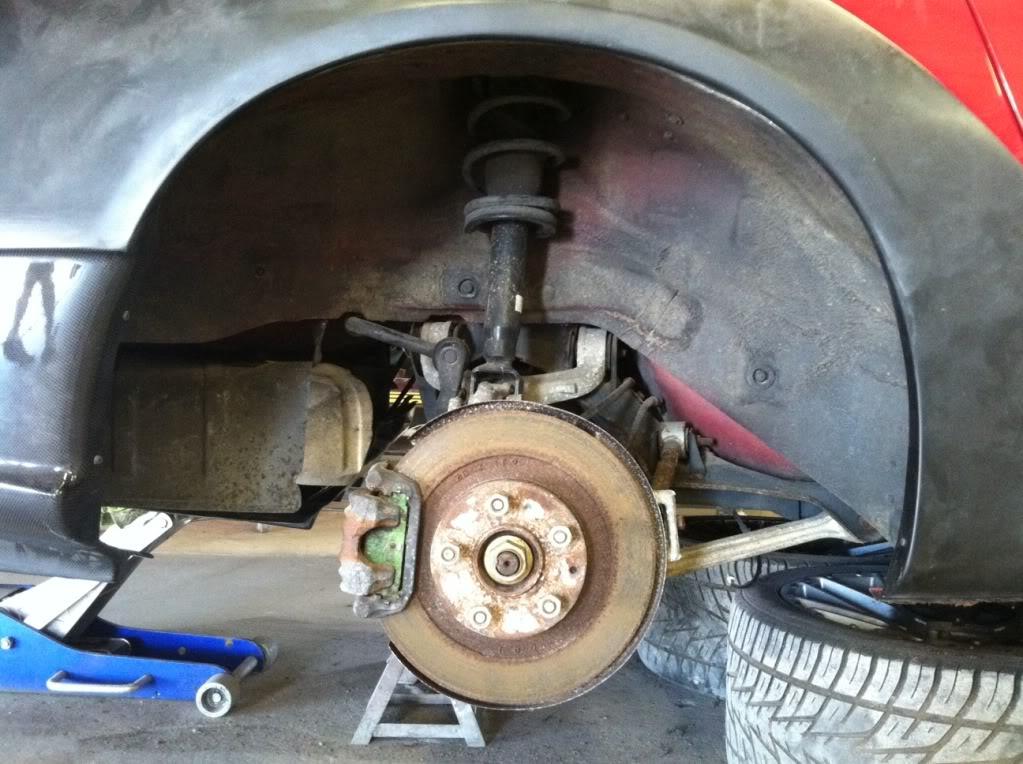
Rear wheel well cut for the FEED fender flares..
8-20-2012
Aug. 20th, 2012 Some minor update but not much to show... anyhow, more pics ![]()
How the car is sitting now..
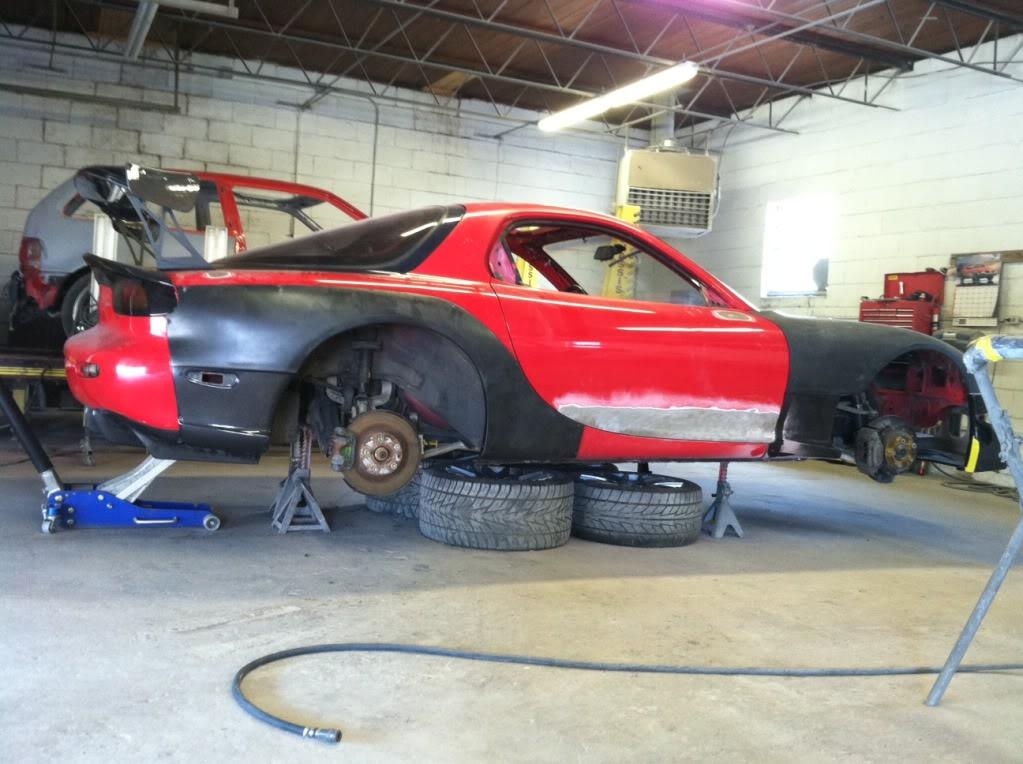
Test fit the UIM..
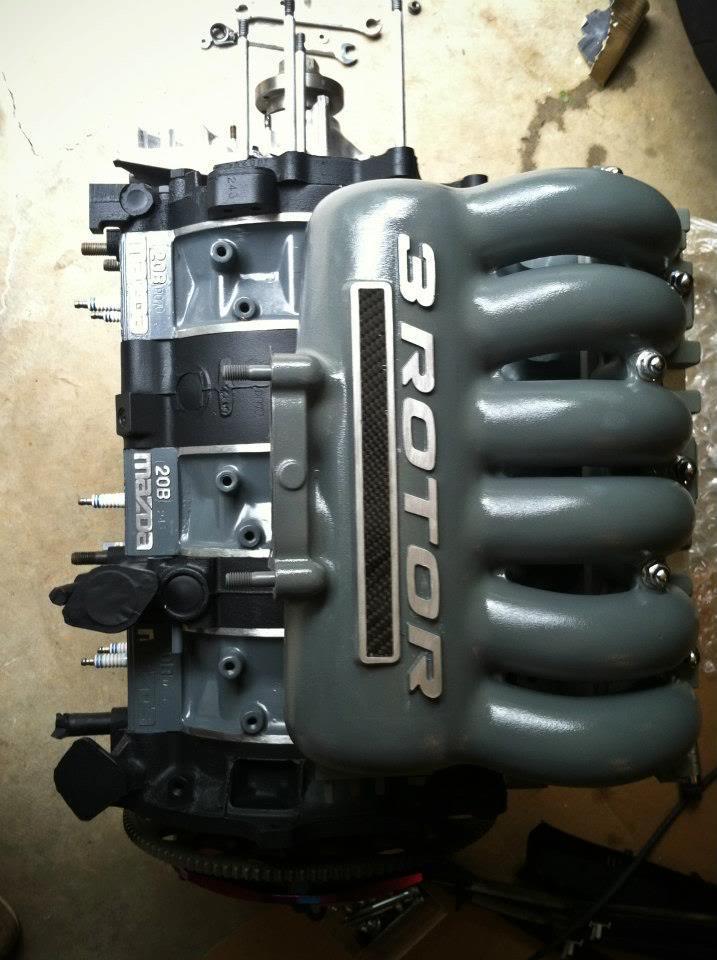
8-26-2012
Aug. 26th, 2012
Let's see what I've been up to...
Friday, I went over to my long time friend, Bryan at bnrsupercars.com to use his sand blast to clean up some suspension parts.
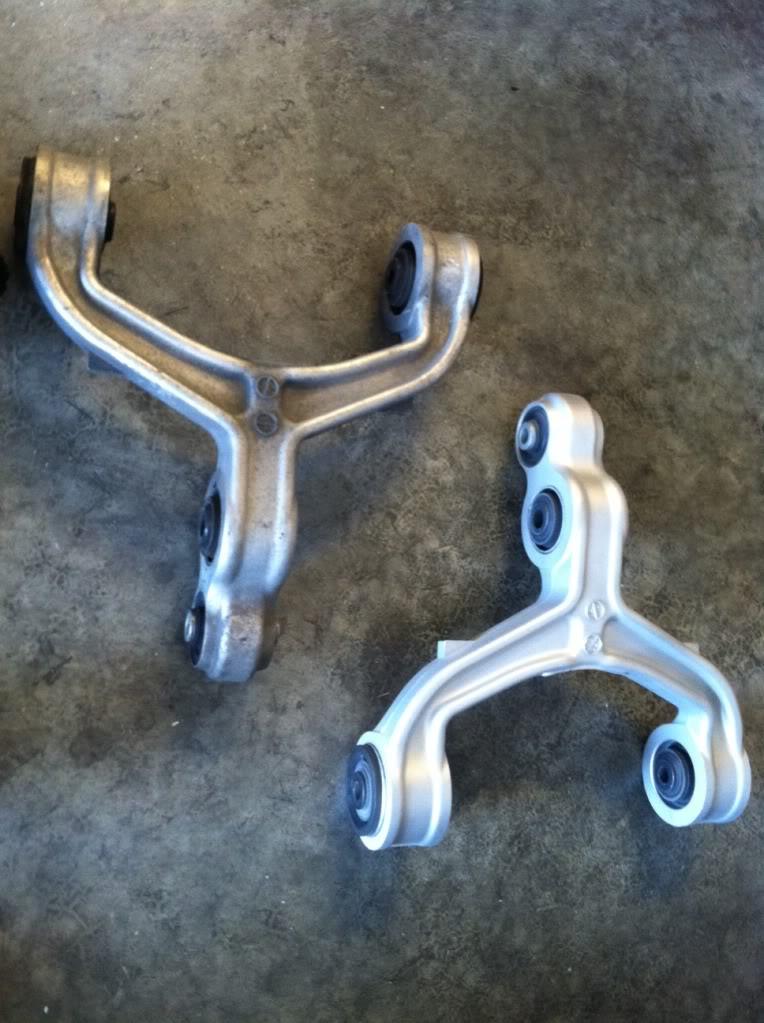
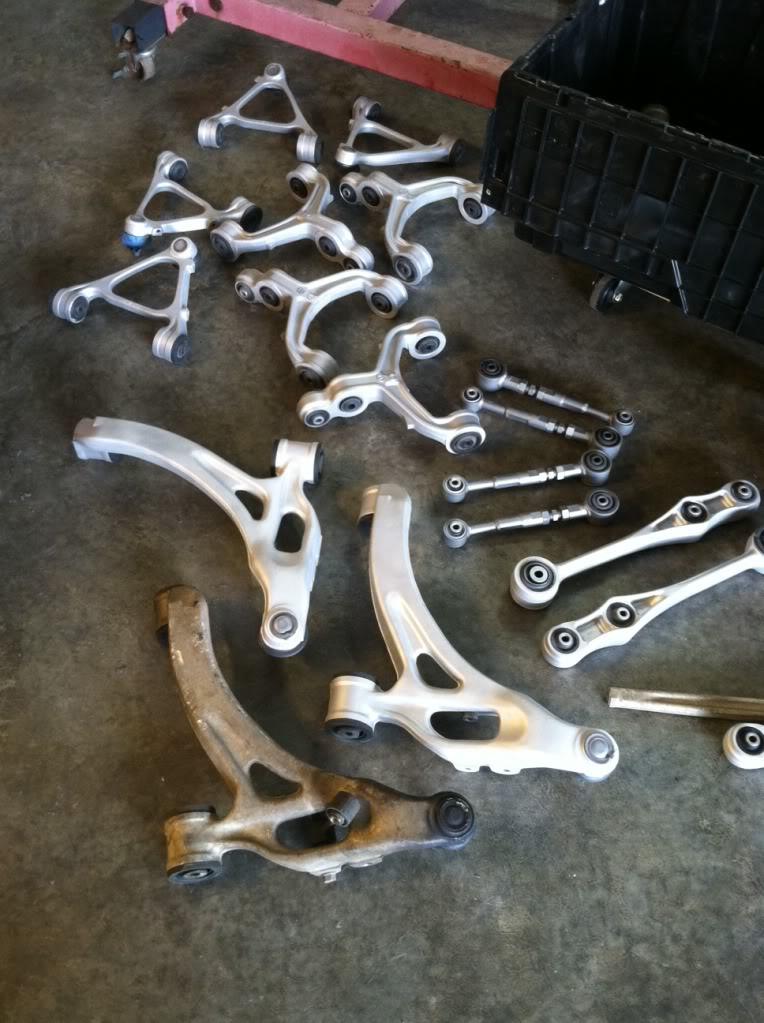
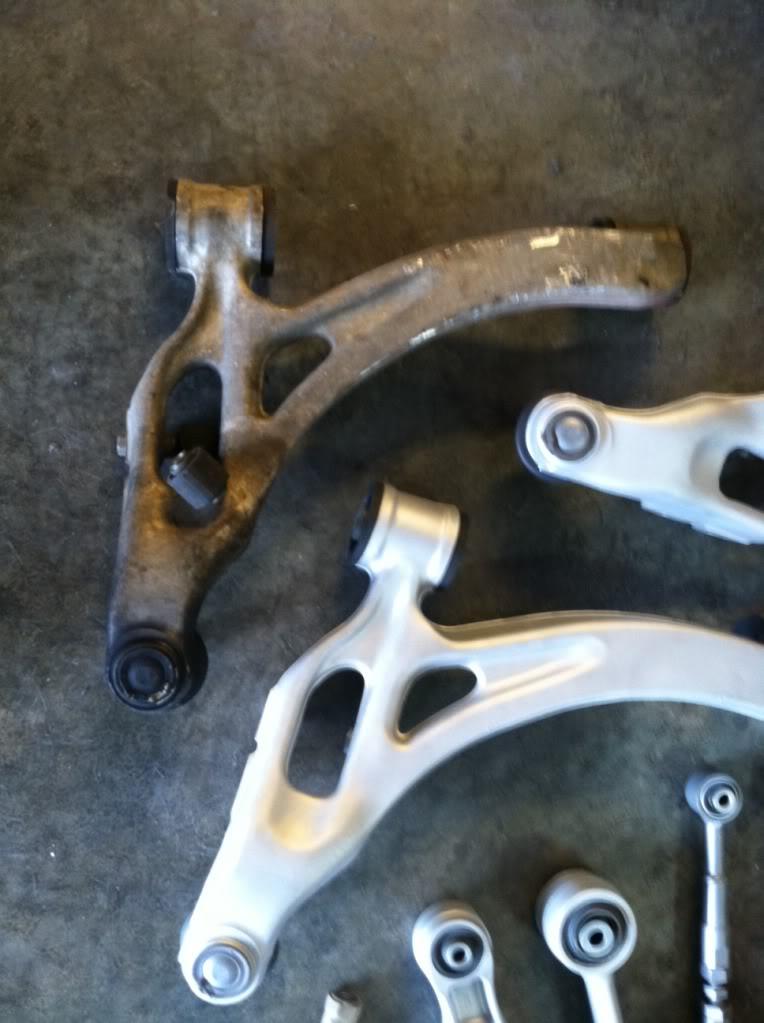
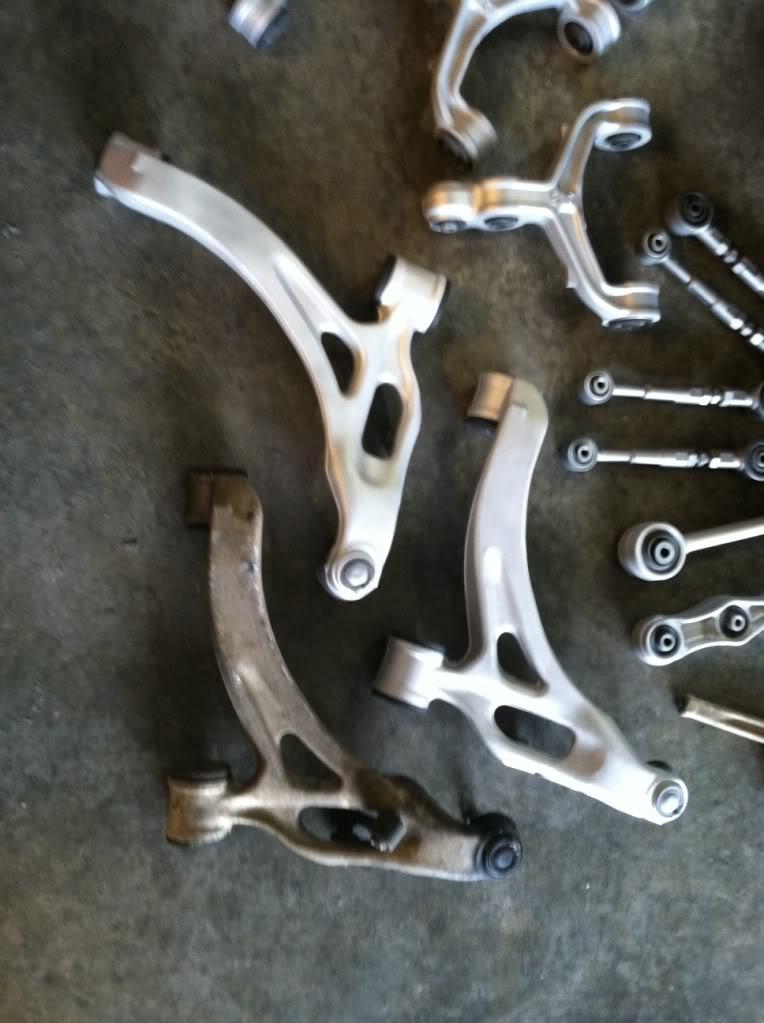
And yesterday, I was pressing on some Powerflex Bushings. I heard great stuff about them and once the old stuff were pushed out, install was a simple hand press in. I was amazed how easy it was since I've installed a set of Delrins in the past. Quality of Powerflex bushing were awesome!!
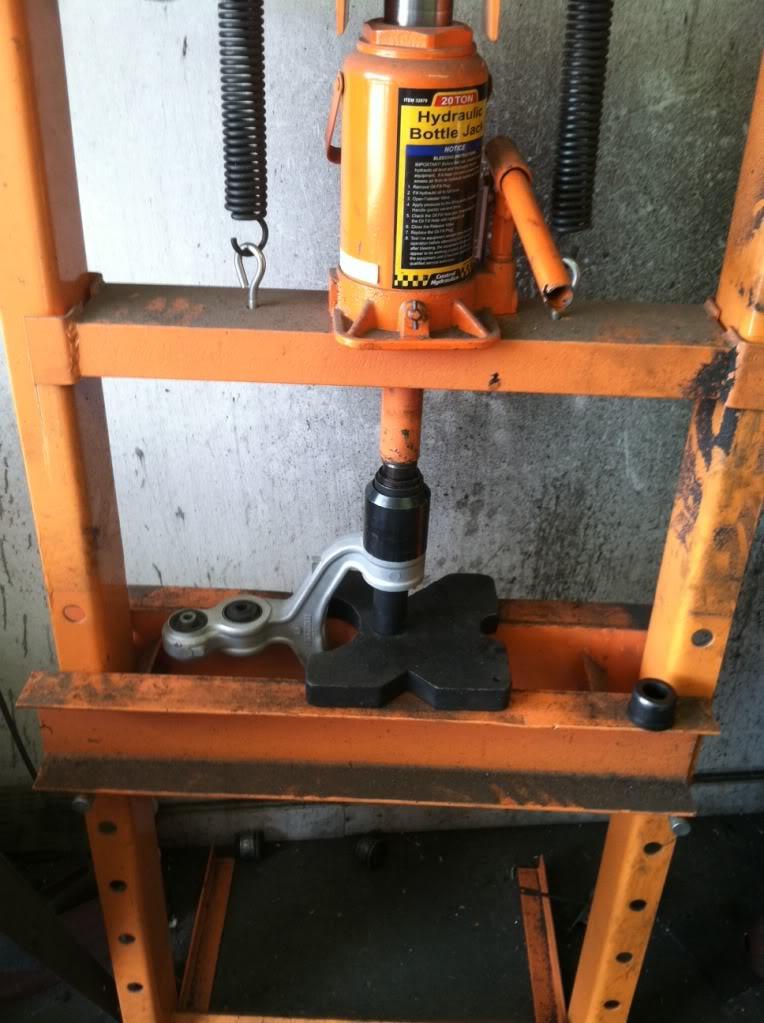
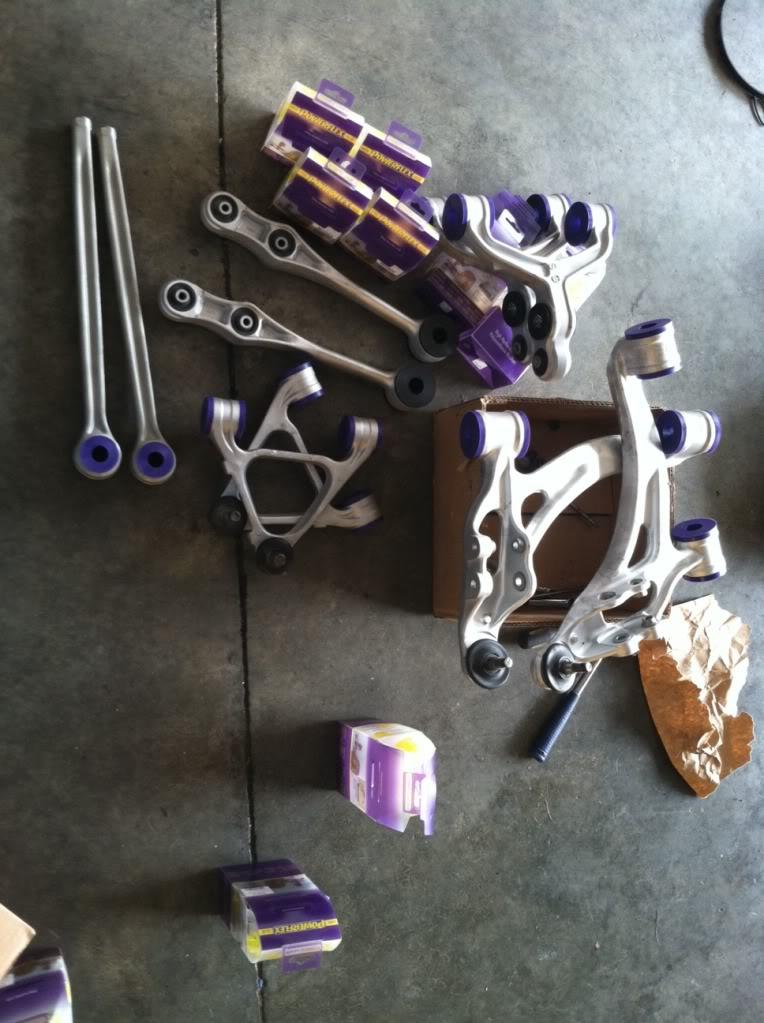
But I did break something... Lack of sleep and hurry to get the job done, I did this..
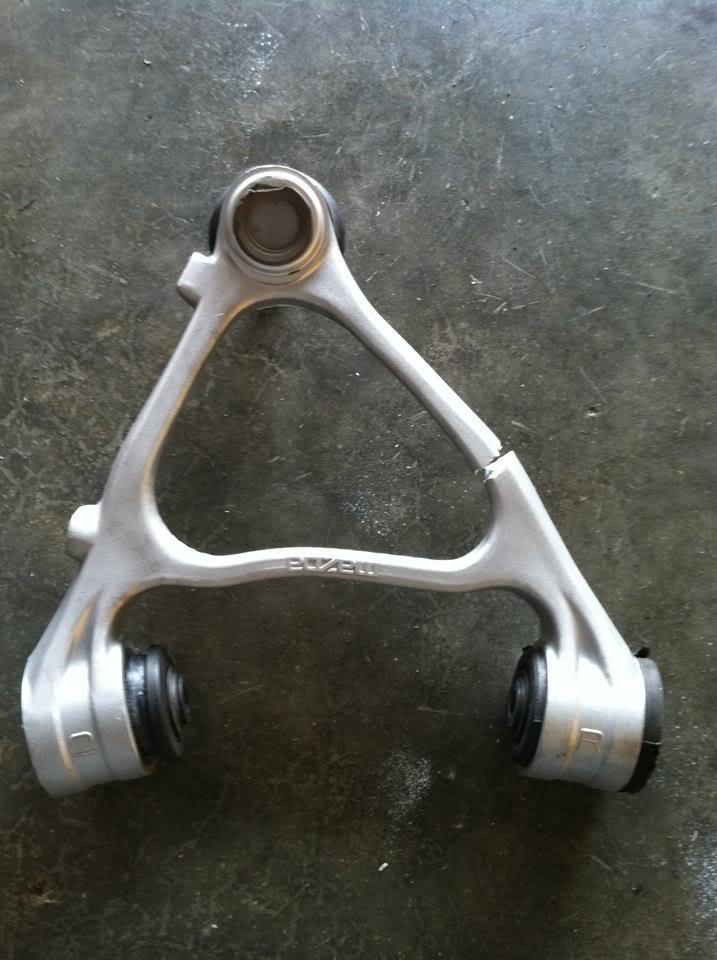
Luckily I had a spare ![]()
I also decided to refinish my Alcon calipers for this..
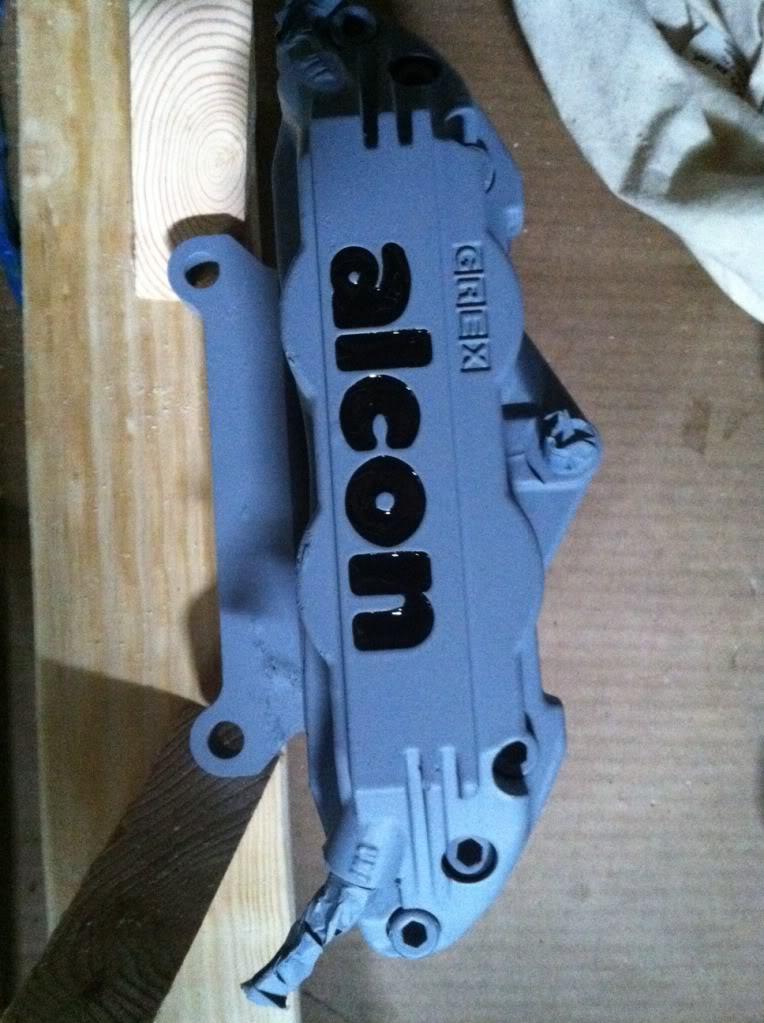
Did a pretty good job on one, but other one, I kind of messed up and have to re do it..

Anyhow, Tomorrow, I'm re blasting the one I messed up and re doing it
9-2-2012
Thanks! I'm pushing forward ![]()
Sept. 2nd, 2012 Well, I been busy trying to fabricate some stuff and re-doing my caliper that I messed up.
I had a chance to re-sand blast and re paint them.
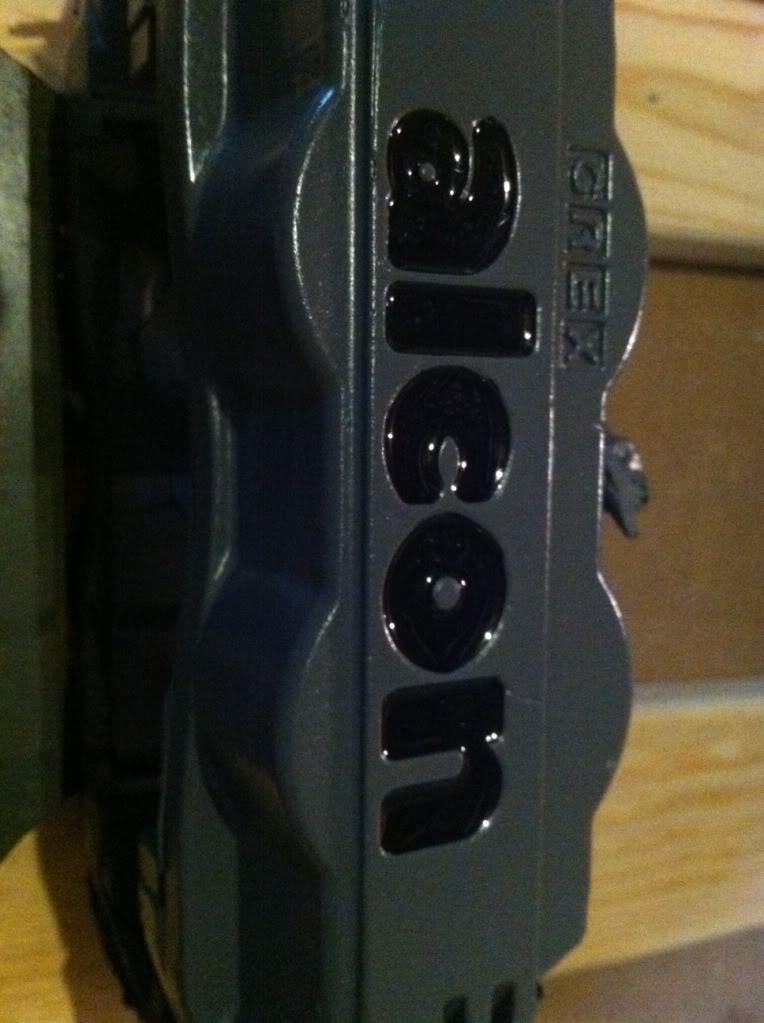
now looks perfect ![]()
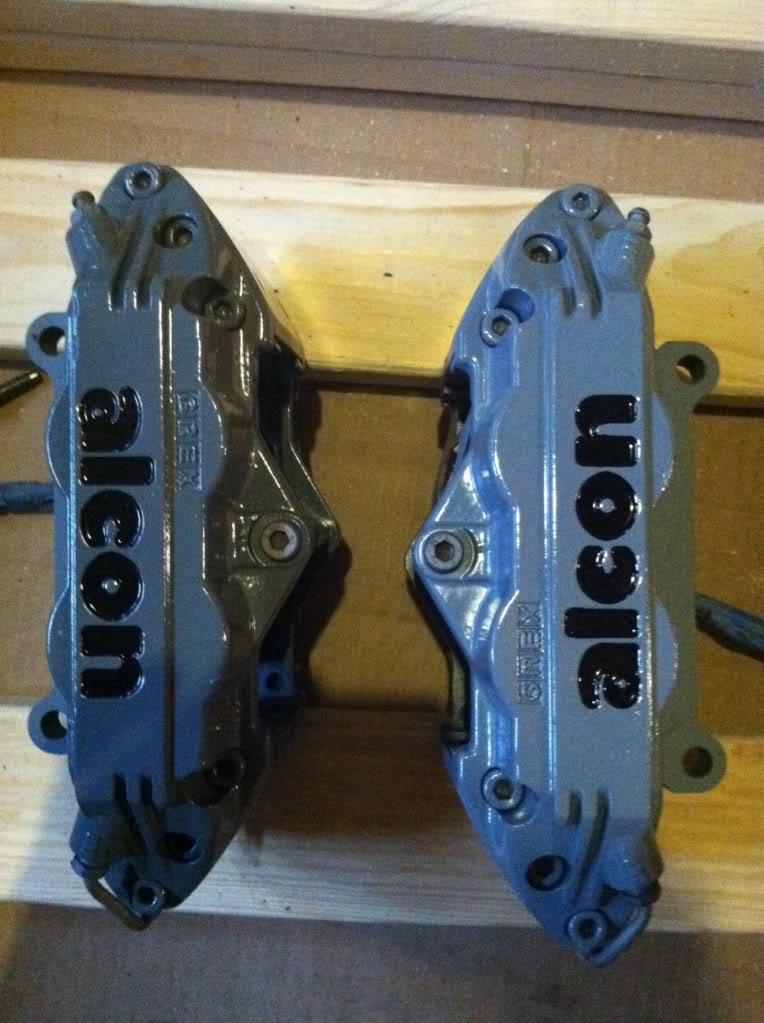
Also, an announcement of new LIM for 20B!!
I was lucky enough to hear about this LIM 6 months ago and now I can show it off to you guys.
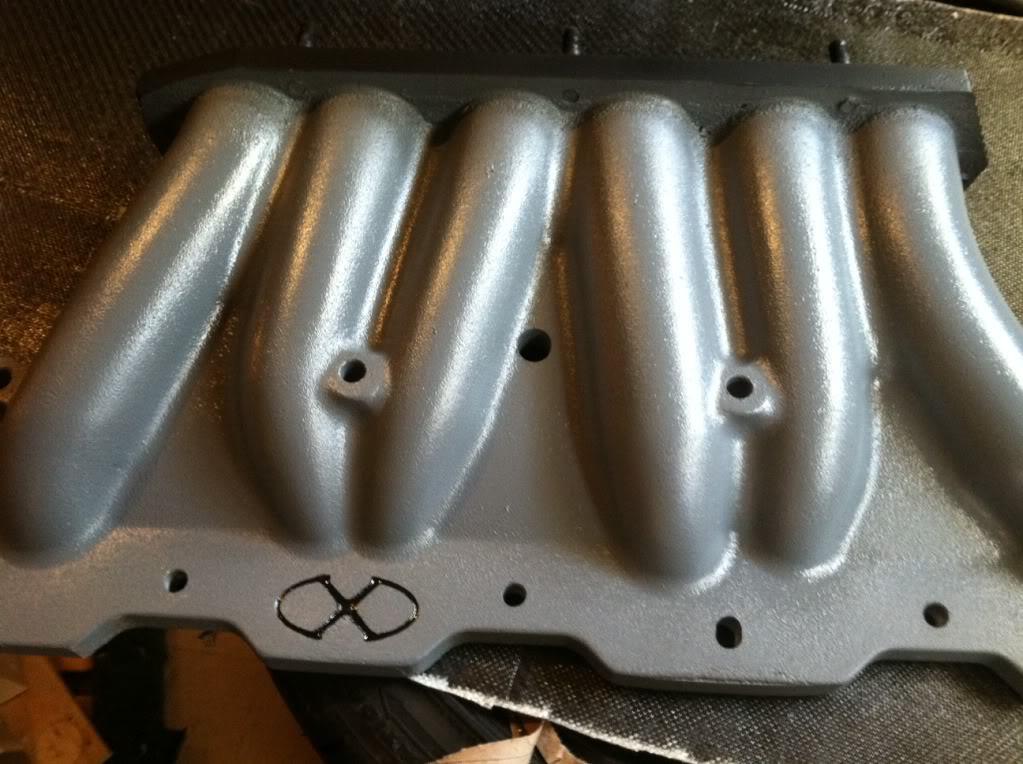
This one isn't my photo.

More information about the LIM and more pics later..
9-5-2012
Worked on few this over the past few days..
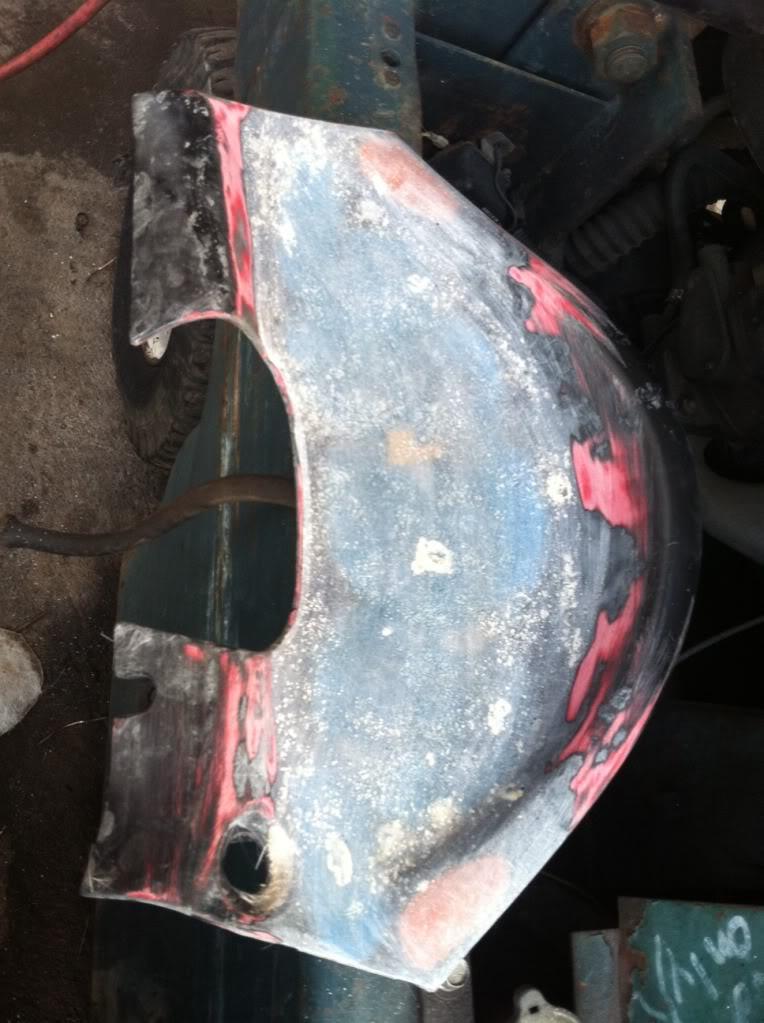
Cluster surround, fiberglassed and process of smoothing out.
making my own MS R-Spec signal lights ![]()
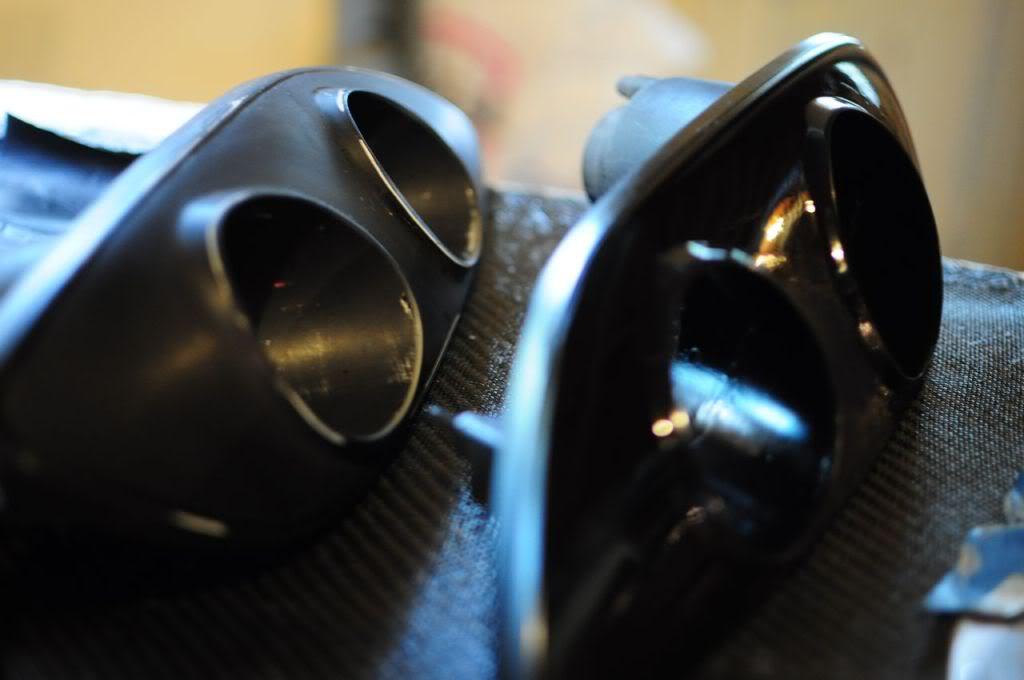
Studded everything and shorten bolts so I could put FD chrome nuts and bolts for the LIM.
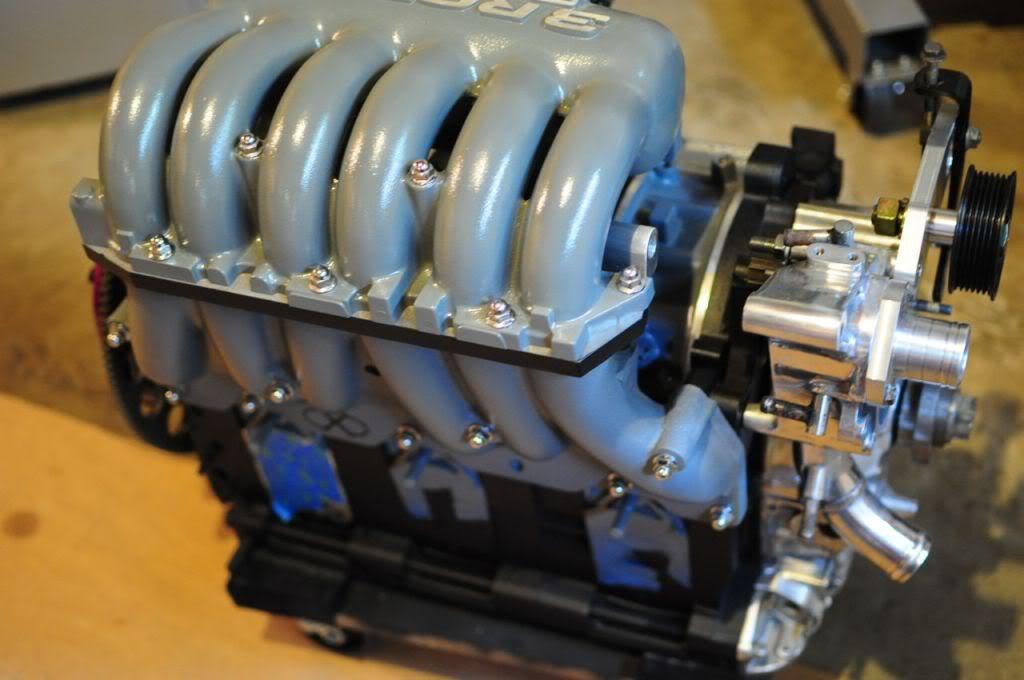
This was from about 3-5 FD engines ![]()
And starting to test fit everything and such..
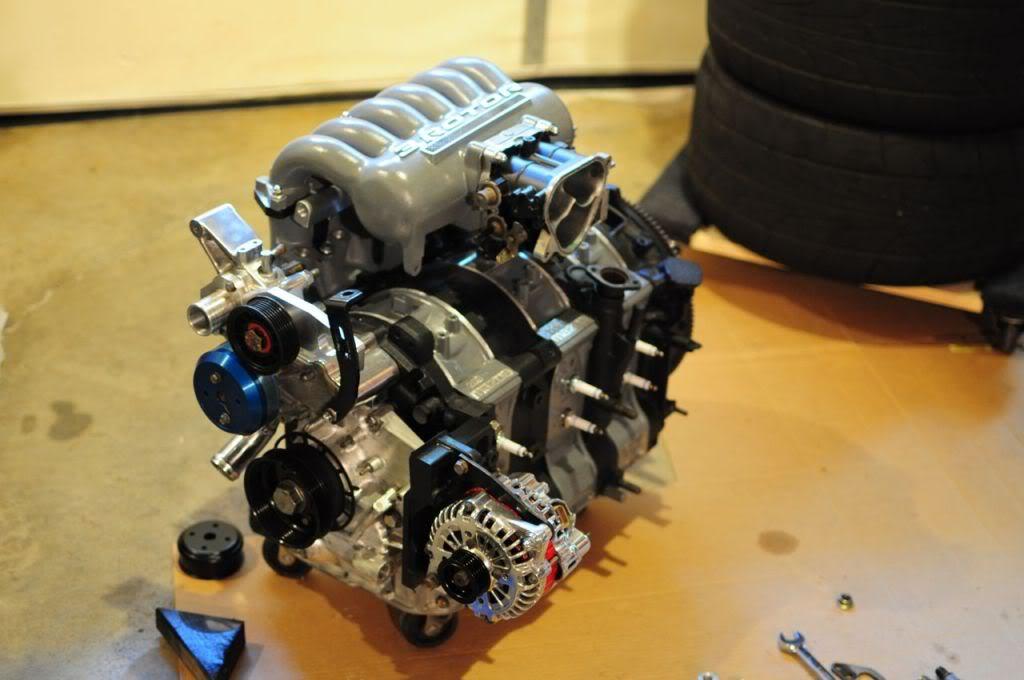
9-10-2012
some of the goodies that are going in in this car..
Aluminum rack..
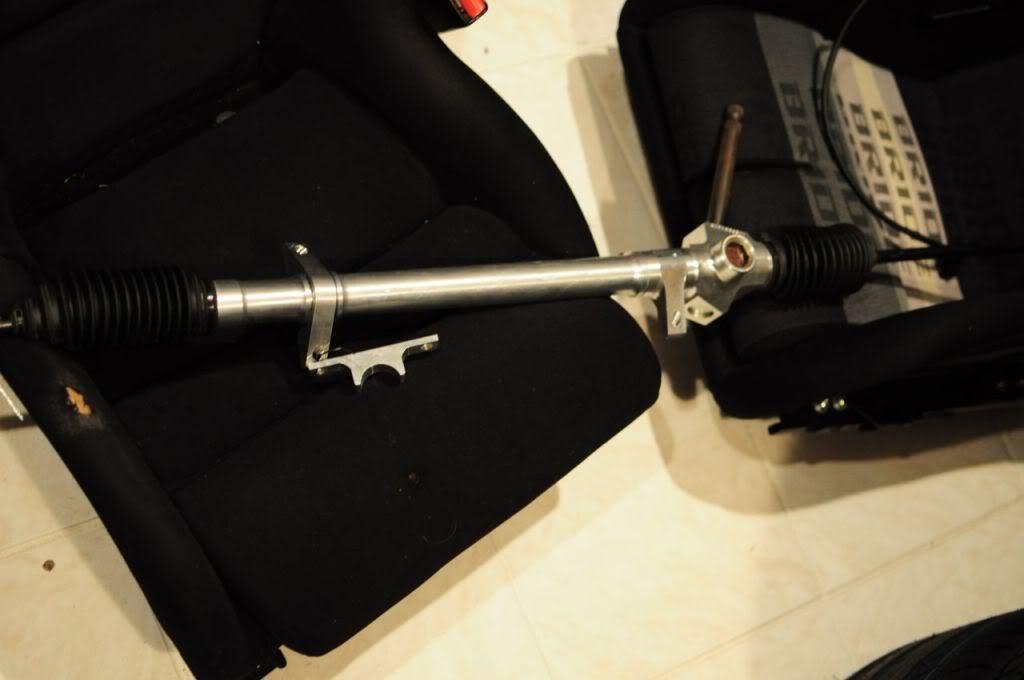
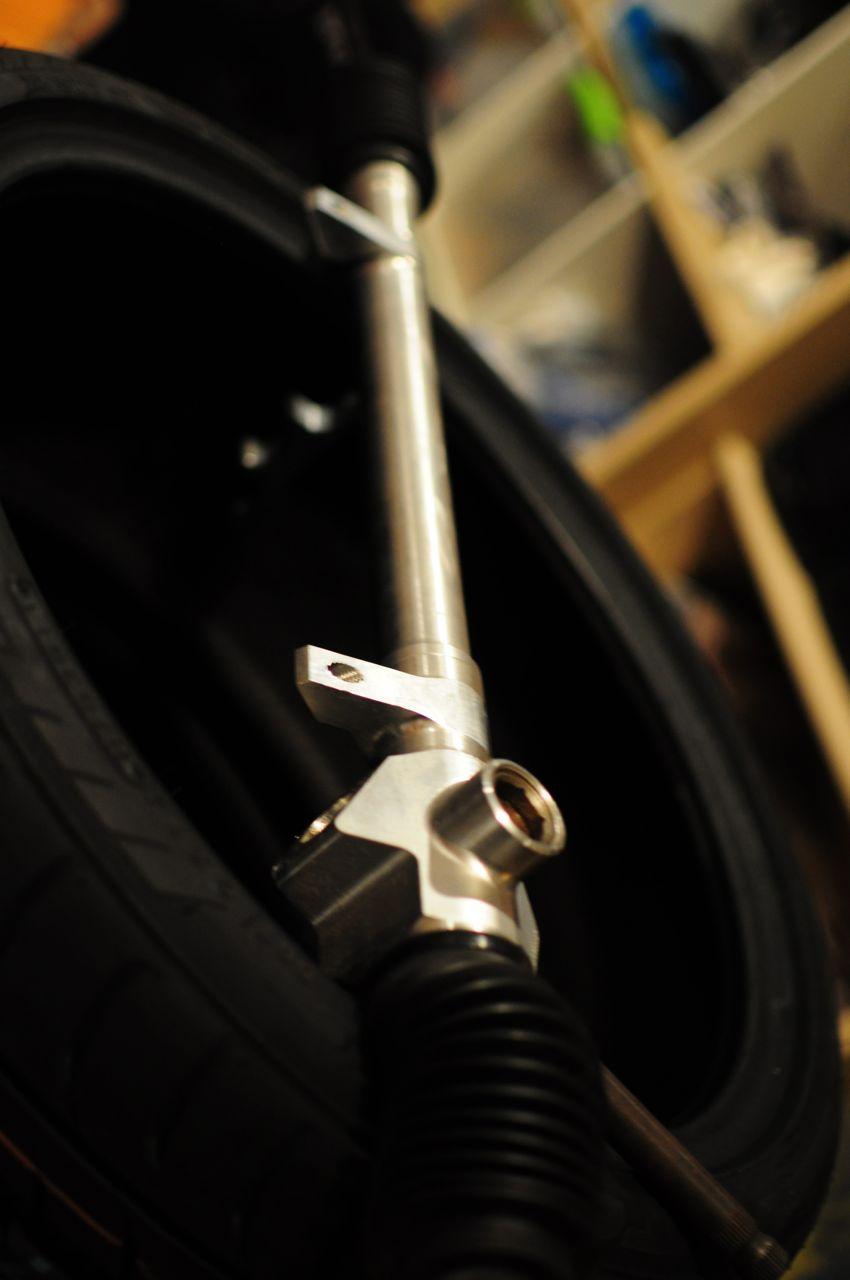
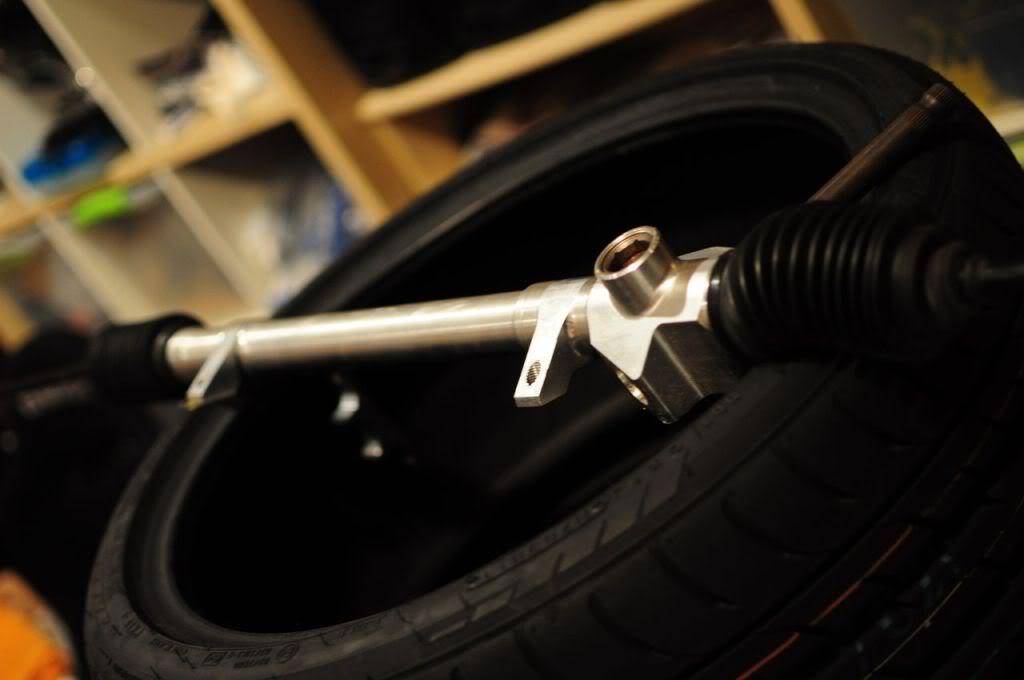
Carbon Shaft.
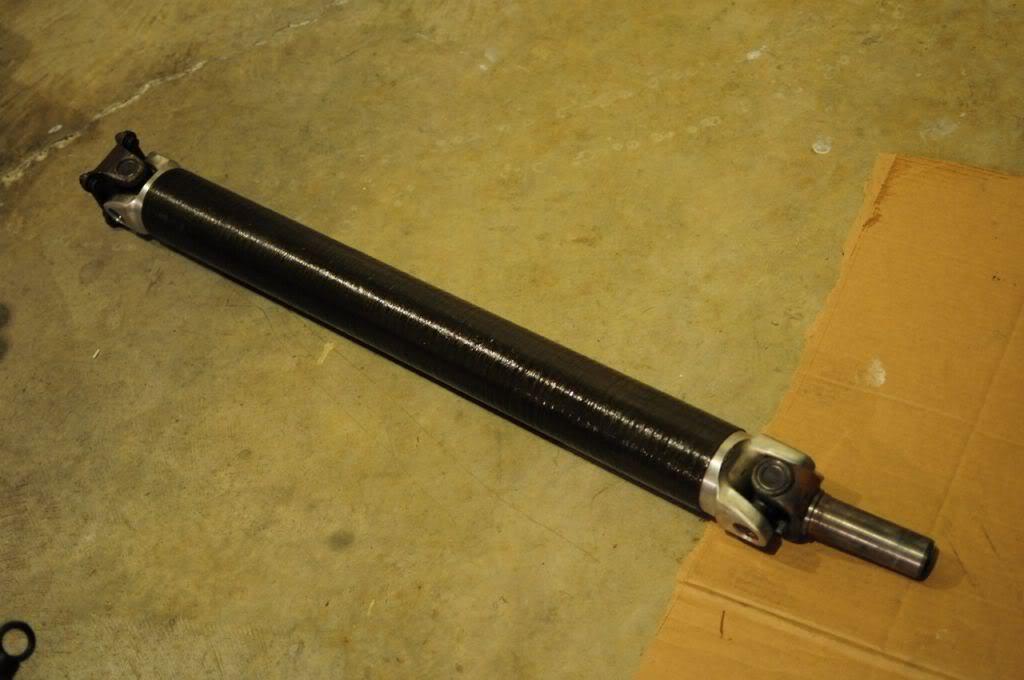
FEED trunk thingy in carbon ![]()
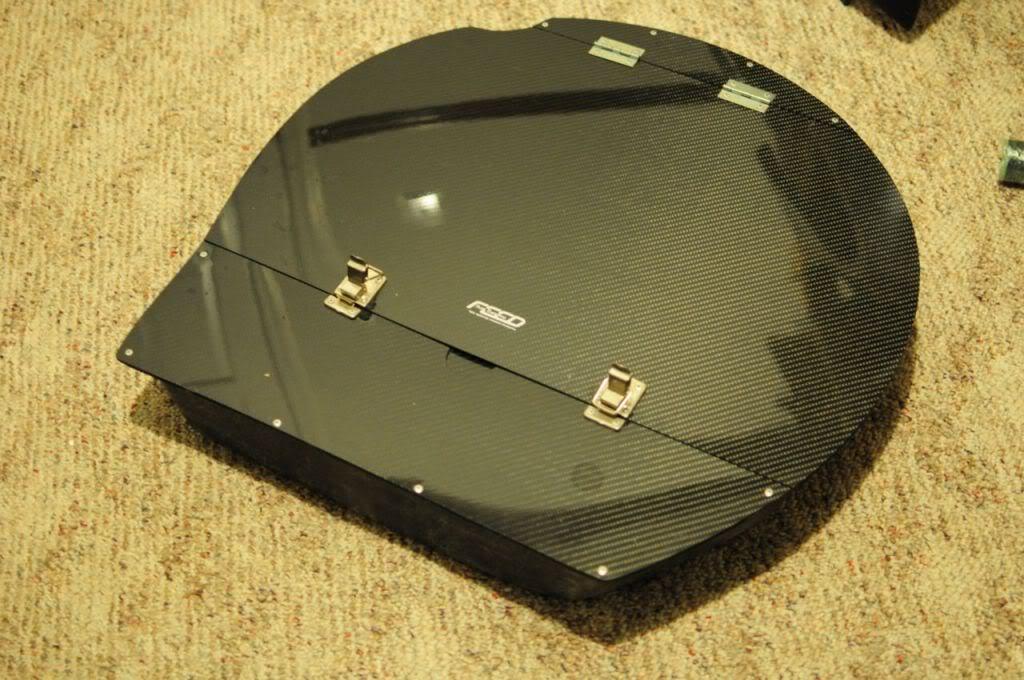
9-13-2012
This is Atomic. I need to thank Chip from Chipmotorsports for selling his extra one.
more update...
I finally took some time to work on the rear diffs of the FD RX-7s.
Here are some pics of the diffs.
Stock vs Kaaz
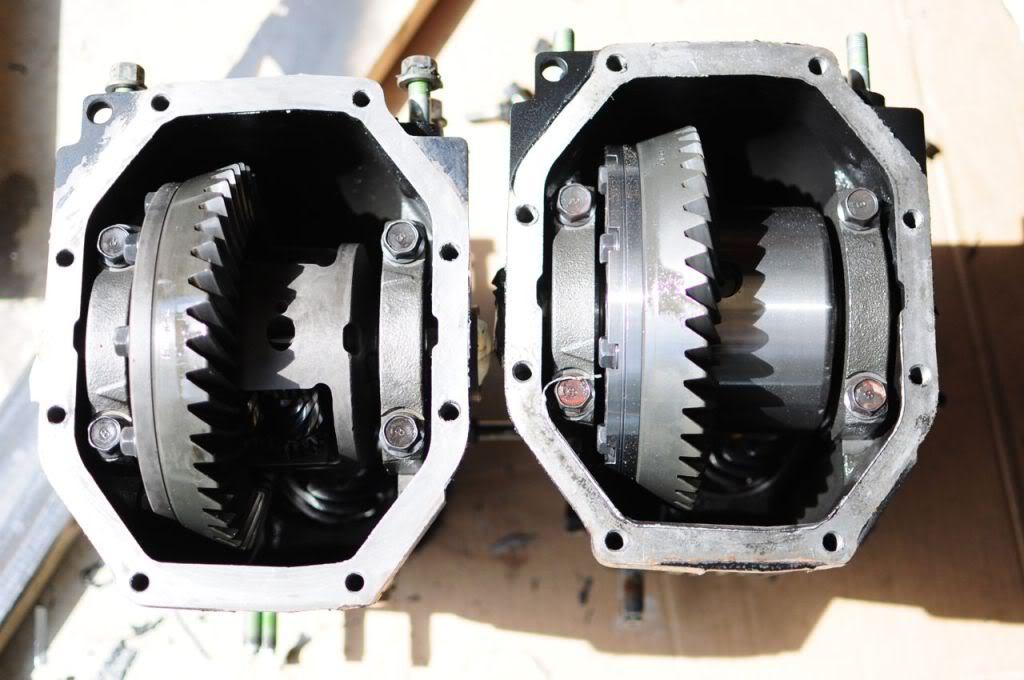
After cleaning the case, sanding it down, and re painting it with epoxy paint,.. I put the new covers on.
Stock vs. Greddy higher fluid capacity cover.
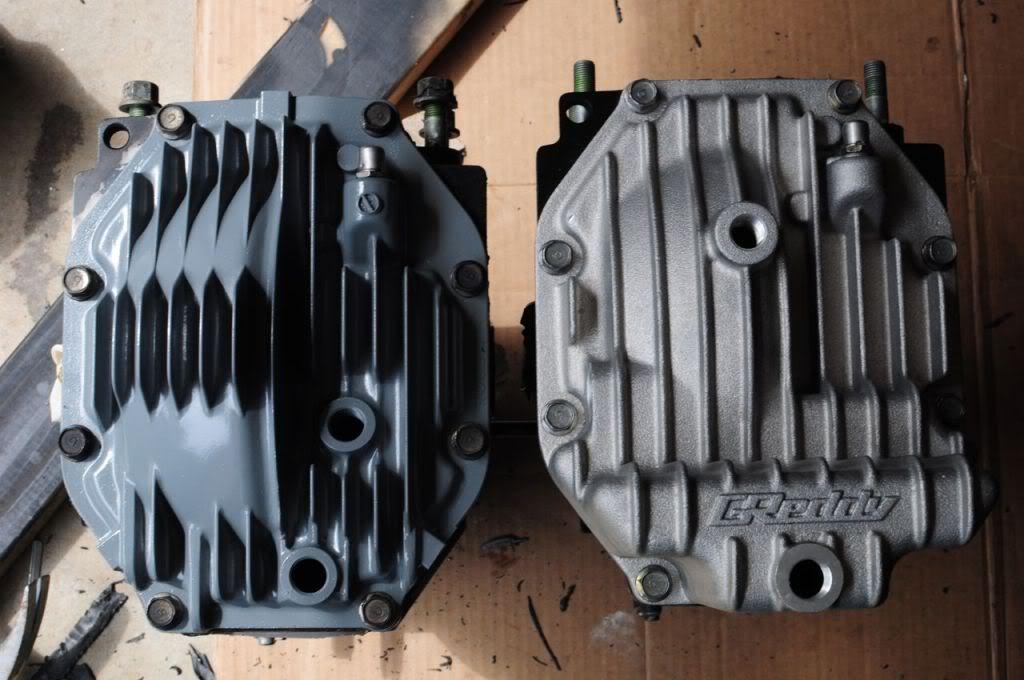
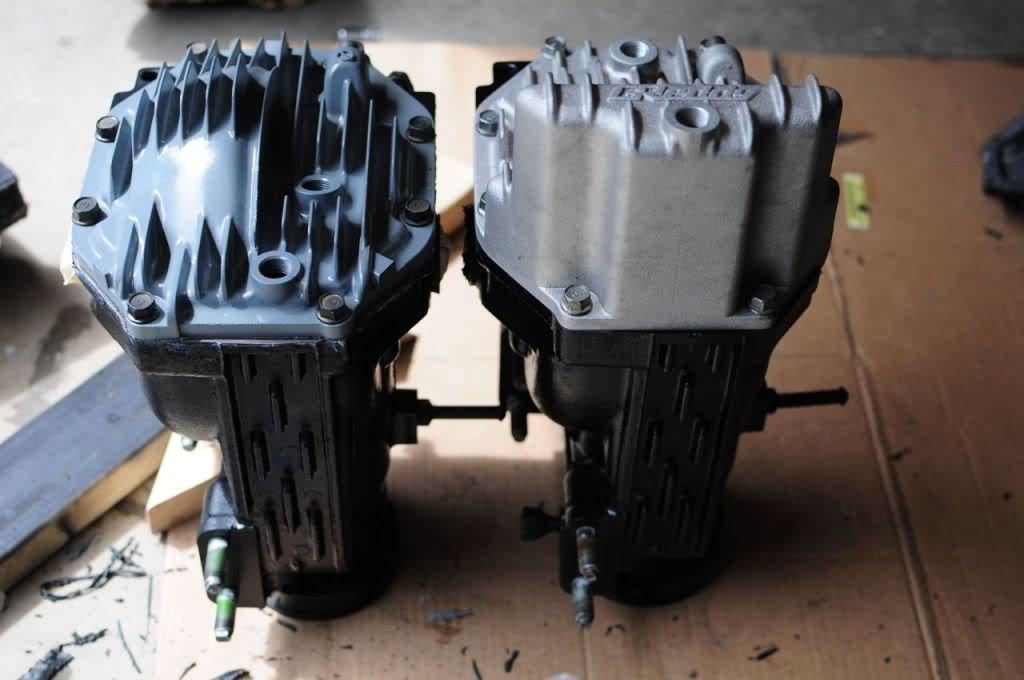
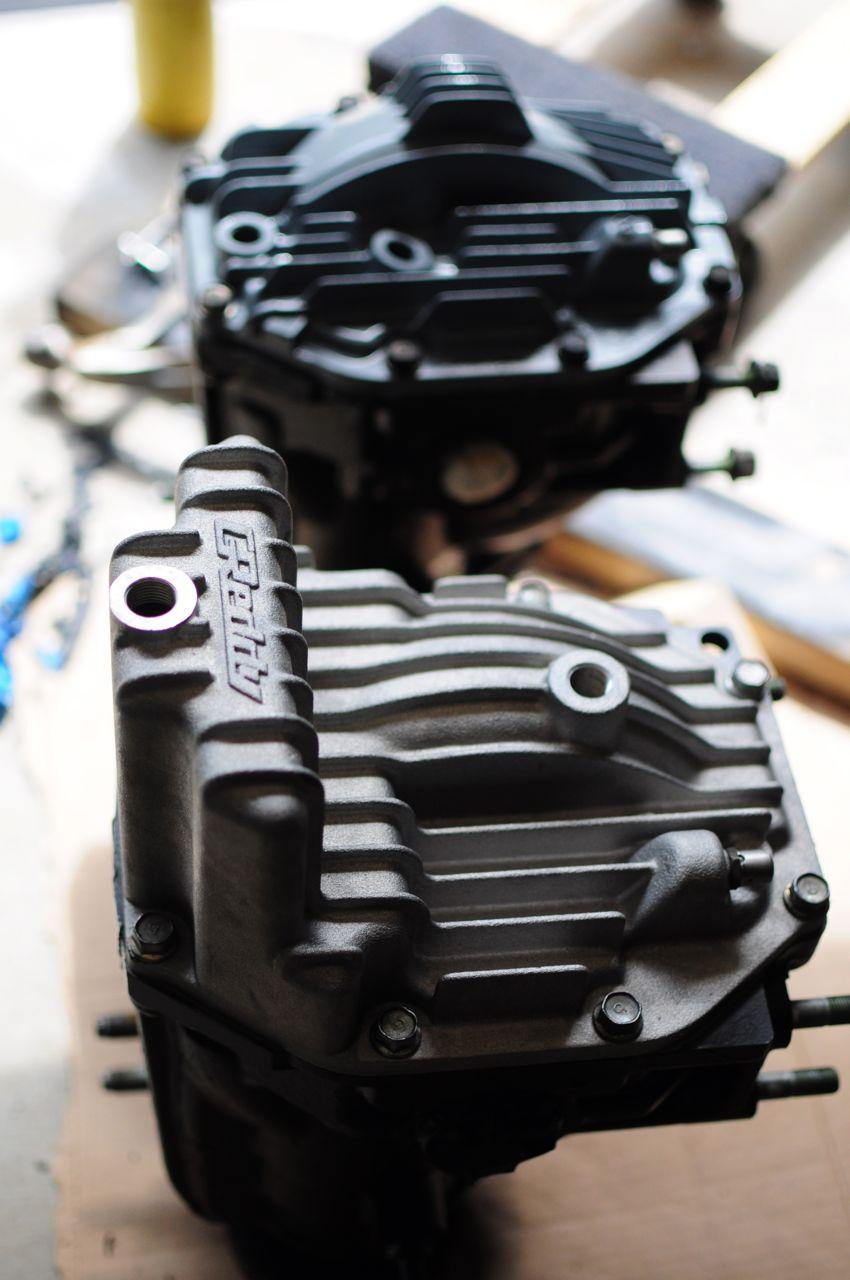
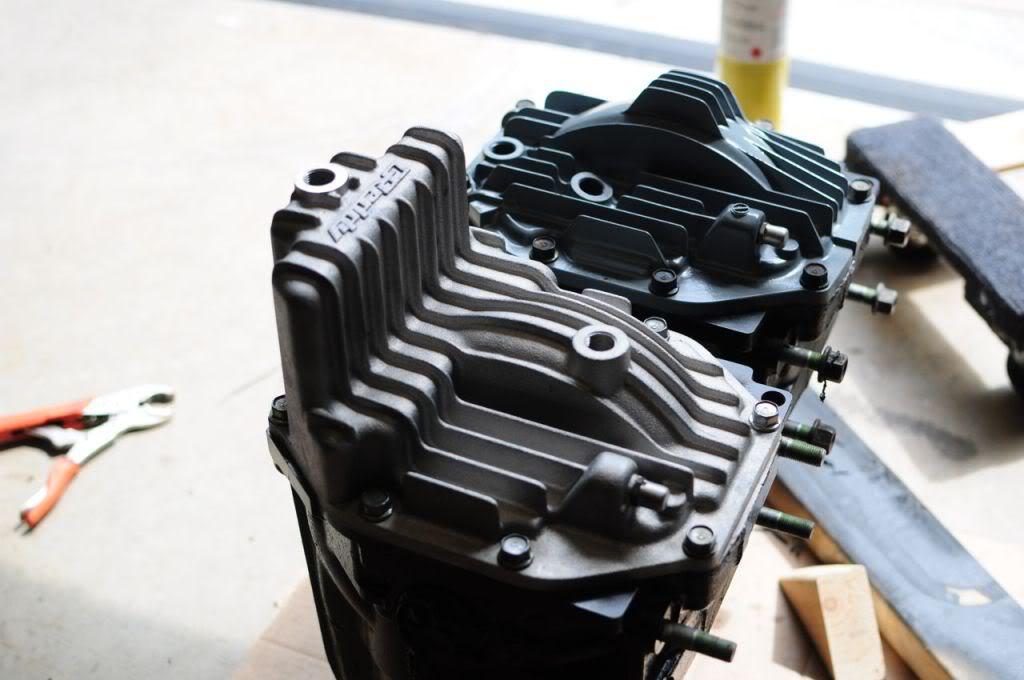
9-19-2012
Sept 16th, 2012 - Little bit more update...
Took some time getting the transmission painted and such.. Some color scheme.
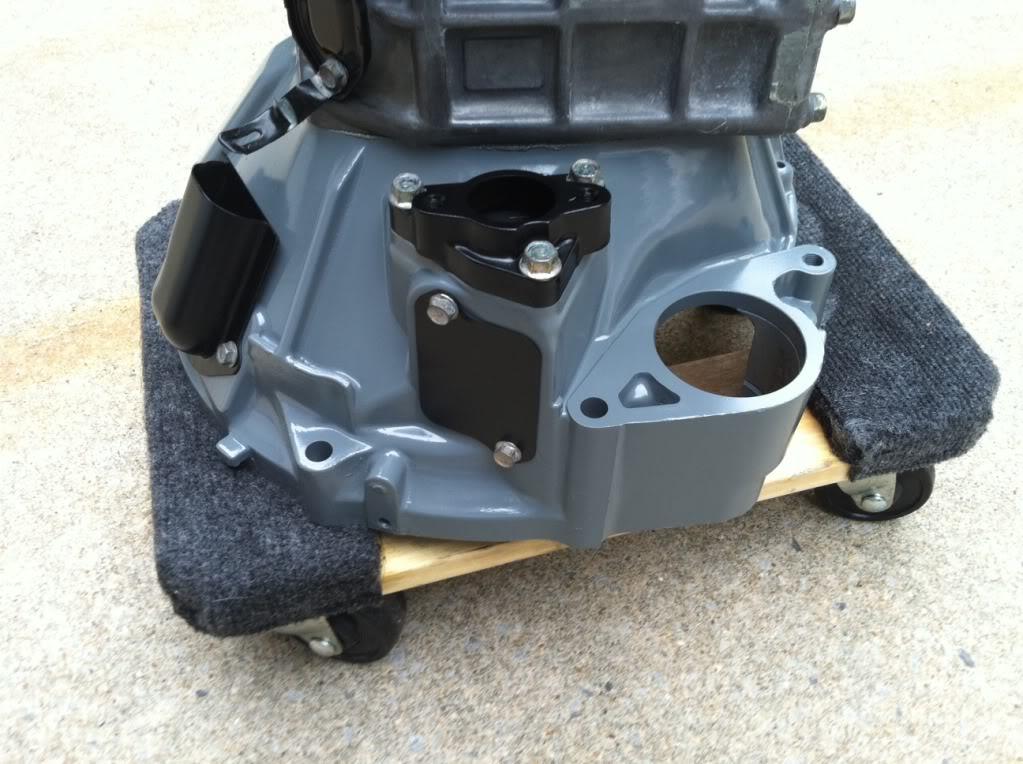
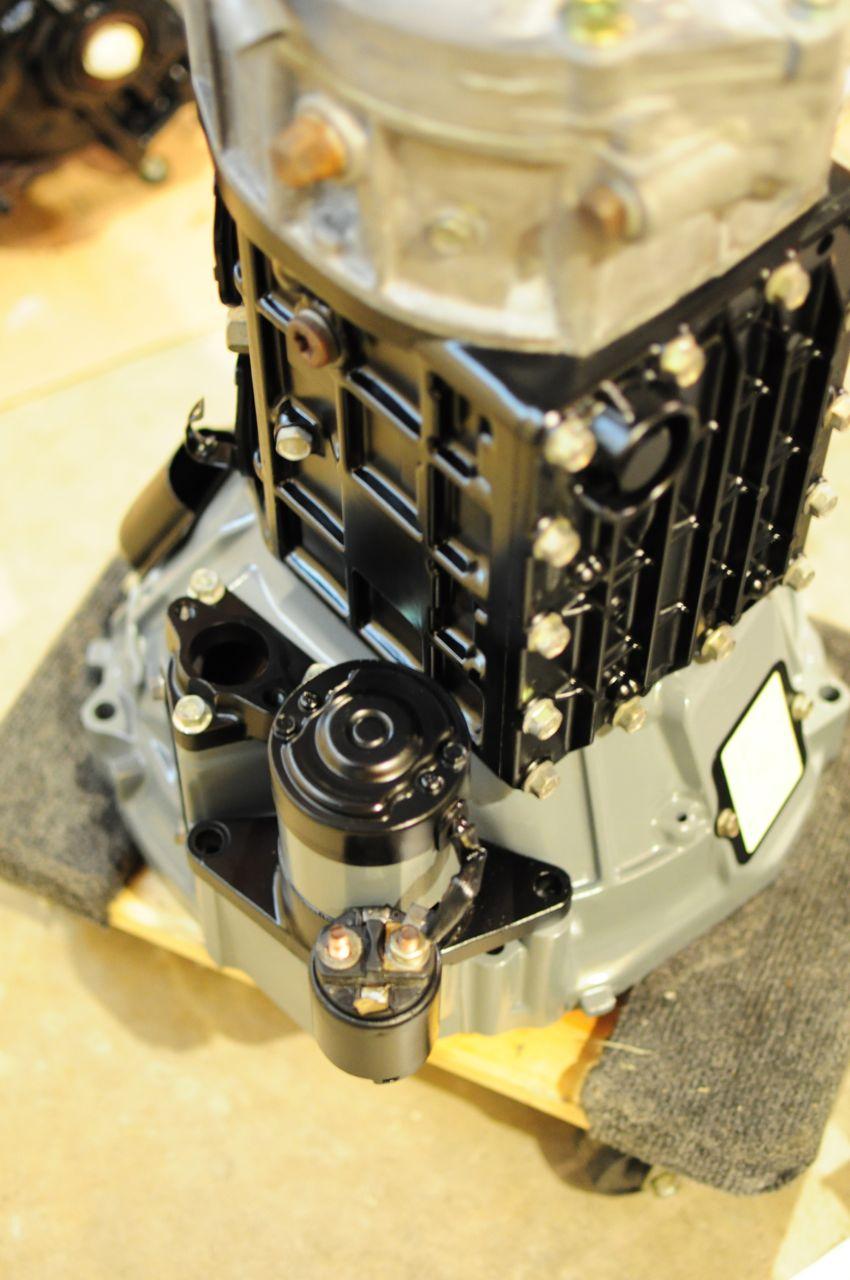
and becoming a master of taping ![]()
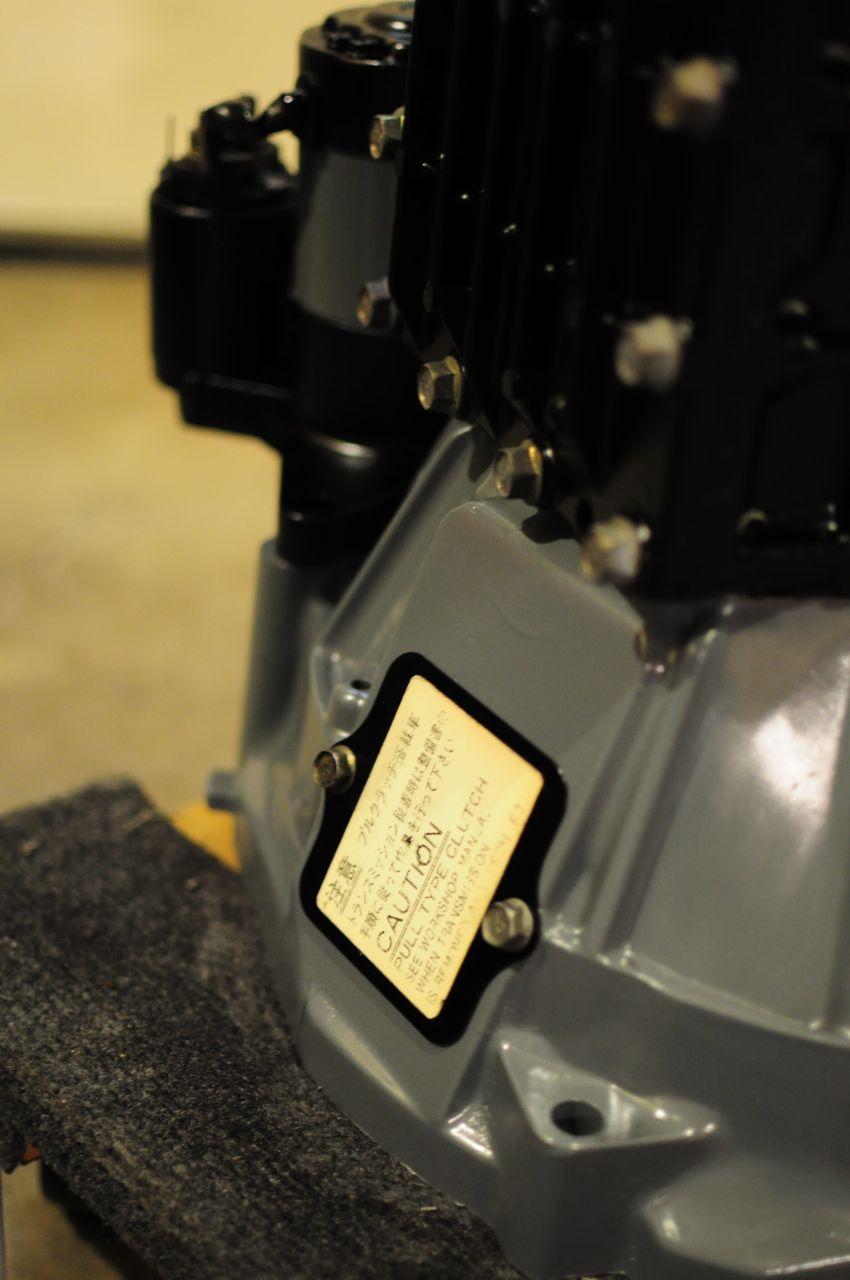
Also, plugged the oil metering hole ![]()
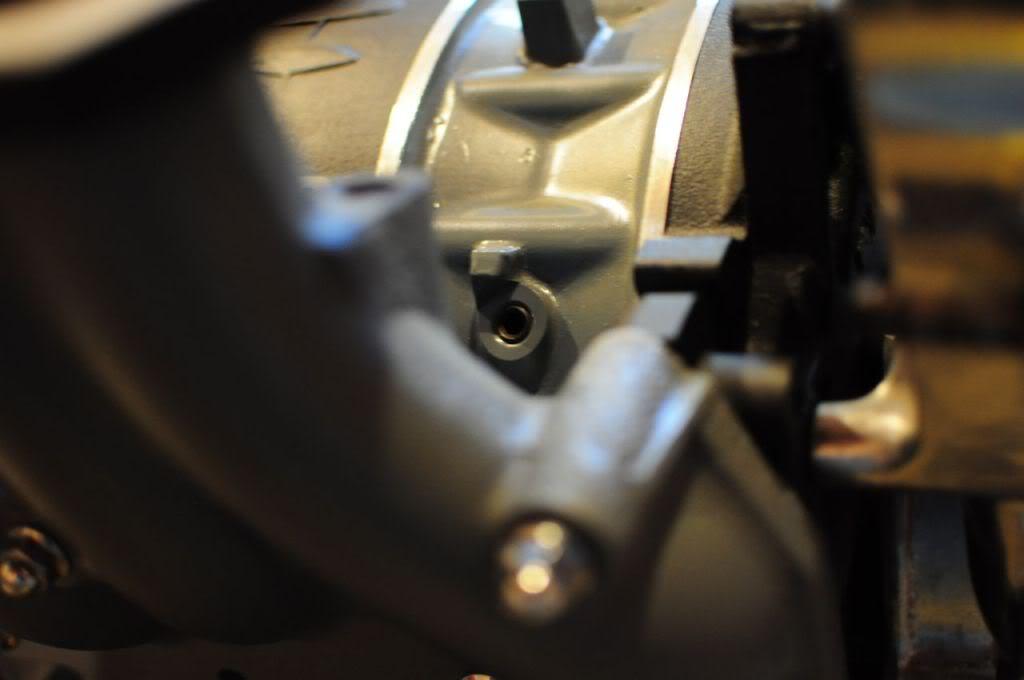
and another angle of the painted diff..
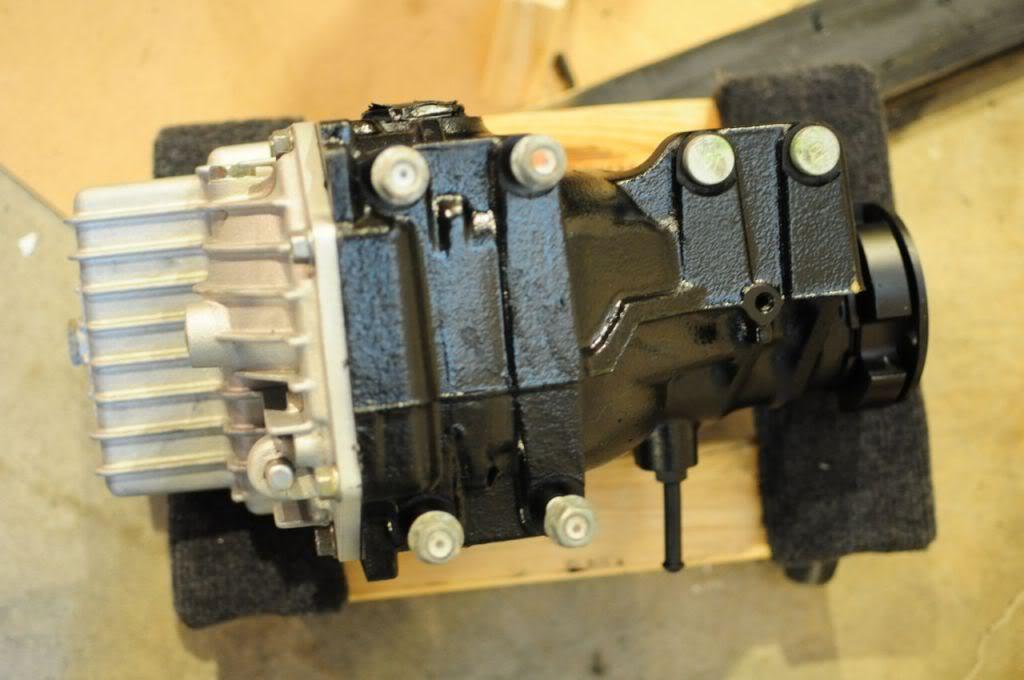
Sept 19th, 2012 Updates from past 3 days..
I had the rotor hats made for the Disc Brakes Australia rotors and got them refinished in similar black.
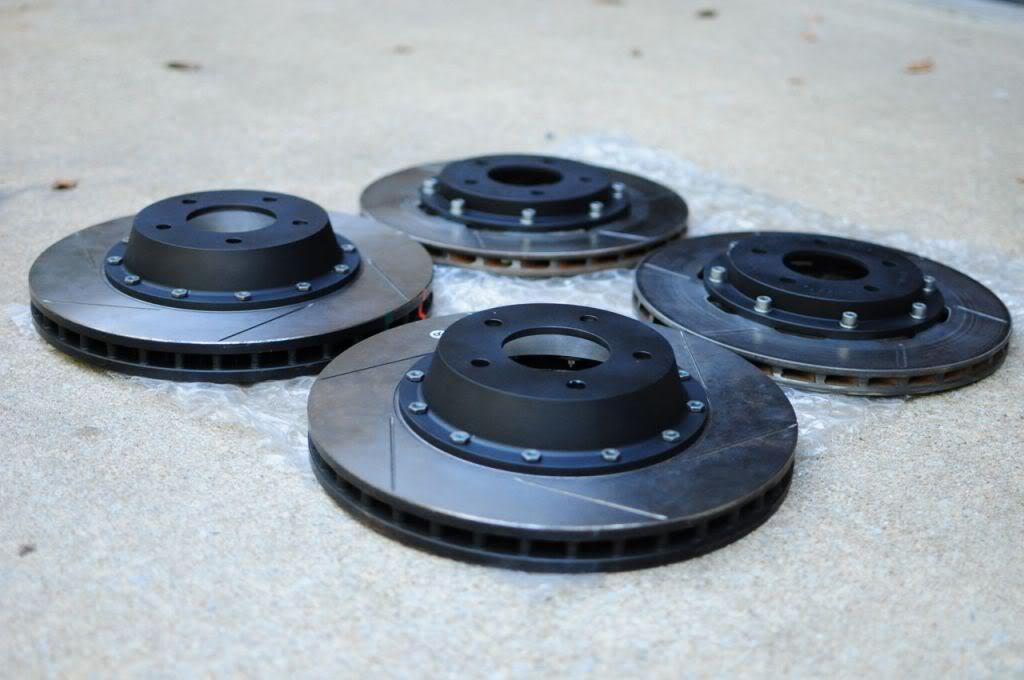
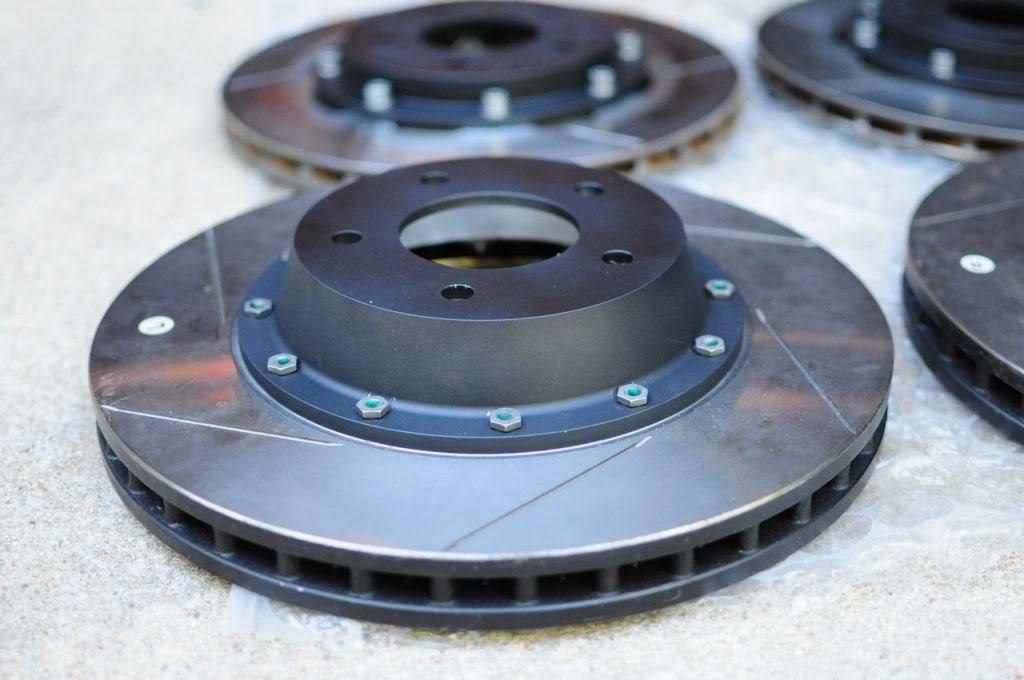
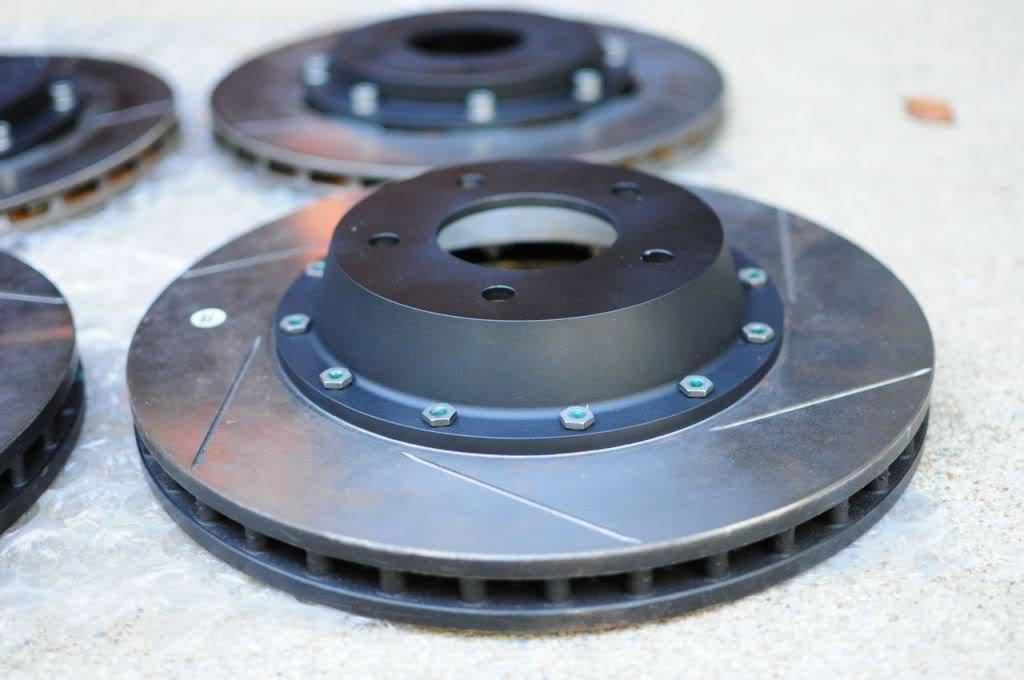
Cleaned up and repainted the RZ calipers.
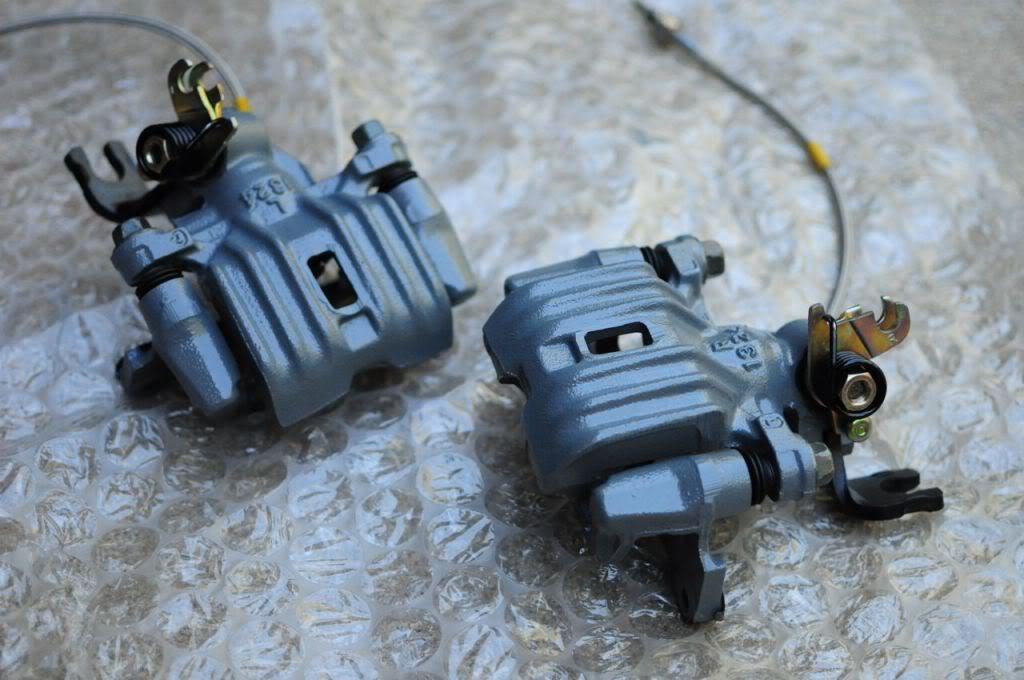
I also replaced the diff bushings with Powerflex bushings.
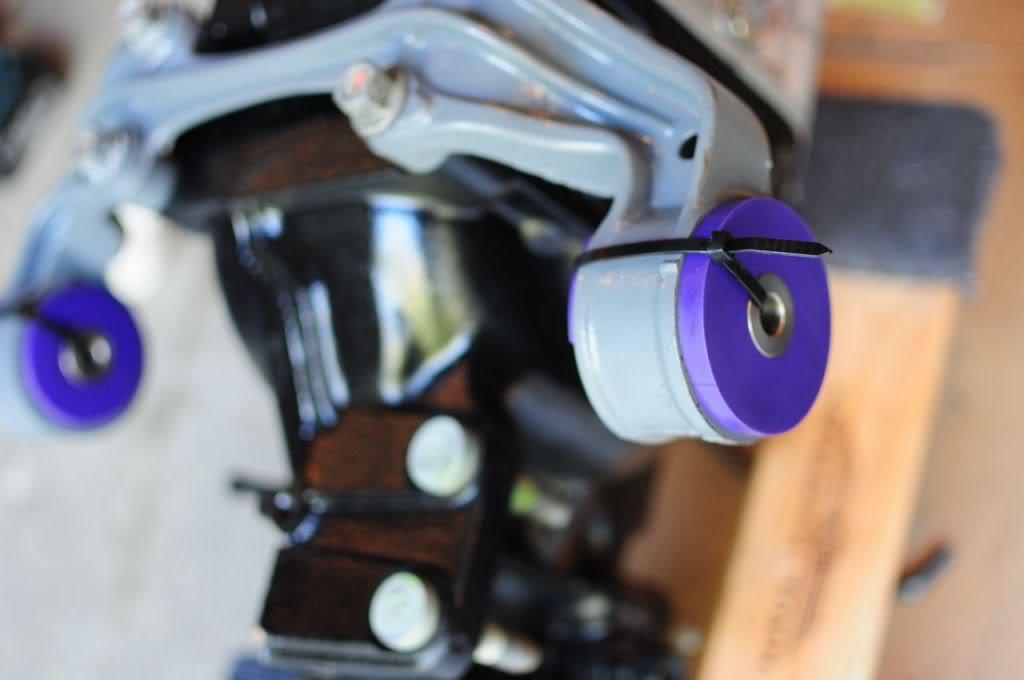
9-25-2012
Thanks for reading!
Couple of updates... I got my Takata Harness today.. Actually it was shipped to my paint and body guy vs. to my home... and I could could of gotten it 2 week earlier..
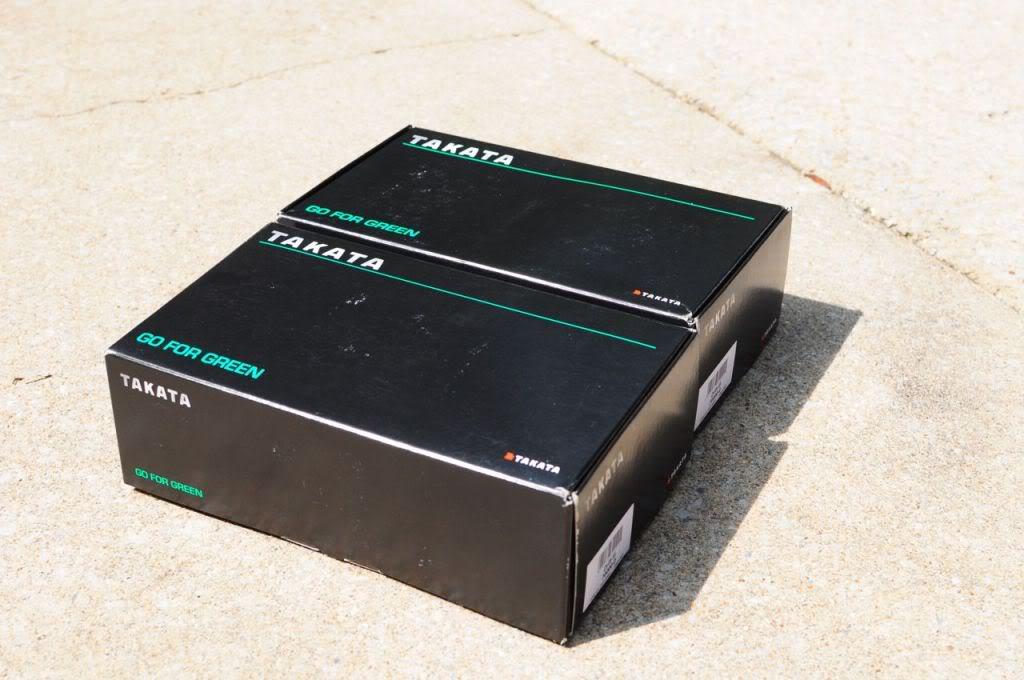
Takata came up with new design... and color. Hope it will take some time for people to fake this..
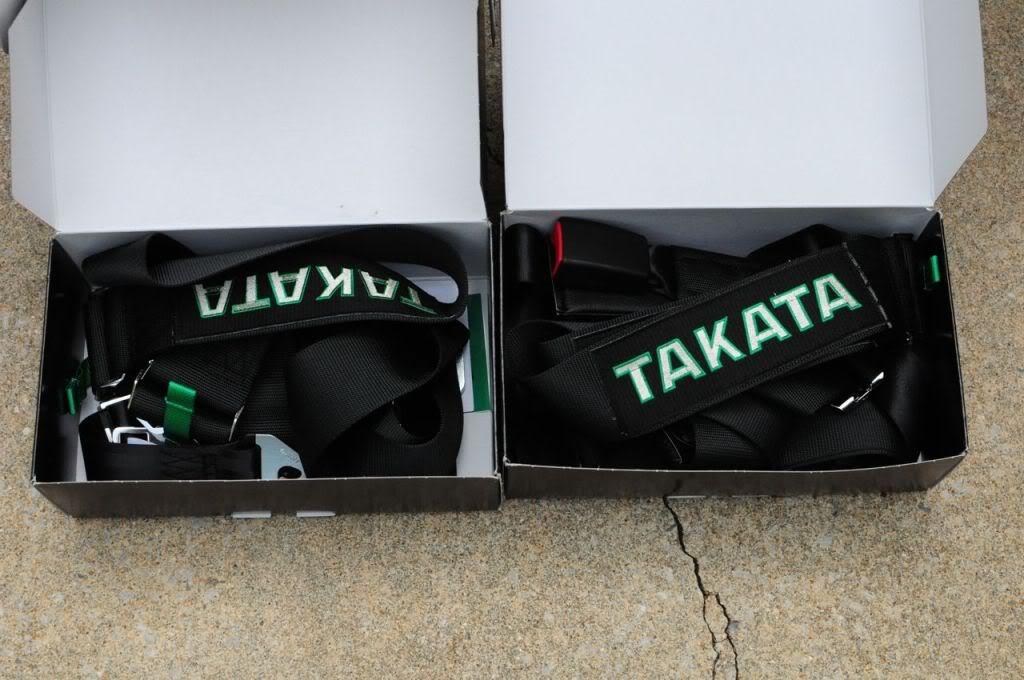
And testing on my bride seats..
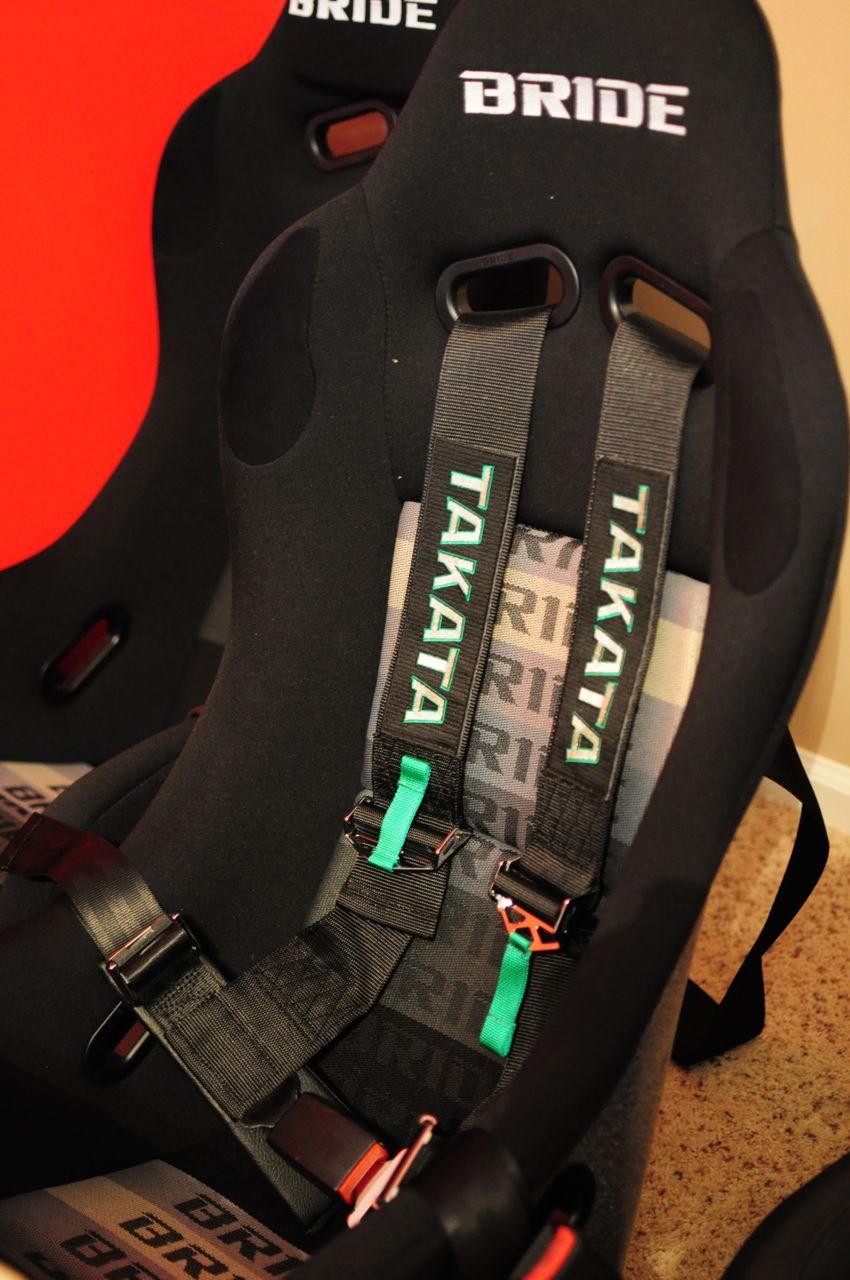
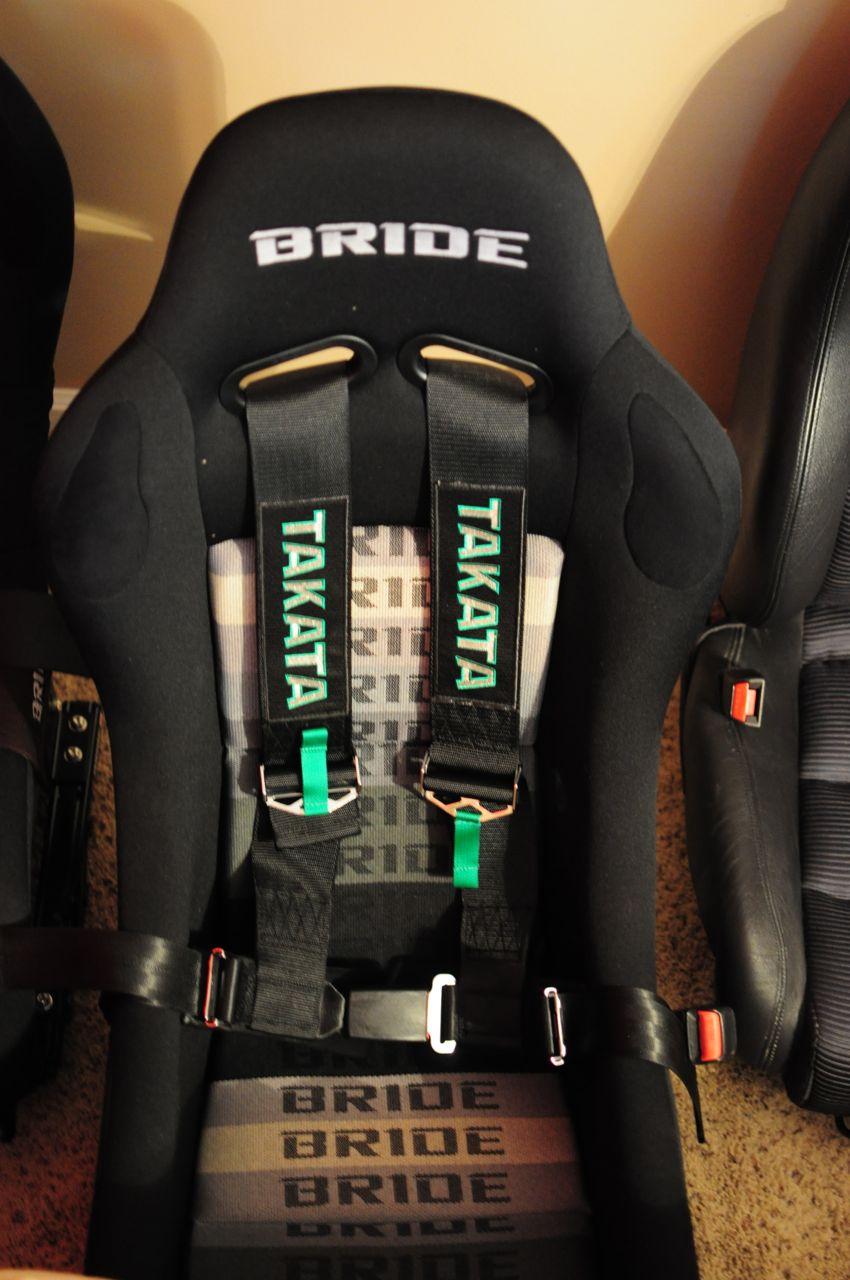
And refinished my pedals and added discontinued widefoot, heal toe pedal.
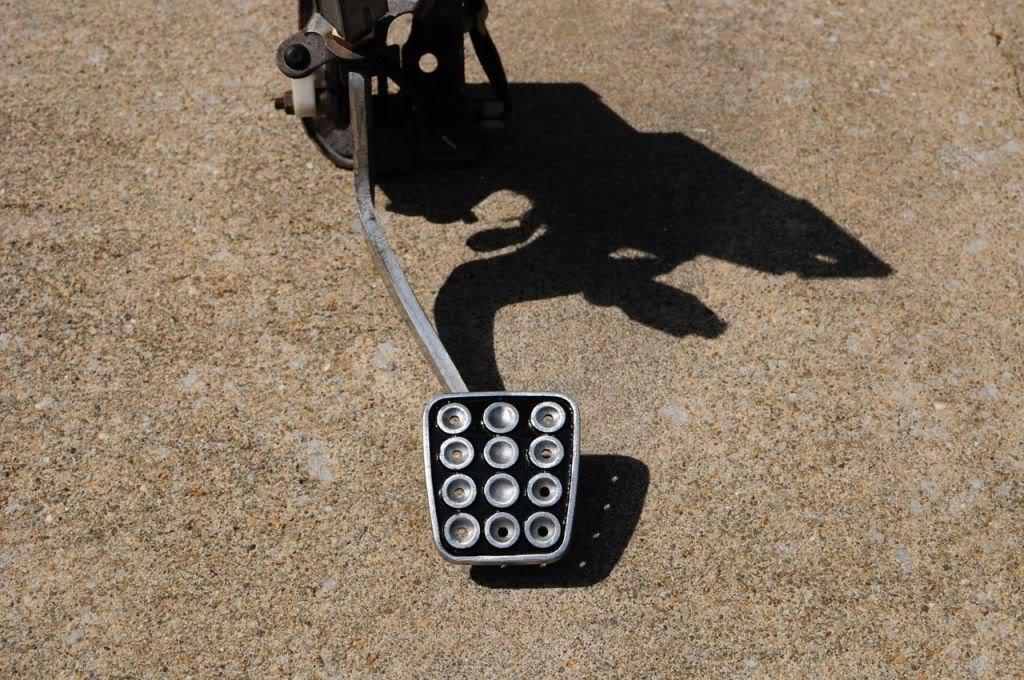

9-30-2012
Correction.. I just realized I said the black Takatas are FIA approved but I actually meant to say, "These are NOT FIA approved".
I'm debating about the interior and test fit the Takata Harness on the Spirit R Recaros.
Let me know what you prefer?
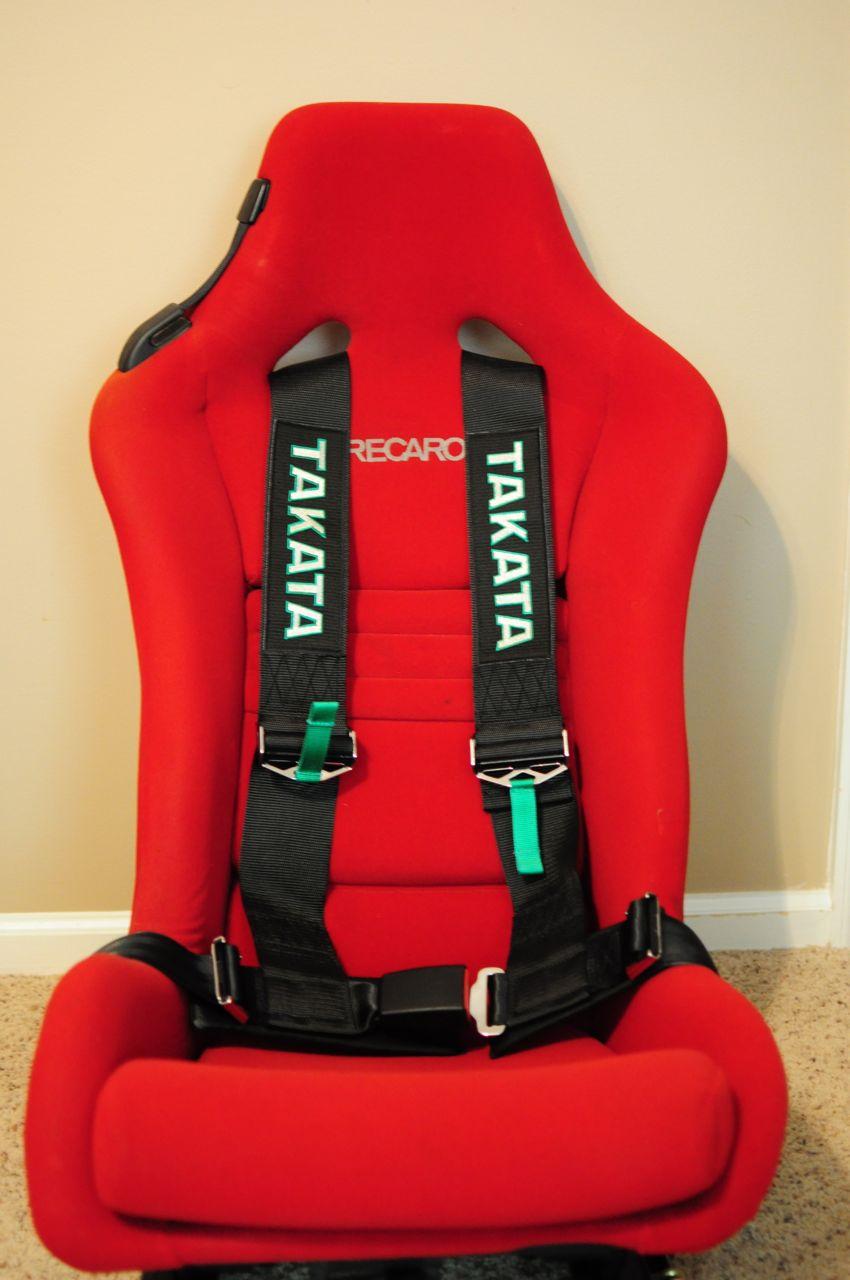
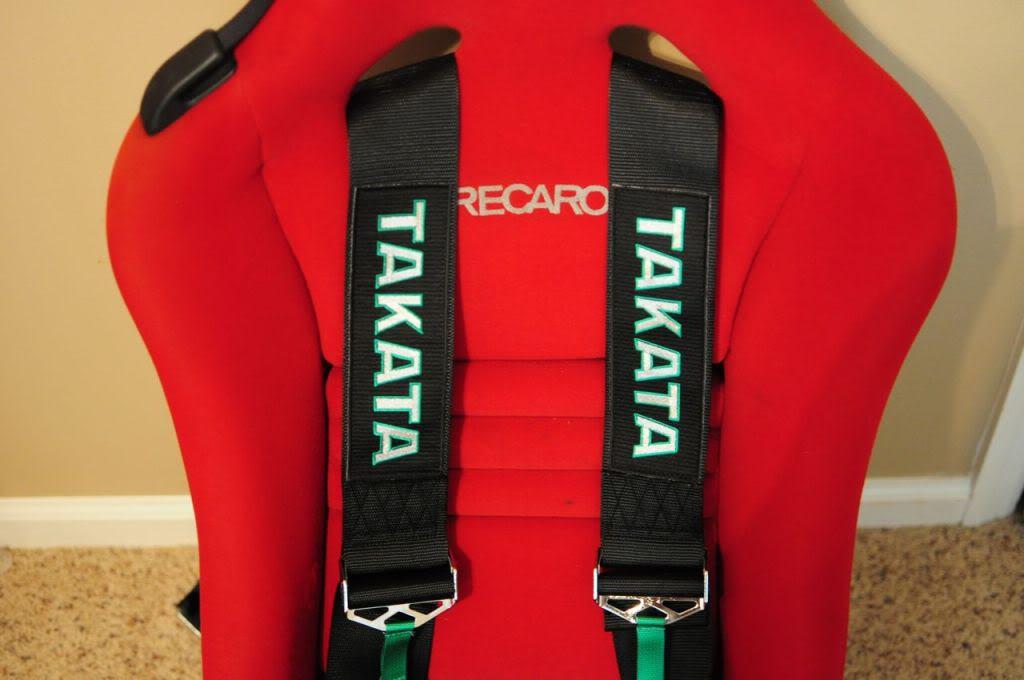
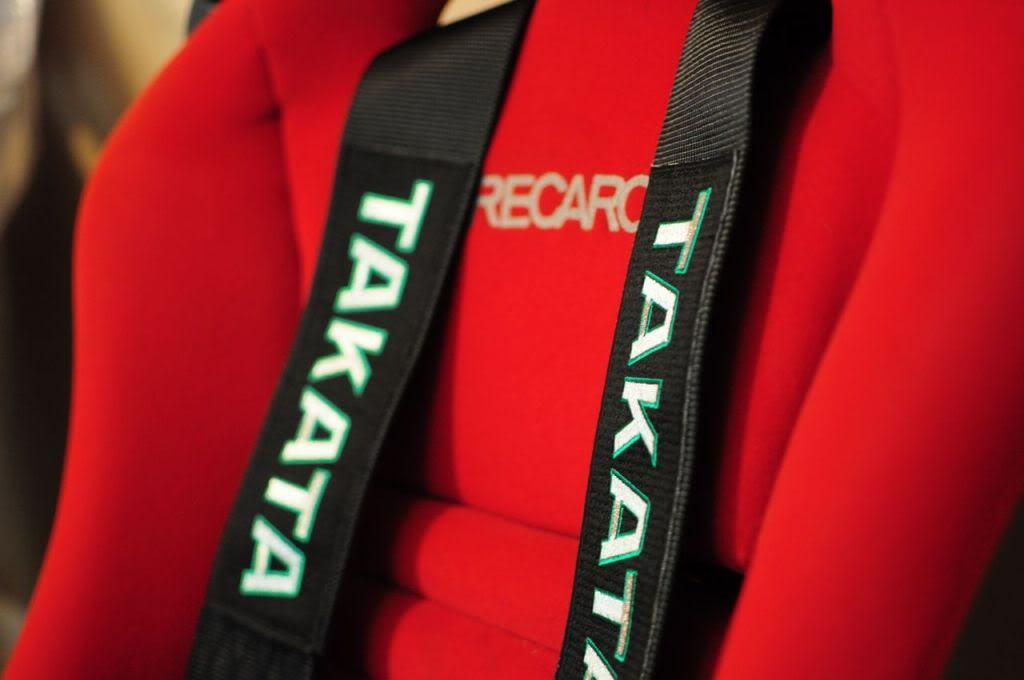
Also, got my VS-XX refinished/powder coated and put new Toyo T1-Sport tires. I've heard great things about these and can't wait to test them out.
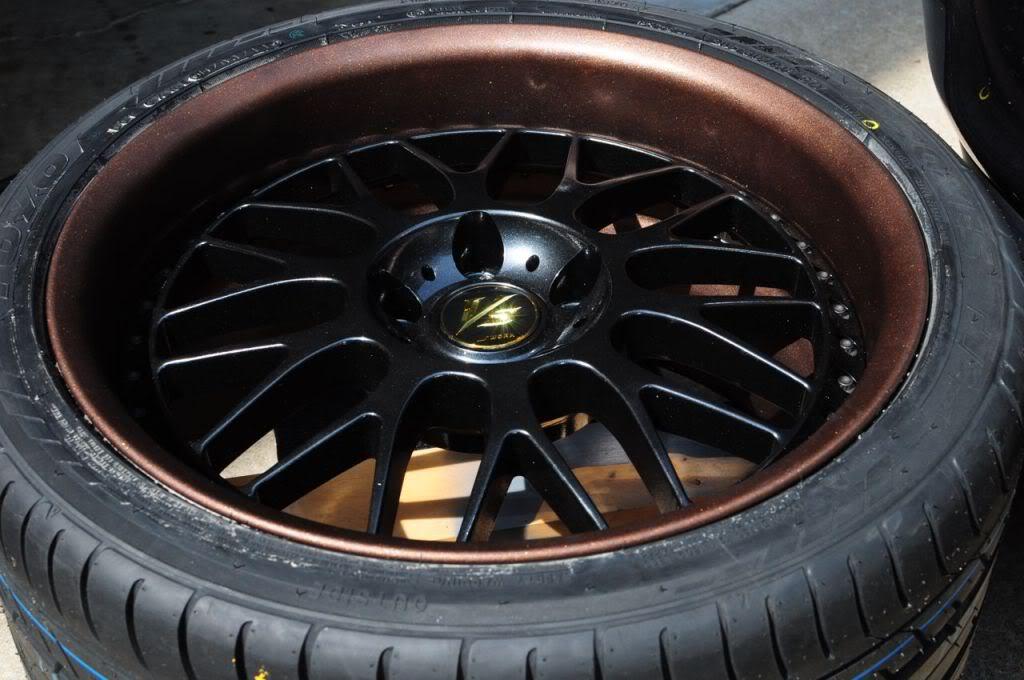
**They are not going on this 3 rotor project car**
10-4-2012
COOL! Thanks man!
more updates...
Past couple of days, I decided to strip off my spare RZ hub assemblies and fix up the rotor back plates and such.
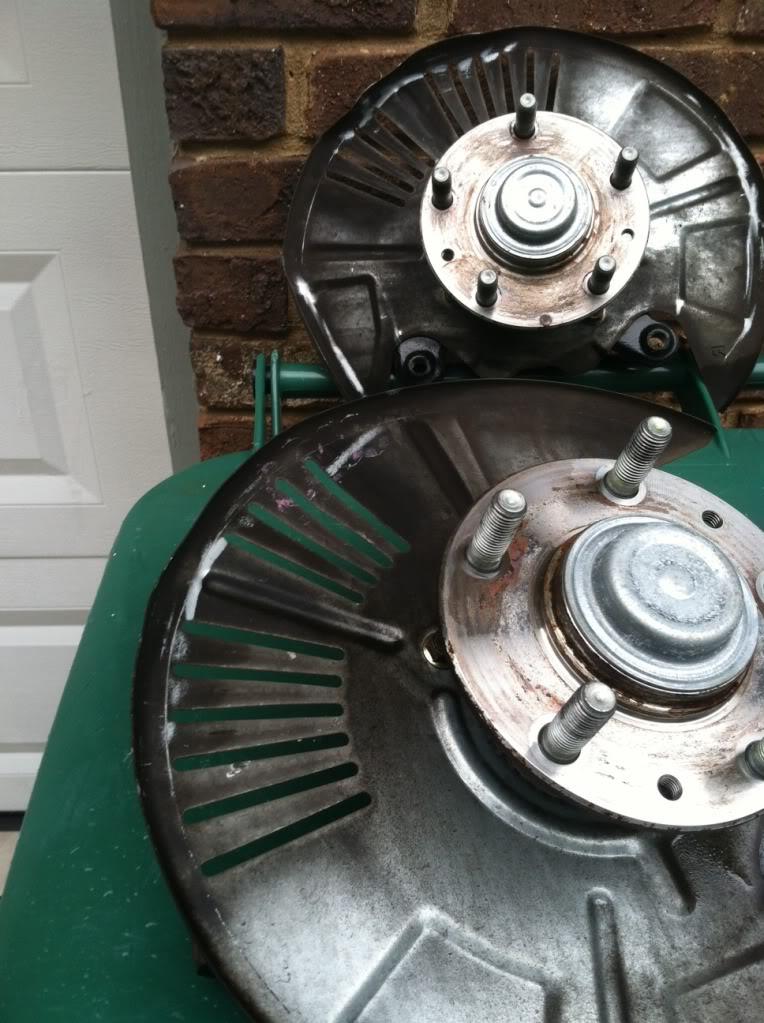
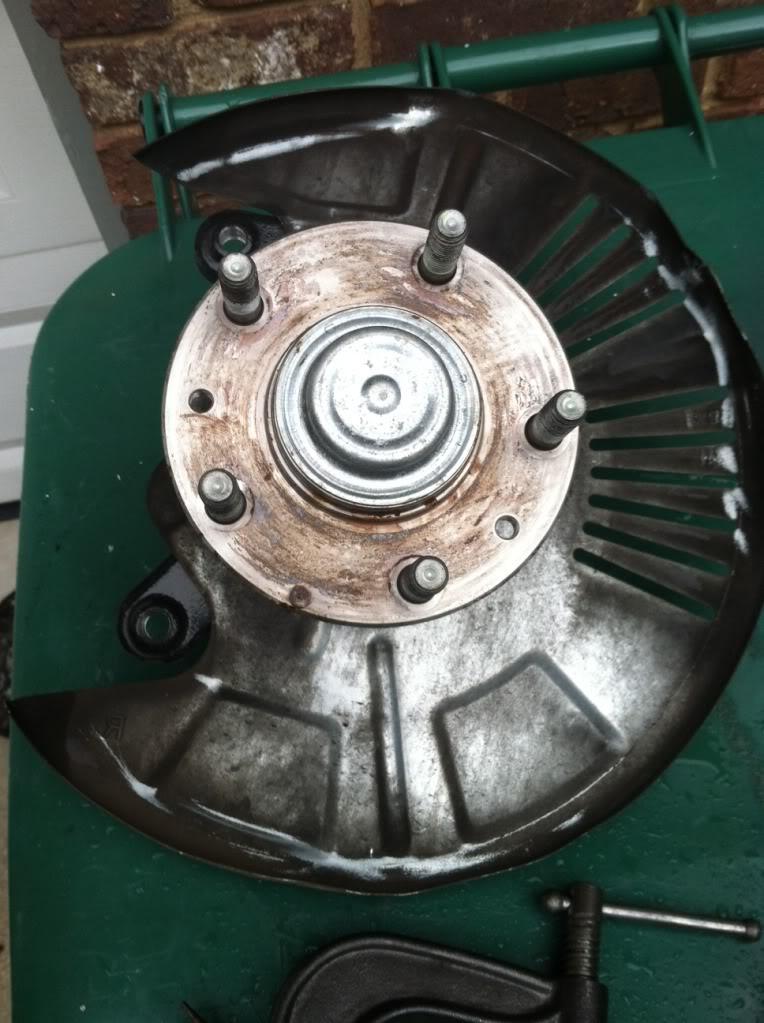
Fronts fixed and degreased... Test fitted the new DBA rotors.. Shaved some metals so DBA rotors can freely spin.
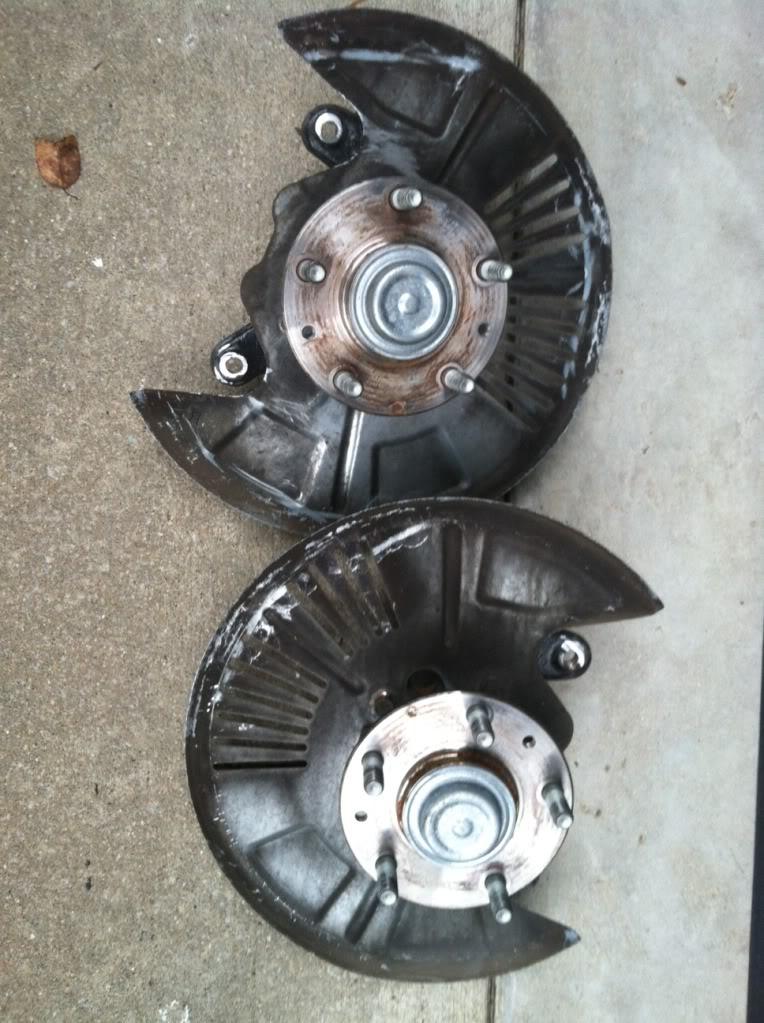
Rears fixed and degreased
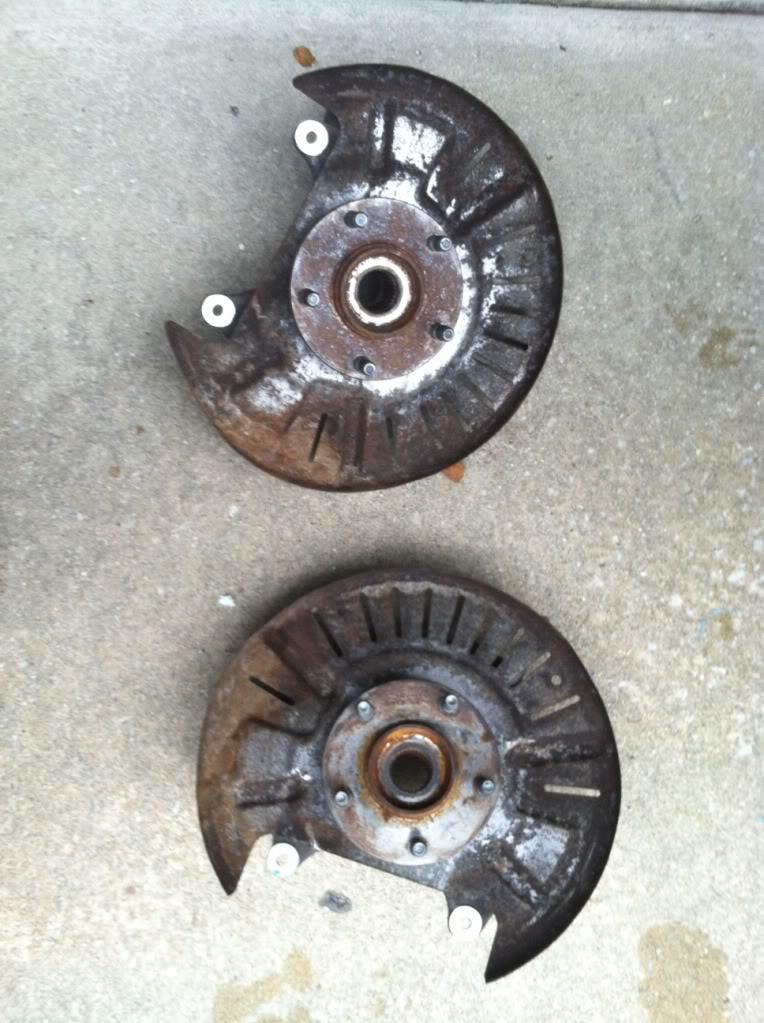
My good friend Bryan from BNR Supercars is going to let me use his cabinet to blast the rust and such off so I can get the prettied up today.
Also, I received some goodies from Turbonetics.
Their GT-K 1050!!!!
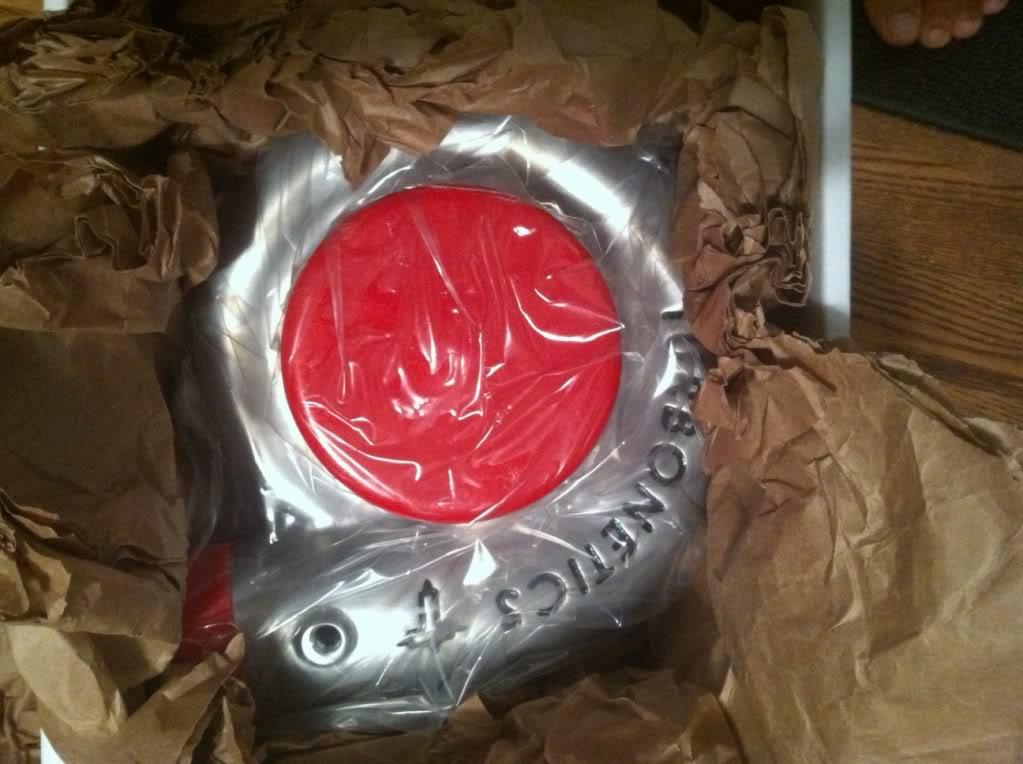
10-24-2012
I'm currently putting the car together for SEMA and I can't upload all the stuff that's going on..
I'll make this short and share 2-3 pics.. including the render done by amazing artist and designer, Greg Thompson. He did an amazing job rendering the car with few pics I sent him and list of goodies I was going to put on. Just amazing work!! Since its so close to SEMA, I'll share the render to give you guys an idea what it will look like (exterior).
Hint of couple of parts..
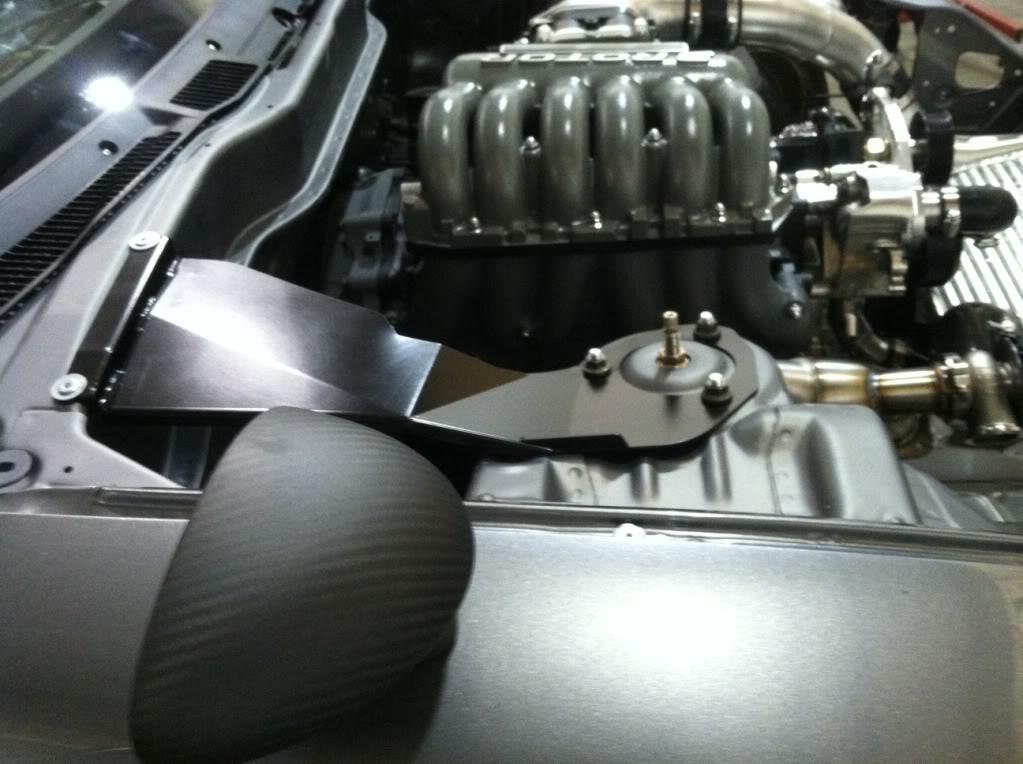
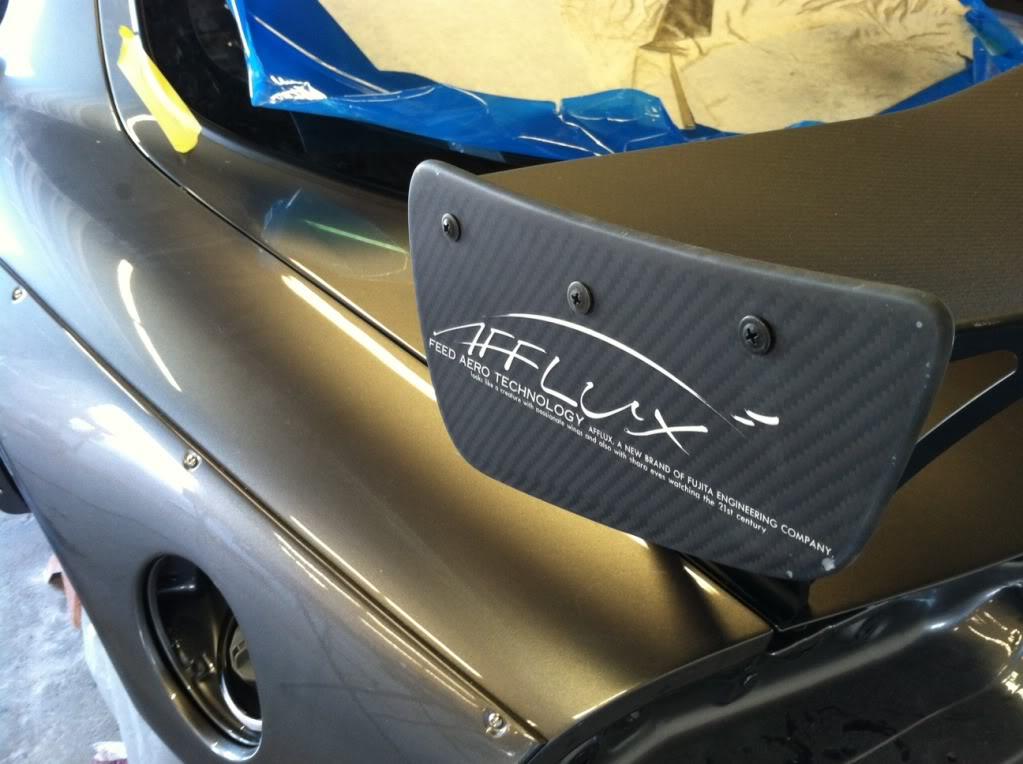
I'll update the full car on my way to SEMA..
10-30-2012
Unfortunately, I didn't bring my DSLR so I don't have that great of a pics. I'll try to post some as days progress.
But here is one from last night.. after SEMA management called me and asked to move my 'grey Honda'.
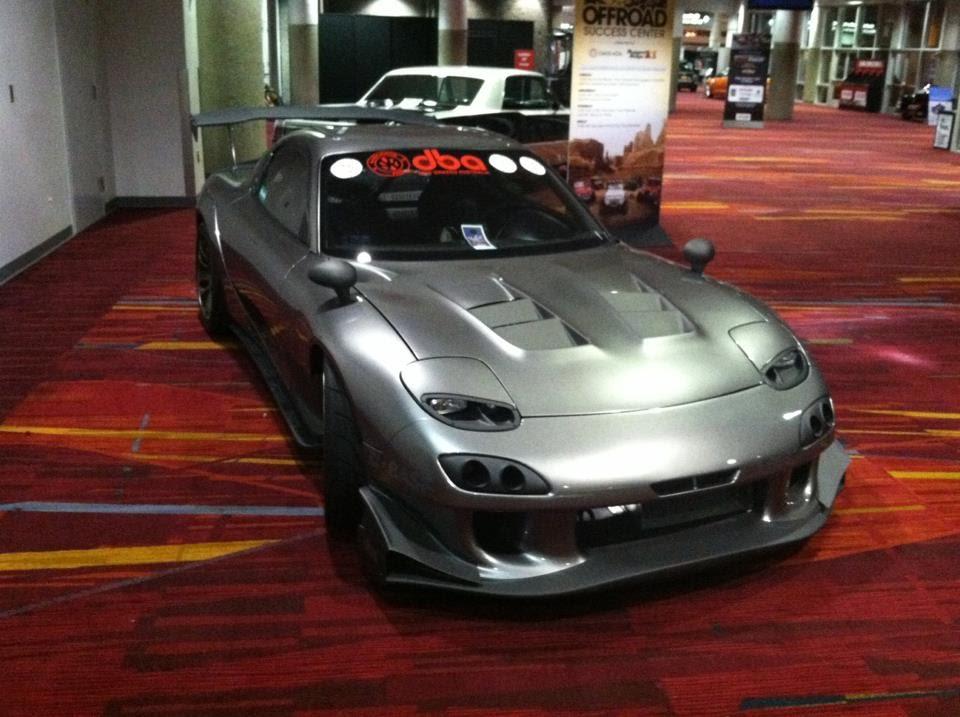
11-4-2012
Here is another pic of the car... I'm still in transit and more pics will come later... and a feature somewhere ![]()
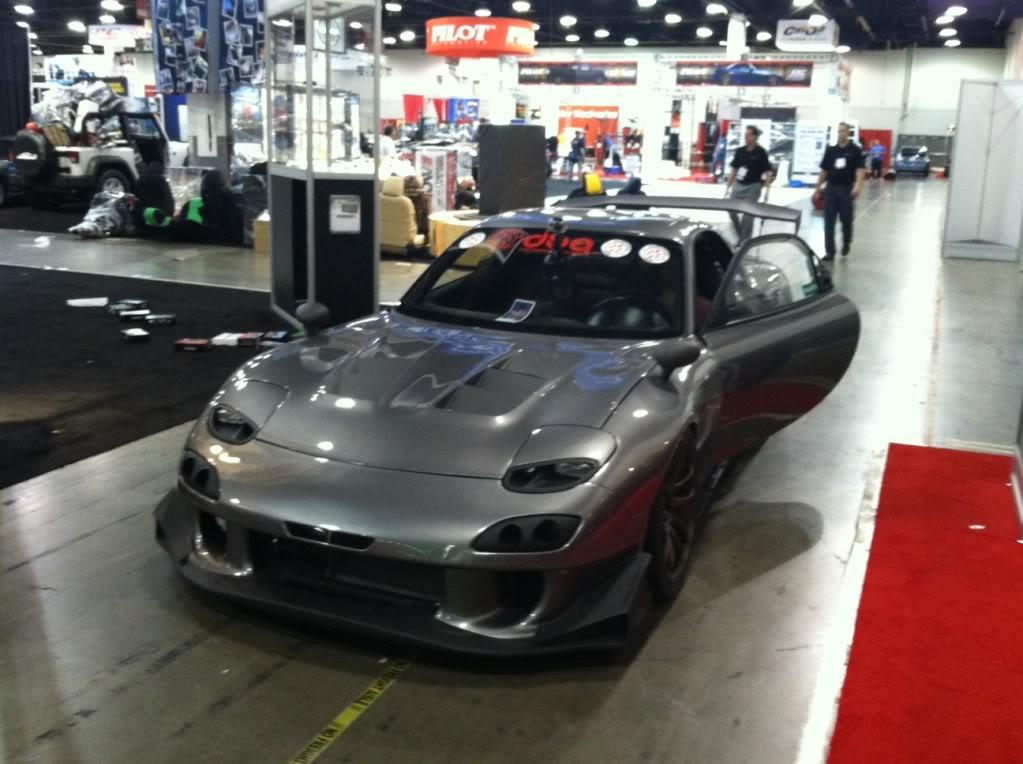
11-6-2012
Thanks Rich!! I guess some assumes and forget that we been around for a while and not a complete morons ![]() Either case, I have more important things to worry about
Either case, I have more important things to worry about ![]()
Also, something good happened from SEMA... They included a picture of my engine bay (not quite completed) in one of the articles they wrote.. This means a lot since I follow Speedhunters and was checking on their site while I was at SEMA..
SEMA 2012: ENGINEHUNTING - Speedhunters
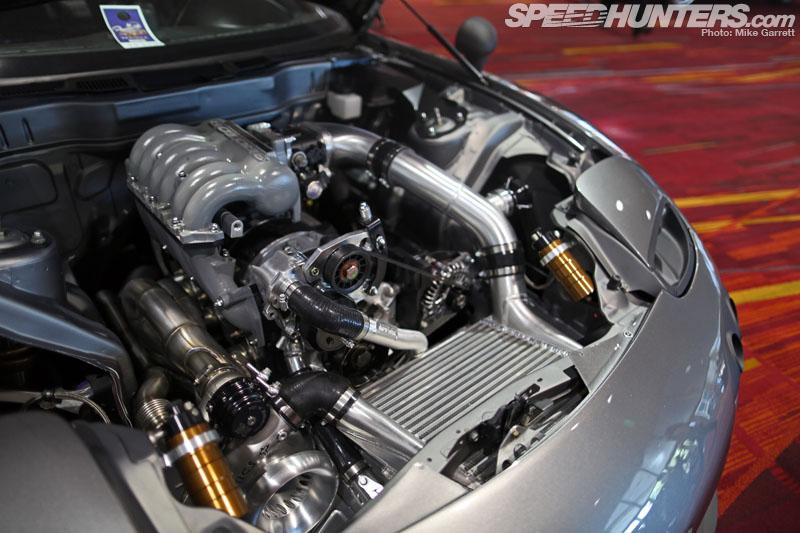
11-9-2012
Now to my response to the others... and bit of explanation to clear things up.
I'm not disagreeing with some of you who stated that the rear needed to be lowered... It does. The problem I had are the following.. I didn't get the shell til 8 days before I departed for SEMA... and I had 6 days to put the car to be ready to be seen at SEMA. 6 days to put a car from absolutely nothing on it (when I say nothing, no windshields, no panels, no interior, etc).
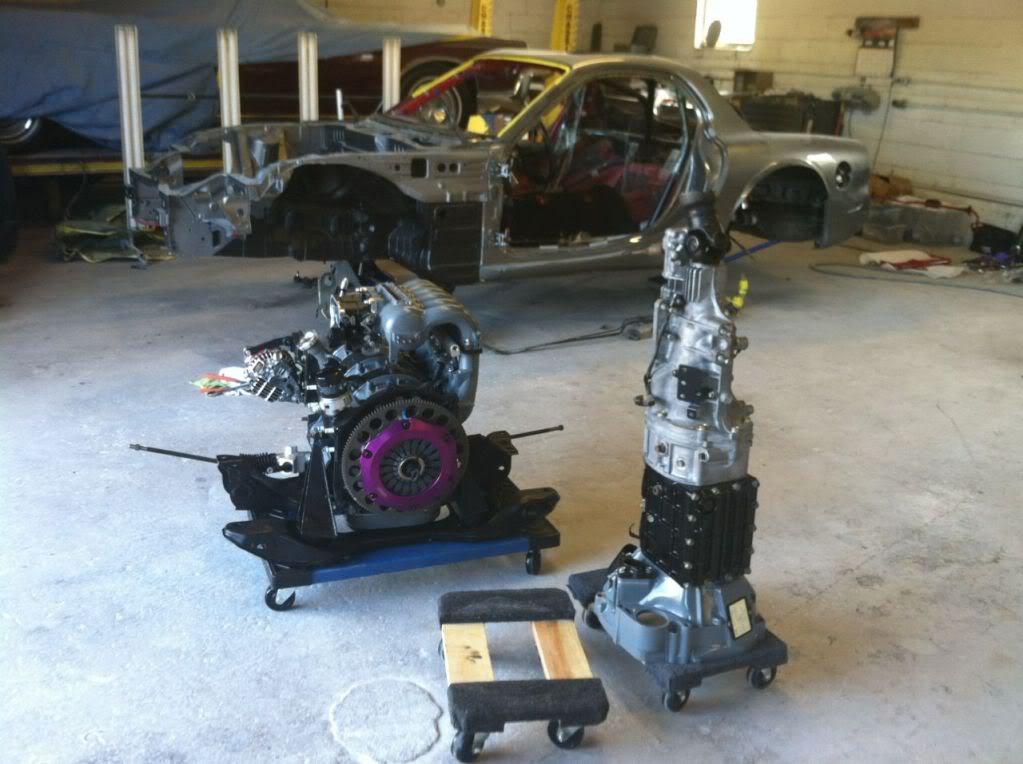
And I left the coilovers up so loading and unloading the car I wouldn't damage the diffusers (front and rear). But when I got to SEMA, something wasn't right.. the rear would not go down. I've spent 6-8 hours over the 3 days trying to lower the rear thinking I might of done something wrong.. But after calling Stance, and getting a tip from them, we realized they put a different height springs on the rear. Hence the abnormal gap.
The rears are now off the car and already shipped to Stance USA.
Now you guys know the truth about the gap.. and now to the comments about cost, not being up to the standard, etc. etc.
Not all of you know who I am... I live in a modest house and I'm no means make '****' load of money as some have put it in the past. I do have to save up like most of you to build cars and I do that by giving up stuff. I gave up drinking 10 years or so and stopped smoking 6 years ago. I don't go out buying all things new and I had this goal to build a 3 Rotor FD since I moved to Bham, AL just over 10 years. This project didn't happen over night and it took years of preparation.. I didn't just hire my fabricator, engine builder, or painter just by opening up a car magazine or a phone book but over the year experience with them, them understanding my goal, and their desire to work with me. They are in my opinion top of their class, not just locally but in this country.
Ultimately, I'm building it for my taste and input and ideas of those who are helping. I don't need input from the whole community but maybe select few that I know their credentials. But ultimately, because its my car, I have the final word of saying OK or not. That said, I wasn't just born on this forum couple of years ago or building my first FD... I've seen what goes on this forum and respect or lack of respect that are passed on in different form. I would like to be respected but at the same time I realize that ultimately only select few's opinion matters and rest, well, it really doesn't. That said, don't think I don't respect your opinions... I just realized its what it is, a personal opinion and taste. I might hate sushi (just an example) but you love it. It doesn't mean I have to conform to your liking and have to love it. Its what it is... and I myself pending mood might like something that I normally might not like... ie, I get in a mood for thai instead of BBQ.. For that reason, I have 2 more FDs that I'm building it in a different way. MB will now becoming my track car and will start doing some track days next year and my SSM will be the stock/rare Mazda/Mazdaspeed car (not quite stock). I also have a goal to turn the Eunos Cosmo into VIP car and get it repainted next 2 years. And I have a daily sedan to haul my dog and a kid. Its what it is... Hope no hard feelings for any of you and lets move on.. I'll continue to put my progress and if you want to chime in go ahead.. If its opinion based, I'll read it but don't expect a response. If its technical and I have time to answer, I'll answer. But just as I'll try my best to not say negative stuff on other people's build threads, if you guys would do that same, I would appreciate it... Because there are times, I'll blow up reading someone's comment on here... just because I feel like it ![]()
Oh Boy... I'm grabbing a bag of popcorn in my own damn thread..
DeeSan, Not sure if you actually had experience with REAL JDM parts but they do not have 99% fit nor finish. Most of the labor cost on my car was actually spent on getting the fit and finish to near perfect... even then, its close but not perfect (98%.. ![]() ). Rmagic head lights did not fit well and it required quite a bit of 'tweaking'. As someone who has put various body parts, oem 99 parts, etc and seeing how hard it is to go from say 90% to 98%, it requires people with experience and attention to details. I actually when to Goolsby Customs telling them that my number one concern was fit and finish.. less the gaps, get rid of all the waves from FG, etc. Hence my shop Goolsby Customs won at SEMA last year and did a car for headline vendor at SEMA, Lokar this year.
). Rmagic head lights did not fit well and it required quite a bit of 'tweaking'. As someone who has put various body parts, oem 99 parts, etc and seeing how hard it is to go from say 90% to 98%, it requires people with experience and attention to details. I actually when to Goolsby Customs telling them that my number one concern was fit and finish.. less the gaps, get rid of all the waves from FG, etc. Hence my shop Goolsby Customs won at SEMA last year and did a car for headline vendor at SEMA, Lokar this year.
That being said, I don't discredit those doing Stance, show, track, etc... As I always preached in the past to those asking for my advice, you should build your car based on your goal.. either being slammed to the ground to be in trend, performance oriented to do tracks, reliability mods for daily, money saving mods because you are on a budget, or show car based to show off at show events. Its based on what makes you happy and what type of crowd you hang out. At the end, respect for each other should be given... So, Lets stop and move on...
No more stance vs. track talk please!
LOL! Even with a "HUGE" rear gap, it still made it on Stance Nation ![]()
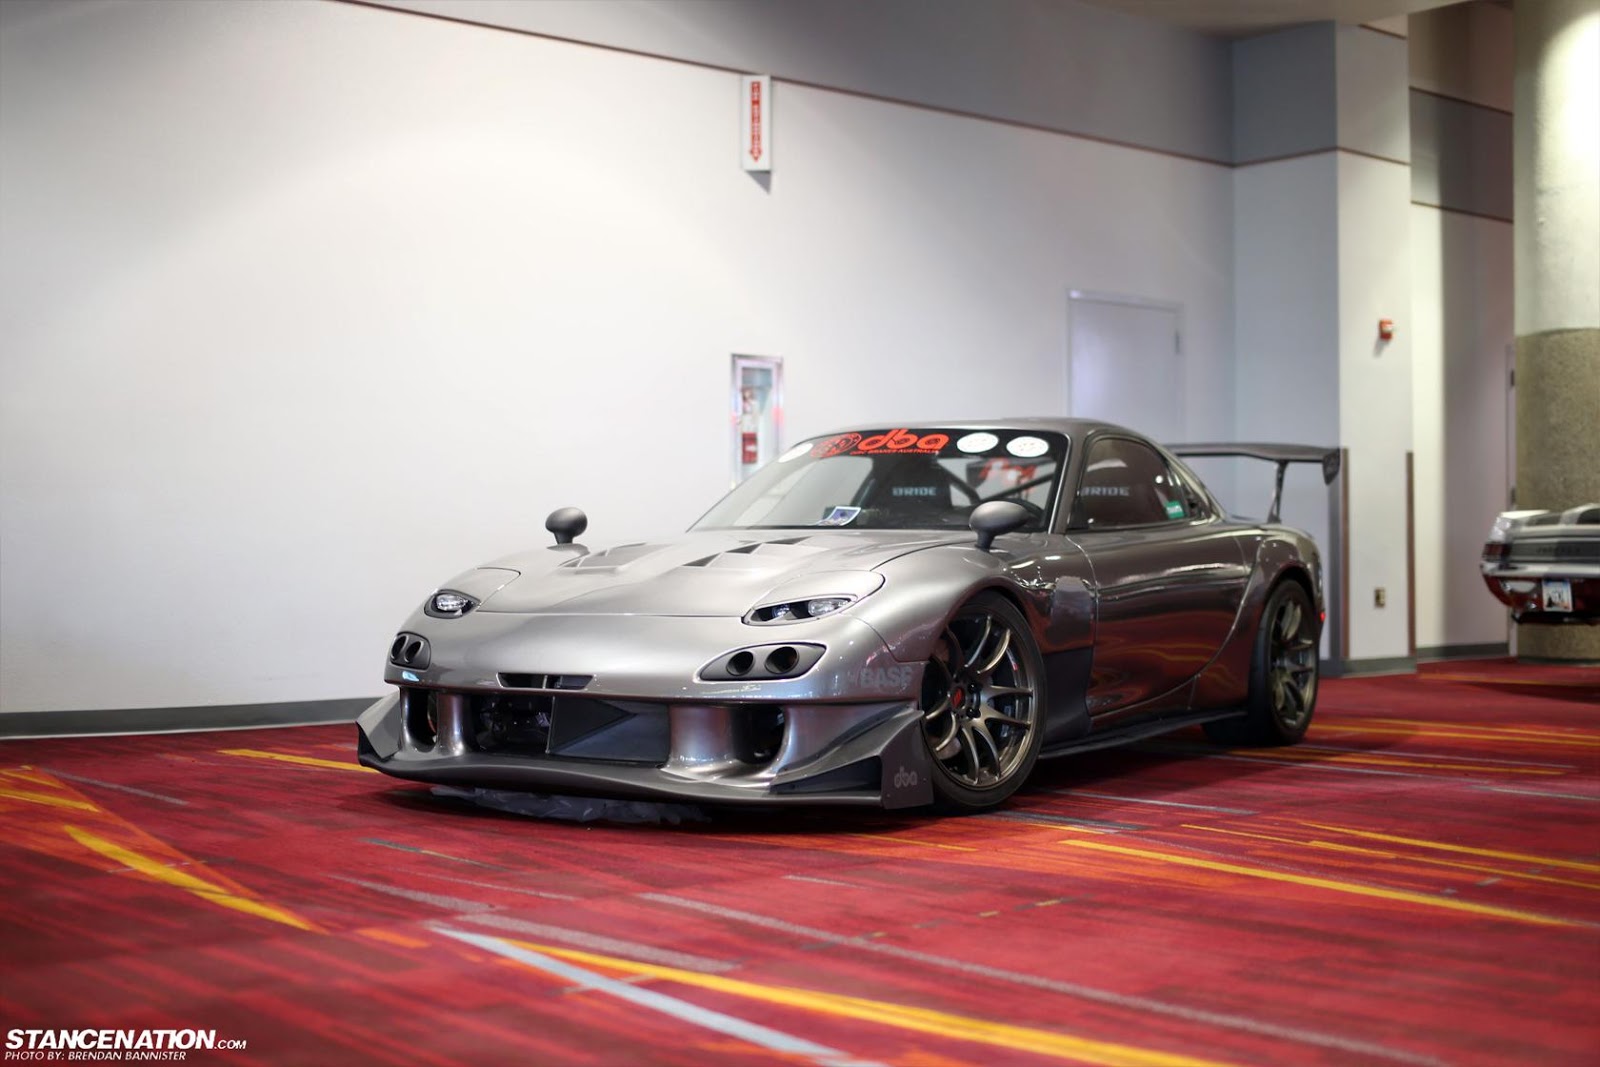
11-28-2012
My New Wheels should arrive today and new set of Toyo R888s have already arrived!!
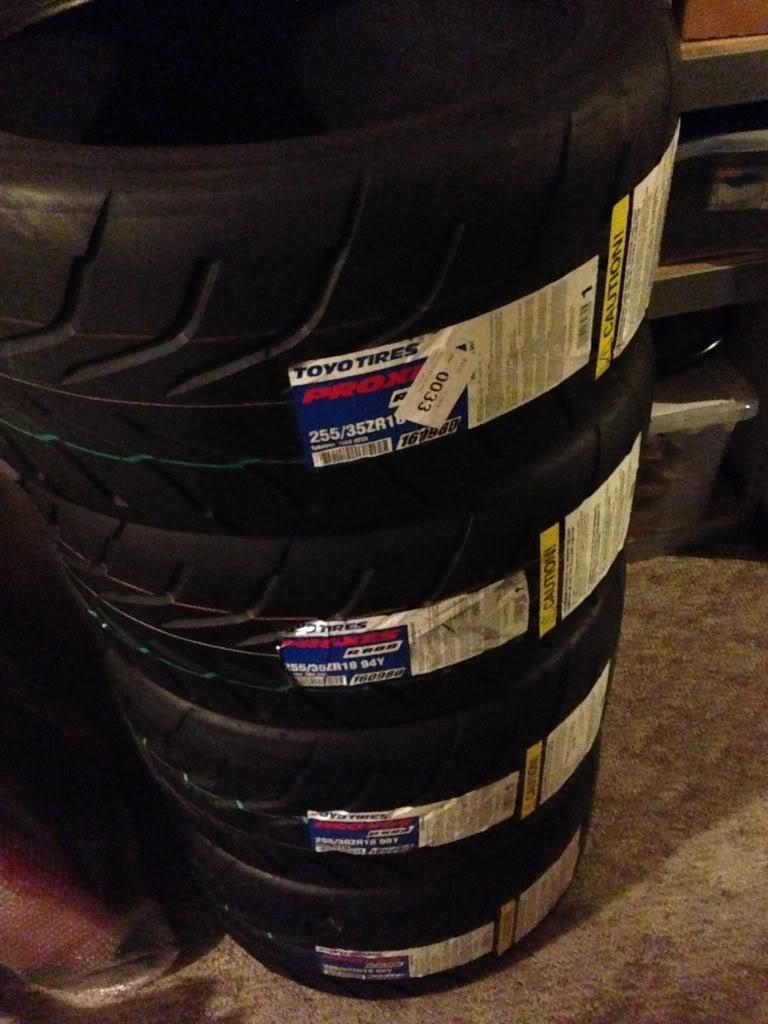
I've been also doing some research about wheels for the past 3 months and will share some input about wheels later..
12-2-2012
My new set of wheels..
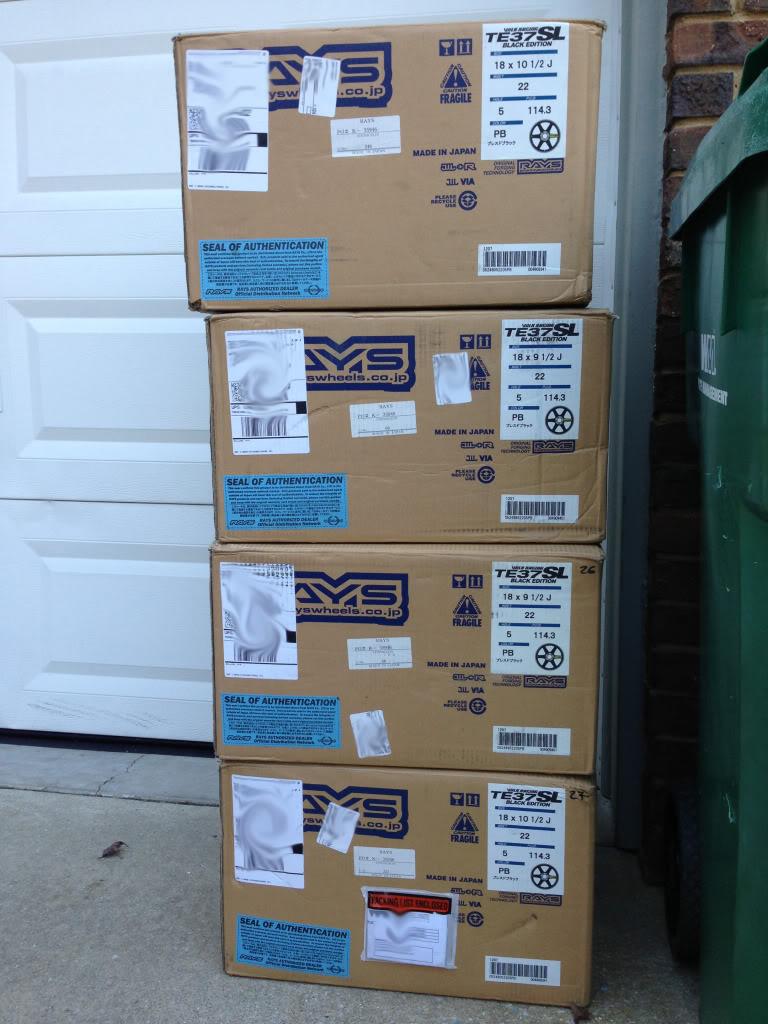
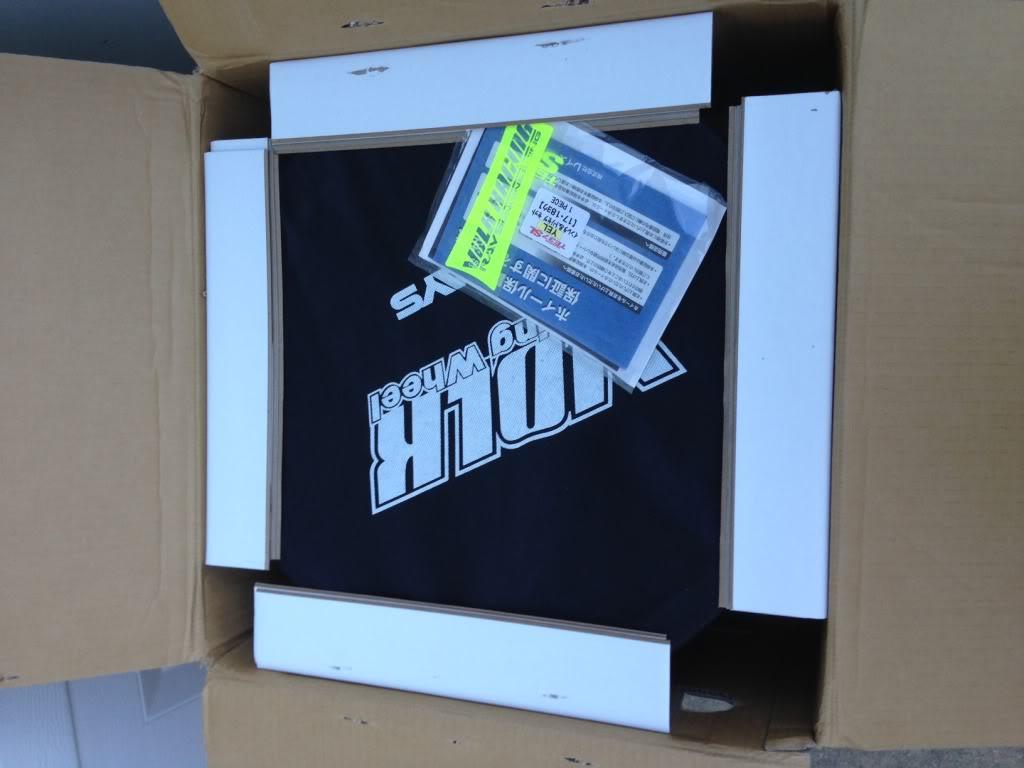
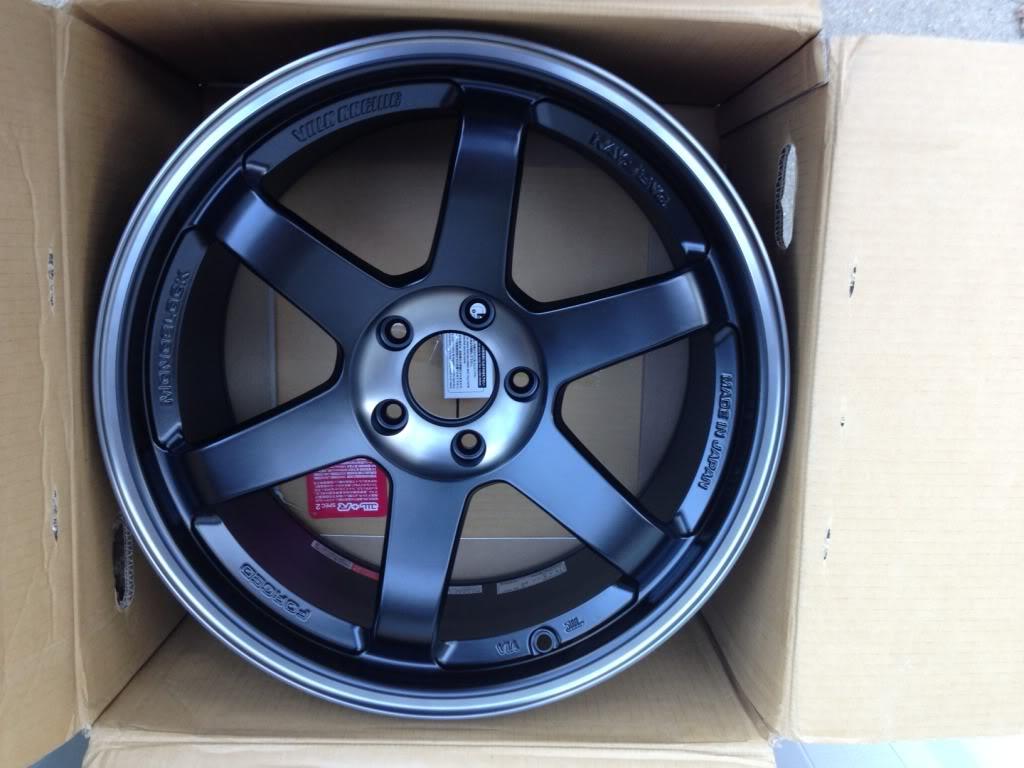

12-4-2012
Thanks! Can't wait to see yours finished!
I had a chance to mount the tires.
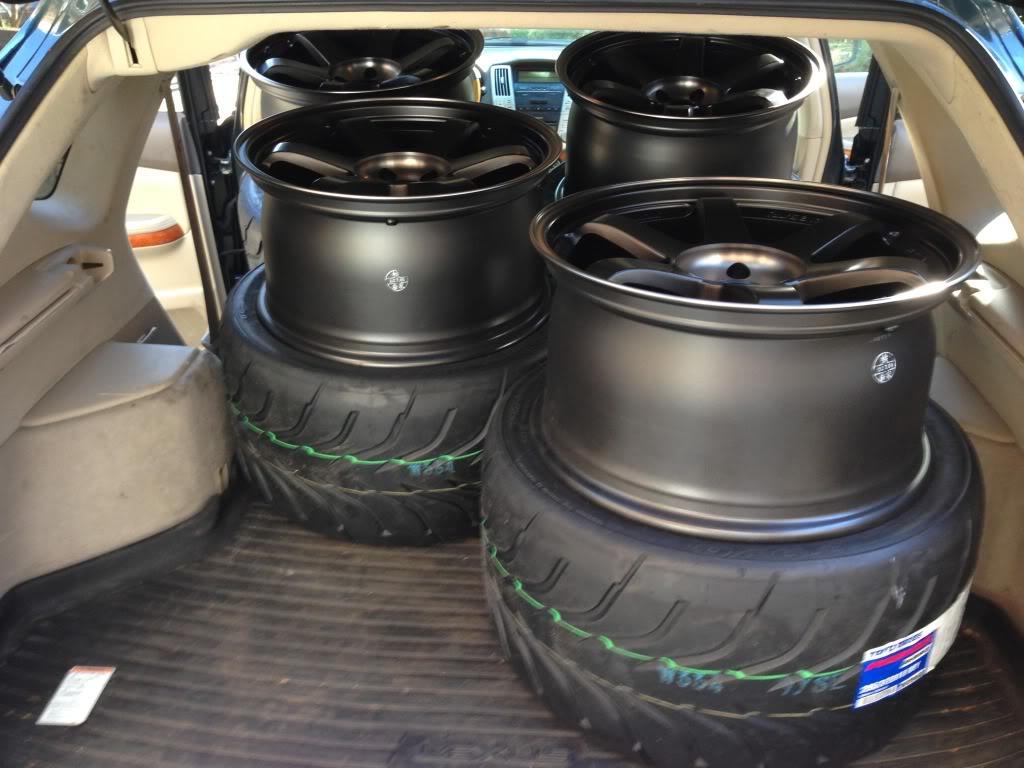
Wheels and tires about to mate ![]()
Mated!
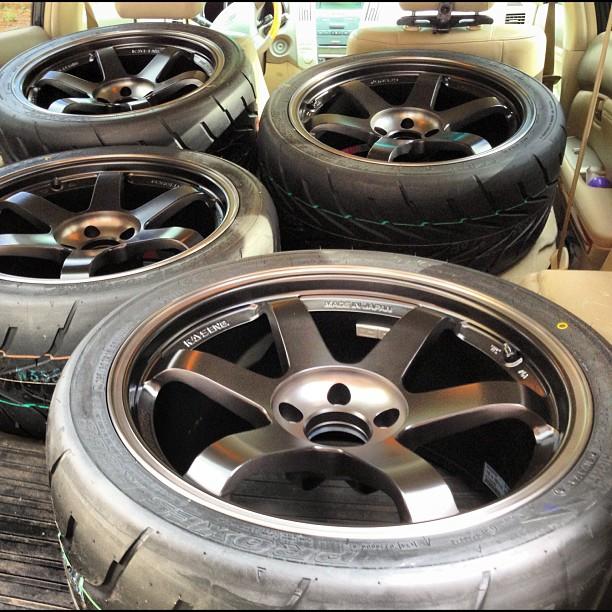
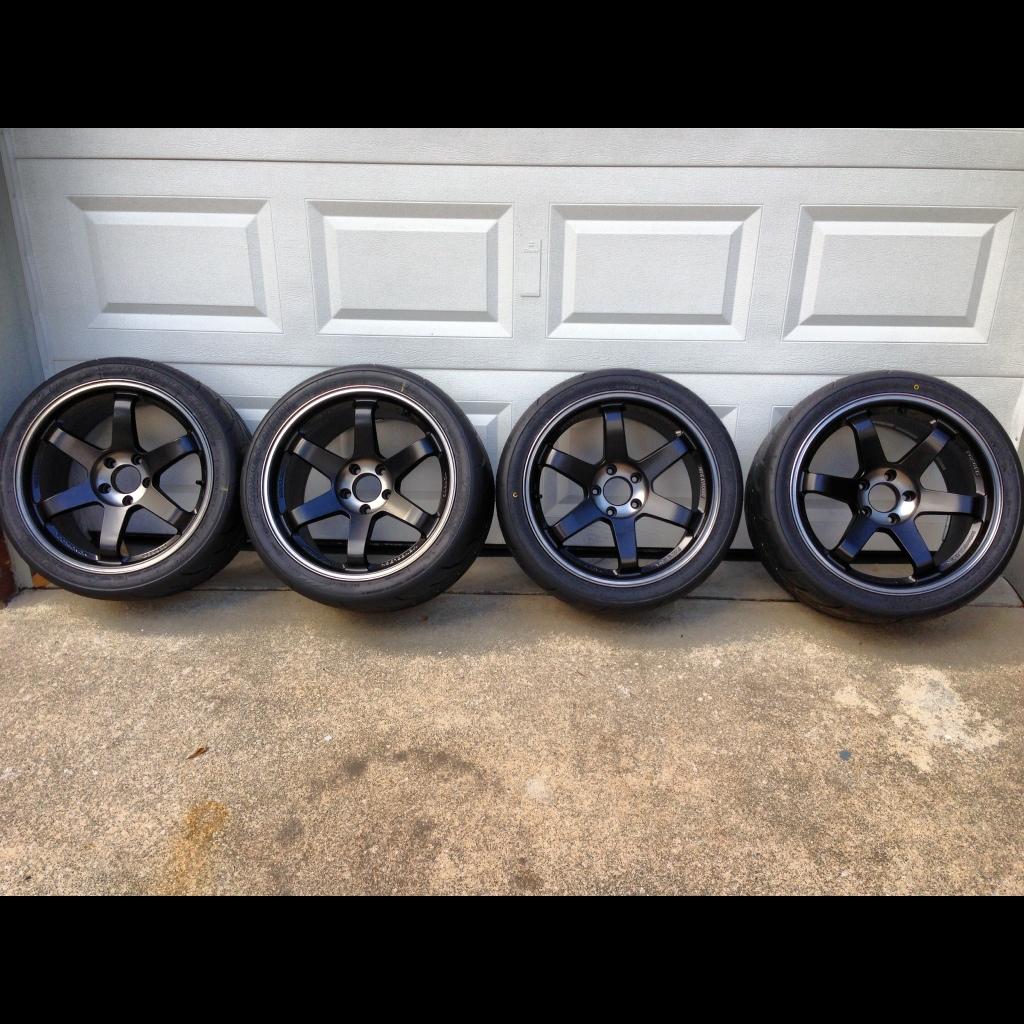
1-14-2013
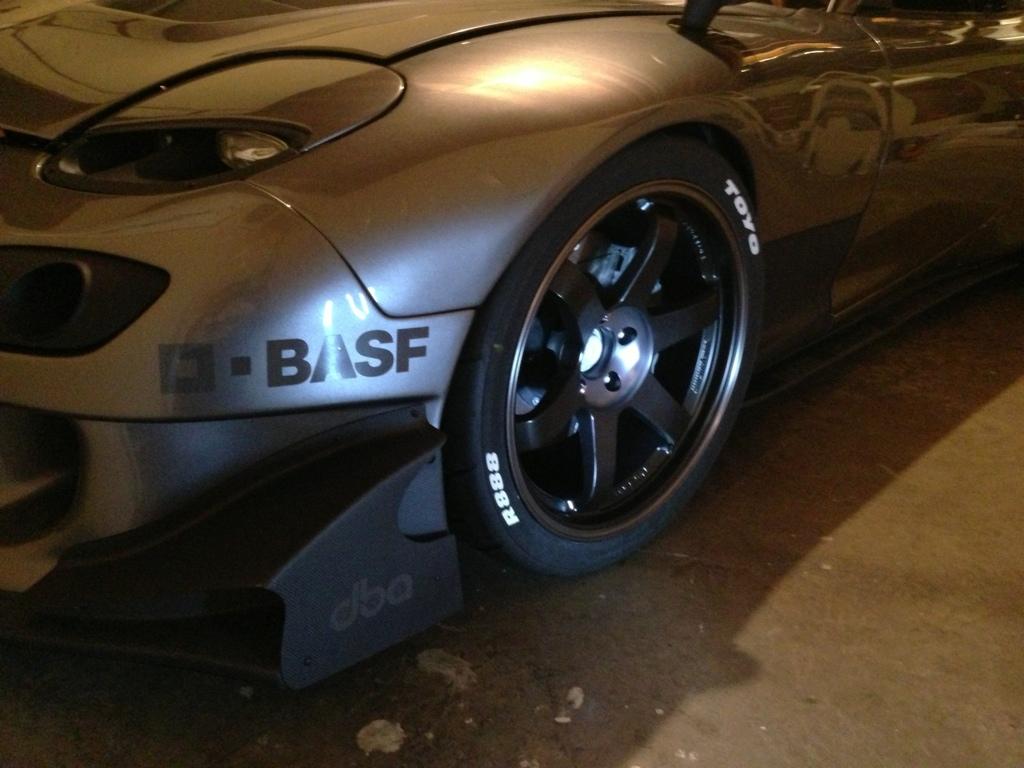
Thanks!
Paint is AMG Imola Grey Metallic, BASF Glasurit.... and painted by world class painter, Jonathan Goolsby @ Goolsby Customs - Custom cars and collision.
I'm bias but its by far one of the best paint job I have seen on an FD or any import ![]()
3-27-2013
few updates..
Defi Cluster mounted..
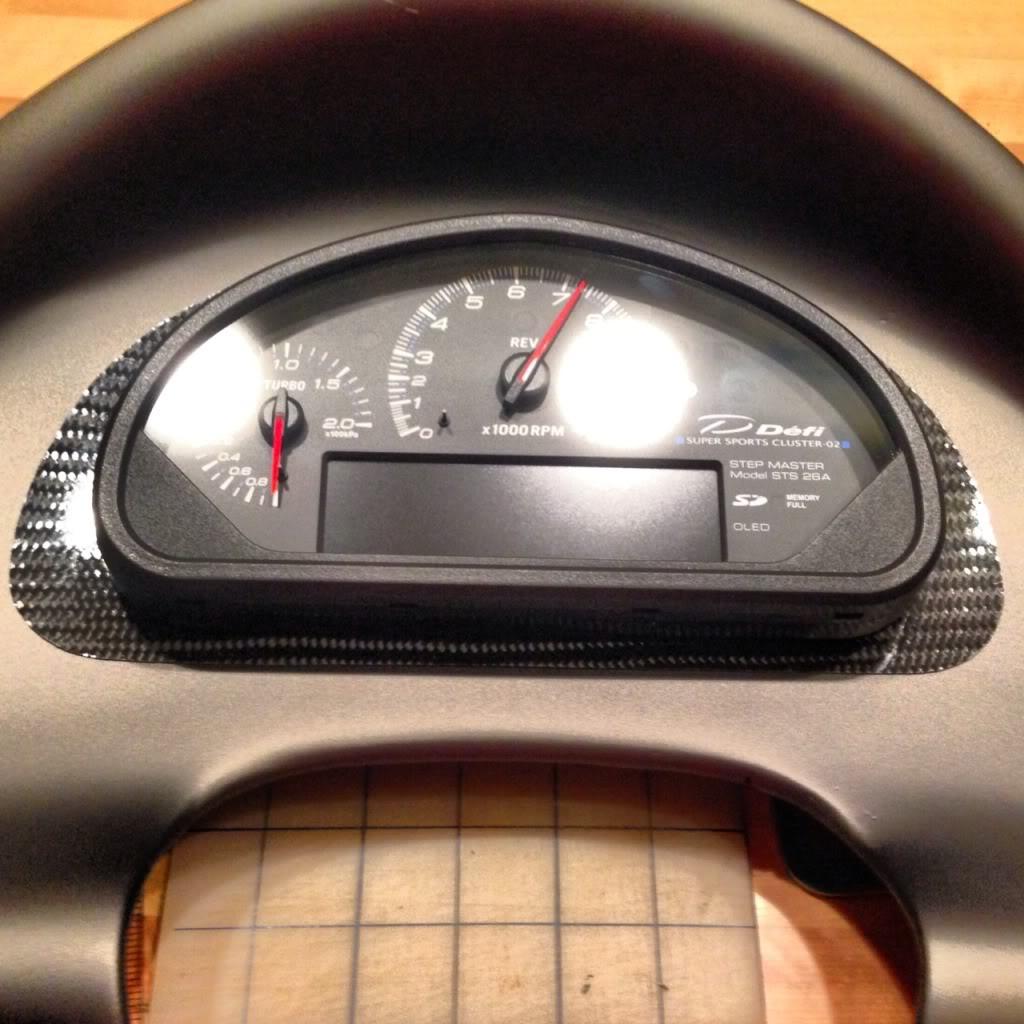
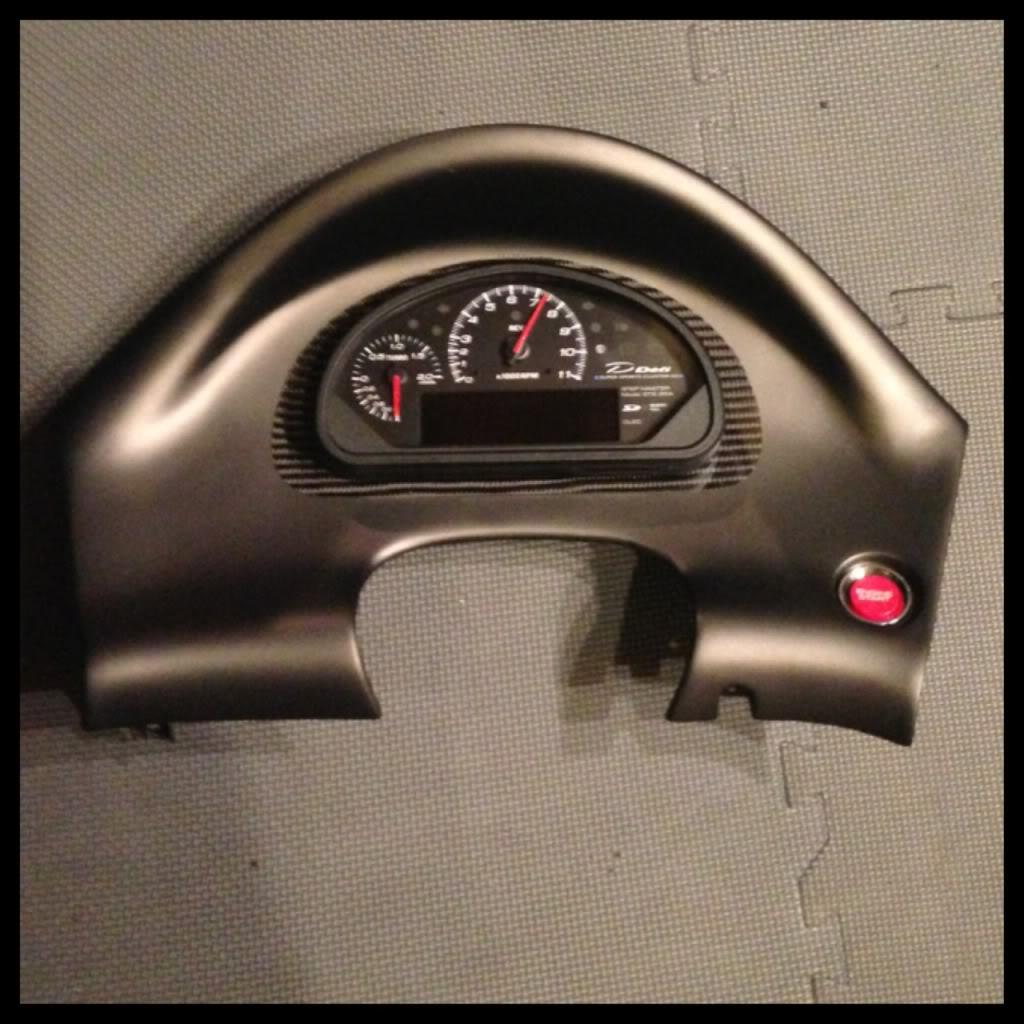
and tested
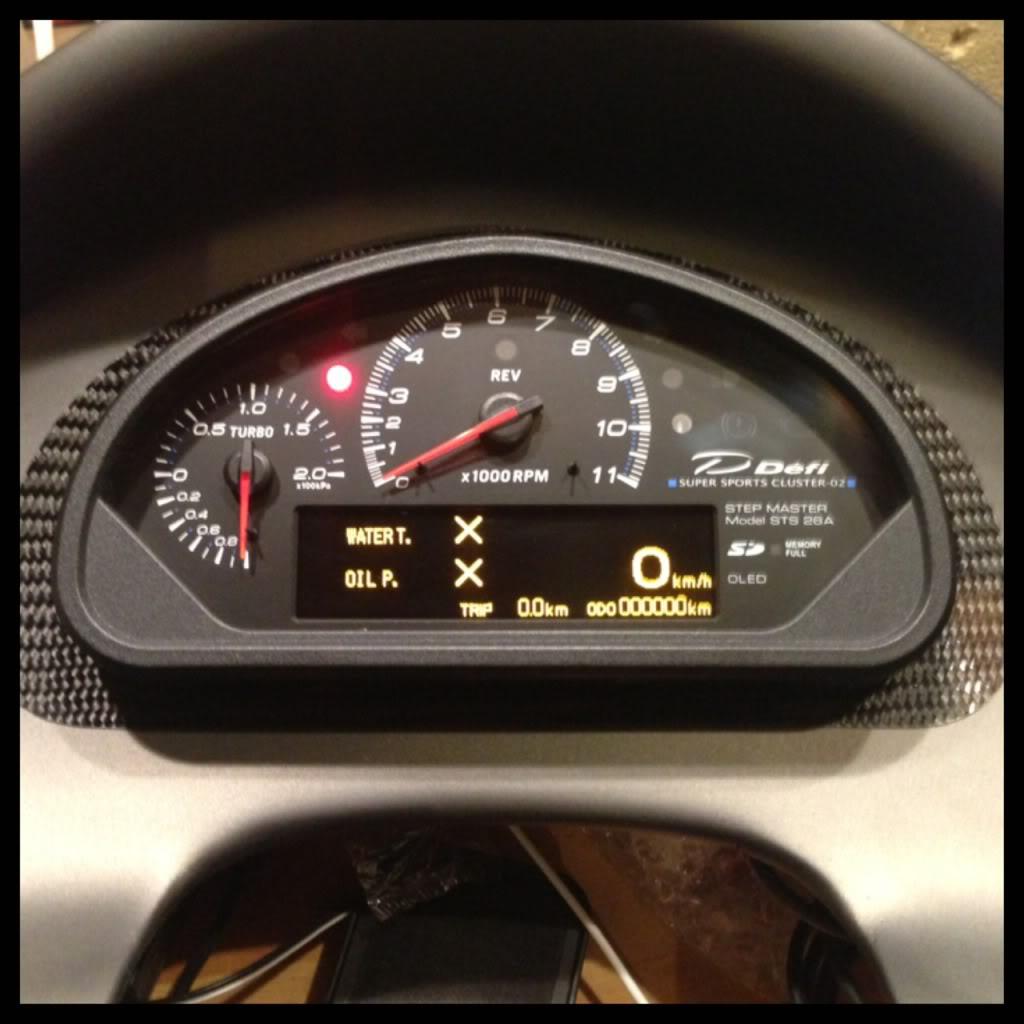
And another photo from sema I found..
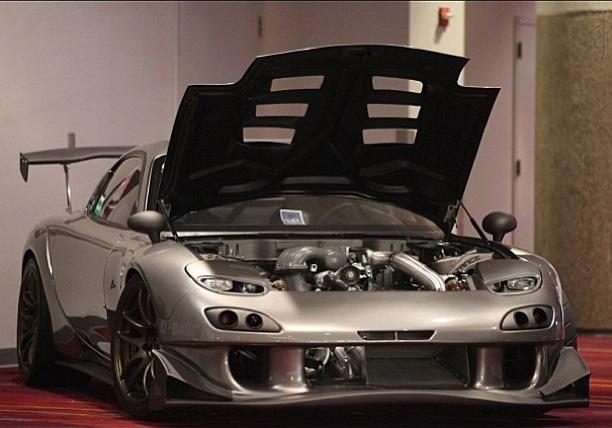
4-25-2013
From DGRR 2013
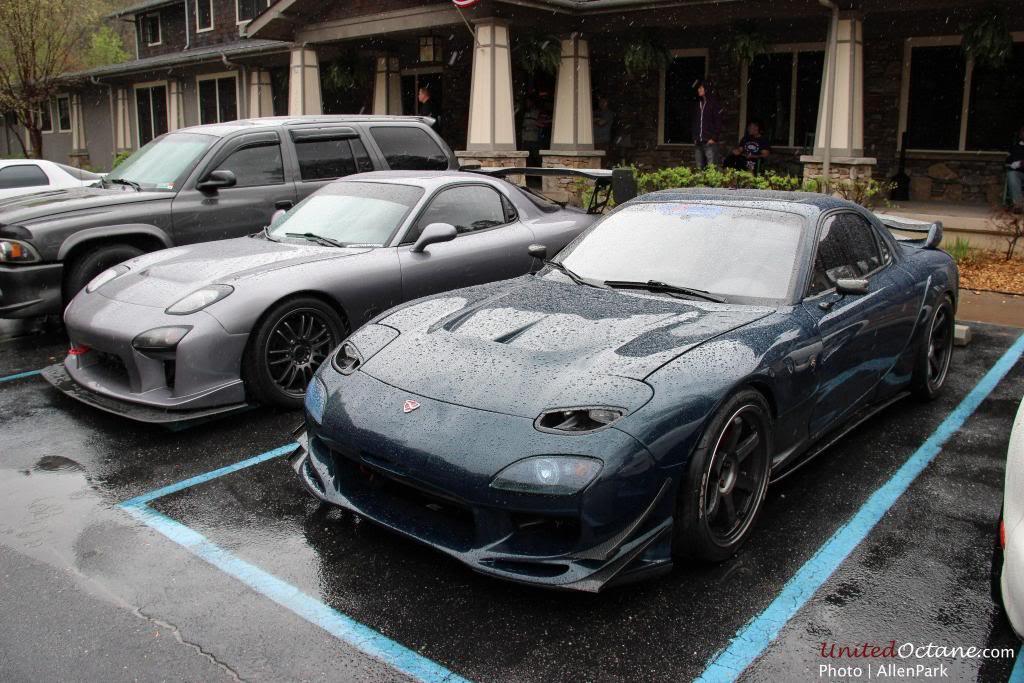
5-26-2013
Thanks for the kind words..
Few more updated photos of the MB..
After Deals Gap Rotary Rally... I went to check out Import Alliance... Few photographers took pics of my MB FD..
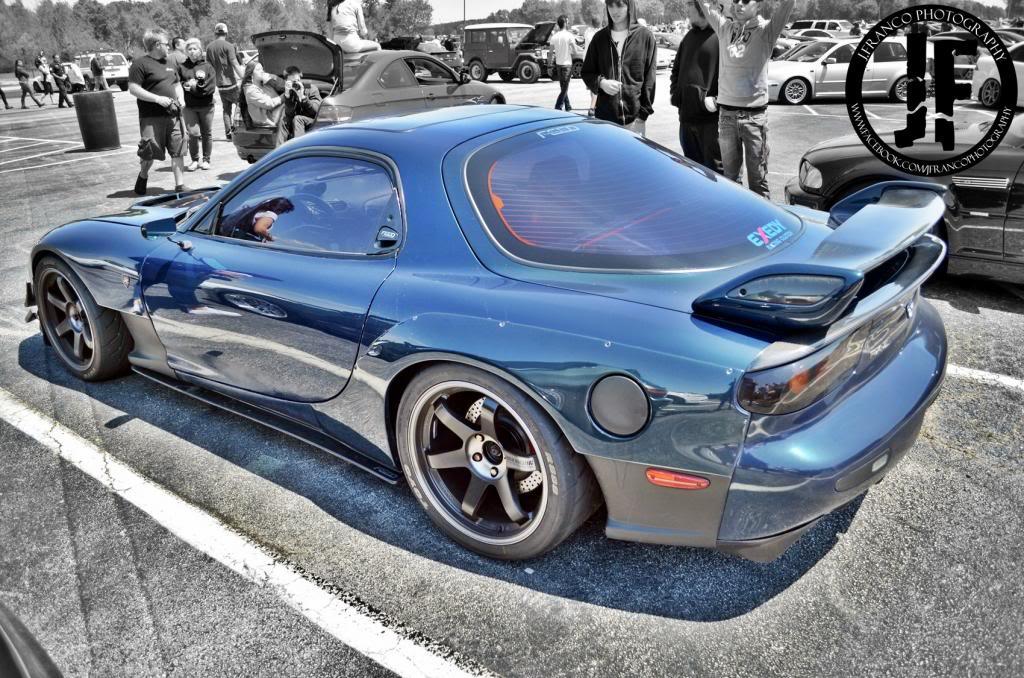
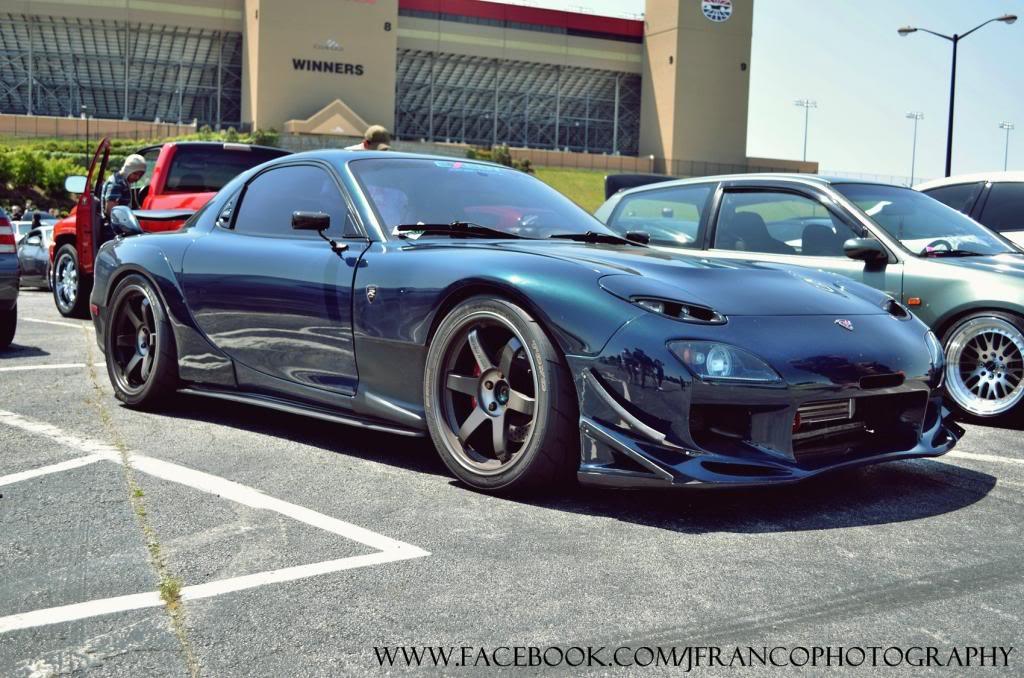
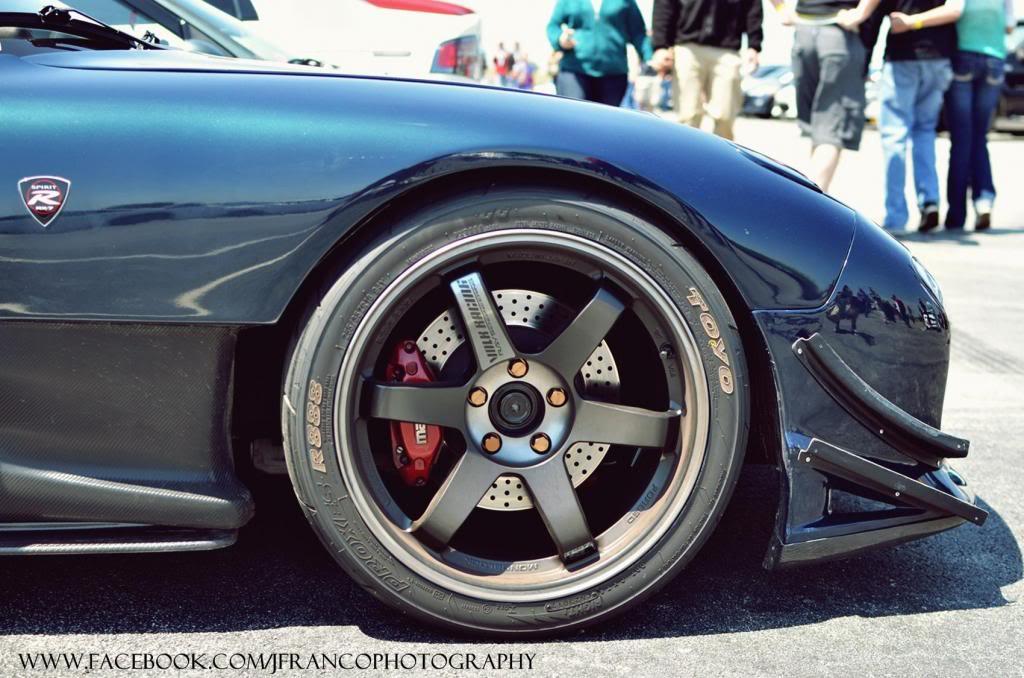
I swapped out the Volk TE37SL Black Editions with R888s to more streetable wheel/tires. Tires are Toyo T1-Sport wrapped around BBS MonoForged wheels also known as GT4 also came on EvoX MR. I am a fan or older Toyo T1S and T1R and was told the new T1-Sports are quiet, grippy, and responsive. Which after driving around today for over an hour through back country roads, highway pulls, sitting on traffic ![]() , I like the T1-Sport.
, I like the T1-Sport.
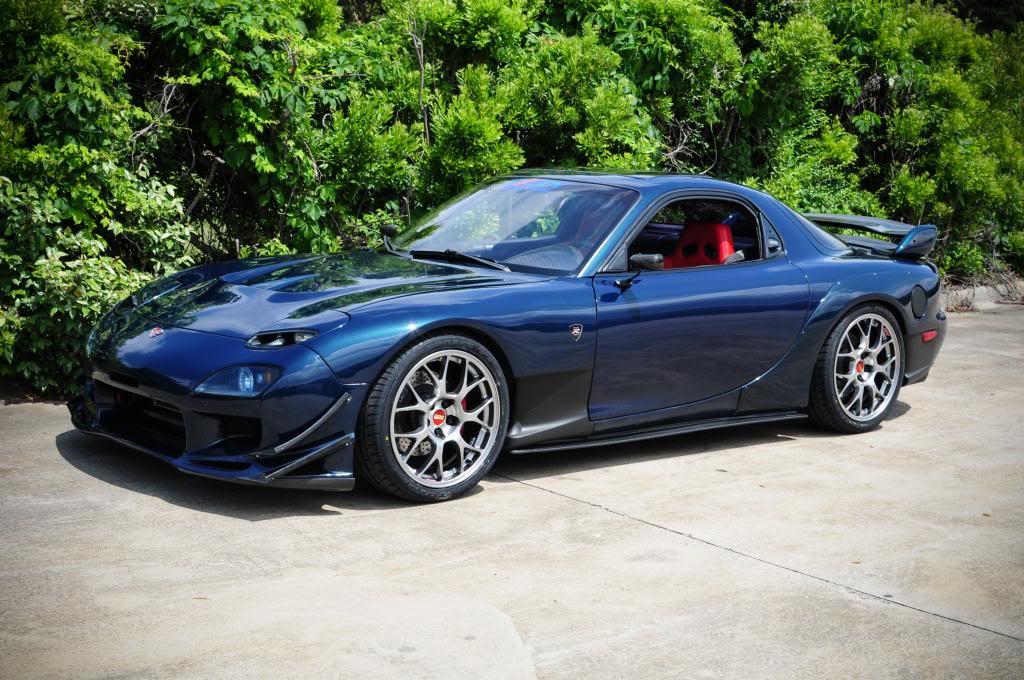
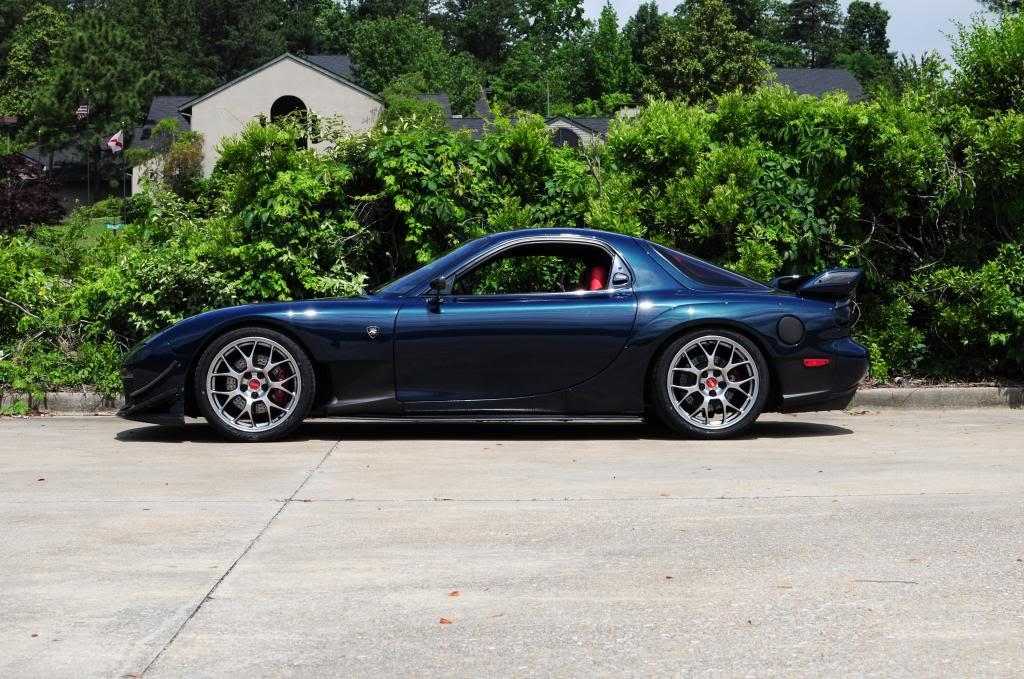
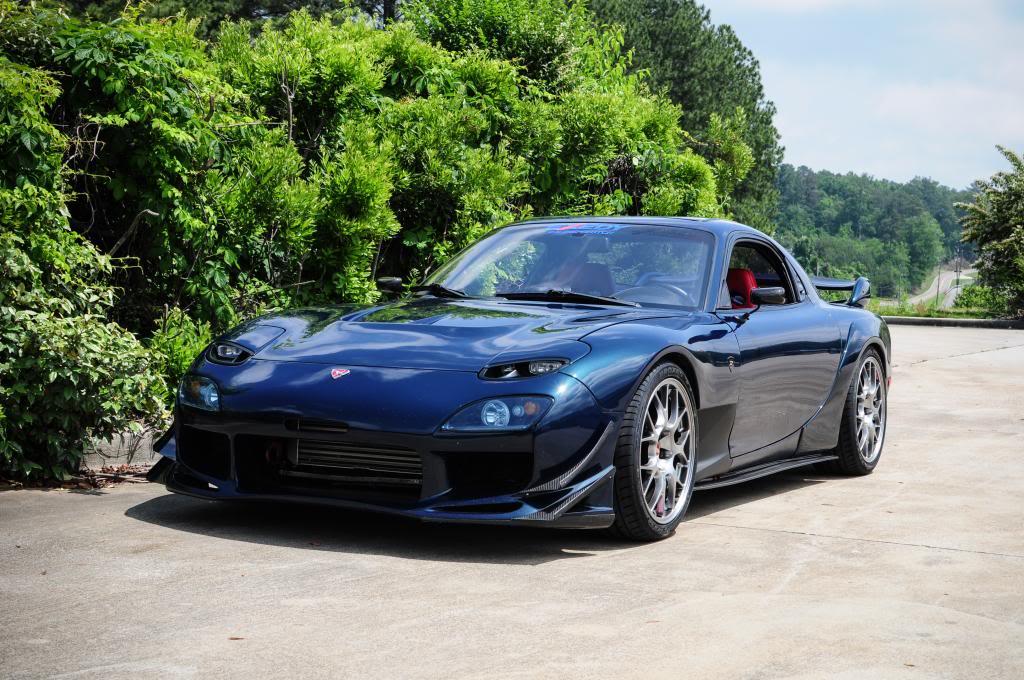
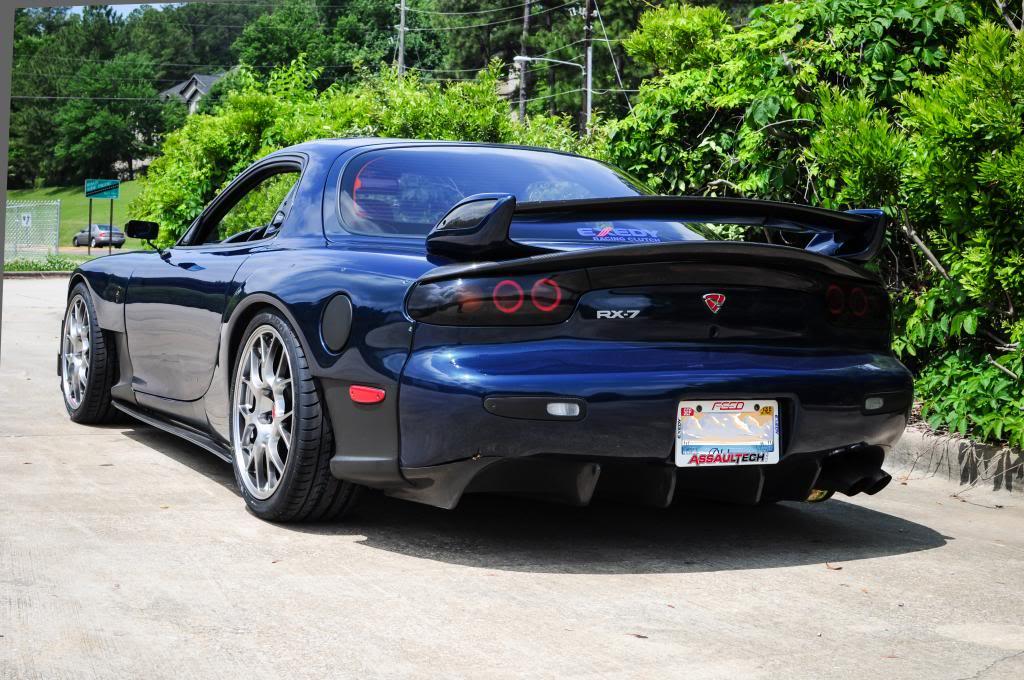
5-28-2013
Thanks!
Updated photo from today..
blacked out Efini emblem and the RE-Amemiya Carbon side mirrors I picked up from Chip.

I've also took the 3M vinyl bottom half of the Feed fenders (to protect the paint) and used Plasti Dip instead... Testing it out as I already F'd up the paint when pulling the 3M vinyl first time around..
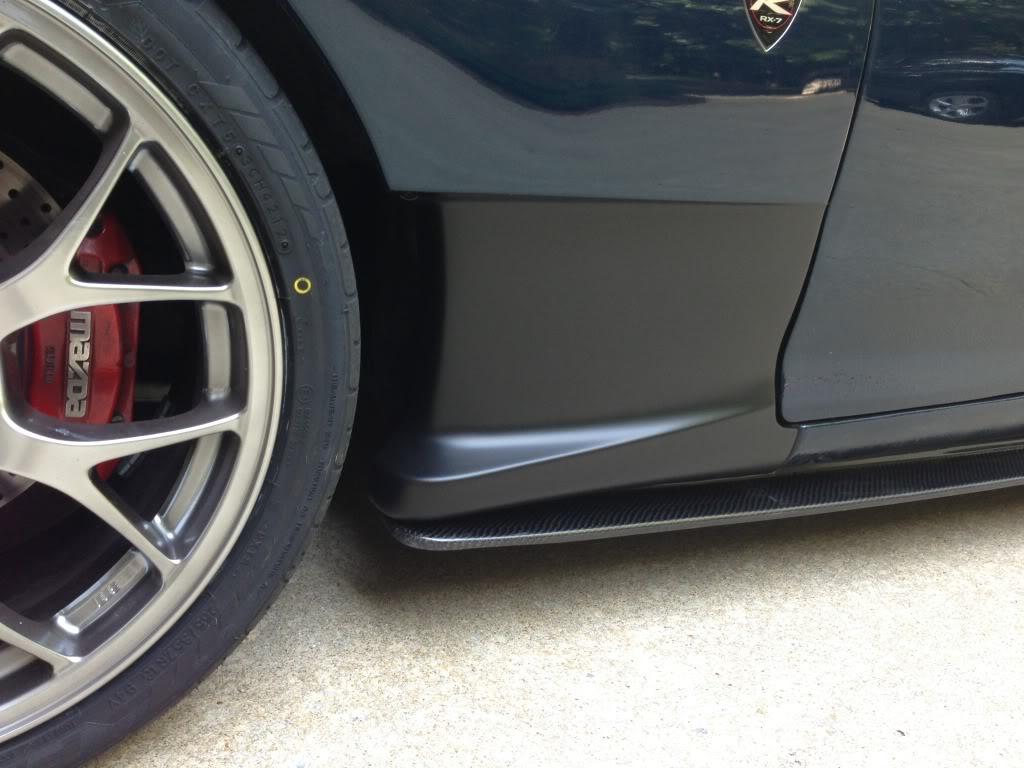
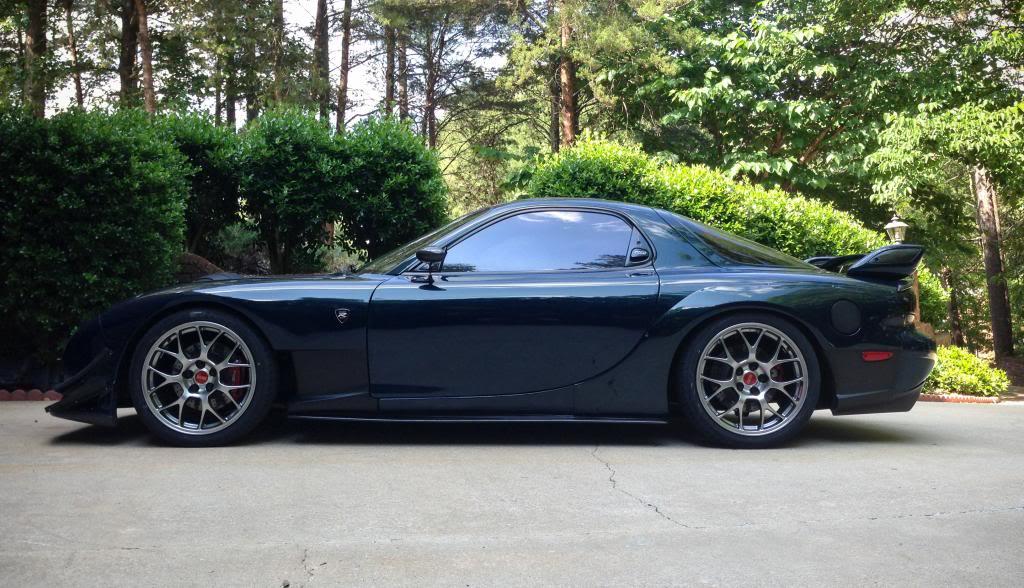
Plasti Dip was bit hard to control to lay it flat but I eventually did a good job on it. I also did the efini emblem with it too. Going to see how long it will last.
Also the RE-Amemiya mirrors are much better than the APR mirrors I had before...
Thanks RE-Amemiya ![]()
I also pulled out the SSM FD as I was re-organizing the garage so I can hopefully get a lift in next couple of months..
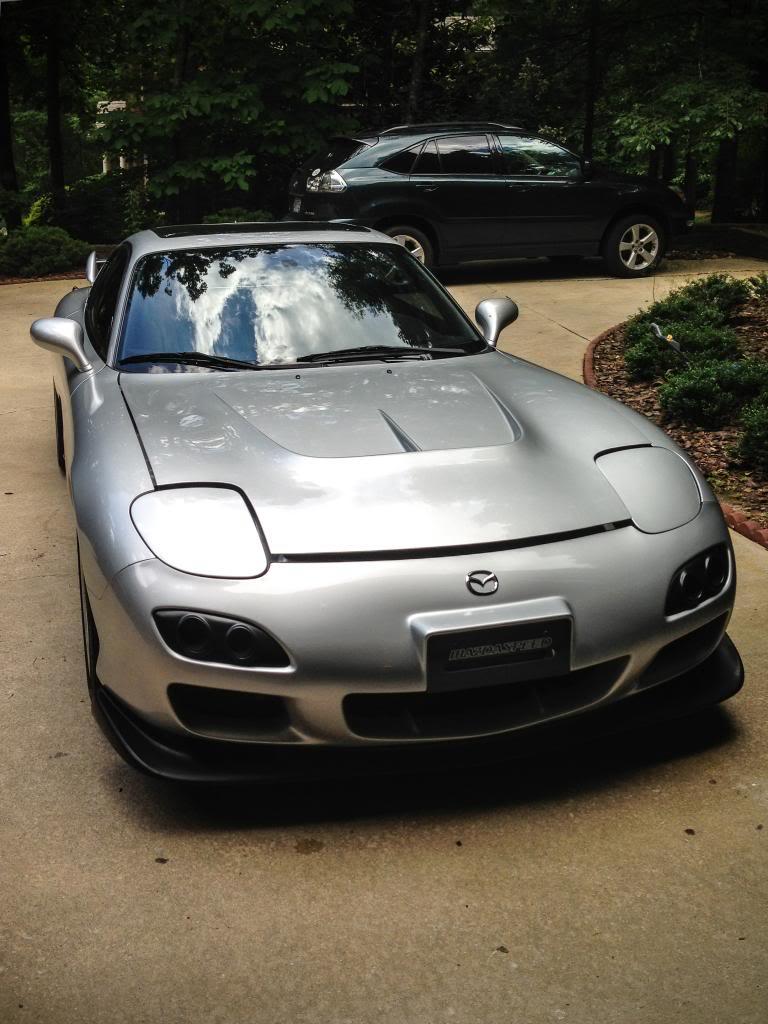
How about these...

I'm trying to come up with something about the covers...
I do agree with you some what.. The G25 is the other wheels I thought of but going to wait and see what else comes out.. On FB, GM of Rays said there will be many Volk Racing products. Volk Racing = Monoforged wheels = Only wheels I would buy ![]()
The other wheels I really like is these from Advan GT... problem.. 19+ size..
Oh, And more I research about wheels, I would not buy 3 piece wheels... Apparently there is no regulation about 3 piece wheels or any wheels sold in USA.. hence so many 3 piece wheel companies popping up in USA.. People should be cautious when buying them... I recently help out a friend when his 3 piece wheel the centers were swapped from front and rear... and when breaking them down, torque on the nuts were way off. Also, when assembling, there were way too much play of the centers. This made me really think about buying them for performance reason.
5-29-2013
Hi David.
well, I'm also a forgeline owner (ZX3). But as I do more and more research, I would still not purchase 3 piece wheels from any company because per value and what you get and what most of us do, its not worth it.
Example, my understanding from what I've read during my research early this year is that most of us have no idea where the 'forged' blocks comes from. I don't think forgelines or any company that says forged blocks are from Alcoa or from other places. Second, unlike BBS, Advan, Rays, mono forged, other wheel companies do not mold form. What they do is they get a general shape and machines out the rest. I know for fact, forgeline, HRE, etc, monoforge wheels are 70-80+% machined out from a block. If you look at the BBS and Rays process, they go through 2-3 mold forming process where near end, general shape of the wheel is made and little machining is done... Just as you are stating about gain structure, this type of mold forming by Rays and BBS is what makes that gain structure.
Also, its final fit and finish. Rays finish is also unique and the process is what you also pay for. Most companies in USA don't have any regulations follow and no post production spec. Volk wheels are on other hand each wheels go through precise inspection.
However, benefit of going with high end 3 piece wheel company such as forgeline is their detail to assembly, exact spec you want when 1 piece wheel isn't available, and changing wheel width later or damaging 1 piece of the wheel you can fix at a value. But as you and I know, that comes with great cost. Their wheels are min. $1000 a piece. And they need to be sent in to change out barrels, which costs 2 way shipping, labor to swap, and $400/barrel. Not cheap and at that cost, RAYS wheels are a bargain for what you truly get.True Monoforging, great finish (FYI: Never buy non Rays finish), super light and post inspection for true roundness. Not sure if you had similar issues but when I was getting my forgelines dynamically balanced, it took on quite a bit of weights to get it done right. I noticed quite a bit with many 3 piece wheels.
If I were to buy a 3 piece wheels because I need an exact spec, leading in machining, design, etc... I would pick Forgeline. All other companies in USA that makes 3 piece wheels are just a followers of Forgeline. However, as I stated about monoforged wheels, I would definitely go with BBS, RAYS, or now Advan as I believe they are best in doing forging..
And final FYI: BBS mono forging is done in Japan.. BBS F1 wheels are also made in Japan by BBS Japan aka Washi Beam. Rays - Volk Racing wheels are ALL mono-forged wheels. Washi Beam and Rays are only ones also do Magnesium mold forged/mono forged wheels. Thought I share that.
Here are some information from RAYS..
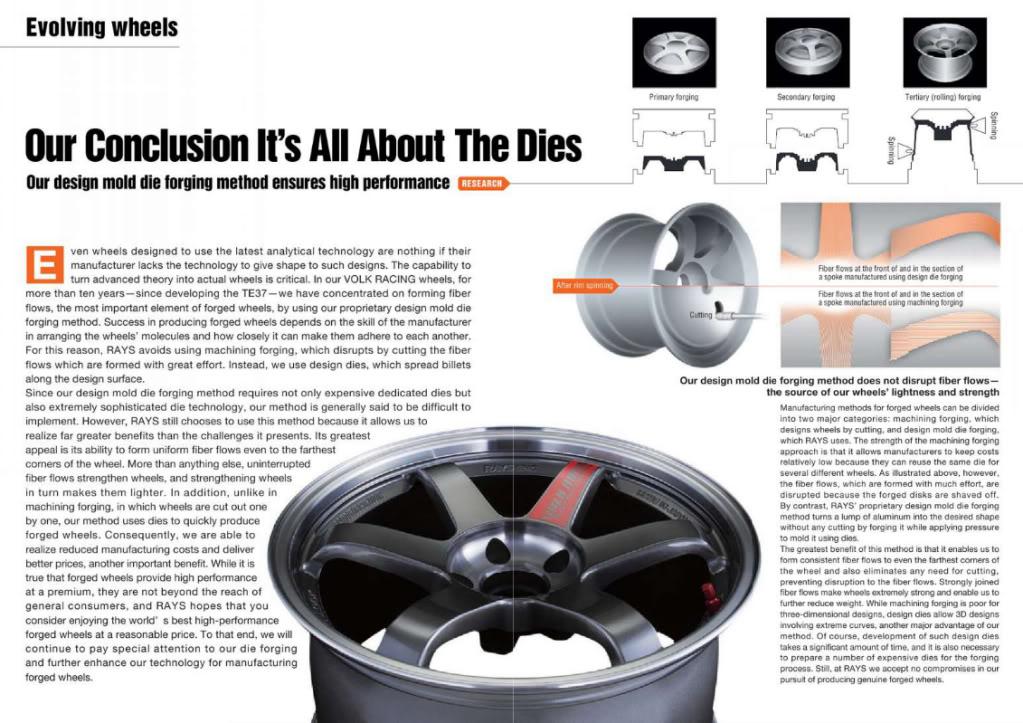
From BBS about structural change formed from mold forging..
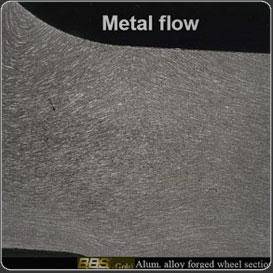
5-30-2013
Thank you for subscribing!! I'm going to be more active here and share some product reviews and answer questions.
Regarding wheels. Here is a pic of HRE calls their mono forged wheel.
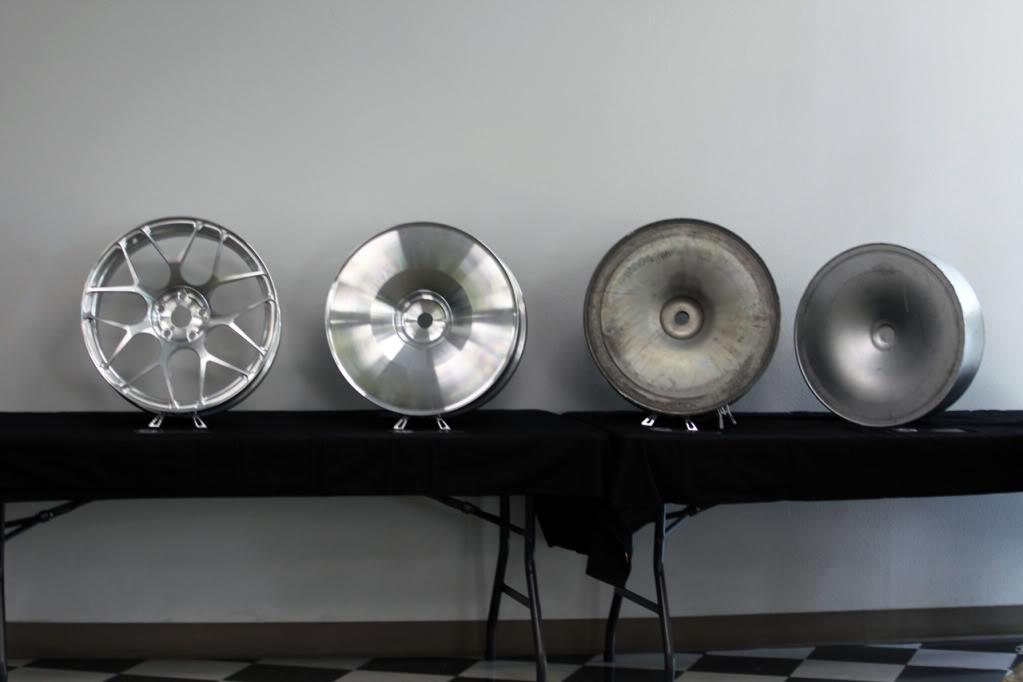
As you can see it starts off as a general shaped forged block and no specific designed die pressed forged block like how RAYS, BBS, or now Advans do with dies.
Yeah. It's not complicated to change out the barrels. But what I've noticed from another multi piece wheel I recently help swap centers, the holes on the centers were bigger and gave some play. That's when I realized what if its not centered perfectly.
WOrk wheels don't care if you do it or not. But who knows what they would do after I say this. Forgeline however will not sell you barrels unless they assemble your wheels. This is liability purpose and I could understand that as a company. They also want to make sure trained personnel did the work. Which again going back to my friends three piece where the centers are swapped and different torque on the bolts. Yikes!! Another problem is you just can't tell if these small shops do any testing on their design and just o make them pretty. I don't want to be the test dummy.
6-6-2013
meh. Photography took these photos at a local C&C
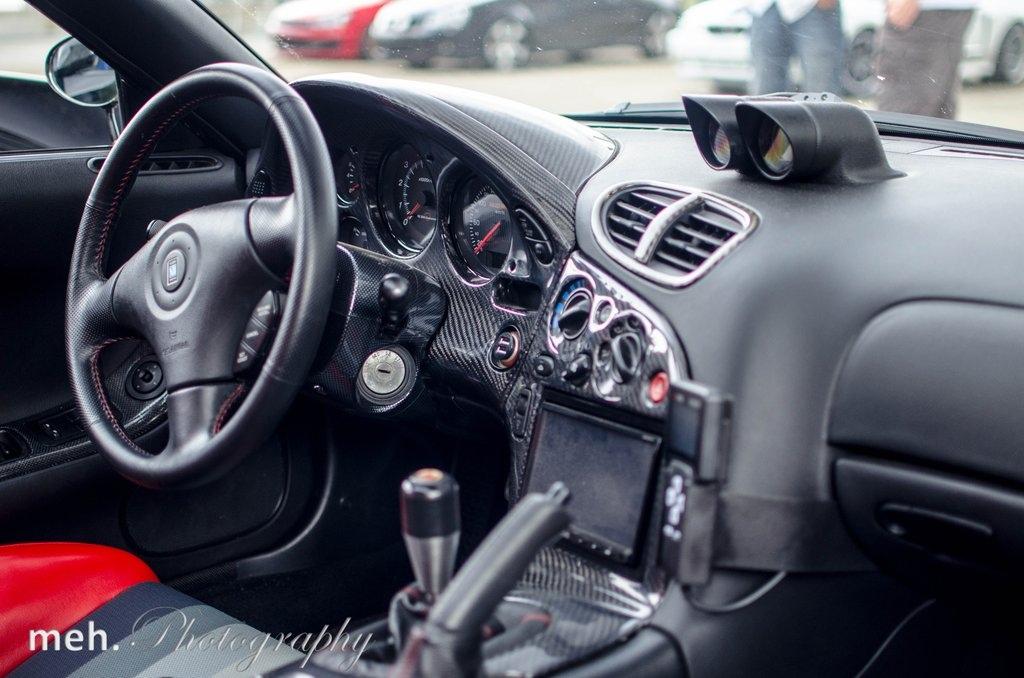
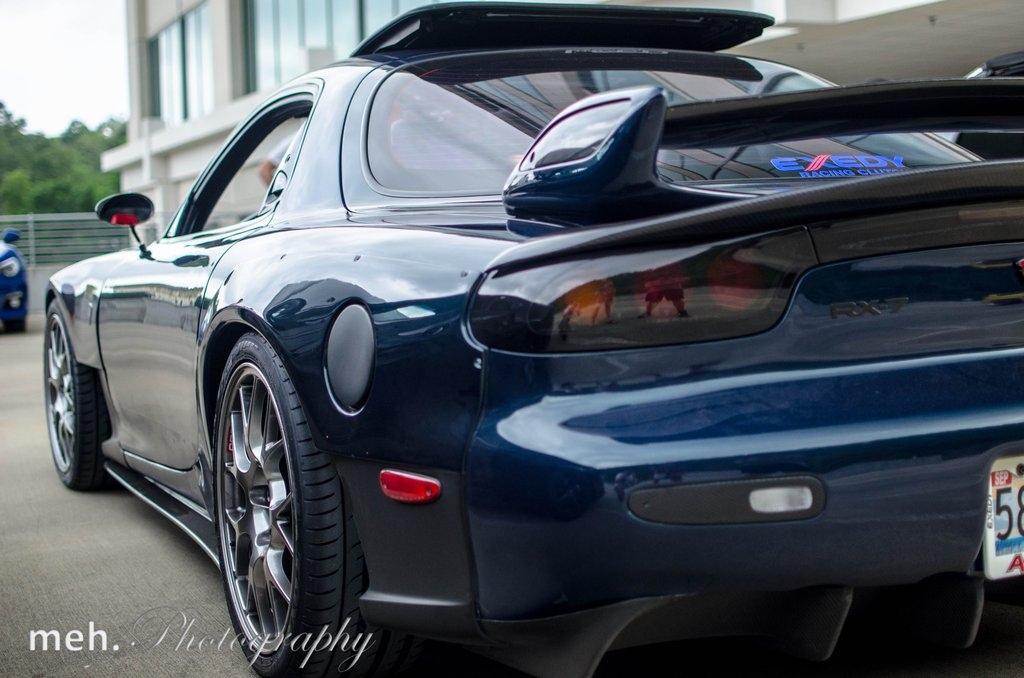
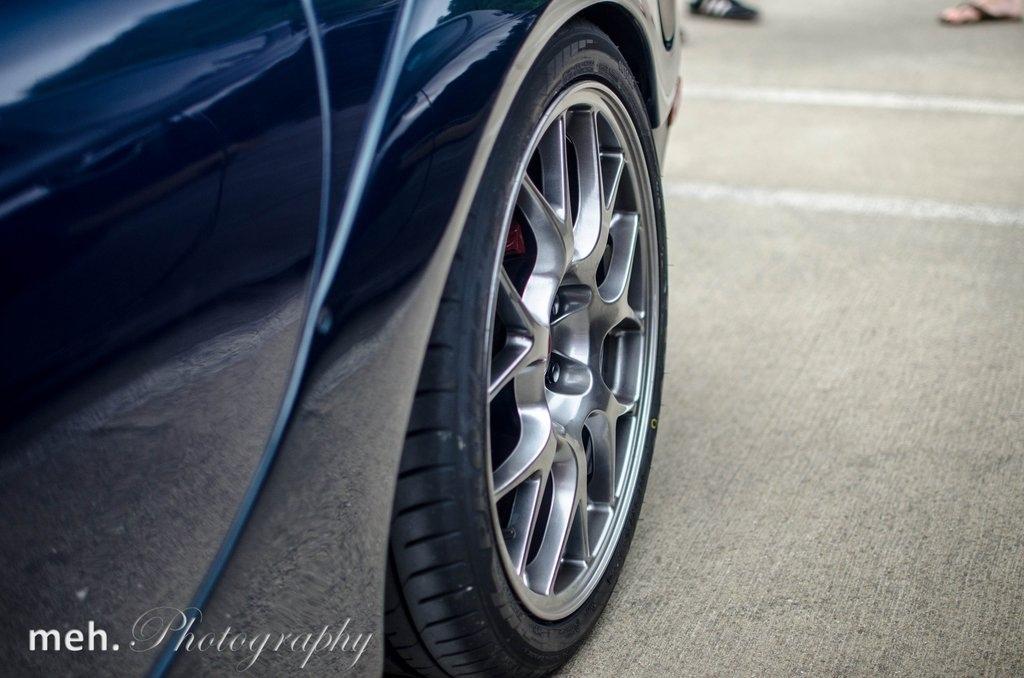
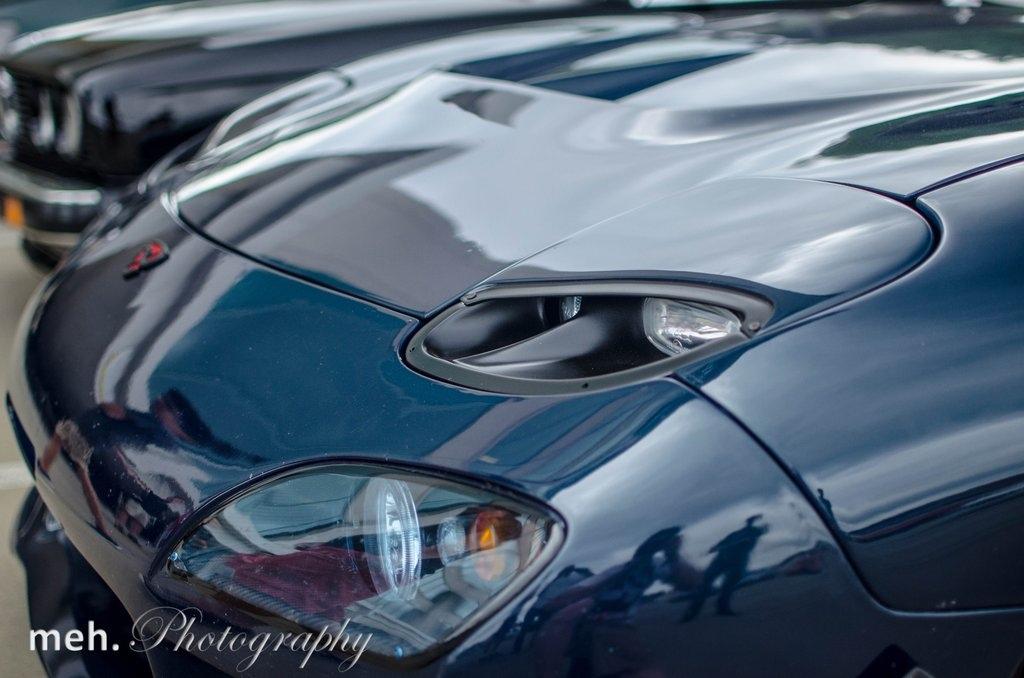
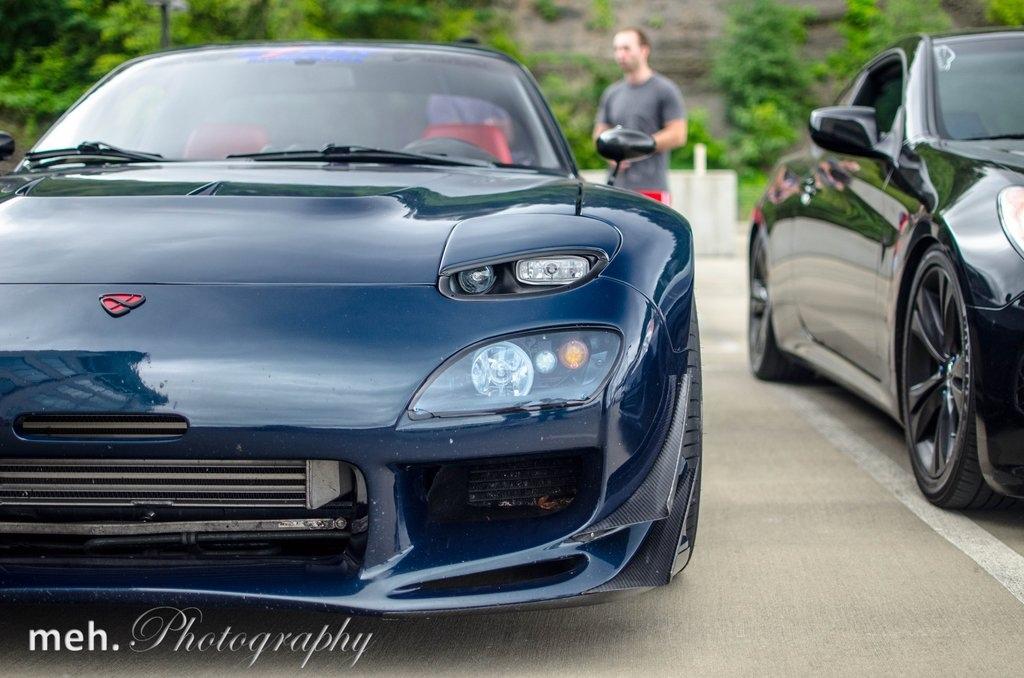
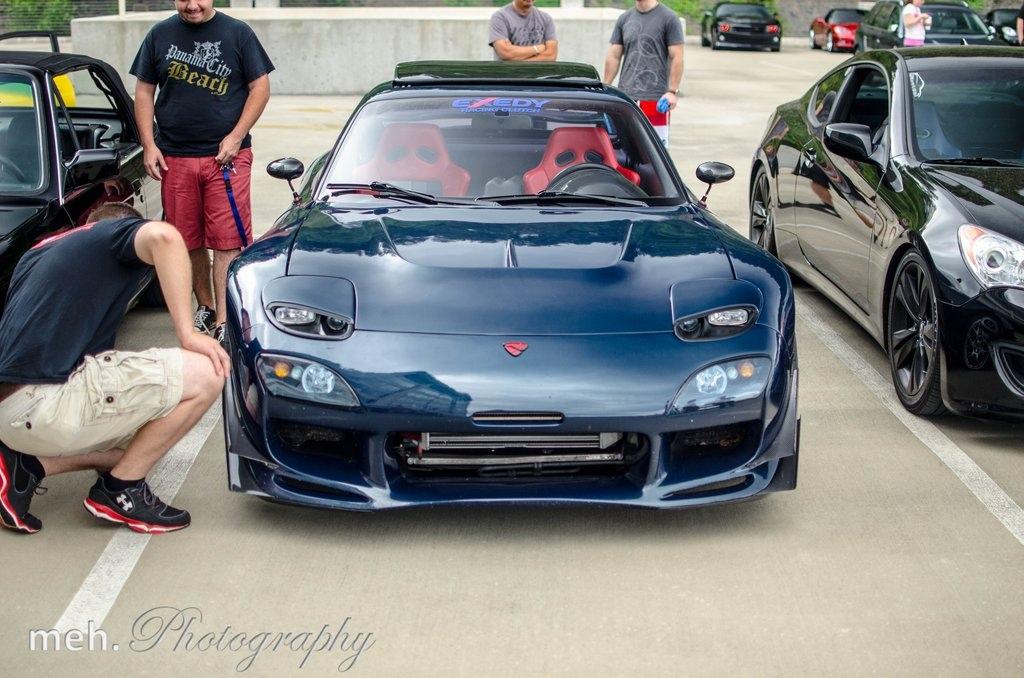
6-9-2013
Just saw this and thought I share.
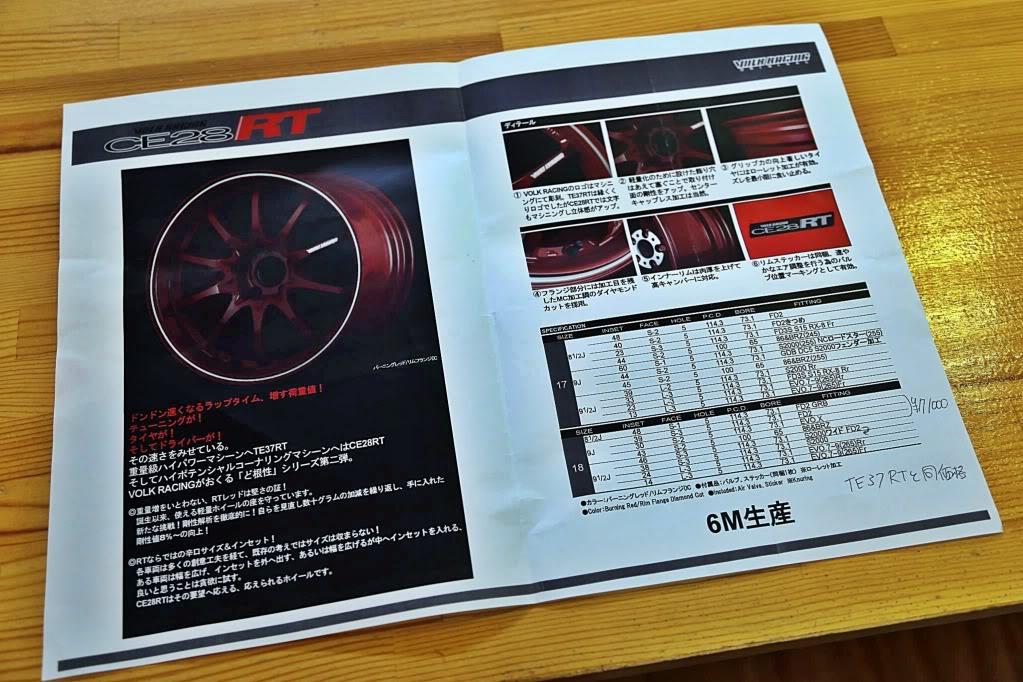
9-17-2013
Here is an update..
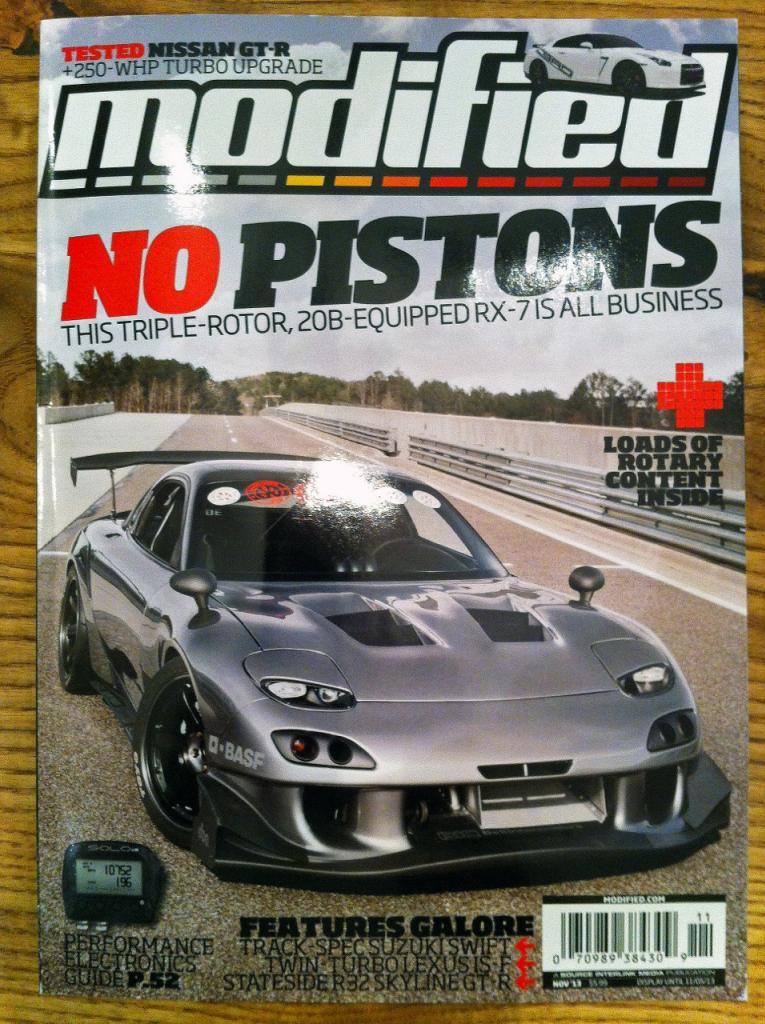
Thank you!
Modified Just uploaded a better cover photo.. I still haven't seen the magazine yet ![]()
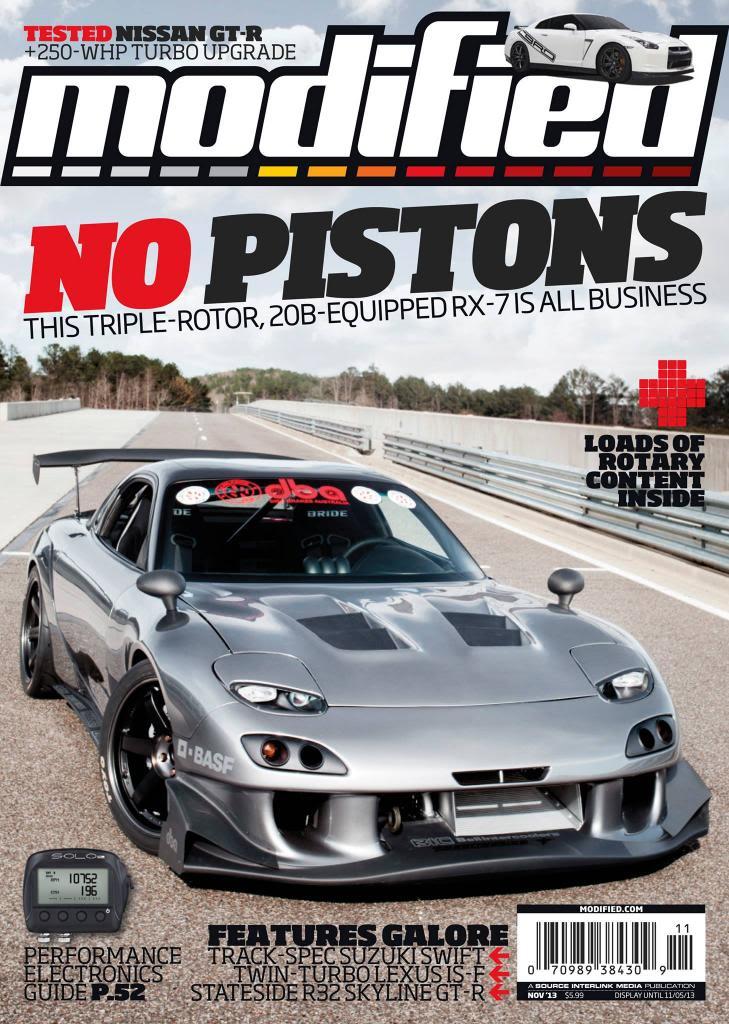
9-18-2013
Latest photo of the MB... I mean flat black..
Loving the SakeBomb's AP Racing brakes and these T1-Sport Toyo Tires are pretty awesome!
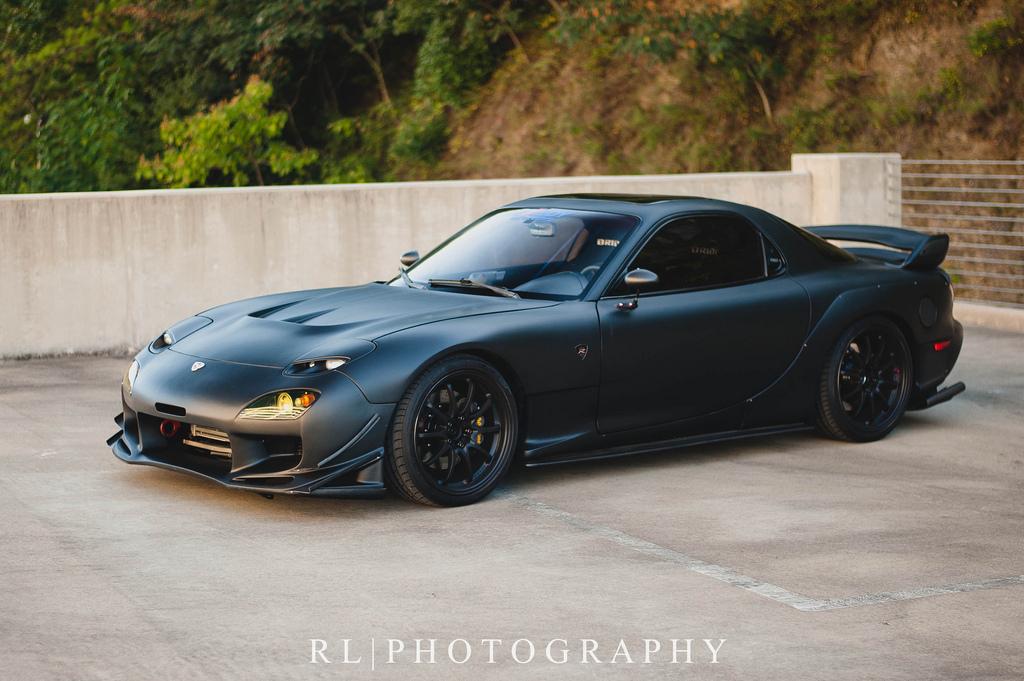
9-28-2013
Sure!
To show the great glory of Rich's feature, here are the photos from the Modified Magazine..
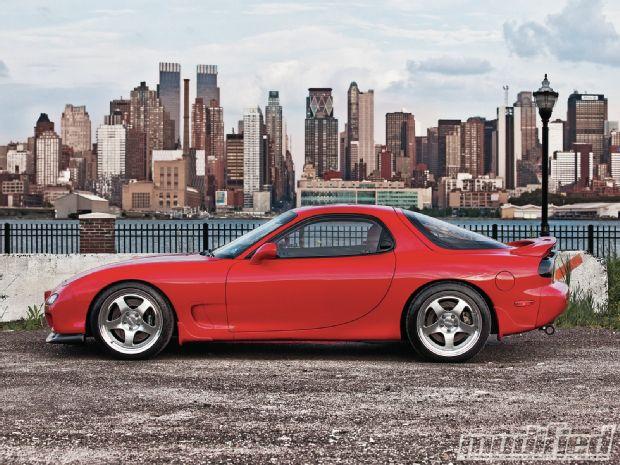
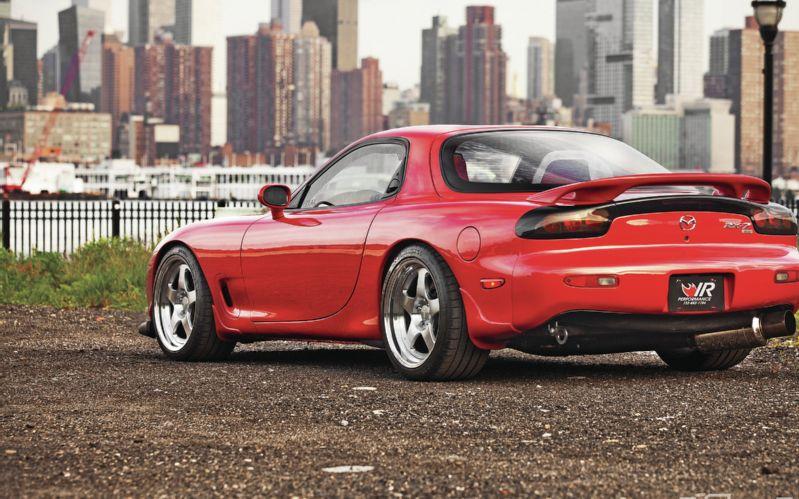
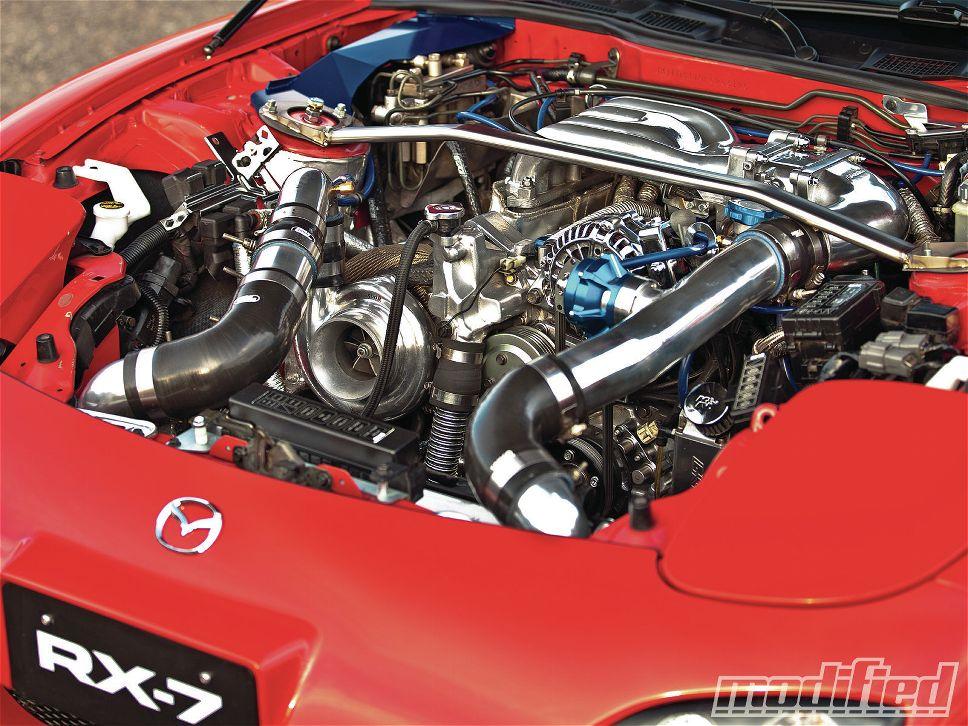
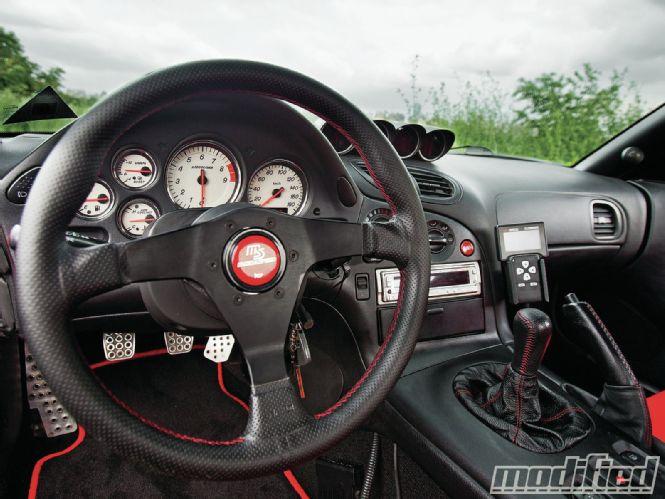
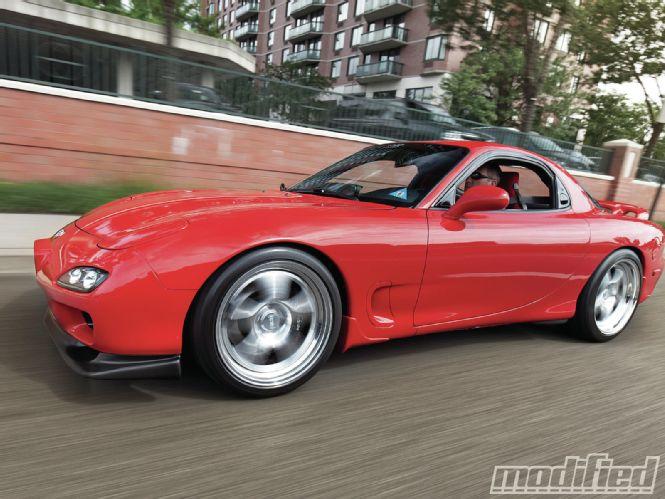
More Photos of Rich's Car that "G" thinks it was rigged and doesn't think it deserves it..
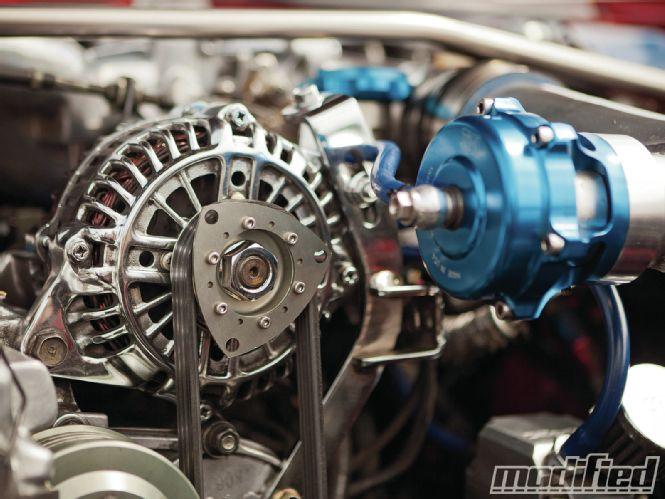

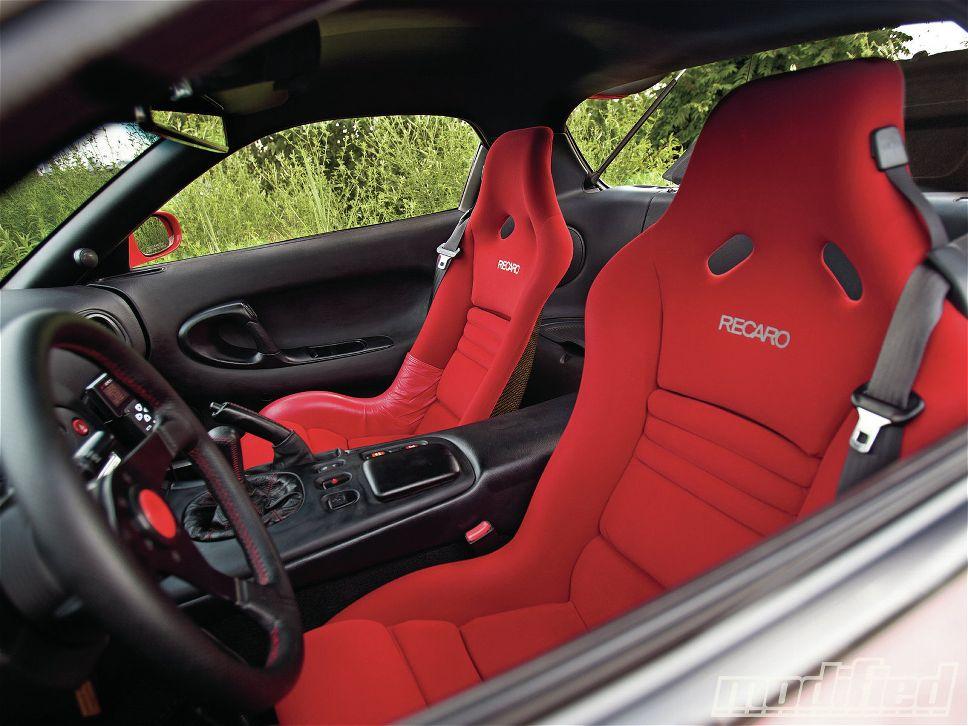
Those Spirit R seats were in MUCH better condition than mine. Only those understand why having a mint Spirit R seats are so much harder than to just recovering them. Just look at all the new Mazda parts he put on this car.. Attention to detail was superb!!!
10-28-2013
Back on Topic..
This came online today on Modified Magazine website...
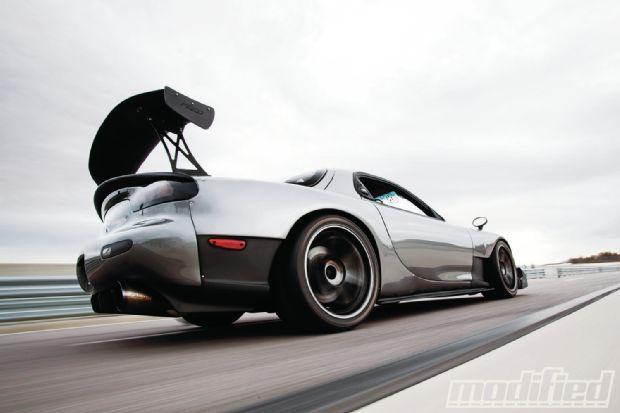
1993 Mazda RX-7 - Built In Bama - Modified Magazine
Many many people to thank on this project but only people I should really thank are the people at Modified for the kind words, their love for rotaries and continuing to feature them, and also rotary related events. Thanks Modified Magazine!!!!! So, go subscribe their mags!
10-29-2013
Couple of photos from past Sunday at Import Alliance gathering...
Showing off my new color (plasti dip) on what used to be my 2 rotor Montego Blue FD.
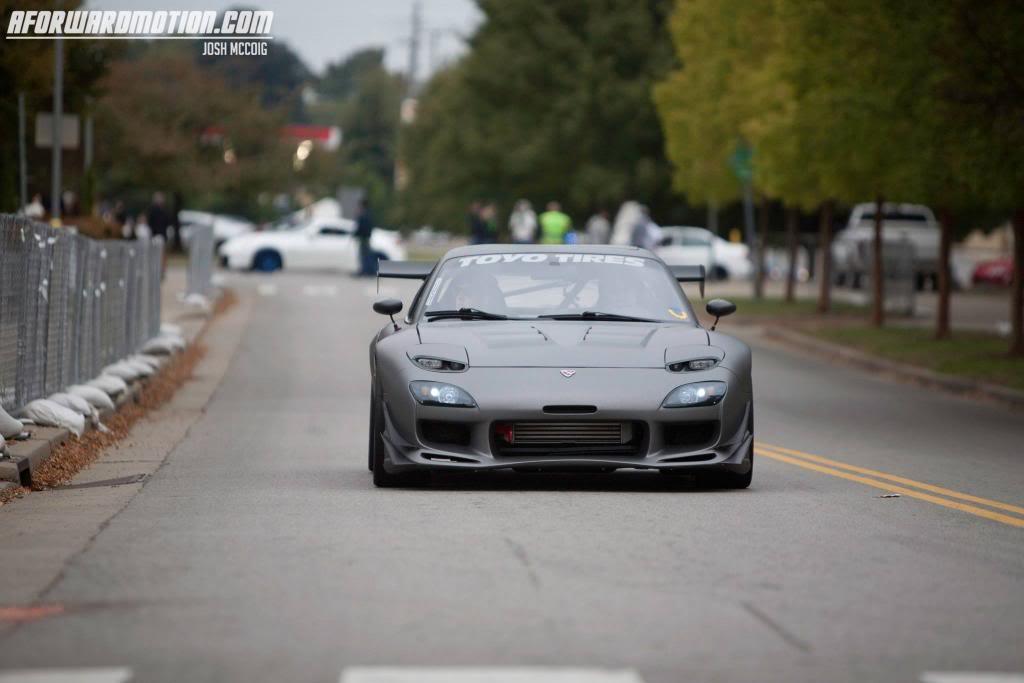
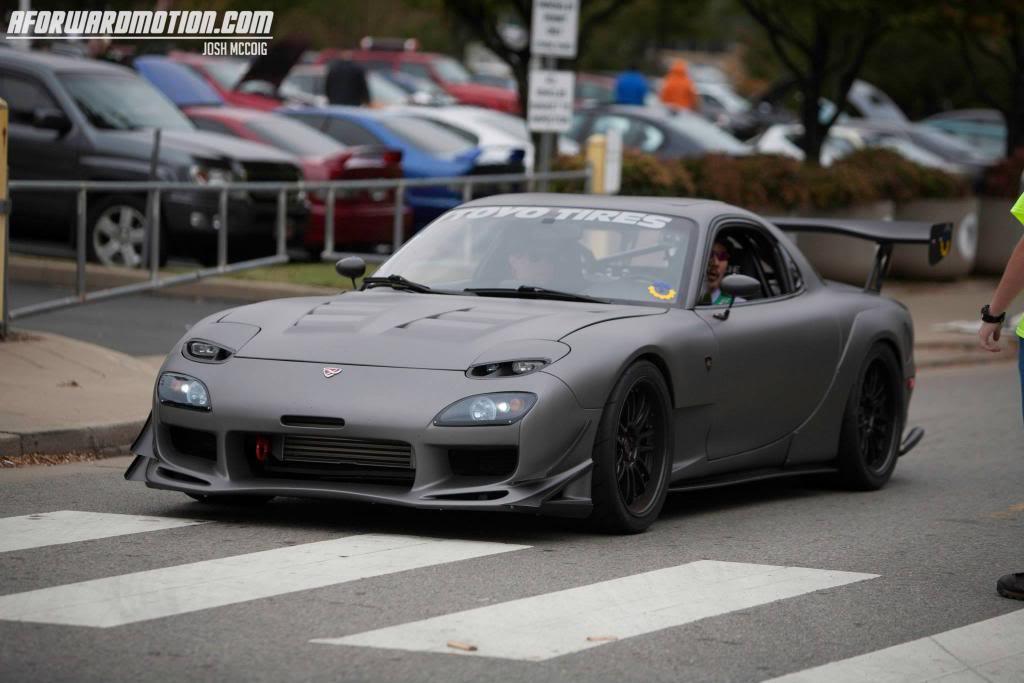
11-14-2013
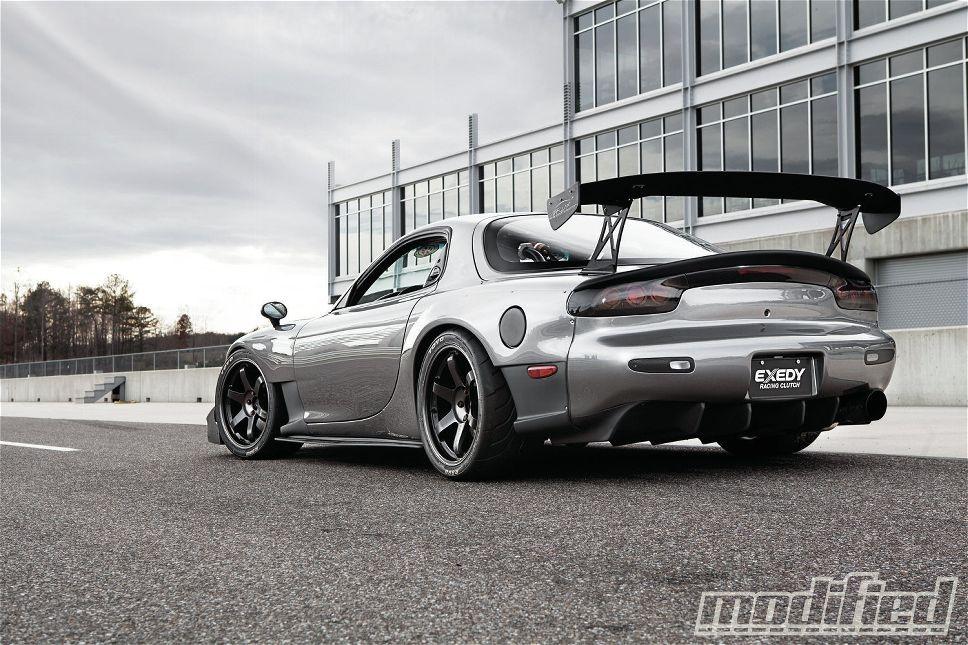
1-2-2014
Update... Long over due..
To Start, my cover feature came out on Modified Mag.. Nov 2013 issue. Which is now online: 1993 Mazda RX-7 - Built In Bama - Modified Magazine
Some photos from the shoot.
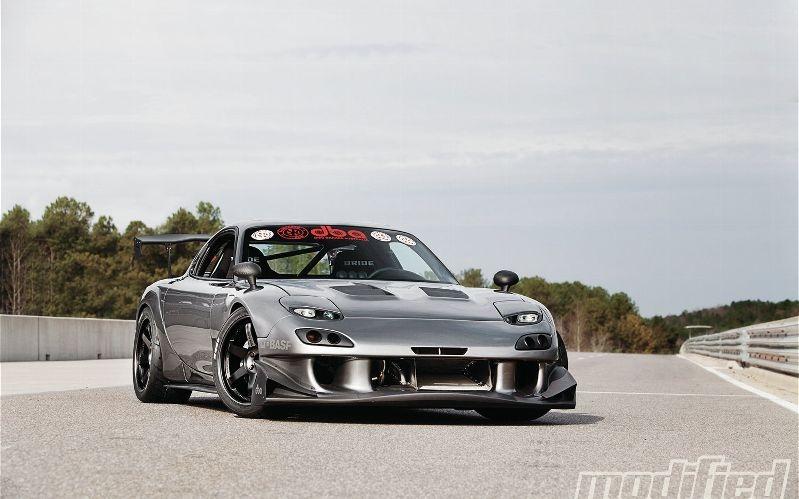
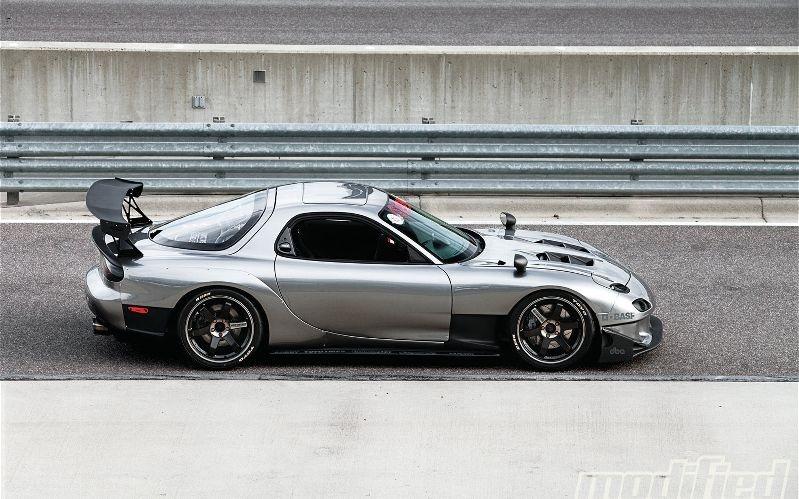
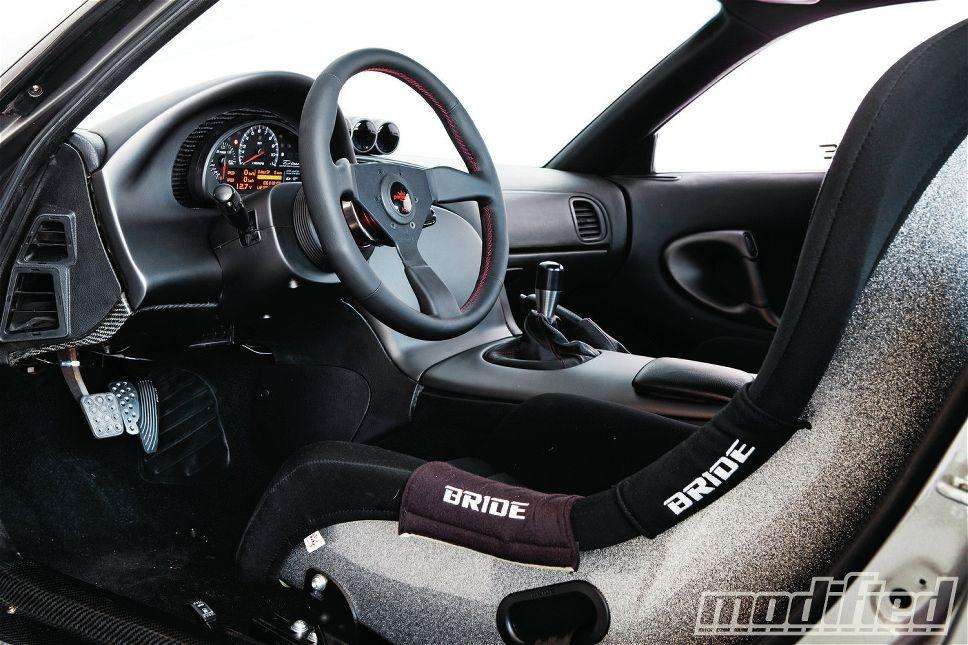

Also just before the Holidays, My plastidipped MB/satin blk FD was featured in Stance Nation. Photos from Stance Nation:
Sinister Rotary // Phils Mazda RX7. | StanceNation
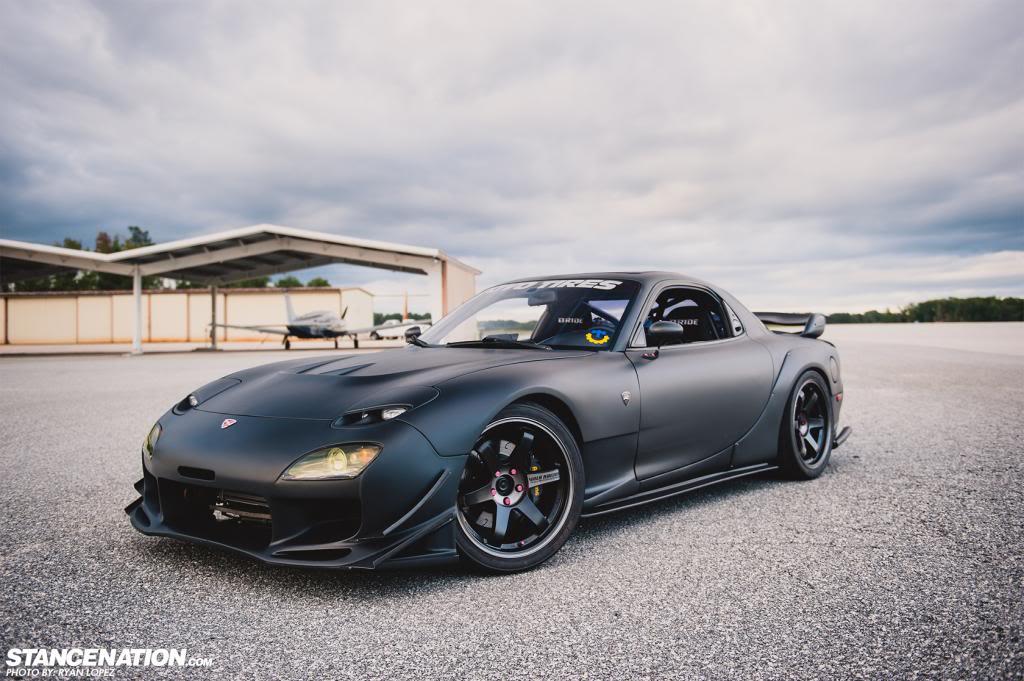

^^is Plasti Dipped (www.DipYourCar.com)
Below is a comparision satin painted the FD from 5-6 years ago (My 1st Black FD where this thread was started).
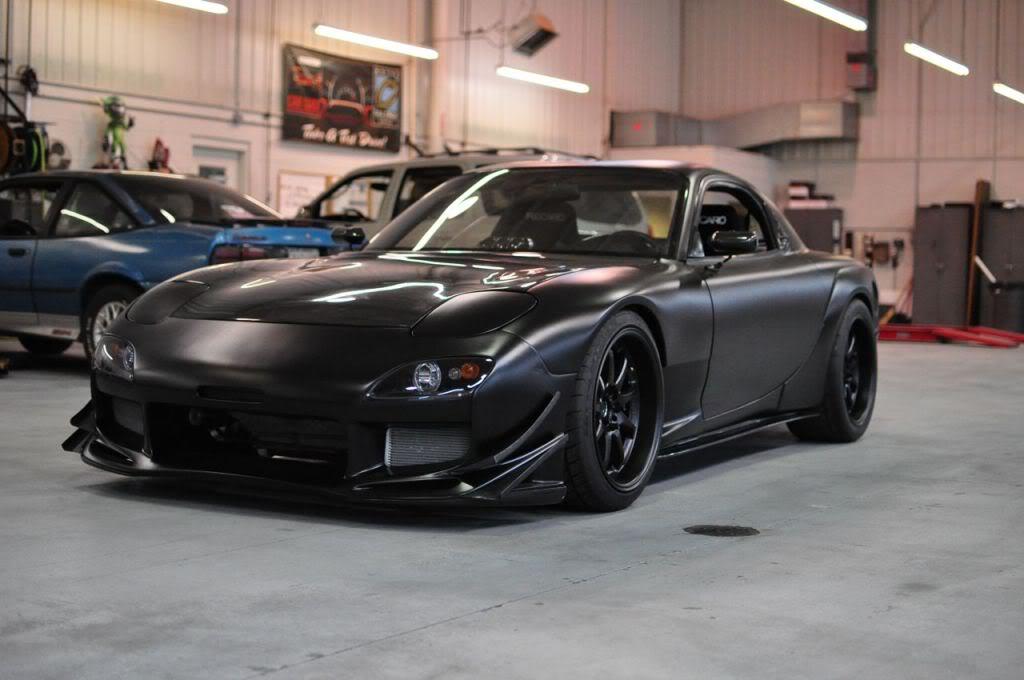
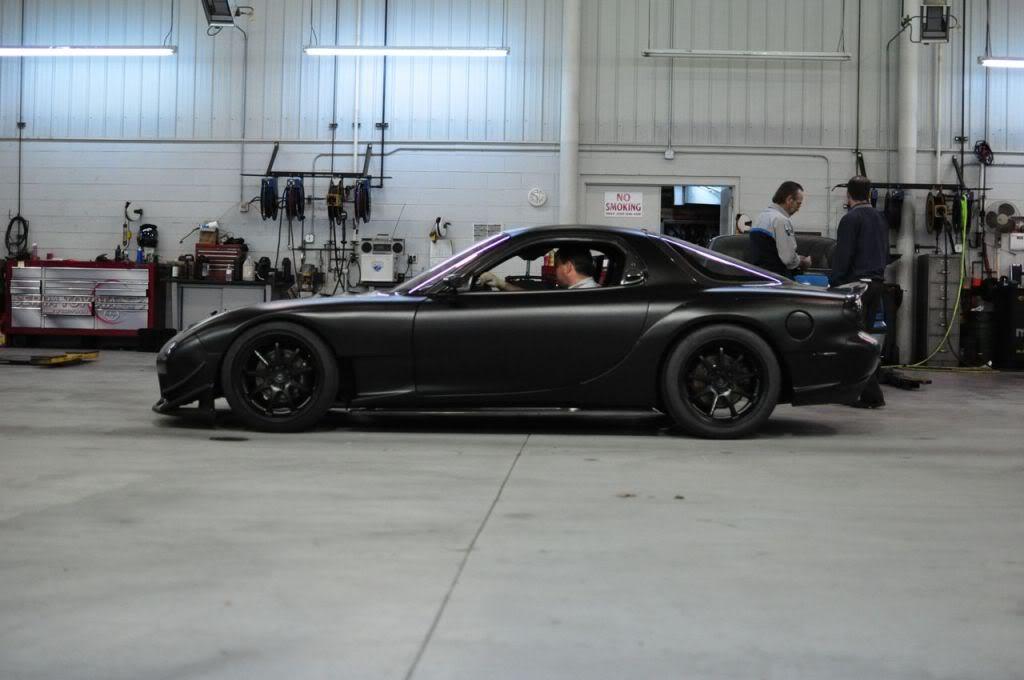
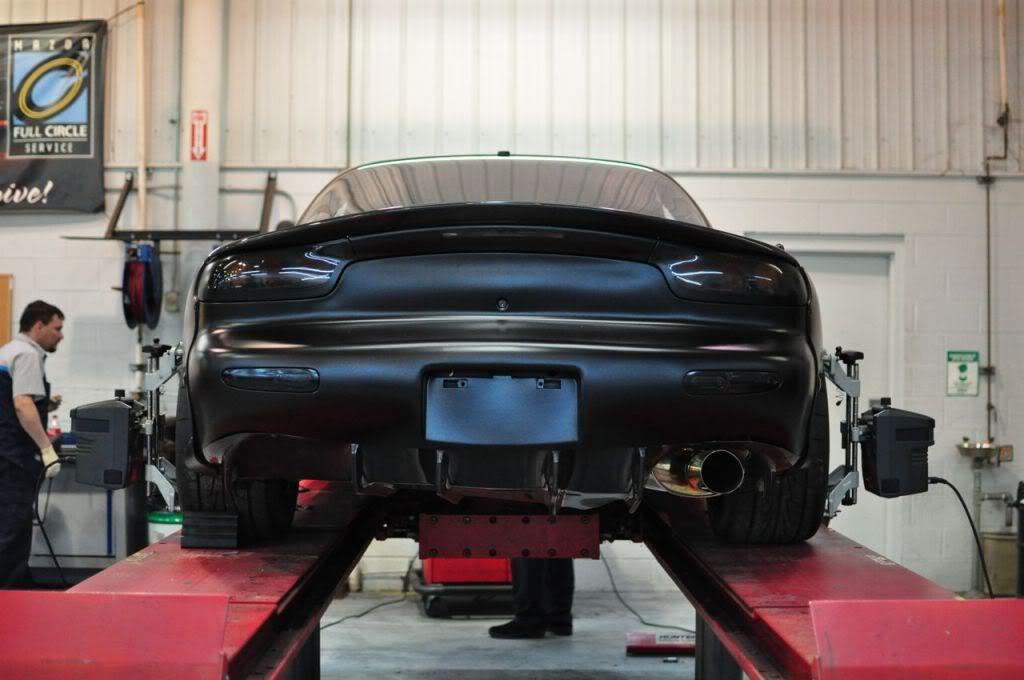
My opinion about Plasti Dip:
I been getting a lot of questions from people.. So I will state some pros and cons compared with my experience with satin paint, 3M vinyl, and plasti dip.
Satin Paint is by far most expensive and super hard to keep it nice. it chips easy and once chipped, that's it. You can't buff, wax, etc.
Vinyl, the theory is nice. but quite expensive if you hire someone to do. I did couple of test run on my MB FD and also my daily TL when 3M first introduced their 'car' vinyl. it was fairly easy to do and held up well. Until, I decided to pull it off. TL, vinyl came off easy and without any issues. However, my repainted/aftermarket painted FD3S? vinyl took my paint off. Apparently this is a VERY common issues with non-OE paint. Of course 3M did not disclosed this nor would they do anything about it since I installed it myself.
Plasti Dip (purchased from www.DipYourCar.com) is by far best, easiest, and cheapest solution. I heard about this 2-3 years ago. Been watching videos and about a year ago, decided to give it a try (for DGRR). I mainly wanted to use this stuff to protect my MB paint (costly paint job) while I drove around town and DGRR. Bought 4 cans from Lowes, experimented on my lower part of FEED flares (where rock chips were common). One side of the car was vinyl and otherside was plasti dipped. Most people for 6 months had no idea one side was dipped and other side was vinyl.
I also used my daily as test subject and plasti dipped the front grill and few other areas to see how well it will hold up since it was parked outside and saw more environmental elements. 6 months, I had no issues on either cars. Cleaned up easily and peeled off without an issue.
I than talked to guys at DipYourCar.com and decided to get their full car kit (under $400 with the sprayer). The satin black FD you see here is 3-4 layers of their black. I did the entire work in 1 day and drove in the rain about an hour after spraying. I also did 2 track days with this and performed great!! I had very little chips, clean up was easy (just water and microfiber towel, in 15 mins), and than I layed 3-4 more dip after running it for 2-3 months (still using the left over from the kit).

With the new color, I have about 6-8 coats of this stuff. I've put over 1000 miles, another day at the track, and the plasti dip is still in great condition. All, under $400.
I'm going to do one more layer in different color before peeling this stuff off. I'll post a results of 1 year of dip later this spring.
1-7-2014
Plasti Dip do make something called, "CLEAR". But its in fact bit matte finished srpay. It will protect your car, but will not give you that 'Clear Bra' look. But for $6-8 dollars a can, it might be a good alternative to blue tape during travel etc.
There are however more specific spray on bra that came out within past year. One is '3M paint defender'. Same concept as plasti dip but costs around $25-30 a can. I personally never used this stuff but I did hear, it performed OK.
Here is a video of 3M:
And Armor All's stuff..
Which to me seems VERY similar to just plasti dip.. Again, I haven't used this product but options available seems simliar at 2x the price.
2-12-2014
One of the photo from April 2014 issue of Import Tuner mag
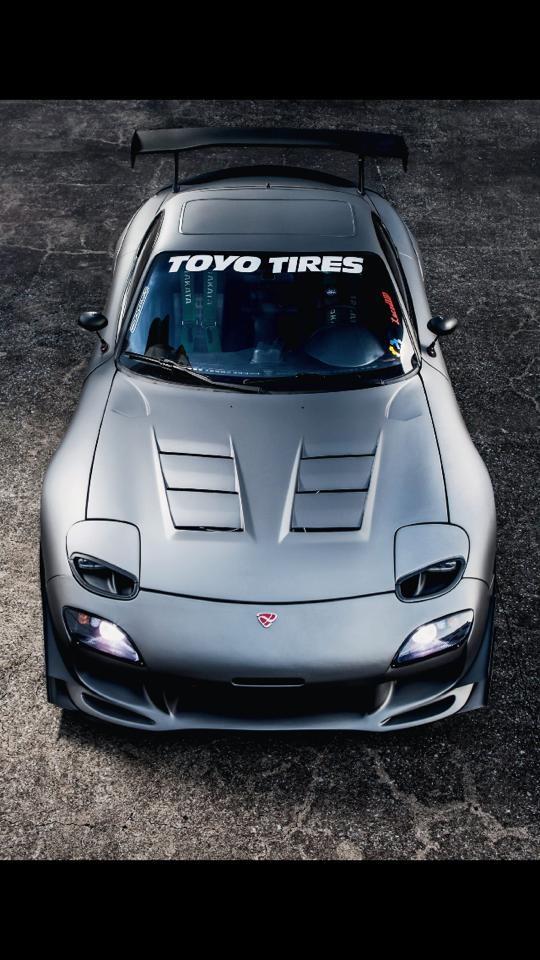
2-17-2014
LOL!
Couple of Updates..
this past valentines day, i did a track day at local Barber Motorsports Park. This is my second time driving on this track and had a passenger with me.
couple of photos from the track day..
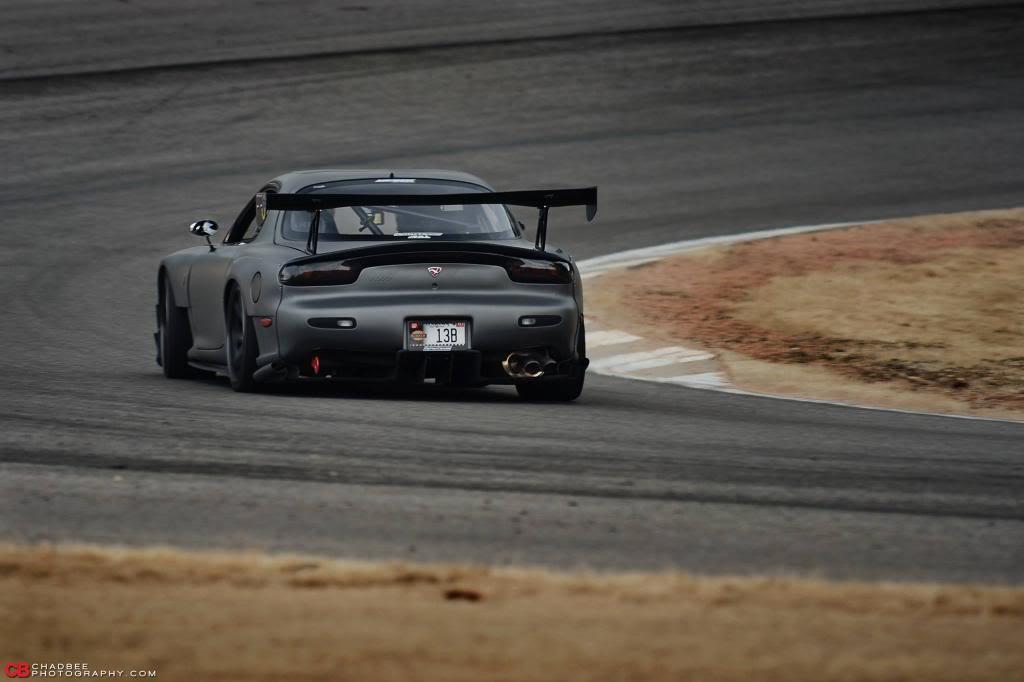
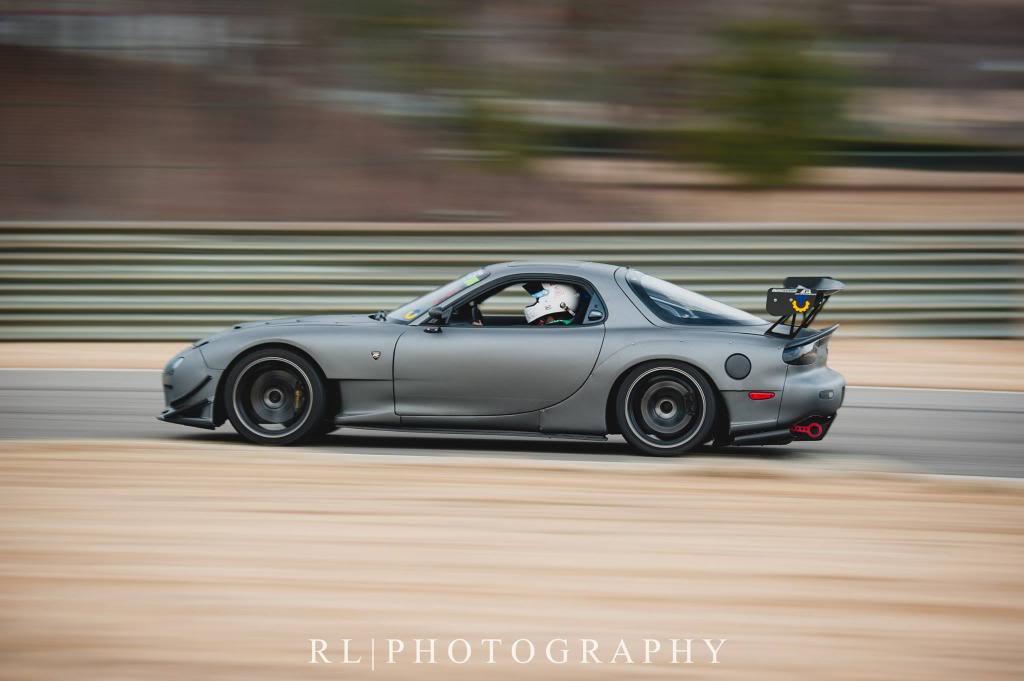
And my Import Tuner Magazine Feature, "Rotary Relationship" came out and picked it up from local book store. (starts page 30)
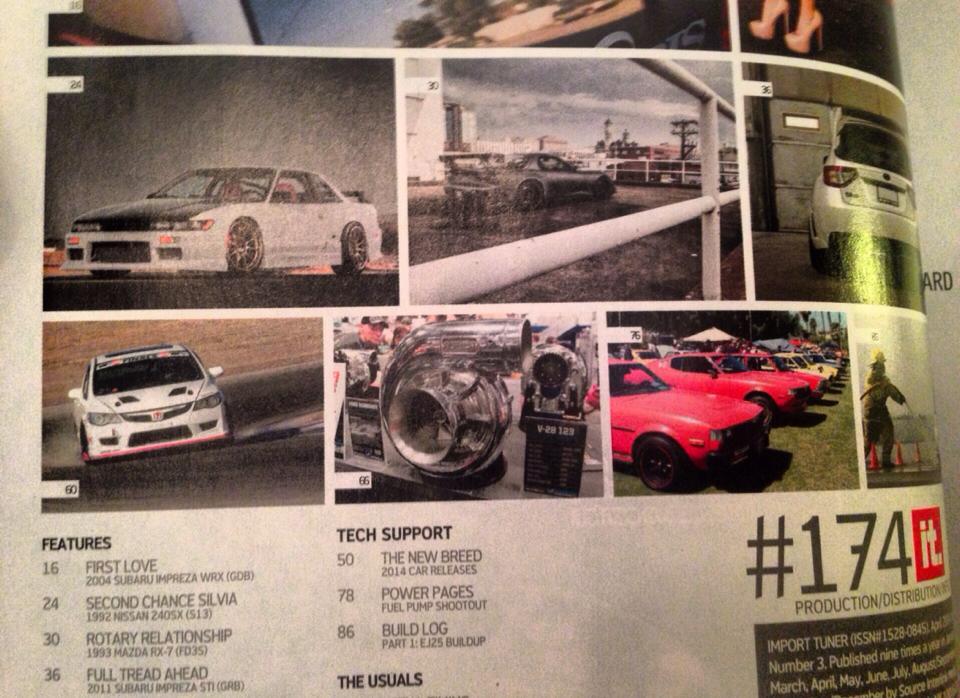
2-19-2014
Another video
2-20-2014
I forgot.. My online feature is now out..
SOUTHRNFRESH Phil Sohns Mazda Rx7
few photos from the online feature..
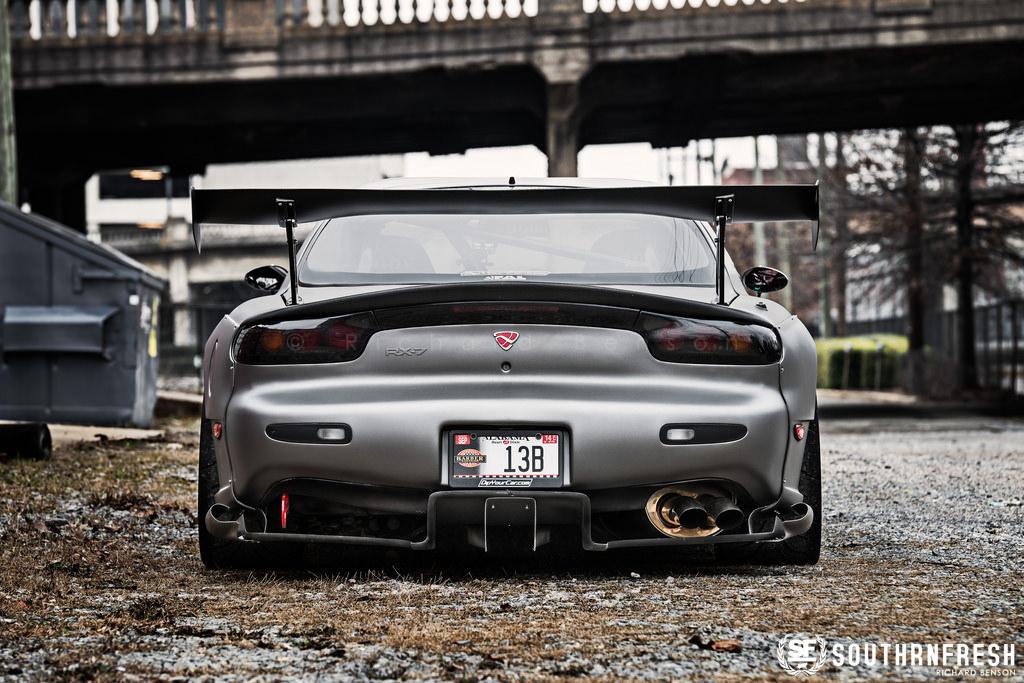

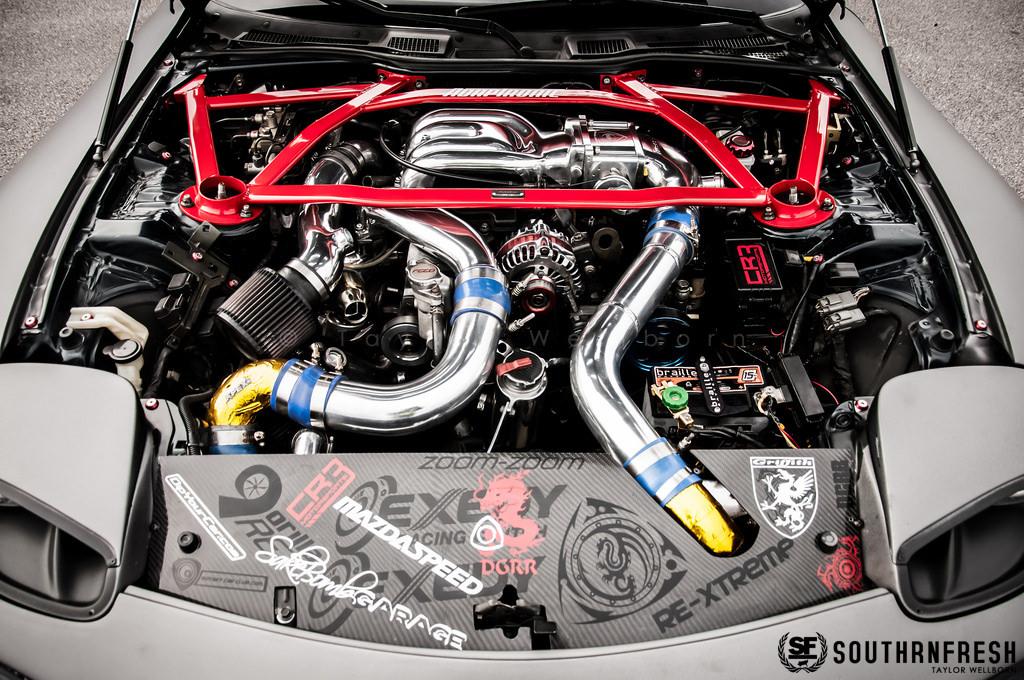
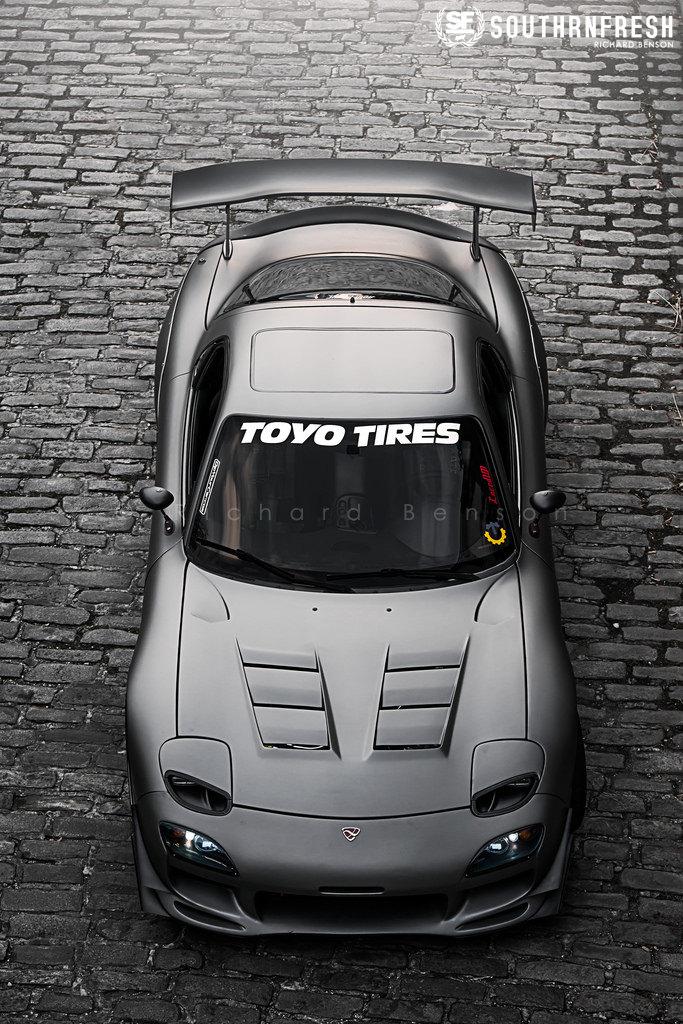
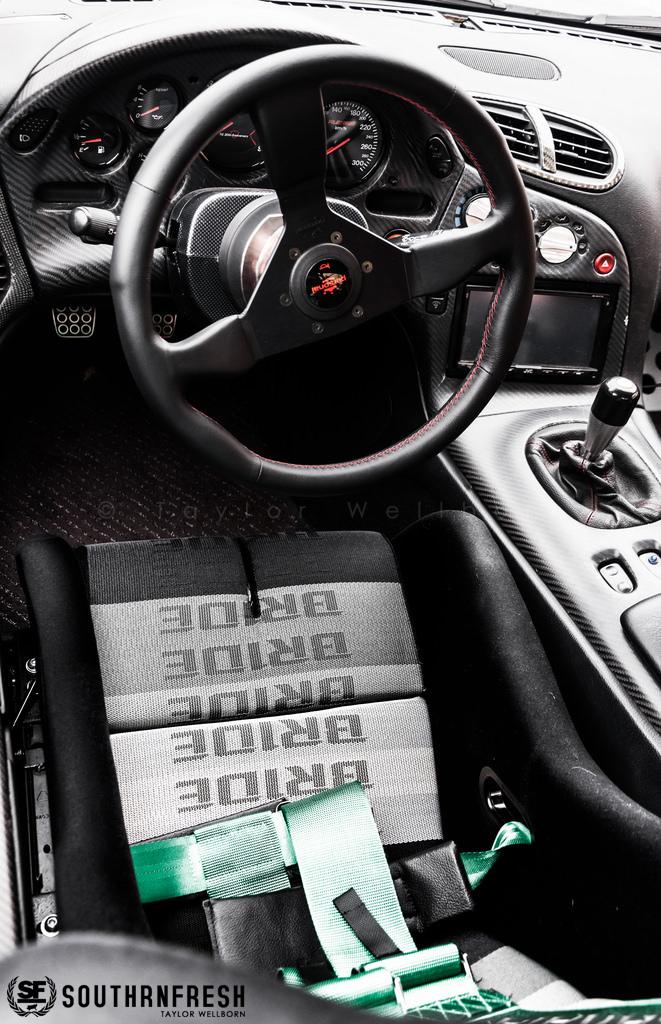
2-25-2014
I say GOLDDD!
Trying something different...
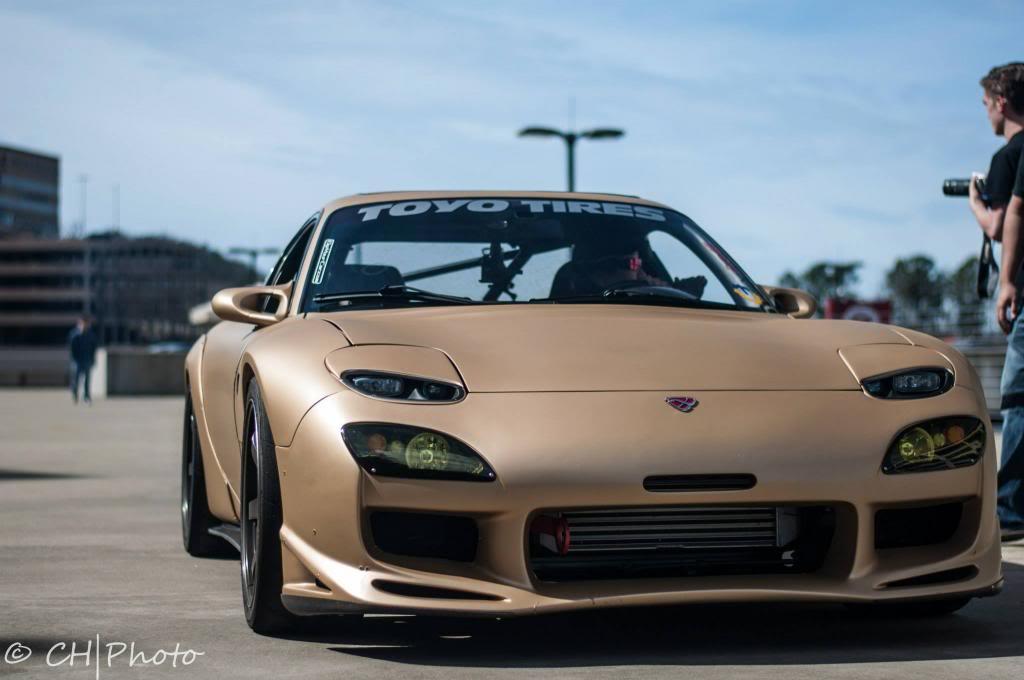

Dated. Meh. I think it's interesting ![]()
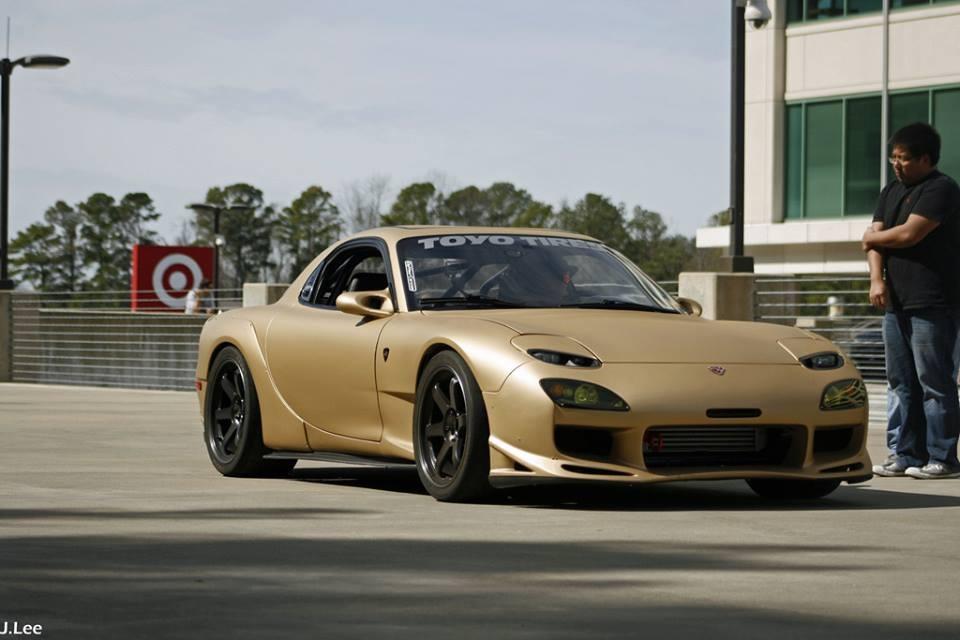
3-6-2014
GOLD!!!!
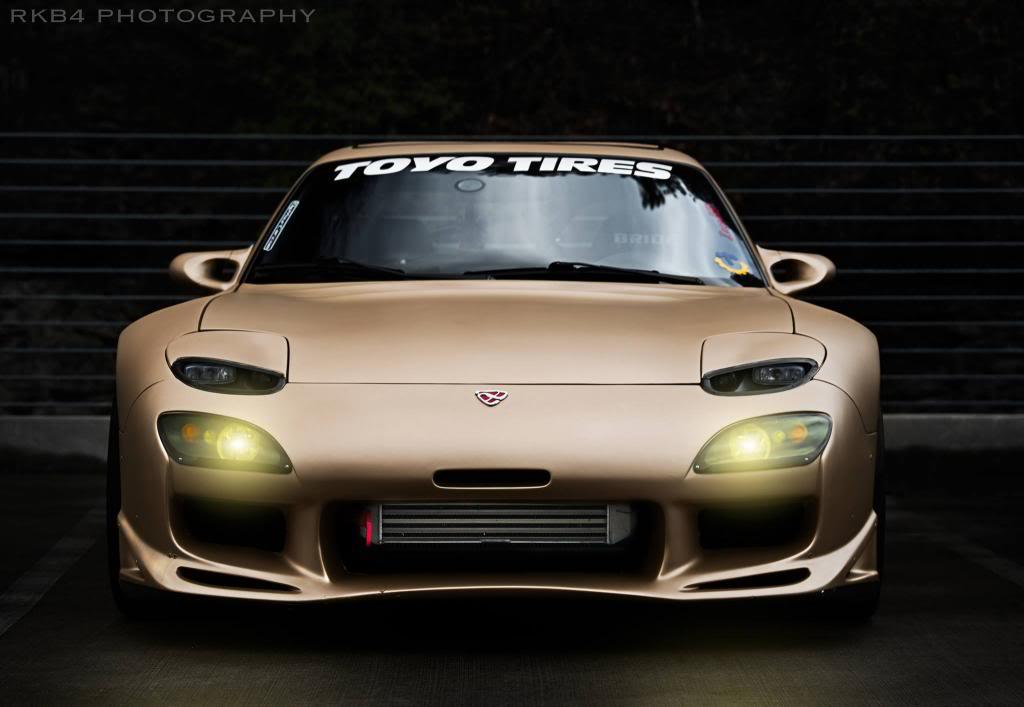
3-18-2014
Hell's yeah! ![]()
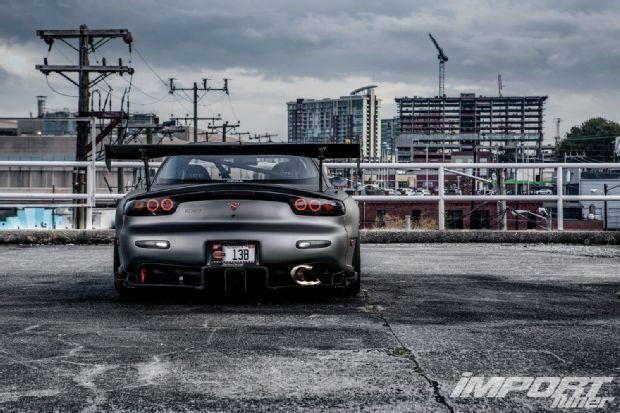
My Import Tuner feature is online ![]()
1993 Mazda RX-7 (FD3S) - Rotary Relationship - Import Tuner Magazine
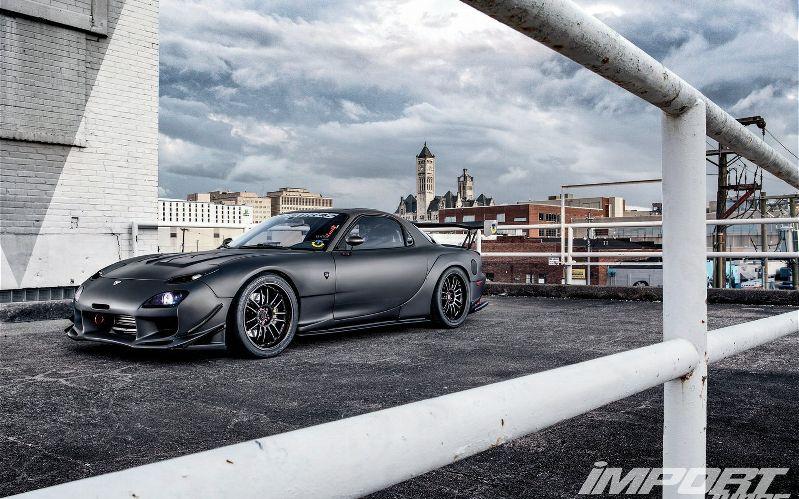
4-15-2014
Just got a feature on Stance Nation..
Old School Perfection // Phil Sohns Mazda RX3. | StanceNation
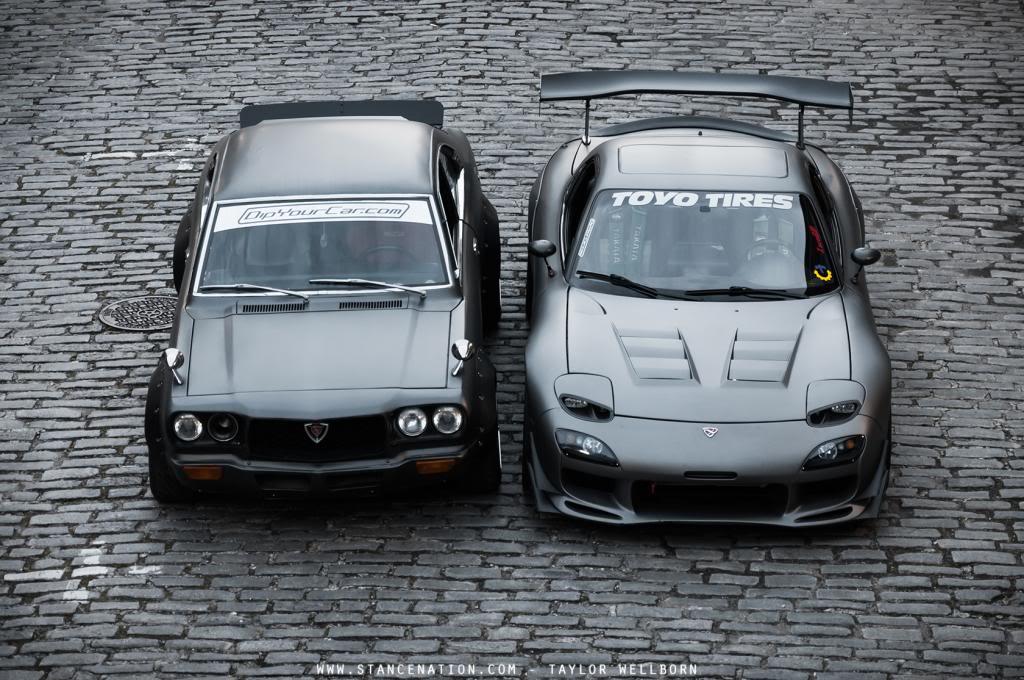
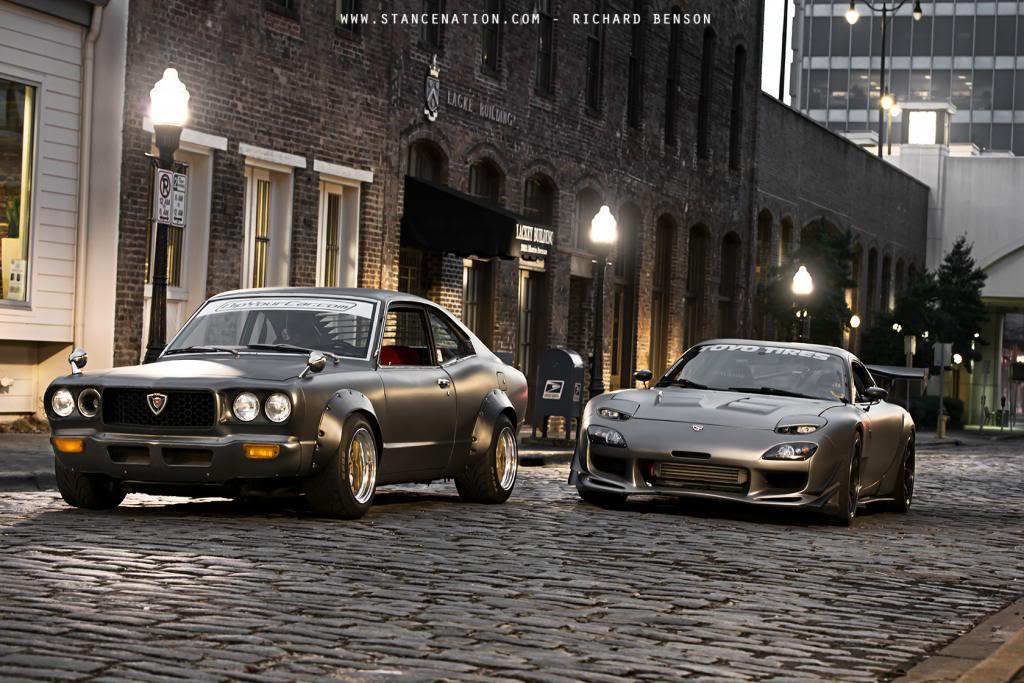
7-30-2014
It's still at my builders.
Updated photo of the MB dg with the new ze40

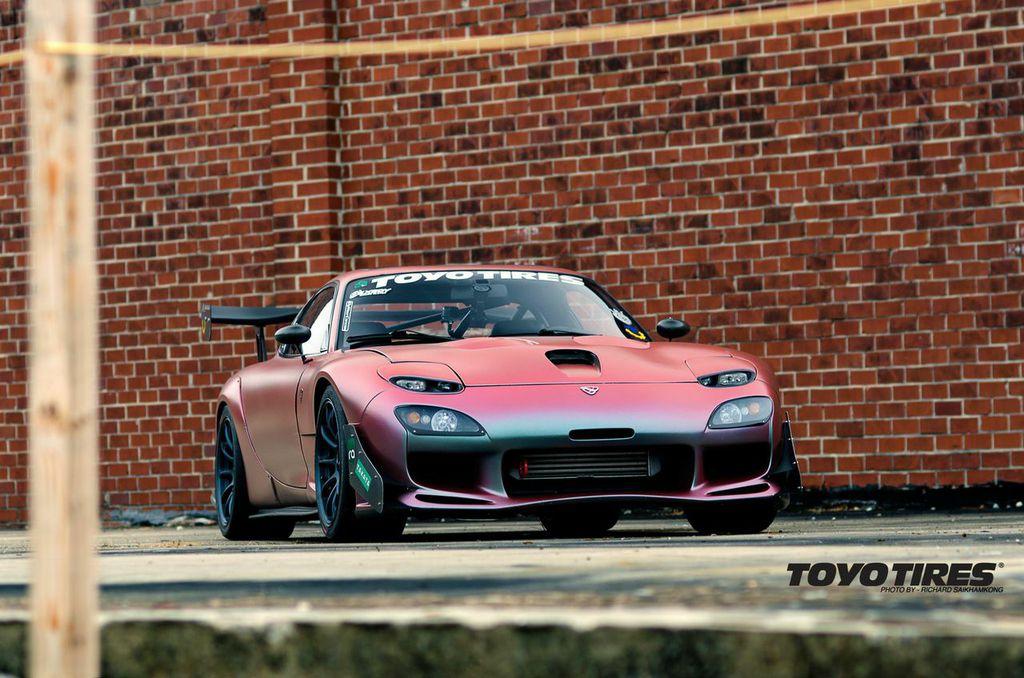
I guess I haven't updated this thread in awhile.
Another feature.
The Golden Years: Phil Sohns RX7 | Third World Society
With my r spec ms rep bumper
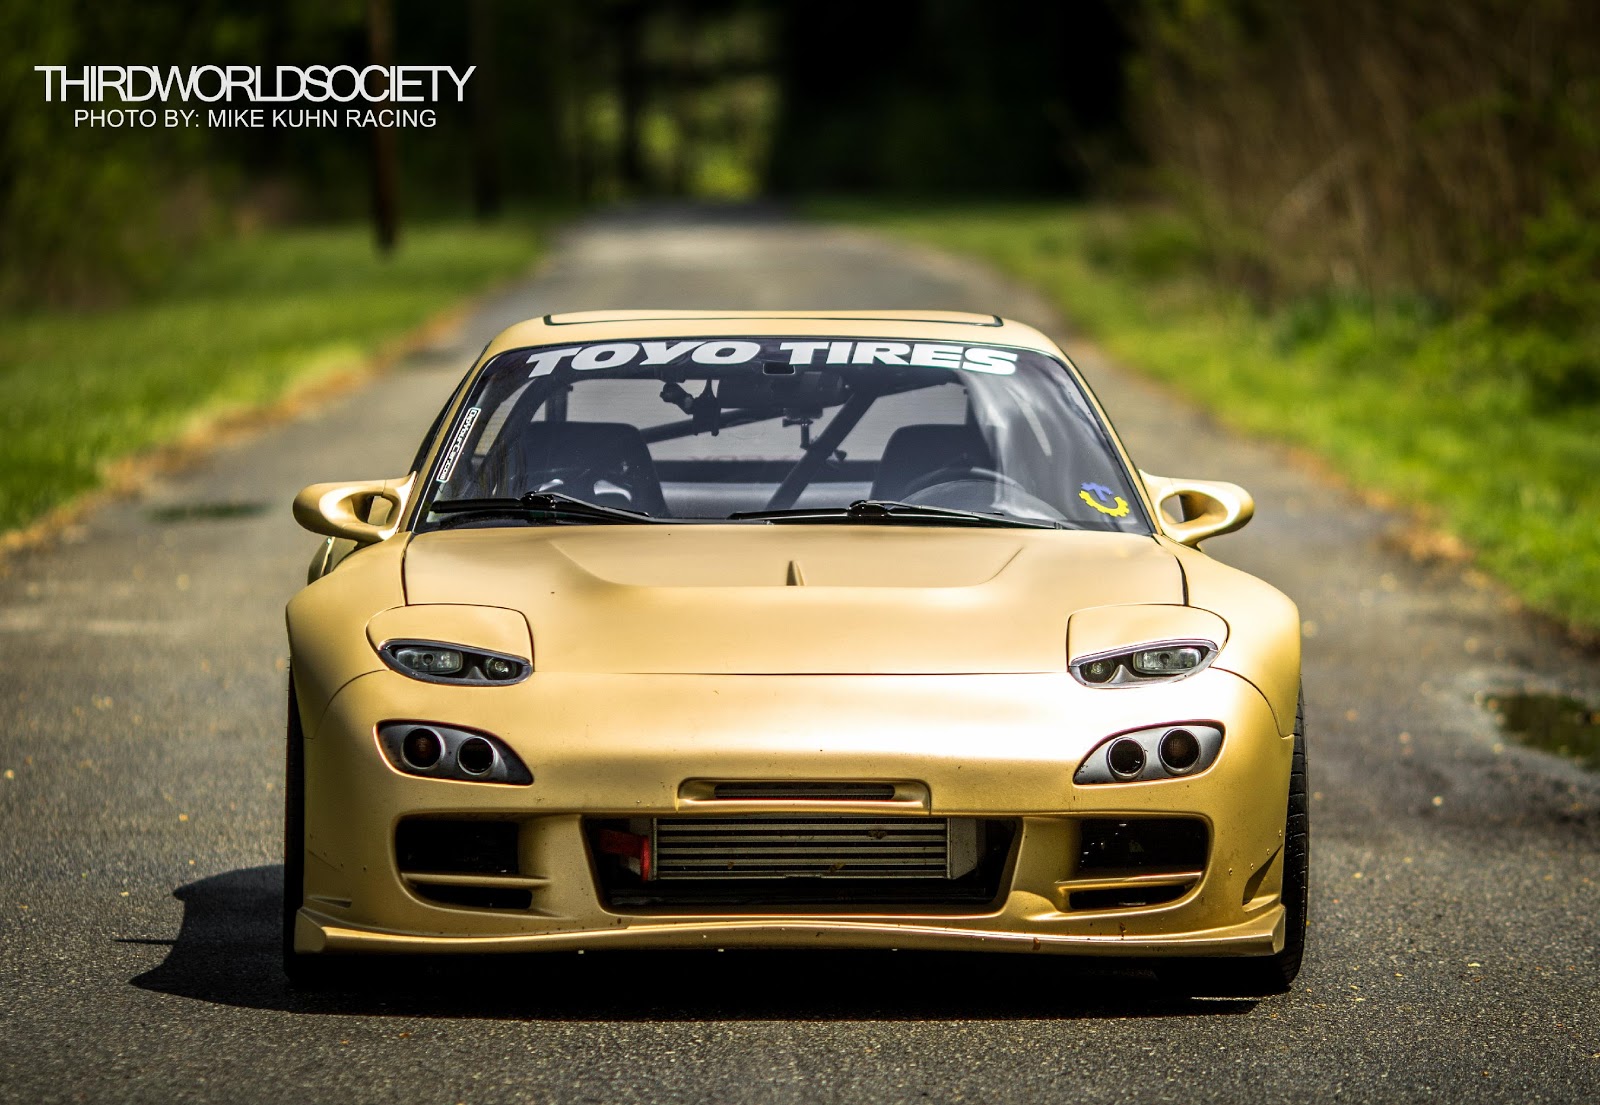
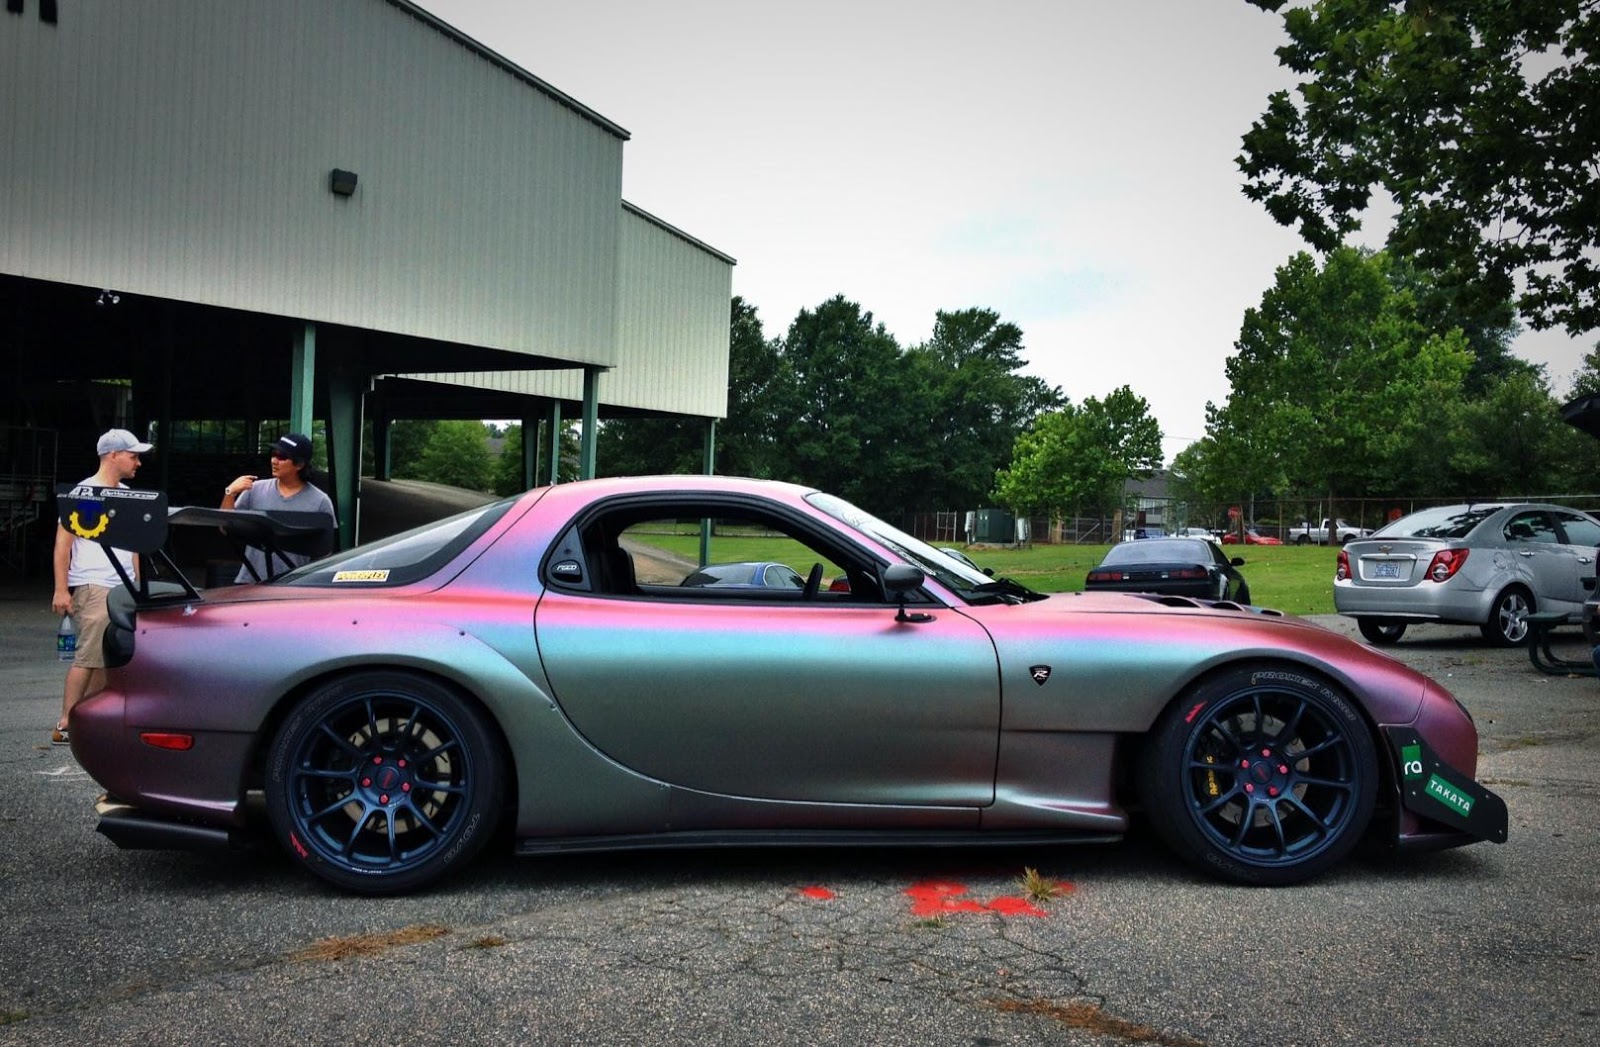
6-13-2015
That is made by Adam Griffith himself..
I'm going to update this build since I haven't done so in almost a year..
Start with photos from Neochrome dipped look
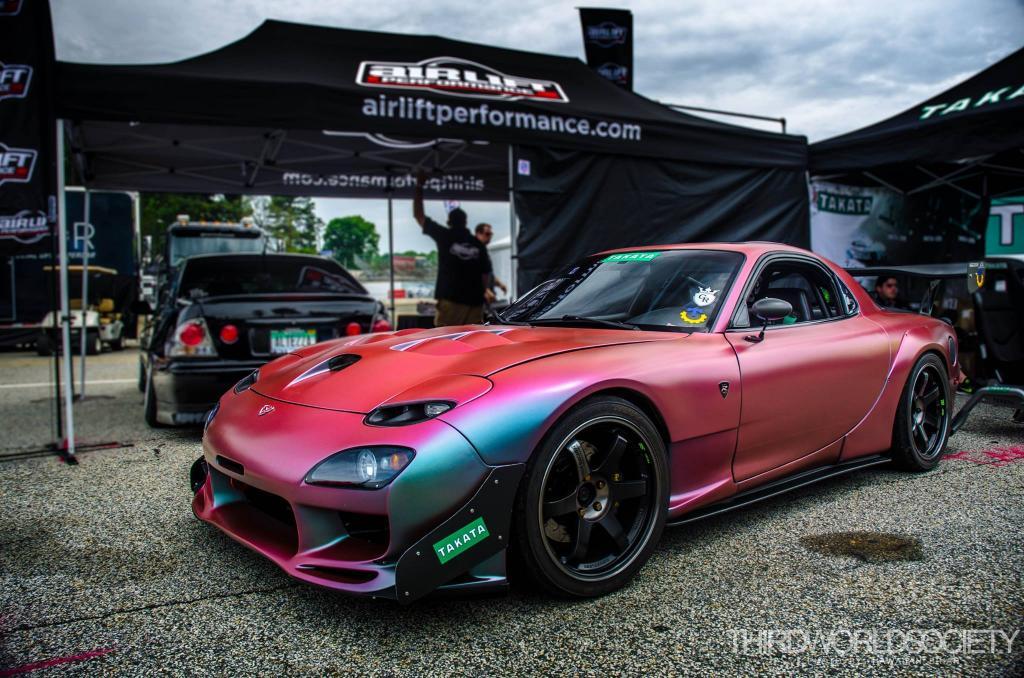
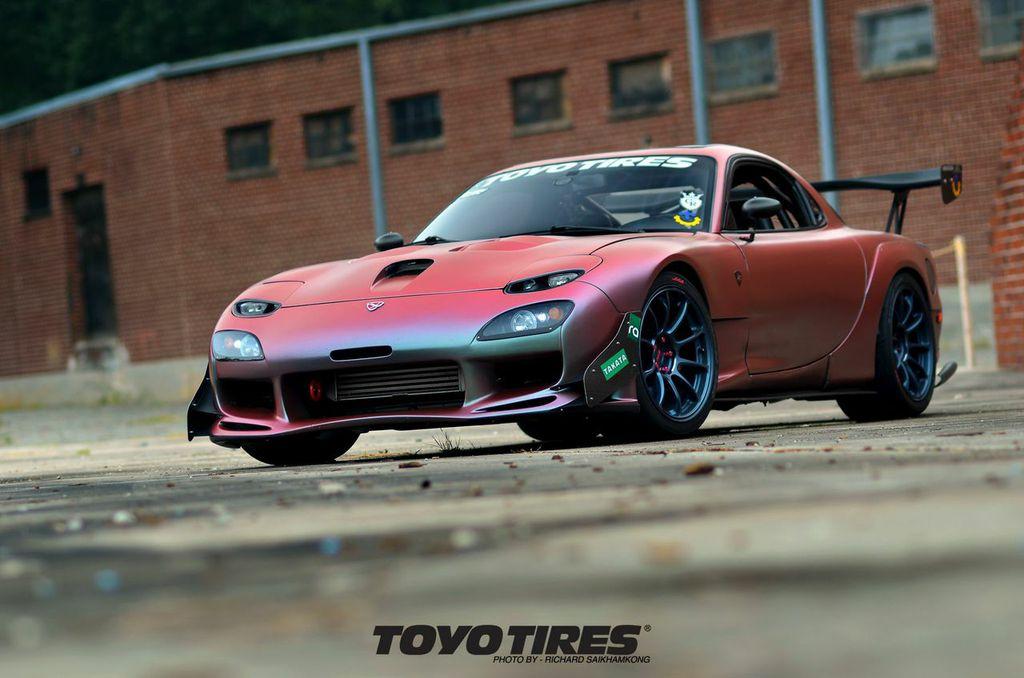

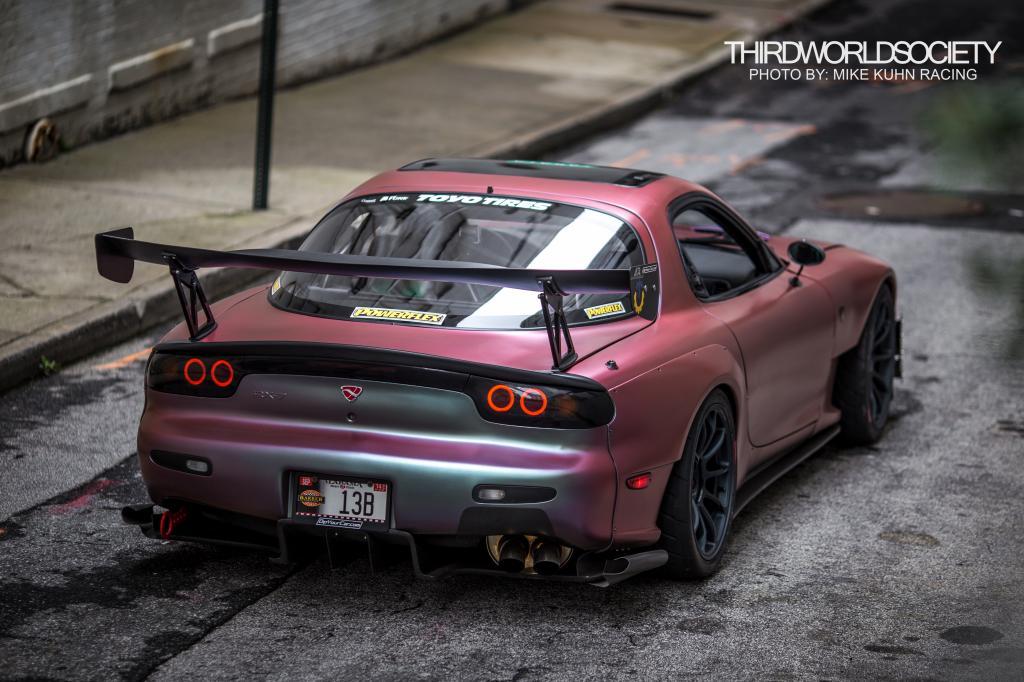

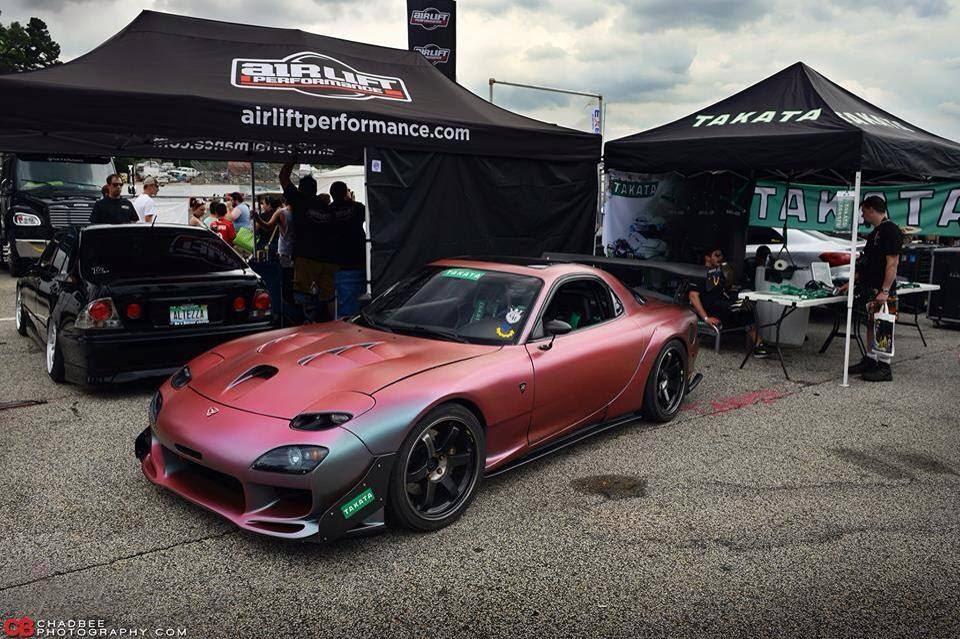
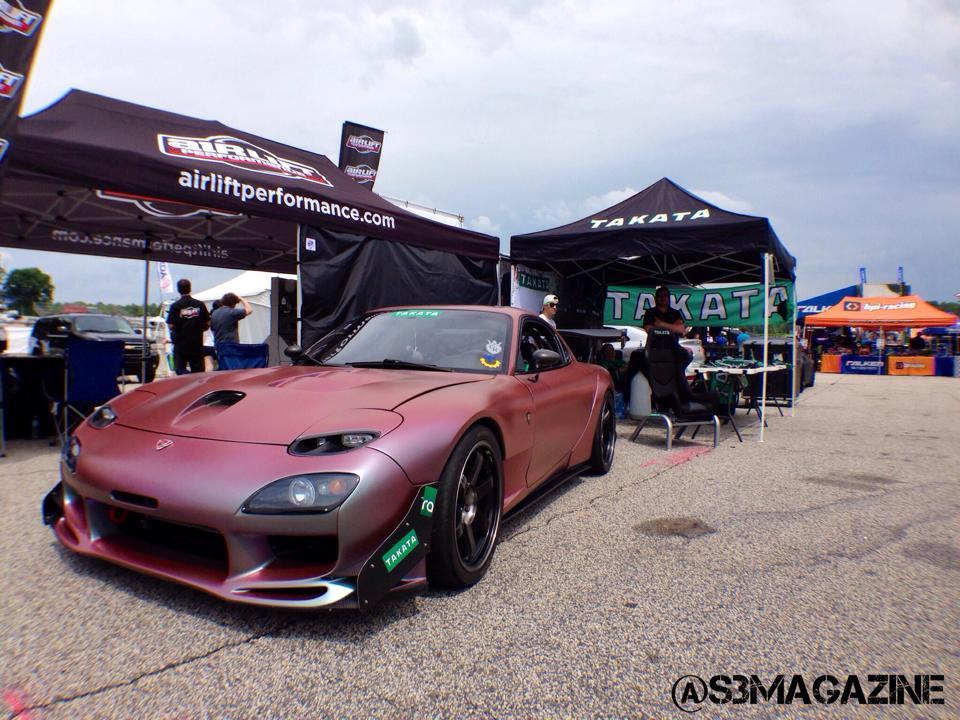
Video from Takata Booth/Formula Drift ATL :
Well, after over a year with plasti dip on my car, I've decided to peel it and do some detailing of the car.
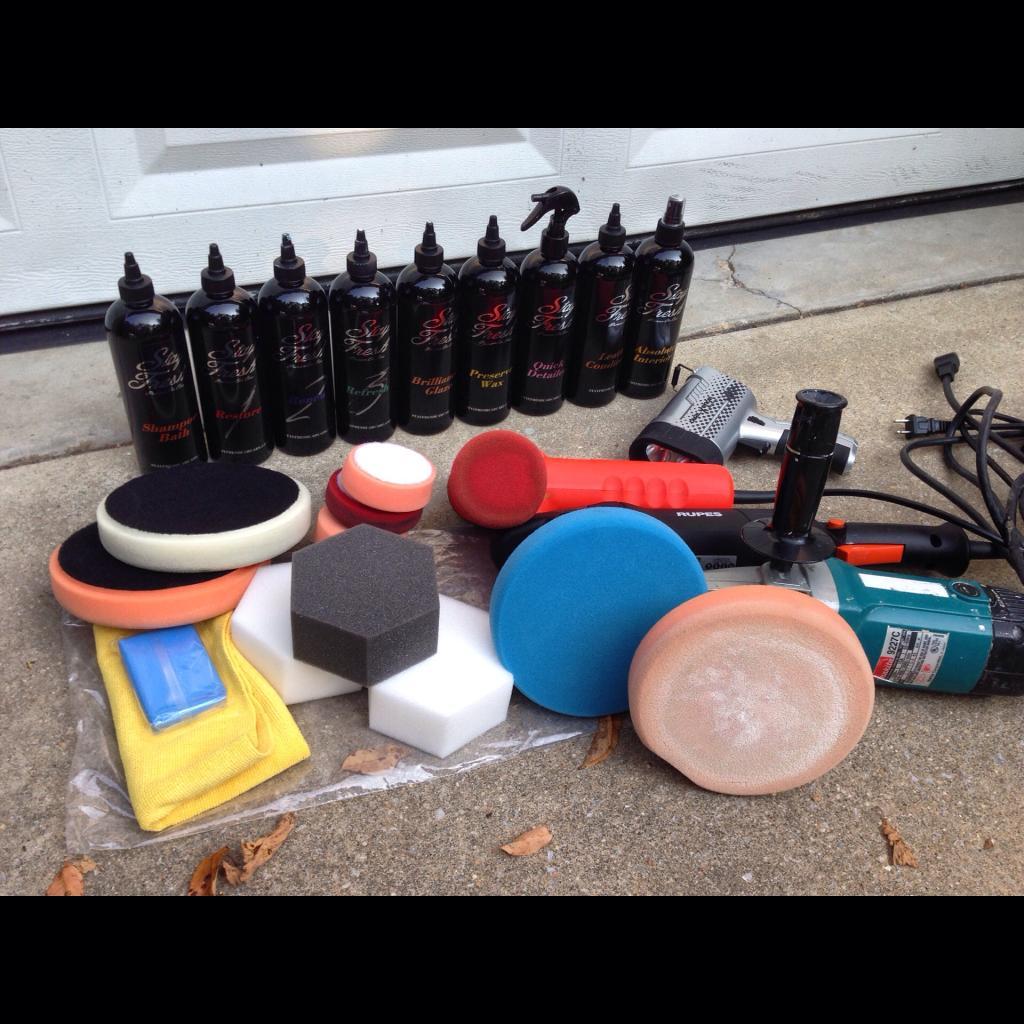
Friend of mine started a detailing product company in Florida called, 'Stay Fresh Car Car' (Stay Fresh Car Care / Premium Car Care Supplies) and I used their products to detail my RX7.
Before detailing - little bit of haze to the clear.
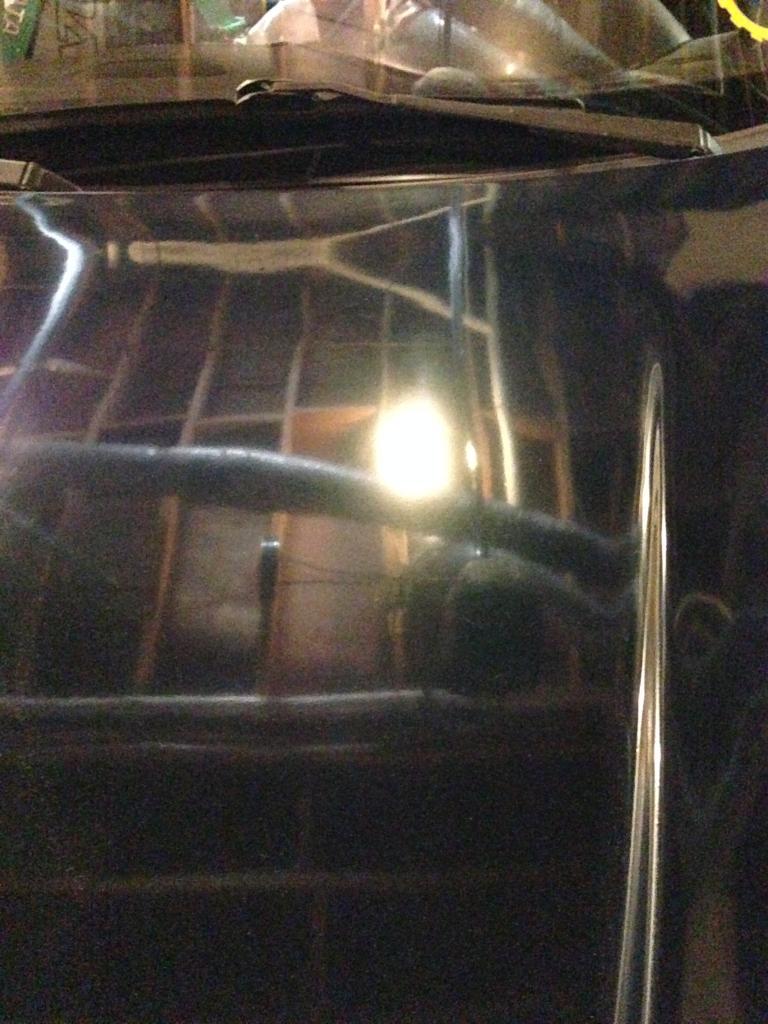
After Detailing
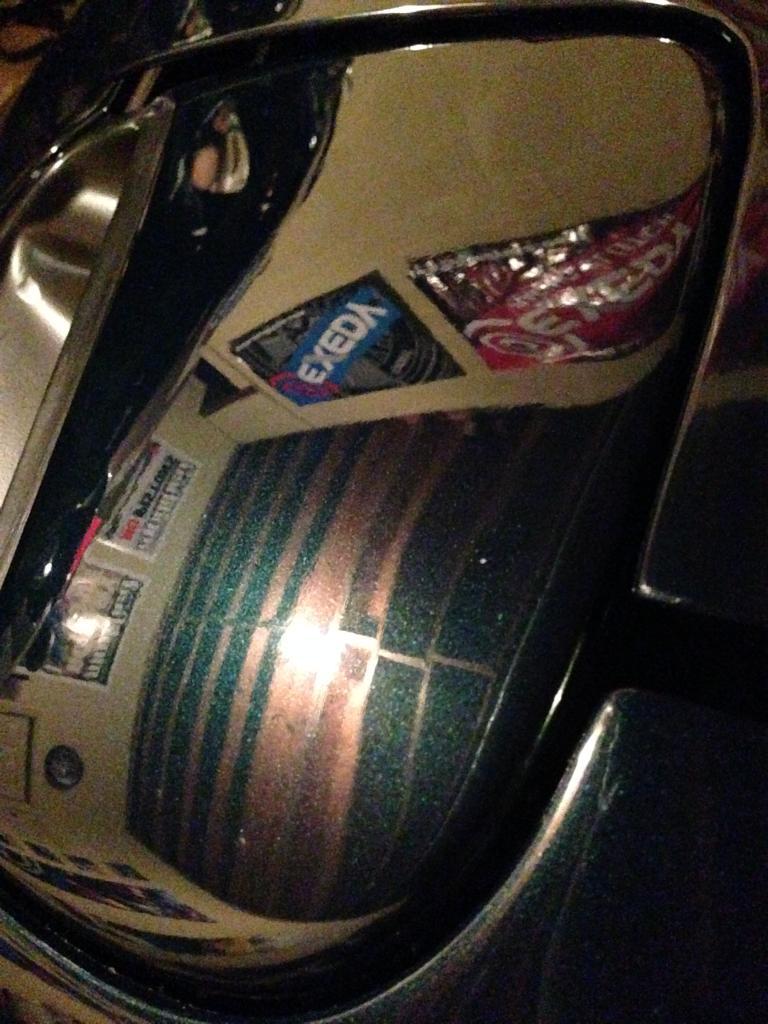
Products worked really well. Easy to apply, easy to remove, and smelled great too!
I would highly recommend giving their product a chance!
Stay Fresh Car Care / Premium Car Care Supplies
Photos of the car after detailing.
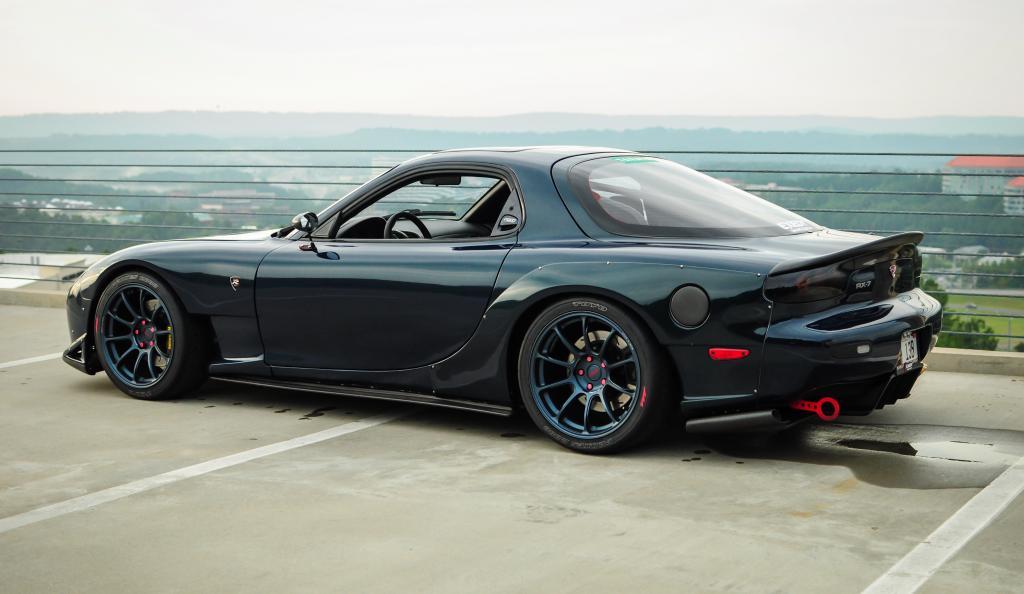
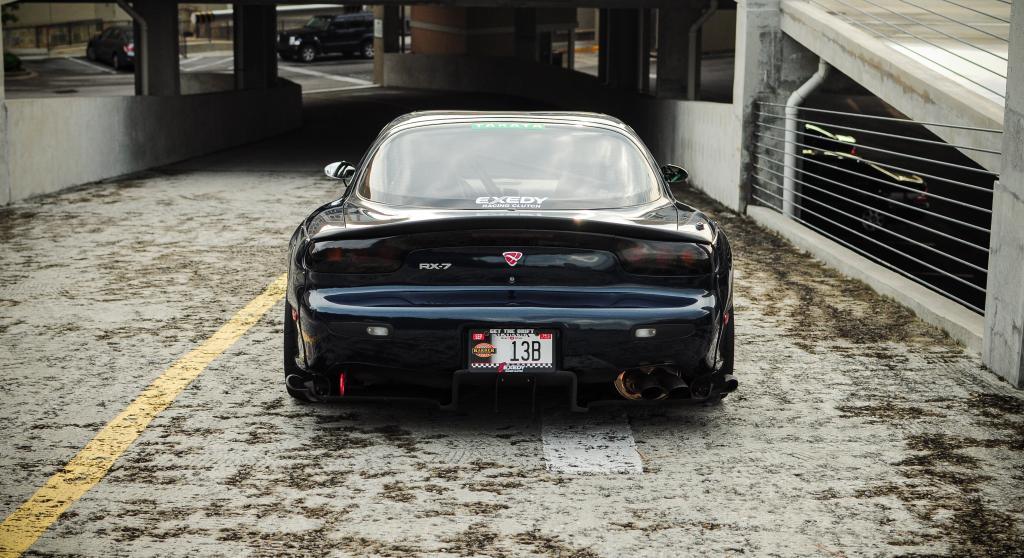
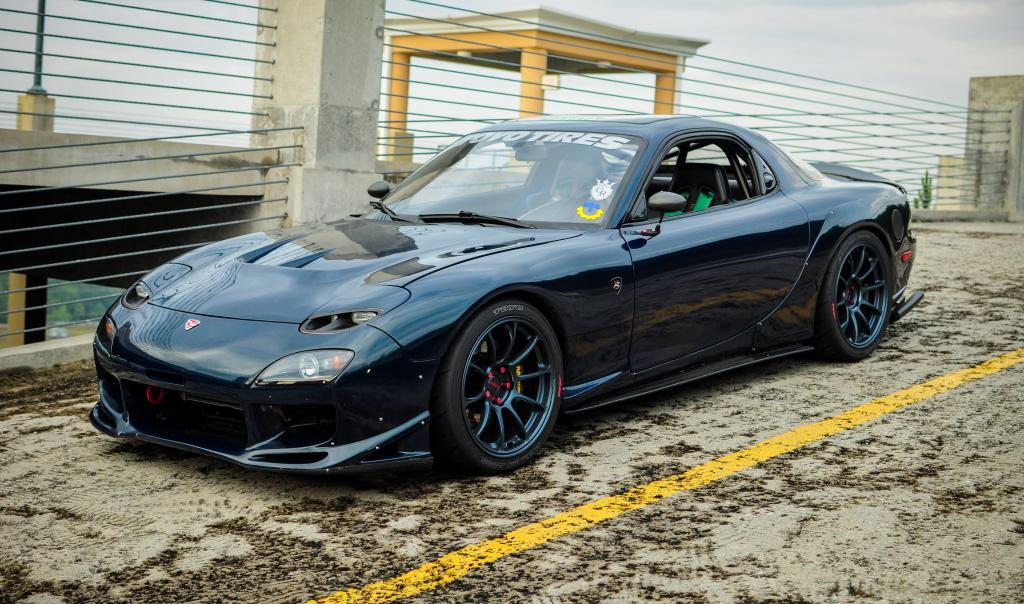
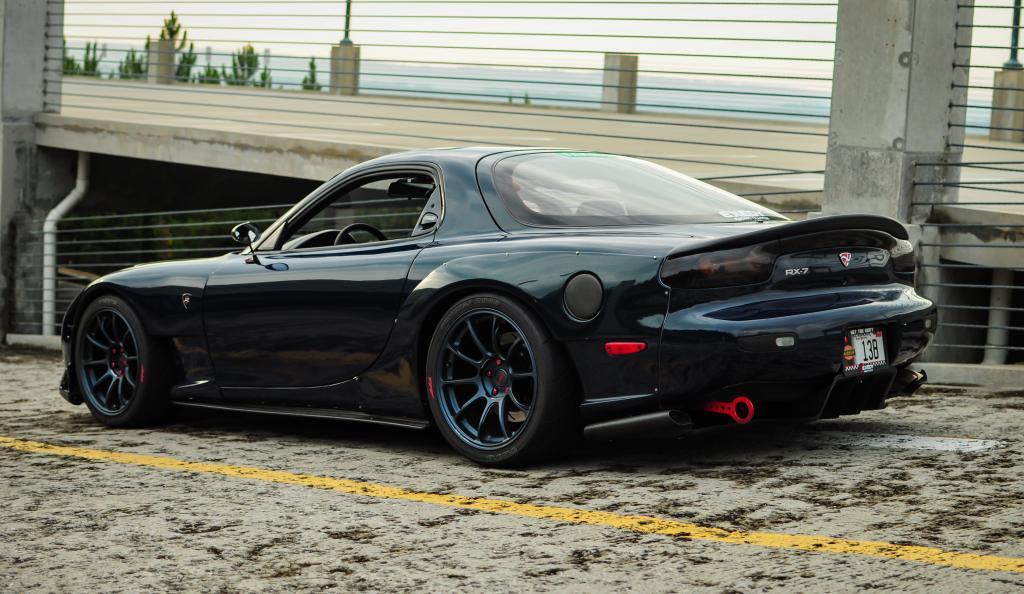
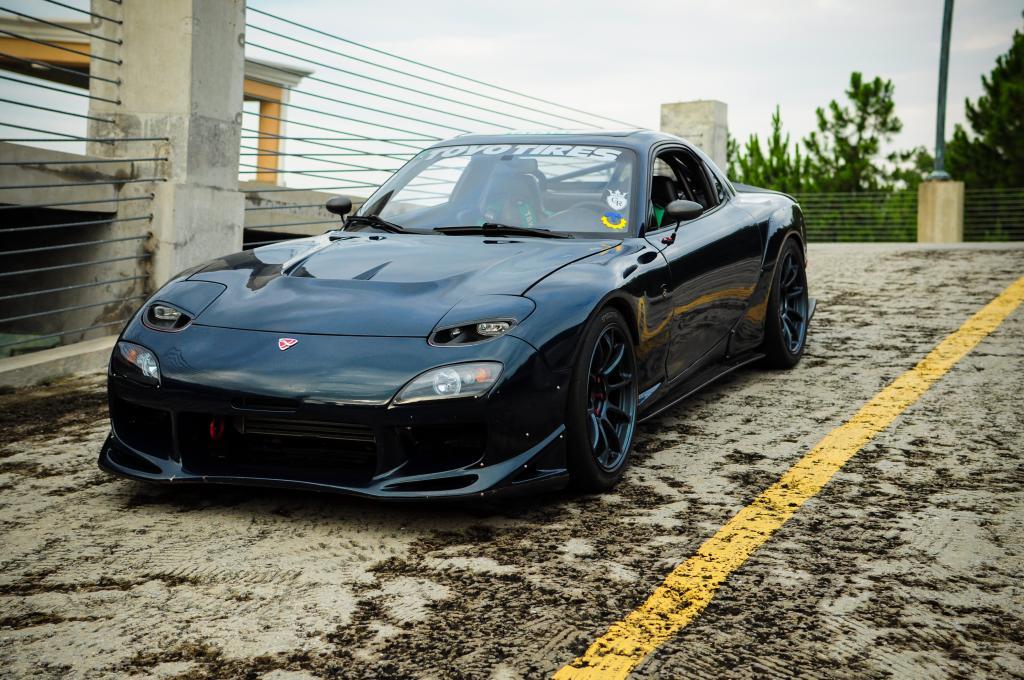
More photos after detailing the car...
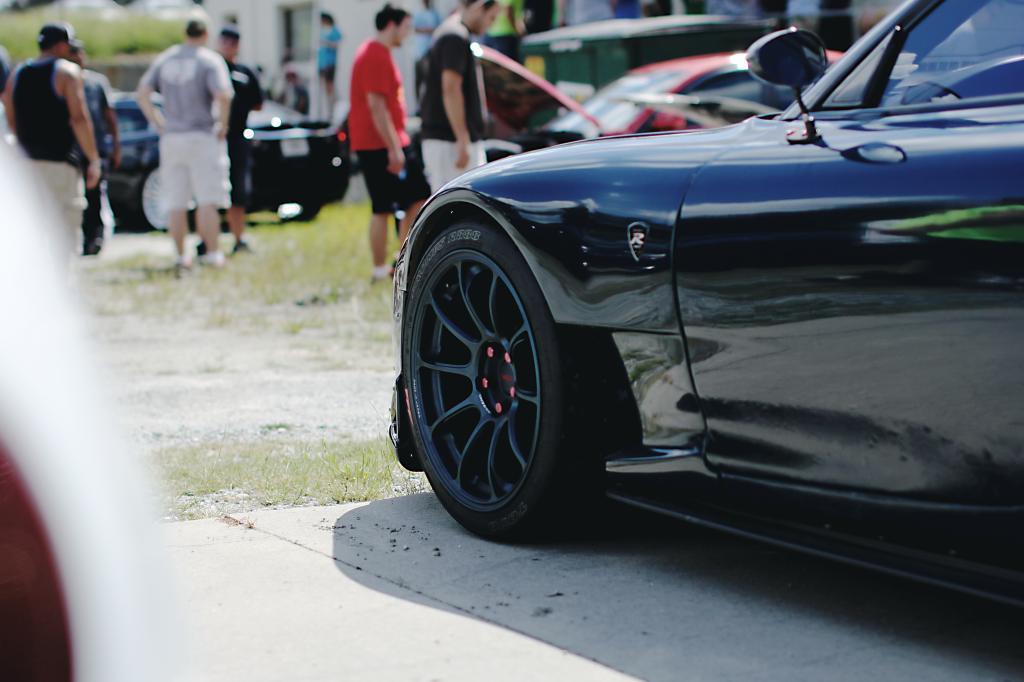
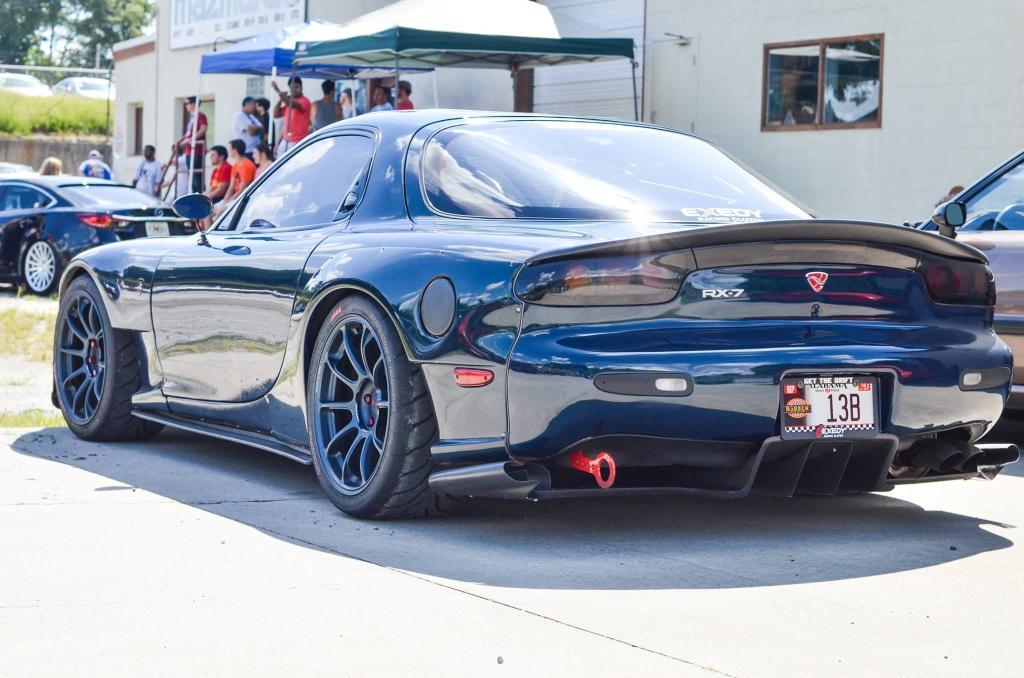
Caffeine and Octane in ATL, GA
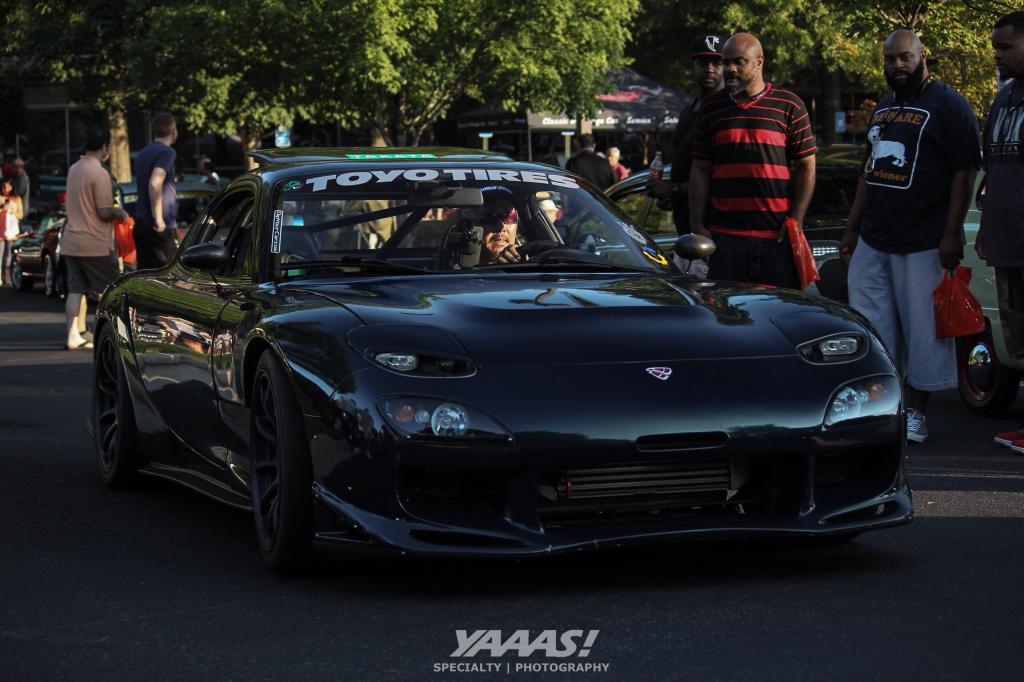
Local Cars and Coffee
Than did a track day at local track (Barbers Motorsports Park).
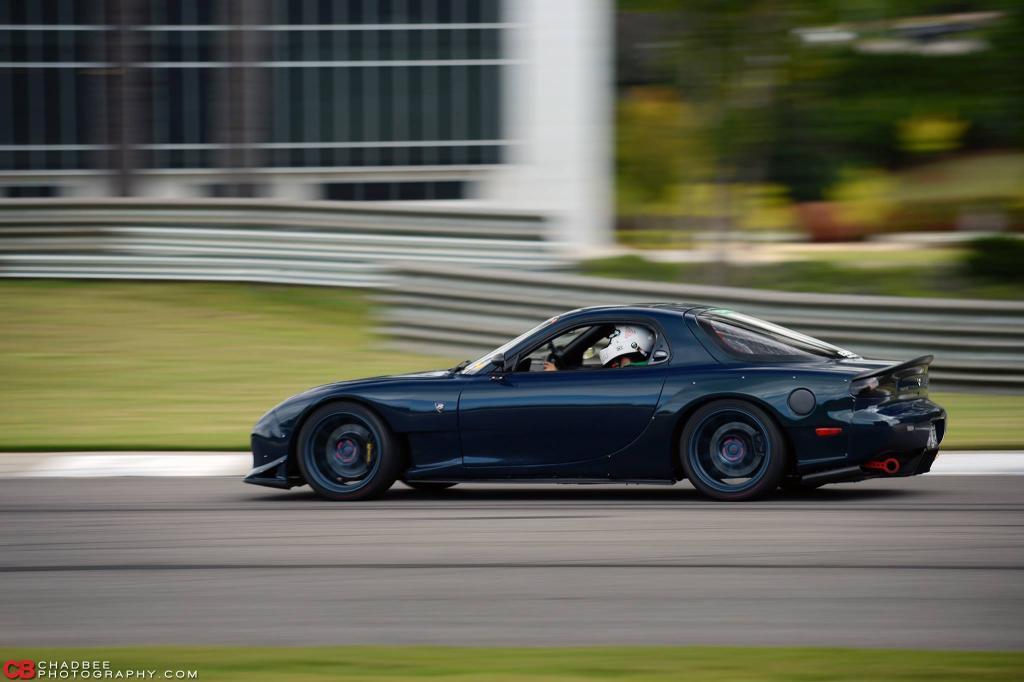
Finally.. Bumpers from Japan.
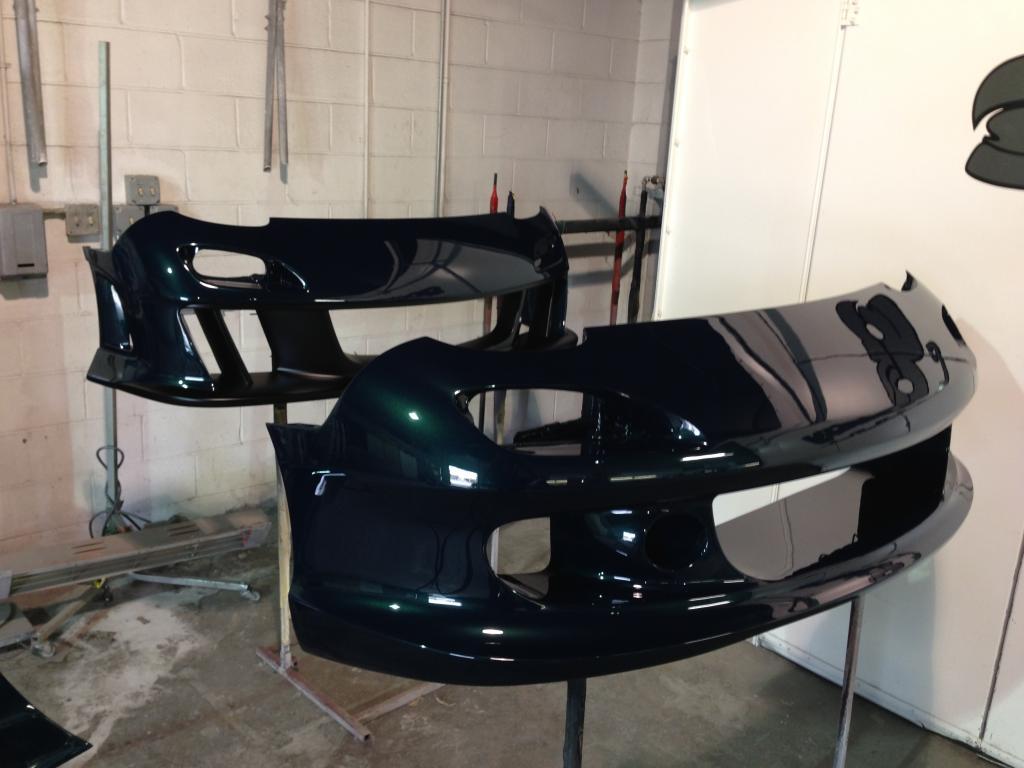
Update..
I finally got my stuff that I ordered from Japan couple of years ago here in USA.. One of the thing I got were these super rare Rays Engineering/Mazdaspeed MS-01 Magnesium wheels.
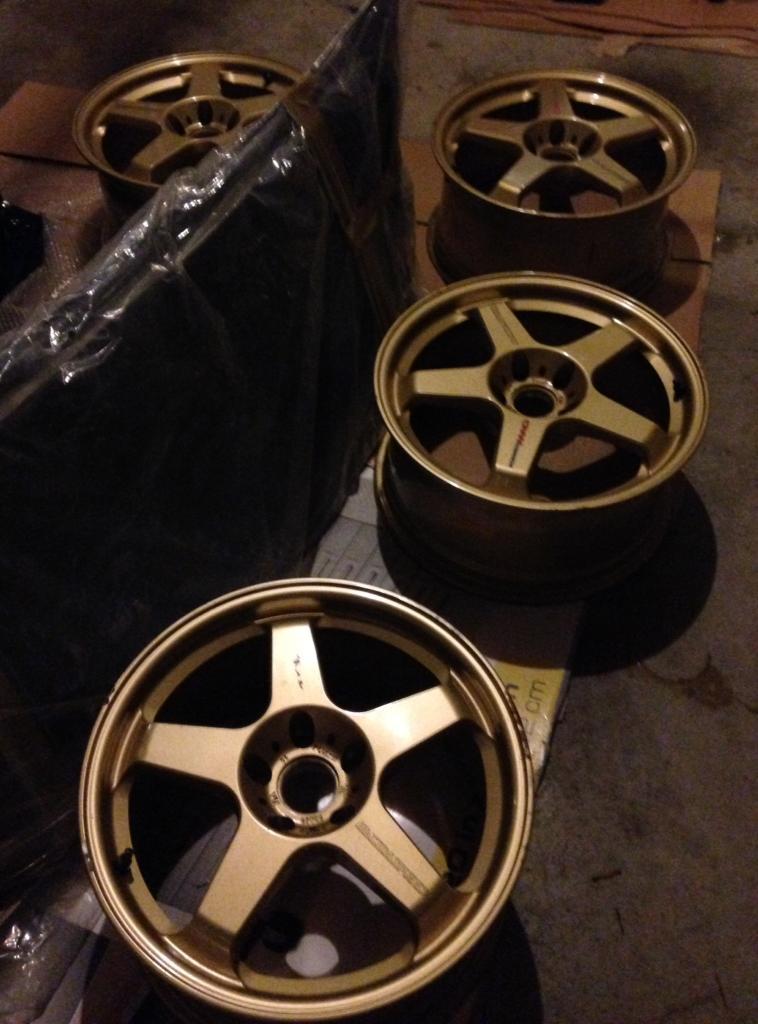
Put some Toyo T1-Sports tires on them.
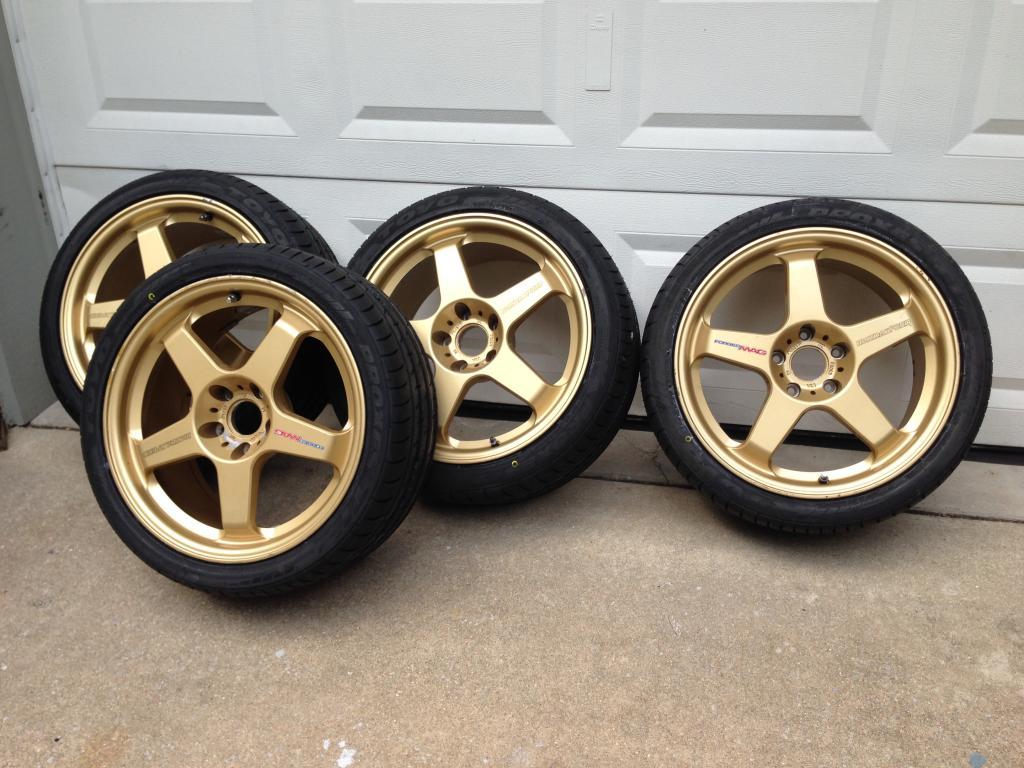
I also got the newest Knightsports Type-7 bumper painted by one of the best body shop in USA, Goolsby Customs.
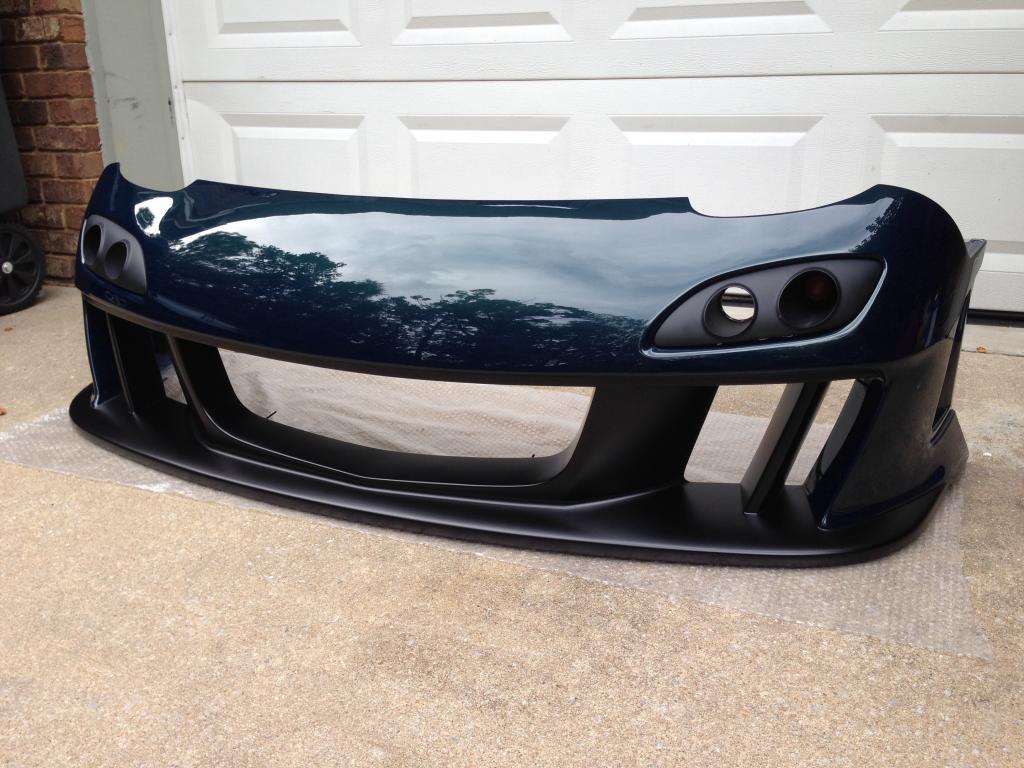
paint quality the reflection is amazing.. Definitely worth every penny to get them to paint!
Check their site: Goolsby Customs - Custom cars and collision

Some of the photos installed

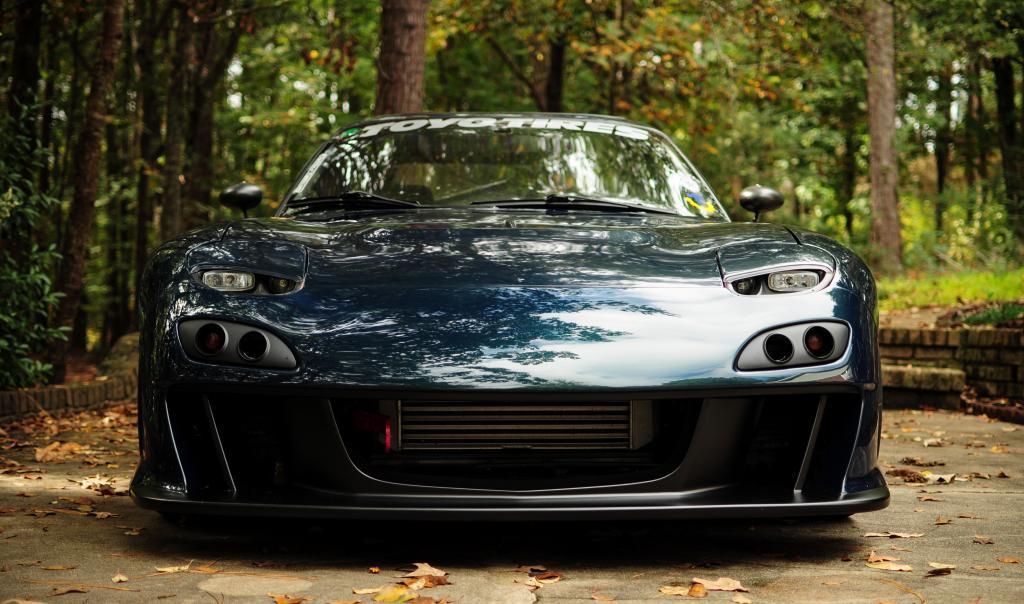
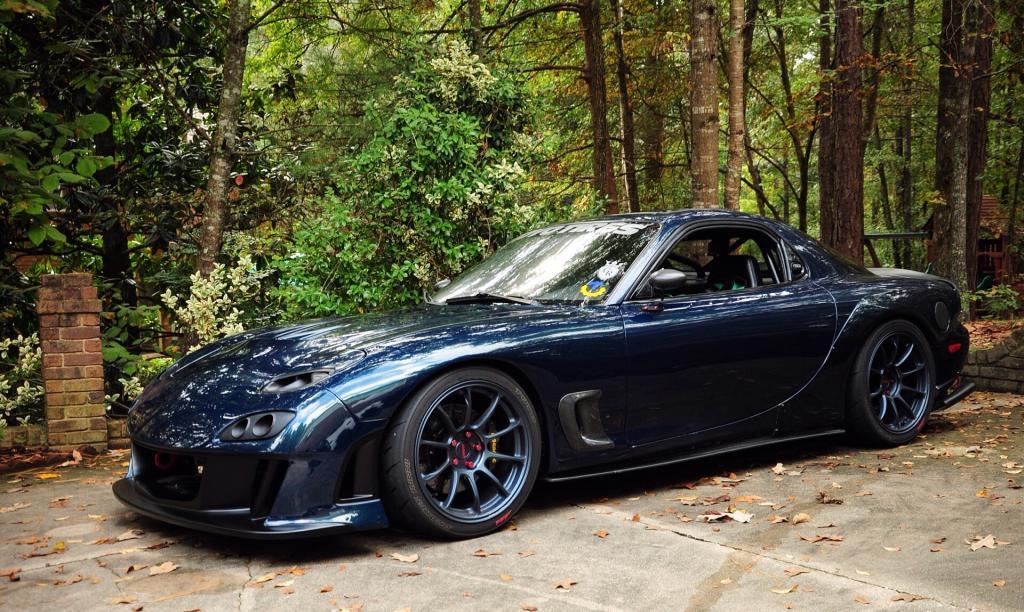
and fun pic to represent my city..
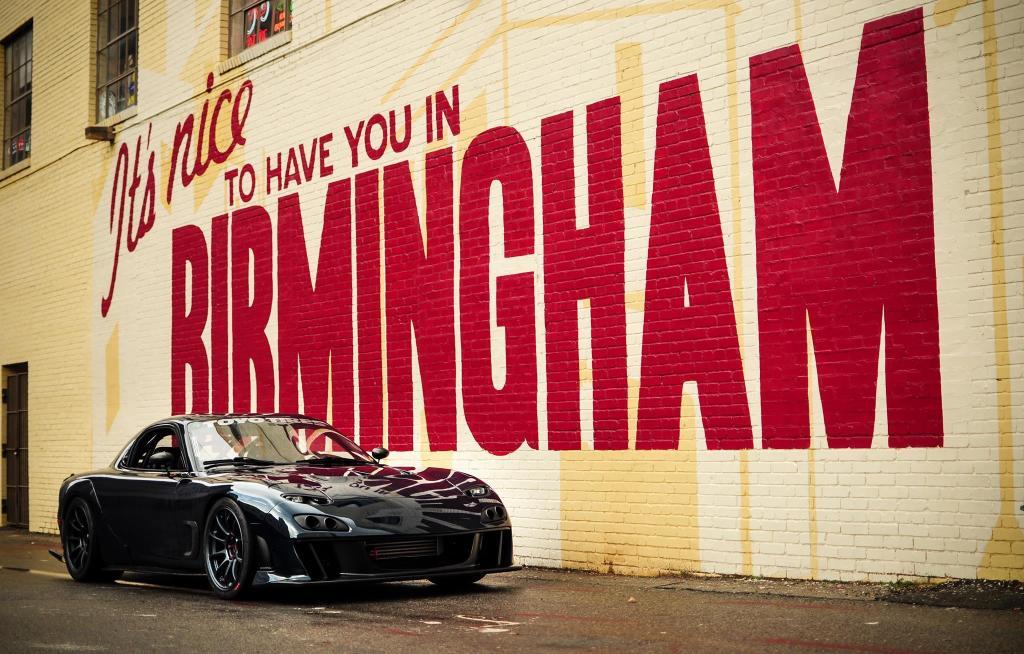
ITs been awhile since I updated.. Alot have happened so I'll start with where I left.
Made it black again..
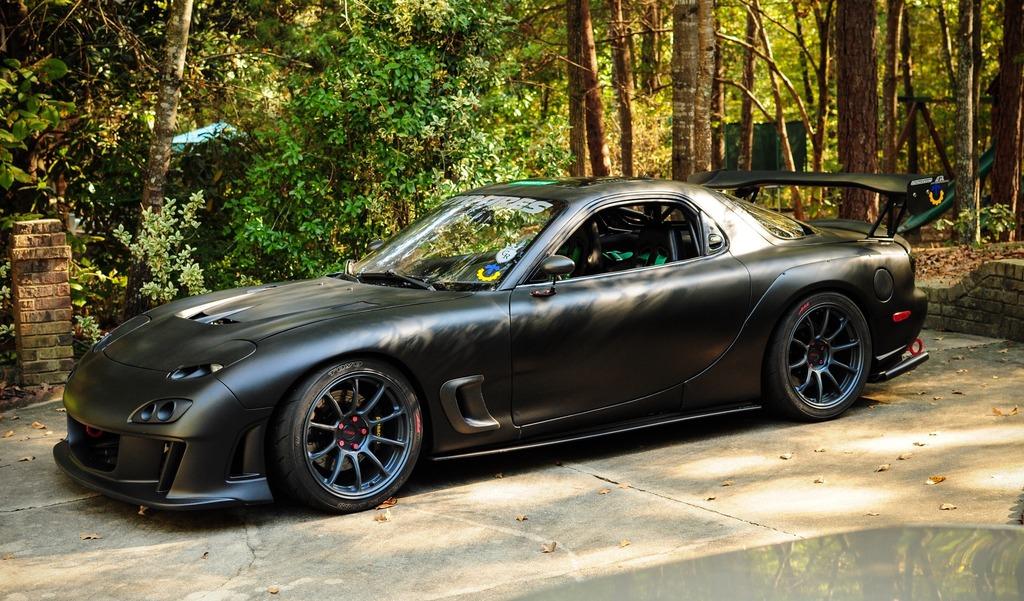
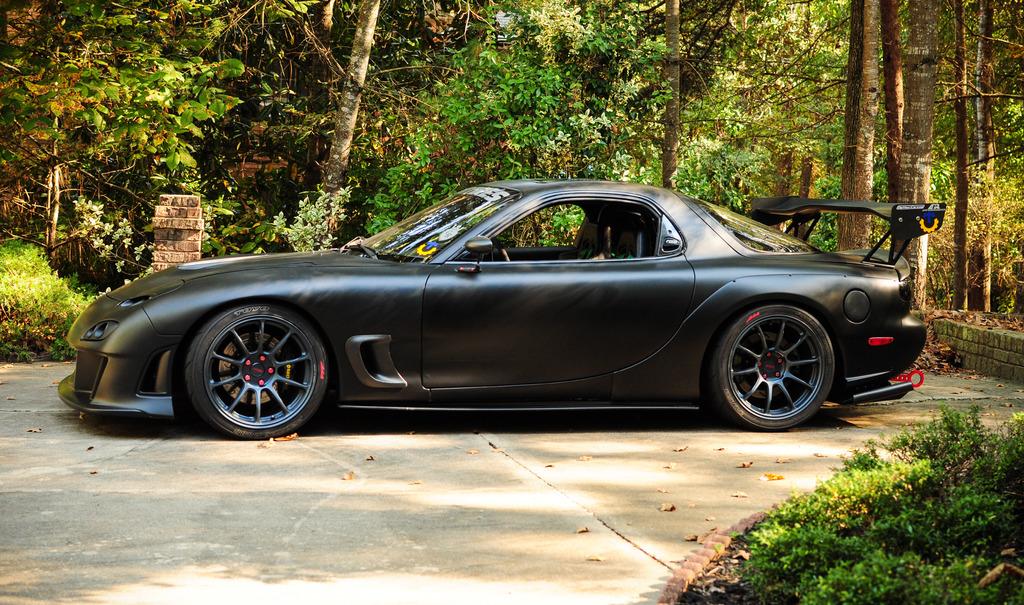
Week later, I took the car to Nashville TN to show under Grip Royal booth.
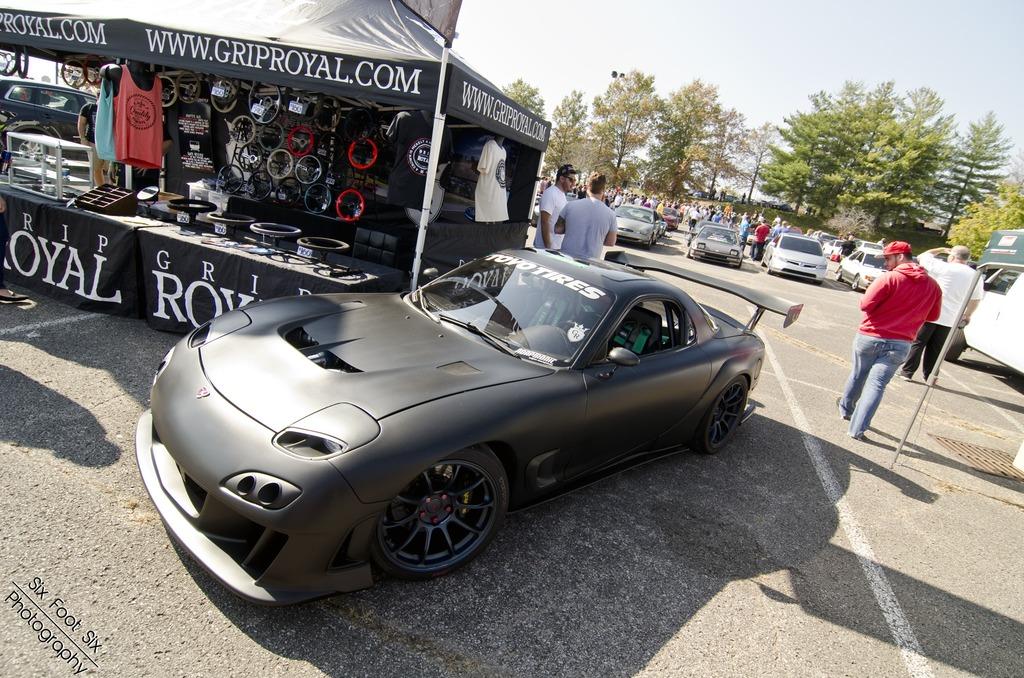
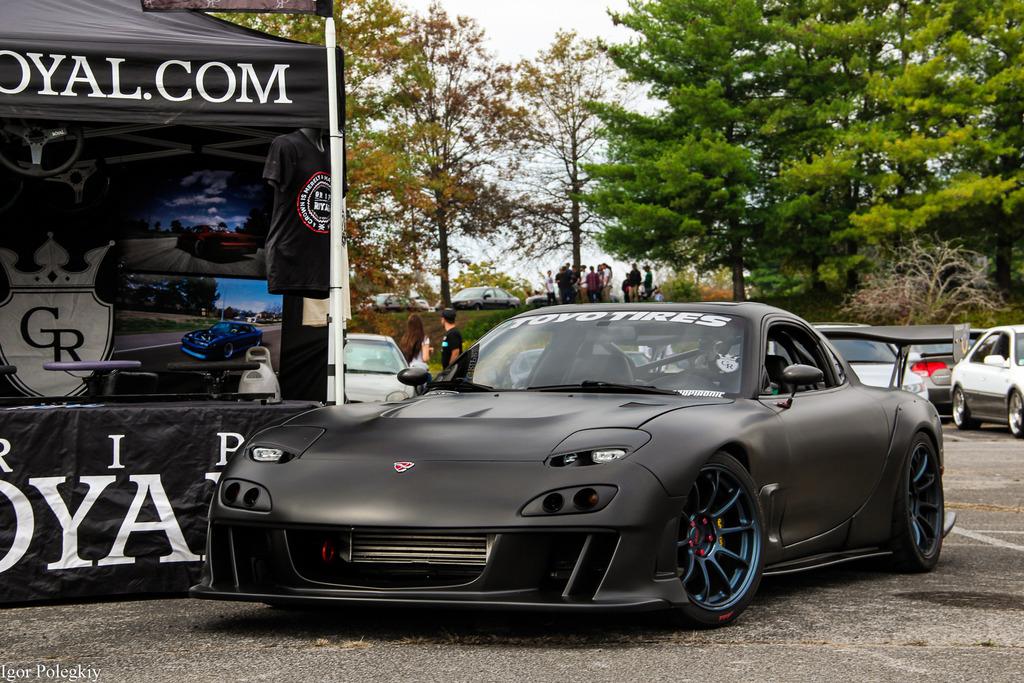
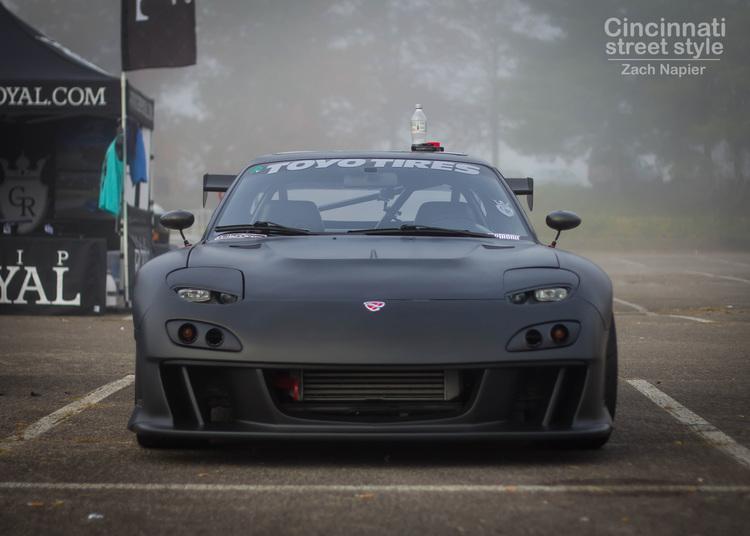
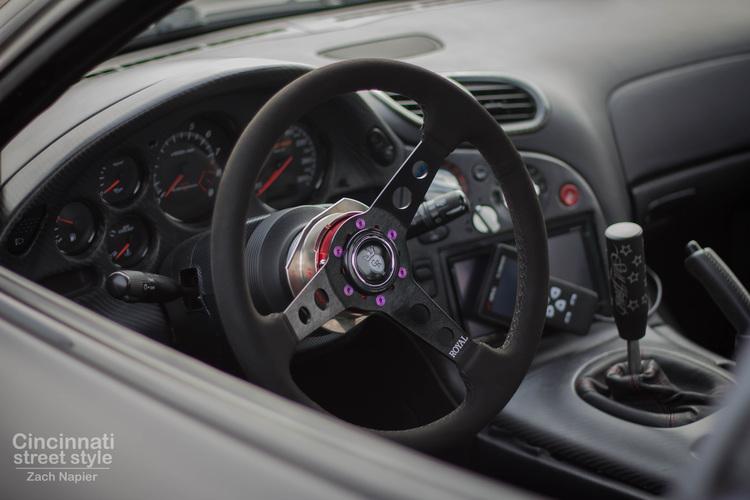

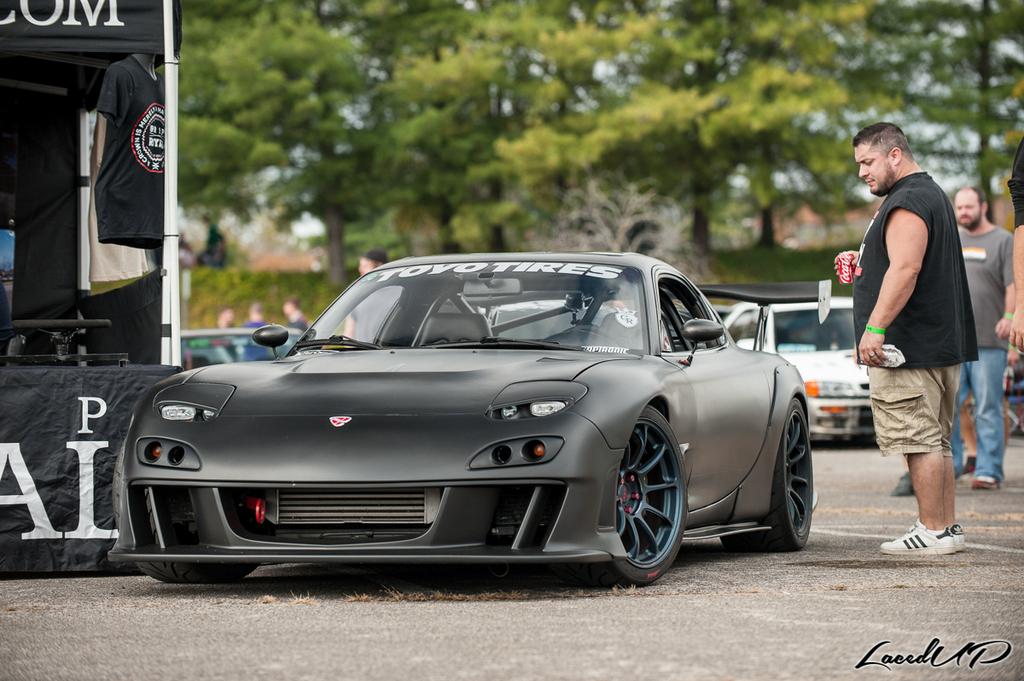
After the event, I had a photoshoot with some photographers.
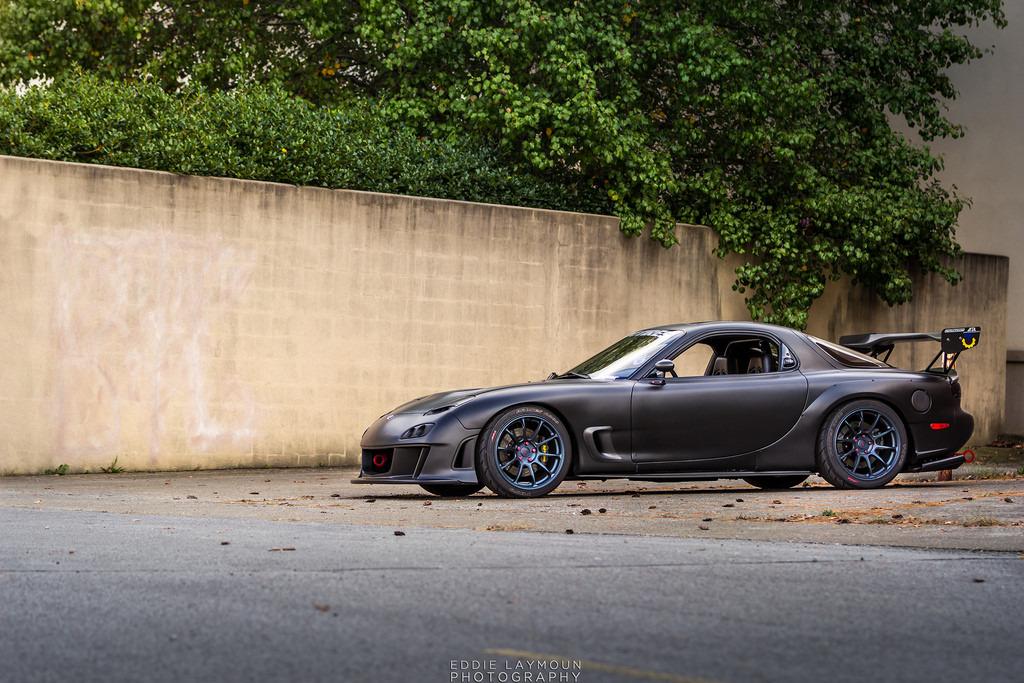
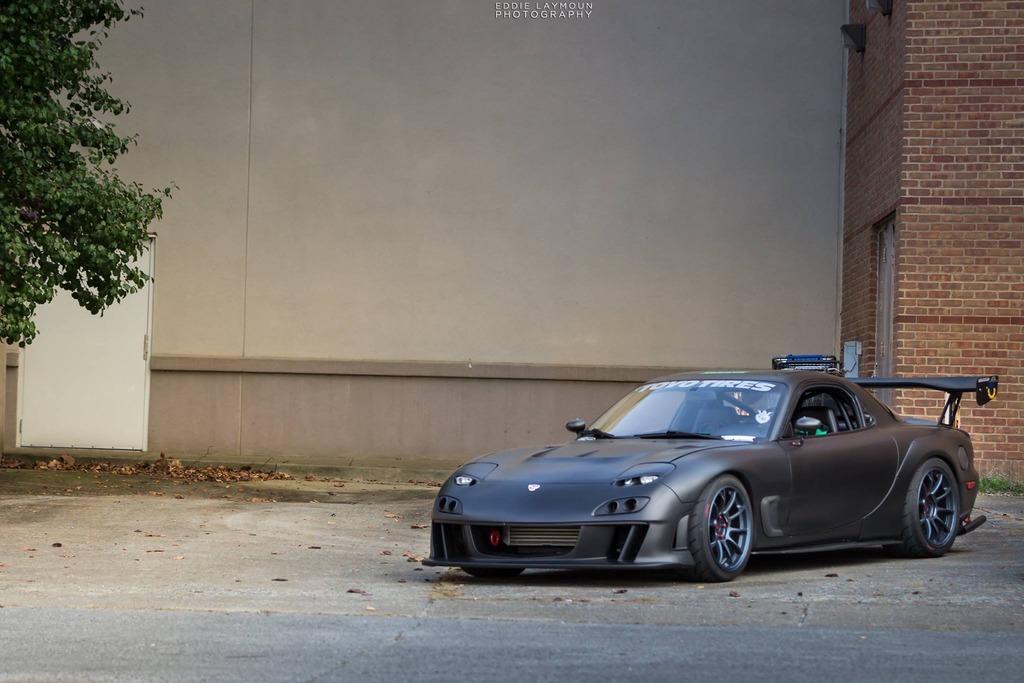
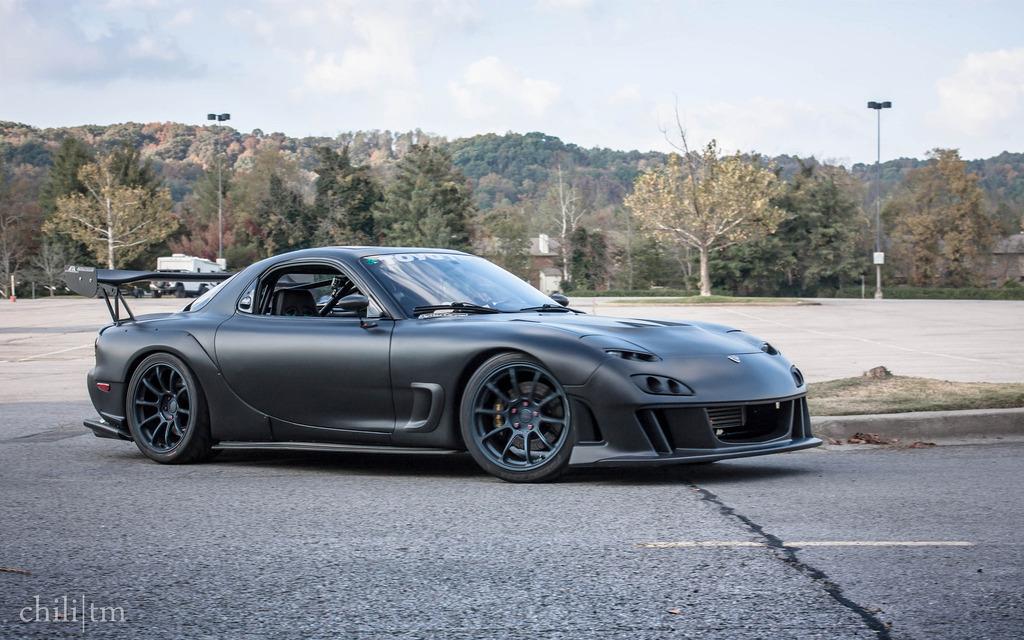
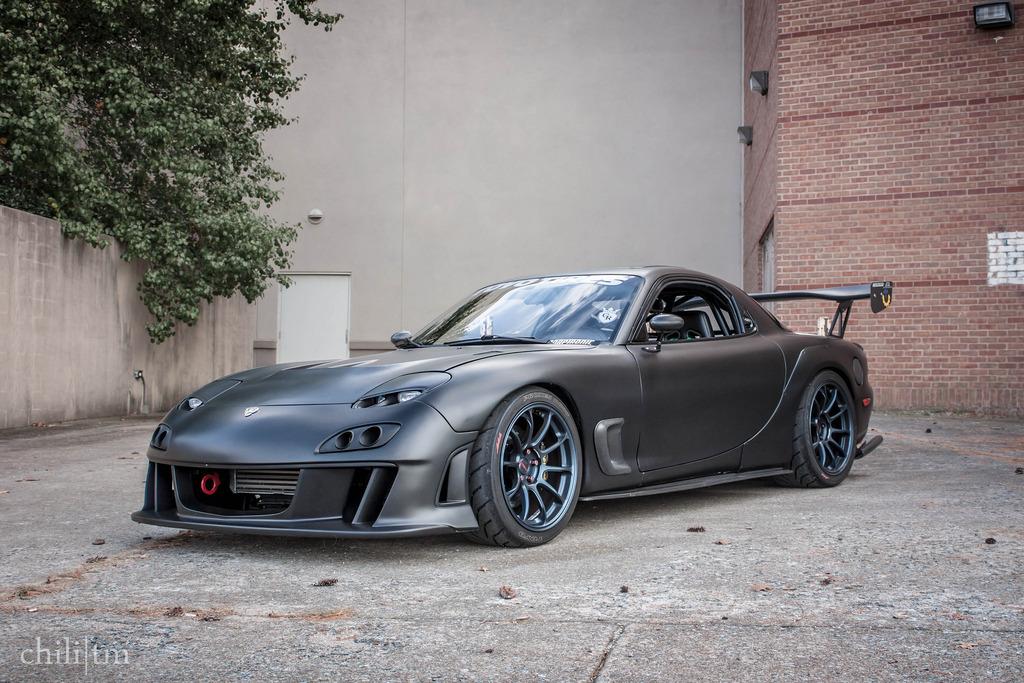
more
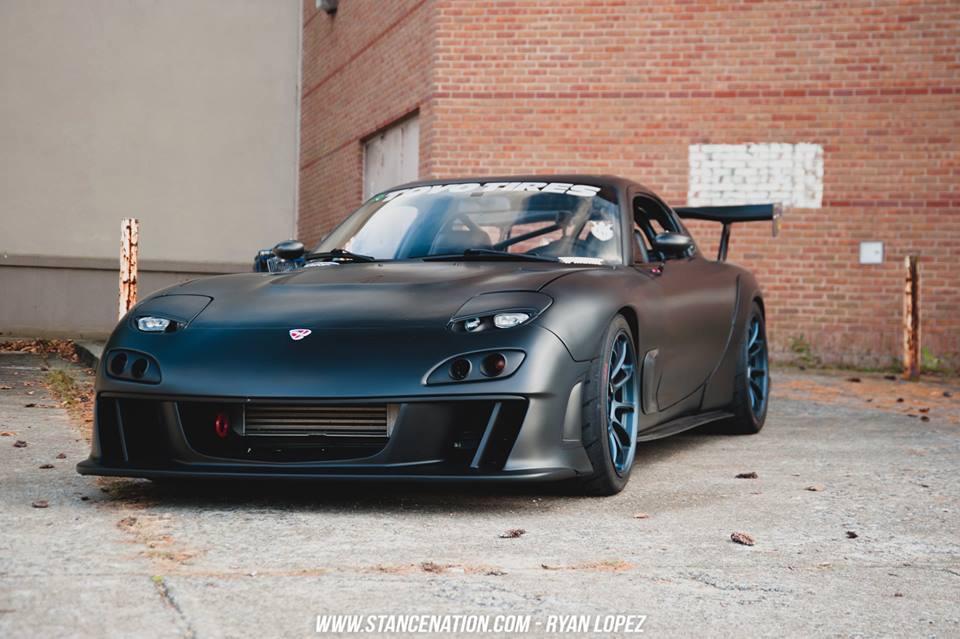
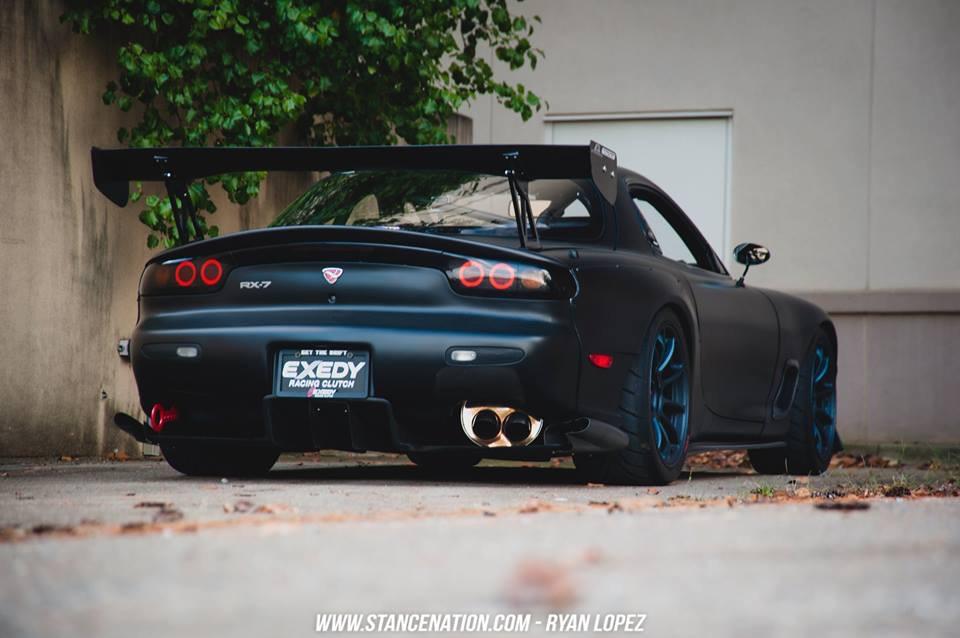
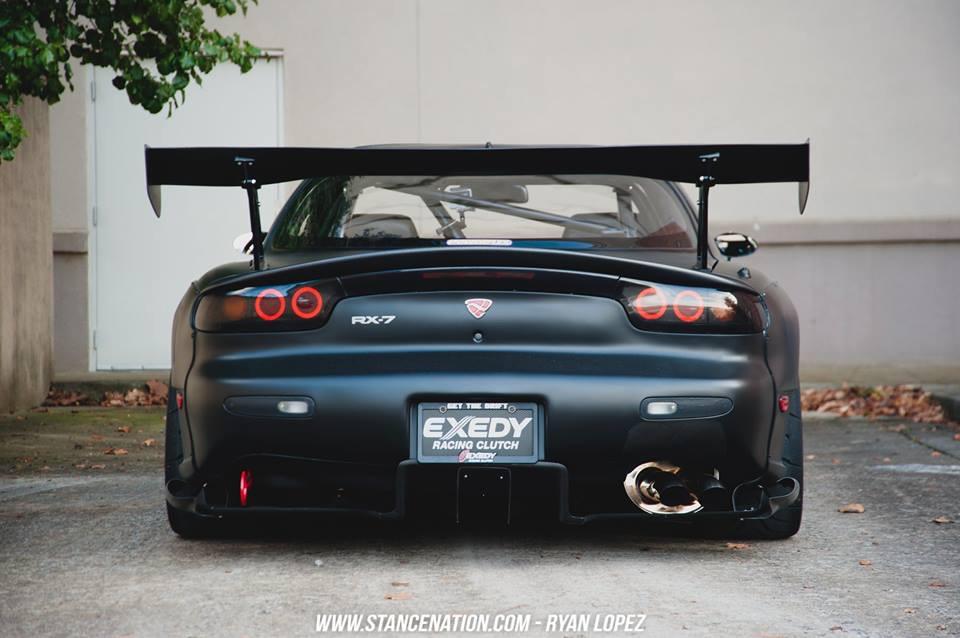
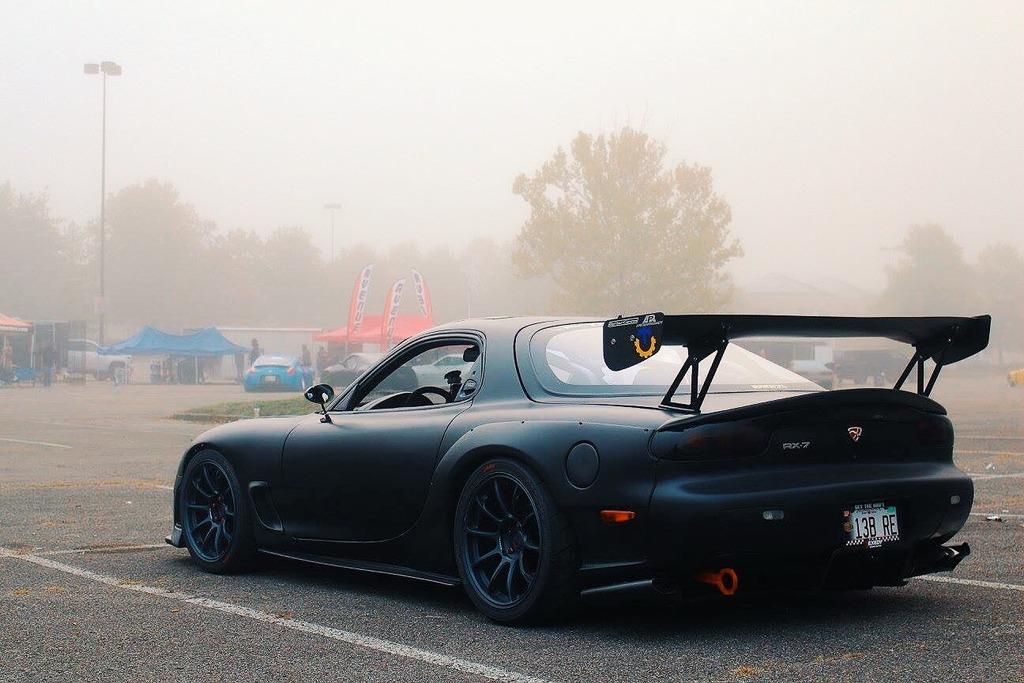
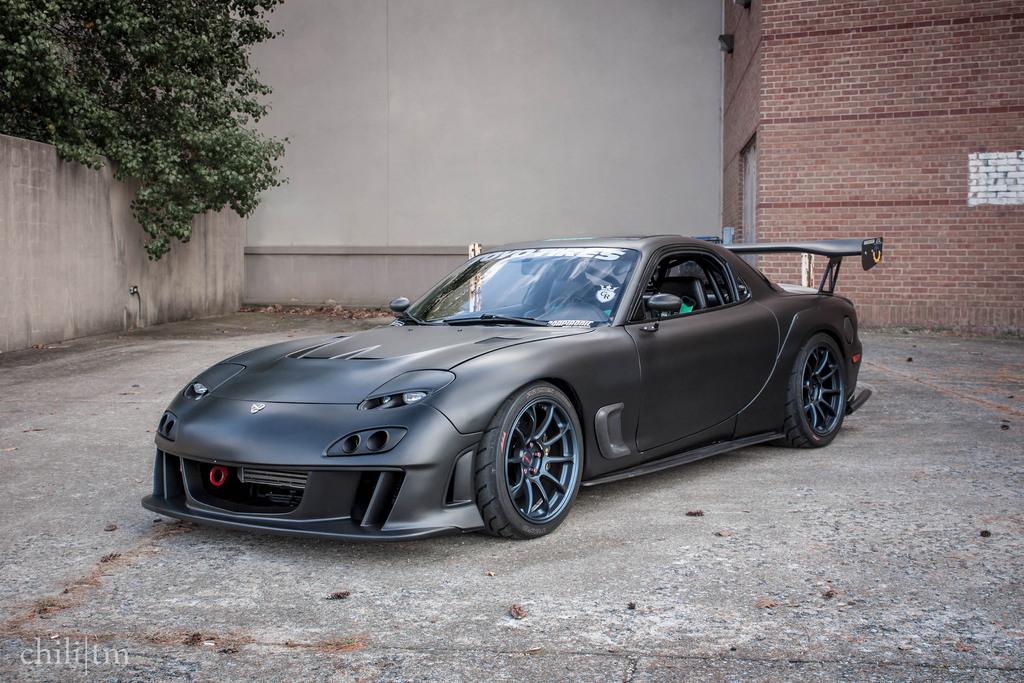
Couple of weeks later, Did a drive around Barber Motorsports Park.. Just a short drive
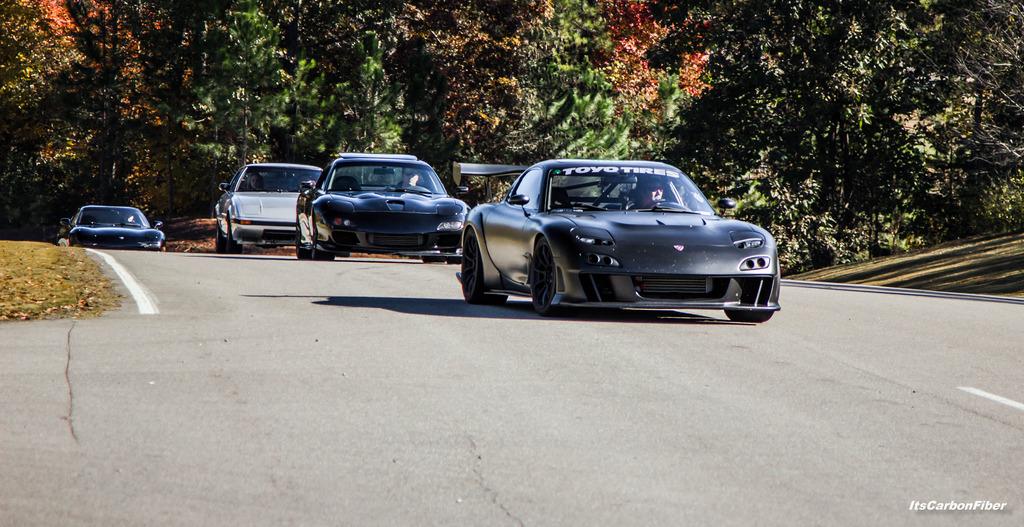
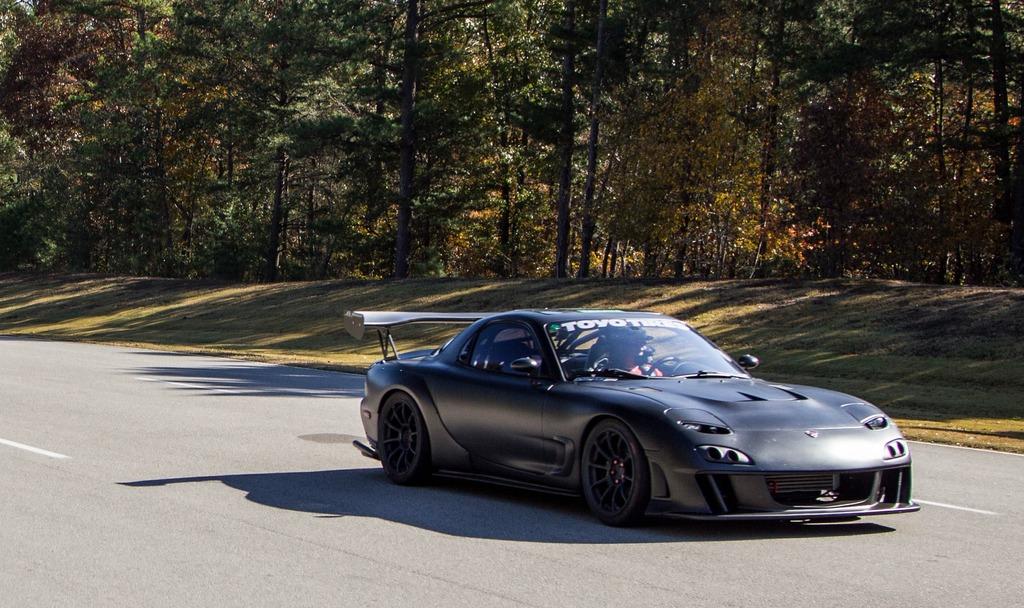
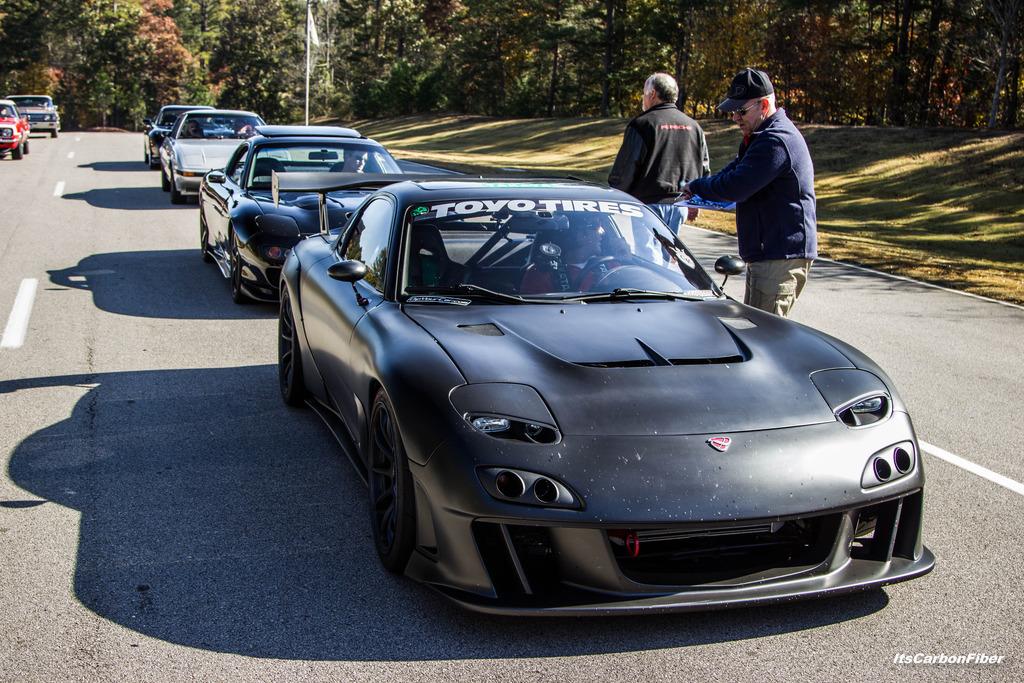
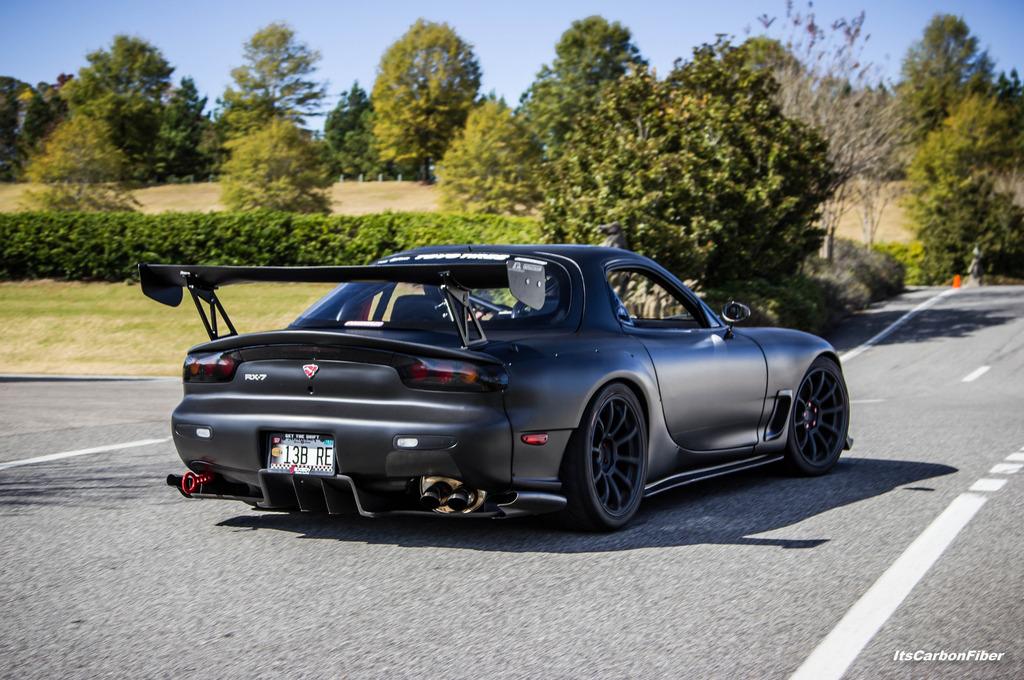
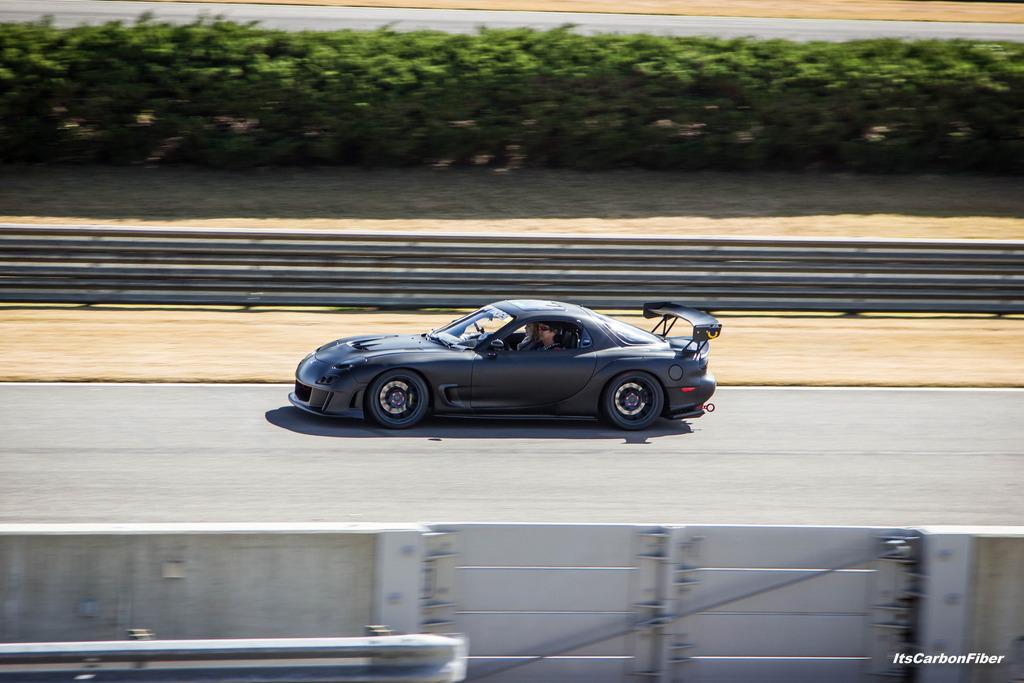
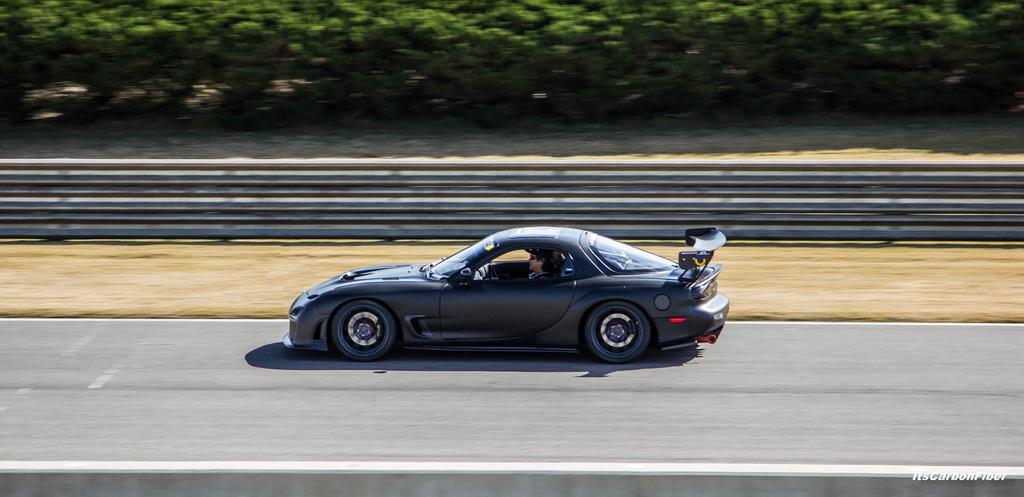
I also had couple of features on the Neochrome RX-7
First was Performance Tuner Magazine
Made the cover
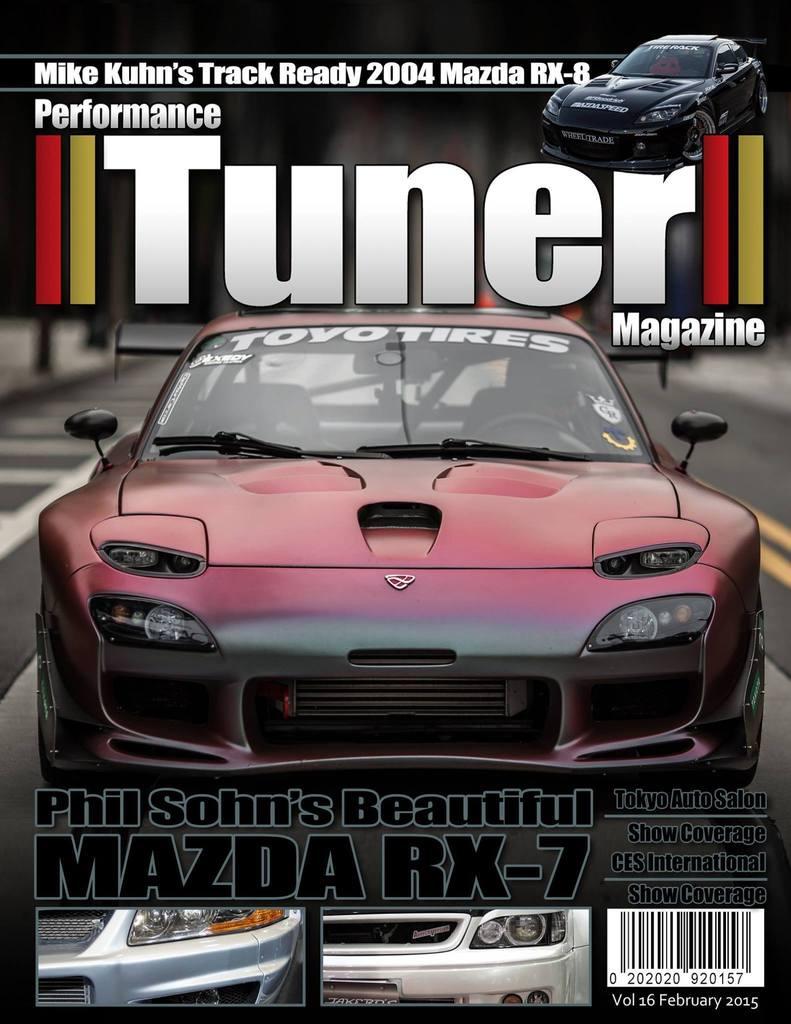
Here is an online version
Performance Tuner Magazine Volume 16
Photos from the feature... Photos by Mike Kuhn
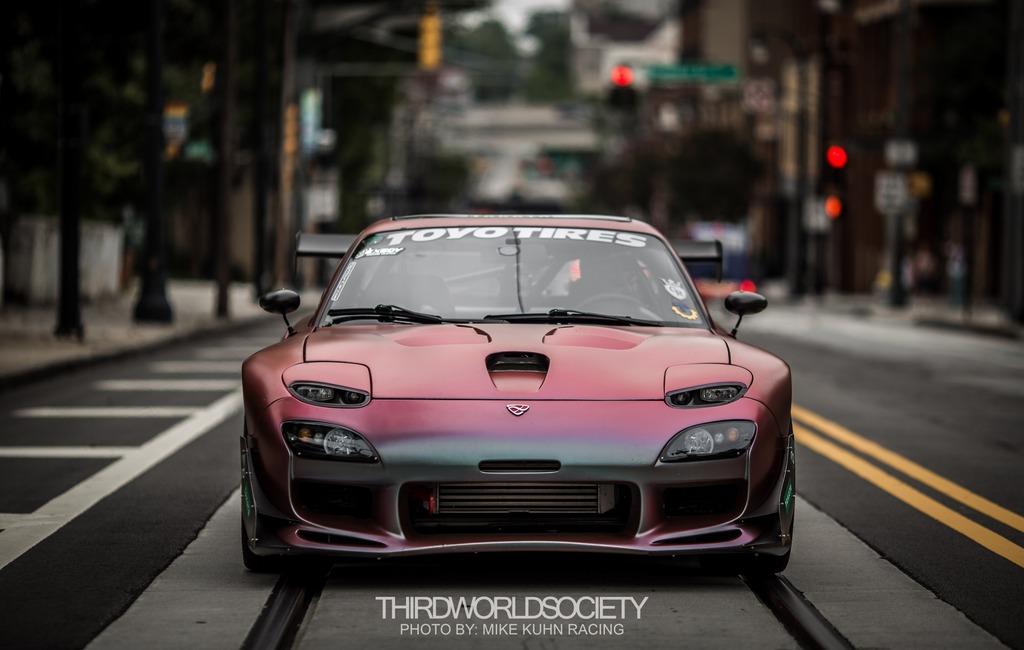
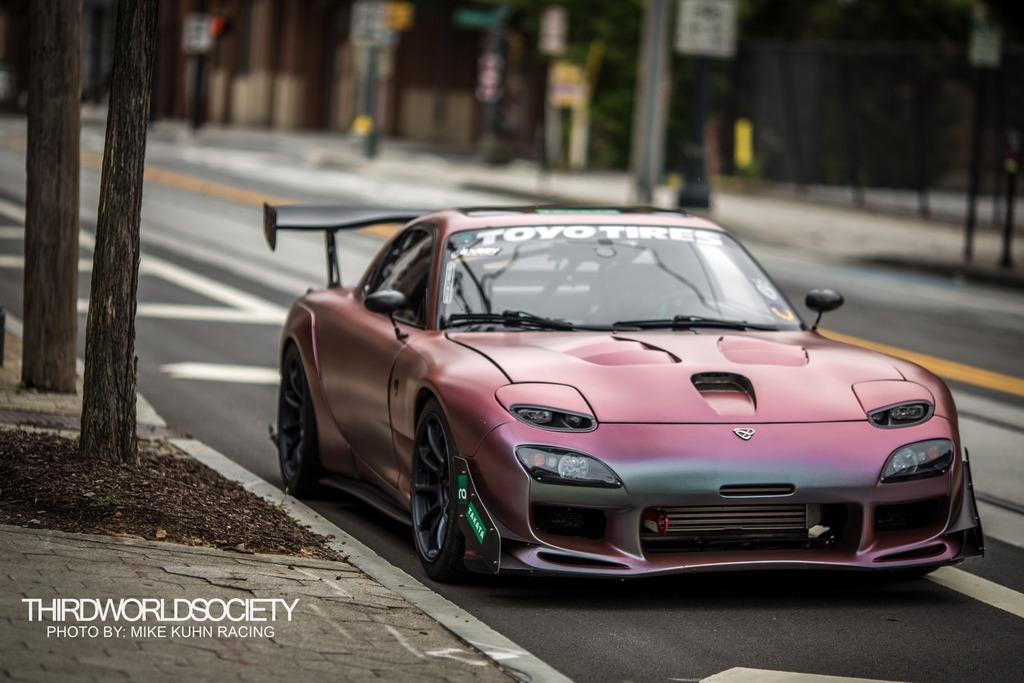
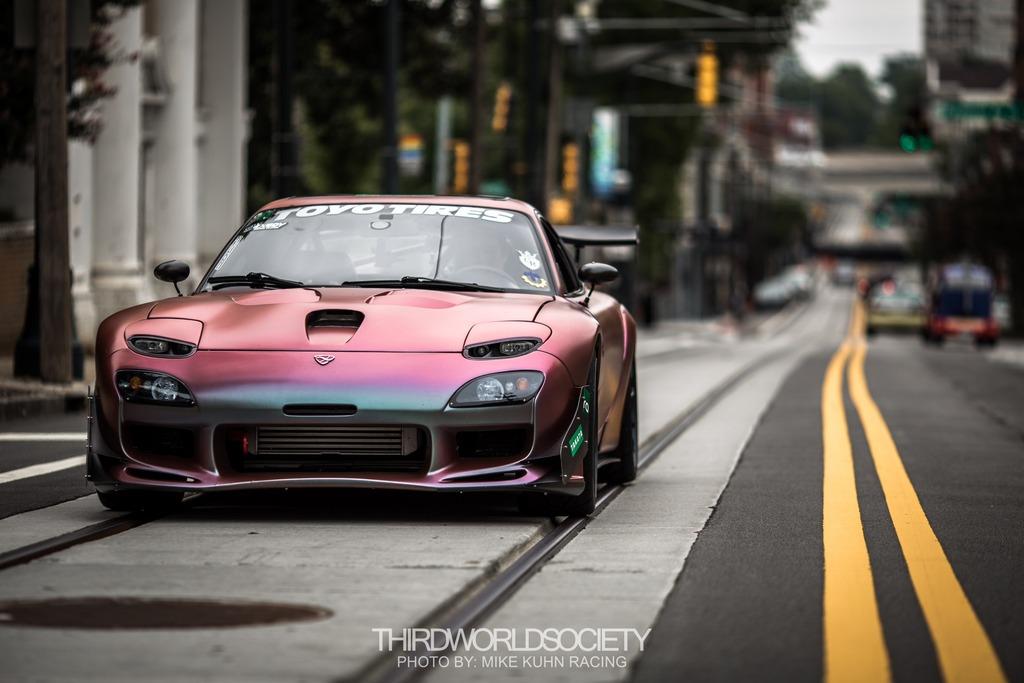
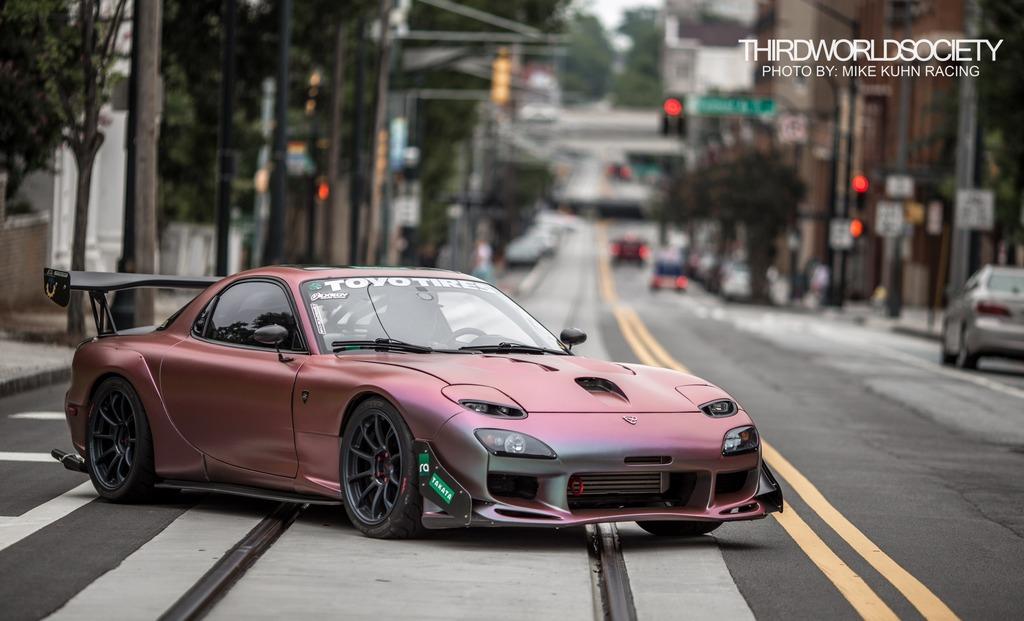
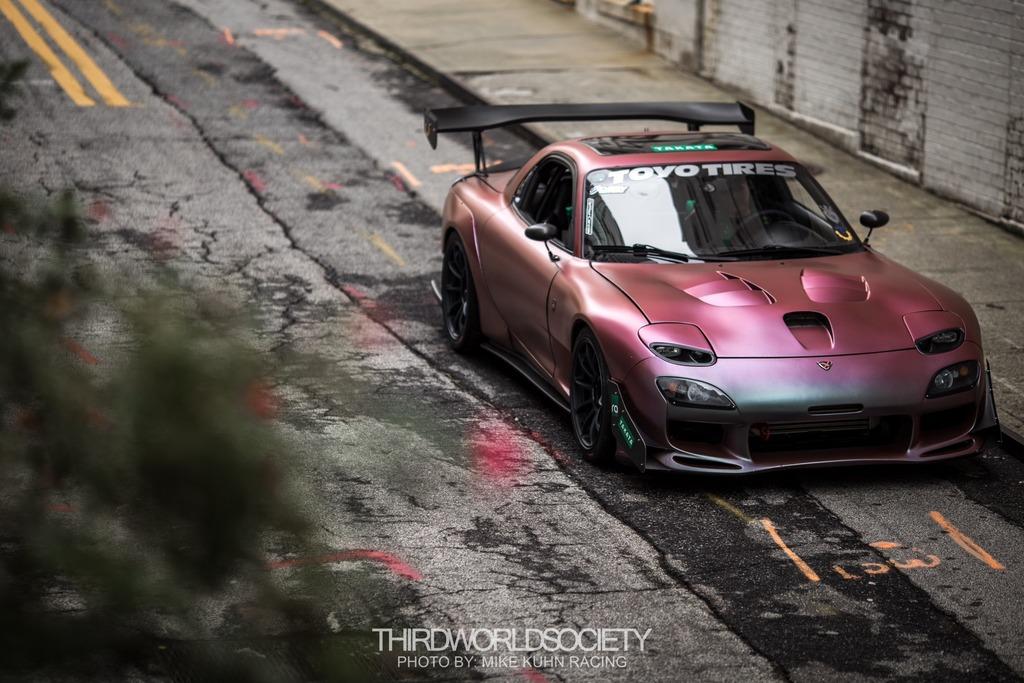
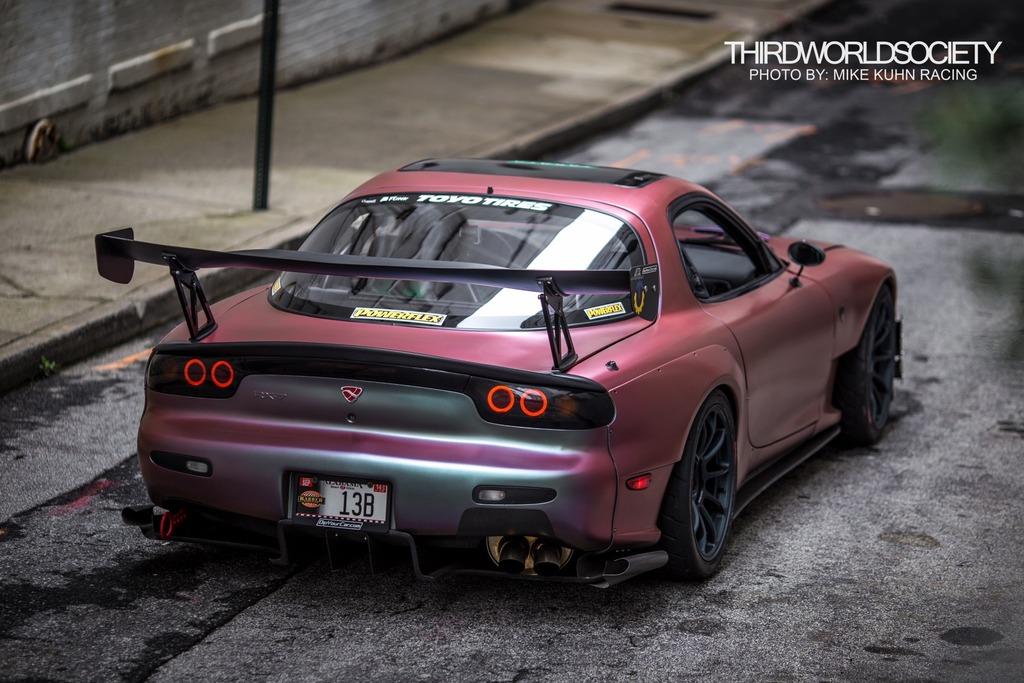
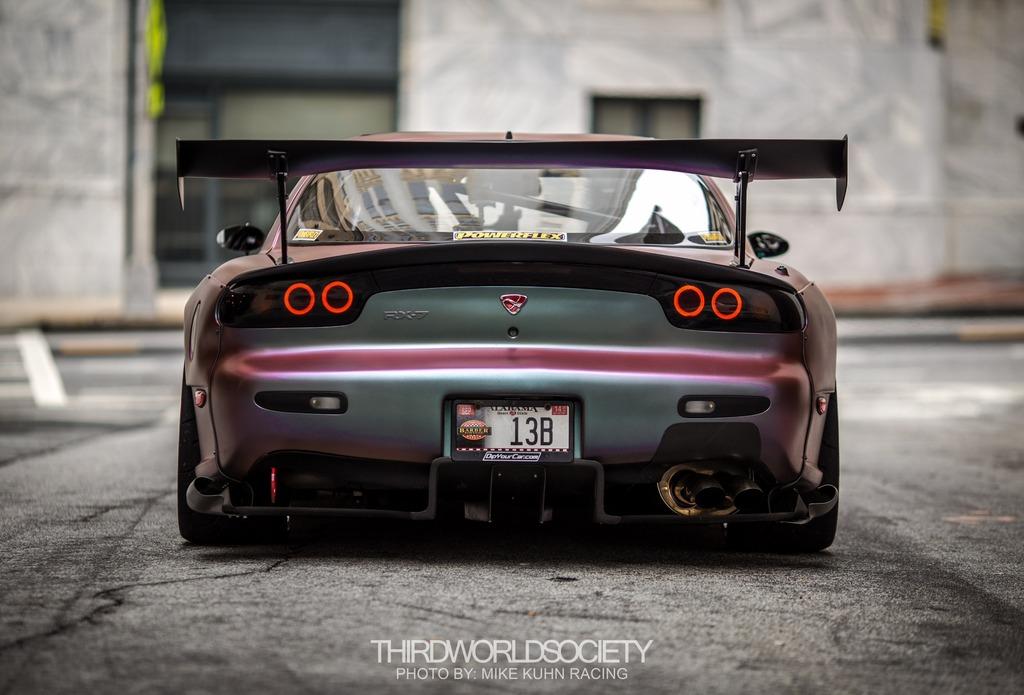
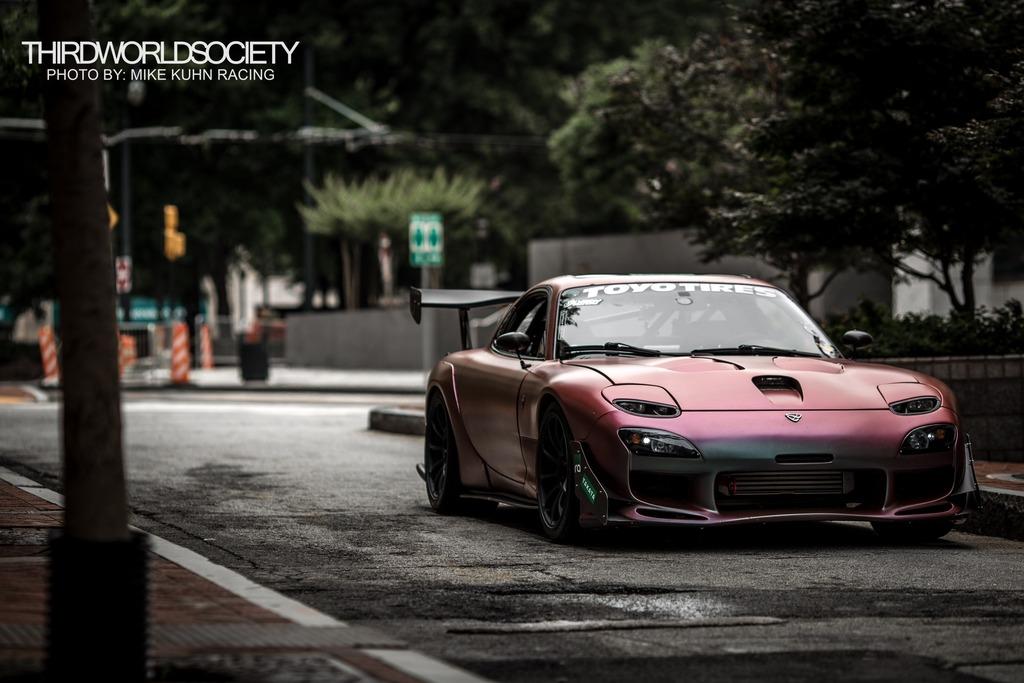
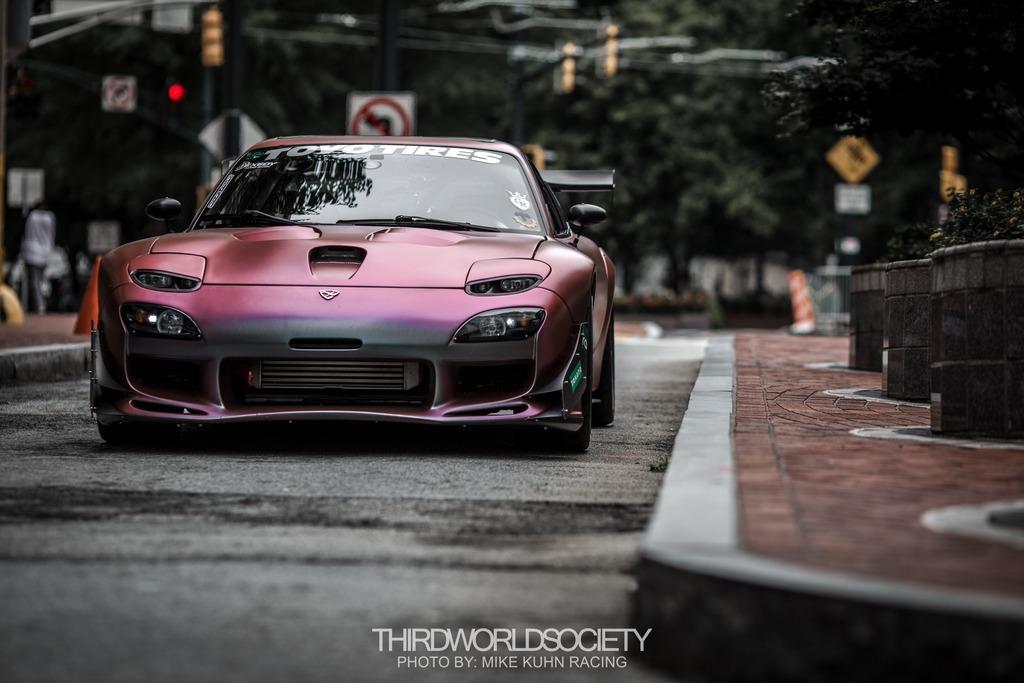
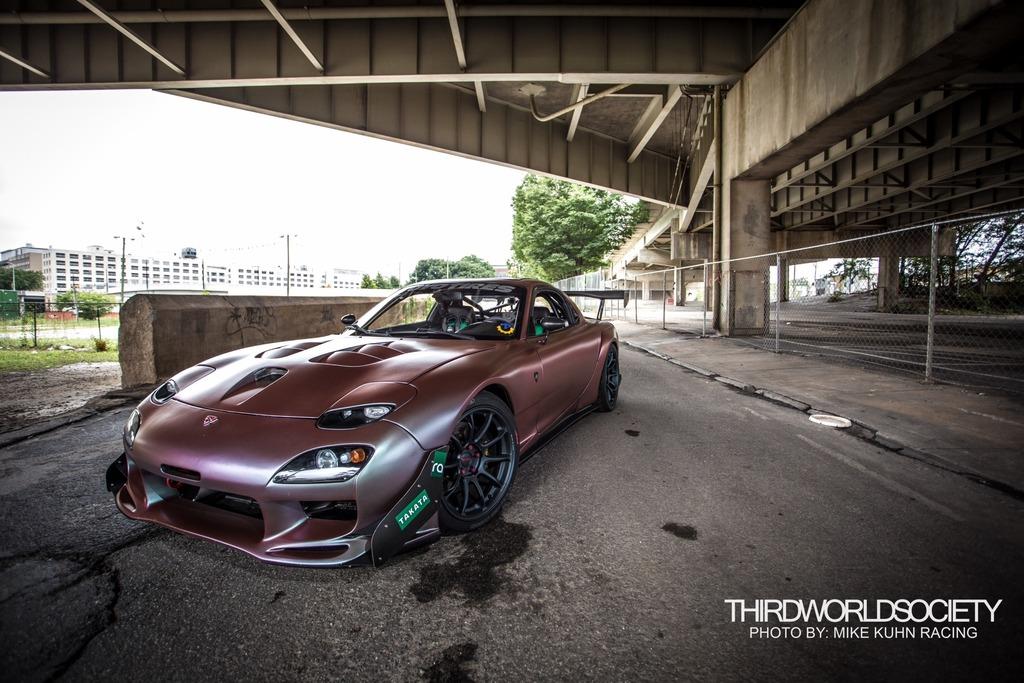
6-15-2015
So, my FD also got into S3 Magazine..
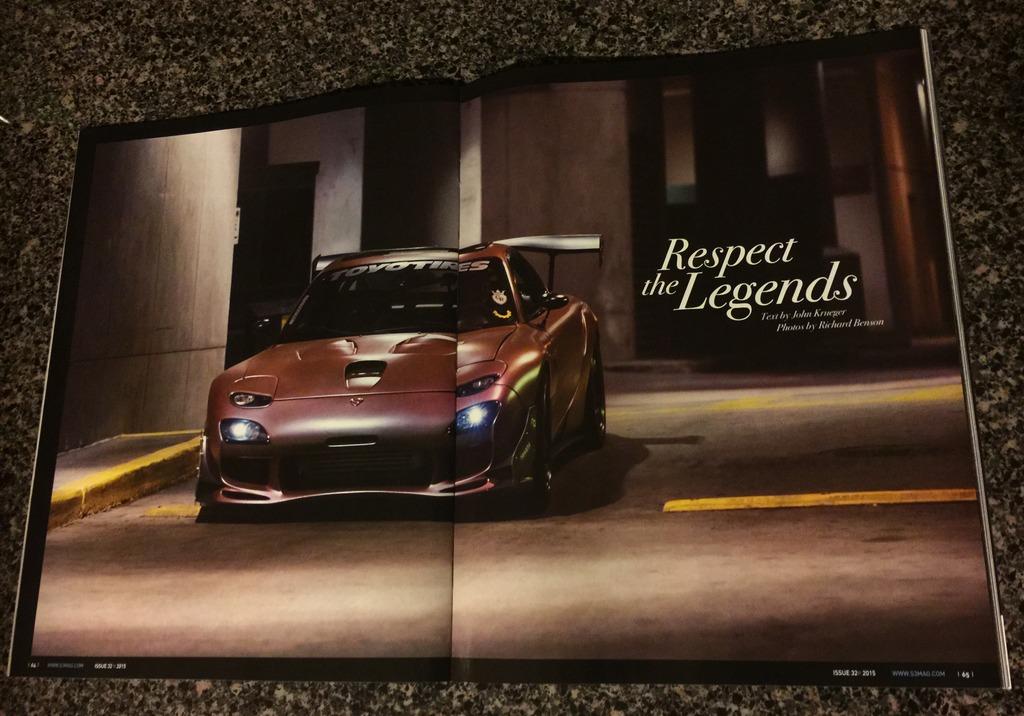
Photo by Richard Benson
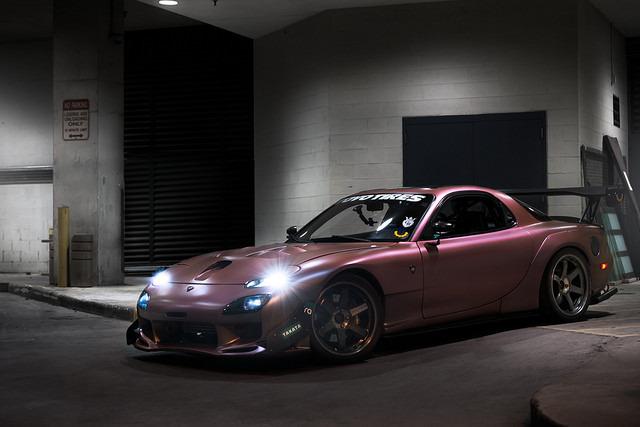
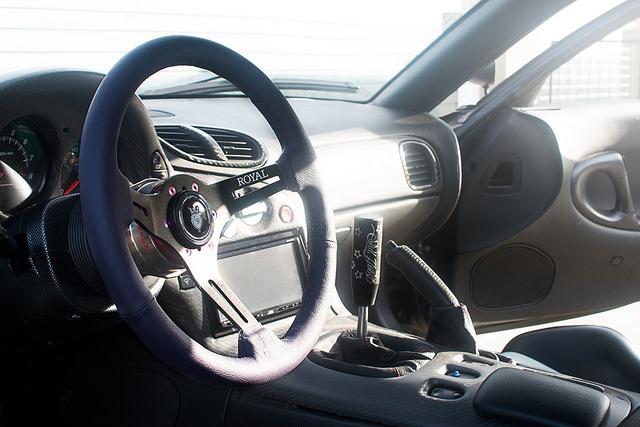
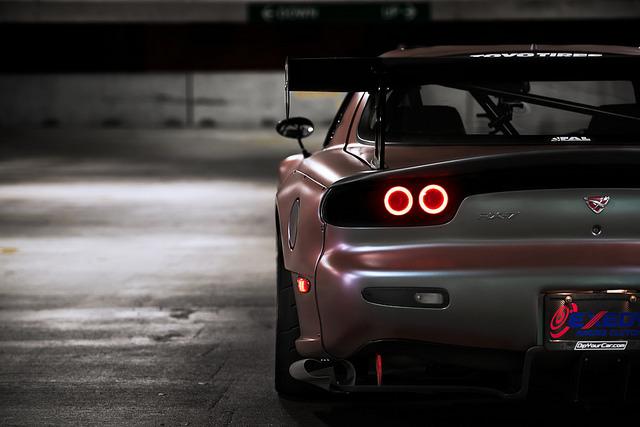
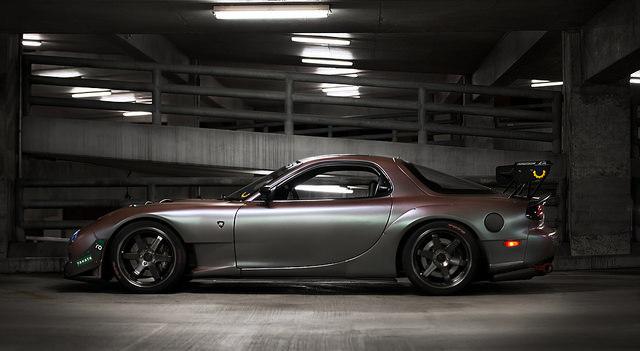
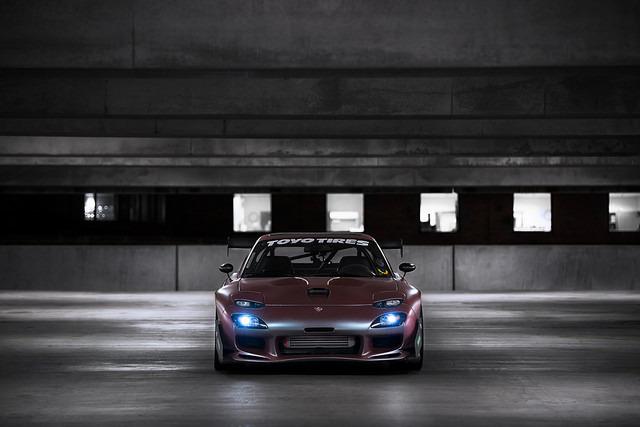
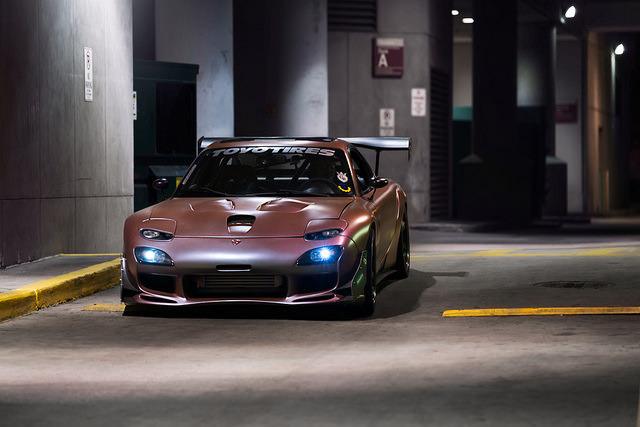

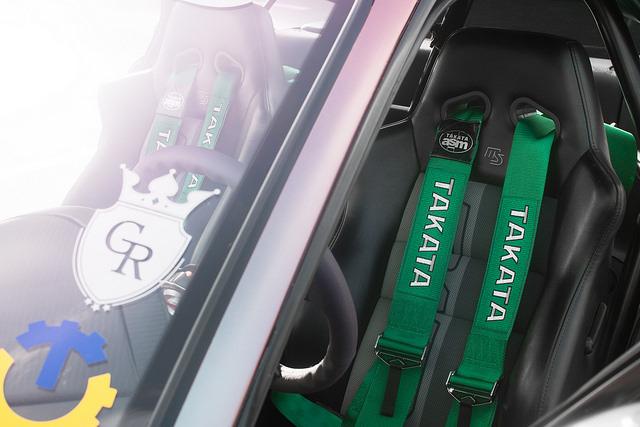

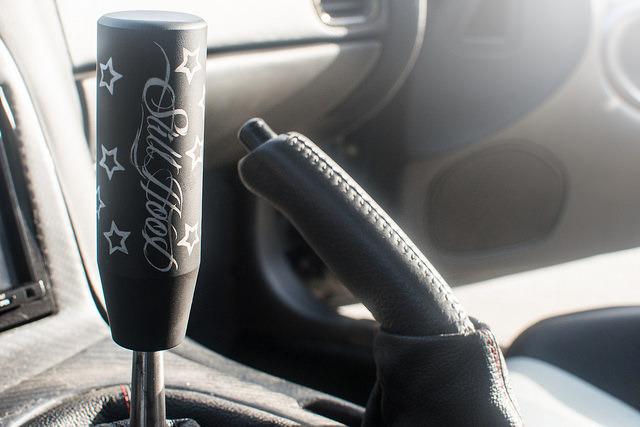
6-21-2015
So, I did several track days in year 2014. But one of the more interesting track experience was driving my friends R35 GTR at Barber Motorsports Park.
Here are couple of pics of his car and a video
2010 GTR making about 550WHP on Pump Gas..
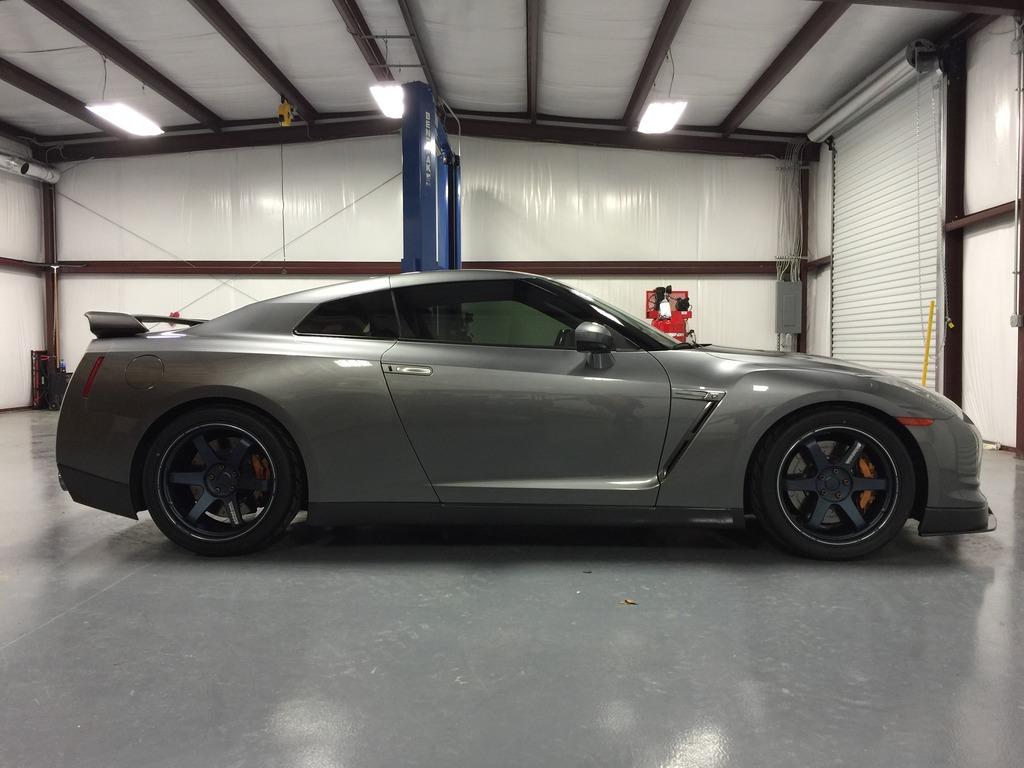
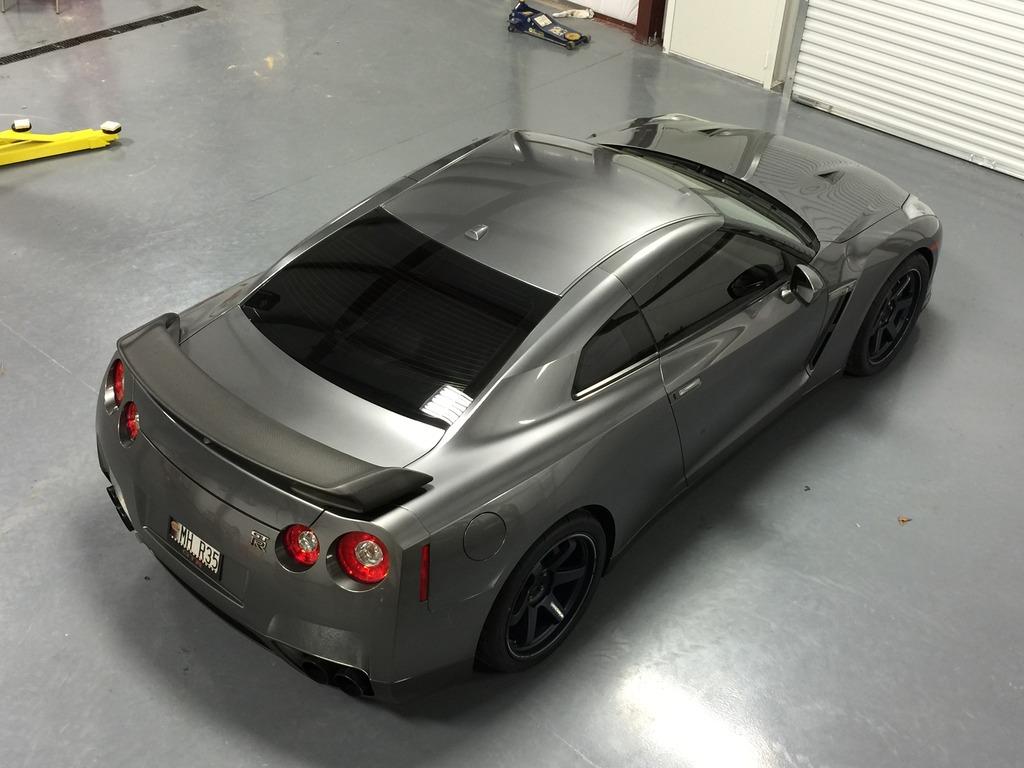
My friend let me drive 2 x 20 min sessions with his car. Since it wasn't my car I was braking early and was getting used to the paddle shifter. Also the lack of 4+ point harness, I was sliding around in the seat. But was it FAST!!! Also, even on Race setting, I could feel the traction control kicking in at certain spots on the track. I guess it made sense as I was pulling some serious G in 4000lb car and I guess it kicked in to save me.
Anyhow, Driving the GTR made me realized I needed more HP and I was in the right direction when I started to build and upgrade my engine bay set up. I been wanting to build my own engine and turbos. Luckily I was good friend with owner at BNR Turbos and he allow me to be trained and build my own Stage 3 Turbos (bnrsupercars.com) and Engine build was assisted by my long time engine builder, Luis Canizales of LCR in Gadsden, Alabama.
More Photos of turbo build and Engine build in next couple of days..
More Update...
Turbo Build...
For 3-4 weeks, I would take one day a week to head over to BNR Supercars to learn how to build turbos. Funny enough, I started off by building upgraded Mazdaspeed 3 turbos. Mainly assembling.
Finally, started on my own Stage 3. Everything for these turbos are new. Everything!
Started off by rotating assembly
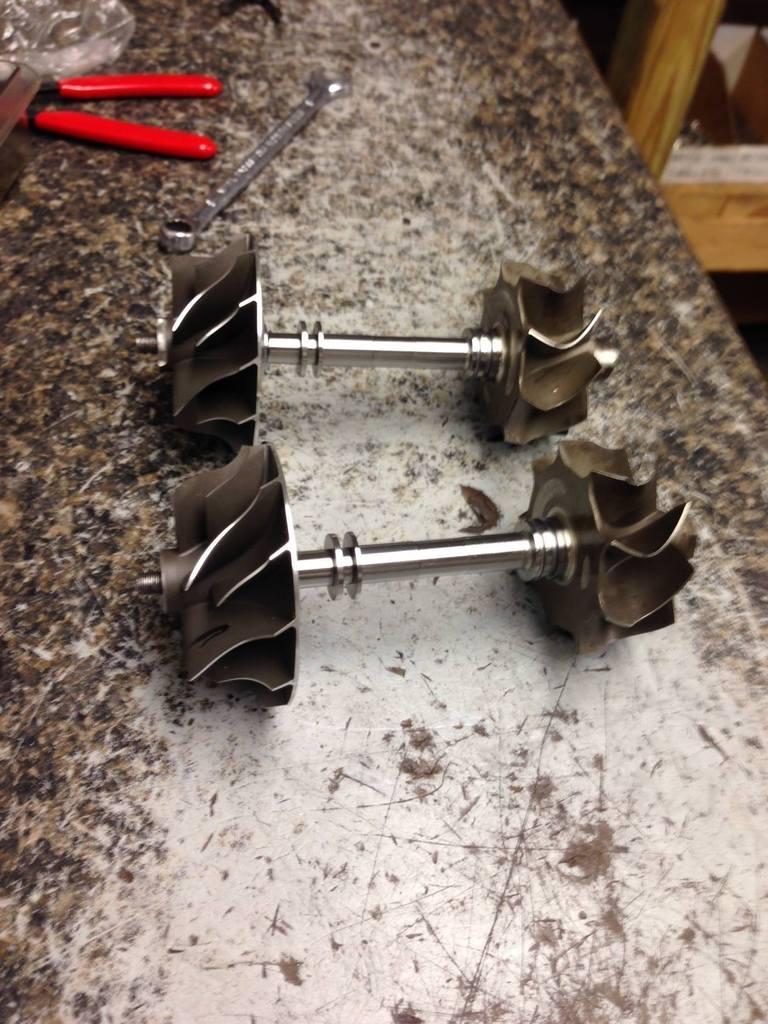
Learned how to balance
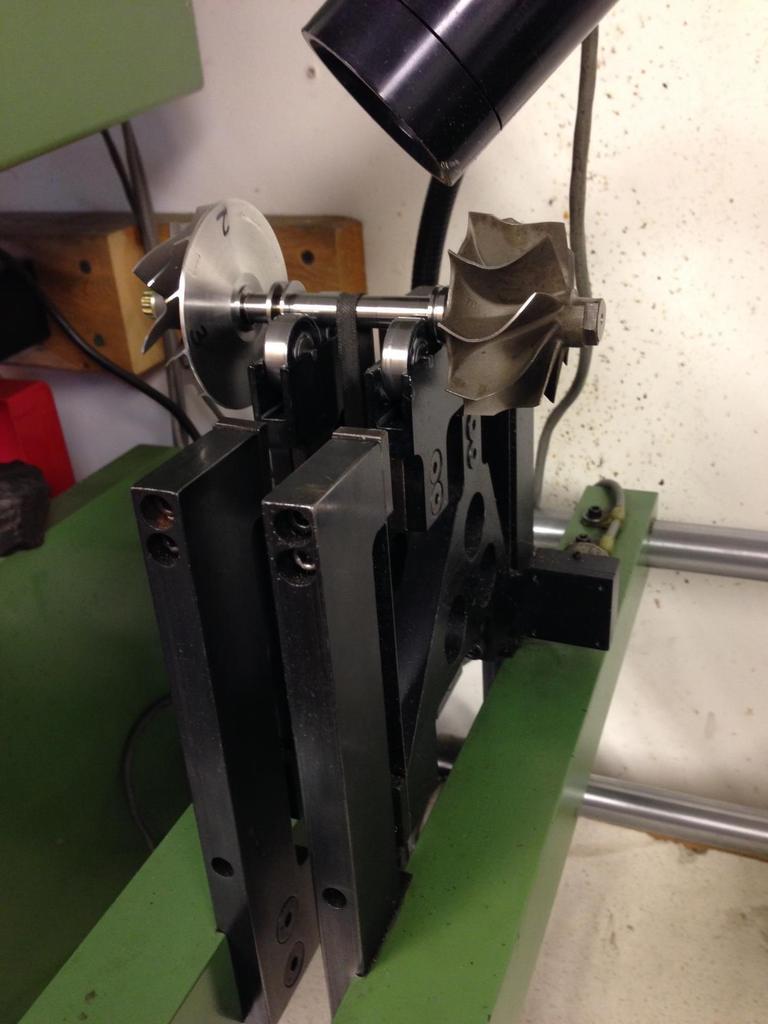
After balanced, assembly
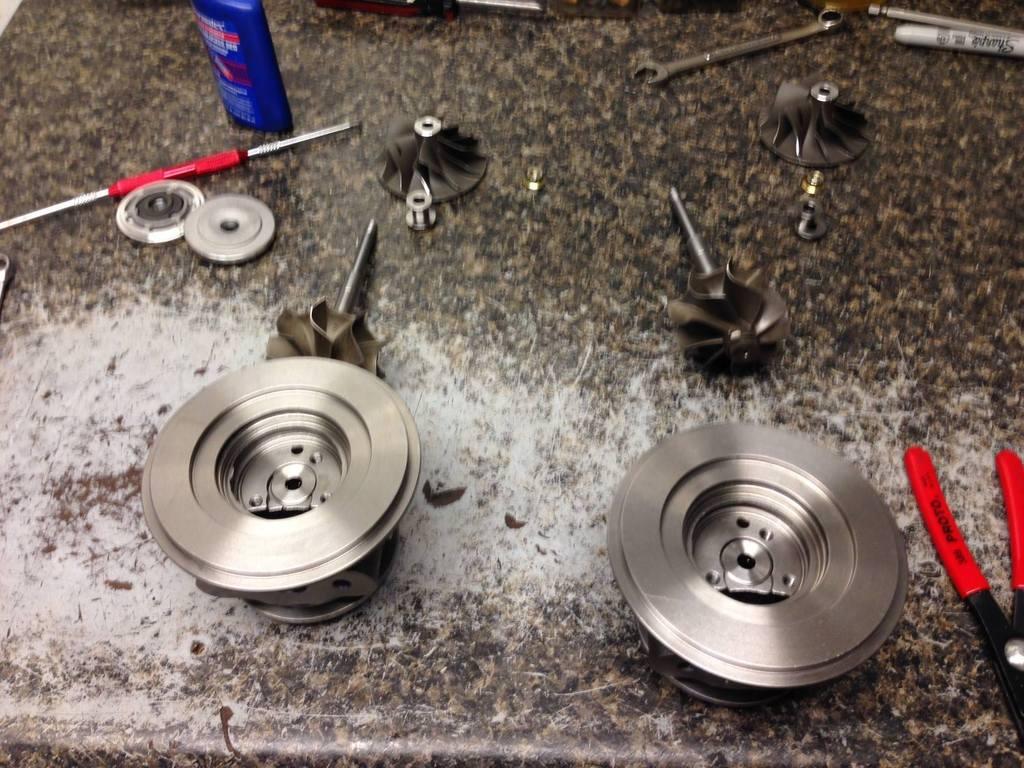
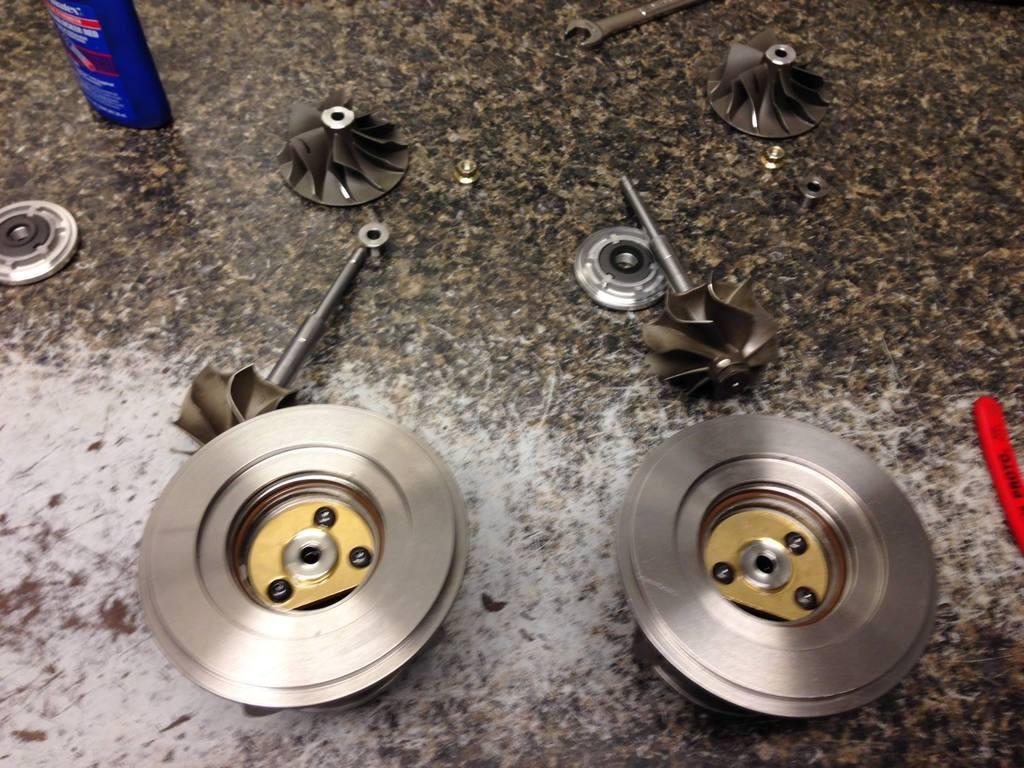
Cartridges assembled..
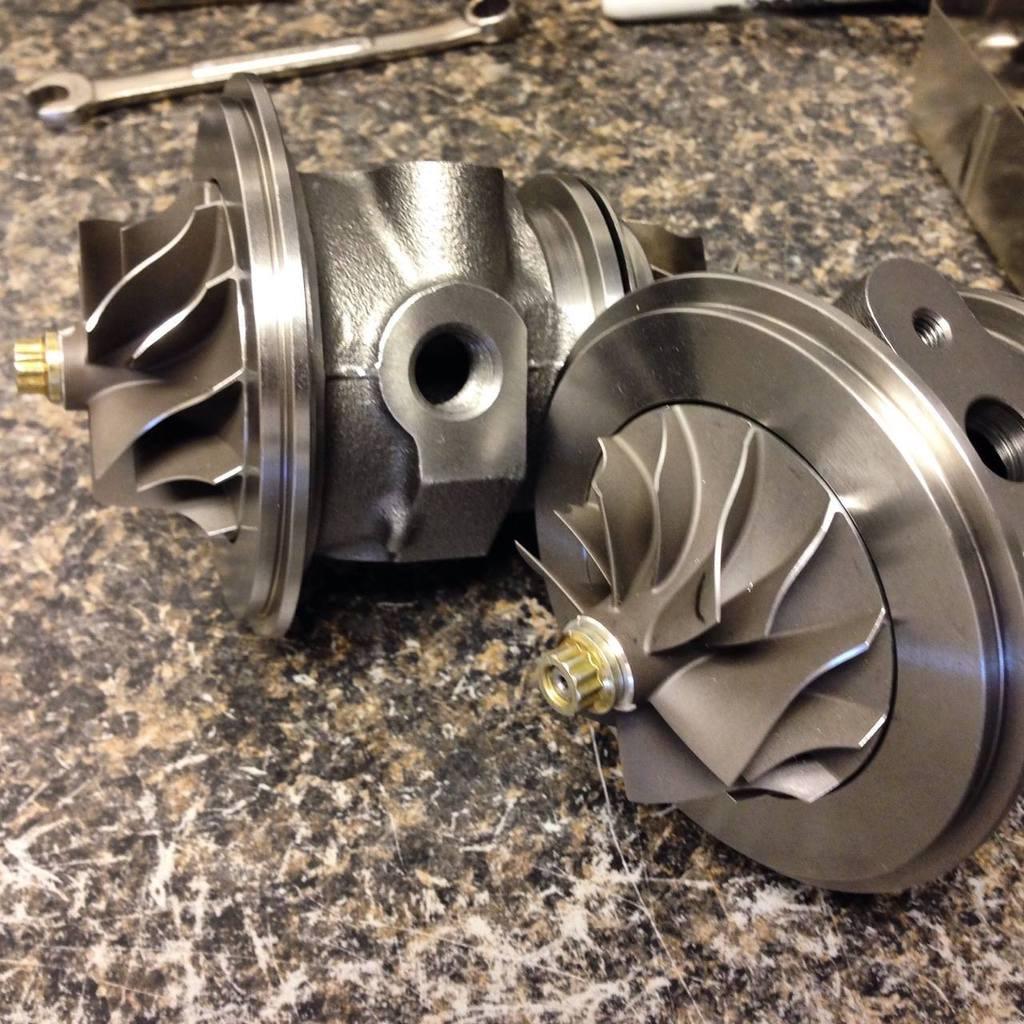
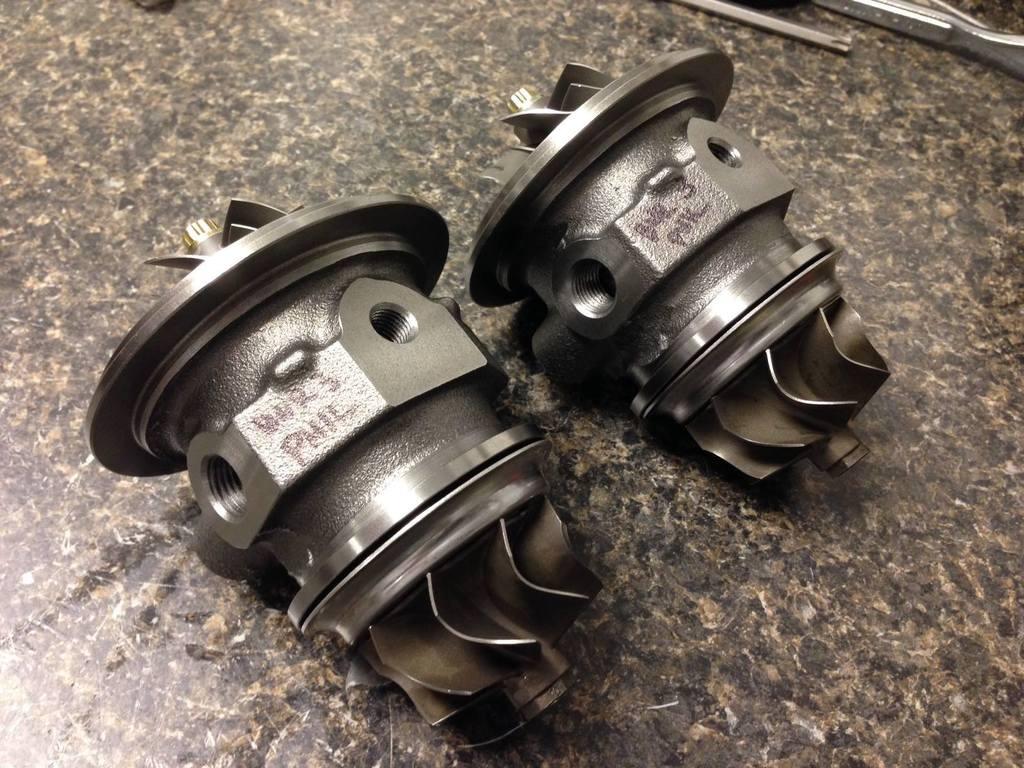
Compressor Housing on
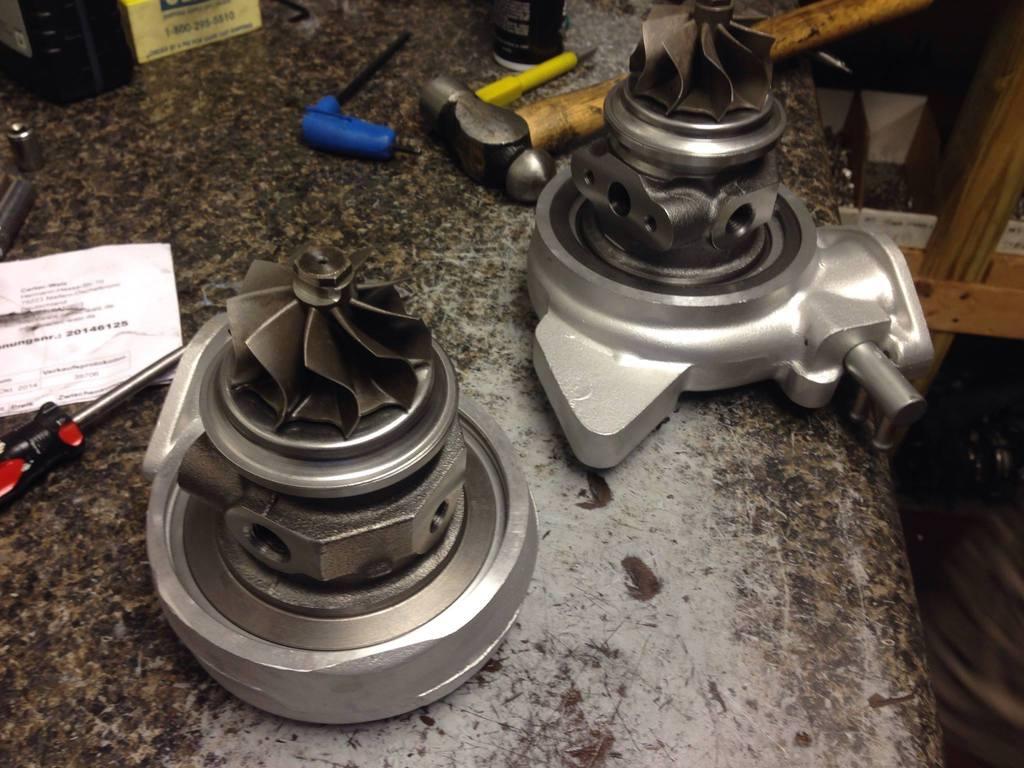

Yup! Here it is..
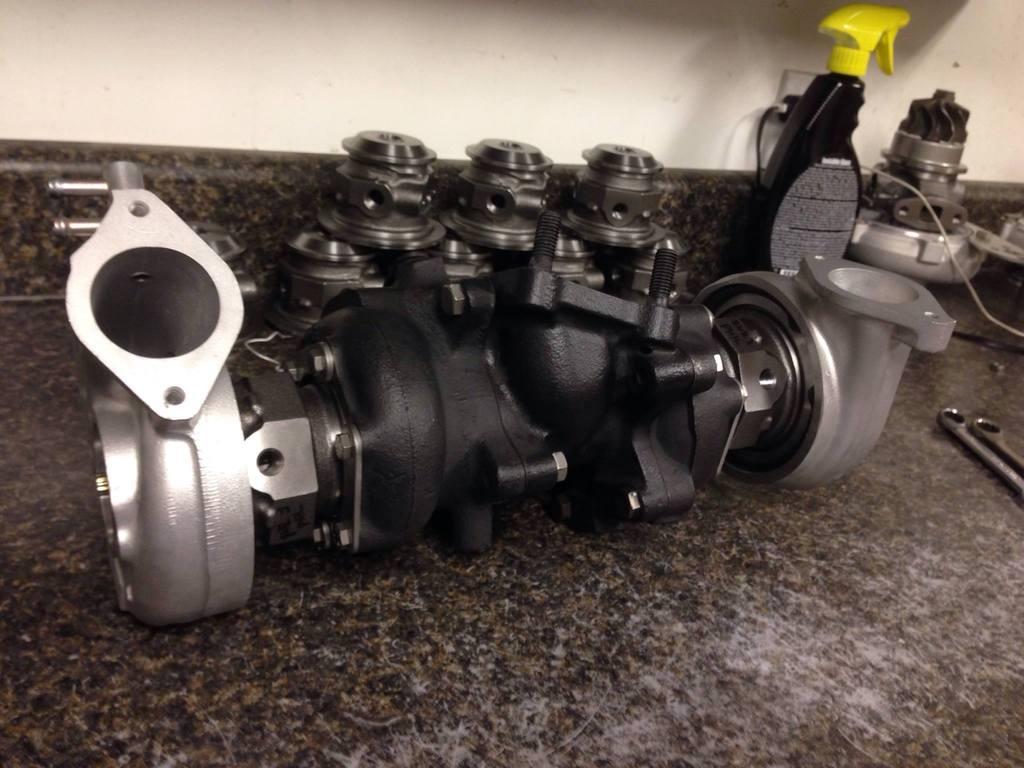
By the way, Exhaust housing are new and needed a lot of machining and such.. All that was done by Bryan at BNR. These turbos took solid couple of days on my part and couple of days of BNR. A lot of time goes into these.
Next update tomorrow is about the Engine...
6-23-2015
Since I was putting in a new set of turbos, I decided to put in a new engine verses using one with about 80K miles on.
To Start, I wanted the new engine to be balanced, lapped, and using a newer housings.
Balancing the rotating assembly
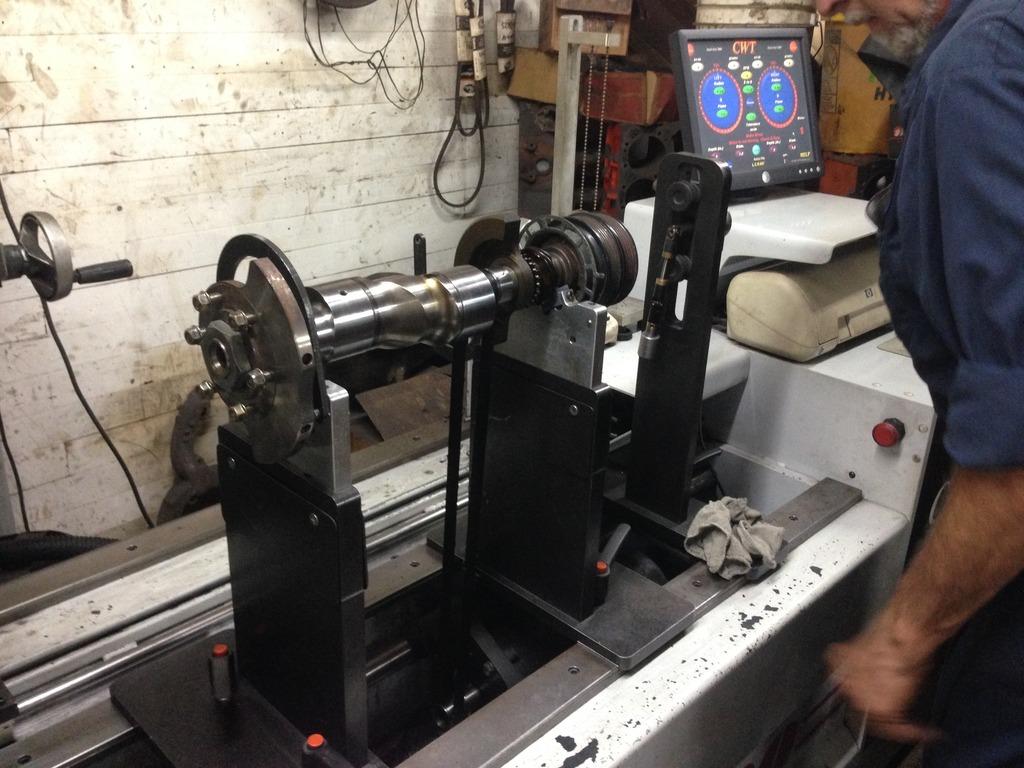
Exedy Twin plate will go on and will be balanced
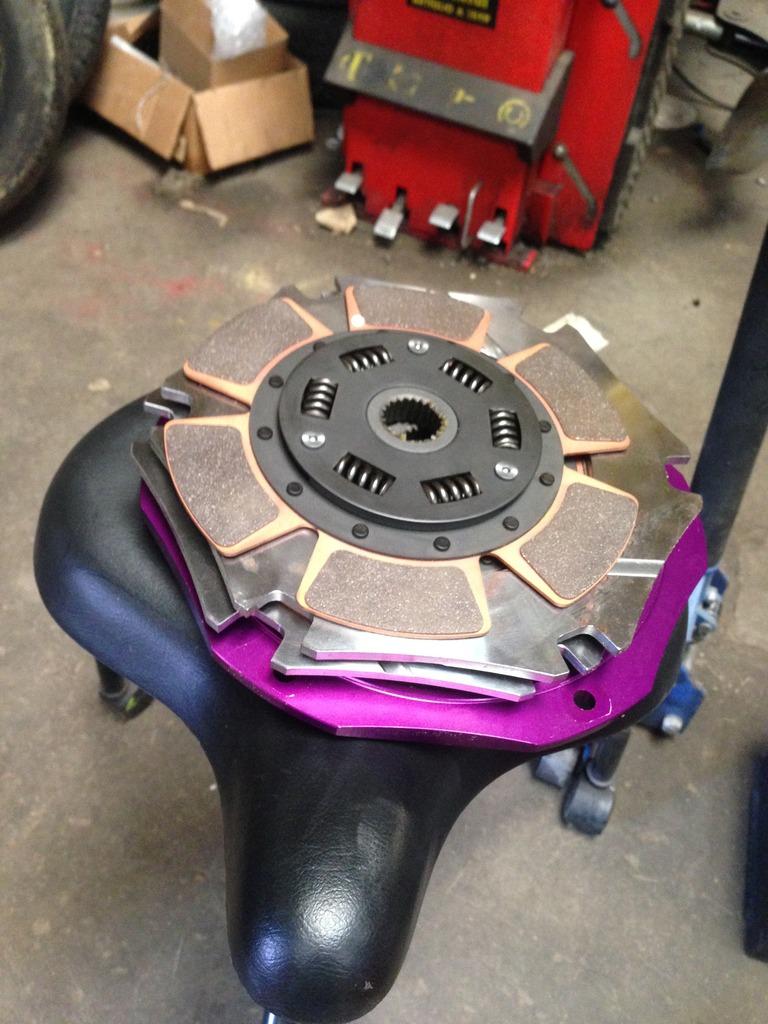
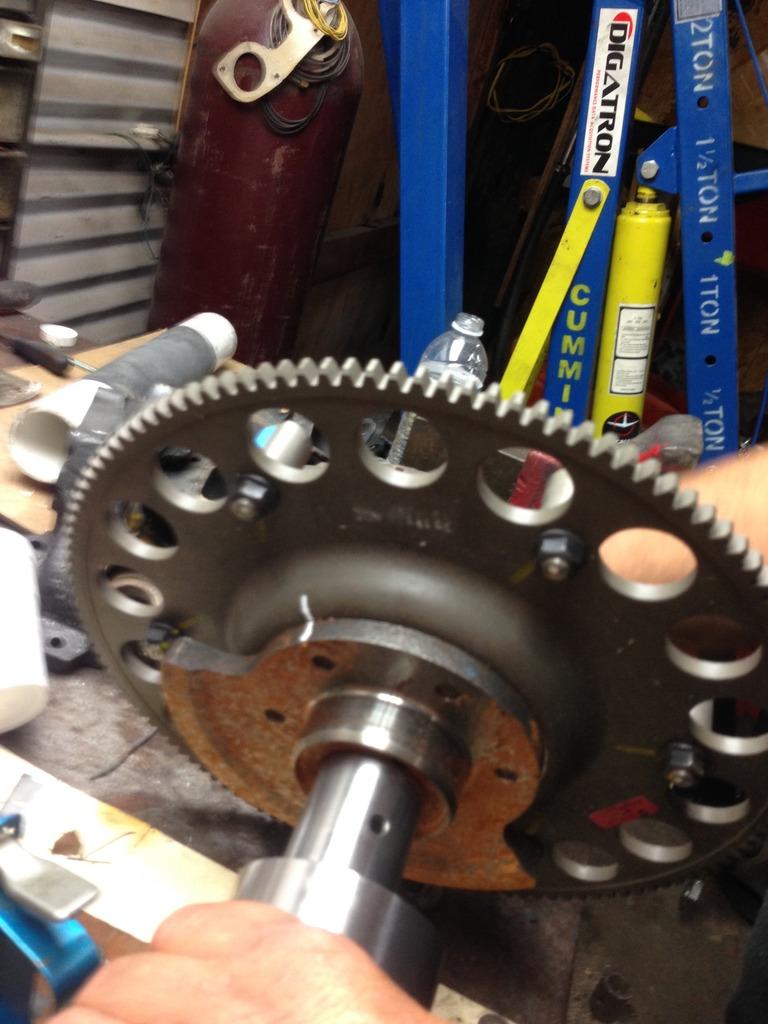
Lapping of the housings
Lapped housings
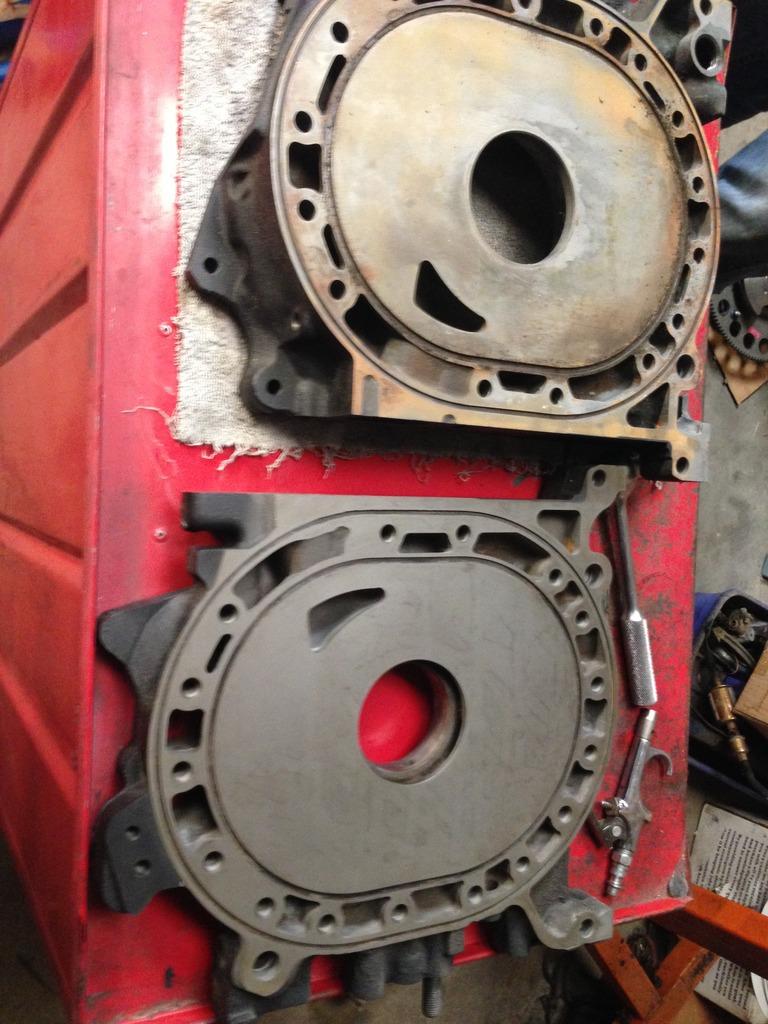
My JDM housings.
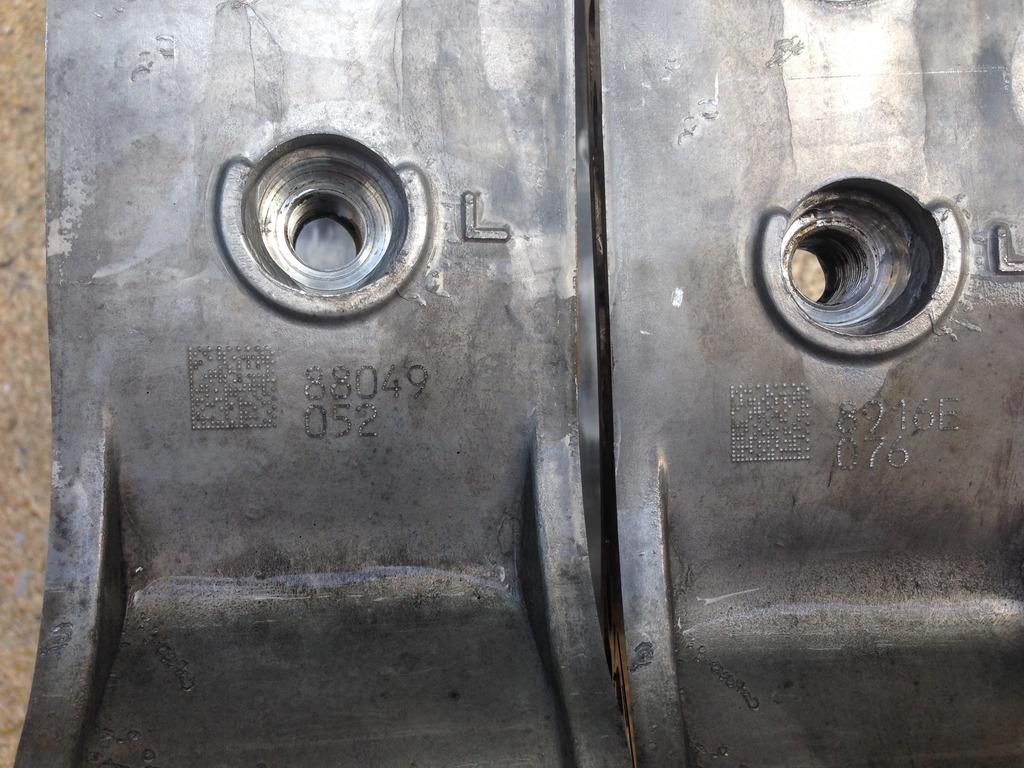
Inside the rotor housings
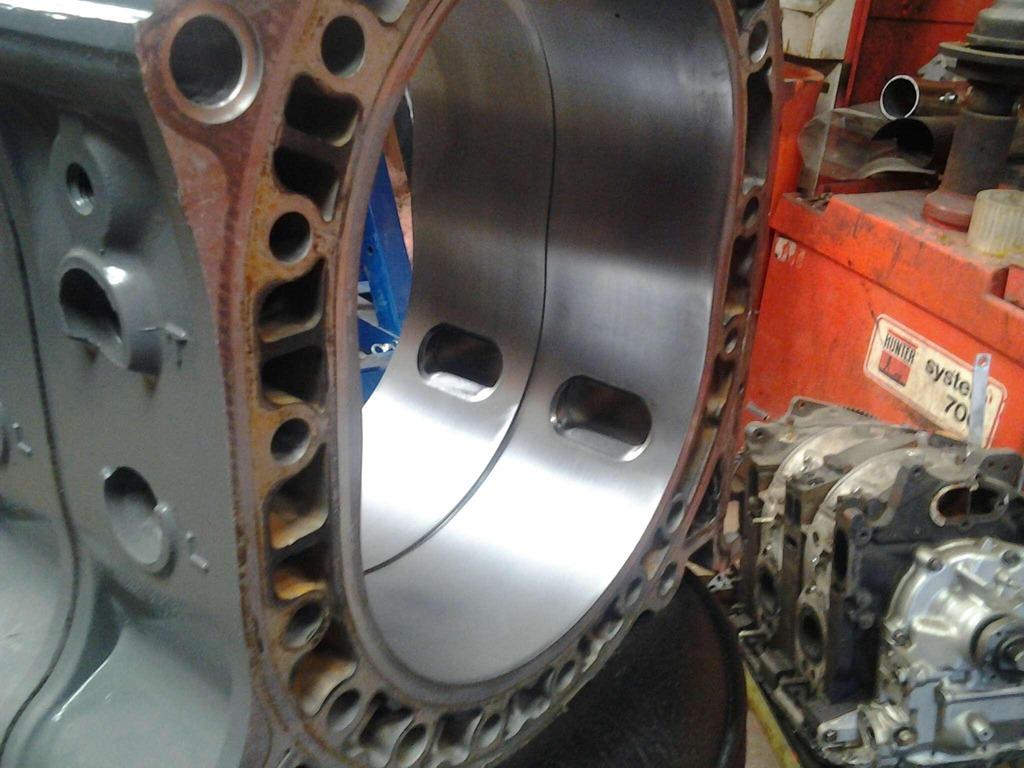
My color combo like the 3 rotor engine.
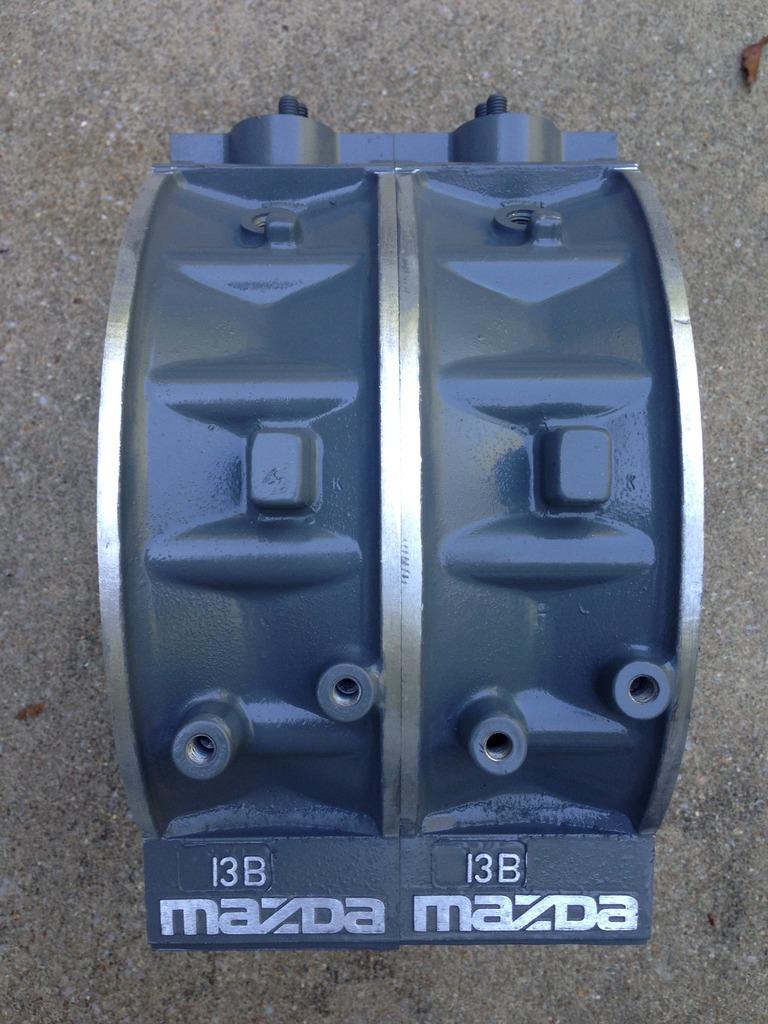
Spec'ing the rotors
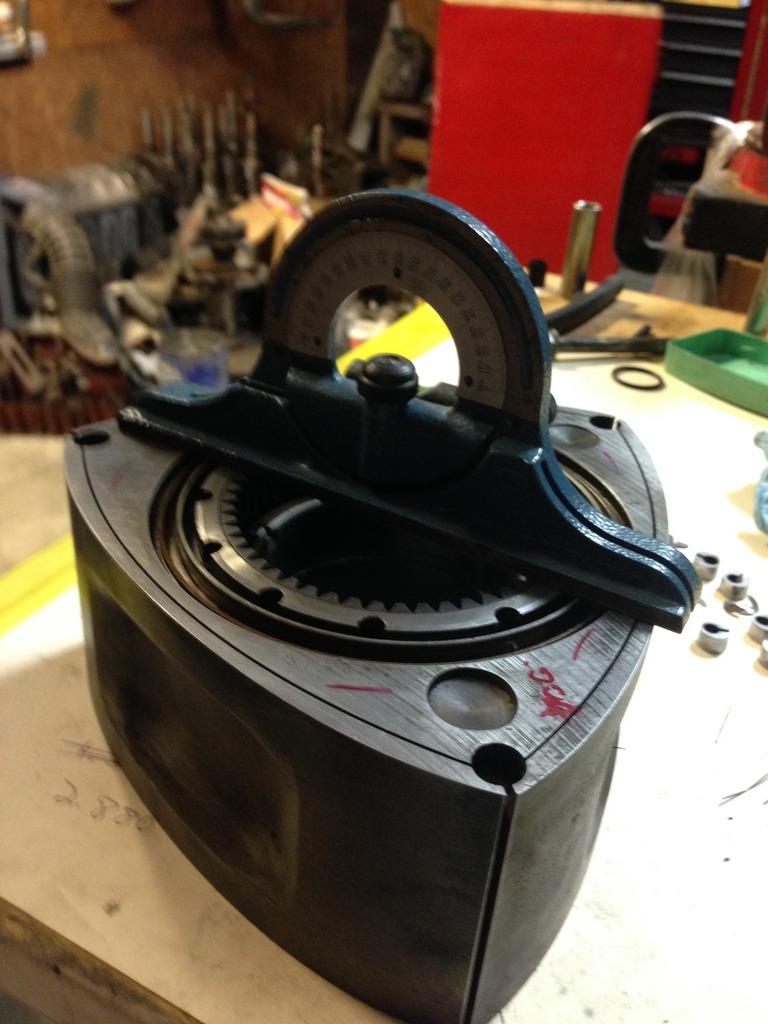
Me assembling
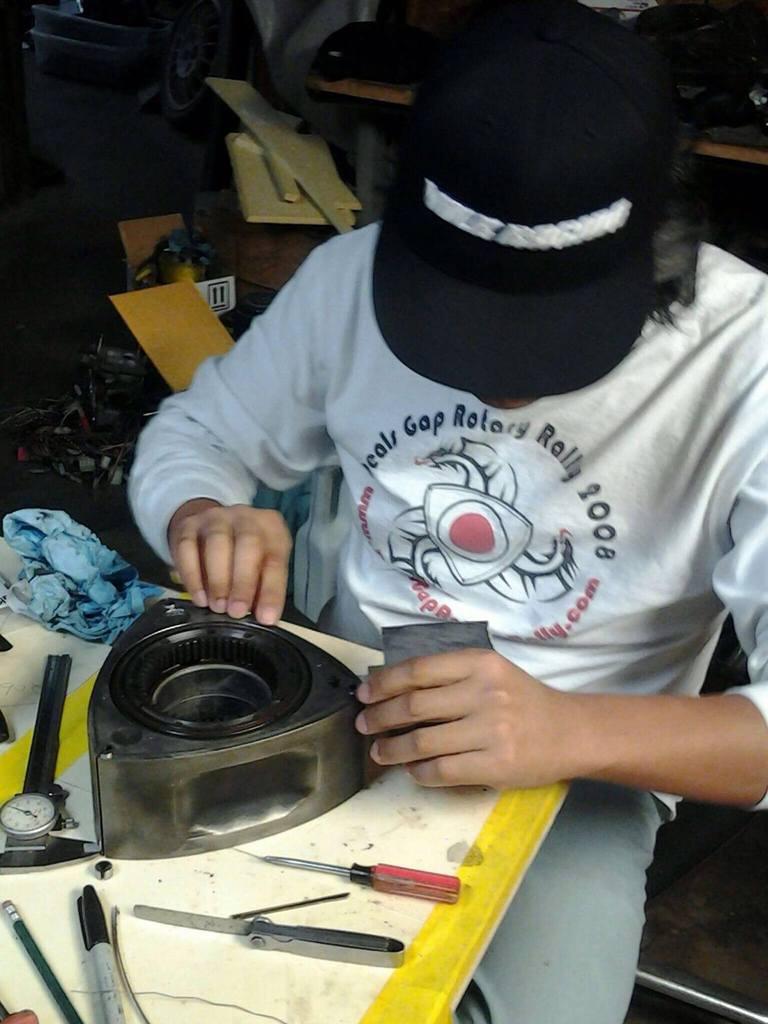
Porting the intakes
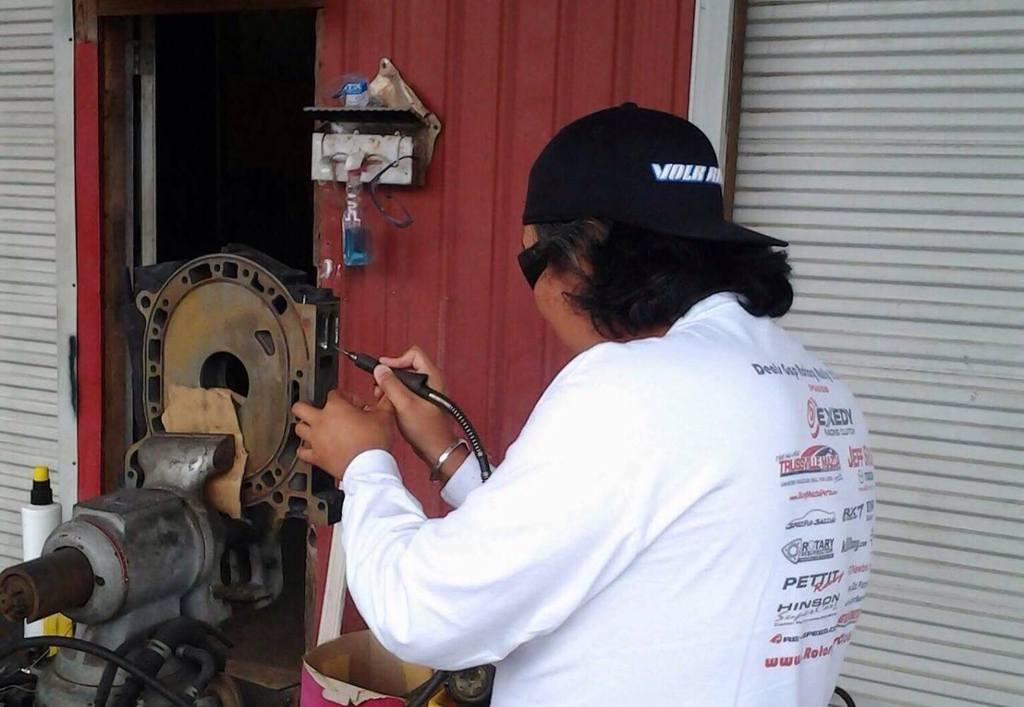
New seals
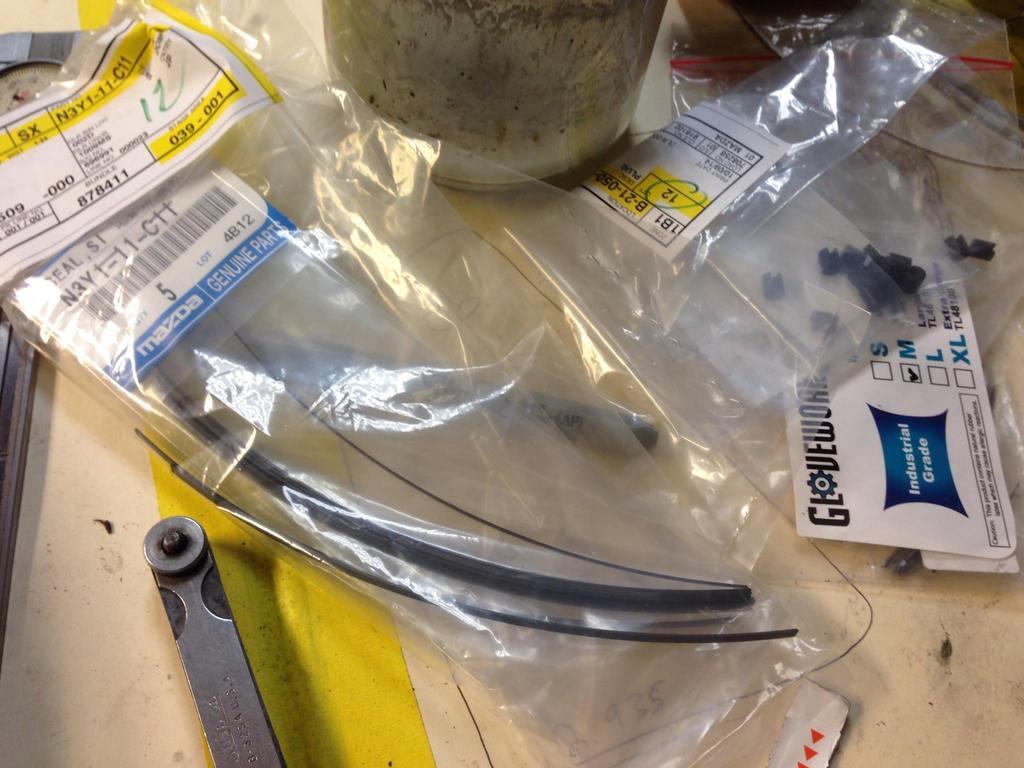
Seals in the rotor
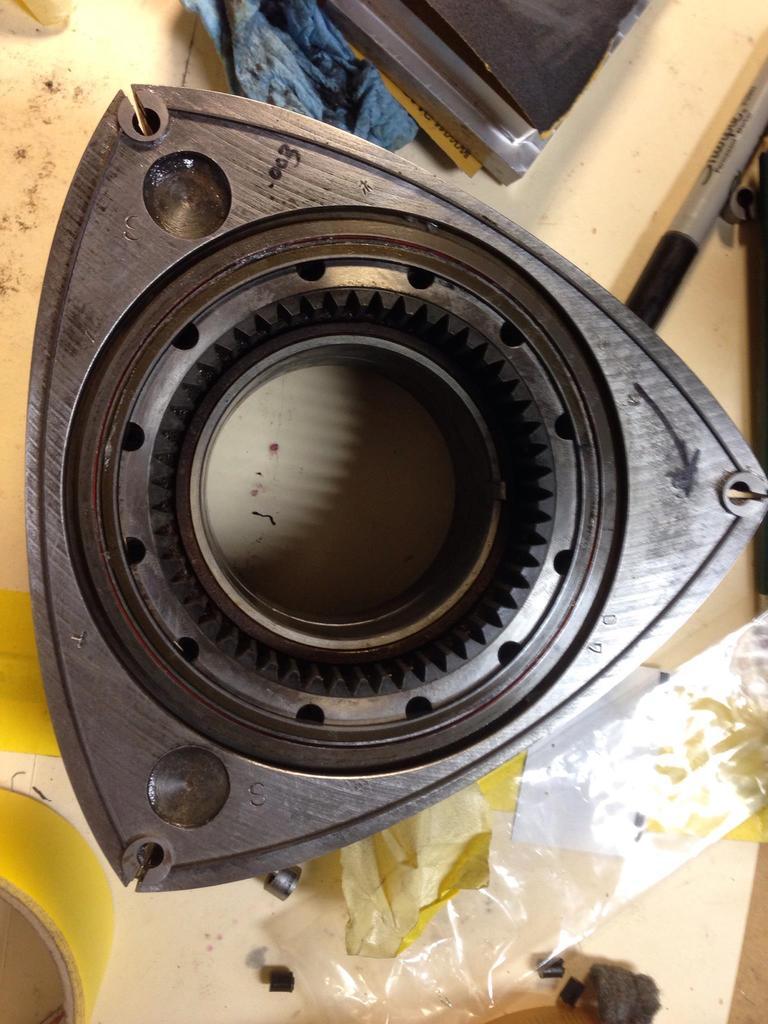
Assembling the engine
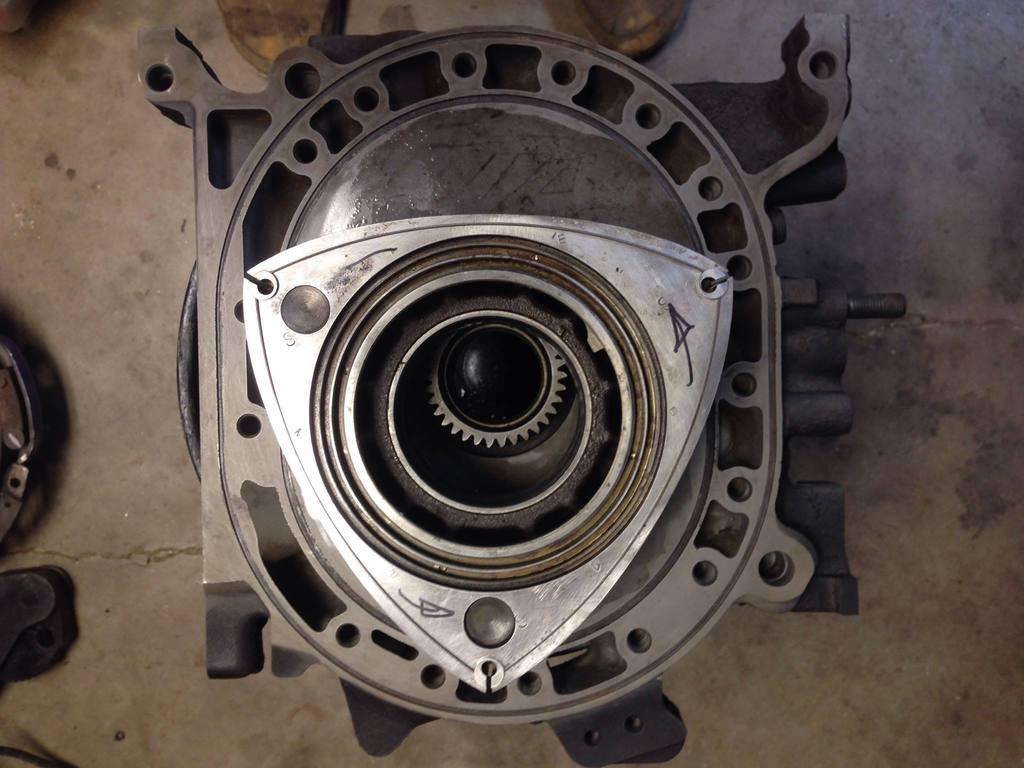
And here it is!
On a spare subframe, using Full Function Engineering Motor mount kit.
I should also thank Luke and Luis Canizales who have been very helpful to building this engine.
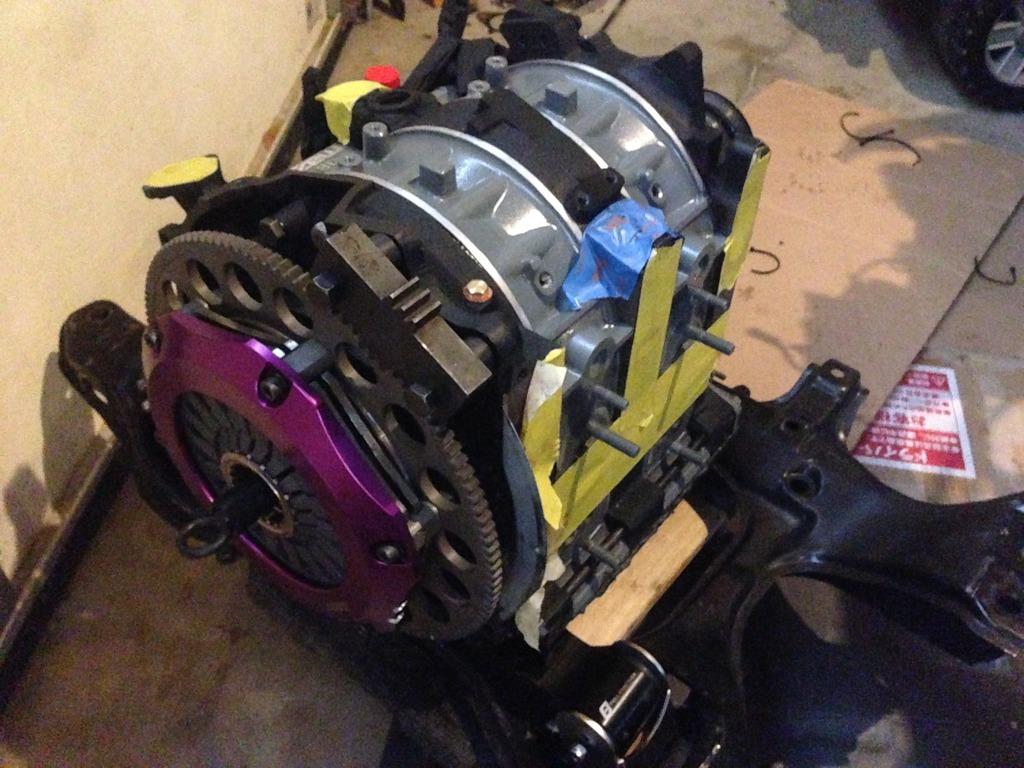
Next install and tuning pics.
6-24-2015
So, Update continues..
I pulled the engine out of my FD.. old engined worked fine. Did over 10 trackdays in a year and several out of state trips.
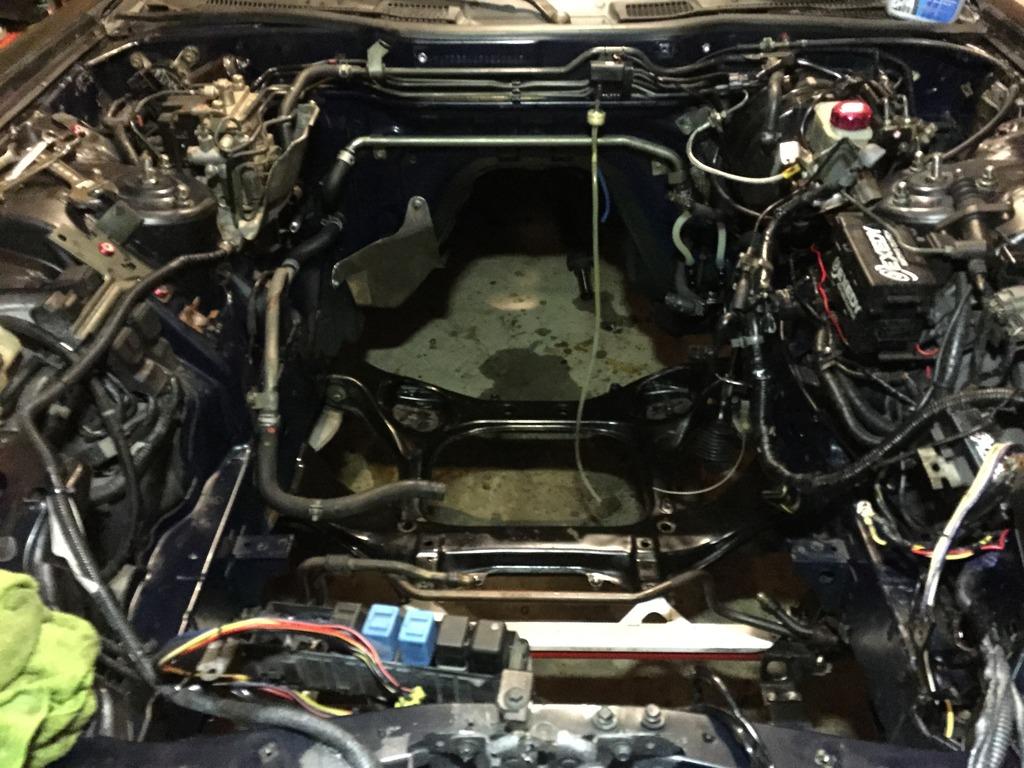
While it was out did could of add ons.. Like this IRP Brake MC brace.
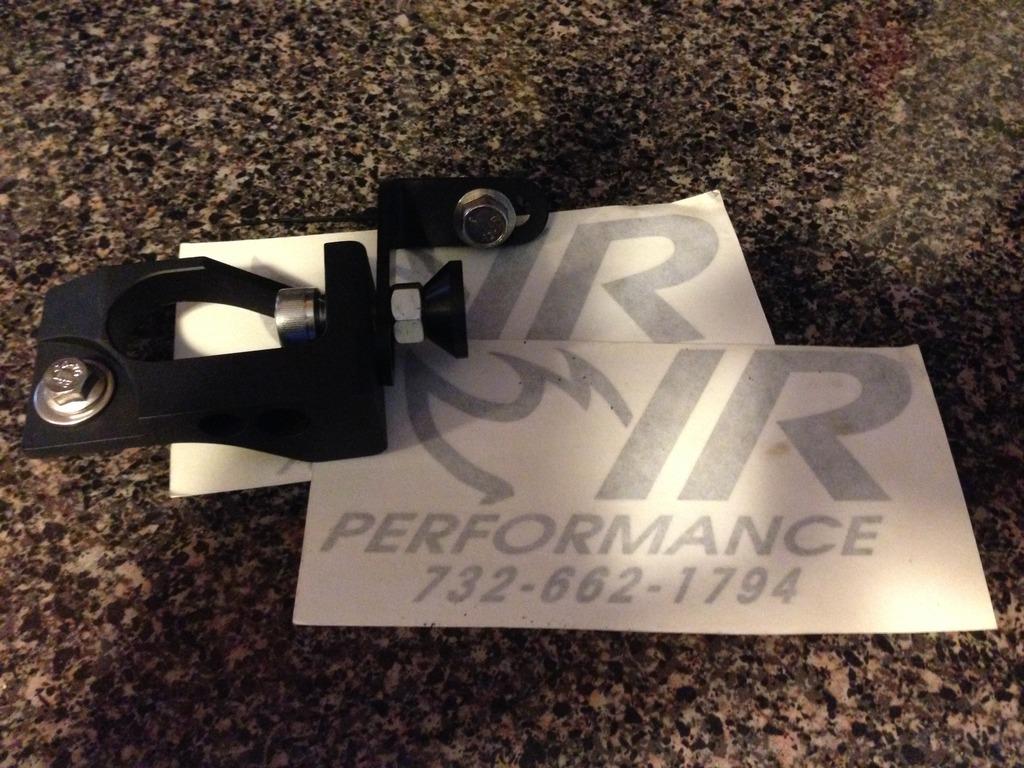
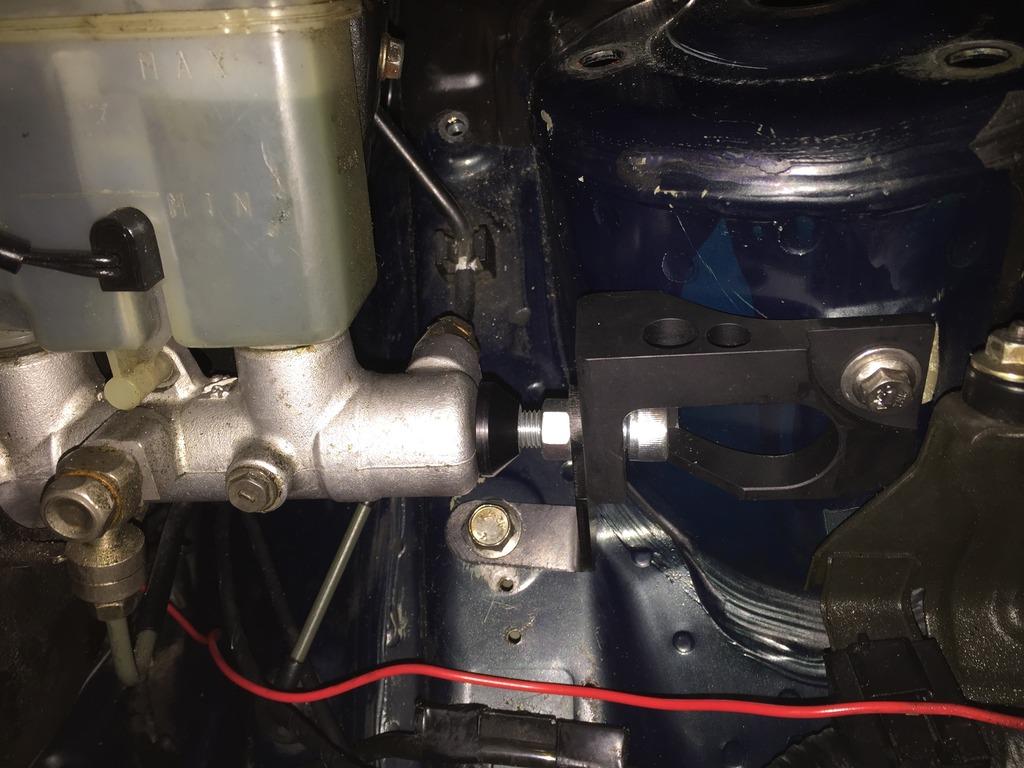
Also added new oil coolers..
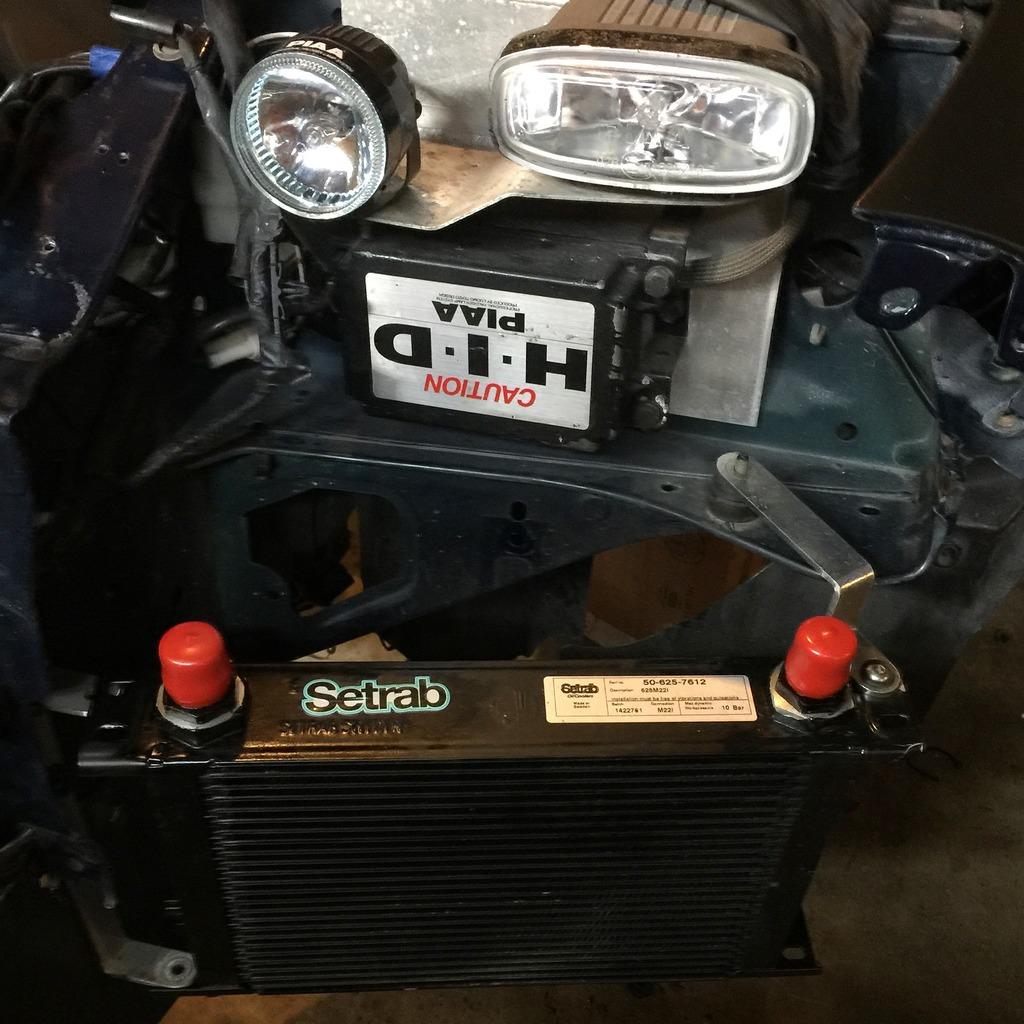
And I decided to drop the subframe to install because I needed to also change out the coilovers.
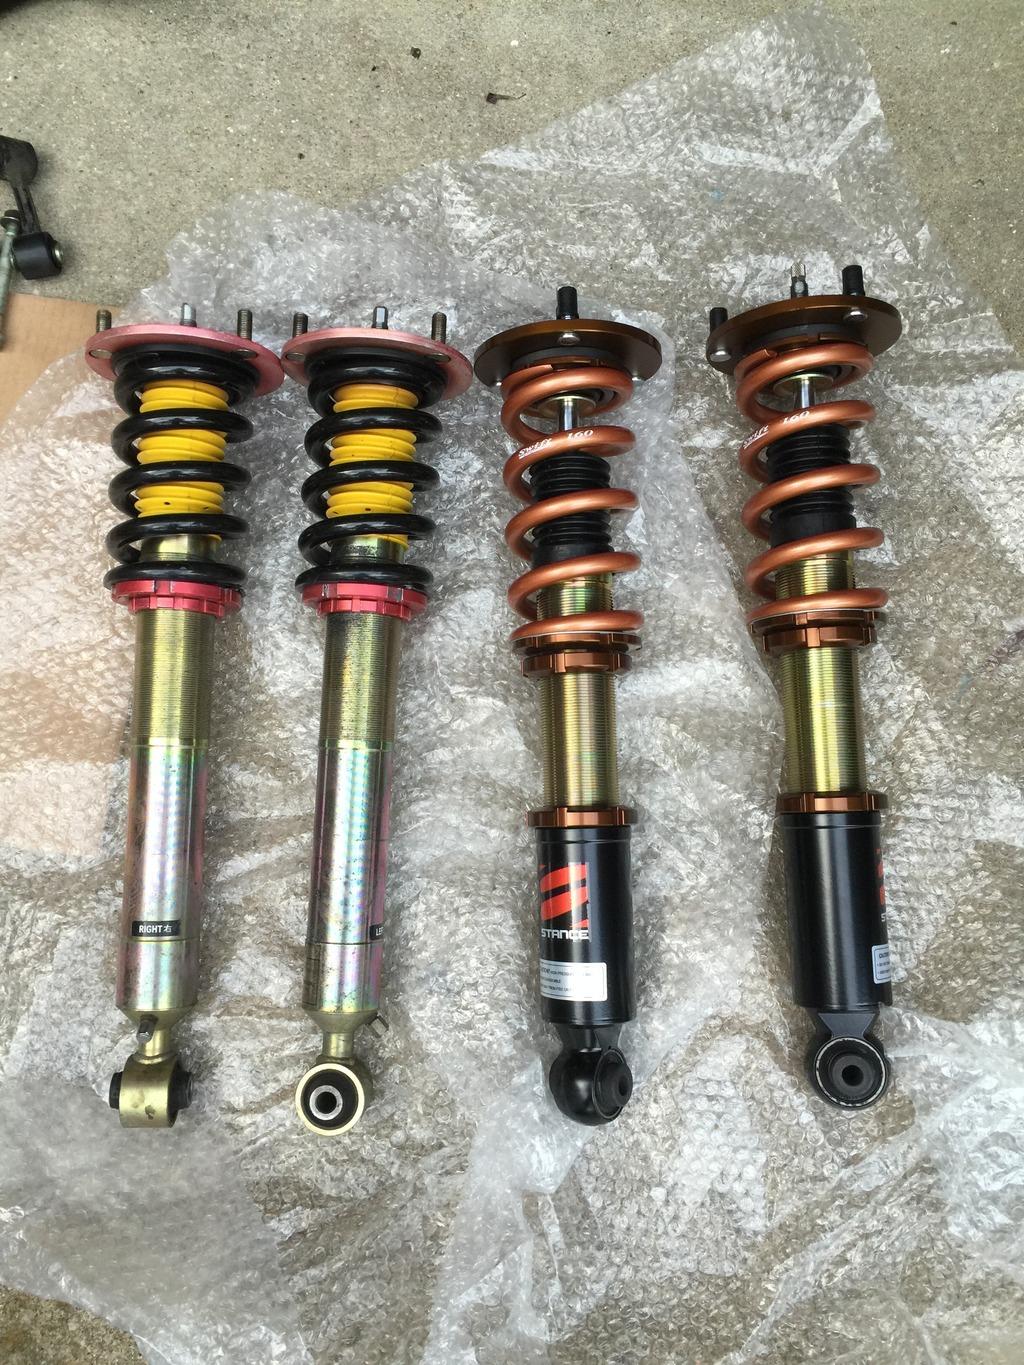
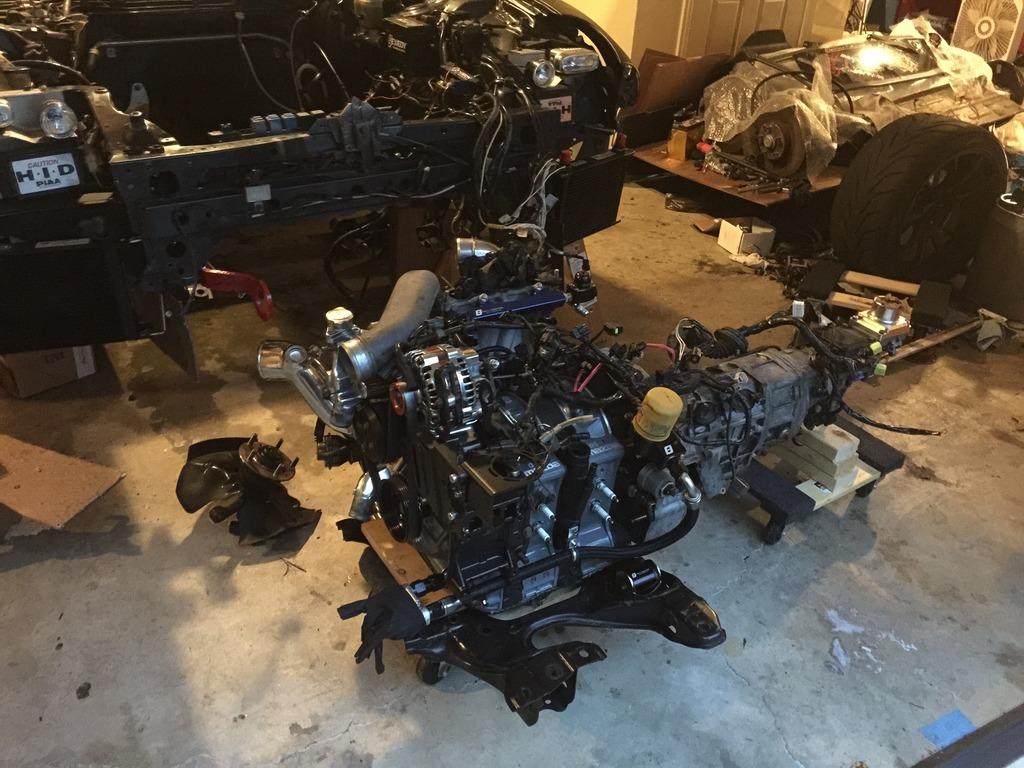
I also added Radium Competition oil catch can and IR Performance Oil filler neck
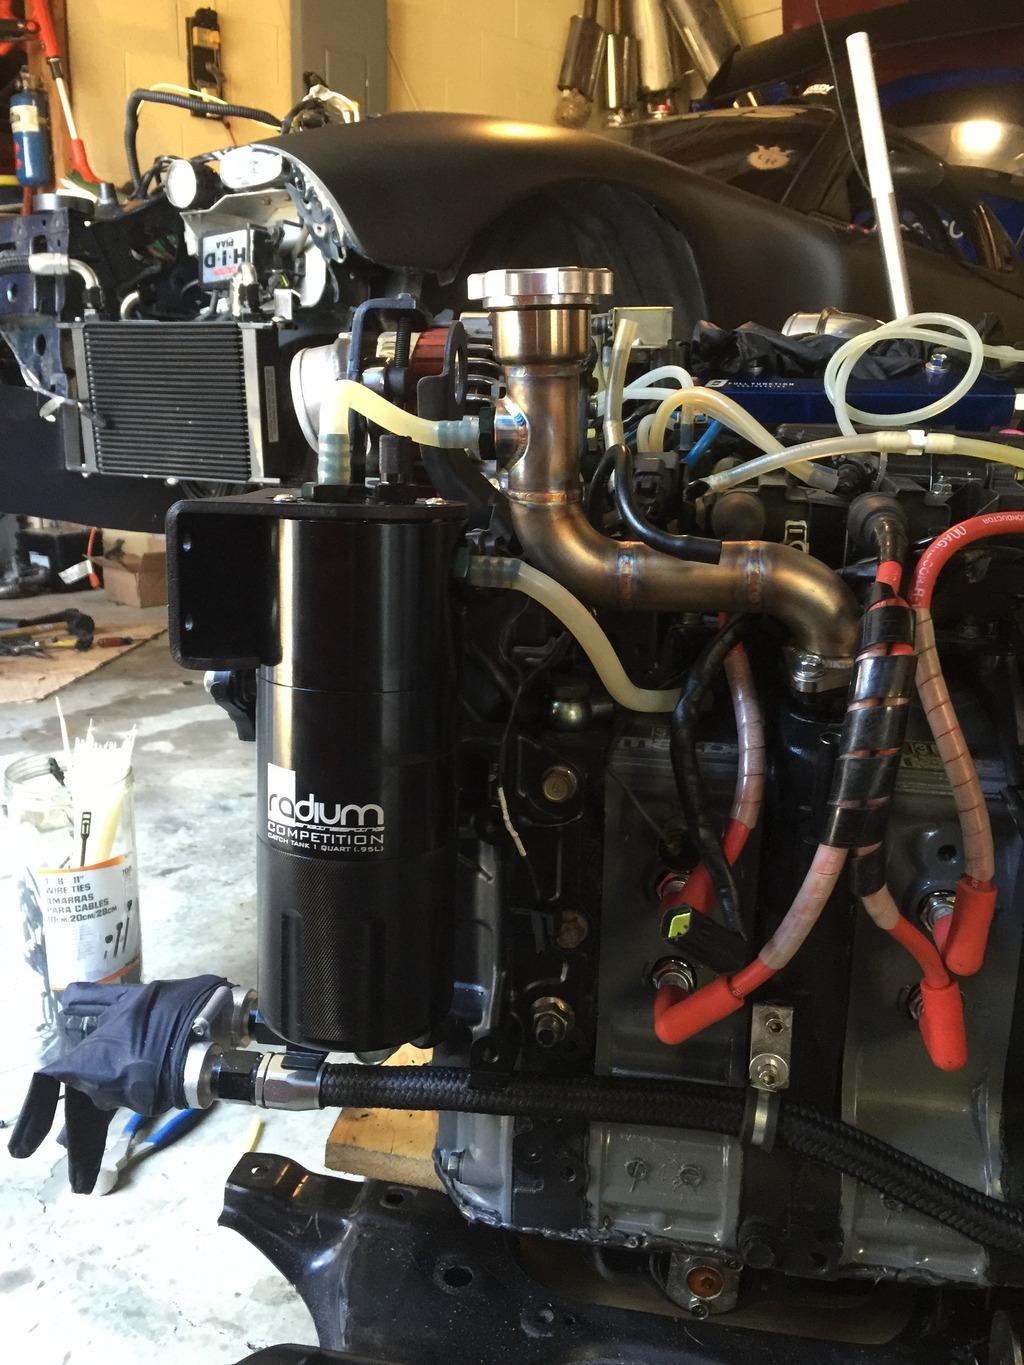
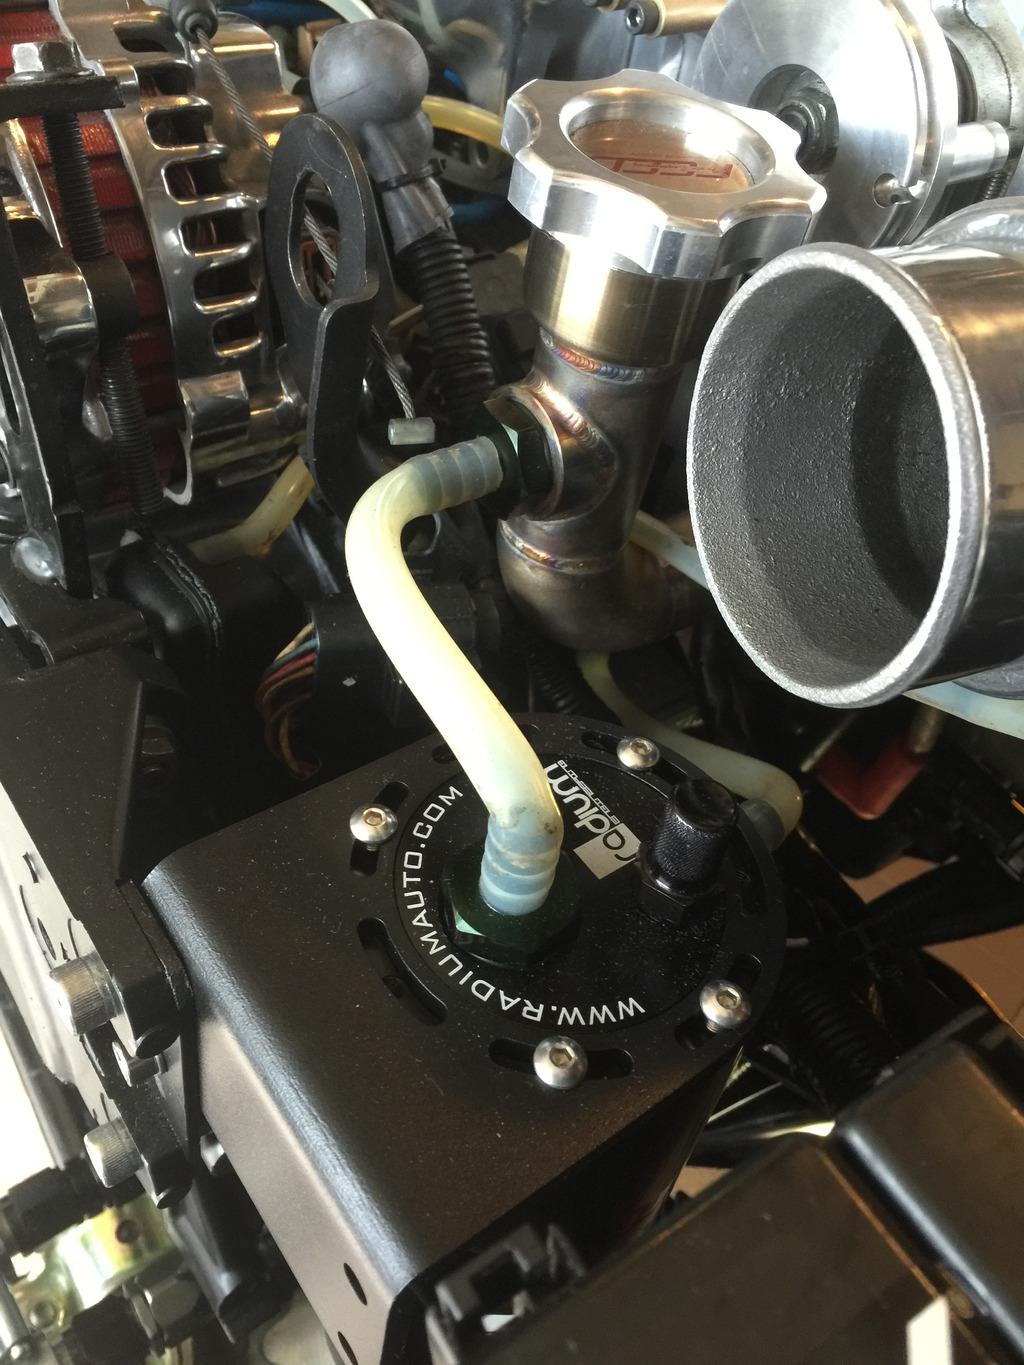
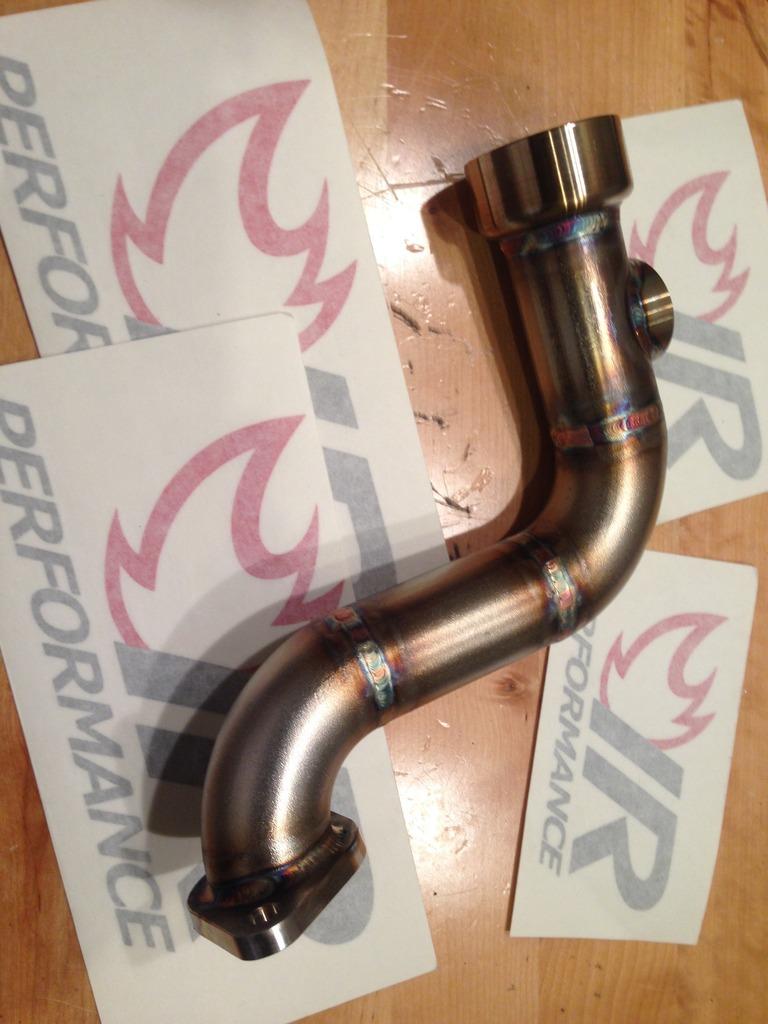
Full Function Fuel Rails for 13B-RE LIM, Full Function Oil Filter neck, and few other new parts.. Anyhow long block is ready to install
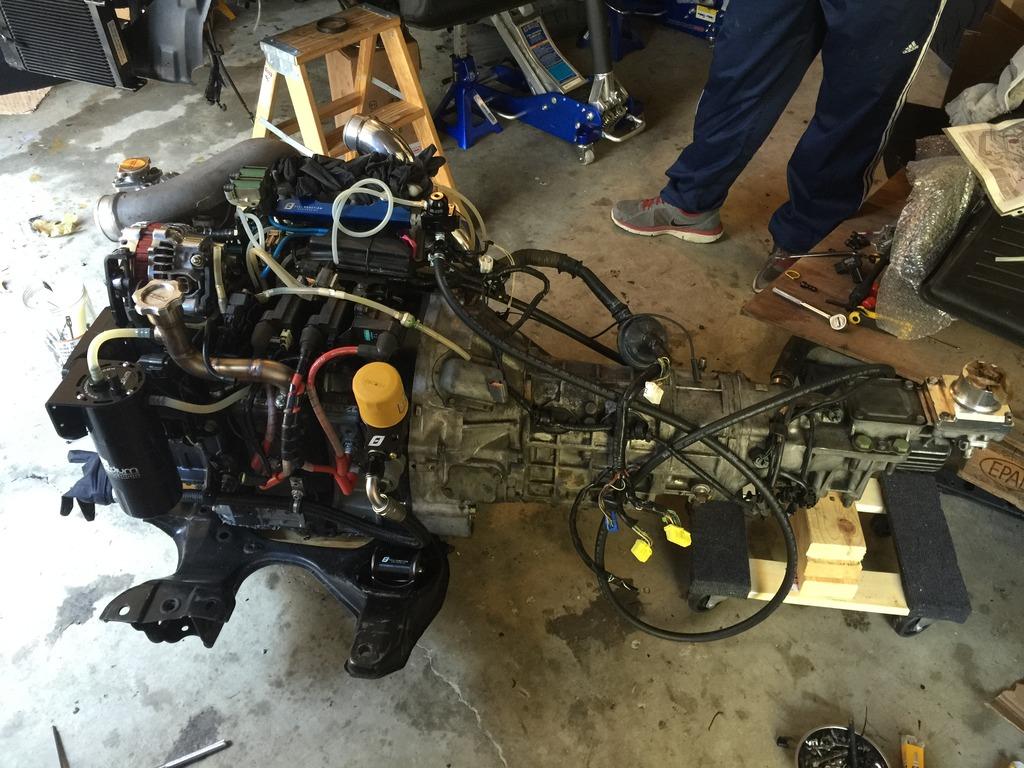
Engine in!
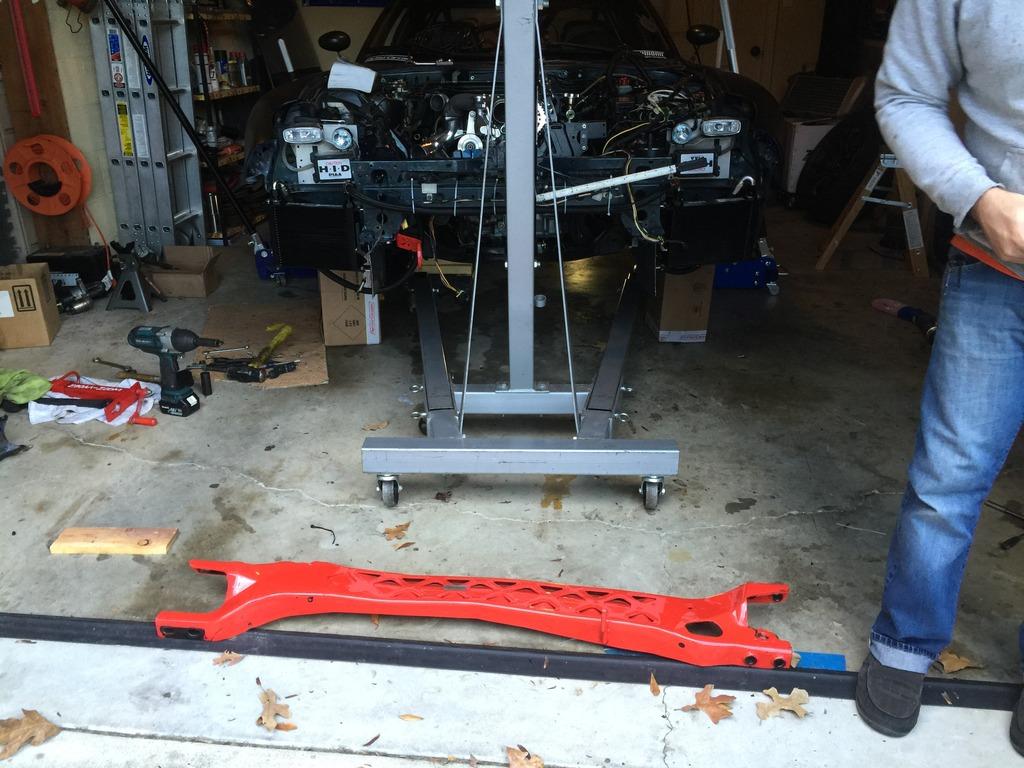
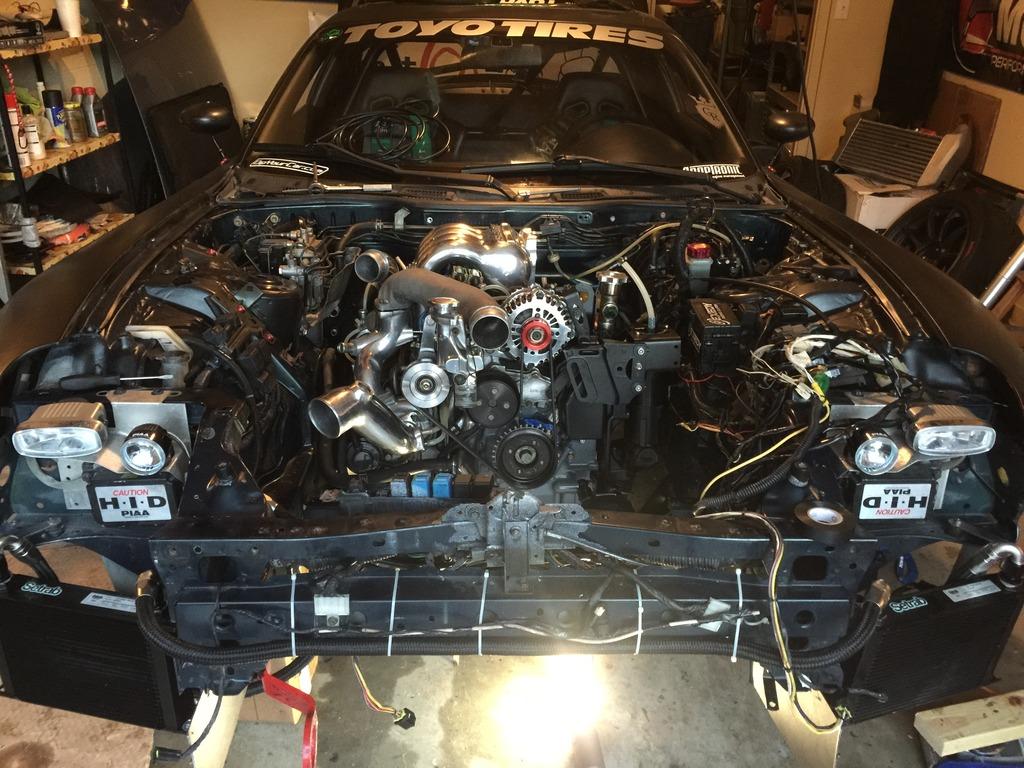
Also upgraded fuel system using Radium Fuel Surge tank with Bosch 044 pump inside.
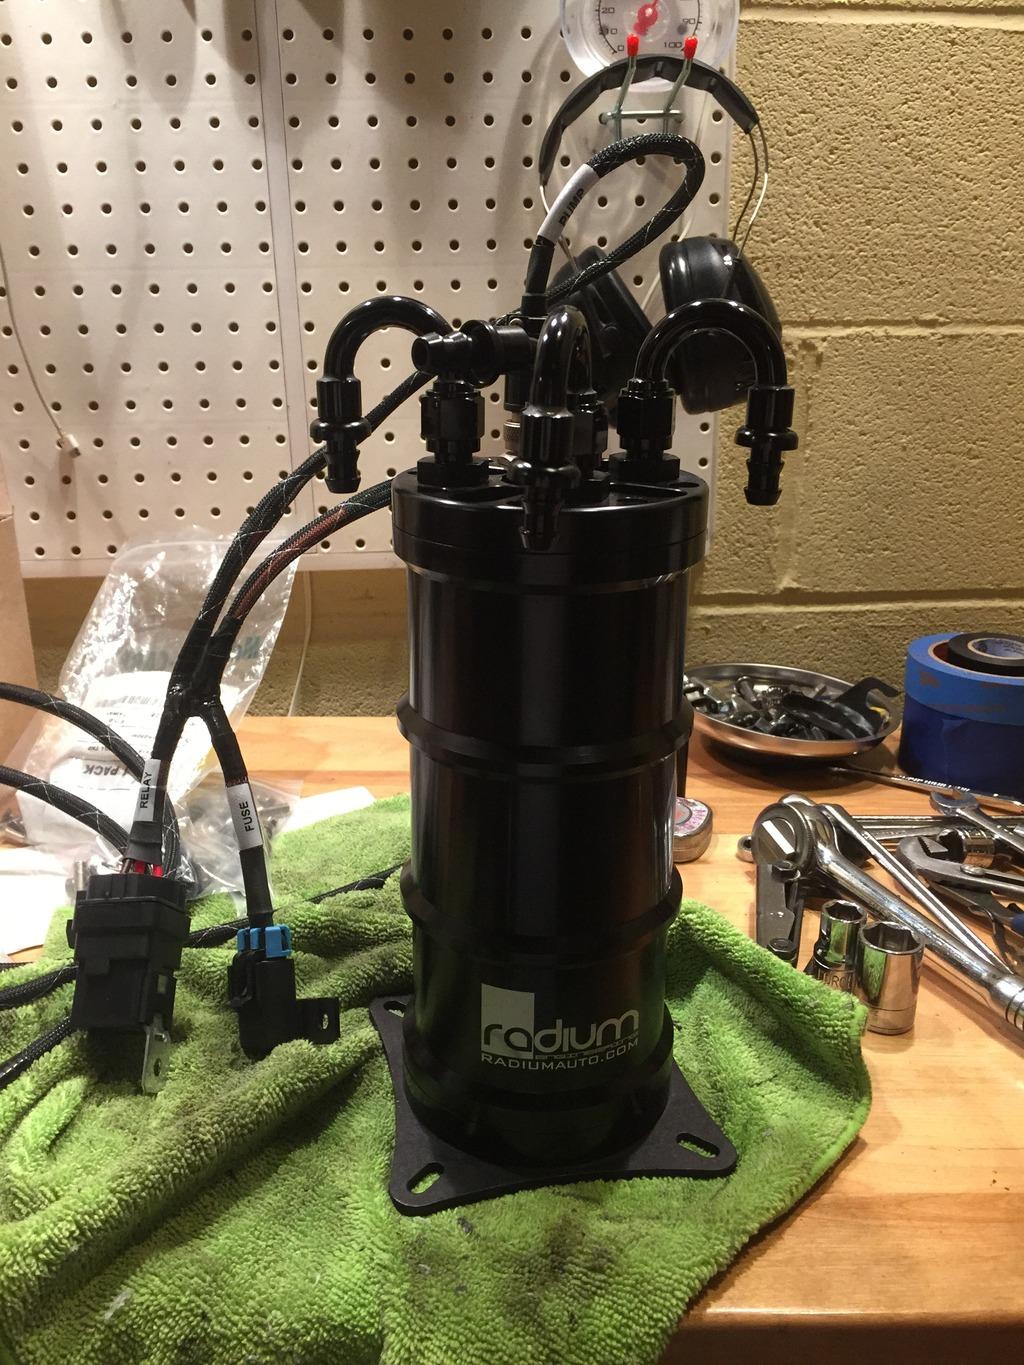
Stance Super Sport + coils installed!
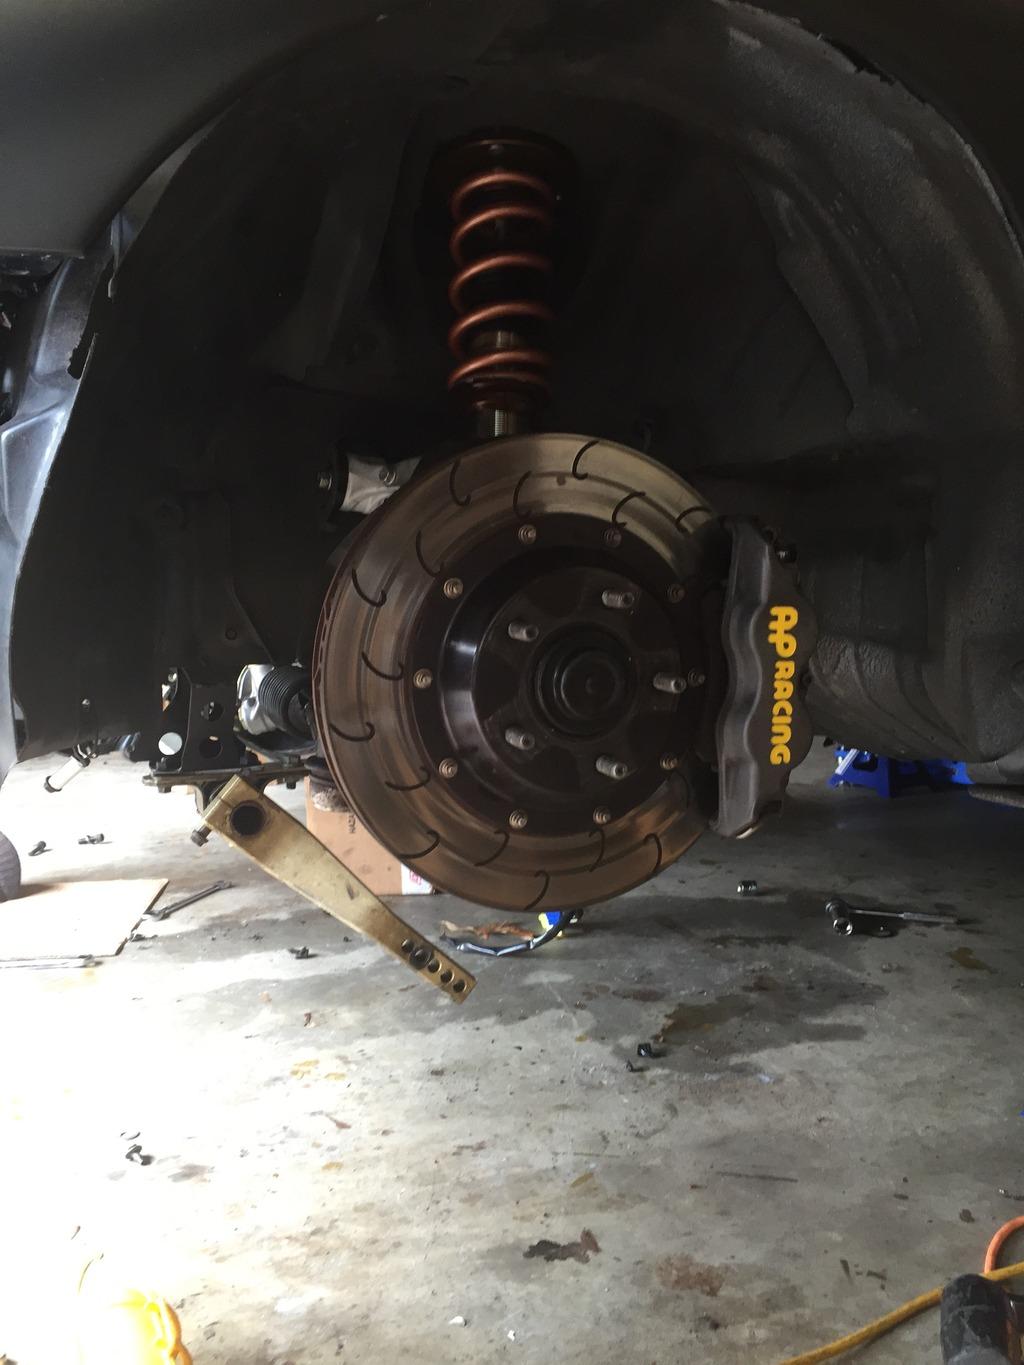
Engine is port matched for 13B-RE Cosmo LIM and UIM.. I'm running sequential twin set up for this..
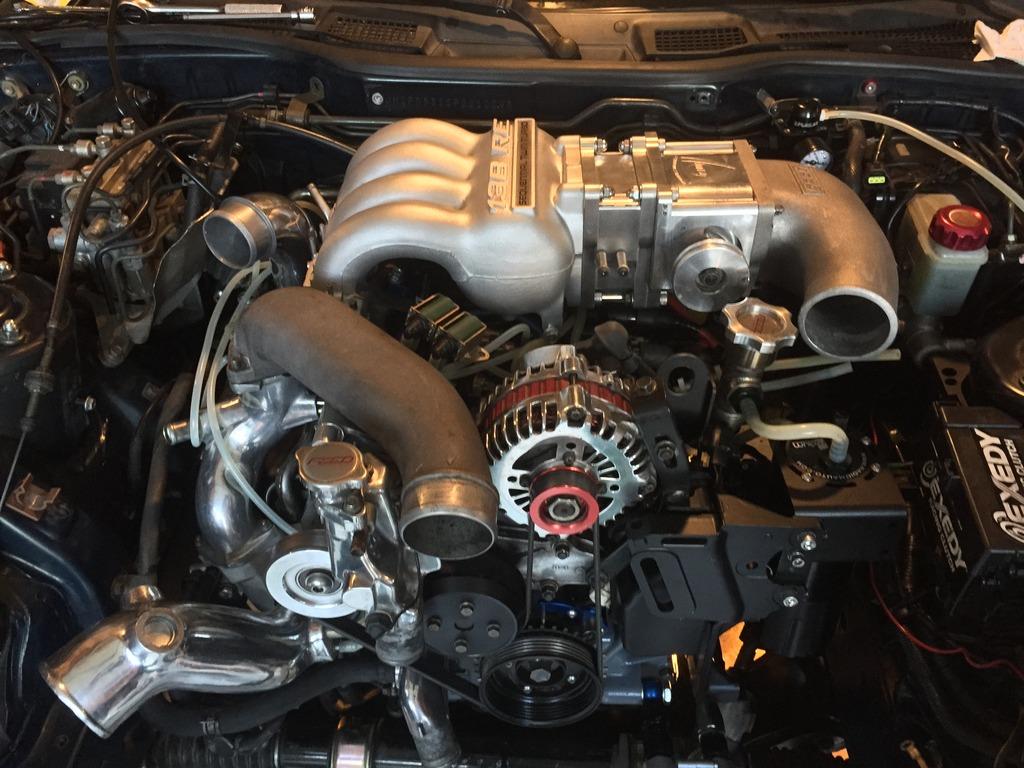
Installed some polished goodies ![]()
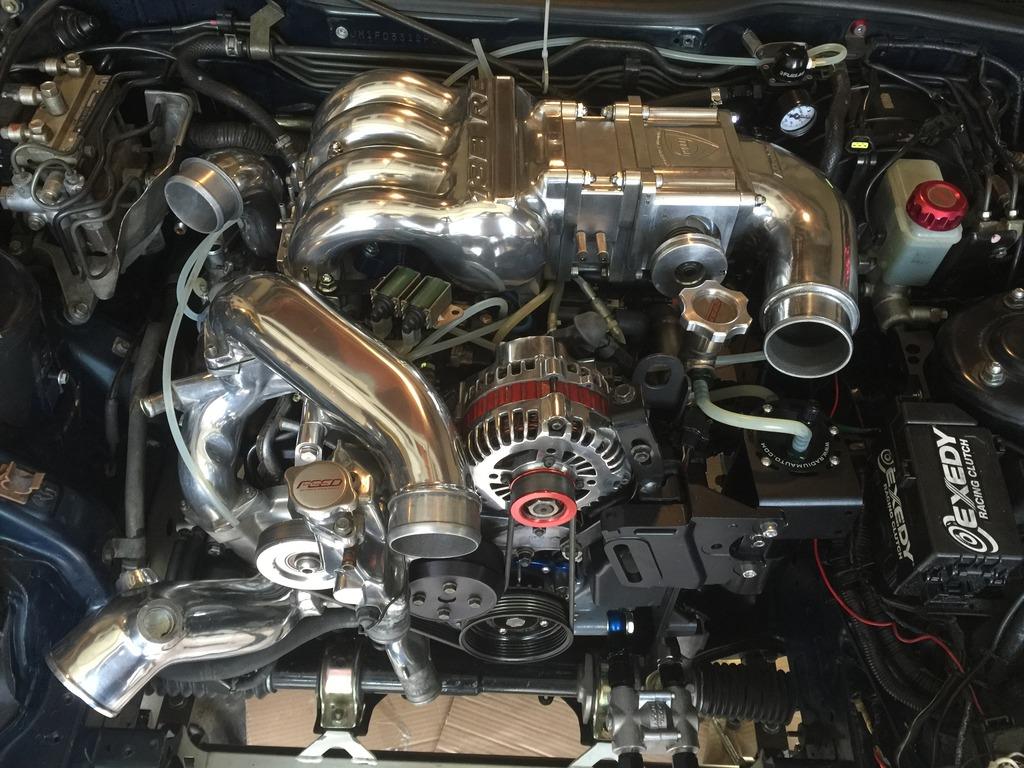
6-26-2015
More Update..
I started to add some rare parts I had..
C's short shifter.
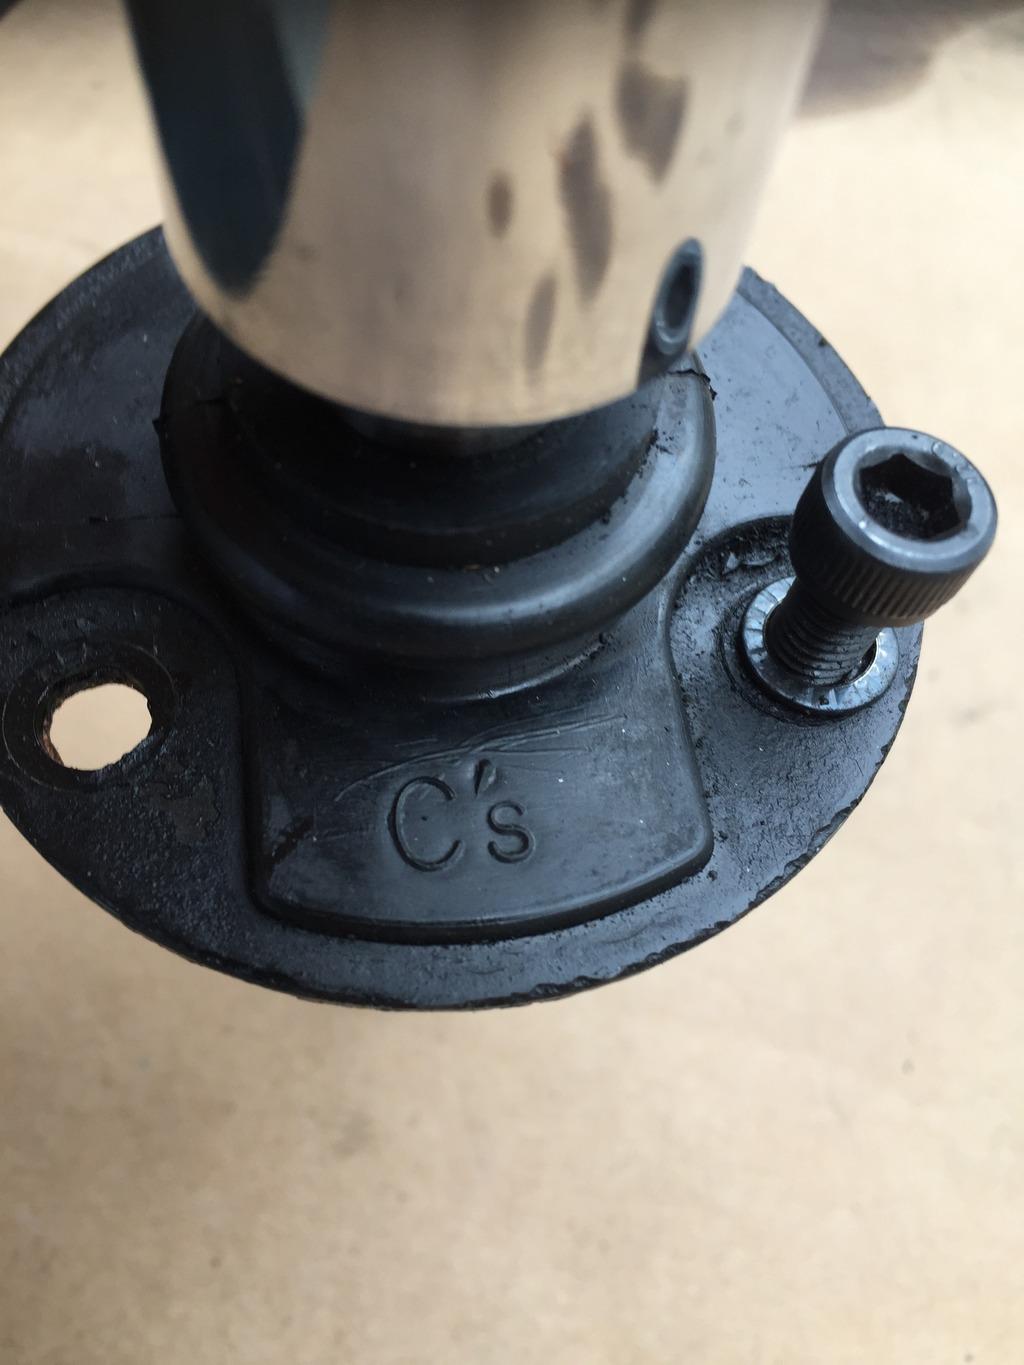
Mounted the Radium Surge Tank
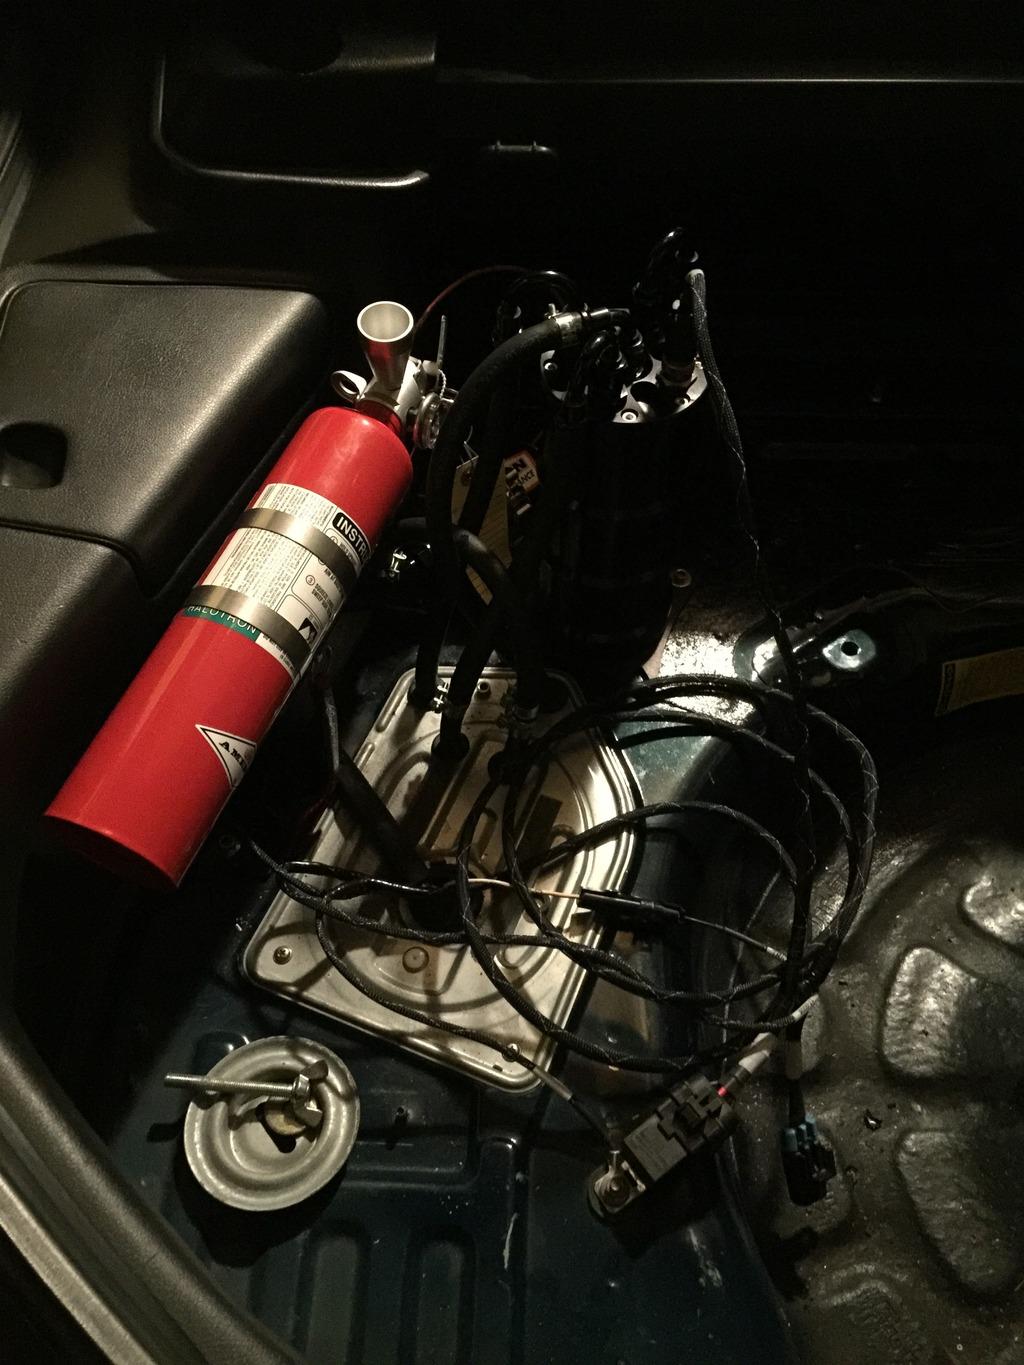
Chase Bay overflow tank and eliminated OE tank.
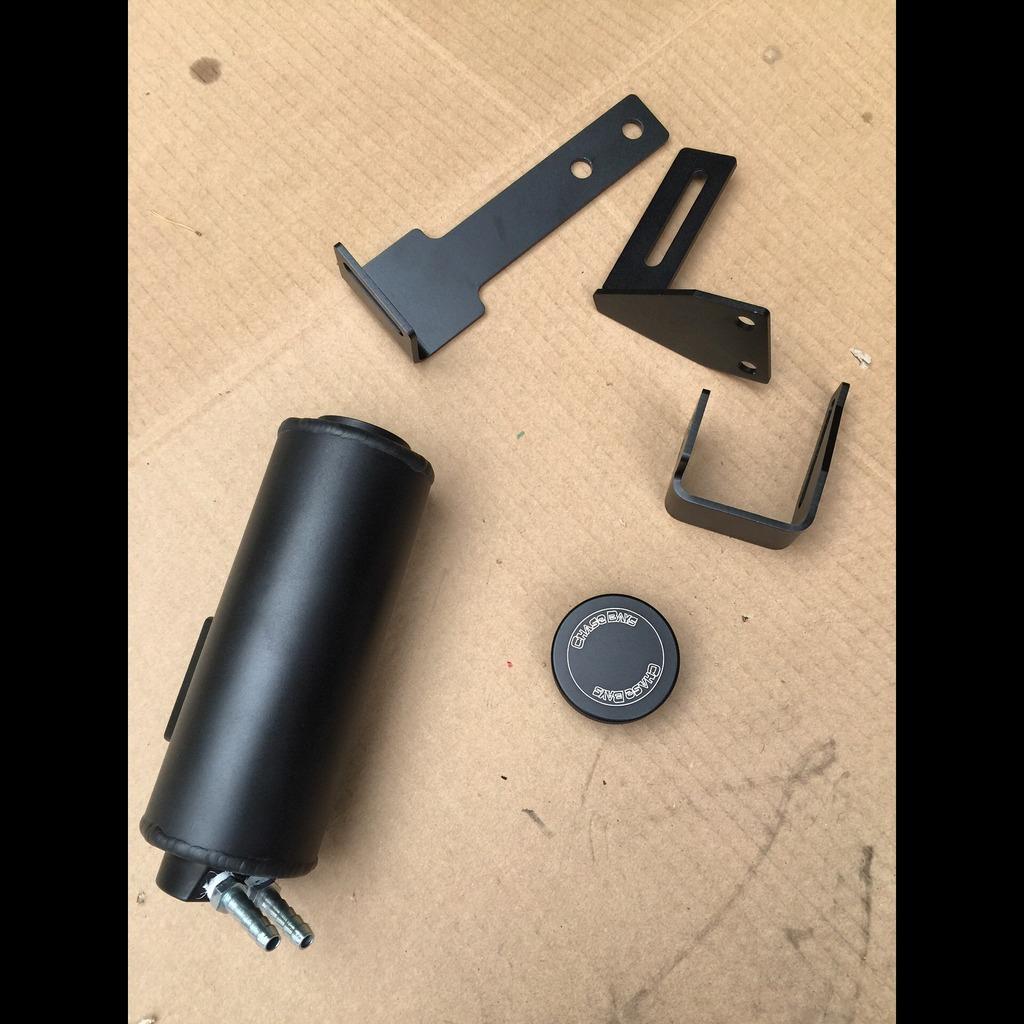
Finally its all bolted up
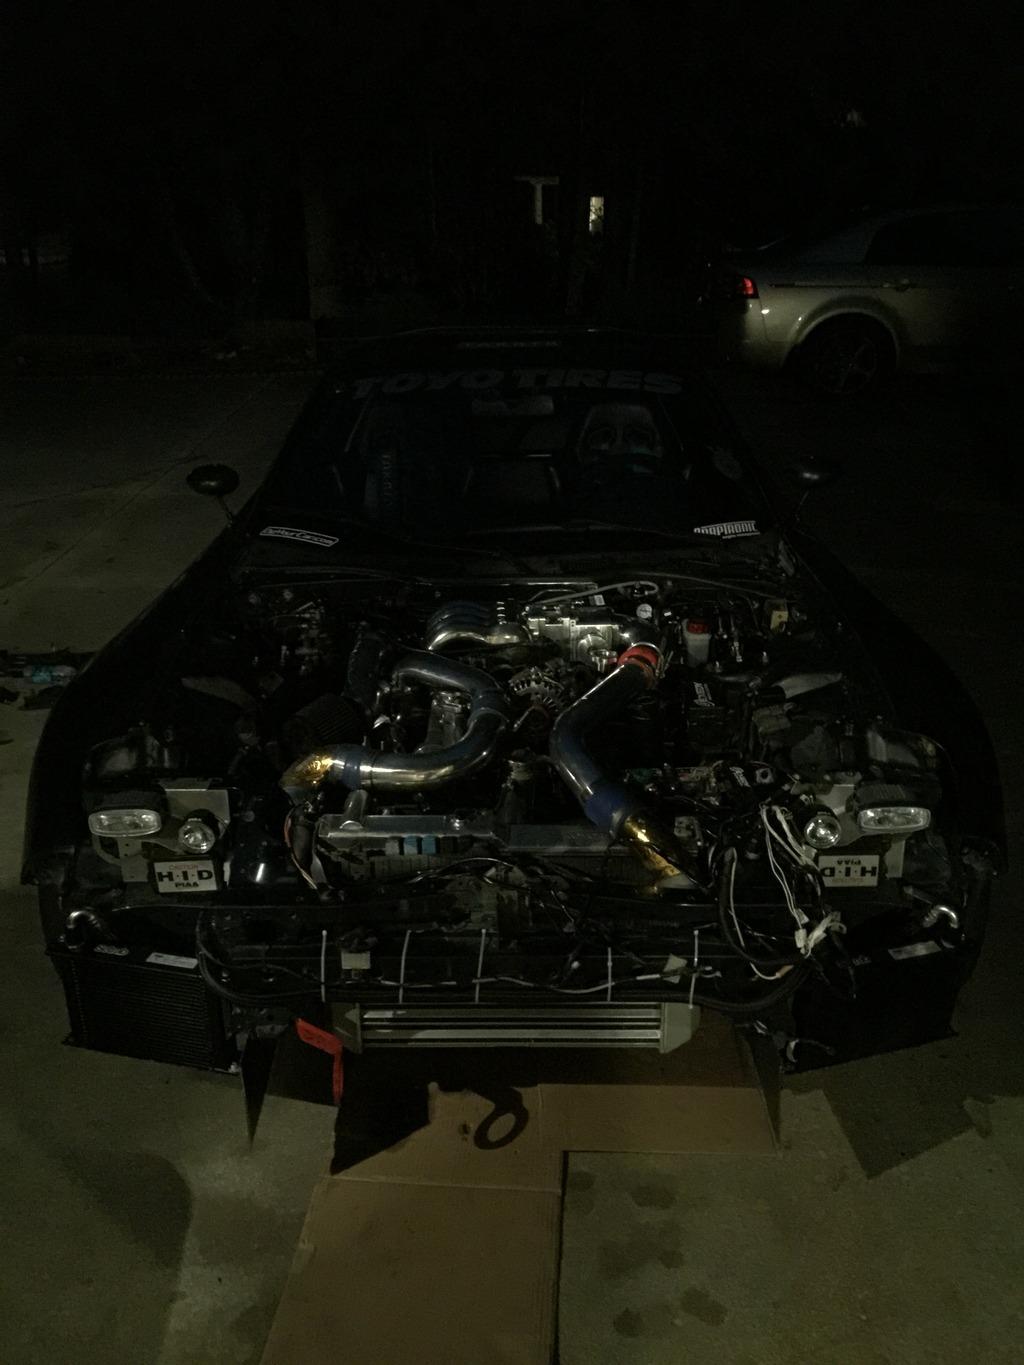
Andy from Adaptronics flew in from Australia and with Elliot from Turblown, they came down to Birmingham AL to tune my car.
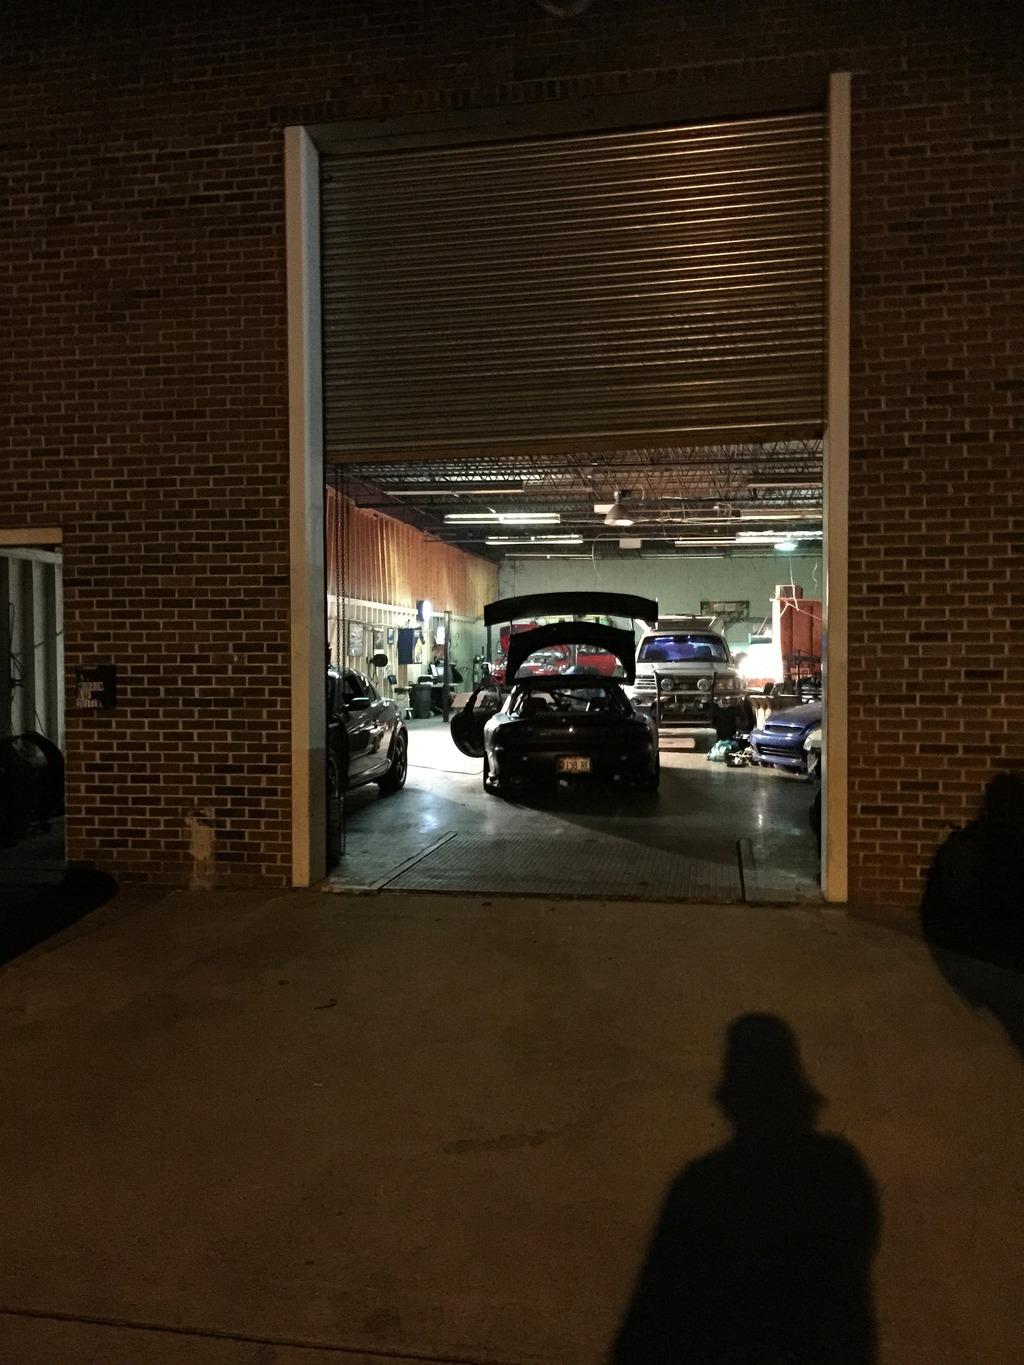
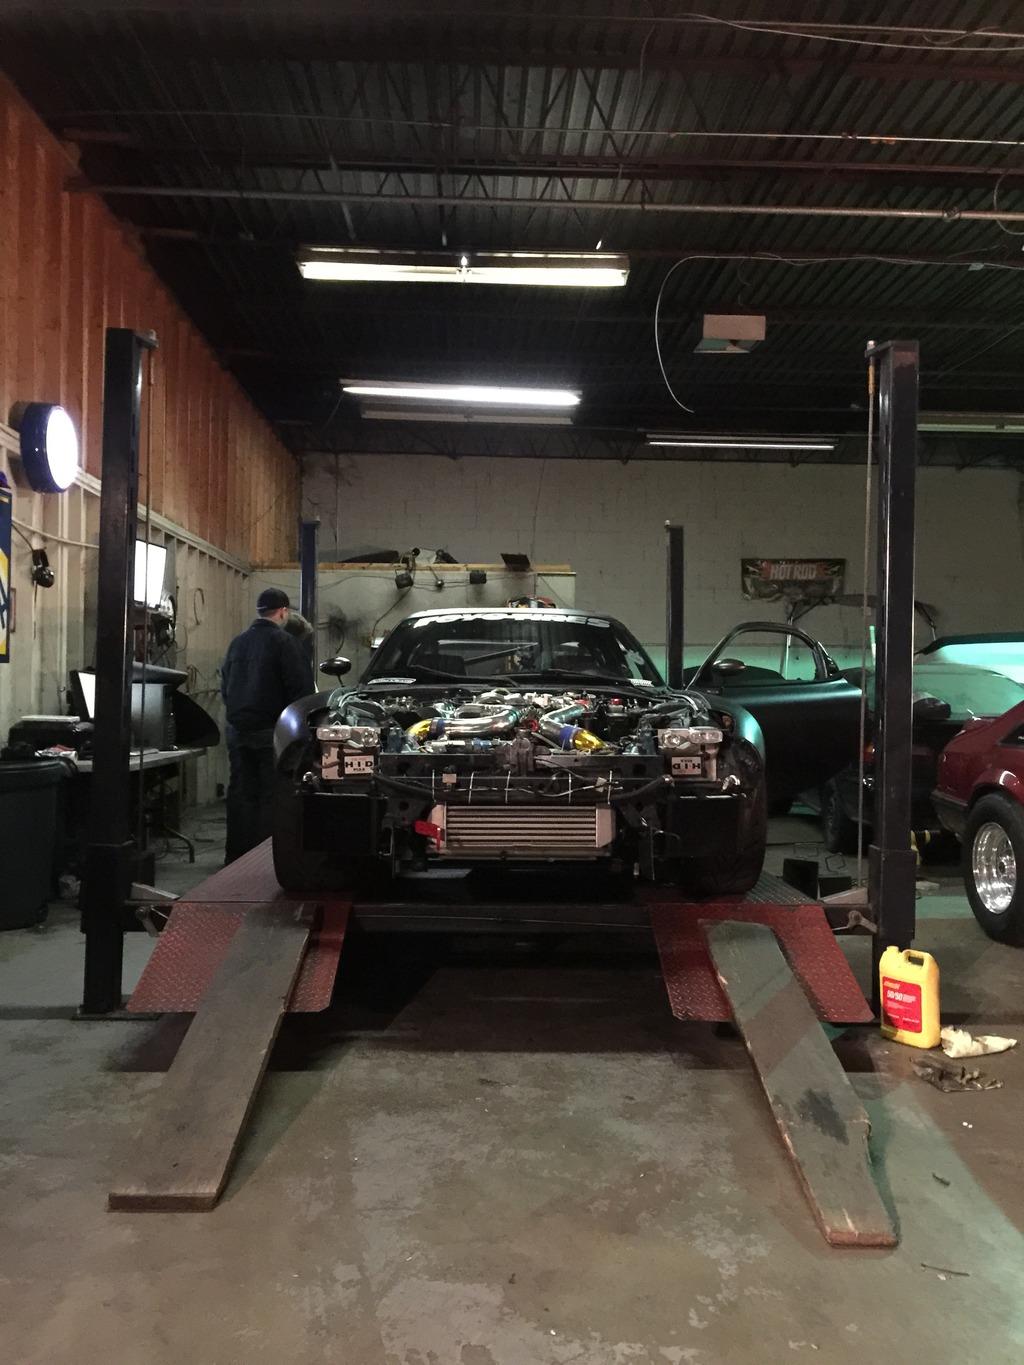
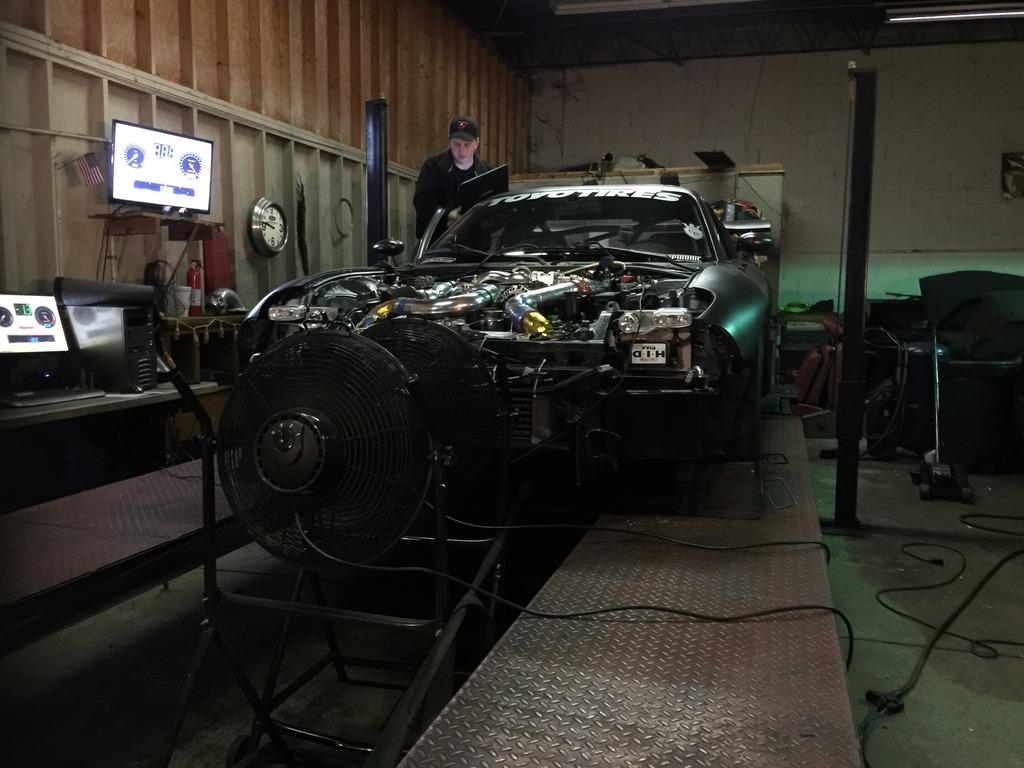
Video of the dyno run..
Due to some boost controlling issue, we ended the tuning and decided to do couple of days later.
Couple of days later (day when all of us were heading to PRI) I brought these with me in case..
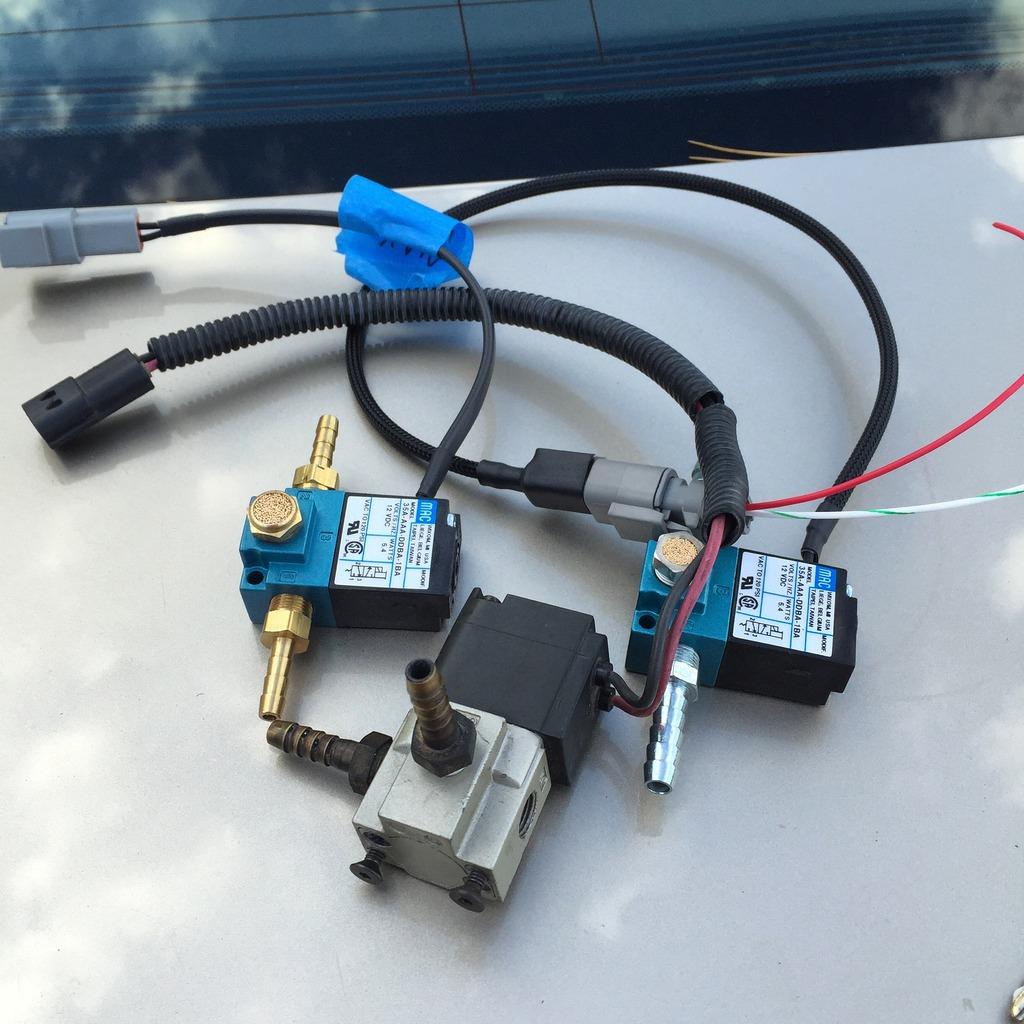
Here is Andy watching the car being loaded.
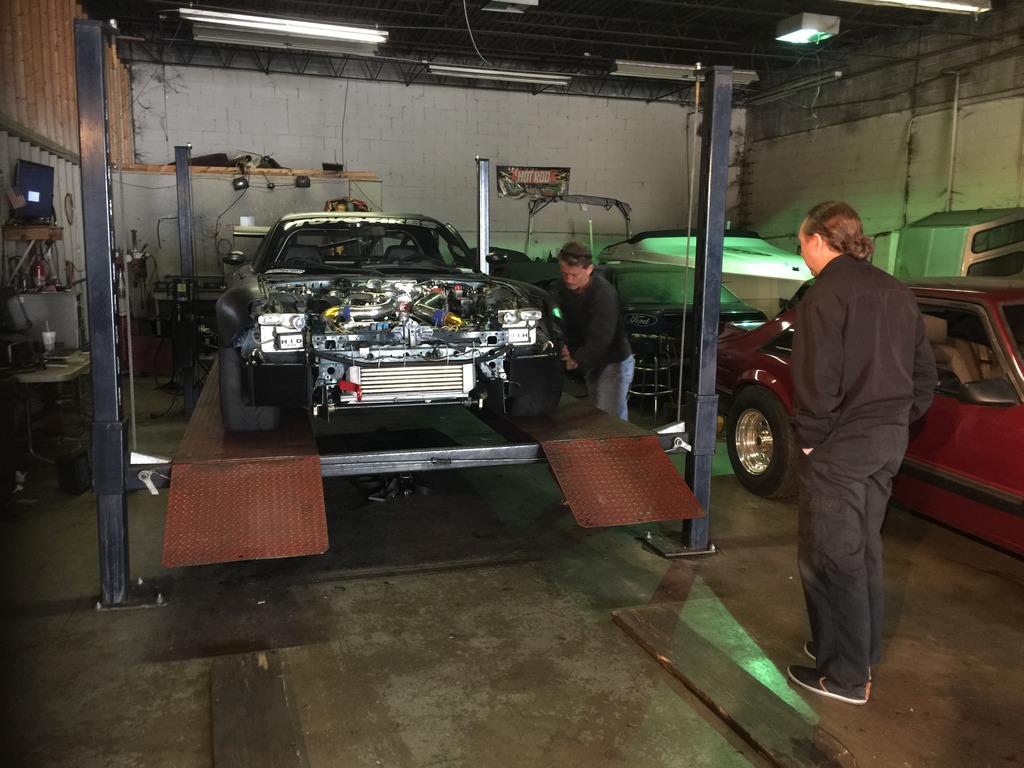
And done!
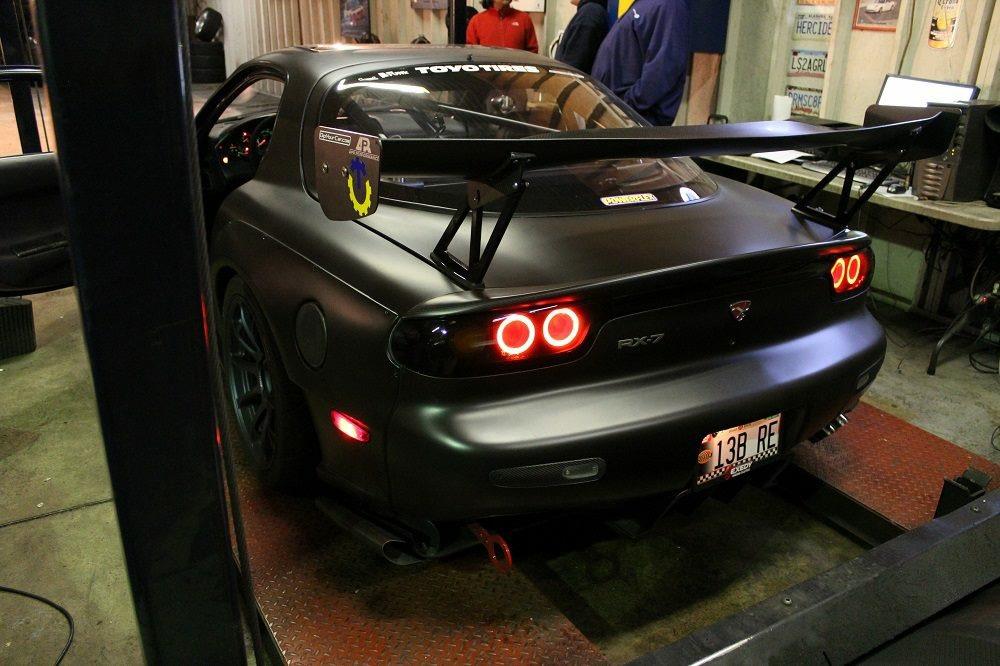
Several days later, while trying to put some miles on the engine and such, I ran into my friend Zach with 20B.
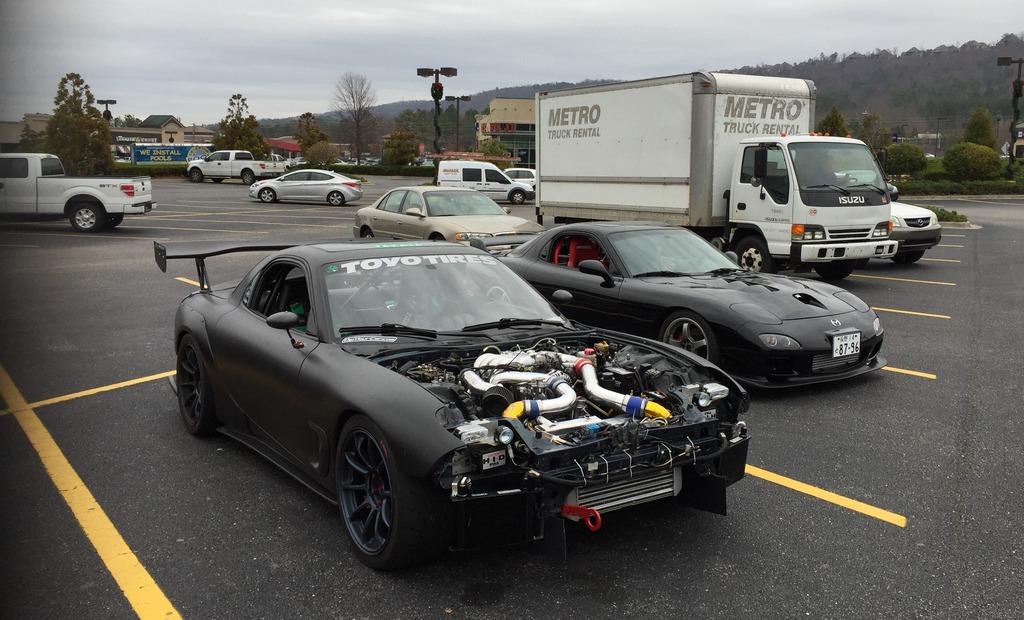
6-28-2015
Quick recall from PRI in Indy..
Couple of cool stuff I saw at PRI
Davies Craig EWP
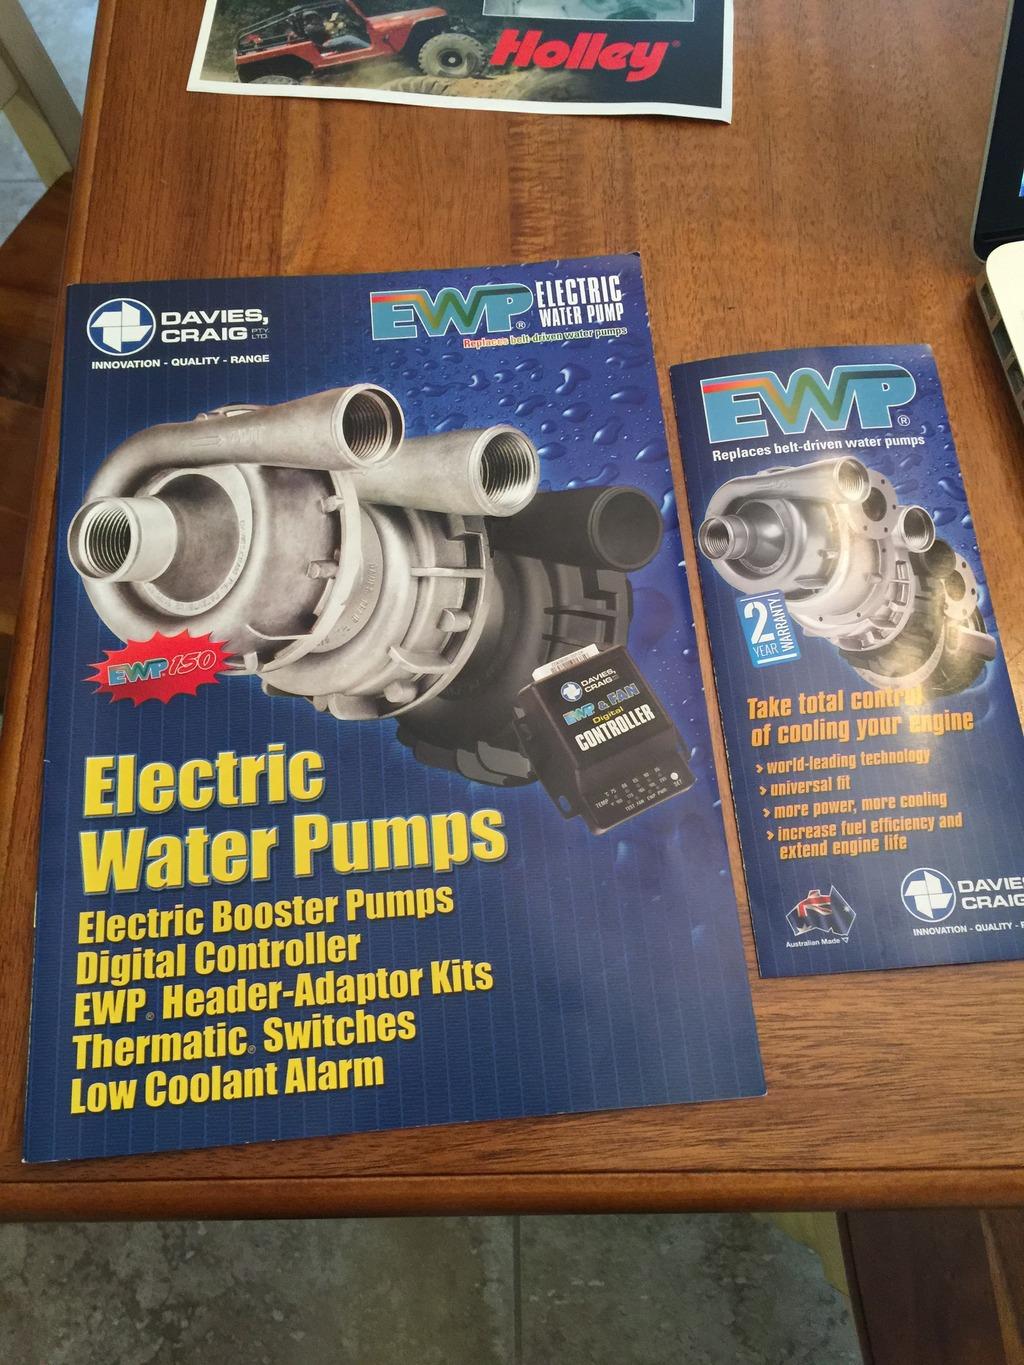
Holley's new fuel pump sock
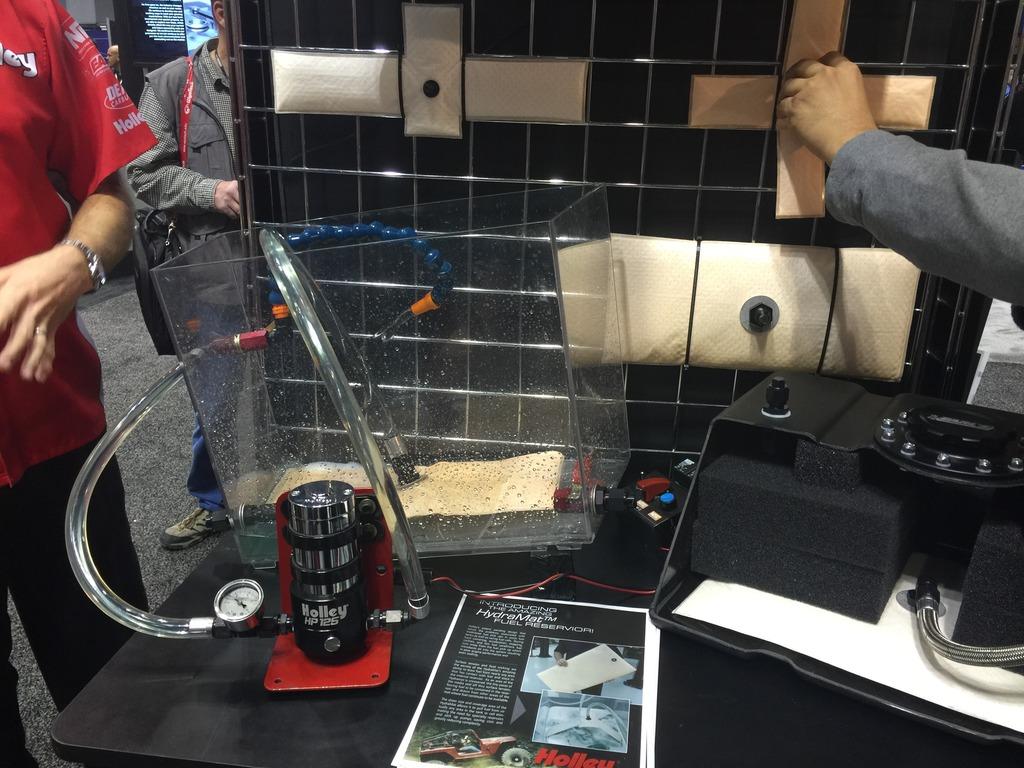
Alpinestars gloves ![]()
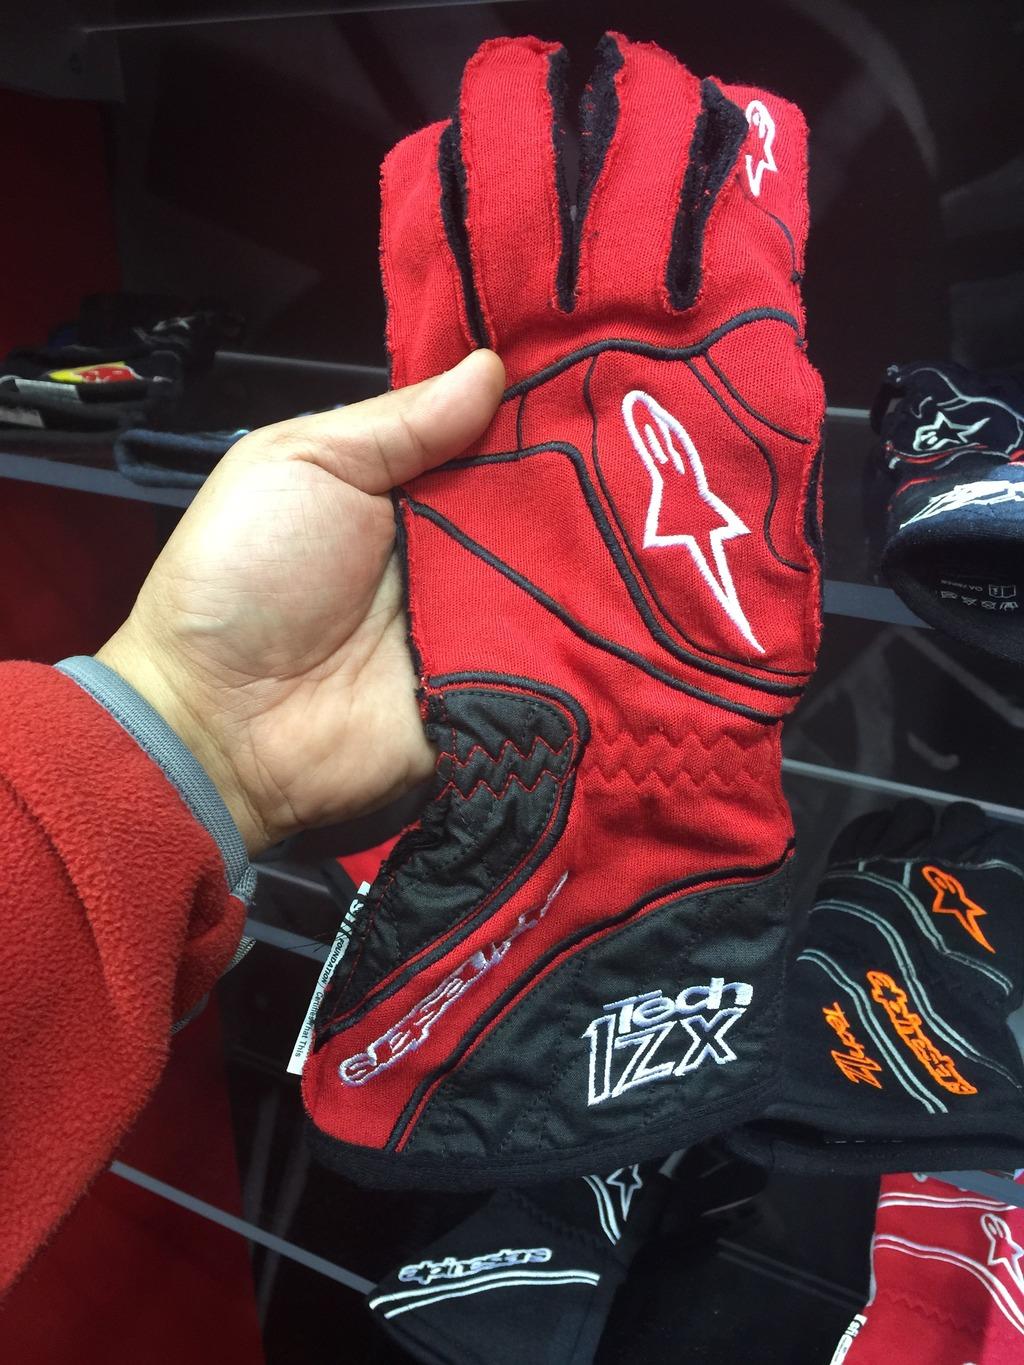
And got to have steak at St. Elmos place.. little hyped but good.
Back to the project updates.
So... got these lights ![]()
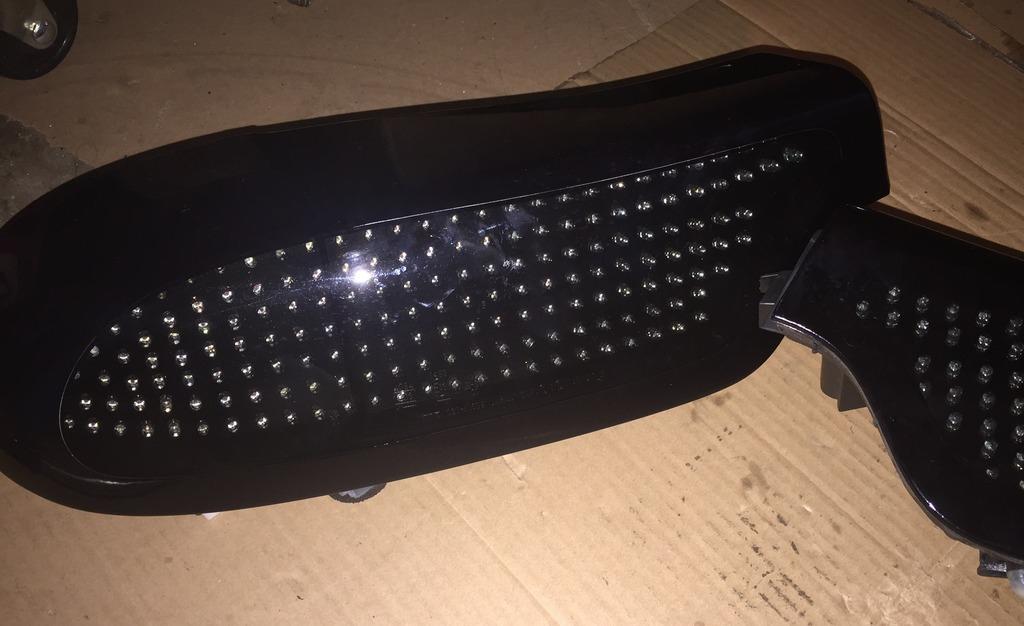
And also changed the color on the car.
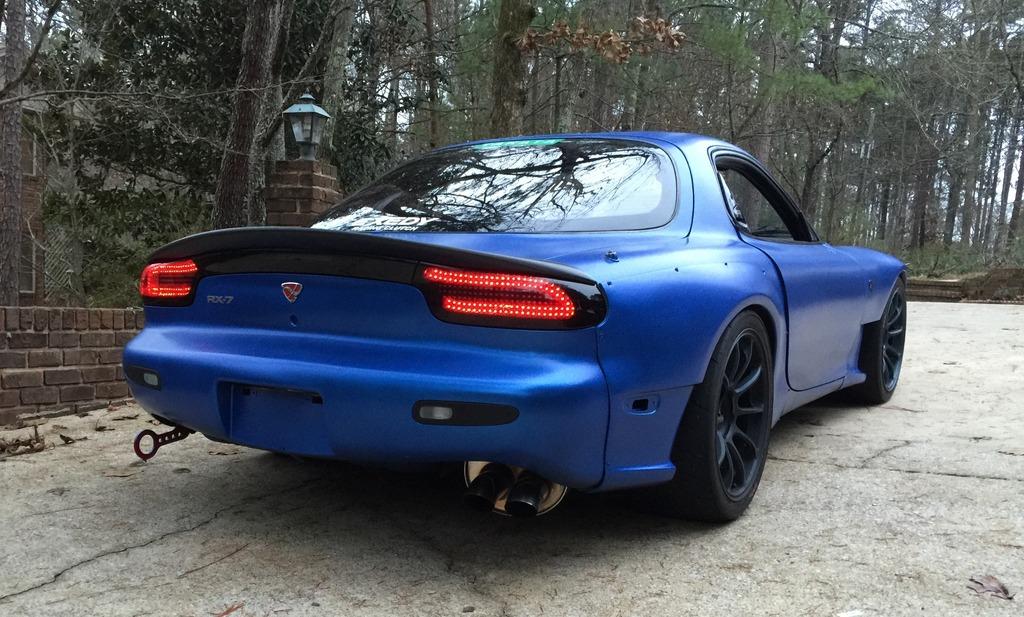
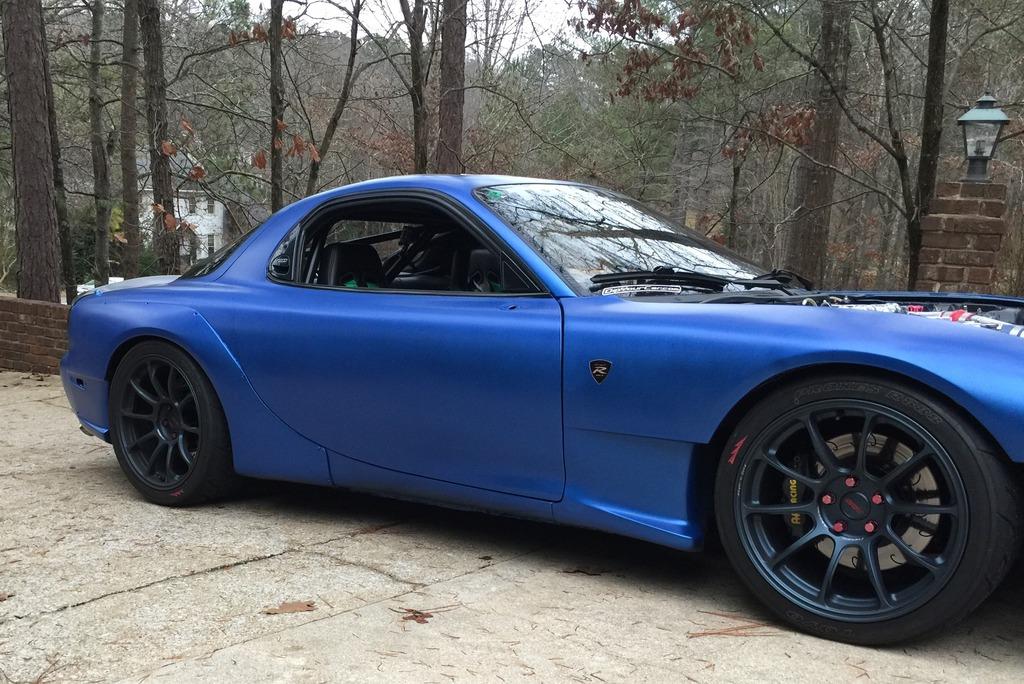
Trying out what wheels will go with the new color..
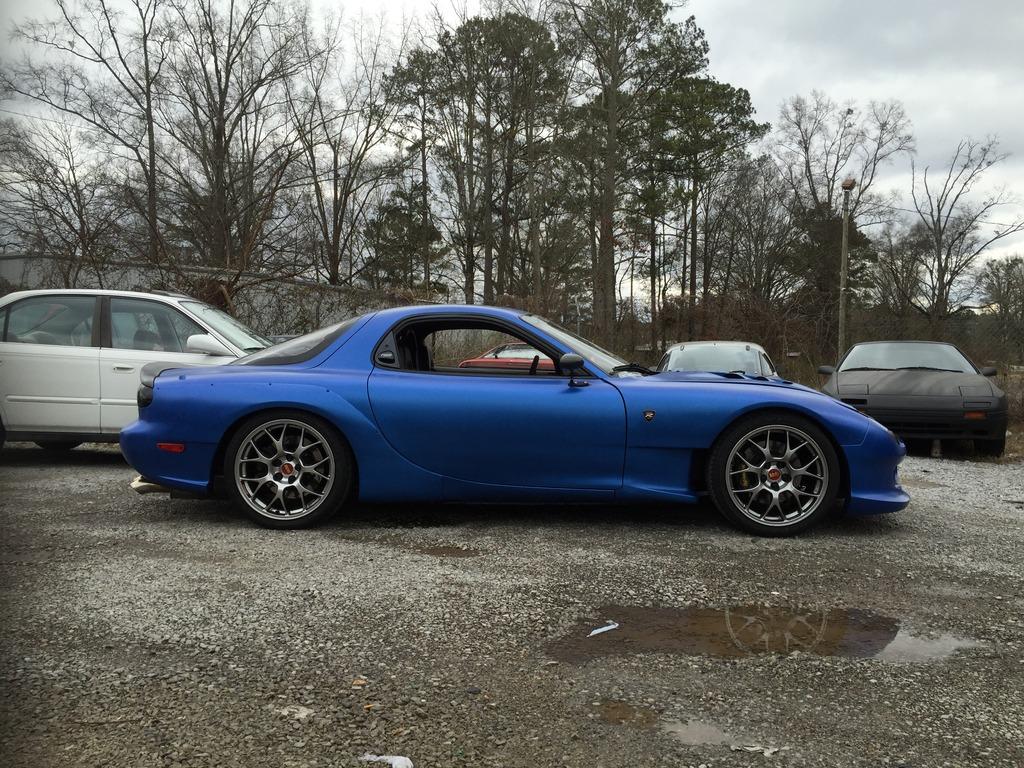
Decided on the Volk Racing RE30
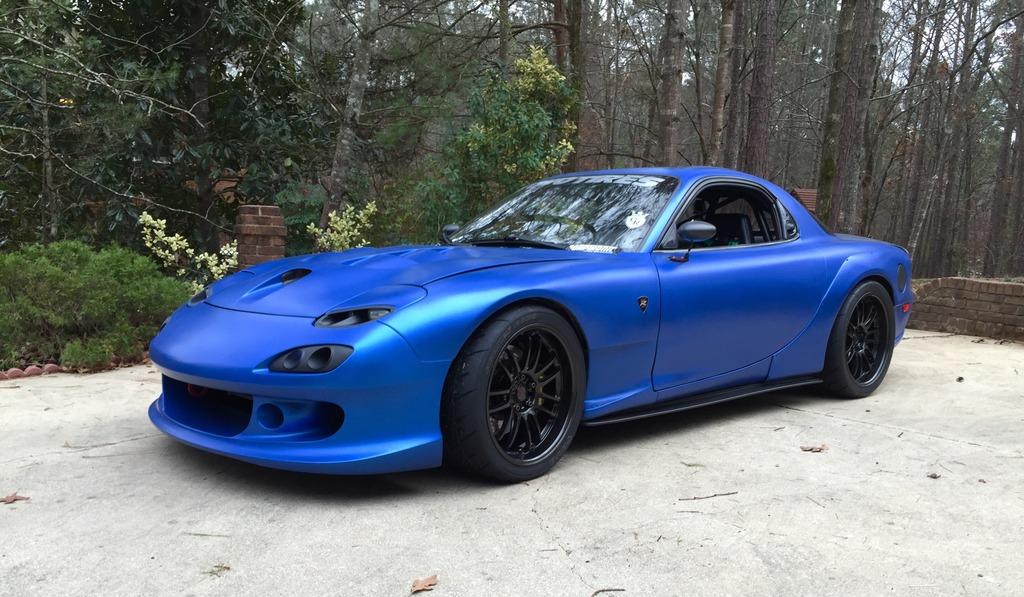
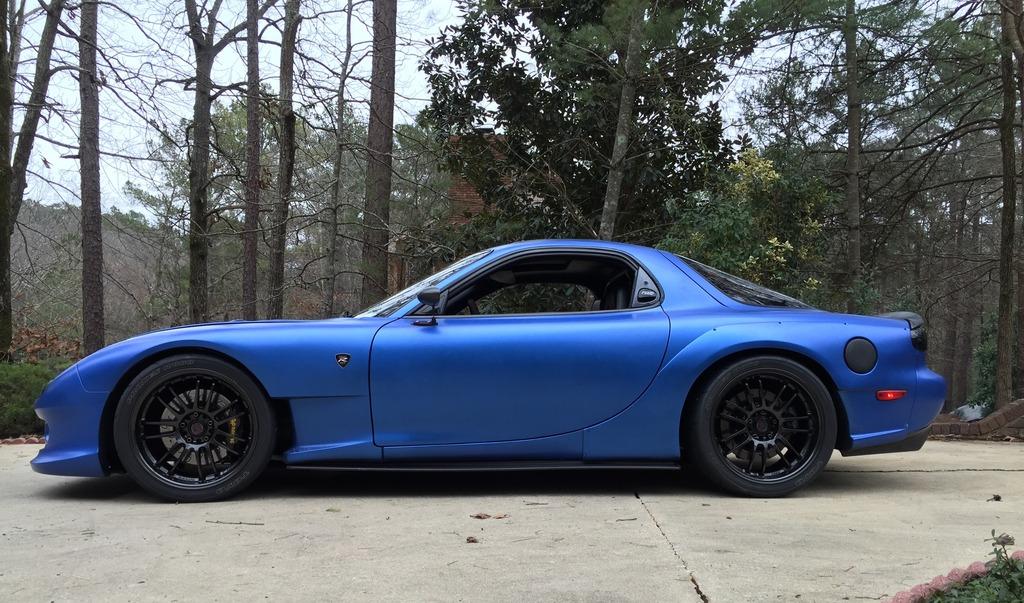
Hit the local car meet
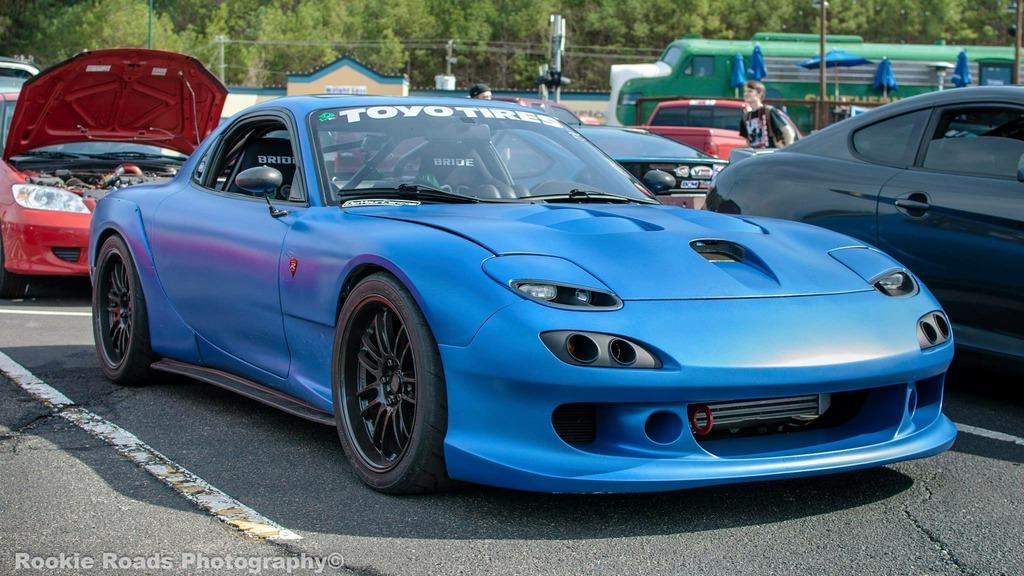
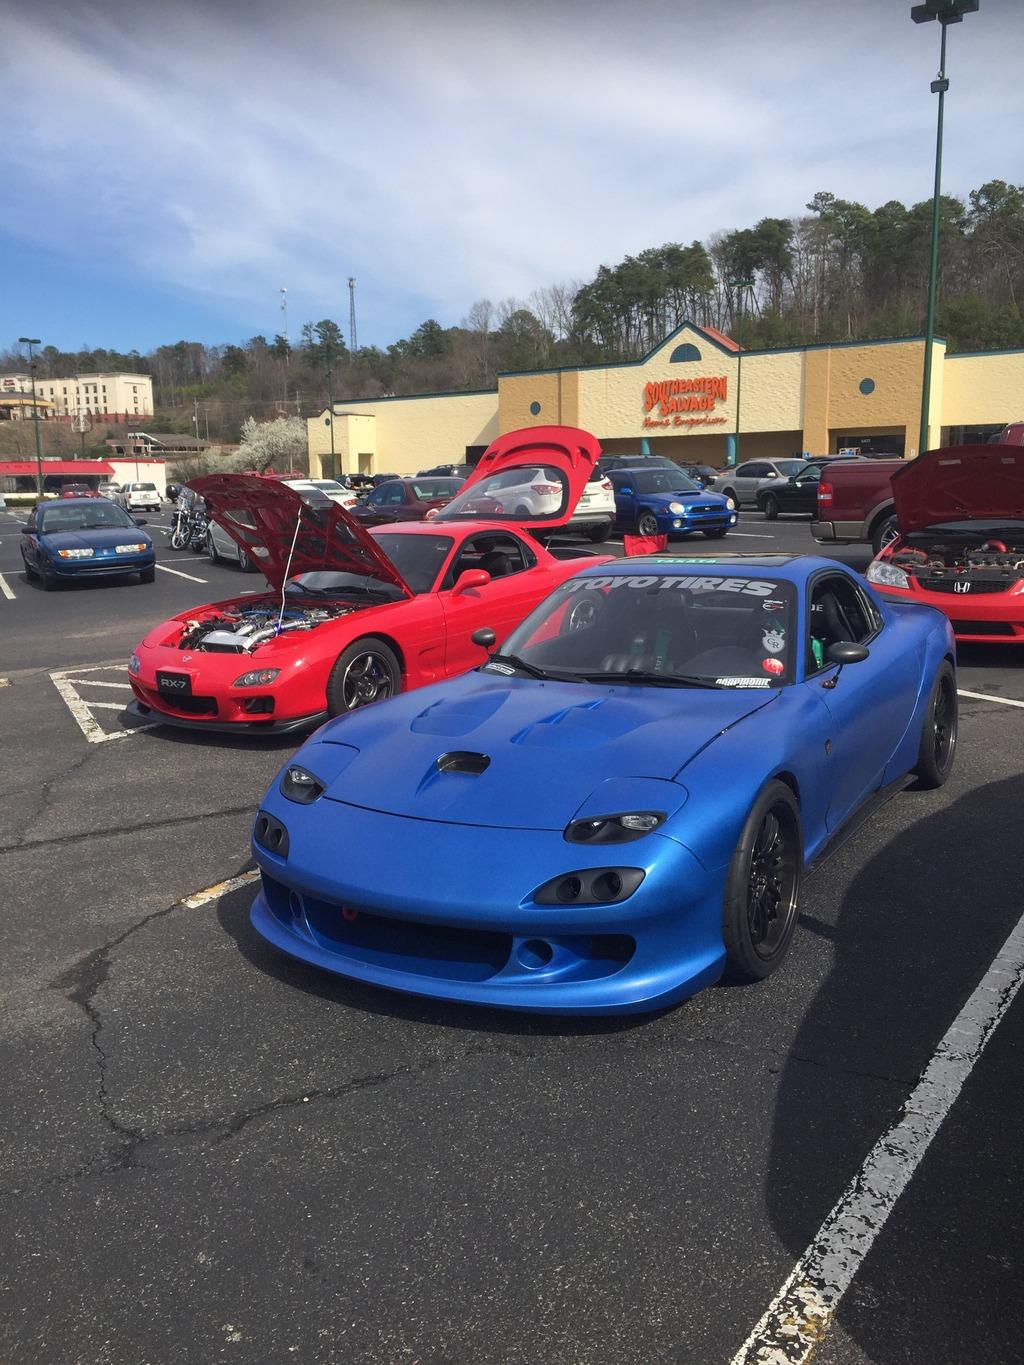
Track day at Barber Motorsports Park, with Just Track It! They are one of the best groups to track with.
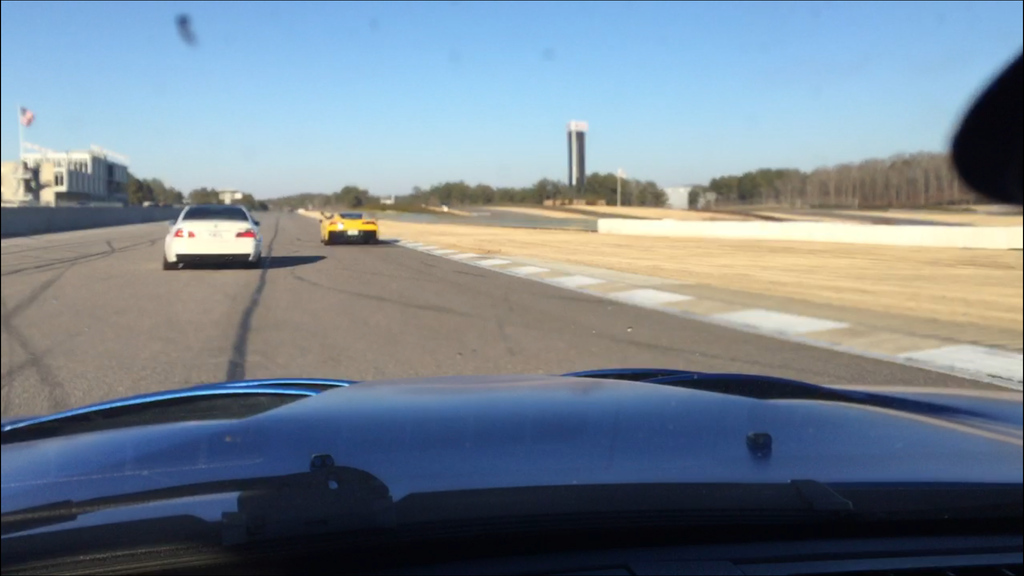
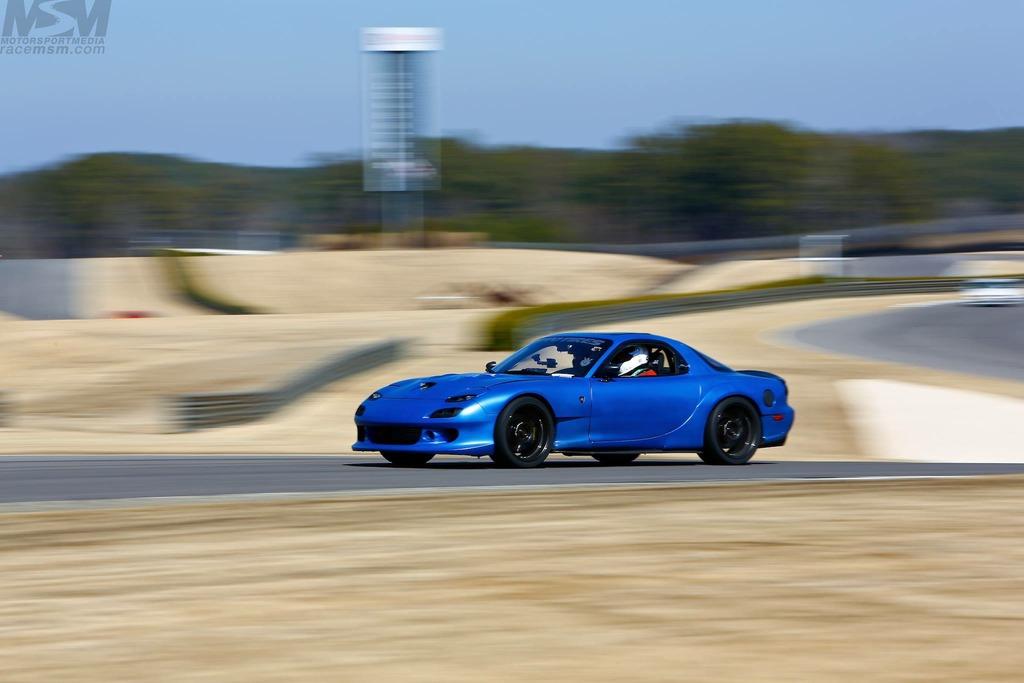
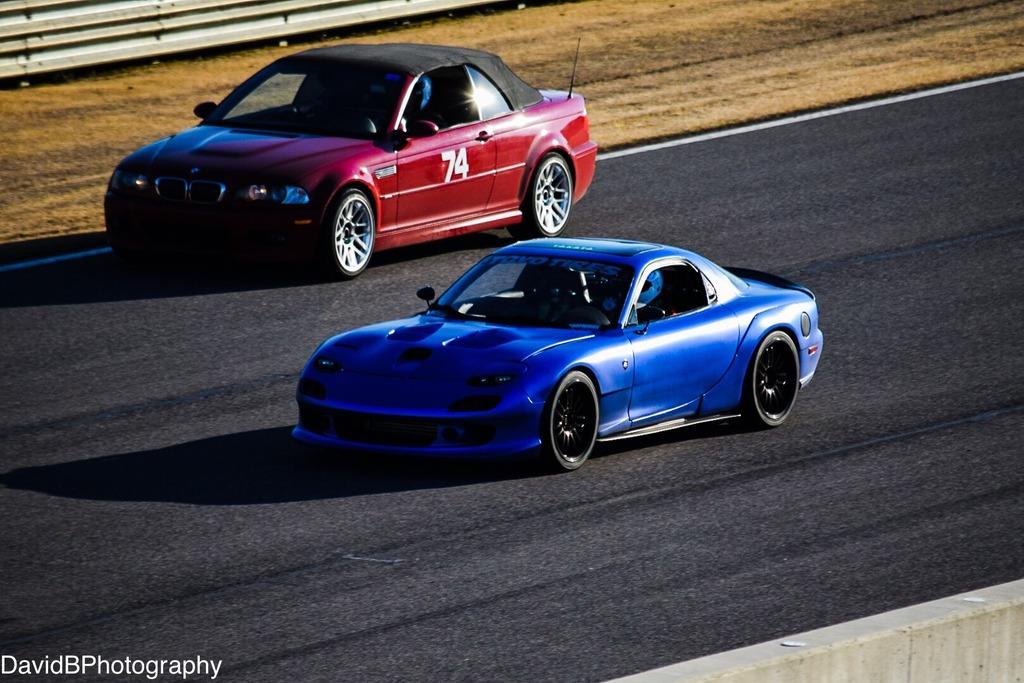
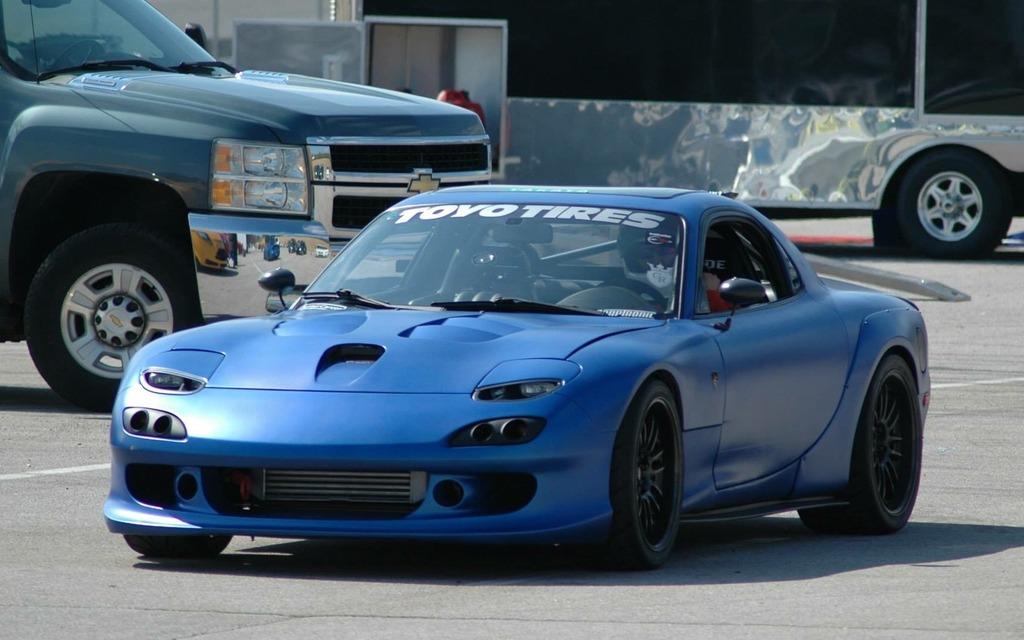
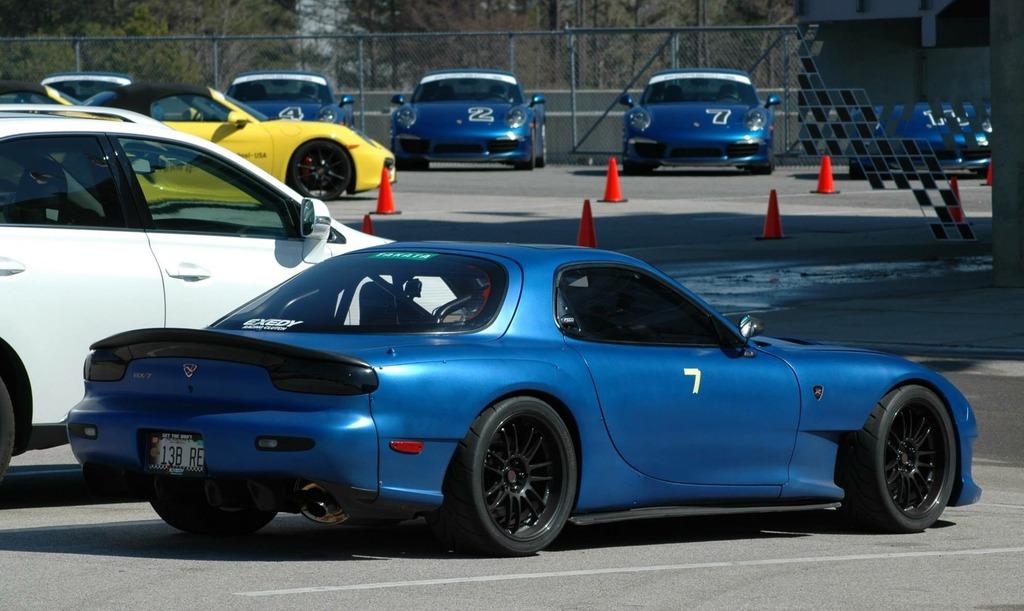
6-30-2015
More Update..
I had a photoshoot with Ryan Lopez, who shot my car other times.. I can't share those photos yet as they are still in bound to a media for publication.. but here are some I took..
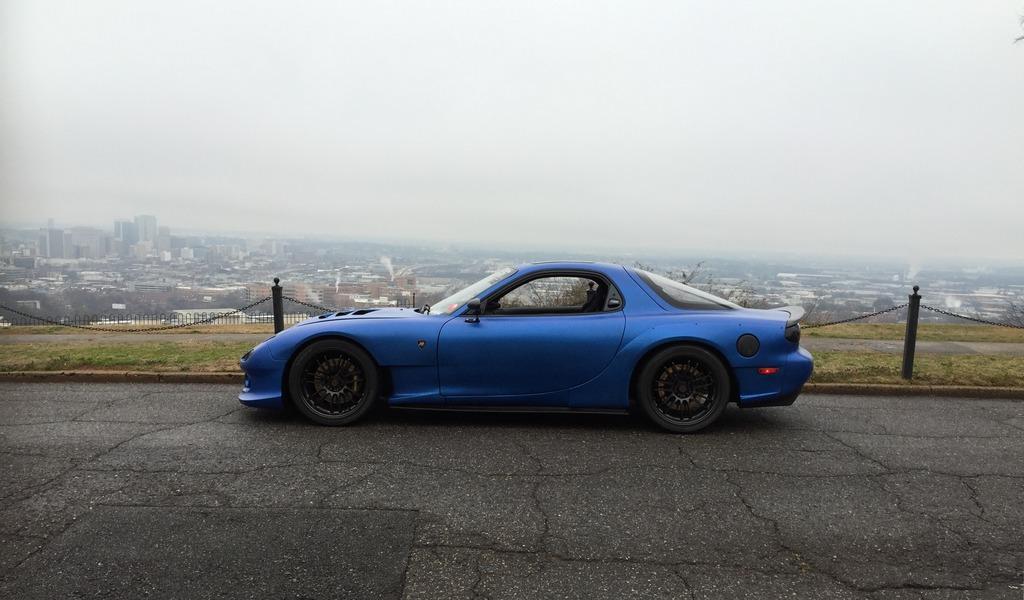
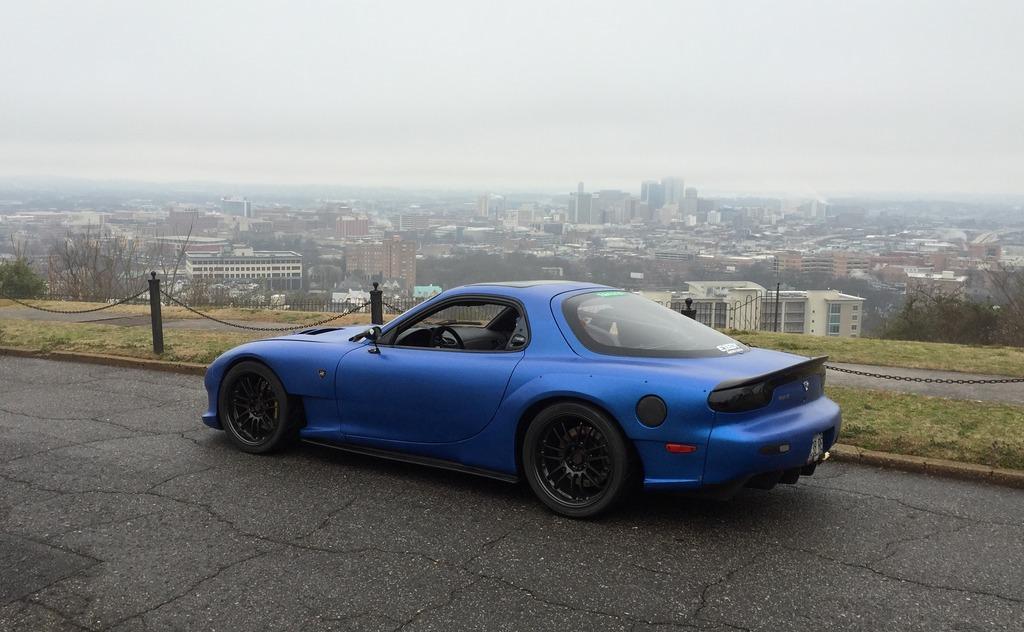
Preview of one of the shot
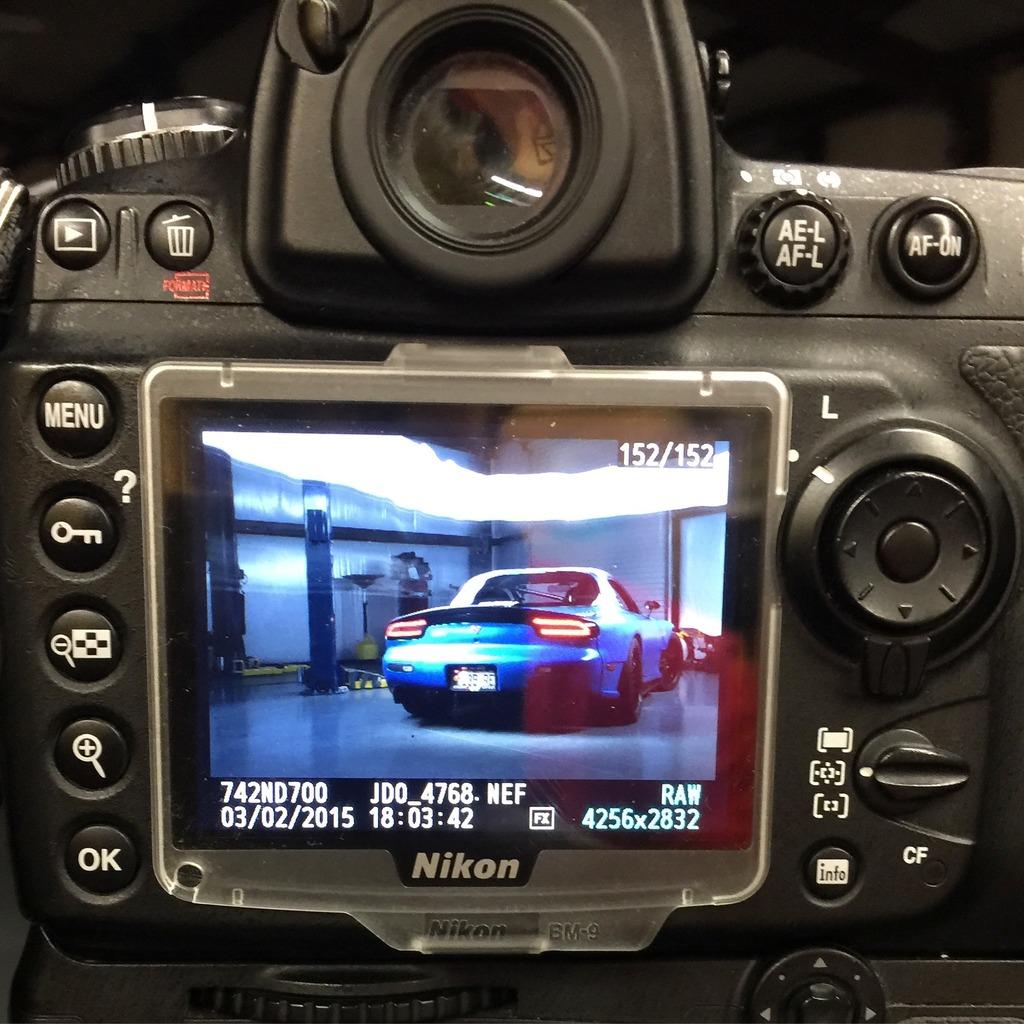
Couple of other things...
I put my SSM at my friend's house

Also started to work on my engine harness at Chase Bays. No one have made a quick disconnect for sequential twin

And since I'm a family man and with a dog, I been secretly searching online for a unicorn... Lexus IS300 Wagon. And finally found one!! 2005 Sportcross, only 1 of 240 ish sold in USA.
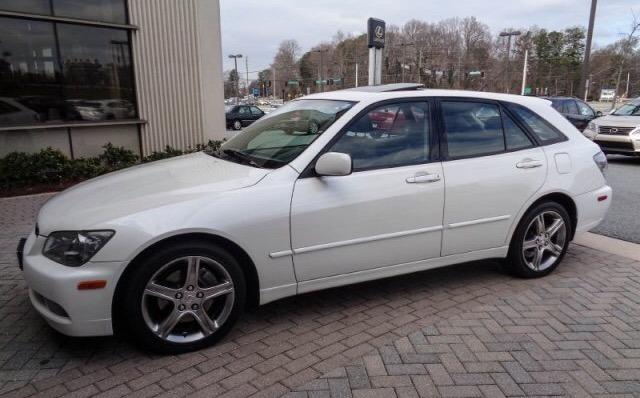
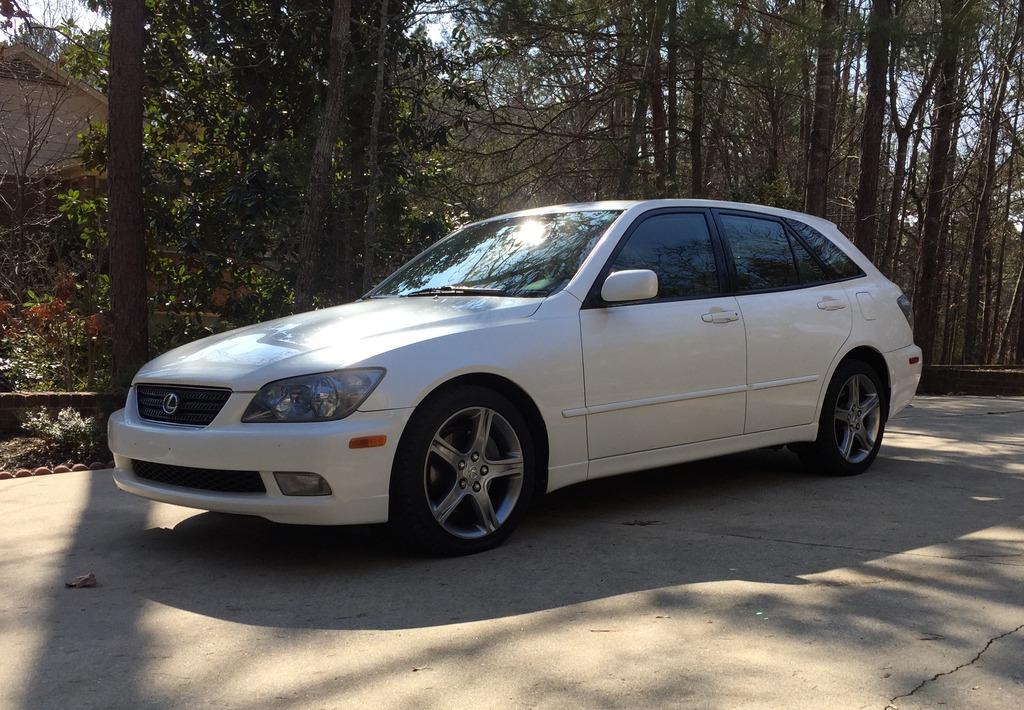
And had to get a custom plate ![]()
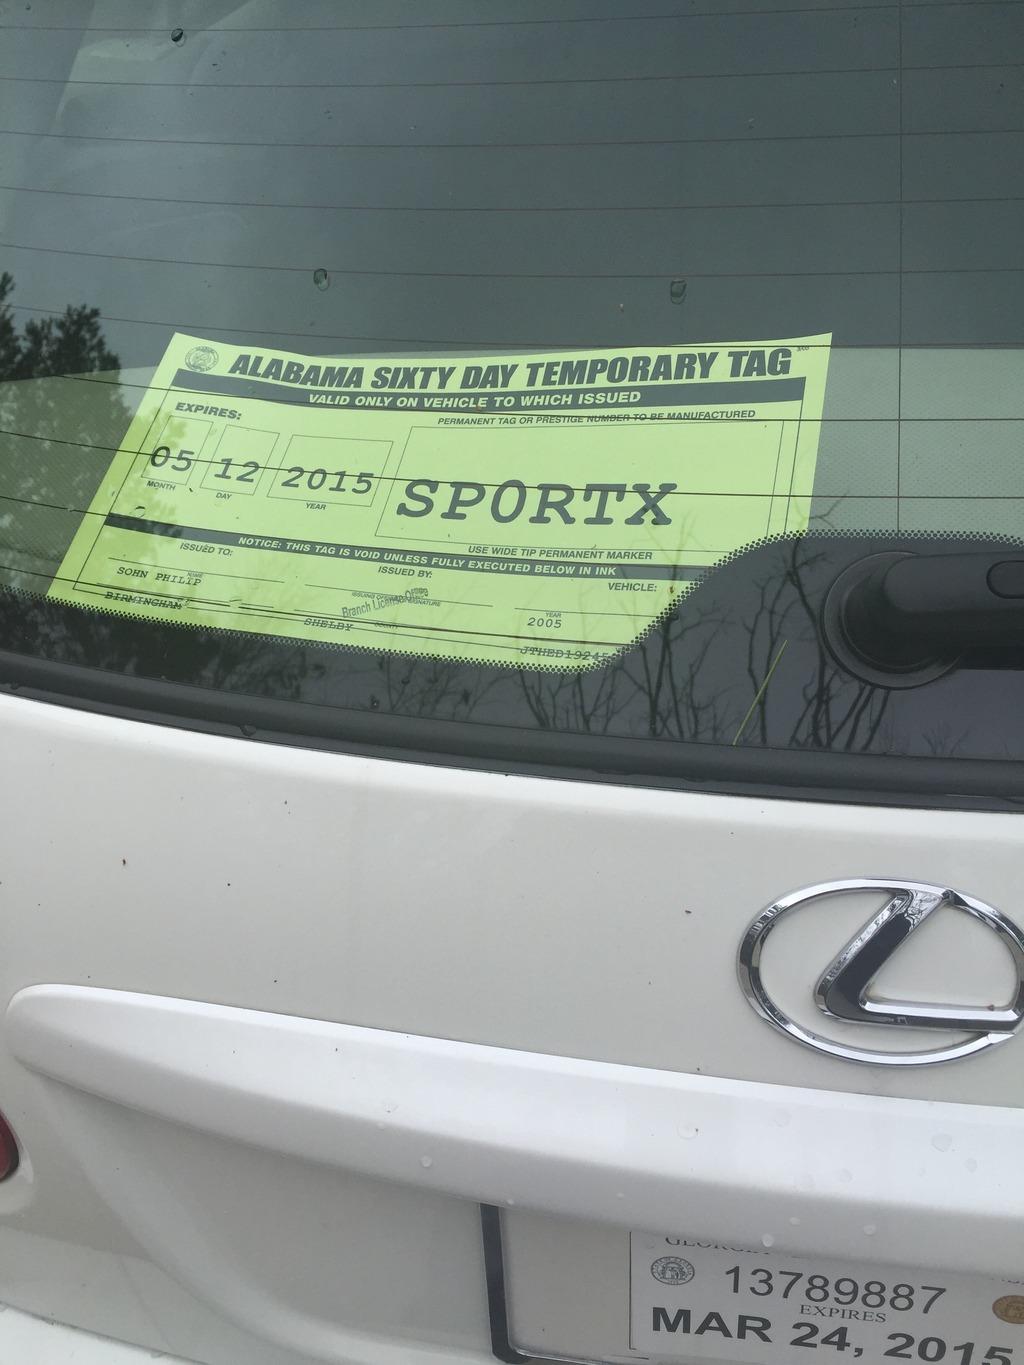
I had some old SSR's from my FD and put some new Toyo T1-Sports on them. I had great luck with these tires.
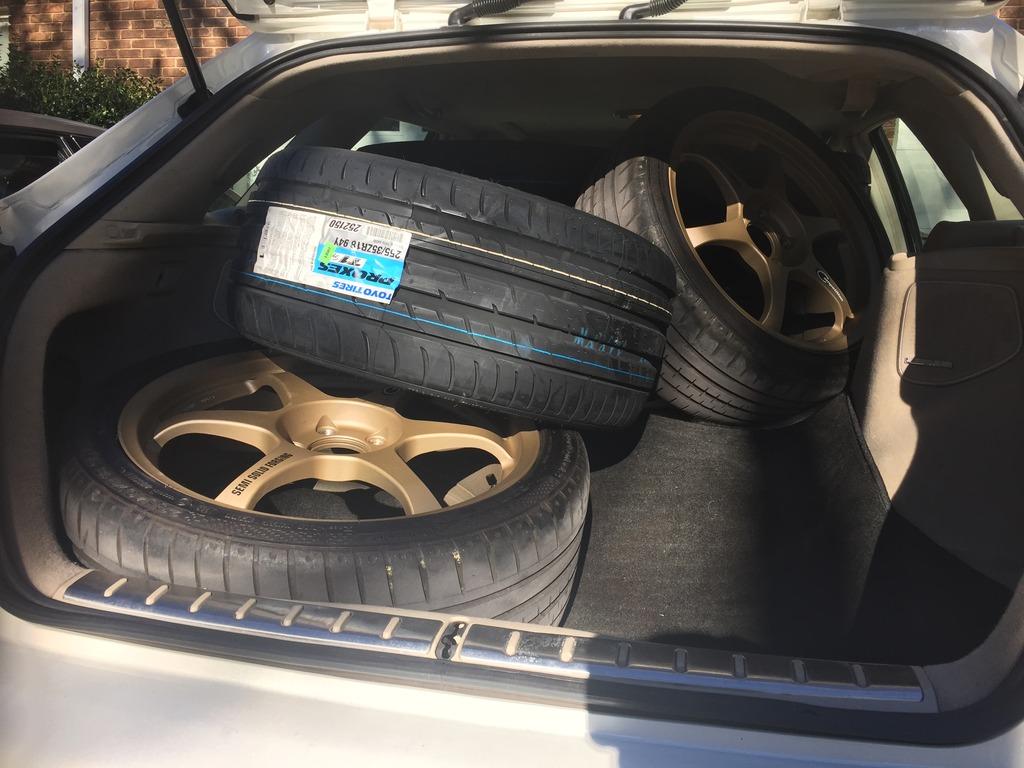
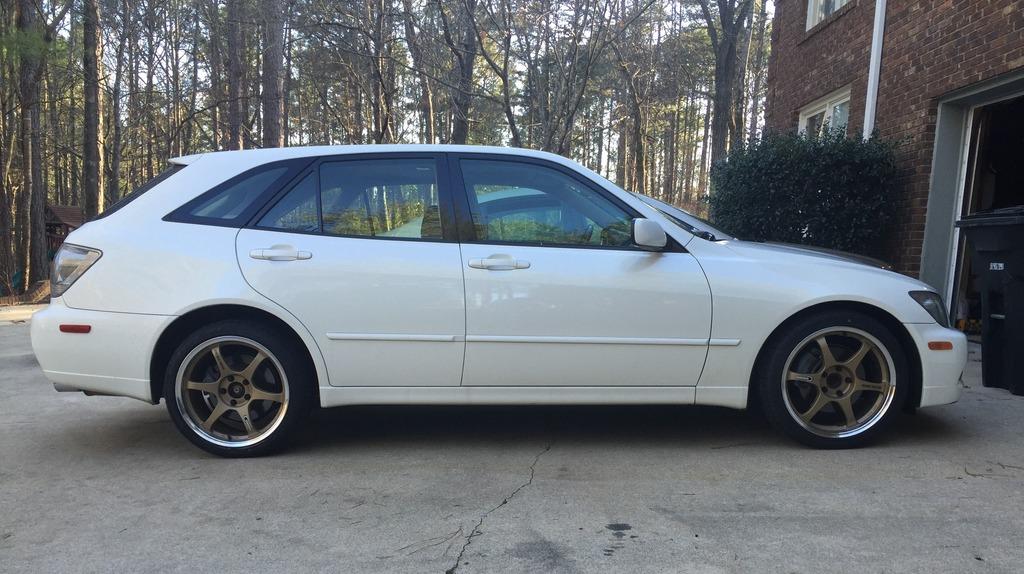
Talking about wheels.. I also picked up a set of MS-01S in 18s for the FD. Bought them throught GTR-Garage on Yahoo auction japan. Those of you looking for people to bring in large parts from japan, GTR Garage is the place! More info and their contact, GTR Garage
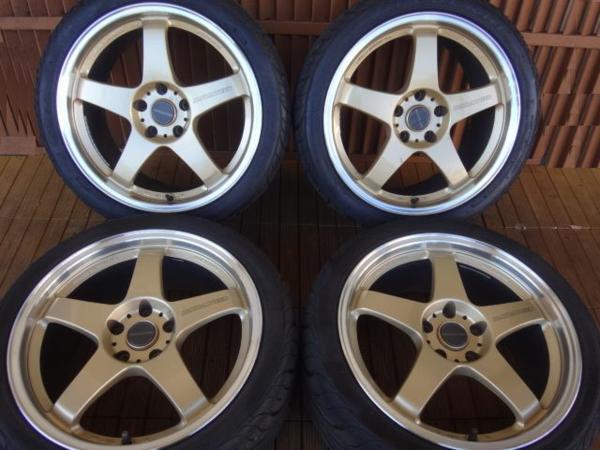
7-1-2015
Catching up on my updates..
So, I've decided to pull the dip off and rock my Montego Blue paint. But to protect the paint, I've added some dip to areas where its prone to chipping.. Mainly using Toyo Tires, R888's.
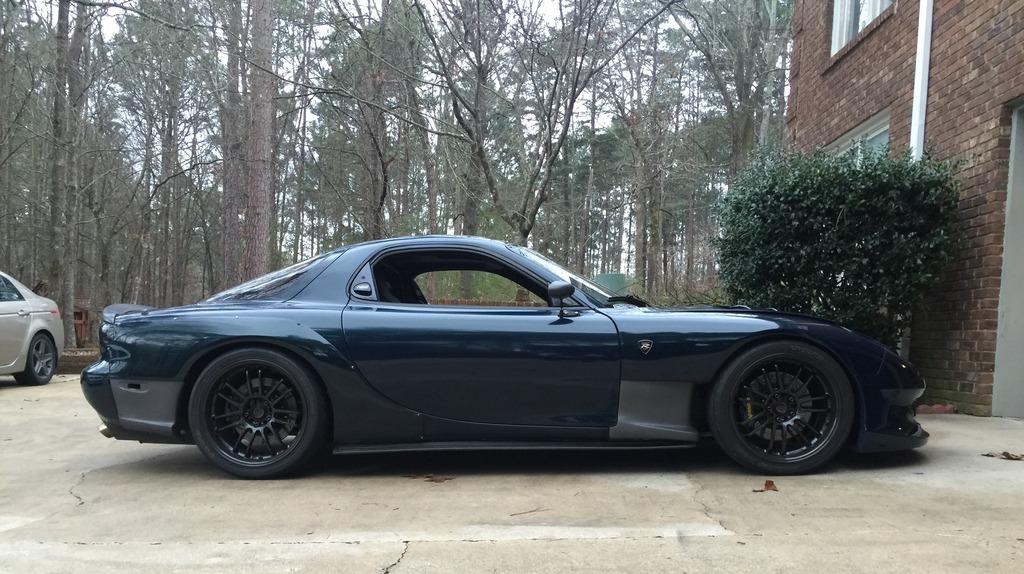
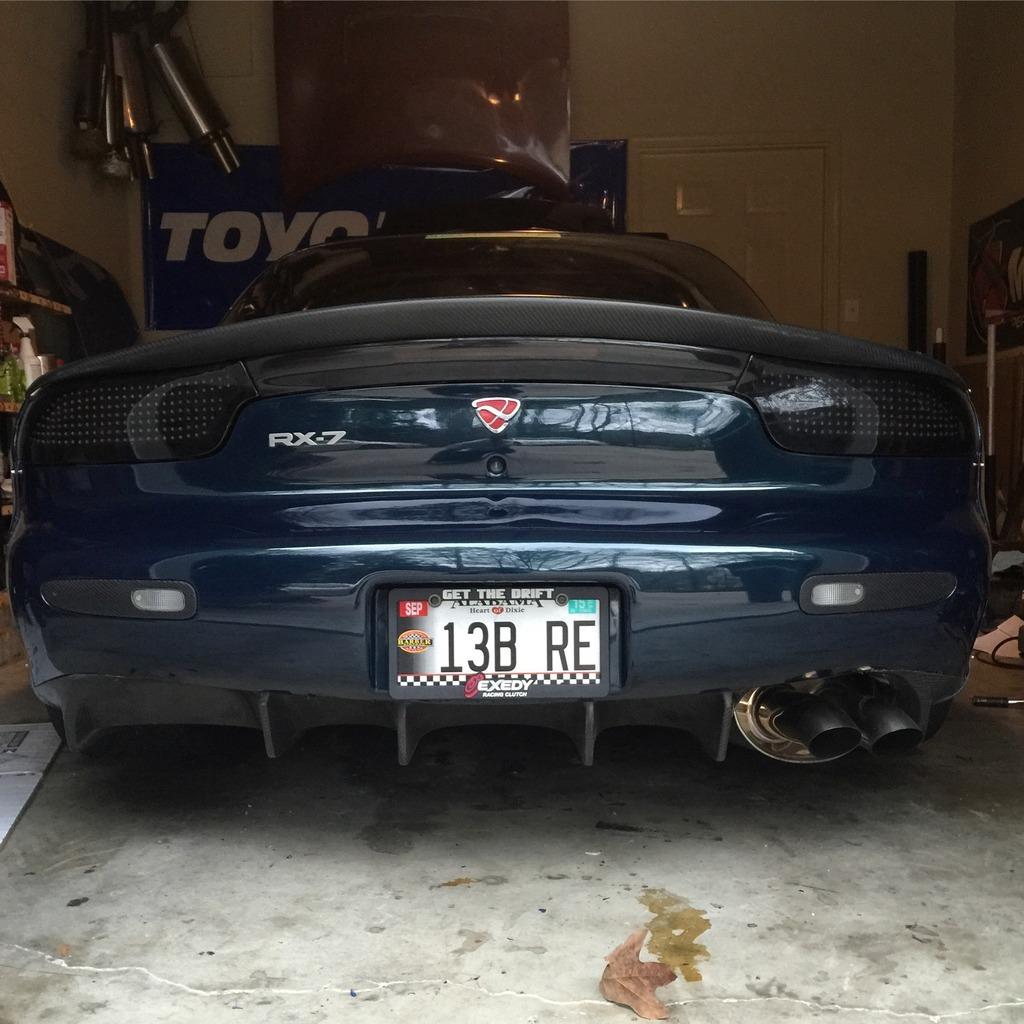
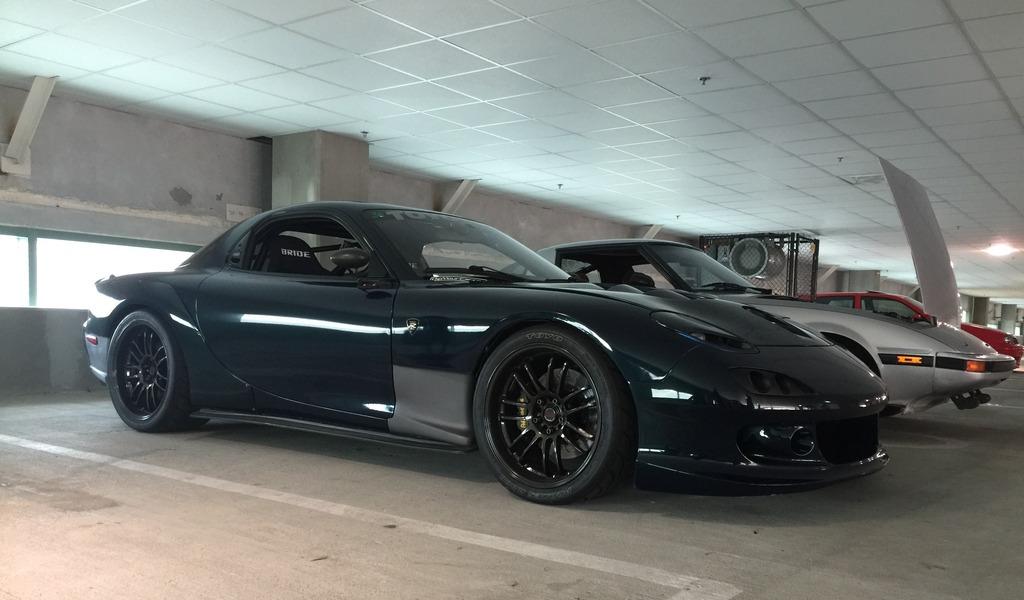
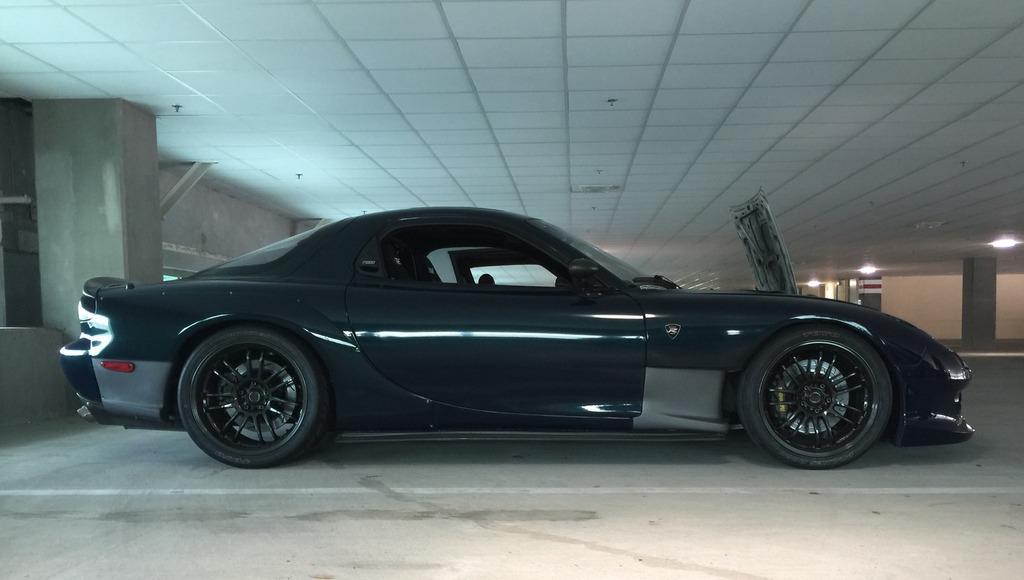
Also, I was getting my RZ Recaro Carbon Kevlar seats recovered.
I didn't want something too crazy, so sticking with neutral grey suede.
perforated center cushions
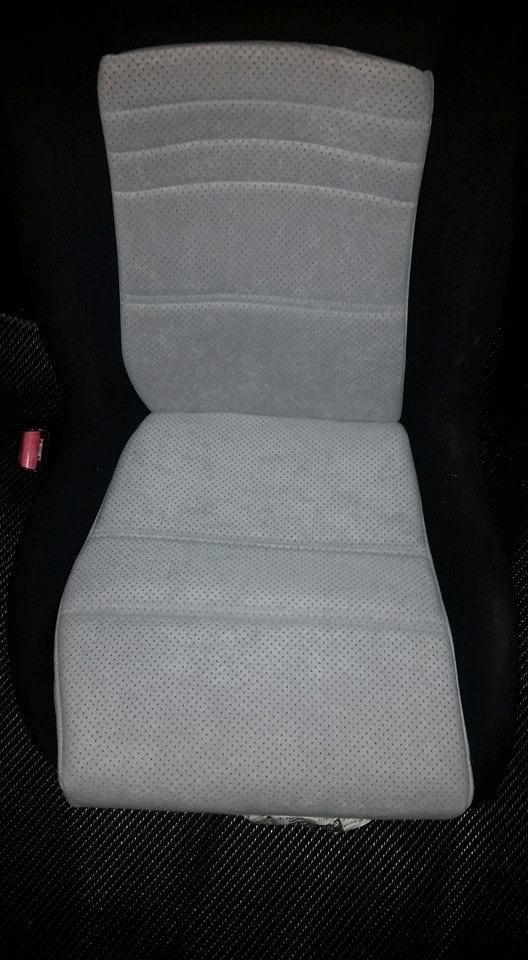
All the original material removed.. I'm saving it in case for the future..
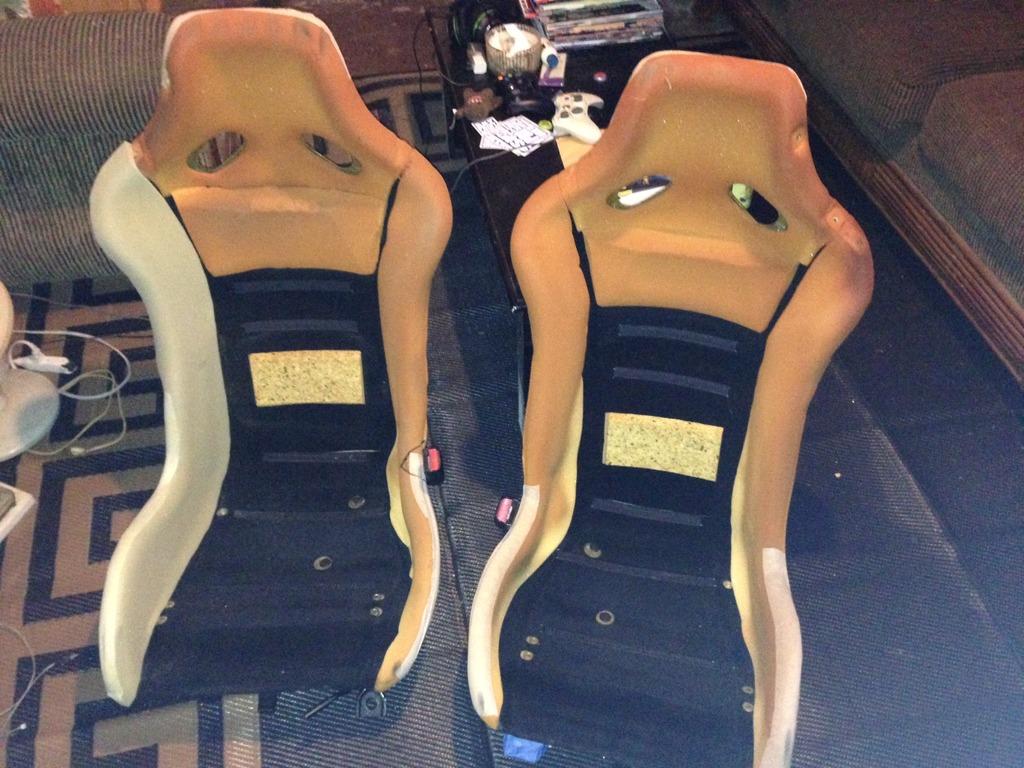
Meanwhile, still working on the OE harness at Chase Bays.. Completely disassembled and ID'd.
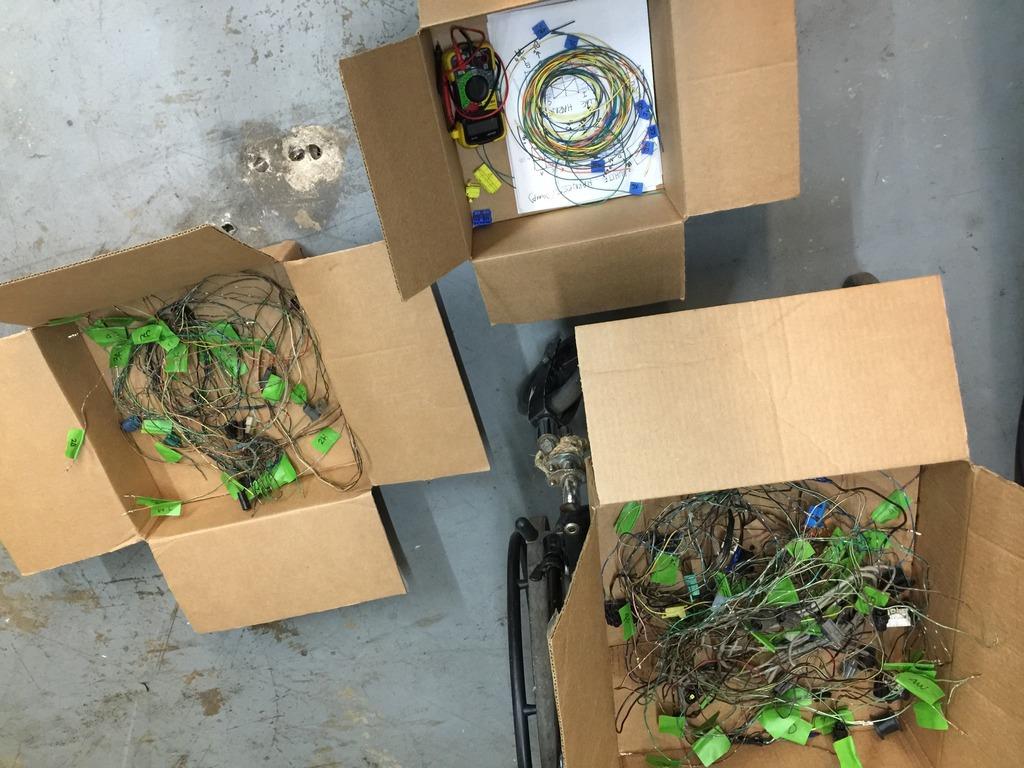
Also, working on a bumper. I've been a huge fan of FEED (Fujita Engineering) and RE-Amemiya. Both bumper has its positives and wanted to build a bumper that utilizes best of the both.
I was one of the first in USA to have the FEED Type 2R bumper and lights and its the signal Driving lights of Type 2R that I loved.
What I liked about the RE-Amemiya was the lower half. The aggressiveness of the lower half of the RE-A bumper is what I loved. Hence My 20B FD has the RE-Amemiya N1-02 bumper. So, I fused the two together.
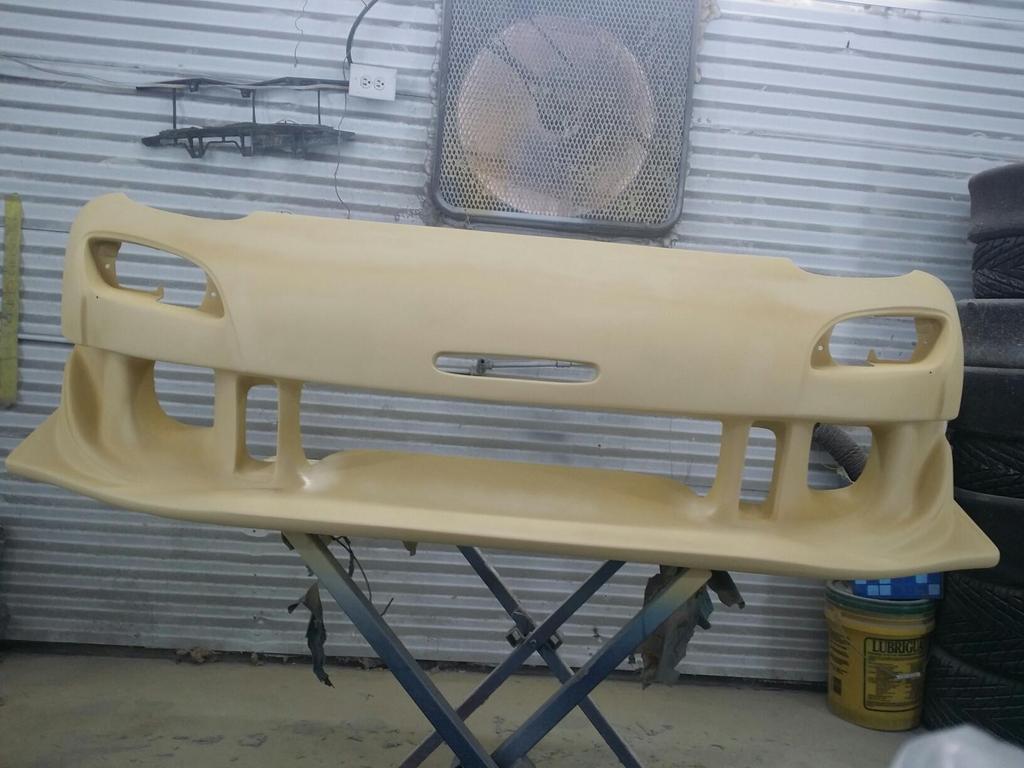
But what I did not like about either bumper is the center lower section raised. This caused a problem when wanting to use front splitter. So, we are making it flat.
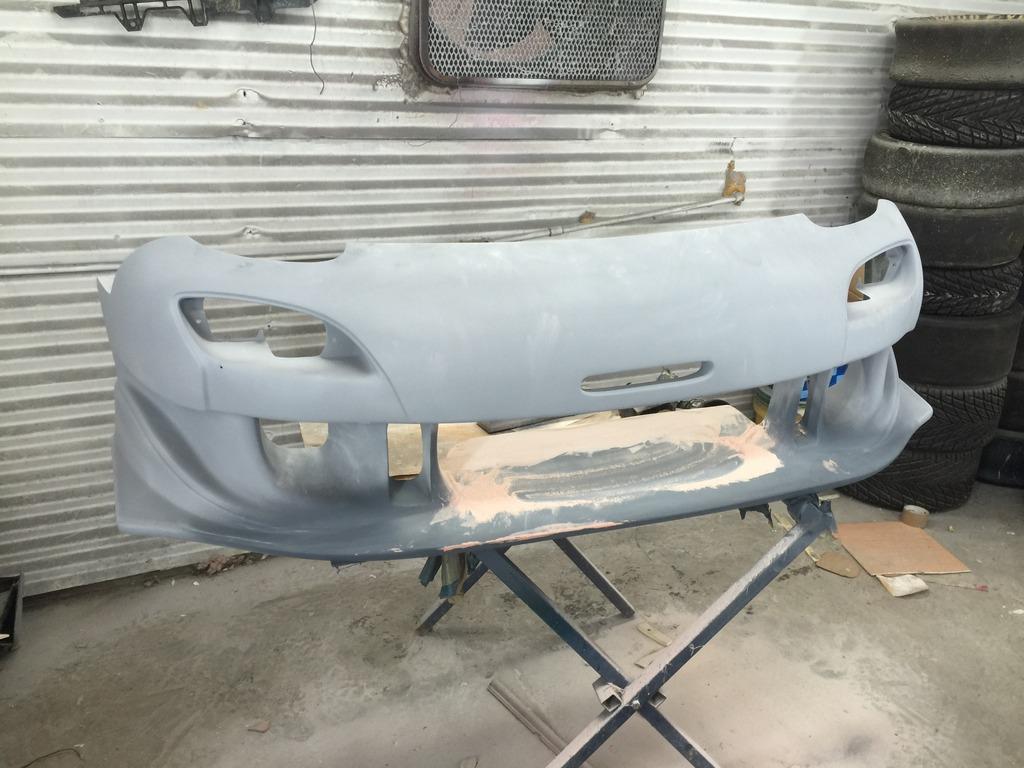
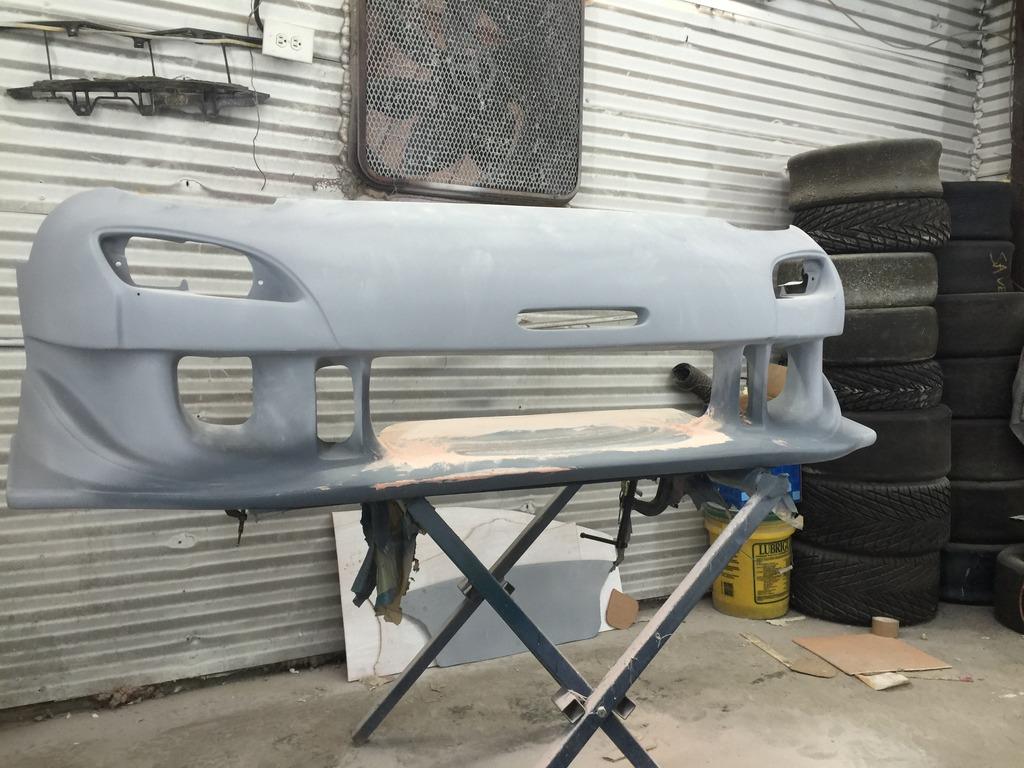
Everything smooth out
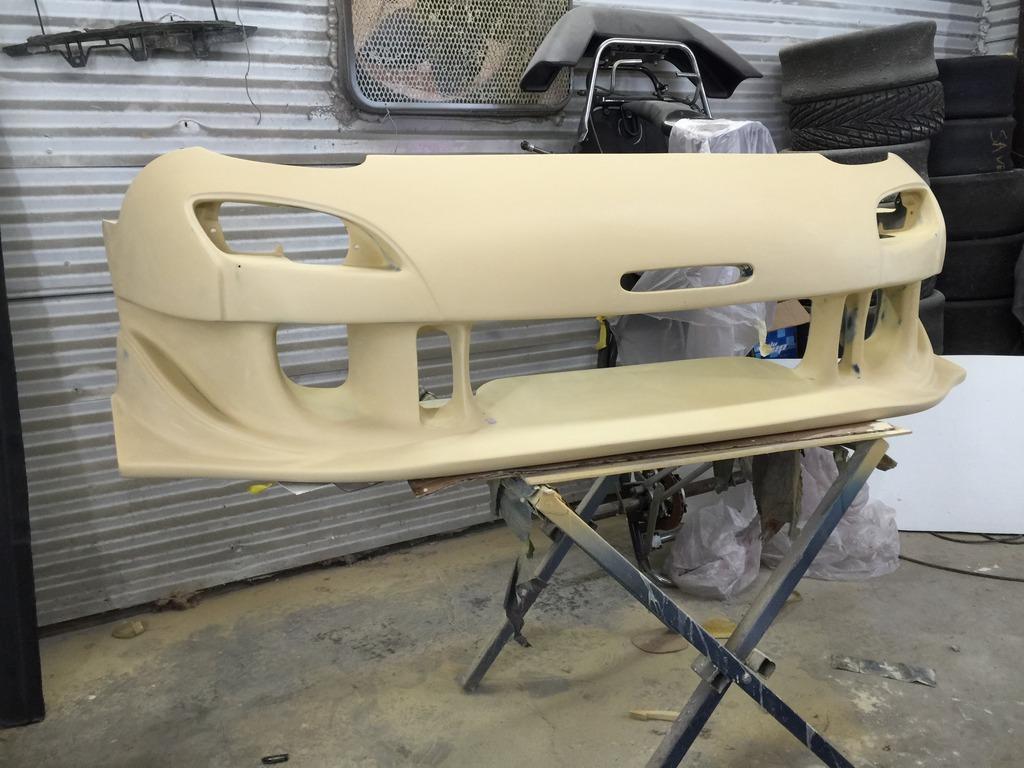
And Mold being made.. (credit goes to LC Racing for making the mold).
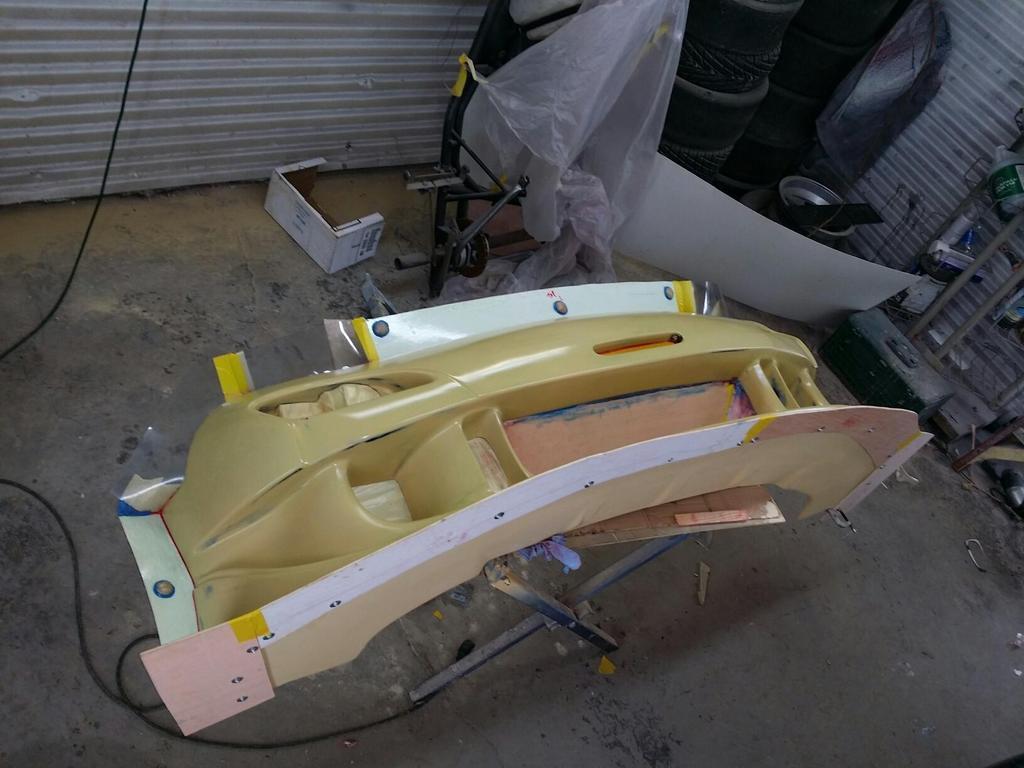
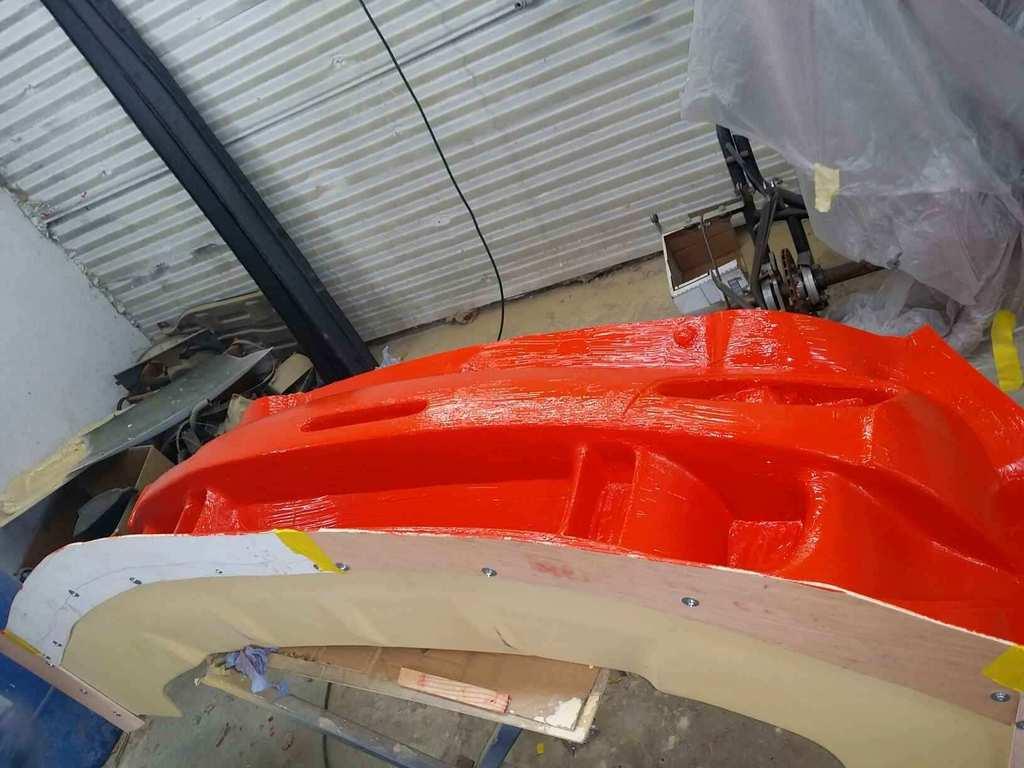
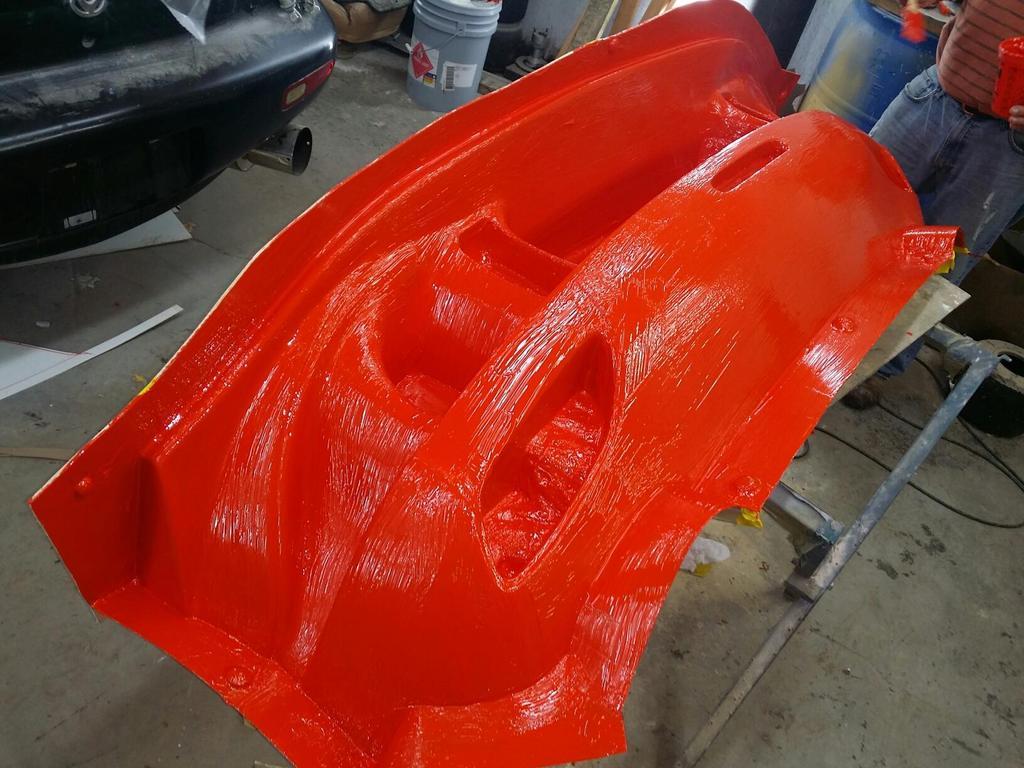
Bumper is currently on my car and few things to be adjusted and new mold needs to be made.
7-3-2015
More Update...
No dip
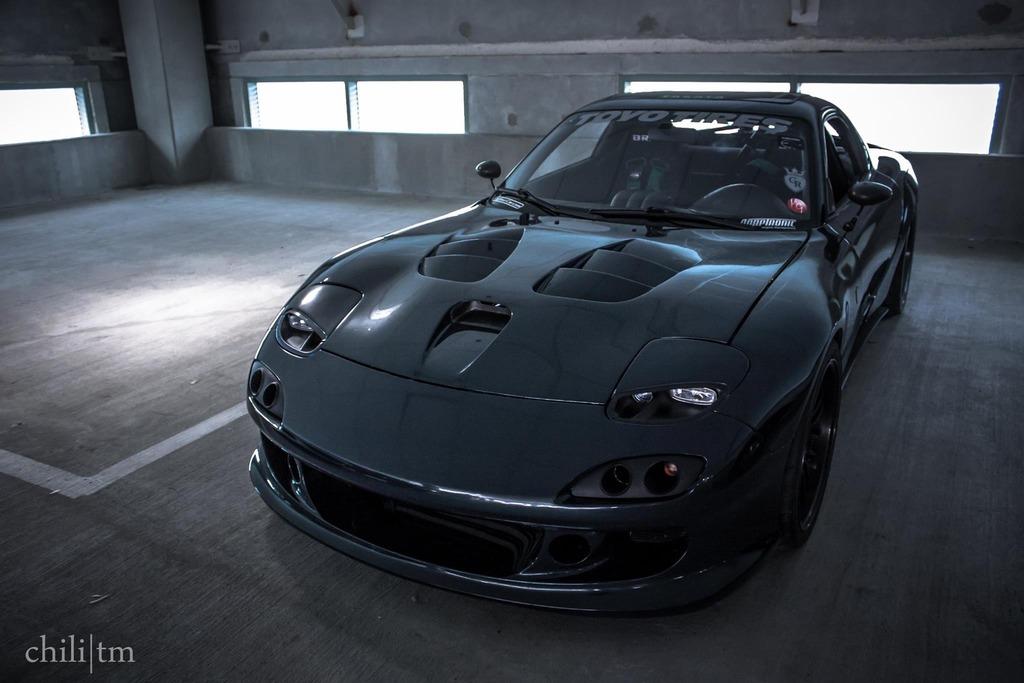
I run an all rotary car event called, 'Deals Gap Rotary Rally' (www.DealsGapRotaryRally.com). Because this is almost 1000 mile journey at the end, I decided to dip portion of my front bumper to protect.
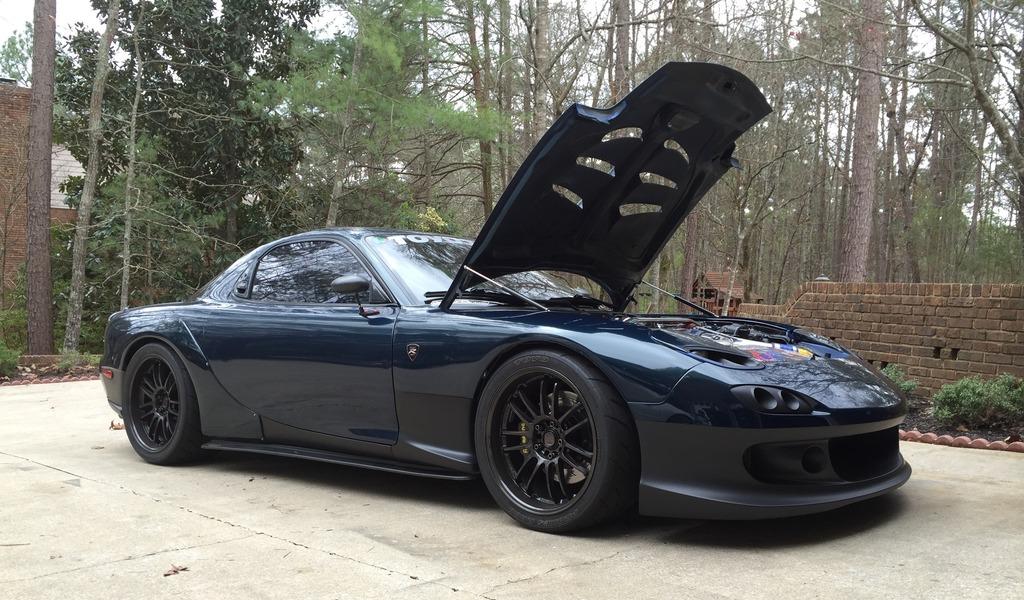
Event T-shirts
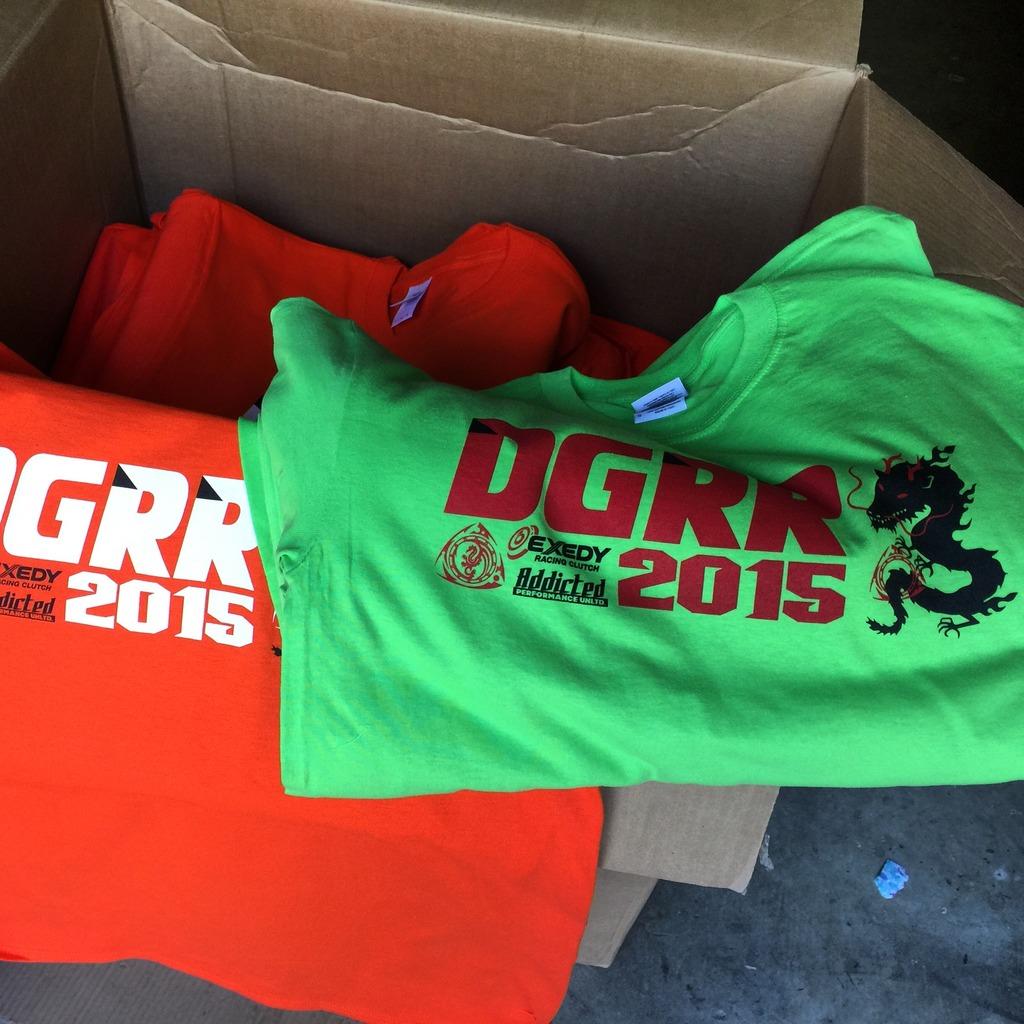
Video from my event
After the event, I had a photoshoot with my friend Kenny Glover aka Super Model ![]()
These are photos I took of him taking photos.
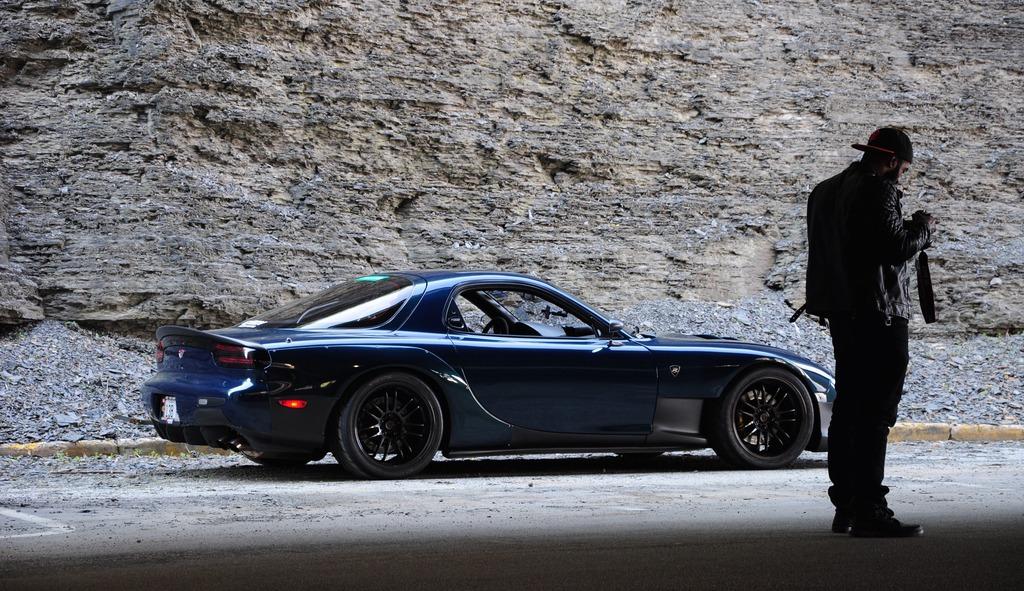
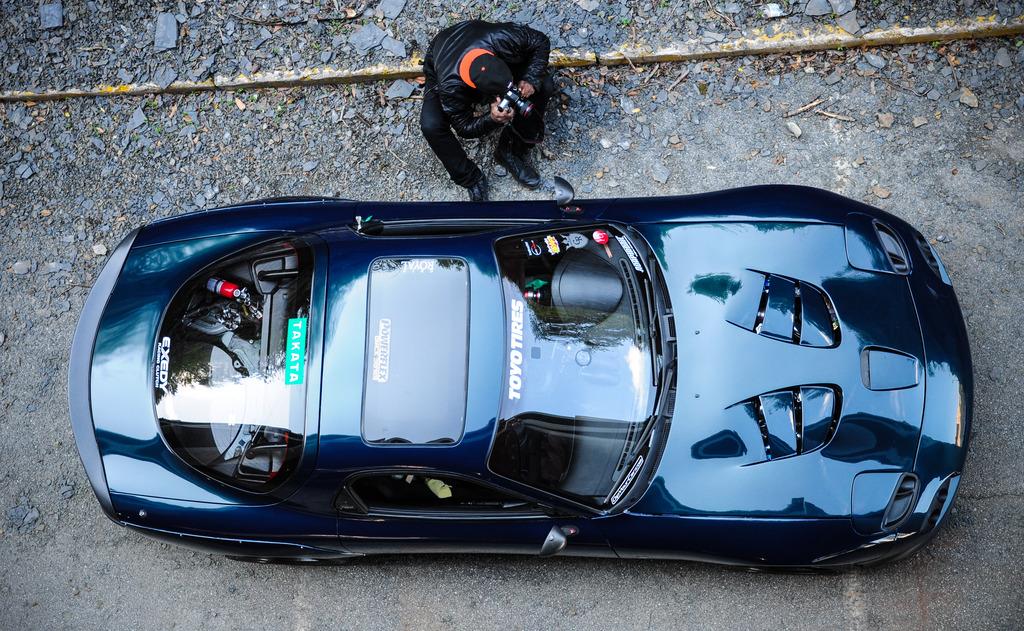
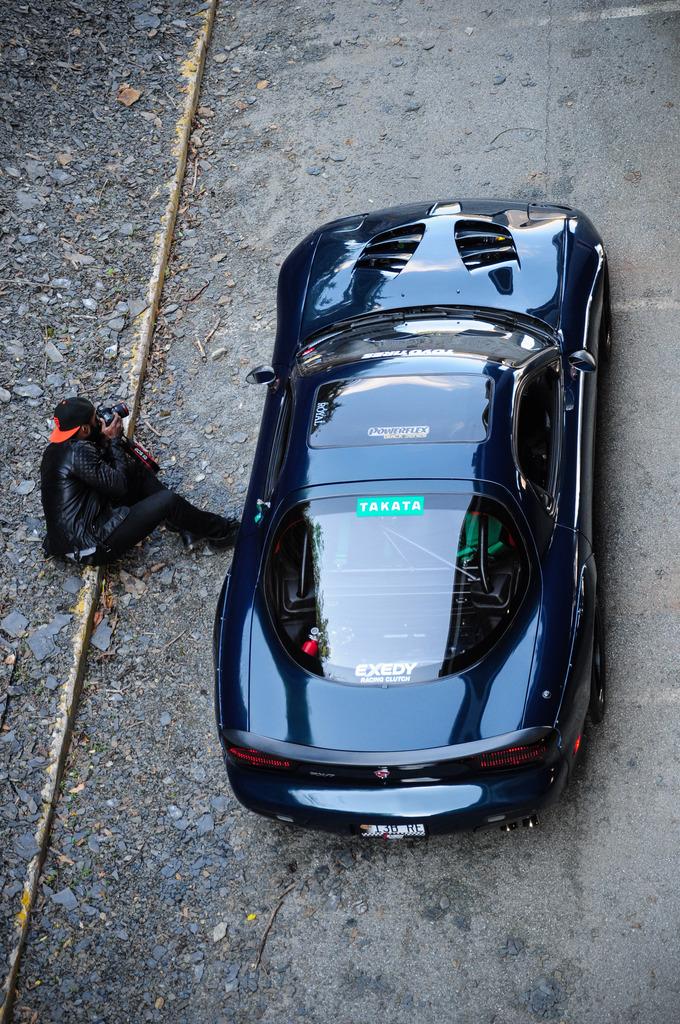
Here are his photos
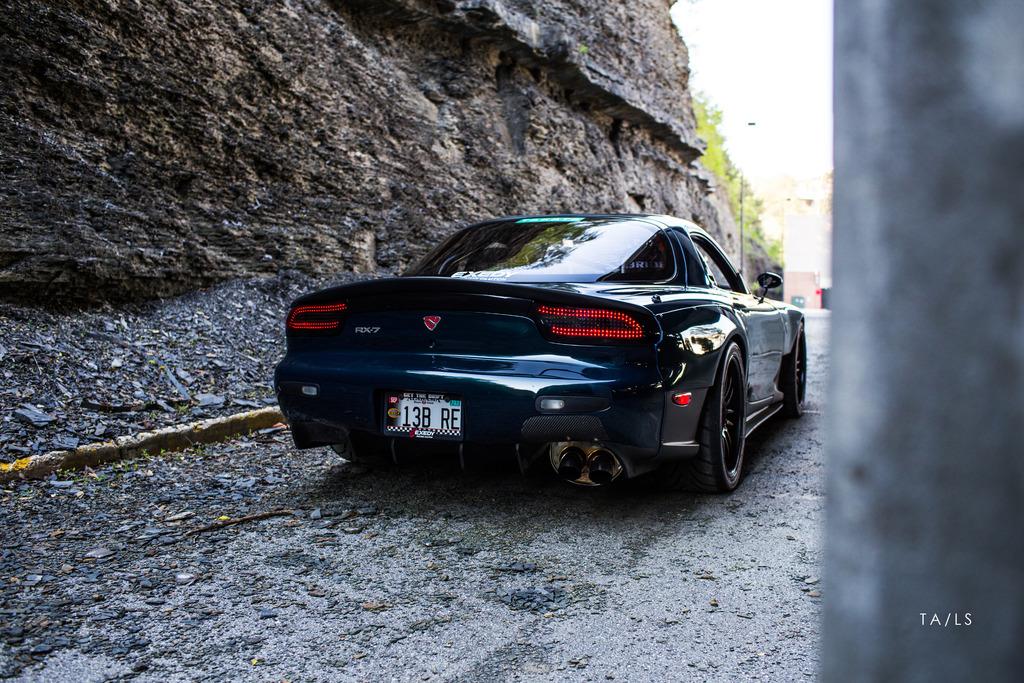
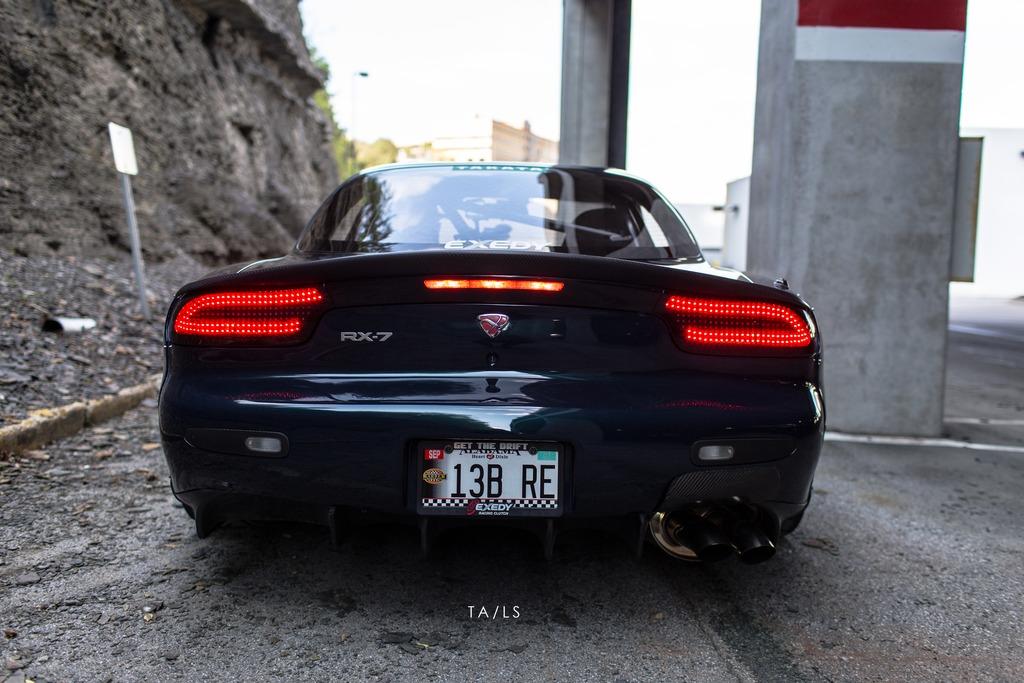
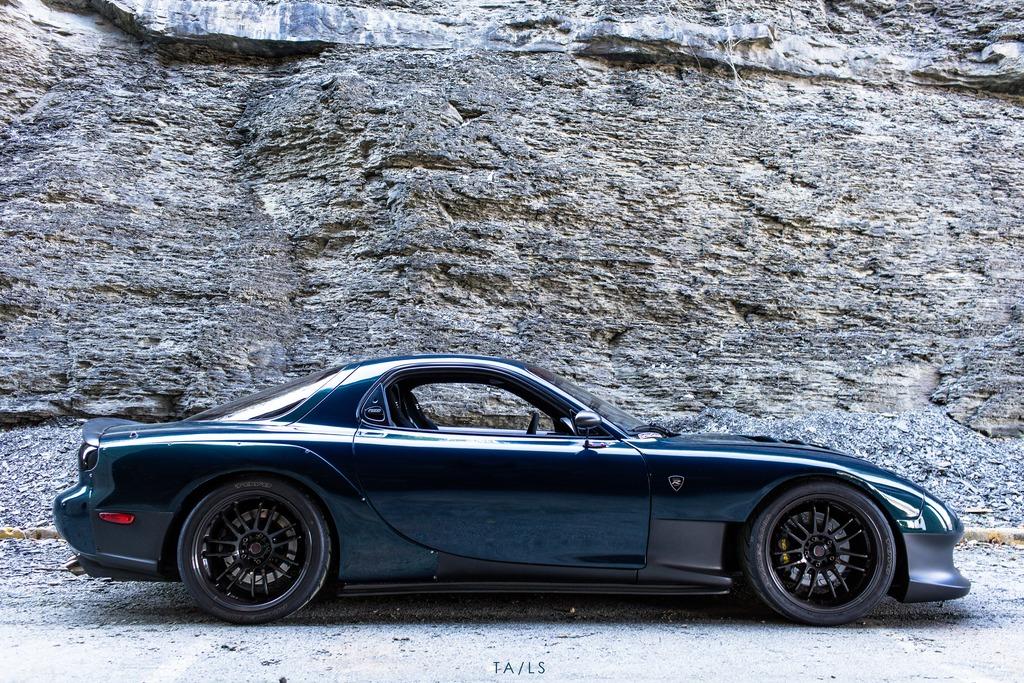
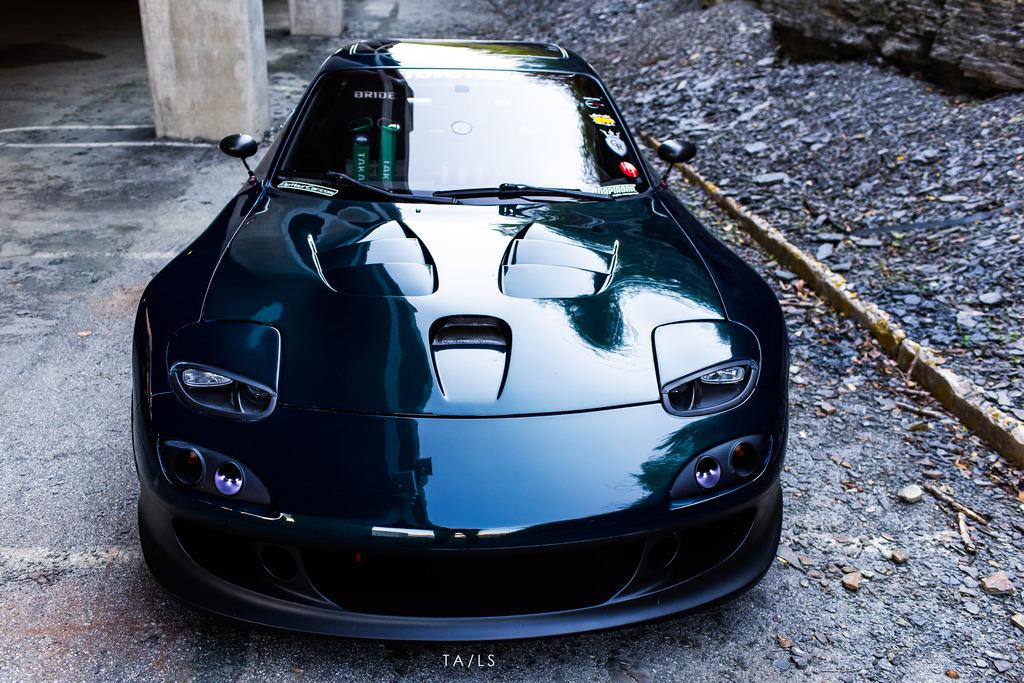
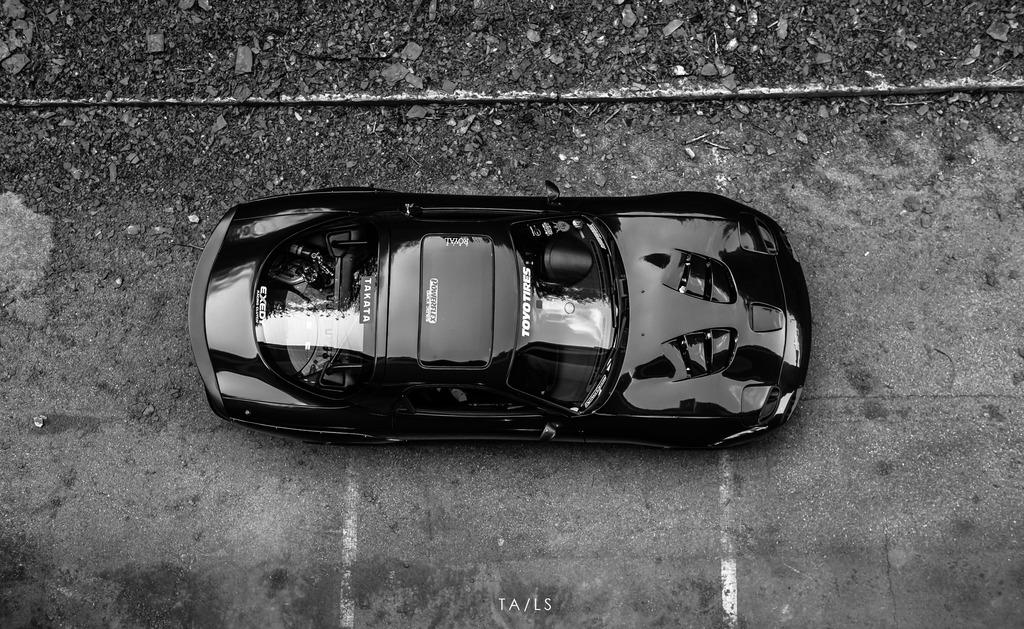
7-4-2015
Update..
So, I drove to Atlanta for Import Alliance to be booth car for Grip Royal.
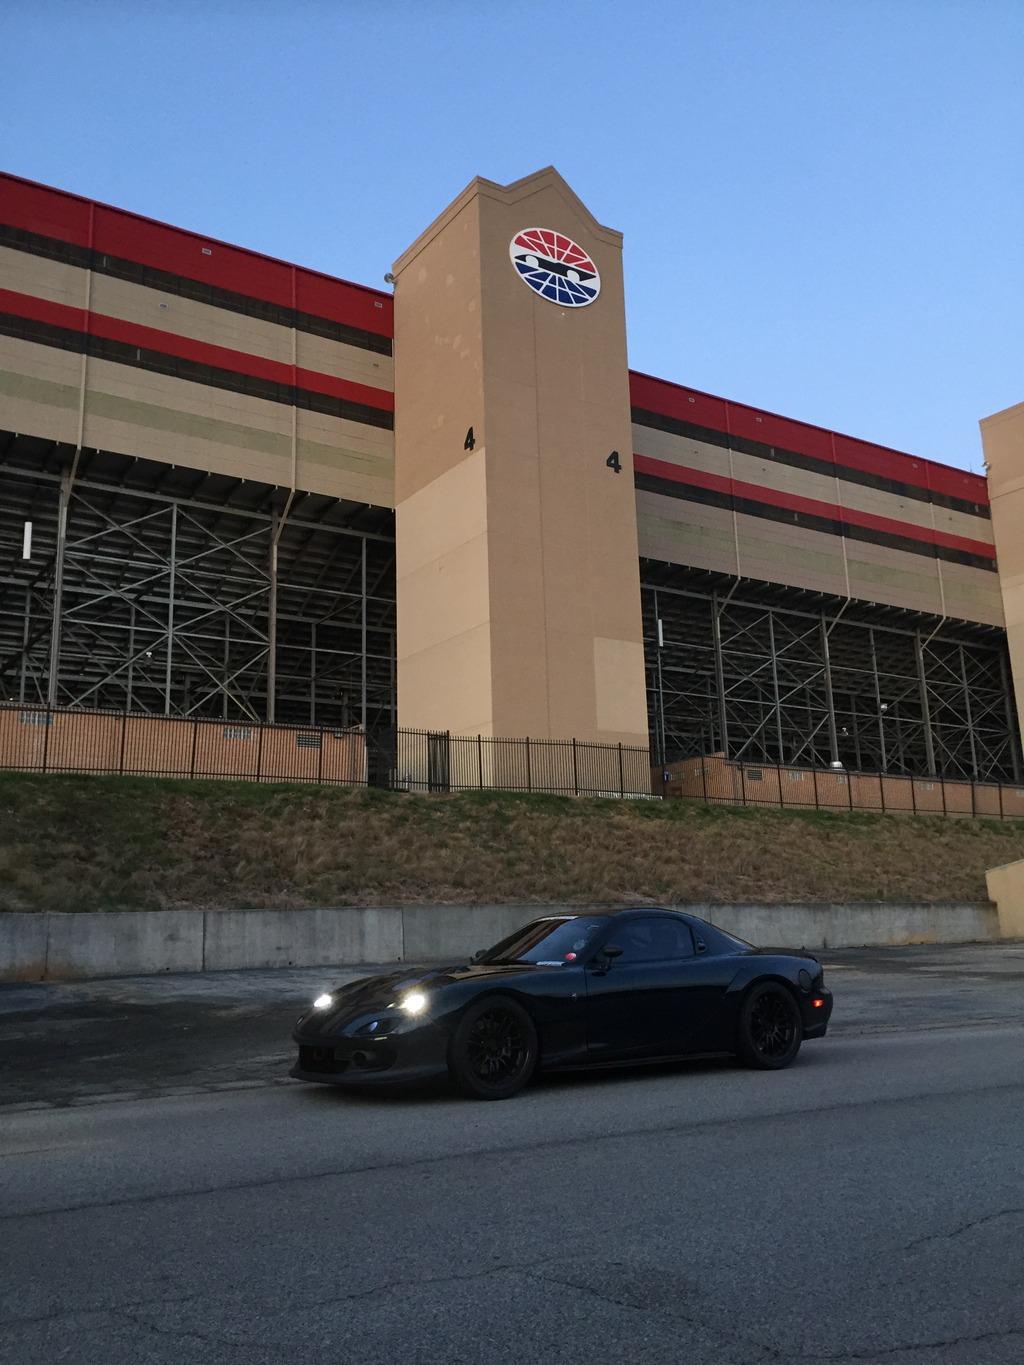
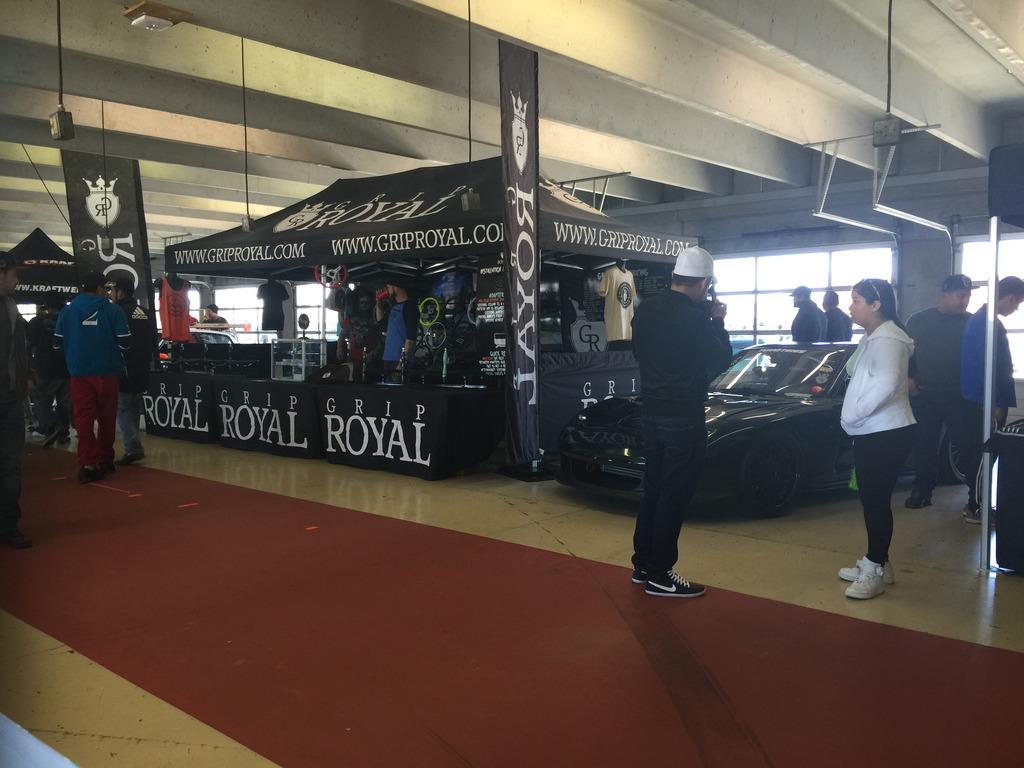
After the event, I went to Downtown ATL to do a shoot with Mike Kuhn and his girl Sami
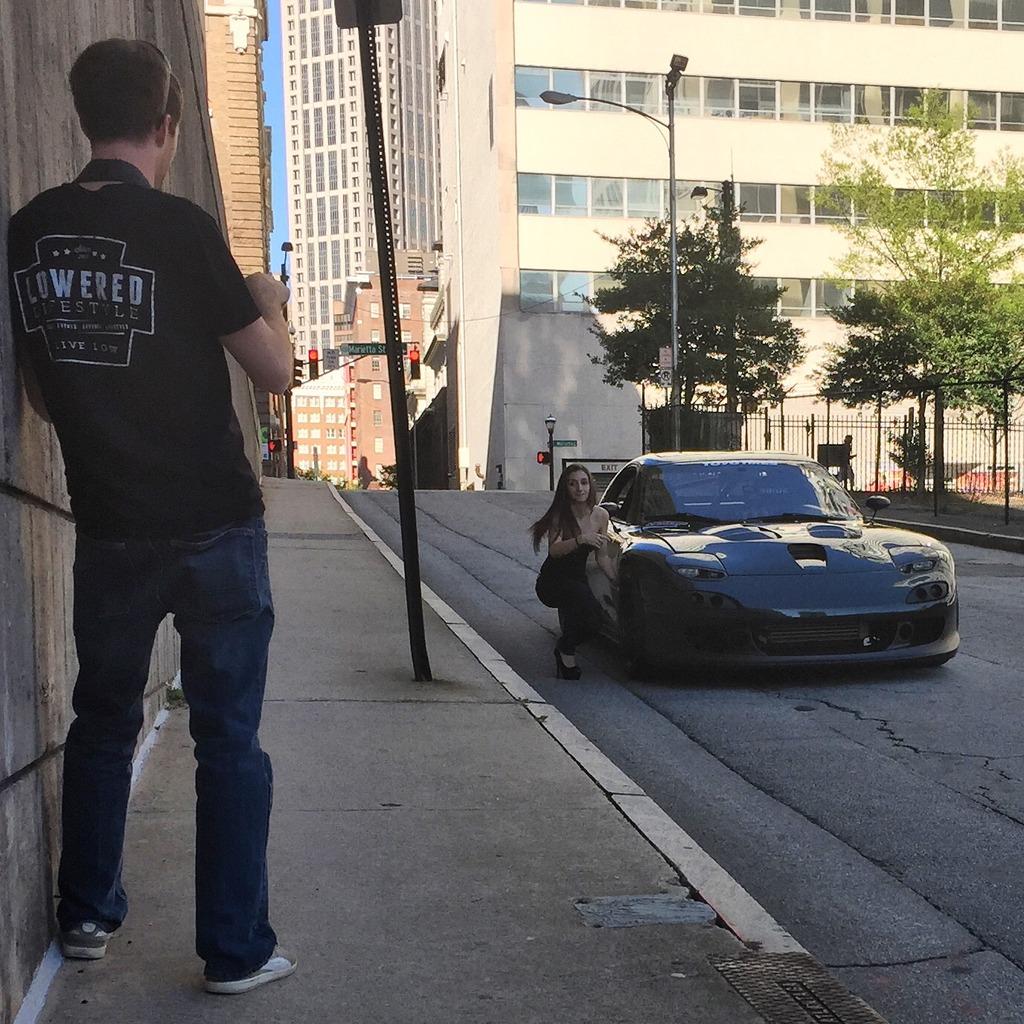
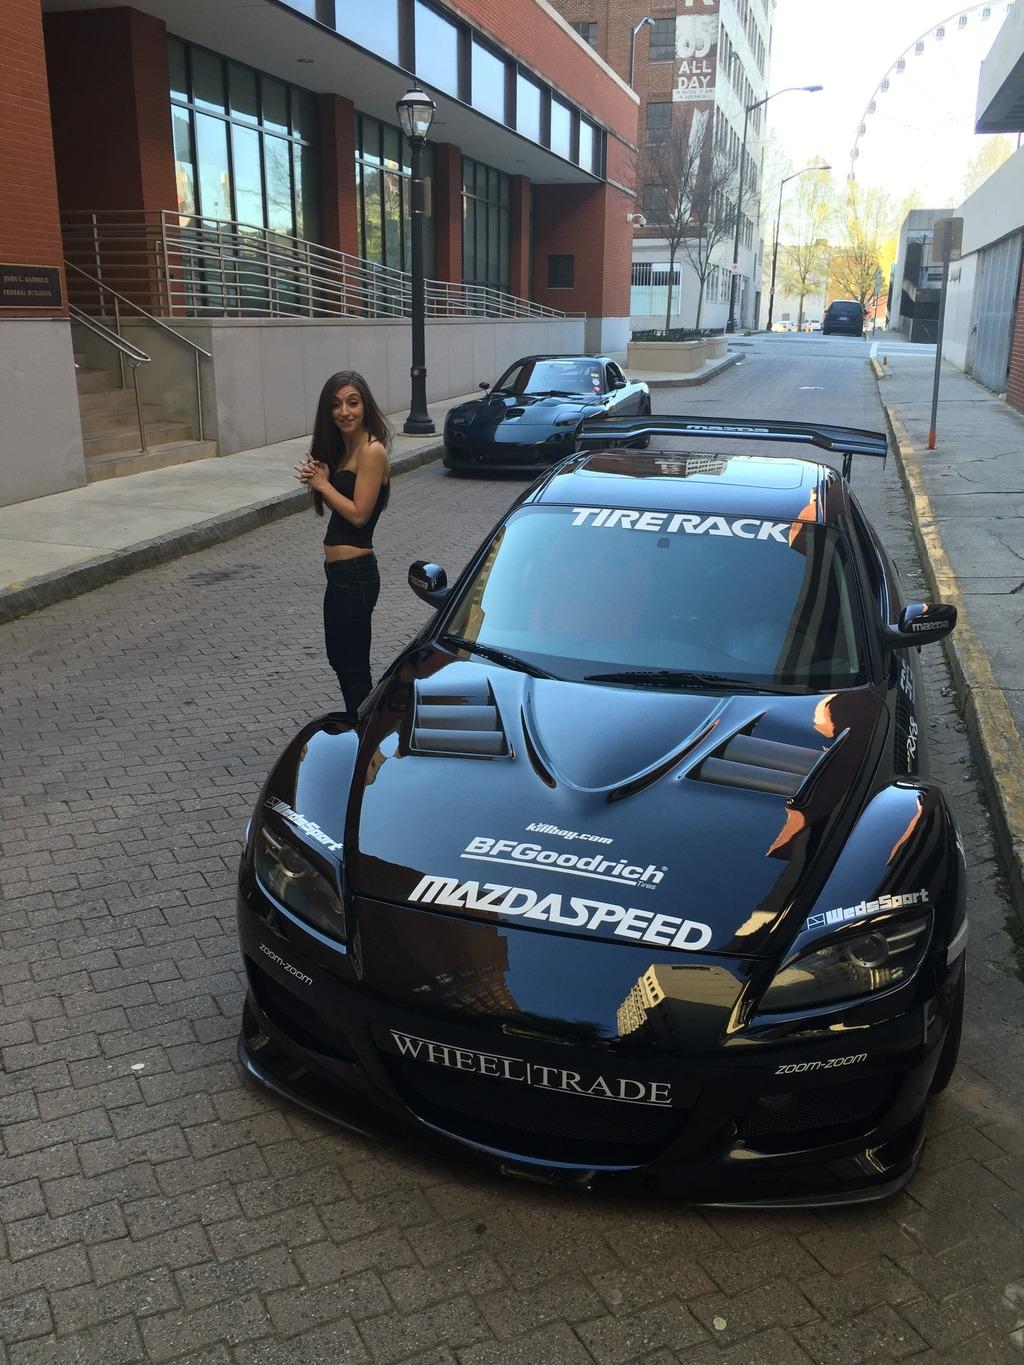
Here are Mike's photos
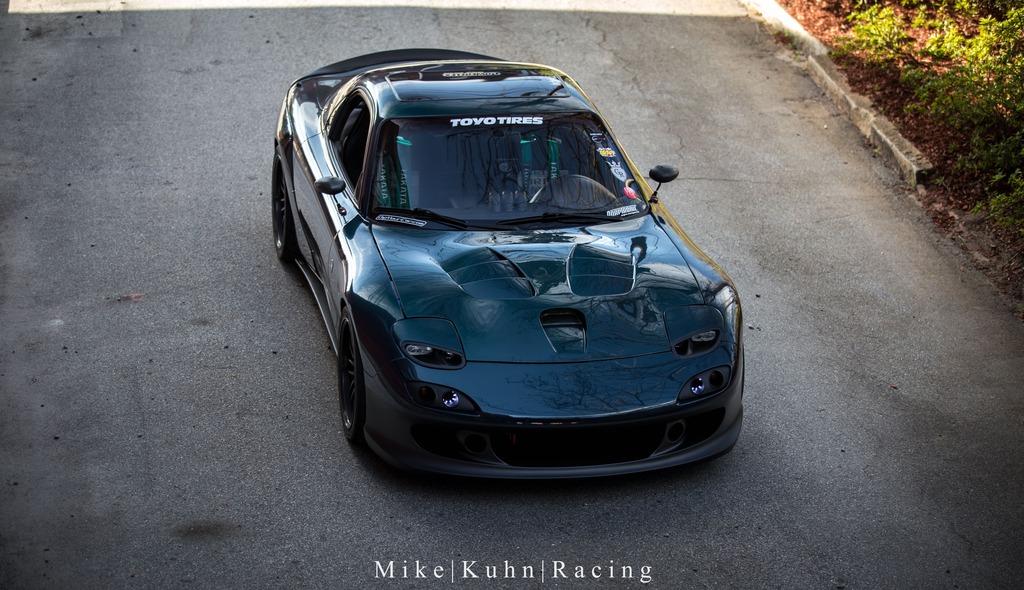
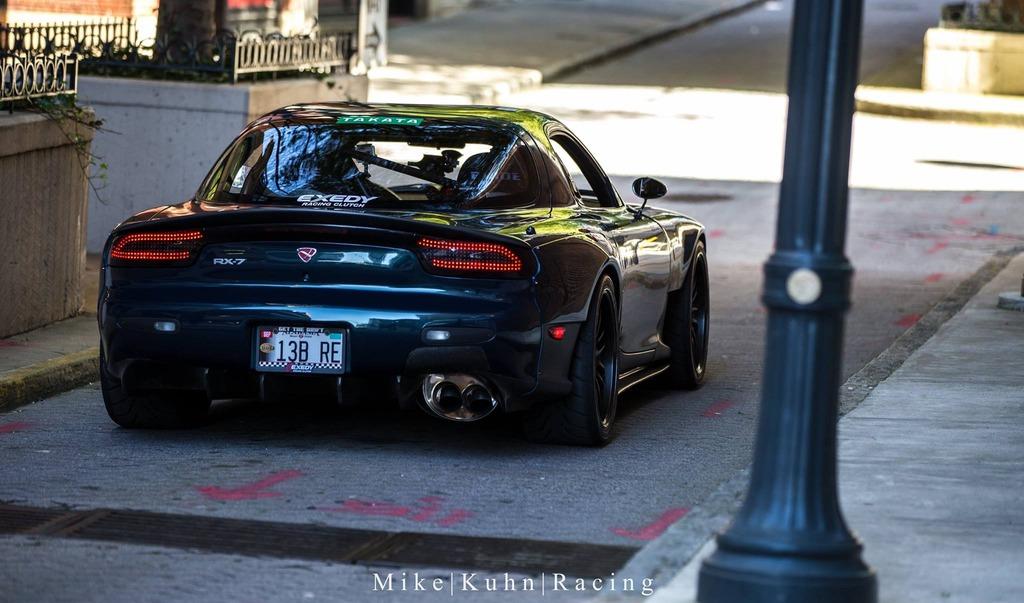
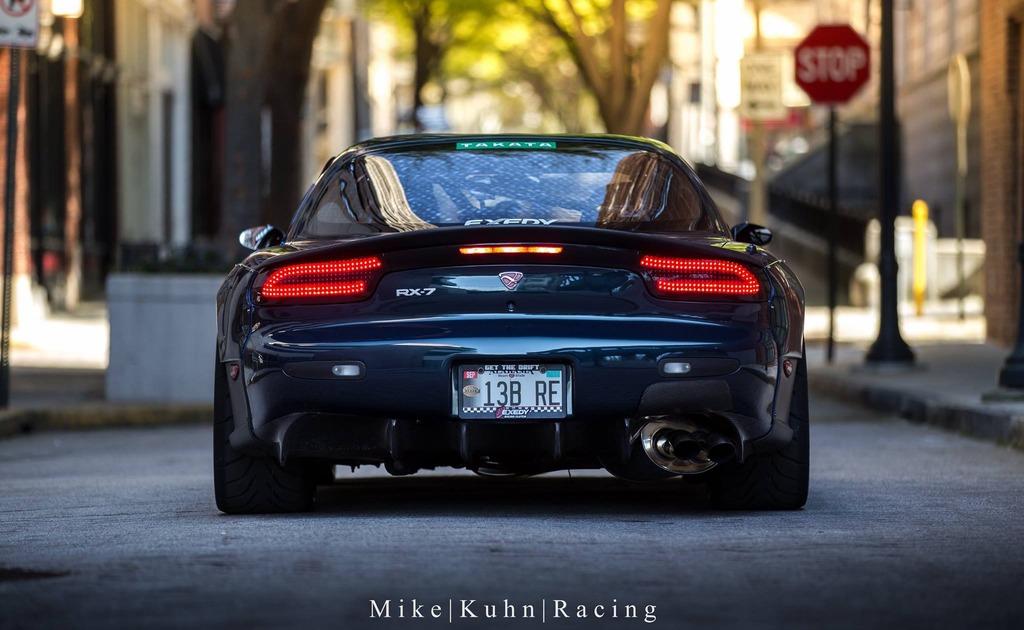
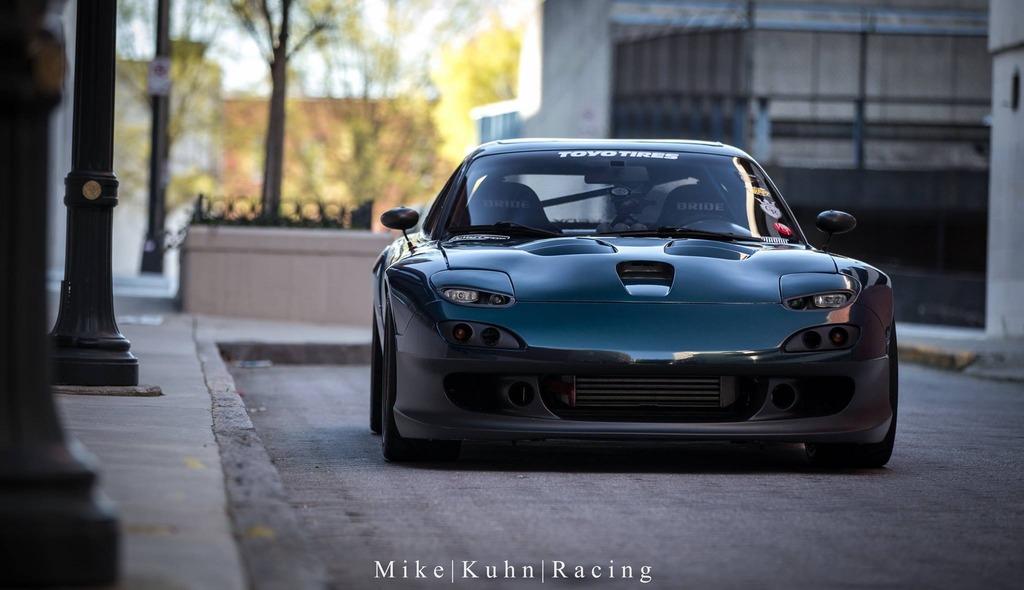

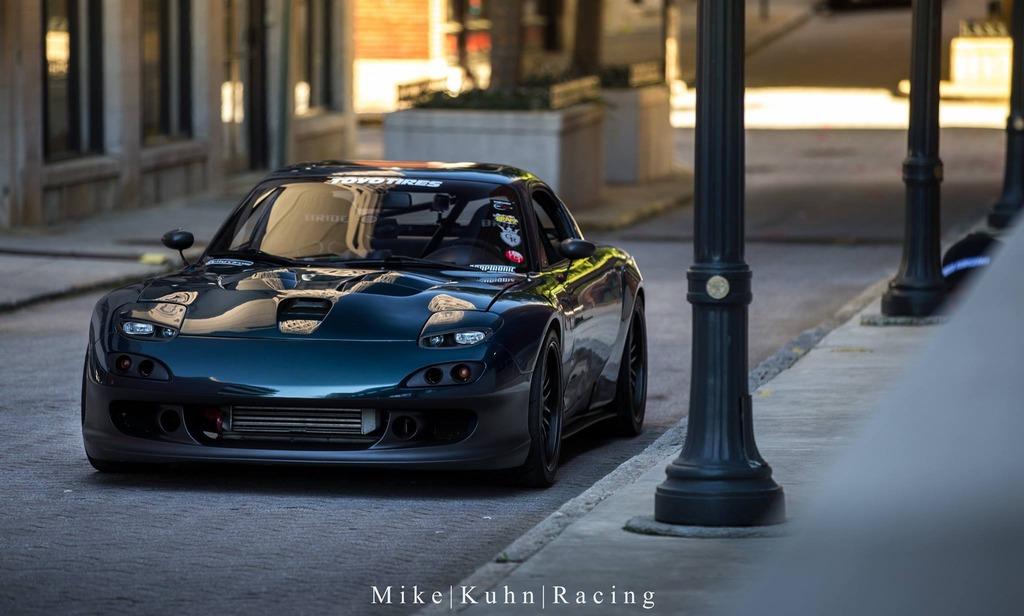
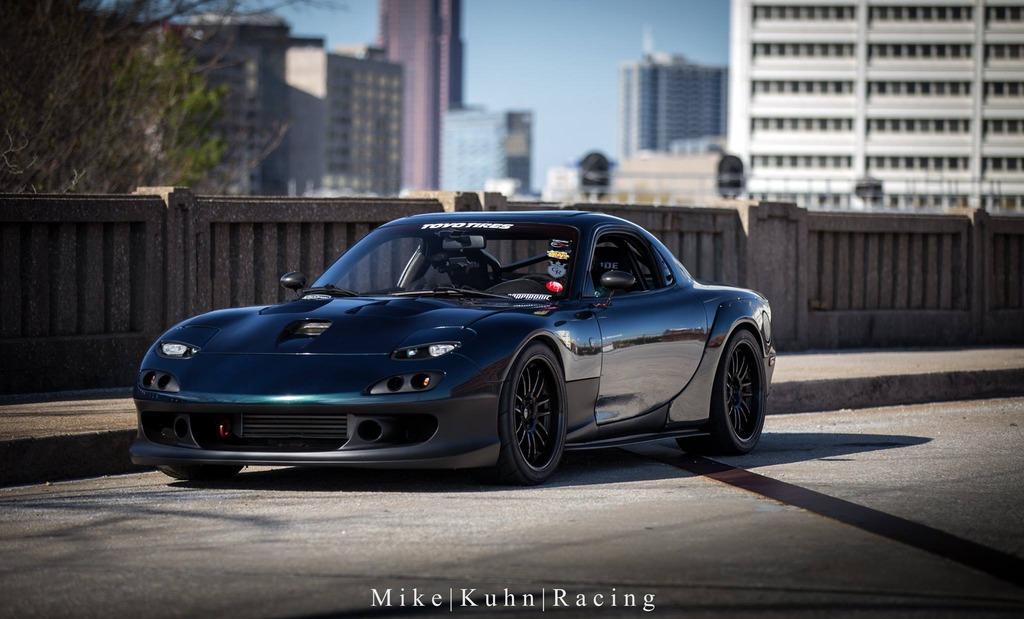
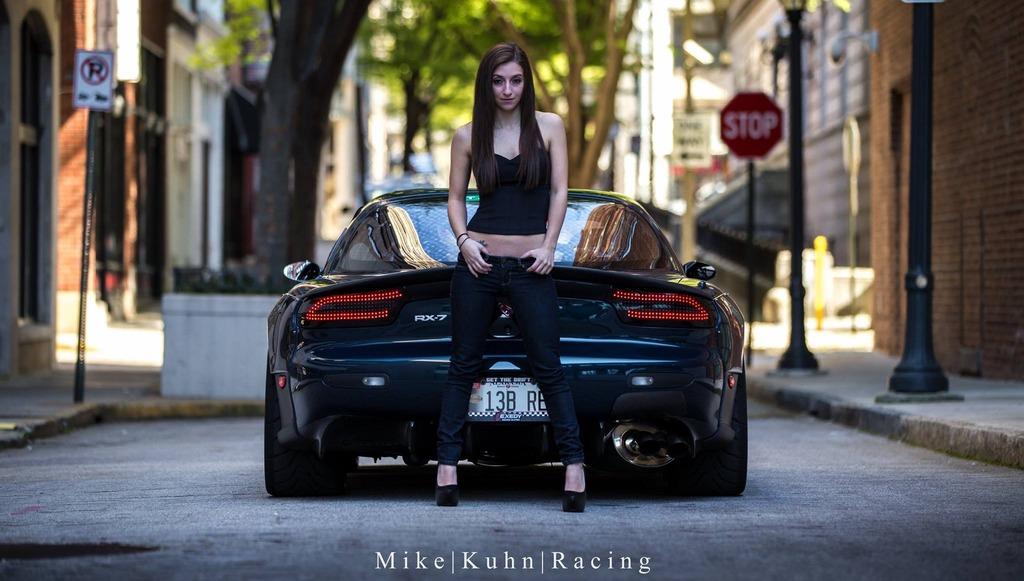
7-6-2015
More Update..
Just before my event, Deals Gap Rotary Rally (DGRR) (www.DealsGapRotaryRally.com), I got my seats back.
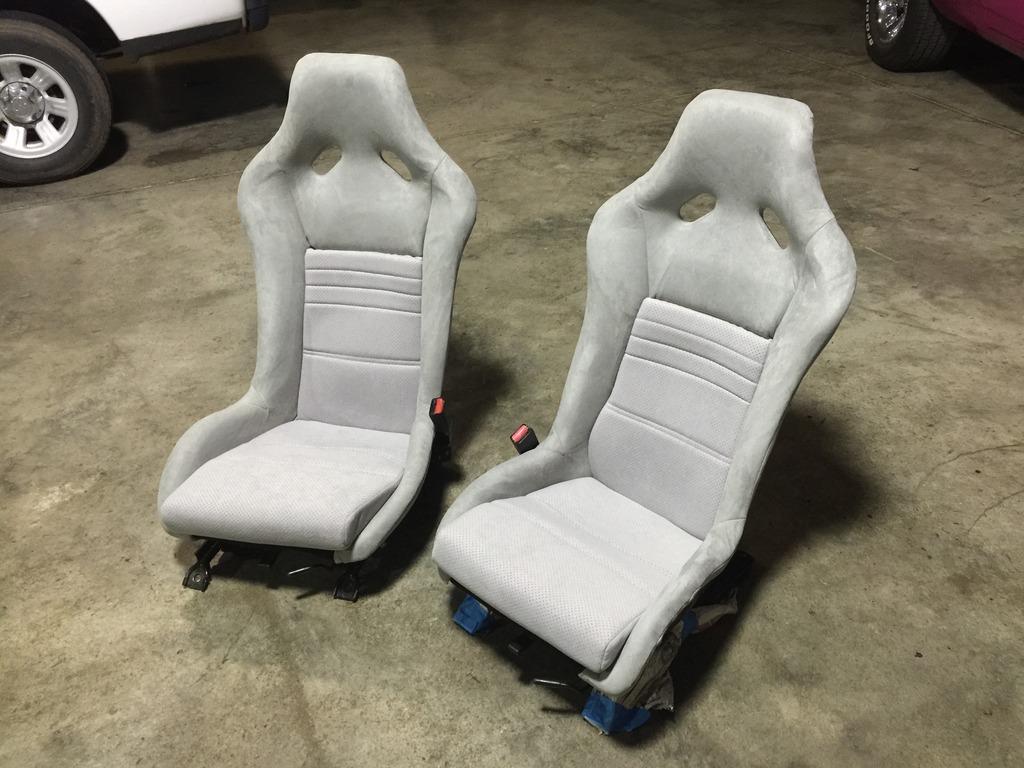
recovered Recaro RZ seats in grey suede
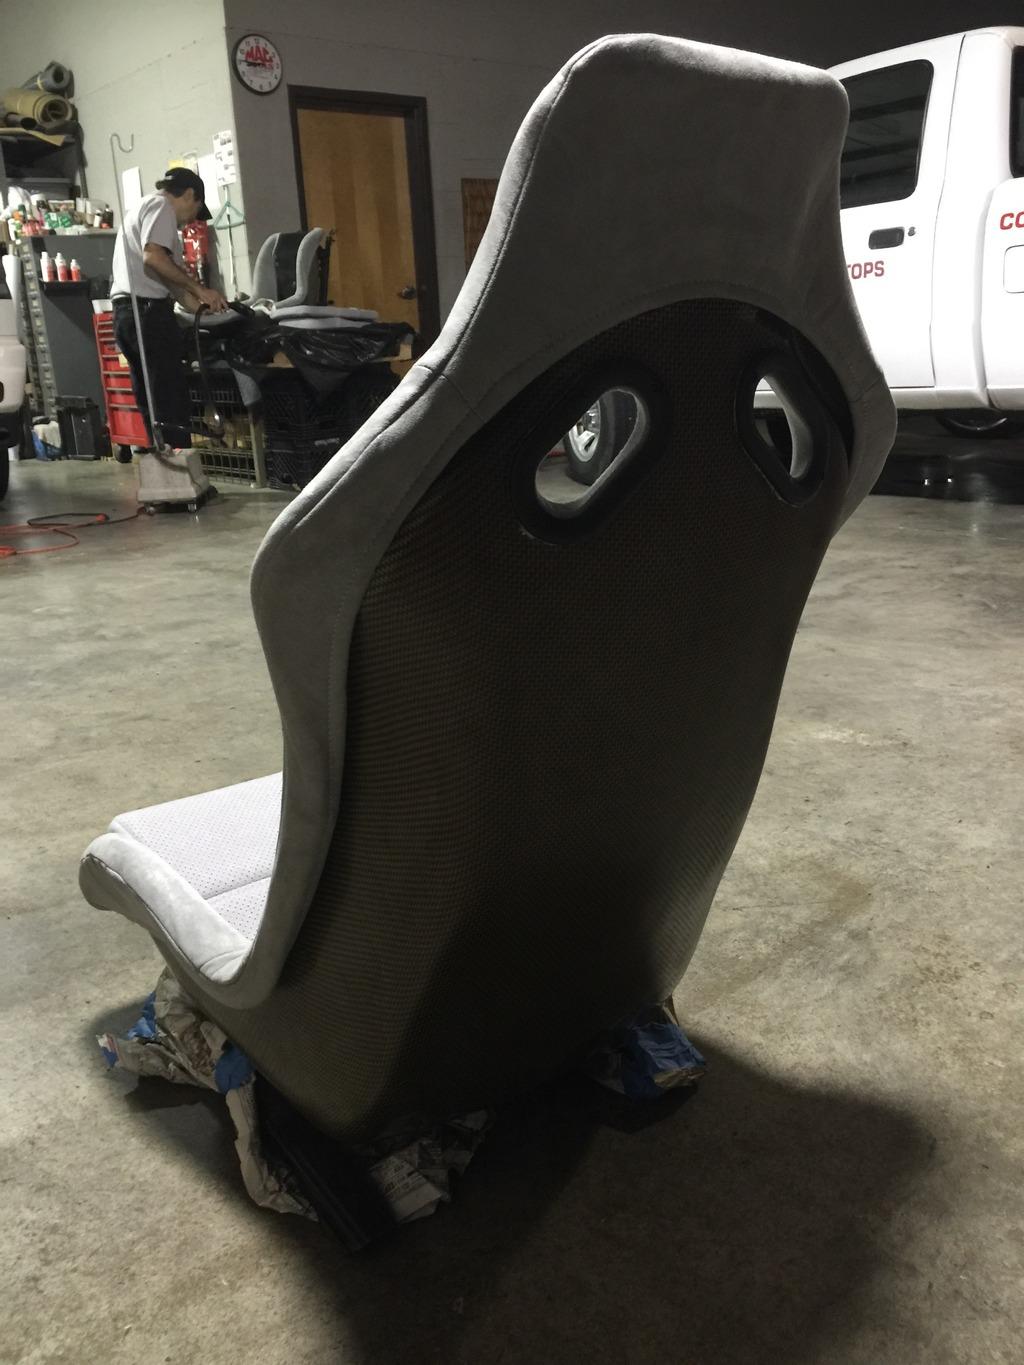
Installed in the car.
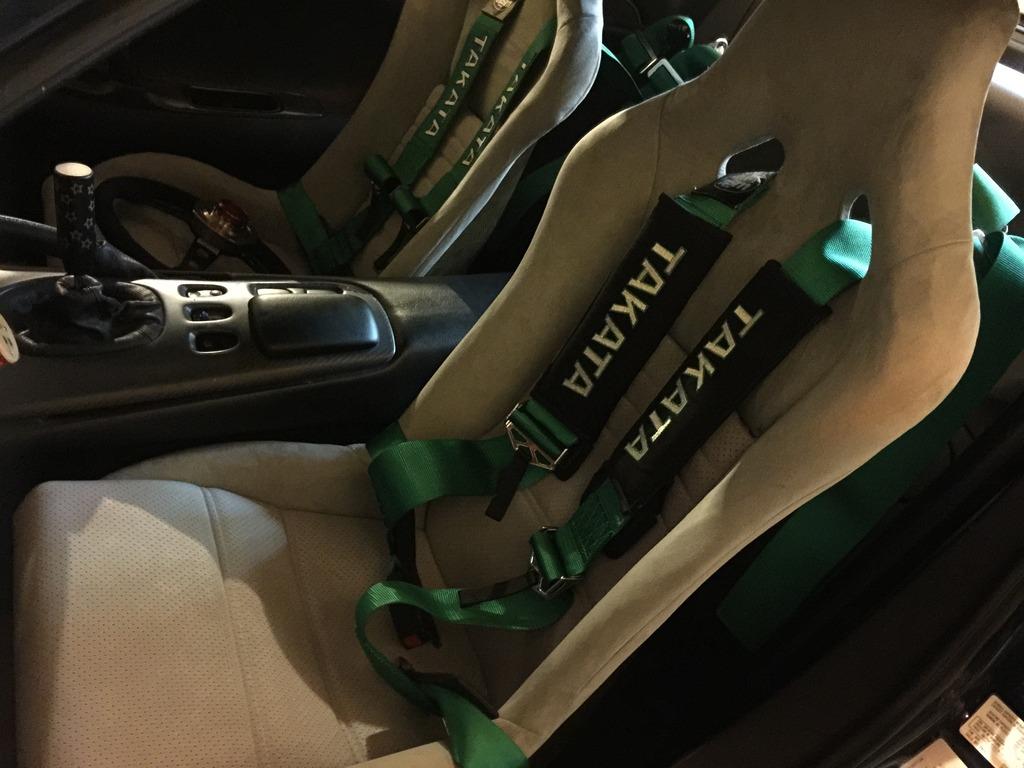
DGRR takes place in North Carolina/Tennessee and is one of the largest rotary car event in USA.
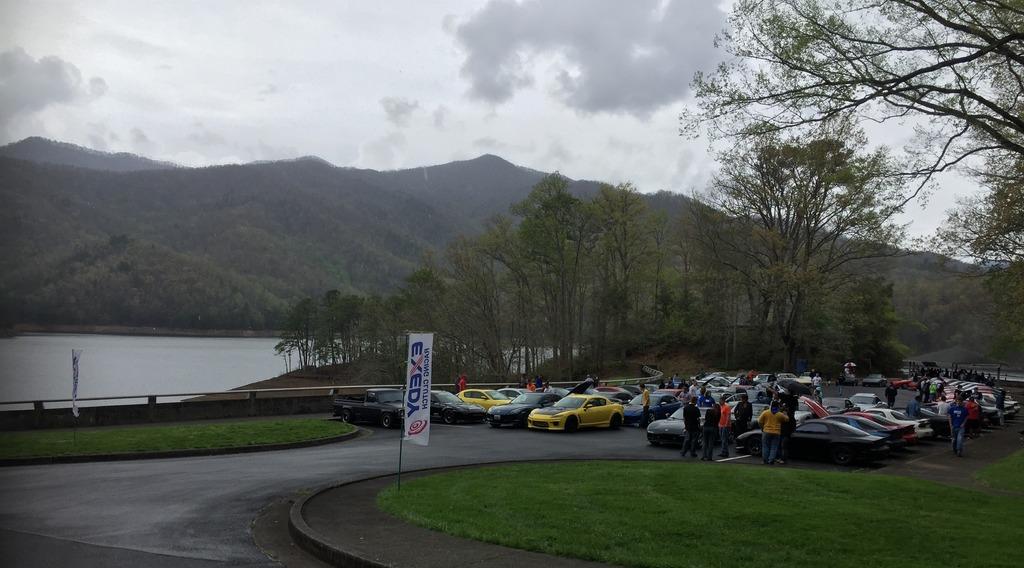
Its supported by the following sponsors
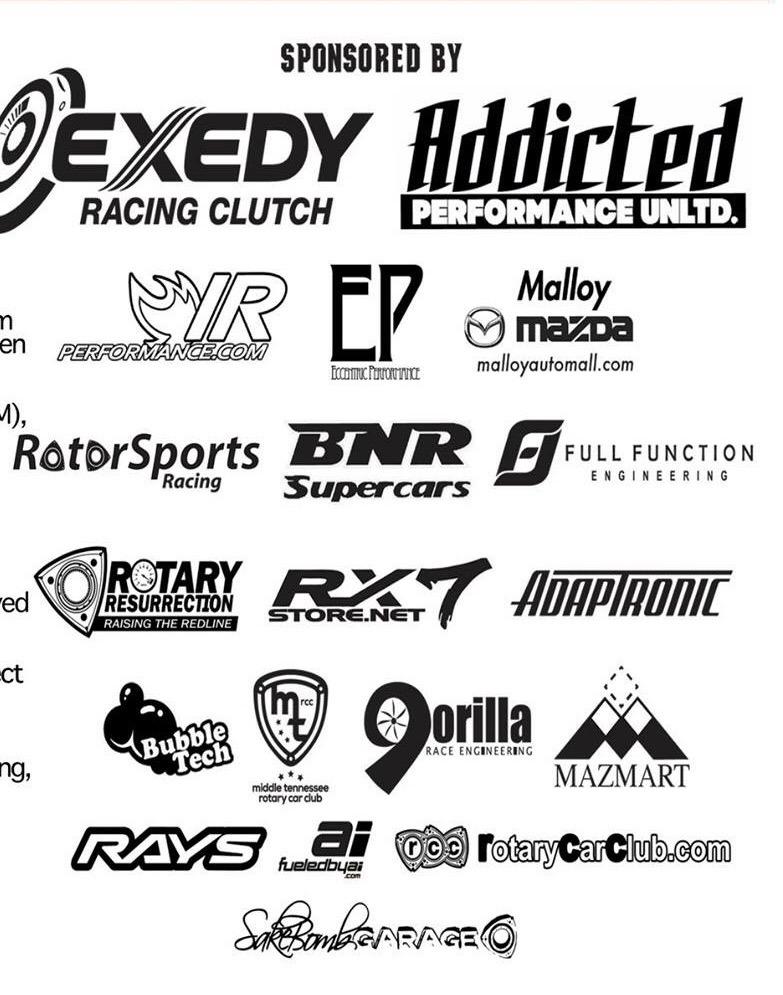
On my way it rained and when parked, I saw this ![]()
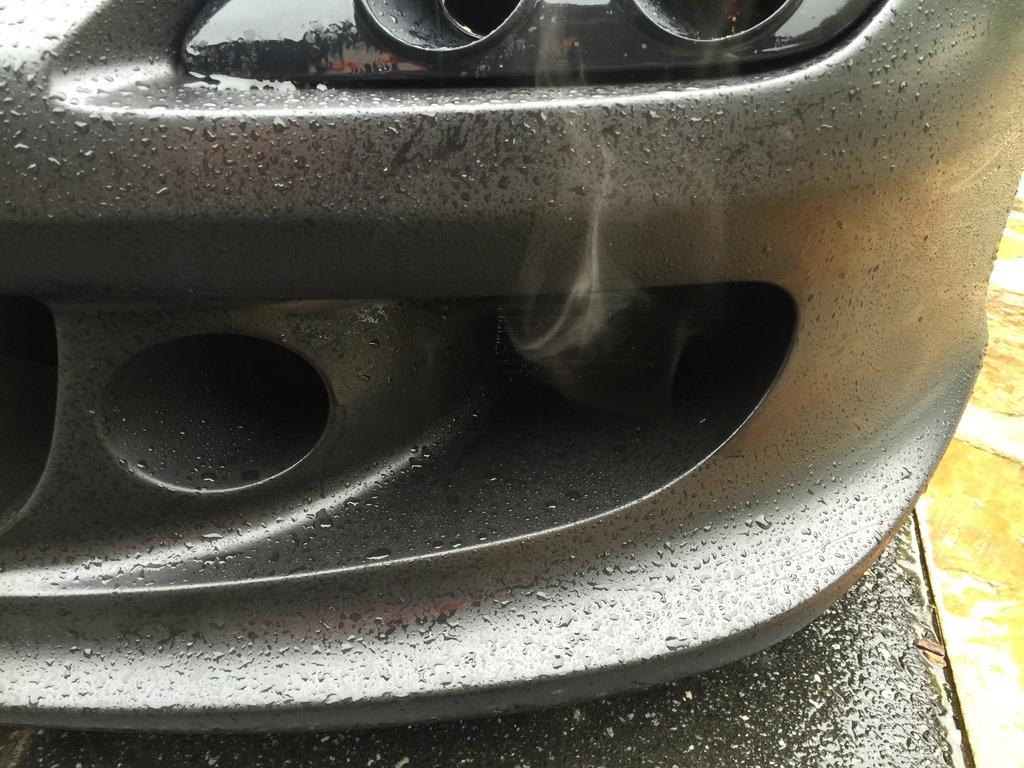
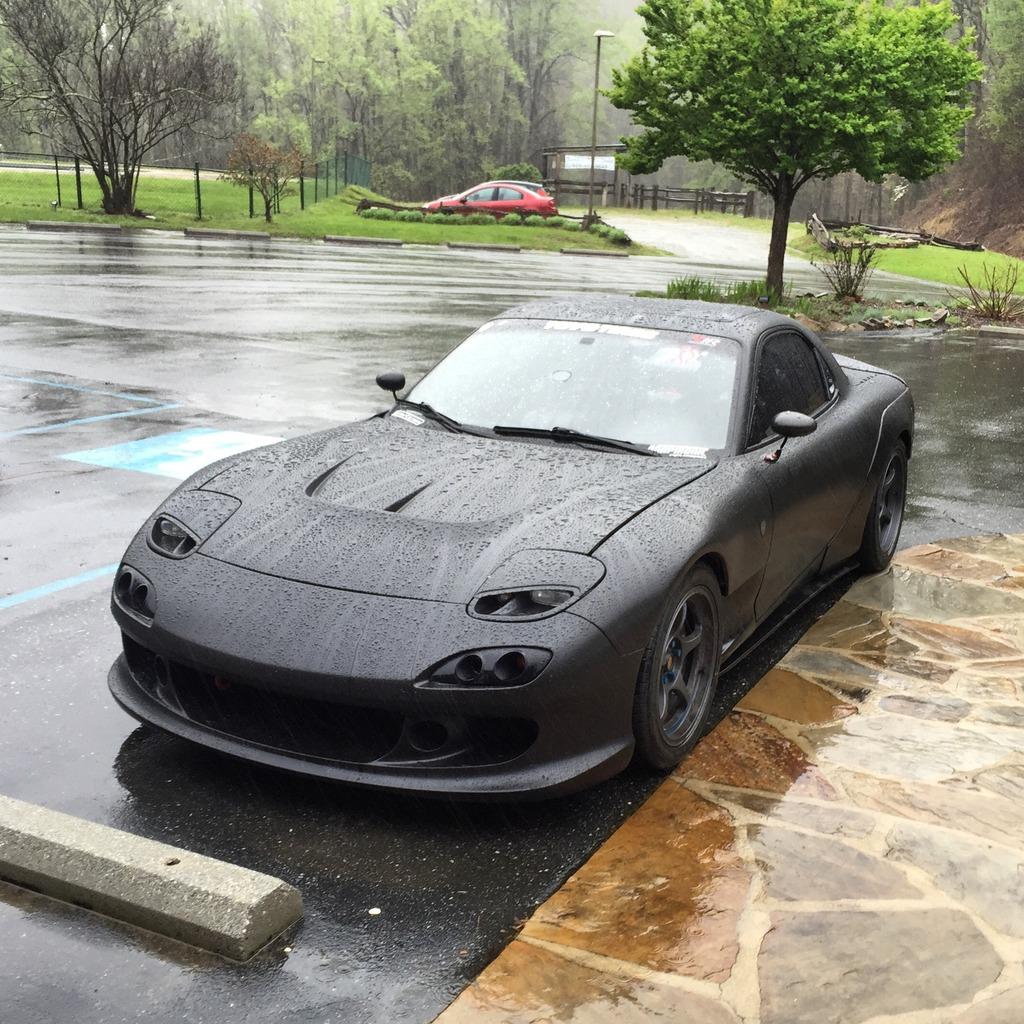
More photos from the event..
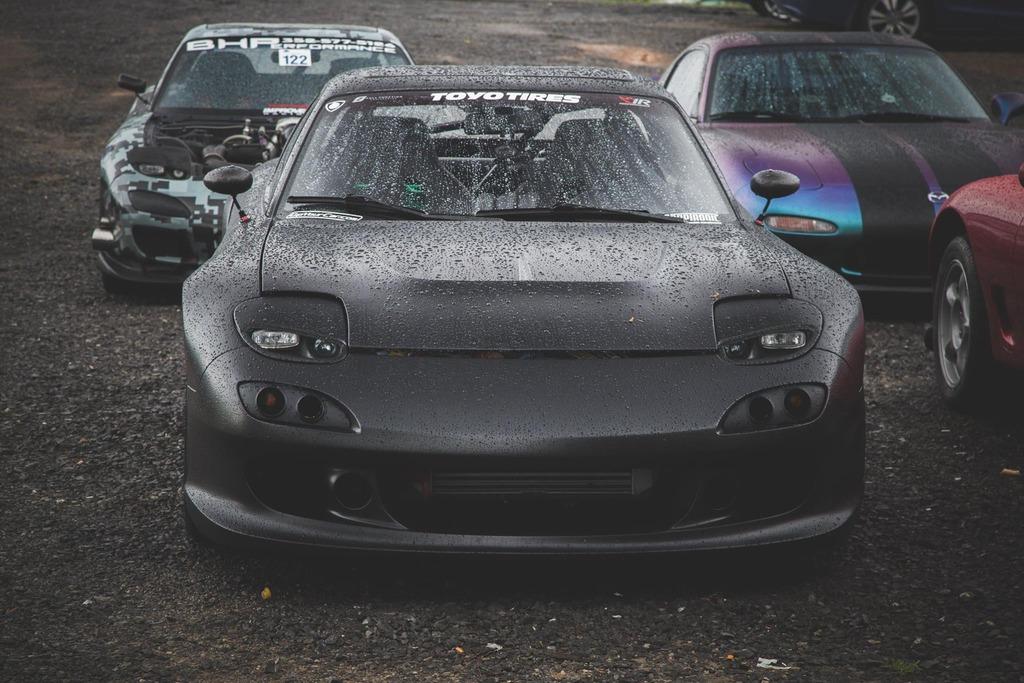
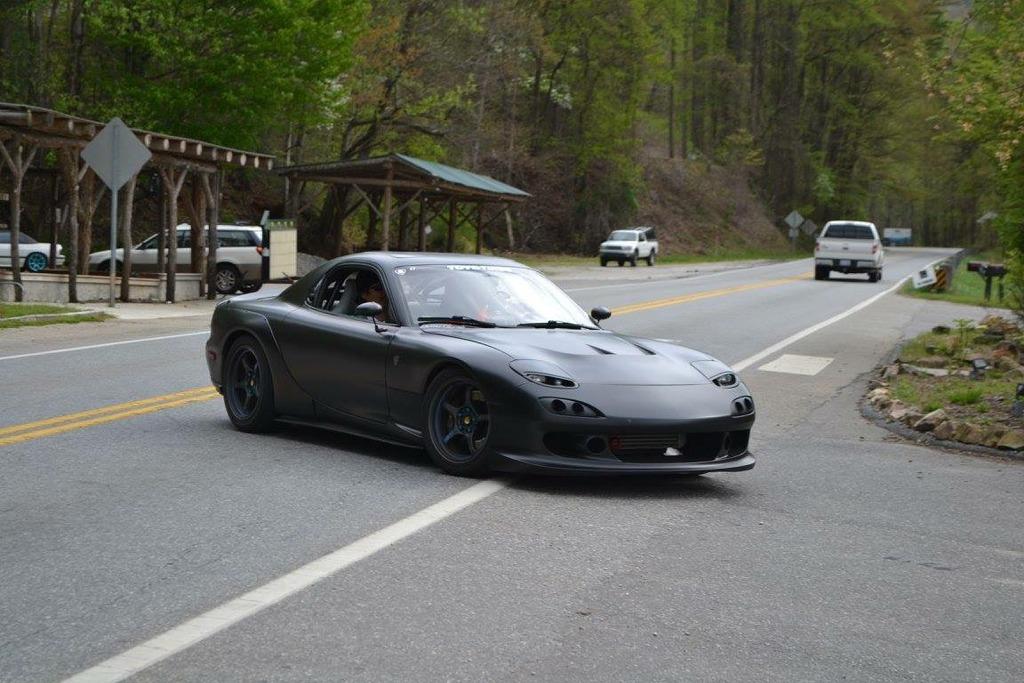
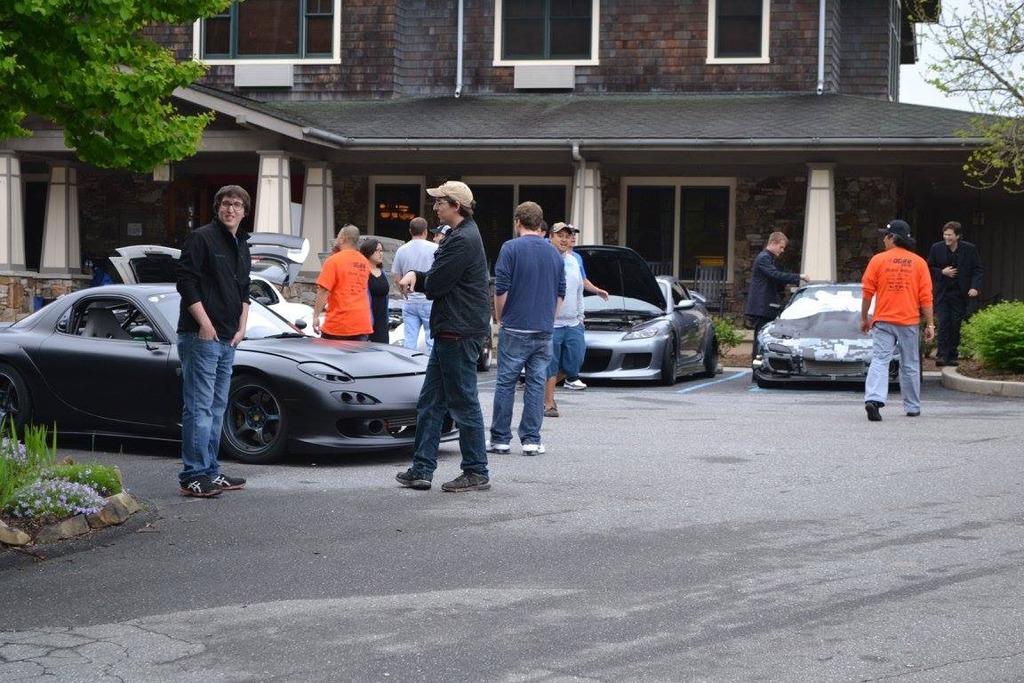
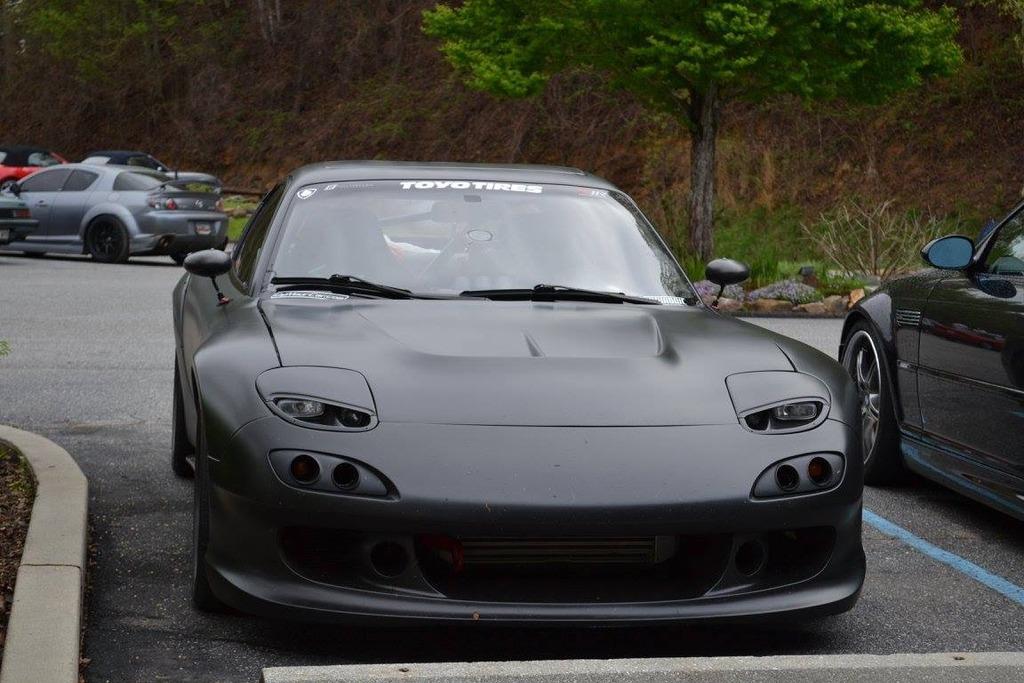
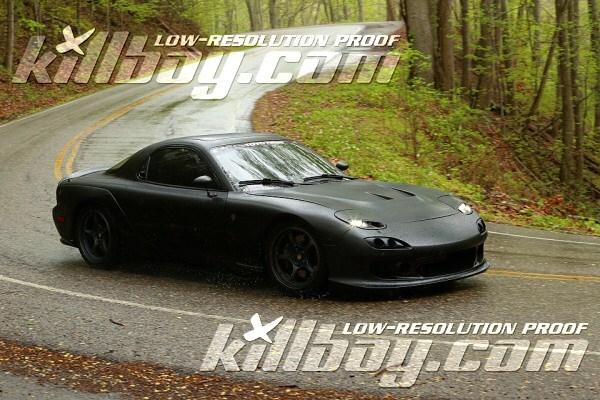
after the event, I got this box ![]()
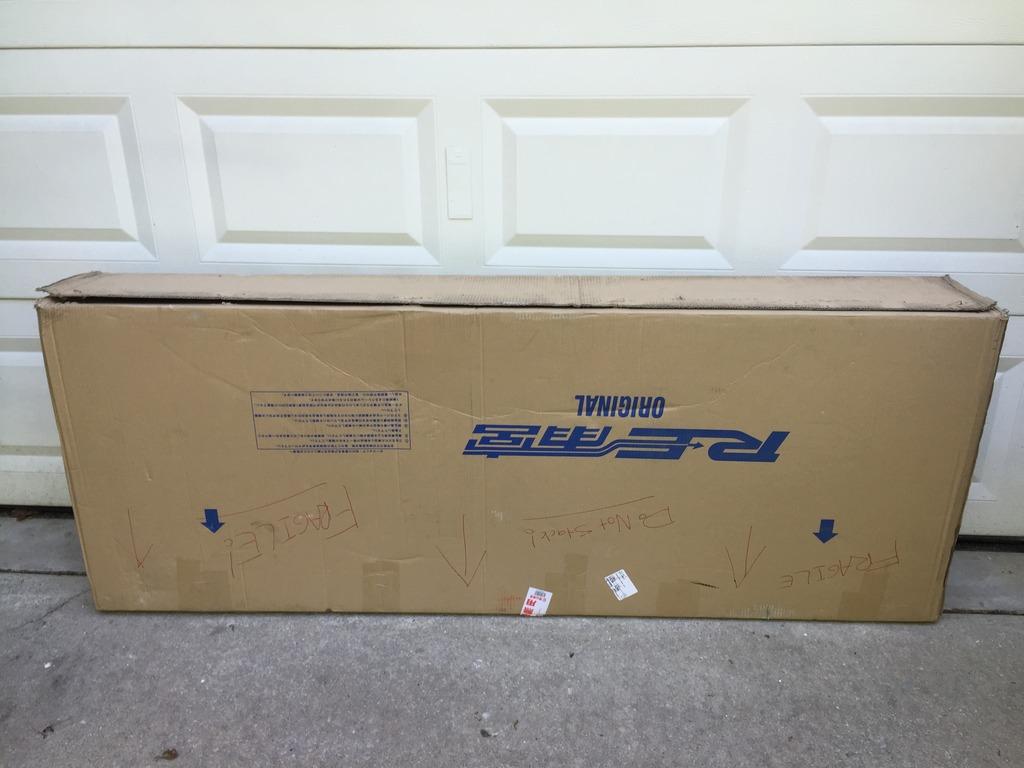
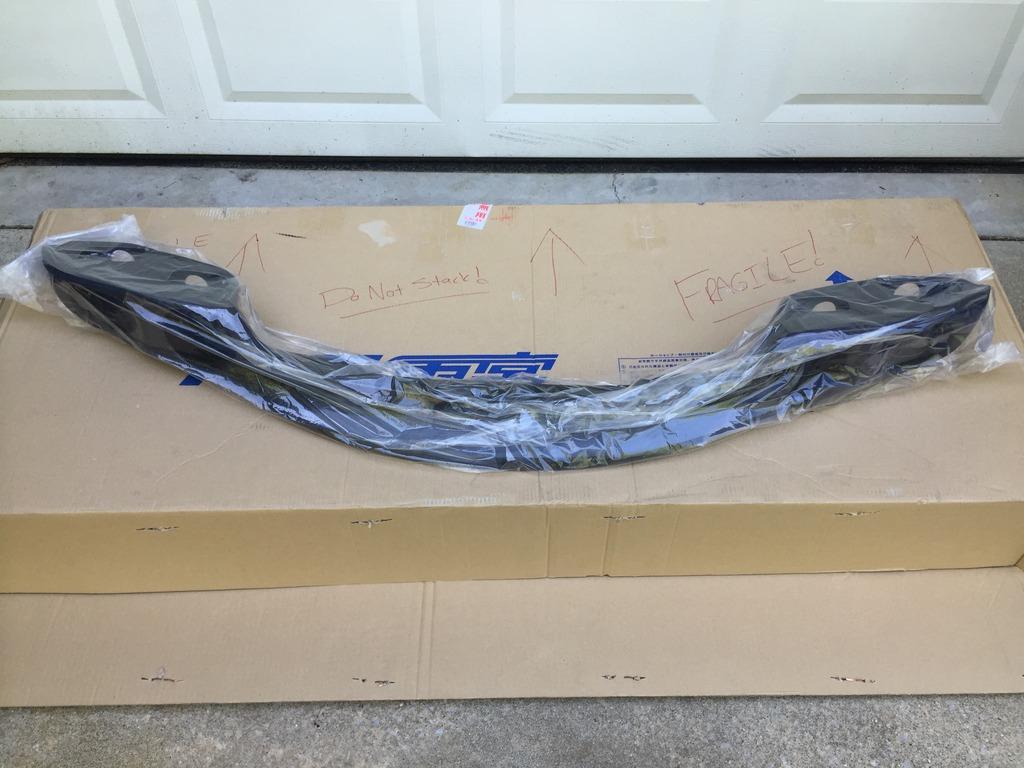
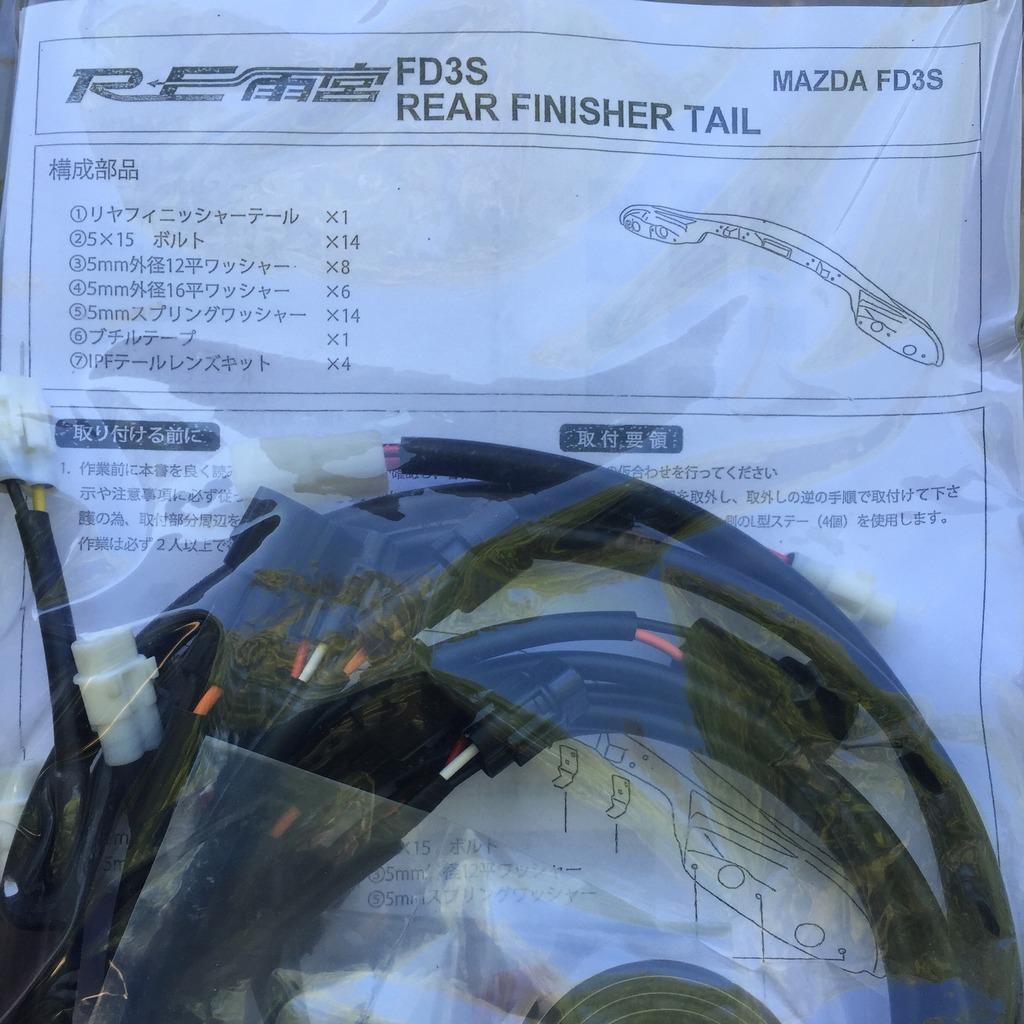
7-7-2015
More update..
Just before DGRR, I was asked by Speed Academy (Speed Academy) to do a write up about Plasti Dipping my FD. So, I've documented the process and they published it!
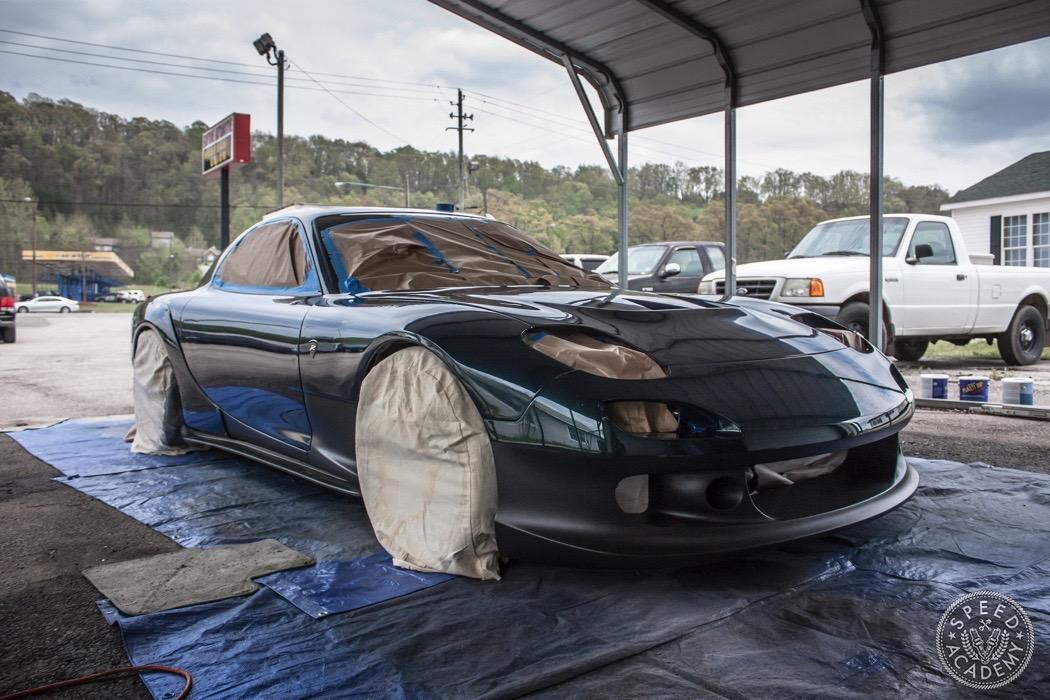
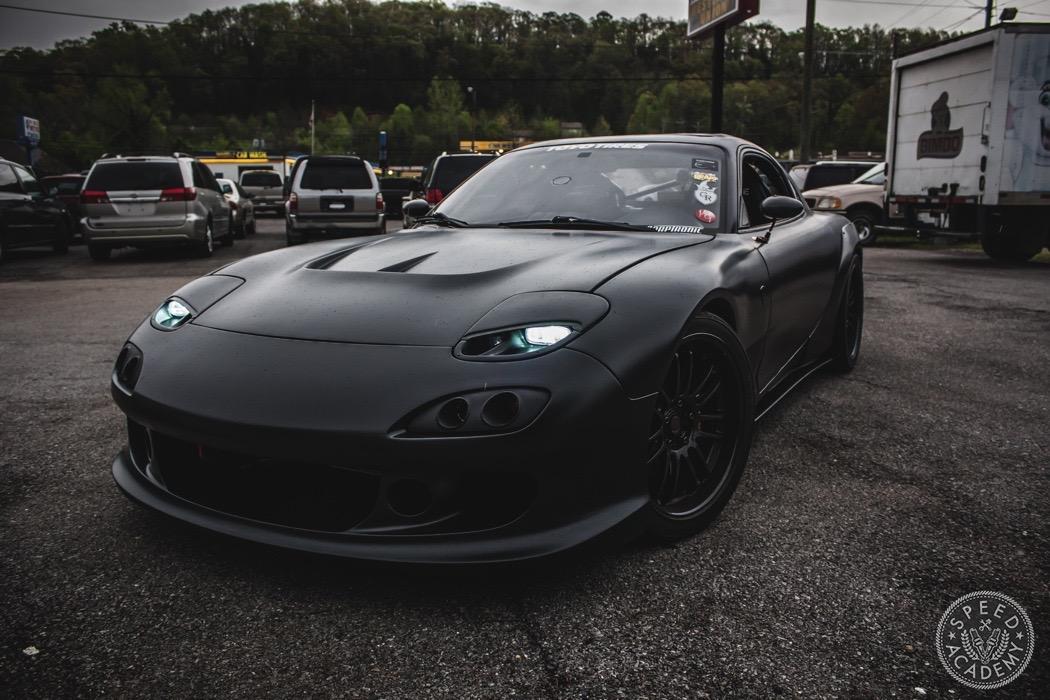
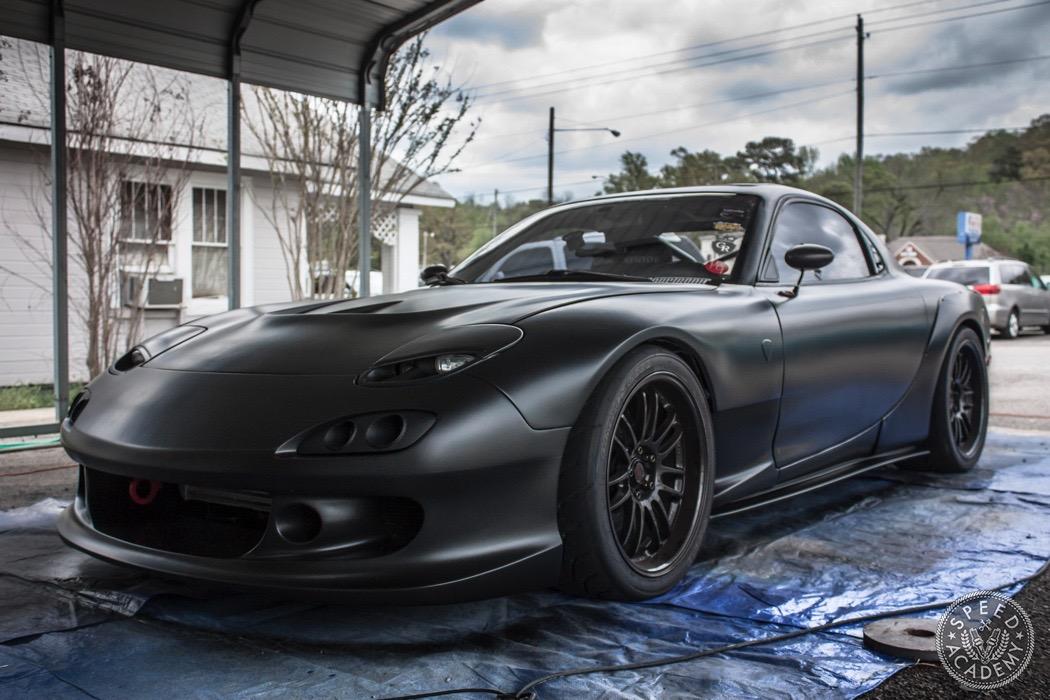
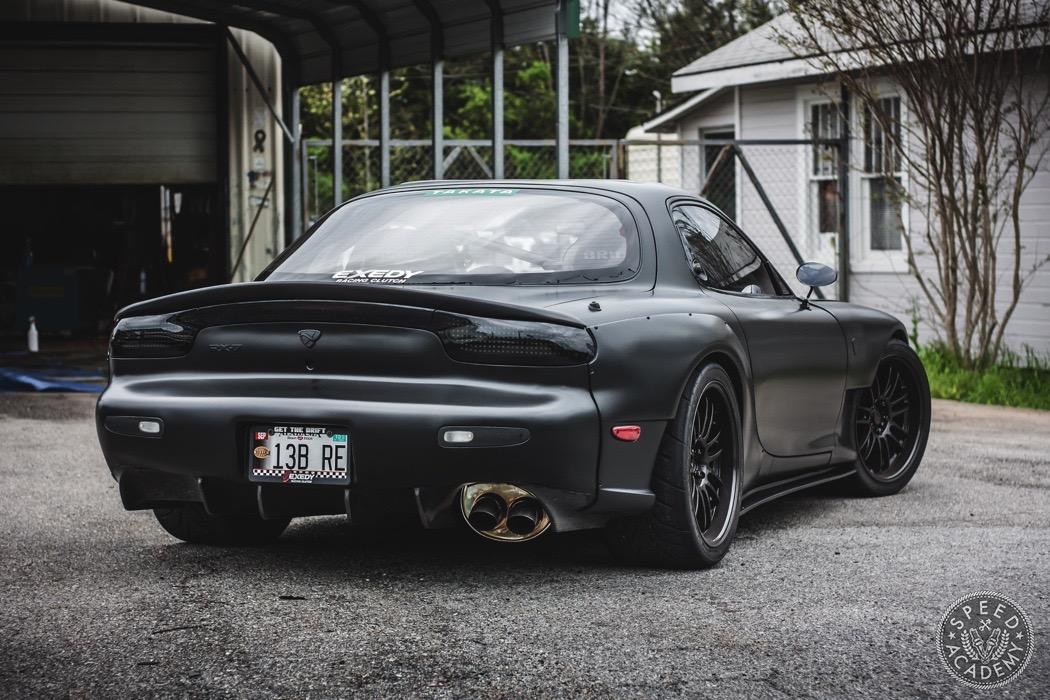
Go here to read the entire article.. Plasti Dip your car: Tips and tricks from a Pro | Speed Academy
Another photo.. from my event DGRR
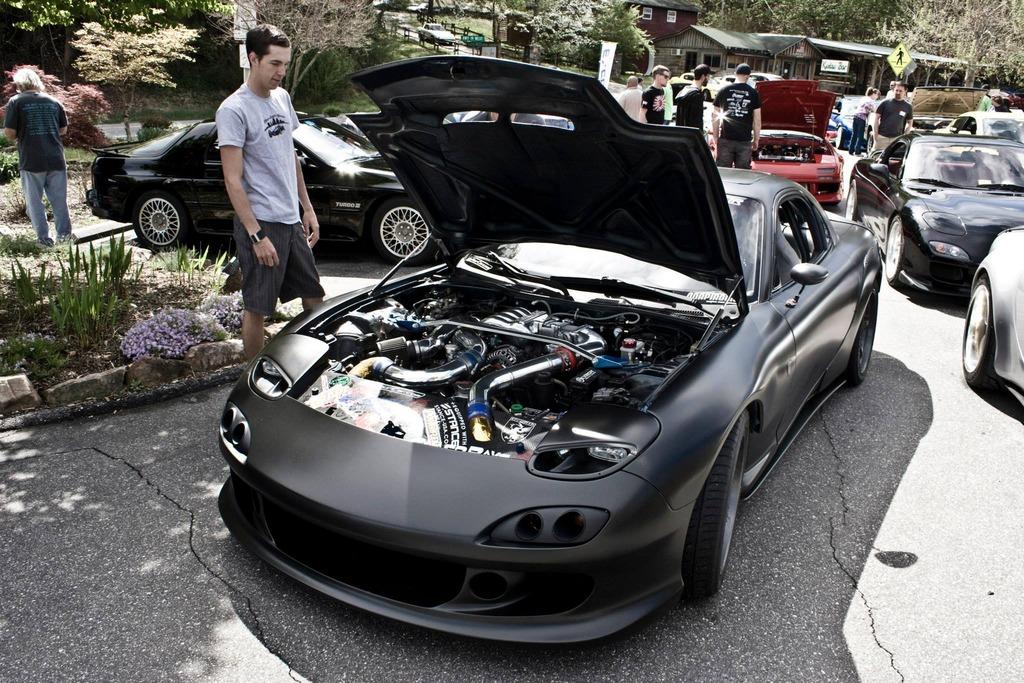
Now that DGRR is over, I had approximately 3 weeks to get my car ready for the Exedy Booth at Formula Drift.. Also, I had a feature shoot with SpeedHunters.com
Its been my dream to be featured on SpeedHunters and one of my favorite photographer was going to shoot it, Larry Chen.
In 3 weeks, I'm going to install Turblown EWP kit, my new bumper, new color, new interior, etc.
To start, Turblown EWP kit (aka Davies Craig Electric Water pump)
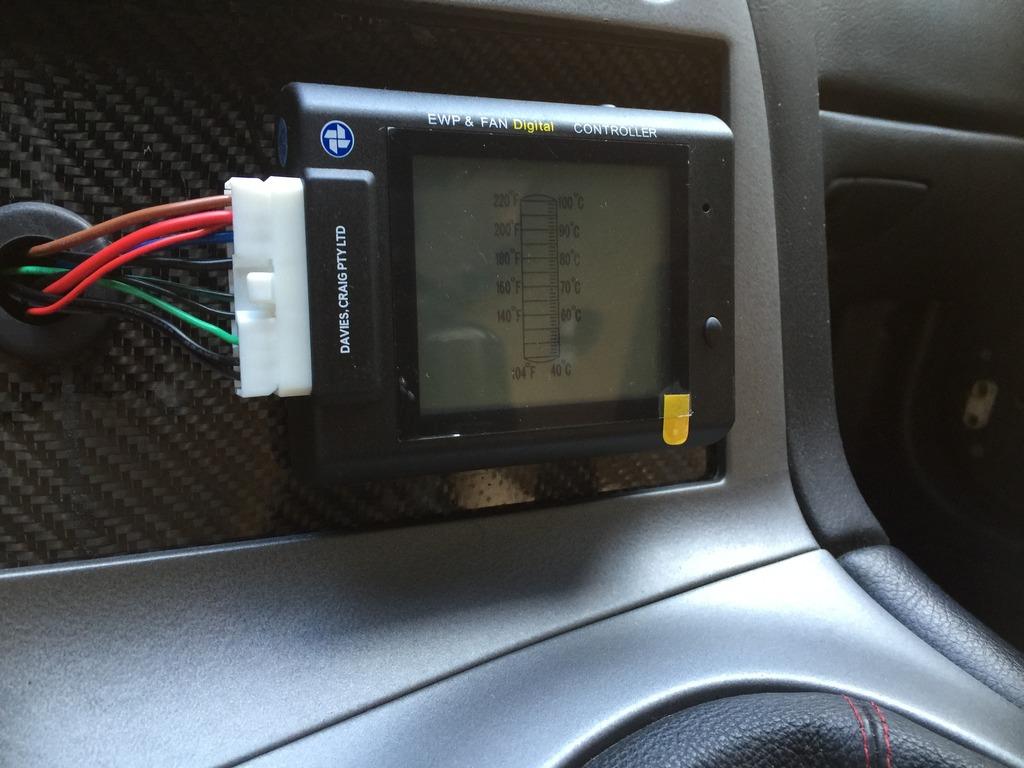
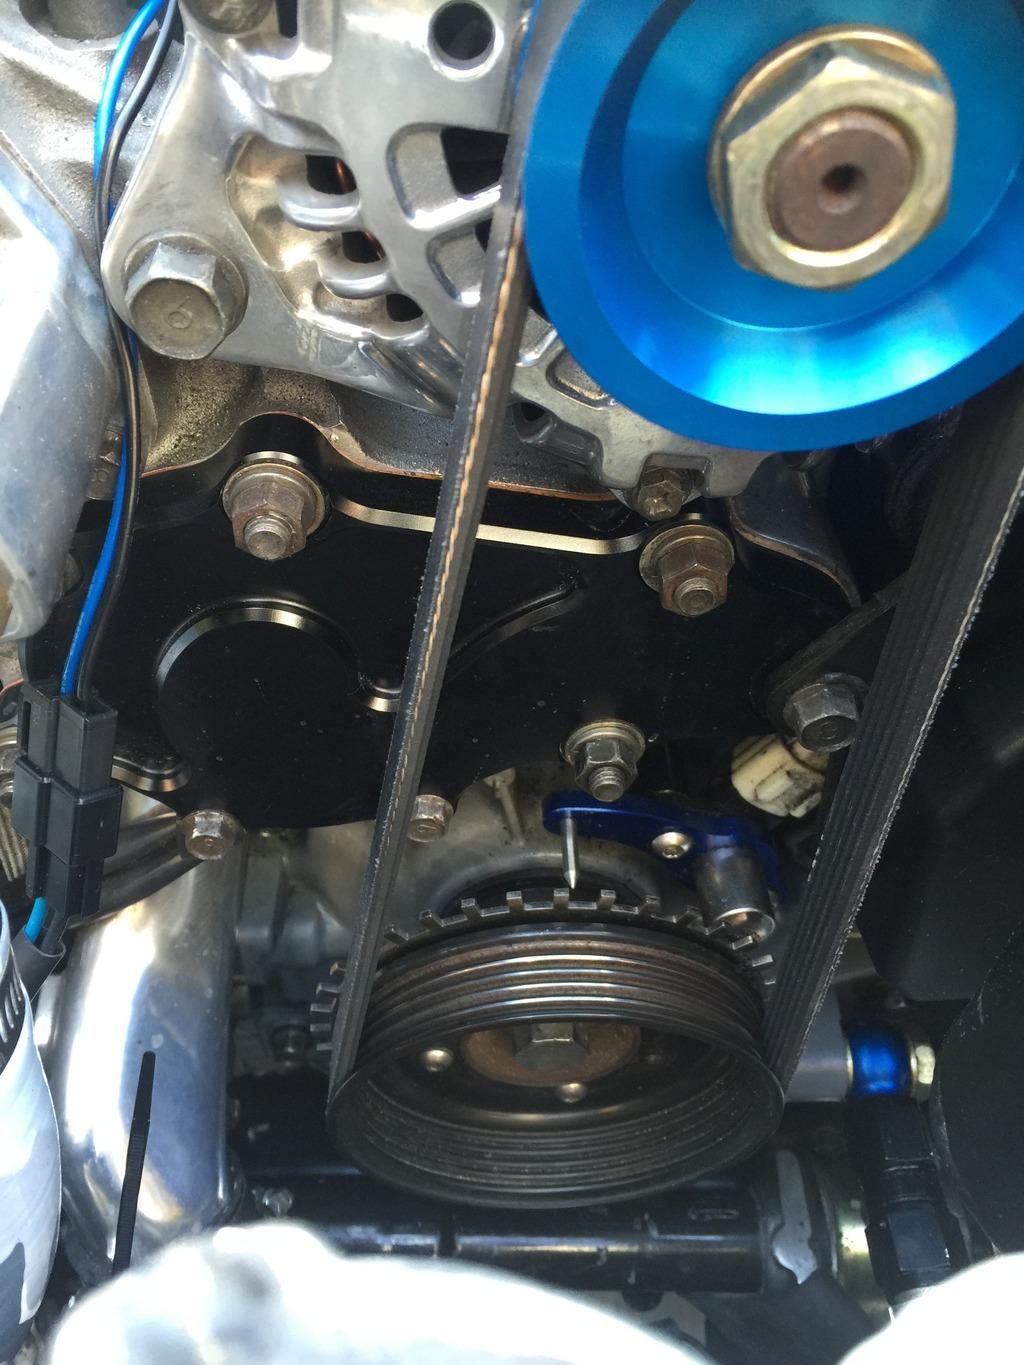
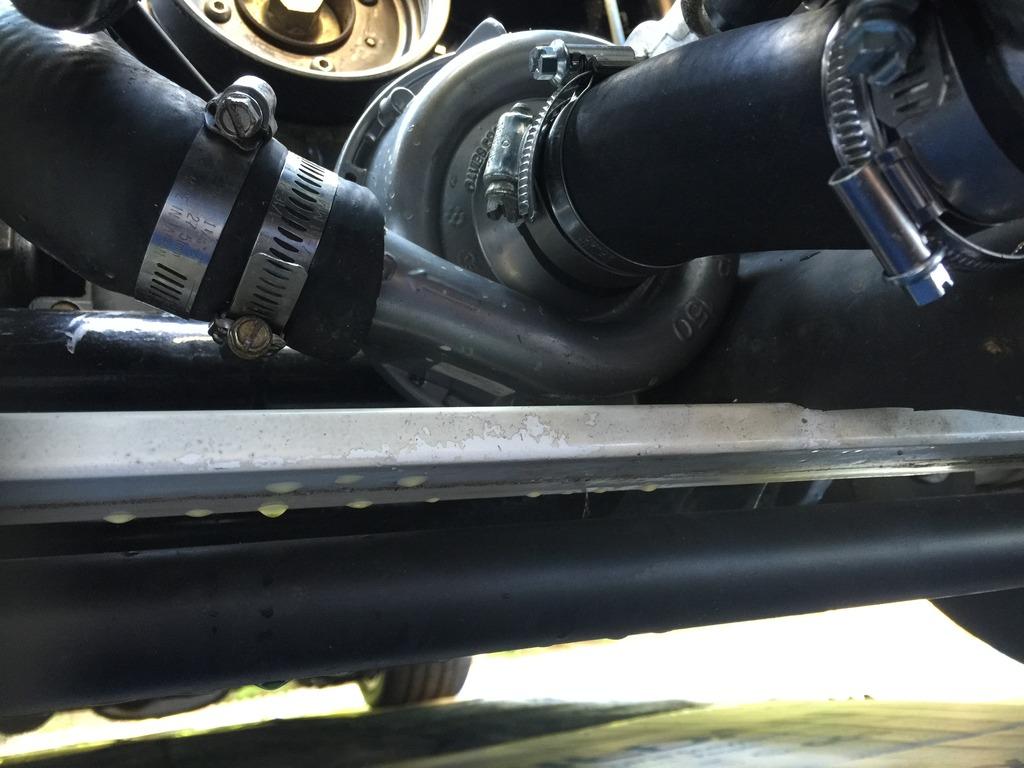
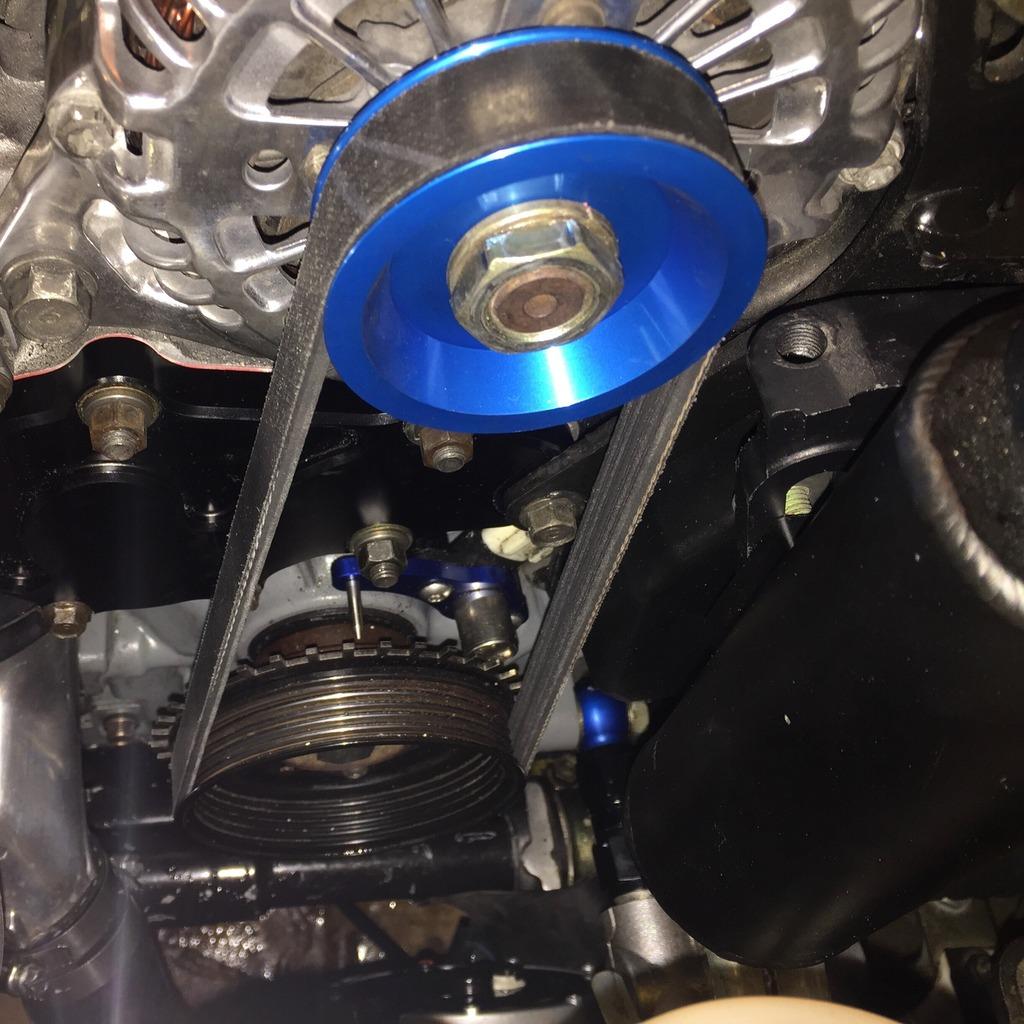
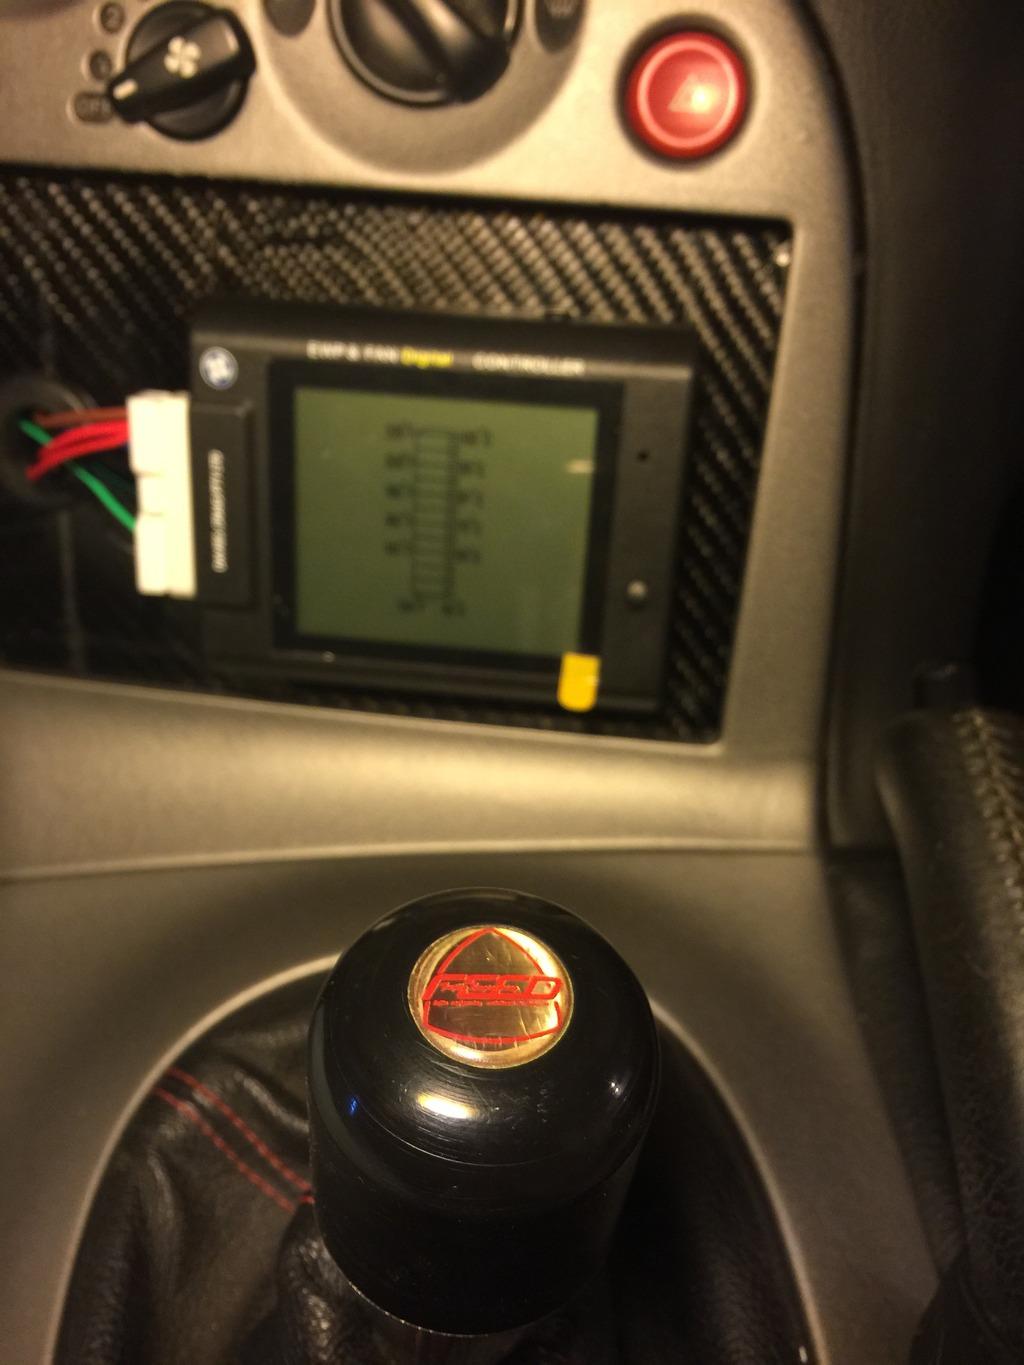

I'm going to say this is one of the best mod I've done. Why?? Unlike other EWP kit I've seen, the controller will hold the pump from kicking in and pulse circulate during warm up, and once its fully warmed up, it will pump, when temp is too high, it will kick on the fans, and maintained the temp amazingly!! Another awesome feature is to continue to circulate the coolant and turn on the fan after engine is shut off.
Also, getting rid of air after filling the system with coolant was an ease. Just power the pump and fill!
More info about Turblown kit: FD3S EWP System - Turblown Engineering
Here is a video I did of the pump set up..
https://www.youtube.com/watch?v=zOIlZNCwQ_Q
7-11-2015
More Update..
After my event DGRR 2015, I had a photoshoot with my friend and a photographer before I started to break down the car. I had at this point about 3 weeks til my photoshoot with SH.
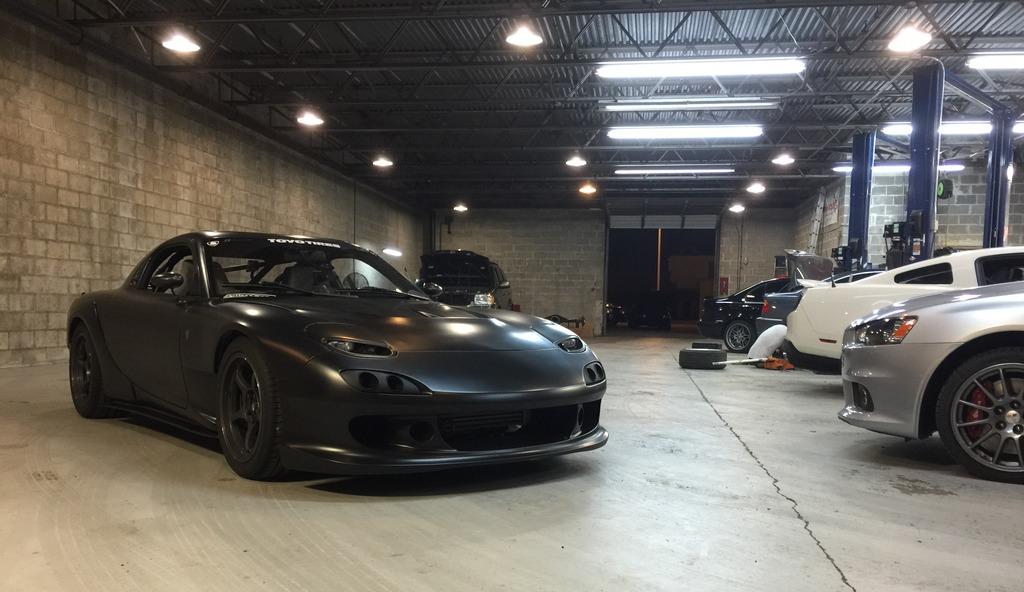
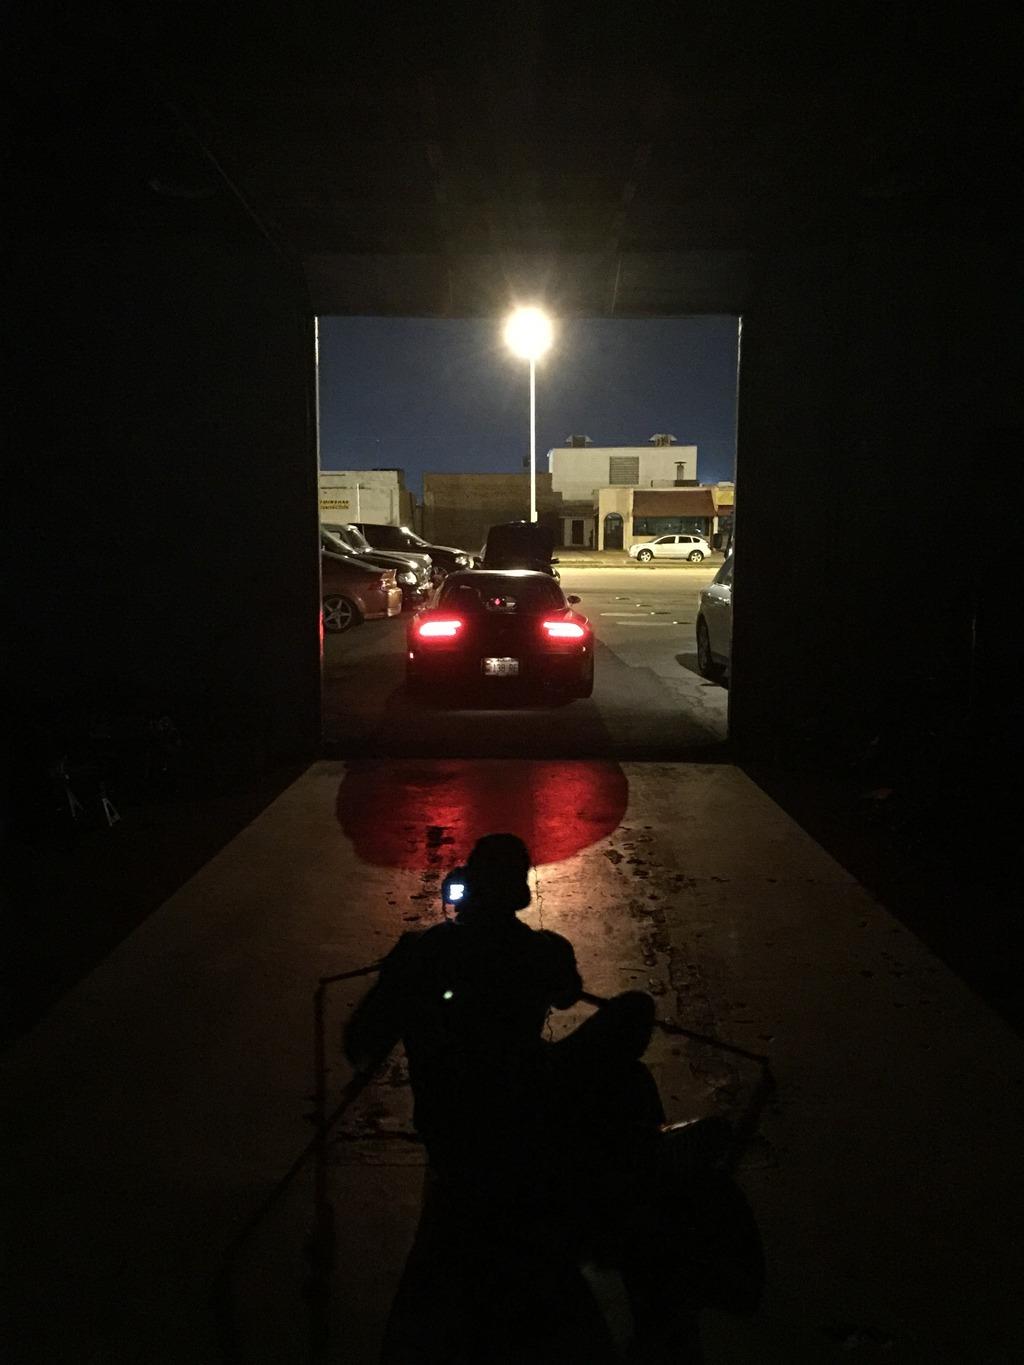
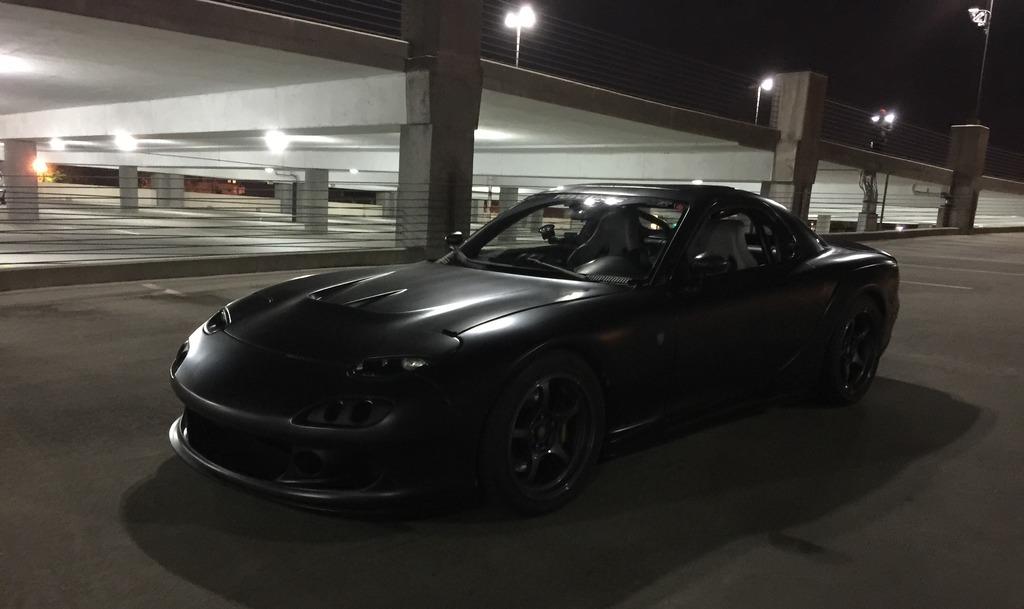
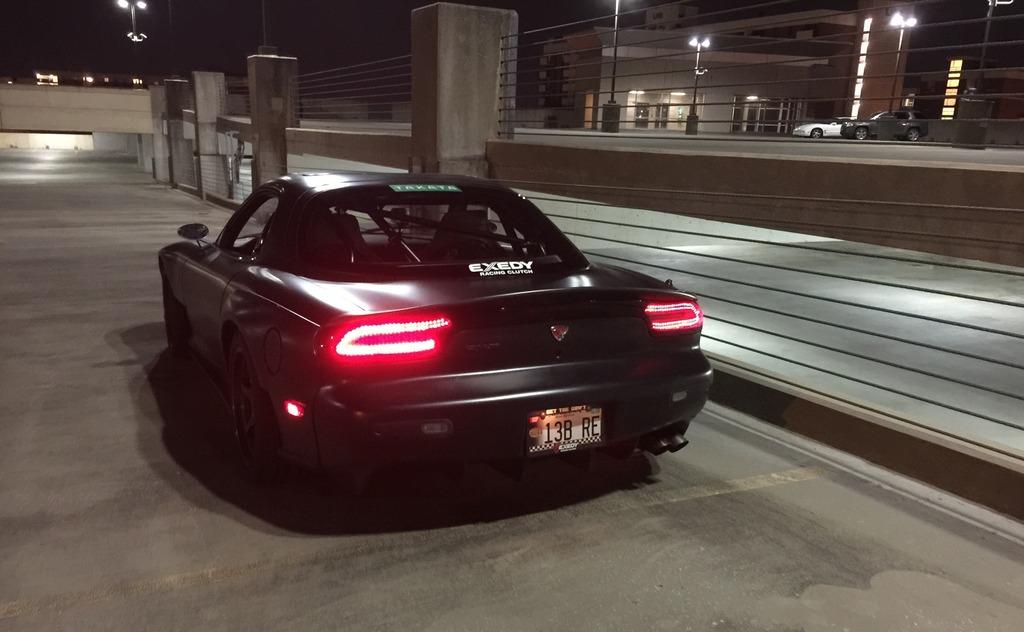
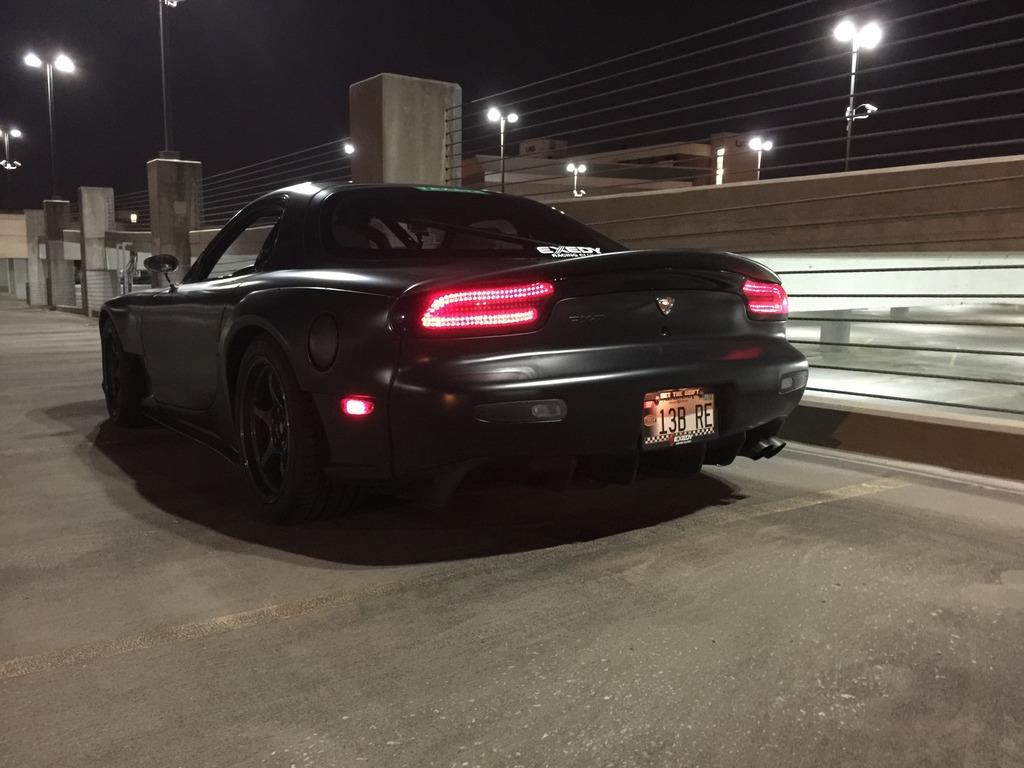
Clean up my garage and hung my Exedy and Rays Engineering flags.
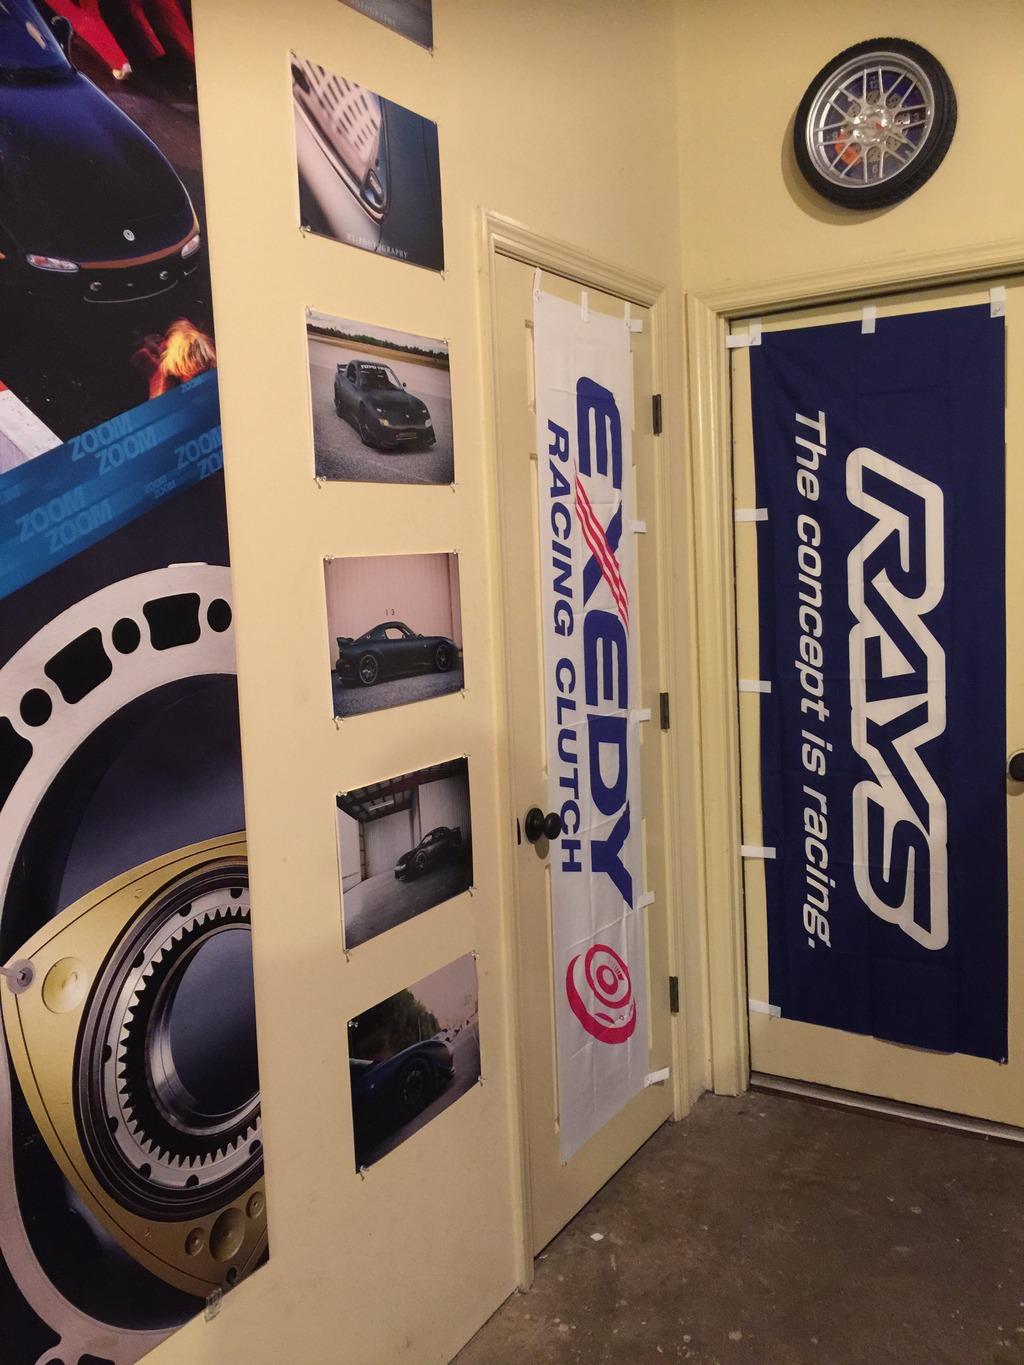
I than started working on the interior of the car. Replacing my old interior (CF) with all OE plastics with zero broken tabs.. and got them refinished.
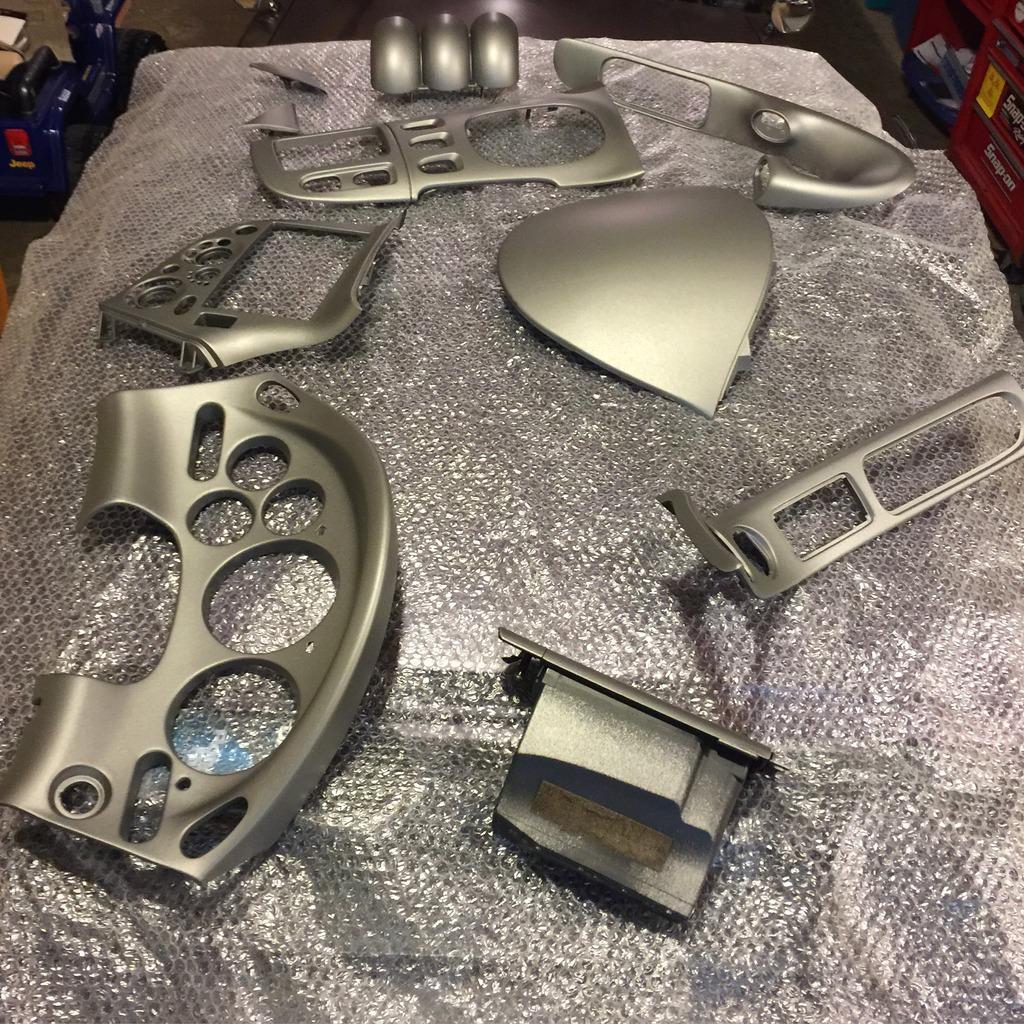
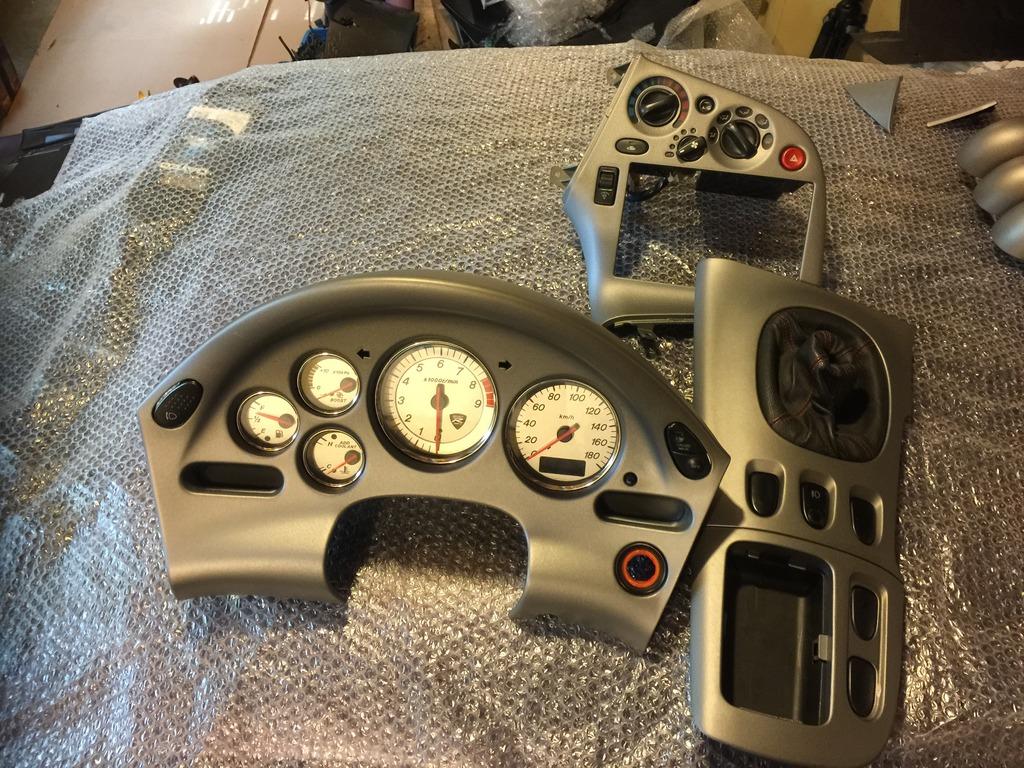

With Spirit R cluster
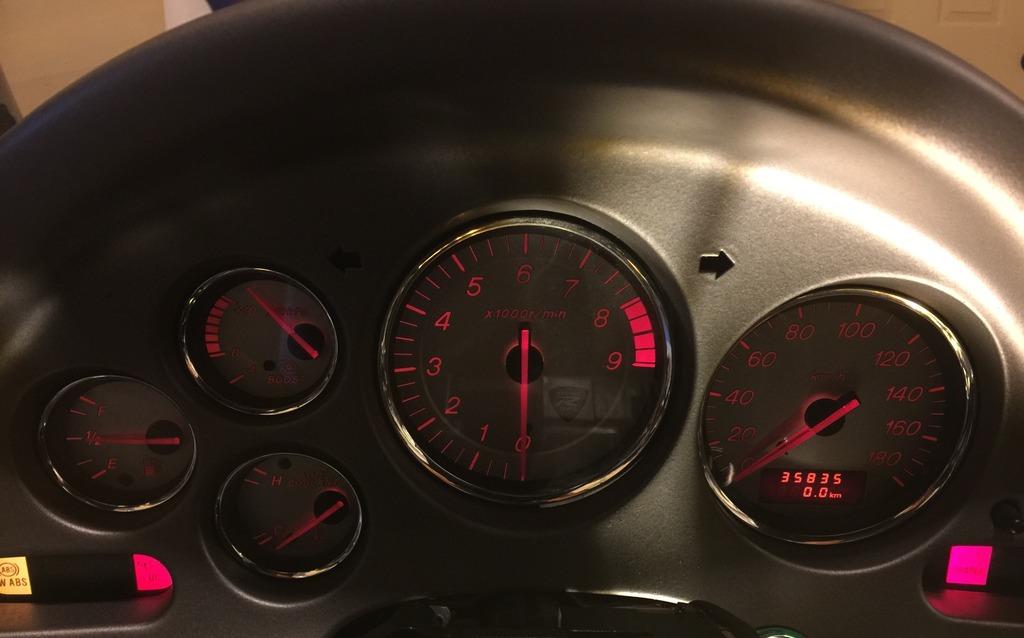
Changed the Steering wheel to match the recovered RZ seats.
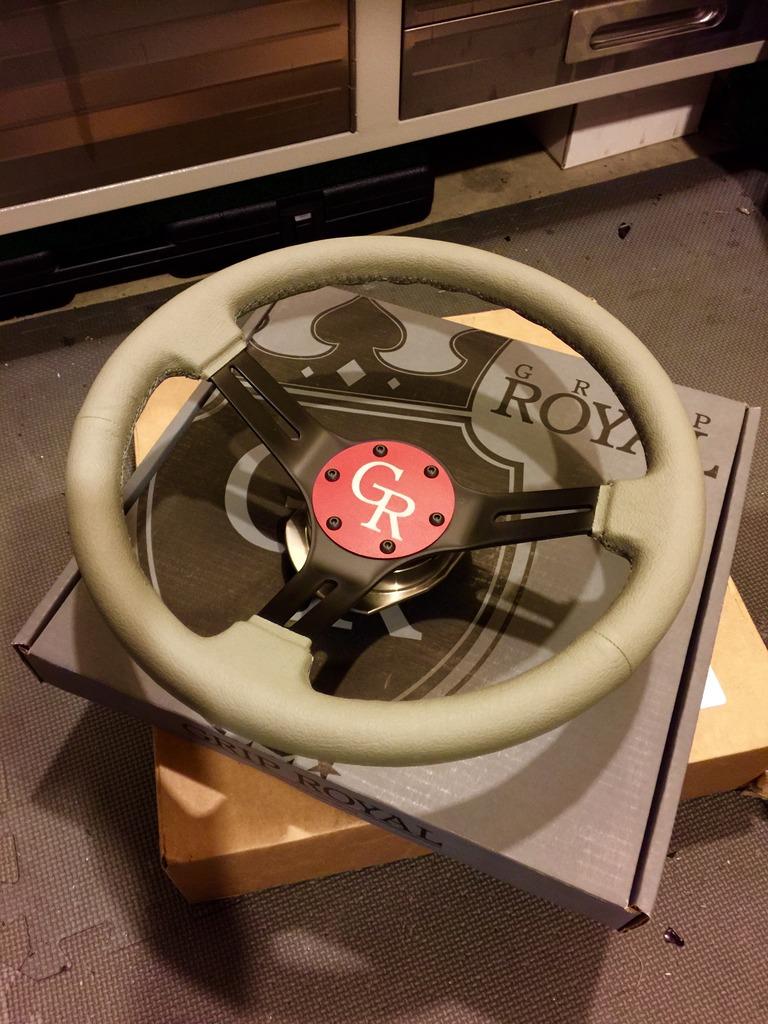
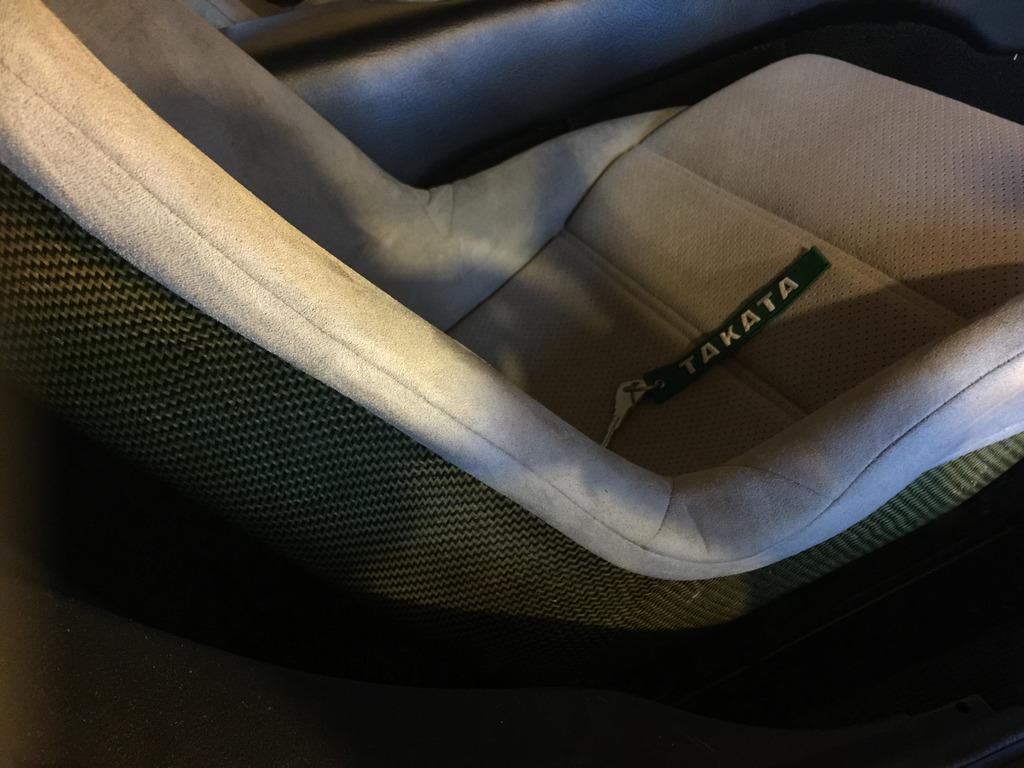
Changed out the Catback.. replaced the RE-Amemiya Dual Dolphine tips to Ganador full Titanium catback
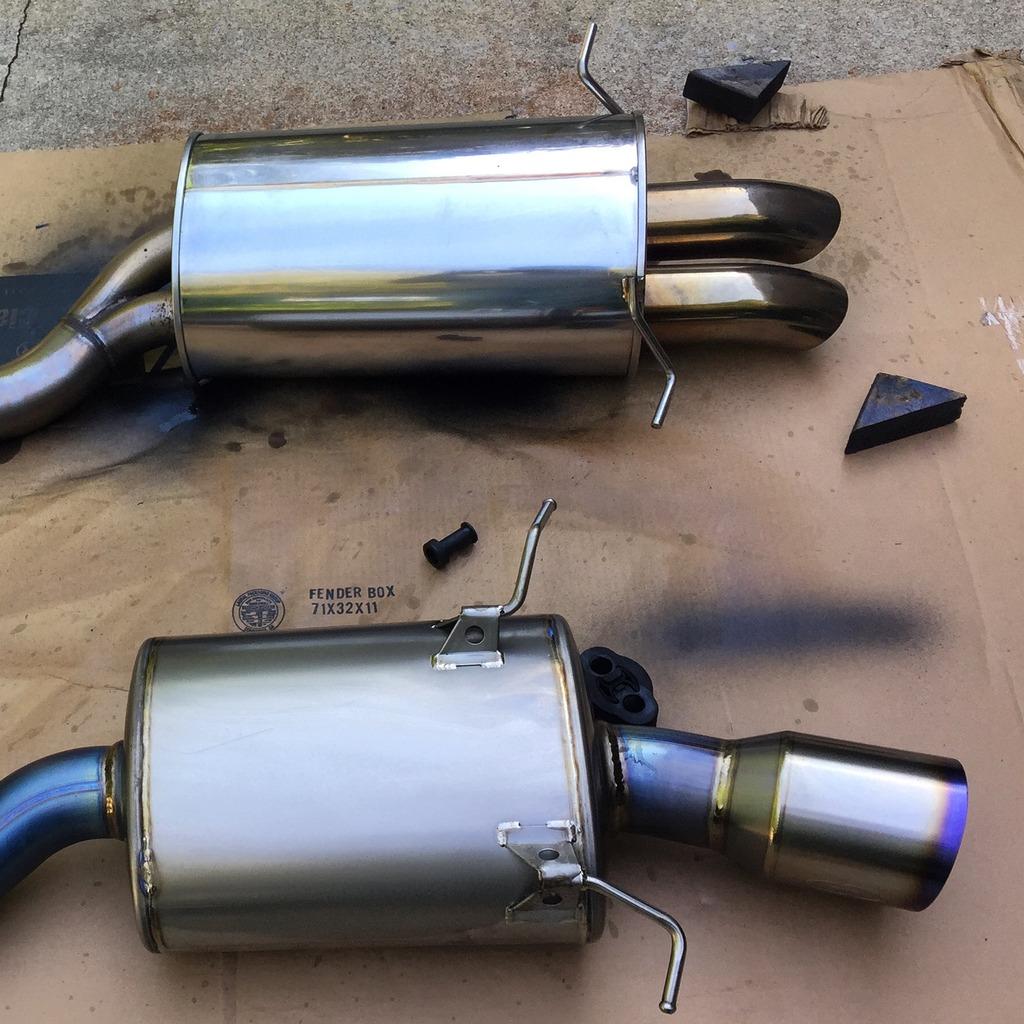
Got my Defi BF gauges I had for severals years, got new sensors, wires, and tested them out.
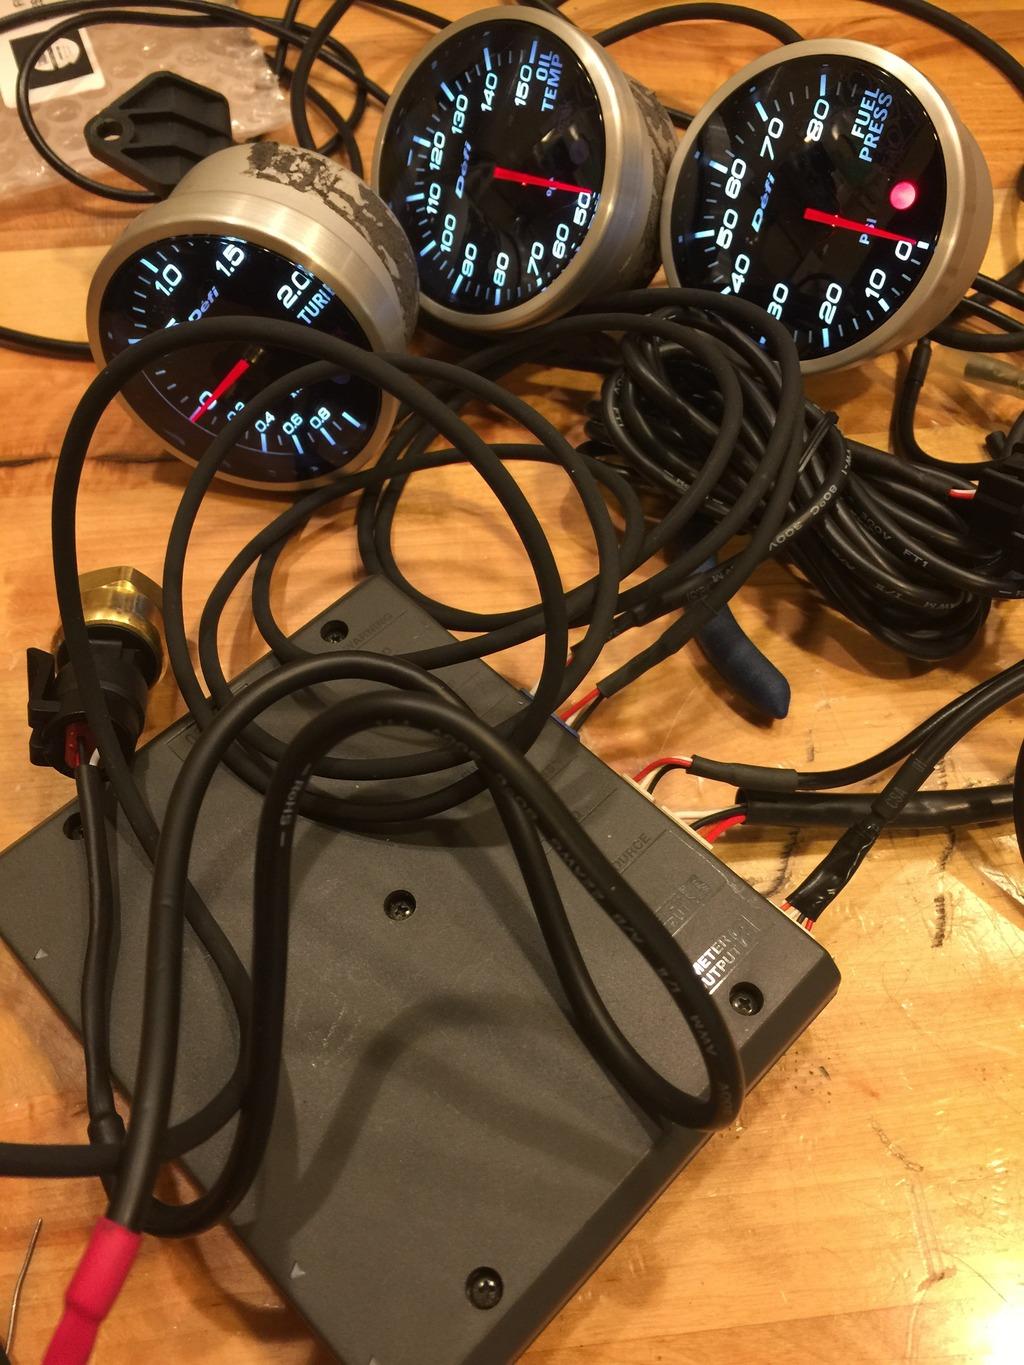
New AutoEXE hood struts.
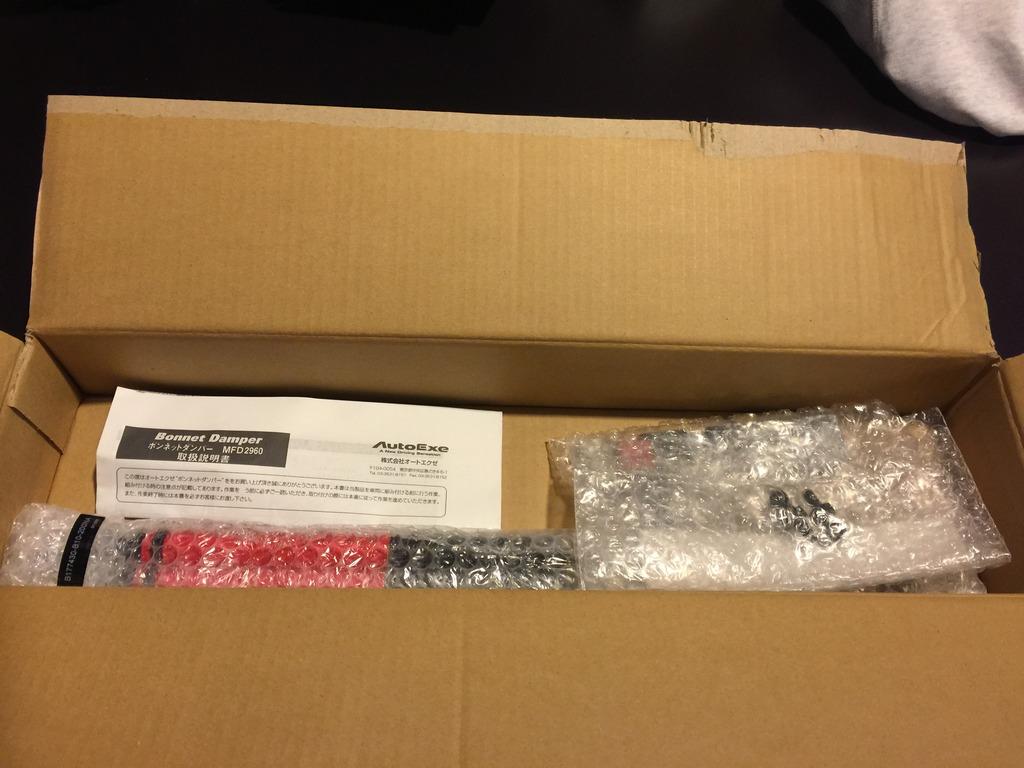
Full Function Engineering goodies
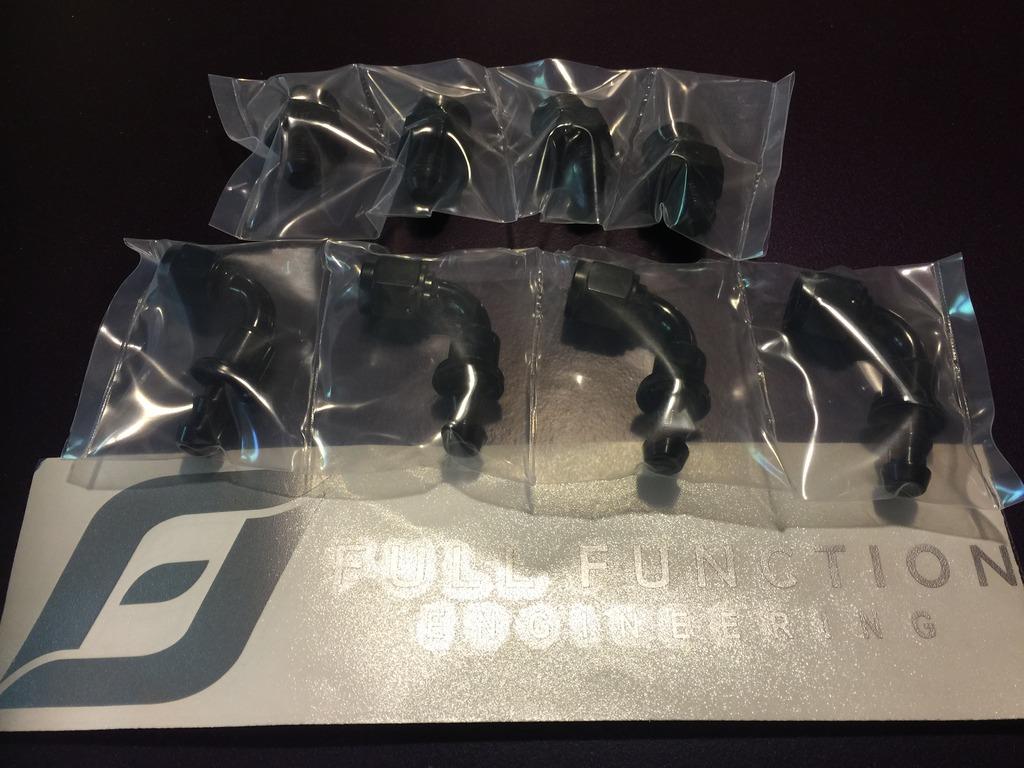
Some Carbon goodies...
Feed interior covers and Feed Ganador mirror cover in CF.
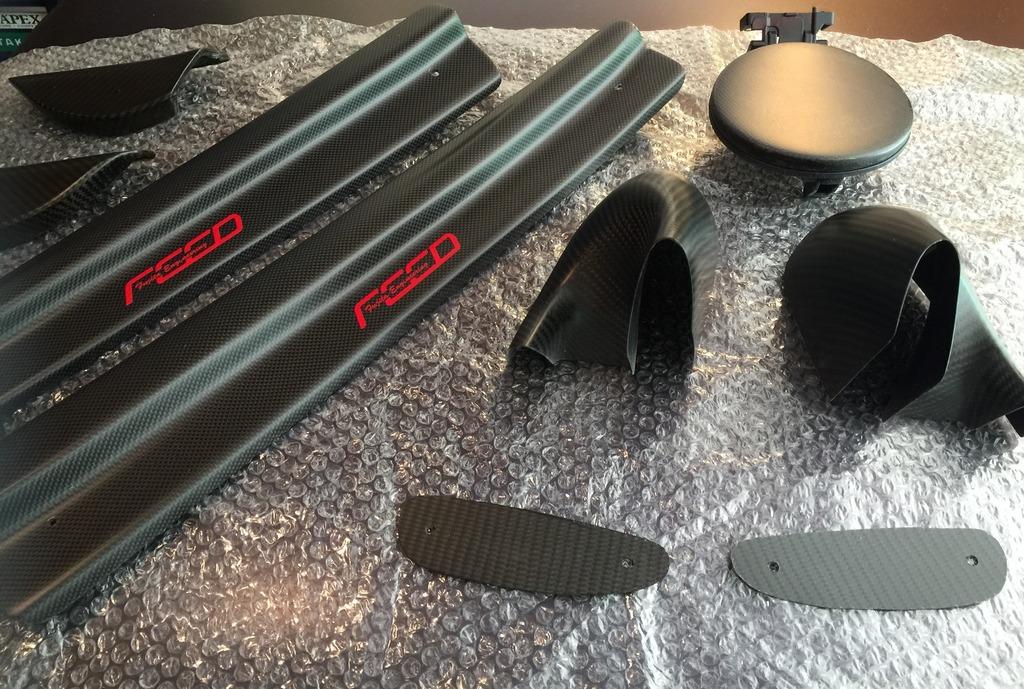
I been a fan of Samco Sport product since knowing Samco were first to produce OE upgrade rad and IC couplers and hoses. Mazdaspeed kit, Samco were the supplier for MS IS kit. So, i wanted to run their goods.
Ended up getting box full of Samco goodies..

And finally the bumper...
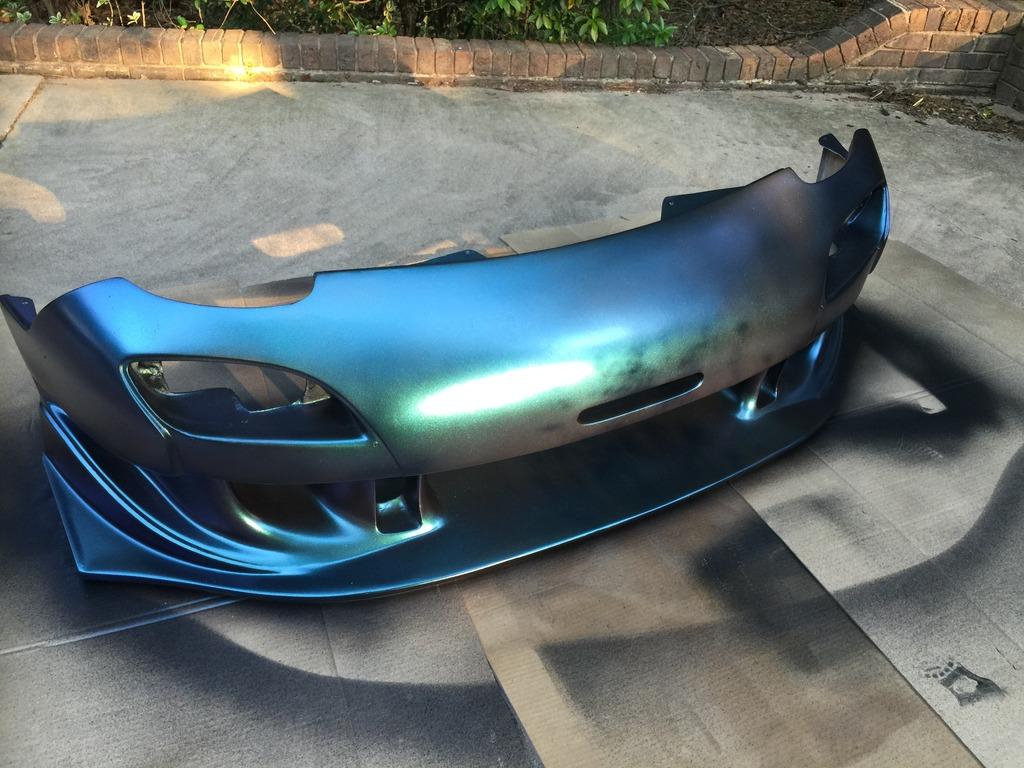
And Engine bay