You must be logged in to rate content!
13 minute(s) of a 620 minute read
10-28-2011
It's this time when the paint is near perfect, and everything shows great detail that you just have to stop and stare at your work once in a while.
Often times during a project like this your focused on the frame issues but out of the corner of your eye you see the bigger picture. Items such as wheels and tires, brakes and I knew I had to deal with rear bumper mounting.
I knew with the cas cap cover that I would want to space the bumper out another inch, so it and the gas cap cover are flush. I also knew the mounting system for it was not acceptable.
It's 5 inch channel. To just drill holes and tighten it to the frame would not be strong, that is close to how it was before. Since there would be a cavity when you tighten the bolts, the bumper itself would give or compress as you tighten the bolts. Obviously if I used very large diameter flat washers I would spread the force of tightening across a larger area and this would help, but it's not the answer. I also hang a couple large tow hooks from the bottom of the bumper. When the tow hooks are used, and used to the max it's as if I'm tighening the bolts, I'm once again putting all the stress on the strenght of the facing of the bumper. If I yank hard enough, the bumper where the bolts go through can give a bit and now the bumper can accually feel loose and I'd have to retighten the bolts to take up the slack.
Ok, I want to space the bumper out about 3 inches, I want an absolute non-compressionable mounting and I want a pad to bolt my tow hooks to. No suspence.... here is my answer.
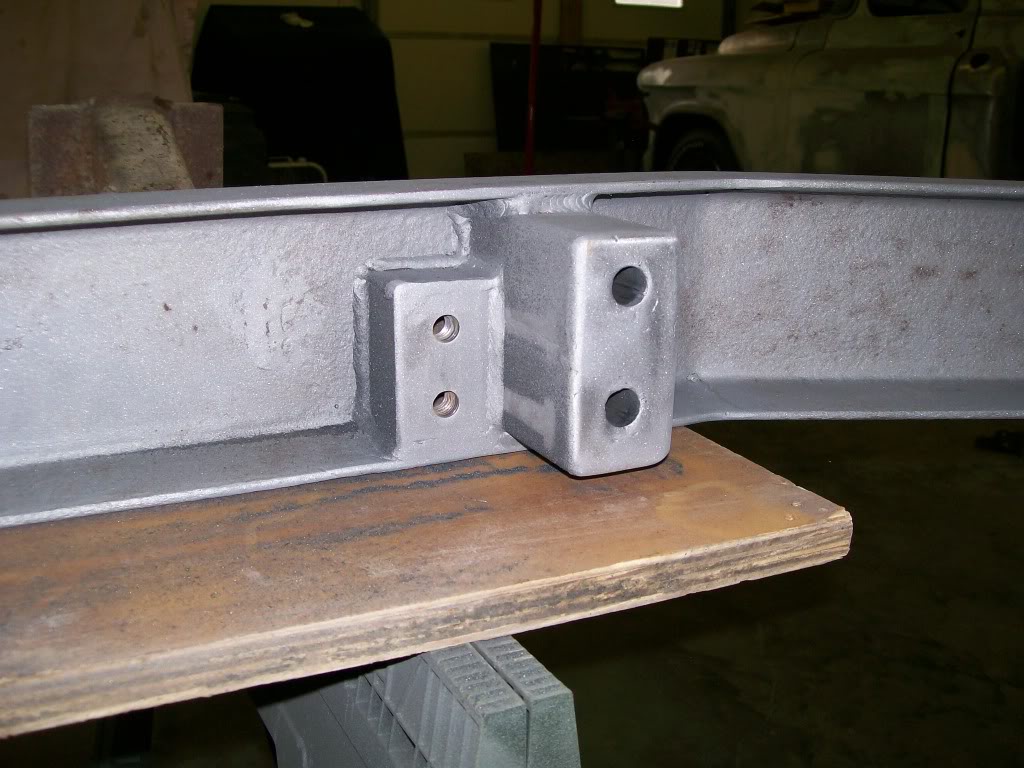
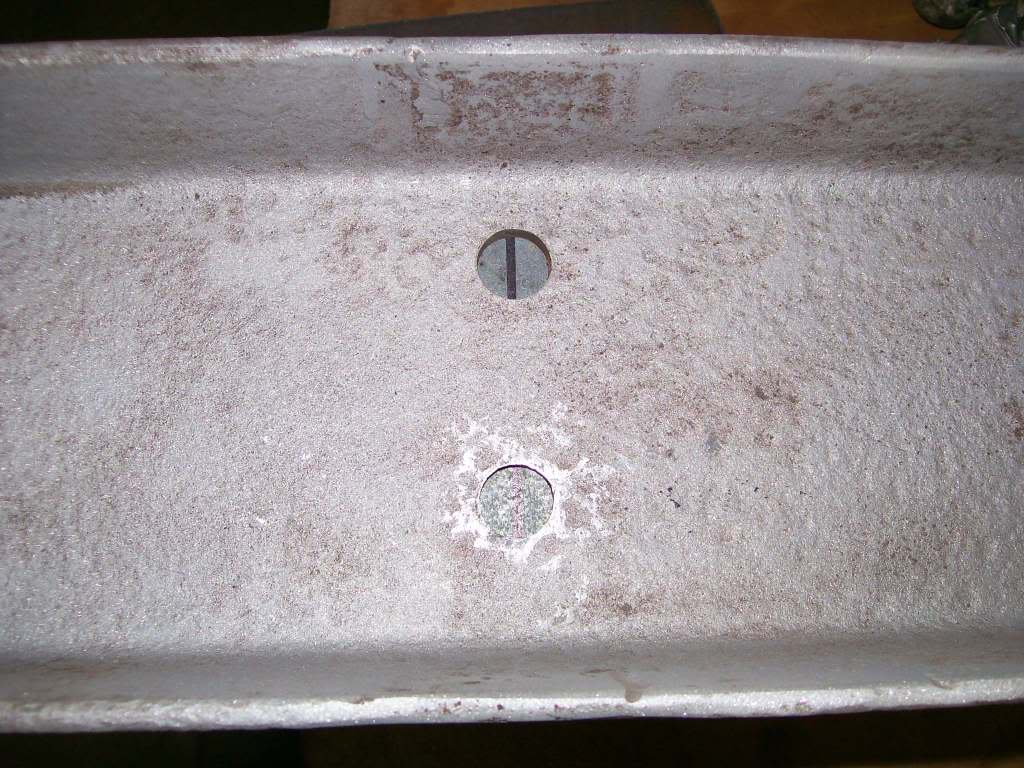
A picture of what I'm starting with. I only sandblasted the main working areas so far. You can see where the holes are drilled in the bumper. Imagine running a bolt through them and tightening the bolt, the more you tighten, the more you'd bend inward where the bolt is. Not good.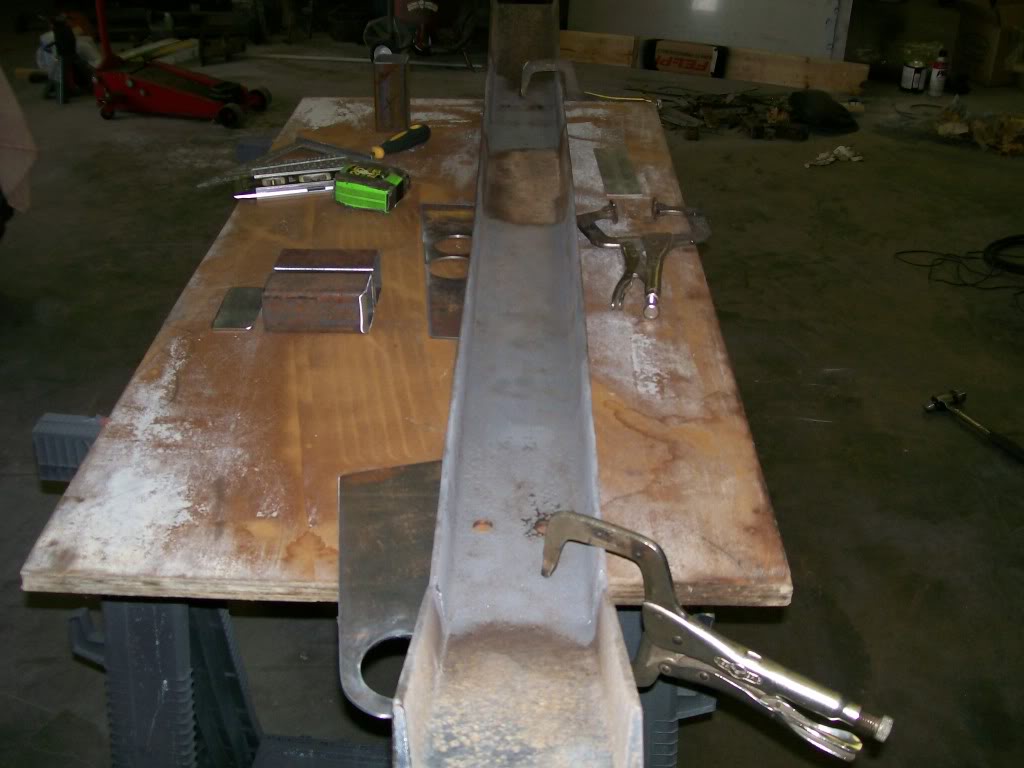
Here are the items used to get the spacing I'm looking for. A couple square tubes, 2x2, 1/8 " wall. Clamp together and tack weld. At times like this you'd be tempted to just lay a weld the hole lenght of the tubes. STOP!!! (I just like saying that) Never full weld till all pieces are cut and fitted. There will be time for that later.
Thanks SaharryMoe, right now I'm just trying to get through the rear half of this truck. My problem is I just have a problem leaving something untouched when doing a project, but it makes for good reading though. Thanks for checking in.
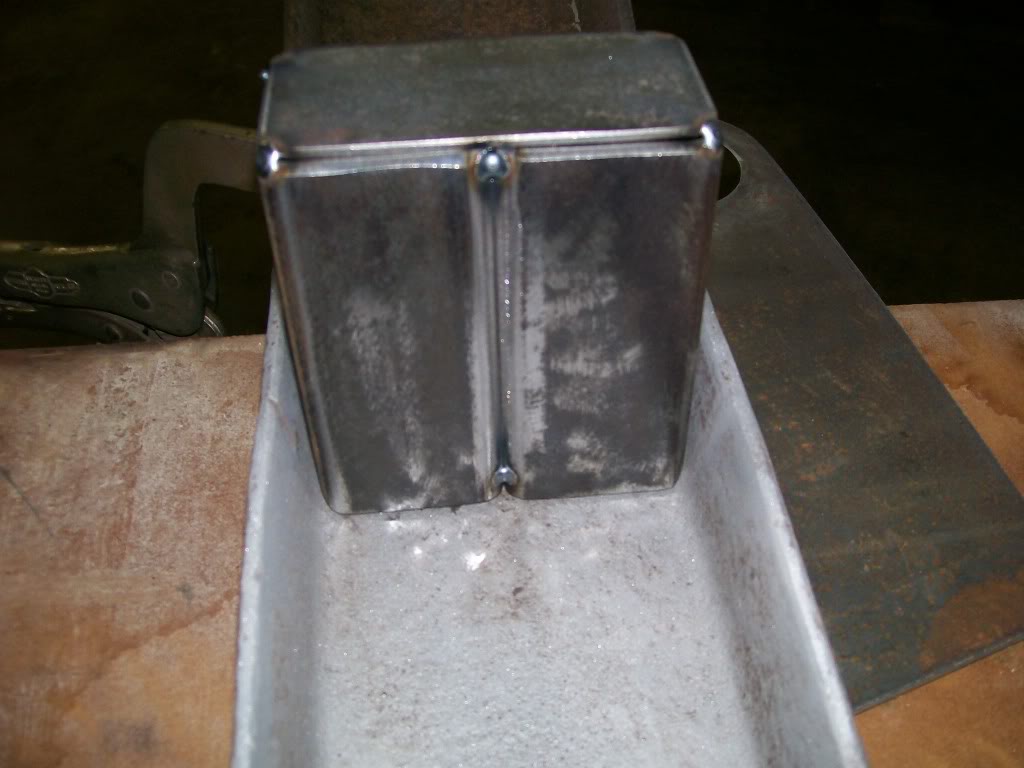
Now I've pretty well established the spacing I want to use to get the bumper where I want it to be. This picture shows the spacer and how it shows past the bumper.
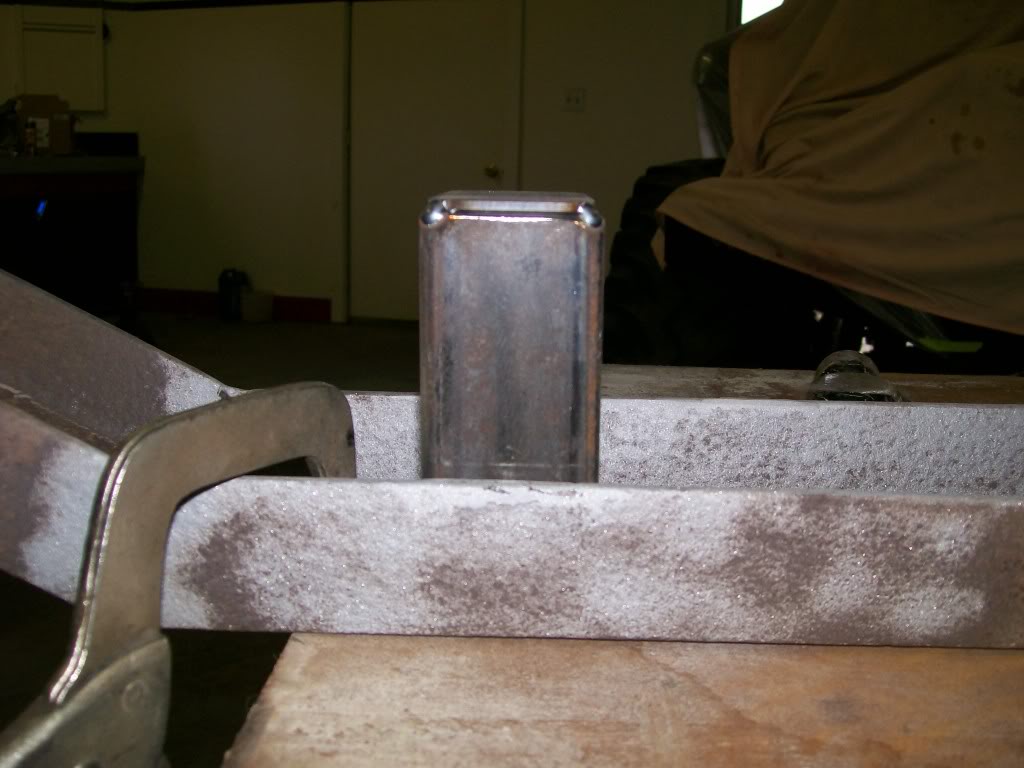
I'm in a tricky spot here. The original holes drilled in the bumper are not exactly centered, plus, being this is channel iron it narrows on the inside width from side to side. For what I'm planning on doing here I need a near perfect fit from the start when drilling this spacer.
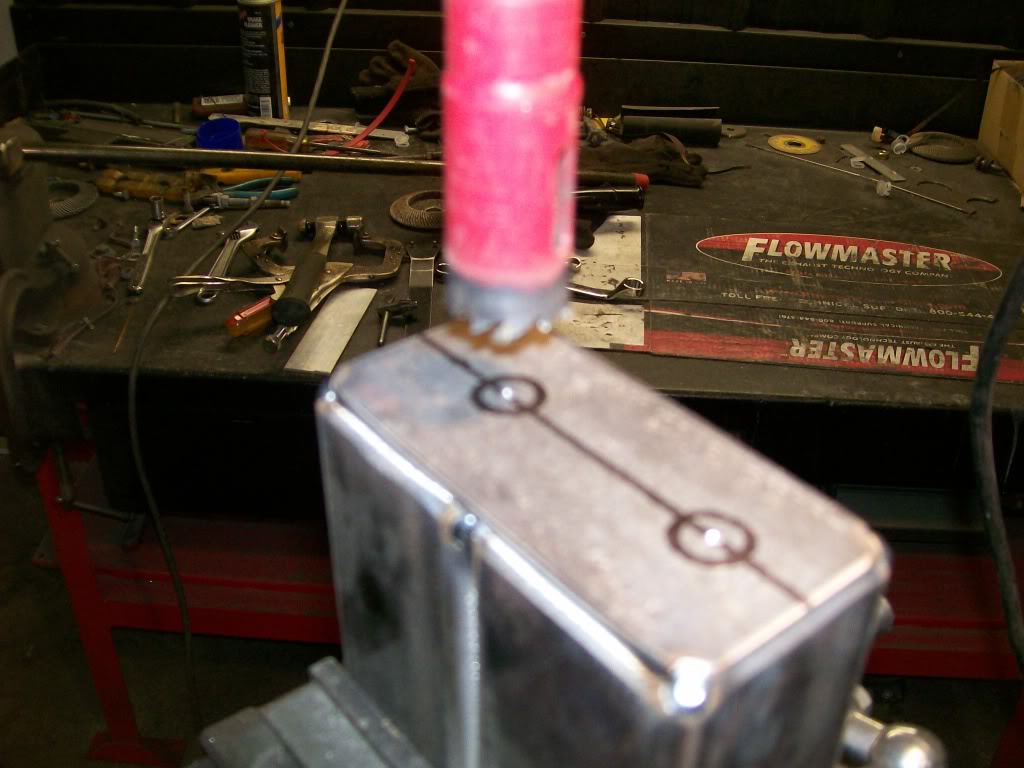
On the 1/8 inch plate that was tack welded to the two 2" square tubes I measured and marked the center length wise. I placed the marked spacer under the bumper and measured and centered the spacer along with keeping the marked line visually centered through the holes. This mark can be seen through the holes already drilled in the bumper in this picture. Once centered in all directions I sharpie marked the a circle through the drilled holes. Now I have a nearly perfect point to center punch for drilling the spacer.
Now to the drill press. Drill press, if you're looking to spend couple hundred dollars on a shop tool, a drill press I recommend. Anything I drill over 1/4 to 5/16, I looking to the drill press. It places an even amount of pressure during the whole drilling process the drill bits last longer. It's easy to use a hole saw, ect. As for a stand up unit or bench mount, I went with a bench mount, then made a cart for it to mount on with shelves underneath. Then a set of wheels, total drilling and portable.
Ok, where was I........ yes, over to the drill press. The bolts I'm using are 9/16 but I'm using a 7/8 hole saw. Pretty sloppy fit I'd say, why did I want near perfect drillings if I'm gonna have so much slop? Some can tell by the finished product picture a couple posts ago. I'll get to that tommorow.
10-29-2011
Showtime, here we go, drooling on my computer again. It's the greatest compliment.
01zerone, your first post I see. I'm glad you're enjoying.
2006LJ. I thank you for giving it a try. . I'm sure your answer is the most common answer, I high five you for posting.
Many years ago, yes, the extra large holes would be to allow for forgiveness while assembly. What I've learned is if I leave the extra space I have more of a compression fit, and not so much a mechanical fit.
For instance. by leaving some"wiggle room", the ability of this bumper to stay in place is the clamping force of the bolts. As I mentioned, if when bolting the bumper to the frame the clamping force of the bolts will slightly collapse the facing of the bumper and now we have a case of the bumper never truely staying tight. Now if I hook up to a heavy item, and I pull sideways, the bumper can move from side to side.
I use the term "mechanical fit". I'm reffering to the idea that once the bumper does move from side to side, it will stop it's movement once the holes make contact with the shank of the bolts. This is the result of two hard items coming together. My intention is to get rid of the collapsing of the bumper and have this mechanical fit immediatly.
The next picture here shows the drilled holes in the spacer and I enlarged the holes in the bumper to match the ones in the spacer. Hmmmm, why is the round tubing in this picture?
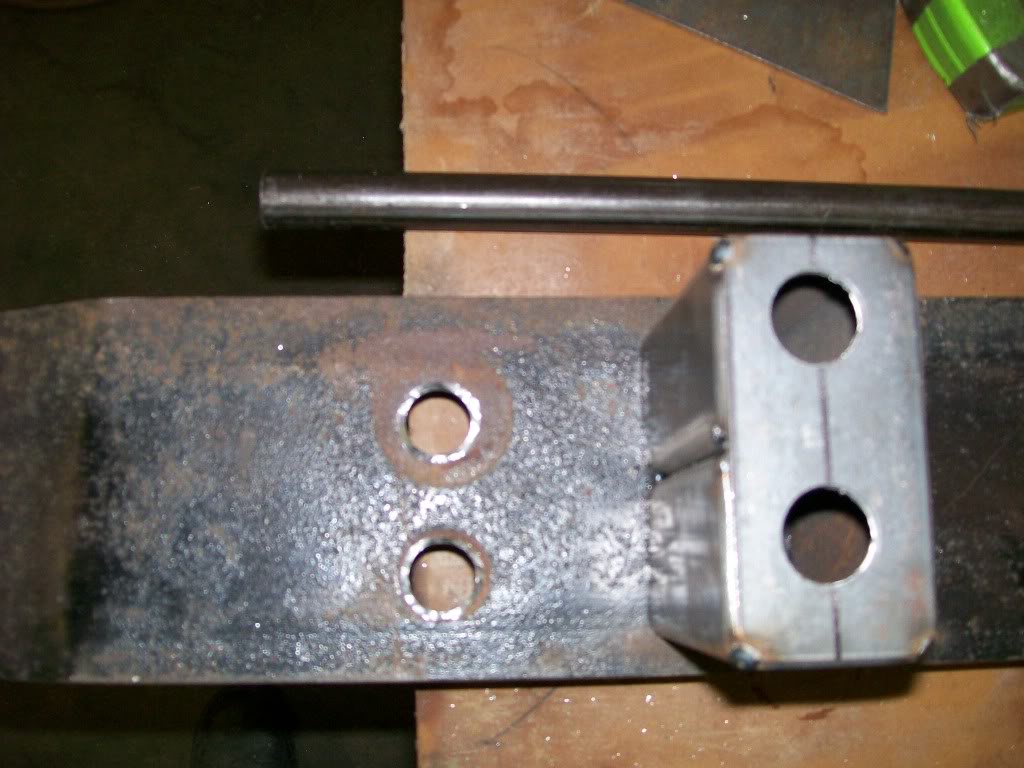
Here we see the difference in size between the bolts and the holes drilled.
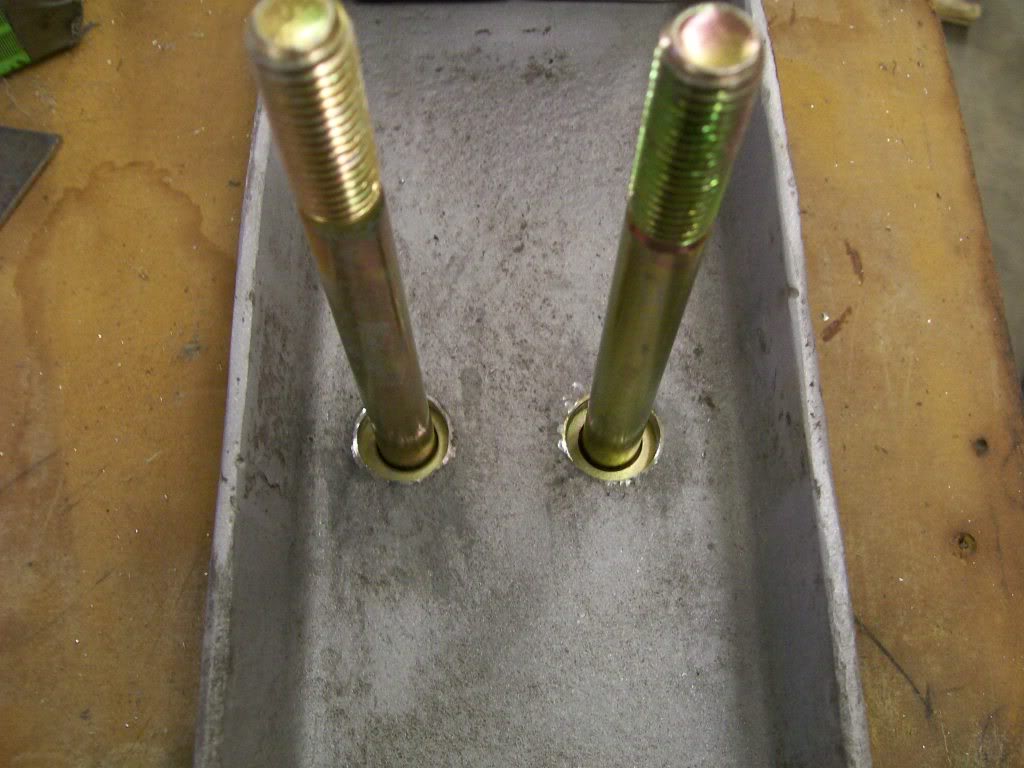
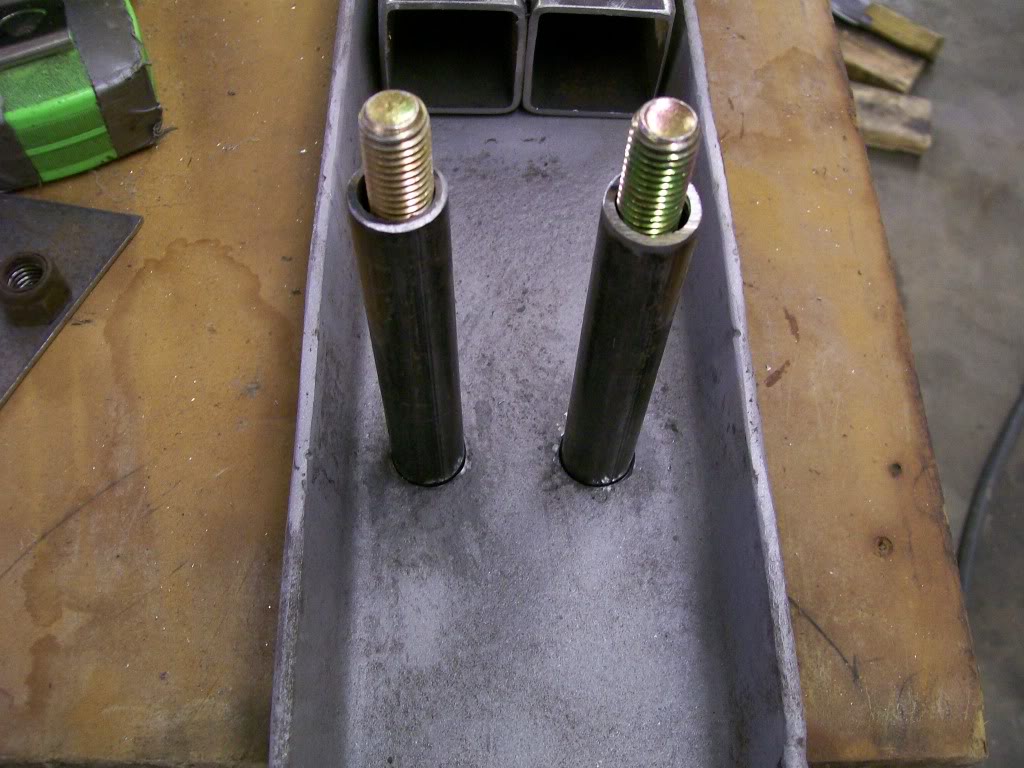
Here we go, tubes. Yes, here is the answer. These tubes fill the difference between the drilled holes and the bolts. These tubes, between the bolt heads and the truck frame will create a non-compressable, tight fit when the bumper is mounted to the truck.
10-30-2011
Here is a picture of the main pieces to create the mounting system.
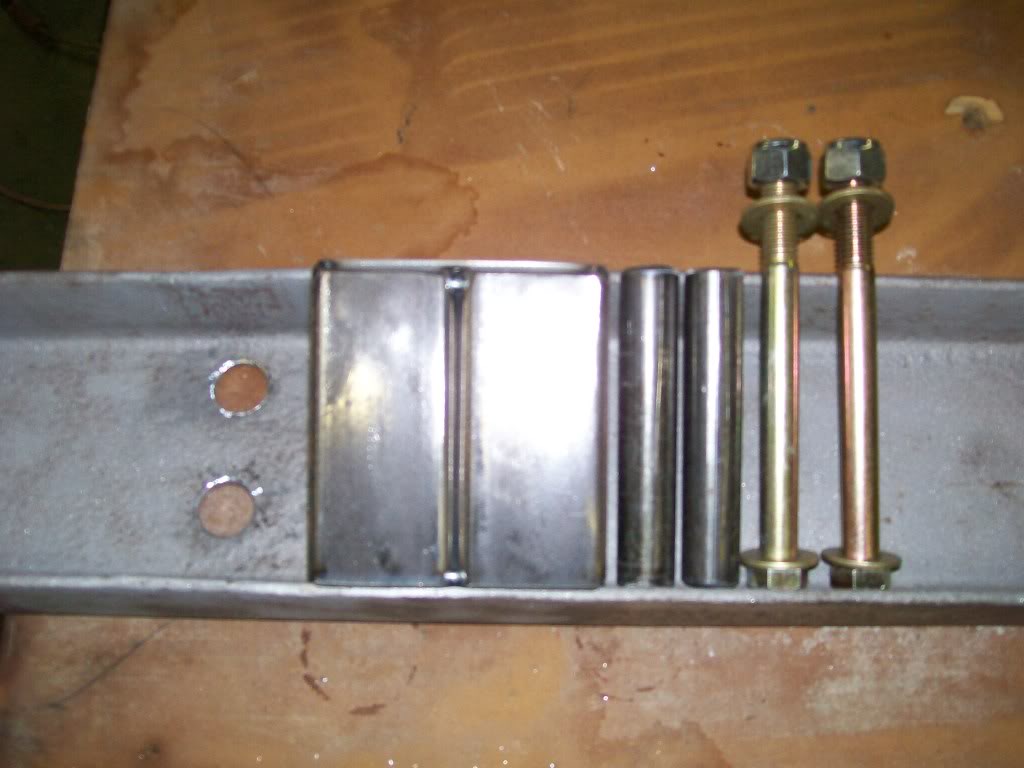
Here are the pieces all together. Oh how I'd like to grab the welder and start welding these all together. STOP!!! What a mess I'd have if I did.
It's all together nearly 4 inches from the bumper to the end of the spacer. If I weld now, even if I try to measure the distance from the drilled holes in the bumper, to the drilled holes in the end of the spacer, Then about 4 foot from one spacer to the other. The try to get the spacers level with each other. then blah, blah blah.

Then we have the issue of as I mentioned before, when you weld there is gonna be a pull while welding also which will cause a slight shifting.
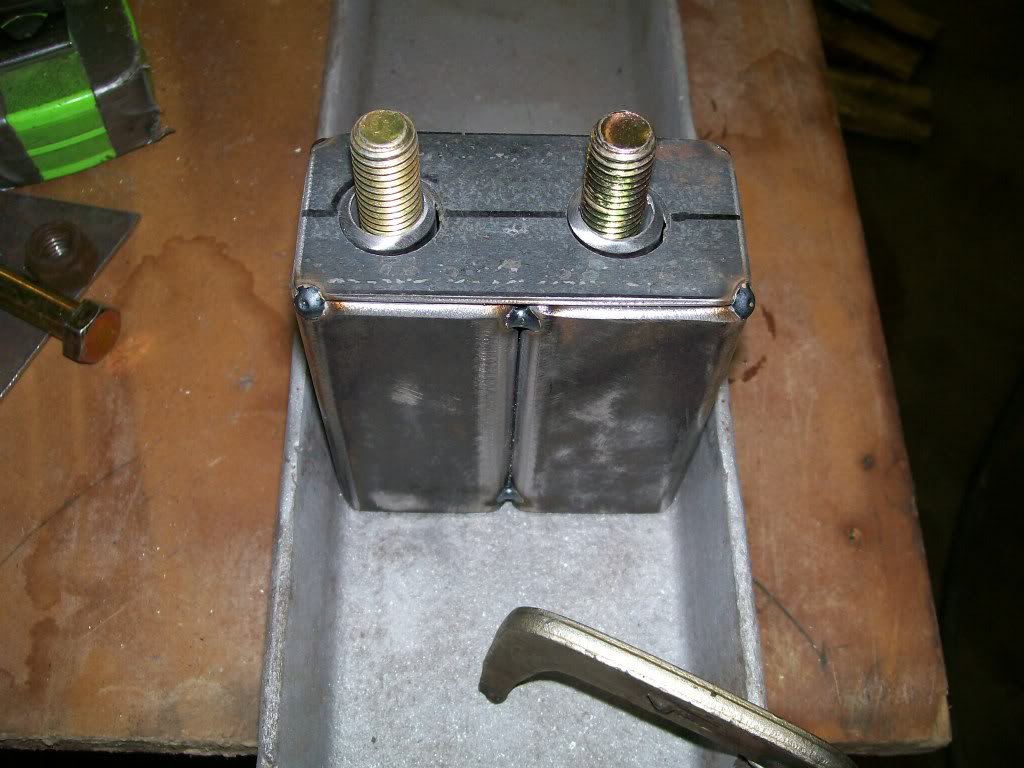
Here is the answer. Carefully assemble all the pieces and bolt it all to the truck. I don't have to measure nothing. I don't have to worry about level between the spacers. I did place about 4 layers of masking tape where the bumper meets the painted frame, no need for accidental scratches yet.
A big plus is when I have the bumper in place with all the pieces together I tighened the 4 mounting bolts medium tightly. This pulled all the pieces together. Now I can weld 4 welds on each spacer to the bumper, one good tack weld on each corner. This way when I remove the bumper to do the final welding I don't have to worry about the spacers shifting during the welding process.
Why the big deal for accuracy?? If I didn't have tubes inside the spacers and I was off a bit, I could simply file the spacer holes to fit the frame holes. BUT, with the tubes I don't have the choice to file larger. If I was to file anything now it would have to be the frame holes, and I don't want to go there. A little extra effort saves alot of effort later.
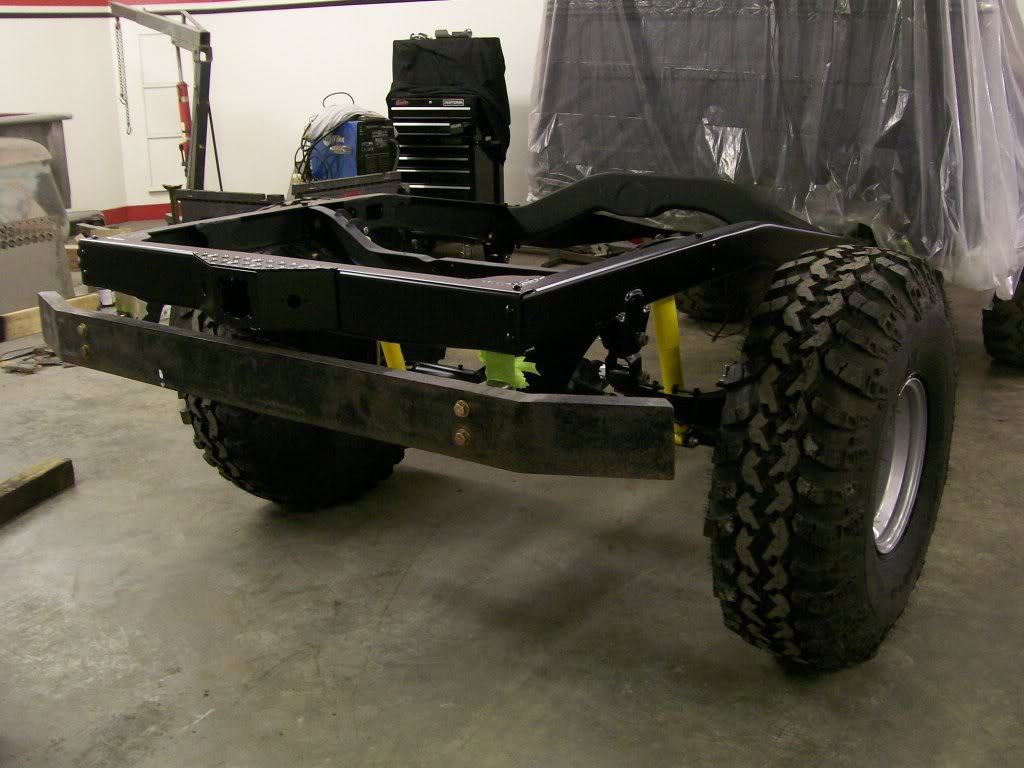
Hi Midnightburn, I think I've seen your work over on old willys truckforum. Some very nice work you've got there.
Actually the large angle iron and the large gusset piece that is attached to it are factory attachments. I used those when I put the truck together back in 1985.
Bumper height has been more of an issue with me than with the two states I've had this truck in. First was Illinois, they seemed more concerned with the frame height under the truck. But in my case since there wasn't truck inspection, I never got checked.
 And yes, when I crossed by a police car I always checked my mirror, no brake lights....
In Missouri there is an inspection. Since the truck is so old there doesn't seem to be a standard written height. The secondary rule referred to where the original bumper would be located on the frame, since the rear bumper is well below the frame there's no questions there.
As for a benifit where it's at now is I tow a trailer once in a while. The trailer hitch drops over a foot as it is.
I do pay attention to pictures of Willys rear ends. hehe. I mean, I notice there are alot of different bumpers available for these old Willys, I wonder if the choices are do to some trucks being built for different purposes back then?
As for my original I have no idea, I would have liked to see the original, I may have tried to recreate it.
Thanks for checking in Midnightburn.
Good catch on the year 1885 I mistakenably posed.
Ha ha ha, I'm laughing in my chair. Hmmm, let' see how I can make this 126 year built sound legit.
Ok, here we go. Way back in 1985 I was working on my truck. (oh, your gonna like this one) outside my shop a Delorean (spelling) showed up. I looked outside because I heard a car hit my mail box. When the dooropened it has Marty Mcfly. I had just gotten the truck running so I hooked up to him with a chain and pulled him up to 88 miles an hour. When his flux capacitor kicked in it transfered me through time also. He mistakenly had the year set to 1885. Being that the chain has made of metal it transfered me and my truck also.
So now I can declare 1885 my original start date.
I'm gonna fix my error in the original post, but your's should show the original date error.

Ultimate classic truck right there
Posted by CCmyVW on 12/26/20 @ 4:17:42 PM