You must be logged in to rate content!
20 minute(s) of a 620 minute read
9-19-2011
The gas I use is a 75% argon, 25% carbon dioxide. I know a large factor in a weld is the pre-cleaning around the area. Although the Mig can burn through alot of crud, it still perfers clean metal to work with.
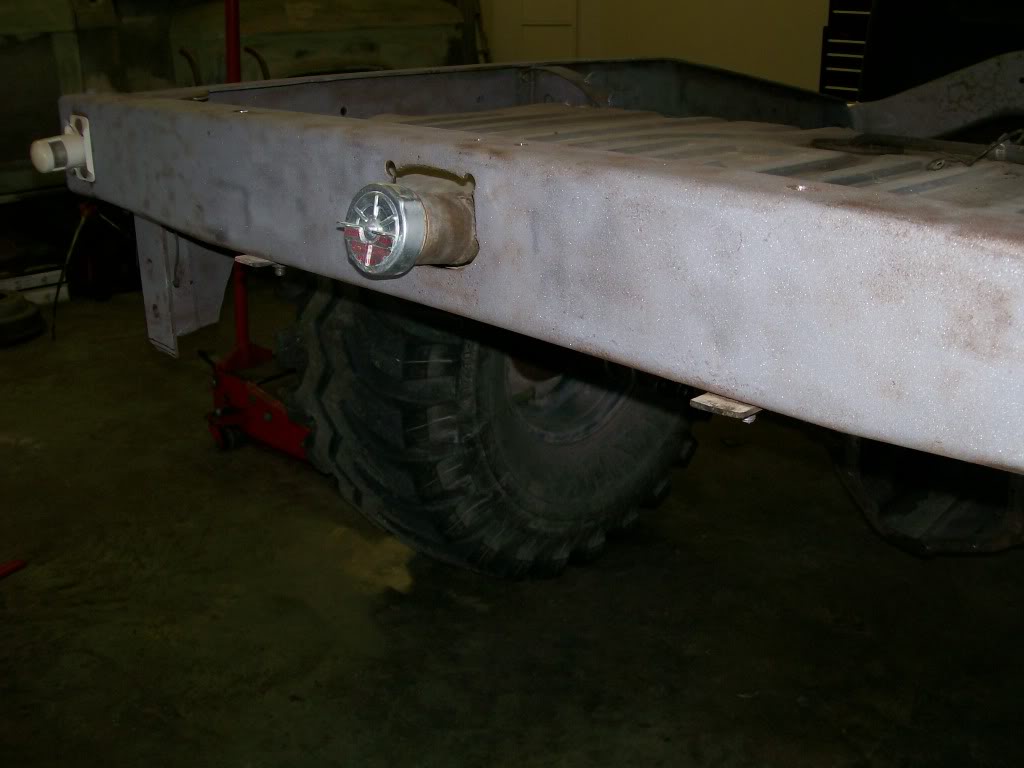
On the build I've had an issue in the back of my mind. In the beginning of this thread I mentioned using a gas tank other than original. The tank had about a 10 inch neck on it originally. Back then I bought a new tank, I cut the neck and rewelded it together only shorter. I may weld alot, but I'm not a used gas tank welder.

Ok, here's my issue, or shall I say issues. 1) I don't like the neck sticking out in the open as you see in this picture. 2) I don't like using a license light that sticks out like the one in this pic. By the way, I think its the third or forth one, I end up breaking them all. 3) I've always had a flat 4 prong trailer connector hanging from the back, very unprofessional.
With one contraption I will solve all 3 issues and gain a benefit when done.
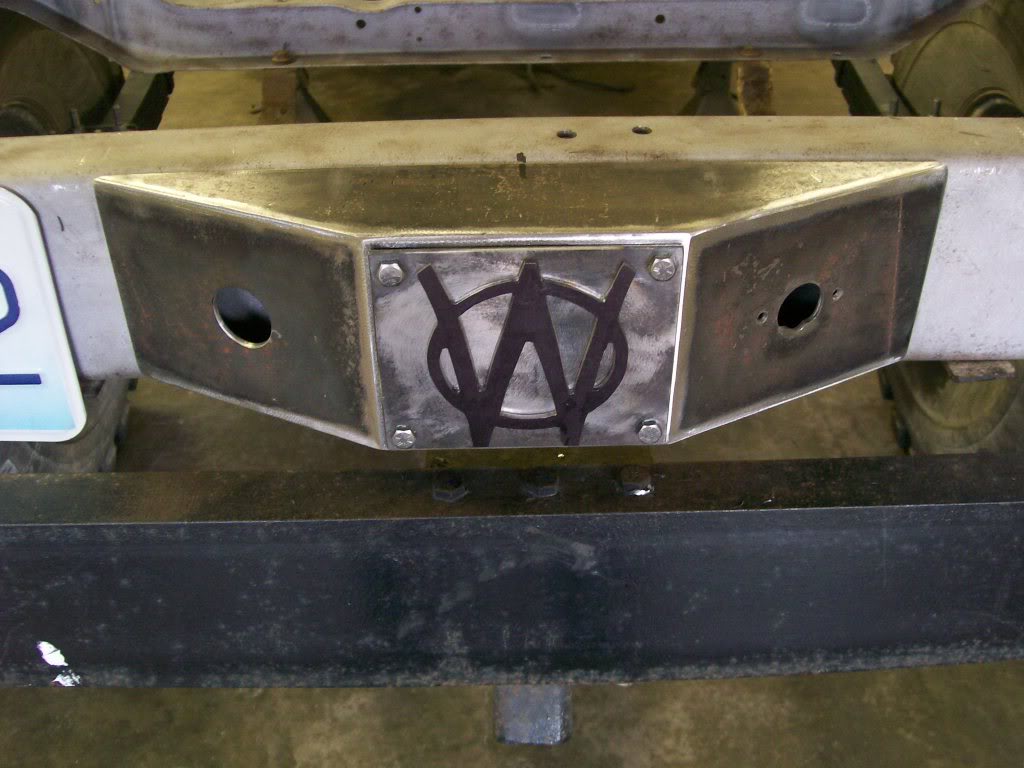
Ok, no suspence, here it is. License light to the left, trailer connector fits in the right side, the whole thing covers the gas tank cap, and when done I'll attach diamond plate on the top and it will serve as a step.
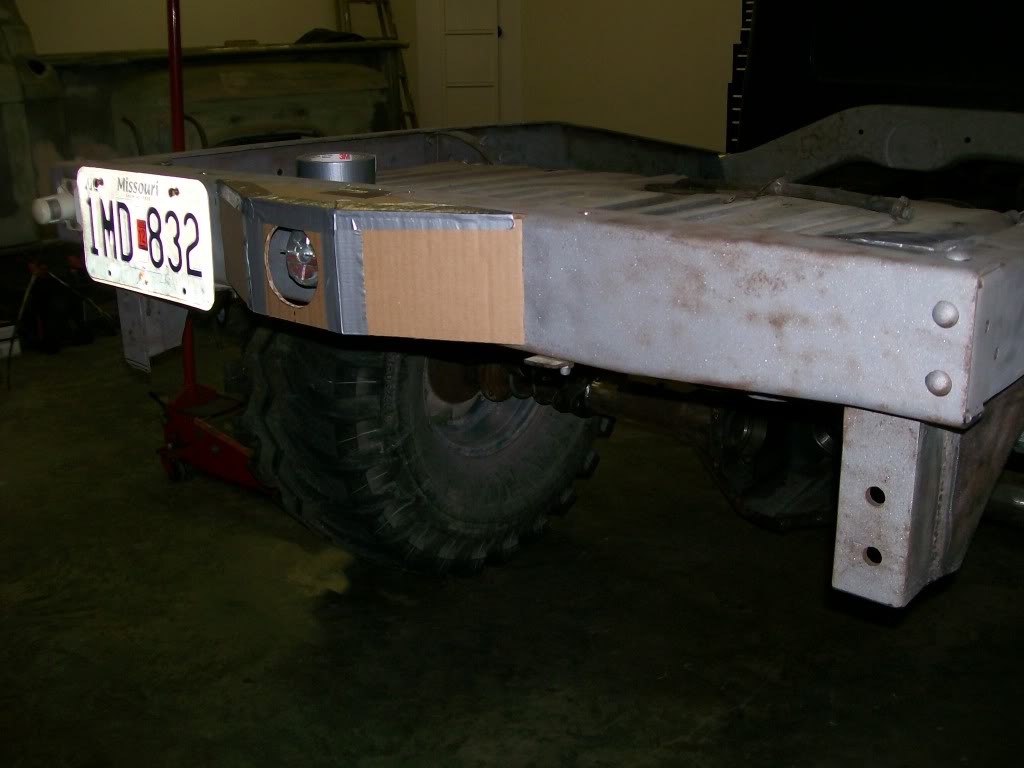
Here's the great part of this thread, step by step fabrication. It starts as a card board template. This not only gives me size and dimentions it helps give an idea of the visual concept before cutting metal. To me it looks like it sticks out quite a bit in this picture. But refer to the picture above. With the rear bumper in place it sticks out about the same so it blends better with the rest of the lines of the back of the truck.
9-20-2011
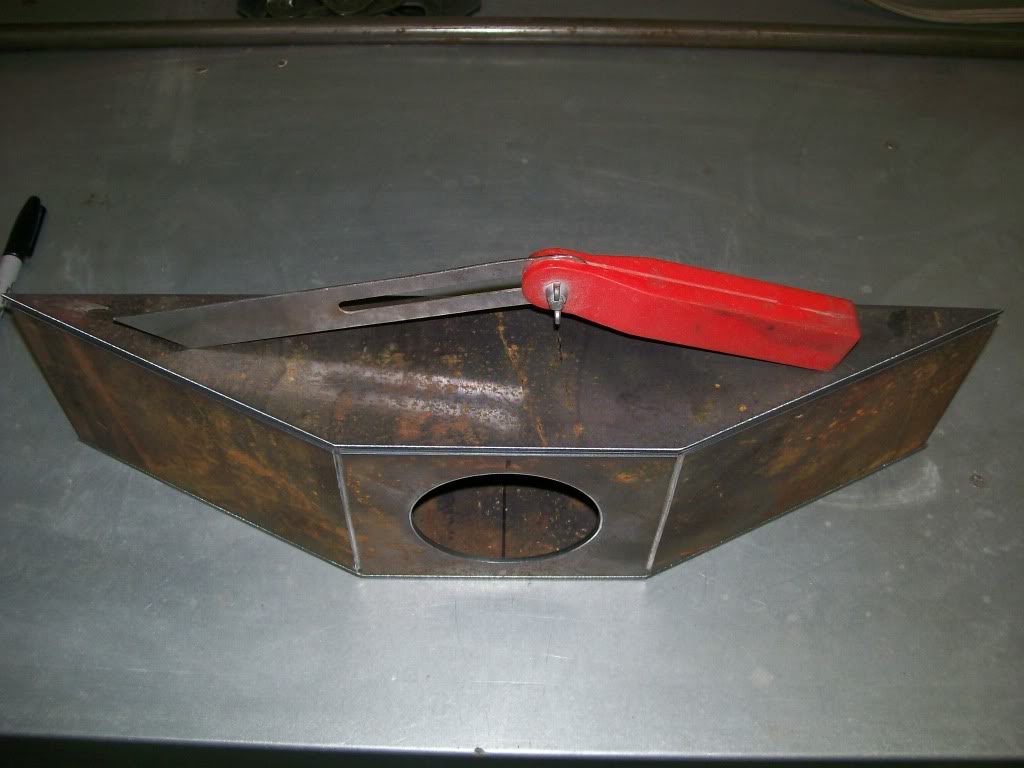
After the cardboard template was made I removed the tape and had the sections in front of me. Most all the pieces were straight lines so I merely measured and put the measurments into the computer and here is the result.
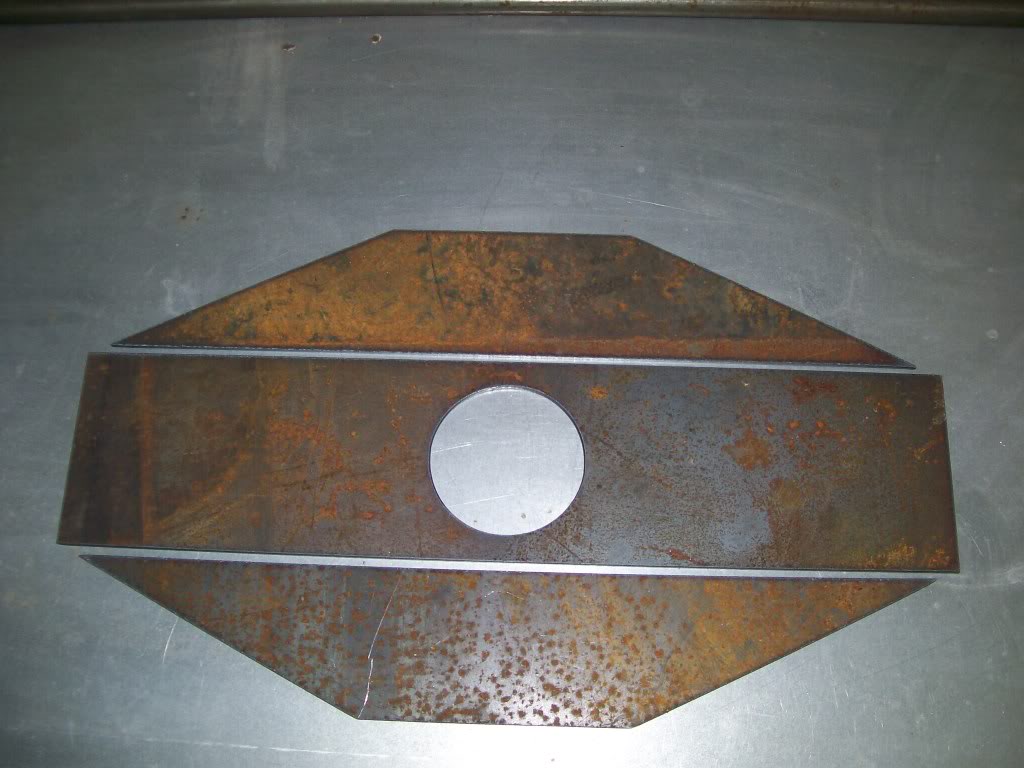
Time to put two angles into the center section. First I want a crisp clean edge at both angles. Second, know this... if the bend is off, even the smallest bit at either one of the two bends the amount I am off will be mutiplied at 9 inches further away from the bend. This bend can not be forced, it has to be a easy to bend situation. If you haven't guessed yet, it's back to the ole' grind with the cut off wheel about 3/4 of the way through and gently bend back the two sections.
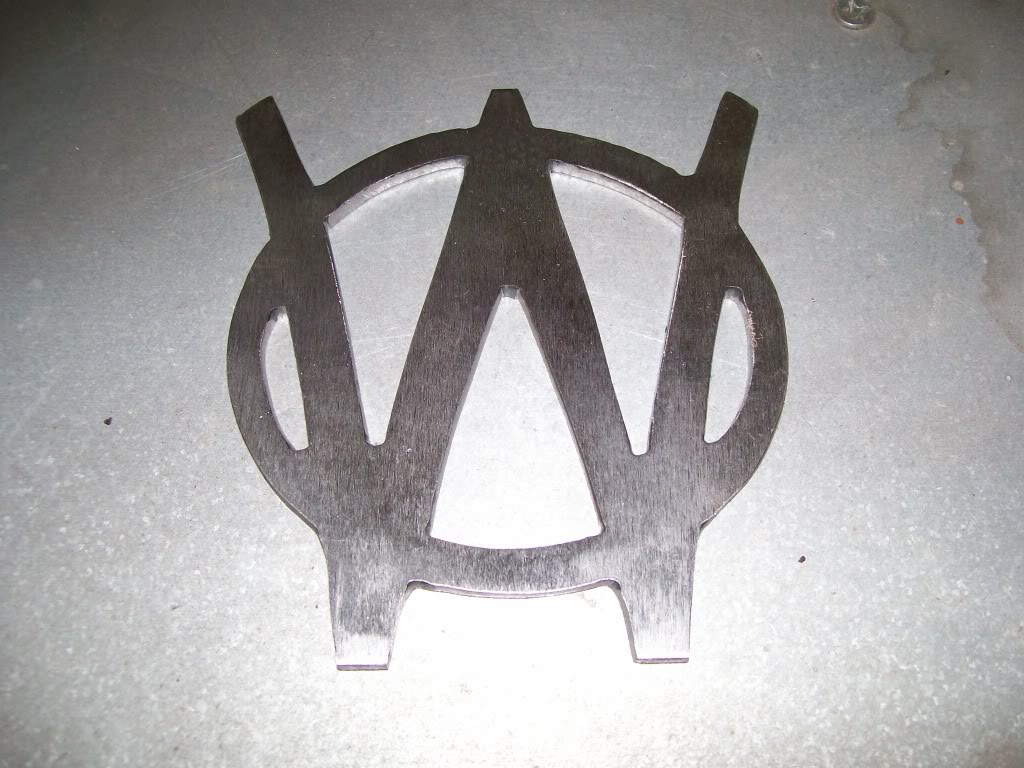
I always pondered if I could make my own emblems. The Torchmate uses a plasma cutter to do the cutting. It creates an arc that melts the metal and at the same time it blows air to blow away the melted metal. Although it is rather accurate, for small cuts such as this emblem it requires a little filing and grinding to clean up all the edges. Otherwise, it is a doable thing to do.
9-21-2011
I'd stick with the chrome for this one for one reason. I've already purchased new emblems for the rest of the truck, they are a beatiful chrome finish and they would all match.
I have seen the nickel plated stuff. Actually on a truck that is to represent the idea of big and tough, nickel would look good on this old truck.
My next issue, down here in Missouri I don't know of anyone near that does this plating, I probably have to send stuff out to be done. Anybody here have any plating done personally? and where do you send yours?
9-22-2011
I have no idea why but the Photobucket thingy is not uploading right now, so I have to take the pic right from the computer, it's huge. I believe you can click on the image for a small, more resonable picture.
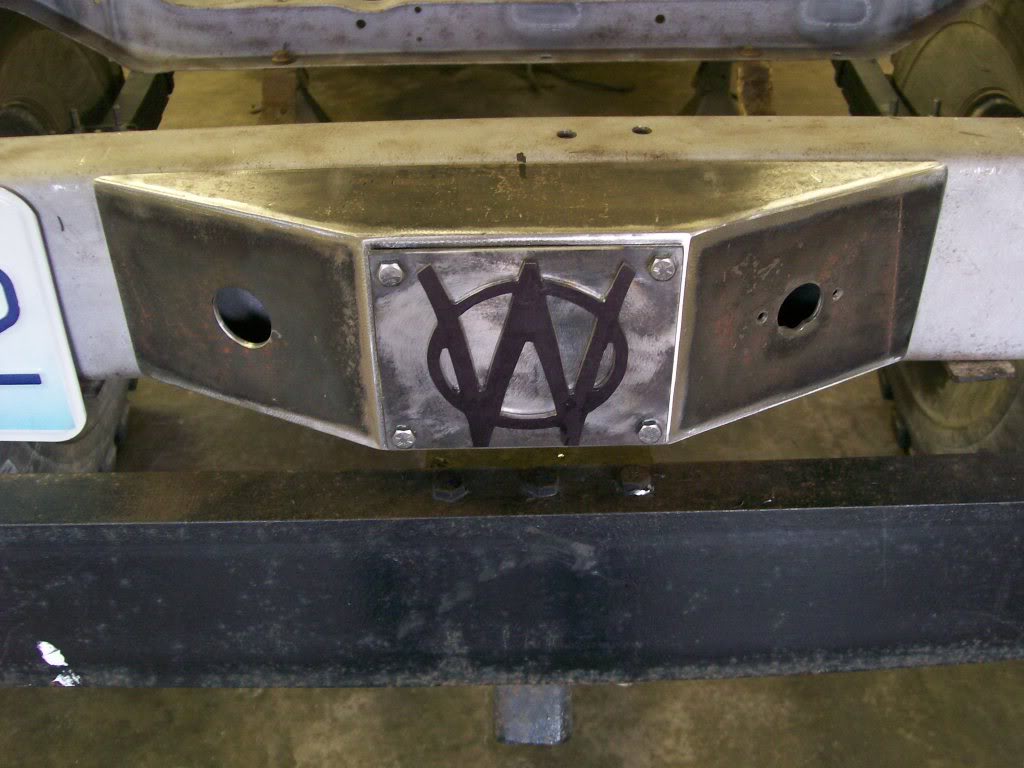
Some have shown excitement about the Willys emblem I made. Quite frankly, so am I. Yes, I used the torchmate. I still had to clean up the edges by hand. Once I was happy with the emblem I had to have a way to mount it, 3 screws would be fine.
At the most central areas of the emblem I drilled 3, 3/16 holes. Then got 3, 3/16 screws then cut the heads off the screws. Threading to nuts on the headless screws. I put the thread with the nuts in the vice being careful to keep them facing straight up. I can still spin the thread in the nuts so I made it so the thread was sticking out the top. then layed the emblem over this threaded piece. The threaded piece came about 3/4 into the emblem. Then using the Tig welder, not the Mig this time, I melted the thread and the emblem material together, once melted I dabbed a little welding rod in to bring this weld area flush with the emblem.
Hopefully Photobucket, will be working again soon.
9-23-2011
Yes, that red one is an eye grabber. I like roller top edges and the fendersare like original Willys truck.
Photobucket is up and working again, we're back in the saddle.
This first pic is the gas cap cover again. I just wanted to cover the means of opening it up to get to the gas cap. There are 4 bolts on the outer parimeter of the square where the Willys emblem is. Acually they're fake. I thought I'd add them to break up the area, visually speaking. They're just bolt heads welded on.
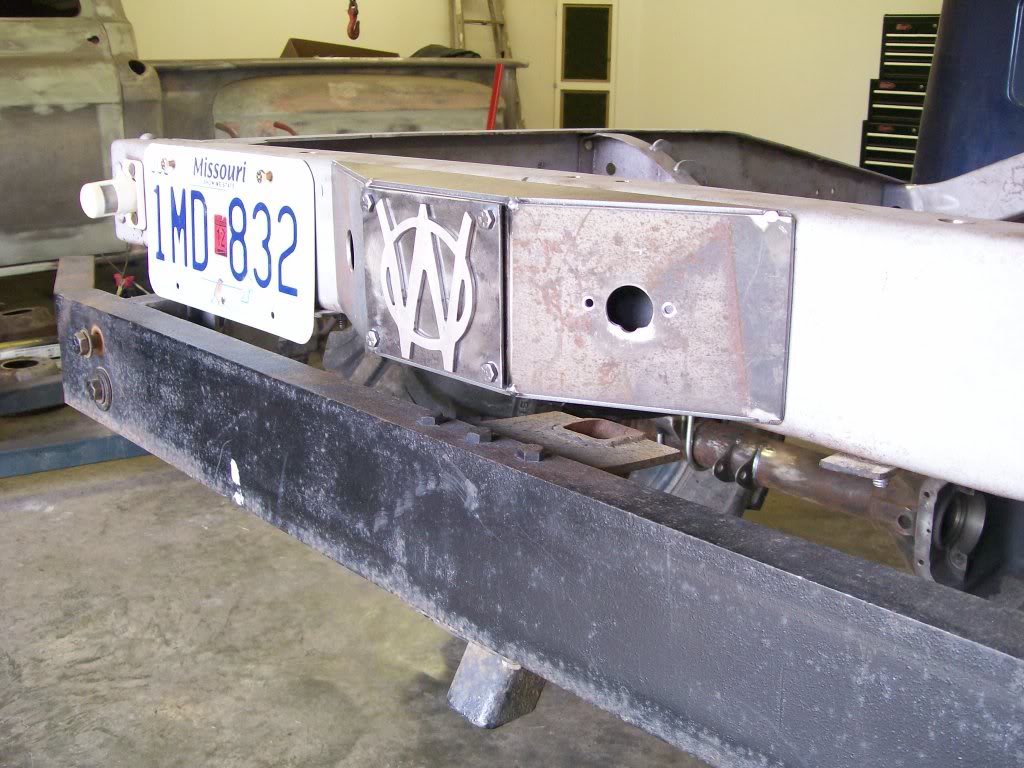
There is one thing I give vehicle manufactures credit for. It's one thing to create a car, it's another to figure how to mount and bolt all the pieces together. Especially on body panels where the fasteners have to be hid. On the other hand, sometimes manufacturers piss me off with how they fasten things together.

 I wanted to hide the mounting bolts for this cover piece. Problem was, the gas cap and neck are in the way on one side, and the gas tank is in the way on the other side. This I enjoy doing, assemble the pieces, then weld the head of the bolts to the frame. This takes care of the gas tank side. For the front I had to make 4 notches that allow me to use a flexible socket and extention, now I can install the nuts on this side.
 Done deal.
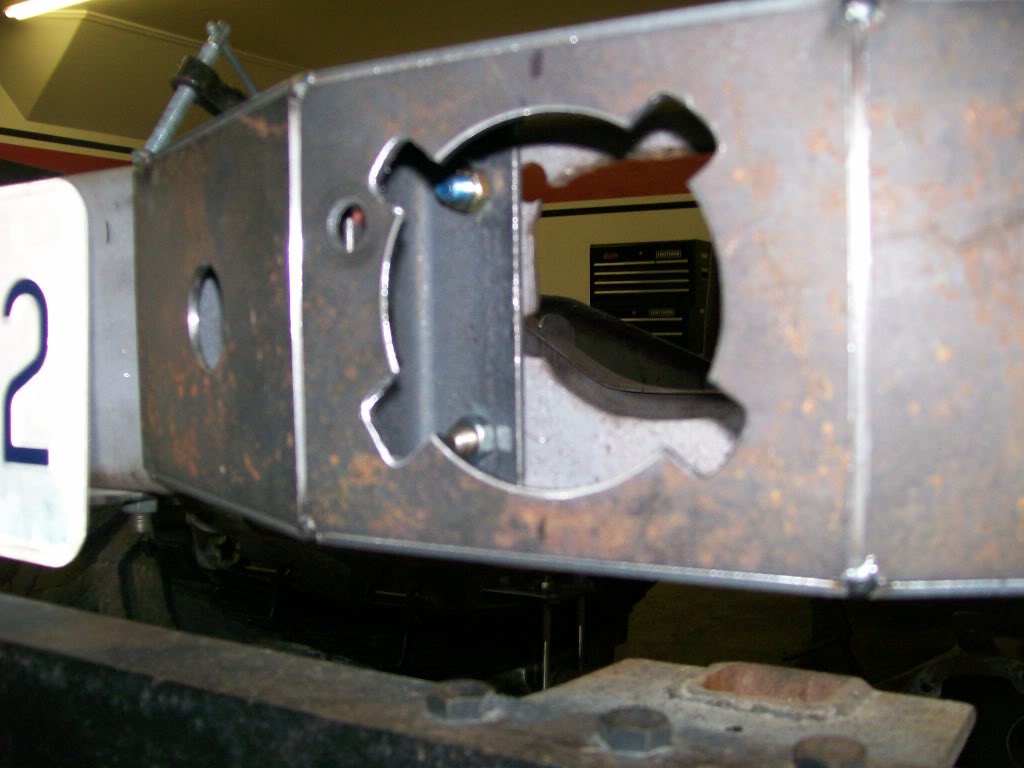
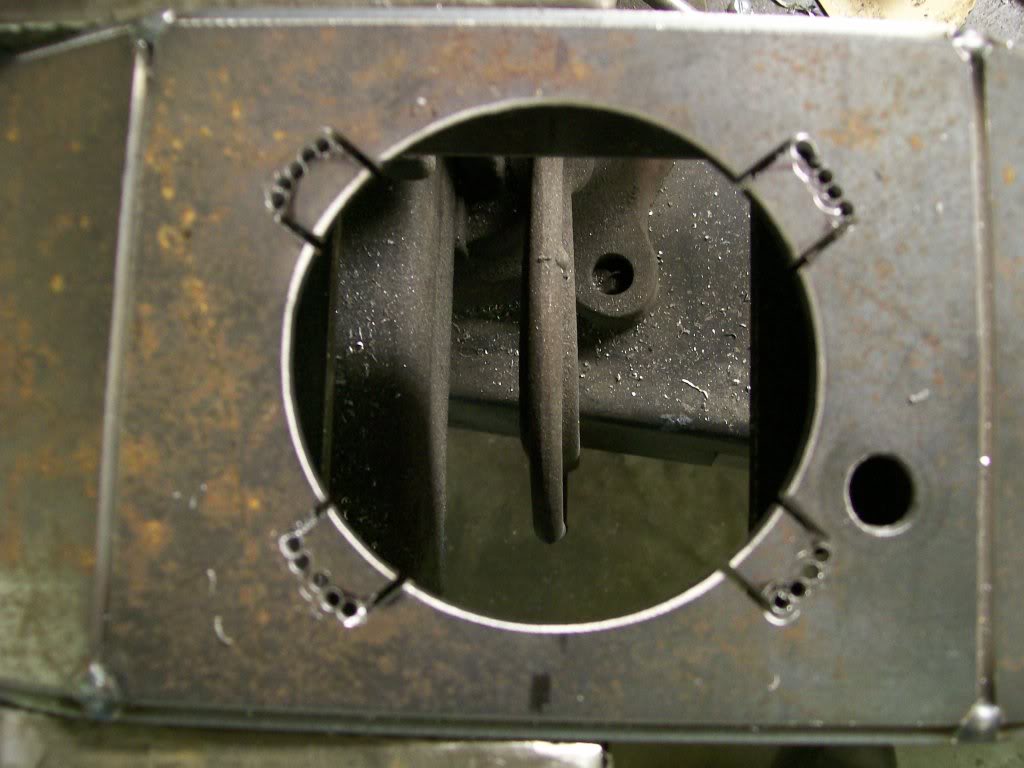
Here's a tool trick. I had to notch, if I knew this to begin with I'd have the Torchmate make the notches, too late now. Ok, mark you notches, and cut. I used the 3" air cutoff wheel. First I cut to the depth. Now the cut from side to side is tricky. It's easy if you don't mind a mess but I don't want a mess this will be seen later. I used a 1/8" drill bit, a nice sharp one, then drill close holes from side to side, then with pliers, break off the tab. Now a little filing or ginding and you got a clean opening. This procedure works great whenever you have tricky cuts to make.
I just might follow the link, I'd enjoy going through someones build that has alot of Fabrication work. Thanks oldtime_ironman.
Since the Photobucket is working right now, let's keep on rolling along.
I'm gonna take care of the welds and cleaning them up with the same technique as the seemless welds I've done so far.
Although it does seem like alot of time to weld this way, if you want a seemless weld this will save time in the long run. These are stitches backed up on top of the one before it. When I put the three pieces together that made up this cover, I did so in a way that they all touched inner edges so they would create a "v" that is perfect for welding with good penetration. I have already done 1 to 1 1/2 inch welds on the inside of the cover to hold everything securely. Each one of these mini beads has good adhesion, but you have to stop the weld just before the weld really melts in, I need the build/fill. Also, if I penetrate too much I am likely to undercut the material where the weld meets it, then I'd have to go back a fill the undercuts. Plus now all the grinding is on the corners, as I mentioned before, corners are way easier to smooth seemless, than a flat area.
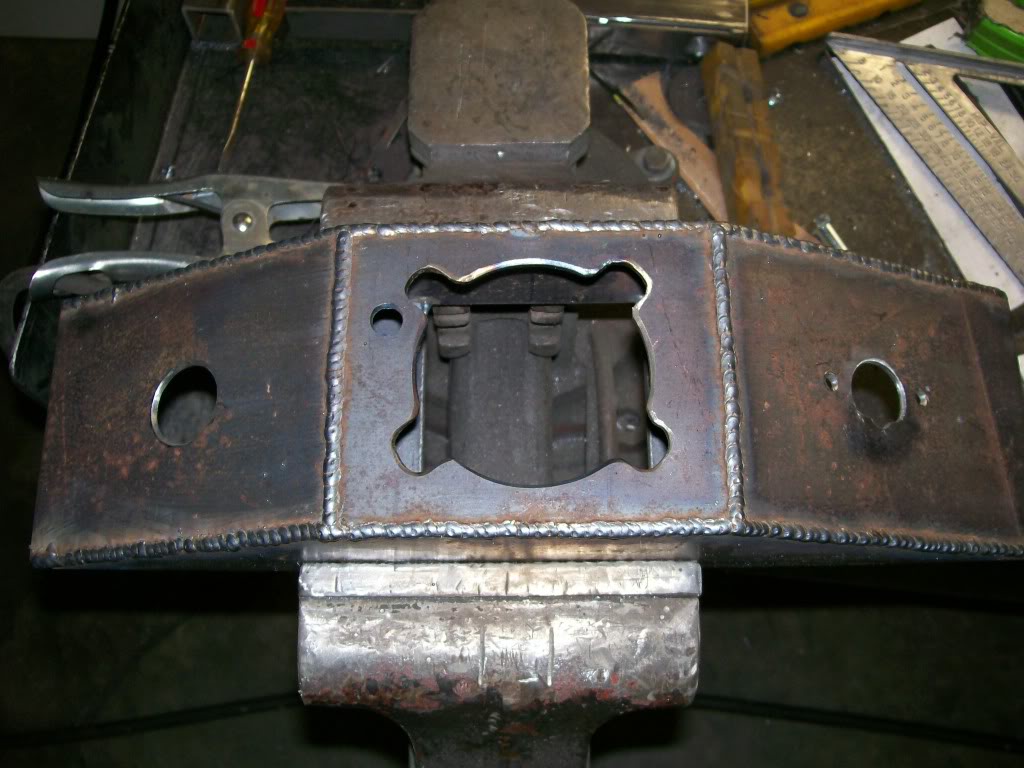
I think I already posted this one but here is the end result. To have this primed and painted should require next to nothing to get it smoothed out and looking good.
9-24-2011
Alrighty then, let's crack this thing open...
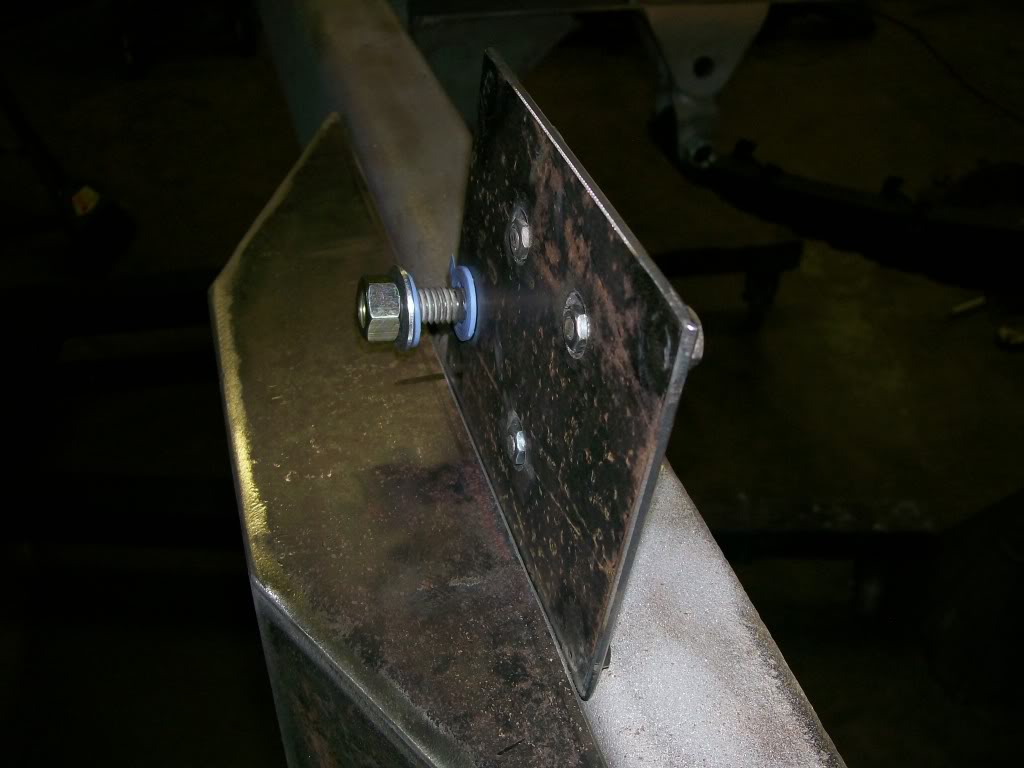
In the last picture you will a hole along with the circle and the four notches you'll see a 7/16" hole. With the gas cap cover plate, in the same location, I drilled a hole. Then took a 7/16" bolt I cut the head off it, and just as I did with the emblem and it's attaching studs, I welded the 7/16" threads to the gas cap cover plate. Now get some plastic washers, in his case I used oil drain plug gaskets, and put one on the cover stud, put the cover in place and put another plastic washer on the threaded stud. Then install a 7/16" flat metal washer, this metal washer distributes the pressure on the plastic washer evenly. Then the key is to use a nylon lock nut, with this type of nut you adjust the tension to determine the amount of drag when opening the cover and it won't back off over time. Then weld a small tab on the main gas cap cover that mounts to the truck. Locate this tab so it will be a stopper so when the cover plate is in the closed position, it stops where it is supposed to and doesn't go beyond this point.
Here's the cap cover with it's washers and nut. Note... the nut shown is a standard one for fabrication, the nylon lock nut has like a crown on top that holds the nylon lock piece.
Here's the unit with the license and the trailer connector in place.
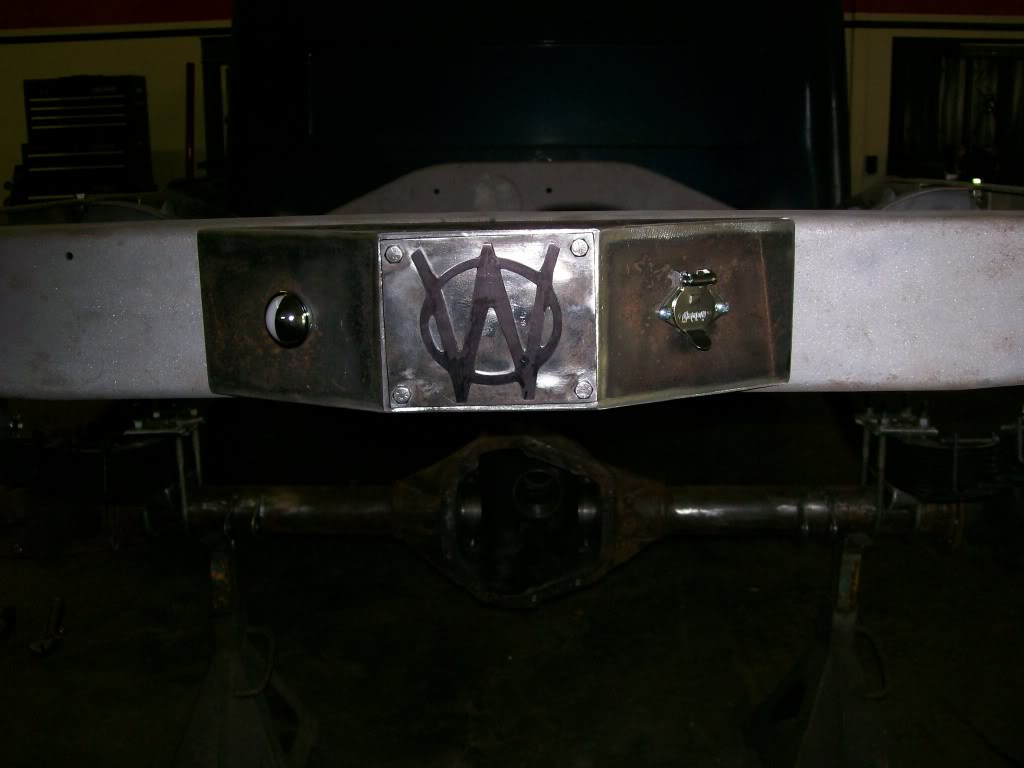
Fill'er up with ethyl please. You younger fellows wouldn't remember ethyl. She was a premium gas back in the days of gas wars.
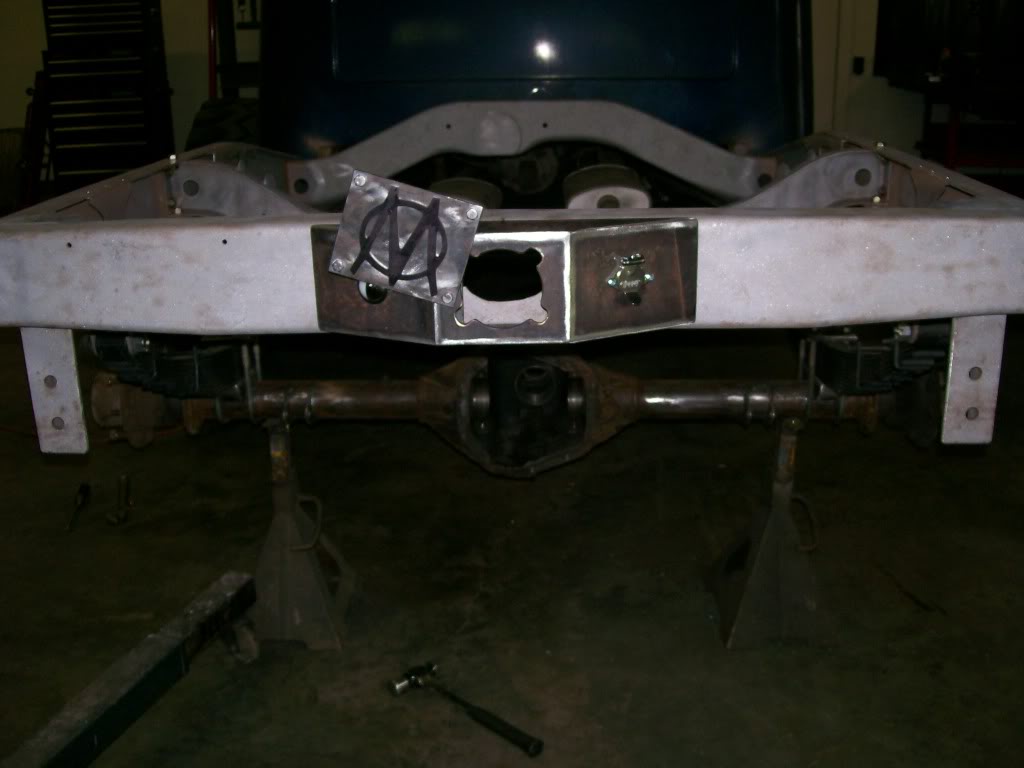
9-26-2011
Well, aint we all having fun. This is great.
Tonight I'll start with an old design, vs a new design. Nothing fancy.
Gas tank mounting straps. The top strap on the right has about 3 inches clearance between the end of the strap to the cross frame it mounts to.
Now the left side strap is within 3/8" clearance, as a matter of fact you'll see a 1/4" thick washer between the strap and the cross frame.
The old way was more of a pressure fit. I had a piece of threaded rod reach from the frame to the strap. Then with a couple nuts located on the threaded rod I held the treaded ro tight to the frame then higher up a couple nuts locked on to the strap. Yup, it held the tank in place, but I wanted to upgrade while Im here.
The new fit will be a solid lock to the frame itself. I simply added a couple inches to the end of the strap, while shaping it downward. Since I don't want later to assemble every thing and for some reason there is space between the strap and the tank, and the tank isn't secure yet.
 I fabbed this whole situation with the 1/4 '' washer on the frame the whole time. This way I know I've built in some flexability for later. Now if the strap gets too tight before it reaches the frame, I'll simply put in a couple shims/spacers and all will be secure and tight. You'll also notice the extra material on the bottom straps, don't worry, they're shortened, and fully sandblasted at the moment waiting for primer.
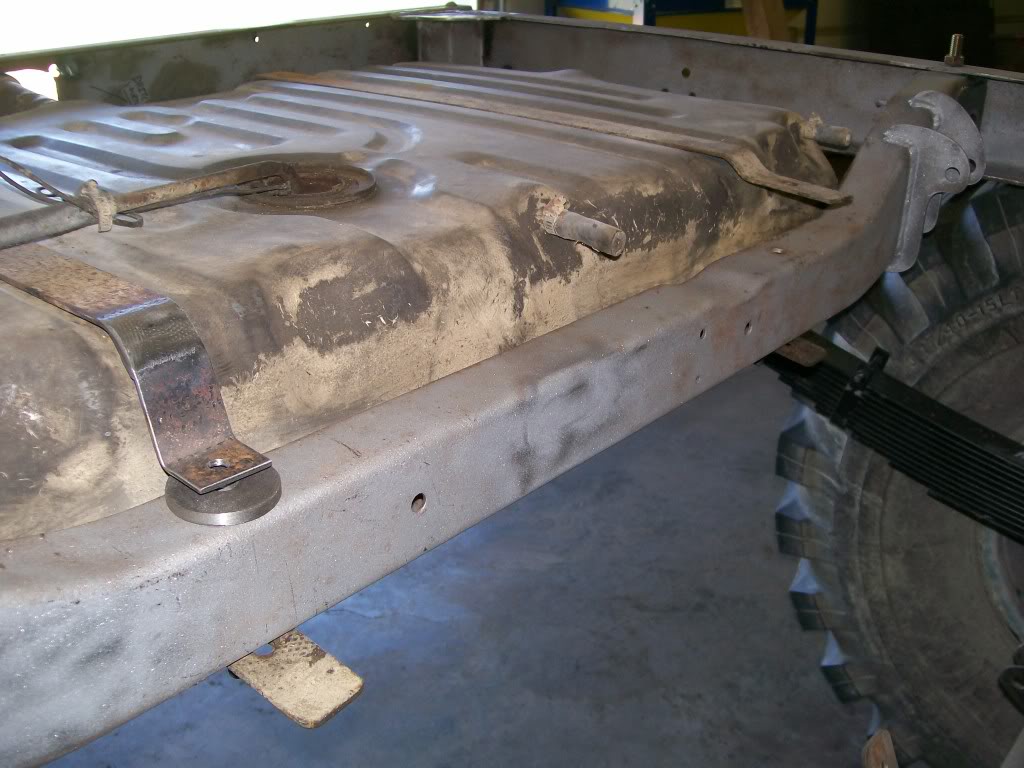
By some of the replies I just read, I know some have recently read the 28 pages of this thread. Some where during the first 10 pages there was conversation of "fish plates". With my dial up it takes forever to find the page again, but to who brought up the subject, I took it to heart.
As this work on the frame is nearing the painting process I really start to reconsider all the possiblities since I'm here right now. The plates I put in the sides of the frame I feel confidet with. Once the x braces are welded in they will support the frame as to where there will be minimal flexing. Plus the side ones are well enclosed.
It's the bottom pieces I welded in. Those plates are about 2 inche wide and simply welded end to end, and there will be alot of flexing at these points. Plus, the rear part of these plates end almost right where the weight of the truck, plus anything I load into the bed transfer to the frame. Sooooo, I fish plated, With this picture you can see the front fish plate, it over laps the old and new frame about 1 1/2 " each. Should add alot of strength.
The rear one I could have done the same but I had an opportunity to go one step further. By stretching the length of the fish plate I not only welded the fish plate in, I also brought it far enough forward to bolt the spring mount directly to it for a double plus.
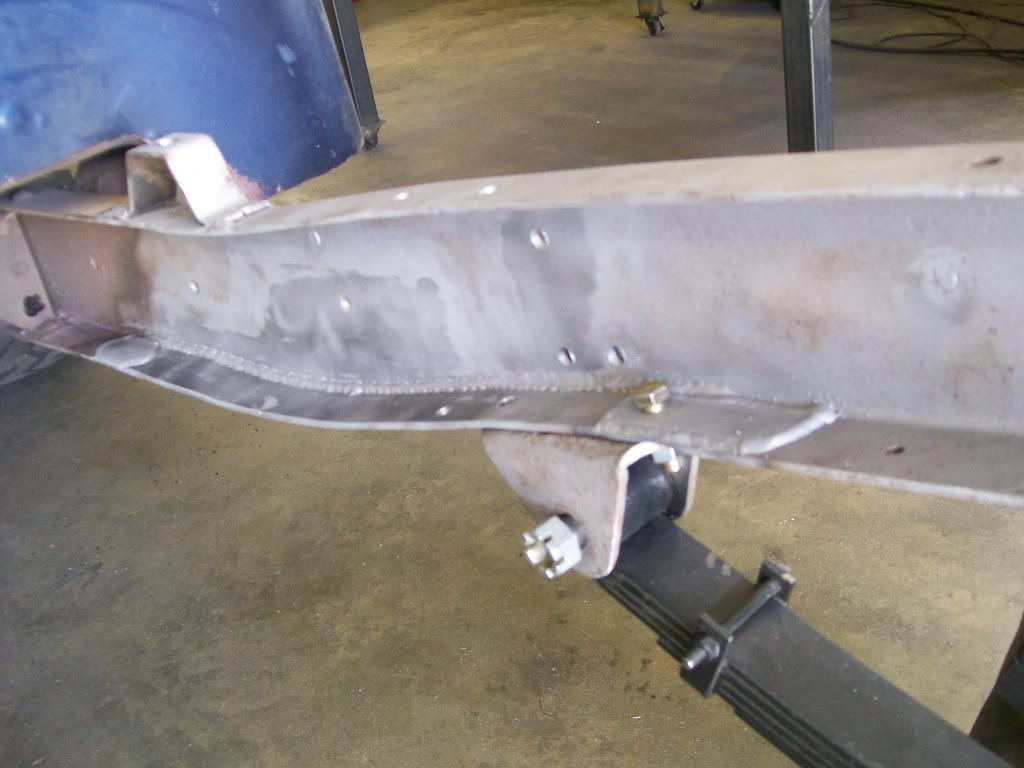
9-27-2011
Last week was time to decide I've done enough welding on the frame. I see some of the pics from the start, shooooey. This has certainly been a project of patience and fabrictaion. Some times you just have to jump in to a project. You don't always know where it's gonna take you, but there's nothing more uplifting than going through a photo album and seeing what was, and now, what is.
For most of the sanblasting I was able to roll the truck backwards till the rear frame stuck out far enough. This time I wanted to the areas that the spring mounts bolt to the frame. Sooo, it's down to a completely naked frame, including the cross frame sections too. I'd wager to say this is about as clean as a 61 year old frame can get. Well, the rear section anyway.

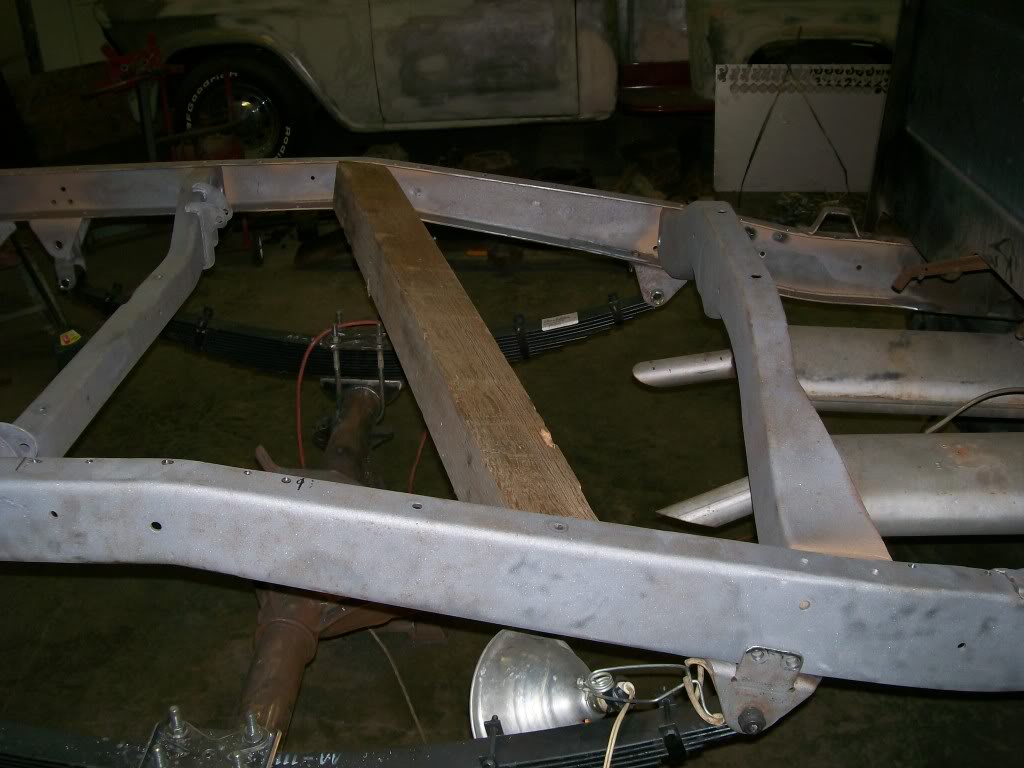
For those who recently went through all 28 pages you may remember me being curious if the main cross frame will fit when it's back in good shape again. Well, once everything got fitted and strong again it became aware that I would have to beat the front cross frame back into place. The rear one where the shocks are gonna mount now is no problem, but for the front one I ended up using a 4x4 post wedged between the frame rails to gain some room to reinstall the crossframe. Also looking closely at this next picture, you notice a copper color every where pieces are either weld or bolted together. This is a weldable primer. I use it whenever I weld body panels together on cars. Usually after welding rear quarter panels on, you can't spray anything on the weld later to prohibit the weld area from rusting. With this spray, it stays where you spray it so there is protection from rust later. Now I hope this will slow the rust issue in hidden areas here also.
9-28-2011
I also hate sandblasting, yuck, sand gets everywhere, it always finds a way to get to bare skin, the face sheild turns to a blur too fast, the sand always gets under the head cover, yuck.
On the other hand the finished product is great, perfectly clean metal, so I bear with it for the results.
The black beauty blasting media is a pain, it does have small specks that are large enough to clog the tip, this sucks, you have to dissasemble and clear it out.
When using the fine silica sand, it's issue is the smallest amount of moisture in the air line causes the sand to glump up in the tank, then it doesn't flow out the tank valve as it should.
In this , while blasting, usually you can reach over and close the valve that deals with the air flow. Not the main inlet valve, not the sand regulating valve but the other one. By closing it off and on real quick the pressure in the tank raises for a second and will force the moist glump to push through the system. It like kitty litter and moisture, it glumps.
It'll shoot a large amount of sand through the hose for a second, then you'll gat a clean shot again. But atleast you don't actually have to stop. It takes just a few seconds.
Hope this helps
No, you are correct, the bottom is the sand regulating valve. What I am saying is...
I know the bottom one likes to clog, so the path of least resistance is for all the air pressure go through the air valve outside and around the tank. So sometimes instead of messing with the bottom valve, real quickly turn off and back on the air valve. This will not allow the air to go the path of least resistance and you'll force the tank pressure to rise for a second, then the sand in the tank has to go through it's valve when the tank pressure rises for this quick second, usually clearing the clog. The hose will spit a couple strong shots of sand and be back in working order in no time.
Otherwise I found messing with the bottom valve it takes more time, I lose more sand, and I have to reset the sand flow setting again.
Good luck

Ultimate classic truck right there
Posted by CCmyVW on 12/26/20 @ 4:17:42 PM