You must be logged in to rate content!
27 minute(s) of a 58 minute read
12-25-2020
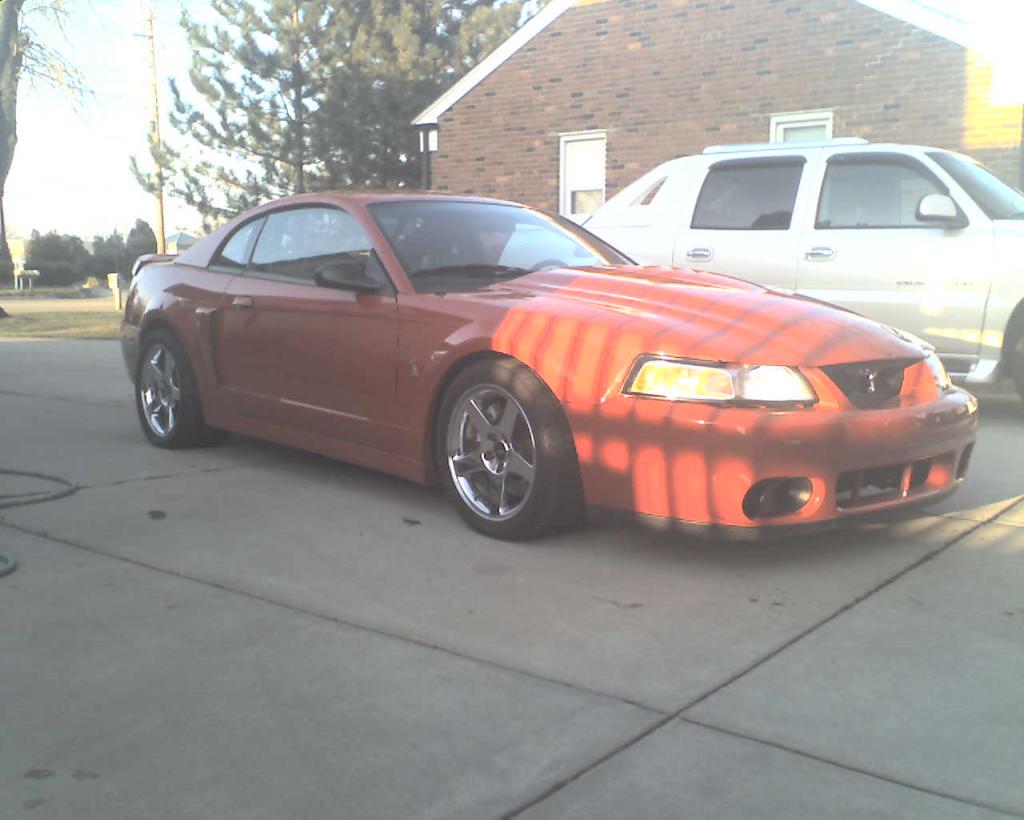
88mm Turbo 5.4 Build by Z06KILLR
Compliments of Z06KILLR @ www.corral.net
5/31/2008
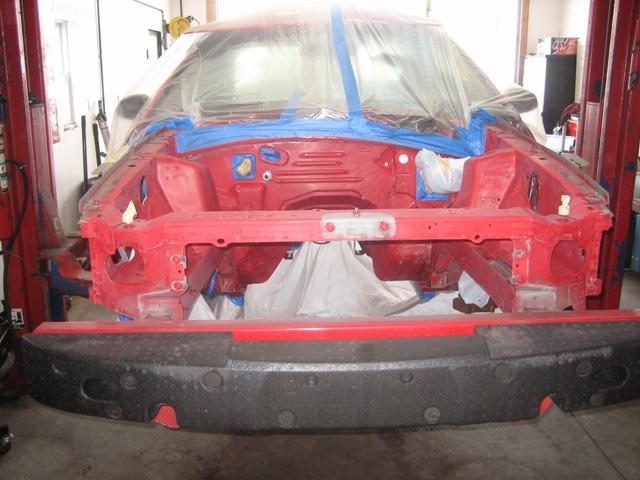
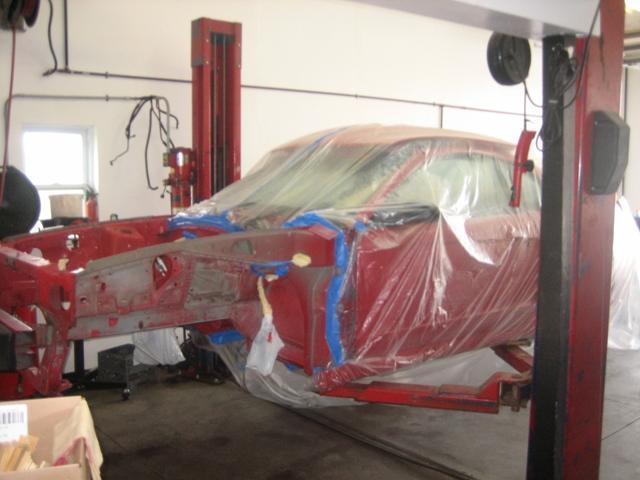
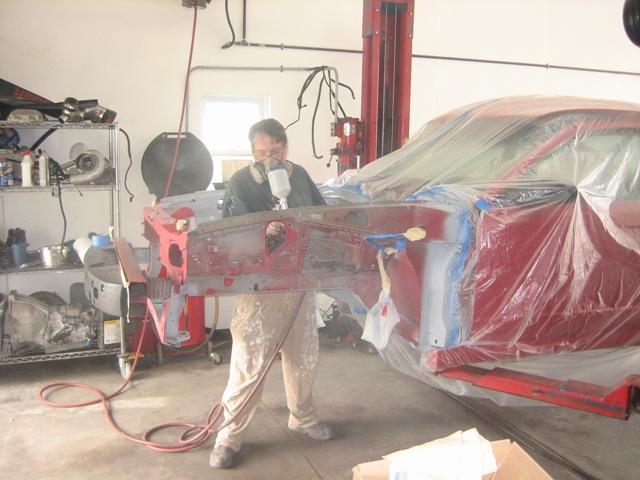
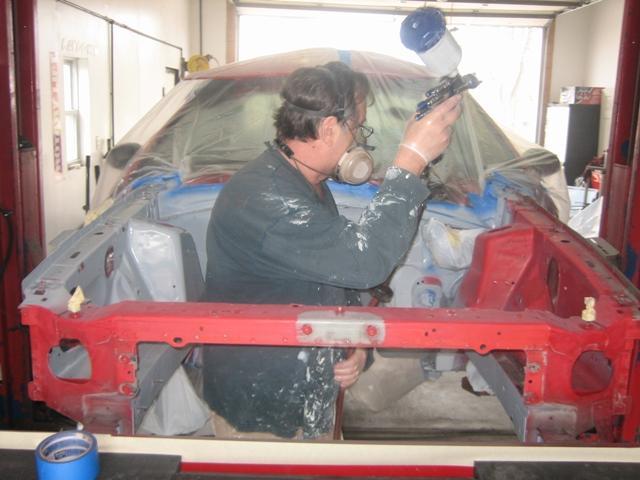
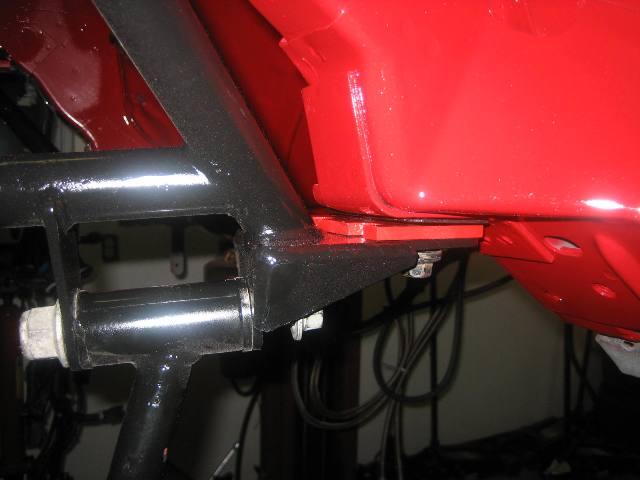
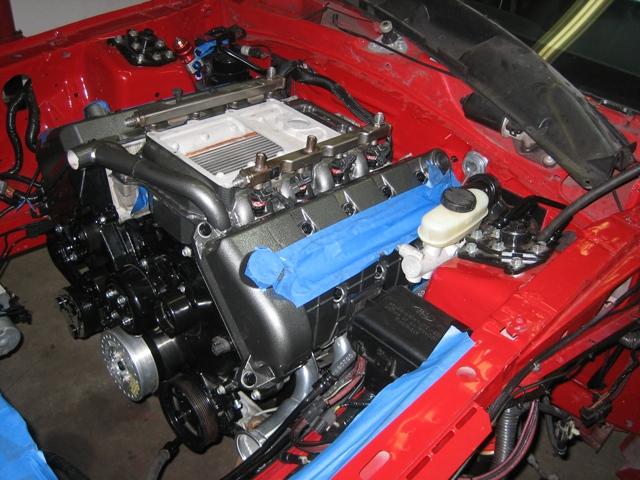
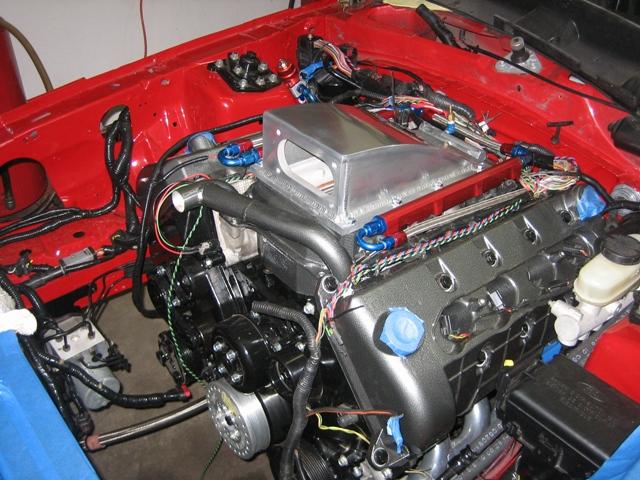
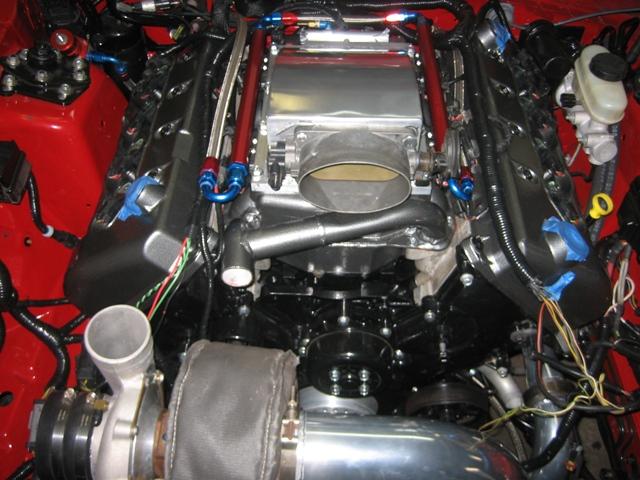
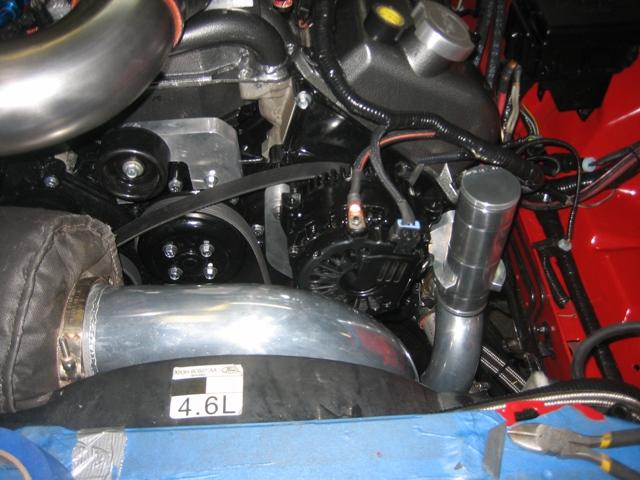
Here are some pictures of the build I'm doing. I pulled the old combination out and stripped the engine bay so it could be repainted (primed, base, clear) while I waited for the new engine. I'll be moving as much as I can out of the engine bay inside the fender wells to help clean up the look and add some space (boost controller, sensors, senders, evan pump, etc). I'm also switching to a 4R70W transmission which I'll share the process of (baumanator installation, wiring, etc).

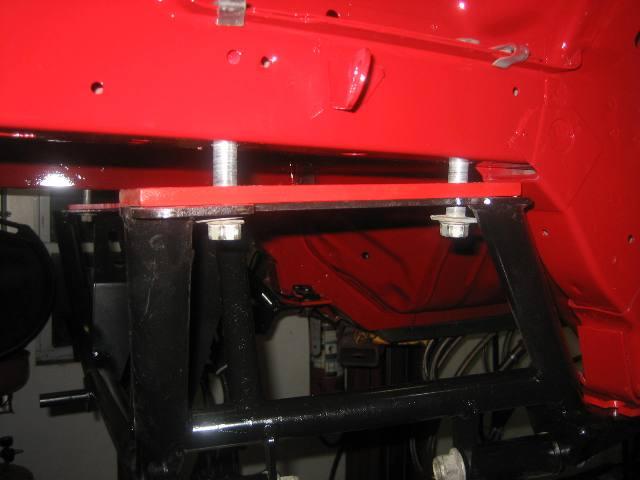
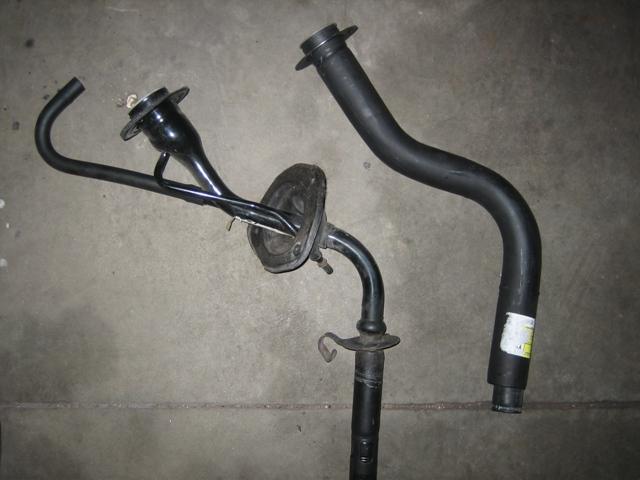
Here are the spacers I'm using the help drop the K-Member in an effort to create space for the larger 5.4. They are 1/2" thick.
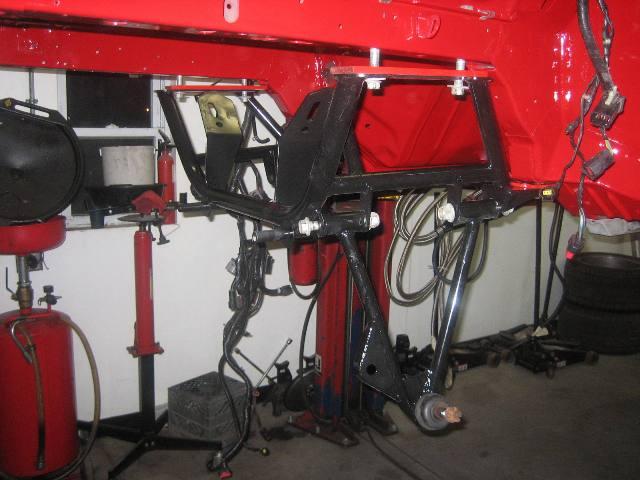
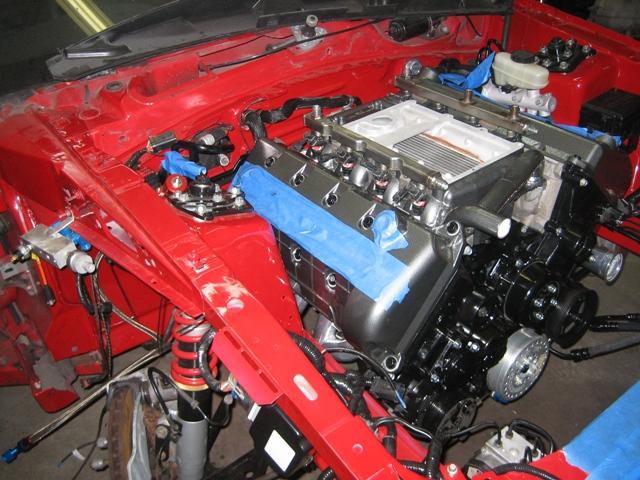
Here are some finished pictures of the engine bay. I'll add some pictures as it comes along...I hope to have it done within a month.
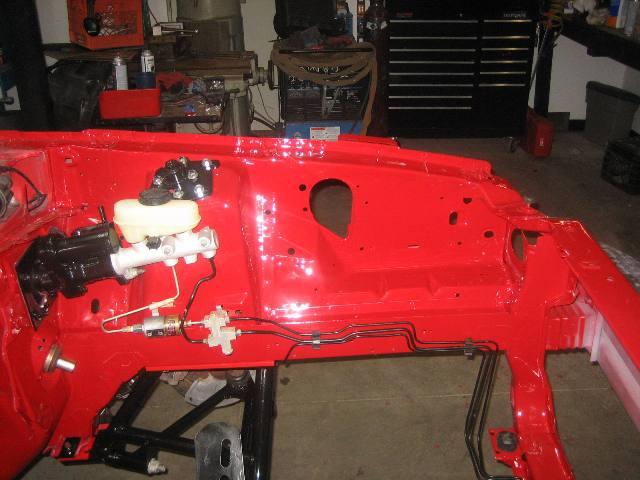
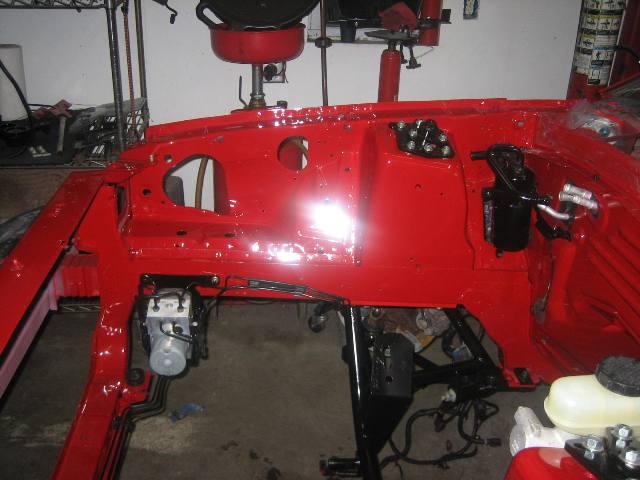
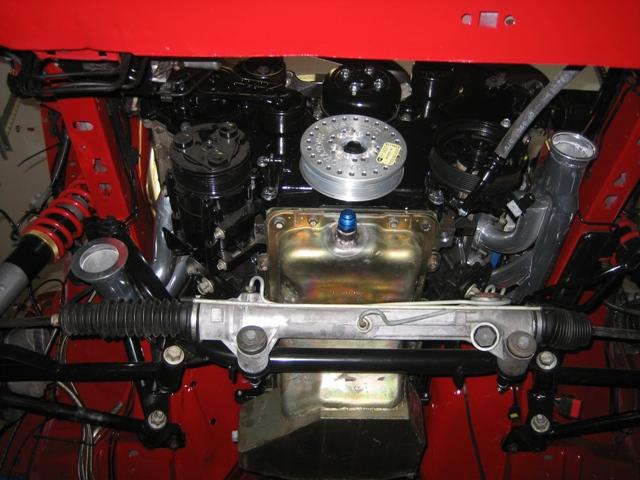
I had a friend make a new alternator bracket, and will be moving/replacing the power steering reservoir. The basics of the setup are the same (displacement, heads, cams, intake, intercooler, etc) but I'm just going through and making everything pretty/perfect.
I wasnt sure how this motor would respond to turbo boost as it was all new to me...but now that i'm sold on it it's time to go through it all and make it right.
6/10/2008
Got the weldon pump, weldon pulse regulator, hobbs switch for WOT trigger for weldon, trans cooler, and intercooler pump wired up.

Dedicated 20amp relay with 10awg wiring for the weldon.
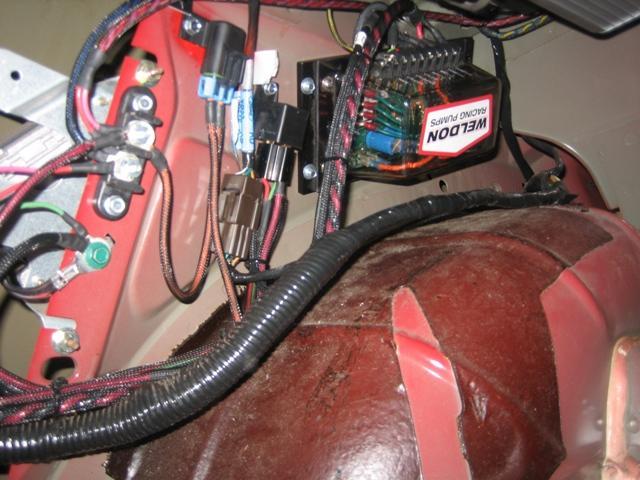
Here is the controller for the weldon. There is a dial that controls the pump for regular driving. A hobbs switch activates it into race mode (via the blue/yellow harness) when the car reaches 2lbs of boost. This hobbs switch will also turn on the crankcase pump.
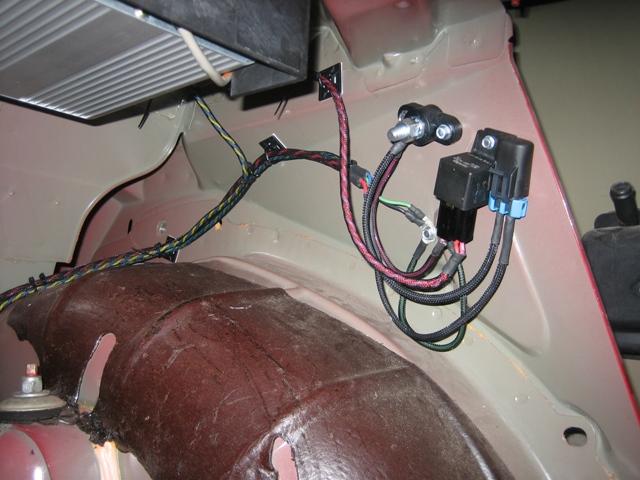
Here is the wiring for the intercooler pump and trans cooler. These will both be mounted on the bottom side of the car (no exhuast on this car, turbo downpipe dumps up front)
6/15/2008
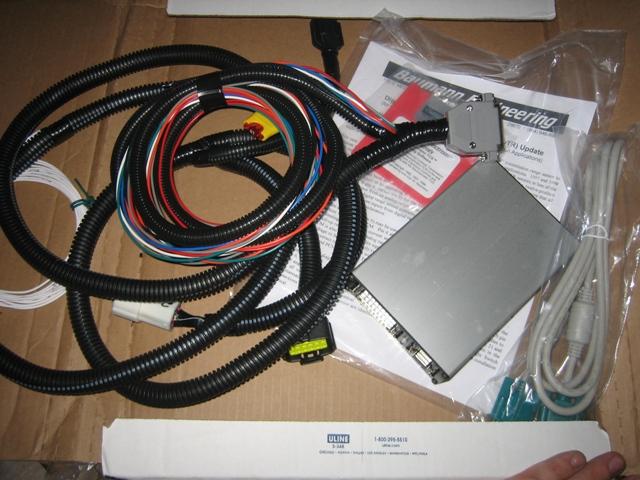
The Bauman (stand alone computer for the 4R70W) came in, along with the twin disc precision converter. It should rev to about 4500...
I soldered the wiring up for the weldon and completed installing it. Note the rubber pads inbetween the weldon and the mount, and the mount and the body. This is ideal for keeping the noise/harmonics to a minimum
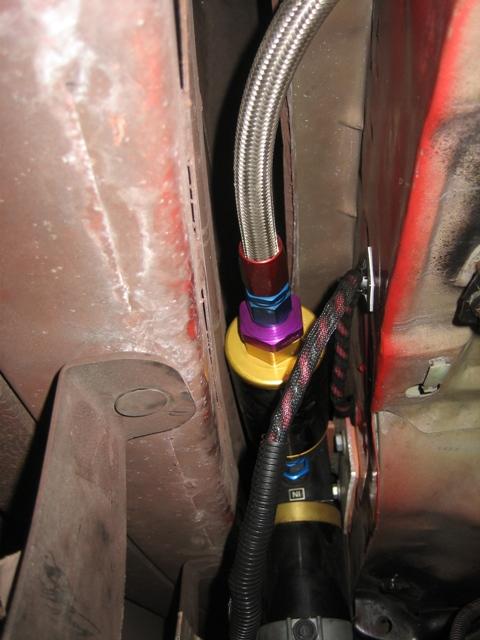
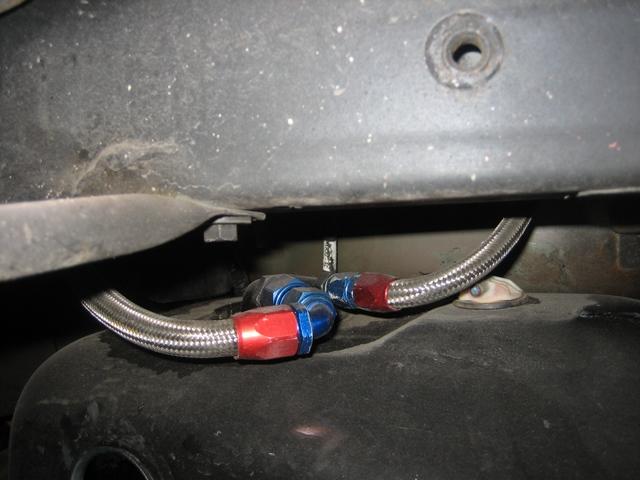
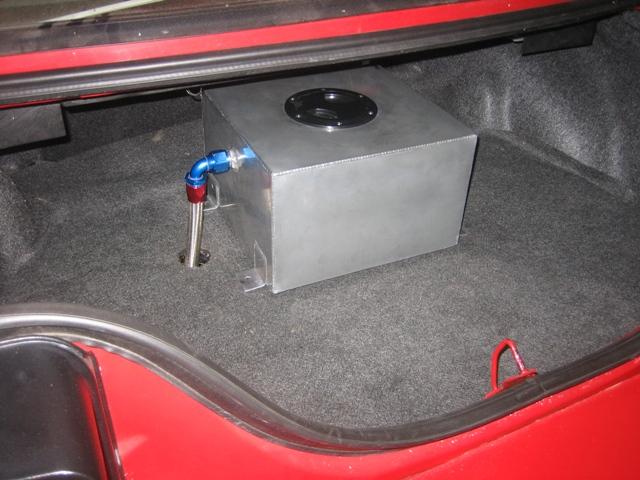
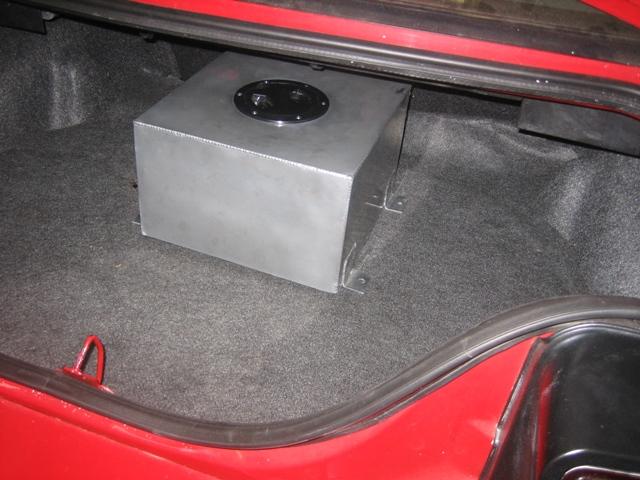
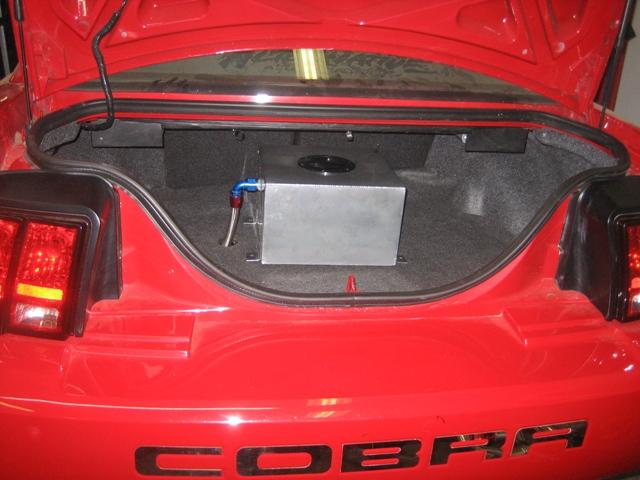
I opted for a pickup tube vs sumping the tank (i dont like the look of a sump). To go this route i used a 94 tank (from autozone, $100 new), a vortech intank pickup ($90), and a -8 feed/-6 return.
The 94 tank uses a different filler neck (style and size), tank seal, and trunk seal. These must be changed along with the tank. The fuel level sensor was integrated into the fuel pump on my car from the factory...on the 94 tanks it isseperate. The wires on the factory harness must be spliced into and connected to the seperate fuel level sensor
Here is a shot of the pickup tube on the tank...
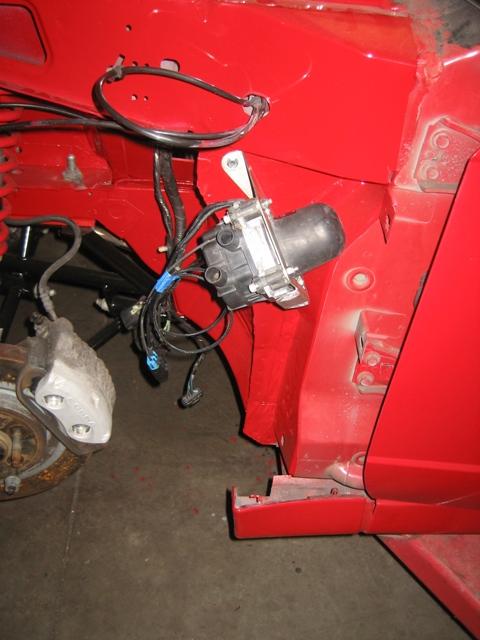
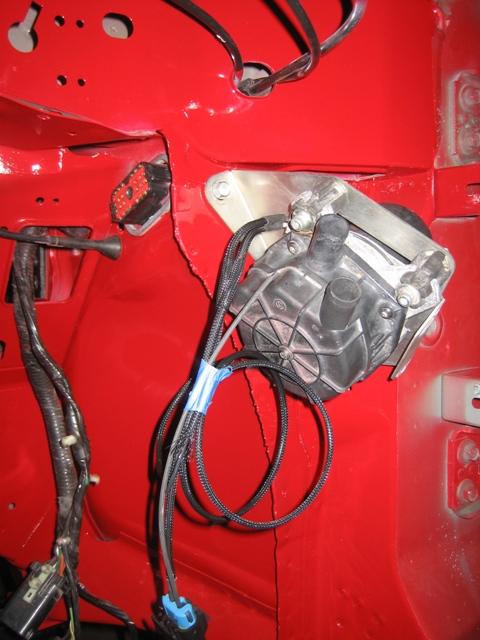
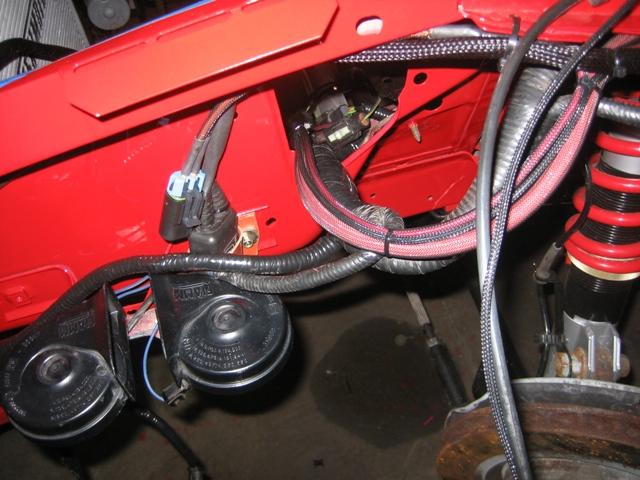
The evac pump is mounted and awaiting for the motor for final plumbing/electrical runs. This will come on at 2lbs of boost via a hobbs switch...it is a 97 Cobra Smog Pump. I mounted it inside the fender/inner fender so it's out of sight...
Hope to have the Bauman installed this week as well as the guages/boost controller wired up. Perhaps the motor will even be done...then it will really start coming together
6/16/2008
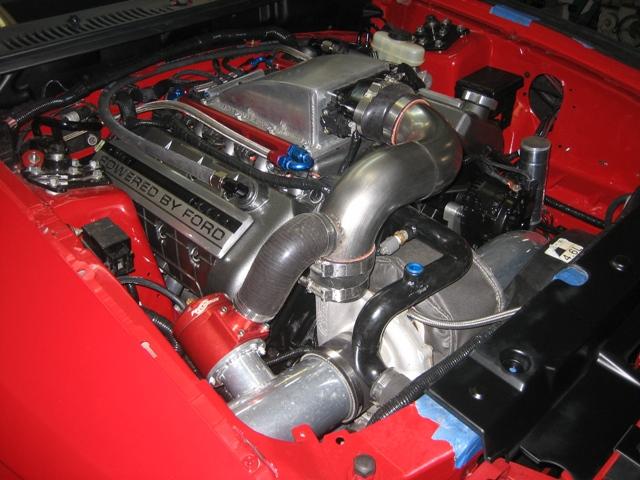
Here are some pics of the powder coating and ceramic coating...my buddy did all the hot side parts, turned out awesome..
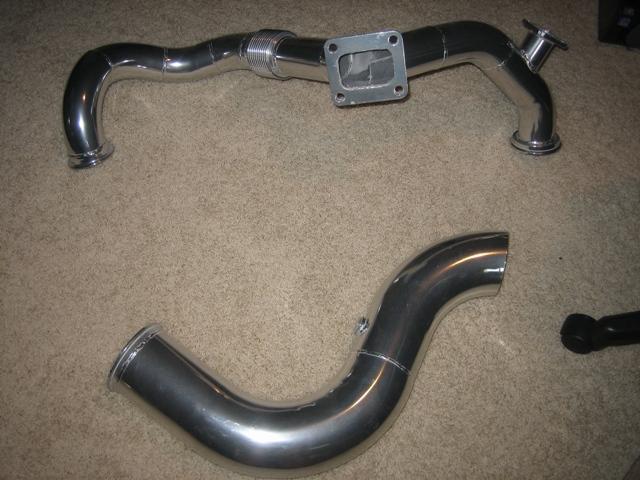
Downpipe/Crossover pipe..
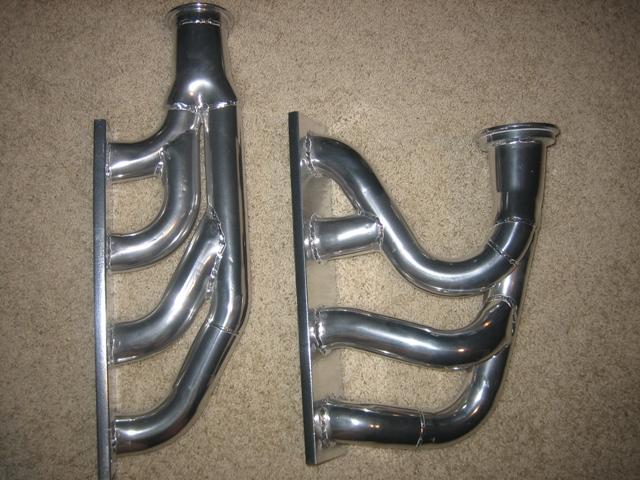
Headers
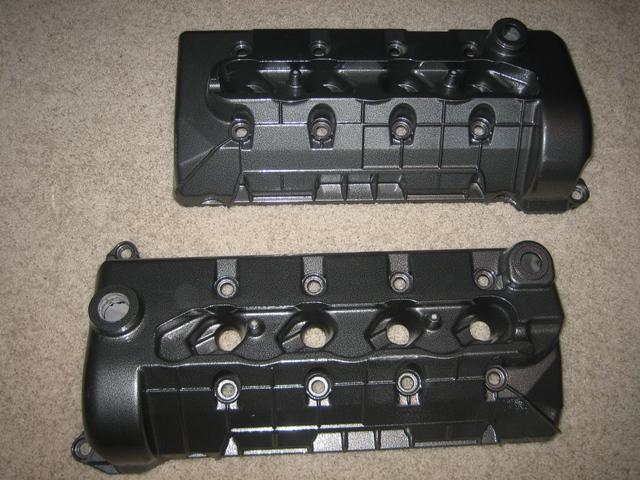
Valve covers....i also got the lower intake done...as well as the timing cover, and alternator housing...the coating is called 'silver vein'
6/29/2008
The Innovative Wideband (left) and TurboSmart Eboost2 (right) are all wired up a mounted. I got about 90% of the wiring done for the 5 guages and 2 warning lights.
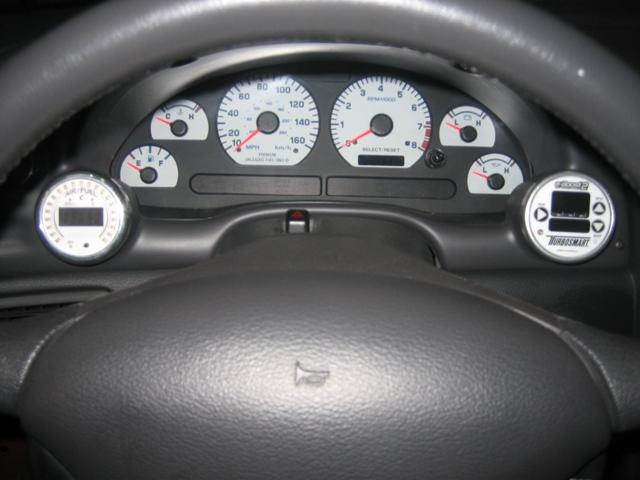
Here is the wideband LC-1 mounted behind the inverted horns. You can also see the feed wires from the battery in the trunk and guages/lights in the interior.
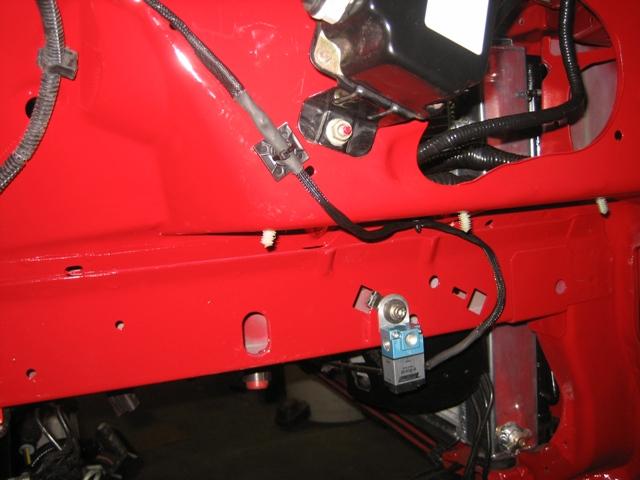
The valve for the Boost Controller.
Hope to wrap up all the wiring (at least on the interior and evac pump) tomorrow...more then.
7/15/2008
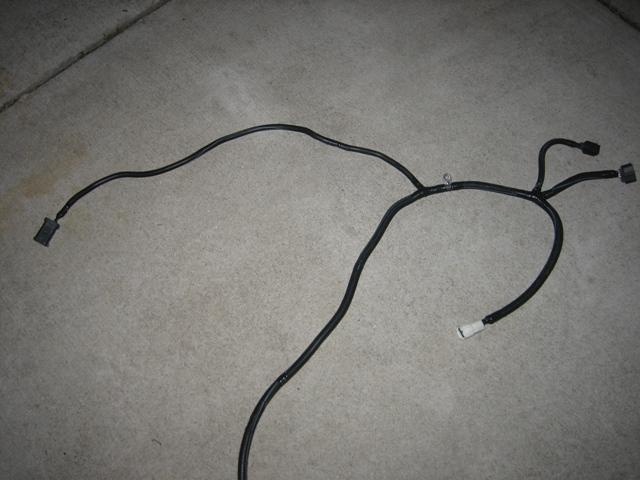
Completed the harness for the Bauman/4R70W. I ended up using the bulkhead connector off the 4.6 2V GT harness I had that came with my 4R70w.
The backup light wire/pin on my ECU harness to the trans matched the GT 4r70w hareness (black with pink stripe), but the power feed to the trans did not match (solid orange on mine, purple wire with orange stripe and also in a different pin location on auto GT harness)
I pulled apart the bulkhead connector and moved the wire on the GT harness to the correct pin location so it matched my ECU harness. I then removed all other wires from the bulkhead connector (O/2 sensors, trans sensors, etc..these are already in the bauman harness)
Left over GT harness

Here is a picture of the harness completed laying on the ground.
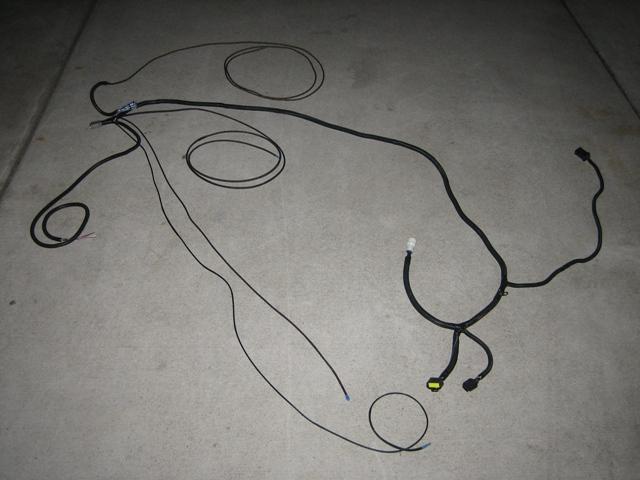
The harness branches off to the neutral safety switch/circuit (which i will tie into where the clutch pedal was), Throttle Position Sensor (which i will tie into at the bulkhead connector by the firewall), Solenoid Ground (chasis ground, seperate from power ground), main power/main ground, and finally converter/overdrive/table switches (which i will wire up when the interior is installed.
This is the segment exclusively for the transmission. You can see the longest harness is that which will connect to the ECU harness/made/described earlier.
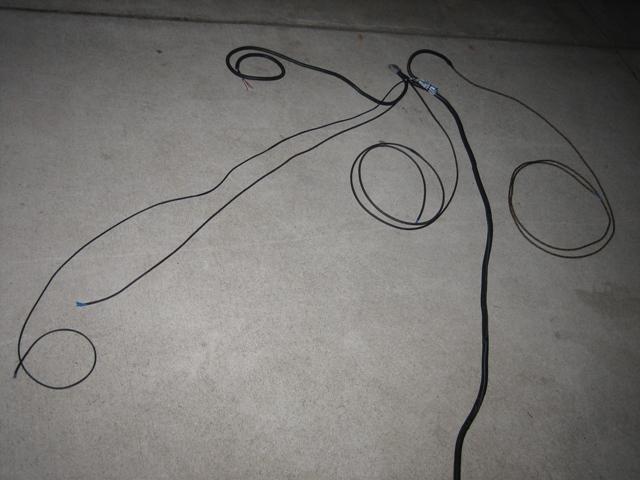
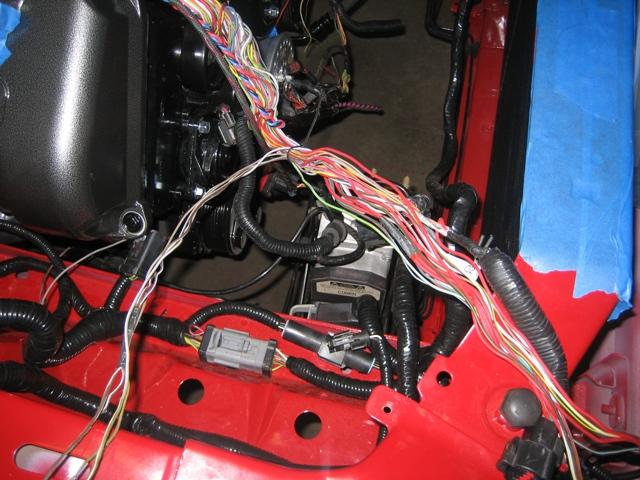
This segment is for the various connections inside the car/engine bay
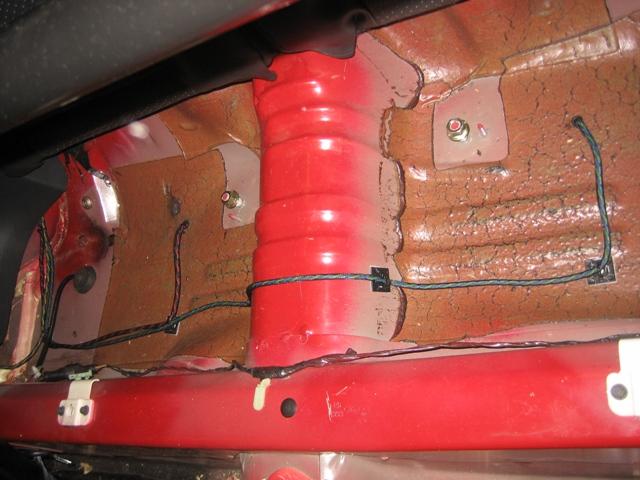
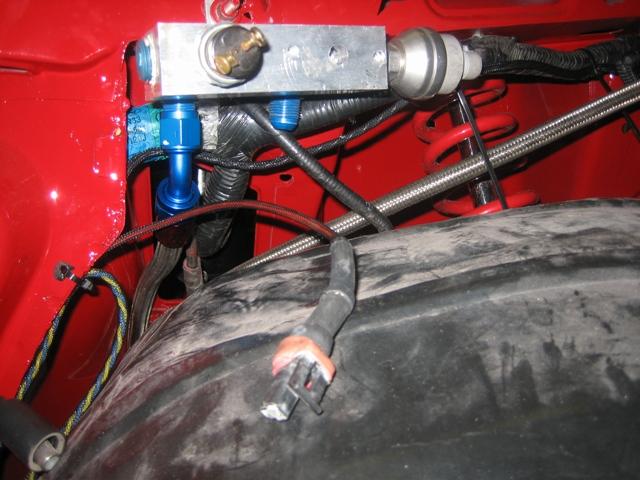
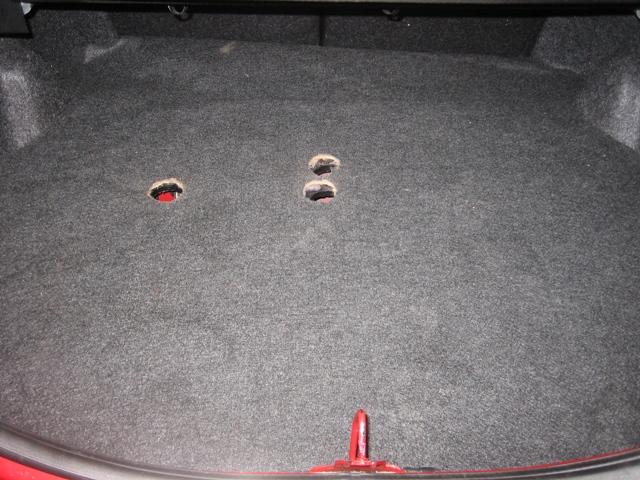
Here is a picture of the fuel distribution block I made and partially installed. I'm hiding this inside the pass. inner fender along with the hobbs switches/guages/sensors to keep the clutter out of the engine bay. I will do the same thing for the oil system.
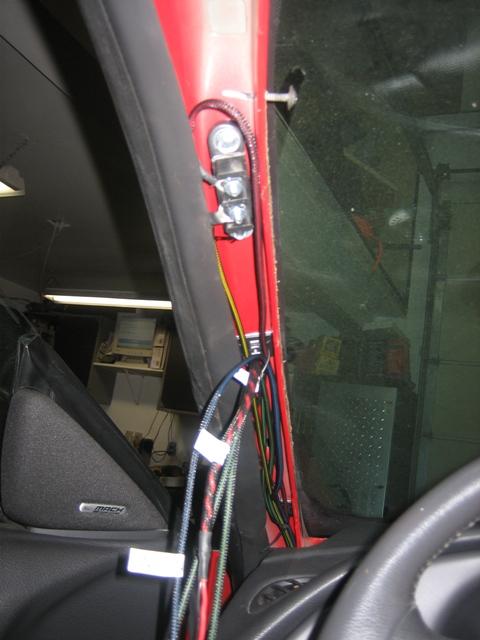
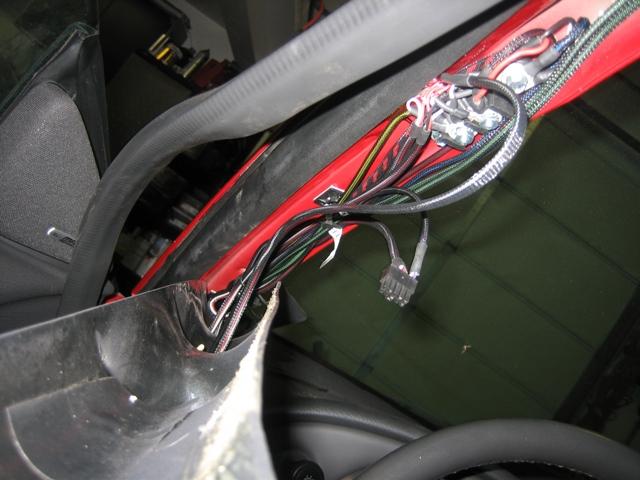
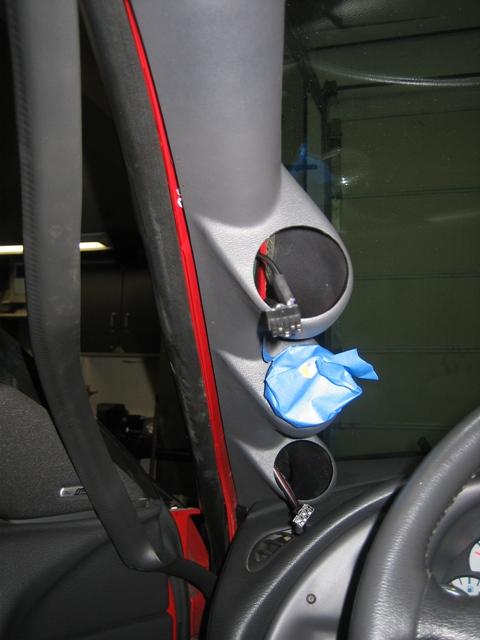
The last picture for tonight is the power distribution block and wire feeds for the various guages that will be mounted on the A Pillar.
7/16/2008
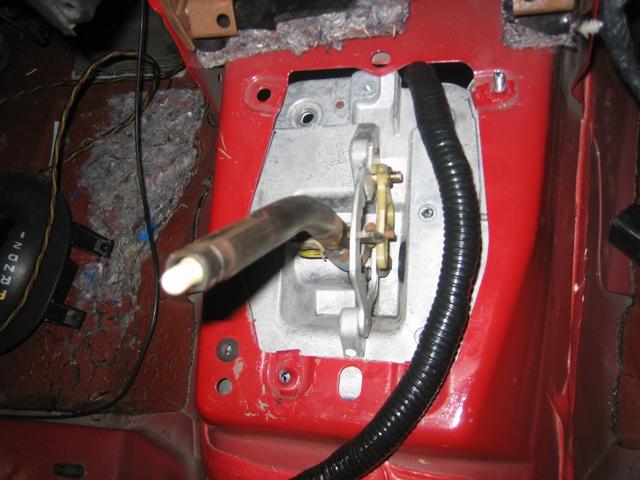
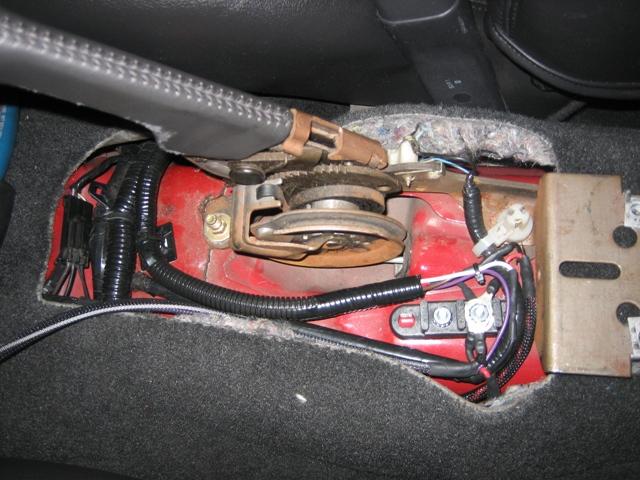
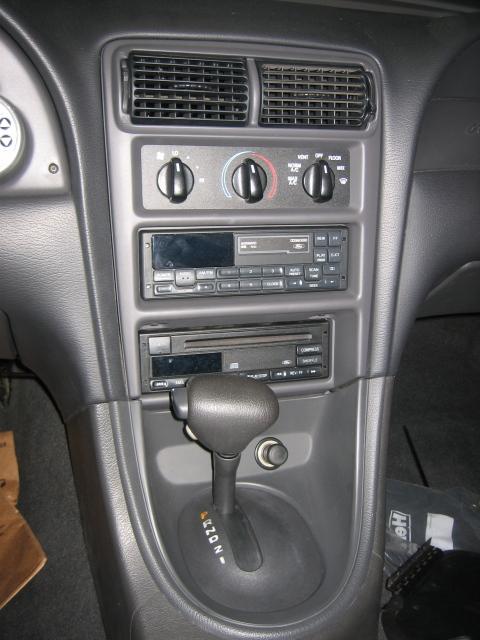
So here is the shifter assembled....it's not going to install, plain and simple. Not without taking the cap off, or cutting away metal...
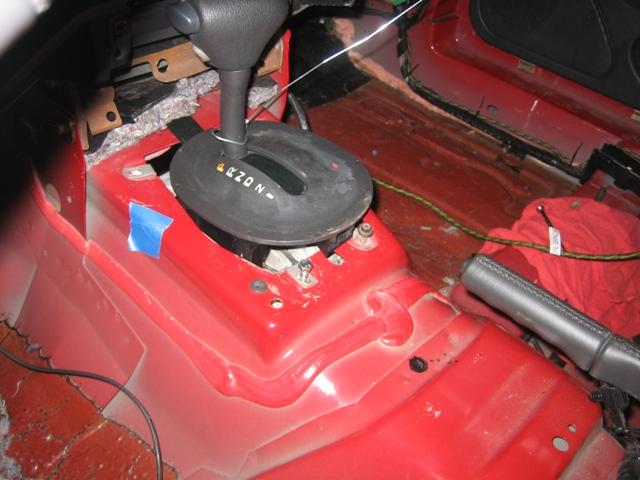
So, I disassembled the shifter and tried again. viola! Installing it from the bottom disassembled allows you to actually take the lips on the shifter and tuck them into the edges of the trans tunnel (this is where it mounts to on an automatic)...here it is on a 'test fit'
next I installed the center console and shifter trim bezel to get everything lined up. It's pretty amazing that it needed VERY little adjustment...
I marked the shifter body with paint to note where i would have to drill holes so it could be mounted to the cap. I then milled out the existing holes (the paint marks were right next to them) and mounted the shifter into place.
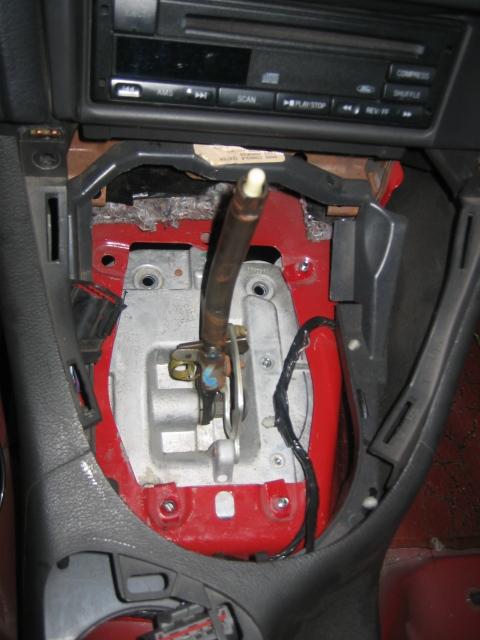
Next was installing the Bauman harness that I made yesterday. I didnt want to drill a giant hole in the floorboard or trans tunnel to feed the large bulkhead connectors through so i removed the shifter and ran the harness through the shifter hole. I then reinstalled the shifter and clearanced it so it was just tight enough but not too tight to where it might wear through...I snaked the harness around peaks and valleys and installed the center console, again, to make sure everything fit.
Time to get some sleep! The carpet will go in tomorrow along with the final connections/soldering for the bauman. The engine comes in tonight so some serious progress is about the happen!
7/27/2008
Progress...
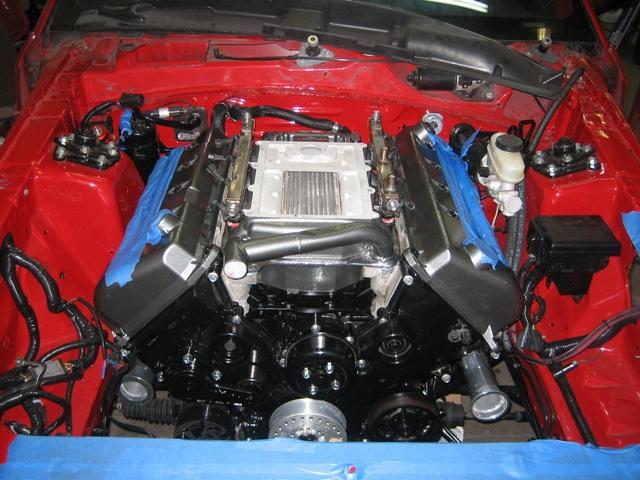
Manley Rods, Diamons Pistons (9.5:1), arp hardware, total seal rings, new nvh block, ported GT heads/valve job, crower cams,
8/3/2008
Some more progess...
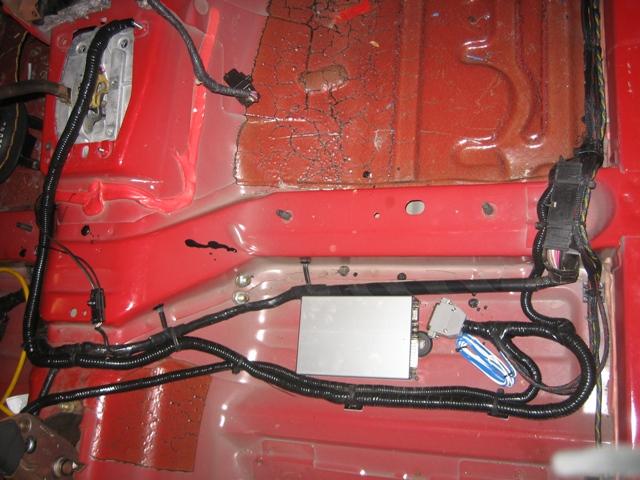
Time to tear apart the main harness. Always a nervous event! Since a lot of the sensors are moved around with the new setup I need to cut open the harness and re-route them to their proper place. After testing i'll seal the harness backup like it was stock
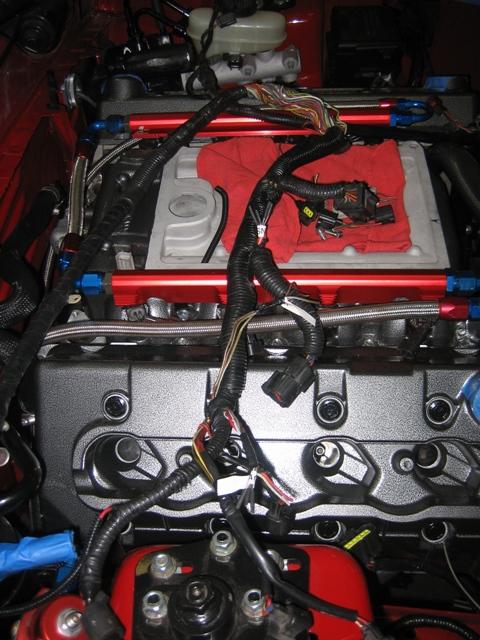
Solder and Shrink Wrap (dont forget expandable braided sleeving).
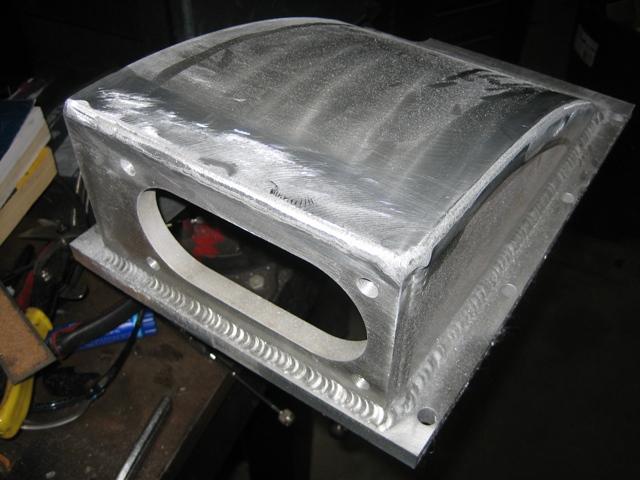
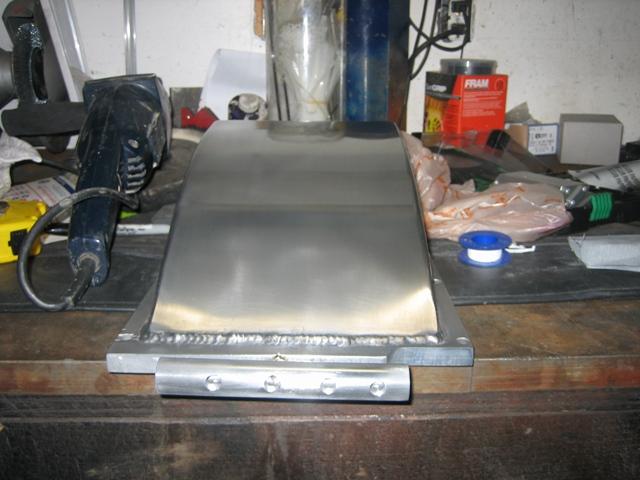
Next up was milling down the intake i had made to spec. After milling it was time to grind down the top seams and polish it up...I also tapped the bottom flange (1/2 inch aluminum) and joined it with a 'vacuum bar' via 1/8 inch NPT close fitting I made out of aluminum (this was also tapped with 4 1/8" NPT ports)
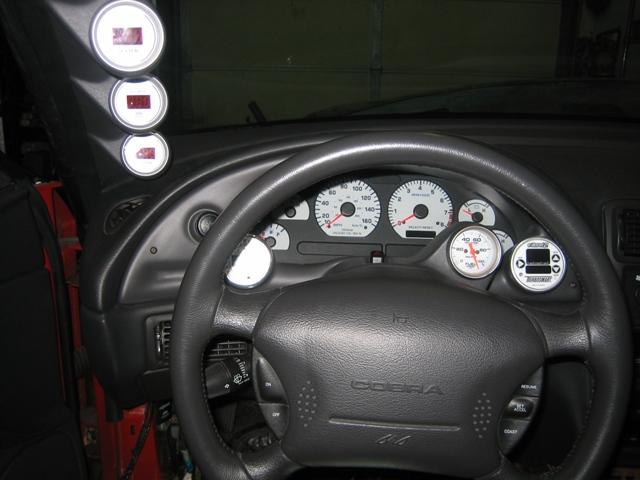
Next I finished the wiring for the guages inside...
A picture of the command center...
The fuel system is complete and the intake hat is on. I'l finish running the oil lines and start it up tomorrow
8/5/2008
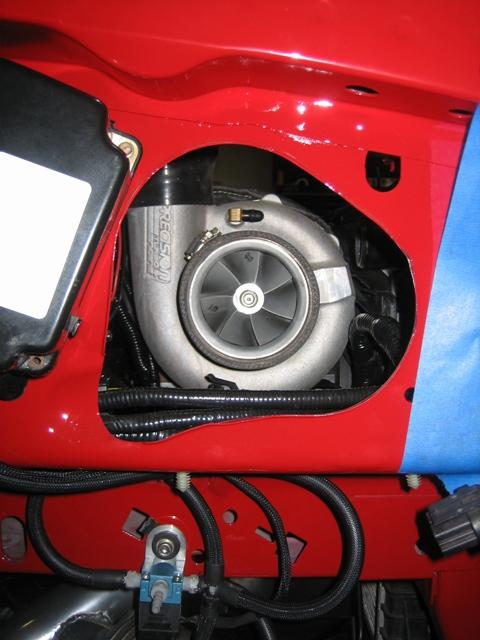
Finished most of the harnesses...boost controller is plummed, cross over is installed, turbo is mounted, turbo blanket is on...trans cooler and lines and installed along with thermostat and guage sender...hopefully drive it tomorow and test the automatic out.

8/26/2008
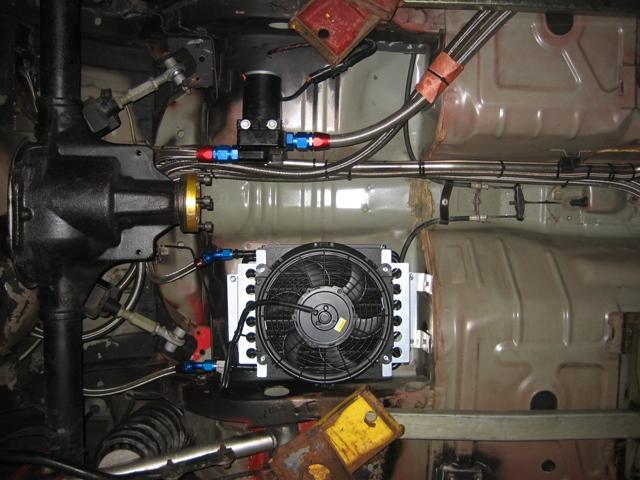
picture of the meziere water pump (20gpm, for air/water intercooler) and 2 stack trans cooler with fan/170* thermostat. The cooler has an excellent built in shroud...nice piece.
Here is the LED i installed that will light up when over-drive is turned off. I installed it in the drive side center vents. I wired into the stock O/D switch built into the shifter.
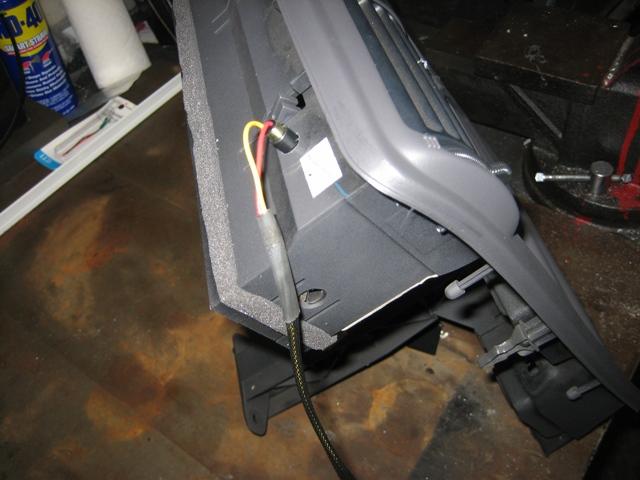
This wiring controls the 2nd table switch, LED, and over drive switch (all from the Bauman)
9/4/2008
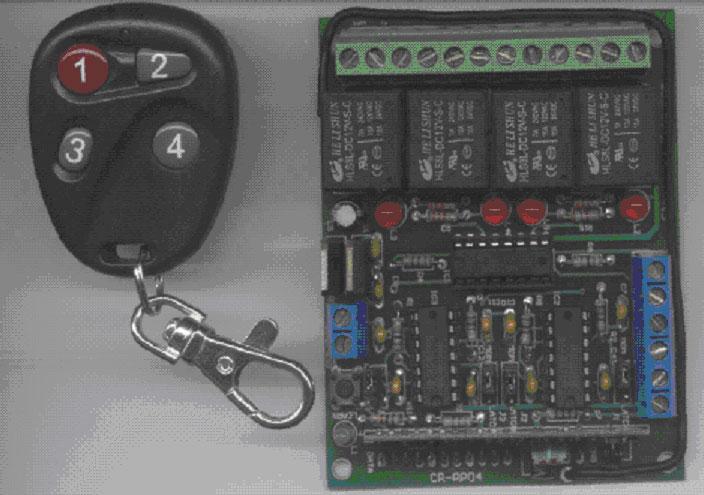
Ordered a RF controller and remote to control the boost over time, 2nd tables in the bauman, transbrake, and linelock...
I dont want to clutter the interior with switches and didnt want spiral wiring running everywhere...so im going to give this a try. I want to be able to keep both hands on the steering wheel at all times...which this will allow me to do.
9/11/2008
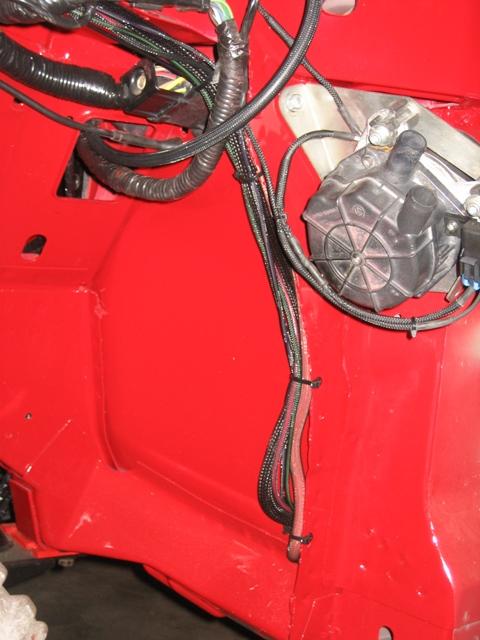
Here is the radiator overflow tank tucked inside the fender along with the oil filter, oil distribution block, turbo feed, and oil sensors.
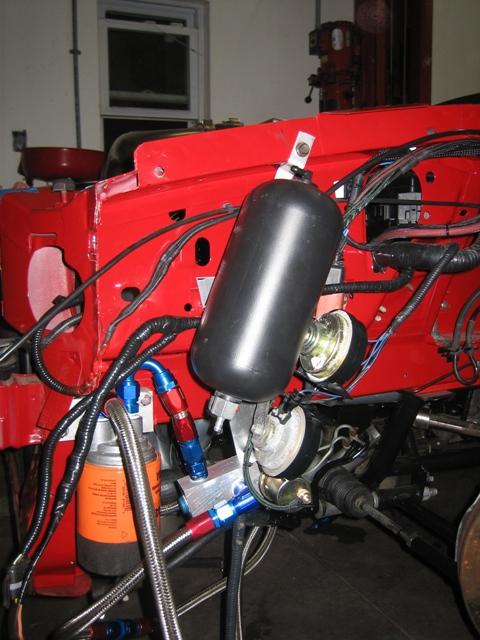
The wiring feeds from everything added to the car buttoned up before the inner fender/fender install.
I still have to wire up and plumb the evac pump
getting closer...
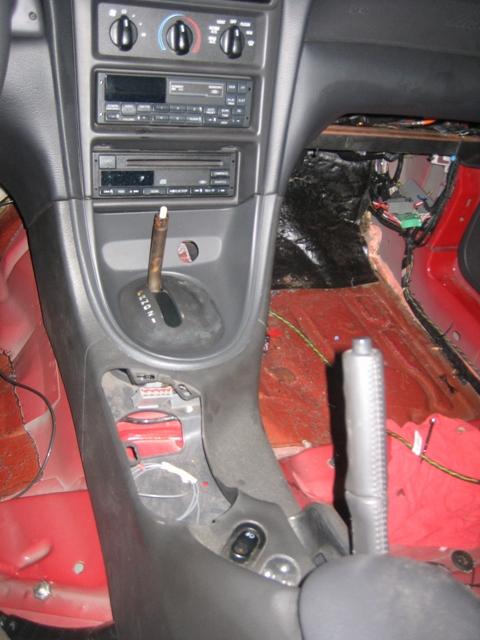
Here is the interior all together again...corral language filter blocked it lol
9/14/2008
Mounted up the intercooler tank. -12 feed, -12 return, and a -8 drain. This tank holds about 8 gallons...also installed the carpet and panels to achieve a 'stock' look. Made me a little sad to cover up all my wiring 

I mad a custom floor to help support the tank as the thin panel the carpet is glued to would not have sufficed.
9/20/2008
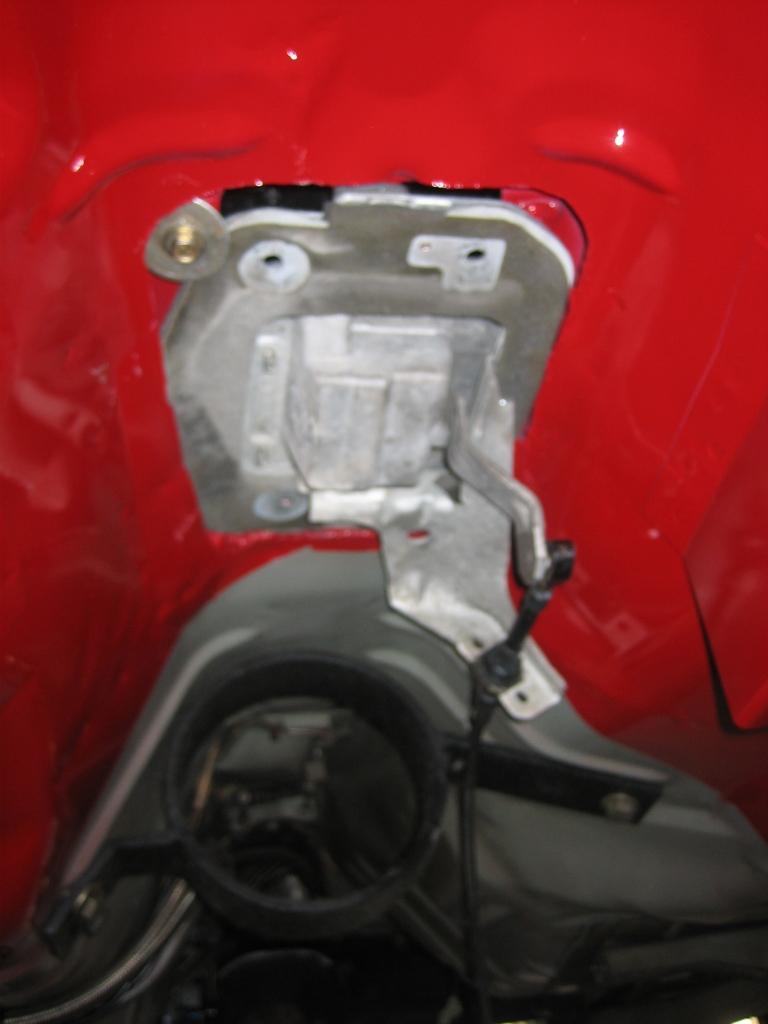
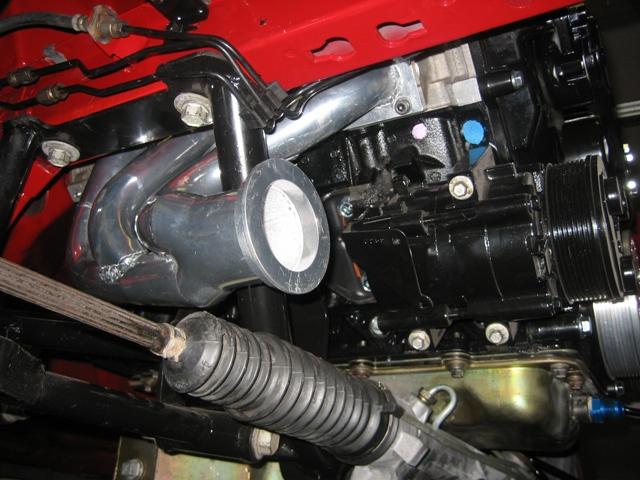
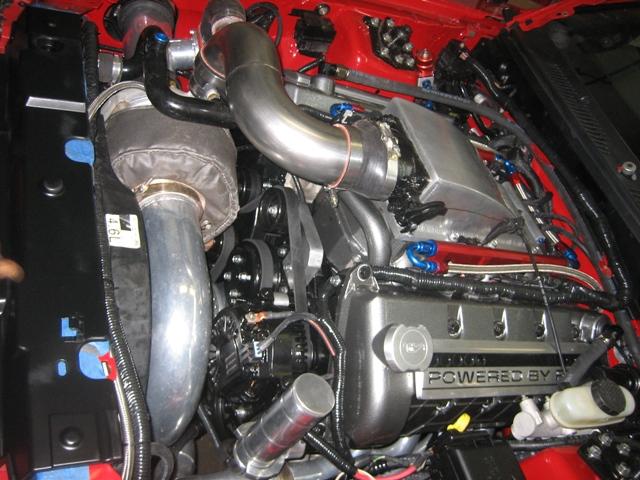
Since this intake has the intercooler built into it and takes up the valley...the original alternator location will not work.
Here is a pic of an idler bracket i made to take the place of where the alternator went. This is required, at least on my car, to route the belt properly.
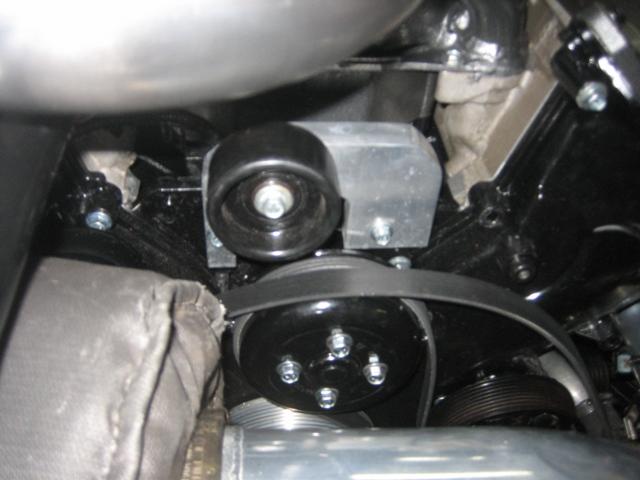
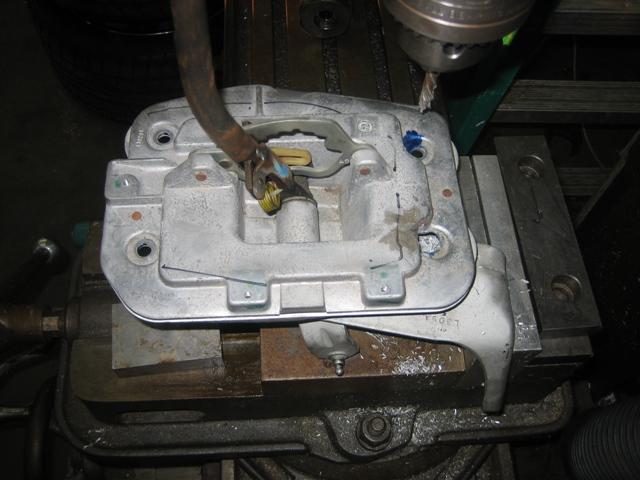
Here we have an alternator bracket that my friend Roy drew up and made. These are available for purchase if anyone if interested. They move the alternator to the diver side of the engine and invert it.
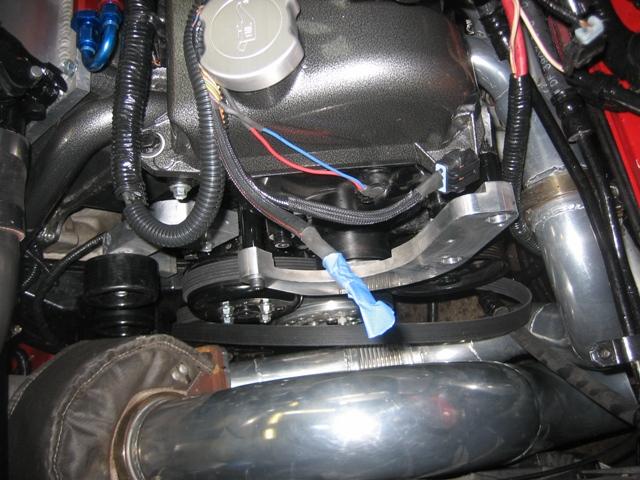
Here is the alternator mounted along with a resivour tube/tank for the power steering pump..
10/1/2008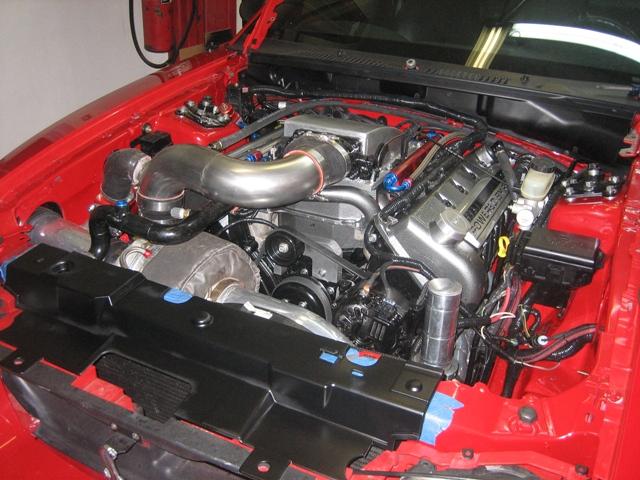
10/8/2008
Drove it around for about 30 mins tonight and I think it's finally done. No leaks, squirts, drips, chirps...nothing.
Tune is tomorrow at 2pm @ Lidio's (Alternative Auto). Auto works great (shifts way to early but Lidio will tune it up)...
Wish me luck...hoping for low 700's on 15lbs through the auto
Yeah it made 864 on 15lbs last year with the stick....I'm not sure how much power this automatic is going to eat up so I'm shooting for low numbers. It has .7 more compression so perhaps that will factor out the auto and it will make around the same power...i'd be pretty pumped if that was the case. Well see!
10/8/2008
no numbers...something happened around 5k on a dyno run. The exhuast popped extremely loud a few times and the car stalled out. It starts up, but runs very rough and pops. Seems to be a timing chain/cam issue..fuel, oil, spark, injectors, trigger wheel, COP's, etc are all reading correctly. Compression checked out 150ish across all the pistons...
I'm pretty bummed...but well see what it is eventually.
10/19/2008
Looks like things *might* finally be getting easier for me...
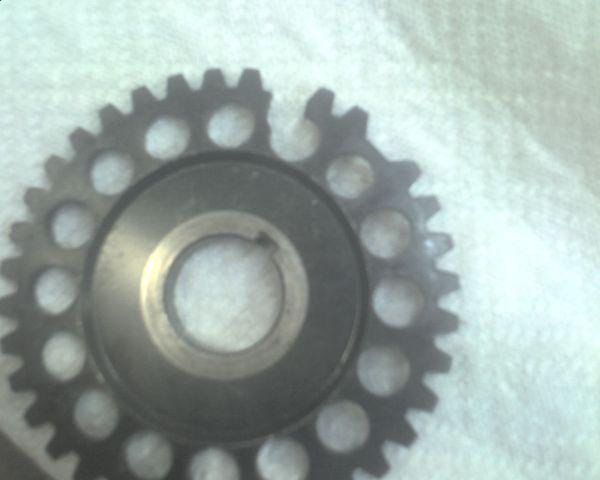
Pulled the front cover off and didnt find anything wrong with the tensioners/chains...
But I did find this..
11/20/2008
Yeah...it's back together (minus a fuel leak) sitting in my garage on a lift with a tank full of race gas and an untuned motor and trans...damn winter!!! Just ran out of time and actually grew tired of working on it...
I'm not sure if it's smart to tune it in 20 degree weather...I'll see what lidio says.
3/1/2009
Got it running tonight, it was indeed the trigger wheel...started right up. Should have it tuned by the end of the month...
4/2/2009
car was on the Dyno yesterday...made some progress after we eliminated the boost controller (it wasnt keeping the gate closed).
We put vacuum to the top of the gate and let her rip...turbo seems to max out around 19-20lbs of boost (starts to fall off after 6000 RPM, turbo is rated to 1250hp)...the last pull we made before running into a timing problem was 772rwhp @ 19lbs with 10 degrees of timing...hoping to get it back up there and get the tuned finished and get some final numbers..
To be honest I might just keep the timing super low and keep it close to where its at...i'm not sure I want to throw a ton of timing at it and try and make 1000rwhp after all the work this has taken...
I just want to drive it..
4/3/2009
She's back on the road...
8/23/2011
It's been over 2 years since I posted last here. The car has been sitting just as long as well. Havent had time to work on it much since moving to houston. But I'm in the process of fixing it now. I did get married and have a baby girl in the mean time, though! lol 
9/14/2011
Here is a video of the car on the dyno.
It developed a rod knock after this pull. We ran into an issue with a pegging meter on the dyno. The air/fuel ratio would spike to 12.5-12.7 above 5500 RPMs with 24lbs of boost (wastegate pressurized closed). The tuner added fuel to the table over a couple of pulls to correct it but it didnt work until AFTERhe noticed the pegging meter and THEN added a mafia.
Too little too late. I checked the cylinder when I got it home and it was down 60psi. Added a shot of oil and it picked up a bit. This combined with the lovely rod knock was a pretty ominous tale of what happened.
So I'm in the process of rebuilding it now. I'll add pics and info as they become available. shortblock should be done in a couple weeks the the longblock a week or two after. Then its off to try it one more time before it gets an LSX
10/17/2011
Getting close. Had to replace all the exhuast valves in the heads as they were damaged from the combustion heat. The rods and block were replaced as well. Diamond pistons with coated side skirts and tops. I hope to have the engine this week/next week ready to drop in.
I ordered up some Bosch 160lb injectors for E85 and new springs/retainers. Looking forward to seeing those injectors!
11/1/2011
had a falling through with the engine builder. Im leaning towards MMR or side lining the car and getting an inground pool, lol.
1/14/2012
I'm going with MMR.
5.4, Manley Billet Rods, MMR 2500 Coated Race Pistons (11.5:1), Total Seal Rings, Forged Crank, MMR Stage III Turbo cams, Manley Springs & Titanium Retainers.
The builder I had building this was taking my parts and selling them online and using my money for other engines.
I got my money back for the parts and labor that was never done. Time to go with a shop that does this everday.
1/15/2012
Seriously man if this build fails car is for sale and im building a LSX First Gen Firebird
5/1/2012
It's alive. Fired up instantly. I'll put up a video and pics in the next couple days.
I havent found a tuner yet. I had the tune pulled off the chip and edited for the 160's and E85. Im going to put some break in miles on it and try and find a tuner I'm comfortable with.
The additional compression , MMR cams, and E85 create sich a sinister exhaust note.
I'm working on the last issue. Clutch is giving me fits when i want to put the trans into gear. I think the 1st disc in the clutch isnt clearanced enough from the floater plate (mcleod street twin)
sigh...
5/20/2012
I took it outside the Subdivision for the first time last Sunday. Havent started it since as I'm waiting on a tuner appointment (Manny @ HPP). I'll trailer it up to Dallas and let him dial it in.
runs and drives well. Had the existing tune edited for E85 and 160's so it shouldnt need too much work.
I'll start it up tomorrow and get a video up.
5/21/2012
I have a date with HPP June 15th or June 22nd. Hopefully I can get in the 15th as having this sit for a whole month will be painfull.
I took a video with my phone but the sound is horrible. I'll get one with the camcorder tomorrow.
6/6/2012
6/15/2012
800whp on 13lbs with 17 degrees timing
900whp on 15lbs with 17 degrees
Car was perfect on the dyno. Was 95 degrees and made pull after pull without issue.
Manny did an INCREDIBLE job. Kept at it 7000 rpm. May take it back in the fall to see what she will
do with cool air and some extra boost and rpm.
6/16/2012
Looks like my camera man didnt get a pull. He hit the stop record button when I handed him the camera. Really bummed!. Should have recorded multiple pulls.
Here is the graph of the 13lb and 15lb pulls. I have the 15lb pull set on the eboost sp2 (12lb by default).

Really can't say enough about HPP & Manny. The whole staff was really a pleasure to do business with. Manny spent about 6 hours tunning it (got done about 8pm).
He said the turbo was really just hitting it's sweet spot as 2lbs of additional boost added 100whp. I also noticed how much cleaner E85 burns. It's incredible.
Hats off to MMR for building such a beast. They clearly know what they are doing.
Nice photos
Posted by Diggymart on 3/7/23 @ 10:44:26 PM