You must be logged in to rate content!
10 minute(s) of a 668 minute read
9-28-2013
Yes, still in mock up. I'm trying to focus on every possible thing or change I want to make before paint stage. For example, I keep looking at the bed from the view of opening the drivers door. I just kept thinking the inside bed sides need something. Finally I got an idea, what sucks is if I'd stop getting ideas I'd be painting by now. On the other hand, if I didn't do all the extras now, I'd regret not taking a few extra months to finish the truck exactly how I want it to be.
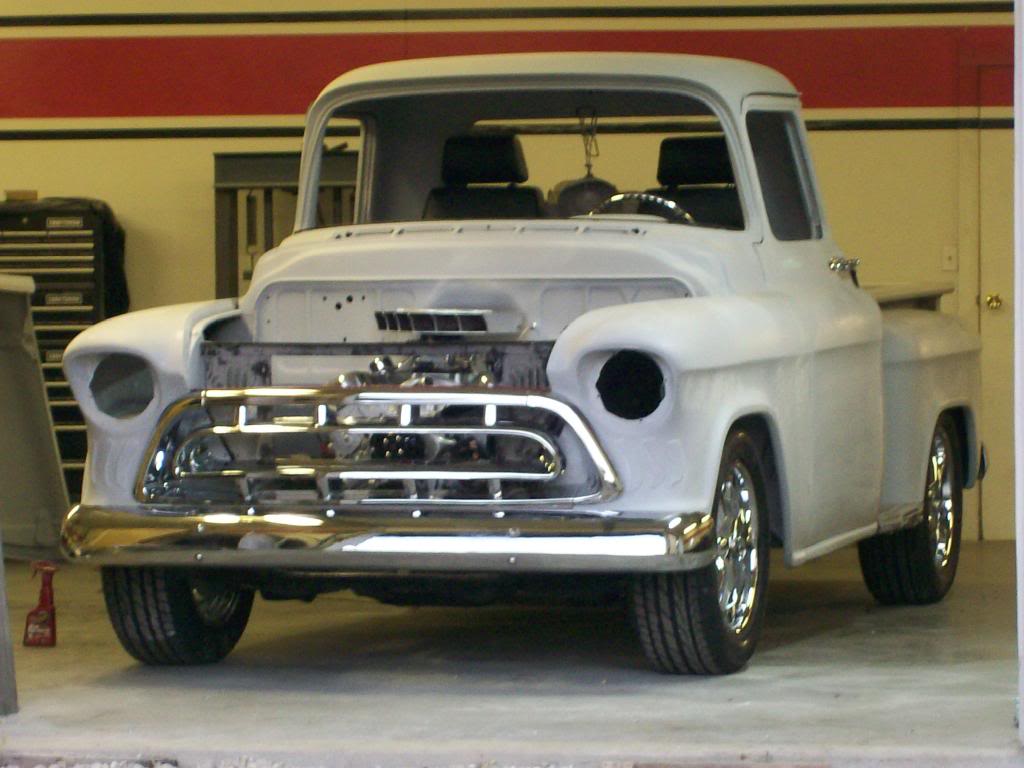
This is a picture from Thursday night. To some this may seem like an awful lot of work assembling most of the truck but now is the time to check all panel alignment and bolt hole alignment.
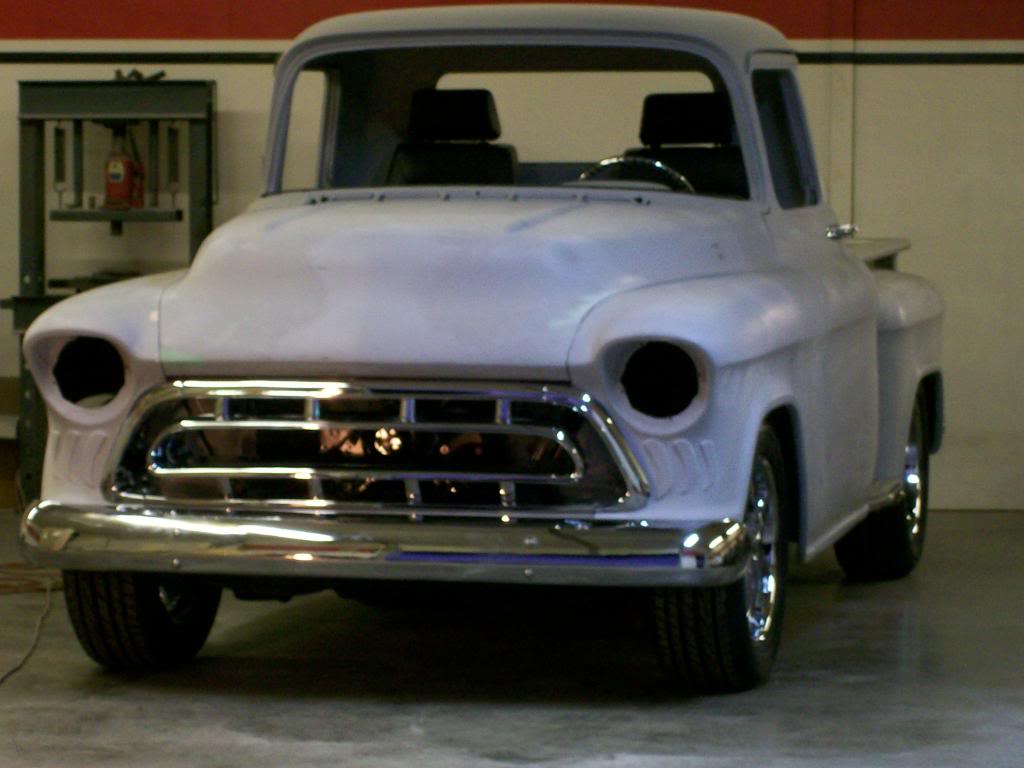
Progress is real slow right now, I'm trying to detail many areas to make assembly after paint easier.
Don't worry, I've still got pics of the process of a few areas that may become helpful in the future.
9-29-2013
berettajeep, Thanks, it's pictures like these that help keep me motivated knowing I'm heading in the direction to get the end result I'm looking for.
LA-Sahara, I wish I could have settled on a design that I could live with that wasn't too far off the beaten path. I was also having issues getting the look from the front to look as good from a side view. I did however go to a grill that is different from the one I had pictured before. This one is a true '57 grill, the other one was a '55-'56. It is a matter of personal preference and I'm not saying this one looks better as a matter of fact I have a fit issue that I have to live with. I do like the idea that is is designed on a horizontal aspect vs a vertical aspect, this can help the truck look lower and wider.
Sometimes swapping grills can be a unique thing to do but in the case of the '57 chevy truck if you do a google image check, many people have made the swap, so by going back to the '57 grill, it still identifies the truck as a '57 and it is almost more unique to stick with the original style.
Jeff88, I have to agree, it's like an unfinished area when they are left open. Although those looking to keep a truck all original, open is the right way to go.
10-1-2013
How about we move to the interior, the project I thought would take a couple weeks, then lasted 2 months.
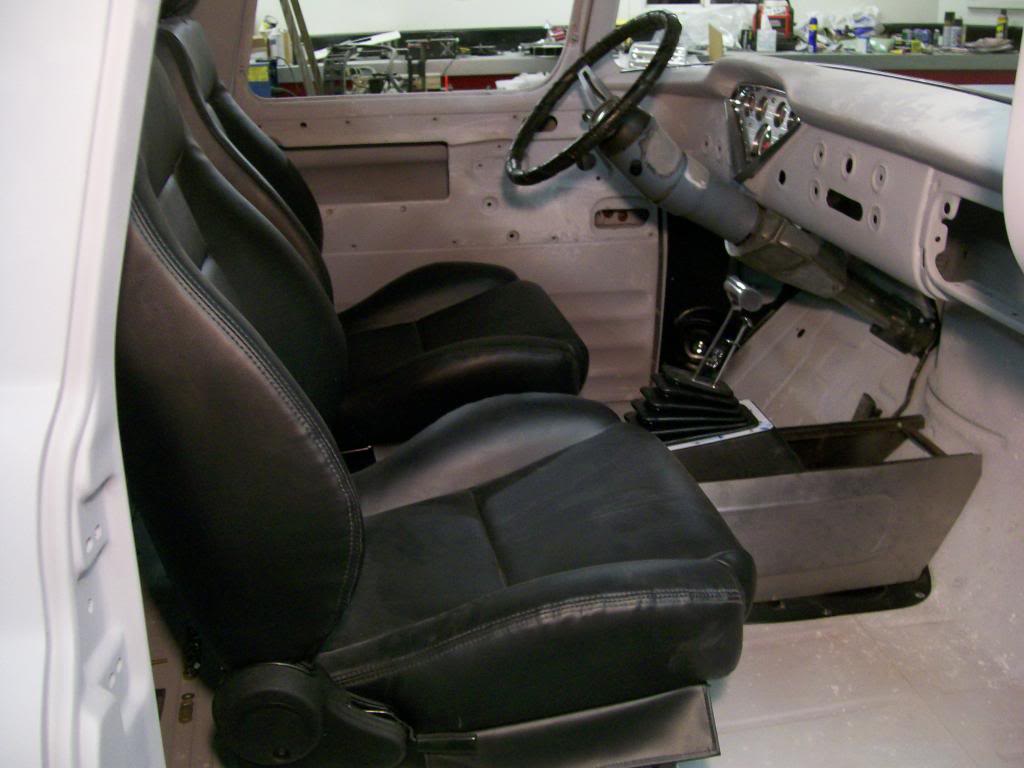
When I look at other interiors I often find a bench set out of a newer truck with all it's foam and cushion. I'm sure they are very comfortable, but not the look and feel I'm looking for.
A couple issues were since there is no tunnel, the shifter is gonna sit way too low. Same with the seats, I've got to raise them up about 6 inches.
Although I'm using 2 bucket seats I'm gonna build one large frame to support both seats. Using one large frame will help keep the height of both seats the same.
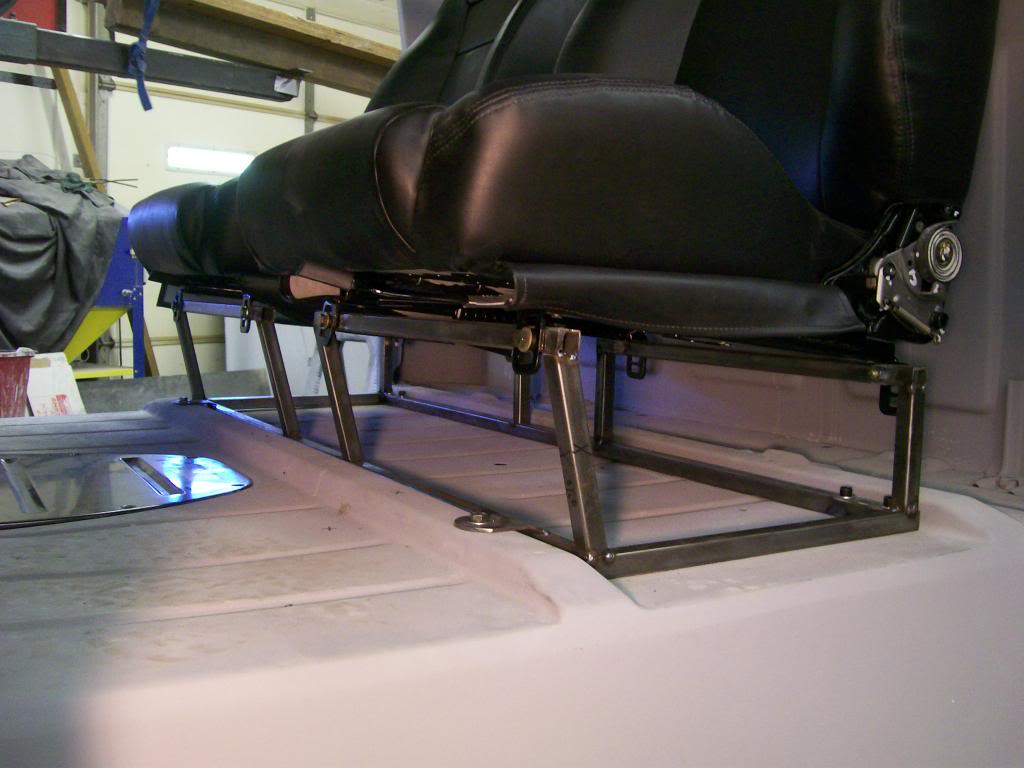
I've tried to use the original seat bolt holes to keep from drilling any extra holes in the floor. Plus the original holes have reinforcement plates from the factory in place already.
10-2-2013
We're in good shape, the seats are on tracks that will allow them to move forward 4 to 5 inches. I haven't attached the adjuster lever yet. I was afraid with the amount of times I've put in and removed the seats that I would bend them.
I'm gonna post a pic from almost exactly 1 year ago. The truck had an after market floor shifter and had the same problems that many people have. Since the truck has a flat floor and the seat sits up quite a bit, it either needs a long shift handle or a way to space the shifter up to match the seat height.
I'm hoping this was meant to be a quick fix in the past, they used long lengths of 5/16" threaded rod to raise the shifter base.
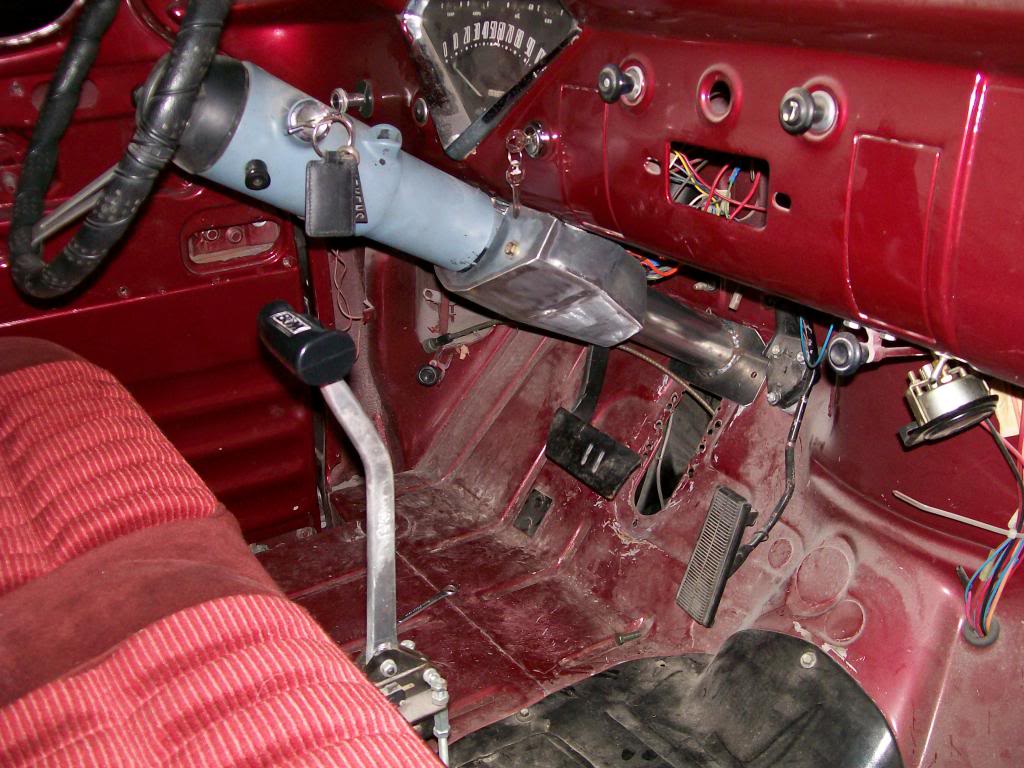
Here is the situation I am in now with the new shifter, way too low.
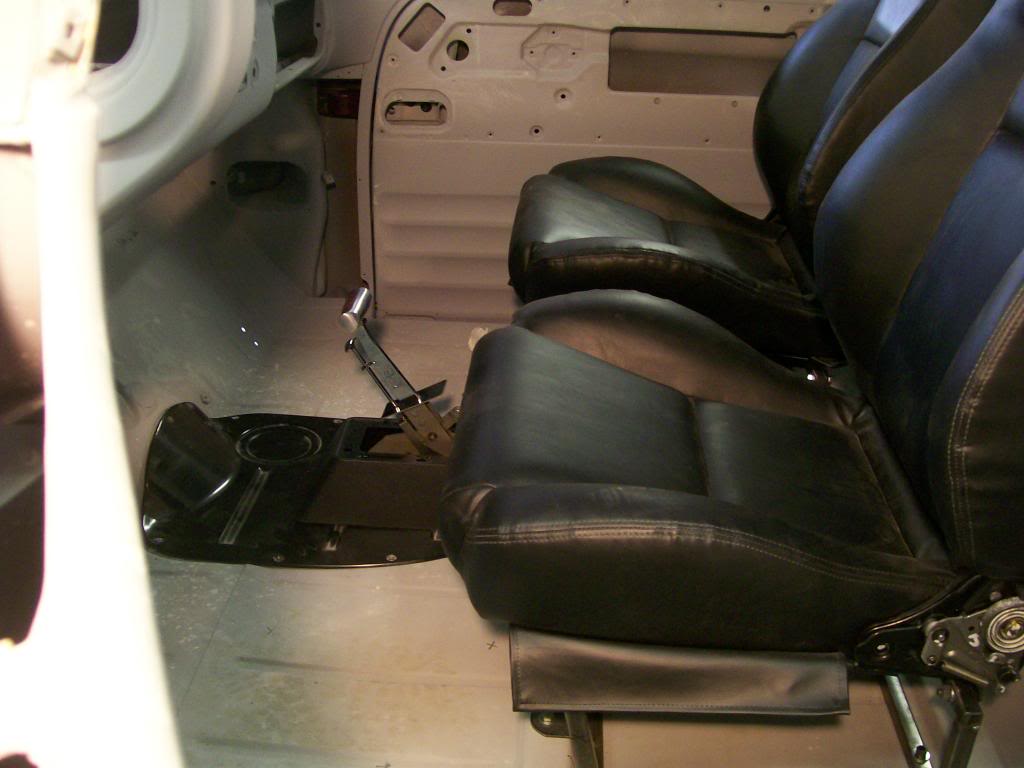
Now I do realize there are long handle shifters out there but they do not offer one thing I want in my new shifter, I want one that has a ratchet mechanism capability.
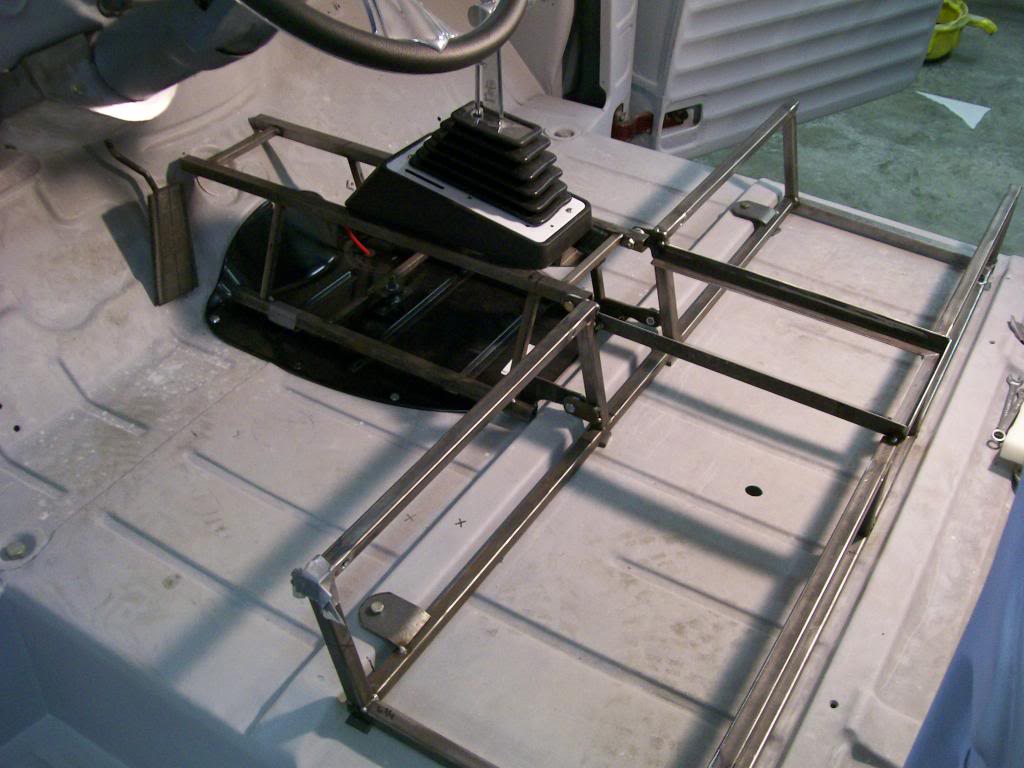
Here is where making the frame work one continuous base helps, I'm able to build forward to create my own tunnel. I used the wood blocks to get a feel for the exact height I want the shifter to be, then build from there.
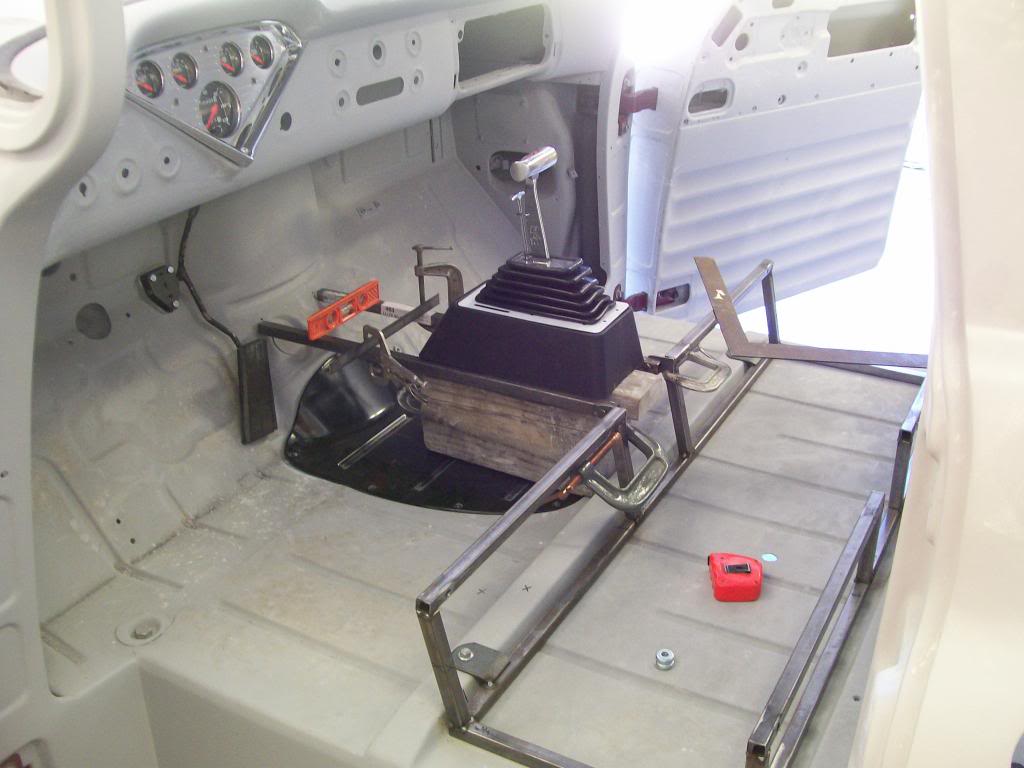
For this interior I wanted the shifter to be the main focal point. I also wanted to build the tunnel, I wanted to create a feel that as the driver you are in your own cockpit so to speak. A far different feel than it did when it had a bench seat.
10-3-2013
When you look at a finished build the details never show through, such as the thought in design to get everything to fit together.
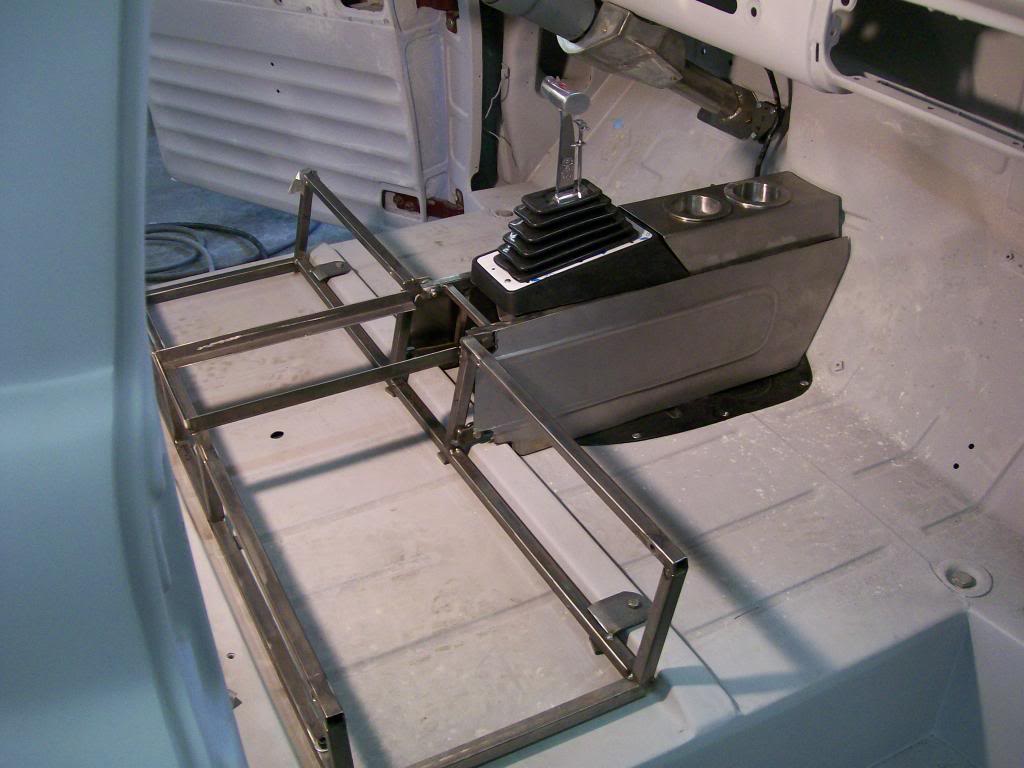
Such as in this seat frame that goes forward into a tunnel. I didn't want one solid framework, I wanted to be able separate the tunnel and the seat frame.
You can see the attaching points where the tunnel meets the seat frame. I've also taped some small 1/4" pieces on the bottom of the framework, I know later I'll want to put down carpet and sound deadner, by prefiguring for the thickness of these materials I won't back myself into a corner later.
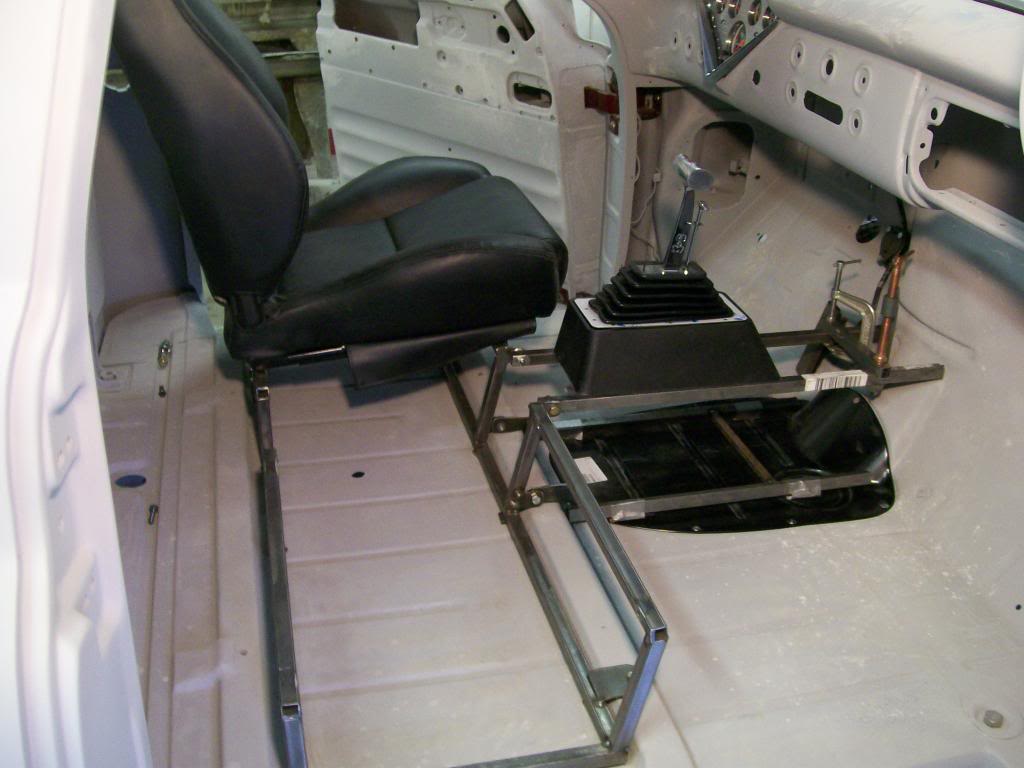
The shifter lever goes way forward when in park. In the above picture it's in neutral. In the next picture it's in park, once I noticed this issue I made the shifter mounting plate angle downward in the back. The plastic covering that comes with the shifter has extra material so I was able to trim it for the angle difference.
10-6-2013
The tunnel became a main focus once the seat height and location was figured.
In the back of my mind I knew the was one item I wanted to have in this truck.... cup holders, yes cup holders. I have another car that I enjoy abusing once in a while, problem is, I don't have a safe place to keep a cup and it's a manual trans, so once in a while I go thirsty since I need my right hand for shifting.
I had space in front of the shifter, perfect, 2 cup holders.
I started with a piece of construction paper then used the paper to use the torchmate to cut the sheet metal.
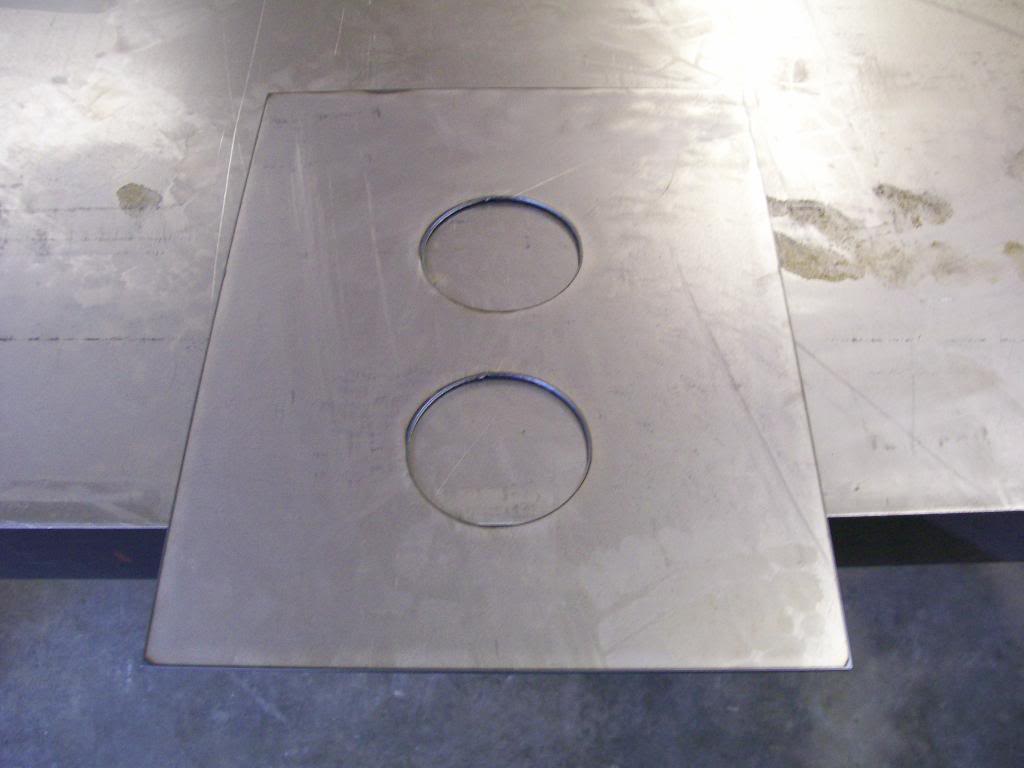
After bending the sides and trimming the back to match the shifter cover, I have cup holders.
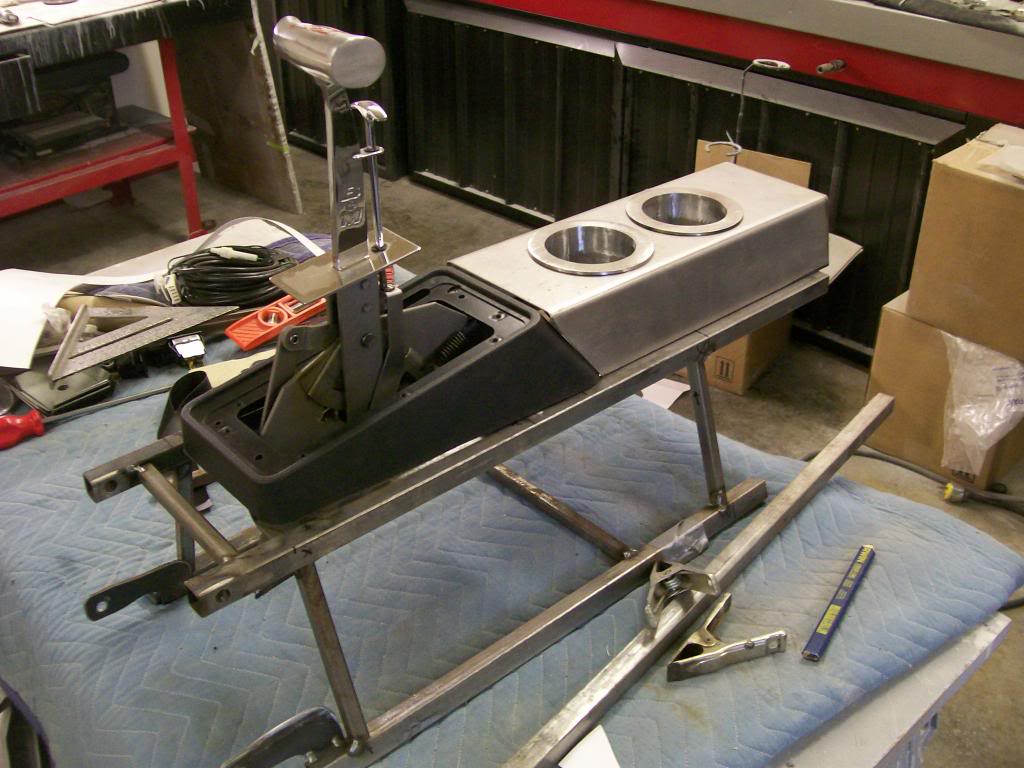
Good picture of how the frame work ended up when done. You can also see towards the front on the floor I welded a stud to the floor, then a flange on the tunnel to attach to to the floor.
I bought a bead roller to add to the look of the sheet metal, it did ok, my original plan was to paint the tunnel.
10-7-2013
I ponder the year that they became common in cars, mine is a 1965, cup holders, what the heck are those??
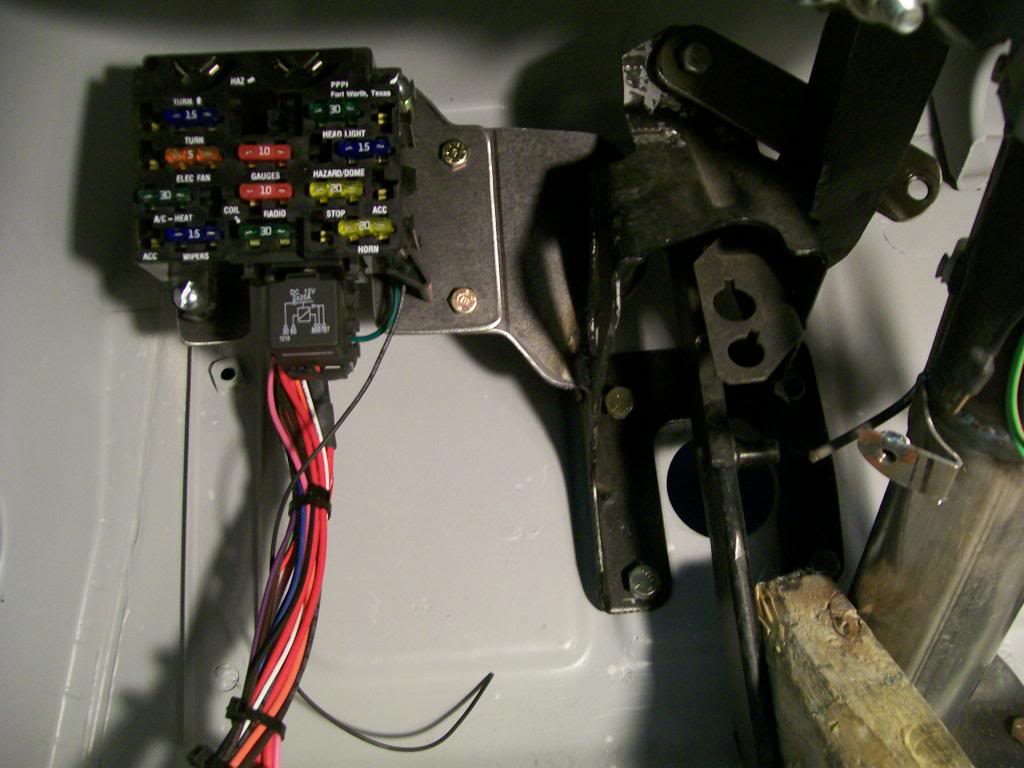
The next part of the build is one that is commonly forgotten til it has to be addressed, the fuse block. If I figure it's location now I can save my self from drilling and scratching the firewall. As a matter of fact, I don't want to use the firewall anyway, I want it accessible, yet up out of the way.
The only solid piece of metal under the dash in this area is the brake pedalpivot mount, this will work.
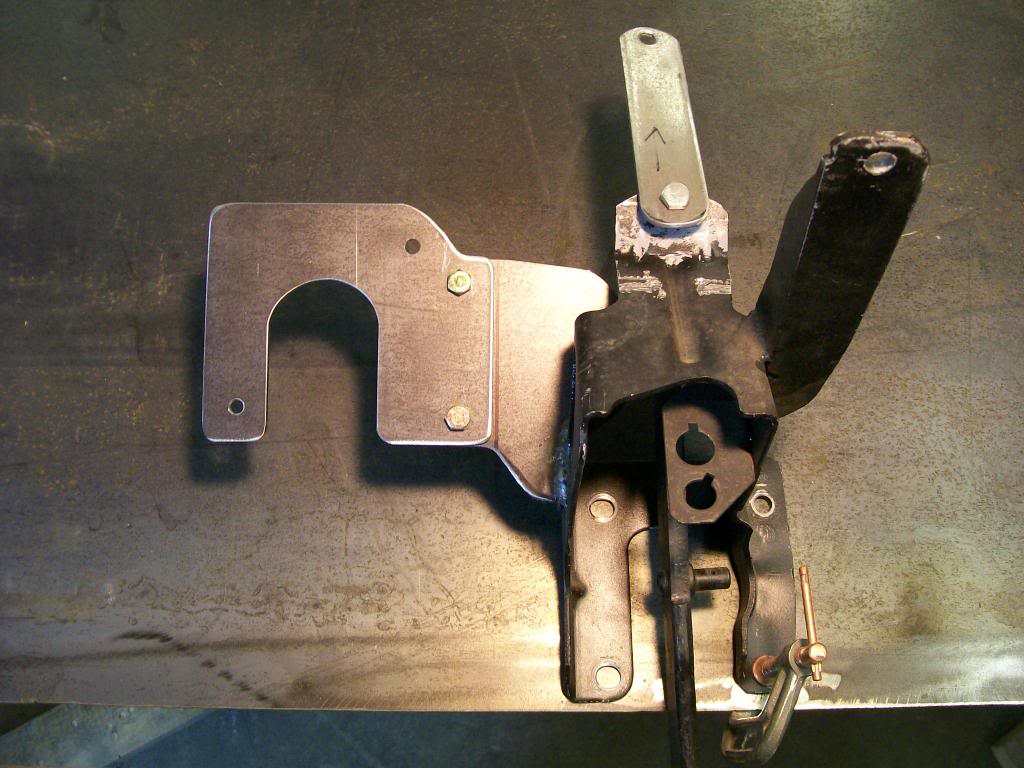
I'm making the fuse block bracket in two pieces, I hate trying to pry wires out of the way to remove something. With a two piece bracket I can install and remove the pedal pivot later when needed.
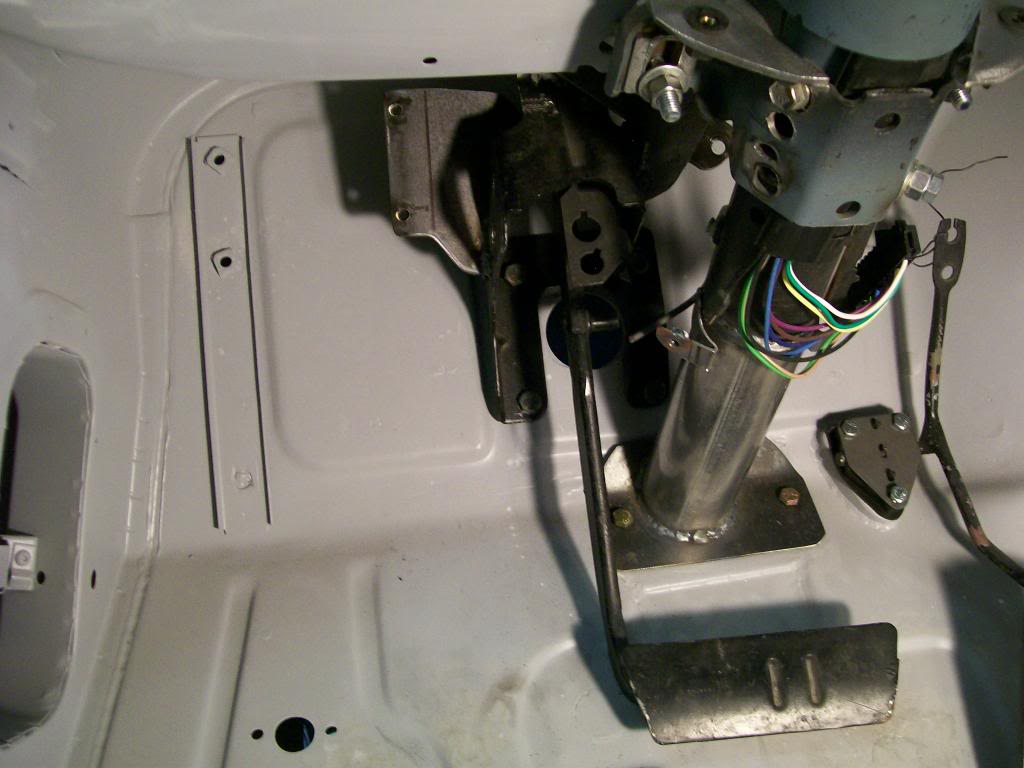
Now with the fuse block backing in place.
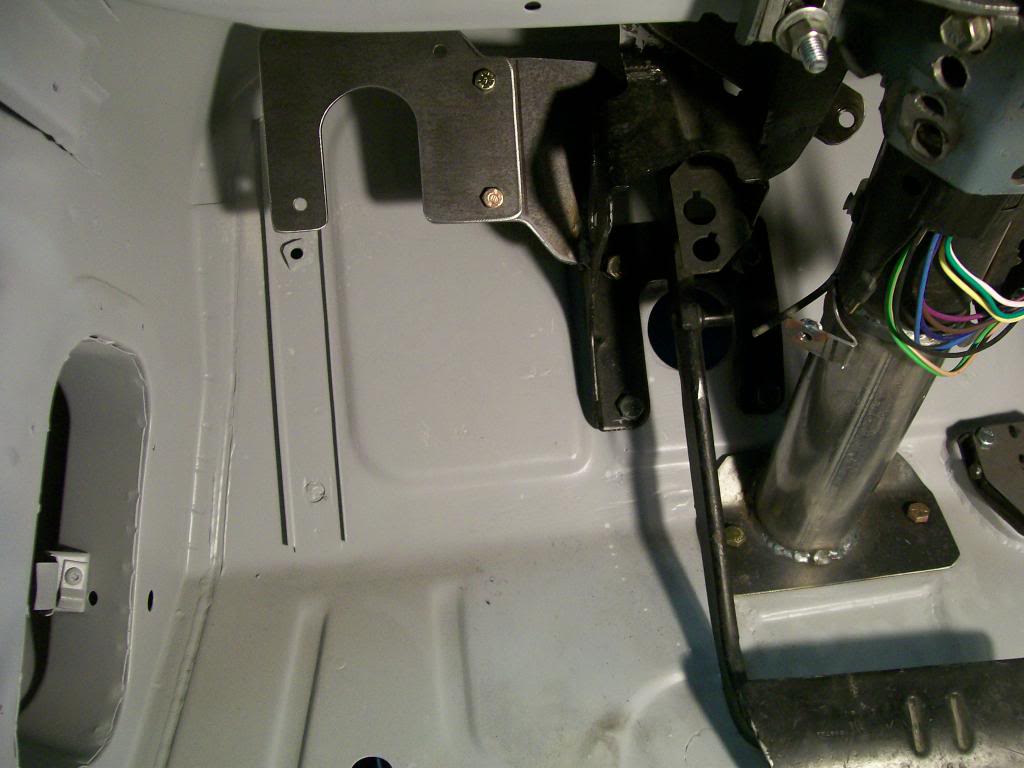
And done. Now I have no holes and no extra wires going through the firewall, I have space all around to run the wires where needed.
