You must be logged in to rate content!
12 minute(s) of a 668 minute read
2-3-2013
With so many variations anymore, it's hard to give a yes or no answer.
I seems electronics has worked it's way into everything anymore. Often times the electronics are used to control the passing gear and shift points vs a transmission such as this Turbo 350 which used a cable that connected to the side of the carburator for passing gear and a vacuum line connected to the intake manifold to read how hard the engine is working to determine when it's time to shift to the next gear.
With later model vehicles, it's more about electronic sensors and electric soloniods to activate shift points, but still having a hydraulic system within.
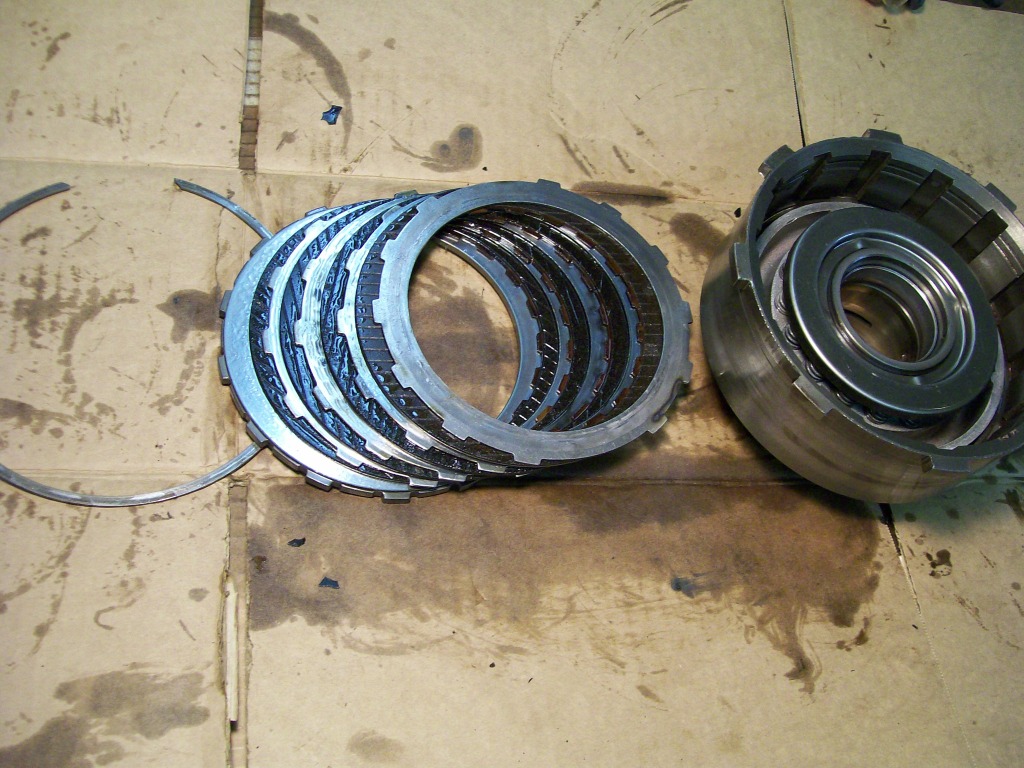
Once the large snap ring is removed the top backing plate along with the steel and fibre discs. These discs have turned black from overheating. Plus small chunks of material has flaked off the fiber discs.
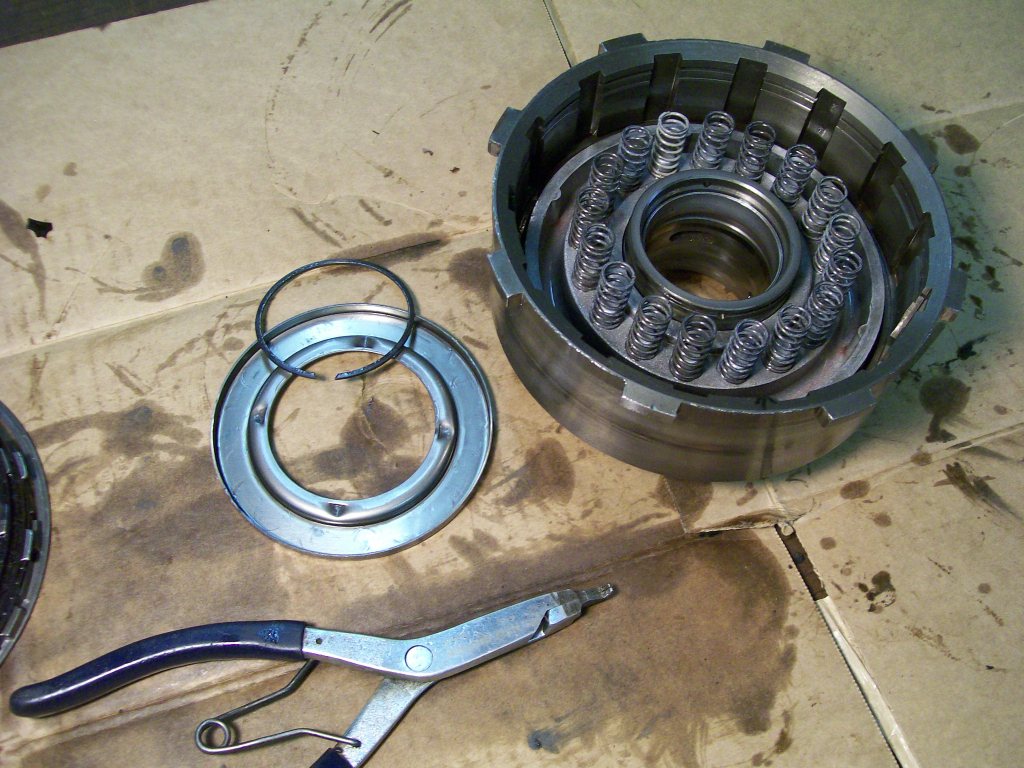
Now for the tough part, this is where the proper tool is going to help. Once the discs are removed you can see the top steel spring retainer. Under the steel retainer is a set of springs. Holding the pressure of the springs back is a snap ring just above the steel retainer.
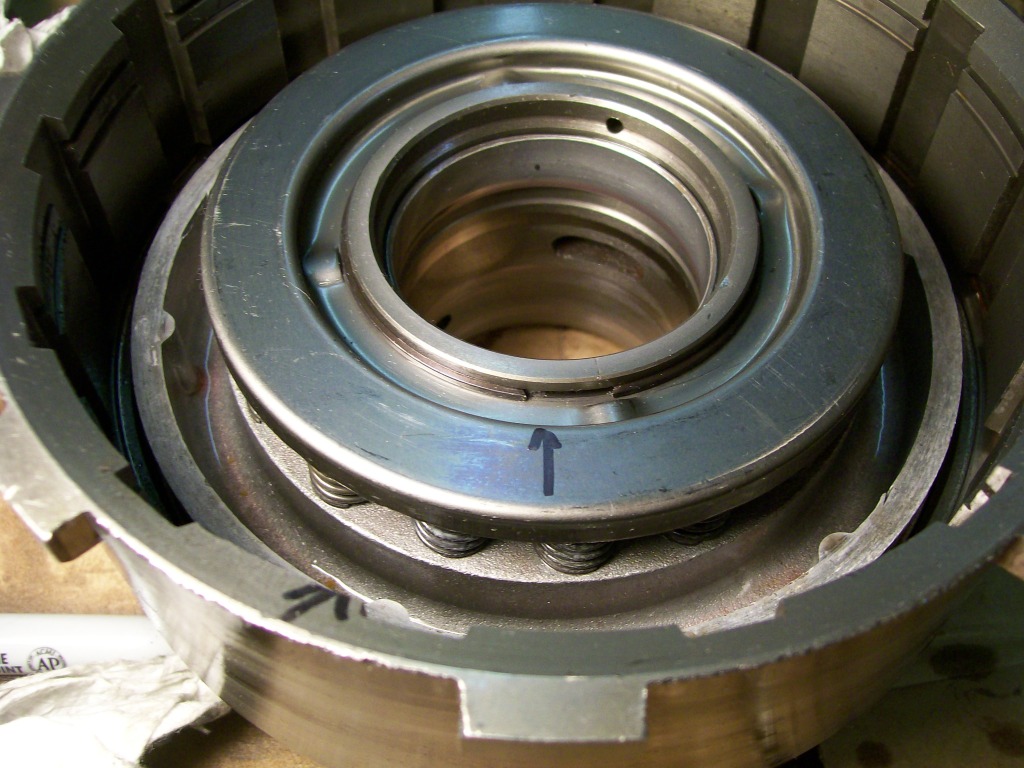
Next the retainer and springs need to be compressed, otherwise the snapring will not come out. Two reasons, 1) simply due to the spring pressure pushing against it. 2) the steel retainer has bumps or ridges built into the steel retainer. Once in place, these ridges keep the snap ring locked in place.
The tool needs to compress the springs far enough to get the snap ring clear of these ridges in the steel retainer, than we can remove the snap ring.
2-5-2013
I did my first couple transmissions with a homemade spring compressor, then I saw this, more professional tool, it works great.
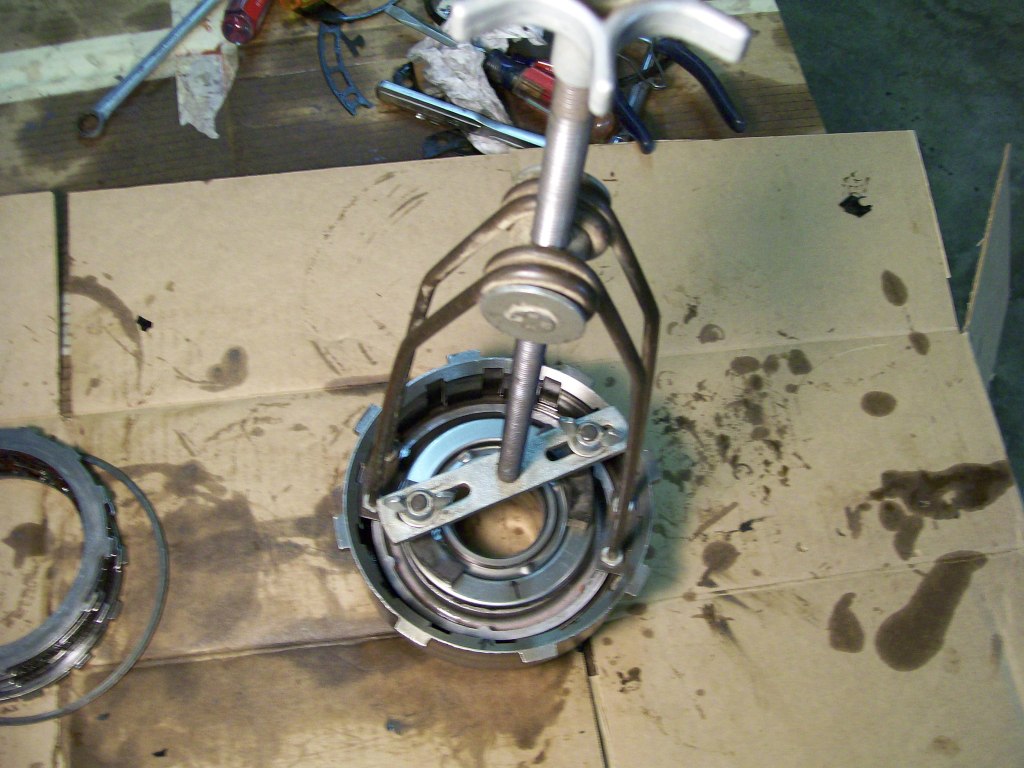
It simply snaps into the upper snap ring groove, then turn the handle and the springs get compressed. Just be sure it's seated into the groove, there's gonna be alot of spring pressure pushing against it.
Here's a closer picture of the business end of it.
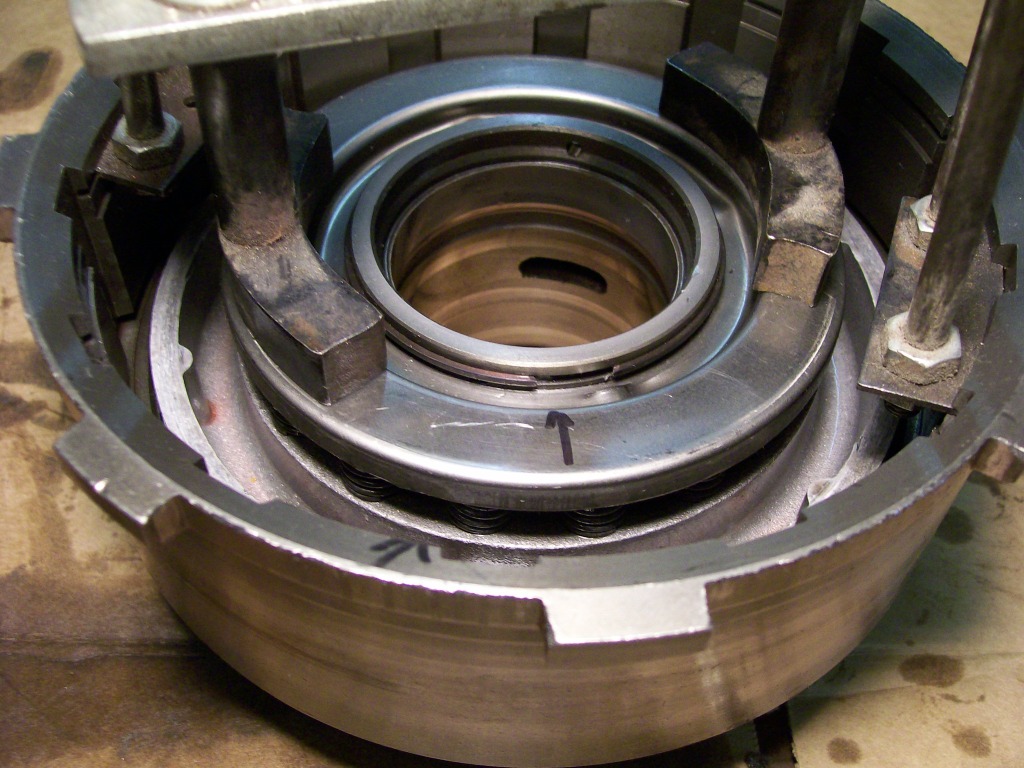
It has compressed the springs and moved the steel retainer down far
enough to use a snap ring tool to expand the snap ring. Once the snap ring is removed I can unscrew the compressor.
Next we'll take a look at the piston and the seals that need to be replaced.
2-8-2013
Once the compressor has done it's job and the snap ring is removed, the steel retainer is removed exposing the springs.
Sitting under the springs is the piston. Around the outside and inside the piston are a set of seals. When buying a rebuild kit, the seals are always included.

Along with the seals there will be clutches in the rebuild kit. With the seals we have the old ones becoming hardened over time or becoming ripped. The next thing that goes is the clutches. Once the seals no longer hold the pressure needed to lock the clutches tightly together when engaged, then the clutches are allowed to slip under load they will overheat and the friction material will wear away. Next thing we have is no friction material so we end up with steel rubbing on steel.
This next picture shows the result of old seals leaking. They didn't hold pressure and the clutches failed. You can see where we should have steel, friction, steel and so on. One of the friction discs has worn to steel now.
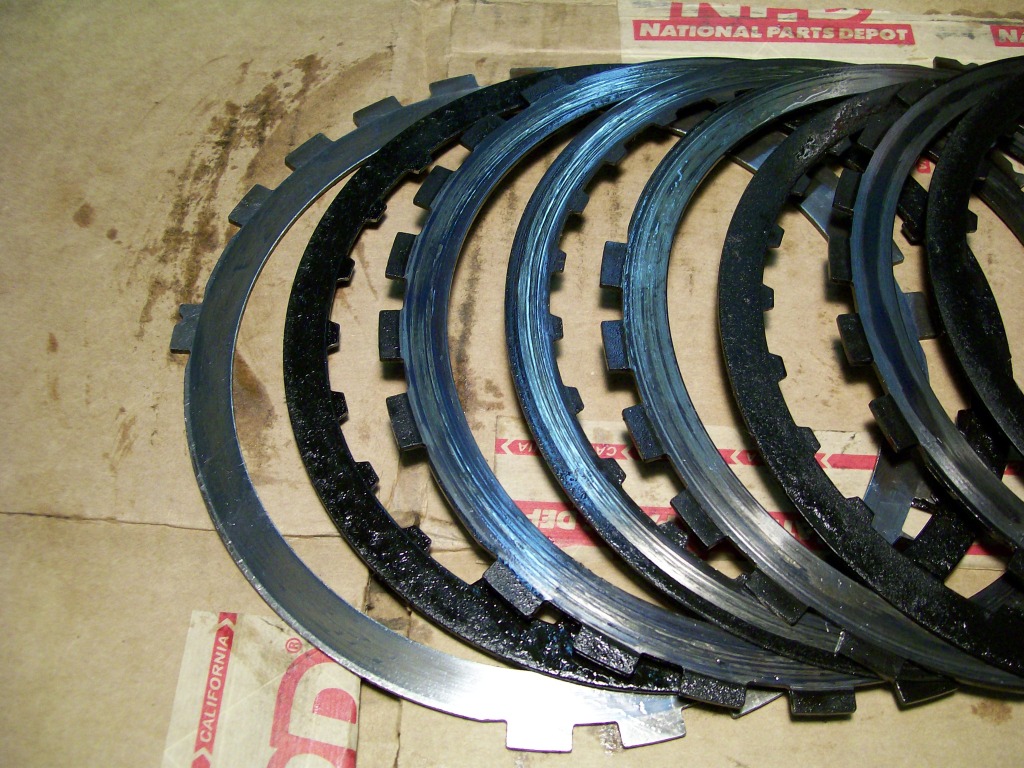
The owner didn't mention one of the issues he had with this transmission. Once I removed this set, I asked if he had any issues with the transmissionwhen he put it in reverse. At that time he said, " well, as a matter of fact", and told me how he had to wait for reverse to engage when cold.
Moral of the story....worn parts always tell a story.

9-2-2013
Ok guys, lets get this thread back to an active state again.
I finally shook off the dial-up and now have a high speed connection. I ended up with Verizon Jet pack. It acts like a cell phone and receives it's signal the same way. It then serves as a WiFI hot spot.
My signal is fair and occasionally I get 3G speed, which works good, way better than dial-up. Usually, when I place it at the back window, I get 4G speed, wow, where I used to wait 10 or 15 minutes for a picture up load, 4G is like 10 to 20 seconds.
I've been extremely focused on the 57 Chevy truck, once again, if you don't mind stepping away from Willys stuff, you'll enjoy. I wanted to get it finished by July, now I'm hoping by November, ha, now I may be looking at next spring.
The delay is not do to lack of ambition, I am finding myself stepping into areas that I haven't dealt with before such as interior work. I hope I do as well as the talk is going around town. I've had a few visitors over the last couple months and they've spoken well of the project so far.
If you want to see Willys work, I haven't had to do any, I must have done good with all I did last year because I just keep getting into it, turn the key and put it to work. It has been my perfect work horse.
I'll finish the transmission that we left with last time, within a couple of posts, then get to the 57 Chevy.
Too late tonight to post pics.
Thanks everyone for your patience. Jim
9-3-2013
Wow, thanks everybody. I do see a few of the lurkers stepped forward also.
Just a touch of the dial-up failure. Once photo bucket up graded, my explorer 7 wasn't able to be used, I had to go to explorer 9.
I tried to download and upgrade to 9 using dial up. The time to do so was like 2 hrs, what the heck, I'll do it. Well it took a couple of times because the computer would disconnect before the download happened. I tried it a couple of times and finally I got it downloaded. Problem was, it wasn't a proper download and explorer 9 would sign off when ever I tried to use it.
I got a hold of photo bucket and they recommended going to Chrome as my browser. I did get it down loaded although it took a couple days. I could now get a picture up loaded if I was lucky.
Then the torchmate had a problem, now I need to upgrade one of my drivers. Ha, I went to download it and the timer said it would take 40 minutes, then shortly there after it said 2 hrs, ha, then it went to 2 days. THAT'S IT!!!!! Time to do something!!!.
That's when I was directed to the Verizon jet pack.

This thing kicks butt.
Now that I have high speed I see that most pages and sites are running videos for the commercials and ads, these absolutely kills the capability of dial up anymore.
Yes, it does me good to see an idea I've posted to be put to use. What I like about this technique is 1) the nice clean bend that can be done with a thicker material, looks very nice. 2) if or when you get it welded, you didn't have to force or leave any tool marks on the bracket, gives you a nice factory finish.
9-4-2013
Hi Mike, it great to reconnect with you. I've wondered how you're doing. Let me get this straight.... you sold the truck you had and picked up a cab and fenders for another project? If this this is so, I have to say, good for you.
What I mean is... sometimes it's more fun to build something that has lost most of it's originality, now it's an open book to do anything and any modification without the inner feeling that your destroying a piece of lasting history. I saved mine from years of sitting in a farm field, I figure I saved it from certain death, I could do anything I wanted to it and it has been happy with it's second life, it just keeps on serving me when needed.
Ok, go back a couple of pages and we were dealing with the turbo 350 transmission. I removed the old lip seals off the piston and have new ones to slip into place. With this picture you can see why they're called lip seals.

Now with the lip seals installed on the piston.

Now for the tricky part, getting the piston back in place with out ripping the lip seals. Look closely and you can see how the lip seal is trying to fold over backwards, force it in and the seal will rip.

Here's the answer, in this picture I'm using a feeler gauge. In some of the recent rebuild kits they also have a round plastic disc that works well also. The idea is to gently push the lip of the seal downwards while applying slight pressure on the piston. It takes a little patience and sometimes it seems like the piston won't drop down, but keep working and it drops into place.

At the moment I don't recall the situation but this technique had to be used to assemble something other than a transmission, so keep this in the back of your mind for the future.
9-5-2013
Hi tj98, yes, mostly steel. Back then they were more concerned about a truck that worked and not so much about making it fancy or comfortable.
I've googles pictures of interiors and found a ton of extremely nice interiors, much more in depth than I would be able to do. But on the other hand I'm not looking for a truck that is all comfy and cozy. I'm trying to build on the original look of the truck. I have always seen an authoritive look, especially the way the front of the truck is shaped.
So for the interior I want to stick with black, along with stainless steel accents. I will be covering some of the inside with vinyl material to add a little depth in some areas.
The outside of the truck was going to be maroon and silver two tone, that decision has been changed to black and silver, once again, trying to capitolize on the aggressive body design.
The bench seat has been replaced with a set of bucket seats also. I have pictures, we'll get there soon.
Finishing on the transmission, when I mentioned the lip seals, it was because you will also find square cut seals, you have to pay attention when disassembly because they can be the same diameter yet have different styles.

Clean, clean, clean before assembly.
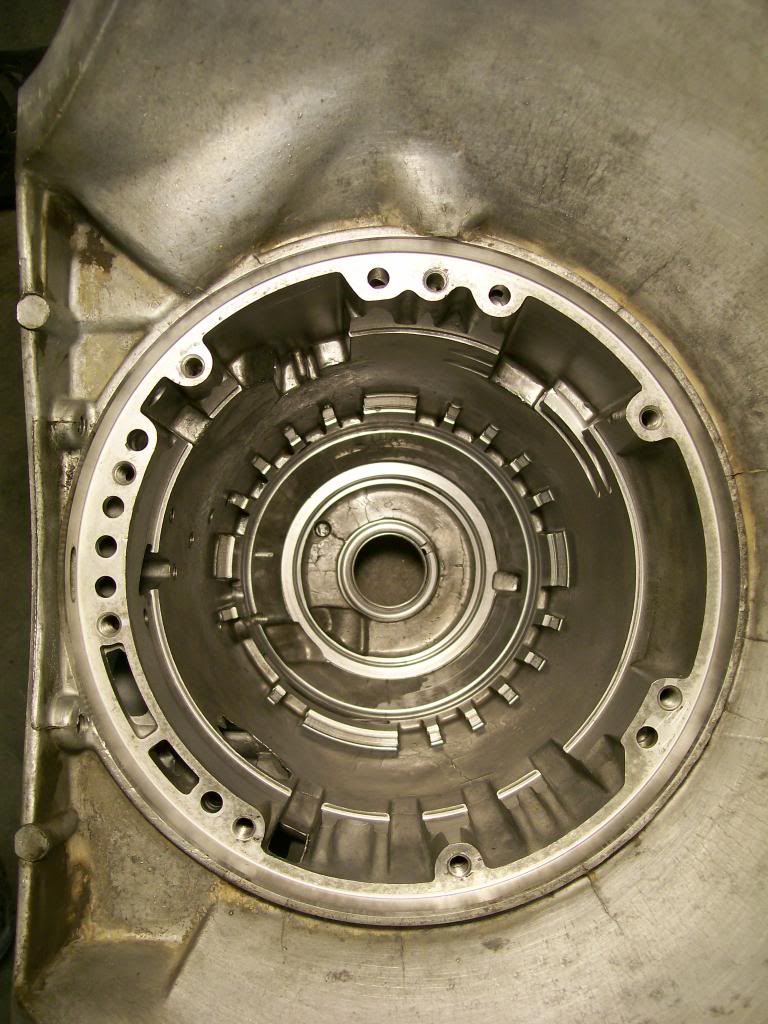
Many of you have heard about the check balls. You can see then in their places here. Beware when doing a shift kit, some companies will have you leave a couple check balls out when upgrading, read the instructions.

The pile of replaced parts.

I'm happy to say the truck is doing well and he takes it to car shows and does quite well.