You must be logged in to rate content!
8 minute(s) of a 668 minute read
11-23-2012
Luke95, just a bit of Corvette trivia.... The 63 through 67 were the original Stingrays. Then in 68 with the new body style they dropped the Stingray name. Then along came 69 and through public concept they put the Stingray name back on the Corvette. They altered the name slightly, it was the difference from Sting and ray being together, vs Sting and ray being one continuous word. I'll let you dig into it if it sparks interest. Either way... it's a classic.
tj98, thanks for checking in. As for the turn signals I'm hoping to use a headlight that has a turn signal built into it. This particular head light has details built within that will give a nice eyeball look to them.
Believe me, everytime I sat back an considered the final look with these gills I was 50/50. Then I thought about the original turn signals and I concluded that they didn't help the aggressive look of the front, so I went at it.
I'm trying to be carefull that they don't stick out too much when done. I guess I'm looking more for the impression on gills vs a strong set of gills. (Hope that makes sense.lol)
I keep reflecting on the 69 Camaro. In front of the rear wheels Chevy put louvers in the quarter panel. They weren't stand out features, but they made a subtle statement that worked.
tj98, thanks for following along the thread. This is just a good time for me to say.... I'm not the most artistic guy, but I have to believe that by posting the large variety of stuff I do in the shop that I have sparked the imagination in many following along. It may be engine, axle, welding, painting, fabrication, ect. I wish I had the internet to follow many years ago, how lucky todays generation is.
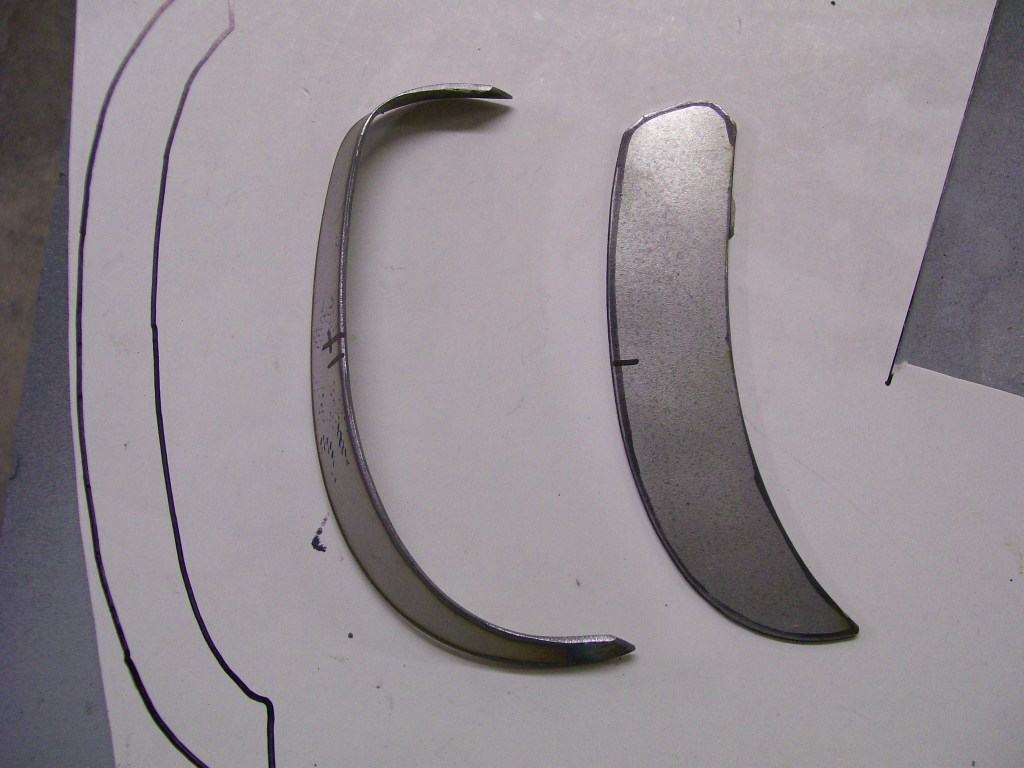
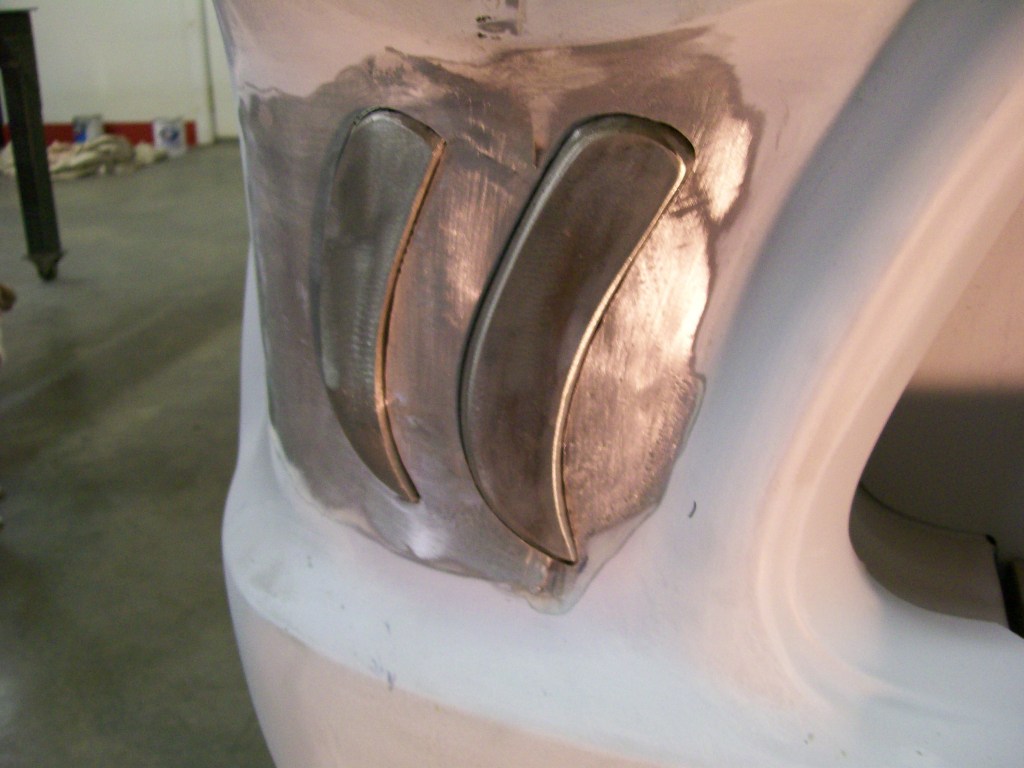
I had to decide how to make these gills. I decided on a 3 piece design, top, back (flare side) and the front flat side.
I am blessed to have the torchmate, once I made the first top of the first gill by hand I copied it on the computer then down sized the image for the other gills. Making the flare side was the difficult side. trying to get the flare took a bit of work, once I figured it out I was ok with the rest of them.
Picture time....
Cutting a flare piece than bending it to fit the top gill took a couple tries.
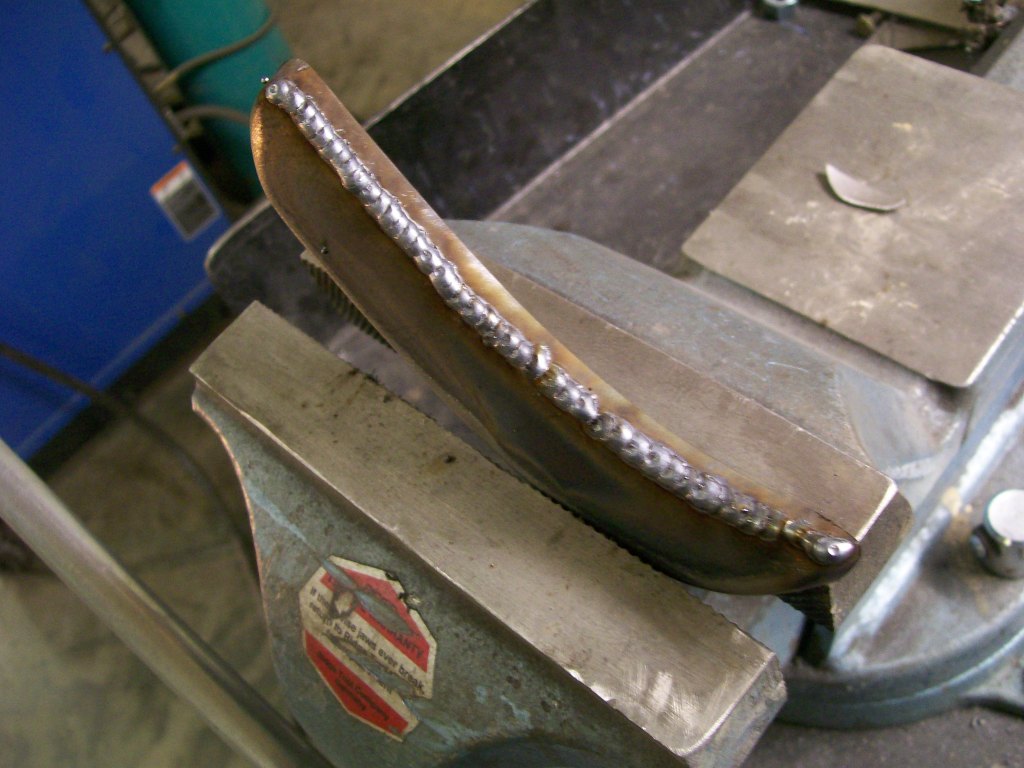
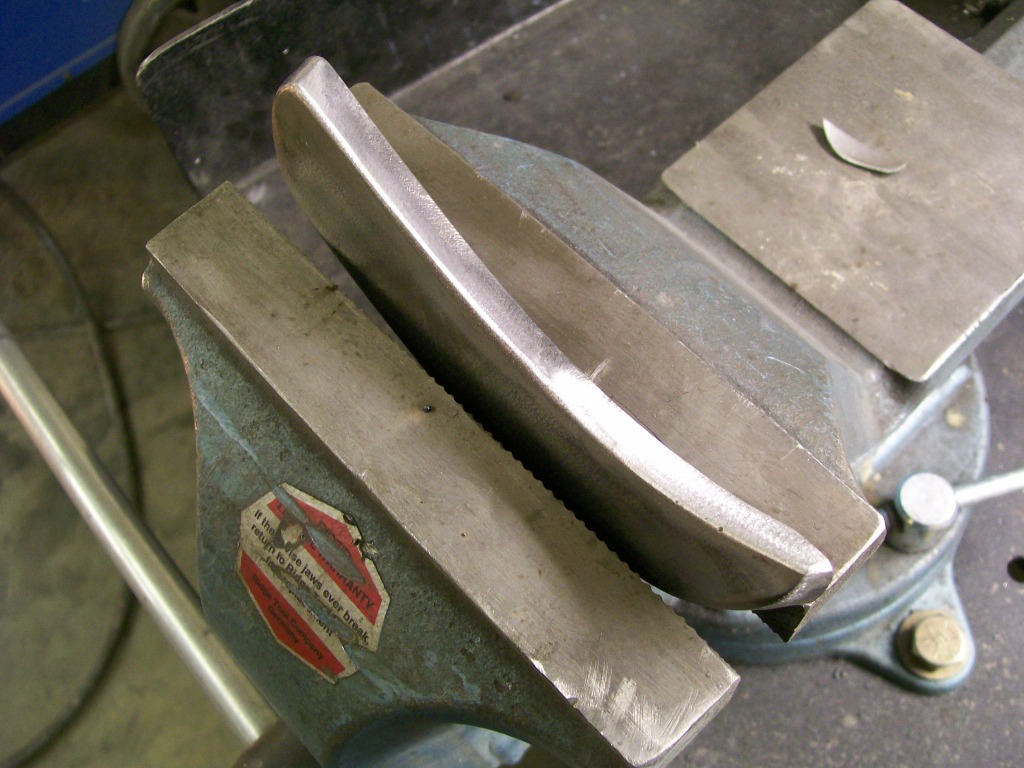
Once all the pieces were cut it was welding time. I've posted a bunch of these weld and grind items, I just like how bad they look then how good they look.
11-25-2012
Cutting up american muscle cars, shame on you... lol. Ooops, I better hide my past also. I hate to think of some of the parts a pieces I've thrown away just because I didn't move stuff over the years.
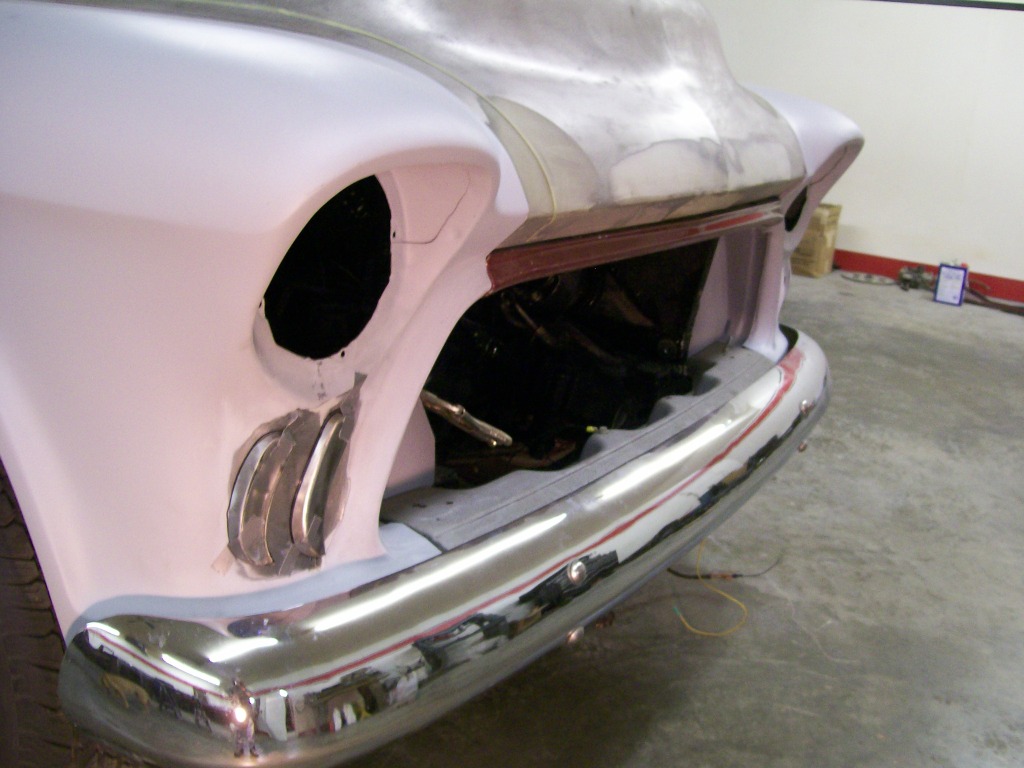
Today I fitted the three gills to the passenger side. I'm really happy with the result. I went a different route than I was planning on when it comes to attaching the gills and a little extra work, I still have work to finish, but I'm confident of the end look when finished.
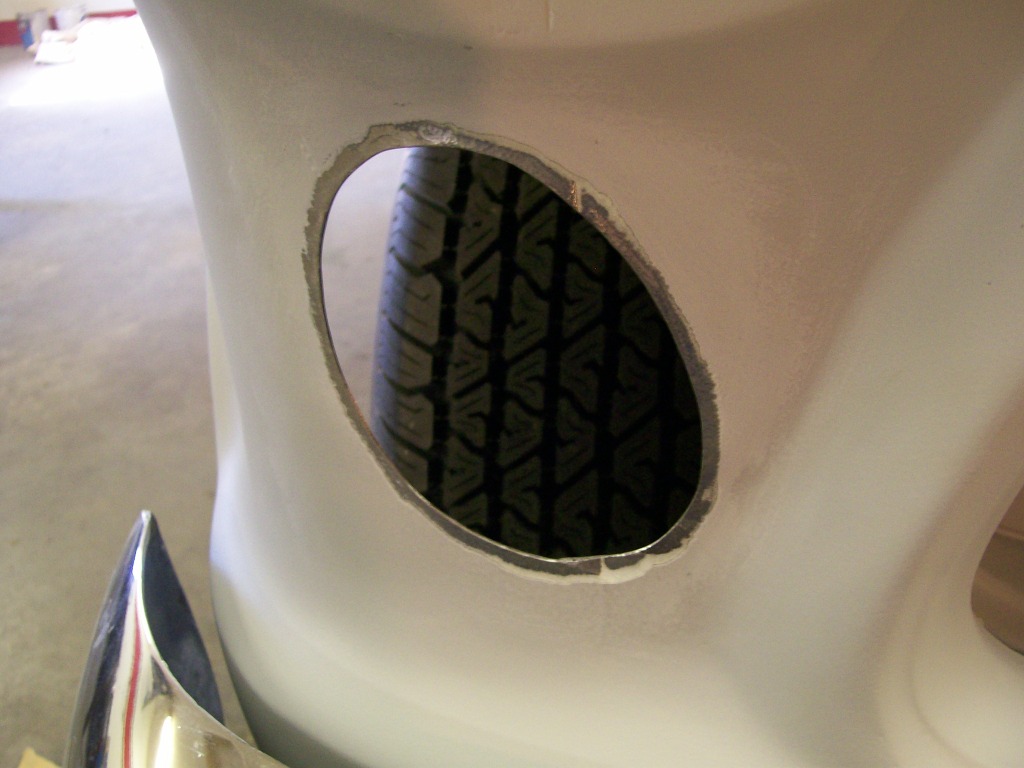
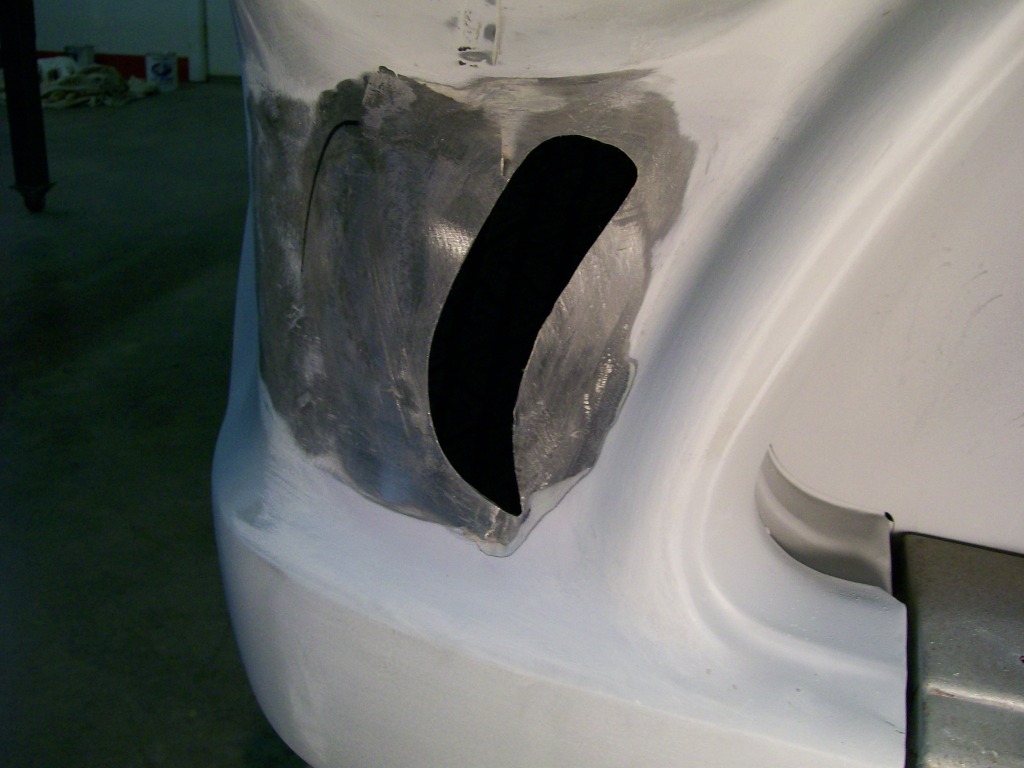
Before I can finish I have a couple steps to do first. I need to get rid of the original turn signal mounting pad on the fender.
I drew out where I wanted to cut. Then once I started to cut, or in this case, drill, I realized my mark was rediculously large, so I cut where I wanted.
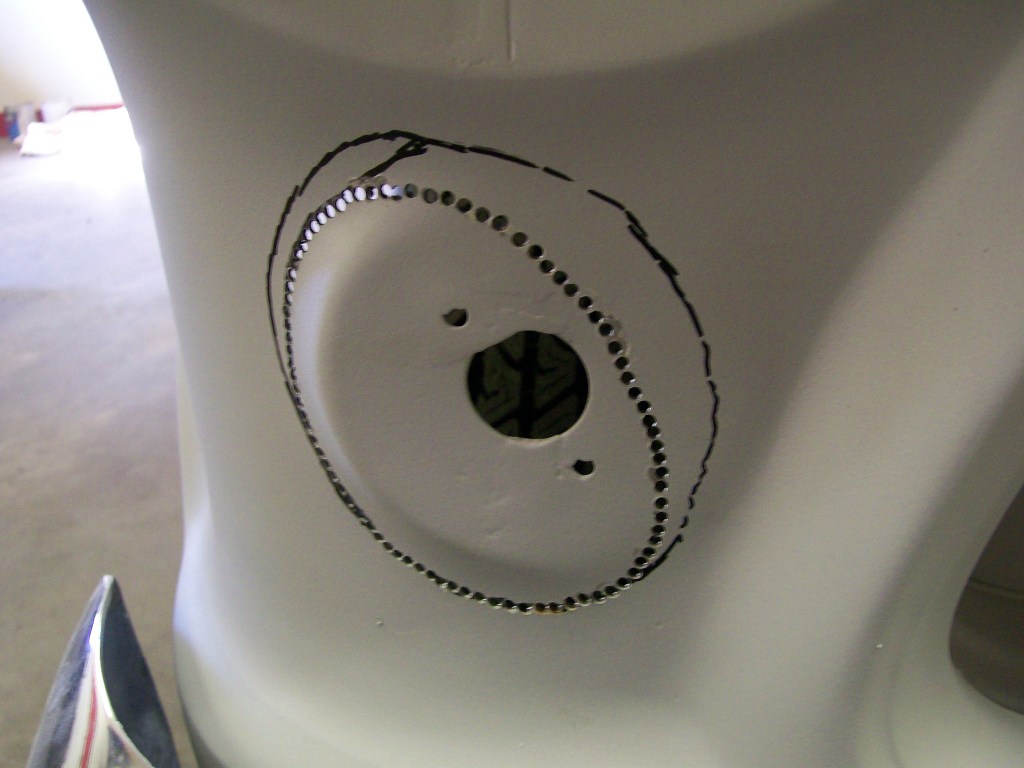
Once the piece was removed I used a large diameter brr on the drill to clean up the edge.
I used a piece of construction paper and a sharpie marker and made a piece that matched the hole, then transfered the pattern to sheet metal, then welded it in.

I'm not overly concerned about the new patch looking perfect here. By time I'm done I will cut 3 large gill slots anyway. The patch just gave me a flat area to work with.
11-29-2012
Thanks dlysle, the subjects bounce around alot through 86 pages, I'm glad you checked in.
I've made some progress on the gills. Here's a reality check....
I had the gills in place on the truck, I happened to walk into the shop totally thinking about something else, as I walked by the front of the truck the gills caught my eye. I had to take a second glance, a big smile came to my face. Basically I liked what I saw.
My point is... we can get so focused on a project that we can't tell if it looks like we want when done. The mechanical aspect of the build overrides the imagination of the build.
The next thing to figure was the location of the gills and the distance between each gill after that. For me I decided on this location, I used the sharpie to get a visual impression.
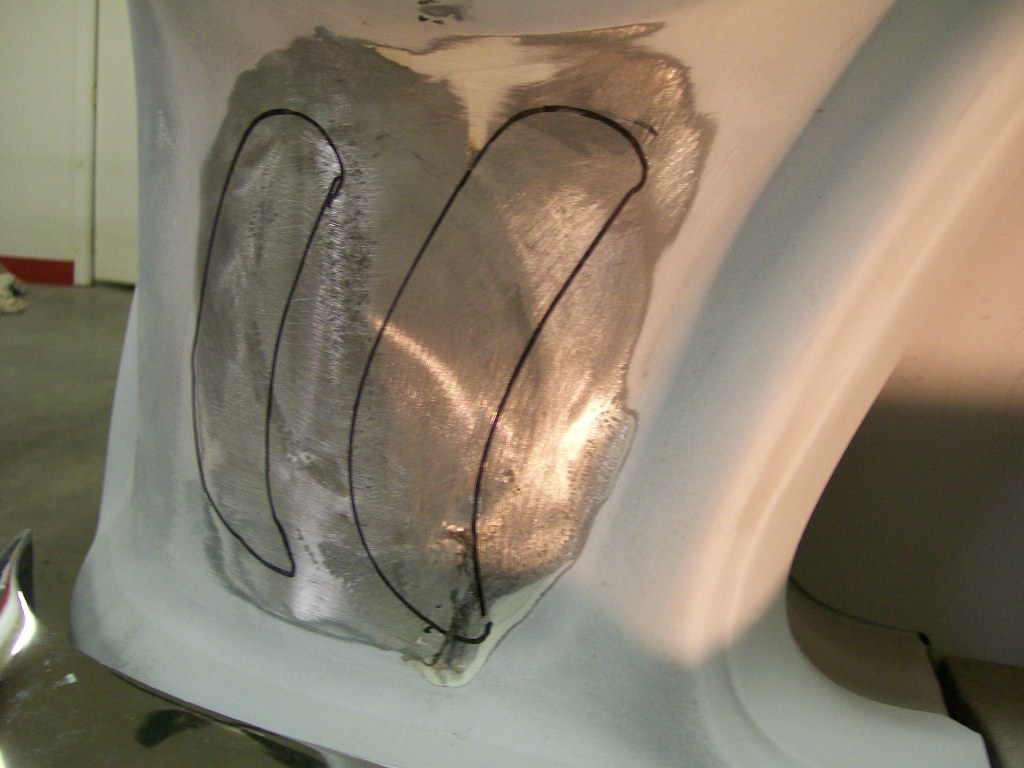
Now that I have the gills to work with I taped them in place to get more of a 3D effect while looking at them. Keep in mind, I only have 2 here, there will be 3 when done.
The third one wraps slightly around the curve of the fender, I'll have it in some of the next pictures.
Hopefully with this picture you can see the shark mouth begining to stand out more.
12-2-2012
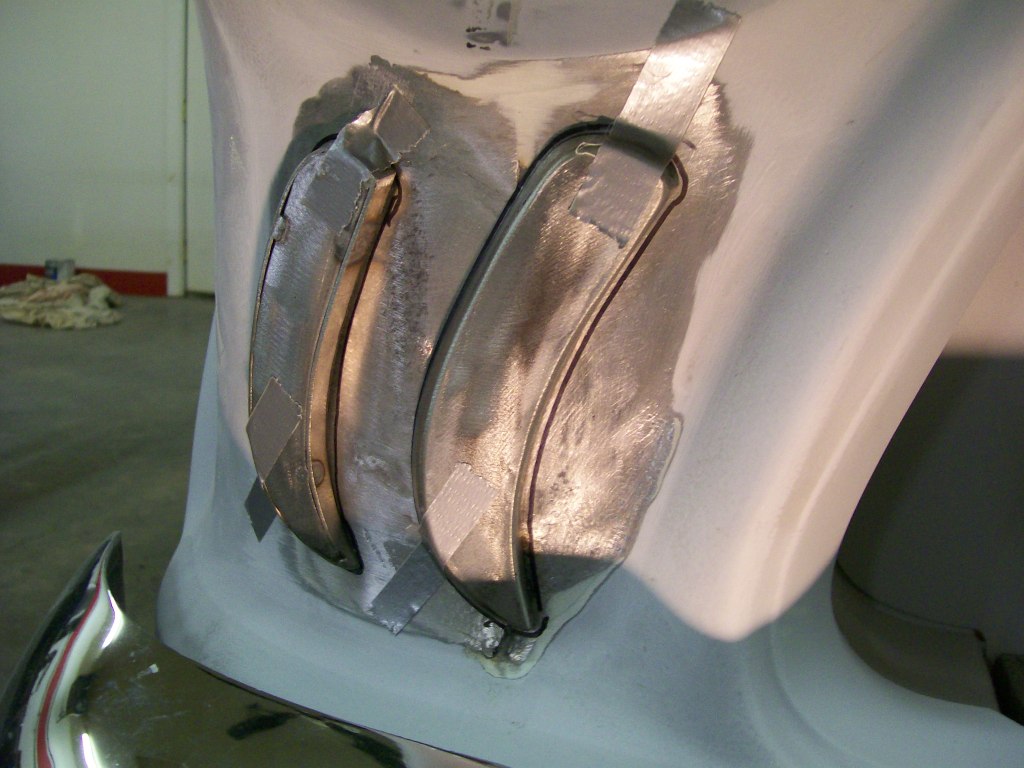
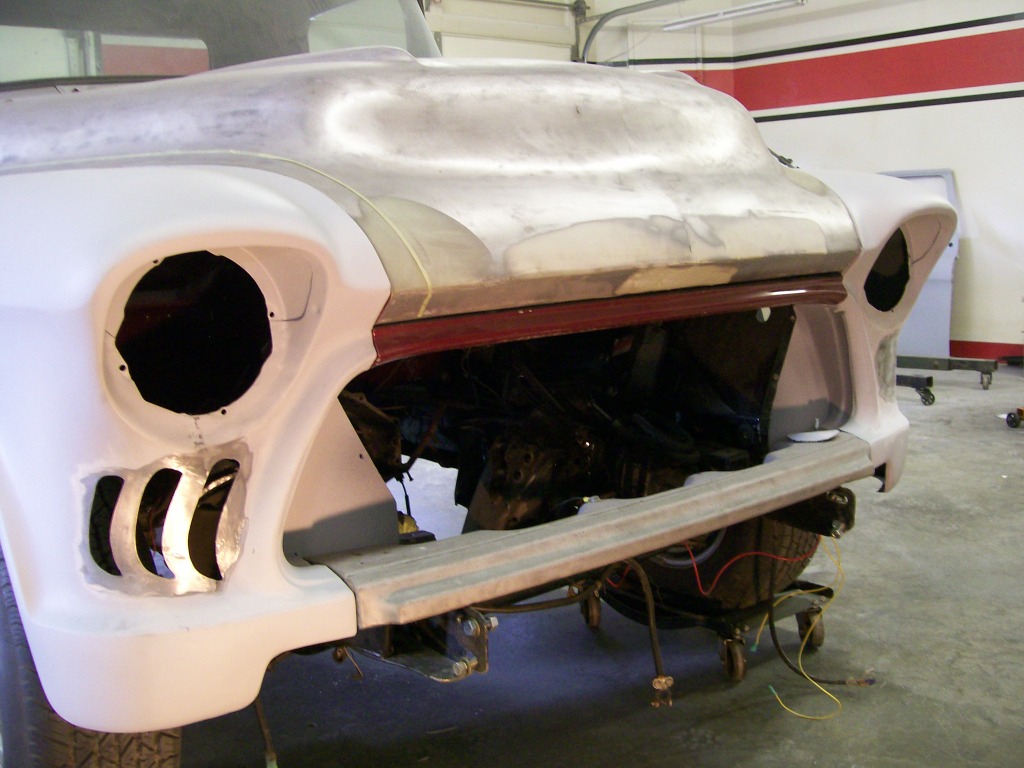
At tis point I have a decision to make at this point, how to attach these gills. Welding them at this point would be easy enough but I'd have a mess of weld to grind away to get the detail back where the gill meets the fender.
The only option I can figure is to cut into the fender a hole matching each gill. Then inserting the gill from the backside. This way all the welding will be inside the fender and most of the grinding will be to blend the gill flush with the inside of the fender.
Carefully cutting the fender to match the gill.
I like this fit, it leaves a nice clean edge all around the gill.
With all three holes cut.
More to follow...