You must be logged in to rate content!
12 minute(s) of a 668 minute read
11-5-2012
J-Quad, thomask, great topics. There has been a couple of areas that I want to step in and start going at it. I do however do the first thing, for instance, polish a crankshaft journal, I did the first, then he did the rest. I did the first intake port grinding, he's done the rest.
He has a very enthusiastic outlook and knows what he is learning is priceless. I know that if he does most of the work with his hands that he is more likely to remember what he learns, just reading this stuff out of book won't stay with you, hands on, usually stays with you.
For the rest of you, digital pictures..........
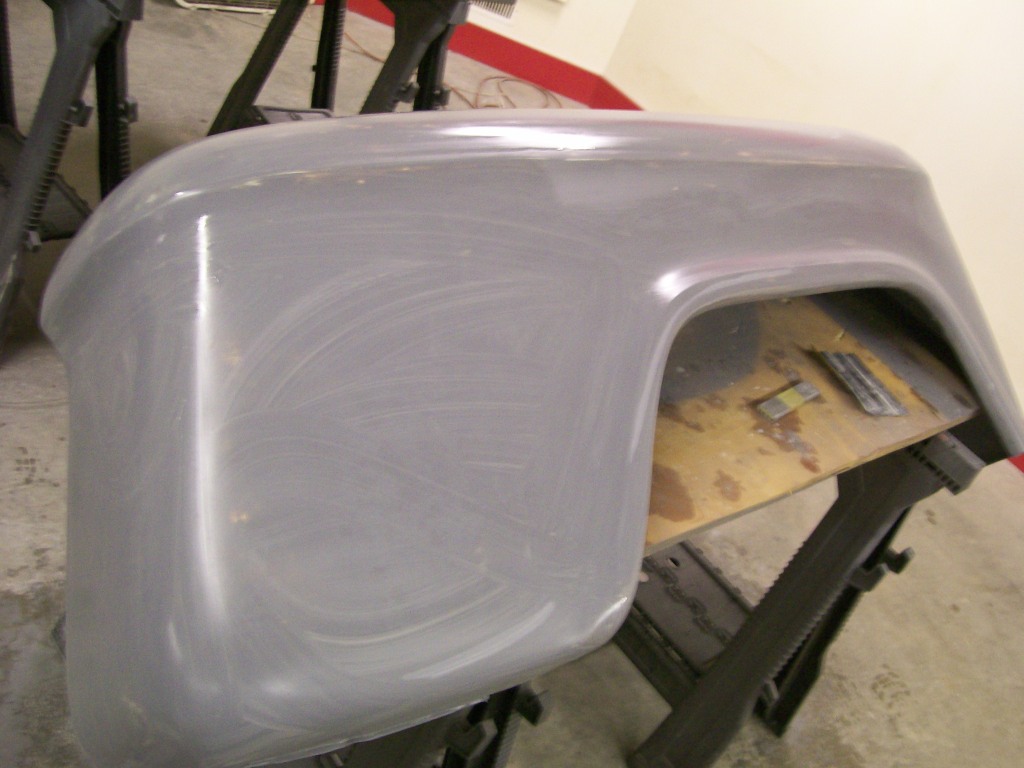
Back to the priming.. After the epoxy primer fully cured I block sanded. My block sanding is wrapping 3 paint sticks that have been taped together, with 220 grit wet sandpaper. The idea is to sand away the primer from the high spots till the highs and lows create a flat smooth surface. The epoxy primer does have some depth to it, but not nothing like a high build primer.
In the case of sanding the epoxy primer, it shows a few of the areas where the body filler meets the metal. The block sanding just levels most all the waves on the panel. Here is the fender just after block sanding, you can see where the primer became thin, these thin areas are all the high spots.
Here's a close up of what block sanding tells about the panel. This picture shows where the sandpaper didn't touch the primer. Now I know a specific area to focus on to level this panel.
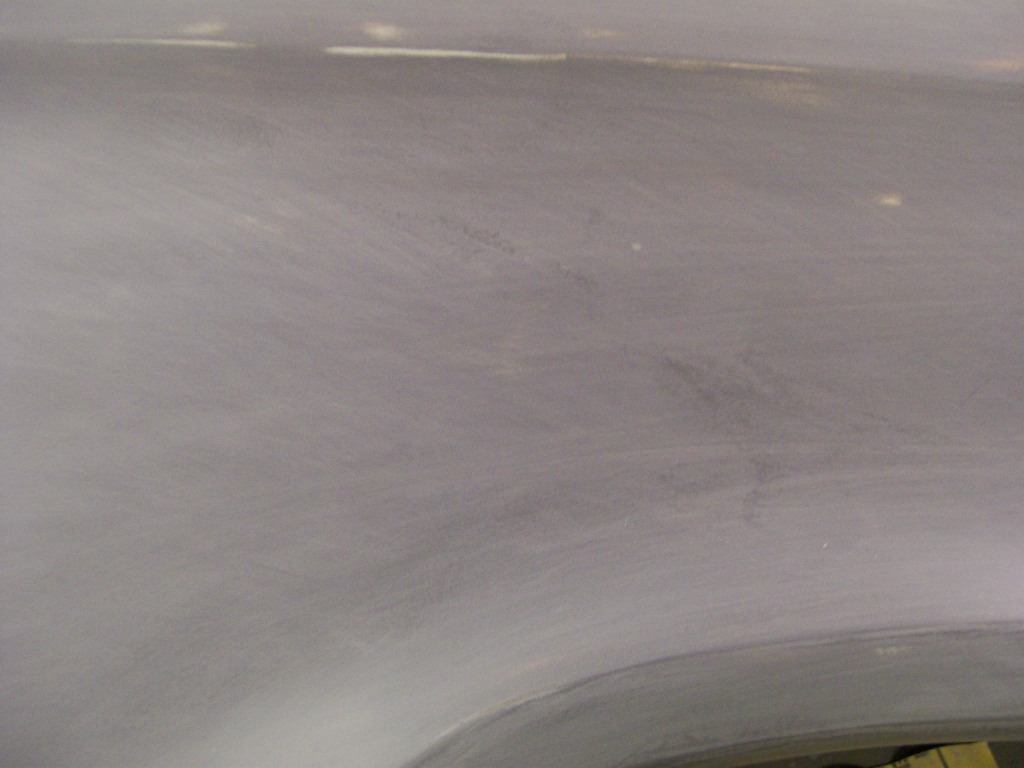
It's my choice now...I will hand sand this area to guarantee adhesion with the next coverage.
11-6-2012
On the last post I mentioned I had a choice. What I meant was, with the very small low spot that didn't get touched when block sanding I have to fill this low spot. I have two choices, I could scuff sand the low spot and spray a couple coats of high build primer and block sand till the low spot is built up.
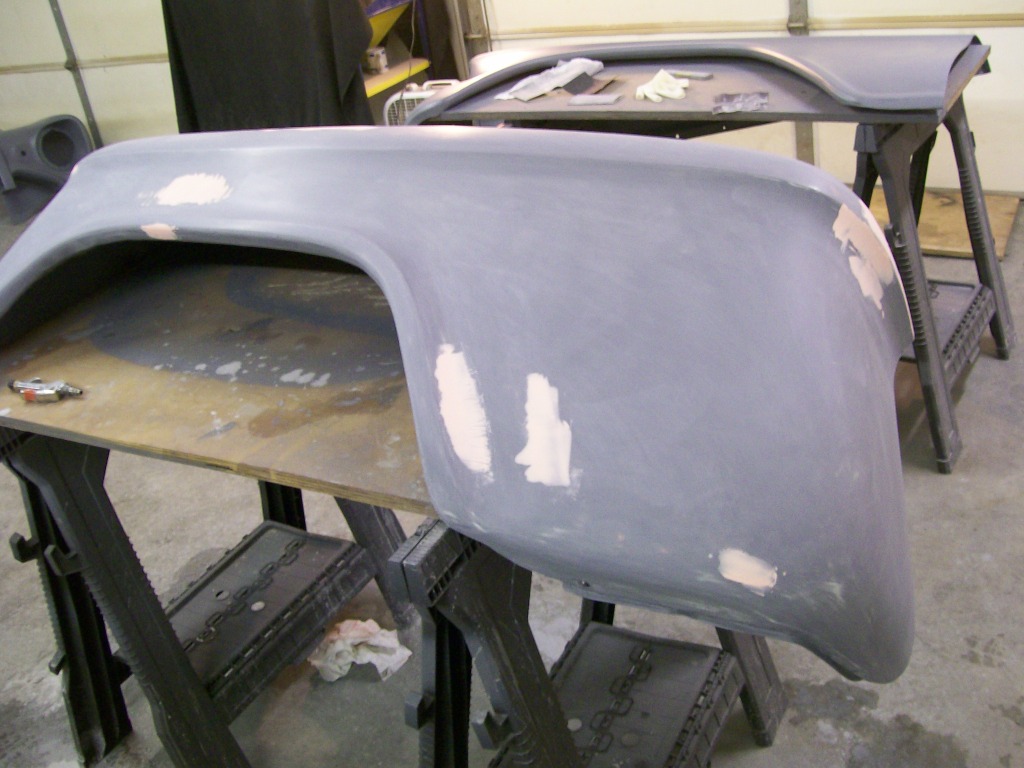
The route I took was to scuff sand the low spot, mix up a little bit of spot putty that requires a hardner. I'll only use the spot putty with hardener, the air dry putty will shrink later and show a depression. By using the putty, it dried completely over night, I wet/block sanded the putty, then when I did spray on the high build primer, these low spots were already a thing of the past.
These are the low spots that showed after the first block sanding.
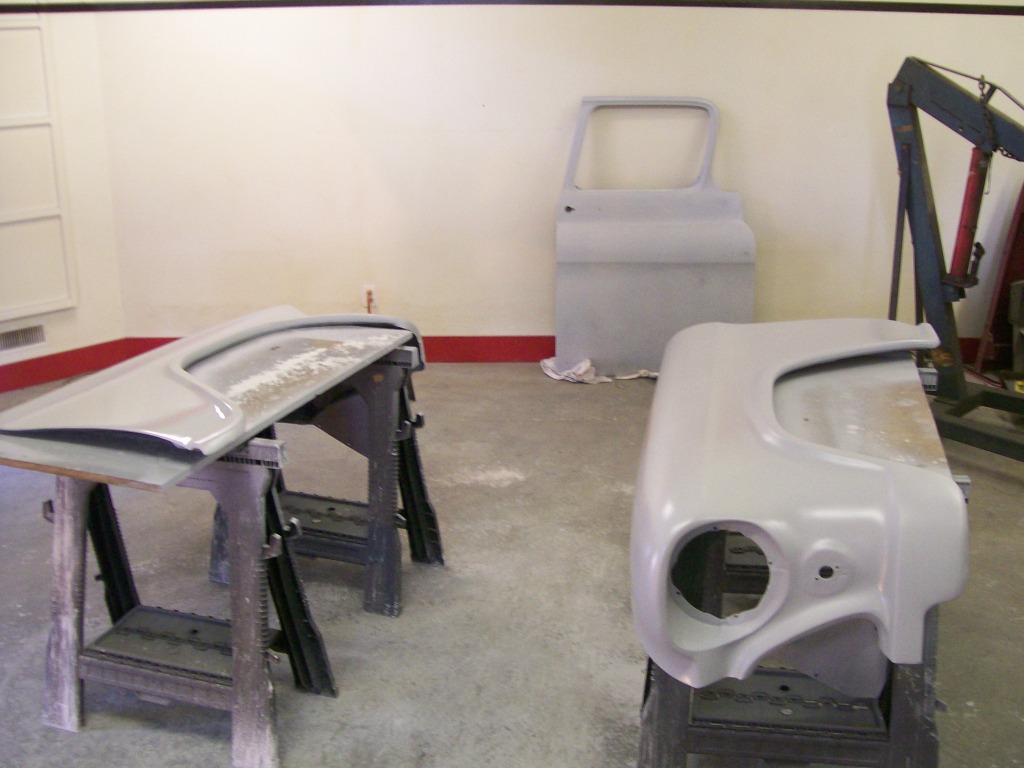
Once I sanded the spot putty areas I was ready to apply a couple coats of primer. The design of the fenders was handy, they layed on the saw horses nicely.
Here is just after I sprayed 2 coats of the high build primer. They look so much better now than they have for the last two years when they were bare metal with body filler.
Back in the late 70's early 80's I was doing bady work continulously. Then I got away from it, now I'm back to doing it again. Although the cost of the materials have nearly tripled over the last 30 years, the quality and workabliity of the products has come a long ways. On the other hand, I noticed the health issues are more of a concern for breathing the fumes. Bottom line, wear a mask.
11-7-2012
I'm glad you asked.
Yes, this is one of the products that changed over the 30 years I was away from any real body work. The old spot putty was simply squeezed out of a tube, once it hit the air you had about 5 minutes or so to apply it how you wanted it. The problem was... it would form a dry coat on the outside, if you happened to get it alittle thick, the dried outside coating would block the putty underneath from getting air, it wouldn't dry fully. Then as you primed and painted and color sanded and buffed the putty would cure, sometimes from the heat of the buffing or just the sunlight. With this curing there would be shrinkage, now you can see the area where the putty was applied.
The second putty now, as I found it at my local parts store, hanging right next to the air dry putty, both made by 3M, is called the professional grade. Regardless of the name, they should only sell the professional grade. It has a hardener just like regular body filler, you mix it just the same. Now, altough it needs air, there is a chemical reaction under the surface that cures the filler thouroughly from top to bottom. It now doesn't have the shrinkage problem and you can work with it much faster.
Moving forward to primers. I was delighted to see there are also primers that require a hardener, or catalyst. The old days we used a lacquer based primer to do the block sanding. Same problem, if it was sprayed on too thick, you would block sand only to see fine sand scratches come through later as the primer was still curing. The last high build primer I used on these fenders was feather fill. It gives you the option of spraying a couple of good wet coats, let it cure and that's it, no more shrinking, the catalyst that is mixed with it completes the cure all the way through.
Hope this helps...
11-9-2012
No problem, glad some of my experiences could help answer some questions and help get past some future problems.
When it comes to what gun to use I don't have alot of experience with many guns. However, I did buy a new one a couple of years ago.
Some of my main concerns when I decided what gun to buy was to get a gun that was HVLP. These have the cup on the top of the gun. The old style had the cup on the bottom and the pressure had to be higher to get the same amount of fluid flow. With the HVLP gun and the lower pressure, the overspray is much less.
We already spoke about primers earlier. The new primers can be sprayed at a much thicker consistancy. With this thickness the needle and the main paint head of the gun has to be larger to allow this primer to be used. There are different parts to be had for the variety of applications, make sure the gun you buy has options available.
I seem to use a 1.2 tip for most paints and clears and 1.8 for the thick primers. You can definetly tell the difference using one tip vs the other.
With thses thoughts I went went with the Eastwood concours gun, it has a very wide range of adjustabilty and replacement parts and the cost was right where I was willing to spend.
Regardless of the gun, get one from commom know gun supplier so you too will have the choices to spray most any product you need to.
Now that winter is here I want to get past a couple ideas and get most of the mechanicals finalized so I can worry about painting in spring.
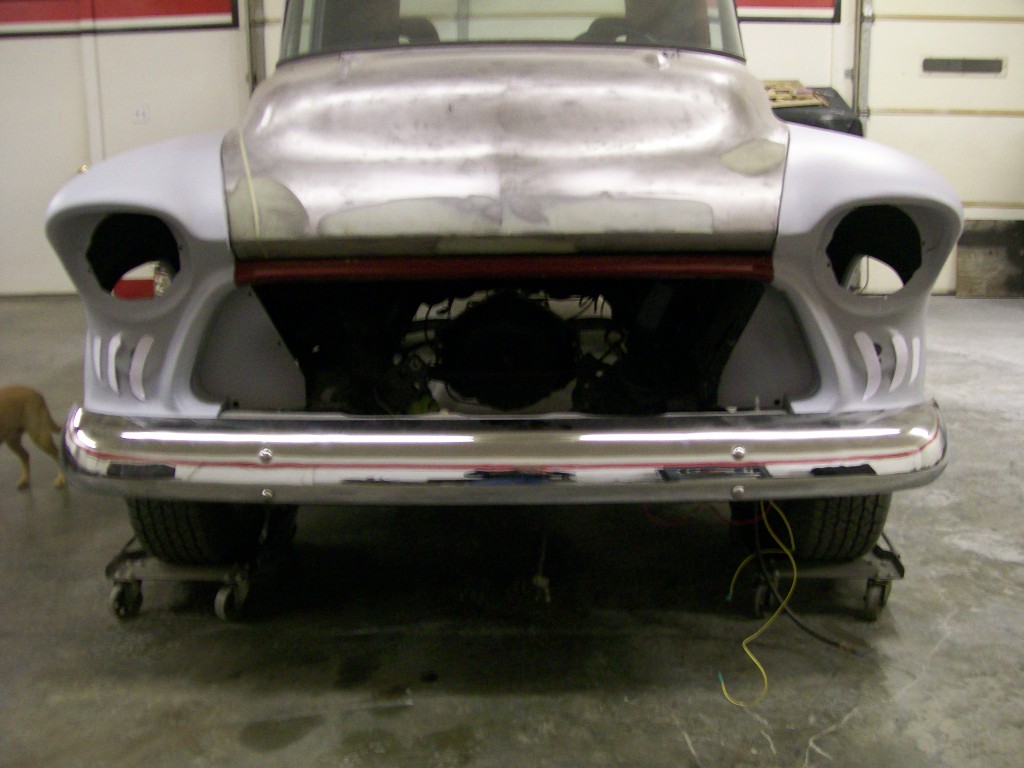
I have a couple things I'd like to change on the front of the truck. Hmmmmm, am I the only one who thinks when they made the front grillopening, they had the image of a shark mouth in mind?
I'll spend a little time sitting on a chair thinking about my next move.
11-13-2012
Good point misterdent. There are so many things we take for granted when young, we just laugh it off til something catches up with us. I know I feel my aches and pains, ahhh but then again, those were the good times.


Honestly, you're right, by simply wearing a good mask now, will make a big difference later.
Luke95, I agree, I know that say for instance the '63 through '67 Corvette. They called it a Stingray, undoubtably the tail of the car was inspired by a Stingray. I see the front of this truck and I see the outline of a Shark mouth, I have to ponder if they had a shark mouth in mind when they designed it. I cut some paper gills as you can see, yesterday I cut out the turn signal hole and welded in a patch. Now I'm working on metal gills for both sides. Then I want to design an agressive grill. Time will tell..........
Jeff88, yes, Jaws it is... It's the dog that died almost exactly 1 years ago. Clinically dead by the everymeans of checking. Anyway, now I have to keep her from walking in front of the truck. It's the Jaws thing...
I have to uplaod more pics, hang in there...
11-20-2012
1968, first year of the next generation. Now is that Stingray, or Sting Ray.? Just alittle Corvette questioning......
Ok, let's get caught back up on pictures.
Two projects going on still.
On the 318, then turned into a 360 Dodge engine. The owner is excited, with the .060 overbore it's actually a 371 engine now. Hmm, it just sounds tough. We've done a plastiguage check on the crankshaft clearances. Got a set of pistons to get the compression around 9.5 compression. New rings, bearings oil pump ect...
I'm mainly concerned with getting the rotating assembly together. Once the crank, pistons and rods are assembled, then we'll get to the cam and heads.
On the 57 Chevy truck I'm slowly working on the front of the Chevy truck. I've been working overtime lately, so by time I get home I'm too tired to focus on the truck as I'd like to.
I still want to get rid of the front original turn signals. Whenever I start cutting and changing I hope I'm going the right direction. I never know til I'm done so here goes....
I'm mainly trying to add accents that will echo off the side of the grill opening. The size and dimension was considered, plus I wanted the side to flare on the backside. This is what I came up with for the first gill.
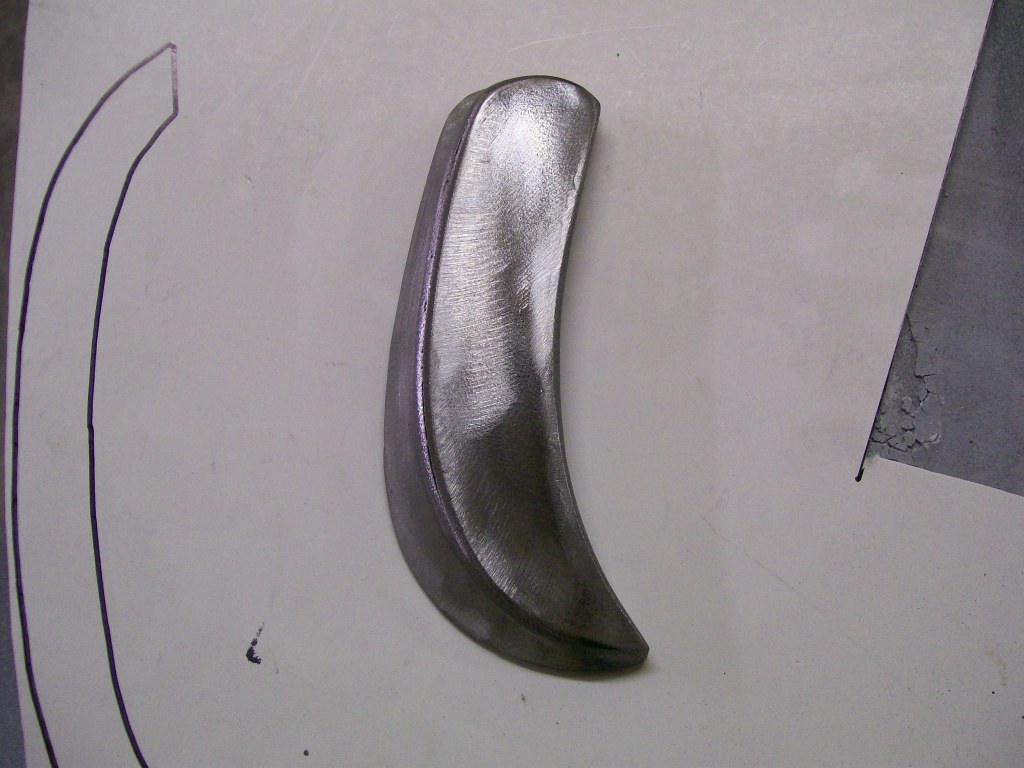
At this point I've welded in a patch to get rid on the turn signal mounting and taped the first and second gill in place for a visual.
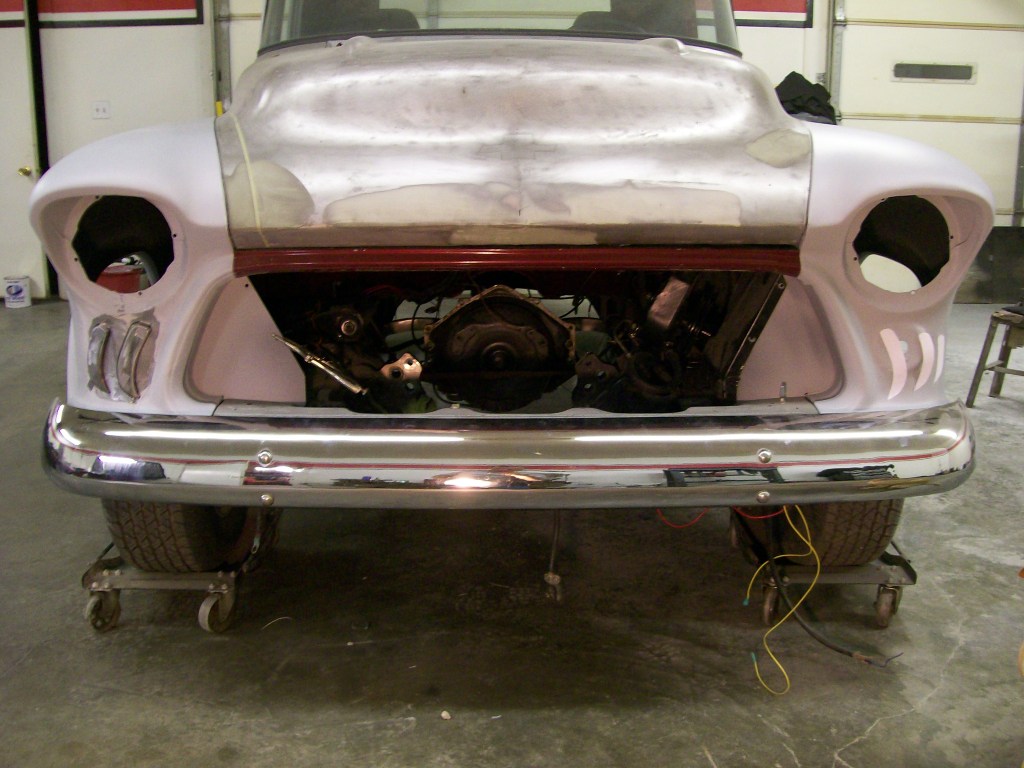
These are just taped in place right now, the angle and location may vary when done.