You must be logged in to rate content!
12 minute(s) of a 668 minute read
10-4-2012
spyder6, I'd have to take a look at my tank. I go through my tanks, then I just go to the exchange place, it's been years since I've thought about the size and contents.

Months ago I had to change the fuel sending unit in the Willy's. I slightly went into the teaching of the different resistances built into the units that make them match the guage.
Once again I'm into a fuel sending unit issue. My understanding of how the sending unit works allows me to build what I need to build for the 57 Chevy.
The tank is located behind the seat in the cab, I know there are relacation tanks that mount in the frame behind the rear axle. For now, I really want to keep the original location. Ok, ok, it's all about weight distribution, I want the tank in the forward location. If I mount the tank behind the rear axle and I have 10 gallons of gas, I have around 100 pounds weighing on the rear axle. Great for drag racing, but I'm not drag racing, wellllllll...... maybe once in awhile.

The truck is a toy, I want to sit at an intersection, lock the front wheels with a line lock, open the exhaust, tap the nitrous button, do an awesume burnout, let off the gas, close the exhaust, release the line lock, and drive like it never happened. The light rear end will help ensure this plan happens.
They do make repacement original sending units. These sending units use a 5/16" fuel line, plus there is a tight bend as it leaves the tank and there is a brass fitting that cuts the line down to about a 1/4". This is ok for a 140 horse 6 cylinder, not for a 400 horse 8 cylinder.
I ordered a universal sending unit, one that matches the 30 ohm guage. I cut an aluminum plate that fits the tank mount and a 3/8 metal line. The original unit didn't use a filter sock but I will use one on mine.
Here is the original and the parts to make the new one.
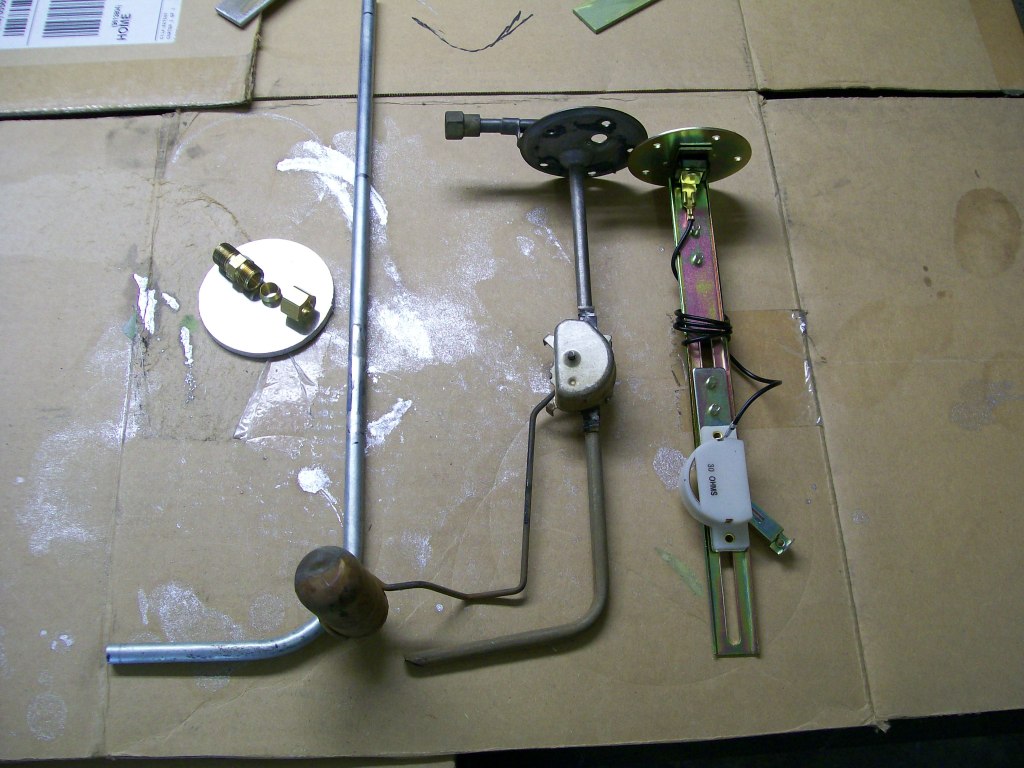
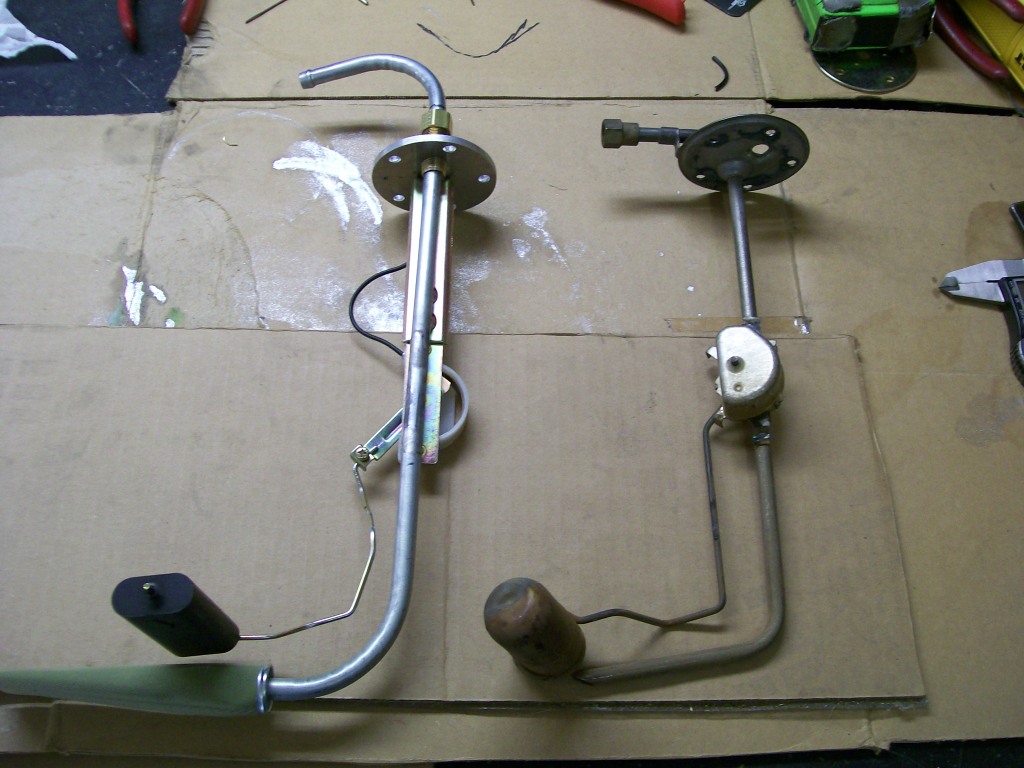
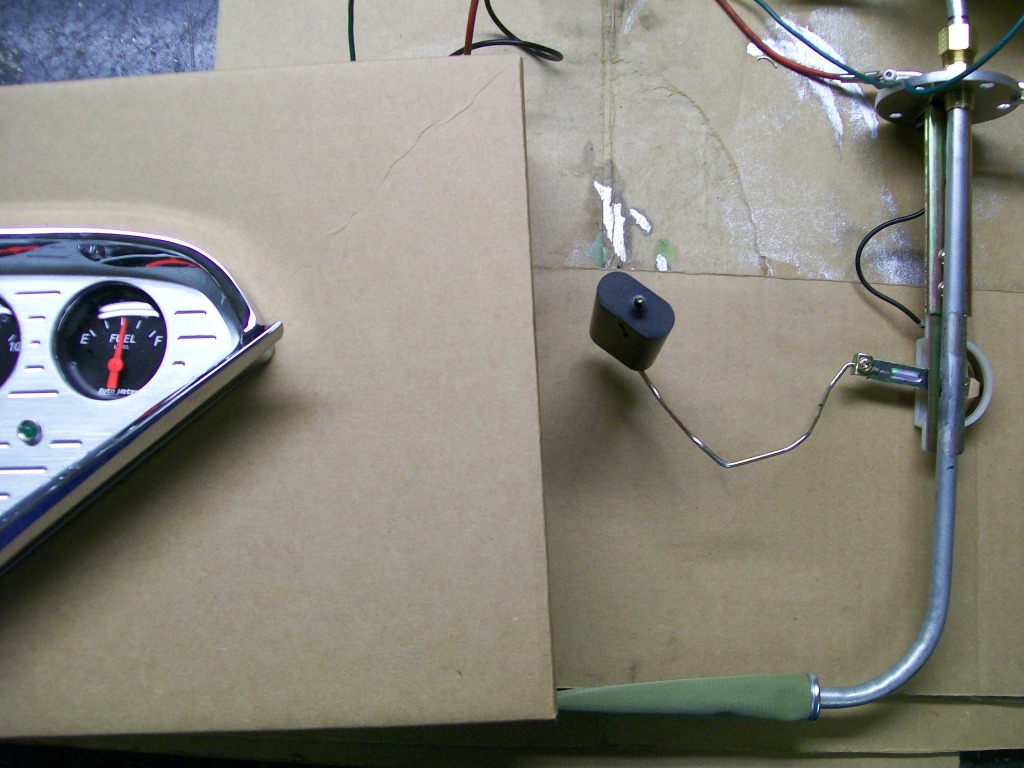
And my replacement sending unit. One difference is the bend and the height of the line as it leaves the top. I could convert this to a 90 degree angle but since it is hidden behind the seat and I imagine this will flow better, I will leave it as it is.
I'm not using the original sending unit and I'm not using the original guage, all I have is the information that they are both 30 ohm units. I still want to test the guage and the sender together before I install everything in the truck.
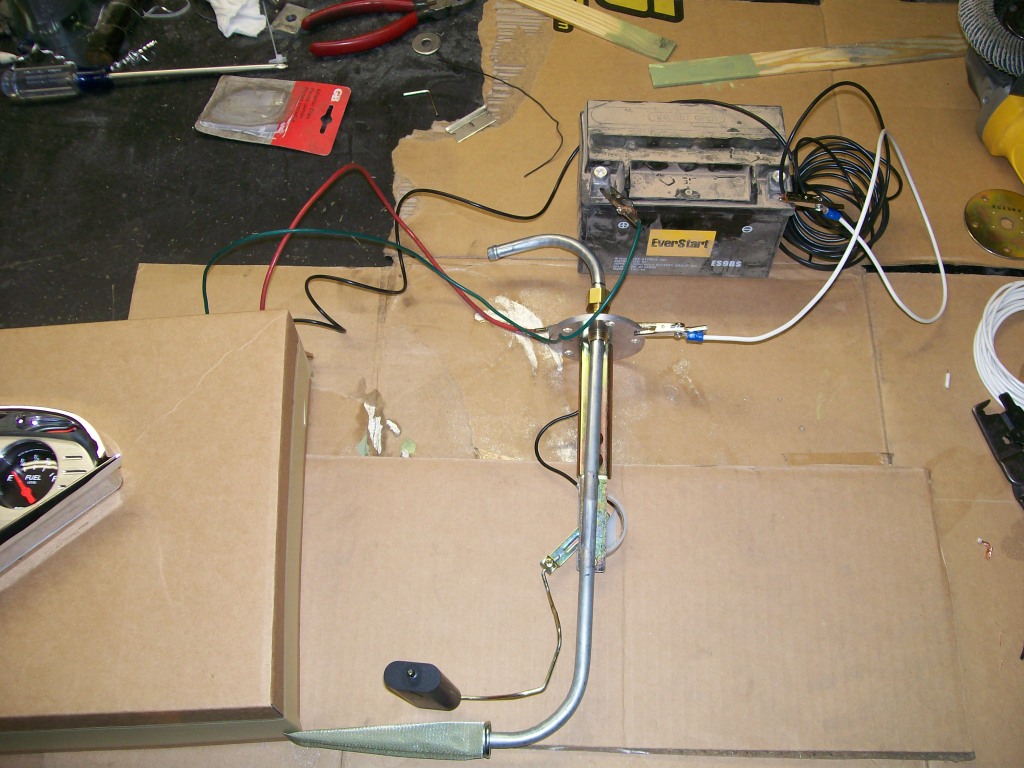
I grabbed a 12 volt battery and did a pre-test.
10-5-2012
Words can not describe the patience it takes to upload this many pics by dial up. But without pictures, this thread would not have the meaning or understanding that is does, so we must move forward.
In the last picture I had to temporarily wire between the guage and the sending unit. The guage has 3 connections. one is power in, one is power out to the sending unit and the third is a ground for the guage itself. The power out to the sening unit is then clipped to the power in connector to the sening unit. Then a ground wire from the sending unit to the negative of the battery.
As I move the float of the sending unit upwards I will be changing the resistance of the flow of the current through it. The guage will be reading this change of resistance by moving the needle.
Here we go.....
Float down, low gas level in tank. Guage reads empty.
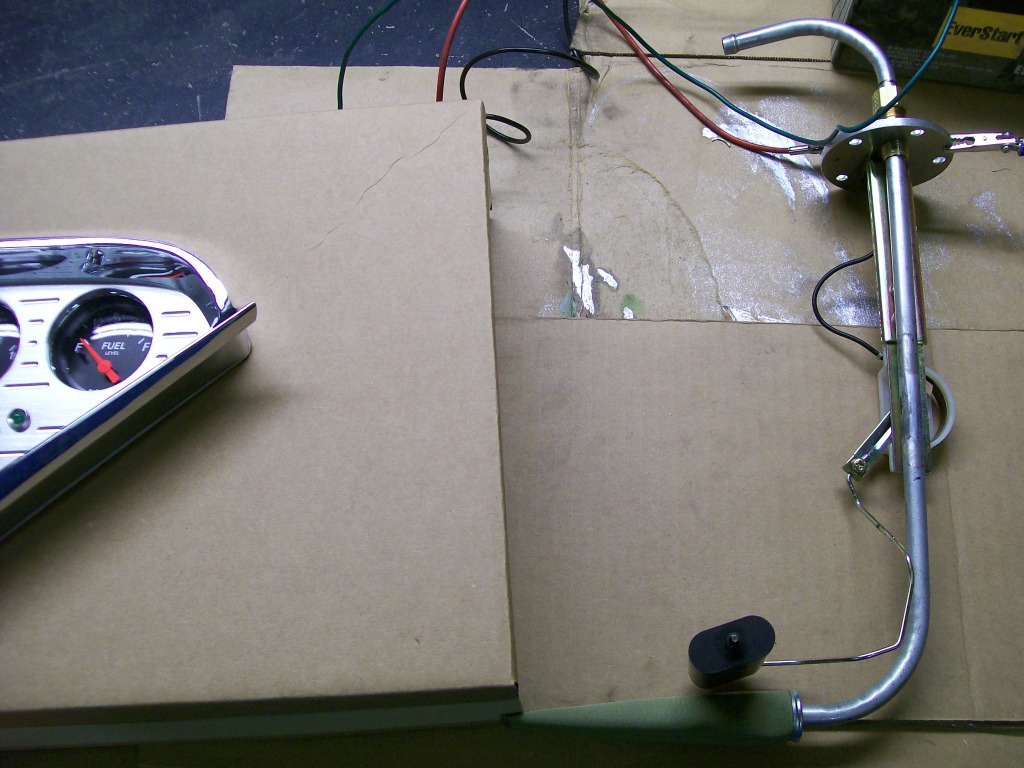
Float in the middle, gas half full in the tank. Guage reads 1/2 full.
Float at the top, gas full in tank. Guage reads full.
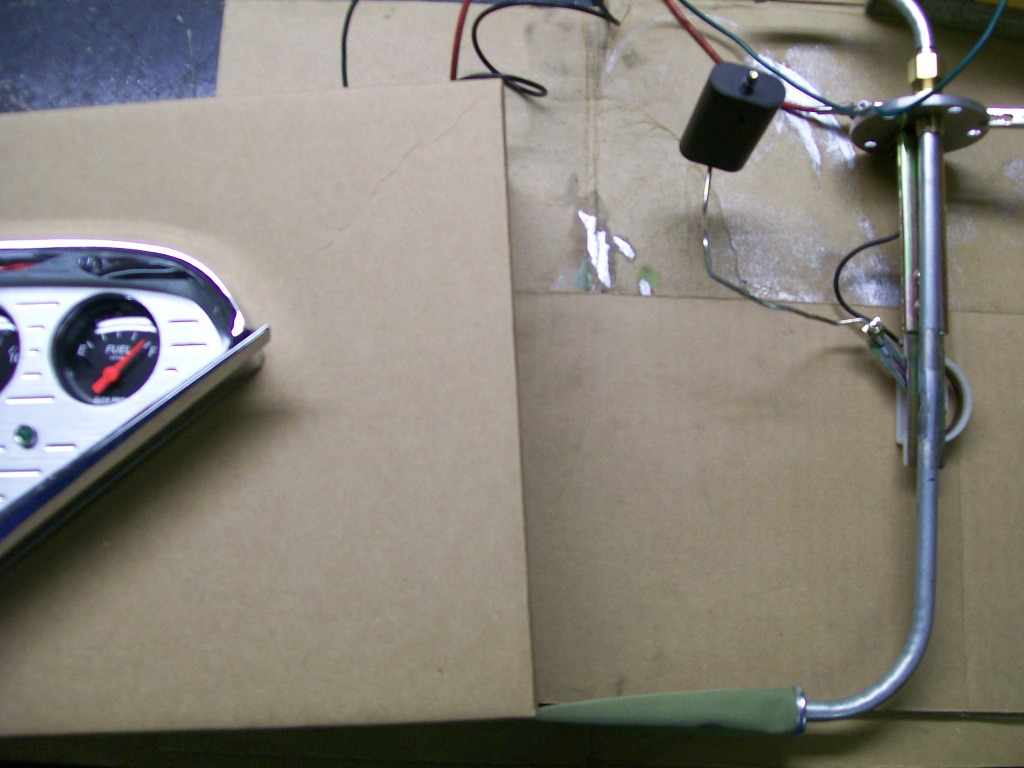
Ok, with the aluminum mounting plate, larger fuel line for better flow, and a new electrical unit, I've got exactly what I was looking for.
10-7-2012
LA-Sahara, good for you, the first passes usually suck anyway. There are situations that have to be determined with every weld. We have the thickness of the material, the type of weld, heat and feed settings. In no way am I trying to make welding more confusing, it's the same as using a computer, if it's something you want to learn, it will happen.
Jeff88, I thought of you when I wrote the cell phone internet hook up. I'm like the die hard dinasaur when it comes to still using dial up. My picture.... haha I've tried my best not to even include a picture of my fingers in the pictures. I don't know why.
jbjorgen, there are different data plans ranging from 20 to 50 dollars. The 50 dollar one had the wireless option. If I got the signal booster, the smart phone wouldn't cost me much more than I pay now. I could drop the land line and with my job I could activate a discount that would pretty well even my costs. High speed I haven't clicked on your location yet, I am very interested, I'll click it later. I'm on dial up, I have to prepare time for such things.
On the 57 Chevy, being happy with the running of the 396, I pulled the engine back out. The start up was a clean run, no oil leaks, so I just had to run a wire brush of the cast iron and tape all the ports and openings shut. I sprayed it down with a pre-paint solvent cleaner to help guarantee the primer to stick to the engine.
Cleaning and taping.
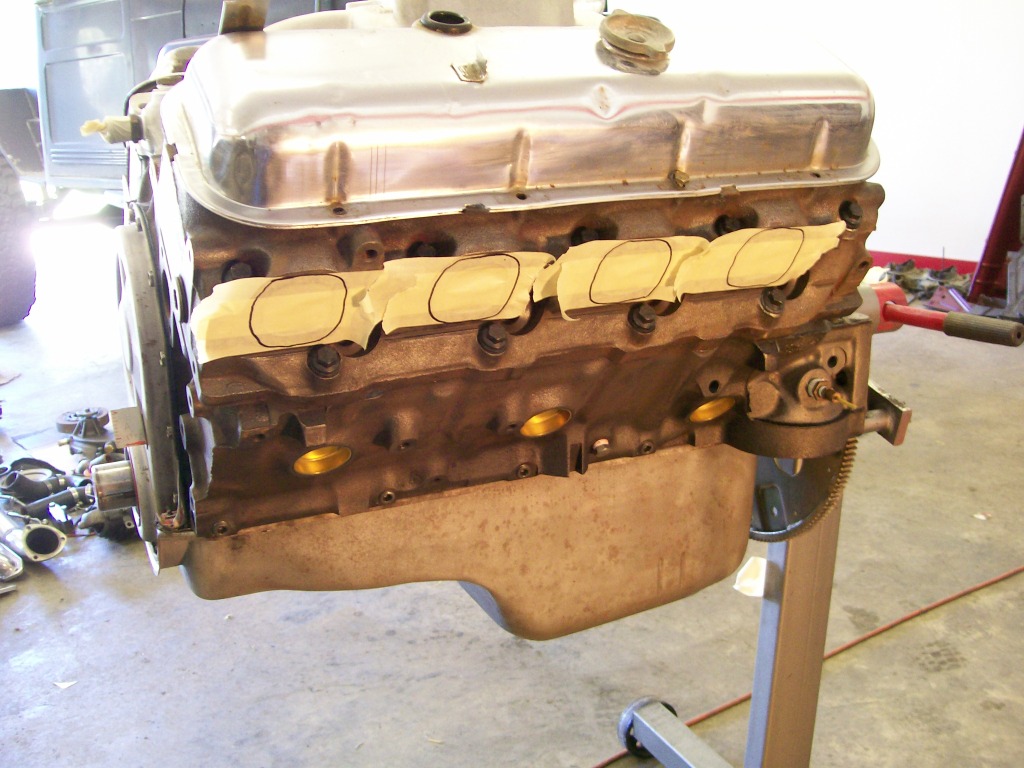
Remember, paint and color is all personal preference.
 . Much of the accessories are back in place in this picture. I still have a order of black oxide ARP bolts coming to finish the bolts. The black oxide looks good against the silver engine. The side inner fenders and the firewall will be clear coat black, my intent is to have the silver reflect off it's black surround.
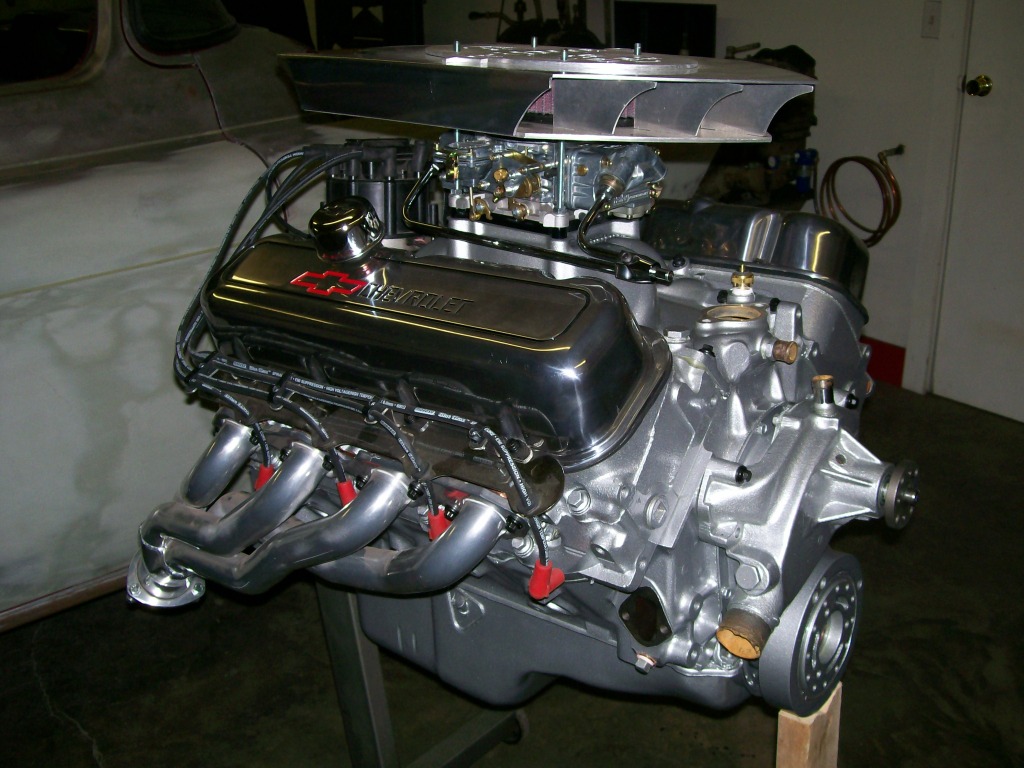
This is the time to reflect back a couple months ago. I was putting the new cam in and installing the engine. Then the oil filter issues, the header issues, the exhaust, the throttle and transmission cables, ect. Once again, it's good to look backwards to know what has been accomplished to move forward with enthusiasm.
10-8-2012
Thanks for the reply, I've built 20 to 30 engines over the last 30 years and every time it is start up time I get the same butterflies with each start up.
Double check your start up list, fluids, timing, wiring ect, then watch the guages and listen for any unwanted sounds.

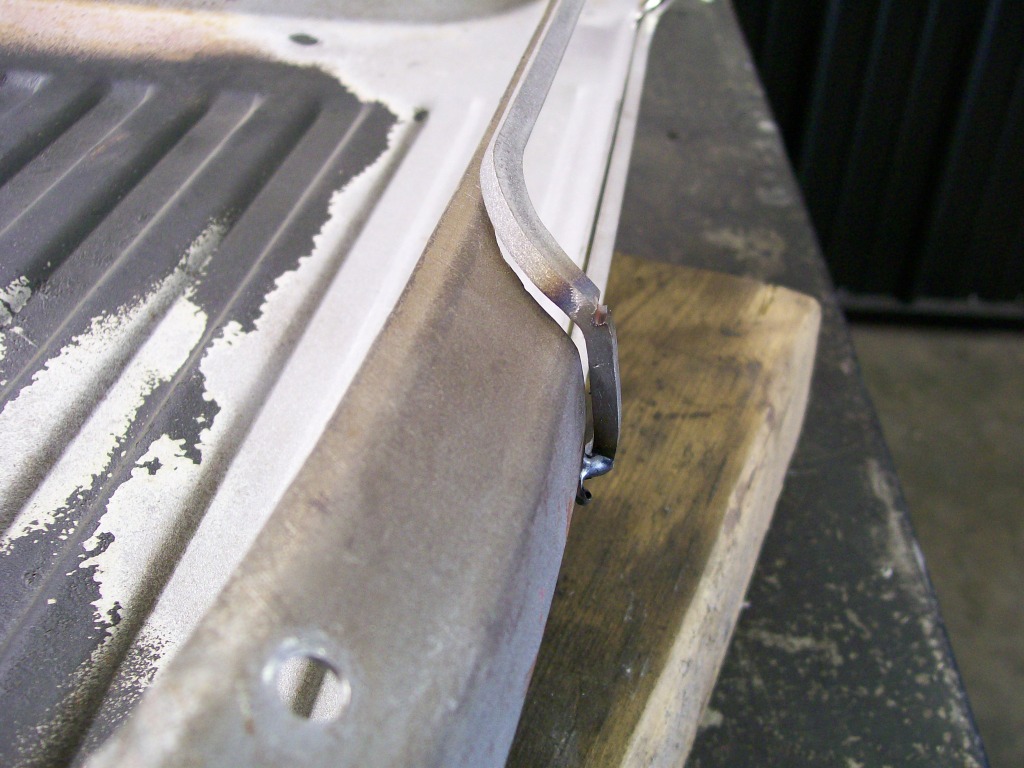
Now that the engine is back on the engine stand I can refocus back to the body work. When I cut the opening in the side steps for the exhaust I made some bezels or rings to follow the contour of the opening. I got the shape fitted to the step opening close but on one of them I was off just a bit. Before I can move forward I have to correct the fit.
You can see the gap in this picture.
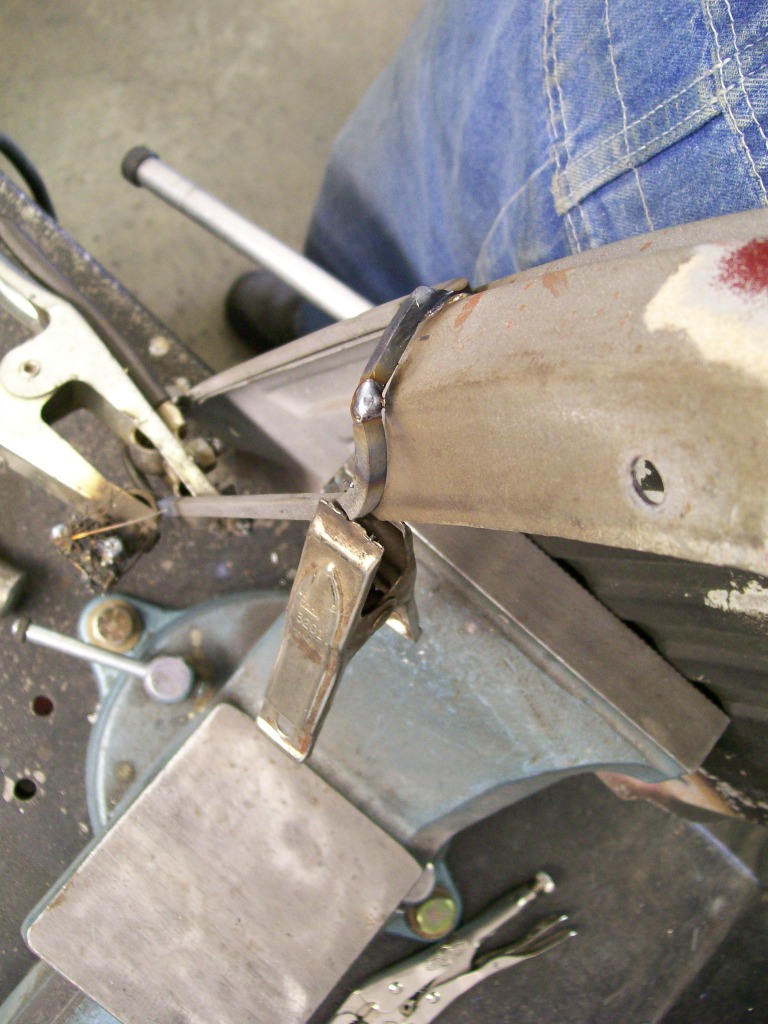
I have it tack welded in place, this is a good thing, the rest of the bezel fits great so when I cut and weld this back together it will fit well and the rest is still in place. I cut through it, then heated the surrounding metal to bend it into place, then welded it back together.
10-9-2012
Once I got the bezel to fit to the original sheet metal I have to weld it all together.
This is going to be a full weld, I want to eliminate any chance of vibration causing the paint to crack along the edge of the bezel and the original sheet metal.
Once again, I have a huge concern of getting any weld bead on the outside where it can be seen, I only want the weld on the backside. I'm going to stitch weld again, this way I can control the heat to keep from burning through.
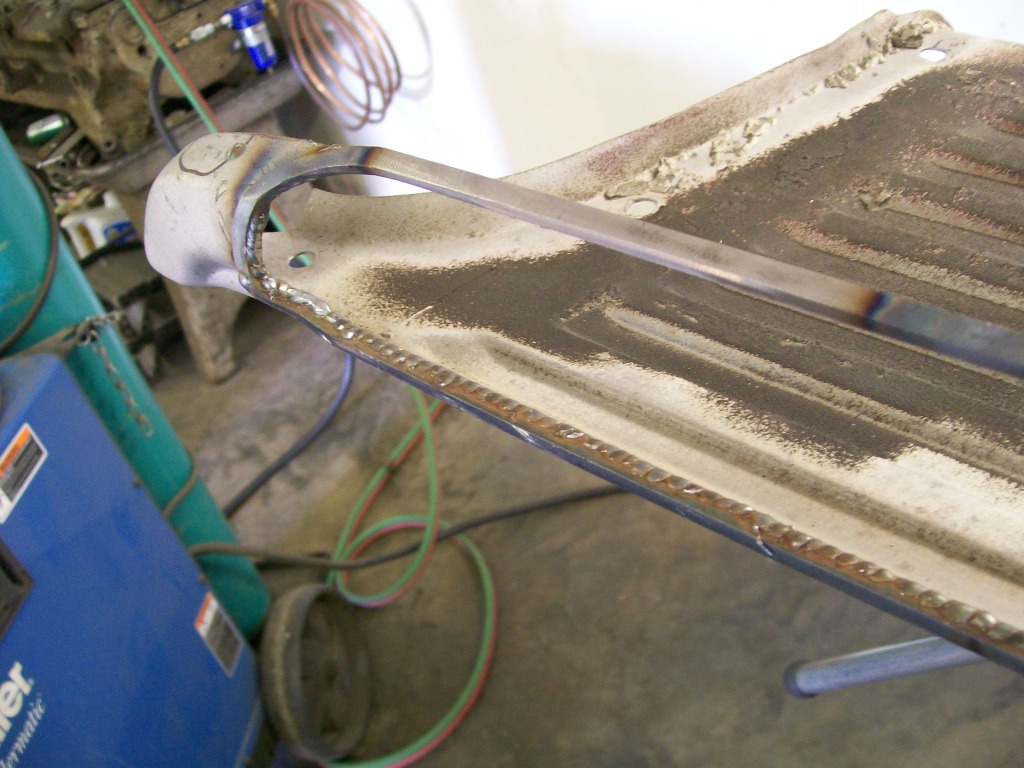
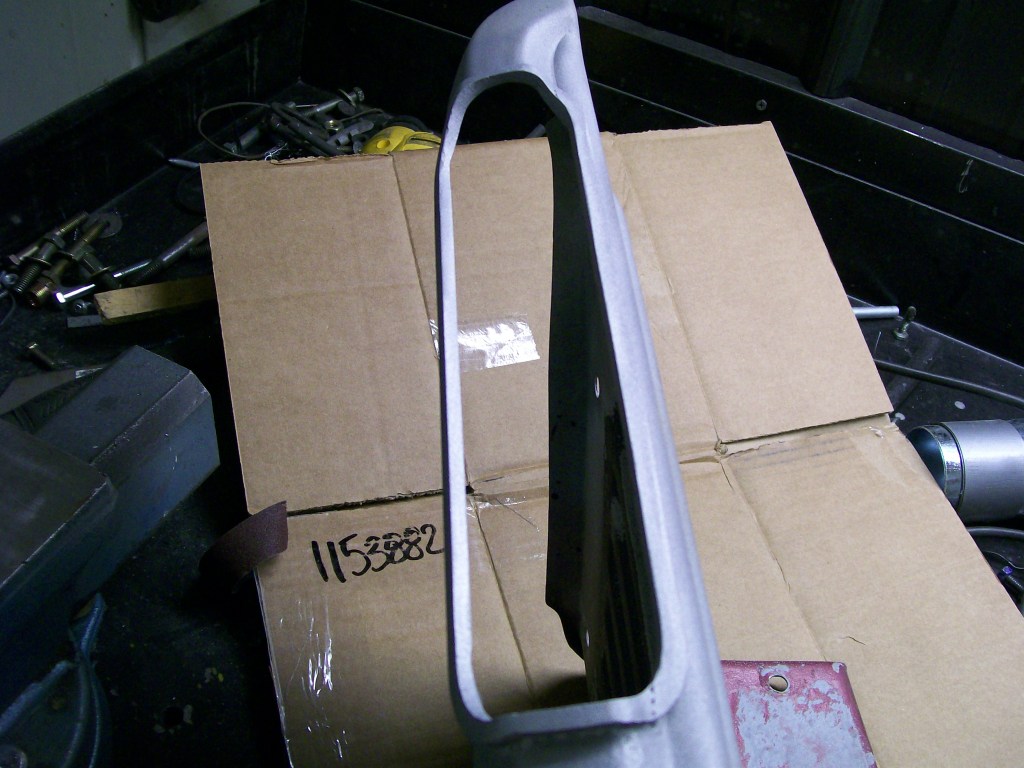
The welding is done and with the rotary brrr on a drill I cleaned up the welding, then outside to the sandblaster. Now just a small bit of filler along the edge and I think this will enhance the outlet for the side step exhaust.
10-11-2012
One thing I'm trying to do with the engine in this truck is to give the impression of BIG. I have the big block and I want to fill the engine compartment.
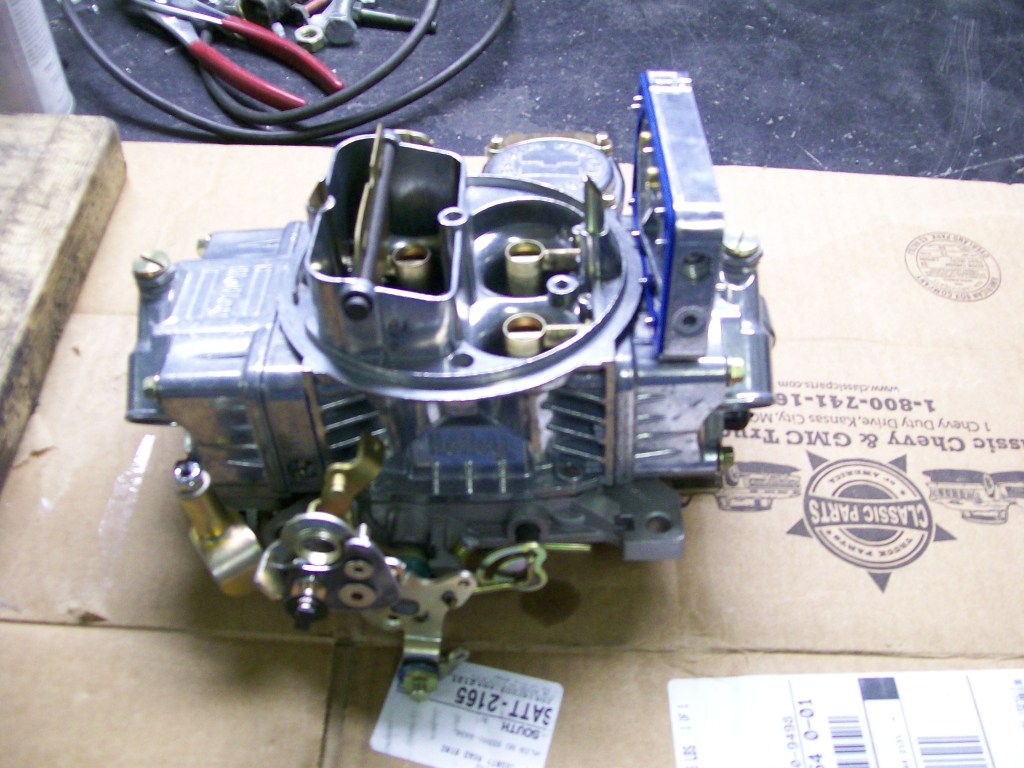
When you buy the vacuum secondary 750 cfm carb it comes with a metering plate and not a metering block controlling the rate of fuel in the secondaries.
It's been a while since I covered the difference between the two. Here I am in a real life situation. I want the metering block for two reasons. 1) It makes the carb bigger, as I said, I want big. 2) The metering block offers more adjustability using jets vs the metering plate.
Here's the carb with the metering block ready to install.
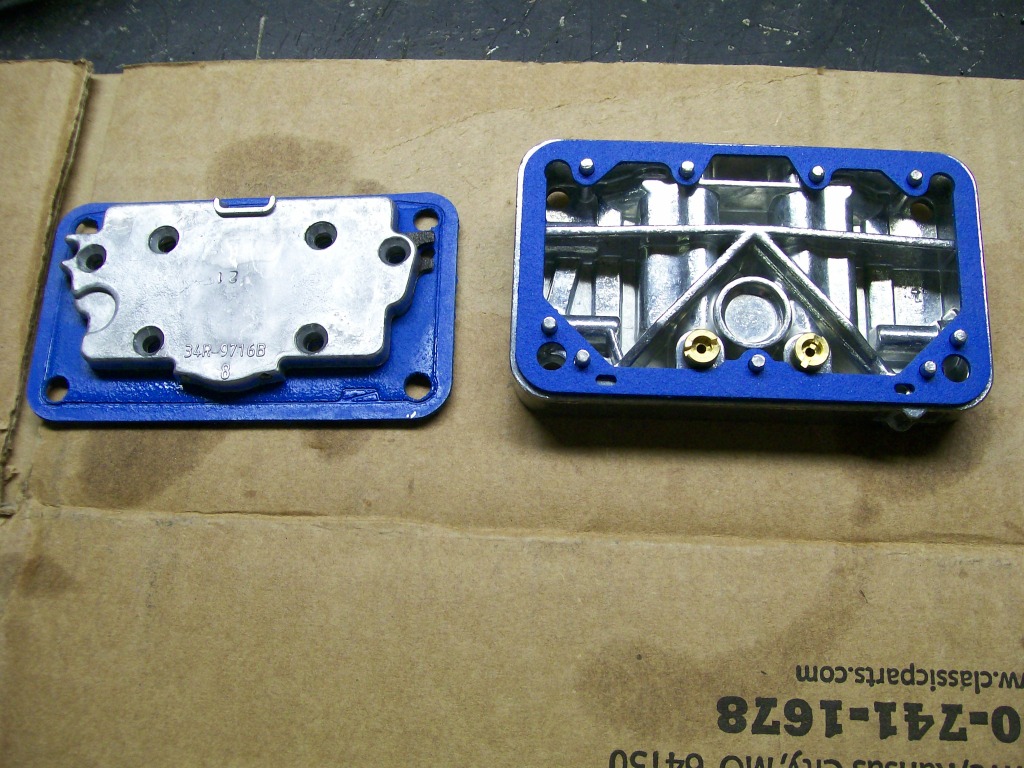
Here's the visual difference between the two parts.
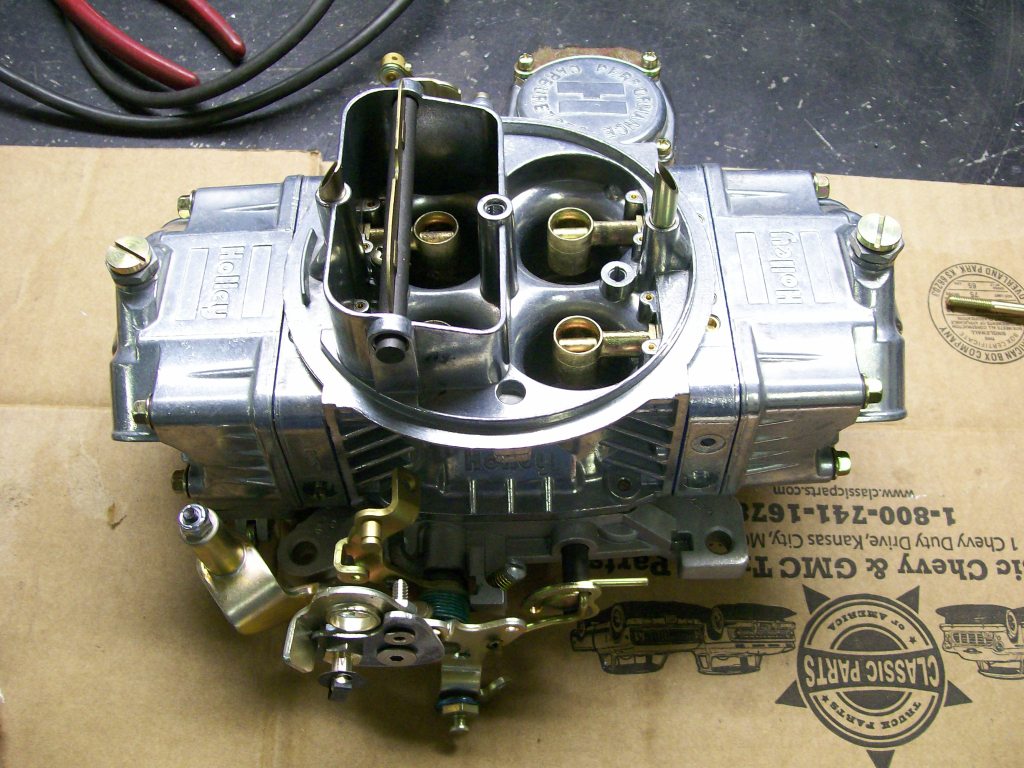
Same carb with the metering block installed.
It's a simple kit to purchase. It comes with the longer bolts required also.