You must be logged in to rate content!
13 minute(s) of a 668 minute read
8-3-2012

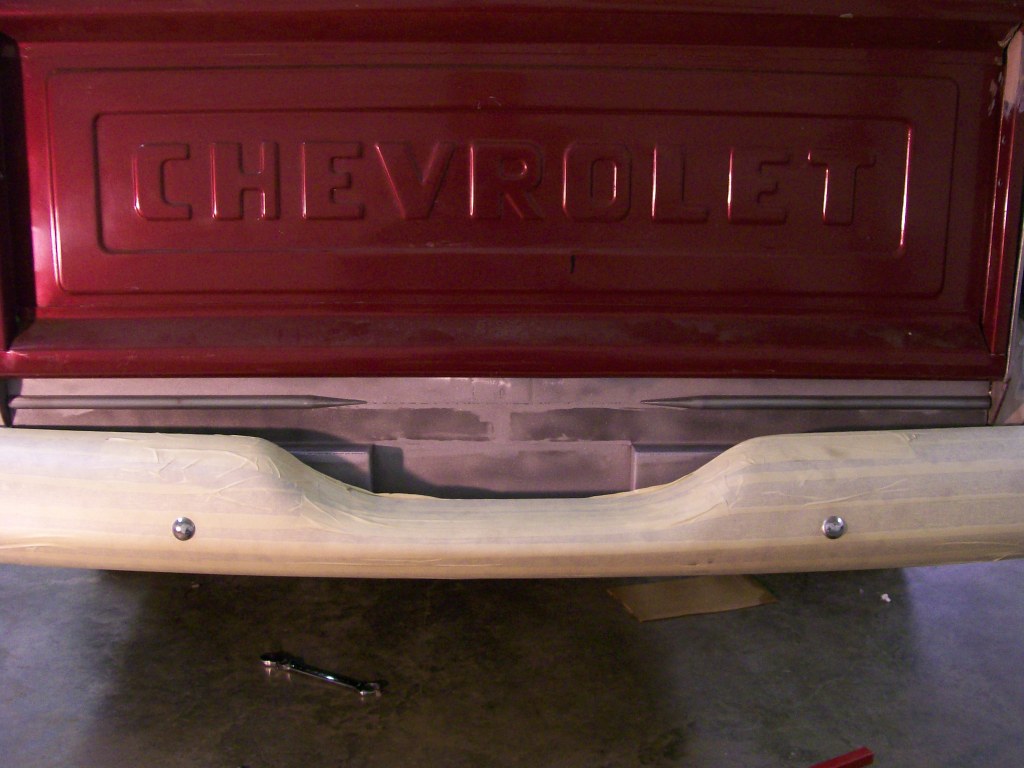
As I mentioned, I moved it up and forward. Once I moved it, it was very clear that there was gonna be too much open space, or view between the bed and the bumper.
When the elcamino bumper was fitted back in the 80's, they took some heavy guage sheet metal and bent it to a 90 degree angle.
The elcamino bumper was straight across at the top. This was convienent, with the 90 degree bend, it filled the area with one bend.
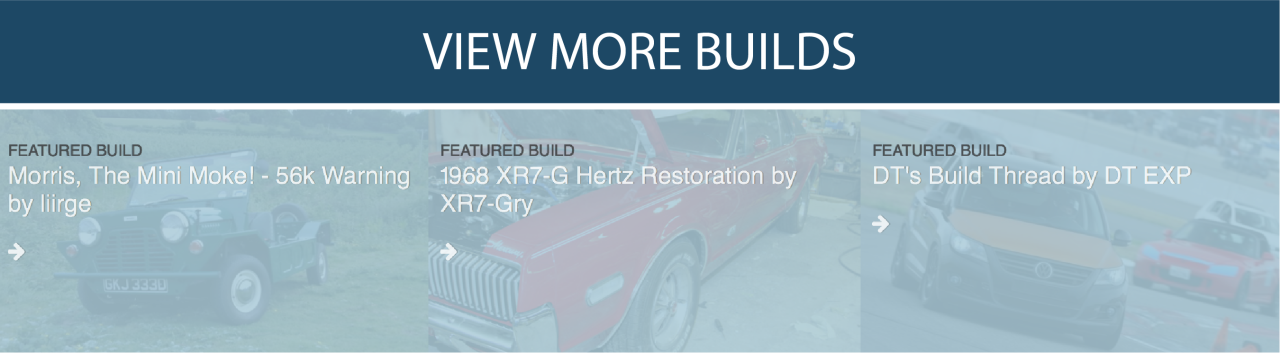
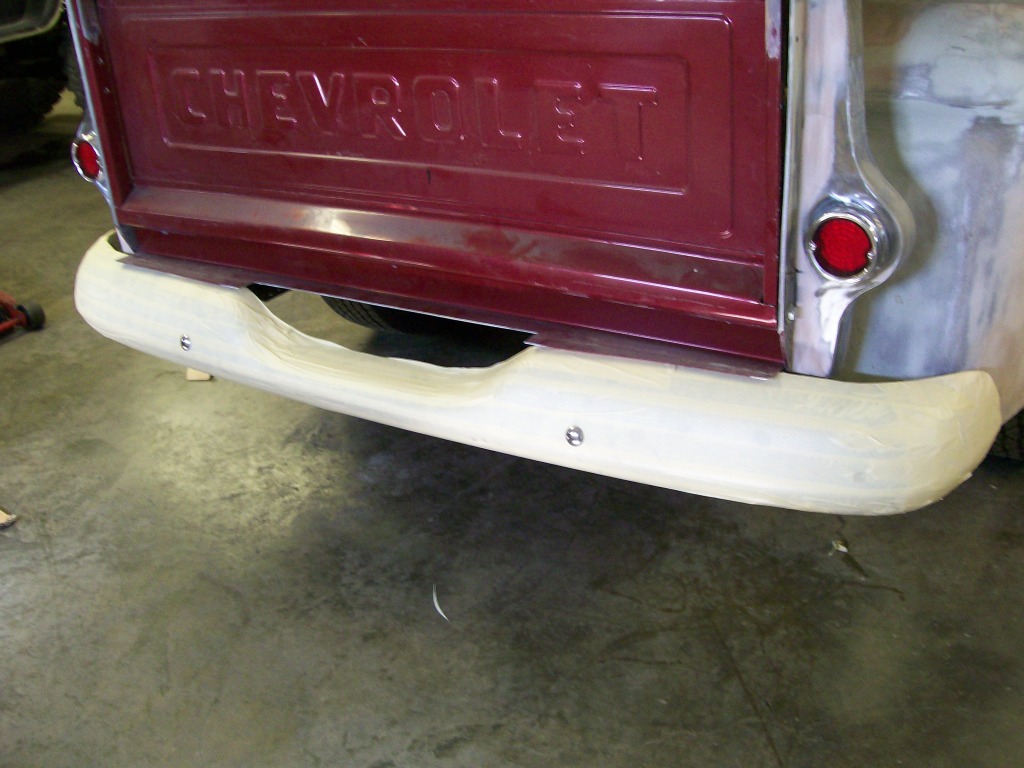
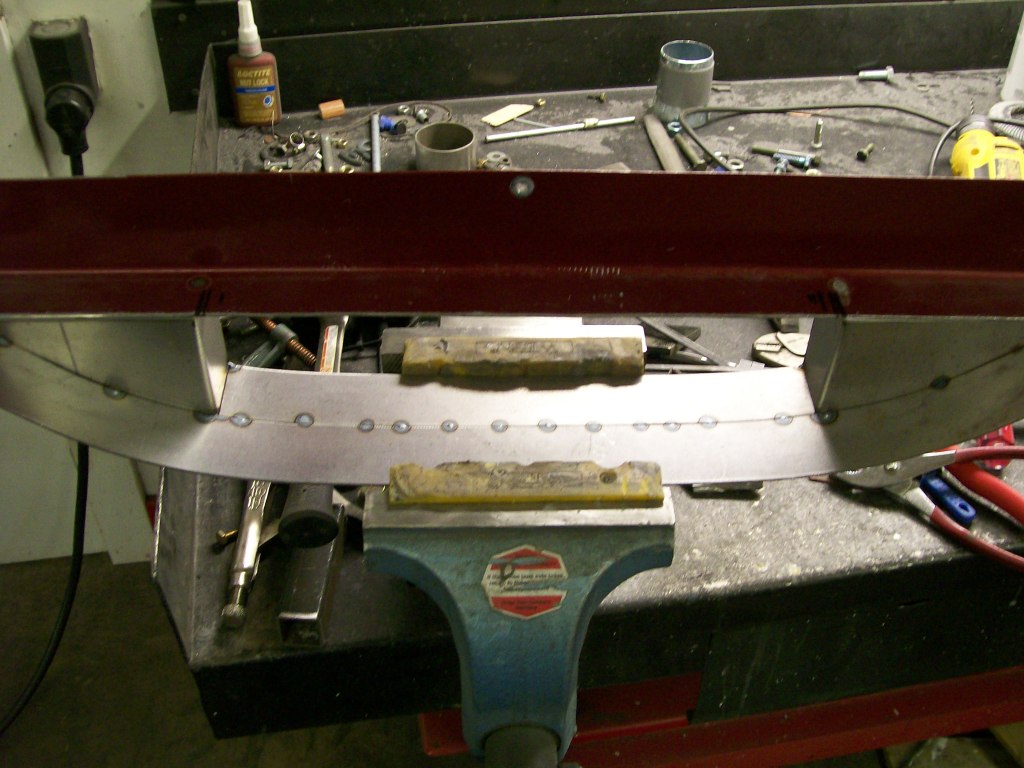
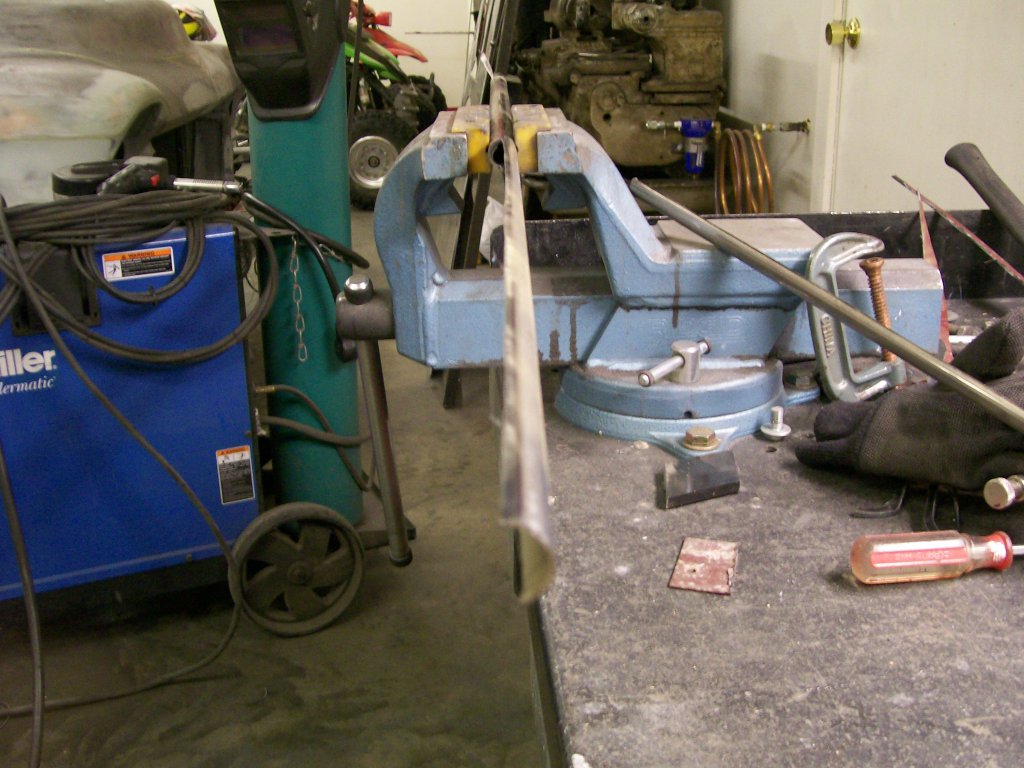
The 1957 bumper has a step built into the bumper, I now have to shape the filler panel to match the curvature of this step. In the next picture I've shaped a piece of sheet metal and tack welded it to an area of the filler panel to match the bumper step.
8-6-2012
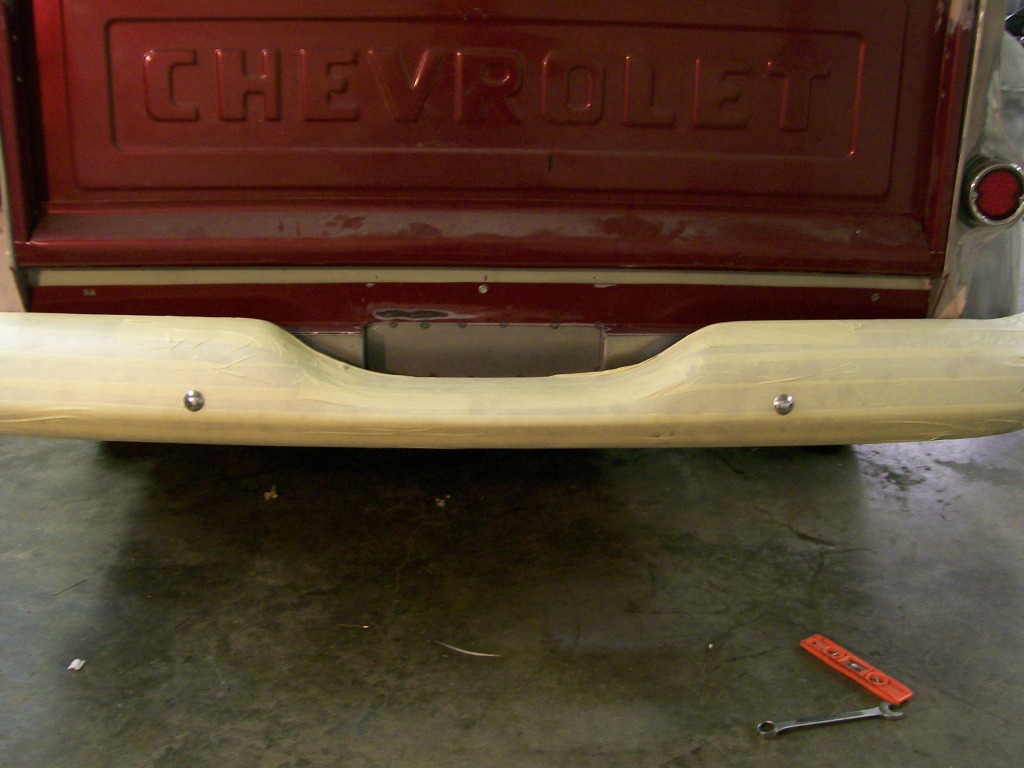
Just to back up a step.... This picture shows the reason I need to build a filler panel behind the bumper. There is just too much open area showing.

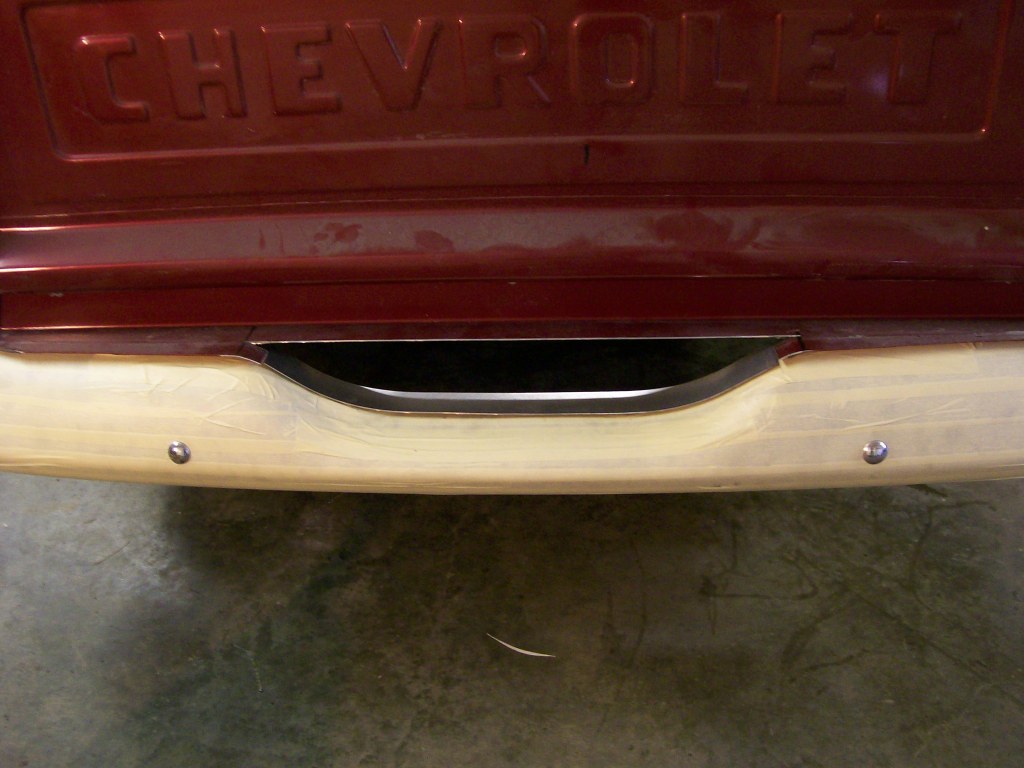
It's the simple stuff that will make the project come together better. The piece of sheet metal I formed to match the bumper needs to be in alignment with the rest of the panel. By clamping the 90 degree triangle in place, I can hold the new sheet metal up against the triangle and be sure it is gonna be exactly where I need it to be.
8-7-2012
Thanks, this thread started as metal fabrication, and now we've gone full circle back to metal fabrication. This is great.
Using the triangle and making sure the piece was lined up properly in the last picture was important to ensure the next pieces align properly.
The two pieces shown here (vertical) need to be at 90 degree angle to both the bottom and top, otherwise when fitted behind the bumper, anything that is not lined up right will show later.
Now I'm starting to see a license plate location.
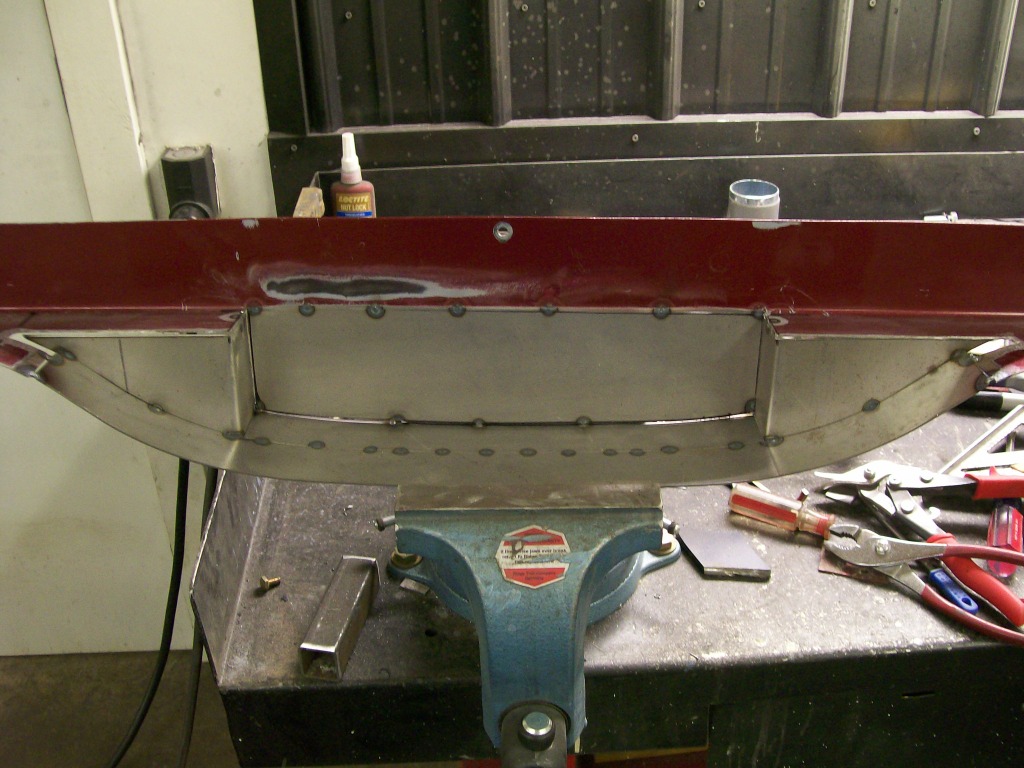
Now that I'm at this point in the build of this panel I can see a couple areas that I could have made some areas out of one piece of metal vs having to weld pieces together. I wasn't sure where I was going with this panel when I started. Sometimes you just have to start marking with the sharpie and making cuts til the vision appears in your head.
8-8-2012
Now to put it back on the truck. Looking good so far, I've covered the gap between the bumper and bed and have a place for the license plate.
Even when standing close to the truck and looking down, everything is fitted and has no gaps showing.
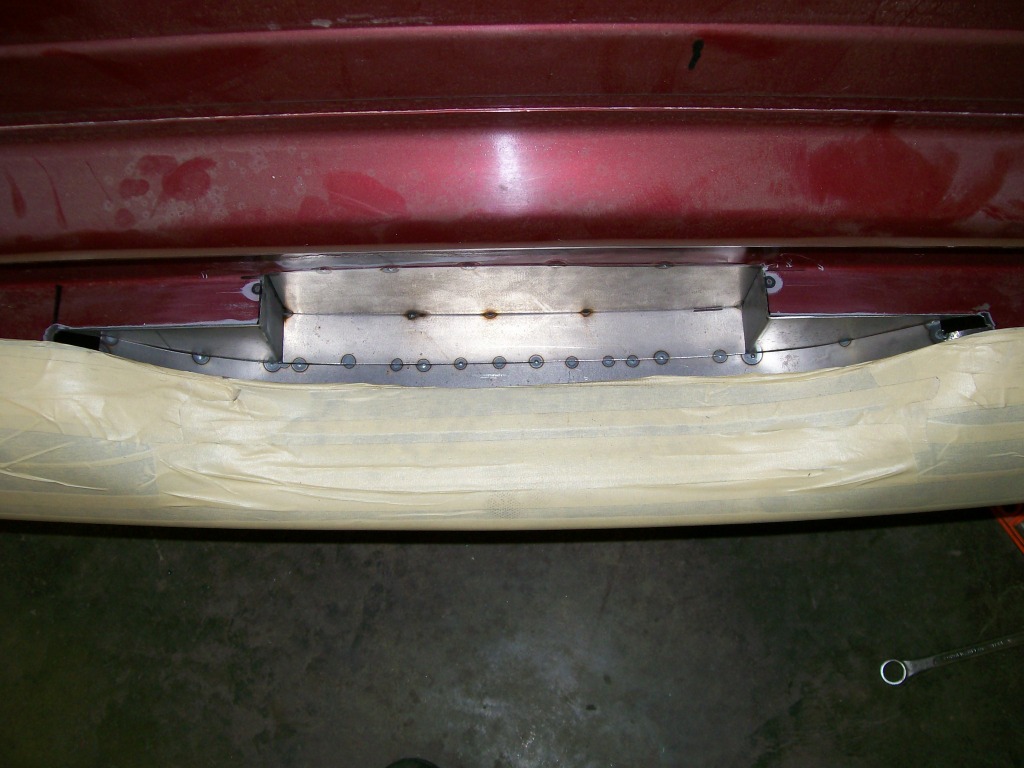
I have one area to fix yet. I have a gap showing where the filler panel doesn't go high enough to reach the bottom of the tailgate. With the other bumper, the panel was higher, with this bumper I had to lower it. Time to weld about 1 1/2" to the top of the panel.
8-9-2012
Brand new brackets, I have no respect.
I measured and marked the cuts to bring the bumper up to where I wanted it to be.

The nice thing about the bracket cutting is they are stright back from the frame. The bad part is they have a downward drop to them. This drop is the cause of a problem aligning the top and bottom edges.
At this point finishing the brackets is not priority. I need a solid way to secure the bumper so I can build the filler panel, and tack welding these brackets worked fine.

8-20-2012
Hi Jeff88, all is well, I got a little sidetracked and photobucket hasn't had the upload mechanism working lately. Photobucket had this issue a few months back, I just had to be patient and it started working again.
My sidetrack issue took me down the road of studying the question.. What if the Israelites would have said no, we can not do all you say when God asked them if they will obey or do all He asks.
I my view, by saying yes, we can do all You say, they are showing self-righteousness, their own ability to keep or maintain the Holyness of God.
By saying no, there is no way way we could possibly follow or do all He asks, they are humbled before God, which is what God wants us to do in the first place.
By saying no, the course of walking the desert would have been a different course.
Just a thought....
Anyway, hopefully photobucket will be back in working order soon and we'll get caught back up on the 1957 Chevy truck project.
I knew I had a near twin out there somewhere when it comes to our names.

Plus, I am so pleased to hear someone has been inspired and has learned something by reading this thread, thanks for taking the time to mention it.
I will certainly visit your build.
I ended with cutting and tack welding the bumper brackets in my last set of pics, I'm gonna leave those alone for a bit.
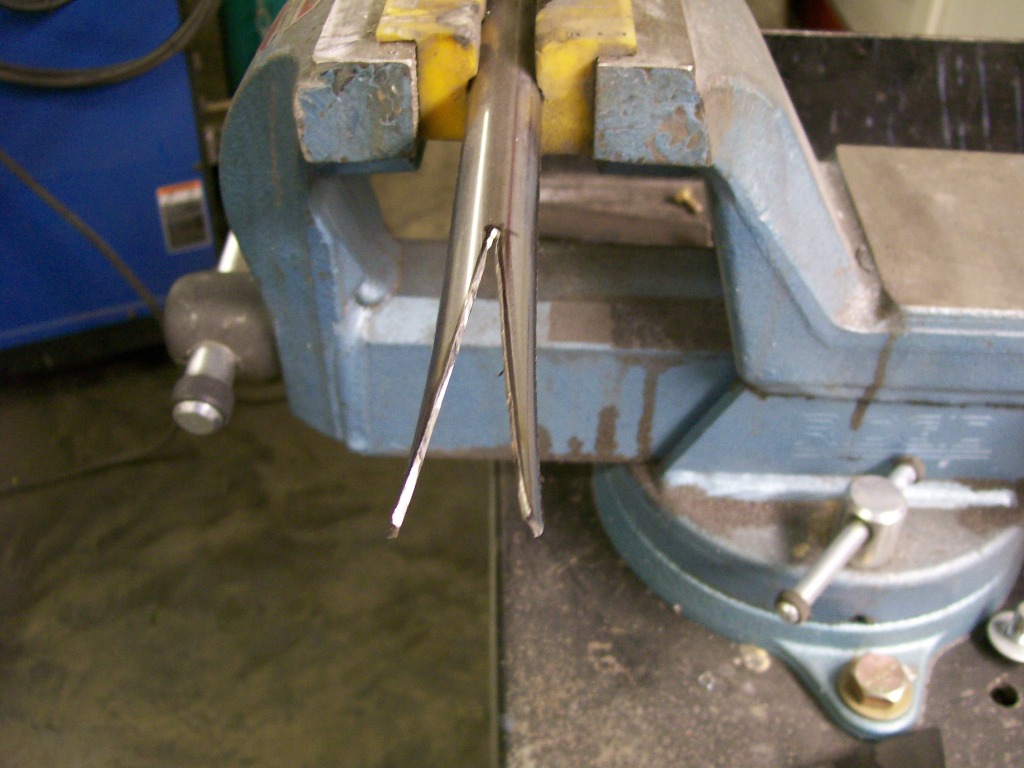
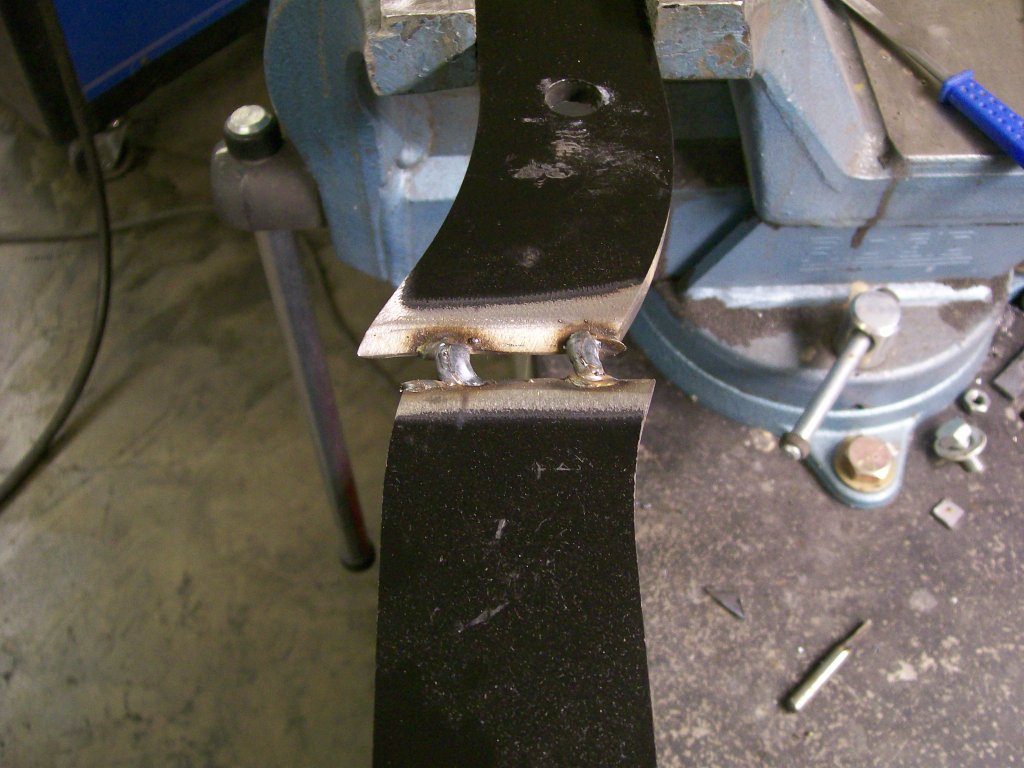
I'm moving to cutting some 3/4" tubing lengthwise about 19" long.
Once I have the half tube cut close to length, I used the 4 1/2" grinder with the cut off wheel and cut up the center about 3".
That last picture looks nasty, but it'll come around to be what I'm looking for. It's gonna take two of these to serve the purpose I need them to do.
8-21-2012
I took a look, that's quite a project. You have one benefit that I didn't when I started mine many years ago, you have a non butchered truck and it's fairly complete.
Keep up the good work, the truck you'll have when done will be special and as every day passes, it becomes even more special.
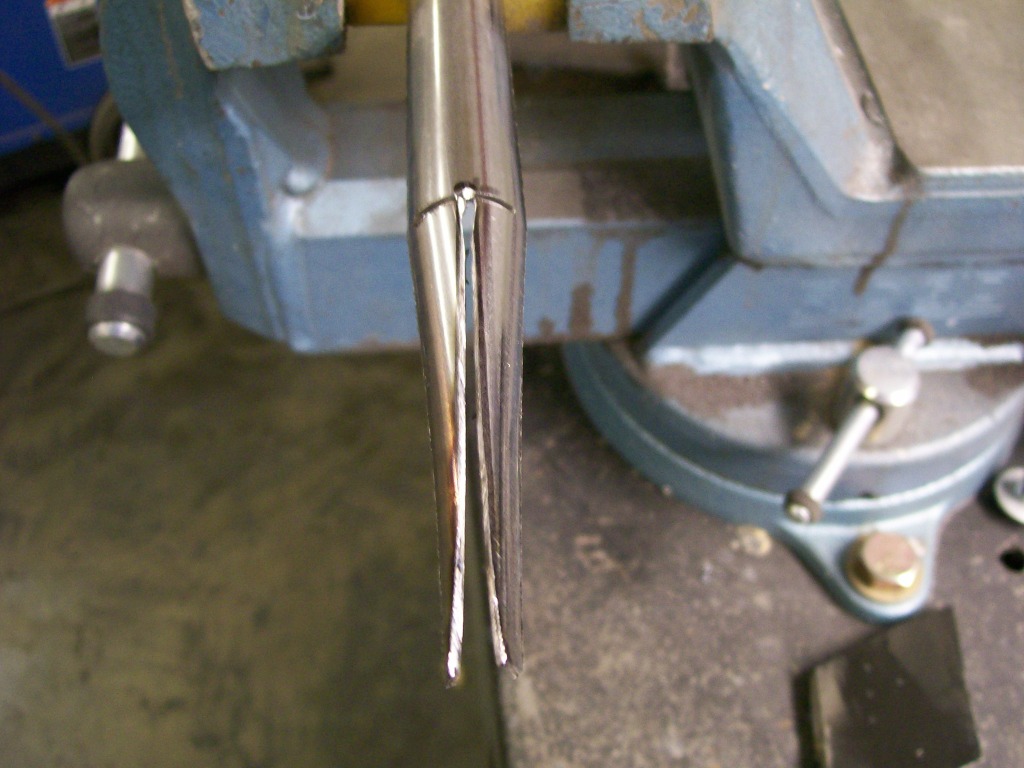
I made one more small cut at the top of this 3 inch cut, it gave a relief so when I used a pair of pliars and squeezed the two ends together I didn't overlap the material.
This is probably the 20th time we've seen the stitch welding process, it sure is handy.

This is going to be a part of the filler panel behind the rear bumper. There is gonna be a pair of them.
8-24-2012
No spears, no defensive devices.
Going back to the filler panel, the flat area of the bed that I'm gonna attach the newly made filler panel has been beat up over the years that the truck was used on the farm. It's not worth my time to try to straighten out this flat area.
The new filler panel will cover the slightly bent flat area. My issue is when I attach the new filler panel and tighten it down, it will try to follow the contour of the bed flat and when done, any imperfections will show since the screws will cause the new panel to follow the imperfections.
With all the pictures I've taken, I forgot to take one of with these attachment pieces welded to the spears I made earlier. With some imagination, I welded 3 of these to each spear on the back side.
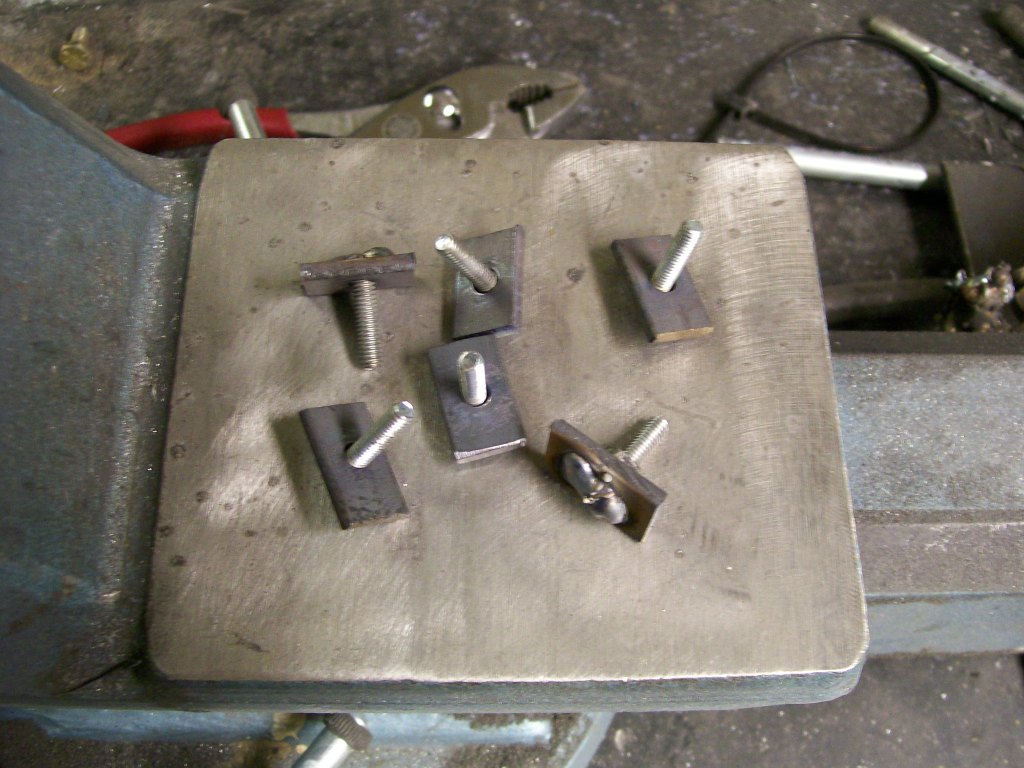
Once these were inplace, I drilled through the new panel and the bed flat. Now by using these mounting spears, the clamping load is spread across a much larger area. The spears will attach tightly without distorting the new panel.
Plus, there was alot of flat area with the new panel. What I've learned over the years, if you have a large flat area, add something to keep the eyes busy.
Here we are.
The license plate fits between the points of the spears. There is space to make a license plate outer decorative surround plate. I just have to decide what to make.
8-28-2012
Still moving forward..... The filler panel is pretty well just as I wanted, I'm very pleased.
Somewhere in the past I touched on the bumper brackets. I didn't like the factory fit. I got a little ahead of myself a cut too much out of the new bumper brackets.
Yes, I could have either added to the slotted openings where they mount to the frame and simply adjust the brackets back using the slots.
That's just not me though. I never want to adjust myself into a corner. I want the fit to be in a way that later, for what ever reason, I can still adjust forward or backward. With that said, I'm gonna mount the brackets in a neutral spot on the frame and weld the brackets and fill the gap I have created.
We've been down the "liquid metal" road before, at least those who have followed this thread. It's the idea of using the welder to not only weld but to fill gaps or openings with the wire feed welder. In some cases it requires spot welding to keep the heat down. In the case of these brackets, the brackets are thick enough that I can just keep welding and filling without stopping.
I bolted the brackets to the frame, I bolted the other end to the bumper, I used jackstands to hold the bumper exactly where I wanted to to be when done. The gap I had was about 3/8". With the Mig welder I started a weld and continued to build on that weld til I bridged the gap. By doing a top and bottom bridge I was sure there would be no movement later.
Looking at the above picture it is hard to imagine the misalignment of the ends coming together and flowing correctly, hang in there, they look great when done.
I takes a couple passes to fill the gap, but what ever it takes, keep filling.

I took this picture just after welding, you can still see the red glow from the heat.