You must be logged in to rate content!
13 minute(s) of a 668 minute read
3-11-2012
Scooter 402, your write up is well taken. Thanks for taking the time. If you're anything like me, it takes time to find the right words when describing and explaining.
 There were many alterations that I had never gotten into. I will refer back to this later as I keep building projects.
Everybody else, the Holley float, needle and seat is coming. I have a very bad problem of getting obsessed with something I'm wanting to create.
A month or so ago I decided I wanted to make my own side emblems for the 57 Chevy truck. I did cut my first idea but it just didn't fully satisfy what I was looking for. I posted a picture of my first idea a while back.
Finally today I designed and cut the emblem I was looking for. When I take pictures of more carburetor work, I'll take some of the emblem. My goal was to maintain the original idea from 1957, along with adding "396" for the engine size.
Thanks for your support everyone.
3-14-2012
redneck_vb, nice to have you following along. I see you're just an hour and a half away.
No relations here in Salem. Matter of fact, I knew nobody here. I started all over when I moved here 6 years ago. Kinda cool, fresh start on life.
Scooter402, I forgot to mention. I listened to the video. You have no idea how I enjoy listening to a V8 with a big cam at idle, or even just above idle. The sound is soooo sweet.
I have 383 chevy, with a rough idle cam. I have a little walk to get to my mailbox. When I get home, the car stays at idle as I walk to the box and back. If someone would just record an hour of that sound on cd, I'd buy it in a second.
Back to the Holley rebuild project.
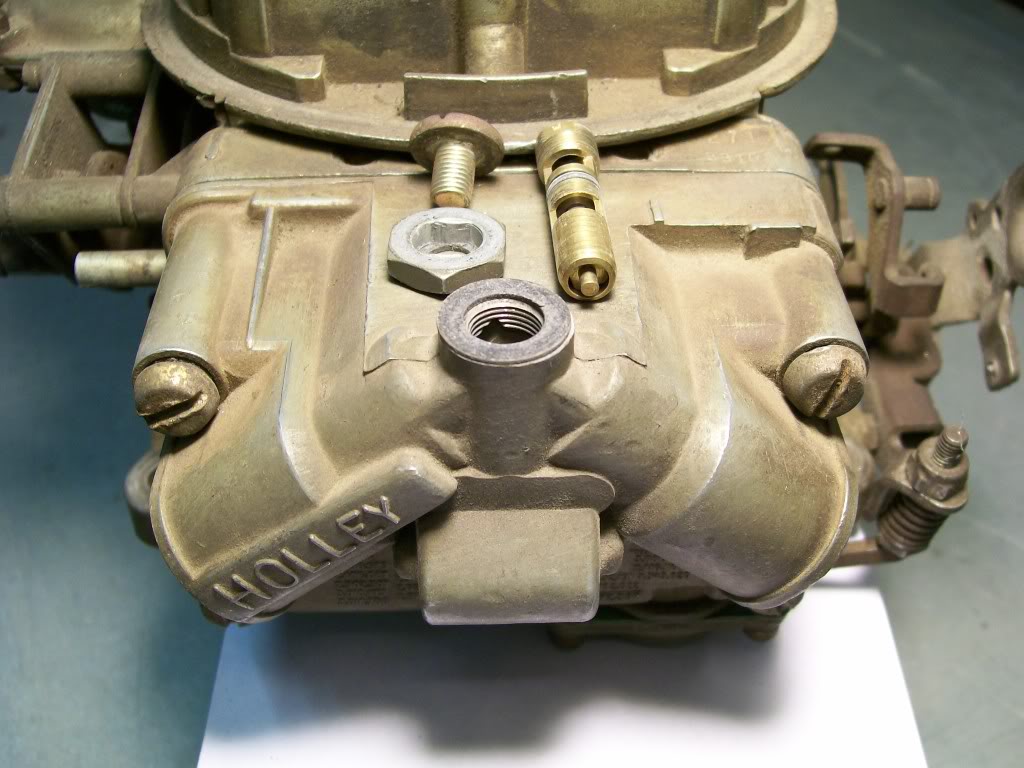
Holley has about the simplest way to deal with the needle and seatadjustment. Not only that, about the simplest way to remove, clean, and replace it also.
Lets first check the amount of fuel in the float bowl. Just as in the toilet, of which I hope everybody did their homework. There is a level that the float raises to, as the fuel enters the bowl, the float pushes up against the needle til it closes off the opening in the seat. Many carburetors require you to dissassemble the carb to use a measuring device to set the float setting.
With the Holley, the float setting is done by removing the plug on the side of the float bowl with a blade screwdriver. Don't pay attention to the screw on the top of the float bowl, only notice the one on the side of the float bowl.
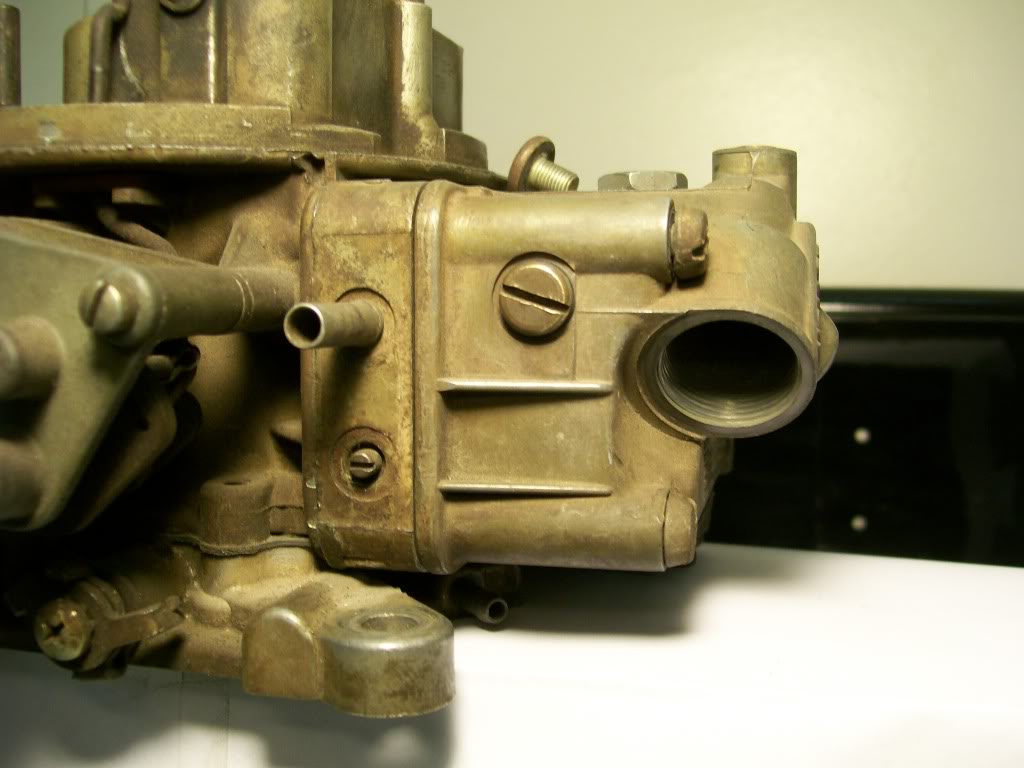
Place a rag under the plug and with the engine running you can remove the plug and see the level. I mention the rag because if the setting is too high, the fuel will run out of the hole. Of course, remove the plug slowly. If you want to do a quick check to see if it is close, you can remove the plug and at least check the level without the engine running.
Looking at the needle and seat adjuster, you can not see how and what parts do what til we take it apart, piece by piece.
A view of which we all are familiar with.
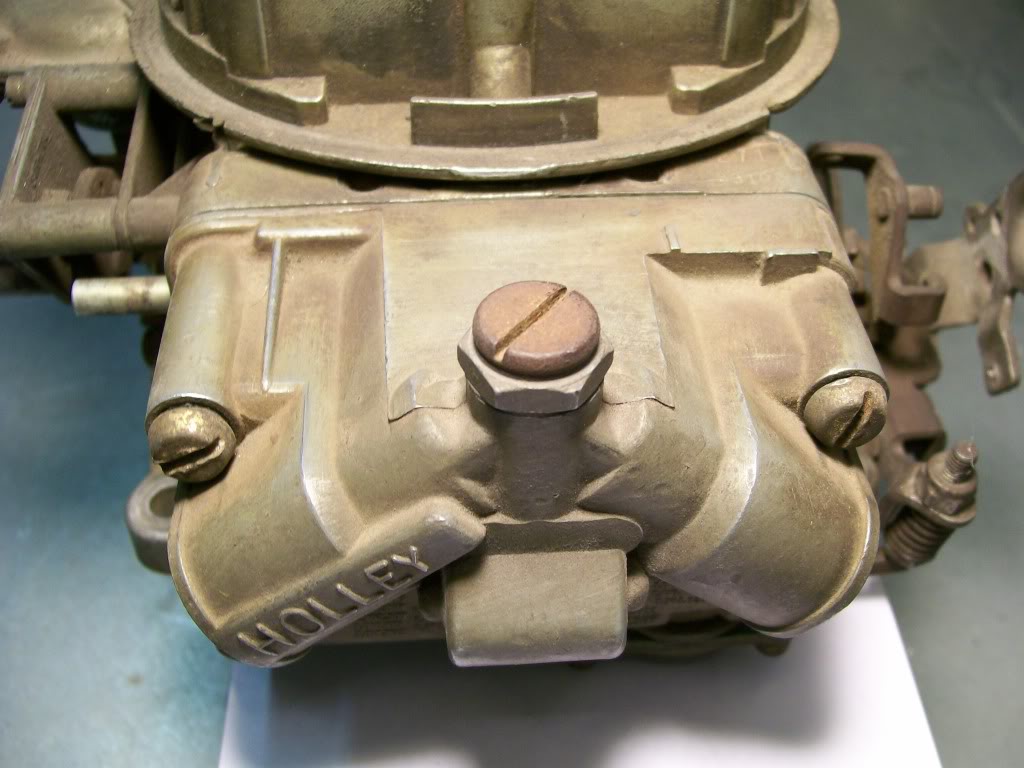
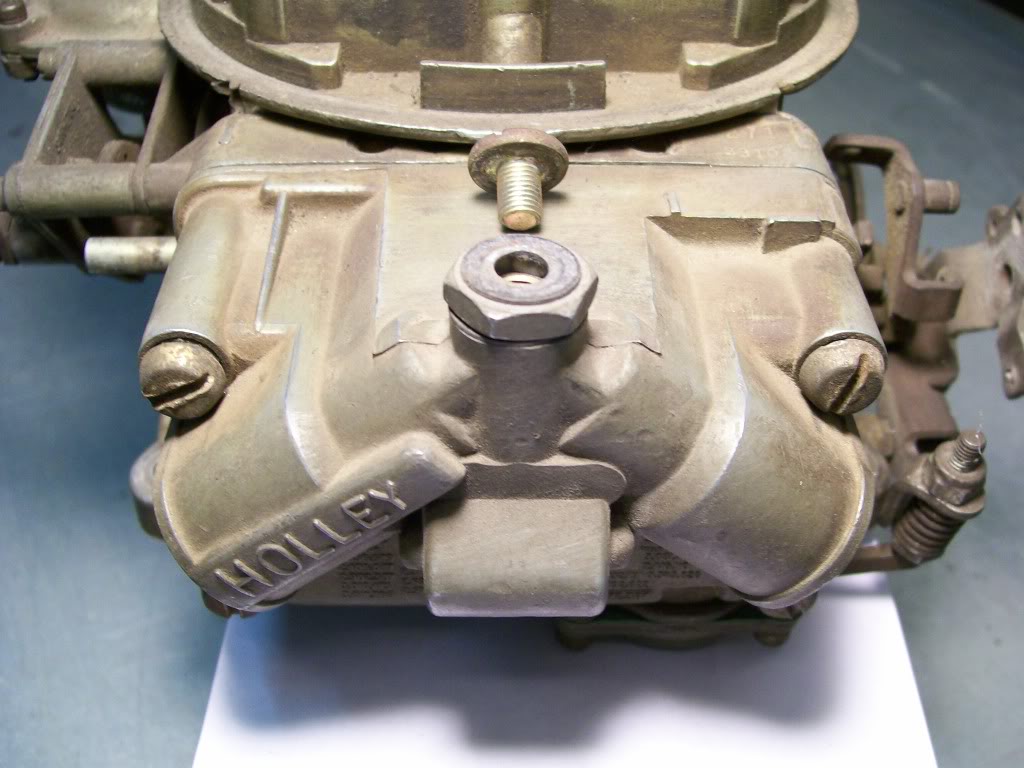
First, the screw has to be loosened to adjust the height. I will remove it so we can see under it.
Know this...... the screw does not adjust the height of fuel in the carb. The screw only creates a sandwich effect that once tightened, it seals the adjuster assembly from leaking. Looking at the hex nut, you can see a gasket on top of it. There is also a gasket under it, these are what the screw will tighten down on to seal the assembly.
More to follow.
3-15-2012
I took a look. Now that would be one to keep as a factory original restoration rebuild. Looked very clean. The "very reasonable price" thing, hmmmm, we all have our price. I have to figure these old Willys trucks are gonna start going up soon, I notice more enthusiasm and interest in these over the last couple years.
As I'm sure you all can tell, until I removed the screw, it seemed like it might have something to do with adjusting the needle and seat, but like I said, it only has to do with sealing the top of the needle and seat.
Next is the hex nut under the screw. Once again, it's function is different than what it apears from the outside. By turning this nut, which you have to loosen the screw first, it does raise and lower the needle and seatassembly. Interestingly though, it isn't actually attached to the needle and seat assembly.
It fits "around" the needle and seat, and when turned, the two flats contact the the flats on the needle and seat. This allows the needle and seat to raise and lower, yet the nut still stays in contact with the float bowl.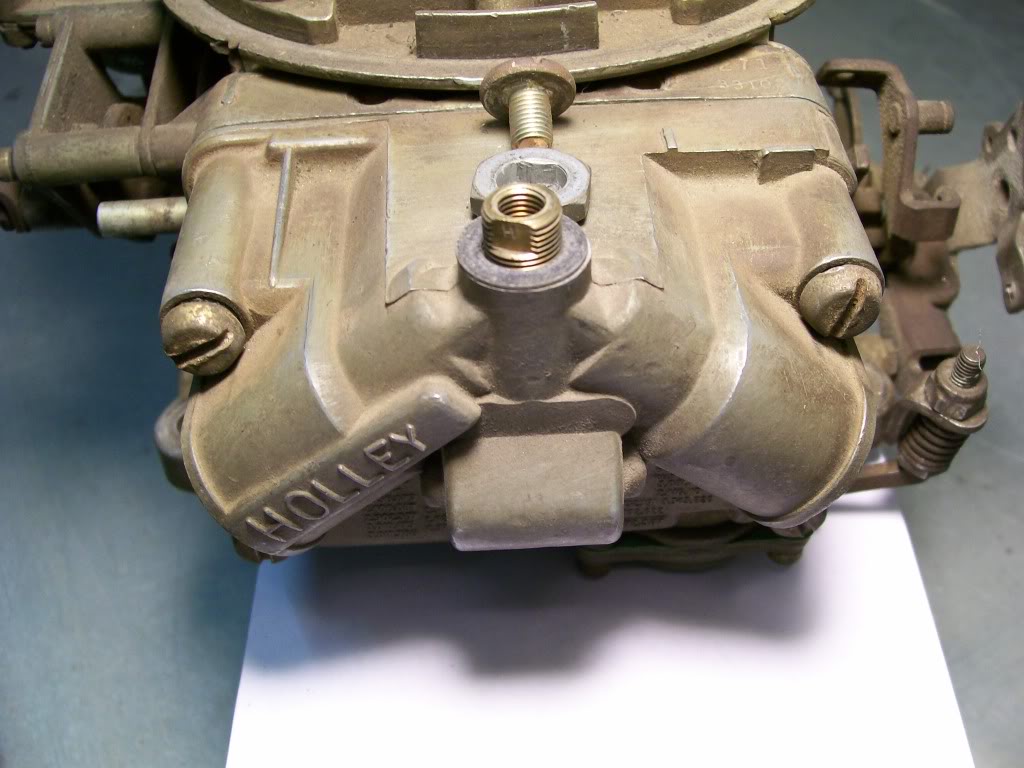
Now, as I mentioned, unlike most other carbs, by turning the nut, we can remove the assembly. The needle and seat will keep raising til it is removed from the carb. Inside the float bowl, while turning the needle and seat counter clock wise, we are raising the float level.
Just the opposite if we turn it clock wise, we would be lowering the float level. A neat design that while lower and raising the needle and seat, the nut stays in contact with the casting of the float bowl. The only time the nut does not touch the float bowl casting is when turning counter clock wise, the needle and seat becomes high enough and at this point it ready to be fully removed.
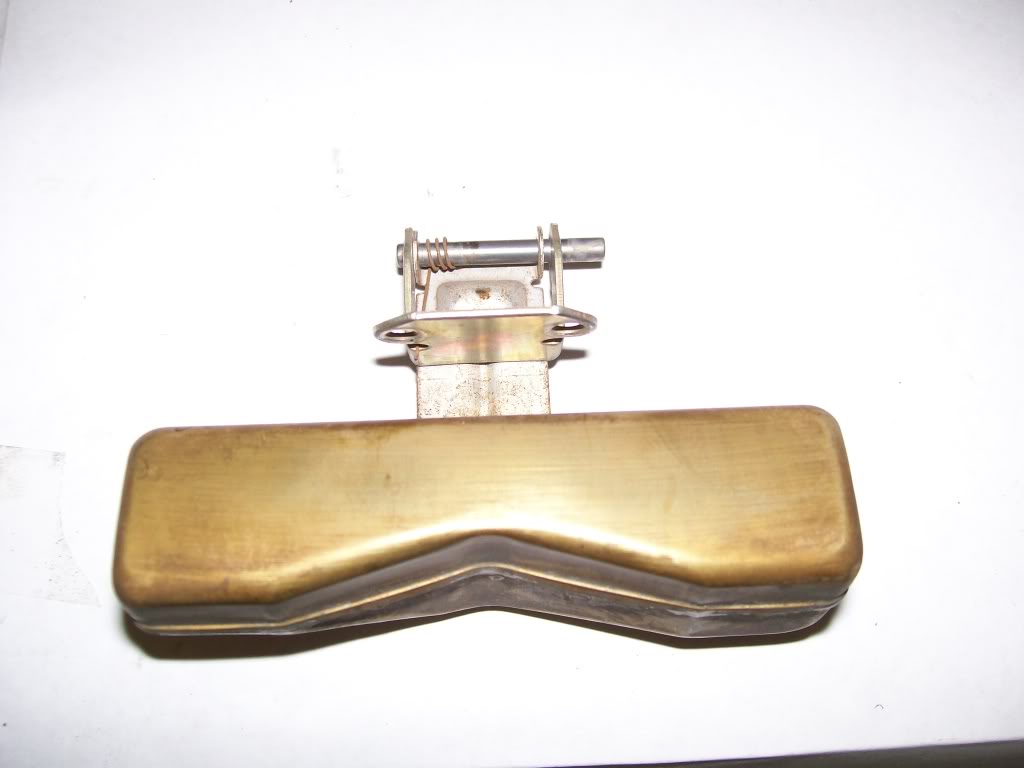
Here are all the pieces removed for a visual.
More to follow. I hope this is uncovering the mystery inside the Holley so far.
3-17-2012
Now that we've seen the needle and seat, and we've removed it from the carb and along the way we've learned how to adjust it up and down. Now let's look at the float that will be affected by what we do with the needle and seat.
Here is a picture looking into the float bowl. The float in clear view. Look to the right side and the plug to remove to check the fuel level is there also.
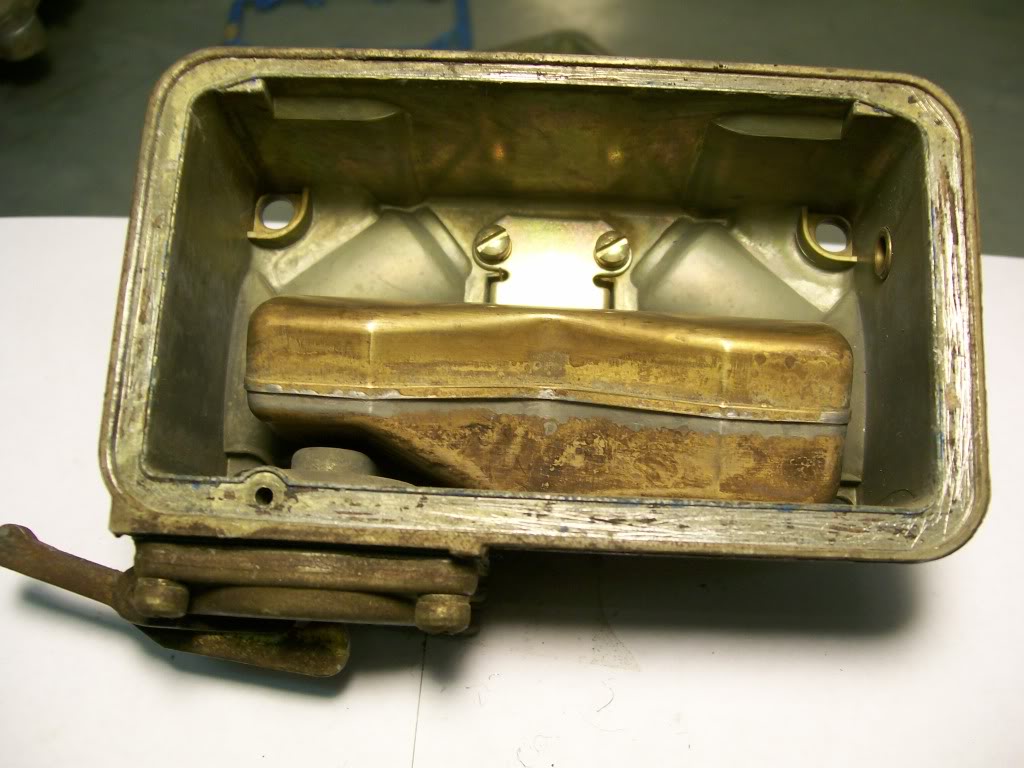
By removing the two screws in the back, the float assembly and it's pivot is removed. If I took a good picture, you can see where the float mounting tab makes contact with the needle.
By seeing the mark on the float mounting tab, you can see where the float, once the fuel enter the bowl, raises and pushes the needle upwards to the seat to shut off the fuel entering the bowl.
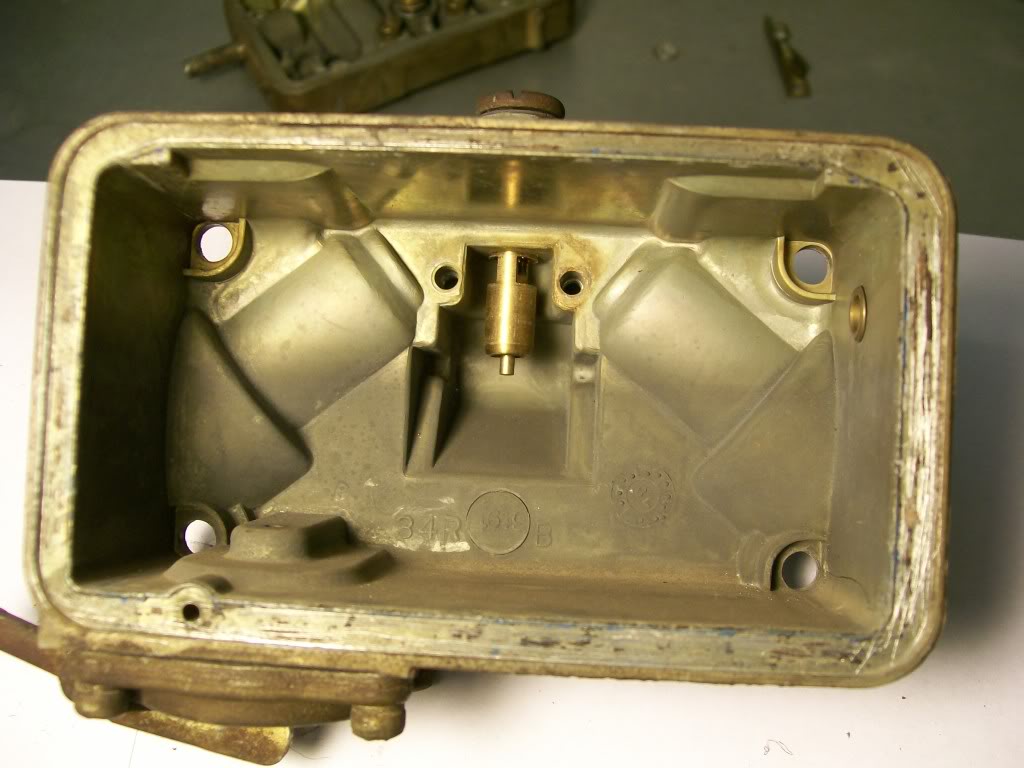
This next picture should put the hole thing together. Here is the needle and seat just waiting to be pushed up and down by the float.
Over the years I've seen guys get a speck of dirt caught in the needle and seat and have fuel come out the top of the carb. I've had this many times, it's just a part of working on cars and trucks. Over and over I've watched them dissassemble the carb to get to the jets, remove them to clean or replace them.
The jets have nothing to do with the amount of fuel in the float bowl. They have alot to do with the amount of fuel getting from the float bowl to the intake manifold.
I hope by now you all are nodding your heads saying, yeah, that makes sense.
So far the focus has been on the Holley, it's a common carb, so to understand it is a good thing. This hasn't been just to learn the Holley carb so much as a lesson on how all carbs work. Yes, all carbs. They all have a float and needle and seat. They have jets. If they are 4 barrel carbs, they have secondaries that have their ways of opening. They have accelerator pumps, the Holley uses a diaphram, others may use plungers.
As long as the knowledge of how and why a carb works is learned, you'd be amazed at what you can do to get yourself out of a bad situation either in the middle of the woods or in the middle of a traffic jam.
There's still a couple of items to cover on carbs so hang in there.
3-18-2012
Next up we're gonna get to the secondaries side of the Holley again.
Going back to the vacuum operated secondary carb, where we have the vacuum canister attached to the side of the carb. Remembering that this design does not have an accelerator pump. Also knowing that the secondaries do not use a power valve, all that we need is to regulate the amount of fuel being allowed into the intake manifold.
What we are talking about is getting rid of the usage of the whole metering block that we had on the primary side. We've seen this metering block, it had a passage for the accelerater pump shot of fuel to pass through, the power valve screwed into it, the screws that adjust the idle fuel mixture are on the sides of it and the two brass jets are screwed into it also.
The next picture will introduce the metering plate. It is a simplified plate that replaces the block. Remember, it has far less to do.
Block on the left, plate on the right.
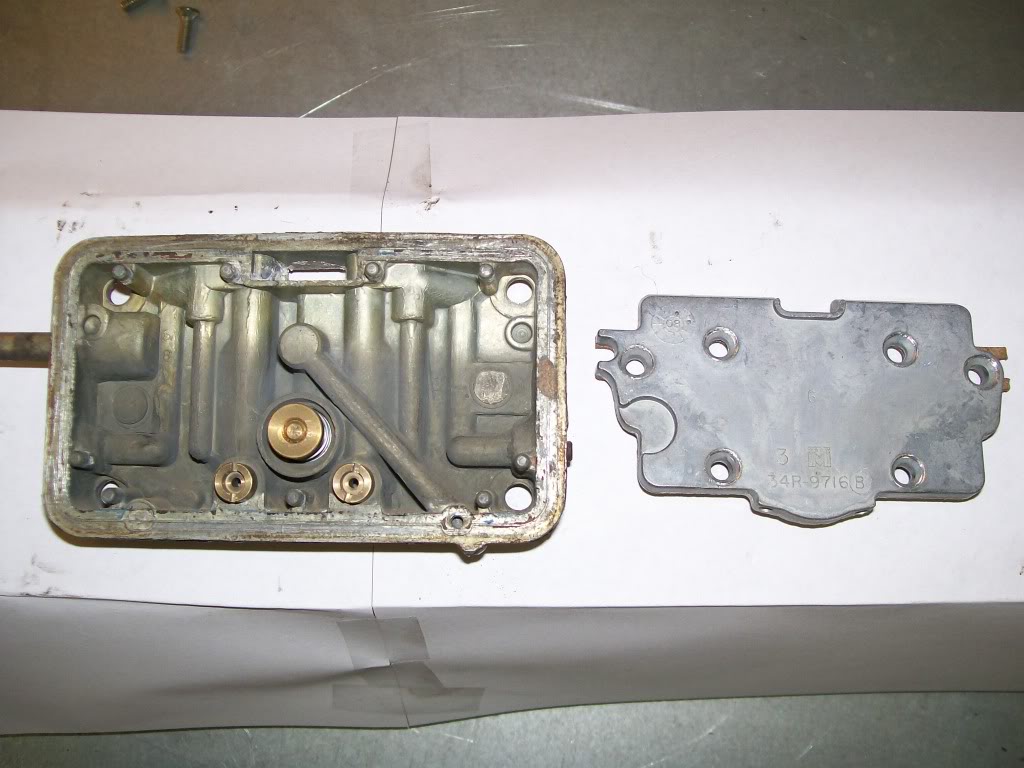
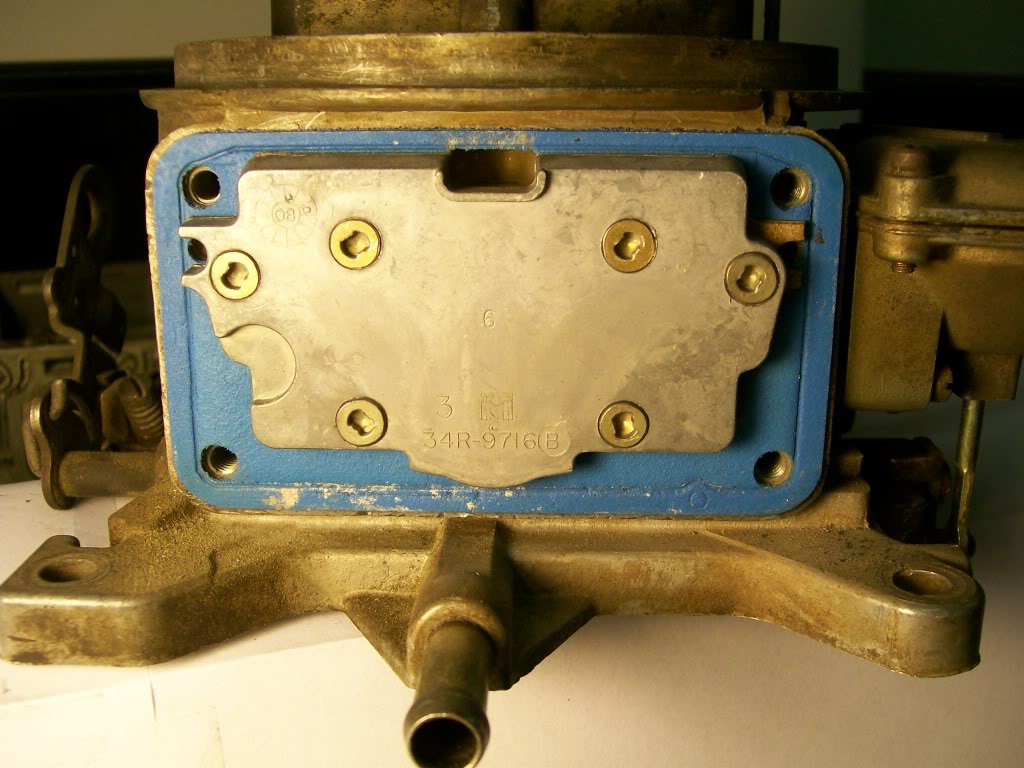
Talk about simple.... The block is actually sandwiched between the float bowl and the main center section of the carb. The plate however, is attached directly to the main center section and the float bowl does not touch this plate.
As we can see by the next picture.
In the previous two pictures it looks like an aluminum plate, in the next picture the fuel passages are exposed.
(Note) This carb is from the late seventies, I don't know it you all will ever see the screw heads you see in this picture. If you do, the screws are called a "clutch" head screw. They hold well, just not always easy to find the screwdriver thatfits them.
Looking at the picture below, look closely at the bottom of the plate. I put two sharpie marks that represent the fuel entering this plate, then getting to the passage grooves.
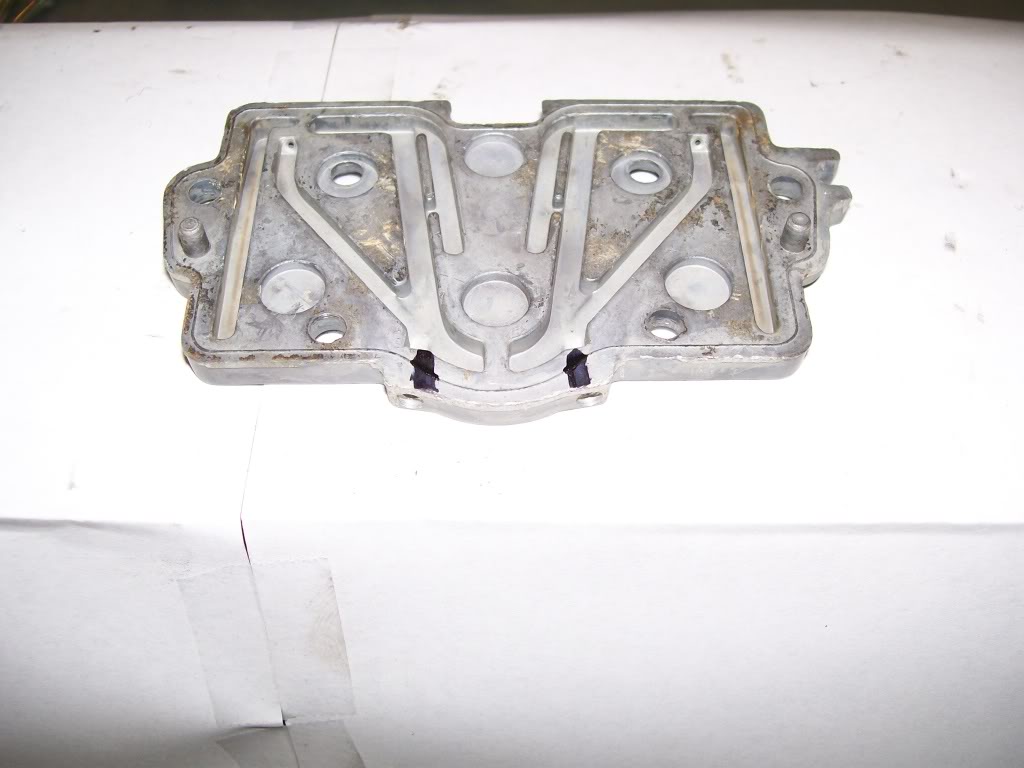
This plate, just like so many of the parts of the Holley carb, are replaceable where the two holes at the bottom have different sizes to meet your needs.
Can the plate that is shown be replaced by a metering block? Yes, go to Jegs or Summit racing catalogs and you'll find kits to upgrade to a block design.
You'll learn this the first time you by the chrome fuel line that splits into two lines to feed the float bowls. I believe there is a 4150 and 4160 series carbs. The one with the block on the secondary side requires a longer fuel line than the carb using a metering block.
Next up I think we might look at the choke system.....