You must be logged in to rate content!
12 minute(s) of a 620 minute read
1-7-2012
Let's get these pieces back in place. With this truck there are not very many parts that are factory pieces. Then in the places where there some pieces that are factory pieces they are attached to hand fabricated pieces.
Because of all the gathered stuff that makes this truck a running, driving vehicle is the reason to always keep an eye out when you walk through a junk yard, or look under the hood of another vehicle to get ideas. If your gonna build, you have to be very adaptable.
Ok. under the hood.
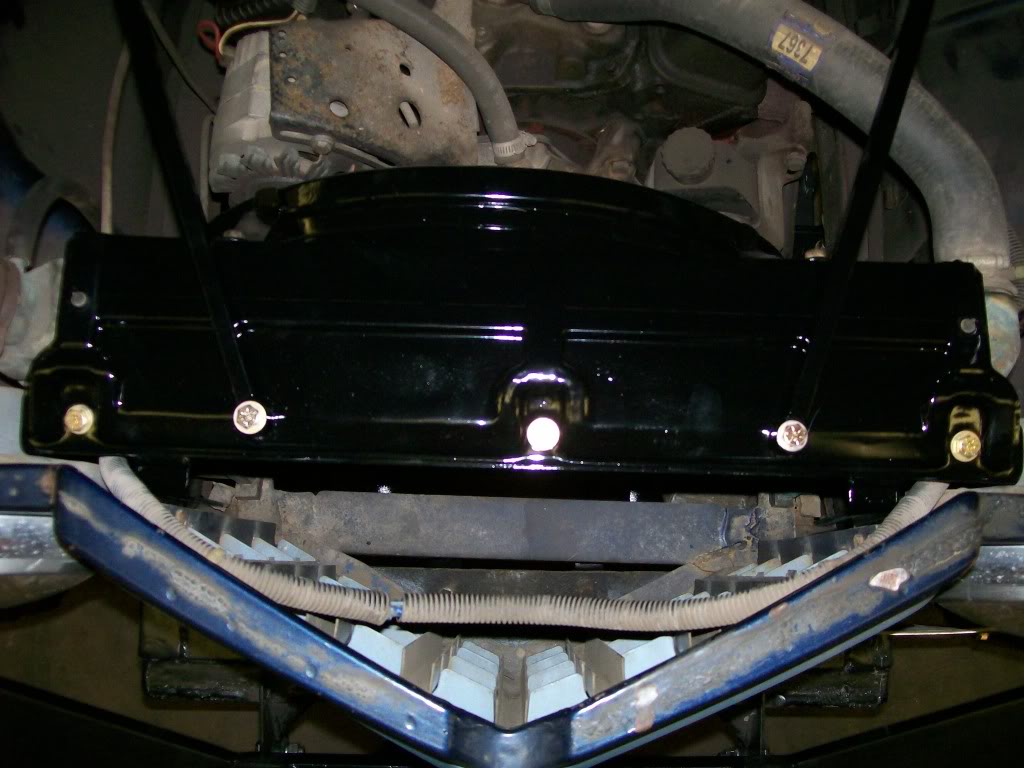
Now from the side. The radiator has lasted the 26, now 27 years without much problem. Towards the last couple years the top inlet started to leak. I have already purchased a new radiator, once I get the odds and ends done around the radiator I'll change to the new one.
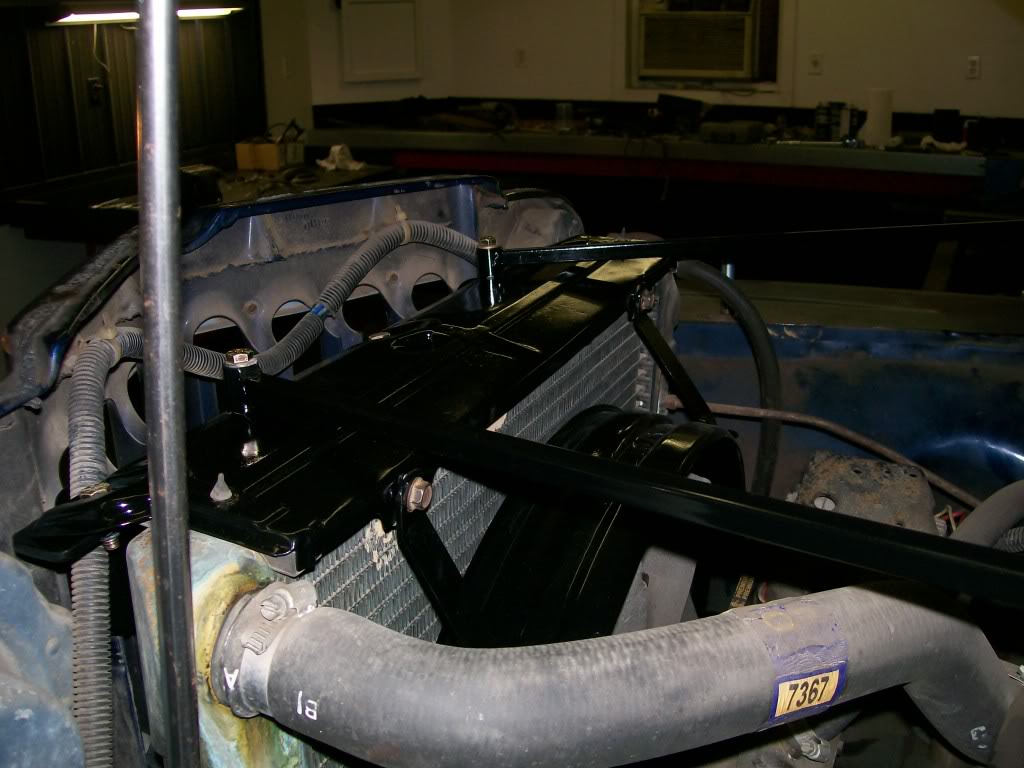
1-8-2012
RikRotorhead, Thanks for checking in also. Good to have more fellow Willys guys stepping up. From the sounds of things, with the enthusiasm from others, we may have more future Willys guys also.
As for the "V" shape front end, hmmmm, I'm not a real historian on these Willys in that department. I have been led to believe that the '48 and '49 where the flat nosed, then the '50 went to the "V" shape.
I don't know if perhaps since '49 to '50 there may have been a time during the change over that some of the '50's in the very early going had the old style before completly switching over.
Of coarse, this is purely my own guessing.
In either case of you build, going street rod or rolling on 40" tires, they both will require alot of modifications. It does sound like you already have a good customization started.
In the case of going big with the 40"s. The rear wheel well openings on the wagon may need to be reshaped to fit the diameter of the larger tire. In the front, as well as the rear, the springs may need to on top of the axles.
I say "may need" for the idea that if you can modify as much as you have, I don't want to place a limitation on your abilities.
Good luck on your wagon, and I know if you do start a build thread, many here, including me, would like to see what you've got going.
Viper723, look at you go, getting your truck posted. That had to be exciting.
RikRotorhead, that pic with the red and black Willys, very nice. Man they sure do stand out.
1-9-2012
RikRotorhead, you have a point with the idea of a Willys section.
Before I started my thread here I looked for a section that the Willys truckwould fit, but there wasn't one.
It was tricky also when registering. There were choices to click, but none were for the Willys truck either. Perhaps with the responce and entusiasm we've generated, maybe?
Either way, I'd like to thank Jeep forums for providing a means to show and tell, and bring us all together with one interest, the old Willys trucks and wagons.
As I mentioned, I took my first official test drive to town on the first of the year. It did well, yet I wasn't pleased with the braking performance. The pedal went down too far for my liking. This has somewhat been an issue before, but now that I'm here I want to get as many bugs worked out as possible.
Of course I checked the shoes for adjustment, I bled and bled the brakes. Now that I've eliminated those, I'm moving to the master cylinder. Ok, here's where it gets tricky. The cylinder seemed fine, I actually changed it about a year and half ago, along with the power brake booster. This rebuilt cylinder began to leak past the rear seal in the cylinder and wouldn't hold pressure as it should. As a side note... as I've mentioned before, it's a truck from a pile of used car and truck parts. The master cylinder and booster is from a '69 Impala. This time I bought a brand new cylinder and I'm now very happy with the brakes.
I tell ya, I know I've spent alot of time discussing theory and the mechanicals behind the parts, without this knowledge you would be either paying someone else, or buying alot of unnecessary parts.
Just one pic tonight, but it says alot. Six or seven months ago I started this frame repair, it was bad. It's come a long way, and it's been alot of funshowing and teaching and learning. It's great to start using it again. This is a driver, and worker, this is the first trip for it's first load of firewood. I'll get more pics later with it with a load of wood.
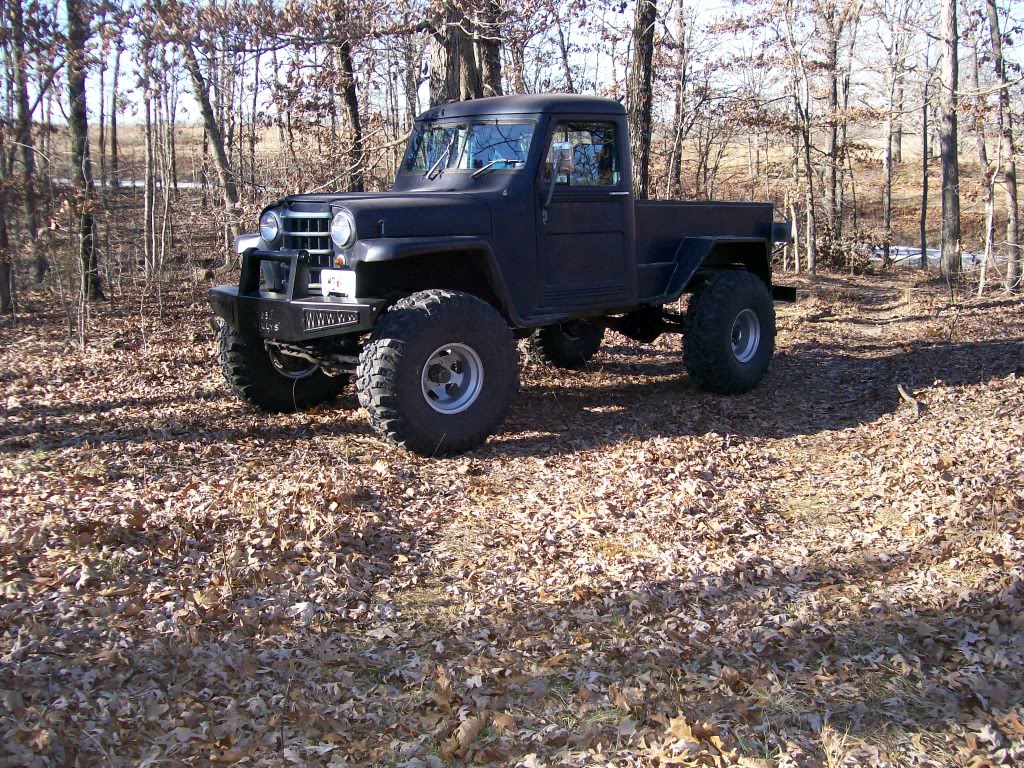
Wow, we've definetly got Willys showing up now.
Alright guys, I have to tell you all, each one of you have your own obsticles ahead of you. Just as I had to conquer my issues 27 years ago, you have the same task ahead of you.
One thing you have going for you is now available the sheet metal, weather stripping, chrome parts, ect. The aftermarket has grown quite a bit since I did mine.
I can say however, it is worth the effort, done right and you can have a good reliable truck for many years to come. The best part about restoring an old truck is unlike a new truck that loses it's luster over a couple years, an old one becomes more special as every year goes by.
I've mentioned this before, but it's worth repeating. If this is your first restoration, have an idea of what your end result is gonna be. The project will cost time and money, you have to commit. It will be a mental game at times, you have to stick with the project at times, even when doing nothing sounds better. Through much of the time I've been filling this thread, I've been working 6 days a week, quite frankly, I really didn't feel like working on the truck, that's where I would just do an hour at a time, those hours do add up to getting stuff done.
Here's a biggy, beware, at times you want to take a break from the project, not a bad idea once in a while. What often happens next is one day turns to one week, one week turns to one month and well, you get the idea. It takes a lot of dissapline to take it to the end.
Mine is back to work again. I'm gathering firewood for next year and the truck is doing great. It may be 62 years old now, but it's been given a new life now.
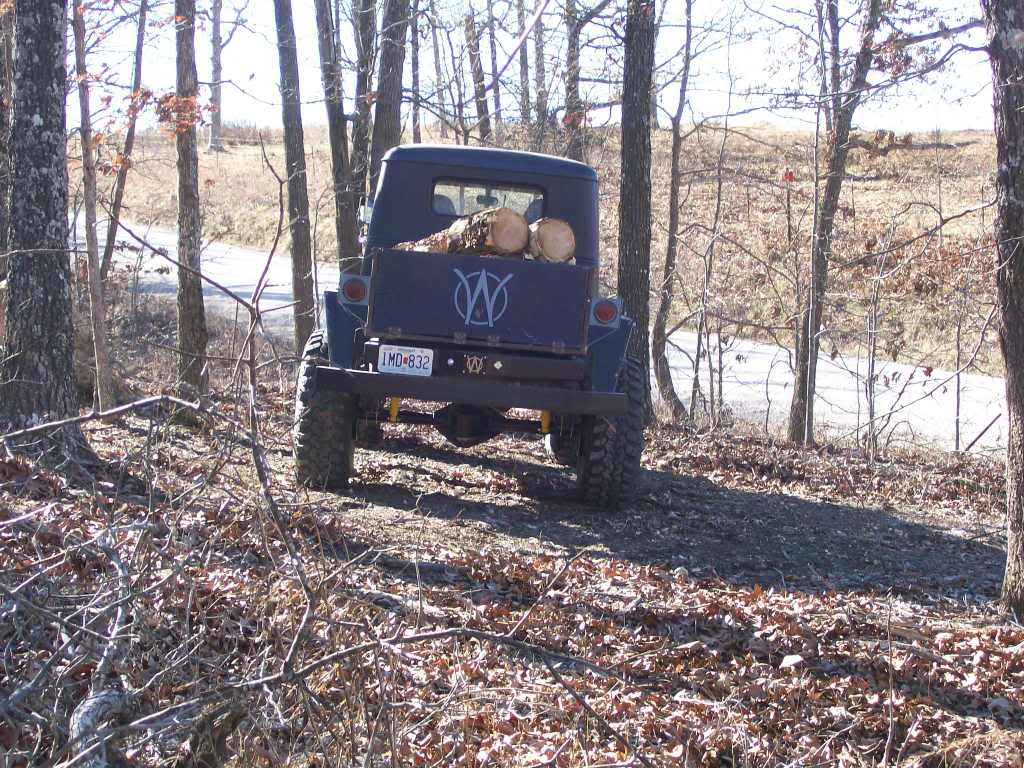
With a load of wood, this is what worried me before. Making a turn while climbing a hill. With the frame a weak as it was I always worried about it twisting too far out of shape. Not now though.
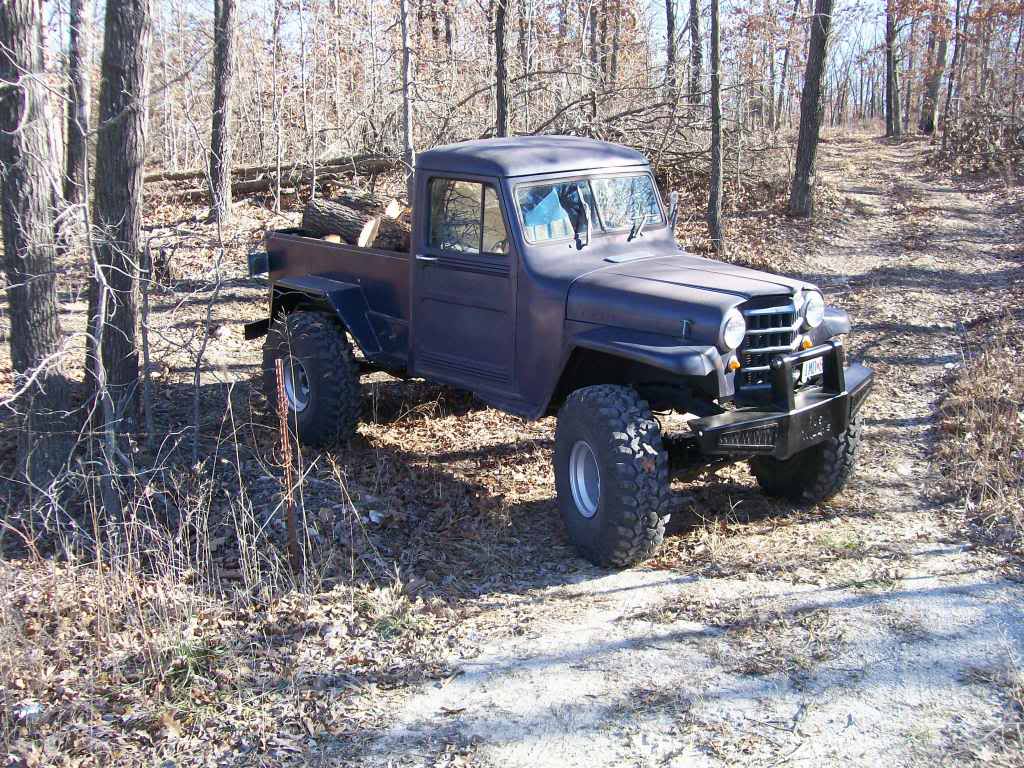
The new rear springs are getting their first workout and doing just fine.
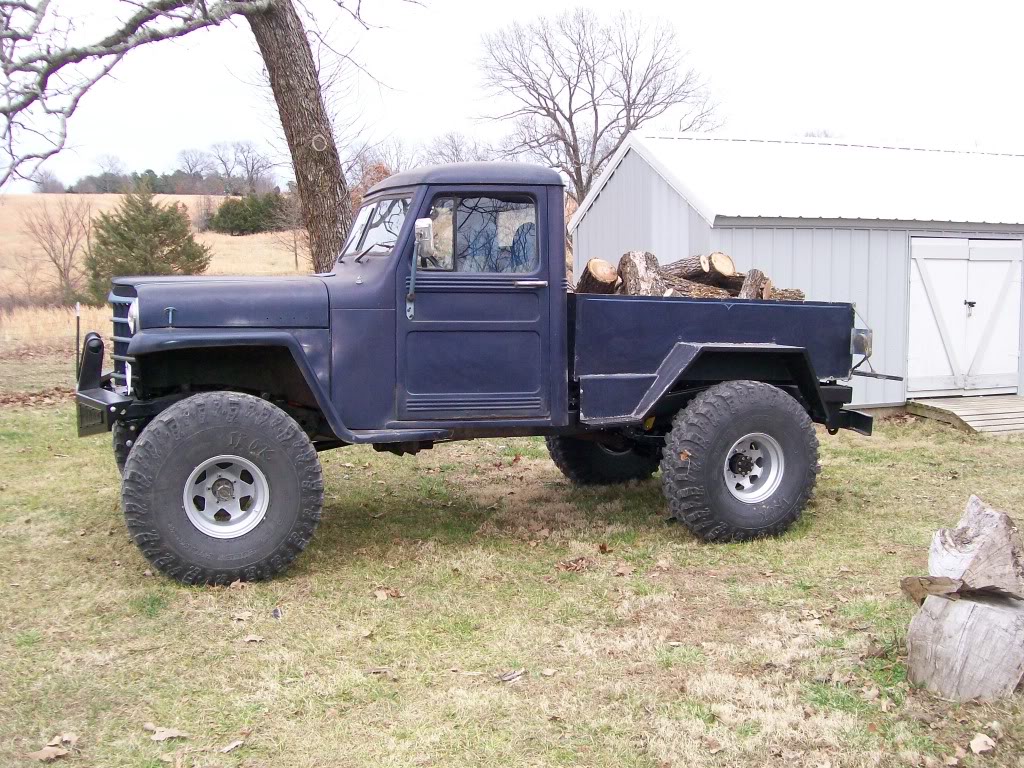
1-10-2012
RikRotorhead, your honesty will give you a free conscience.
This is the wisdom of an old man. I did write that to go right to your heart. I sensed you were looking for something to take you over the wall and start seeing the project as something fulfill a desire than a hunk of iron sitting there and you're not sure where to start to get back to it.
For the rest of you, and anyone with a similar situation like RikRotorhead, it was a aftwarning, looking back at what could have been, or should have been.
For those like Viper723, just starting a project, it's a forewarning. There will be walls and barriers that you will hit, it's a struggle to get past some of them, but don't think you're alone, I've hit my fair share of walls also. Even repairing the frame on this truck I had walls. It's not til you broke a wall down that you become stronger and learn how to mentally handle these walls.
In no way am I saying to leave family and other priorities aside, it's those times where the lazy boy really looks comfortable that will lengthen the time it takes to finish the project.
Thanks again for sharing guys.
1-13-2012
AngryTJ, I do plan on painting someday, it'll be a whille yet. The cab also needs some underside work too. As for now, I want to keep the truck ready for any bad weather that comes up. Any time I hear there is a big snow storm on it's way, I always feel confident. I am gonna take care of a few more odds and ends for now.
98GP, I'm glad you like. I knew all along the future of this truck is to be a truck. In between times of driving around and turning heads, it'll be workin for a living.
There is one part on this truck that has been butt-ugly since day one. In most cases this part would be hidden since it's on the bottom side of the truck. In this case, it's very noticeable. With how high it sits, it takes no effort to take a look at the transmission crossmember.
I've been trying to decide just what I want to replace it with. I could go get another hunk of channel iron similar to what is on there now, and do a much better job of fabrication. I also wanted to do a box design, something with four sides all fitted and welded.
If any of you have followed this thread, you know one of my goals is show the process of creating, not just show the created. This crossmember is gonna push my abilities and my patience but if it turns out how I want, it should look nice.
Here's the ugly... ha, not the first time I've said that during this build.

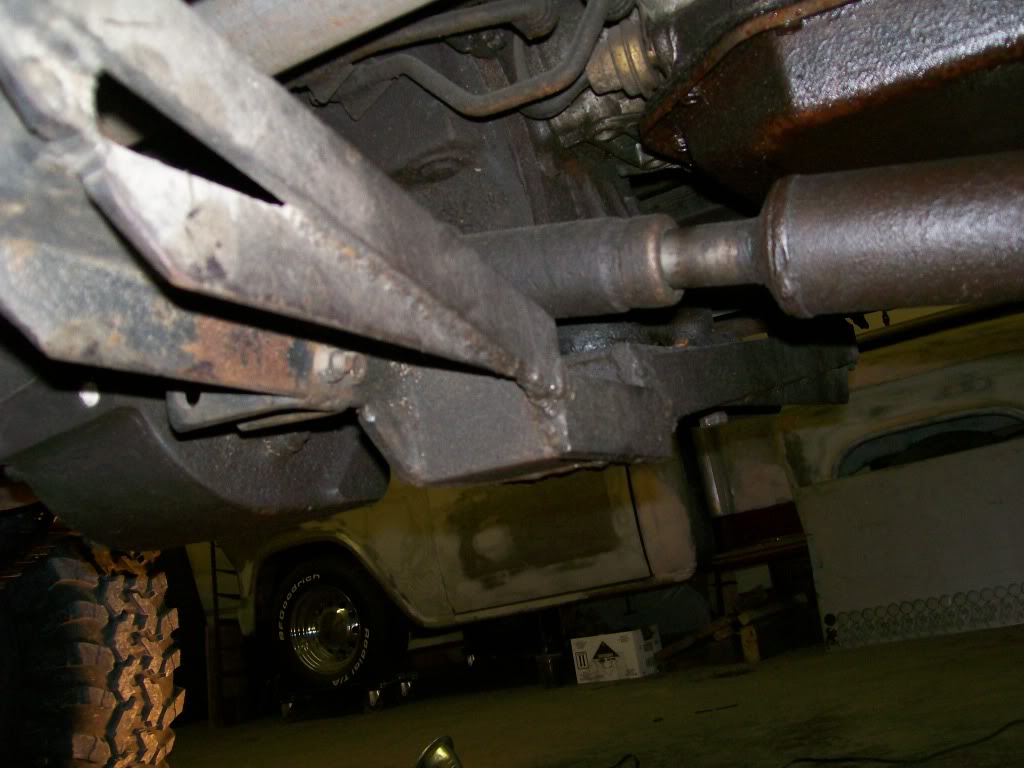
I started with alot of measurements then to the computer. Once I measured 3 times and checked my drawing on the computer, I crossed my fingers and made a big cut with the torchmate plasma cutting system.
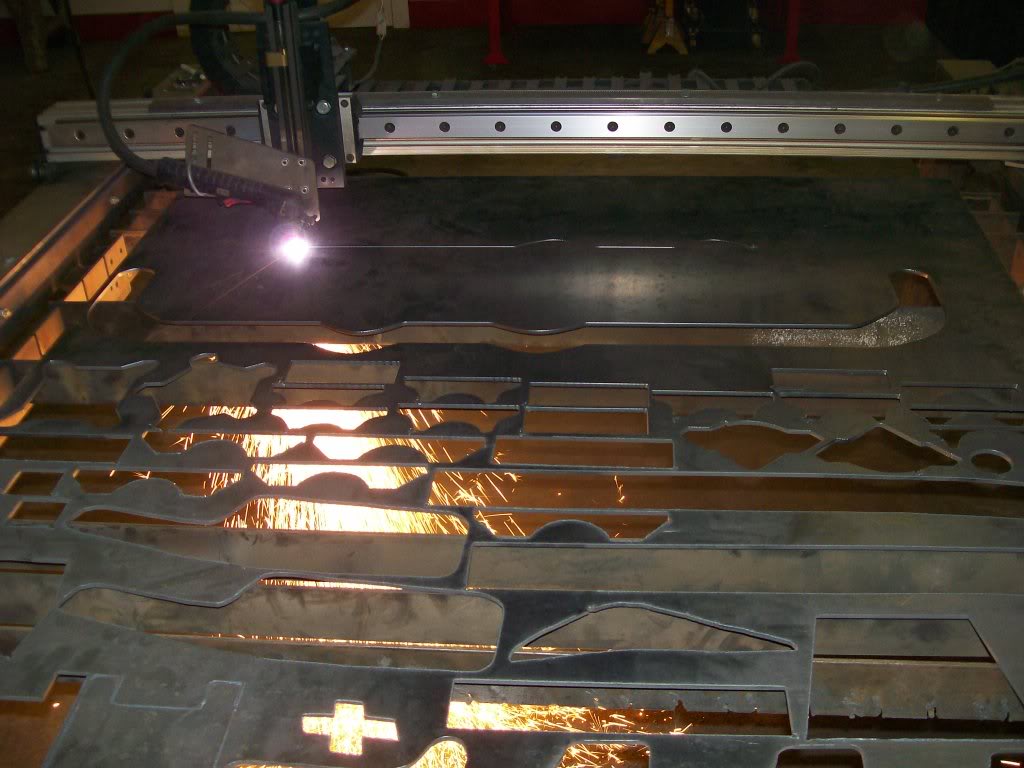
With the box design, there will be the two sides and the top and the bottom. Yes, I'm biting off quite a project here, but if I conquer it, it's one more process of fabrication I'll have under my belt.
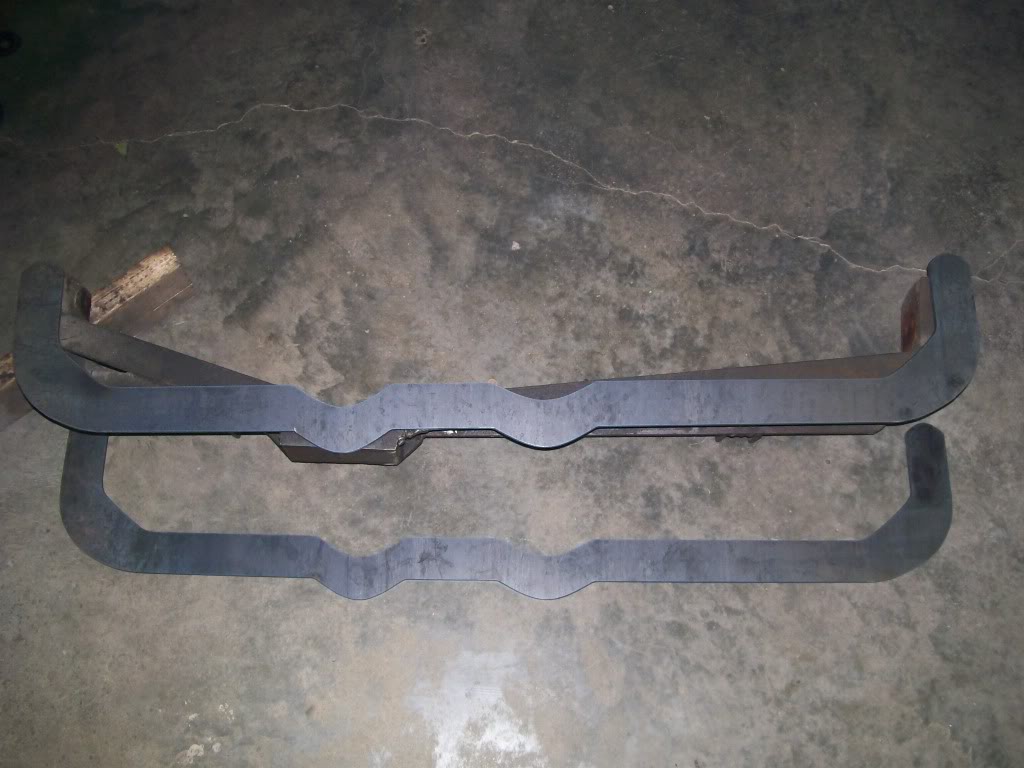
In this pic I've got my two sides cut. I've got the old one off, and layed them together. The old crossmember has the drop where the front driveshaft needs space. The new crossmember has this drop built into it also. The new one also has a second drop. This second drop is allowing space for a part of the transfercase housing. Originally I had to off set the crossmamber forward a bit to clear the transfercase housing. This way I can center the crossmember with this second drop.
Comments

Great before & after!
Posted by Diggymart on 1/11/20 @ 4:10:28 PM

Gotta love the Willys! Good job...great build!
Posted by Diggymart on 12/10/18 @ 8:34:21 PM

Ultimate classic truck right there
Posted by CCmyVW on 12/26/20 @ 4:17:42 PM