You must be logged in to rate content!
12 minute(s) of a 620 minute read
12-27-2011
In the last posting I mentioned using rubber bushings. These bushings are very universal. I get them from the NAPA store. They're about 1" tall but when I need them narrower simply put one in the vise so half of it is sticking up out of the vise and cut with a hacksaw, then rotate the bushing in the vise til you've cut all the way around and through the bushing.
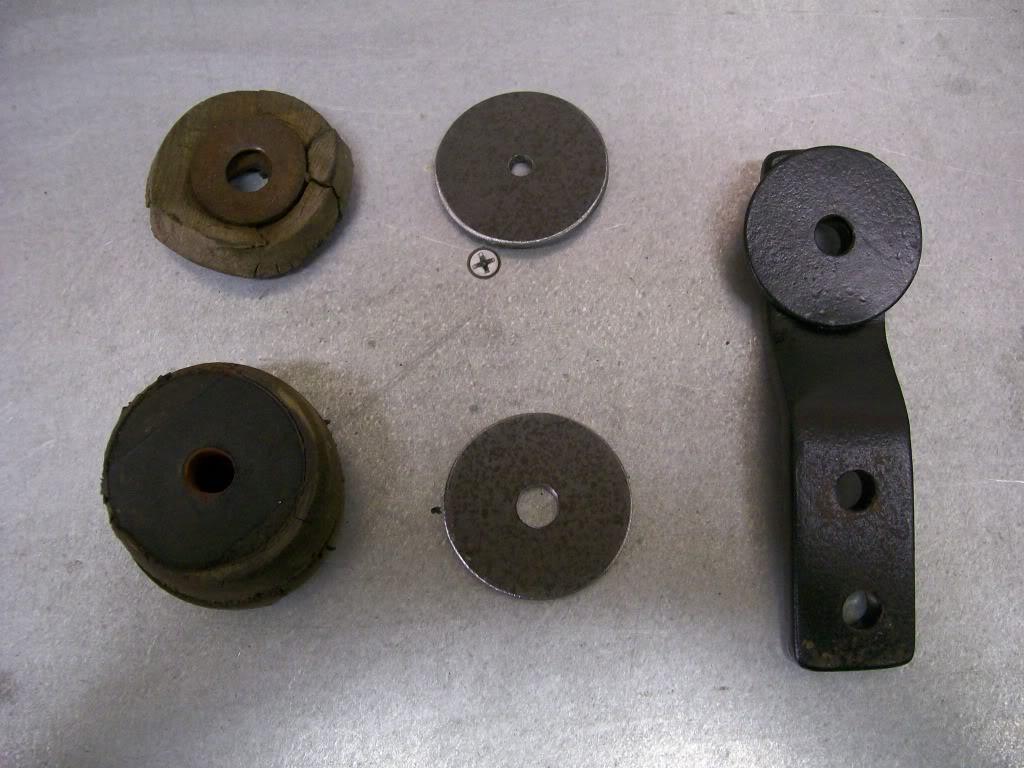
In this next picture you can see the outcome of a bushing that wasn't properly supported. It is the neglect of 26 years and just started to split around the parimeter. The lower bushing lasted as many years but you can see it had better support and didn't split like the other one. True, the stress on different bushings perhaps wasn't the same, but certainly the more the load is dispersed on a larger area of the bushing, the longer it will last.
Next in the top middle is a washer that fits the outer parimeter pretty good and the lower middle item is the same washer with a larger center hole.
To the right is the nose mounting bracket we saw in the last pics.
Where the fabrication comes in is making the washers. In previous posts I've mentioned the usage of a drill press, this is a key time to have one.
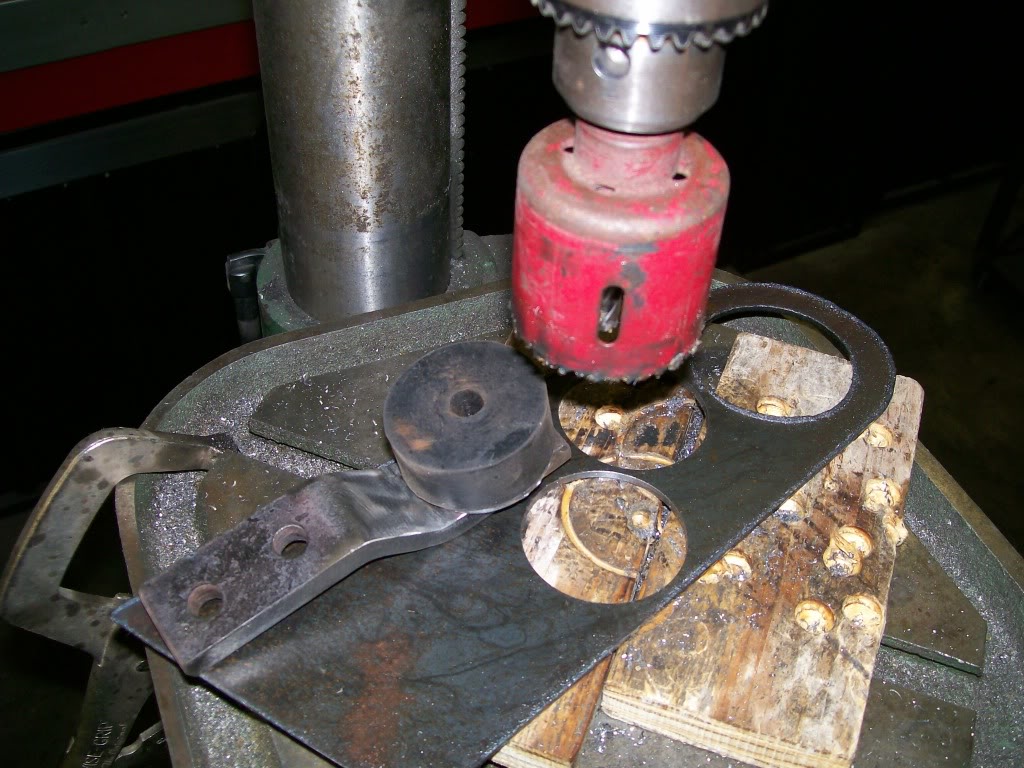
I'm using some 1/8" scrap piece of metal, perfect for what I need to do. I get a holesaw of the righ diameter that once I cut a hole, the piece that gets cut out and stuck inside the holesaw is the diameter I want for the washers.
The holesaw uses a 1/4" drill to center is when cutting. I need a 7/16" center hole so now just drill the center hole and I got my washer.
You can cut these using a 1/2" drill, not as convienent, but it does work.
One benifit by having a drill press is the drill is a solid mounted unit. The metal is also on a solid mount. Having both pieces mounted solidly, you can remove the 1/4" centering drill bit. Now if you need a solid round disc, you can use the holesaw without the bit and get the solid disc without the hole in the center.
12-28-2011
Thanks for checking in 94yjstocklook, it's good to hear from you.
You are always honest, I appreciate that.
There may be others thinking the same thing.
I used the term washers only for the fact that they resemble washers by appearance.
It's not so much the end result/product that is the main focus of this last post. Just as I've taken the Mig welder and gone way beyond it's normal use of just attaching to pieces of metal together. I've taken it to to doing nice long welds to using it like liqiud metal, ect.
Now I've taken the hole saw and drill press and what we would have just used to drill a hole with, we now use the refuge/waste of drilling the hole and turning it into a usable item. In this case, a hmmmmmm, not a washer, but a rubber bushing load dispersing apparatus. Yes, that's it, we'll call it a RBLDA.
Also the plus side of this RBLDA is you can create the exact outside diameter and control the inside diameter as you need it to be.
For example, if I need a RBLDA with a 1 1/2" outide diameter, and if I go to the hardware store, I can get a washer with the outside diameter, but, the inside is gonna be 3/4" to 1" diameter. In this case I'd have to down size stack about 3 washers to satisfy my inside diameter of 7/16" to fit the much smaller bolt head. Now I have a sloppy fit, or I have to weld all the washers together so they won't shift around during use.
Another huge plus is I do control the thickness of the washer I'm making. Recently I restored a camaro where the door striker post had started to break the metal around it. The owner took the car to have someone weld the post and the fatigued metal aound it. Sounds like a quick fix, but there is a washer that is also painted between the metal and the post. Little did they know, it's aluminum from the factory. When they started to weld, the aluminum washer made a terrible mess. And the washer was destroyed.
I had to replace the washer, no problem, I had a hole saw to create the same size washer in aluminum. Here's the best part..... The original was about an 1/8" thick. The door post is to be shimmed for the correct adjustment, now I have to add shims. Or..... I can cut a washer that is 3/16" thick and get a cleaner look without any more shims. It worked great. I also noticed from the other side that they bend the washer in a way that it has a slight wave to it. This wave, when it is installed, it creates a pressure so it won't loosen over time. With the press I also created this wave before installing it.
So the idea of this post topic is once again, where we may have settled for a quick fix fit before, we now take a tool that is sitting next to us and creating the perfect fit.
As many of you grow and become more able to create your own fixes in tricky areas you'll see other people projects. You'll be reminded as you see the quick fixes you used to do when you see their projects, you'll reflect on where you've come from, it's a great feeling. Now I'm not mocking others work here, we all start somwhere, as you've all seen, I've done the comparing here in this thread, on my own past building.

spyder6, thanks a ton for replying. I seriously appreciate it.
Your responce and answer is dead on.
Yes, if my suspension and geometry is all correct the need for stabilizers is virtually eliminated. But we do have the situation of stock/factory trucks that originally have steering stabilizers.
For instance, before the Willys I had a 76 chevy 3/4 ton. After a few years I noticed the ball joints were getting sloppy and the top of the front wheels were tipping inward. Ahhhh, no problem, it still rides fine, I'll get to them when ever.
The truck had a steering stabilizer I don't remember if it was factory or add on, but it had also started to leak, it wasn't up to the task anymore. Now, even though the truck had an original geometry set-up, things did get sloppy, alignment went out of whack.
I clearly rememeber a certain bridge in town, it had an edge to it, when I drove over it, I got the dreaded death wobble. Oh, my, that sucked big time. Nothing like feeling you've lost all control.
Anyway, point is, once the stabilizer gave out, I felt the bad alignment creep up and bite me. I soon learned how to change ball joints and also the stabilizer. Never had the wobble again.
Point is. as you mentioned, if the ball joints had stayed like new, and alignment had stayed the same, not even one stabilizer might not have been
needed.
Ok. as I mentioned, my caster is not at the perfect setting, yet, I haven't experienced any drawbacks in 26 years. I'm on the edge and I know it, but still have a secure feeling when driving.
Now, would one stabilizer help eliminate any possible wander I may have with my caster being off, absolutly, I did drive with one for about 6 months. But now comes personal preference.
It is the feel of the steering wheel. Example, all my vehicles are 30 years and older, nothing has a rack and pinion steering set-up. Now, when I do occasionally do drive a newer rack and pinion car I love the feel of the slight resistance of the steering wheel. You feel as if you have complete control from the steering wheel to the front wheels. And with this total control feel, you get very little bump steer. Meaning, as the wheel encounters pot holes, and edges in the pavement, there is no wander or action sent back to the steering wheel. (spyder6, I know you already know the meaning of bump steer, others may not).
Ok, with my truck, I am wayyyyyyyyyy far away from rack and pinion steering. And even though the second stabilizer is not needed to drive the truck, there is something about the resistance the second one offers that very slightly resembles the resistance of having a rack and pinion steeringfeel.
Let's reflect, even before the topic of two stabilizers became a conversation, I took a picture of the truck in my driveway. In my write up I mentioned the fact that the stabilizers mounting bracket wasn't welded on yet, and I noticed the steering was much easier. Being easier didn't mean easier was good in this situation, being easier and noticing it immediatly meant I wanted it back to the feel I had before, the same resistance it had before I disassembled it.
You are correct, with proper set-up, one is sufficient, but now personal preference steps up. Personal preference will quite often throw a twist into logic.
hallsofstone, just think about it, all we've done here is post pictures and write words. Really not much different than what school does. So I have to ask, why can't school be just as interesting?

We're moving onto the old fan shoud. I'm trying to recall, but I know the radiator and the mounting of the radiator is all from a '72 Chevy Nova. As for the fan shrod itself I believe it was from around a 1967 chevelle. I think I liked the older shroud because it is metal vs. a plastic one. I could cut and modify it to fit my needs.
To put everything together, the motor sits slightly lower in reference to the radiator location. Now with this in mind the fan blade is slightly exposed lower than the radiator. My fan shroud serves two purposes. One, is to pull the air through the radiator. Two, serve as a splash guard so the fan doesn't get water and mud splashed up into it from underneath.
Before I go any farther, I'm sure many are thinking, just install a electric fan. Today, this is a very good way to go. I can open up any performance catalog and pick the one I need. Twenty six years ago, it wasn't gonna happen. The best you could do was go to the junk yard and maybe find one on a car.
Right now I'm sticking with the same old set-up. I really don't even want to get involved with anything in the engine bay right now, but since it's in the shop, I'm gonna take care of some odds and ends. I also figure we have snow sometime in the future and I want to keep it close to usable condition.
I want to redue the splash guard on the shroud. It's location isn't exactly where I want it, in two different ways.
Here's what I'm working with. The flat shield is gonna be cut off and changed. The black mark is the height on the left side that I need to get to.
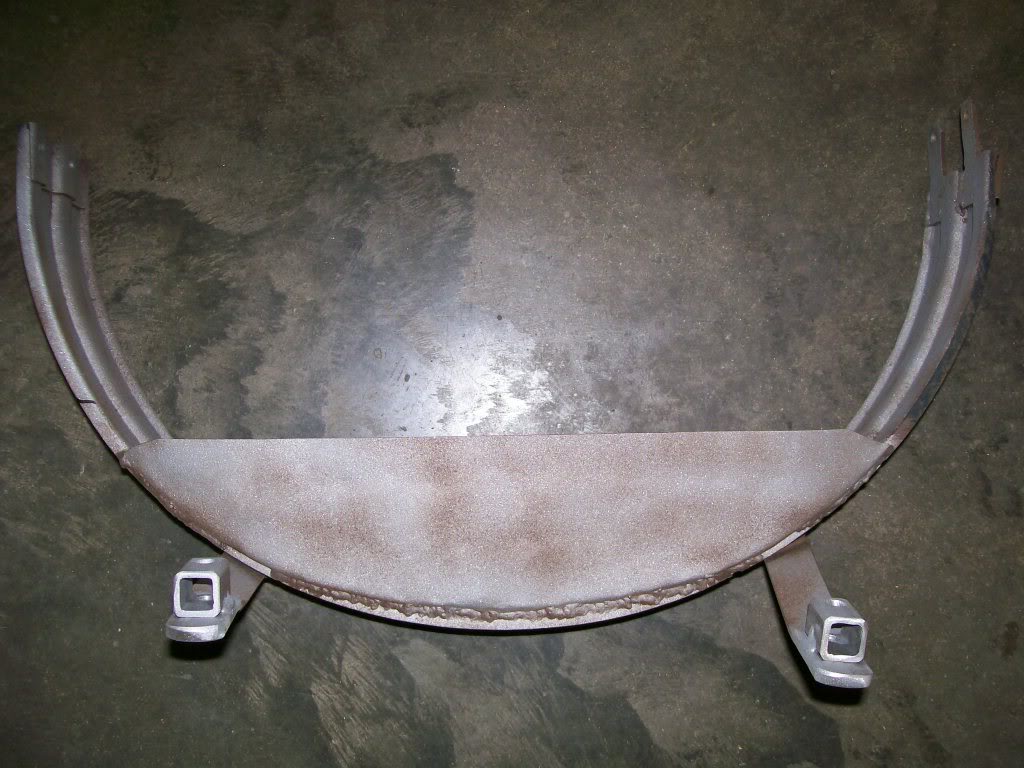
Not only do I want to alter the shield according to the rotation location, I also want to space the splash shield forward about an inch. This next picture shows the old piece removed, then the two pieces that will replace the old shield.
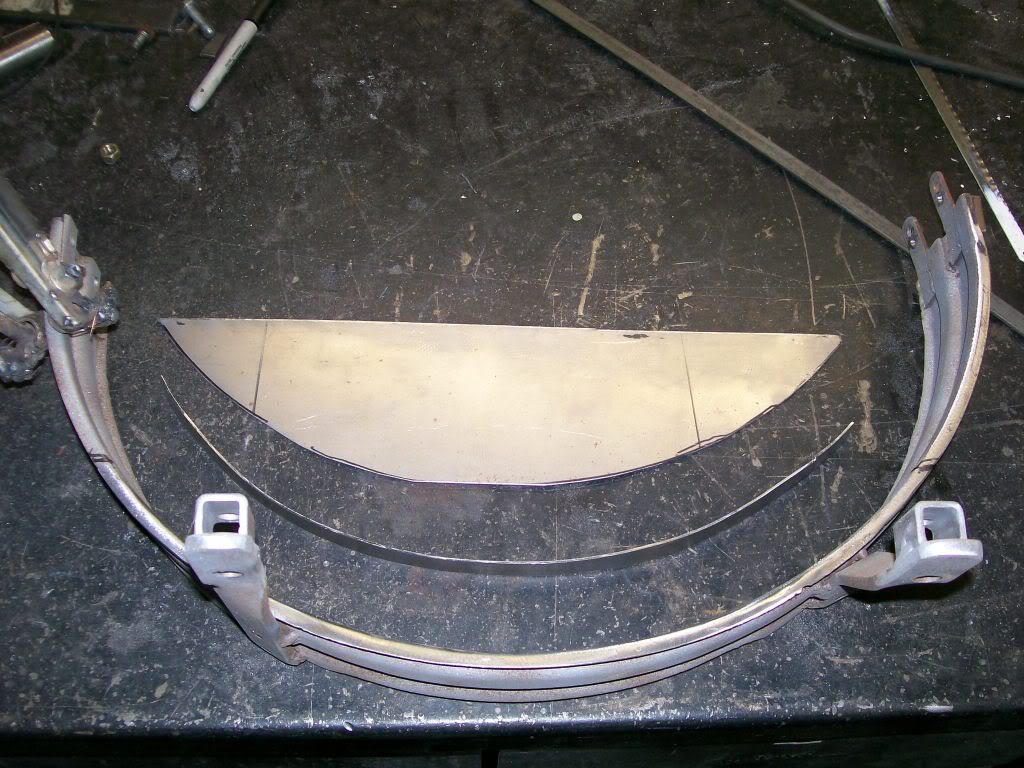
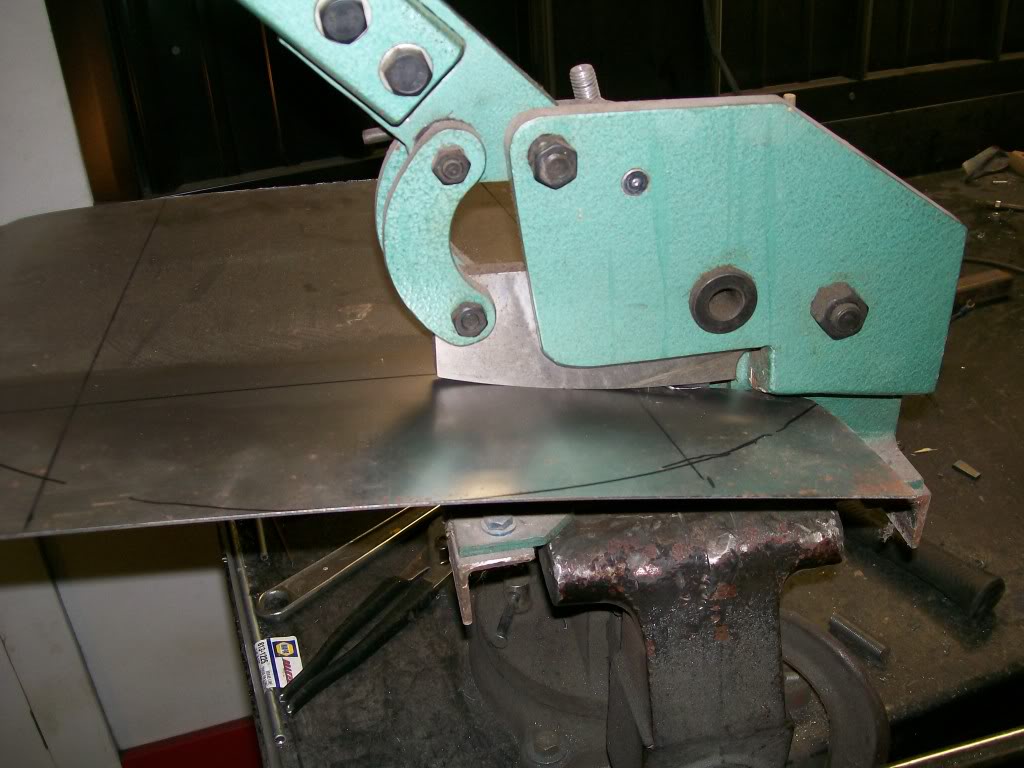
I cut these pieces with a hand shear from 16 guage sheet metal. Rather thick for sheet metal, but holds it's shape quite well. If anyone's gonna do much sheet metal work, these will save alot of time without taking up much roomin the shop. Usually these are mounted to a bench top, but I just made a mount so I could clamp it in the vise when needed.

Ultimate classic truck right there
Posted by CCmyVW on 12/26/20 @ 4:17:42 PM