You must be logged in to rate content!
8 minute(s) of a 620 minute read
10-11-2011
Ok, that's 2 for giving epoxy primer a try. Now I also have to follow my own advise and read the label too.

There's nothing like a before and after picture to tell you how much crap you took care of during the build.
During the manufacturing of this truck, the best I can figure is the rivet machine must have had a problem. The rear spring brackets I believe were supposed to be riveted in place. Mine had rivets, then some where during the assembly welding entered the process. I don't know why but the mounting ears had to be welded in place. After a quick shot of sandblasting I uncovered this mess.
For those of you just getting into welding there is one thing that will ruin a weld real quick, paint, undercoating, oils, ect that like to come out of crevices when things get hot during the welding. This frame had a coating that was a pain. It was like a asphault undercoating and it was in all the crevices.
After another sandblasting and some grinding I "v" grooved into the old weld and did my own welding and grinding.
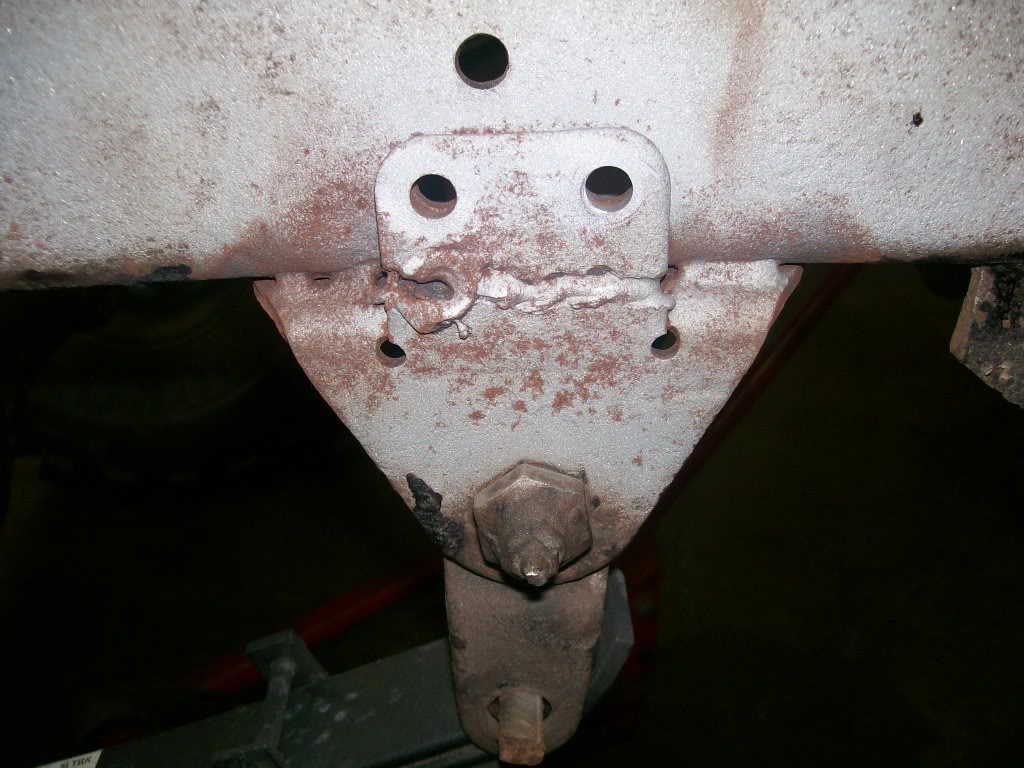
Now after a new weld and grinding.
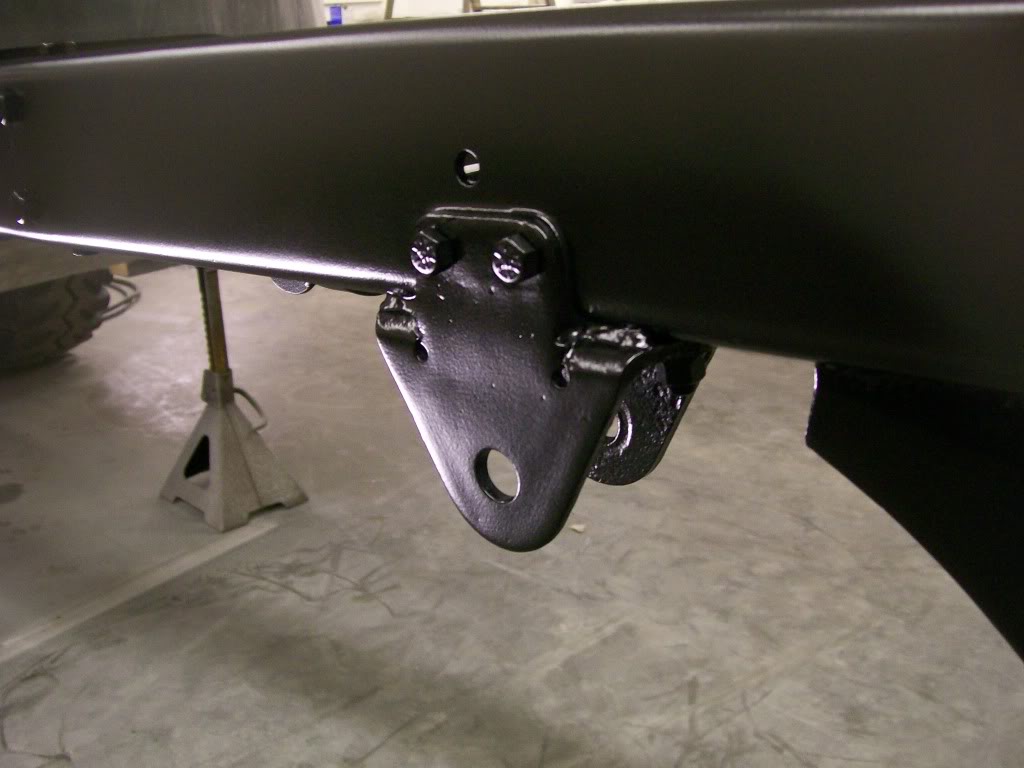
10-12-2011
Good advice from both who answered. Grinding is a fast way to clean metal. I like the torch and burning away crud, been there done that.
The mention about many years ago and what they breathed in back then. It's not til many years later that we know we breated in poisons, then it's too late. Case in point.. all the talk about esbestos these days.
Your concern is very legit. For example, the spring mounting bracket still oozed sizzling undercoating when I welded it. The smoke that came out of there, I have no idea of the toxics that could have been expelled.
This topic is also being covered in the fabrication section of this forum. The topic is that of using brake cleaner to clean the existing oils and grease before welding.
I am very familiar to the odor of brake cleaner burning, it has a strange vegetable smell to it. I recently cleaned the inner rear axle tubes with a rag wetted down with brake cleaner, then with a rod I pushed the rag through tube to remove any crud. Then I sandblasted the outside of the axle housing. After sandblasting I welded the small braces on the shock mounts.
The heat from the welding sunk through the tube, and heated the brakecleaner residue. Although the brake cleaner was dry and gone, it still left a deposit that I could smell as I welded. The odor traveled down the tube then escaped out the end and drifted my direction. I used the tig welder which is slower than mig so the was more heat generated.
My solution to not breathing in welding fumes... I just set up a simple household box fan to blow the air away from my direction. Not enough to mess with the tip of the welder, but enough to give me fresh air to breath.
I'm gonna run through a few before and after pics. After this much work it's fun to sit back a enjoy the view for a while.
Here's a before pic. All those holes in the rear frame piece. All that rust yet to deal with.
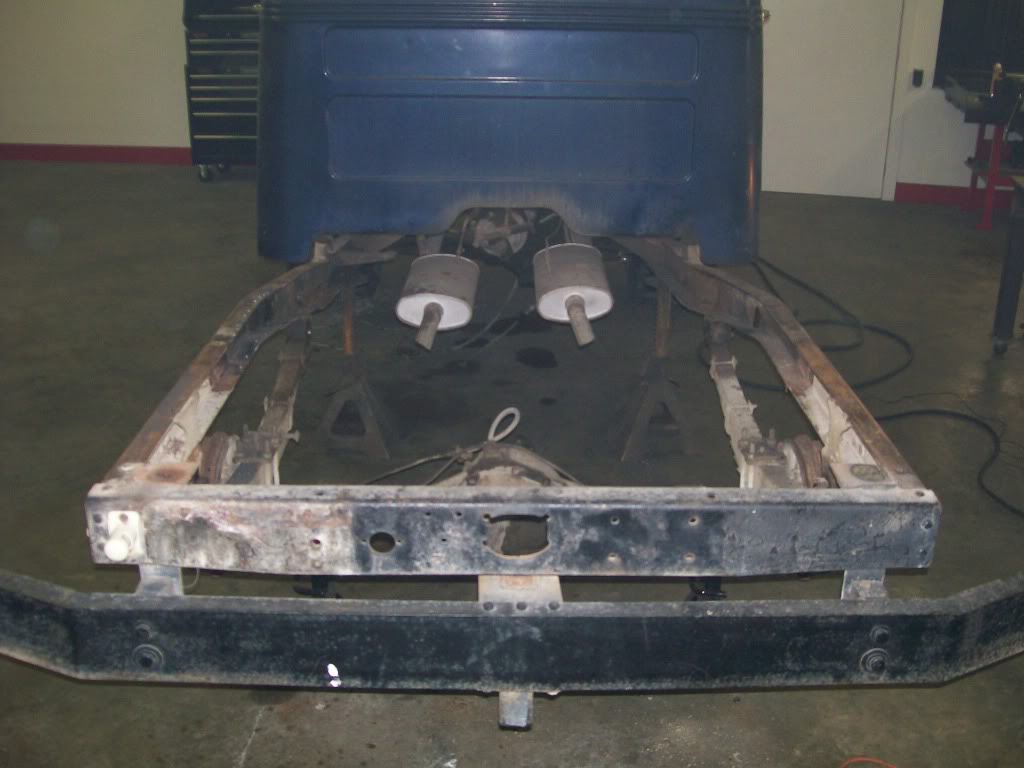
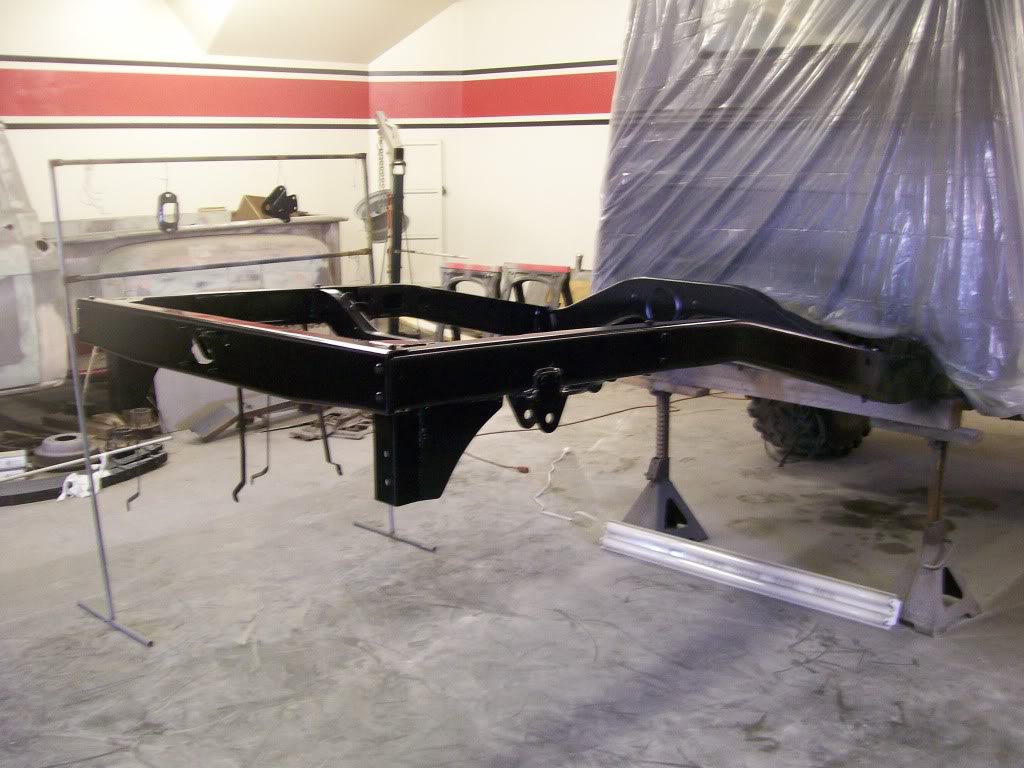
Just as I spot painted to be sure I filled all the holes and difficult areas with primer, I do the same with paint. Kinda gives the frame a zebra effect. lol
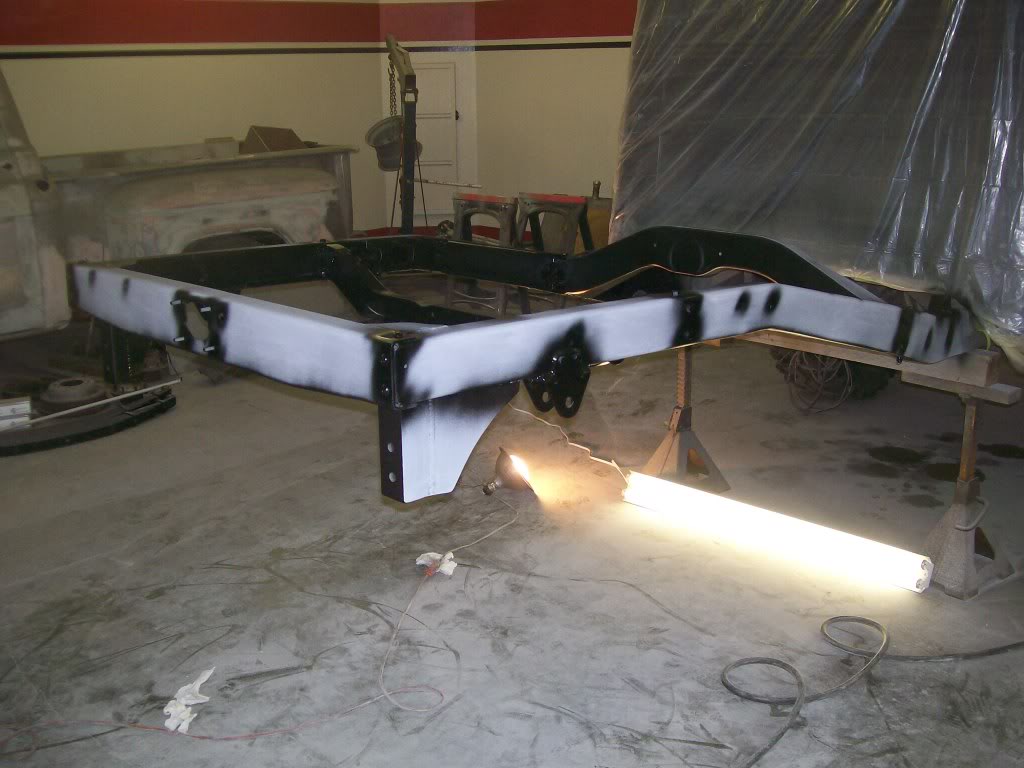
And the finished product... Notice the 4 ft flouresent light fixture on the ground. In my past I've noticed bad paint, runs, dry spots, sags, ect are due to poor lighting. I need to see the exact texture and wetness of the application while painting. This light gave me an opportunity to have a perfect reflection while painting the botton of the frame.
10-13-2011
Harold_Ray, Yes, absolutly, the salt that is put on the roads during the winter is a killer in the north. Here in Missouri, it's not so bad. But this truck spent over 50 years in the north. I like the fact that not only you, but others are finding an interest in these old trucks. They just get more unique every year.
hallsofstone, yes it sounds like you missed a couple classes while you were gone. Go check with angie in the second row, she has good handwriting and she takes well organized notes. That will help get you caught up with the rest of the class. But there will be none of this->
Jeff88, you keep making comments like that and I'll have to sell my truck. The cab on these Willys trucks are quite small, my head won't fit. Just kidding with ya. thanks...
I'm still new at this forum stuff, when someone subscribes do they get a message when a new post is posted?
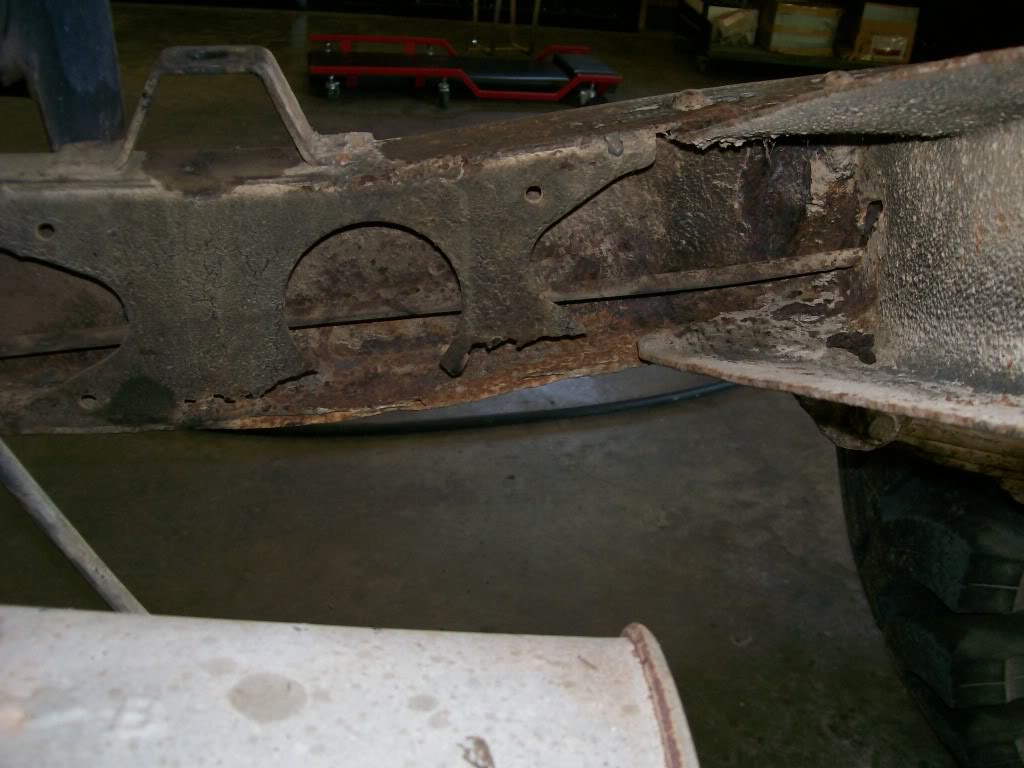
Let's look at a before pic. To be honest with you all, I had no idea where I was going when I look back at pictures like this. I just knew I had to disassemble and start making sense of the situation in front of me. One thing that I do keep in the back of my mind when I disassemble a vehicle. For years I've seen cars and trucks get torn apart to never be put together again. For me I vow to stay with the project til I get it back in working order again, I don't want to be a statistic of what percentage never gets back on the road again. Hmmmmm, (rubbing my chin) maybe that's why I'm single.
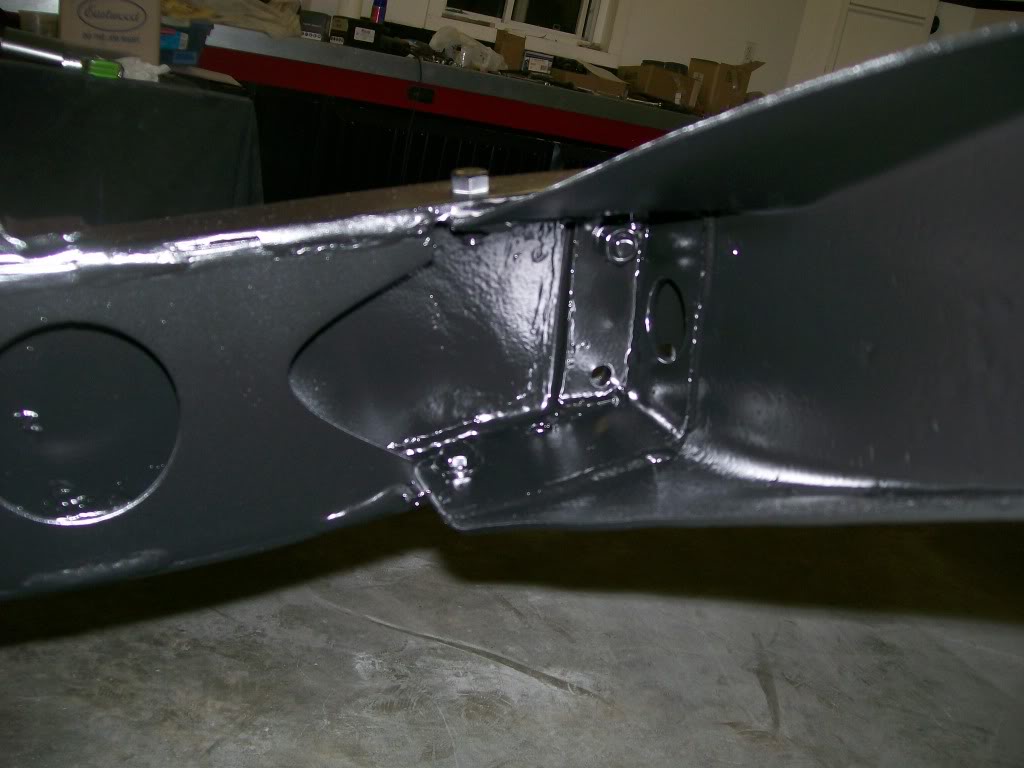
This next pic is the after. I wasn't so concerned about cosmetically perfection. I wanted no rust and good paint. Next I'm gonna spray with a good undercoating so everything will be covered soon. The couple holes not filled with bolts are the ones that hold the spring perch to the frame. Once I paint the rear shackles, I'll assemble the rear suspension, and install these bolts and undercoat the new bolts and everything will be coated.
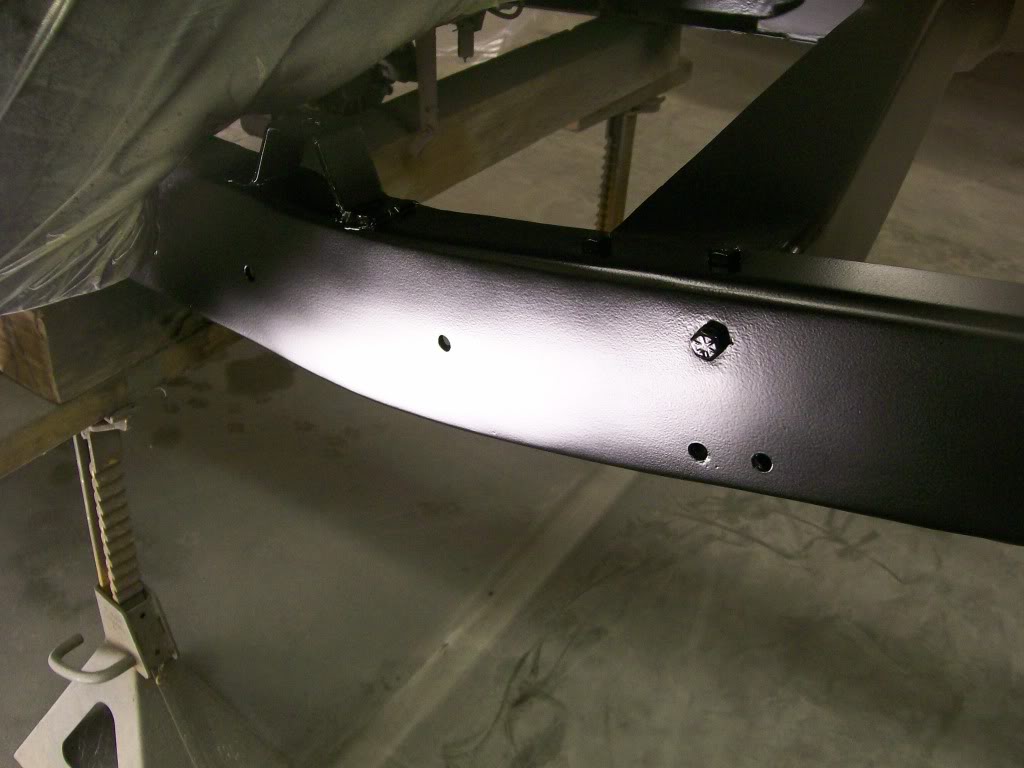
How about one more picture. This one doesn't need a before, I'm sure all will remember this plate being installed. I remember the responce I got once I finished the welding and grinding to a no seam repair.

Ultimate classic truck right there
Posted by CCmyVW on 12/26/20 @ 4:17:42 PM