You must be logged in to rate content!
18 minute(s) of a 620 minute read
9-13-2011
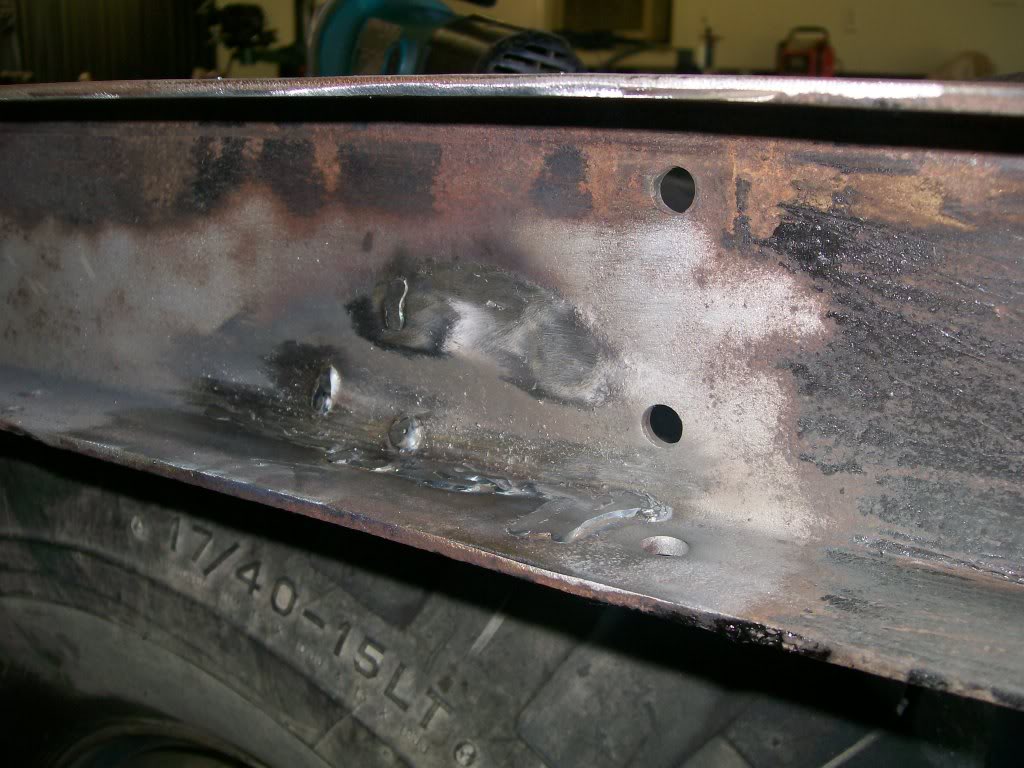
Last picture showed the first grinding after the first fill. The picture showed a pretty good fill yet there were a few pits still remaining. This next pic is one that shows I got ahead of myself, oops . I filled the pits and started to grind then I stopped and said "I forgot to take a pic" soooo I took one and here is the result.
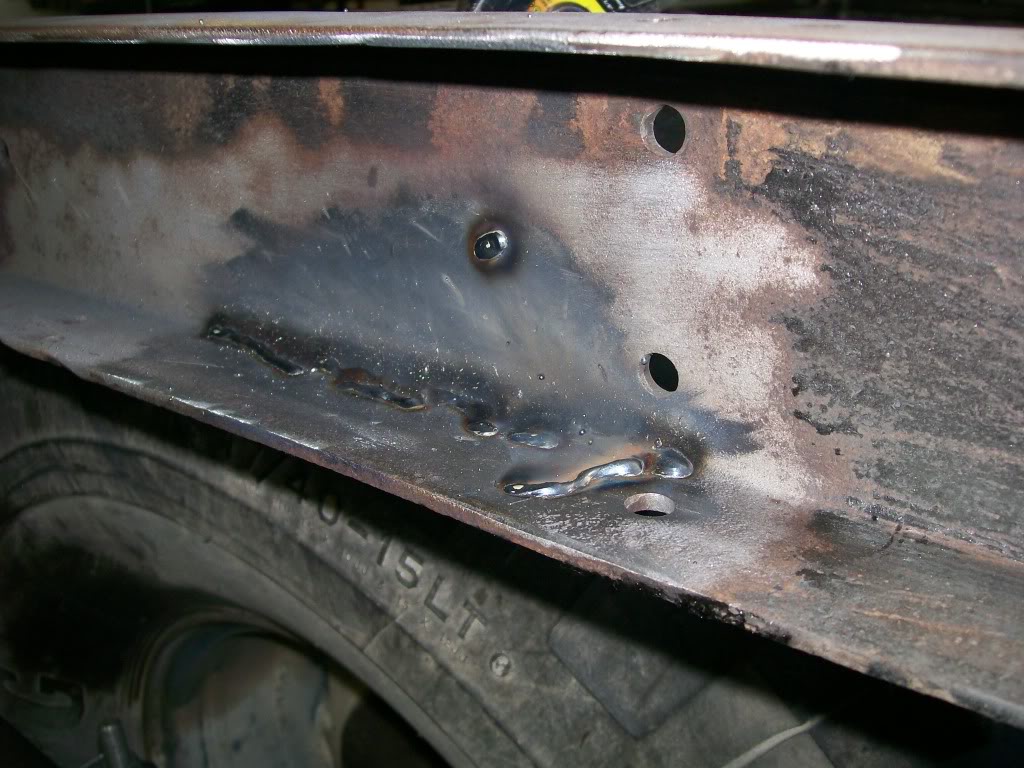
After the grinding I filled again, this time I remembered to take a picture. As mentioned before, this is a repeat process, fill and grind, fill and grind. This picture is the third fill. I already seen the end of this fix, it's gonna look great.

9-14-2011
I've got a couple days off work so I'm finally making some progress.
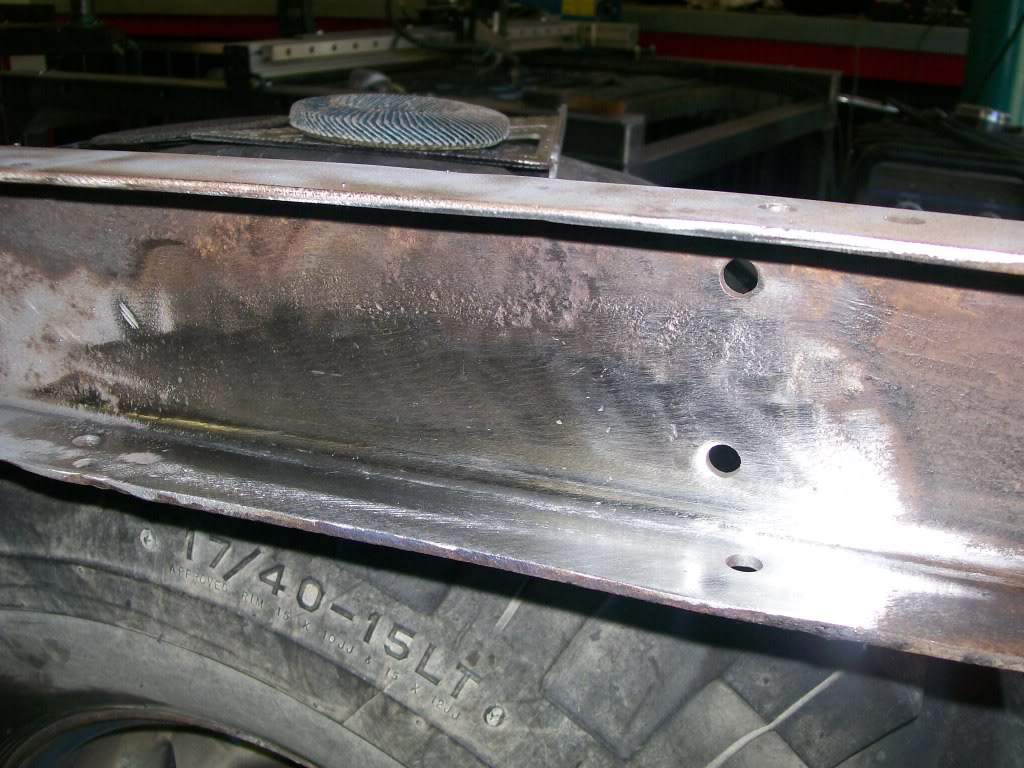
Let's finish this rusty frame section with the fillin and grinding. The picture says it all, it looks great.
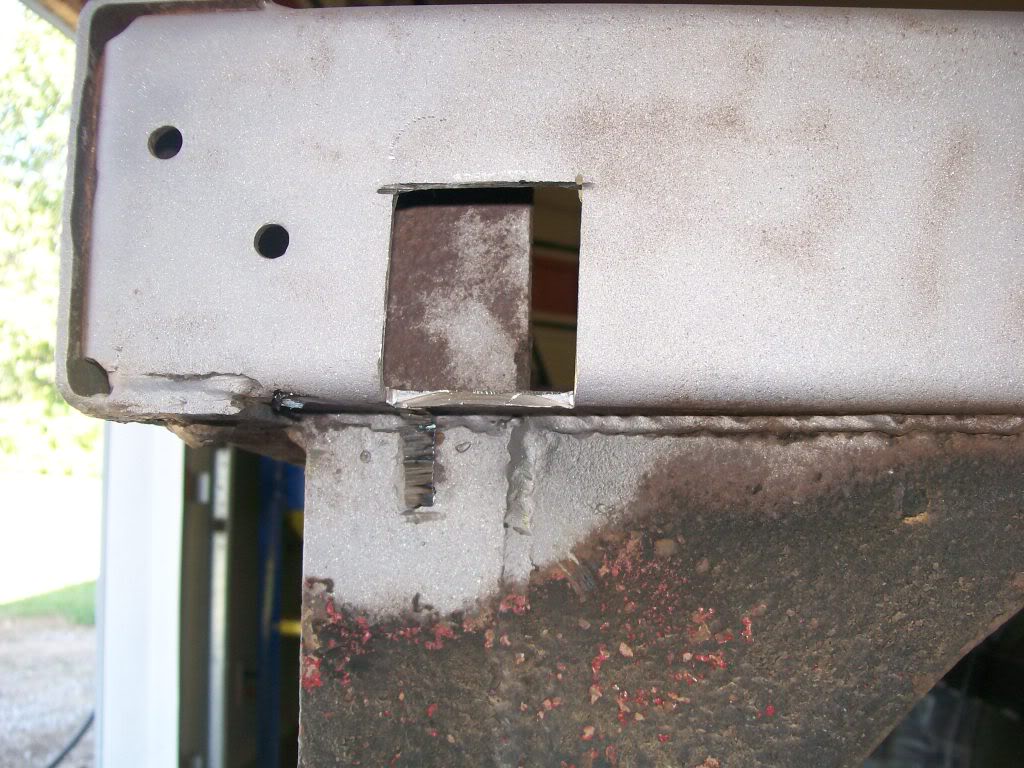
Next on the menu is this hole, or what ever it is. I've looked at it for years now, it's time to do a dissapearing act. Lesson time...It looks butt ugly, I don't even know how it got there. Sometimes to our eye something can look confusing as this hole is. We have to simplify the mess so we can construct a plan on how to fix it. Here's the hole.
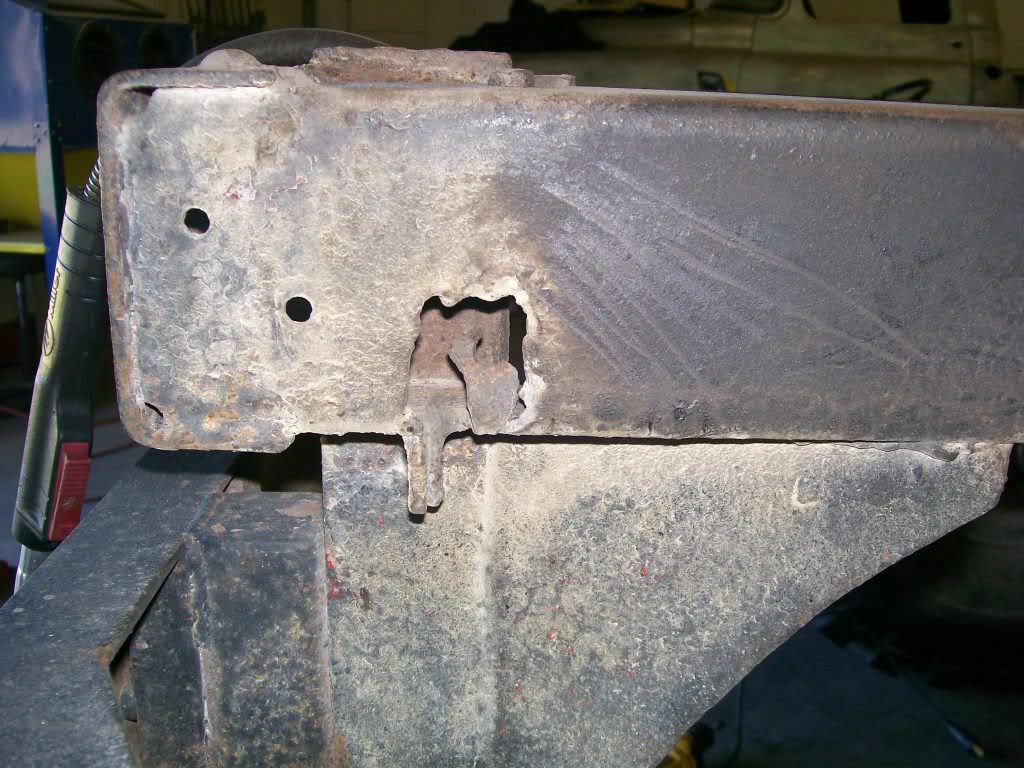
Now to simplify the hole in the frame. Just simply square it up. I've got to make a filler piece so squared up is an easy way to go.
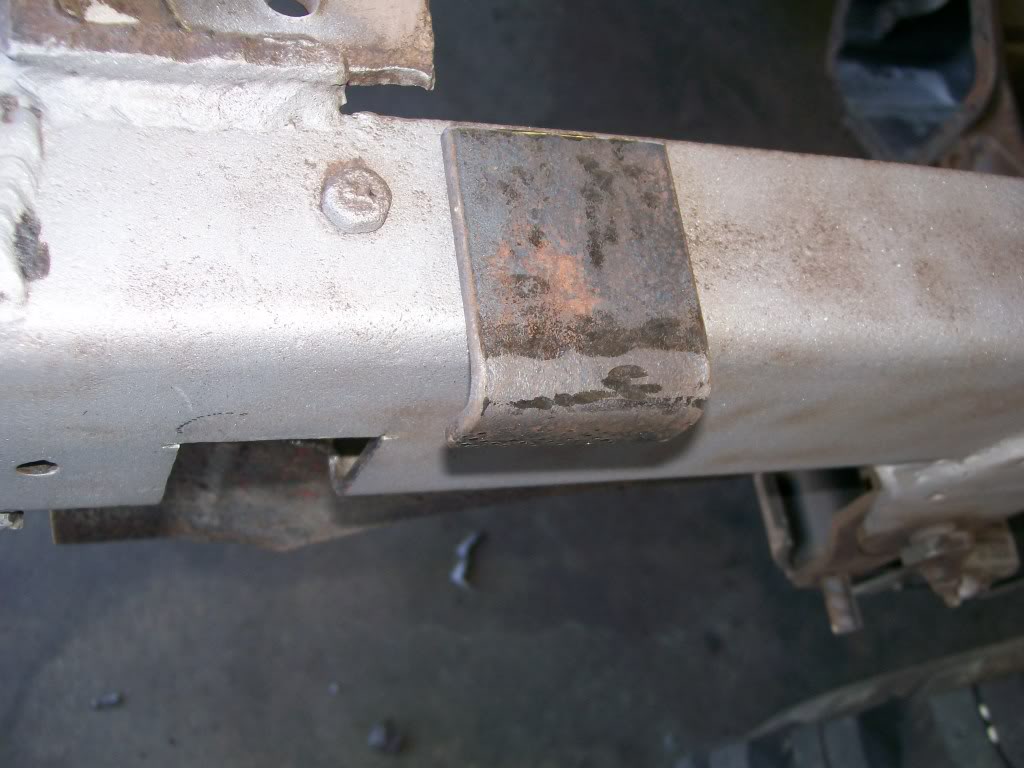
A piece of 3/16 close to the size of the hole. I'm thinking there's gonna be some grinding soon.
spyder6, if it's a heart thing, something that never leaves your desire. With all the temptations and stuff to redirect your attention and you always fall back to working in the shop, invest in your shop. God gave you a talent, if you know it, fulfill it. I craved working in the shop as a teenager, then life happened, I got missdirected, wasted time chasing quickies and short pleasures. I probably lost about 10 to 15 years, aaarghhhh. Now, obviously, I'm back in the saddle again, a few things have tried to redirect my focus lately, but my past helps me see the red flags real quick and I'm back to my passion, the workshop.
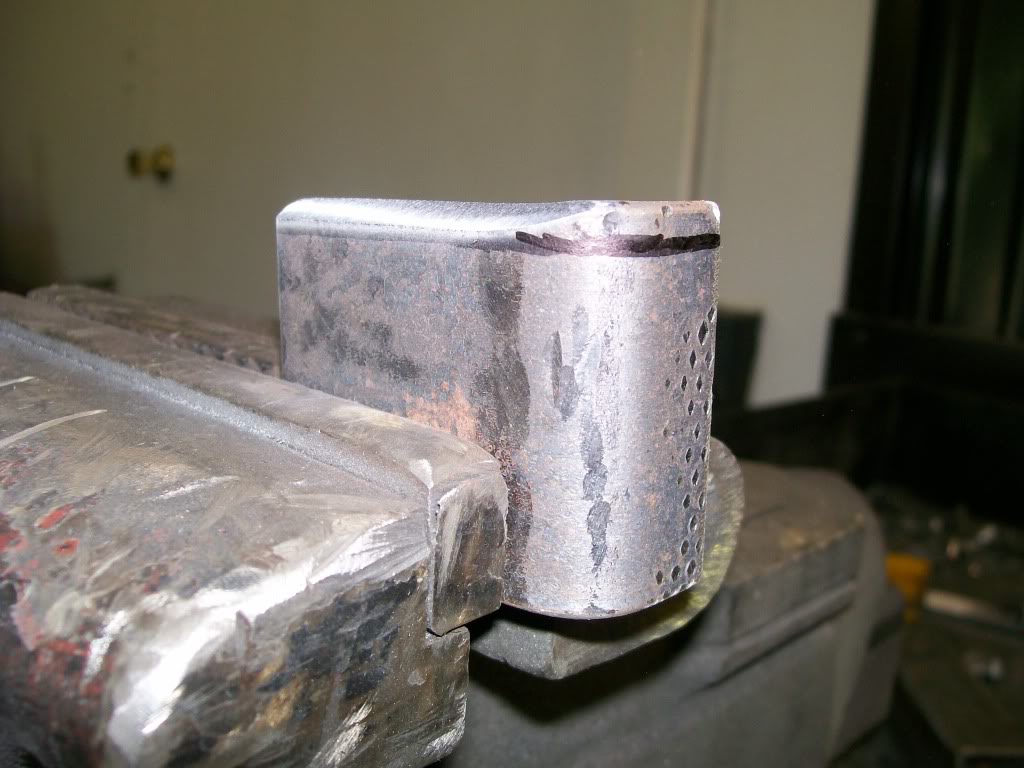
I'm gonna finish the "hole" real quick tonight. I have one metal working lesson to pass on. This first picture is the lesson. This filler piece is 3/16 thick, it takes some grinding to remove the amount of material to get to the sharpie mark. Always try to grind at an angle, the cut will be more agressive. For example, the grind in the pic is working with an angle. There is a second benifit also. Take the angle down to the sparpie mark, this way when you grind the rest of the material you grind the srurface flat and your done.
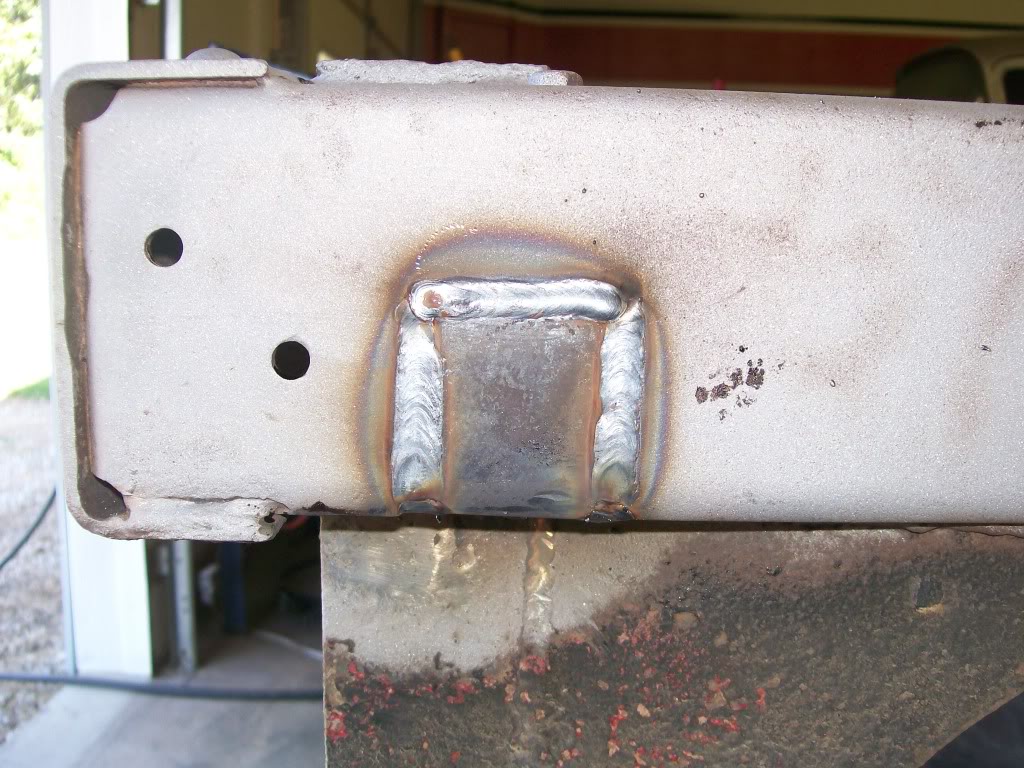
This next pic is the piece made to fit and the surround is "v" cut and ready for welding. The clamp you see next to the hole is holding a small steel plate that is covering the back side of the hole. This way the new filler piece has to stay flush with the rest of the frame.
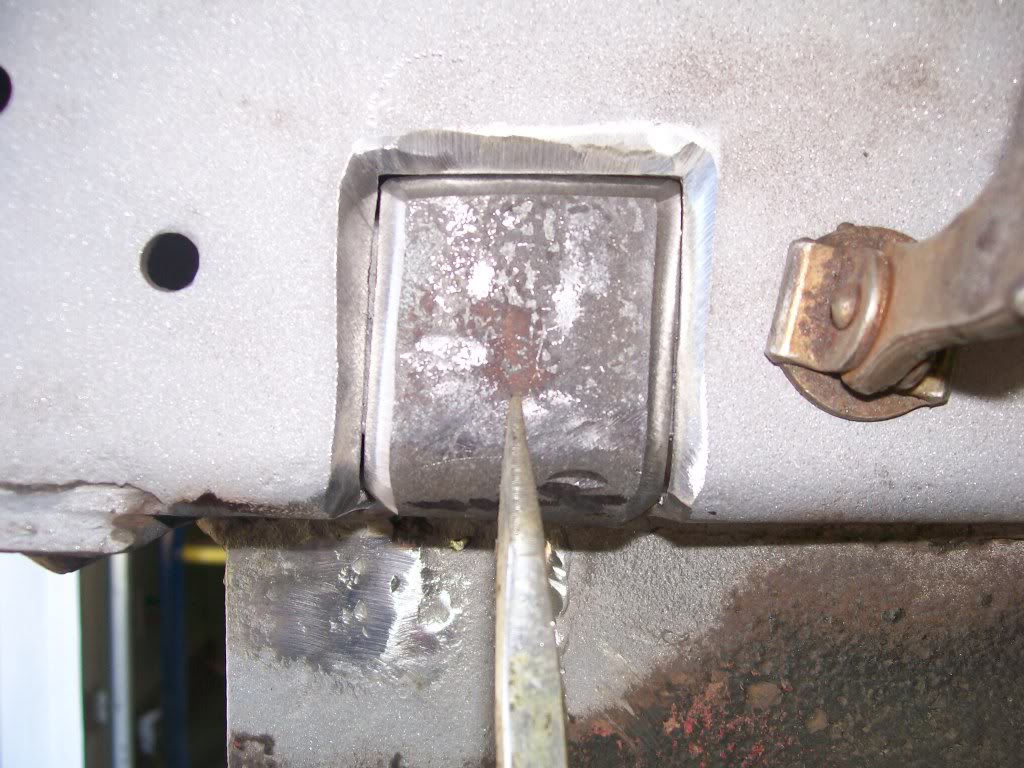
And the weld. We've seen enough of the grinding, so after this we move to the back of the frame, got a couple uglies there also.
9-15-2011
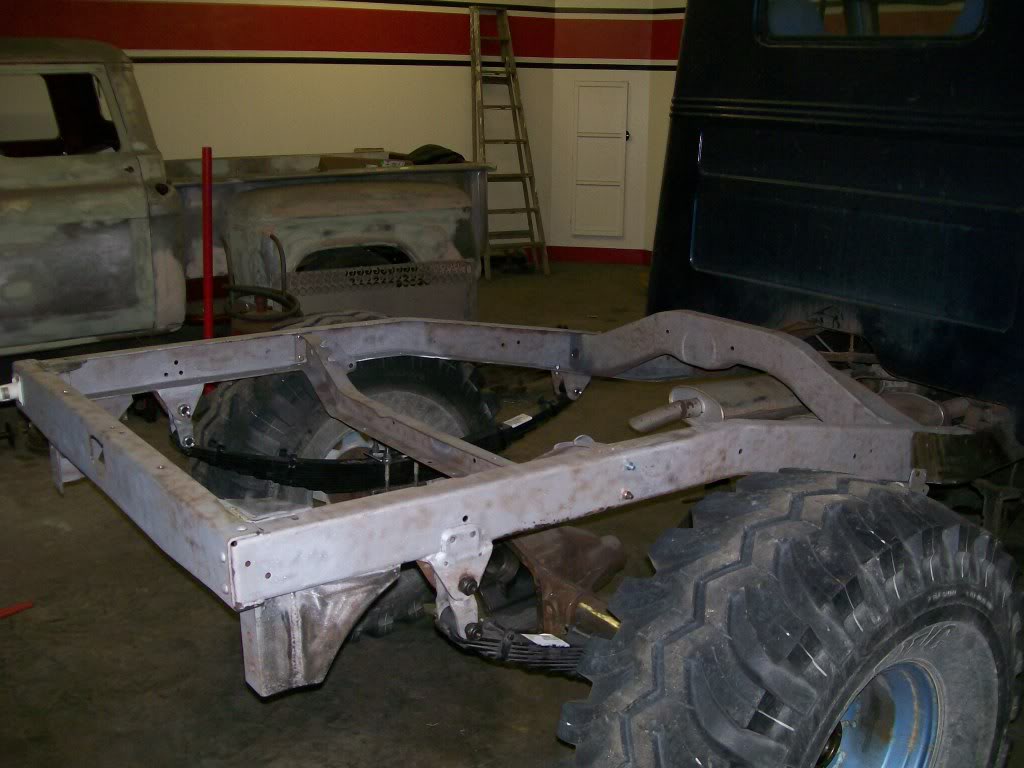
Been focusing on all the welding and grinding, let's move to something new. Before I can declare the frame ready to prime and paint I have to settle the springs and their mounts on the frame. Since I had to replace the frame sections where the front mounts bolt to the frame I have to be sure when the painting is done I don't have a missalignment situation. Always, always, check your fits before paint, nothing worse than having to force partstogether later, this pre-check will save time and headaches in the long run. As compared to todays suspensions where we have rubber bushings that have some miss-alignment forgiveness, these old Willys use solid bronze bushings, not much give if things are off from spring mount to spring mount. Picture shows how close the frame is to looking done and clean. Also it's the first time I had all the bushings pressed into the springs and rear shackles. Before this I haven't had the bushings pressed into the suspensionyet. This gave me the freedom of assembly and disassembly without abusing the new bushings yet, but now it's time. The next set of pics will go though the removal, lathe work, pressing, and reaming of the new bushings.
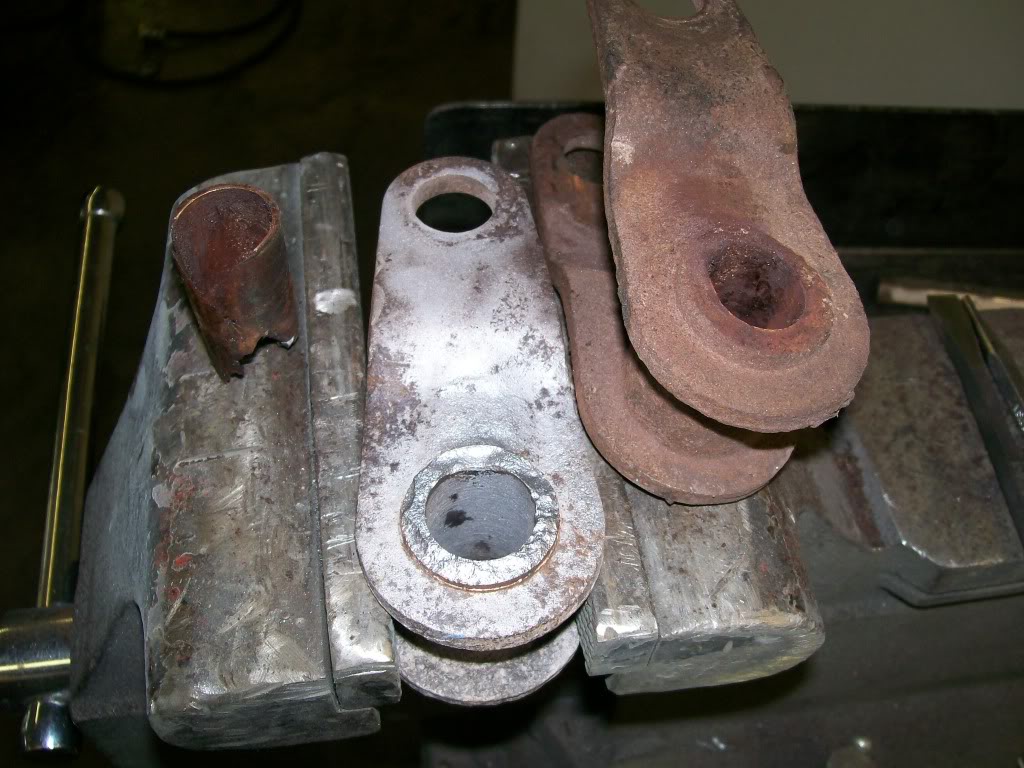
These shackles really show their age. A couple places has new ones in their catalogs but none in stock. I have no choice, gotta use the old ones. This pic shows one old bushing removed, it's shackle cleaned up a little bit. The opening where the bushing fits in is badly eaten away . I have no choice, I have to fill and grind. (and I thought I was gonna get away from welding and grinding, ha) and the one I have'nt touched yet.
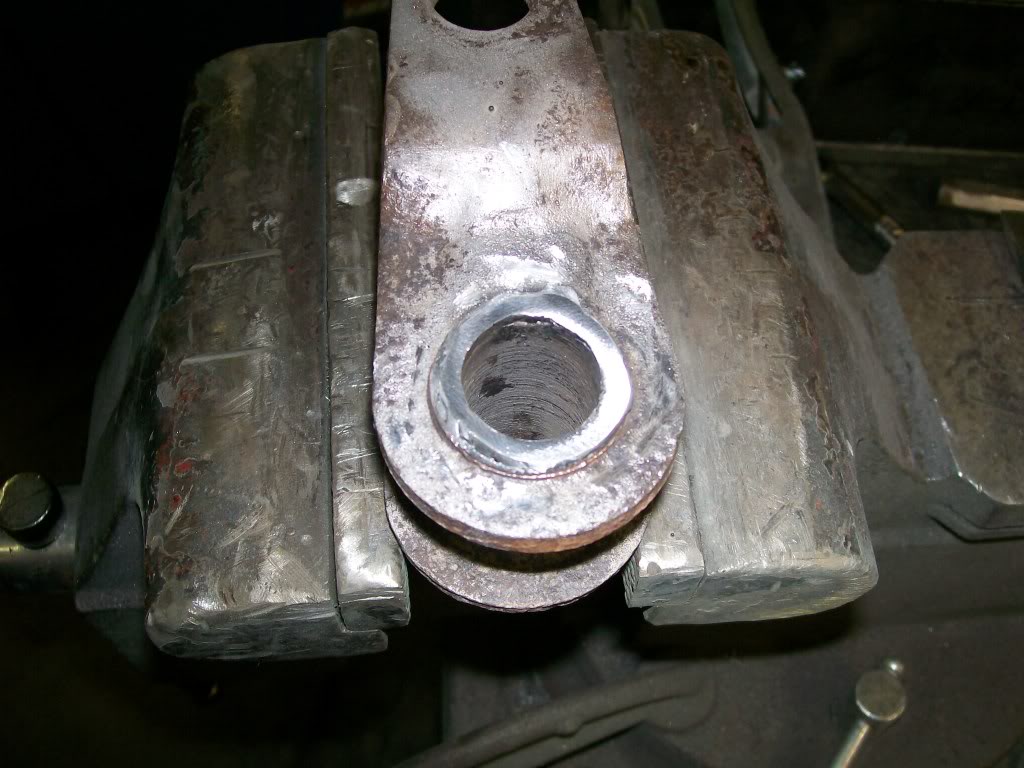
Here's the filling process. I can't do one continuous weld, I have to do short stitches. If I did one continuous weld I'd start to burn into the material too much and distort the hole. After this I used the, yup you guessed it, 4 1/2 inch grinder. Using a caliper and checking the measurement continuously I got a pretty accuate resurface. Here's the fill.
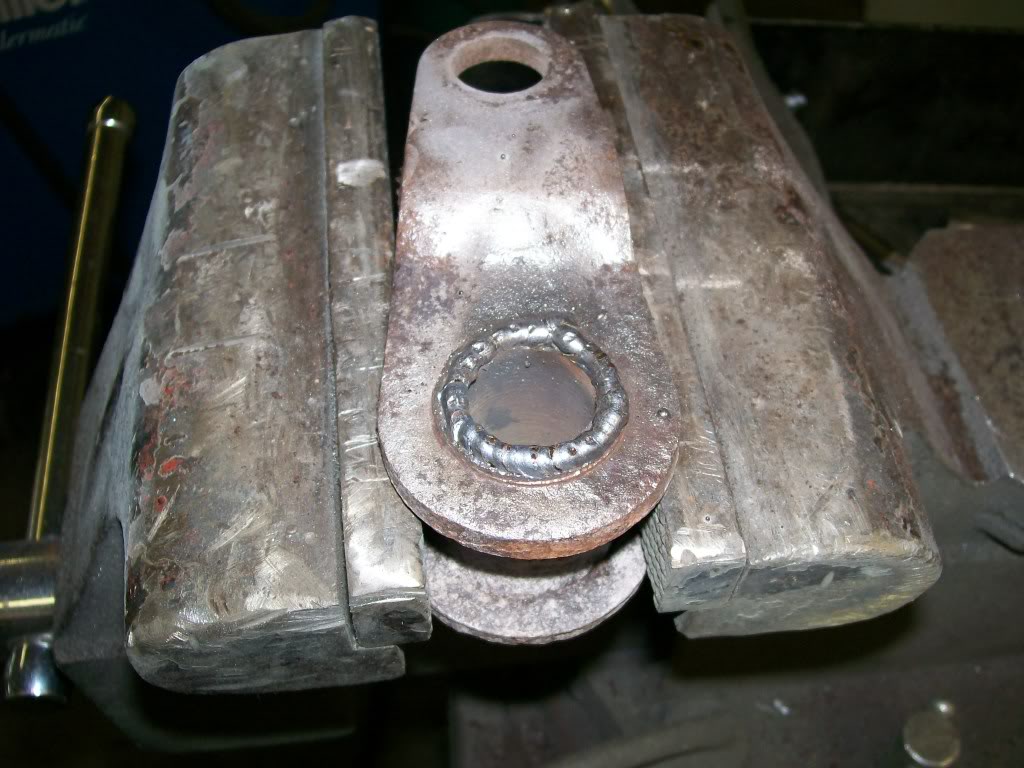
I did the fill in the last set of pics, here I've cleaned up the weld. The purpose of the side of this shackle is to maintain the shackle in the center of it's mount. Perfection is not necessary, but it's good to have it close.
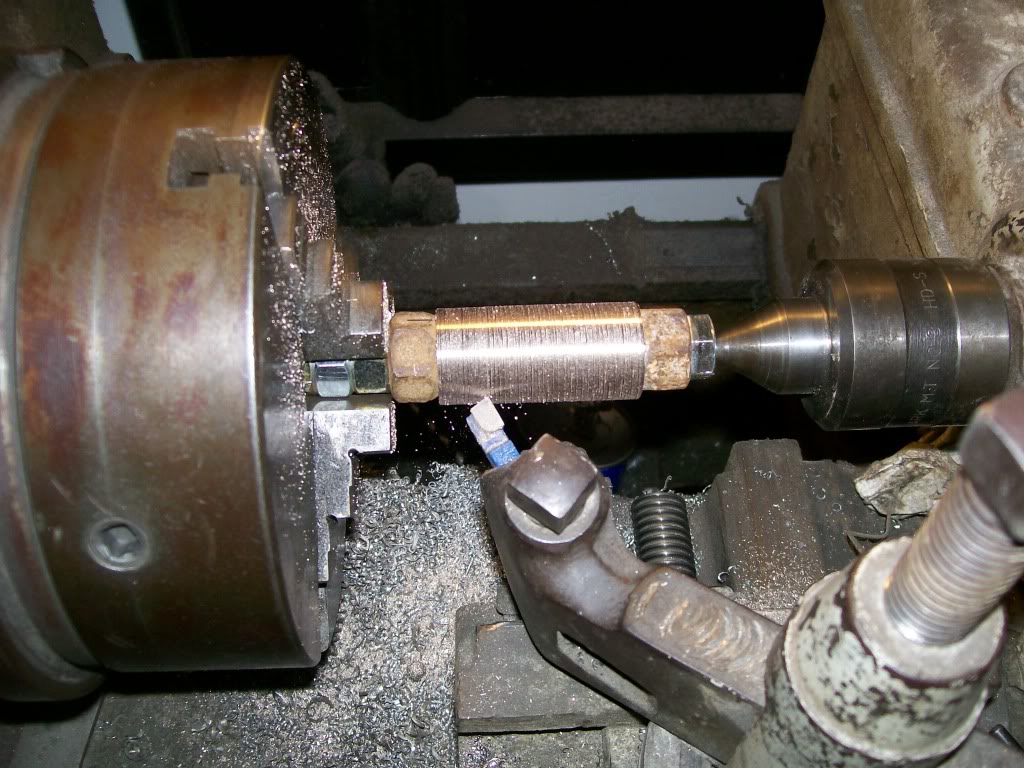
The bushings that came in the kit were the right size on the inside but too big on the outside. Kinda dissapointing, this wasn't mentioned when I bought the bushing and bolt kit. Anyway, over to the lathe, it's older that dirt but it has saved me more times than I can think of. Don't laugh at the mounting of the bushing. When it comes to mounting stuff in the lathe sometimes you have to Mcgyver. Yup, they're lug nuts, they had the perfect taper for the bushings.
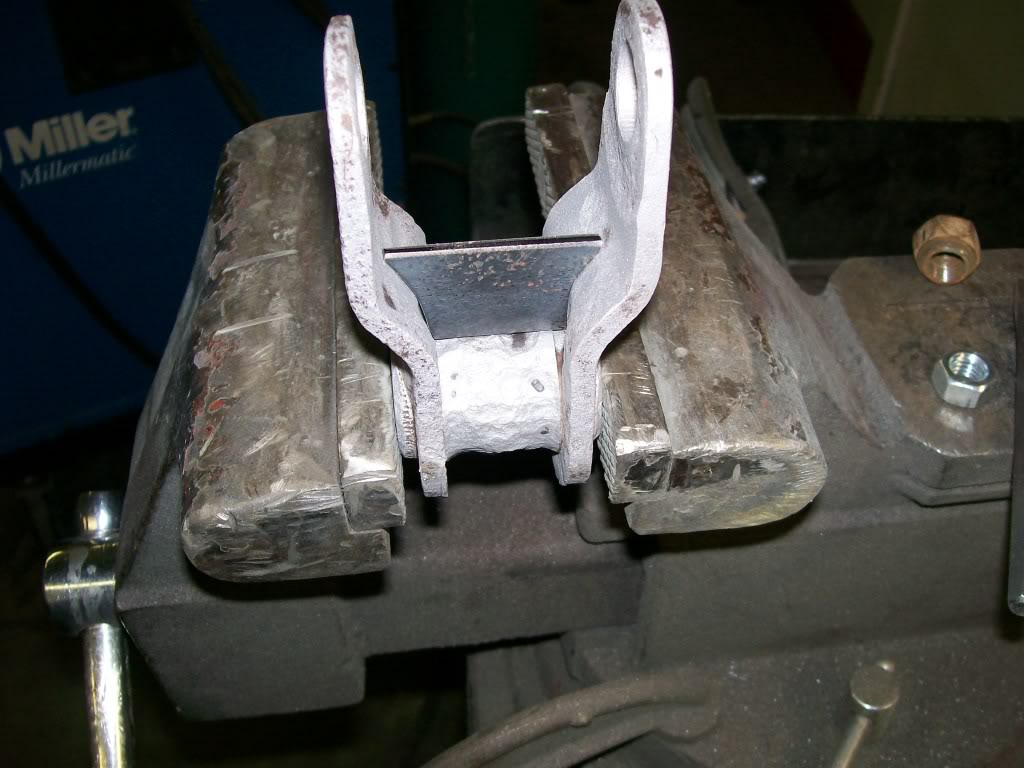
With the deteriation of the shackles I wasn't sure of the strength. I was also leary of the way the sides were pressed onto the bushing tube in the center. So I fab'ed up a piece that ties all three sections together.
9-16-2011
I this pic I pressed the bushing into the shackle. I'm not a machinest by no means but when I cut the outside diameter of the bushing I figured about 4 thousands of an inch press fit into the shackle. Being it is a soft material I knew it would give a bit if necessary.
I use the term "press" I know not everybody has a "press" but they are not that expensive. There are times I don't use mine for months but when I do I'm so happy it's there. Countless times I've used a hammer to install bushings, countless times I've rolled the edges of bushings during installation.
The press makes a nice smooth non-impact way of doing so much work. Earlier I used in on the bearing insallation on the rear end rebuild, I had to re-install during the shimming process and never once did I damage the bearings.
I also knew I was going to use a reamer to recut the inside diameter, so when the bushing compressed itself to fit the shackle, I'd recut the inside back to 3/4" again. Which is the perfect fit for the special bolts used.
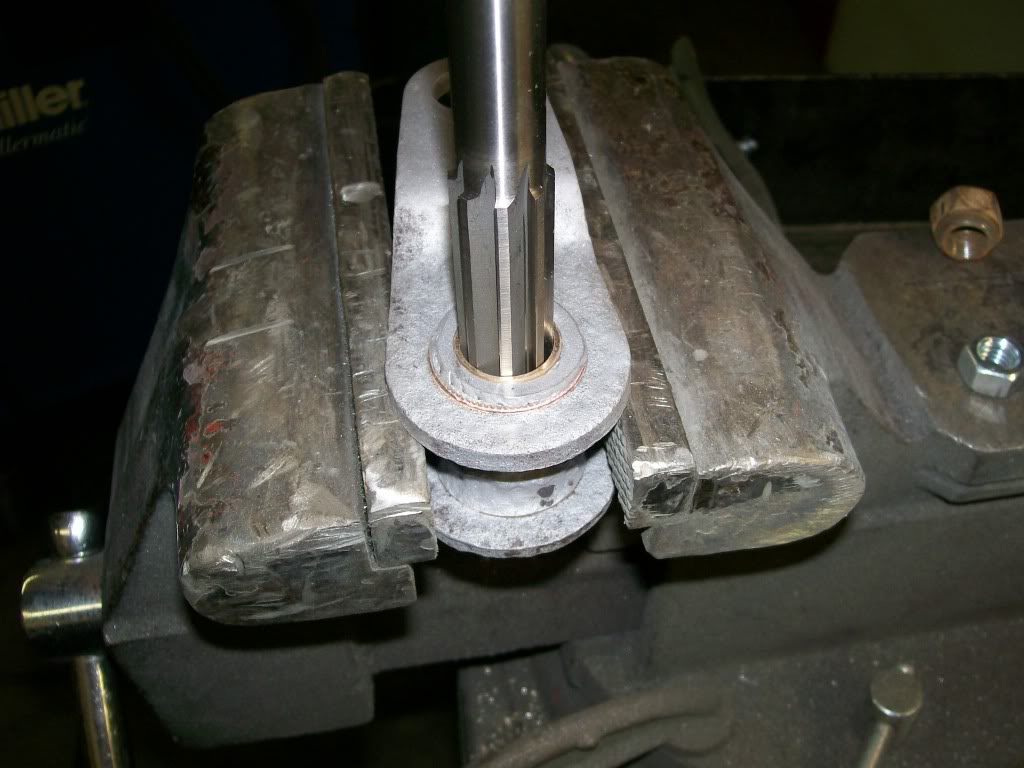
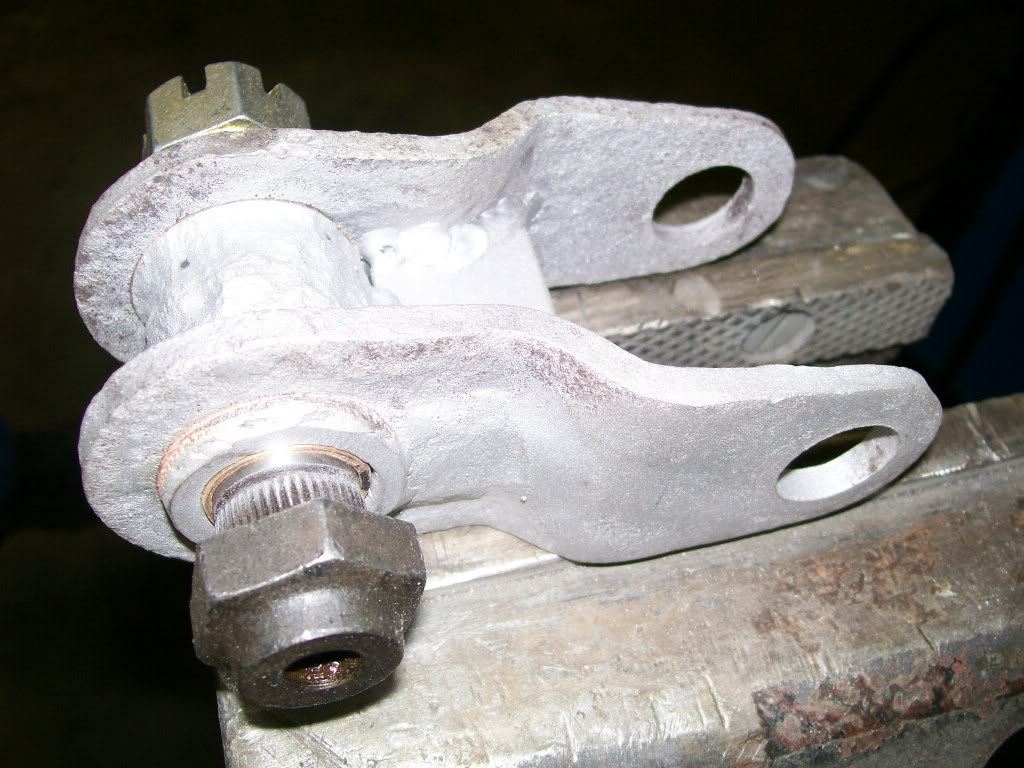
And here we have the shackle, bushing insalled, shackle reinforced, and the new bolt inplace. Although the shackle is pitted, the main pressure is placed on the bottom side of the bushing when in service. I figure by reinforcing between the two arms and the bottom of the bushing I should cover the main stress areas.
Along with me, I just turned 50, this Internet and how it brings people together is a learning in it's own right.
Posting my progress is fun for those following and for me, it's encouraging to teach as well as watching my own progess, and recording it. I have no idea at what age we should stop learning new stuff, at 70 it sounds like you are inspired to dig into a deeper learning of the automotive field. When I finish this frame repair I'll be doing body work, engine rebuild of a 350 chevy and turbo 350 automatic transmission. If you don't take a class, you'll at least be knowledgeable of the inner workings to what may be a mystery to you now, just as we tore into a rear axle earlier in this build.
Your farm and ranch work does at least give you the very basics of many mechanical aspects that that many city folks never get to see.
This having time is great. I'm trying to design something on the torchmate so while I'm designing I'm downloading pics. Here is the next set.
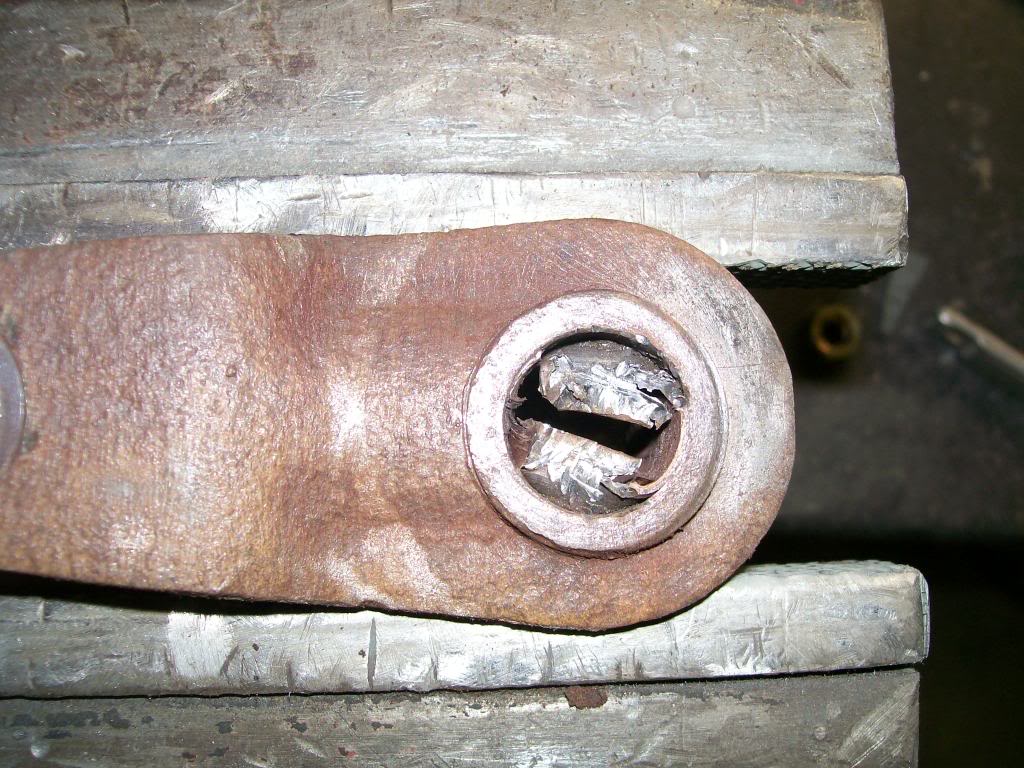
In my time I've had to knock out many a bushing. Problem is I don't see a good punch for knocking them out and not damaging the item they are pressed into. The pic here is the bushing being rolled inward almost ready to use a large punch to knock it out all the way.
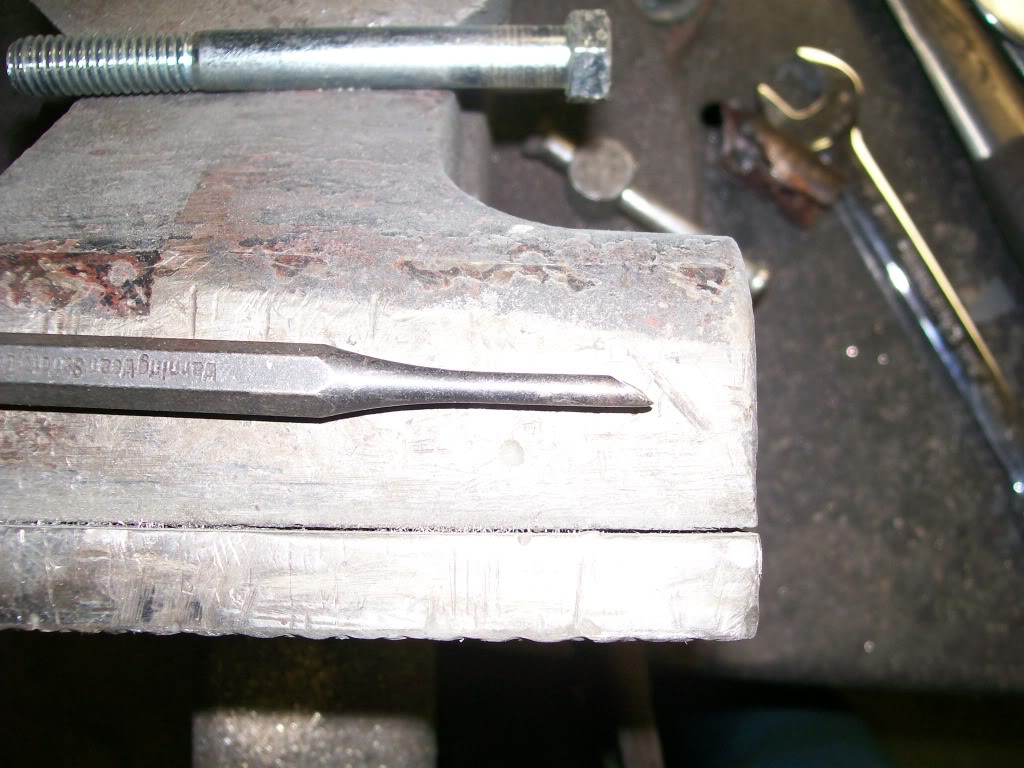
What I find that works best is to take a medium sized round punch, turn on the bench grinder, with the edge of the stone wheel create a counter sunk groove at the end of the punch. The outside of the punch is round to match the outer parimeter of the old bushing, and the counter sunk groove helps to get behind the bushing and curl it inwards so you can use the larger punch to knock it out.
9-17-2011
Getting the rear leaf springs ready was no problem. The bushings that came in the kit were the perfect fit. No machine work. just press them in.
Since I'm a one man shop I had to suppport the far side of the leaf spring during pressing. I have enough problems getting these things to cooperate, they like to flop the wrong direction when I work with them.
 . I used a ladder and stacked wood on one step til the leaf spring was supported level with the press surface, then pressed the bushings in.
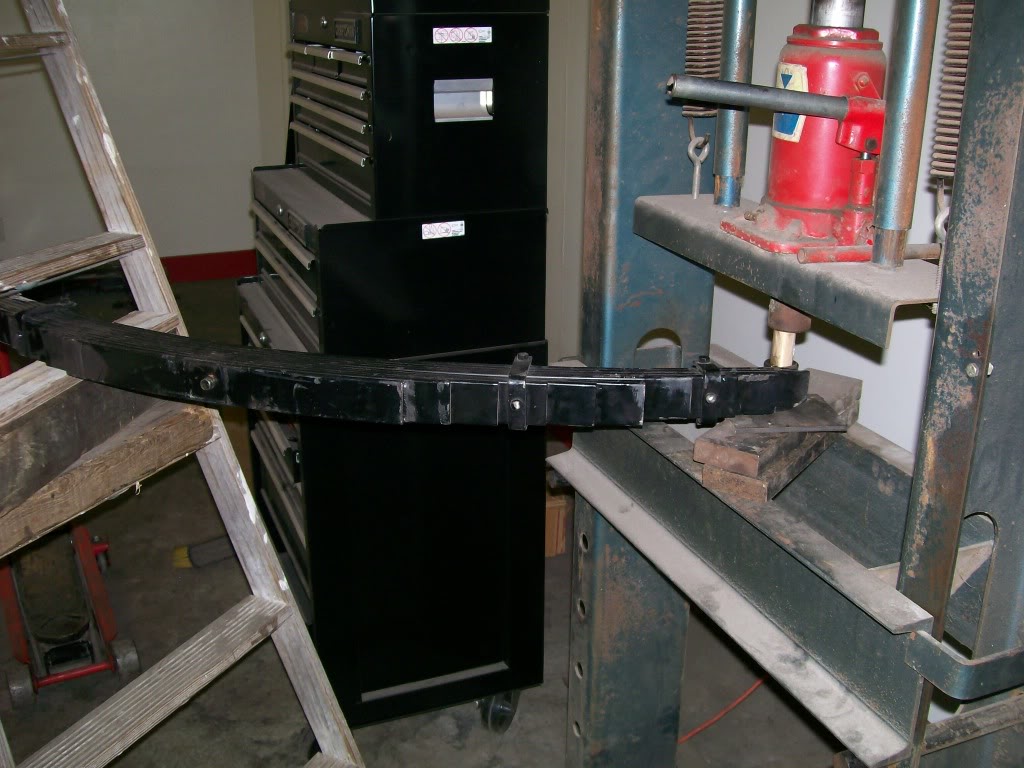
Black and bronze always looks good together.

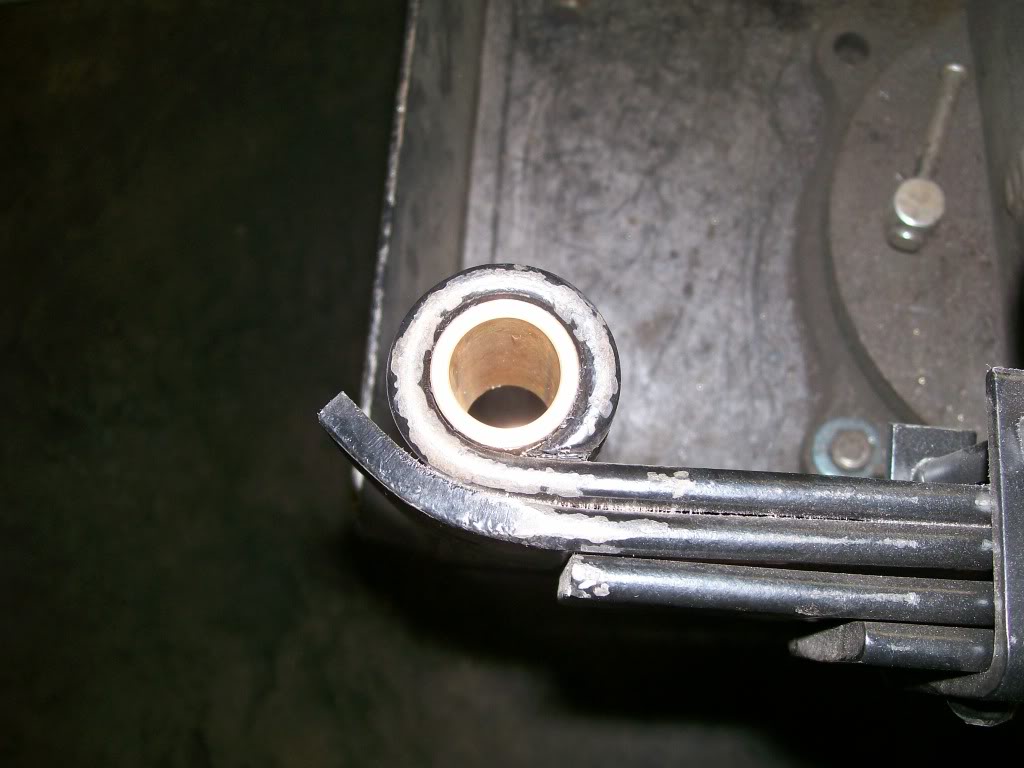
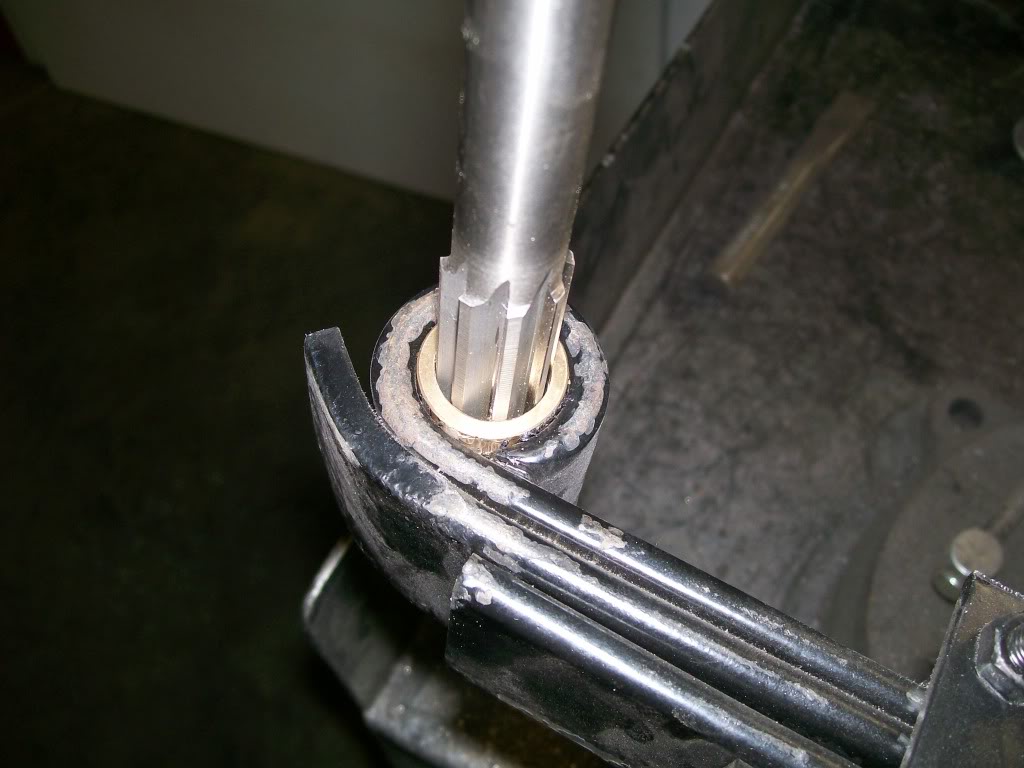
Once the bushing is pressed in I clamped the spring in the vise and ran the 3/4" reamer through the bushing...done.
It's lunchtime and the dial-up is working pretty cooperatively. I started at the frame just behind the cab, I've slowly worked my way to the back. I'm about 3" from the very back of the frame, the end must be getting close.
Years ago when I made the bed I welded square plates in the corners to support the bed, don't laugh they worked and that's what matters. Obviously these need an update, so here goes.
Originally they used 1/4" angle iron to drop from the frame to support the rear bumper. The best I can tell, they allowed the angle iron to be about 3/8" higher than the top of the frame. I can only assume that this extra material gave them plenty of material to allow them to lay a heavy weld bead for strength.
Personally I don't like the extra height of this angle iron, so my update will allow me to grind down the extra material yet, still maintain a strong attachment from angle iron to the frame.
Here is the ugly that needs to be updated.
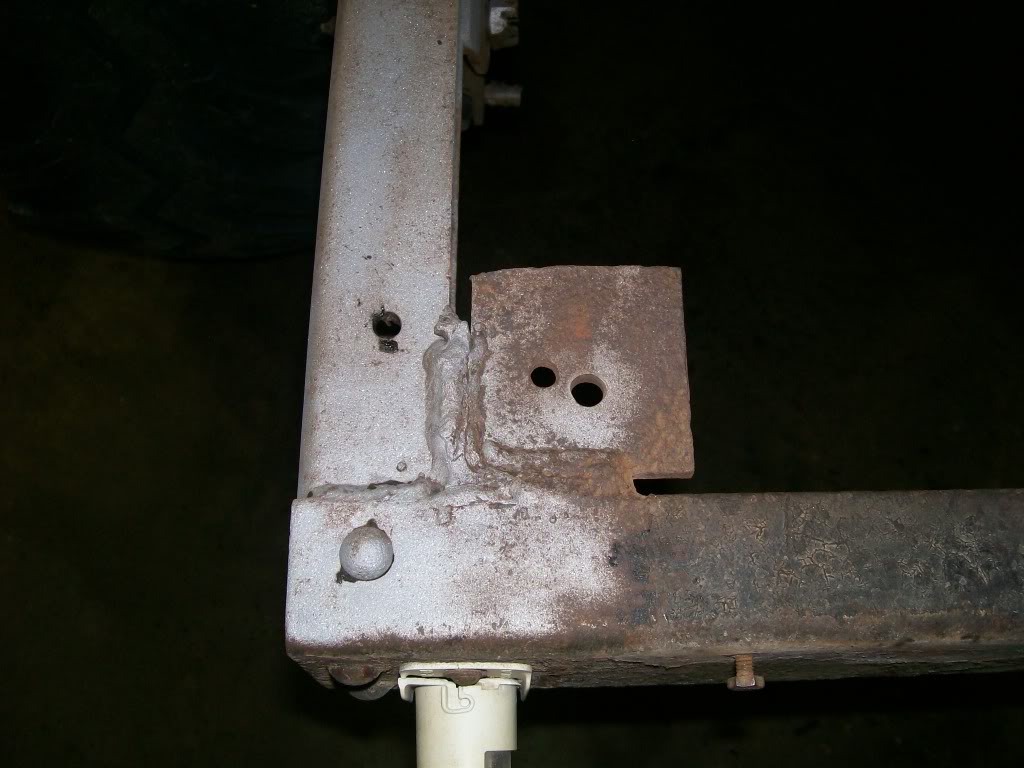
Here I've cut out the square away from the angle iron and ground down the angle iron closer to the height of the top of the frame rails. Somewhat also started pre-grinding the frame where the new welding will be done.

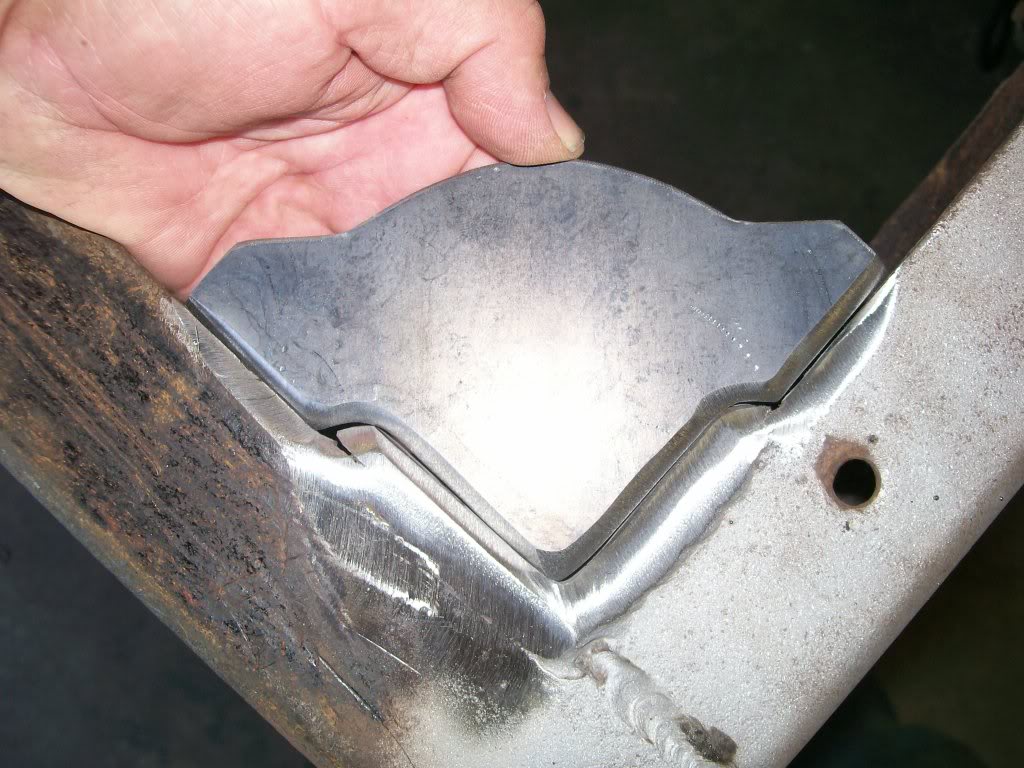
Here's the new corner piece. It will span the corner to create a new mounting tab for the bed, and it will be a perfect gusset for the whole corner. The loss of original weld and material is now gonna be supported from frame rail to frame rail. Is it just me? I have a desire to say... Na na na na na na na, batman. wham. slam. boom. smash, crash. You all gotta know the 60"s and 70's to remember..
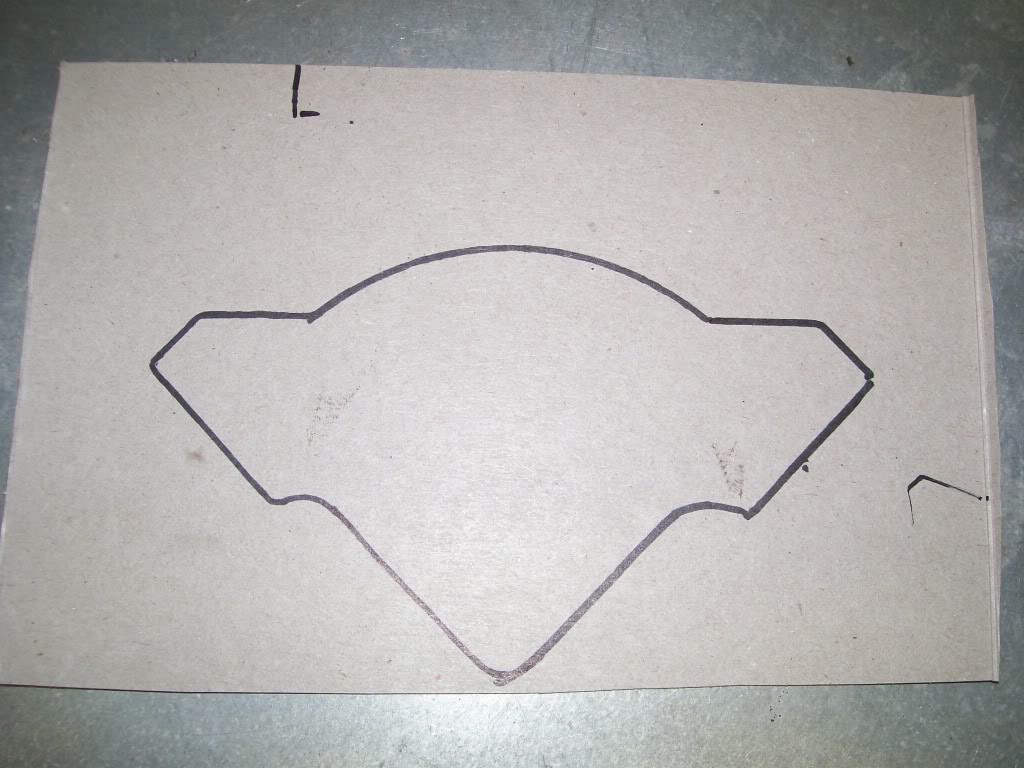
Harold_Ray, it's a matter of technology. Most of my ideas start with thought, then a piece of card board, or in this case, a cereal box from cinnamin toast crunch, gotta love those tasty squares. Oops, back to the build... I draw the idea, scan it to Thorchmate. It creates a cut path and it's cut with a plasma cutter.
Here's the paper idea.
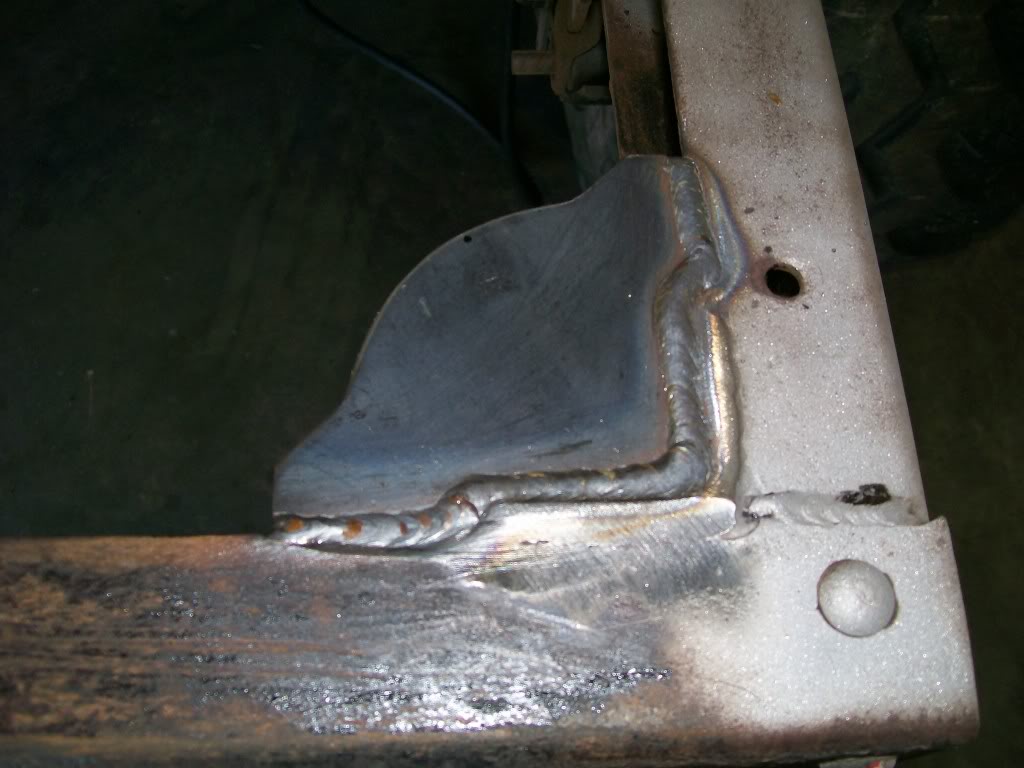
In this next pic you can see how the new corner piece draws the corners together with the 1/4 angle iron caught in the middle. Beautiful fit.
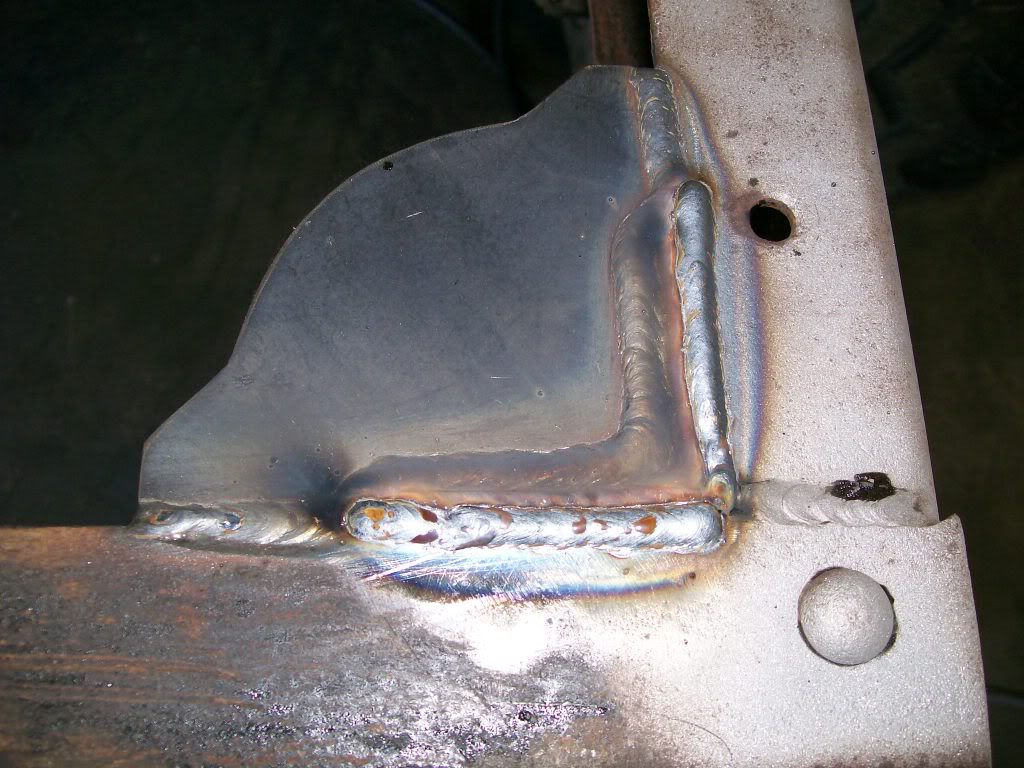
Once I ground down the original piece of angle iron I went through much of the original weld on the opposite side of the angle iron. I used the 3" air grinder w/ cut off wheel and "v" cut into the old weld and layed down new weld to firmly reattach the angle iron to frame on the backside.
9-18-2011
Let's look at a technique for filling holes with the Mig welder. I see so many times people talk about using copper or brass as a backer while filling holes but I never get to see the results. So, let's just clamp a piece of brass to the backside of some holes in the frame shall we.....
I had a 1/8" piece about 12 inches long and 2 inches wide. I clamped it in place.
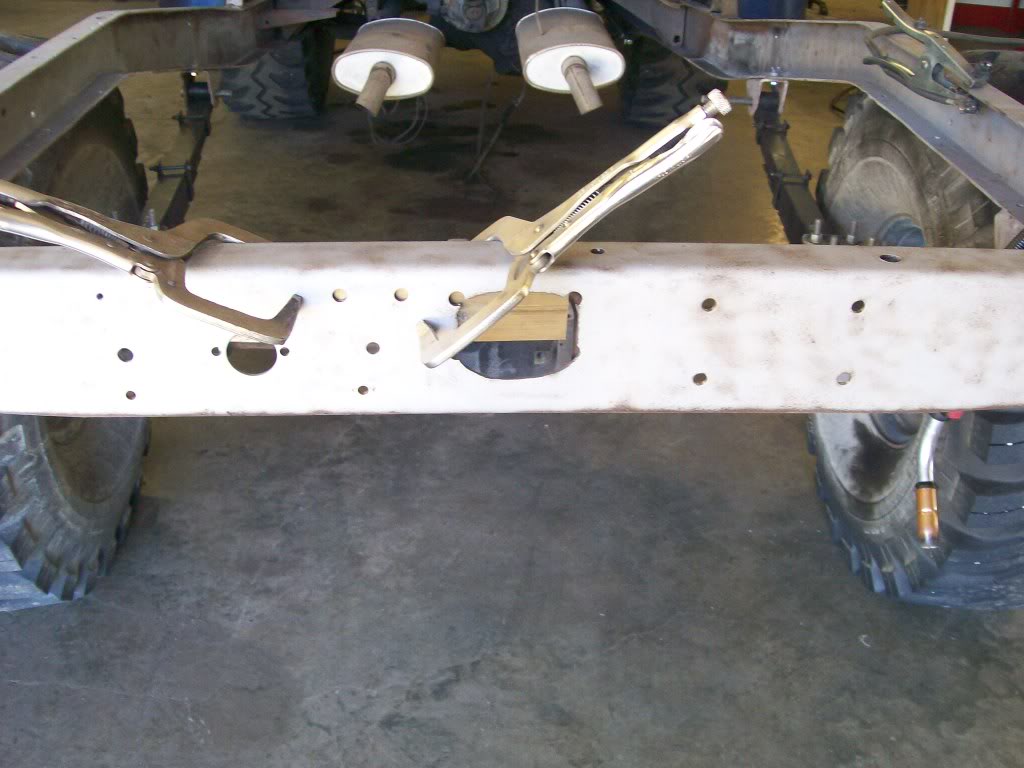
I filled a bunch of holes. Here is the backside...or brassside of a set of them. The nice part of using the brass backer is I only used a wire brush to clean the born residue. With these being between frame rails, no grinding is needed.
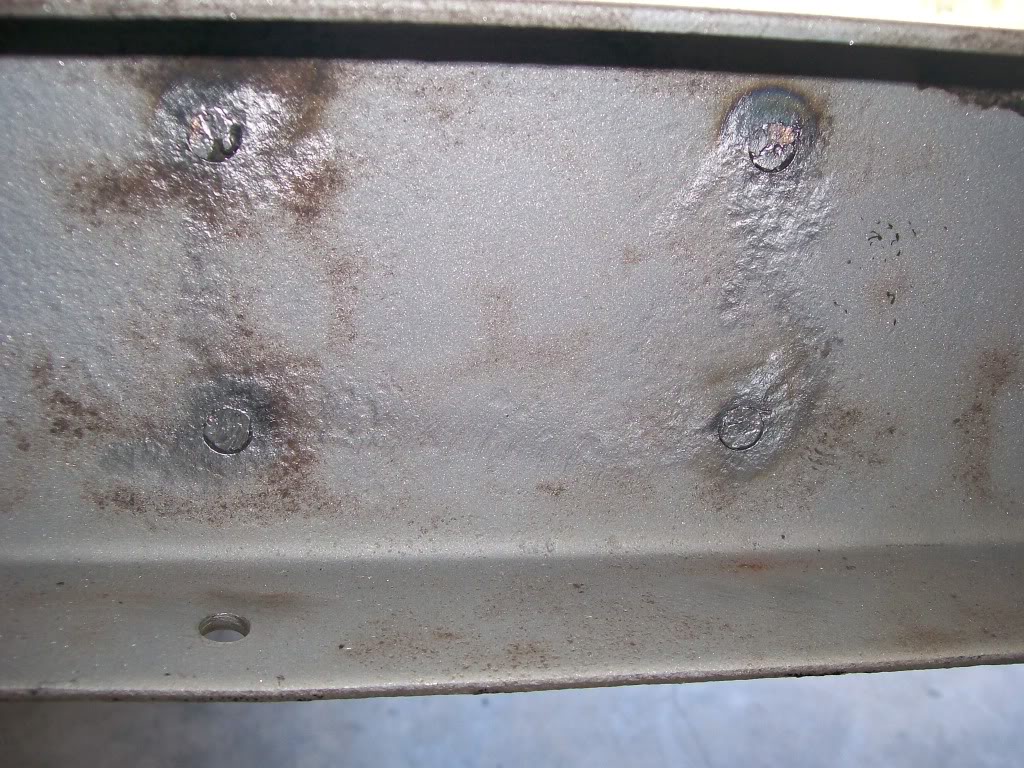
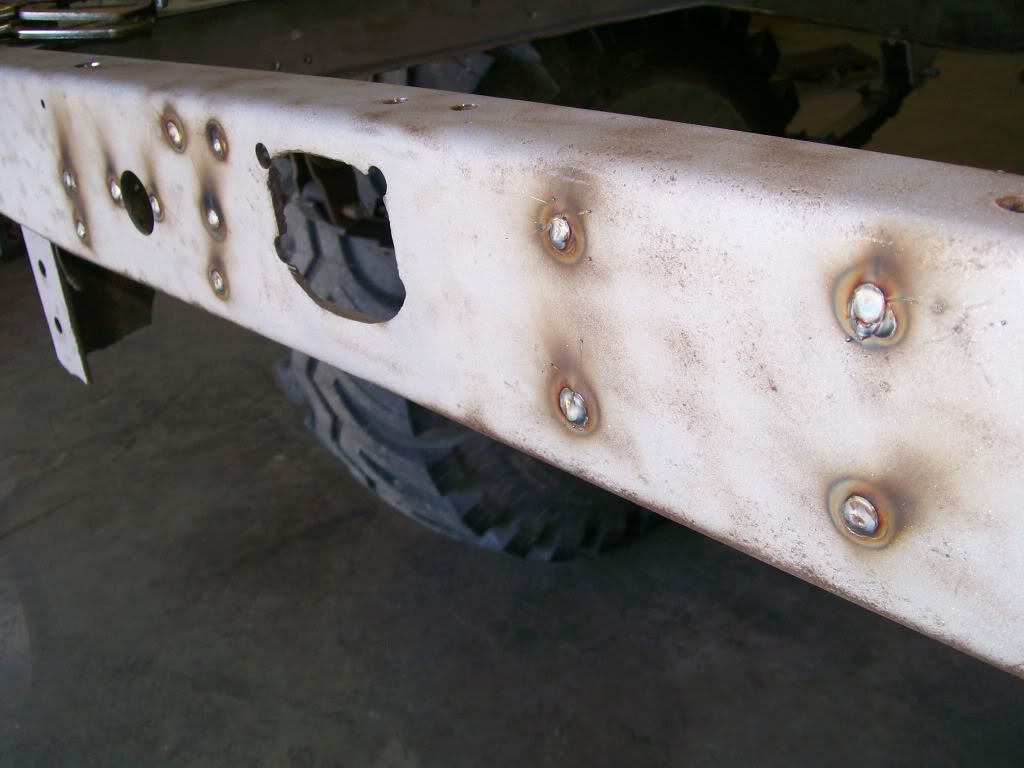
And here is the front side, looks the same as usual.
Ray, thanks for the reply. hmmm high school in the 50's, I bet that was a great time to be in High School, it was a very optomistic time. I do sence a desire to do some rebuilding in your future yet though.
Exactly Jeff88, If you try to weld to brass or copper the weld just spits and sputters. When I filled these holes I had to aim towards the side and not directly at the brass itself. The only thing I see that might be a negative is if you look closely at the backside/brassside of the weld it doesn't look like there was a deep penetration around the edge of the hole. Although I know towards the front side of the weld it did melt in good. Since these are merely a cosmetic weld and strength is not a major issue, all is good.

Ultimate classic truck right there
Posted by CCmyVW on 12/26/20 @ 4:17:42 PM