You must be logged in to rate content!
14 minute(s) of a 620 minute read
8-31-2011
Your thinking is exactly where I am, I do have the extra threading on the u-bolts so the fit is perfect. My main concern is the tabs/holes bending again after years of service as the old ones did. The clovers will spread the load of the clamping force across a much larger area and should solve the problem for years to come.
The bottom plate is the next set of pictures. Now that the first clover is drilled exactly how I want I am gonna use it to align the next 3 sets of holes I need to drill and figure a nice smooth way to create the kick-ups at the ends of the bottom plates. Follow along, I think I'll present an alternative to how most would bend up the edges.

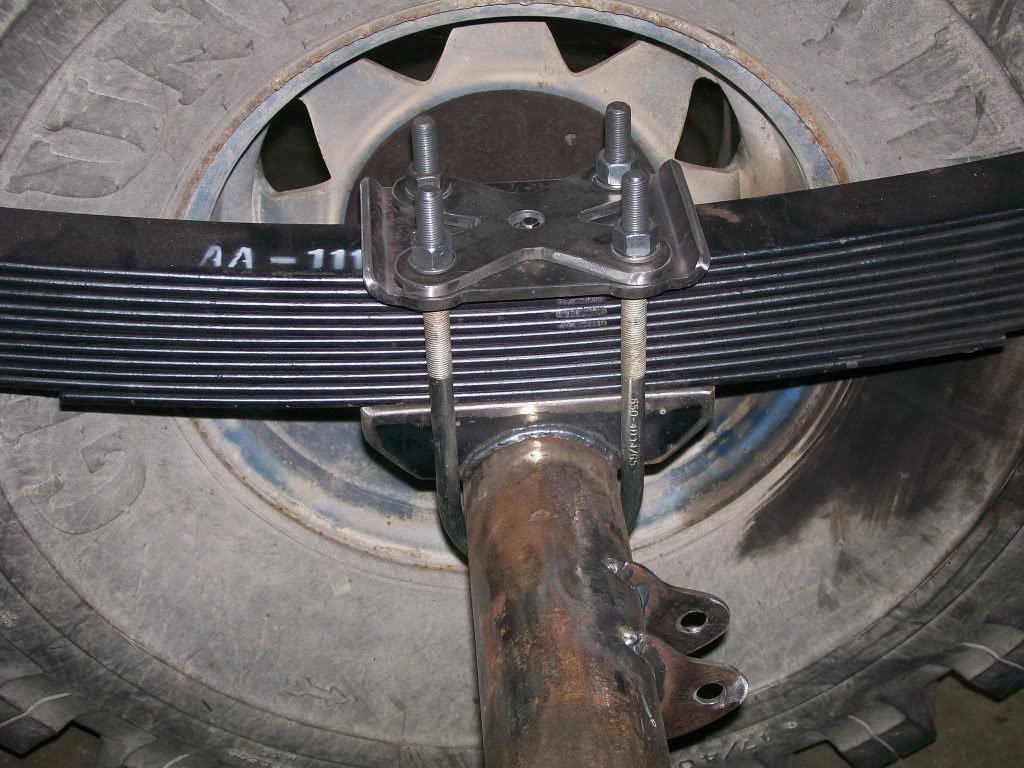
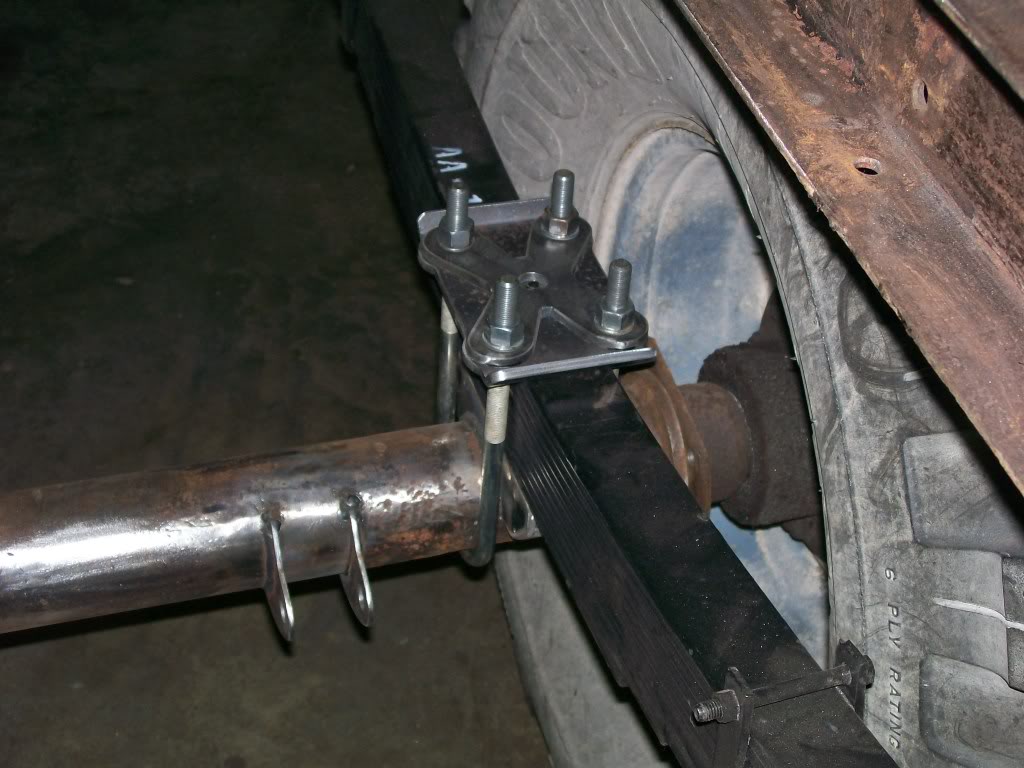
Alright, alright, a simple request, I will honor it. Let's kill the suspence and I'll work backwards then. Two pictures of the final product. I gotta tell ya, I find then to be very appealing to the eye, and you get the feeling of the strength the clover will provide. Hmmmm, clover, never thought I'd use the name in building suspension parts.
 . Nobody get excited about the u-bolt not being straight up in the second picture, I was just going for the picture, I didn't slide it up against the spring perch.
I kinda see 1/8, 3/16, and 1/4 inch and beyond in different classes to work with. 1/8 inch... pretty manipulative, with no heat it's fairly cooperative to bend and shape. 3/16, you can work with it but you'll need heat sometimes to reshape it. 1/4 inch, big hammer, torch, leverage, ect. I'll bend the 1/4 without hammer, torch or leverage.
Also, I've taken a couple pics of the tools to work these pieces. I talked to a fellow in town the other day about some welding and grinding on his bumper. I found that I took for granted that he would know the tools and grinding discs, but he looked a little puzzled. So during the fabrication on these plates I took a couple pics of some tools also. Ok, finished product, no more suspence.


9-1-2011
Ok, first I say thanks to all. Know this also, I try not to be too proud, I figure you all have learned this by now. Once again, If I inspire anyone to jump into a project, that's great.
J-Quad you had a couple questions about assembly. The nuts are the standard ones that came with the u-bolts. In the end I will use grade 8 flat washers and on the u-bolts and shock mounting bolts I like to use nylon insert nuts, they lock well and never back off later until you want to remove them, also since the nylon part of the nut fits tightly around the threads it helps seal out moisture later. As for never sieze...I didn't think anyone would ask but yes, for any project I will keep for years, for sure I will use it. I've done so much atv and motocycle work especially where a steel bolt is threaded into aluminum, it becomes a habit. Yes, I have to remove the axle again so once it's out I'll weld a strap on the bottom of the mounts. It'll be more convienient then.
Last night I mentioned showing some of the tools. Bennettj13 mentioned earlier that many of the tools are hand tools, nothing special. It does take a while to aquire a large inventory, even of hand tools. One thing I've learned is once you buy a tool you tap into a new world of projects, then the next tool, another world of projects.
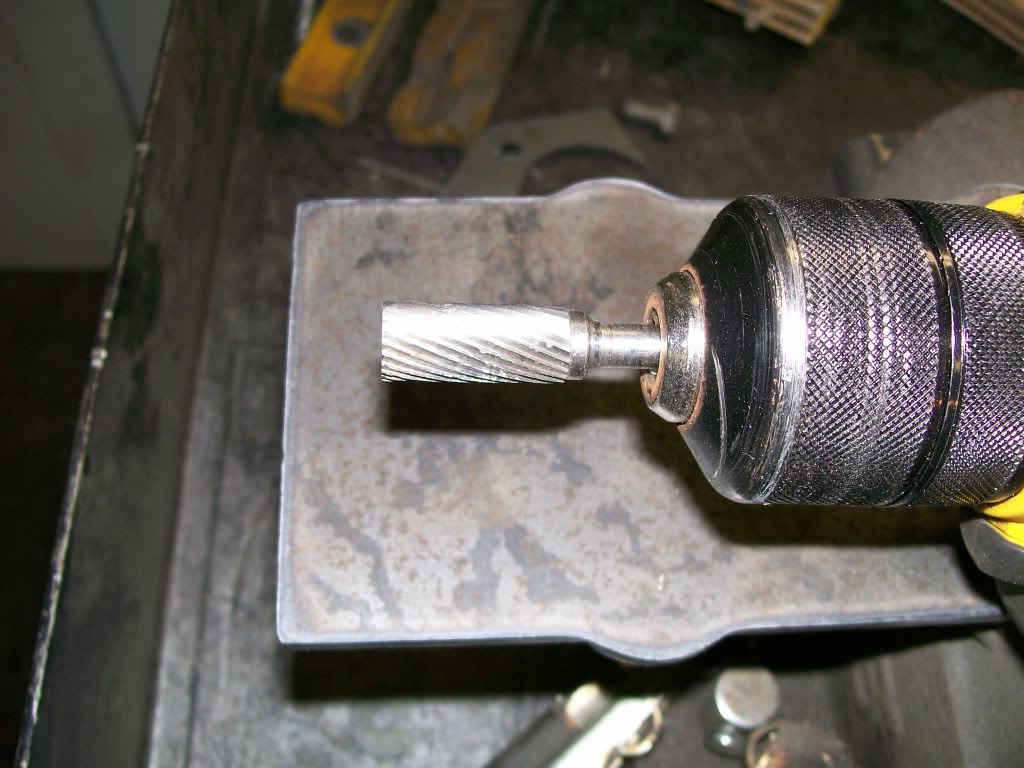
First pic is the tool that used for opening the one hole that was off a bit. I've used files and grinding stones but these kick butt. Rotary burr is one name for them and there are many different sizes and shapes.
Once I drilled the first clover to the exact fit I was looking for I declared it my pattern to reference the rest of the drilling of the other plates. In the past u've seen me use vise grips, bench vise and clamps to hold the control pattern to the piece to match it. With this project I needed a more immovable way to keep them together. I tack welded four corners together. Take note...if at all possible if you're gonna do this try to tack weld on rounded edges as I did here or, weld on outer corners. When you are done with the drilling and you cut the tack welds there will be tack weld residue to grind off. With the welds on rounds and corners it's easier to remove the residue vs grinding on a flat area.
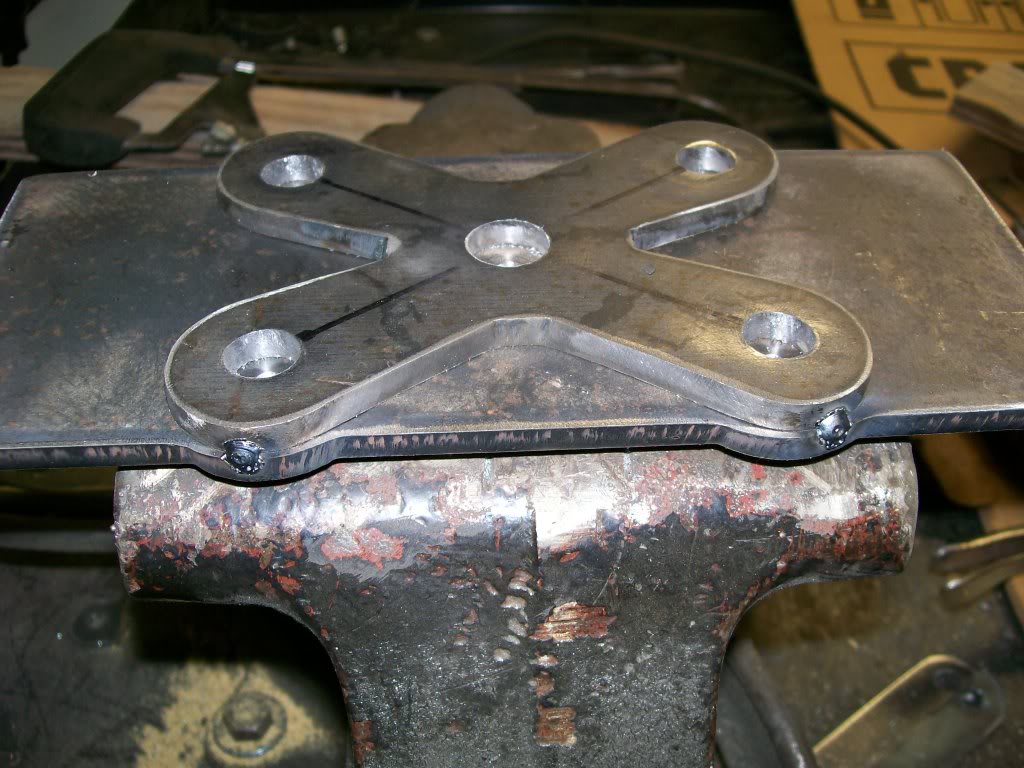
Once the plates are tack welded together I used a 1/2 inch bit which is the size of the outer holes. The clover aligned the bit and I got a centering point for every hole. Same goes for the 5/8 hole in the center. I'm one for predrilling a pilot hole with a smaller bit so the centering points give the perfect starting points. Once the pilot holes are drilled then the larger holes are drilled. Everything a perfect match.
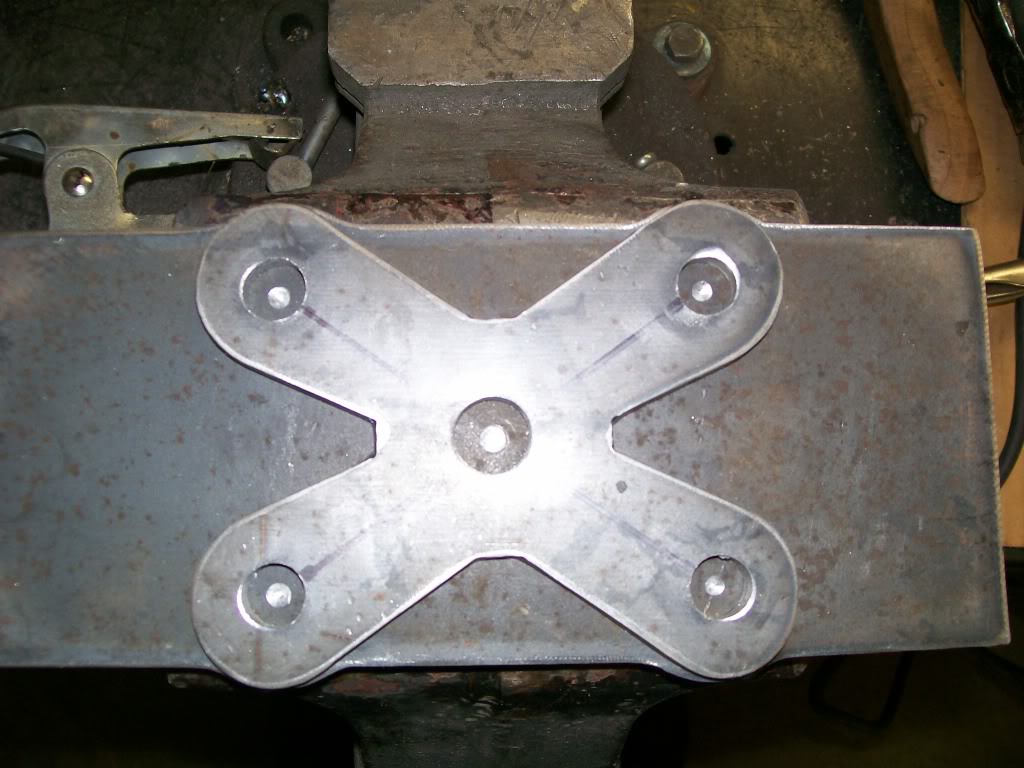
Once the two plates are drilled give a quick check on the springs and u-bolts. Looks good, now for the other clover and the other top plate. ALWAYS using the original clover as my pattern to drill from.
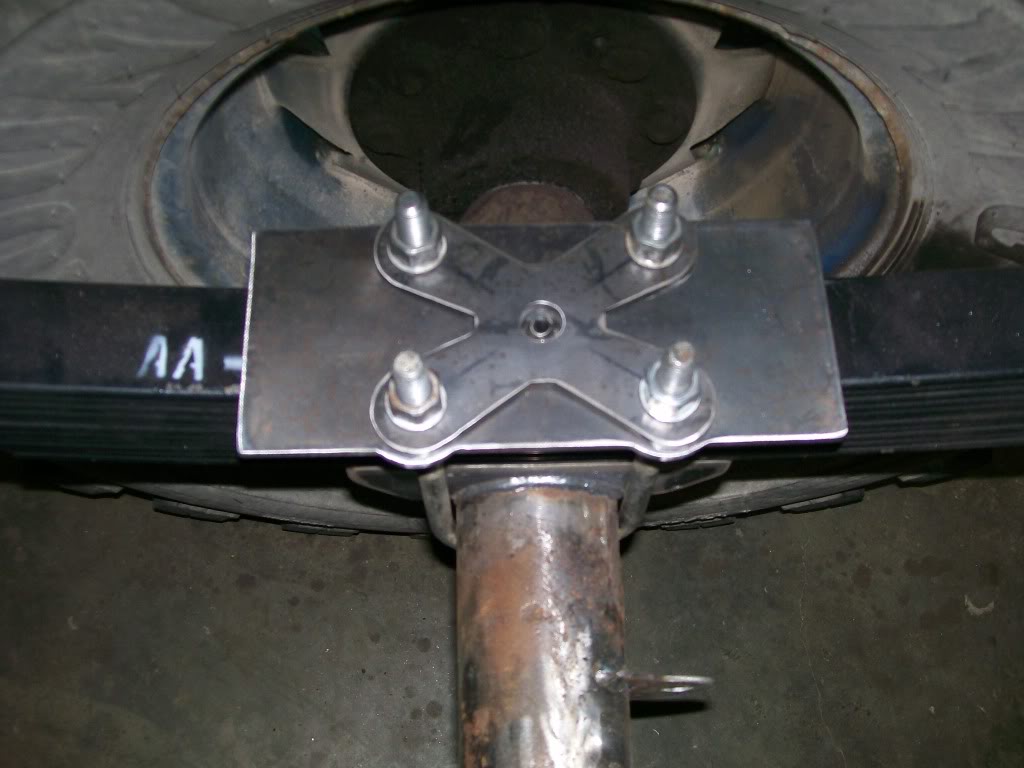
9-2-2011
Thanks for checking in Ray. Hours hmmm, no idea. I can say though, for all who is reading...I really only get about an hour a night on it. Progress is super slow. I put in around 55 hours a week at work, I'm blessed for this yet I have no free time. Here's the point. I'd love to have 3 to 4 hours a night, someday this will happen, but for now I only have an hour so I use it. Imagine what I've gotten done over the last few months, you've seen the progress. Now had I said every night, oh pittifull me, I don't have enough time, I'd get nothing done and when I get the 3 to 4 hours back I'd be way behind where I am now. There's the lesson for the day.
Next.. welding, I know I've done alot but mostly what I'm trying to emphasize in these posts is the fabrication aspect. You can put a tool in anyone's hands but they have to know the limitations of the tool get create art. My purpose is how far can we push the limitations of the welder also. I've used the term liqiud metal, that's what we have in a Mig welder, a 10 pound spool of liguid metal, it is so adaptable.
With that said, showing close-ups of the welds. If I have close-ups, don't pick, like I said, I'm self taught because I had to. I've seen many professional welders that have a consistancy in their welds, time after time, that just blows me away. I do believe the next couple pics will get to some more welds.
I just got in from the shop, the welder I use is a Millermatic 210. With most all my welds I use a .030 wire.
Last time we did a pre-assemble of the clover and the top plate together. We need to pop these tack welds apart. I'm gonna want to cut the welds without getting into the plates themselves. For me I'm gonna use the 3" air grinder. It has a nice narrow cut and I can focus exactly where I want the cut to be. It also has variable speed to control the cut. Looking closely at the tack welds in this picture I already ground into the tack welds, now smack it a few times and they'll pop apart. Them a little touch up with the 4"1/2 grinder and it's like it was never welded.
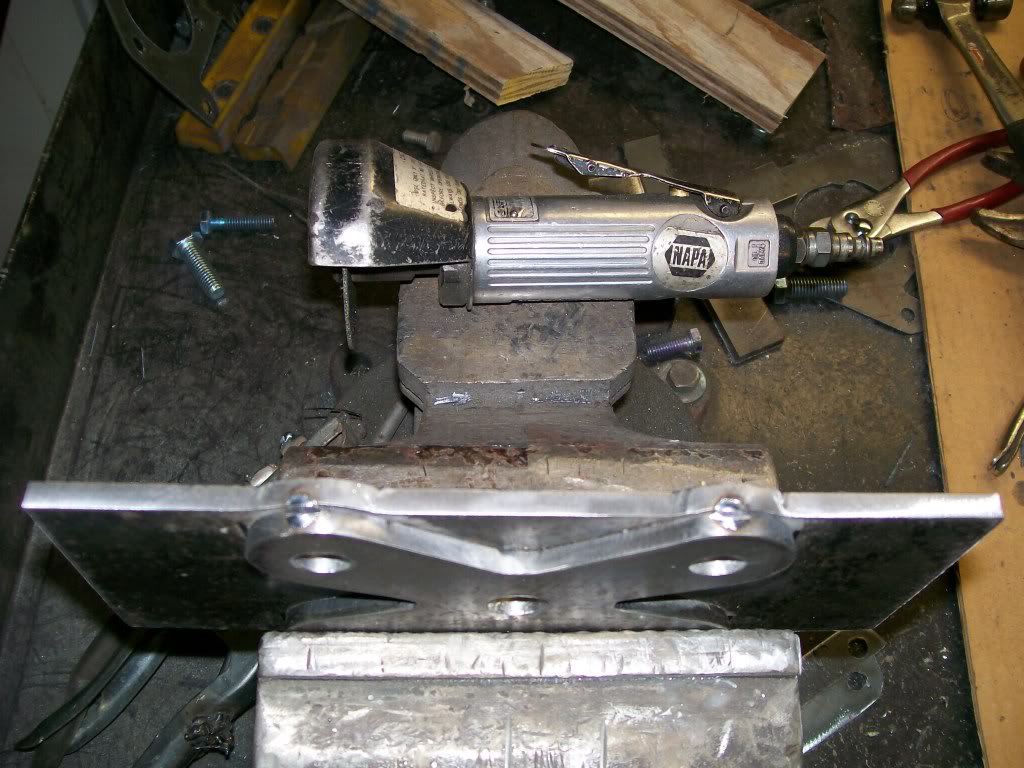
Ok, now I'm getting to the area many have been waiting for, we have to bend this 1/4 inch plate and it has to look good when done!!!
 Using the clover on the plate I marked the far outer tabs of the clover and used a straight edge and marked a line across the plate. Then decided how much space I wanted between the clover edge and the upward bend of the top plate and drew another line. This second line represents where a cut is gonna be made across the top plate. Repeat the process for the other side of the plate also and check your measurements at least 3 to 4 times before the cut. A cut you say??
 Yup, we'll bend this baby by hand by time we're done. :2 thumbsup:. Some of you I'm sure have figured out the plan by the picture below. Once again simple tools to the rescue. I'm gonna use the 3" air grinder again. I'm gonna use the line that represents the space between the clover and the bend, I'm very carfully gonna grind a line following the sharpie line. Then I'm gonna follow this line over and over till I've ground into the plate 3/4 of the way through the plate, then stop. On the plate in the picture I do not have the first line marked so don't be confused, I marked the other side of the plate with the line representing the outer clover edge then marked this side with the cut line.
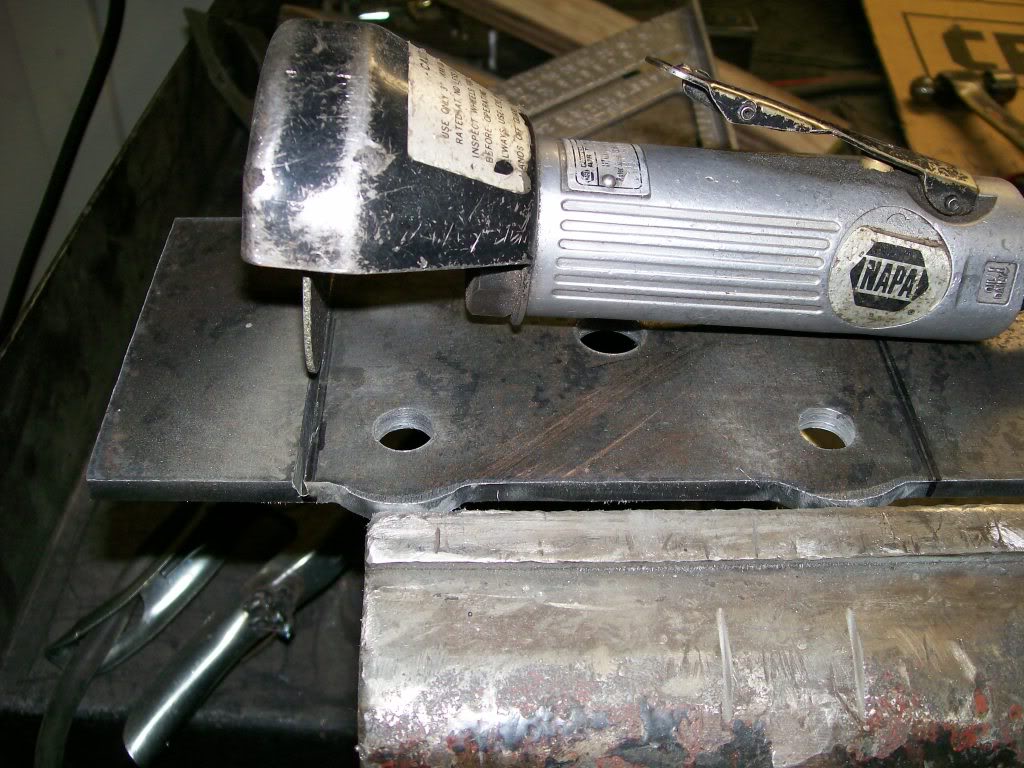
9-4-2011
Ok, ok I know I didn't really bend 1/4 inch plate, but it is 1/4 inch plate that I bent. Here's the best part about this procedure. If I put it in a vise and heated it red hot, then beat it with a hammer I probably wouldn't have such a clean looking bend, I'd mave hammer beat marks and the bend wouldn't be true all the way across the plate. The best part doing it this way is even if my pre-grinding wasn't perfectly straight all the way across, it's only desire is to bend perfectly straight so the plate will give in certain areas to create a straight bend for you. I used the old plate to figure what angle I wanted when bending this new plate. When I reached the angle I wanted I used an angle thingy to record the angle, then used it to match all the bends. Two reasons where it helps to have the extra material at the ends of the plate. One is it gave me a good hunk to clamp in the vice when I bend the plate by hand. Two, the longer the material to check for my final angle, the better I feel about my accuaracy, the angle thingy tells a better story when it makes more contact with what you're checking.
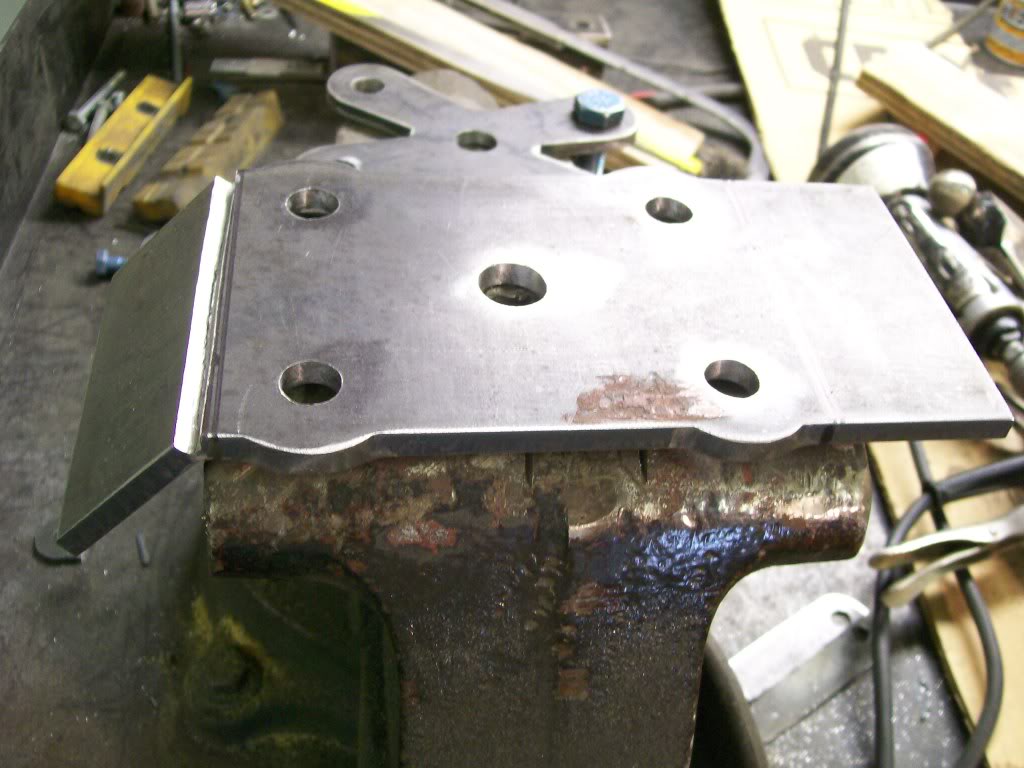
I can check boths sides and know they will be a match when done.
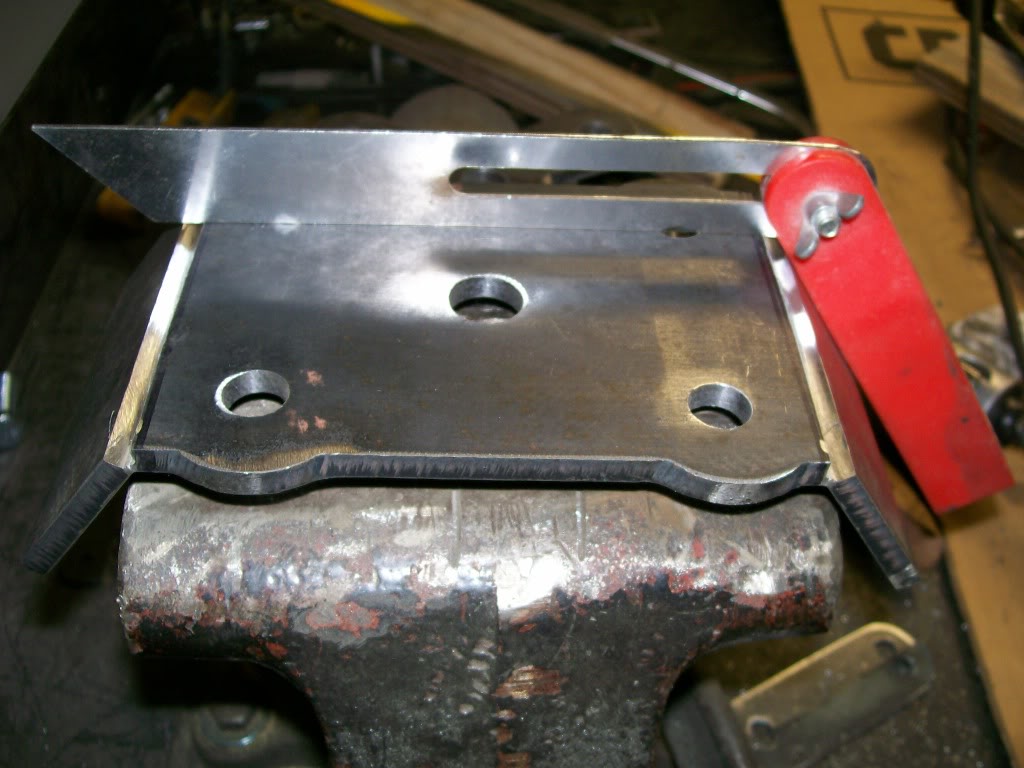
Alrighty then, shall we get back to the build. After I bent back the outer portions of the plate to the angle of my desire it's time to weld, great, I love this part. I've got a pretty large gap to fill here, it's gonna take two passes to fill the gap. This first pic is of the first pass with the welder. It filled about half the gap.
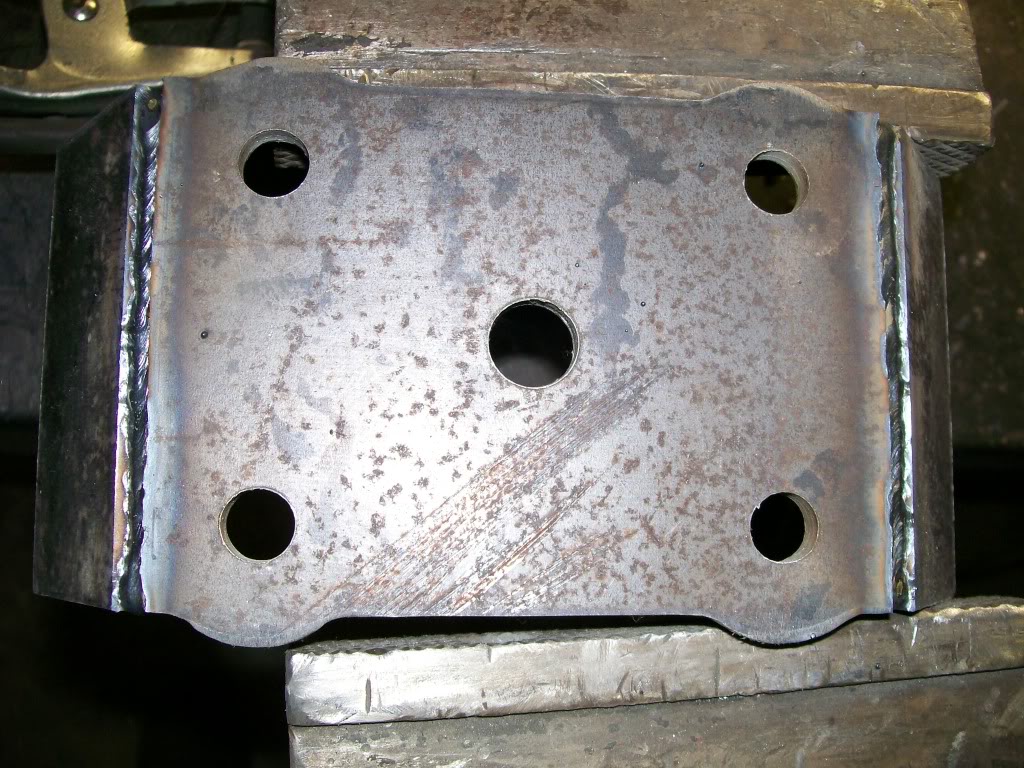
On this second pass of which I did immediatly after the first pass I had quite a gap from side to side to fill. When doing a weld/fill such as this I had to move the tip of the welder back and forth about 3/8 of an inch to reach both sides of the gap. There's gonna be some grinding to do after the welding, perferably I want as smooth as possible weld which will cut down the amount of grinding to smooth the whole edge. Let's say I didn't fill all the gap, I left a couple small indentations in the finish, simply identify them, and fill them with more weld, and regrind. In this situation while grinding an outside edge, grinding is much easier than having to grind smooth a flat area such as I had on the sides of the frame.
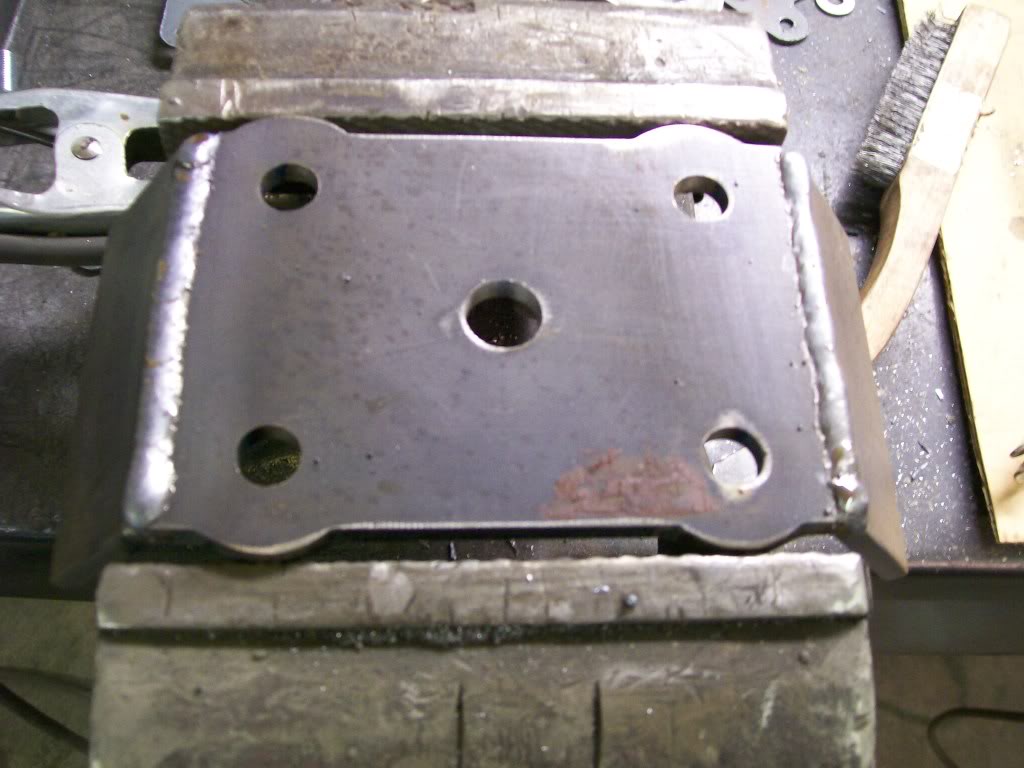
This second pic is the second plate and the first pic is the first plate. I forgot to take a picture of the first weld on the first plate, so I took it while doing the second plate to tell the full story.
Comments

Great before & after!
Posted by Diggymart on 1/11/20 @ 4:10:28 PM

Gotta love the Willys! Good job...great build!
Posted by Diggymart on 12/10/18 @ 8:34:21 PM

Ultimate classic truck right there
Posted by CCmyVW on 12/26/20 @ 4:17:42 PM