You must be logged in to rate content!
12 minute(s) of a 418 minute read
12-28-2009
Frame welding today.
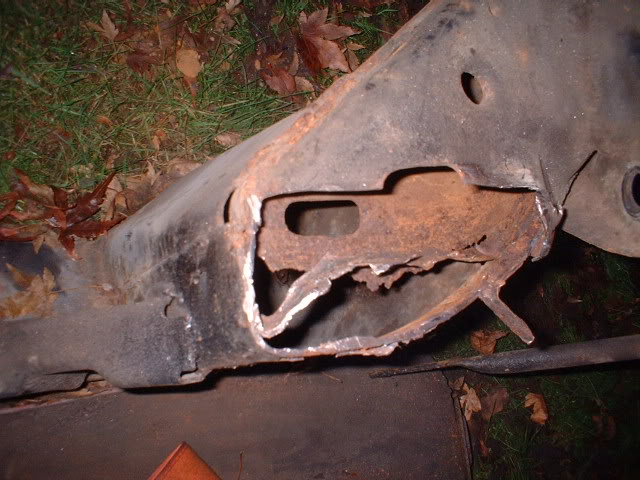
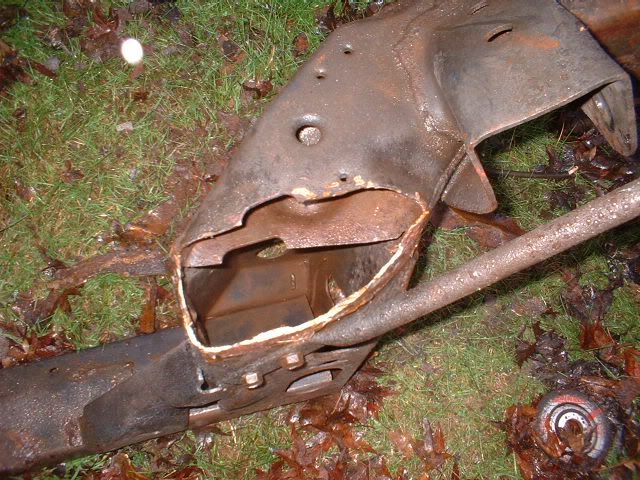
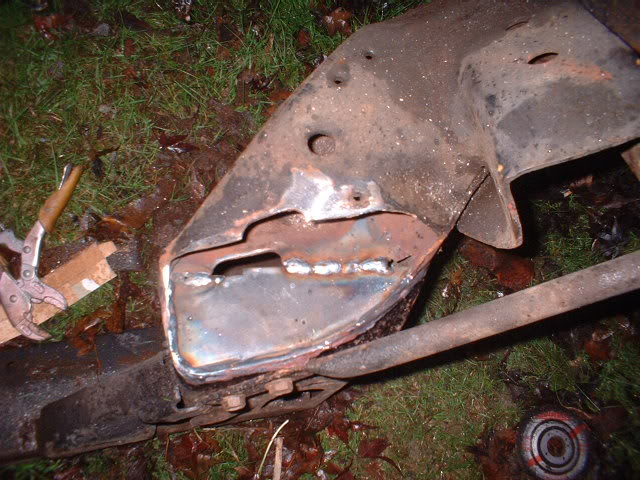
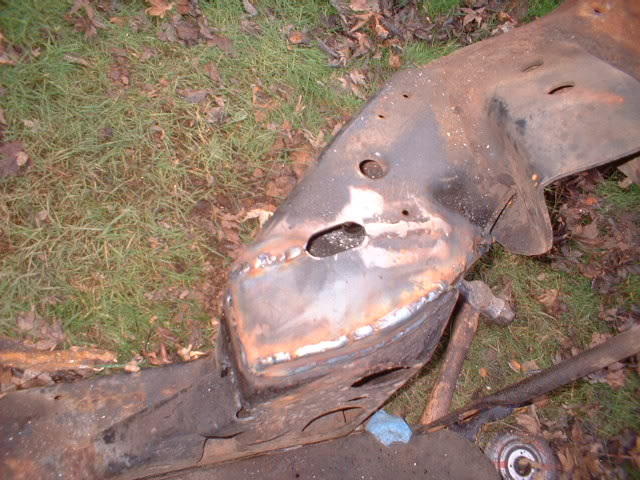
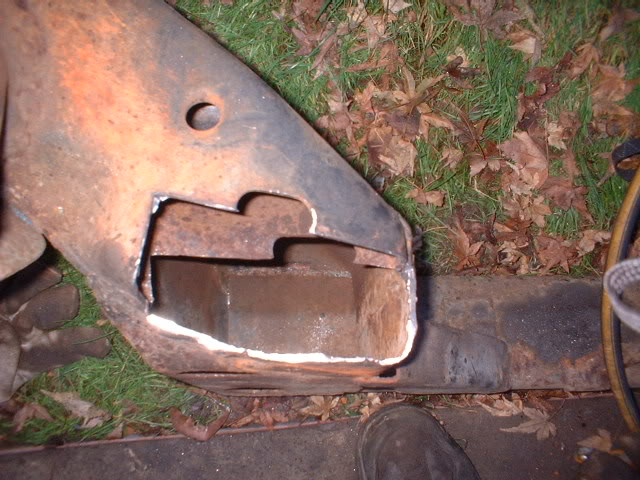
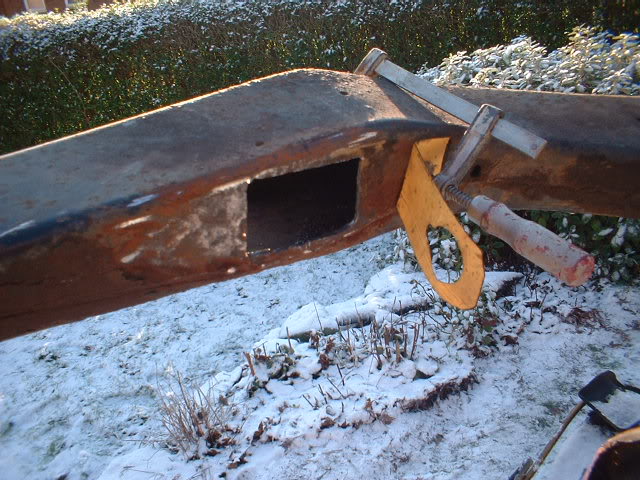
Heres the frame corner that is just behind the front drivers side wheel.
As you can see it has been plated.
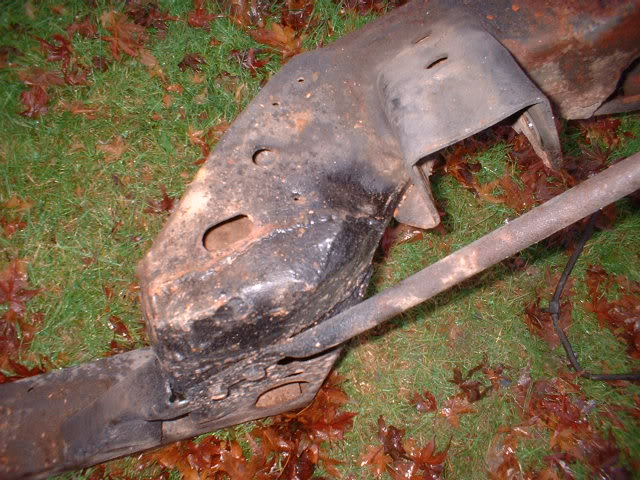
Whats the betting that it has been welded over rusty steel?
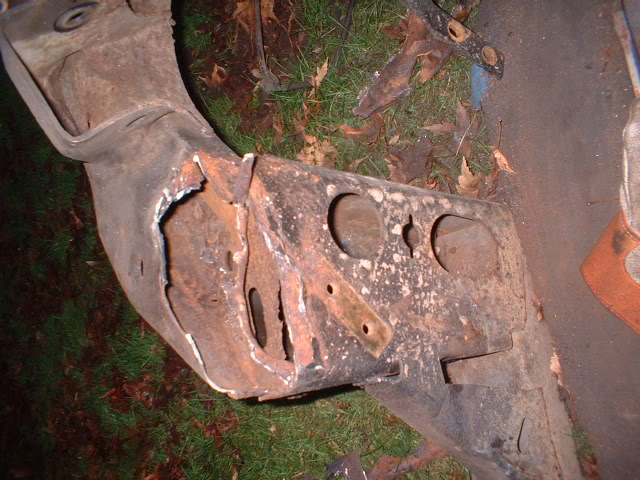
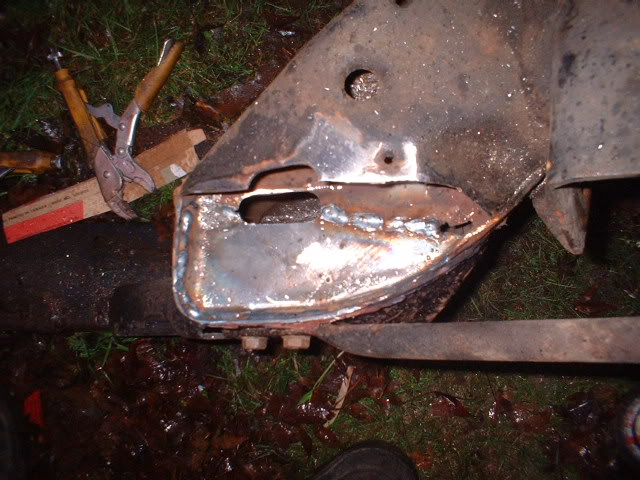
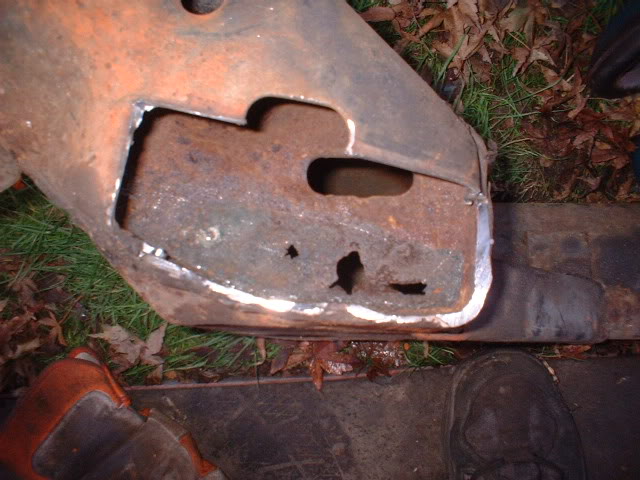
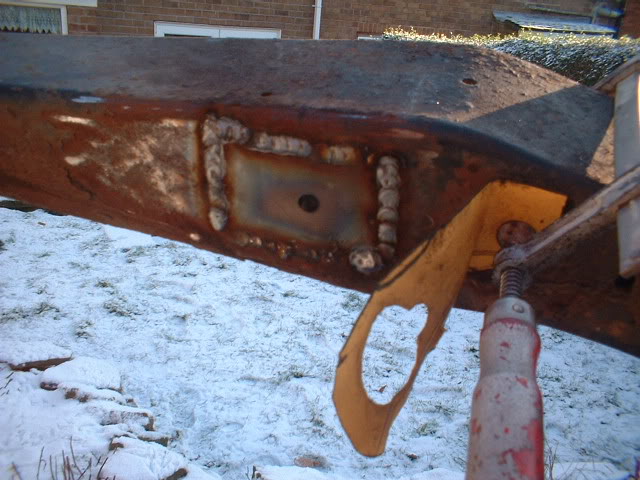
Here it is after the plate has been cut off
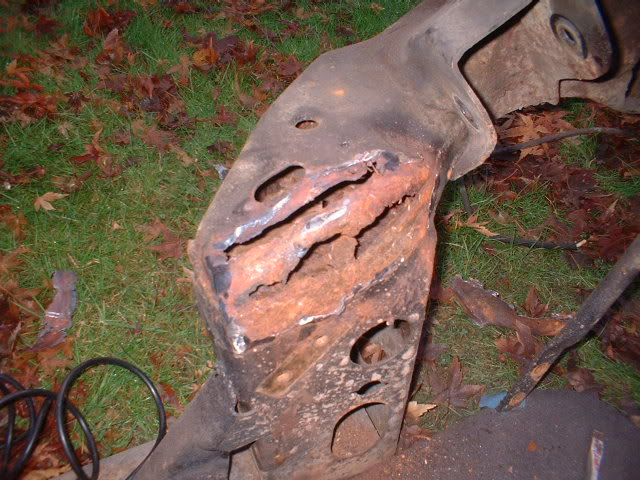
There you go then! I was right! The usual shop stuff doing the job wrong but in the quickest way. If I was a shop owner, would I plate over rust for a quick buck, or do it properly?
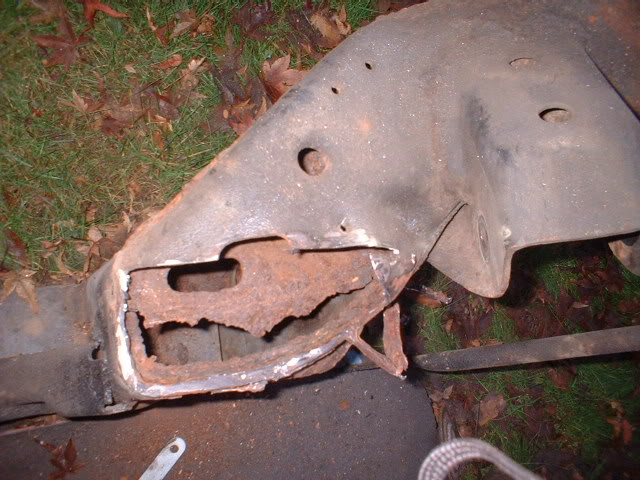
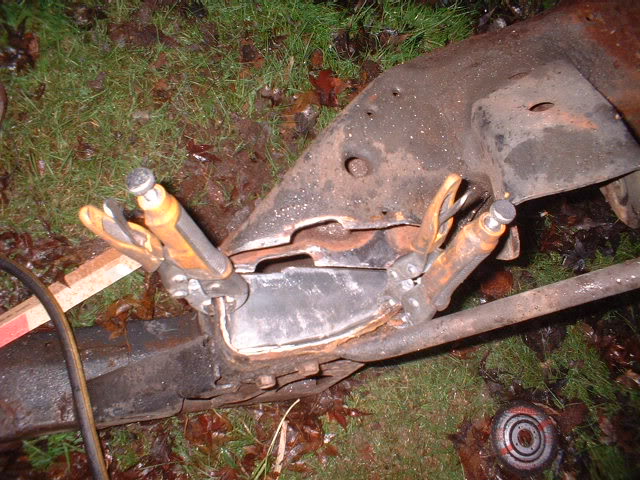
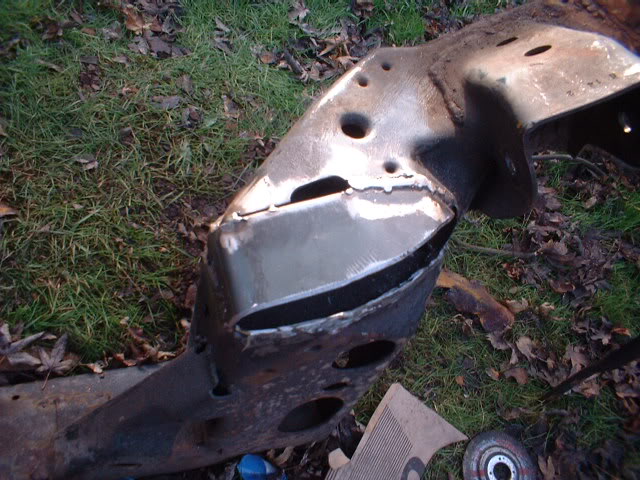
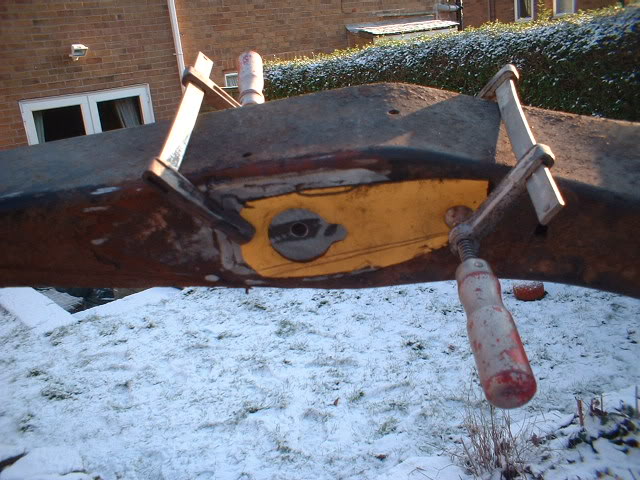
Anyway, here it is in various states as I gradually cut away the rot to good steel.
Note the corossion on the inner wall. This is no doubt due to water lying in there.
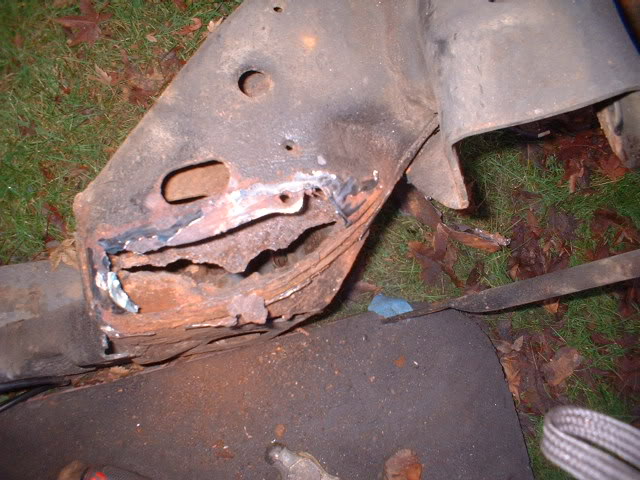
A slightly different view
Then my air saw packed up! Can't believe it. Have to get one tomorrow.
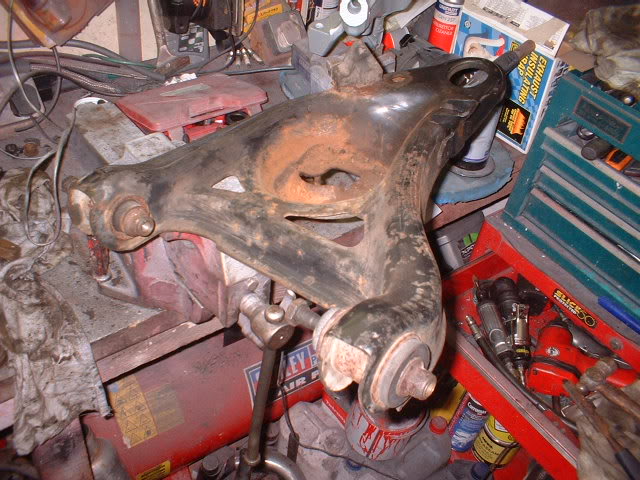
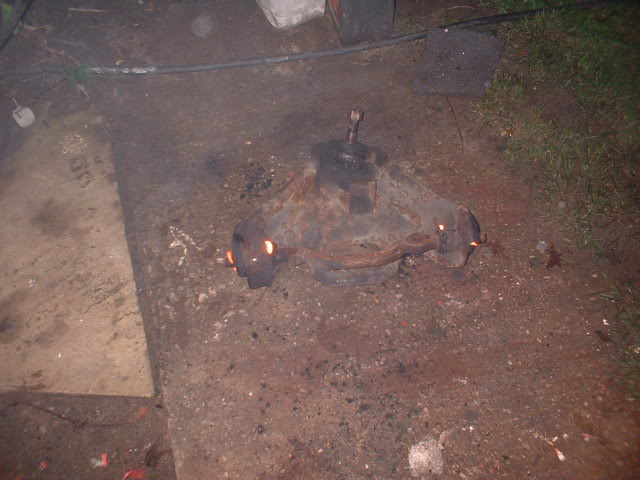
In the meantime, lets get the suspension arms ready for media blasting.
Heres the LCA ready to go
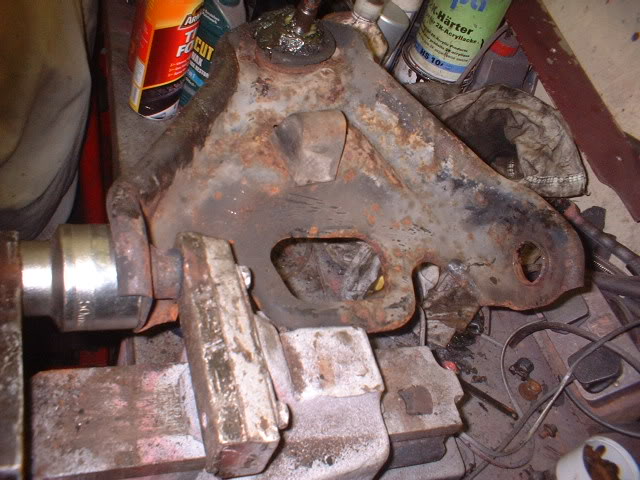
How to remove the top bushes in the upper arm when thet are as rotten as this when coolant has been spaying on it for years!
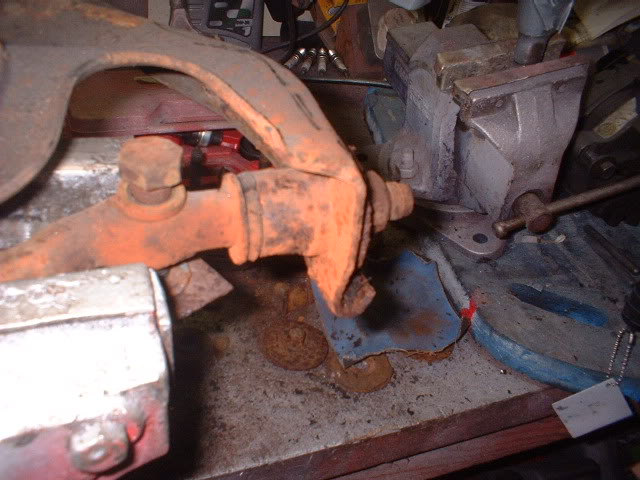
Set fire to the rubber,
knock the arm through and push out the shaft. Then press out the remains of the bush.
12-30-2009
Day off yesterday getting a new air saw and doing mundane things as the rain pors down.
Today wasn't as bad so I got back to work.
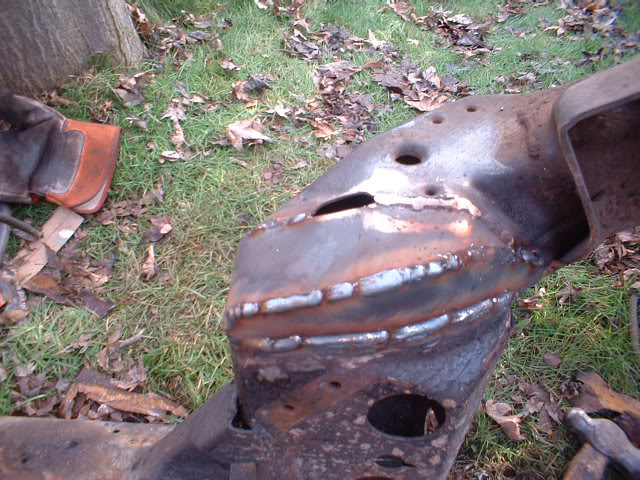
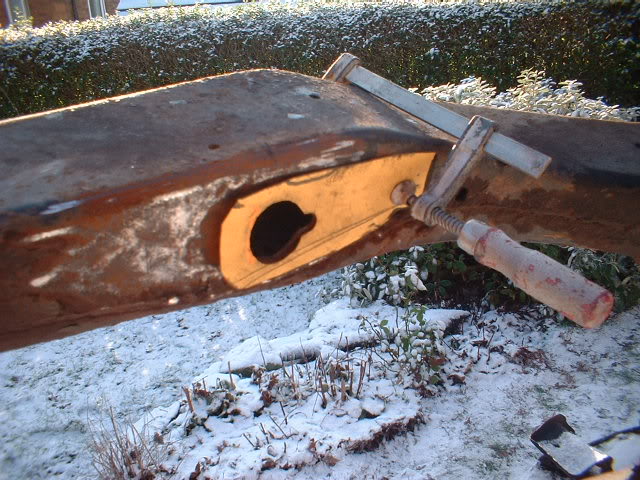
Finally cut out the last of the rot in the corner of the frame with my new airsaw
First repair section fabricated out of 3mm plate and clamped in place
Welded in
and a nice finishing touch-re profile the elongated hole
If the weather holds out a bit tomorrow (some chance), I will finish off this side.
All the blasting/powder coating places are not answering my calls. so all must be shut until the 4th january. Typical. Holidays to do jobs, but can't because everywhere's shut. And they all open up when I am back at work.
12-31-2010
Finally finished welding one side

The other side is just as bad so another few hours repeating all this!
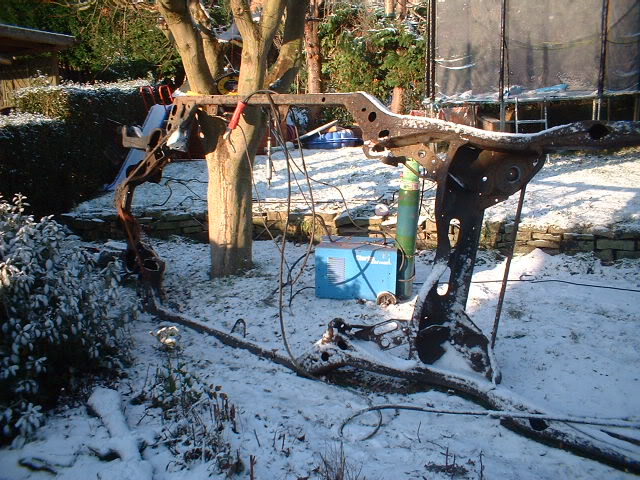
I have set up the wagon where I want the wheels to be - roughly.
What do you think of this?
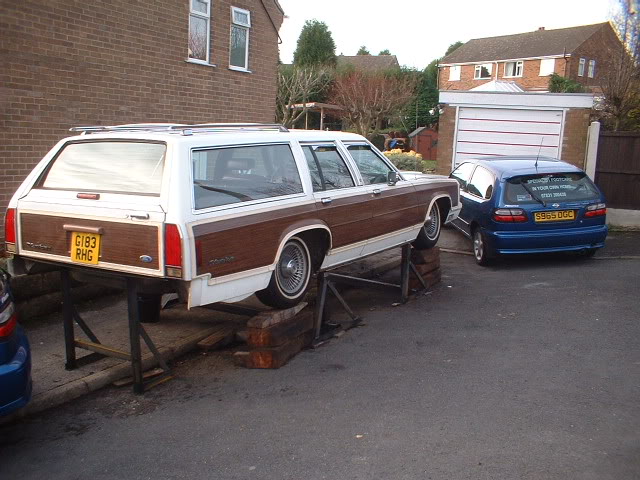
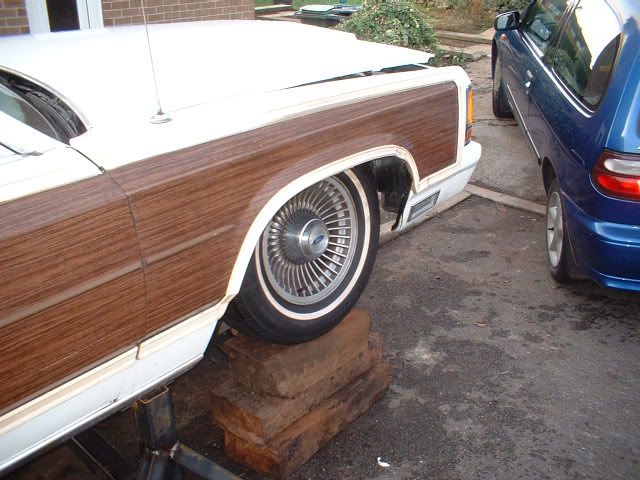
Thats what I call low!!
1-1-2010
Over to other side of frame today, so flipped it over (easier said then done I can tell ya!).
Looked far better than the other side, so only a bit of work then? Err........no!
Looked suspicious so off came the front section to reveal....................
So a good half hour later with a cold chisel, an air saw, a air die grinder and a big hammer and all major corrosion is gone
Finish this off tomorrow.
In the meantime its thinking out loud time...........
Most places are back at work on monday - including me - so I have to decide what to do with the frame.
Media blasting is only half the story. In fact its exactly half the story. What about the inside? The important half?
I am going to get a price for media blasting and powder coating and then another quote for chemical dipping and electrostatic coating and possibly powder coating. I'll report back on the costs.
This has got to be right, no point in building a car on a dodgy frame is there?
1-2-2010
Hi rtg
For a living I teach math to 11 to 18 year olds at a high school (I think you call it). I have a degree in special maths, but don't let that fool you! I am not your average pen pusher. Luckily I have spent a LOT of my spare time learning welding skills, fabrication, electronics, engine management systems, body prep, spraying, plumbing, single phase house wiring etc!
I'm not an expert in any but reasonable at most. It helps being a perfectionist
I hate paying anyone else to do jobs for me!!
My fav job/pastime is diagnosing modern car faults-bit like your job really. How do you find your job? Enjoy it? I bet it creates challenges?
1-3-2010
Sunny but cold day today, but I must get the welding on the frame done.
Drag welder out of the garage in position and look at this for a winter sight!
Simple weld up of the corner
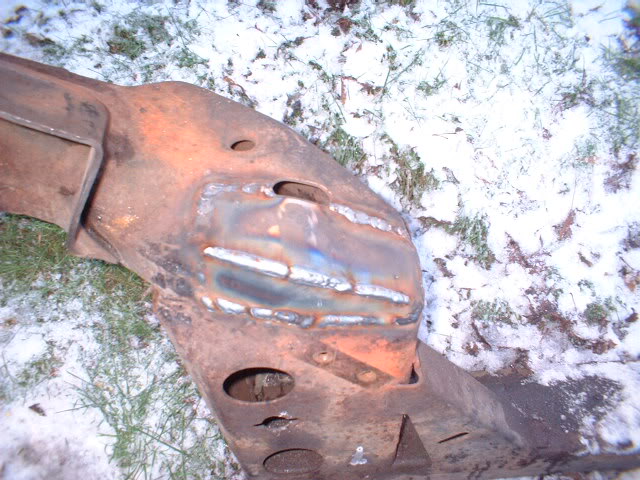
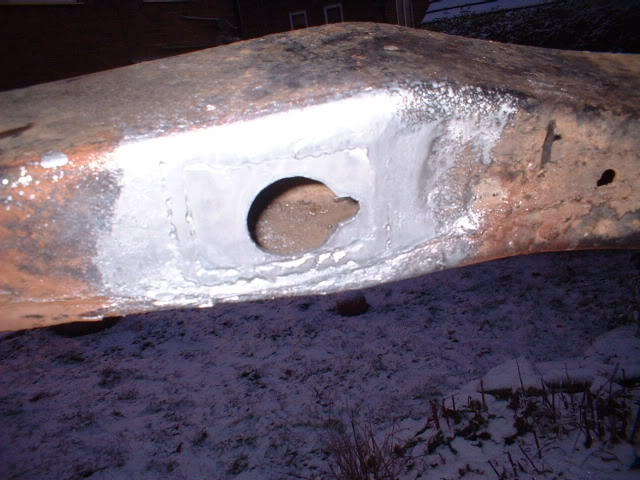
and its on to a weak spot on top of the frame that is rusted and thin. Directly under a body mount.

But how to get the hole back in the right place? Make up a template
then bend it back out of the way, do the repairs, fold it back and cut the hole out! Simple!
Heres a strong piece of angle iron clamped across the rails to prevent twisting while welding
Heres the finished hole
Final photo after a long but fruitful day today.
Here's a photo of an engine mount complete and the other with the rivets drilled out and the clamshell split.
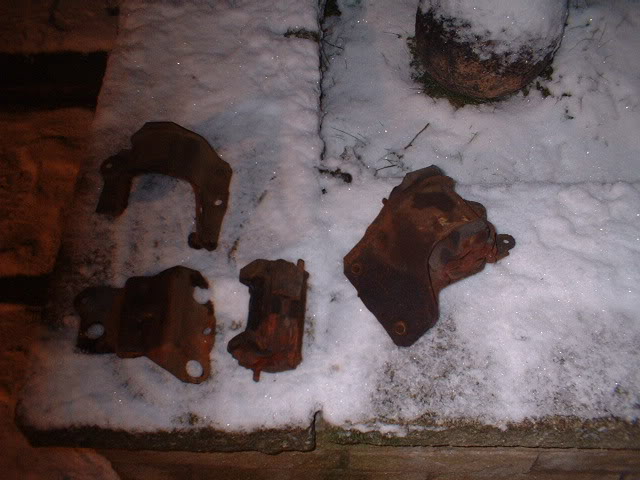
Now I can clean it up properly and put some paint on.
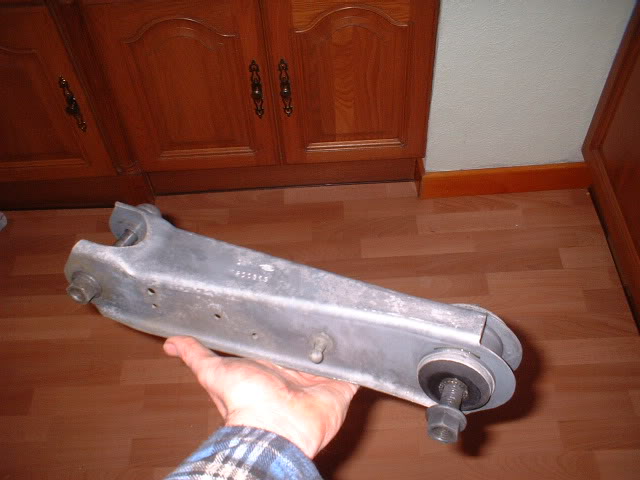
I have also put in the acid bath the upper trailing arms for the rear axle.
Photos of that later.
Back to work tomorrow in the snow and ice, but I'm sure I can squeeze some time in tomorrow somewhere.
1-4-2010
Contacted Surface Preparation Ltd Paint, Rust and Underseal Removal for Cars and Industry by Surface Processing Limitedtoday for a quote on chemical cleaning/stripping of the chassis and Electrophoretically coated. Cost for all this is £1300 ($2100).
This will produce a chassis that will need a further coat of paint to finish, but will last years!
An alternative is hot dip galvanising which will probably make it last 25 years +. I'll get the cost of this next.
A lot of money though!
1-6-2010
Interesting developments on the chassis front.
If the chassis is chemically stripped down to bare metal inside and out it is £480 + VAT. Then it needs treating inside and out. Another £670 + VAT will prime it eltropheretically. Then it has to be powder coated or painted which will be another few hundred if a good job needs to be done. Plus transport to and from there which could be £200. This will head us off into the £2000+ ($4000) region and a bit silly.
On the other hand there is a top galvanising firm nearby (less than 10 miles) that I have heard good things about. Guaranteed good work and a friend of a friend! Derusting phosphoric acid first and all the trimmings. The frame won't need painting after this and will last between 34 and 150 years (according to the tech write up).
I will get a price on this tomorrow hopefully and post it up.
1-7-2010
Had a chat to the owner of the galvanising firm and he advised that I didn't have it done. When I asked why. He said that it will be dipped in a container of molten zinc at 450 degrees and it will most likely twist. Might not, but might.
Well I can't replace the chassis if it does, so I agreed it may not be the wisest move!!
So, it was off into the garden to have a look at the chassis and a deep think! Looking inside the chassis, it is surface corroded in only a few places. And all those are accessible to a media blaster. So, I contacted a media blaster and powder coater for a quote. I am still witing for that, but have now resigned myself to the fact that it now won't be rust stripped on the inside. But it will be heavily rustproofed with Dintrol 3125.
In the meantime I have loads of work to do on the car outside but cannot because it is way below freezing most of the time. Piggin' frustrating.
Heres a view from my eldest sons bedroom window at the snow laden frame leaning against our tree! Awaiting something to happen!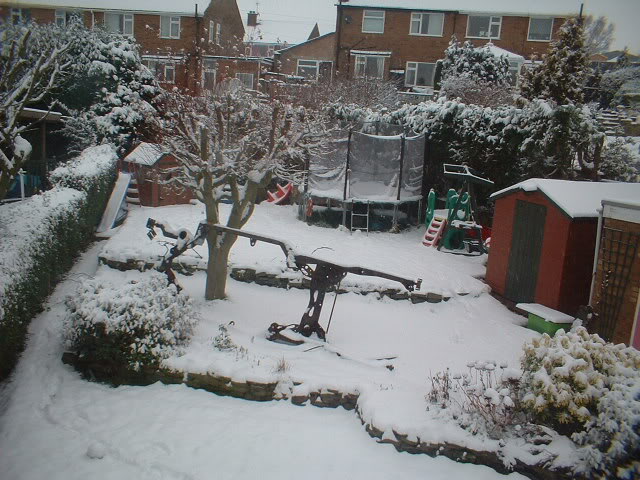
1-9-2010
Still waiting for a quote, so its onto the suspension component prepping for paint.
For any non believers of the deox-c acid crystal rust remover stuff (or naval jelly type of stuff in the states), here are a couple of photos of the rear axle upper trailing arms. They went in rusty lumps and came out looking like this

The rubber bush is untouched.
Even the nuts and bolts are clean and rust free. And this is an acid bath outside in a plastic container with an inch of ice on the top! Can't wait to see what it can do when it gets warmer and more active!
1-12-2010
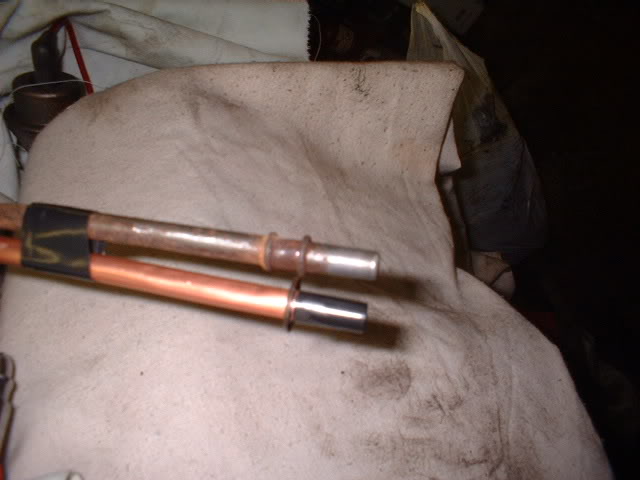
Fuel line reconstruction now. They are all very rusty and there is no way I can exactly reproduce them.
First I located some exact diameter pipe (5/16 and 1/4") then put on a one way circlip (thats what I call it anyway) and pushed it onto the tube to make the stop to prevent the fuel connector being pushed off under pressure
Heres the new and old end (black tape on the end to prevent scratching)
Heres the first section bent to match the section from the fuel filter back
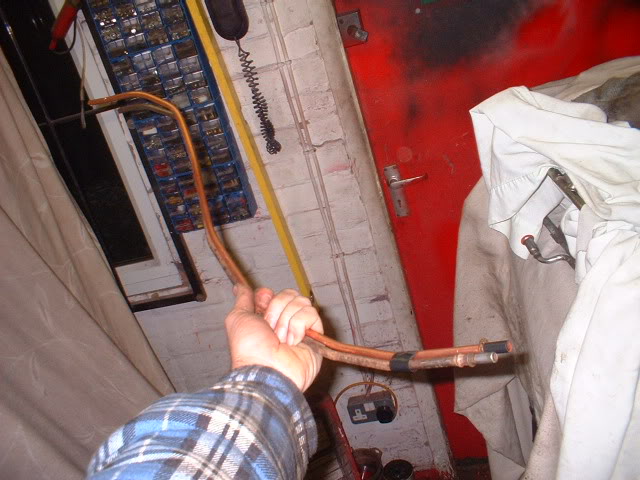
Now got to repeat this for the rest!


Love this build, so much work!
Posted by diyauto on 1/21/21 @ 1:46:55 PM