You must be logged in to rate content!
9 minute(s) of a 362 minute read
6-28-2020
Hey all,
Been a bit busy lately to do any progress on the Dodge. I did find time ( as we all do ) to buy something. It arrived all bolted together ( all 750 kg of it ) so spend most of yesterday putting it together.
As my garage roof height is 3.4mt I bought the extra height left one so when the car is under it the ramps sit above the car and you don't hit your head on it. I just have a few adjustments to do and then bolt it to the floor before I put the car on it.
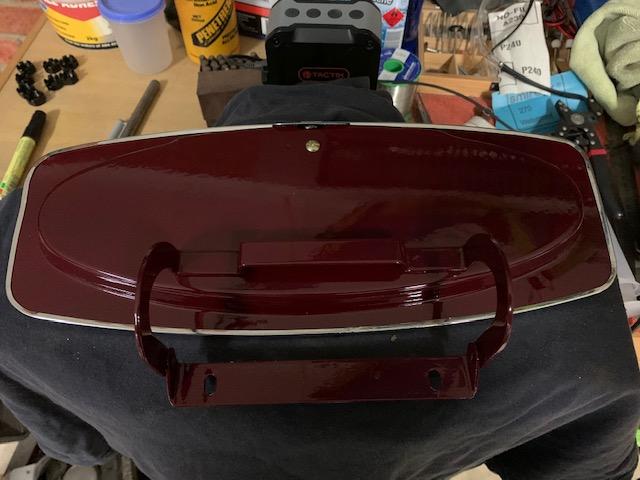
Started work on the glove box and glove box door and getting it to fit. There is a large gap between the lugs at the bottom of the dash when the glove box door bolts to and the bottom of the glove box so I'll make up a wooden support which should fill the gap nicely. Once done I'll adjust the do so it shuts properly. I'll post photos when I'm a bit further along.
Cheers
Ian


7/29/20
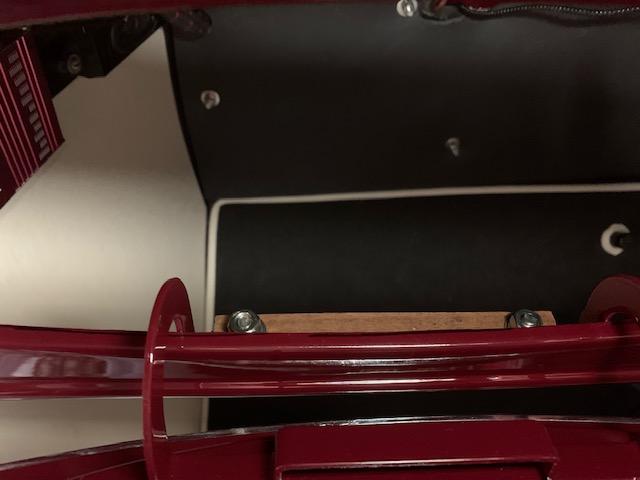
Finally found time to work on the car and post a few more photos. After contacting a few other dodge owners they sent me photos showing three lug at the bottom of where the gloxebox attaches to. Typical....not on my car !...back to making my little wooden support. Used a piece of redgum ( very hard timber ) . Grabbed the rebuilt glove box door with all the fittings and cut my little piece of redgum to suit. Made sure it fitted between the two hinges and didn't foul on them. Allowing for the bolts to hold it in place, I made a smalled piece, drilled the holes and countersunk them so the screws wouldn't hot on the hinge support. Tempory fitted the anchoring screws after marking out on the glovebox base. Checked the glovebox for fit around the door and where the hinges go and then adjusted the hinge slot in the base of the glove box. Finally after all that attached the glovebox door. Another two hours of adjusting and finally go the glove box door to shut properly. Now all I have to do is put the actual glove box in the housing !
Funny thing is I thought after a few hours I'd have this whole thing finished....sometime the simple things take the longest time to do !
Cheers
Ian


8/22/20
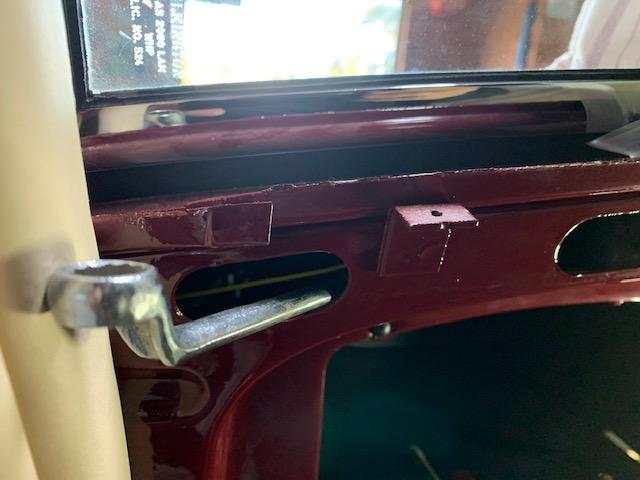
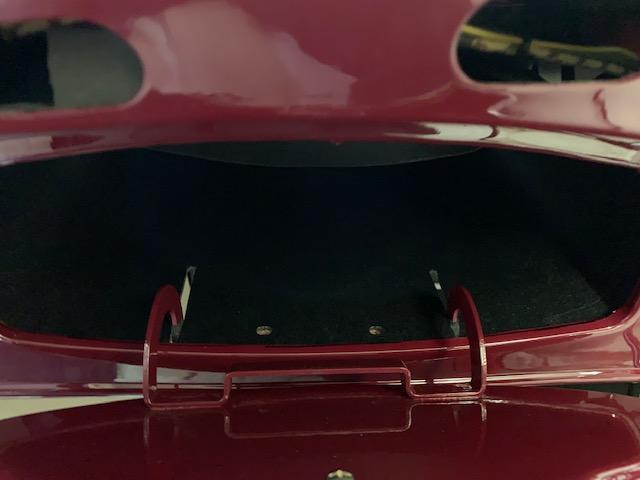
Ok so back to the glovebox. So I have some power from the car ( for charging phones or anything else ) I fitted a USB port in the side of the glovebox and ran the wiring back to the light switch. It has a black cover and blends in well so all you see is a black round disc on the side of the glovebox. I finally got the glovebox in the required position and when I put the top bolts through the lugs there wasn't enough room to get my hand around to the top to get the washers and nut on. Had to think about that for a bit then had the idea to use a thin piece of wire with some Blue-Tac on the end. The end of the wire I made a horseshoe shape so that when I got the washers over the bolt I could just push the wire away and the washer should drop down....good in theory.....well bugger me....it actually worked ! Same thing with the nut, but this was a little more tricky....took a bit longer but again it worked a treat. Once I got the nut on I could use my little piece of wire to gently turn the nut as much as I could. You can see in the second photo I didn't have much room to move and the top of the bolt was well out of reach. Then I got a long ring spanner to hold it while I tightened to scres from underneath. Once these two were in I screwed the bottom ones in place......job done. The two arms of the glovebox were hitting on the dashboard frame. I used some tiny 3M pad with self adheasive which I put around the arm which will prevent the paint from chipping...you can just see these in the 5th photo.
Next the sun visors.
Cheers
Ian


9/28/20
Sorry all, been busy working my around the lockdown we have here.
For those of you that don't know we ( being Victoria ) had a spike in Corona Cases and metro Melbourne was put on Stage 4 Lockdown . This meant you needed a permit to go to work ( over 5 kms ) you couldn't go out after 8pm to 5am ( unless you have permit ), masks work everytime you go out, only one person allowed to go shopping........................you get the idea. The number of cases have now dropped and they have started to ease restrictions. The sad part about this is both my wife and I have mothers in Aged Care Facilities ( in their 90's ) and because the aged care places got hit the hardest ( one place half the residents died ) we are not allowed to go visit, which means we may never see our mothers again. Something we've come to terms with but a little hard on the family.
I have been working on the car but due to the lock down some thing cannot be done...i.e the leaking gas tank, the people that have this are in lockdown, the upholsterer is in lockdown and the guy doing the rope assist and travel rug cord is in lockdown so I have to do what I can with what I have at the moment.
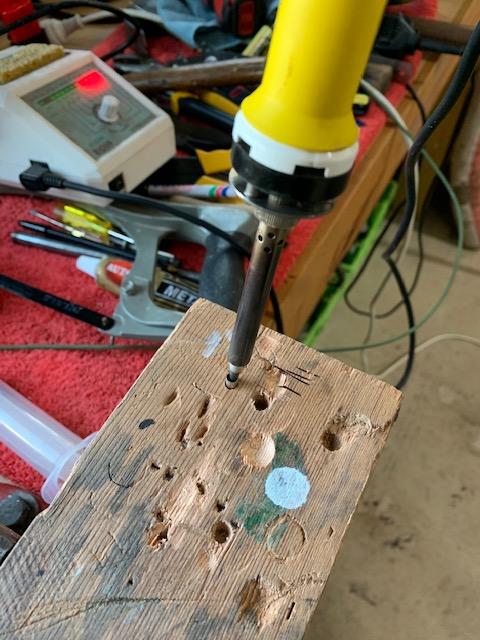
I decided to fit the horn wiring. I grabbed the wire and the end which I put on it in a previous post. I needed a insulating washer which I found and fitted this to the plastic grommet I had made by a friend on a 3D printer. The wire is then fed through the steering wheel down the streeing shaft and i pops out at the base of the steering box. Checked for length and removed to fit the end contact which I bought a while ago from the restoration supply company. To attach this I drilled small hole in a piece of wood and inserted this into it. I then stuck the soldering iron into the top which heated it up enough to allow me to melt solder into it. Then I could get the exposed wire and push it into the liquid solder. Once cooled I put some heat shrink on it, refed the wire and attached it to the wiring loom connector. Another small but fiddly job done. I'll post some more updates of what I've done as soon as I get time.
Cheers
Ian


Great build what a beauty! Fun family picture BTW
Posted by Diggymart on 1/31/19 @ 4:17:12 PM