You must be logged in to rate content!
11 minute(s) of a 362 minute read
4-2-2020
Hi All,
Went and checked on the ole girl today ( dodgng the virus on the way ! ) and a bit more progress. He formed up the rear seat arm rests, made a temproary support to get the size, the completed it with a more solid construction. He's also made some templates for the trim pieces that go above the doors and the pillars on the sides of the doors.
Next he said I'll see a big improvement as he's going to fill in the rear luggage section and start to finish off the pieces that go from the headlining to the base of the windows.
Also took my hubcap skins to a guy not far from me who after an hour took all the dints out of one of the skins. Next is coppering and then some adjusting and finally plating.
Cheers
Ian


4/23/20
Okay, so a bit more of an update now I have my computer glitches sorted out ( which took a few weeks ).
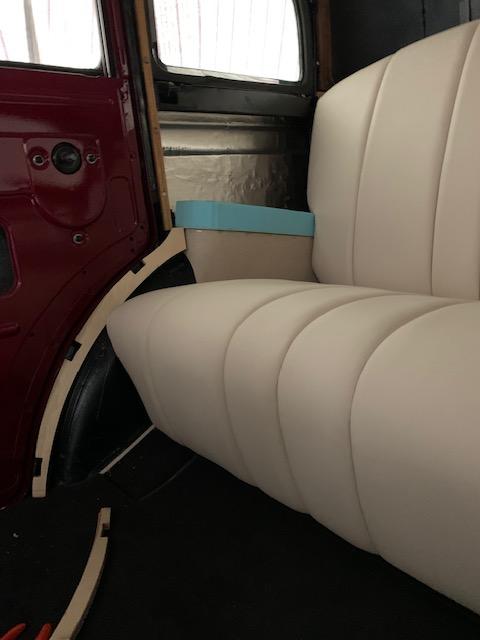
The upholsterer has almost finished the front and rear seats. The buttons went in and then it was heated with a heat gun to shrink the leather and remove the creases where the buttons are. The rear panels aboce the seats have been formed and are just sitting in place. These will be straightened and adhered. Once the garnish molds go in place that should pull everything into alignment. The holes above the rear quarter vent window are for the window winder and the passenger assist strap. Rear arm rests not quite finished yet along with the panel above it. More adjusting and adhering.
Also got my hubcap skins back the other week and ready to have the black lettering and ring done. I'll tackle that when I get a bit of time.
Still working on a lot of small things at home for when she gets back.
Cheers
Ian


5/20/20
Hi all,
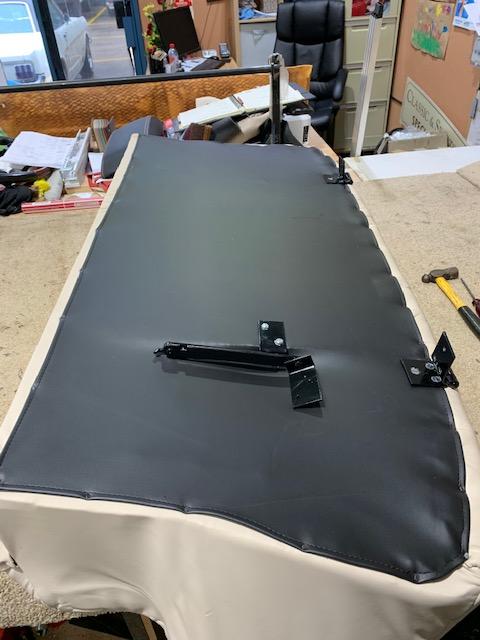
Finally got time to sit down and post where things are up to. The upholsterer is moving along. I've attached a photo of the side that has been fitted as a trial. A lot of adjusting to do as well. Funny thing is when I got home I noticed the header panel was done and I didn't even notice it in the car. I also noticed that on the pillar near the front window has also been done but this should be covered with the garnish molds. A lot of the upholstery will be held back when the garnish molds go in. I'm going over later in the week and hopefully help to fit the front seat in place.
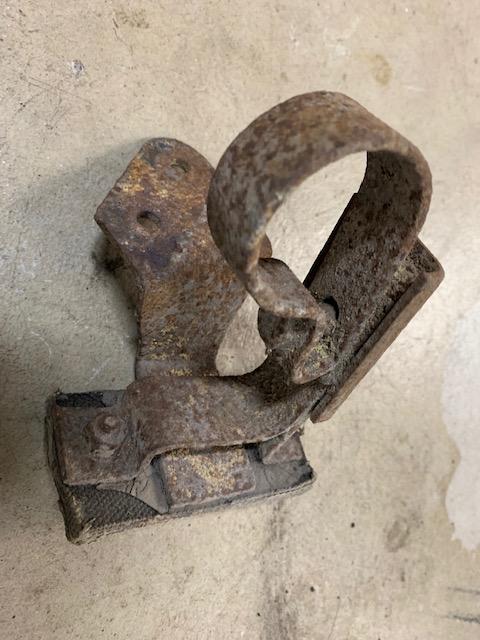
Also started to think about the exhaust system. I went and saw a guy not too far from me and he's happy to do my system. He asked if I had the original hangers for the exhaust pipe and I said I actually got nothing when I bought the car as it must have been too far gone. Then I thought of a friend of mine who is modifying a 34 and contacted him. Low and behold....he had them hanging up in the shed. Sent them to me and I got about stripping them down as the exhaust maker has a small blast cabinet so he'll blast the and reassemble when he does my system. I was amazed and the amount of parts just to have the two exhaust hangers. I'll drop these off tomorrow.
Cheers
Ian


5/21/20
Anywho, took myself off to the Upholsterer and the first part was to reinstall the rear seat on the hinges and install the "stay". We had to unpick some of the rear lining material and find exactly where the holes were. Also we finally worked out which way around the stay went and installed that. We decided not to cut the lining material rather then leave it so the stay bracket when screwed in place actually stretched the lining material. Finally got the hinges and stay done and installed back in the car. Not a very big area for luggage I must say ! The upholsterer also lined the rear of the luggage area and made up a little mat for the floor.
Cheers
Ian


5/28/20
Dropped over to the Upholsterer prior to sending to the exhaust maker. Gave my upholsterer a hand fitting the front seat. In a previous post ( a number of years ago ) I cleaned up and got working properly the front seat runners. Mounted these in the floor where he cut a slot for them in the carpet. Mounted these and then put the base of the front seat in. Four bolts to hold it and then did a temp fitting of the lower cushion. Got to sit in the car for the first time in 20 years....actually got a bit emotional !.....anyhow all the rear lining boards etc should align once the garnish molds go in and a screwed into place. Still have a lot of adjusting to do but we'll get that sorted as we go along. The truck came and we loaded her up to go to the exhaust maker. Took my brother with me and we followed it along the road. As the truck driver turned the corned there was a rush of petrol spewed out from the left side of the fuel tank. Now this hasn't spilt a drop in ten years so either the filler neck has a problem or the tank has a split in it. Once the exhaust guy has drained the tank and he's finished his work, I have to drop the tank and check it out.......at least it present a problem now and not on the road......that would have been a disaster. Just goes to shows you're sure everything is ok and then something crops up !
There's never any problems.....only answers !
Cheers
Ian


Great build what a beauty! Fun family picture BTW
Posted by Diggymart on 1/31/19 @ 4:17:12 PM