You must be logged in to rate content!
9 minute(s) of a 362 minute read
11-16-2019
Ok.....still plugging along.
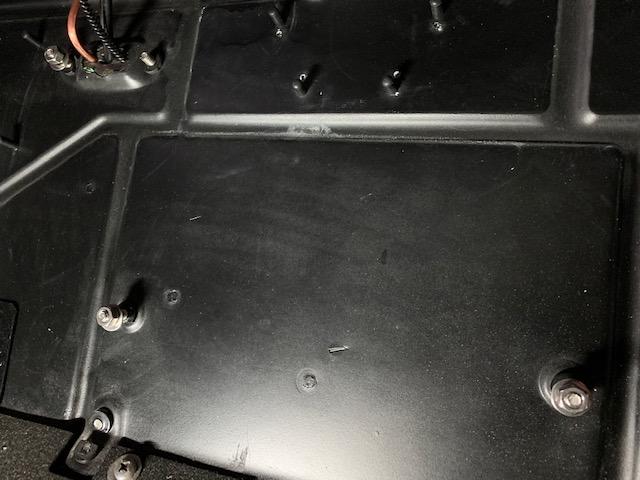
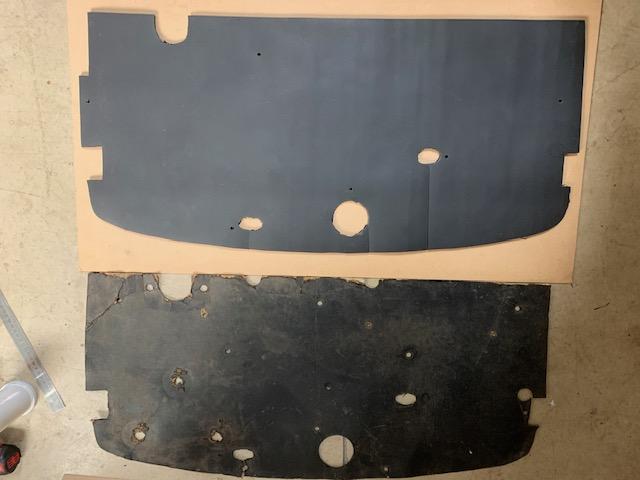
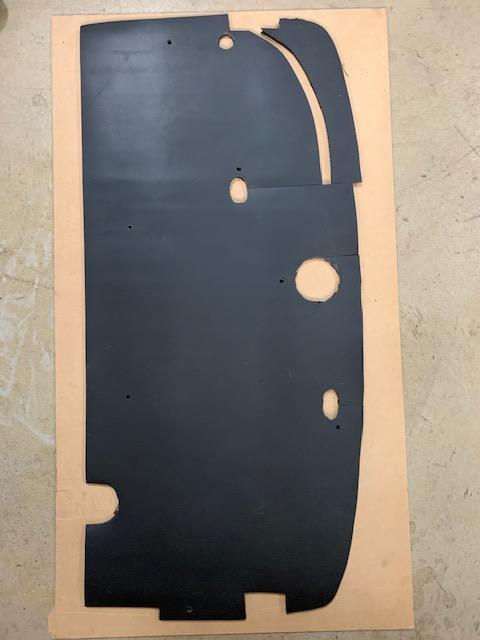
Found the original firewall liner. I was at the Motorclassica car show and they had a display of firewall material that acted as both a liner and soundproofer. Bought a length not realising I have enough for 3 cars so I may use it elsewhere in the car. The guy who owned my car before me cut out a piece of Fibre Pin Up Board and some suedo timber lining board. Imagine trying to get this around the coil and all the wires and cables coming in from the engine bay. Located suitable screws on the other side of the firewall and replaced with longer ones where necessary. Using the original liner I made up a cardboard template and did a trial fit adjusting here and there. Had to cut one piece out where the front vent drainage tube goes. Layed the cardboard template over the new material and cut this out making slits from the top down to the various holes where the cables protrude. Marked where the bolts went and drilled holes in for them to fit through. After only a few small adjustments it actually fitted better than I thought. I'll probably use some Nylock nuts so the wont come undone with any vibration.
Another task done.
Cheers
Ian


11/17/19
To cover over the battery hole in the floor I had a 3mm stainless steel plate made. Using furniture caster holders, I cut one side off so they fitted between where the hole is going and the edge of the timber. Tapped them in place, drilled a hole from the top and polished the top as well as I could. Once the carpet goes in you won't really see this but wanted to make it as strong as possible. I ligned the underside with some very thin stick on felt tape to avoid any rattling.


11/19/20
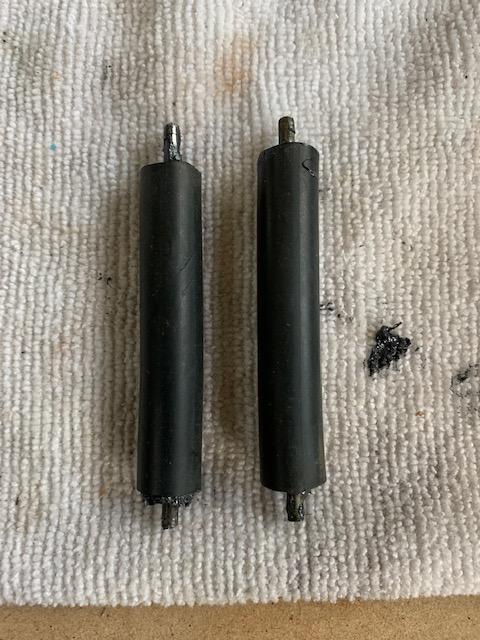
Found some original size tubing for the other anti rattle window rollers for the front doors. To get them straight I used bamboo skewers inside them an put them in the microwave for 5 seconds. That heated them up enough to straighten them out. Inserted the two rods and gently tapped them back into the repainted holders. Only problem is they dont seem to fit between the inner door panel to the window...they're about 1/4" too big.....another problem to sort out ! Installed the four little clips that I had that this forum helped me out where they went too. Found and polished the two rear window winder handles and the two front vent window winder handles.
Cheers
Ian


11/21/20
These were my original sill covers. 8 years ago found a guy in the states who made reproduction ones complete with original etching pattern.
I love looking at these.....


11/24/19
Bit of spit and polish before she goes to the upholsterers


12/2/19
Well finally the old girl moved and is on her way to the Upholsterer. Been a while since she's seen daylight.
Now I can finally sort out whats left to do and all the finishing pieces.
Hopefully catch up with a fellow 34 owner on Wednesday and going to see someone about an exhaust system.
I literally did not have one that came with the car.
Cheers
Ian


12/26/19
Not a huge amount to report with Xmas and work in the way. When I got the car there was no roof lining, no carpet and one door trim in tact. The seats were badly deteriorated and a few things had been living in them. The upholsterer pulled the front seat apart, blasted and powdercoated it. The other seats are being pullled apart slowly. We've decided on leather for the seats, A light grey for the headlining and a charcoal carpet. Just waiting on them coming back from holidays. The guy doing the hubcaps said due to them being so deep dished they are splitting his molds so he won't be able to make new skins for them. I'll start having a crack at restoring these myself.
Cheers
Ian


1/25/20
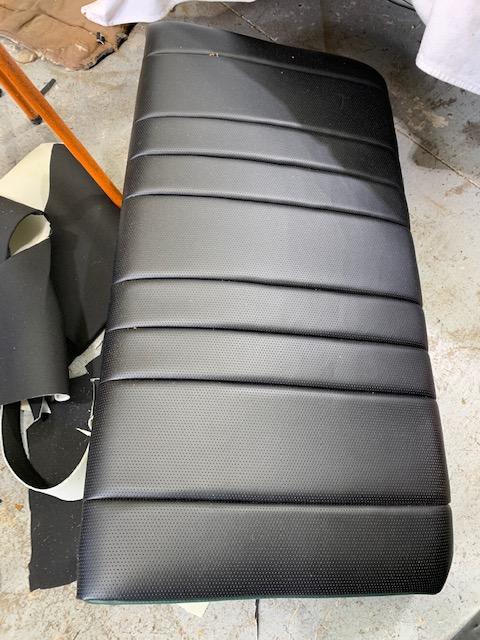
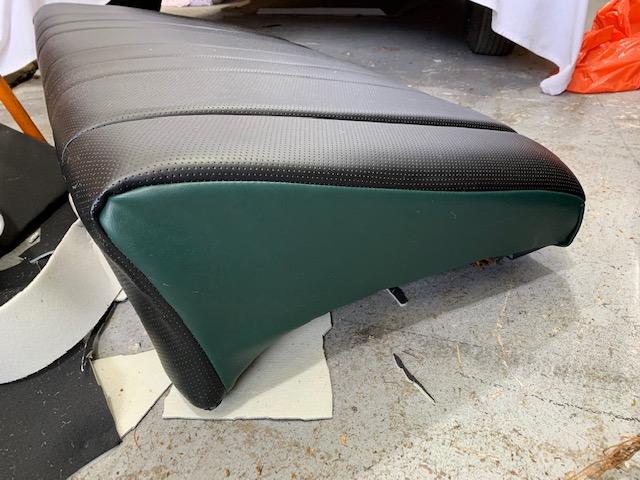
Bit further on the progression of the car. The upholsterer has now cleaned the stripped seats repaired any damaged springs etc...
They then attach what looks like "shade cloth" to the underside to protect the base of the seat.
He made a temporary cover for the seats in black vinyl to get an idea of the pleating pattern in the seats. The buttons have not been installed as this will be done on final assembly.
He does this so he gets and acurate pattern for the seats before he cuts into the leather.......good idea I say !!!
Next step is to start on the headlining.
The guys doing the woodgrain effect on the garnish molds also came back to me and they have base coated all of these. They've done the woodgrain look and once dry will be giving it 2 coats of clear.
Slowly but surely getting there.
Cheers
Ian


Great build what a beauty! Fun family picture BTW
Posted by Diggymart on 1/31/19 @ 4:17:12 PM