You must be logged in to rate content!
11 minute(s) of a 362 minute read
7-31-2019
Sorry guys its been a while since I posted. Family and life really gets in the way sometimes as you probably know very well !! Visited my Niece while in London and she's getting married next year and has asked if she could ride in the Dodge. Now I'm really under the pump !!
Getting back into it so here we go......two jobs I have not been looking forward to doing :
First I had to replaced the cracked rear glass in the wind out window due to it binding on the rubber seal when wound in. I pulled the existing frame out and got the glass out of the frame and has a new piece made. Reinstalled it in the frame and reinstalled it. It took two full days of constantly adjusting the rubber seal to get it in a position so the window would not bind on the rubber seal. Once completed I filled the gaps between the rubber seal and the body with Black Polyurethane and then used my daughters facial wipes ( much to their disgust ) soaked in Kerosene to smooth it over and give the blended appearance so it all looks one piece. Now dry works like a charm.
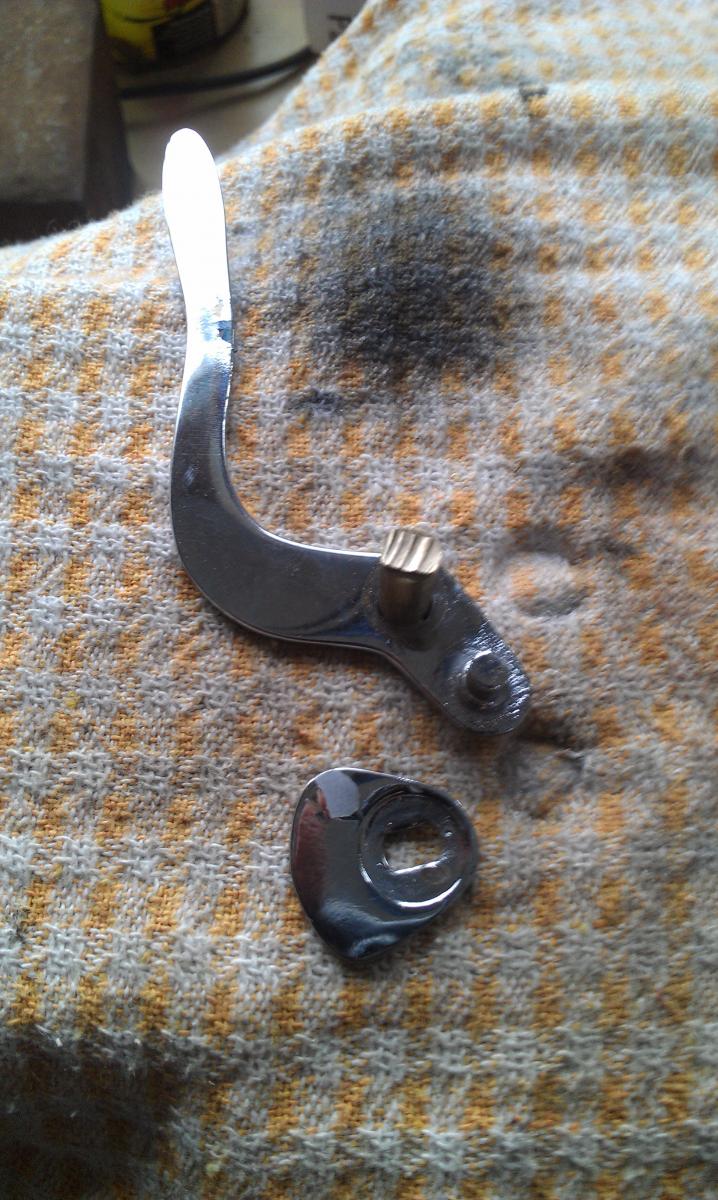
Second and one I' admit I've been avoiding was to replace the damaged lever and cam on the front passenger and driver side windows. When we first peened the brass pin over that holds these in place we chipped the chrome work on both the lever and cam. I had to grind the lever off and remove the pin and then grind the cam off as well, had strip them back and fine sand them and have them replated. Use some brass rounds for a pin and reshaped the ends to fit through the holes in the lever and cam. Peened them over very carefully this time and hope this will do the trick.
The front windows have a weird mechanism where when you wind the window down the entire frame drops down, HOWEVER, when the vent window is open and you wind the window down, a locking mechanism activates only allowing the fixed glass portion to wind down. Clever design but a pain in the bum to get working properly. Not only that but all the felt channels and windstrips need to be replaced. Anyone done these on a 34 that has pics ? I have the bailey channel to go inside the door frame but still working on the window. I bough the robbers seals for the vent windows 8 years ago and they fitted like a dream !!
I'll keep you updated.
Cheers
Ian


8/2/2019
Ok, so I went to see a guy who sells a small amount of channel etc and I bought some from him. I fits perfectly in the straight part of the frame but not the top and curved part. I've decided to use the channel on one side and felt on the other two sides. Did a temp fitting and everything seems to be ok. I used the same black polyurethane by running a thick bead down the core of the frame channel then a thinner bead on each side and pressed the felt channel in place. I then used the felt strip and doing the same procedure I forced it into the frame but this side I used the old vent window glass as a template to hold the felt in and then clamped it. It will have to wait a week to completely cure then I can see how well it went.
Cheers
Ian


These are some photos of the old original frames. You can see the old weatherstrip on the out side of the frame and the stuff on the inside of the frame as well. Has anyone replaced this and if so with what ?
Also are a few pics of the anti rattle rollers. I believe the one sitting on top of the door goes inside as the screw hole align up. Again anyone got photos of these they can share or ideas ?


8/6/2019
Made up a wood template which will enable me to clamp the felt into place around the curved part of the window frame. Long process waiting for the polyurethane to dry and move onto the next part but I'm sure it will be worth it.
Cheers
Ian

8/8/2019
After the Polyurethane dried I cut along the edge with a scalpel so once done this gave me a good starting point for the curved bit using the template I made. This gave a fairly neat edge...trick is to have a sharp scalpel !! Then using my template and again filling the inside with polyurethane and two smooth beads lining the sides I was able to get the felt to sit inside the channel. I used a few clamps to really compress it in place so now I have to wait a while until it dries to see if it worked.
Cheers
Ian


8/9/2019
The moment of truth !! Cut along the felt with a sharp scalpel and it was actually easier than I thought. The only issue I had was getting the wooden template out of the window because along the line some of the polyurethane must have got onto the wood and dried. Using a pair of mutligrips I grabbed the wood and gently tapped the multigrips down and out she came ! So far so good. Now I have to get some felt in the two sides where the window winds up and down at the base of the frame.
Cheers
Ian


8/11/2019
Spent a full day on the car today. Cleaned up the garage, tightened all the body to chassis bolts. Put the last pieces of felt in the window frames. Cleaned up the glass holders for the front windows and got rid of excess polyurethane. Ran a final bead the length of the window. Almost completed the windows now. The last shot is the original fabric covered strips that sit in the window frame where im attaching the felt to.
Cheers
Ian


Last piece of the felt glued into place. Next I'll clean up the new windows that I've resealed in their frames.
Cheers
Ian


8/18/2019
Hey all,
Found two little brackets that mount inside the front doors to buffer the window frame when being wound down. Rubber buffer was hard and missing one. Found a similar one at the local hardware store and cut it down to suit. Wire brushed the rusty brackets and tapped new holes as the original screws were too small. Should fit a lot better now. Also cleaned and painted the 4 little brackets I couldn't work out what they were for until another member helped me. Painted 2 Windlace retainer brackets too. Cleaned and taped, then painted the window channel bracket. Also taped up both doors ready to install the finished window and frame assembly.
Cheers
Ian


Great build what a beauty! Fun family picture BTW
Posted by Diggymart on 1/31/19 @ 4:17:12 PM