You must be logged in to rate content!
9 minute(s) of a 362 minute read
9-27-2015
Bit more progress. I instanned the ignition switch and have made up a few short connecting wires.
All I have to do now is fit the freewheeling cable assembly and thats all the knobs on the dash completed.
Where I installed the front window operating levers, the chrome chipped when I was peening the brass rod over. Looks like I'll have to remove them and redo both of them ( could only stuff up one could I !!!!! )
Cheers
Ian

9/8/15
Did a bit of work on the wiring today. Finished making up a little control panel that bolts up under the dash. This houses starter switch, relay, fuel pump switch and flasher cam. Finally had the opportunity to test the rear indicator lights to see if they actually work......Its alive !!!!
Next I'll wire up the turn indicator switch and mount that.


9/2/15
More progress. Finished off the wiring for the Indicators and mounted the turn switch I've had for five or six years.
Also got the front bumper back from my body guy. ( again it was bent everywhere where I'm sure the previous owner used it to touch park ).
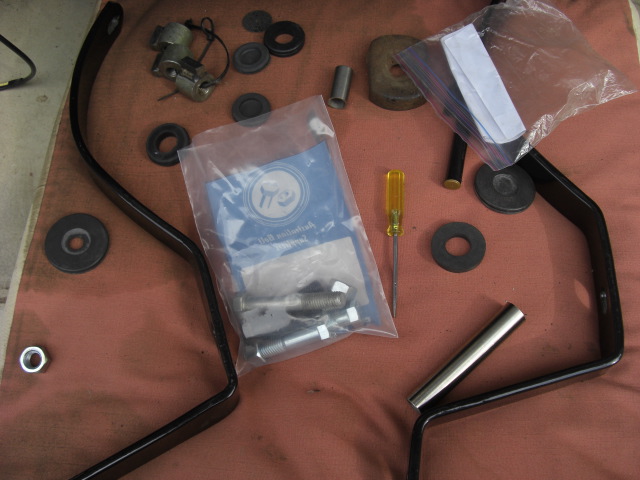
All the original mounting bolts etc are long gone so using a similar method to the rear bumper I found / made some mounting pieces.
The hole in one fender was quite large so I got a couple large soft grommets and using a scalpel widened the inside so it would go in the fender.
I then used a thick stainless steel washer, solid rubber spacer, stainless steel flange, bumper iron, cover backing plate and bolt in that order and bolted one side up.
Worked well so repeated the other side. Moment of truth....mock bolt up of the front bumper. It actually fitted perfectly with the gaps between the bottom of the fender and the top of the bumper almost exactly the same. Only issue was the bumper iron at each far end was back from the bumper about 1 1/2" so I'll have the heat and bend them back and get them repowder coated. Overall pleased with the result so I can now take the bumper bar to the plater.
Cheers
Ian


A few more shots.......


11/6/15
Dropped into the body guy and we adjusted the bumper irons. Then it was off to the chrome platers and dropped the bumper off to him. On the way back dropped into the powdercoaters for them to redo the bumper irons.
While I was at the body guy I had a look at a 1934 Chrysler Roadster ( fairly rare ) and a 34 Dodge 2 door that was half way through being rodded. Next was a Lamborghini which had a front panel damage. When he repaired it and was sanding it back he came across an enormous amount of filler. Literally 1/2". He had the owner call in but just wanted it refilled......at least my Dodge has no filler !
Anyhow back to reality and a bit more on the Dodge.

11/21/15
Got excited the other day ( not unusual these days ! ). I received a phone call from my Plater guy and my front bumper bar was ready to be picked up.
Also received a phone call from the powdercoaters and the Bumperbar irons were also ready.
Now hopefully over the coming week I'll be able to install it and see how she looks with a bit more bling.
Cheers
Ian


11/22/15
Thankyou for the kind remarks. I'm just sorry it's taking so long as I am getting a little anxious to drive the car. I guess not have a complete car to start with I'm improvising in some areas but still trying to maintain the original look of the 34. I have a lot a friends at home that follow my progress and often check on me to see where I'm at........I've promised them I'll take them for a drive when she's finished.
Work also gets in the way as I'm basically back working full time so I try and squeeze as much time in the garage as possible. I was hoping to get the bumper bar fitted this weekend but didn't get time so instead I painted a few small parts ready for when it gets fitted up.
I'll keep posting pics as I believe this forms a good reference point for others down the track and I too get lots of ideas from other posts on the great forum.
Cheers
Ian
12/10/15
G'day all,
After a lot of mucking around I finally got a chance to do a temporary set up of the bumper bar and irons for the front.
Using all the stuff in my previous post I attached the irons. Has to use a few washers as spacers and bolted them up.
Moment of truth.....the front bumperbar. I felt the angle of the front bumper was turned up a bit so I grinded the ends of the flanges I had made with a slight angle.
this angles the irons down a bit as well as the bumper bar. After a bit of adjustment the bolts went in so off to a good start.
As I'm putting indicators on the car my daughter's boyfriend is making up a couple of brackets to hold them in place and then I'll be able to tighten and align everything up.
Cheers
Ian


4/3/16
Well finally been able to do some work on the Dodge. After our summer has passed and my daughter has had her 18th Birthday and party and she got her licence I can get back to work on the Dodge.
A number of posts ago I may have mentioned my neighbour got a skip in and basically cleaned out his garage.
While throwing a few things in there myself I noticed something shinny. Pulled it out and it was a new indicator light what looked like was off a motorcycle. Jumped in the skip to see if I could find the other one.
Found it !
So years later ( yesterday ) I made up a few brackets and drilled the holes to support the indicator lights. Looking closely at them they have "Harley Davidson" on them so that was a real find.
Connected the wiring and soldered the joints and used heat shrink to cover the joins.
I think they look ok and will match the front headlights.
Cheers
Ian


Great build what a beauty! Fun family picture BTW
Posted by Diggymart on 1/31/19 @ 4:17:12 PM